popeye the sailor
-
Posts
16,007 -
Joined
-
Last visited
Content Type
Profiles
Forums
Gallery
Events
Everything posted by popeye the sailor
-
 fabulous work.........the wood effects really make it look real the gate is very well done.......your having fun.....I can tell! Ekis said:....... So here we are, concentrating on trying to make the best out of a traditional medieval French fortified village, and we find ourselves in the pissoir... What a sad fate! 🤣😂 .......this made me laugh!
 -
Military Wrecker - Revell - 1:32 Scale - PLASTIC
popeye the sailor replied to CDW's topic in Non-ship/categorised builds
I feel like I missed most of the party......your about done the wrecker looks great.....really like the use of the two drabs. these older kits are why I enjoy being a nostalgia nut.....especially if I had built them before. it gives ya a chance to see how evolved your skills have become. really sweet looking model.........hell yea on the rusty chains -
....a flying saucer? lost in space perhaps? interesting concept.............nice looking hoist
-
Honda CB 750 F dio by kpnuts - Tamiya - 1/6
popeye the sailor replied to kpnuts's topic in Non-ship/categorised builds
....in the land of Lilliput.........don't tell me..........let me guess.........your chief mechanic's name is Gulliver! kinda cool in a way........it shows the scale of the model. with the large scale models I've built in the past, I wondered about it too.........why aren't some of these ports tooled open? there so much that can be done to enhance these models.....are you going to use screen for the ports, or did they simply have the butterflies in there? I suppose we'll just have to see what your pint size pit crew comes up with. -
...a very interesting way to mask camo the methods are endless here........so far so good
-
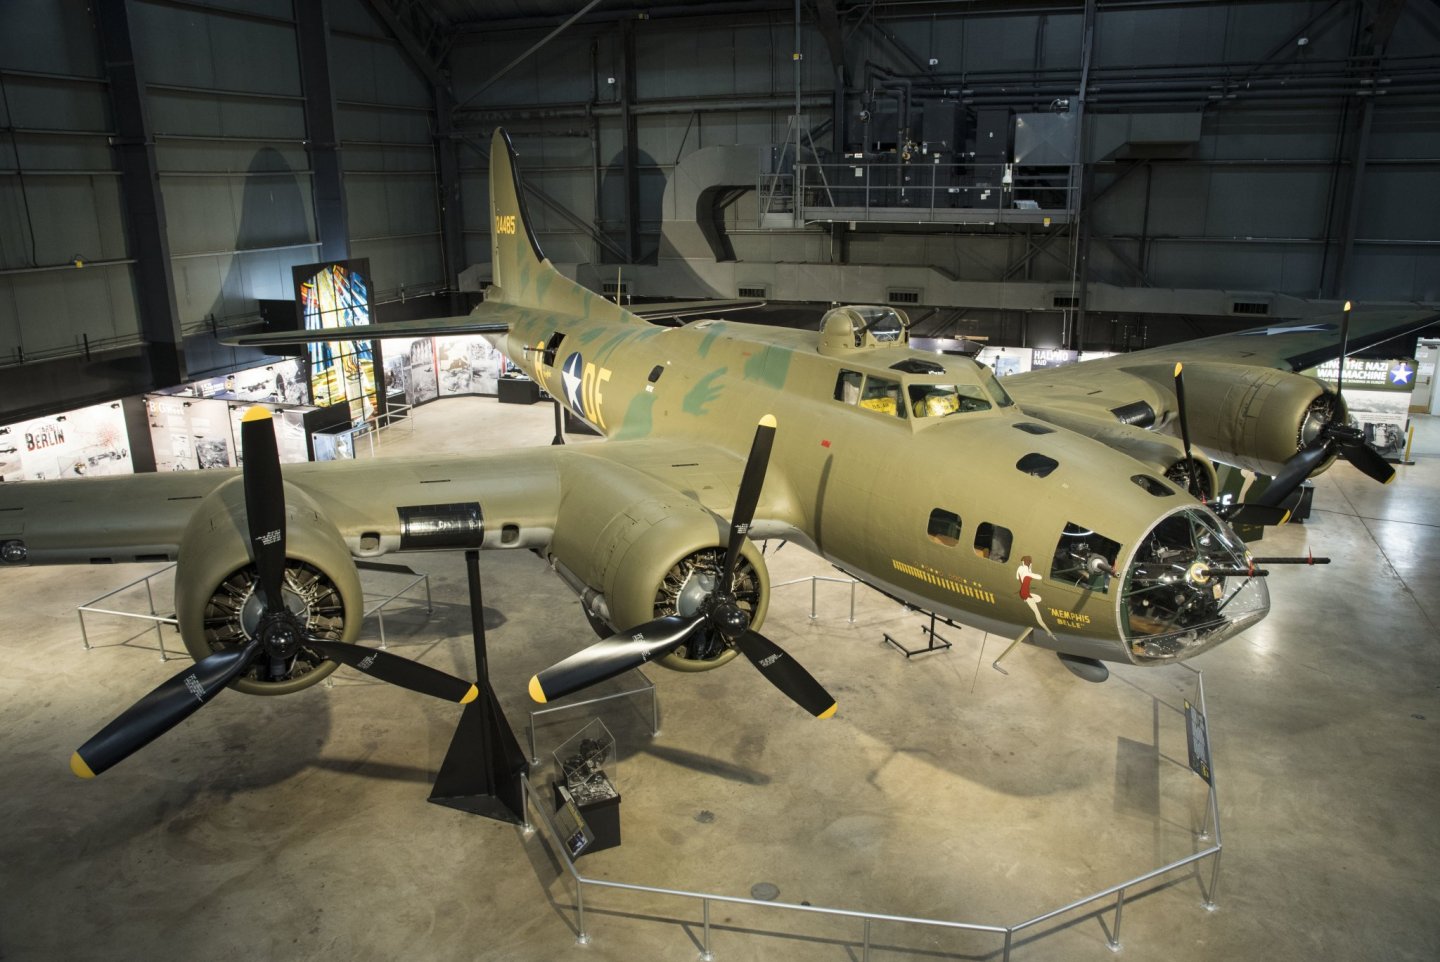
WOW!.......OC ...she came out great! few bumps along the way, but ya did it.........sweet looking plane and none the worse for wear glad ya stuck with it
-
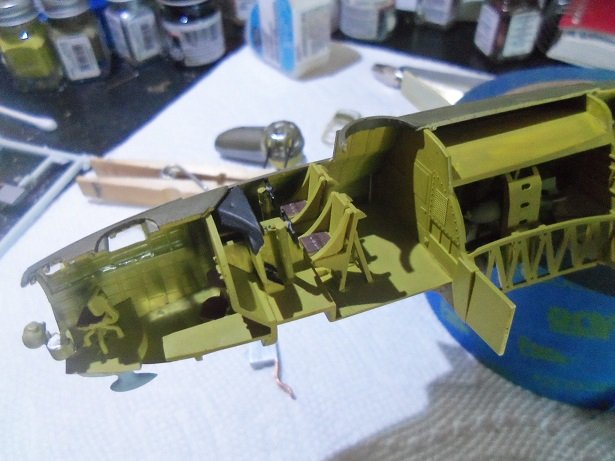
just a short update at the moment......done during the work week. these are the parts I will add to the plane: I had glued that small part on the other navigator's window....I had to remove it to put it on this one. the guns were added to the nose of the fuselage, the last bits to be added before closing it up. the deed is done I should have done a close up of the waist guns.......they show quite well with the belt additions. the tail is on as well. it can't be seen here, but the belly turret sticks out quite a bit...... must be in the lowered position. I had painted the tail gunner's glass with the masking, but it came out foggy. I lightly scraped off most of it and painted it freehand.....I also did the navigator's window too. it came out reasonably well......I used a very fine tipped brush. the cockpit glass looked kinda light too, but I chose not to touch it up since it came out better than the rest. I trimmed it to fit and am impressed with how good it looks. I'm gonna start adding to the fuselage.......
- 247 replies
-
- 11
-

-
awesome looking plane joe........the camo is superb!
-
you had a Roden kit that wasn't up to par too? guess I'm noit the only one
-
made 'em think.....didn't ya?!?!? I had the same trouble with 1001 Hobbies in France....took a month a Sundays to get my order...........an in the middle of it all, they sent me a survey . I didn't fill it out.......I e-mailed them.......had just as much fun! the car's look'in great Andy.......
-
looks good scribing the mortar joints will give it some extra detail........lotta work though
-
mom was the gun at the navigator's window as well as at the top turret....they do love their moms I need a magnifying glass to read all the decals
-
I'm sure a little stick and tissue would produce a decent looking nose section...but you are correct that it would be quite large to match the scale of the jeep nice looking model combo!
-
so most of the modifications were done in the field. not say'in I disputed it, but I am mechanically inclined.......it's functionally impossible to change direction on anything that is built to go only one way.......not without modification. it is after all the mother of invention as for the dorsal gun.......the instructions don't show it, and I haven't seen any pictures of her with one. it wouldn't be hard to change though.......I have the parts for the variant. can't go by the instructions though...they show the wheel covers, but no parts to facilitate it.....ie......a hub cap. I chose the navigator's glass per the diagrams. I do notice though that where the gun would be located, I see the word 'Mom'......noe you have me wondering. I looked again at the site I have on her, and they show the picture of her at the museum if you look close.......there it is {I use the close up mode to really see it}. I also changed the nose glass too, because I felt that the guns were too far apart and not in the correct place. the one I'm using looks like it does in the picture. I see no painted frame either, so I won't do what I did to the original one I was going to use.
-
no missing fingers here please.........
-
nicely done!
-
I recall building the F4B4 as a monogram kit in my school days.......I built a number of those small scale planes. they are delicate, aren't they ?!?!?! you did some very nice work ......please don't be shy next time. we all make our little bloopers.....best is just to laugh and move on it's all we can do really.........any more and it would make one throw in the towel. not too sure you want to go Roden........they are a nice kit, but as I'm finding out, I'm having to fit everything. it might have been different if I didn't get a defective kit. read my log on the Dr 1. hope to see more of your fine work
-
toodles Ken...........
-
haven't done anything today.......I dug up the stump, rescreened the back door, put the admiral's flagpole back up {when I originally put it up, a rogue wing gust blew it and the mounting off the house the same day}, and I mowed the lawns. now we are going to go and see the grandkids....after three months of covid rule. we will be outside, so it should be good.........I have a pack of masks in the car anyway, in case we need them. I hope to get something done later on..........I'll post if I do pinkie swear
-
that was Craig Harley........I did that with some of the glass. I used a poor masking set.......that or they don't work well with enamels. now if you saw when I added the panels on the sides of the nose....they had to be painted with the Chromate first, or the drab would be seen note the open panels at the nose part of the panel can be seen here. it is glossy, but it shows the Chromate as the undercoat. at 1:72......to me, it's not as critical.......but thought does need to be done in deciding where the most probable areas are. then it could be done.......that's what I did here. I believe the Avenger was a 1:48 scale model, and how critical it is to use the method. Craig passed on a very good tip here.....I would never had thought of it.......first time I used a masking set too. a huge thanks! that has to be an oxygen tank on the shaft of the ball turret.........something the kit doesn't show. yea, these are are not staggered windows at the waist. I'm not up on these types of guns, but I have a hard time thinking that the mechanism is universal.......unless the gun is built right or left, the feed would only go in one direction. it would be like trying to feed something into the side that wants to kick it out..........going in the out door. all conjecture aside, the kit had them that way, so that's the way I did 'em. nice pictures though........I appreciate you posting them ........the last photo shows them with attached ammo boxes.......those are left and right handed guns. an interesting note....this kit has an option to add a gun at the navigator's window at the top of the fuselage. if the Belle had it, I would have added it.

-
could also be considered a pause in the thought process OC..........that's why I make mental notes I put them in a place where they would be safe..........then I forgot what I considered a safe place. thanks Craig.....the new camera? well.....I took two pictures with it just out of the box, and I found them to be a little out of focus. I'll read the instructions now. what I've been using is a Kodak Easy Share, which has auto focus. it's a small camera, and has been very good. it is a little sensitive towards needing the right light, and if you wait too long to take the picture, it will begin to readjust the focus....makes the picture crappy. the new camera is a Vivitar Vivicam XX14. it's a small camera too....I saw it in the clearance bins. it had a price tag of $79.99.......down to $49.97......I thought that was the price. when I got to the checkout, I was told it was half price {ie.....the $49.97.......that's what I thought}. I looked at the sales slip, and I saw that I paid $24.98 for the darn thing!........holy cow! so I haven't used it yet....the batteries I have in it are just some we had hanging around, so it's not fully charged {you can't charge the thing either......I'll be stuck buying batteries for it}. the easy Share came with a charger. so I simply plug it in....low cost. for the cost of the camera, I can't complained, and I had a 32 gig memory card that I put in it.....so I can take pictures galore, until the batteries die. now I gotta buy a pack of AAA batteries, or buy into some I can recharge. it also has a flip viewing screen in the back, so I can take better selfies too! I'm in the BIG TIMES now!!!!!....look out!
-
thanks Mark..........that's the way the parts were intended. thinking mechanically.....I would think that the mechanism shuttled the belt only in one direction, no matter how the gun was placed. same with shotguns and rifles with auto eject.......you never see a shell casing eject from both sides. I didn't want to change the natural order of things........if that's the way they have it....... it's just nice I could make it work I have two other belts that came along with the kit you sent me.........the kit comes with enough armament. I'll find a good place for the rest of the kit a huge thank you again let's see........I think the only thing left are the two machine guns in the nose {sides}.........the nose glass can be after. I think I can join the two halves together and close her up..........{celebrate like Tom did hee.....hee}. things will move quickly after that I have some chores to do first though.......then fun time thanks also to those who hit the like button!
-
thank you OC.........my version of a selfie silly me...I was holding the camera and reflex did the rest...I'm usually not that grumpy looking wanna hear how dumb I am.......I thought I had lost the decal sheet for this model. it's almost as large as the box.......for cry'in out loud...........how could I misplace it?!?!?! I looked everywhere!........after a while, I was getting worried......then I found them! they were on top of the computer tower, tucked under the desk top! I felt like an idiot.........un^#@&%believable! I put 'em where I KNOW I put 'em now...........


-
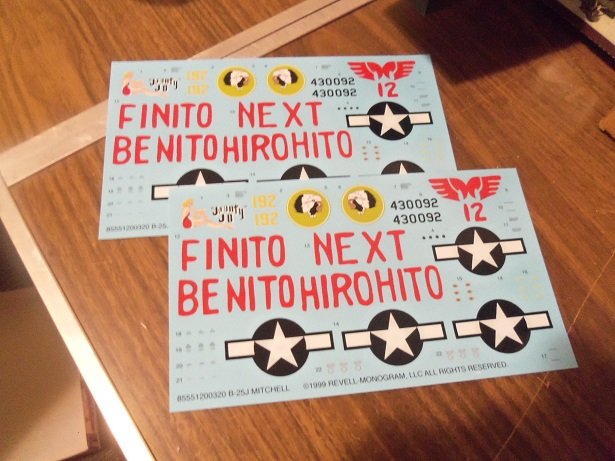
your giving me fitz!...........she's a biiiig girl now I can't wait to start building mine! I don't think you answered my question at the beginning of this log. in my kit, I got two decal sheets {they are the same}, and two complete sprues of clear parts. is that what you got? here is why I ask...... these two sprues are identical........I have not seen any differences between them. the tab at the bottom of the sprues has the mold number on them, and they are different. easy assumption is that there is more than one mold......but it's a mystery. why the duplications? it is a milestone....I'm about ready to close up the Memphis Belle. heck....I've done it.......close the fuselage and find that I forgot to add the windows! it quickly becomes an art to install the windows, unless you have a tube of window maker.........if the window is large......well, your in for some scratch building. now you can move on to the external good show! ....a more perfect union...... good to hear you have the weight question covered.......I was hoping you had that in mind

-
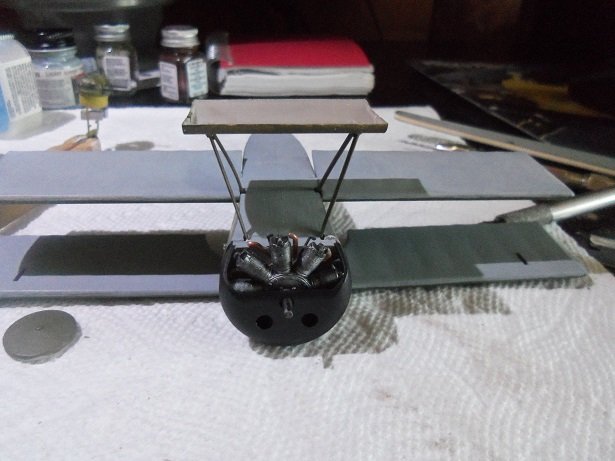
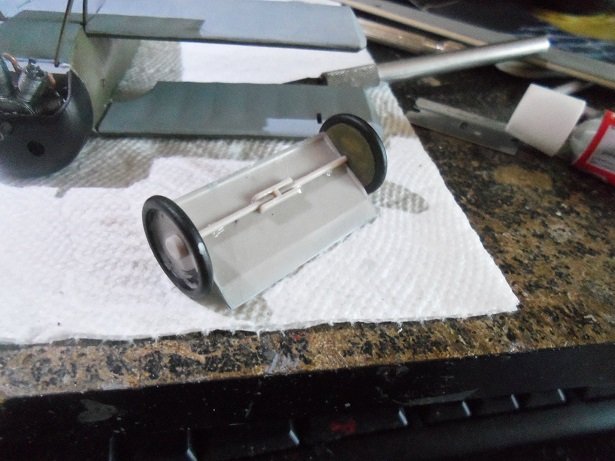
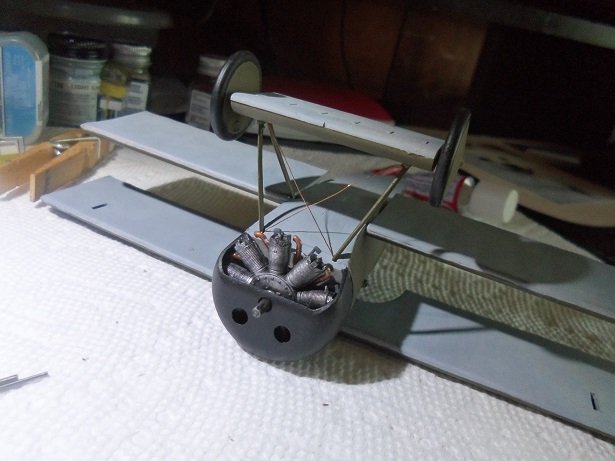
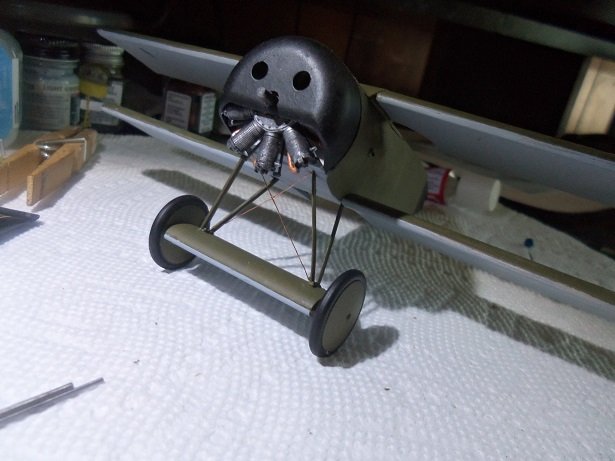
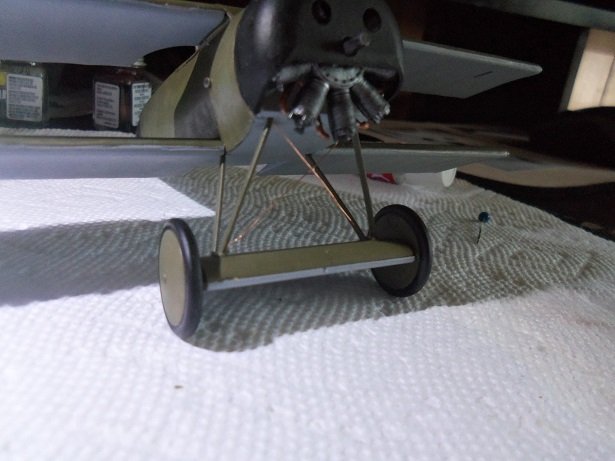
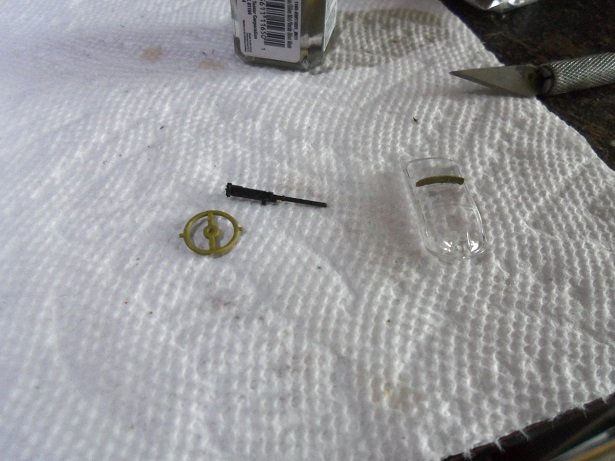
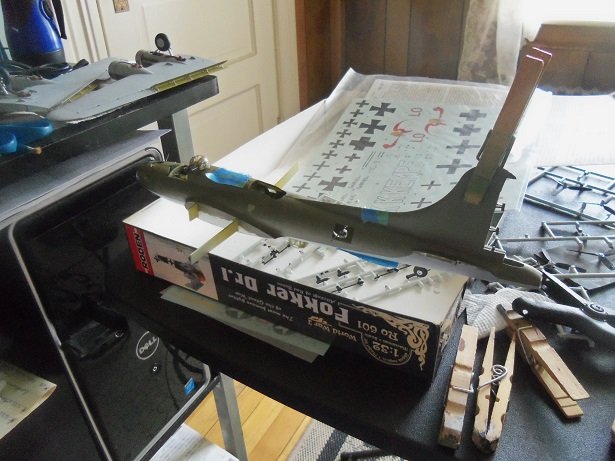
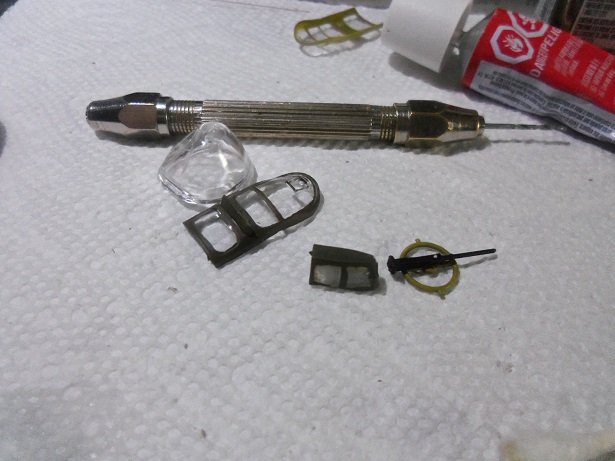
I focused a little on the Memphis Belle today.......but I had other thoughts. it was asked, do I intend to rig this model.........and I said yes. if I could rig that hobby craft model, it should be no different to rig this one. I had to do all the things I will need to do with this one.......basically drill holes for the rigging. but the one thing that is different about this model, is the fact that the wings are {for the most part} solid.......there is very little air space inside the top wing, and there is nothing in the stabilizer { it's a thin wafer maybe 1.5 mm thick}. the Hobby craft model had one thing going for it......the holes were molded into the parts..........these aren't. I assembled the landing gear today..........the parts were already pre painted. as I suspected, I had to modify the struts so they would fit into the slots in the top part of the landing gear 'wing'. holes were drilled into the places where the assembly would be located. the struts had pins on each end to facilitate easy assembly via the holes I drilled. once this 'frame was assembled, it was set in place to dry. oops........wrong end of the camera I bought a new one by the way. there we go.......centered, it was left to dry. while this was going on, the axles were run through the wheels and cemented in the slots in the bottom part. I also cleaned up all the logs I'm following in this forum...........paused to go to Michael's {had to buy thinner}........went to the grocery store, where we actually found Coffee cookie crumble ice cream for the admiral {her favorite...she has the knack of liking something that eventually stop being produced}......had supper and watched more grim news......and when I look in, I expect to see at least ten logs with new content. youse folks are too prolific for me.....I have a hard time keeping up ! I tried to phanegle another model, but the admiral wouldn't have any of it {I even tried the medicinal angle......no dice}. the bottom was added to the assembly, two holes were drilled along the inside front area of the struts.......real tiny holes. getting a strand of that thin wire I like to use, pieces were stuck in the holes and glued. the assembly was then mounted on the underside of the fuselage again.......this time, the back strut braces were cemented in place. the thin wire was run into the holes for the front strut braces in an 'X' pattern. with a pair of flat jawed tweezers, the wires were adjusted until they were as straight as I could get them. then the front strut braces were cemented in place. I later painted them flat steel, as I will for all the other bits of rigging....there's really not a lot. there is the cables under the top wing from the fuselage........the two sets above and below the top wing for the ailerons.......... ......the two for the rudder at the rear of the fuselage.......and the two sets for the stabilizer elevators at the rear of the fuselage { I already drilled the holes for them}. the one I'm concerned with, is the one in the stabilizer for the upper elevator cable.........I need to drill this hole at an angle. if I mess it up, it might look weird. we'll just have to see what happens. I finished off this session by cementing in place the tail skid. as you saw with the Memphis Belle, the tail gear root fit into a tab inside the fuselage.........it's the same story here........there is supposed to be a hole inside that I needed to find. the good thing is that there is a pin outside as well, so fitting the outer pin in that hole, made it fairly probable, that I found the hole inside. at least.......in theory......I hope so