HOLIDAY DONATION DRIVE - SUPPORT MSW - DO YOUR PART TO KEEP THIS GREAT FORUM GOING! (Only 36 donations so far out of 49,000 members - C'mon guys!)
×


popeye the sailor
-
Posts
16,007 -
Joined
-
Last visited
Content Type
Profiles
Forums
Gallery
Events
Everything posted by popeye the sailor
-
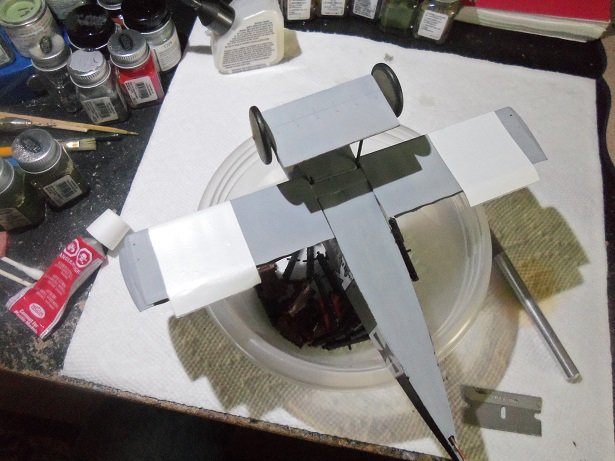
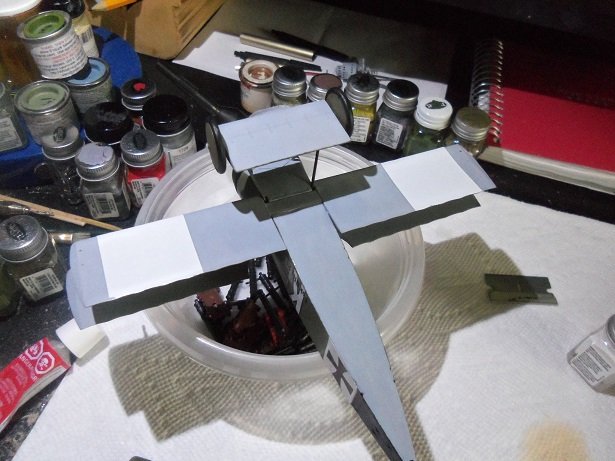
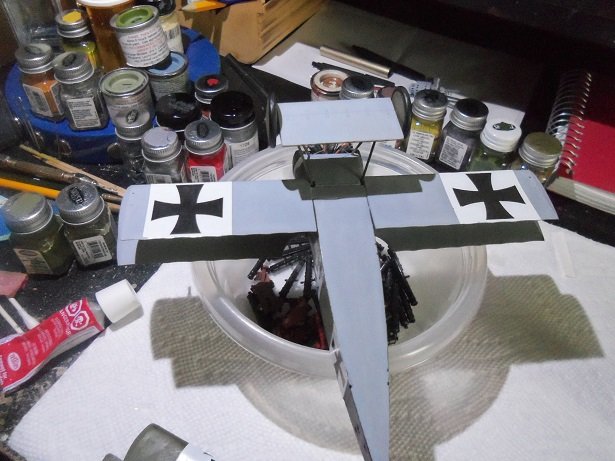
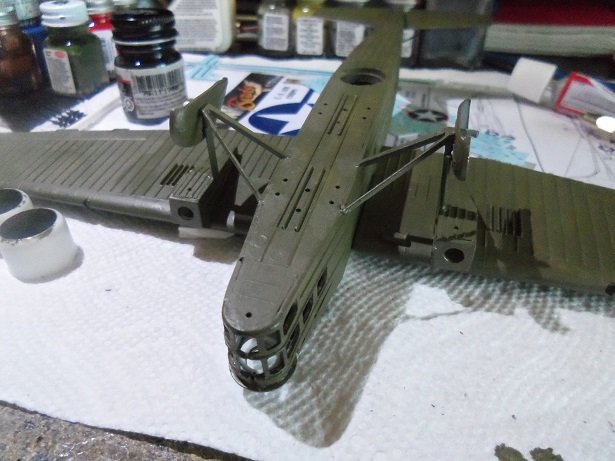
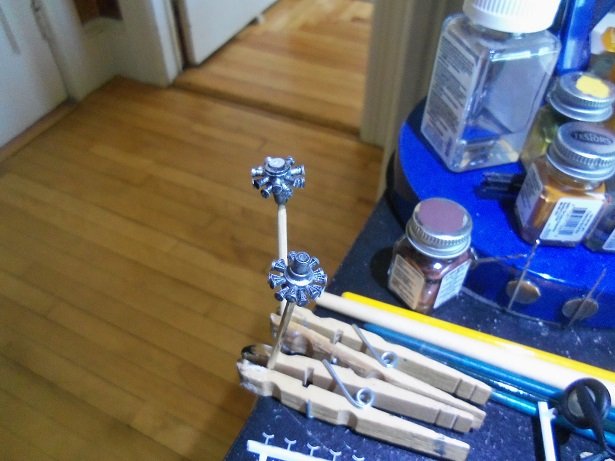
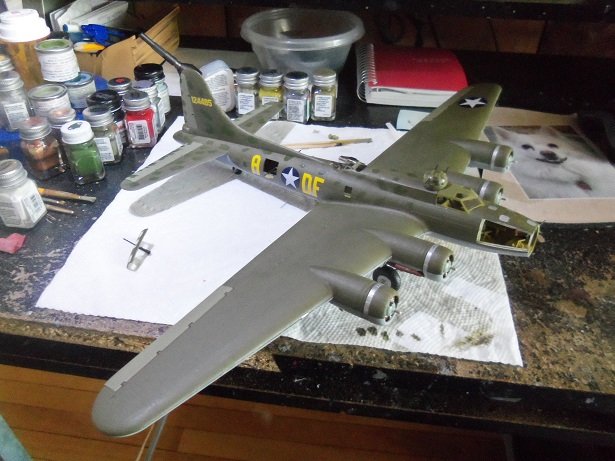
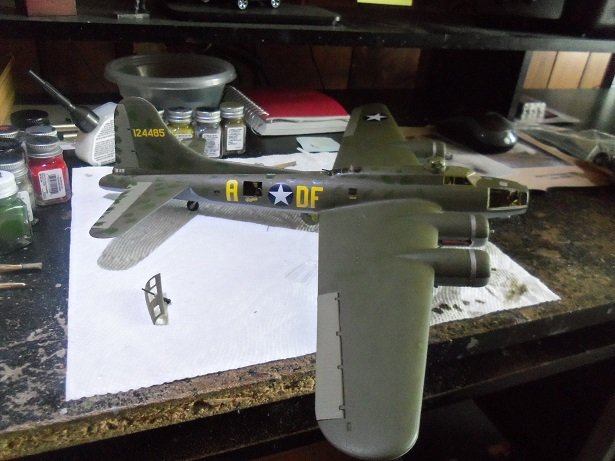
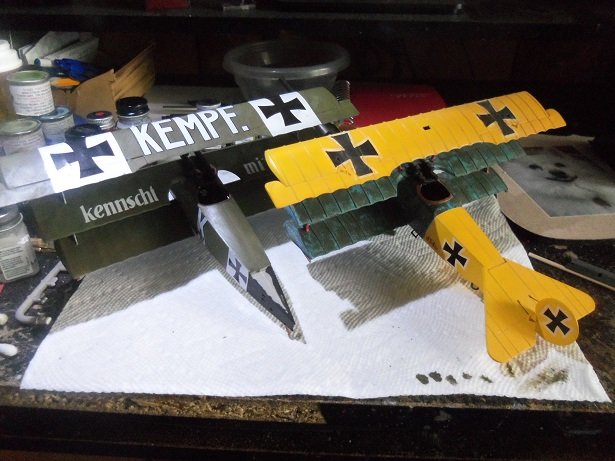
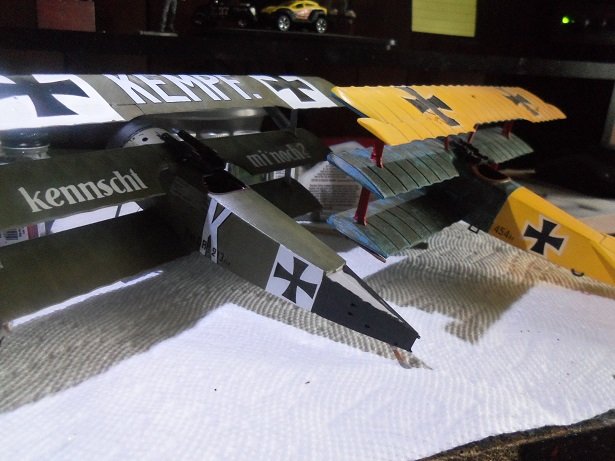
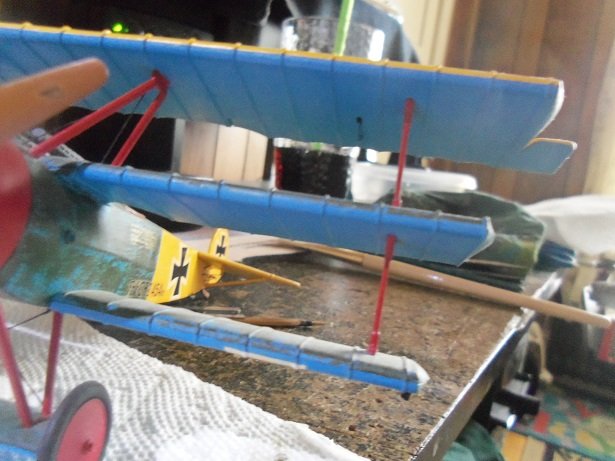
 as promised I did some work on this .......uuhhhhh...beauty the wings are painted and are now in place on the fuselage. pay little attention to the ghosting........there will be some fading done on her later. as mentioned, I wasn't going to, but I kinda liked the tire fenders, so I added them. again, I had to adjust the locator holes to accept the parts better.......a little tedious to begin with. later on when dried, they were painted. the assembled engines were painted flat black, then dry brushed with aluminum other parts were painted too. I didn't even bother to look for a masking kit for this model........so I took to painting them freehand. that's as far as I've gotten.........hope to have more soon
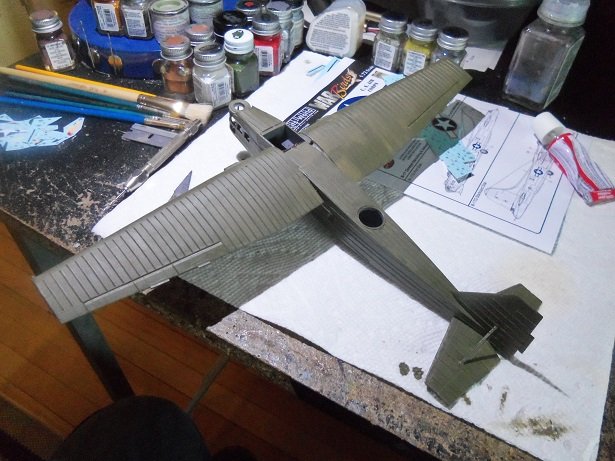

- 63 replies
-
- 10
-

-
look'in good Jav
-
I seem to be missing out on all the fun here.........made for good reading though. thanks for the head's up on Testors....I'm an enamel head too.......I'd be lost if I went for some and it's all gone! I'm lucky though........I can just hit Lou up for some more! not to worry.....your doing a great job
-
thanks to all for the well wishes.......I'm alright. the left leg gets pretty sore by the end of a work day, and so far, everything I've done to get rid of the sore,,,,lesion...whatever you want to call it, on the side of my heel, hasn't worked too good, and is one of the symptoms. they were supposed to check out both legs, but the tech only did my left leg. I have to wear compression socks for six weeks before we can get to planning the procedure. at that time, they will do the ultrasound to my right leg, but it's a sure bet they will need to do both. it all outpatient.......minimally invasive, so I won't have to deal with any real down time........just can't overdo for a week. ....not a tough pill to take it hard to believe, but some folks elect to have an amputation, rather than have what I'm going to have done. I would imagine they might have an extreme case.....I've seen pictures of some really nasty stuff it's estimated that around 50 % of the folks in my age group, have some form of this condition........unless it gets to the point that it makes itself known, most don't even know there is a problem. I guess I should finish this up.........I started to write this, this morning. since then, I've walked the dog, mowed the lawns, assembled an oscillating fan, and other small tasks around the house. tangents just don't apply to my model building so of all this, I'm fine........the procedure should be a piece of cake, and it's still a ways off yet I appreciate the kind comments and support........and yea, the bomber isn't look'in half bad either more to come........I hope to do some decal work on the wings, so I can finally get them on the plane.
- 247 replies
-
- 10
-
-
neat project
-
some of it is noticeable.......but inter fuselage detail can still be elusive I've seen those combo packs........so it is true that there are two kits in it. ....more bang for your buck........I'll have to look into it
-
...one of his last great works
-
nice!!!
-
well isn't this an interesting turn of events?!?!?! a dio is a cool idea thumbs up to whoever did the good turn....very kind! looking super so far OC....
-
Roswell? very interesting dio
-
coming along nicely Carl.........I like the idea that the markings are painted and not decals. looks more life like super job !
-
late to the party Mike..........following along nice start!
-
small update coming up.......
-
your off to a very nice start OC cockpit looks really nice! I do agree........quite a few planes listed for this kit.....the decal sheet must be huge!!!
-
P-51B Mustang by jwvolz - Academy - 1/72 - PLASTIC
popeye the sailor replied to jwvolz's topic in Non-ship/categorised builds
looks great...very nice start -
very nice looking model I tried making a couple of the Metal Earth butterflies, but fails miserably......not for me I guess
-
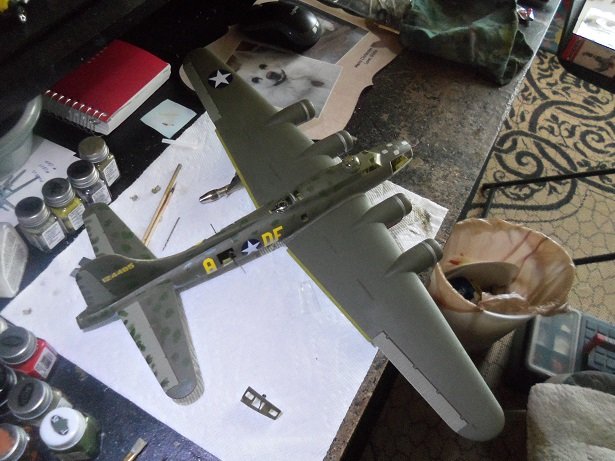
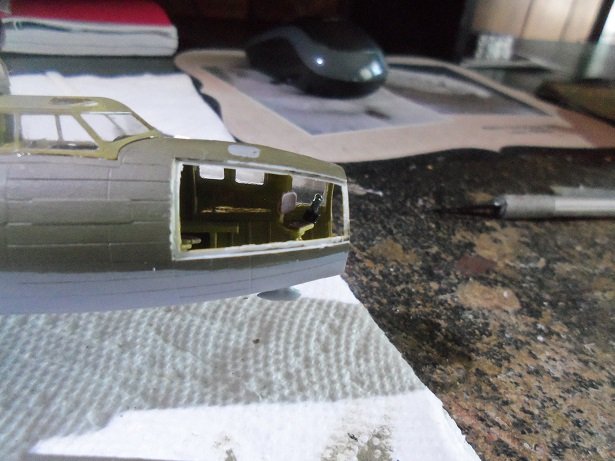
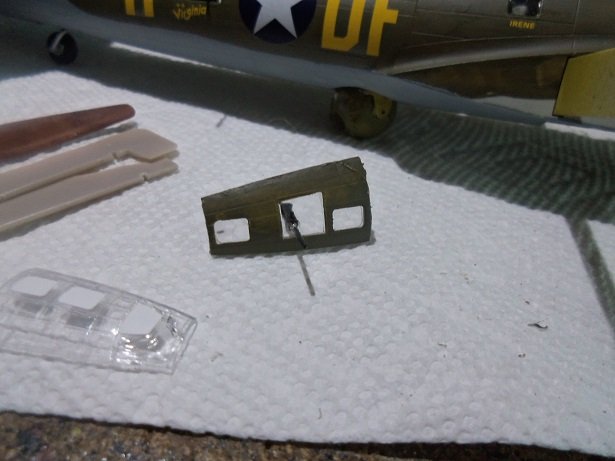
I had to see the doctor today...the referral to that vascular Dr. basically there is a one way check valve in the vein to my leg that need to be closed off. not to worry........there are two other veins that do the same job. as a matter of fact....if they need to transplant a section of blood vessel anywhere in the body, this is usually the vein they use easy procedure.......done in-shop. won't be until six weeks......until then, I need to wear a compression sock. more as it happens...... anyway.......I did another dry fit before I left.....thought you might like to see it. yea......the fuselage got a case of the measles........haven't done the wings yet. .......and yes, I goofed again. the panels should have been the raised panels rather that the flush mount windows. I could change the starboard window since I have it out, but the overall plane wouldn't look right. so I'll put that one back on. I'd rather get another kit and start from square one. I did add one more decal to the mix.......below the port gun window, there is a single swastika that was not on the kit decal sheet. I have the letters and numbers sheet and it has bomb run markings and kill stats.......got it from there. if I get another kit, I'll re-decal this one to an unnamed bomber......but that's the future after some cleaning and trimming, the window panel was cemented back in place......looks much better. ...and with the decals restored..... the Norden bomb sight was put back in place... the nose has also been cemented in place. the repair work is done.......mov'in on

- 247 replies
-
- 12
-
-
not at that time though.......and remember that the D VII was rejected before the F 1 came out. I've built quite a few Dr1's and D VII's.........I built a Guillow's D VIII and that was my best flyer but yes.......wind tunnel testing had come into play around this time period......but I don't believe the Germans were actively doing it until a bit later. they had started to work on jet powered planes, and this required testing the air frame to be sure it could withstand the forces. to me.....I don't think it was important to them......these planes didn't go very fast and the war was on. after what they learned about the Dr 1....handling and such, it likely became common practice for future planes.......the D VII & D VIII. Fokker took some of his planes with him to the Netherlands,,,,they didn't get 'em all
-
the gate is a model all by itself! awesome work my friend.........I recall back when you first brought it out...just the church. it has grown so much!
-
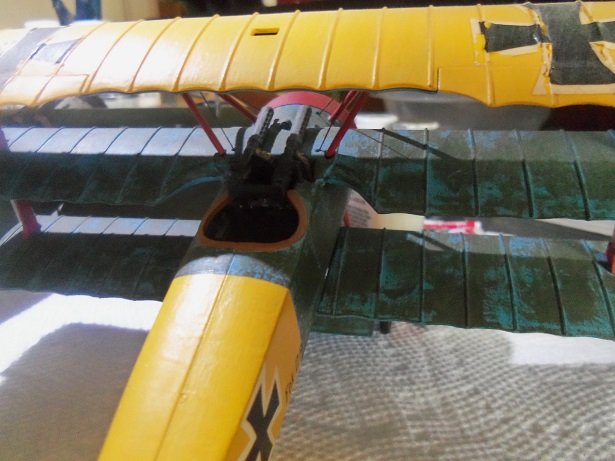
I think that's why he hyphenated it Carl....probably thought that it all wouldn't fit there. from the sites that I read, it was though that he had been wounded and kept out of the sky for a bit.........it would take finding out what plane he flew before the Dr 1 to put any validity in that statement. the Hobby craft model was worse than this kit, in building it........very thick plastic and nothing really fit well. the center wing root and the top part of the fuselage was assembled differently than the Roden kit, although, there was still somewhat of a 'top' for the center wing root. rigging it was easier though.......I was able to run the 'cables' through the holes before assembling the wing....all the holes being pre-formed. I don't consider the model to be a true representative of the Dr 1 due to the raised rib lines....looks to klunky. not to say that other nations didn't revere their pilots, but the Germans perhaps went a little overboard with their adulations. the color red was a badge of honor...how much one had on his plane, denoted how fearless he was. injuries were common with these early planes........either by becoming wounded, or too rough a landing {these planes were not kind to their pilots}. German pilots who performed well in battle also got free reign on the camo of their plane.......most came off the assembly line already decked out in military camo.......some four color camo, some with five color.....the speckled lozenge was particularly interesting. one must remember too, that these planes were not tested as they are today.........they would likely fail a wind tunnel test.....or even be torn apart thanks to all who commented.......you all have the patience of a saint. thanks for the likes as well. to go a bit further on this build, I took a look at the underside of the top wing. the holes for the cables were drilled out, and the same wire I use for the landing gear will be used. the hole on the fuselage were also drilled out. the cabane struts are removed from the sprue and cleaned up.........note the absence of slots for them on the top wing.....just those four pins {?} I have no clue what they were thinking here. the top root of the strut does not fit in between them. I've yet to dry fit the wing again in place and attempt a dry fit of the struts...that will be my next step. I still need to add the levers for the ailerons and elevators.......go from there
-
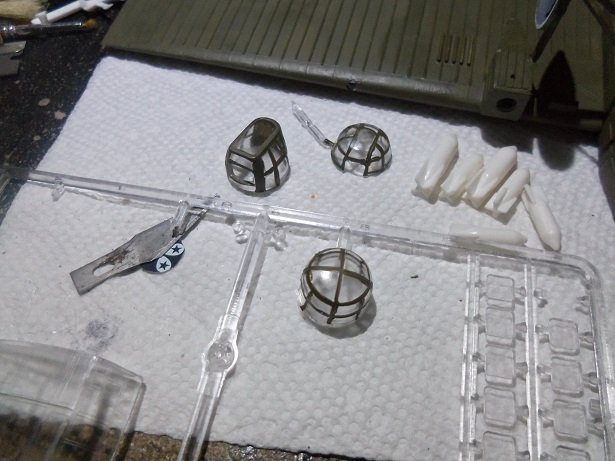
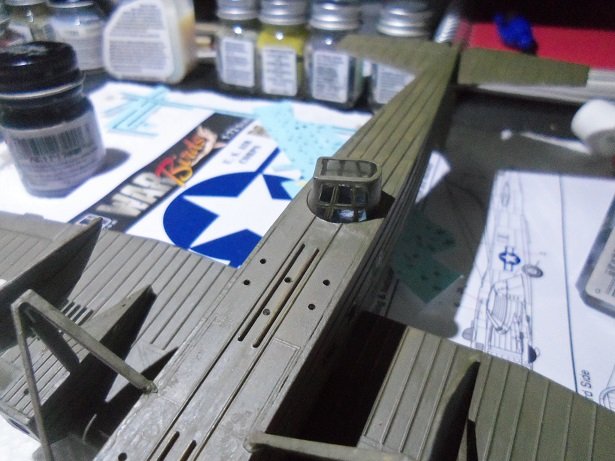
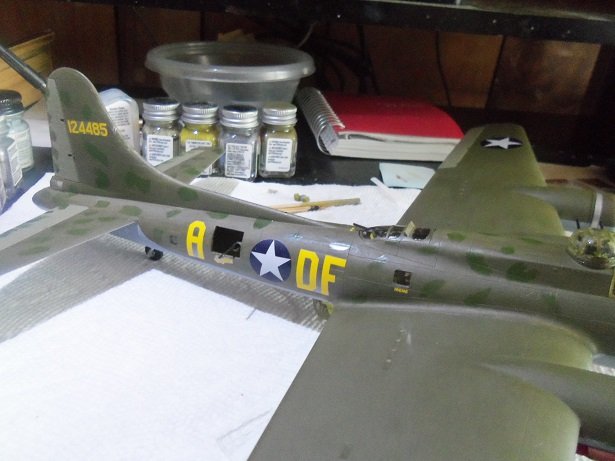
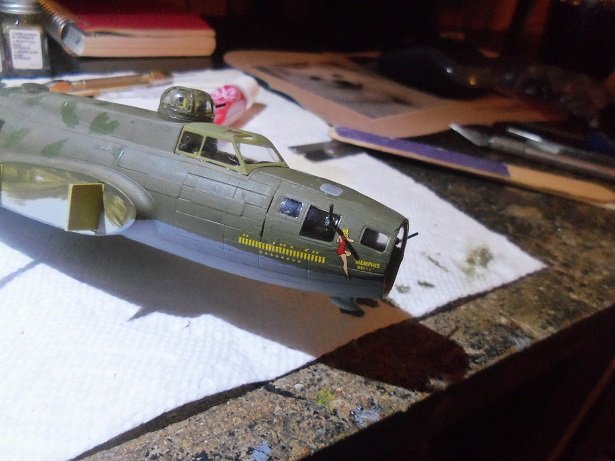
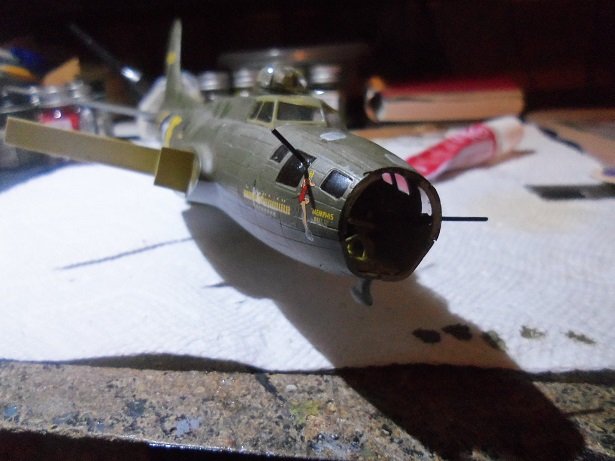
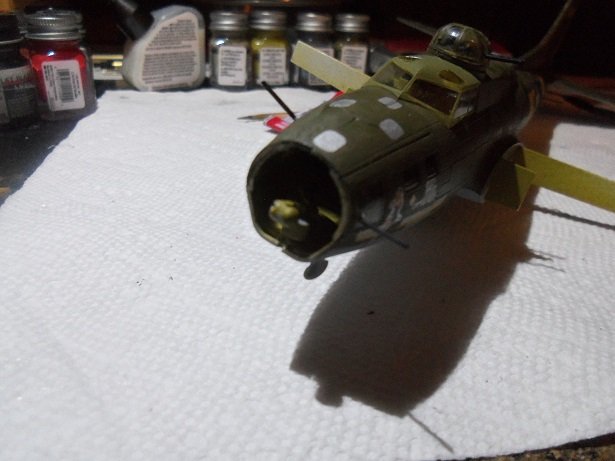
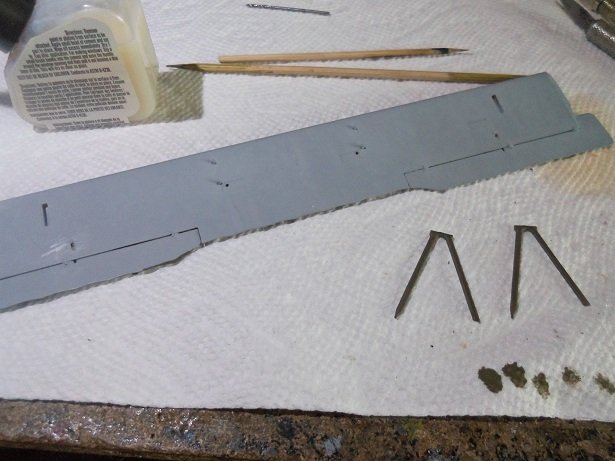
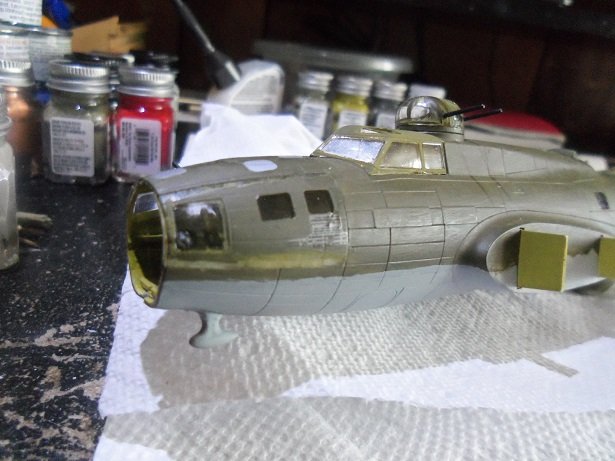
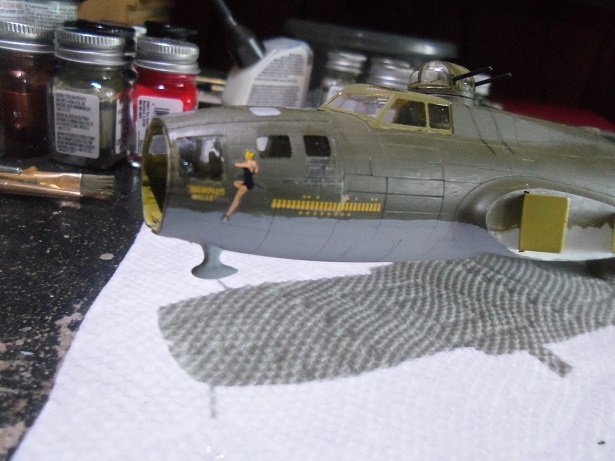
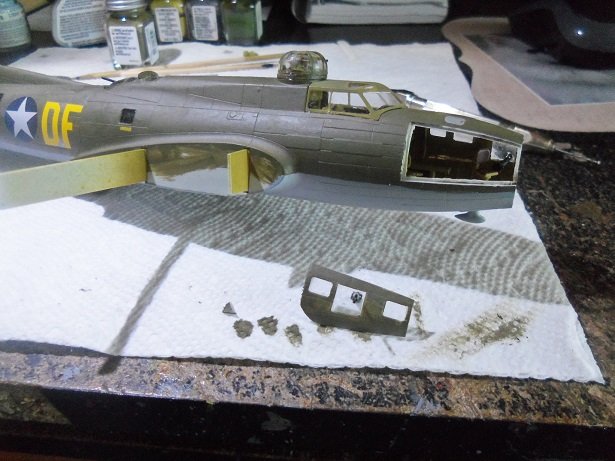
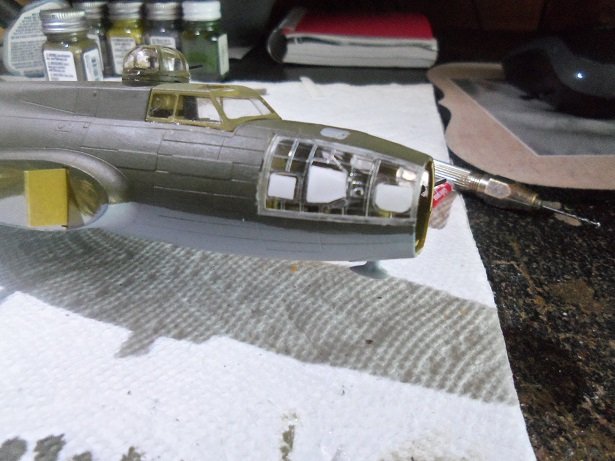
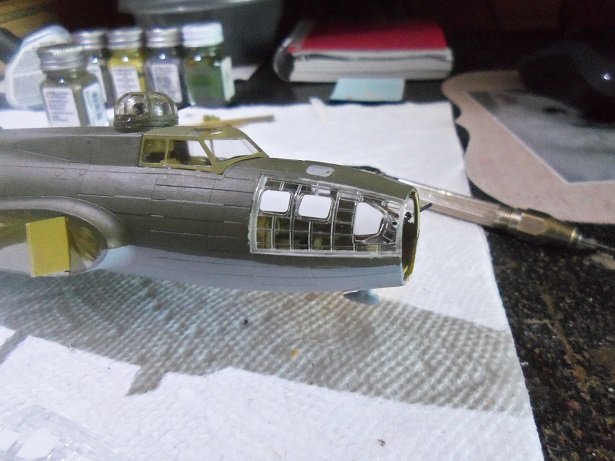
there was a sense of doom of late for our great war bird. I decided to try and tidy up the nose panels. the first problem was the decals........I looked through the 'now' immense collection of 1:72 B 17 decals I've acquired during the B 17 glut.......and I don't have another pair of 'babes' in the event I can't save them. so I tried.......got a large piece of used decal paper from the trash and got it wet, hoping that there is enough adhesive on the paper to be able to put them back on with no trouble. this part was relatively easy...they came off even though they have been on there a while. I don't have the ball turret guns or the tail guns in place yet, but the waist, nose and top guns are there........just waiting to be knocked off {Murphy waits with bated breath}. the port side was a no go for the removal prospects.......it was firmly cemented in place. what I did was scrape down the edges that were raised......to my shame, there was even some flash that I had missed. sanding it down to make it look better, it was touched up with paint.........I tried putting more along the top to fill in the thin gap that is there. it didn't totally work, but it does look a little better. the decals are back on now and there is some improvement the norden bomb sight fell victim to brash handling.......knocked out of place. I also noticed that the bombardier's seat was at an angle too...looks as though it got pushed by the port gun when the halves were cemented together...had to fix that. I wasn't going to do much with the starboard side panel........thinking that it would be impossible to remove as well. but I tried anyway. all went well until I got to the lower corner aftward....the panel snapped off leaving it there I wasn't going to try to remove it, but I did and......of course Murphy saw his chance..........it popped off onto the floor! I searched for a while.....not having much success. then things got a little more complicated.........Gibbs came over seeing his chance for a 'cuddlefest'. we had given him a bath the other day, so { as all American Eskimos are} he was 'extra' fluffy. this is bad, because if he lays on the floor, the I fear all will be lost! the part may stick to his fur, and god knows where it will end up! but Murphy miscalculated the telemetry of the flying part.........it had landed on my seat cushion...between my legs in the picture to the left, the broken piece is the triangular looking blotch next to the other olive blotches. apparently, the big difference in the many variants of the B 17, is this starboard side window arrangement. I dug out the other variants and noticed that they are all shaped the same way. the gun cold be centralized as I have it here..........or it could be centrally raised, or raised toward the front of the panel I put on the maskings when I did all the other parts....guess that was smart on my part I'm going to confirm that I'm using the right panel.........but in the meantime, I will repair the one I took off.

- 247 replies
-
- 11
-
-
sweet look'in plane Carl most war planes were not very glossy to begin with.....come from being shot at all the time nicely done!
-
I've had models that were a joy to build.........and I've had some that were a down-right bear. some could even go farther with detail........limiting how much molded detail, which would up the parts count. accuracy could be better too. but it is what it is.......it's up to us to make it what it is how much further you want to go with it is up to you.
-
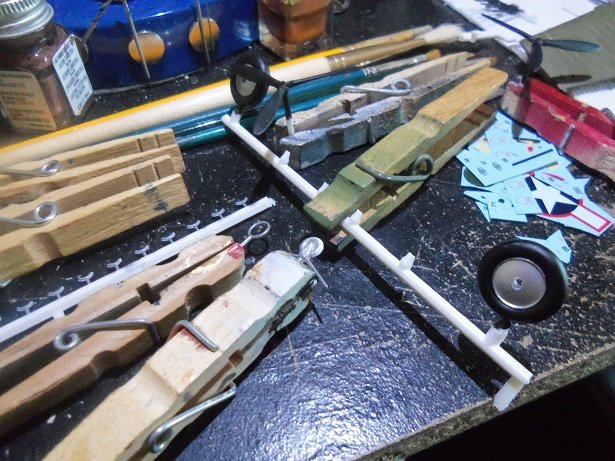
I did go a little bit further........adding the machine guns to the model. I did start to think about the HobbyCraft model.........I put the two side by side. I fitted the top wing on to get a better idea....... these models are quite similar, with a few differences.......the raised ribs on the HobbyCraft wings.......the machine guns........the one thing that the HobbyCraft model has over the Roden model, is that the cable holes are exposed. I have had to drill out all the holes for the Roden kit. the decals are in tough shape.........note the slot in the upper wing for the cabane strut. the wings are thicker too.........
-
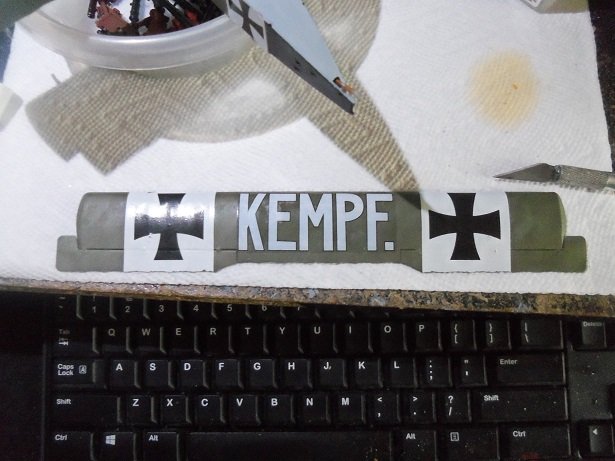
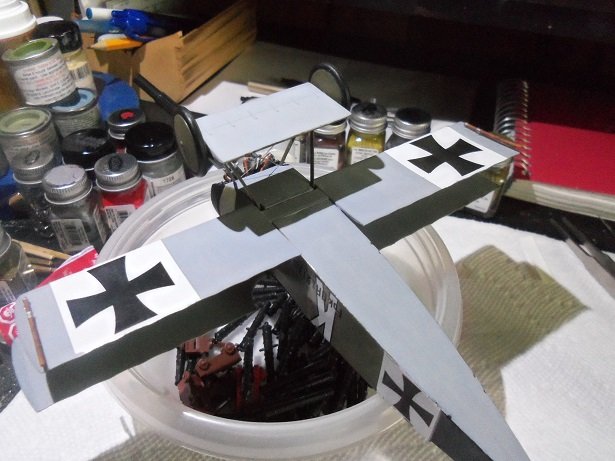
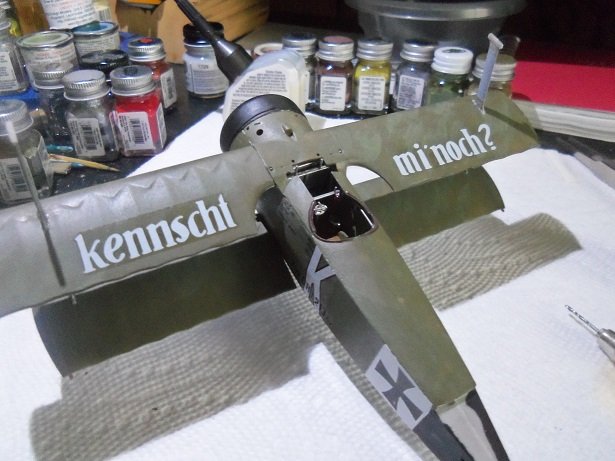
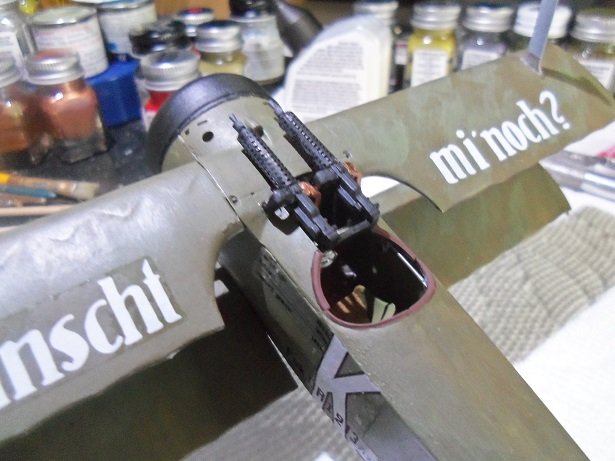
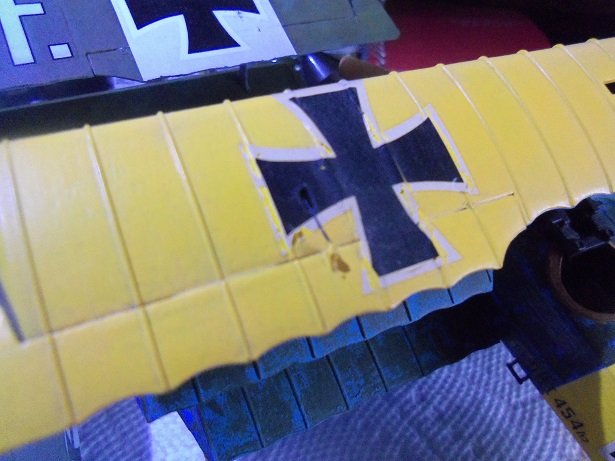
I started the decal process by applying the bottom wing fields. I will need to trim them. the upper wing was done next, while the bottom wings were drying........the insignias were added, as well as the name graphics. the top wing was trimmed before they had dried.......there was minor chipping. with that.......the bottom wings were trimmed, and the insignias were added. the wing skids were added next. where I left off on this bird, was at the middle wing. there are two decals there that are a phrase: Kennscht Mi'noch? looking up the meaning is a bit confusing, because it appears there is a word missing, but it translates to "do you remember me?" more to come.....I trying to get up the gusto to paint the stabilizer and rudder. the bottom of the stabilizer is flat black.........I tried to brush on the upper paint { flat white} and what a mess I made! as you recall, the other stabilizer was ruined by paint thinner. the other stab was sanded along the leading edges, flattening a curvature, so it could be used. once I gt over that hurdle, the cabane struts will be the next big one. it seems there are no slots for the struts in the upper wing. I can't wait to see what I'll have to do with them