
HOLIDAY DONATION DRIVE - SUPPORT MSW - DO YOUR PART TO KEEP THIS GREAT FORUM GOING! (78 donations so far out of 49,000 members - C'mon guys!)
×


popeye the sailor
-
Posts
16,007 -
Joined
-
Last visited
Content Type
Profiles
Forums
Gallery
Events
Everything posted by popeye the sailor
-
 WOW! you have made some really good progress since I last looked in! she is a very well detailed model....that's for sure the lighting must have been a nightmare.........but well worth it! very nice
- 337 replies
-
- 4
-

-
- finished
- mountfleet models
- (and 1 more)
-
fitting that you put her in a case Chris..........she's a stellar looking model! very nicely done ........congratz!
-
it will be with no weight in the nose you have to know my meaning.
-
nice........and to think that everything stacked on top will have to be in sync........ this is gonna look awesome!
-
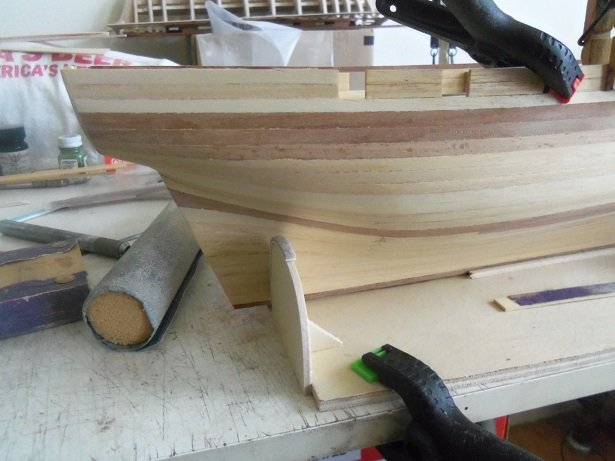
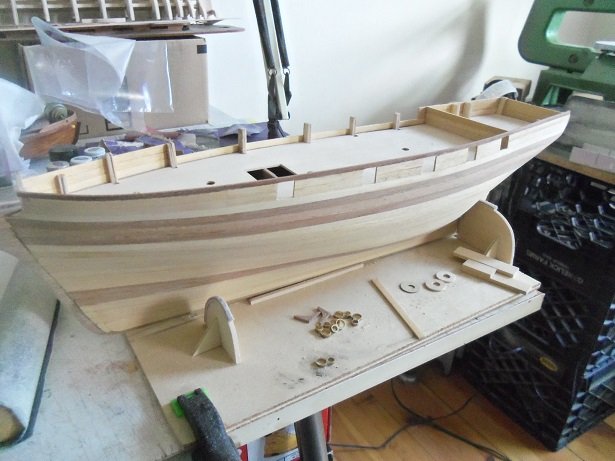
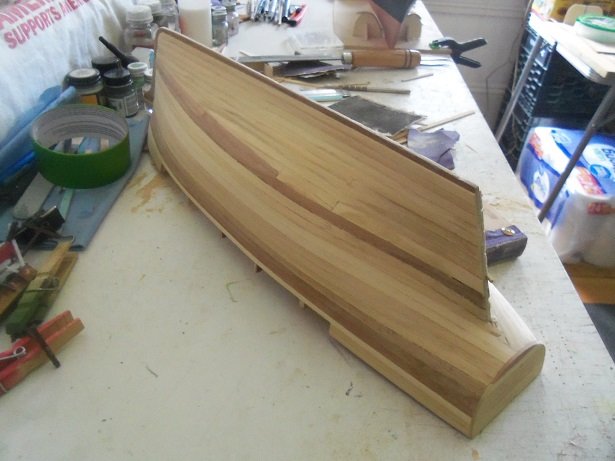
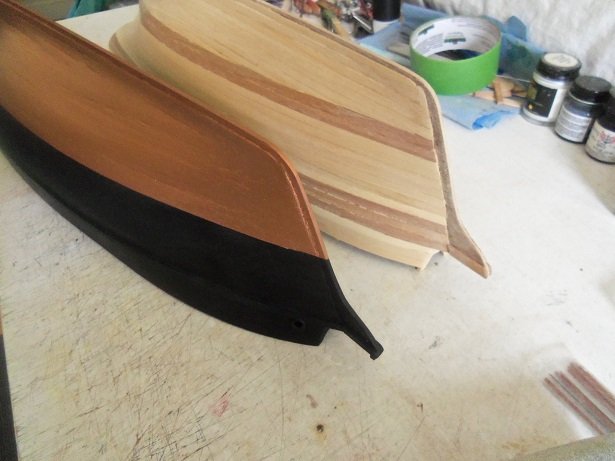
...and this will catch her up to date........this was done on the 20th........the starboard side. I did get a couple pictures of the process. the sanding stick on the slip is 10 mm wide. the hull is a lot more defined than when you last saw her. with this done, the mahogany was run along the top. there is a gap at the bow.........I'll just fill it with filler and sand it later. in fact.......there's filler on it now. so......here she is. I'm glad I didn't throw the parts out...it was worth the gamble. I see a lot of potential here......I'm already getting ideas. thanks for look'in in........I hope to have another update soon
-
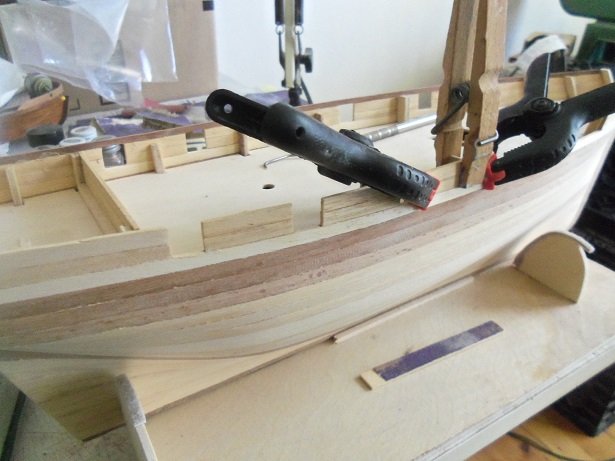
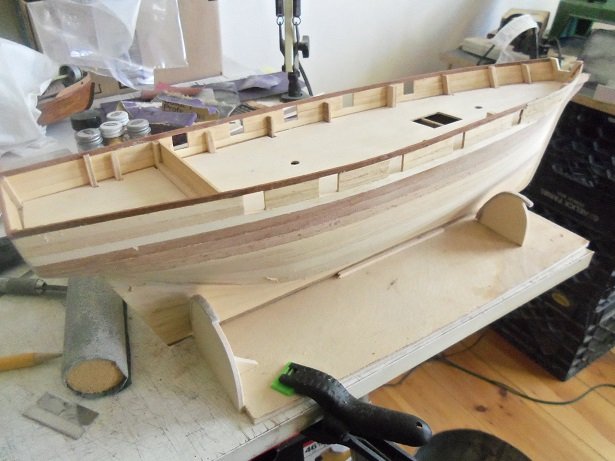
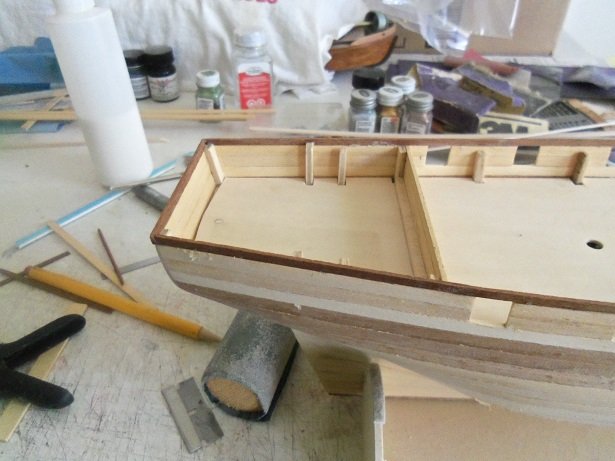
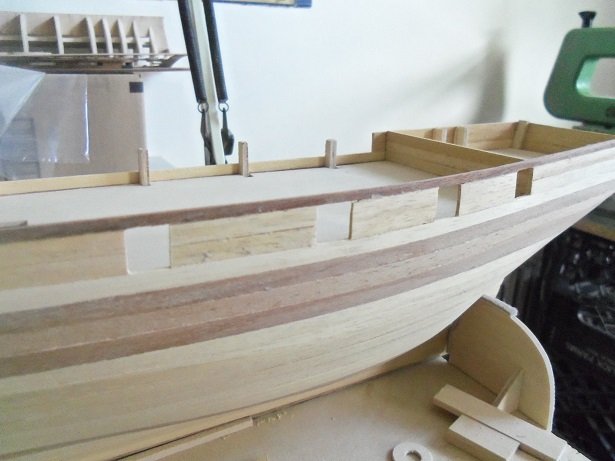
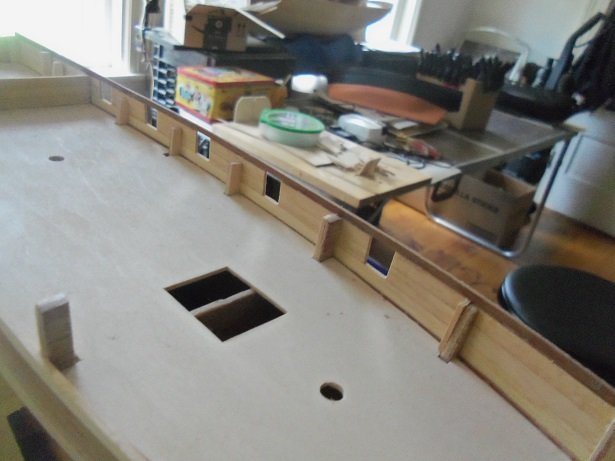
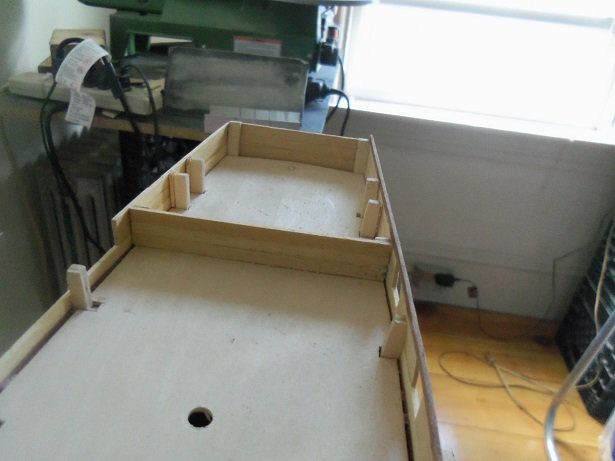
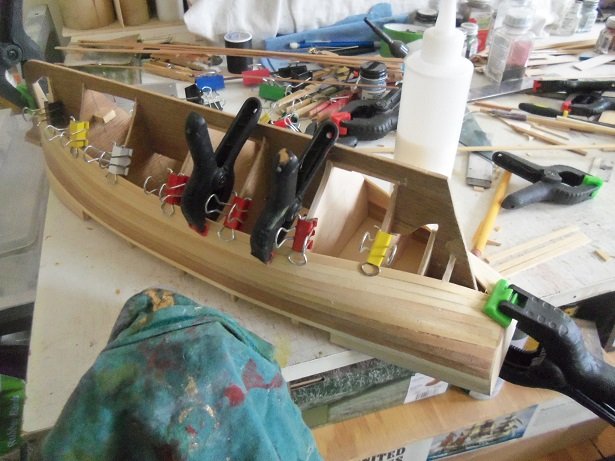
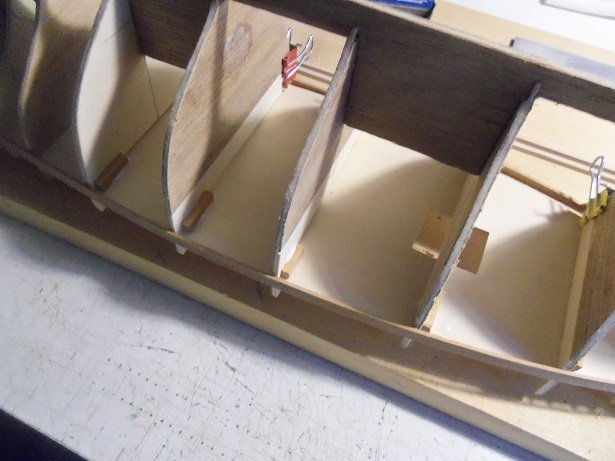
thanks god the transom came out OK so this will bring her up to snuff.........the 15th of May. I've done some more filler work, as well as sanding, but these next two updates concern the assembly of the gun ports. as I mentioned, they will be 10 mm X 10 mm..........amounts to two strakes high. simply......spaced ports with short segments of bulwark. I ran a 2mm strip of mahogany to cap them off. what also can be seen, is that the aft cabin is defined. there will be a companionway entrance, and I may add some portholes or windows.......gotta go higher and build it up. I also need to adjust the posts too........good firm base for the cap rails. still a bit to do before I can plank the deck.
-
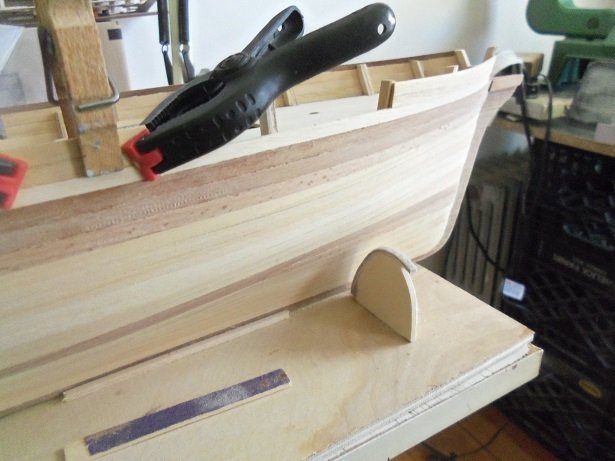
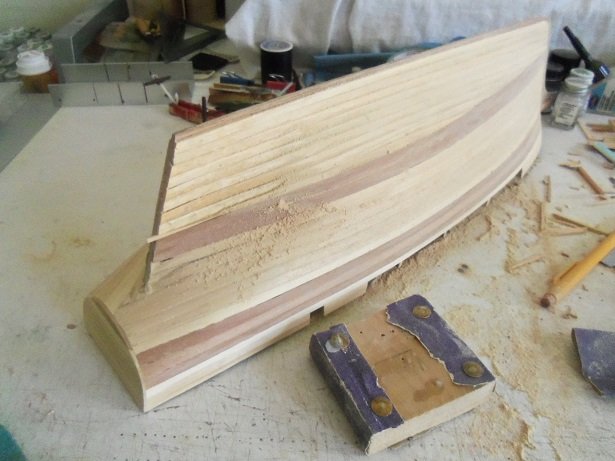
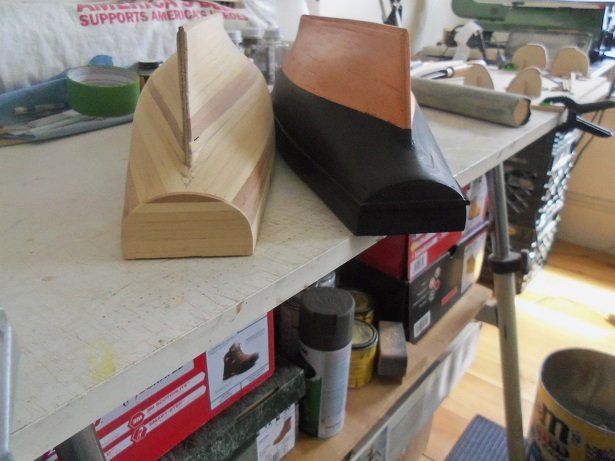
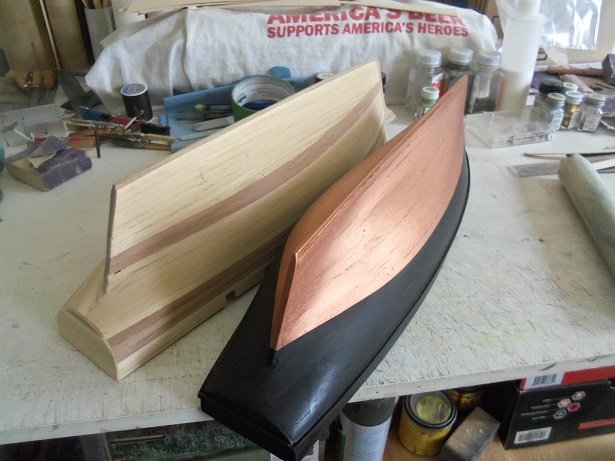
May 8th..........I am done! I've done quite a bit of sanding too..........the rasp lived up to its name. it took down a lot of the high spots and shaped the counter / stem relationship. from there, it was medium grit sandpaper, later switched to a finer grit. still more to go..........it can be seen that there was a bit of a problem on the starboard side. I tried to fix it, but there was no other way, but to cut it out. it will have a copper bottom, so it will be hidden. more sanding was done in the meantime........a little filler and shaping was done. dusting the hull off and cleaning up the mess, I thought it rather neat to do a comparison with Cloey. ohhhhh....there's the RASP!!!! she still need a bit more work, but I'm quite happy with how the hull came out
-
John.......I just told the admiral what you asked me..........her answer was "too many if you ask me! " I look at it this way.......I'll be spend'in the rest of my life finishing them all I'd better be around till a ripe 'ole age, 'cuz I even have a stash that I haven't even started {I'm reminded of this often}. anyway......it's April 30th........I've stopped on cloey till I get this one planked. the hull looks like a three legged dog....it's gonna take a lot to whip it into shape. it's a good thing I have the 'rasp'........hopefully, I have a picture of it somewhere. it's a ten inch 5/8 dowel, with some really aggressive sandpaper adhered to it.......my own design by the seventh strake of Obechi, the planking was well onto the rudder stem. there are five strips of this mahogany left, so I though to get rid of them.....two on each side. as I'm going along, I've also been sanding......mainly to get a head start early. the rest will be done in Obechi. this does seem to take on the looks of a interesting hull planking............almost pretty.......in a sense. this is temporary, as it might get stain, but likely will see paint. I have a hard time arriving with a hull that doesn't show glue blotches afterwards. surprising that I haven't had any more instances of delamination.
-
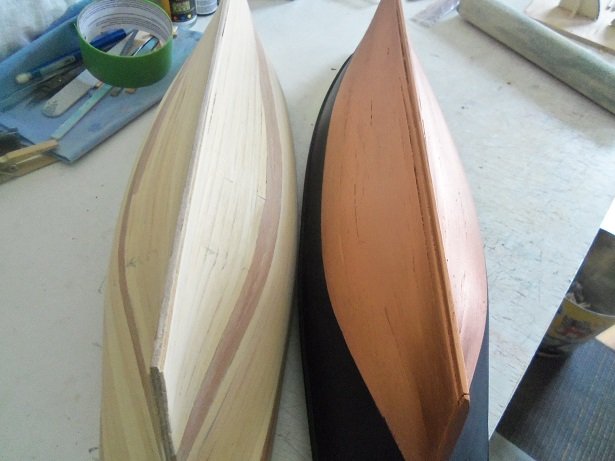
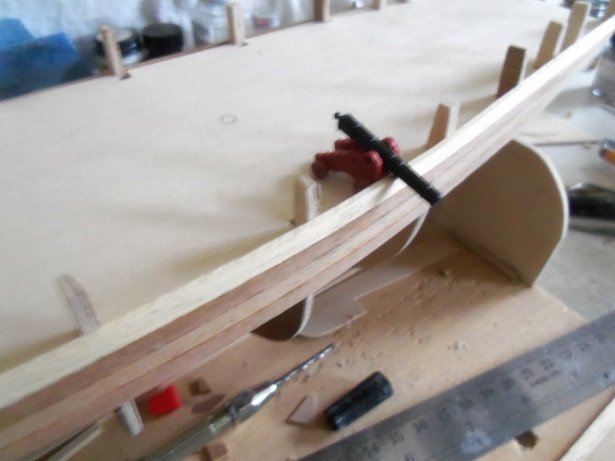
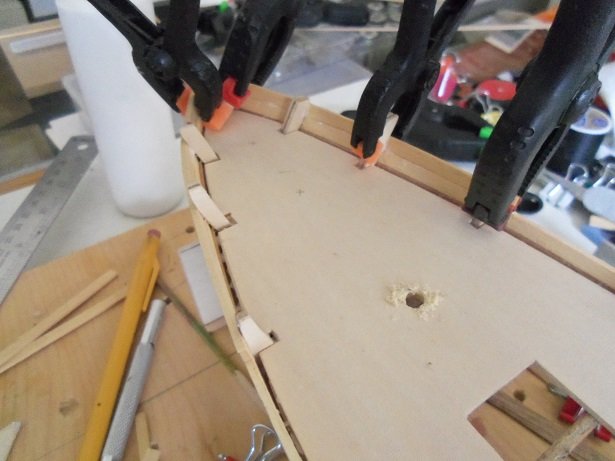
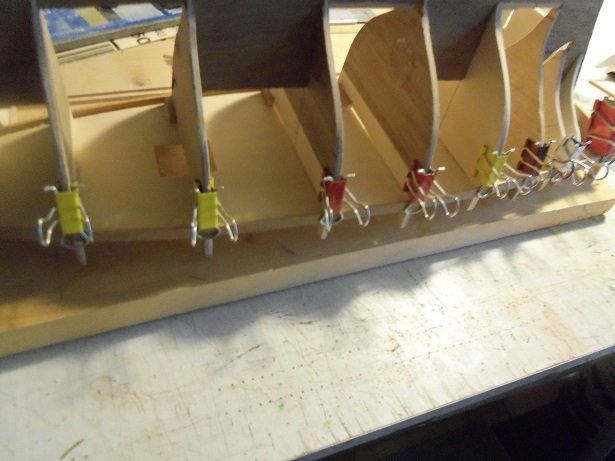
so, by April 25th, I was able to move forward with the port side planking. the mast boxes that I had made for Cloey, were made for this model as well....they are in place. now at five strakes below the 'mahogany' band. along the way, additional fairing is being done, to insure the run of the planking. it has been hard to maintain the line.........at this point, the planks met one another at the stern. I think they call this 'herringbone'........I'm going to let it run like this down the counter, as it will leave a very small area to close when the planking run onto the rudder stem {the terminology escapes me}. this is also the repair of the transom. the planks now are being eveningly laid.......port and starboard. it can be seen how the planking is closing in on the rudder stem. closed sufficiently, the hole can be drilled for the rudder stem to enter the counter. I need to do the same for Cloey

-
hello John........how many...........hmmmmmmmm........I think I've lost count too I will take a census....a big thing at the moment here in the states I'll have to get back to you on that.......I'm sure others are curious as well. basically, this started to see if the parts could be used........I really hated to toss 'em out. I think that when I get to where I am now with the hull, most will agree that the hull is a keeper. glad to have you look'in in
-
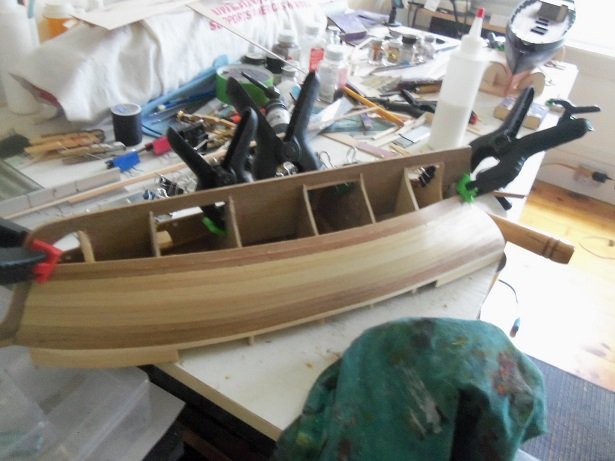
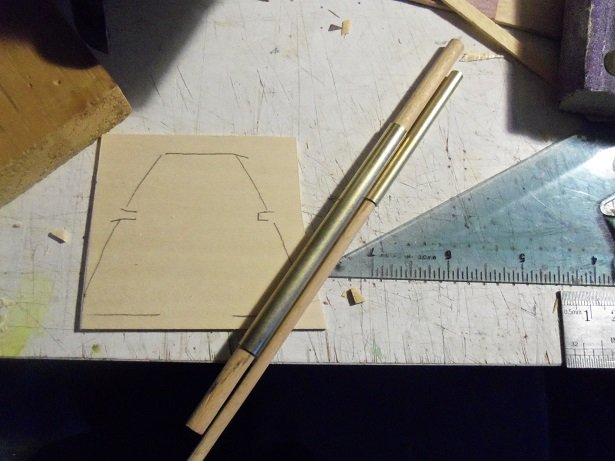
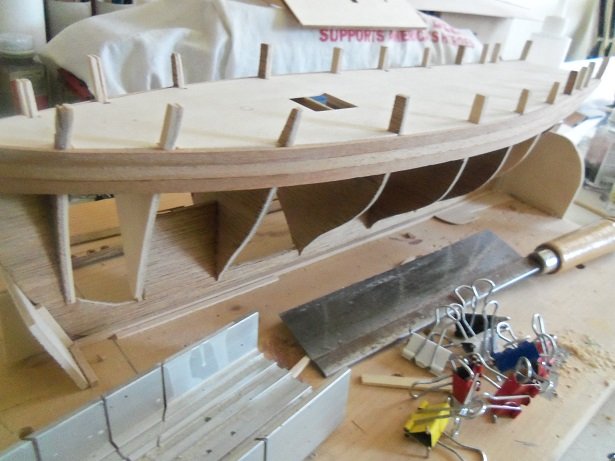
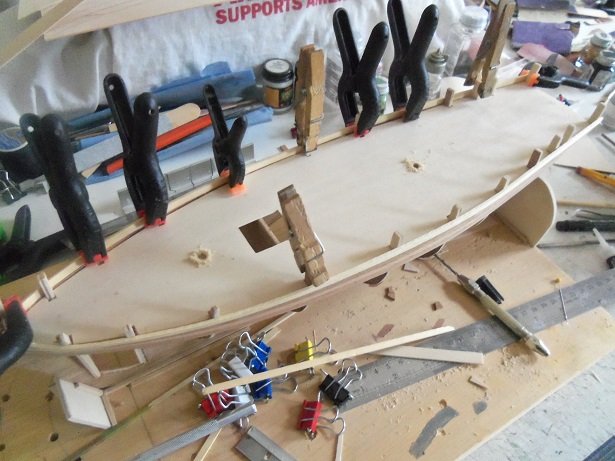
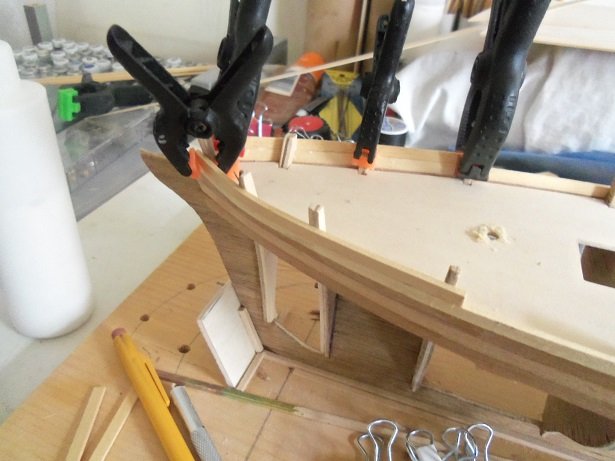
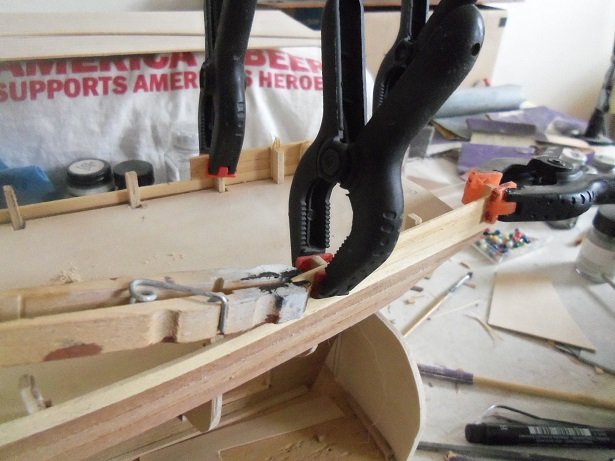
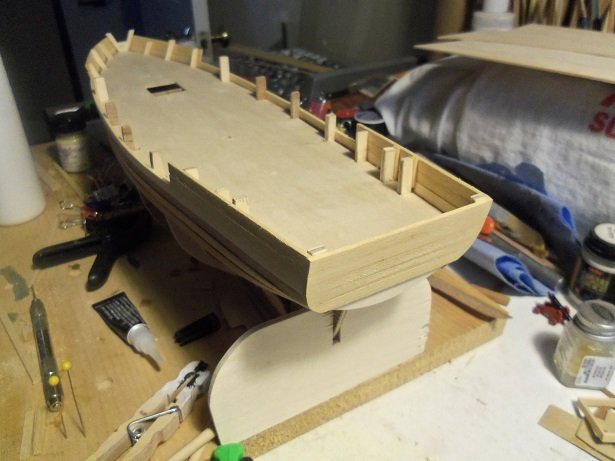
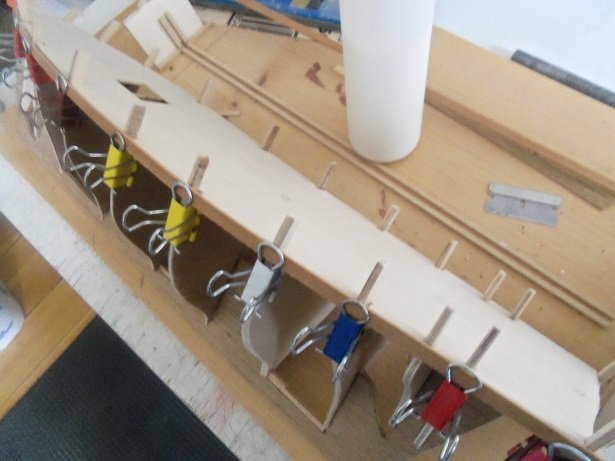
I got back to planking the hull on April 22nd.........added another four strakes to the starboard side. I have been using a small block of pine board to help with terminating the planking at the stern. it fits on the deck and is thick enough to prevent damaging the transom planking. I'll let ya know ahead of time, that it was short lived............one slip later, and the transom wall was broken. ....not that it wasn't expected......oh well! I'll fix it later. the #2 bulkhead looks to be too narrow....I had to shim it. actually, it's the #3 bulkhead.........too wide...........making the hull too rounded as it heads towards the bow. this is about the time when I started to make metal parts for the masts....also a tracing of the bow deck. in the last picture, it can be seen that I used the Dremel to bring down the #9A bulkheads........too much there as well. this hull was turning out to be harder to plank, than the Clotilda hull....... in this picture, it shows the first defined gun port....four more to go on the port side. two thing to note here, is that the extra transom bulkhead boxes the deck platform in leaving a space......that will be covered with deck planking. the other thing is that I trimmed the bow bulwarks to the third post.....I may need to scab in some extra wood to center the gun port. well....it's time to run the errands..........I was able to post as much as I did......and I managed to wolf down two tuna sandwiches I think there are four more sessions to go before the log will be up to date. more to come........
-
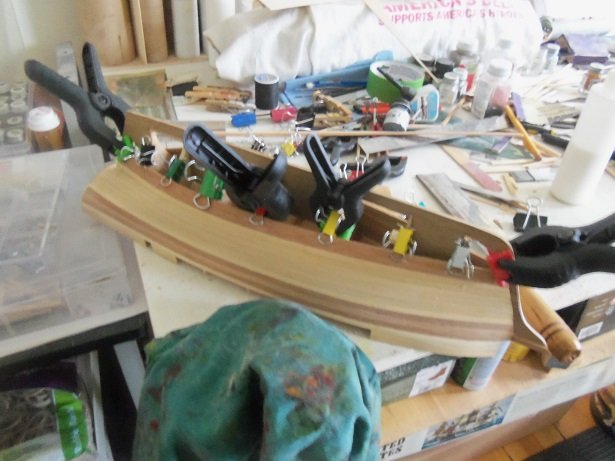
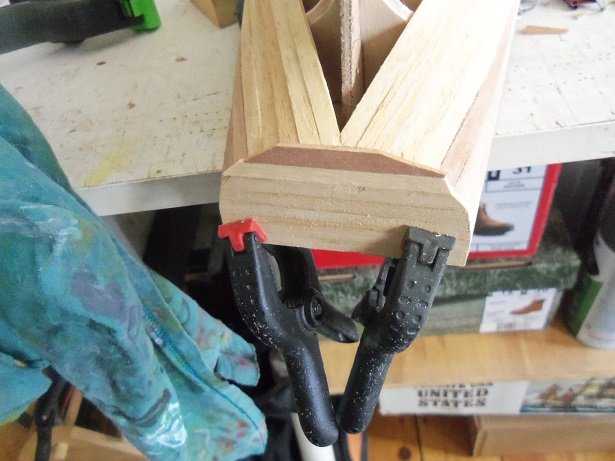
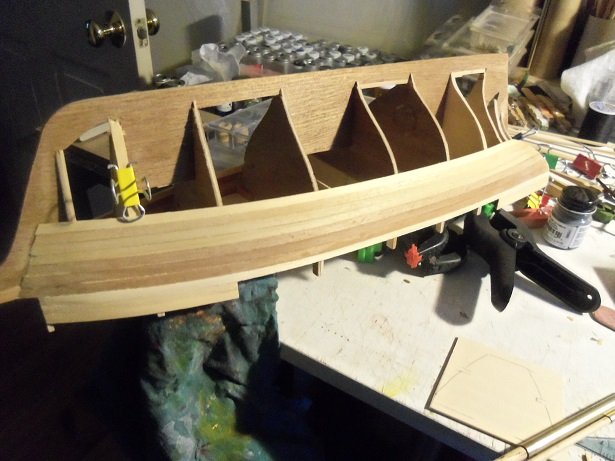
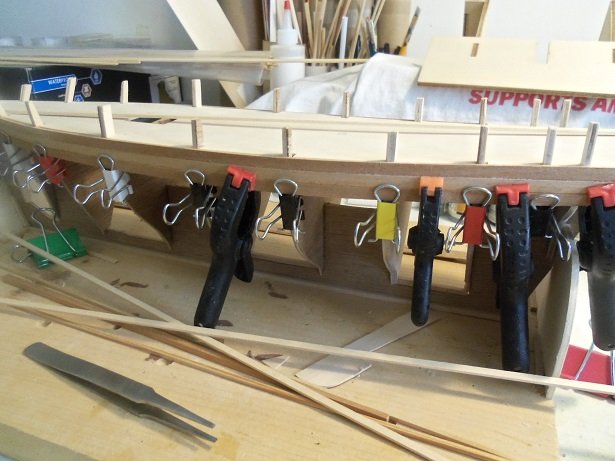
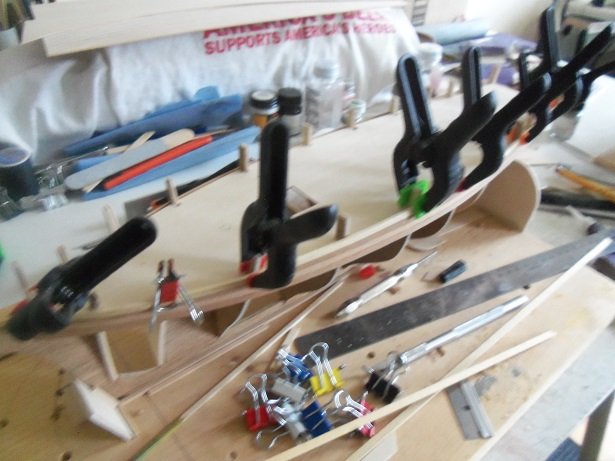
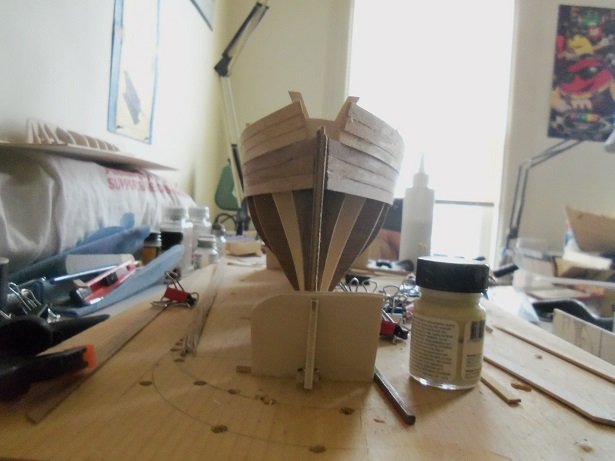
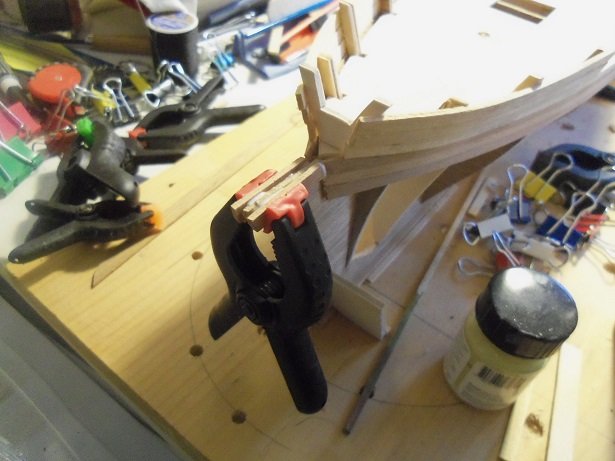
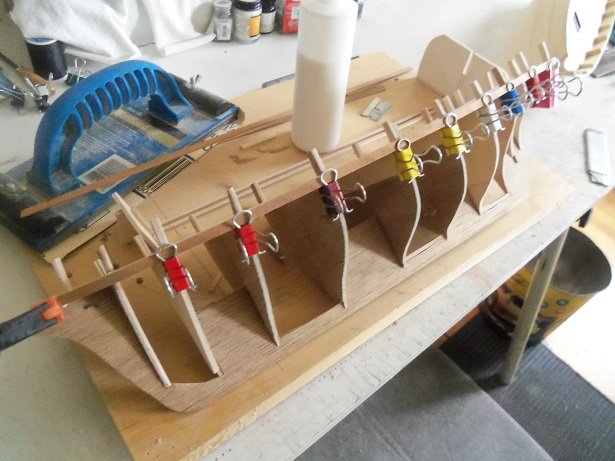
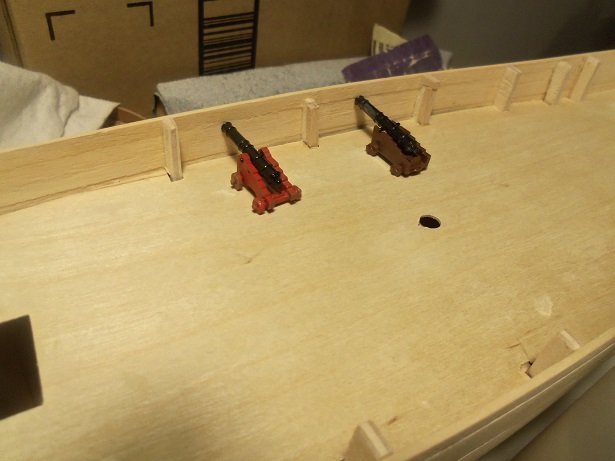
we had a good walk.......the admiral suggested we wait a while for the store, to give my foot a rest...........OK! I can add more to this log! bouncing back from Cloey and other projects, on the 18th of March, I was back to continue. by now, I've added three strakes to the port side, and was adding the same on the starboard side. this wood is tough to bend.......I'm not sure that I will be able to do the entire hull with it. in the event that I don't........I can rest easy knowing that this ship will have an armor belt I had to do a double take here........ it appears that there is a gap mating these strakes to the bow stem.........I looked at the hull........it is not the case {I may have adjusted them......not sure}. completing this, I moved on for a bit........but on April 2nd, I was back to planking the hull further. I decided to use 1.8 X 5 mm Obechi to raise the bottom bulwark sill. the pictures are a bit blurry.......not too bad, but it shows the mast holes were drilled, and in checking the cannon height, it is OK there is sufficient drop. {any closer than that.....you might want to hand out the muskets and swords } I know this is a different approach in creating the gun ports......bear with me. at the bow, there is to be a fore deck, so building up the bulwarks can be done here. the windlass will be set up much like the Clotilda, if this works out as I hope it will. the stern winn be built up as well, a aft 'poop' deck is in the plans too. going fine so far, but I was soon to shoot myself in the foot! I was so bent on getting the transom boxed in, that I planked it.........as far down as I could. little did I realize, that in planking down around the counter, I would need to clamp the planking. not having the transom planked was essential...... the open field on the sides will be spaced for the ports - five on each side then.......a problem occurred.......the bow stem lamination was splitting apart! it was an easy fix though........some glue was tucked into the separation and both sides were flanked with a piece of wood.......might come in handy when gammoning the bow spirit

-
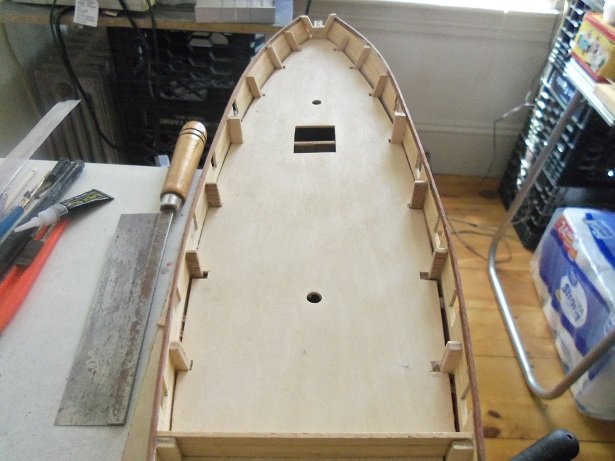
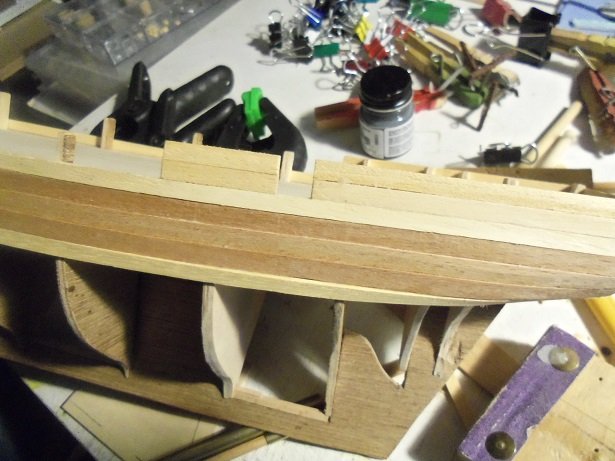
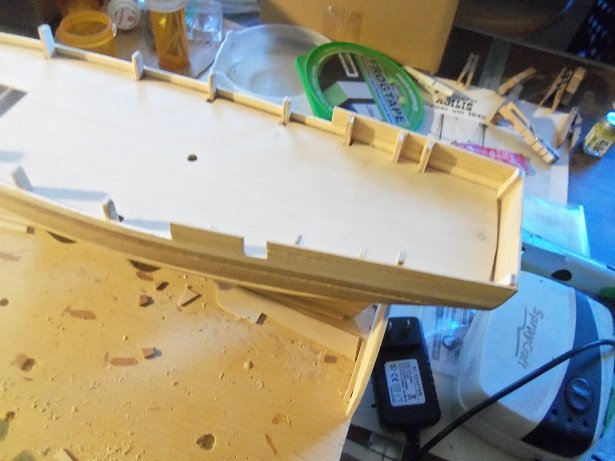
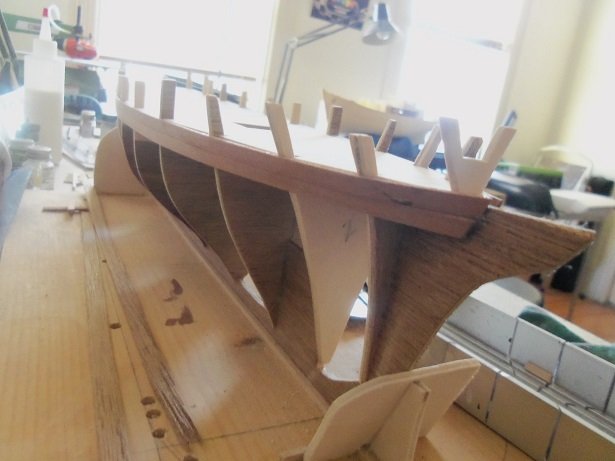
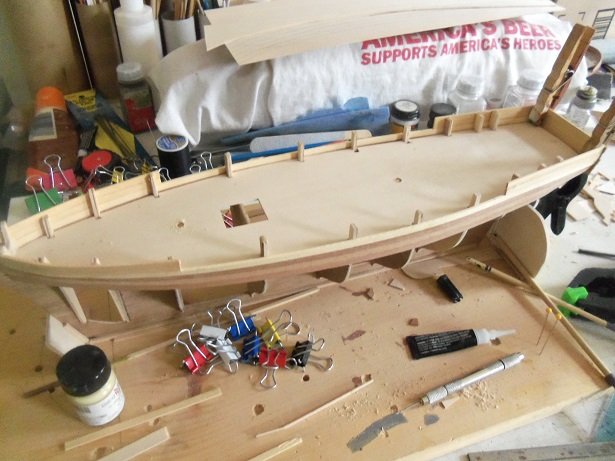
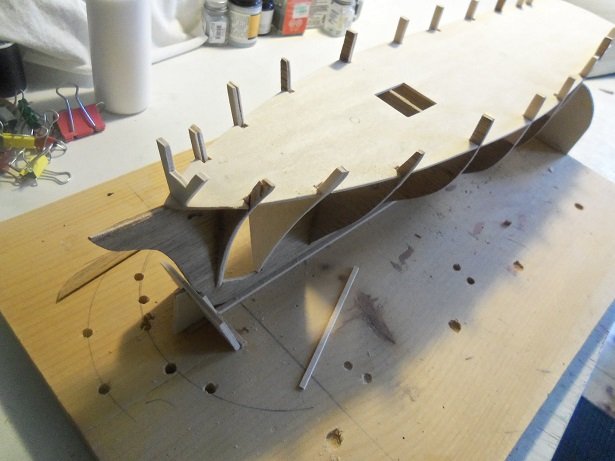
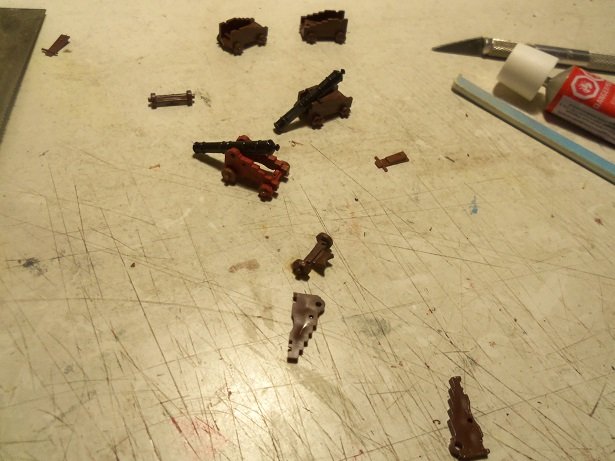
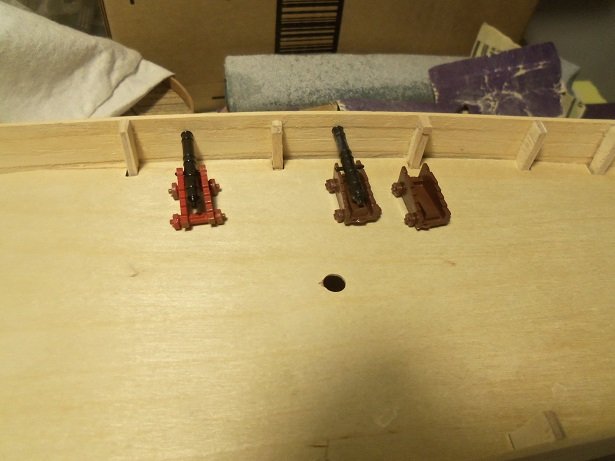
March 12th...........was when I finally got back to her {the Agillis}. the hull frame has fully set and cured by now. the deck platform was repaired....the bits that broke off were trimmed and fitted back in place. at this time, the bow bulkhead {or is this the Knighthead}.......I'm not sure, but as it will work for the Clotilda, the sill produced from the addition of this part, will provide the seating for the bow spirit. the sill I speak of isn't shown here yet........the plank strakes that will run along the decklines, will define the sill. I will be adding the chock at the tip of the bow stem to give the angled lift to the bow spirit. I may need to drill a hole through the bow part, to allow the spirit to run through it. I do plan a fore deck, so perhaps I can get away without having to do it the original part #10 was cemented to the ends of the deck platform, leaving the overhang in the center {which is curved}........the new part #10A was cemented to it, taking up the overage. this bulkhead was also slanted slightly to give a slant to the transom. between all this, some fairing was being done........a head's up from dealing with the Clotilda hull. some of the bulkheads are not exact to contour....if you catch my meaning after these parts had dried, it was time for the real fairing process.....a lot of it! my arms were like spaghetti after! down towards the keel, there was more to be done, but I wanted to get the deckline and bularks defined.......something about those posts dangling in the breeze worried me. getting the upper end of the hull faired, the hull planking started at the deckline. I want to use as much of the original wood as I can...some of it was useless anyway....it was warped and twisted. this stuff looks like mahogany, but is hard as nails. I'm sure that after adding a few strakes of this, the hull will be solid at the bow stem, the sill I spoke of has now been formed {more on this later}. I didn't get a picture of it, but looking at the stern in the pictures above, it can be seen that I added the parts #9A to interrupt the large gap between #9 and part #10 {more on that later too}. to help support the deck platform, I added bits of wood underneath. the idea here is to insure that these two strakes are flush with the platform.......I kept some of the camber some testing was in order to see where to put the gun ports....something I've never done before! I shouldn't mention it, but I will have quite a few cannons from the Connie kit I have. they do look a little out of scale, but look close enough for the model......I used the bow chaser from the United States kit to check the height of the gun port. I got the bow chaser from the Connie kit as well....unassembled, but after all......I'm playing with the deckline set, now to set the bottom lip of the gun ports. to figure this out, I needed a stand in........Cloey will do the honors. positioning the cannons up to the bulwark, it appears to be around 4 mm to 5 mm would be good, to allow the cannon to have sufficient drop. now, I plan to size the gun port 10 mm X 10 mm.....seems to be a good size to me the bulwark strakes for Cloey are 1.8 mm X 5 mm...good food for thought. for what I need.....there is an abundance. I'm sure you're wondering.......what's with Connie? still in the planning stage, but I assure you, it will be interesting nutz........off to take Gibbs for a walk, and I'm sure the admiral will want to run the errands. bee back in a bit with more .......still much more
-
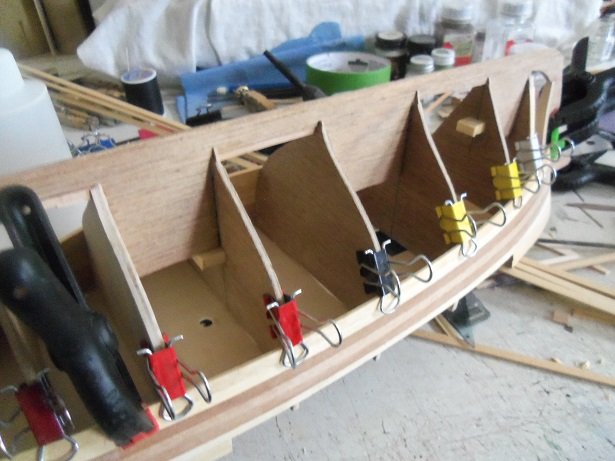
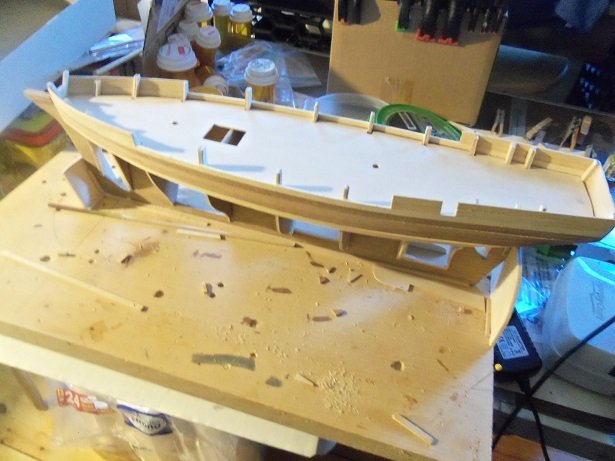
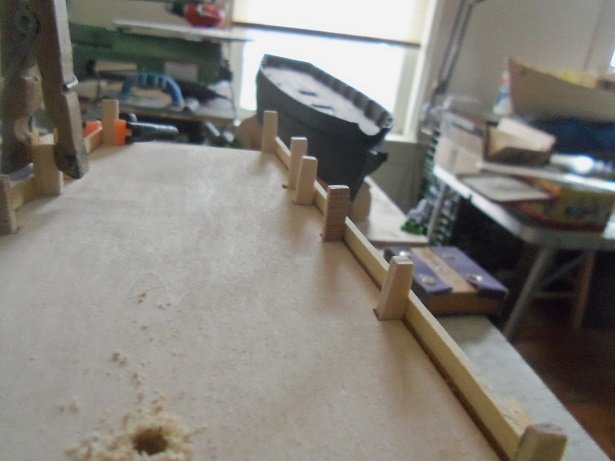
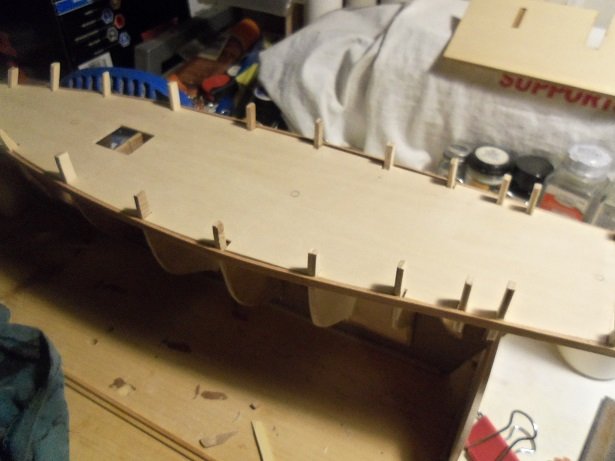
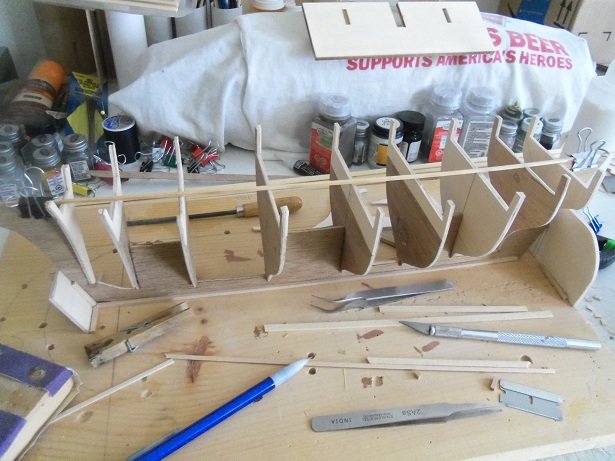
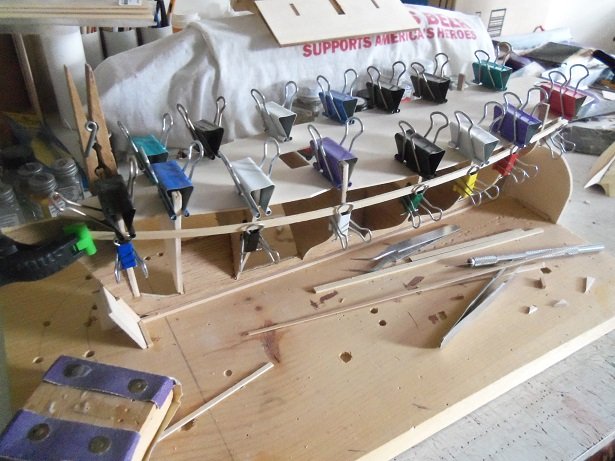
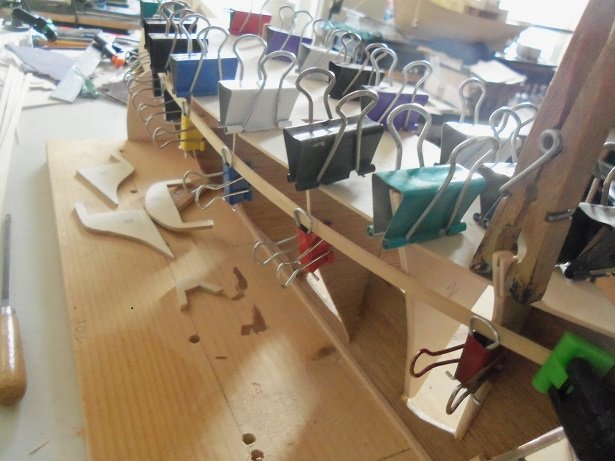
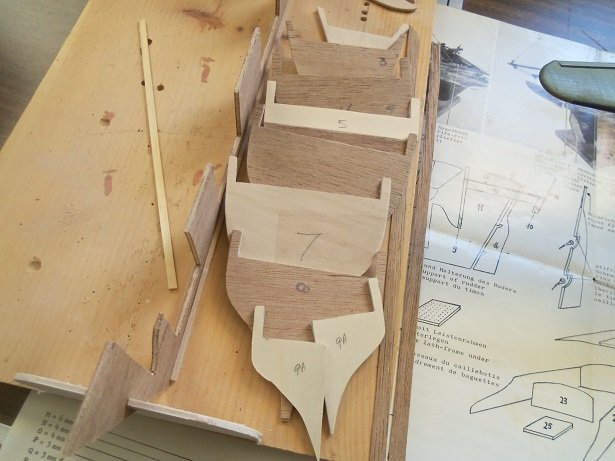
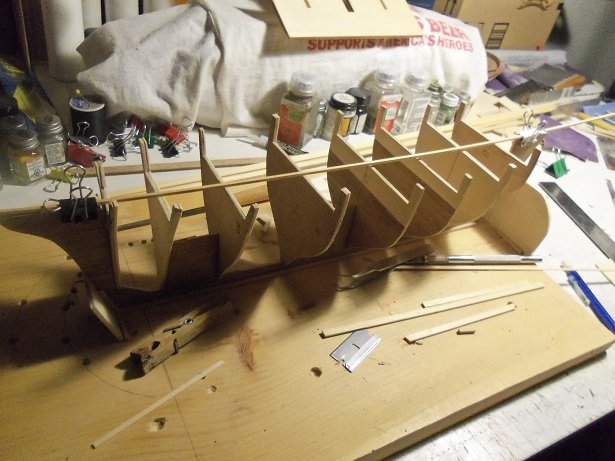
continuing on in February.........the 28th, once most of the frame was assembled and the deck platform was cut out, it was fitted in place. through the process, there was some pieces that broke off.....the wedges can be seen on the build board {the same board that the Clotilda was built on}. to help in keeping the bulkheads aligned, a strip of planking was affixed to the sides. the odd parts I made and the stern bulkhead was left off for the time being, until the frame had enough time to adequately dry. the bow part served well in forming the bulwarks for the Clotilda....I think it will do just as well for this vessel as well. the stern, as built from the instructions, looked kind of lost without the bulwark posts to end the bulwarks and form the transom. the bulkheads are very rough......the mahogany damage and such.......some I simply scabbed in basswood to complete them. others I completely removed all of the mahogany and cemented another layer to them, trimming them later. by the time I was done with this step, mahogany bits were all over the place! from this point, I turned to work on the Clotilda, who by now was nestled in her new birth.....a hull that had been already planked. I made the separate birth, awaiting her arrival.
-
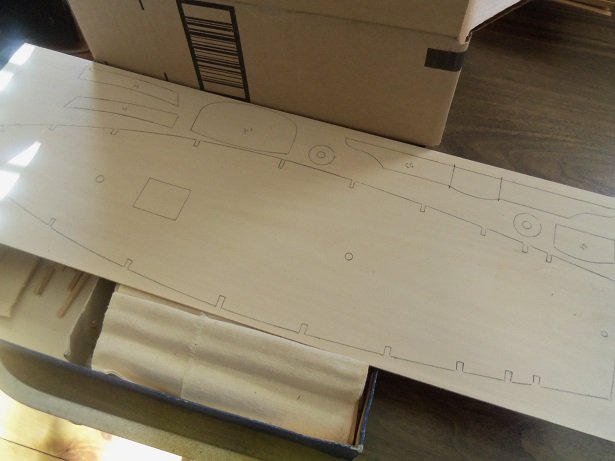
welcome Ed and Kevin I hope you find this enjoyable. it's a kit, but it will have a lot of scratch building from here forward. the build will follow the instructions, but I want to add in a few aspects that the model doesn't have. it has been a process getting the hull to this point........I'm very glad that it worked out. what I've done here isn't new to me Kevin.........I've been replicating hulls for quite some time now. when I remove the parts from the laser cut sheets, I try my best to save them. my only interest at this point are the hull parts, since I have hardly any CAD skills.......I couldn't draw a hull blueprint if my life depended on it. from here I trace the hull parts onto sheets of plywood and cut the parts out. I also try not to use exact measurements from the kit.......I build the hull and scratch build from there....fitting them out as I want to. for example........from the Mary Anne kit, the M&M Fun Ship and the Trawler Syborn were cloned. from the Boulogne Etaples kit, the Andrea Gail and the Holiday Harbor fleet were cloned {although the harbor fleet has shrunk due to defections with the building of the Andrea Gail and the other fishing boat I'm building}. the Midwest Lobster boat was also used to fill in the gap left by these defections, cloning a better model of the Christmas Tree Boat. in all of this, I found that the idea of using the Boulogne Etaples hull for this subject was a bad idea, but when I was assembling the hull frame, I immediately thought of the Andrea Gail.......that idea was a very good one! the Bluenose project isn't off the ground yet, but from the Bluenose that I got from a friend, two other hulls were cloned. this will consist of three schooners....the Bluenose, the Bluenose II, and the America. all three have basically the same hull construction, but are outfitted differently. they will all be at 1:65 scale and will sport sails.....that will be a heck of a lot of sewing, btu I already have the Bluenose sails cut out and ready to sew. I'd like to go larger, like a fifth rate ship...or one of those large sailing ship that I can never afford, but obtaining the parts panels from them is impossible {unless someone is willing to indulge my madness}. I can buy and make the fittings, but some of these kits are too rich for my blood. there are a few other hulls that I'm working on, but so far, not enough to report or start a log about. I'm constantly doing something........ as you read above Ed, all this started out as an experiment, to see if it could be done. most folks will throw the instructions away after their model is built......I don't........not even the plastic models I've run into instances where a person puts out a shout, because they've lost their instructions. the Revell Cutty Sark is still the #1 model in which this is the case. it's so popular, that I posted the instruction sheets on one of the blog sites that I use.........the U.S.S. United States was the second one posted. I mean....really, once you buy the kit, what becomes of the instructions after the fun is done? JCT and I are based our models on the Topsail Schooner {of course his is finished}.....I'm still building the Clotilda. I want to build the Brigg that the box art shows, but I want to build it as an armed capable vessel, perhaps a vessel that participated in the deterrence of the slave trade. I think it's kind of nice to throw a little light on the Steingraber kits. they are a lesser known manufacturer, but they are old. caution should be observed in attempting to build one. I still think it's kinda funny how all this came about.......I'm glad that J had fun with what he did with his kit.....he built a very nice model from his kit enjoy.....I will try and keep the ball rolling as steady as I can........gonna try and do sails, so with no real diagrams to work with, it should be entertaining a thanks as well to those who hit the like button!
-
I use Ca to glue the weights in........either that or two sided tape { test first}.
-
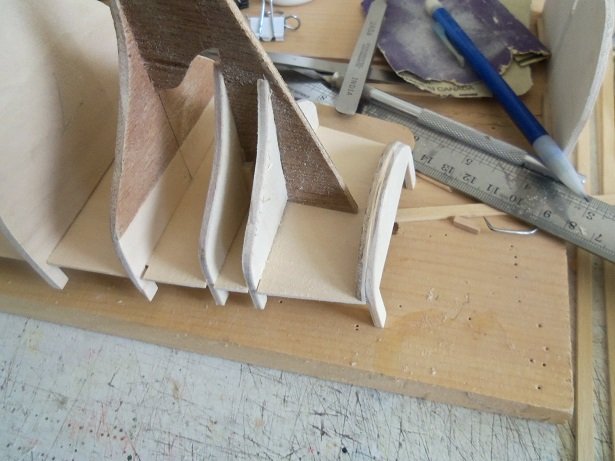
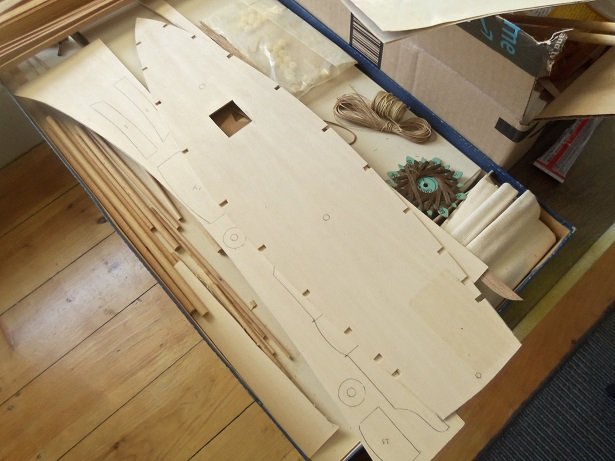
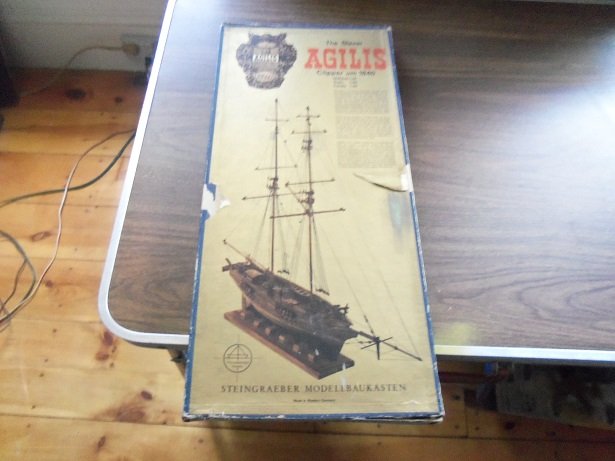
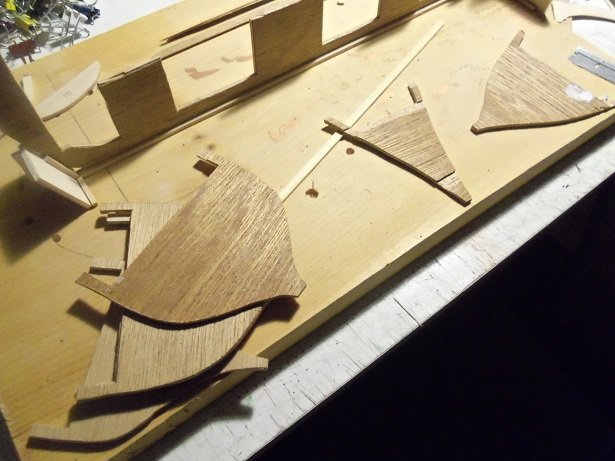
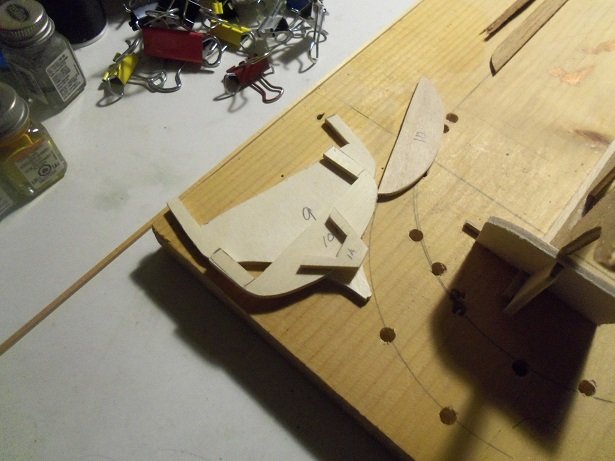
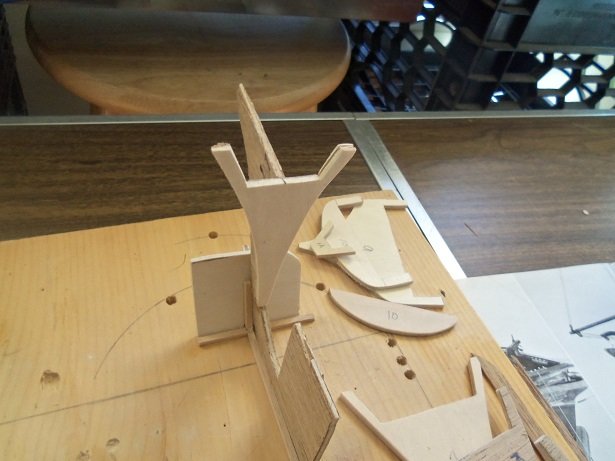
I said that I would start a log on this vessel if it looked like the hull is a keeper. it was touch and go for a while there........but I must admit, it came out quite well. this is the Steingraber kit that JCT and I have been collaborating on. he is finished with his model..........but of course, me with my propensity for making a mountain out of a molehill, have other ideas for this kit. the kit is old.......I would say onwards of 50 years or so, and this played a very large roll in how we came up with our hulls......the most important part of the model. J did replicate some of his hull parts, while I replicated most {if not all} of the hull parts for mine. I even added a couple of parts to mine to complete areas that seemed to be missing something. during this time, I ran into a National Geographic article about the slave ship Clotilda, which caused me to change the name of the ship I was modeling. in our research, we found that there was no slave ship called the Agillis........odd that this would be fictitious. though fitting to do a model of a known slave vessel......the last of the slave vessels, I was still drawn to the box art......I like the way it looked. there were a few Briggs that were used as slave vessels, but my thinking takes me away from that subject. it's just a Brigg...the odd partis that I adopted the name.......seems as good as any, since what I would name her would like be fictitious as well the parts were terrible to cut out of the sheets.......this kit was not laser cut. J seemed to have a better time of it than I was.......mine being mahogany sided plywood, and his being blonde plywood. I was fixing them like crazy, cementing layers of basswood sheet to take the place of the delaminated mahogany. my scroll saw was literally tearing them apart. you can see the missing chunks of mahogany the part 1A for the bow, the modified part #10 with bulwark posts after cutting out the keel part, I removed these strips of mahogany from the cast off with my fingers! the repaired parts of the hull frame.....the two parts 9A are also added parts in the end, we both came up with viable hulls, and we continued from there. I was cleaning up the mess, just about ready to toss these parts in the trash, when my inner pack rat kicked in. so much was done to preserve these parts.......it would be a shame not to give it the 'ole college try, and create a second hull. what the heck.........if it doesn't work....I get to see it burn and so starts the assembly of the second hull I'm doing the Clotilda as a topsail schooner, which will be void of the mast tops. built as a Brigg, the mast tops can be used. I don't like the way these mast tops are shaped, so their refabrication is in the future. it must have been in the cards, because I had traced the deck platform on a basswood sheet, as well as a few of the other parts that required that thickness of wood. the same method was used to create this hull frame, as I did for the Clotilda, running a straight strip of wood fore and aft, and marking the centers on all of the bulkheads. the deck platform was cut out and notched.. I started this the end of February....I have a lot more to cover. so not for anyone to think I'm Speedy Gonzales, I'll give the dates as I go along, until I get caught up. I'll have more on her tomorrow


-
nice job on the deck Jo.......really looks super
-
there is another remedy........like I did for my F 15 Eagle. I made an asphalt base {wood base painted flat black}, and I super glued the tires to it. I also made a stand for another of my builds, but it's hard with a bomber, because the center of balance is at the bomb bay doors. how I calculate how much weight is as follows: taking two chairs back to back, spaced far enough away to rest the wing tips on them. for this you will need to tape the fuselage together and the wings firmly in place. take weight and place it on the nose until the plane looks level. you may need to set up something to catch the plane in an emergency.......not that it might happen, but it's good to be prepared I do the same for my balsa plane too.
-
never learned the language...........just like in Game of thrones.........I never learned Dothraki. besides, there was subtitles so the top part must be Vulcan
-
is that Klingon?
-
she's looking good Tom one thing to consider........this is a tail dragger.........you will need to add weight to the nose of the fuselage for it to sit on it's wheels. having the same kit, I see that there is a space under the cockpit where the weight can be added, and not be seen. is that space viewable from the nose glass? I recently found a 2 1/4 oz wheel weight in the road , which will be perfect for the job. although this really wasn't a problem, since I had bought two boxes of different size wheel weights a while ago from the part store {Advanced Auto}..............{made me laugh....I had to tell them what each type was for}......then again, the folks at Auto Pro didn't even know about vulcanizing cement used for tire repair. if you have a garage that you frequent, ask to see if they have any used wheel weights........or check out your local part store to see if they have any stick on weights {for alloy rims}. I hope I caught you in time.
-
again I'm late to the party........thankfully no parts have seen any cement yet I do agree that the aftermarket contributions injected new life into the hobby. there are still way too many kits out there that are screaming for more detail..........besides the molded on aspects that are the main crux of many inaccuracies as well. I've found it to be a crap shoot though, as some of these replacement parts don't really enhance the model. what I've also seen, are the instances where major modifications need to be made to fit the replacements. at this scale, you'll need to weigh out whether the mod is worth it.........any smaller scale, and visual aides will be needed, even for the person viewing the finished model you got your chops........your no school kid.........you'll know what to do I'd have been here sooner.........but I had to watch that Star Trek episode love that show as well!