
HOLIDAY DONATION DRIVE - SUPPORT MSW - DO YOUR PART TO KEEP THIS GREAT FORUM GOING! (Only 36 donations so far out of 49,000 members - C'mon guys!)
×


popeye the sailor
-
Posts
16,007 -
Joined
-
Last visited
Content Type
Profiles
Forums
Gallery
Events
Everything posted by popeye the sailor
-
 nice
nice -
well ........ if your going to argue ......... you couldn't be the idiot Elkis........to assemble something like this takes brains. you've done a spectacular job here
-
feel better Jav.......gotta see where your going with this
-
sorry I missed it!!! Jack....the dio came out superb in every way! it looks very life like folks in the south can harvest that very moss........grows like crazy around swamps and the glades. we have a variation up here, but you have to look really hard for it. it just so happens that I can find it from an Oak tree that grows in the field across the road. I got some for the B&M snow plow that I haven't finished yet......been a few years. you did a great job....it's awesome!
-
Hawker Typhoon by Asat - Airfix- 1/24
popeye the sailor replied to ASAT's topic in Non-ship/categorised builds
gee....that would be a super modeling room .....but I can see the draw for the woman's touch. I sympathize......I suggest stuff for her.......she shoots it down that is a very well detailed engine.....even the airframe is intricate looks really nice! -
really nice paint job! sweet!
-
good progress OC..........she's look'in really good
-
almost like your building a real car looks awesome!
-
my best car was my Nissan Maxima........man that car would move! got two tickets with it.........no one told me that, the faster you go, the more the ticket was! superb finish on the tank! nicely done.......I'm a little surprised with how few markings on it. a really spectacular job though
-
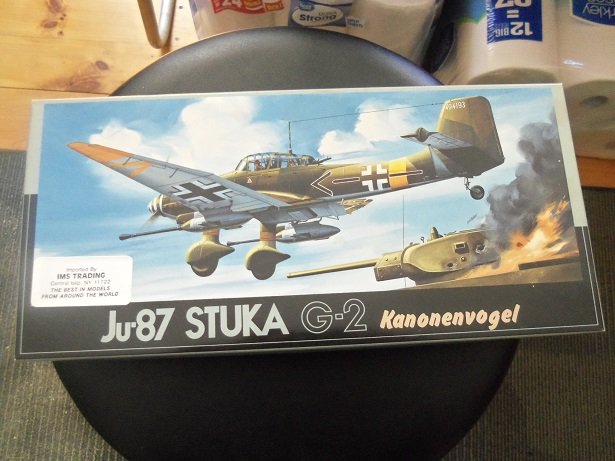
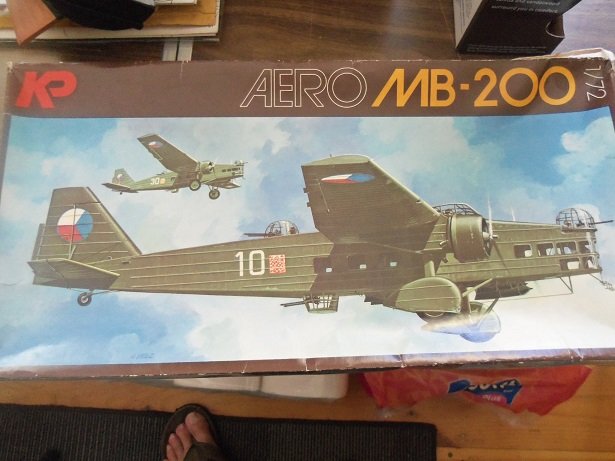
I spent the day off {yesterday} on the Memphis Belle. on this model, I have the interplane struts straightened out. I'm sure that the struts for the landing gear will be an ill fit too. so I painted the wheels yesterday {can't seem to get away from the flat black for the tires}, and I'm going to look into the landing gear. taking a moment, I want to show you the two models I got this past week. as mentioned, I've have been wanting to build another Stuka. it would have been nice to build a 1:48 Memphis Belle, but these two will pacify me for the moment......hee...hee..... the Stuka is a 1:72 model..........small.......but Fujimi looks to be a very nice kit for the size. Revell used this terminology for this particular aircraft back in the day........tank buster...they even had a kit by this name. produced in 1987....the decals look to be in good shape! the other model is particularly interesting........a Marcel Bloch Aero MB 200......a collaboration between the Czechs and the French the box looks a bit tweated, the kit produced by a Czech company back in 1984. the decals are yellowed.......I have them in a window to see if the sun will bleach them. the instructions feel like I'm reading a newspaper and all diagrams appear to be hand drawn......kinda comical. there are a lot of parts, so it should be an interesting build. it reminds me of the bombers I bought made by ICM.......that I ultimately tossed out due to the cumbersome nature of the kits.....yea......I bought two of them..........A.Tupolev TB-3 I still have a set of the decals...... the fact that I have the picture of the box, is that I intend on buying this kit again. I'm not in the habit of letting a kit get the better of me, but the kit was so........how do I say it......ridiculous........that I couldn't build it with a straight face. even at 1:72.......this thing was a beast! the wing surfaces were enormous! so before I leave this earth..........I have to make amends and build this kit.

-
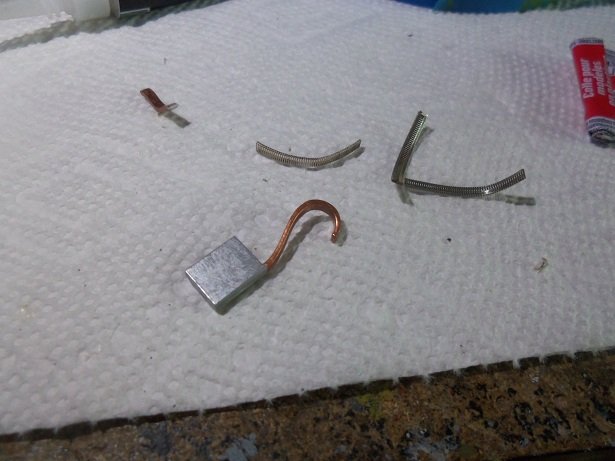
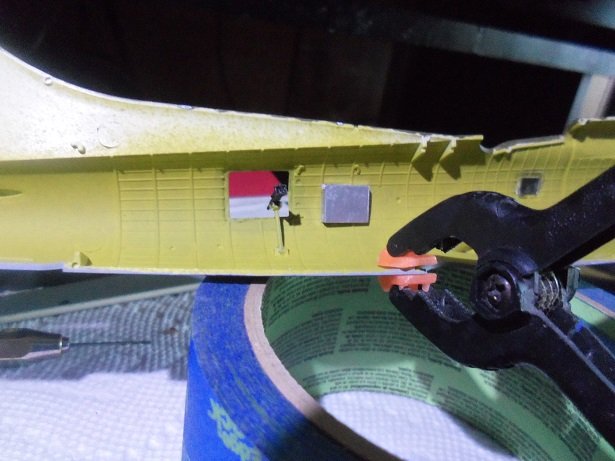
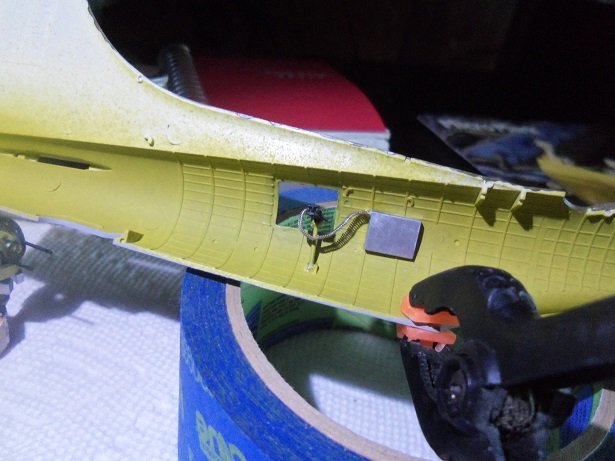
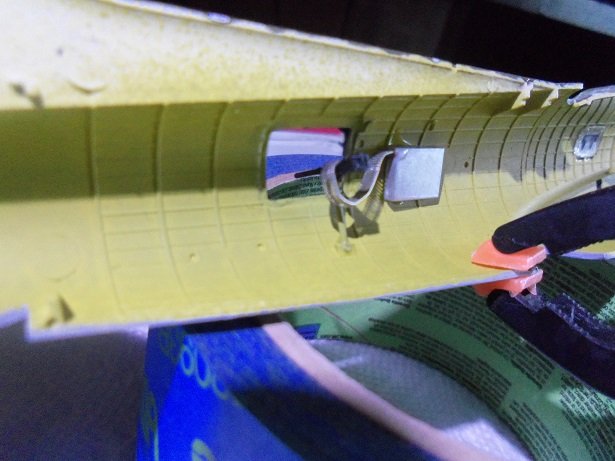
thanks OC..........it is what it is. as I said.......it must have been the brand of masking. I've seen no one else have this trouble, but then again, they aren't using enamels. the thinner is what caused the problem. it is nice that at least I was able to repair one of the pieces of glass as well as I did. live and learn.......always buy the good stuff of brands you've used before. of course this is my first time using them, so what did I know? I did some thinking about the ammo belts for the waist guns.......the port side is an ill fit as well. then it hit me.....Mark sent me those aftermarket guns. the guns and the ammo boxes supplied in the kit are pretty good. so I took my snippers and cut off the belt on the starboard gun. I had to trim the aftermarket belt down, but it worked out very well........took hardly any effort at all. with this a success.......I did it to the port gun too. it's supposed to wrap around the gun and feed on the same side as the starboard gun. the belt was cut off of the box and it was cemented in place.........about the same location as the other one. I didn't need to trim the belt........tried to give it a natural 'hang' again....a big thanks to Mark for sending me those guns............now I'm happy!
- 247 replies
-
- 12
-

-
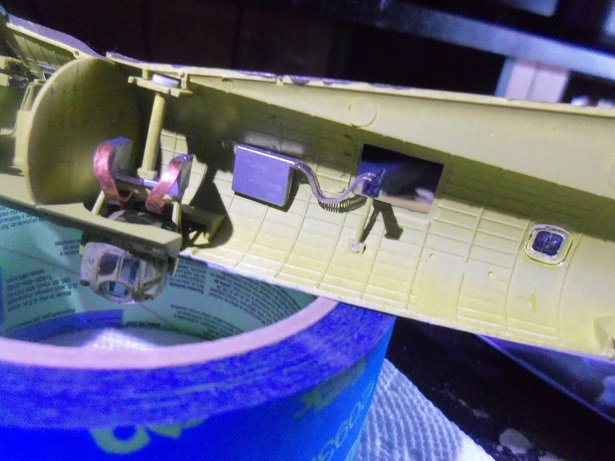
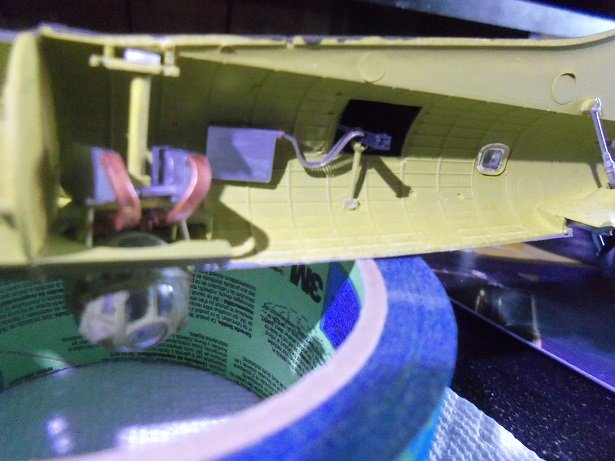
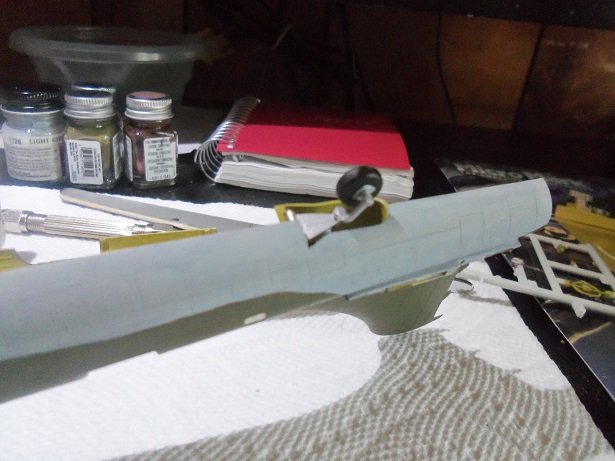
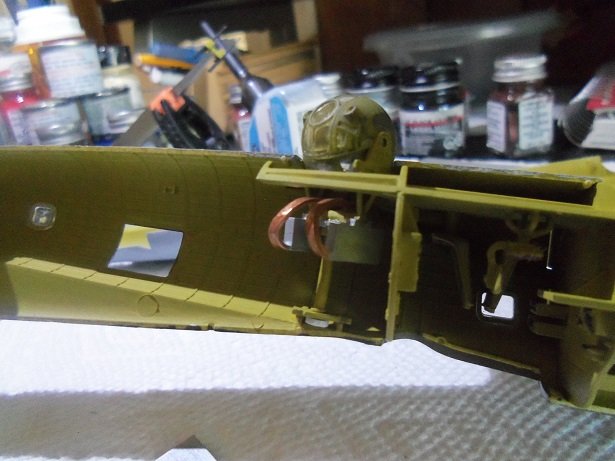
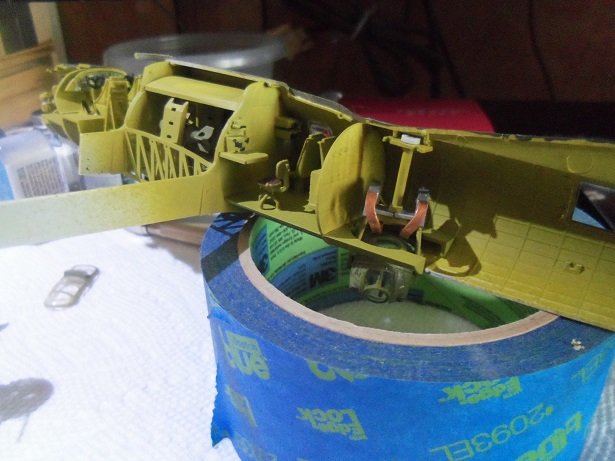
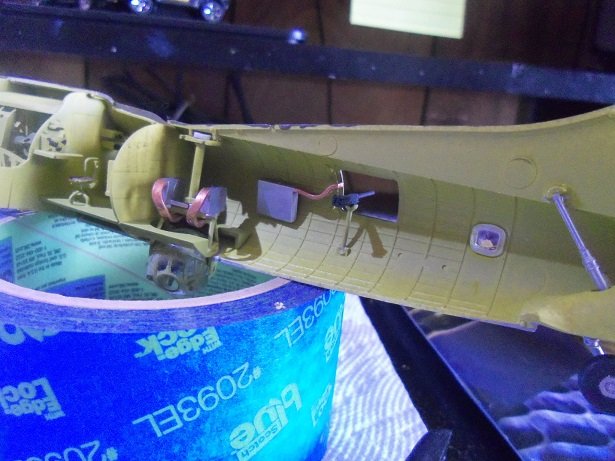
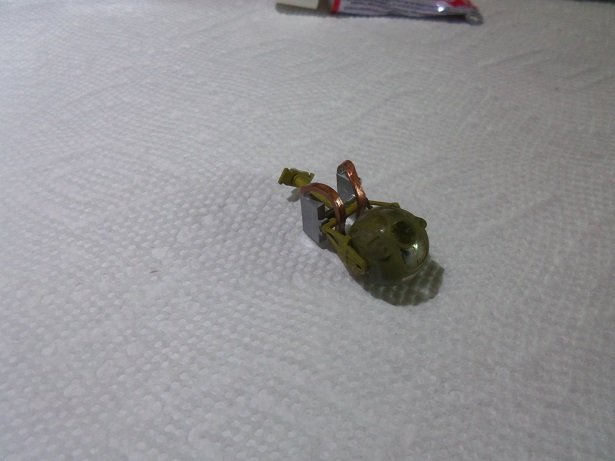
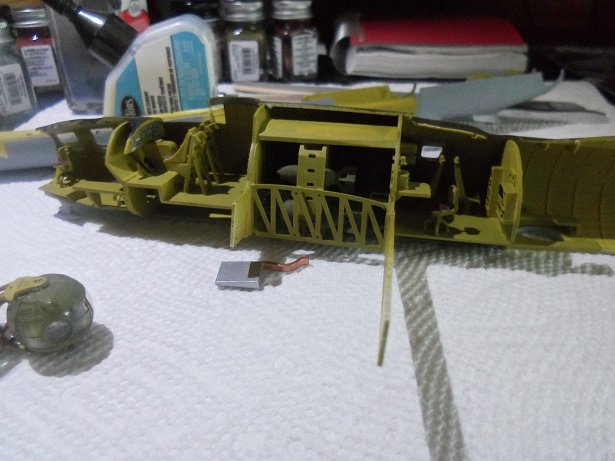
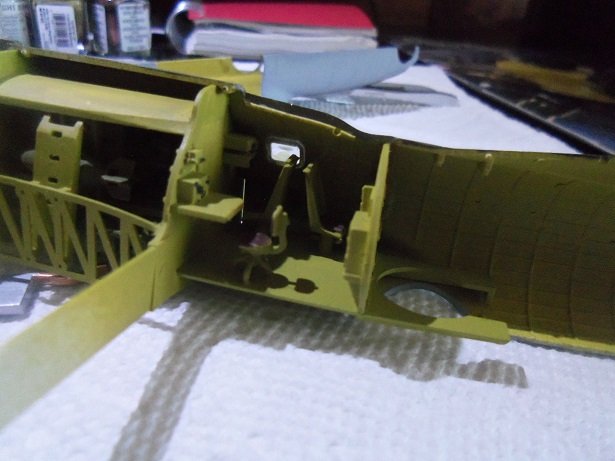
one all this was dry enough, the tail gear was cemented in place. good that I did this before the halves were put together........can ya see me trying to find that target?! views of the ball turret are all through these pictures......any one might give you better insight, than the one I posted of it. the next thing was to assemble the top turret. it was confusing figuring out how this part worked in the scheme of things.......I got it though. nestled in the middle of all that chromate I got tired of the ball turret hanging around......so here it is installed into the ship. I cleaned the glass for the top turret as much as I could......still looks as bad as the ball, but I took a fine tipped brush and redrew the frame. is does look a little better. and on the turret I was going to add the control sticks {wheels} before the interior was installed, but what the heck......I did it now. at this point, I'm adding the waist gunner positions.......I did the starboard side first. not really happy with the ammo belt....it doesn't reach the machine gun. heck, it's not even cemented where it is supposed to be located! I tried to get it as close as I could.......but no cigar. I'll do the port side and see how that looks..........I have an idea I'll have more tomorrow.........nice to have a day off I have chores to do though.........I hope they don't take all day

-
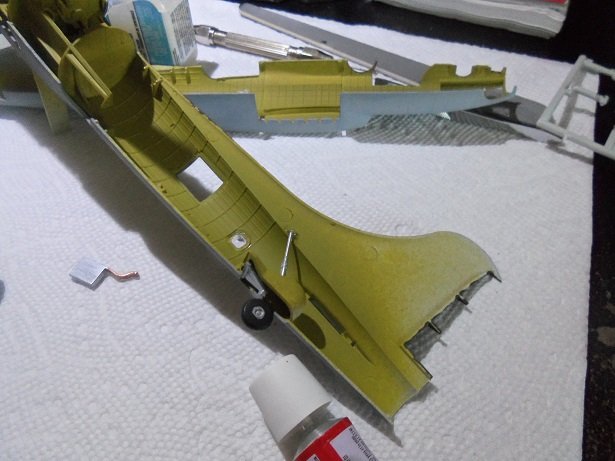
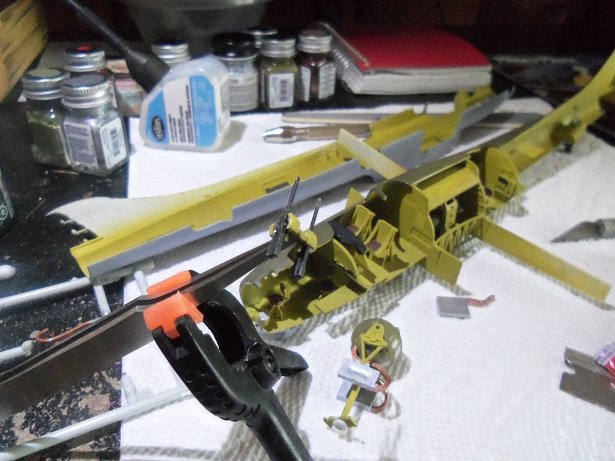
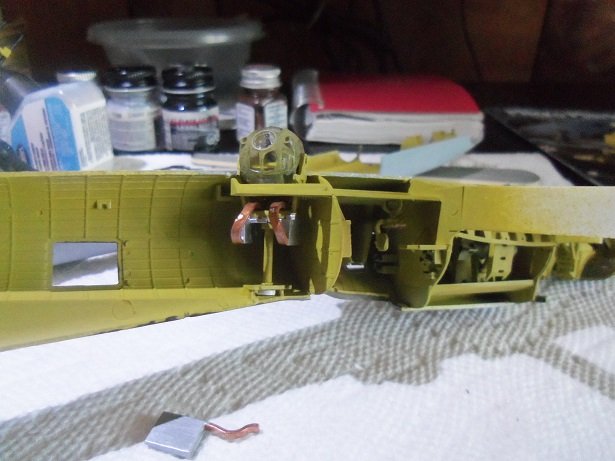
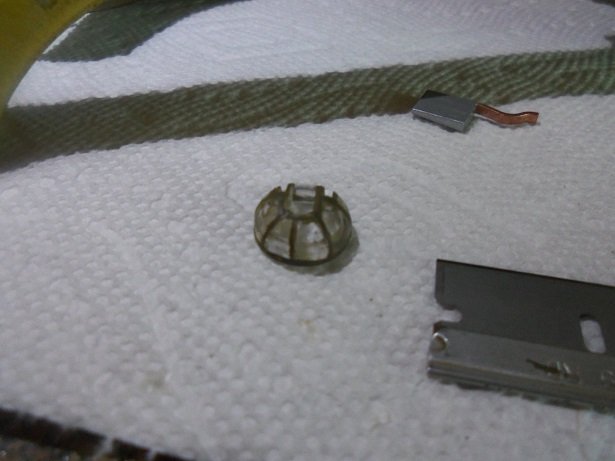
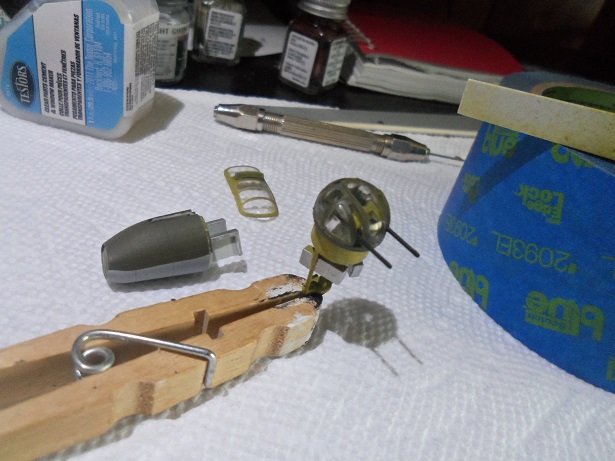
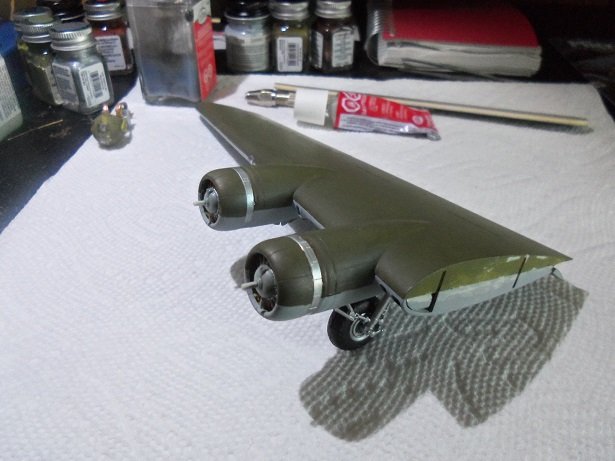
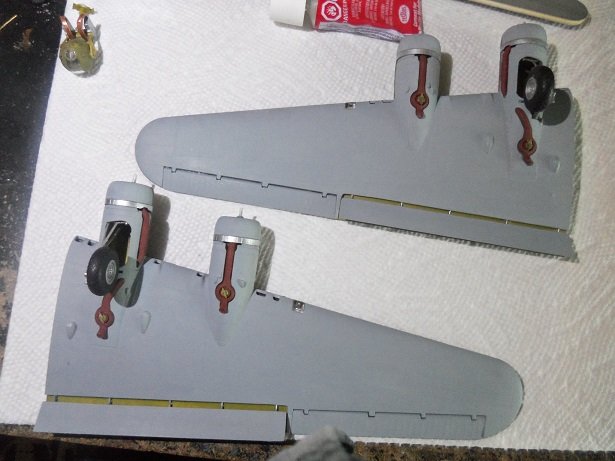
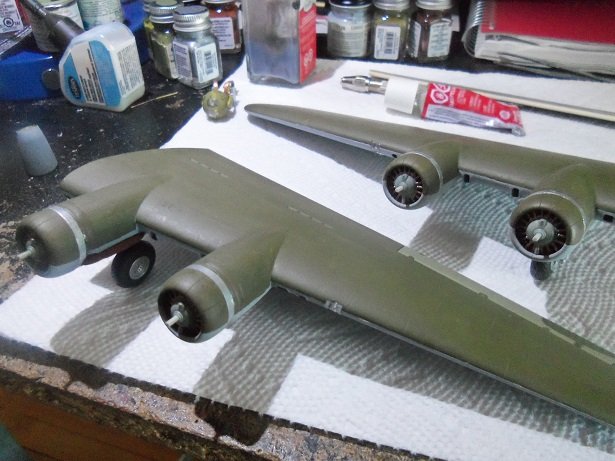
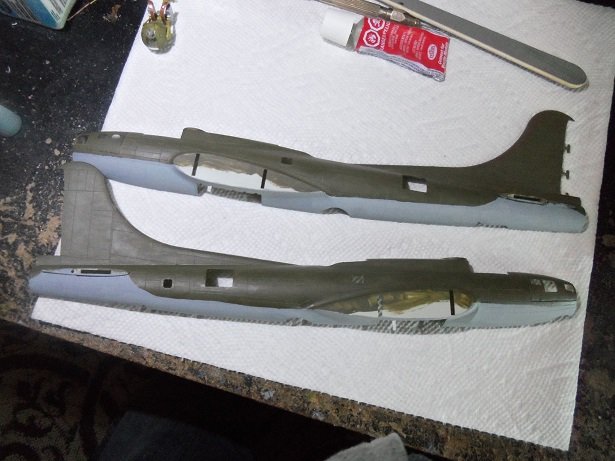
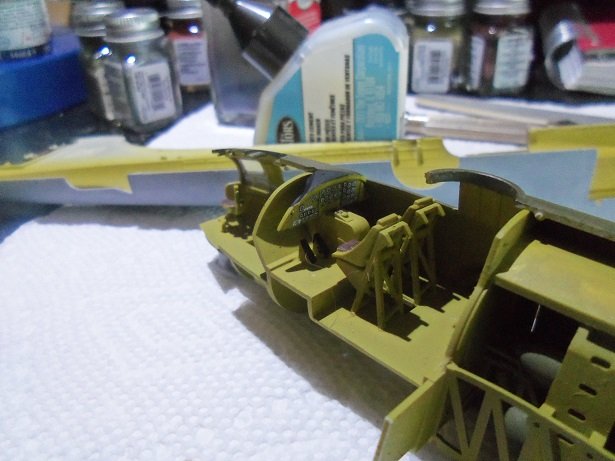
thanks OC........had some damage control with the glass.........some came out good........some didn't. I put some mileage on her today I had done a couple of things before I realized I had a problem with the glass........put the main gear wheels on and painted more parts. I started today with the ball turret......did a lot of cleaning up on it. it still looks a bit off, and I'm not sure how much will show under the plane, but I'm going to go ahead and use it {it's the only one I have. the nose glass I had chosen wasn't a good fit.......the guns would not fit right in it.......so I picked another one {the kit came with three} and drilled the holes for the guns. problem solved......I may try to paint the frame....I may not. the ball turret is assembled....... as a double whammy for the wings, the engine cowls are in place.......... the exterior of the fuselage is now totally painted........top and bottom. I painted the top a while ago....... I even painted under the stabilizers.......like they are supposed to look. once the stabilizers and the tail is in place, it will all make sense. it's the reason why I didn't do it to the other two planes. to really get this build moving quicker in the right direction.....the fuselage glass needed to be installed...just the little ones. with that done, the internals were cemented in place without further ado... from here, the Norden Bomb sight was added......and a couple other parts related to this step. up next........a bit more happiness {no mask required }
-
sounds like a great idea
-
neat ........you made the repair look even better nice progress too Oc........I think your closing in on the home stretch! looks real good !
-
hey gang! again....late to the party! that's a neat little cannon you built there........my word....even come with a few shells rafters beware!!!!! at least I'll get to see the Jeep.........it's like a ship you know........'cuz it's all in how you outfit her off to a great start
-
Military Wrecker - Revell - 1:32 Scale - PLASTIC
popeye the sailor replied to CDW's topic in Non-ship/categorised builds
I got it part right....she is 'grand', isn't she I've got two boys...........best not to listen either .......either that or hide your tools! -
nice detail
-
there's progress finally on the Memphis Belle.............should have the update up soon
-
Military Wrecker - Revell - 1:32 Scale - PLASTIC
popeye the sailor replied to CDW's topic in Non-ship/categorised builds
I see your well under way with this one looking really good so far! congratz on your daughter's birthday -
hello Ferit.........thanks for the kind comment and I hope you follow along. even though this is just the hull, there still a lot to be done yet thanks Phil for the info.......I'll check it out. I do tend to spend more time at the table rather than the drawing board, but I do try some things on the computer. one of the experiments I have going on is with recreating the Danmark hull. I have some odd parts from the kit........I hate to throw them out { I got them quite some time ago}. so I took the instructions and blew the diagrams up. at 150% the diagrams match the scale within about 1/8th {I think the actual number would be 153%}. it was good enough for me and I have assembled a hull frame, but I haven't gotten around to fare it and try the parts. I would also like to scratch build a larger scale Gothenborg. I have the model {and the instructions}.......the original model has damage from a couple of falls....not sure if it's salvageable. if I did it, I would be outfitting it with cannons.......the original kit doesn't have cannons. I have the parts panels for quite a few of the kits that I've built.........it make it easy to replicate hulls
-
your usual standard of workmanship Dan........awesome! the loco looks really good........just as much detail as your larger one! may you be able to go further.
- 29 replies
-
- 3
-
-
- hmw
- Hamburg Harbor
- (and 2 more)
-
you did a superb job Robert...........but only a glimpse of the wheelchair........need one more picture here the only thing I see, is that LT. Dan should be up on the mast, rather than the trawl rig.......but that is a very small suggestion. your presentation is fantastic.......actually looks like a lobster trap. you really did a great job with Jenny.........the weathering and the overall looks is awesome! for anyone who has seen the movie, they would think of the movie right away upon seeing it! ⭐ ⭐ ⭐ ⭐ ⭐!
-
looking through build logs, you'll see how folks deal with planking. planking with whole strip is probably the hardest way to do it, since tapering will need to be done to some degree. scale planking is better, because your not having to deal with the entire length. the planks are cut to lengths that are with the scale length of the model.......this takes some figuring out. to make this approach easier, I tend to cut the planking two, to three bulkheads long and stagger the butts. using this method, the plank can be shaped the way it will fit on the model, keeping with a fairly straight line. it is common to find that the bow and stern, in relation to coverage, is not as wide as the mid ship. so, to equalize the number of planks it takes to cover the hull, tapering needs to be done.........making the plank narrower on one end.......the ends that terminate at the bow or stern stem. you will see that some folks like to 'band' their hulls, to better isolate the field that they are focusing their planking. one can get a better job of it....they fill in that area and then move on to the next.......and so on. the only real drawback to scale planking, is the bending that needs to be done at the stern.........depending on the ship your modeling, the bow planks may need to be fashioned, but the stern is much more critical due to the counter. the contour is hard to navigate, while keeping the line at the same time. the type of wood is also a consideration.......softer woods will conform better than harder woods. I know it sounds like a redundant comment, but it relates to how different folks plank their hulls. some will use a hot iron to aide in bending planks......some will set them up in jigs and allow them to dry. I do the latter........but I also do my planking with the wood damp as well. where I use Obechi { a soft wood}, dampened, it is quite flexible and conforms with hardly any instances of splitting or splintering. being damp, I feel that the glue bonds better to it, because the glue is better able to absorb into the wood. planking can be fun.......I recently planked two hulls. I gotta laugh, because even though the two hulls were the same, I could not plank them the same way....the second one gave me fitz! this not only accounts the wood I used on the second one, but how old the wood was....very hard to work with petrified wood don't rush to the filler....sand the hull first and see what you have to work with. most of the time, you may need only a little filler here and there. your doing some good work.......I'm glad to see your back to the table.
-
I haven't had too many kits that mentioned it.........I found out as a young lad. a very rude awakening. your brain is Ok Mark........it come from my modeling in a cave all my life. I say tomato.....others say tomato {short A}.