Elia
-
Posts
551 -
Joined
-
Last visited
Content Type
Profiles
Forums
Gallery
Events
Everything posted by Elia
-
 Colin, Very nice work on the masting. It all looks very sharp - from mast shaping to the wooldings, the bees and sheaves, the mast head details. Those will compliment the hull quite nicely. Cheers, Elia
 -
Ron, Your little gem continues to get honed further. Beautiful work. I especially like that aft platform notched around the frames - too nice. Of those spacers you've got setting the height of the seat risers - how are they secured? Do they lock into the clinker planking? Cheers, Elia
-
What brand is a good head mounted magnifier,light.
Elia replied to kiwiron's topic in Modeling tools and Workshop Equipment
Sam, So true. I can't believe how quickly I've adopted the optivisor. Now almost nothing requiring fine vision and detail is done without them. Outstanding device. I think the only complaint I have is with the optional light. I find it works quite well and is a worthy addition to the optivisor. The battery case, though, slides around on the headband. Easily remedied with some tape. I highly recommend to any modeler who's eyes aren't 20/20 any longer look into one of these. Cheers, Elia -
Beautiful, Ron, beautiful. A little jewel of a boat. Elia
-
Ron, That is outstanding. Clinker planking is intimidating to me and you've made a sweet ship's boat with clinker planking. Sweet. Elia
-
Len, That is some beautiful work there. Very clean, crisp, and orderly. Super nice. Have a happy, healthy New Year! Cheers, Elia
-
Beautiful work Tim, and a prudent way to proceed. It's a dreary day here in the Philadelphia region today, too. Yes - a good day to work on the ship. Cheers, Elia
-
Alfons, Thank you. I have no doubt you would make absolutely outstanding chainplates if you chose to. Funny thing - when I ordered the deadeyes from Blue Jacket I hadn't realized that the lower deadeyes were doubled stropped. So I had ordered single grooved deadeyes. In fact, Blue Jacket sells double stropped deadeyes! And they also sell entire stropped deadeye/stropped/chainplate Britannia castings! Ordering those would have surely made my life easier. But then I wouldn't have had this modeling experience, one I'm thankful to have worked through. Cheers, Elia
-
Tim, Your PT boat is shaping up nicely! I agree with Popeye - drilling that casting and yielding such a thin and consistent thickness wall is no small feat. Sweet. I really like the mixed materials of this build. Cheers, Elia
-
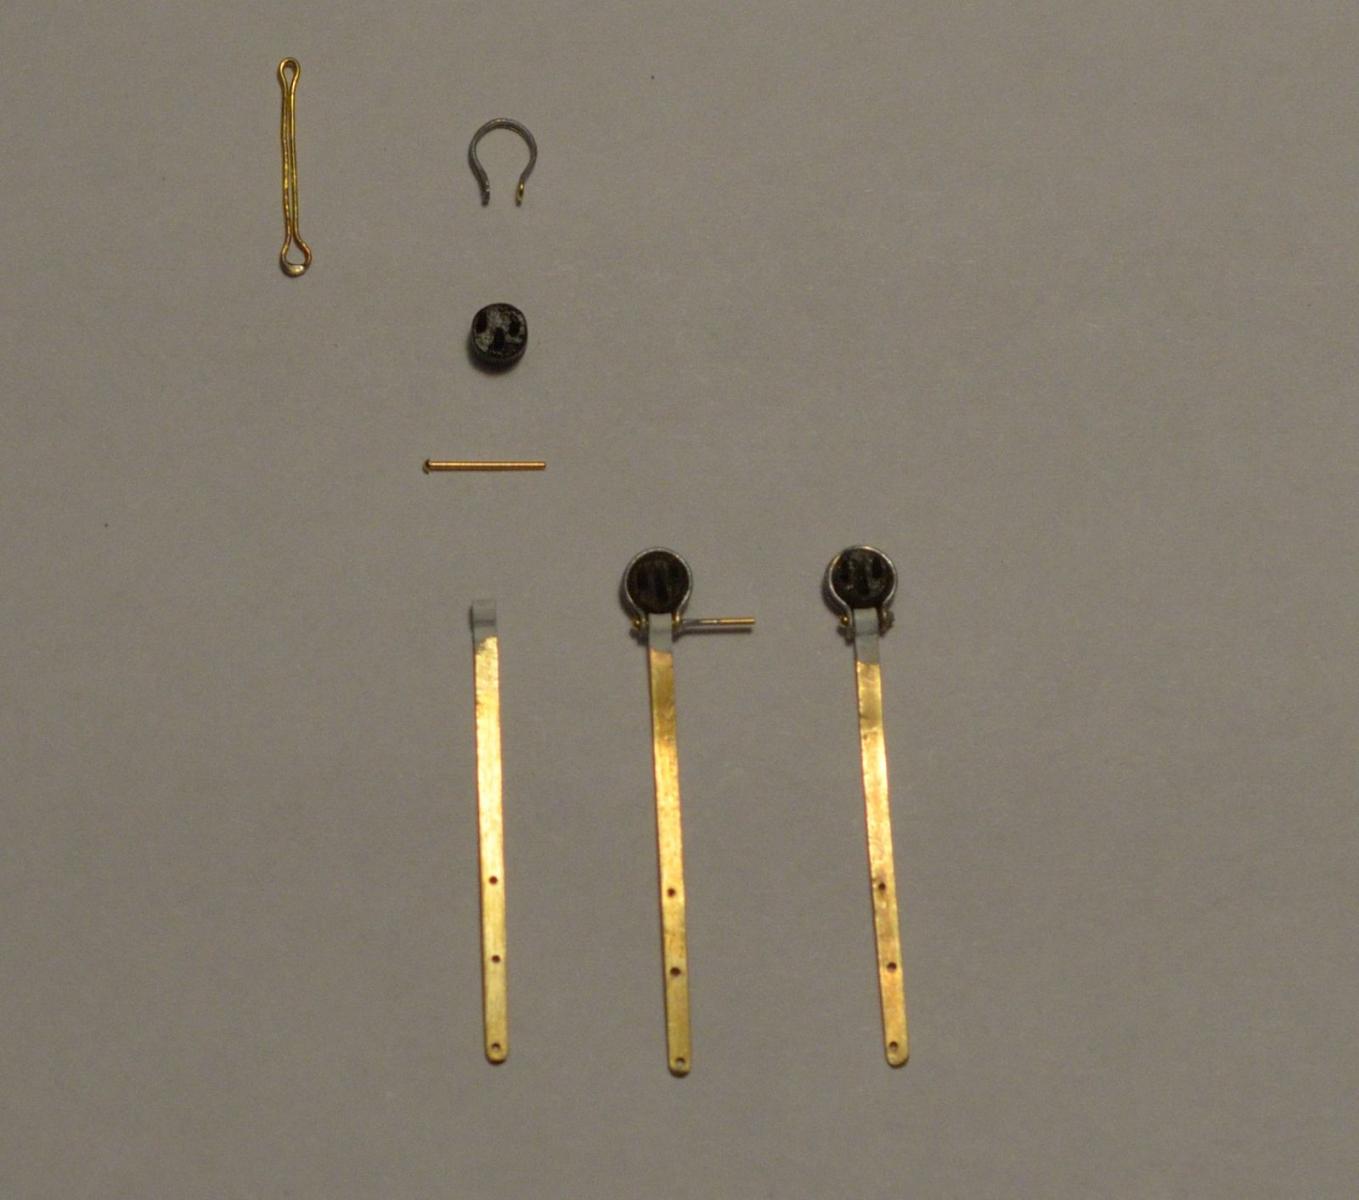
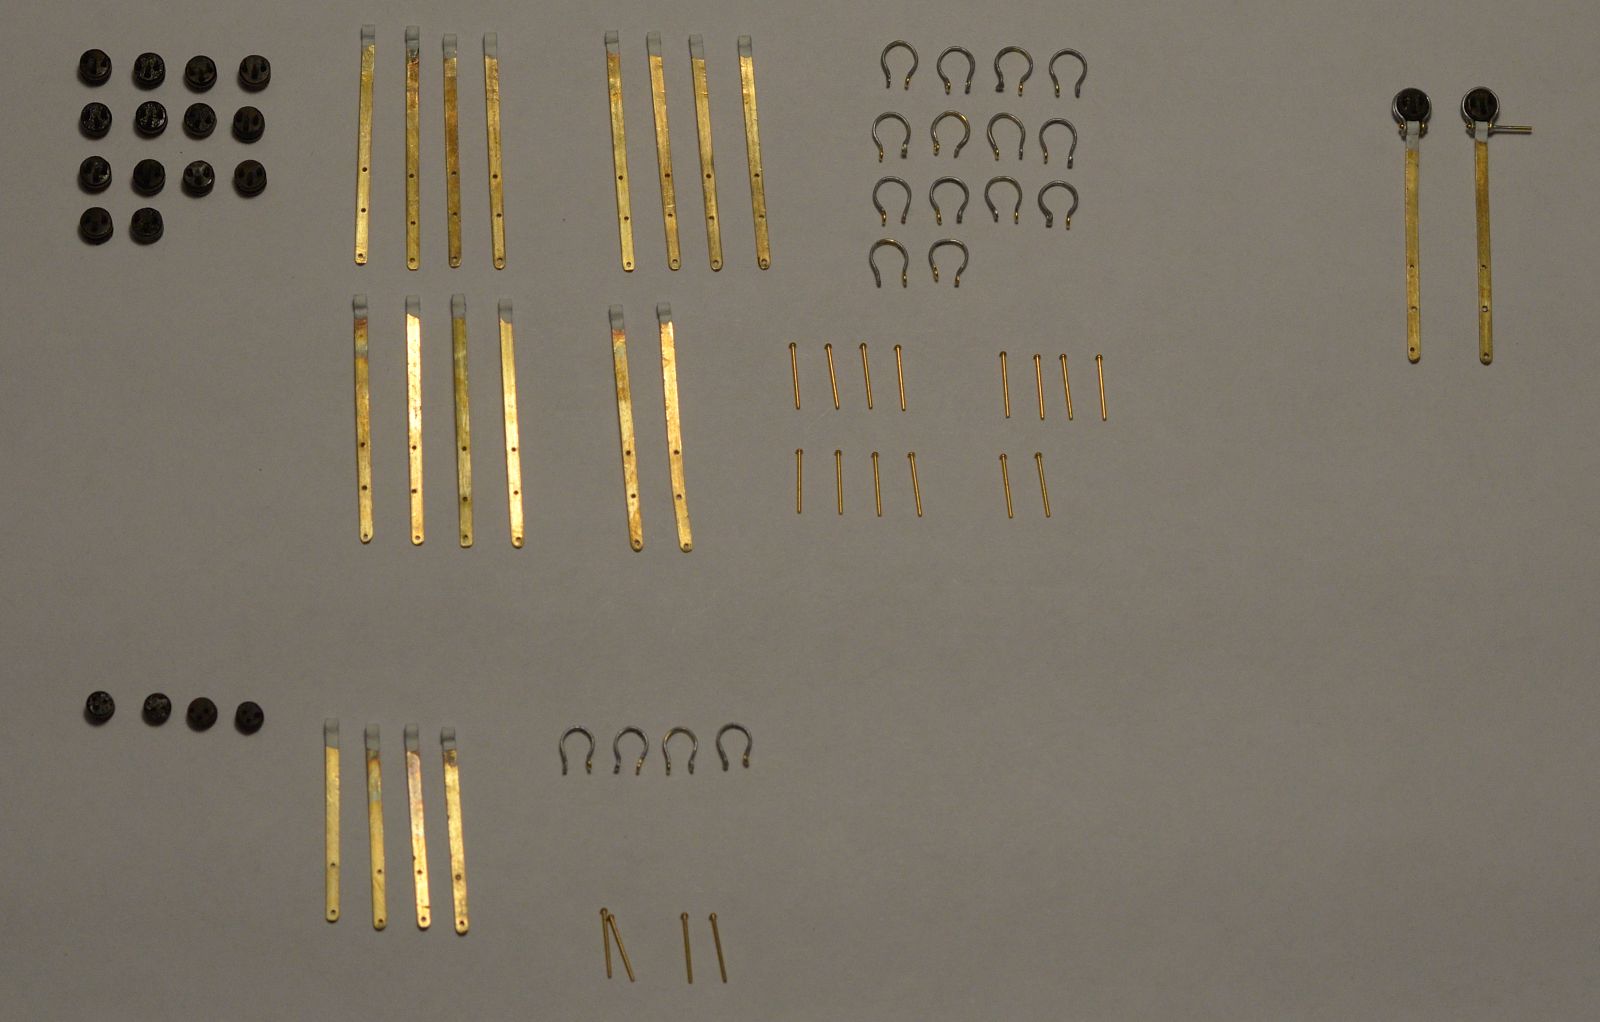
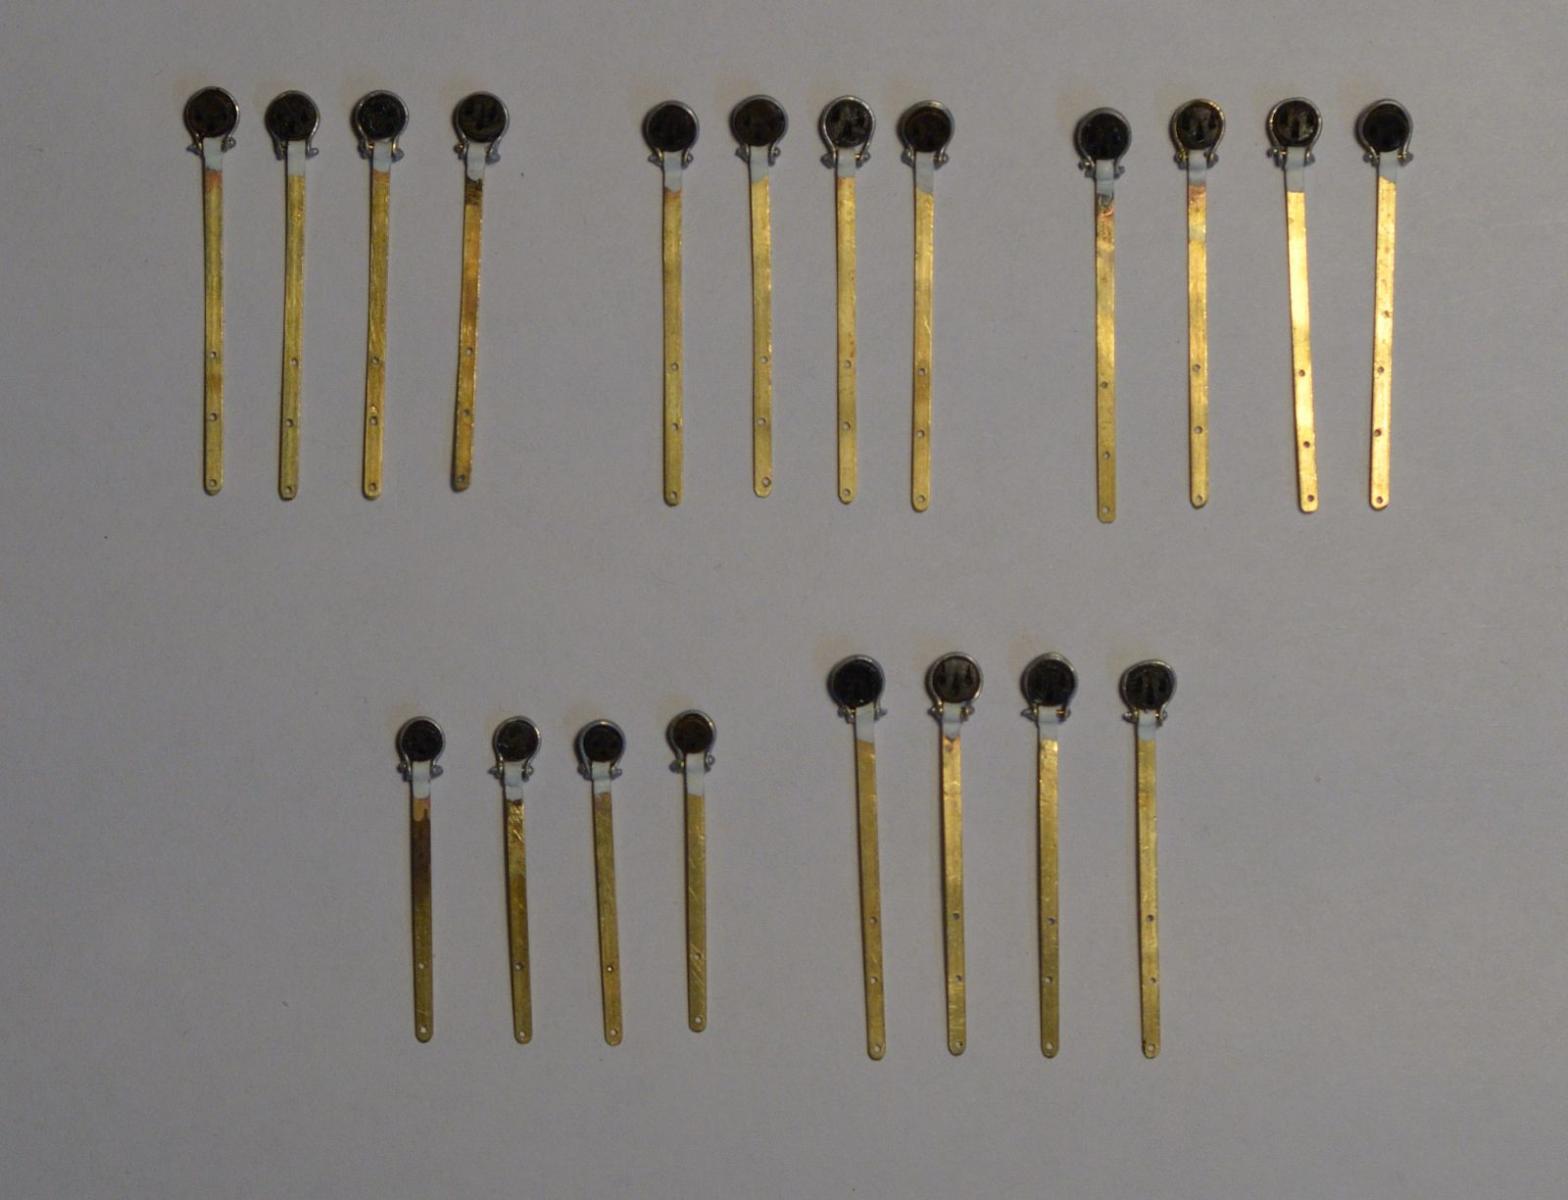
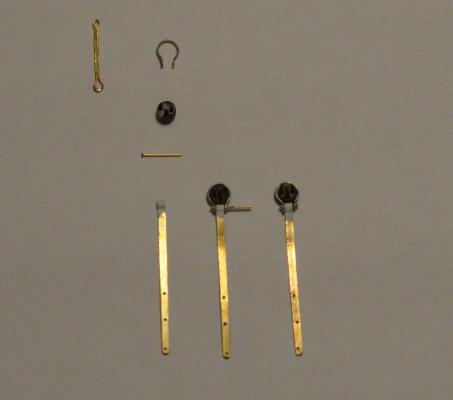
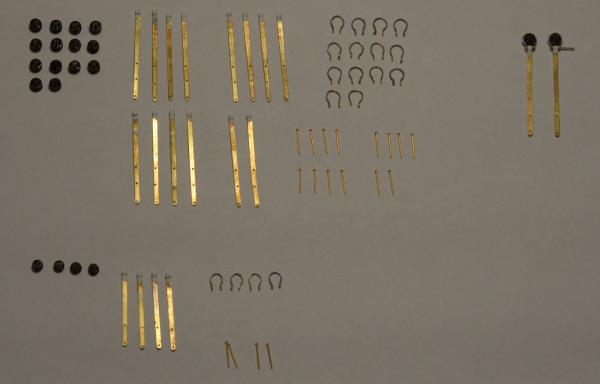
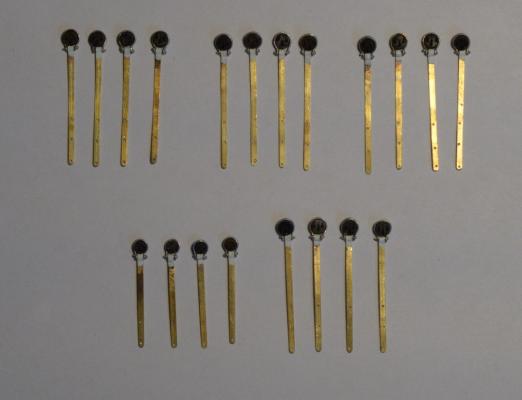
Small progress update Arethusa. I've been working more of the fiddly bits of ironwork for the deck. Following are chainplate assemblies. I mentioned previously that I was 'stuck' on making the double stropped lower deadeyes. I had fashioned the strops from 0.015" diameter brass wire, looping it around two pins a given distance apart on a wood board. I pinched the wire adjacent to each pin, and soldered the overlap of the two free ends with Stay Brite solder. After trimming the excess, and sanding the soldered end into somewhat reasonable shape I used a drill bit which as about the same diameter as the deadeyes to create the strop shape. Pliers were used to straighten the 'lug' ends of the strop. Once those were all formed I painted the entire strop dull silver except for the non-soldered lug end. Here is a photo of the some of the parts in manufacturing sequence. On the left is a straight strop after the one end was soldered and sanding/filed. Next to it is a formed hoop strop, the deadeye, the brass rivet, and the chainplate. Next is the soldered assembly. And last is the assembly with the rivet stem trimmed off. Here is a photo of all of the parts prior to mass soldering production: Here is a photo of my soldering pad and the assembly secured with wire and a pin: I placed the manufactured 0.8mm head diameter rivet head at the end of the strop which had been soldered so that the other end, which would be soldered to the unpainted strop was as far away from the strop soldered joint as possible - to mitigate as much as possible the heat from the full assembly soldering from damaging the first soldered joint. This may have been overkill, as the second soldered joint was made using TIX, which has a melt temp of 270F, whereas Stay Brite has a melt temp of 450F or so. In any case the plan worked acceptably. There were variations in forming of the strop loops, and the soldered joints, resulting in more than I want, but all in all acceptable to proceed with. The final parts assembled, trimmed, and touch up silver paint applied. Soon I'll install them on the ship. Cheers, Elia

-
Beautiful work, Ron. Those clinker stakes lay so nicely on top of the adjacent ones, and the symmetry is impressive. So very very sharp. Cheers, Elia
-
What brand is a good head mounted magnifier,light.
Elia replied to kiwiron's topic in Modeling tools and Workshop Equipment
Ron, Thank you. You are very generous. For the past couple of years I have found my eyes to be getting progressively worse - as in my nearest focal distance has been continually getting farther away from my eyes, make it more and more difficult to see small details clearly. Many times I find myself making things two or three times until I am somewhat satisfied with one of my efforts. Only rarely am I happy with the first. I hope the optivisor changes this dynamic. It is like seeing for the first time again....and with magnification! Cheers, Elia -
What brand is a good head mounted magnifier,light.
Elia replied to kiwiron's topic in Modeling tools and Workshop Equipment
Just an update here - I received an Optivisor for Christmas this year and I really like it. I received with it an additional lens magnification set (#5). The entire device works quite well. It is easy to wear, it has a comfortable headband cushion, and it 's "hood" is deep enough to completely fit over my standard eyeglasses without contacting or disturbing them. Lastly I received the LED spotlight attachment and seems to provide a nice bright spot wherever you aim it. It takes a little getting used to, particularly working with the object at the device's focal distance (versus where I used to hold it). So far I am a happy a camper. Elia -
Chuck, Thank you for passing along the sad news. My condolences and prayers go out his family. Elia
-
Druxey, Oh, I like that instrument. I can see the rack in the upper photo. Is that for adjusting the proportional scale? Or is it for calibration? Cheers, Elia
-
Very nice Tim. That does look like quite thin plywood. It was worth your redoing it over. It looks very good. Cheers, Elia
-
Alfons, Thanks! Yes, I did use the dry transfer letters and transom artwork that came with the Blue Jacket Kit. Those were my first experience with them and I initially had difficulty in learning how to apply them since there weren't any extras with which to practice. Those decals worked well. I think the biggest challenge was that transom decal, which is fairly large, and the need to position it across the curved transom during application. If I recall it moved on me once or twice but worked out in the end. Cheers, Elia
-
Michael, Progress on your cutter model looks great. I think the revision to the coaming dimensions will improve the look of the cockpit, and your wood work is as crisp as ever. I love that bent back wicker chair, too. Cheers, Elia
-
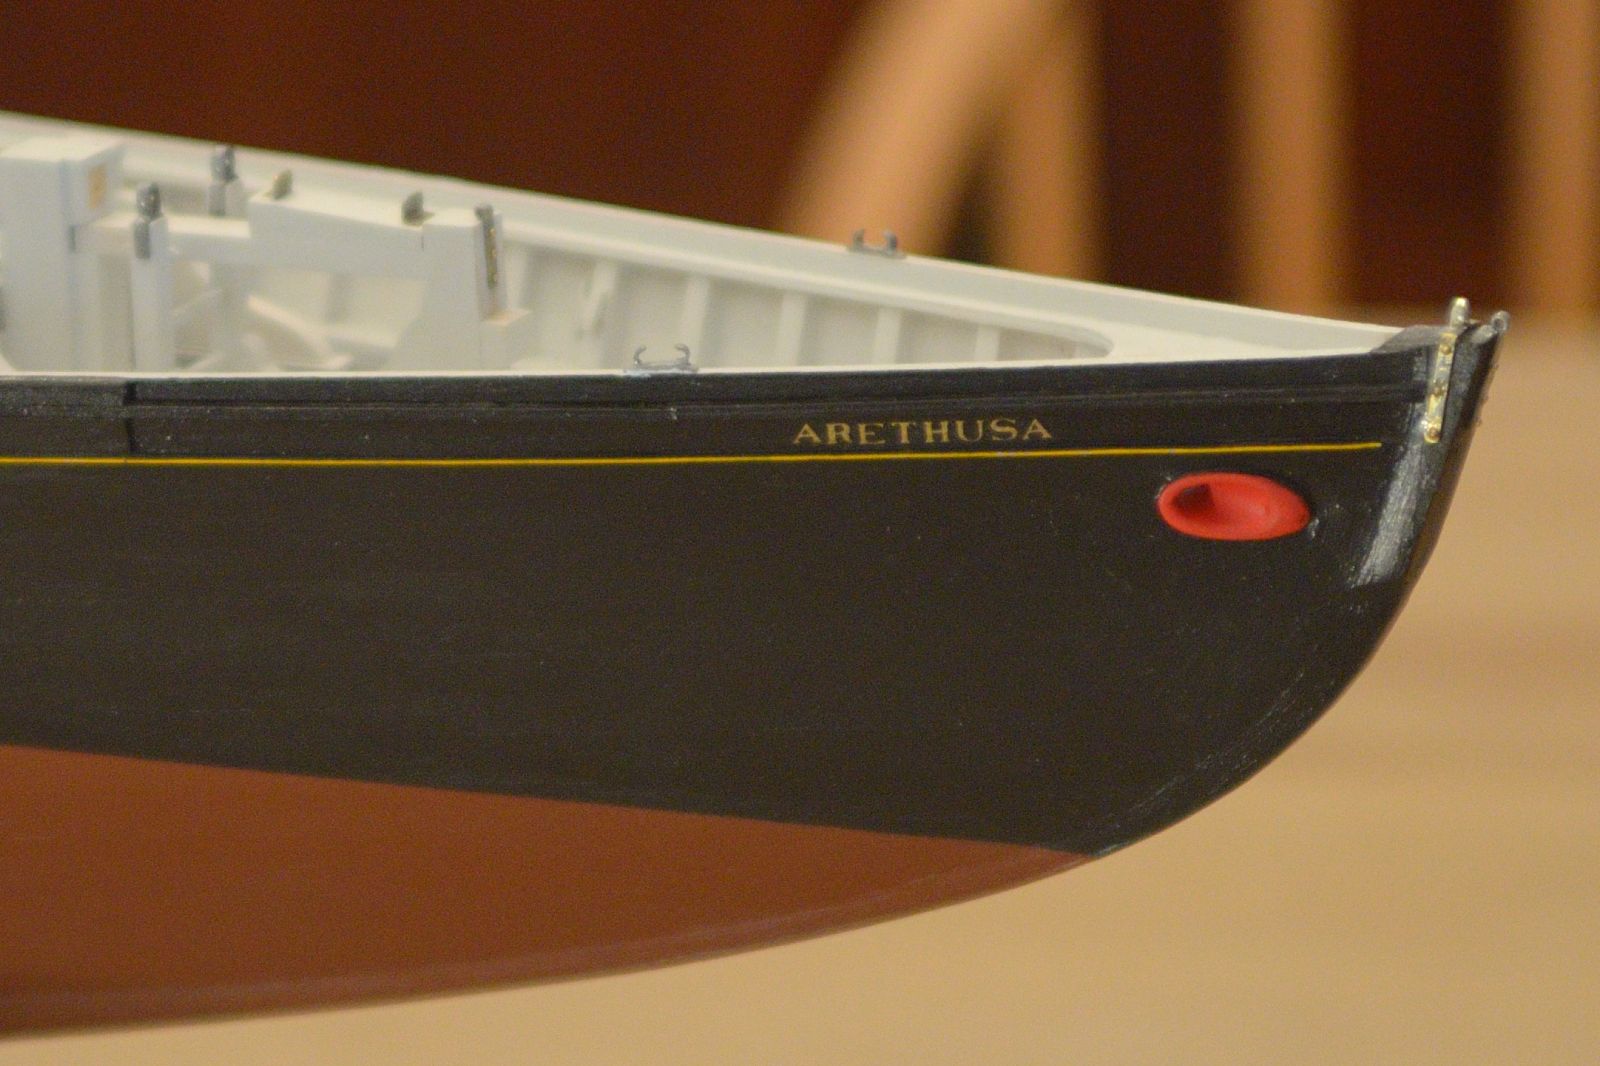
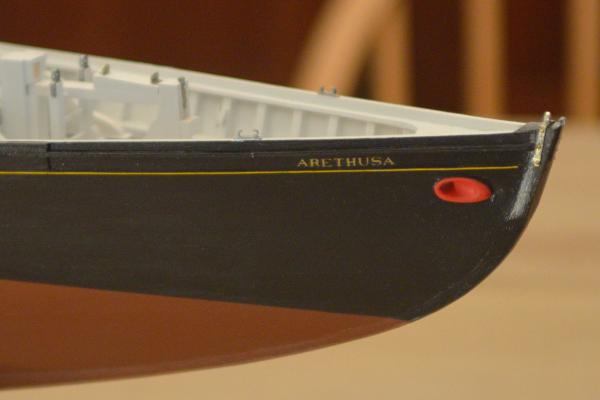
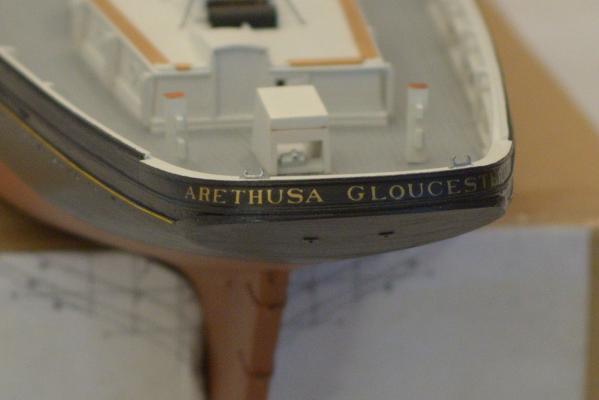
Bob, Ron, Robert, Michael, Thank you very much for your interest and comments on Arethusa. Thanks also go to those who have looked in and 'liked' Arethusa. With the cove in ship shape and the remediation covered under a nice coat of hull black Arethusa is looking better. I've learned a lesson on that cove - similar future details will just be pin stripe masked! On my Smuggler build I first encountered dry transfer decals and while I had a few minor issues with them I did like their application and look. I gave carving the name and hail in wood the old college try, on test pieces of course, but couldn't get the widths of the components of each letter thin enough for my liking and settled on these. My attempts at hand carving were pretty bad, and using a Dremel with a 1/32 inch diameter bit yielded only slightly better results. Woodland Scenics have many fonts, colors, and sizes, allowing for (at least close) matching to what is known of a ships name lettering. I am happy with the results and they were rather easy to apply. Cheers, Elia PS I soldered and fabricated 13 more ringbolts, the last four lower deadeye strops, and four bullseye strops and eyebolts today - yeah.
-
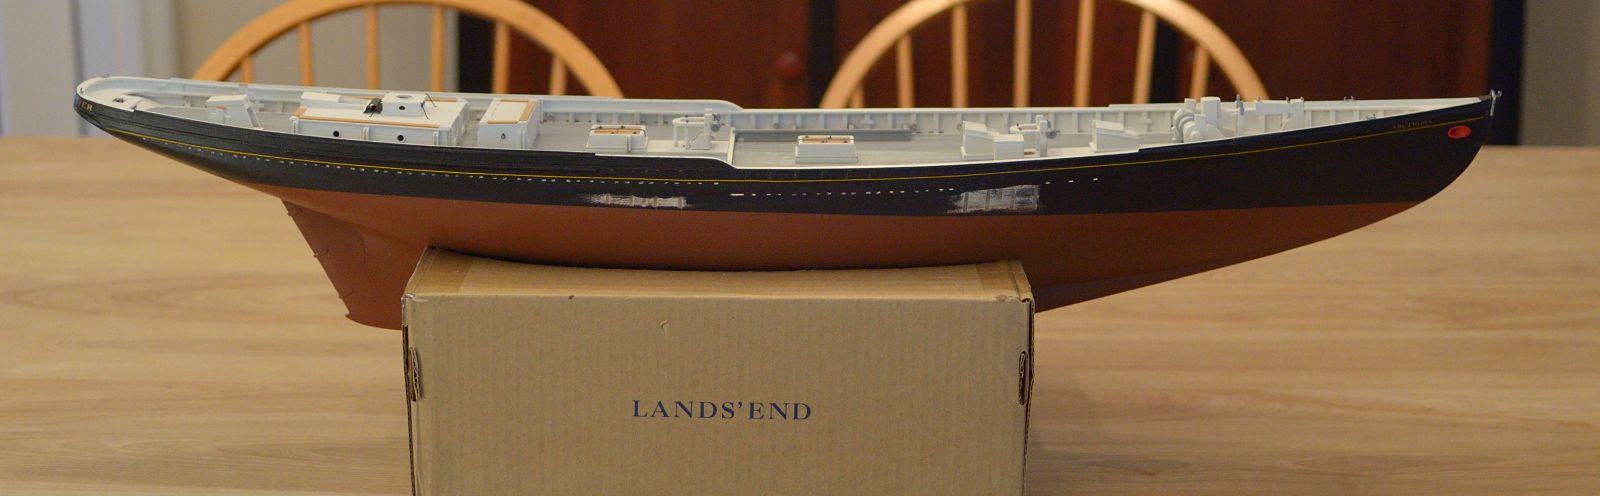
Shipwrights - a little progress on my dearest Arethusa. Third time is a charm, at least for me and the yellow cove. I redid one last section of it on the starboard bow, eliminating the last offensive (to me) waver. Done. Yipee! I have added the ship's name and hail port in the appropriate locations, using Woodland Scenic Dry Transfer letters, and have repainted much of the upper hull black. I have completed the checker board guide installations, the boom buffer, the cleats, the chocks, and the stanchion located ringbolts. I have also installed guide pins for the deck furniture to ensure proper placement and to ensure better retention of the components. It is surprising how much time all of those little elements time. Though not show here in photos I have completed 16 of the 20 double wire strops for the deadeyes, have stained the deadeyes (Minwax Ebony stain), and have fabricated/soldered much of the catheads. I hope to show all of these elements assembled in the not too distant future. Cheers, Elia

- 200 replies
-
- 15
-

-
Ed, Young America looks tremendous in those isometric style photos. Very fine work on those last full frames and their interface to the keel, and the notching for the keelson. May you and your family have very happy holidays. Cheers, Elia
-
Clare, Your brass etchings look great. You've clearly got a good, repeatable process worked out. Have you given any thought to etching those paddle wheel parts you aren't happy with? Cheers, Elia
-
Cap'n'Bob, This is great news! I've seen those plans and have thought that they would make for a well documented scratch build. I'm pulling up a chair next to your shipyard's ways and await your progress. Cheers, Elia
-
PopJack, I can't add anything on the finish scheme of Bluenose, but wish you the best with that cove. I finally got mine to an acceptable state after redoing two smaller sections for a third time (!). Cheers, Elia
-
Beautiful and precise, Toni. So very, very nice. Cheers, Elia