DONATION DRIVE - SUPPORT MSW - DO YOUR PART TO KEEP THIS GREAT FORUM GOING!
×


Elia
-
Posts
551 -
Joined
-
Last visited
Content Type
Profiles
Forums
Gallery
Events
Everything posted by Elia
-
 Mark, I couldn't agree more. Unless I have a very specific measurement need I use my proportional dividers to transfer dimensions from plans to wood or template, find midpoints been model features, etc. As with most tools paying for quality yields accurate, repeatable results time and time again. Cheers, Elia
 -
Tim, That is a beautiful hull there! Really excellent work. Cheers, Elia
-
PopJack, I ran into essentially this exact problem on my Arethusa build. I didn't scrape the groove for the cove parallel to the edge of the waist. I then used really thin (1/64") masking tape. I painted the cove yellow, after drying applied the masking tape, sealed the edges with yellow, and then applied the black hull paint. My cove stripe wandered too much for my liking. The combination of a wandering cove, and the tape not sitting easily or cleanly down in the cove were the culprits. I went the radical route and cut the outboard portion of the entire strip of wood with the cove in it off and grafted in a new, un-scraped strip. After spackling, sanding and fairing I repeated the process except on the second time there wasn't a groove. It worked far better - but - I might suggest you try cleaning out the groove of paint, filling it will a wood filler or spackle, and then sanding and fairing. I think your model will suffer less damage than if you follow what I did (lesson learned for me). I see Model Expo sells 1/64" wide masking tape. That is the stuff I bought, though I don't think I had purchased mine from them…don't recall. Cheers, Elia
-
Symiaki Skafi by stelios
Elia replied to stelios's topic in - Build logs for subjects built 1851 - 1900
Stelios, Very nice mizzen sail. It looks perfect laced to the mizzen mast. Cheers, Elia -
Russ, The deck planking looks very smart and tidy. It is good seeing you make progress on your schooner. Cheers, Elia
-
Ed, Excellent presentation. I've thought about highly beveled, sistered frames and the challenge of installing bolts or treenails perpendicular to the frame face - while getting both bolt ends on the frame flat surfaces. Your pictures present that very, very well. Cheers, Elia
-
Thank you, Bob. It is good to be active again. Cheers, Elia
-
Lou, Blackie, Thank you very much for stopping on Arethusa and for the very kind and generous comments. That yellow stripe by and large runs pretty true. It is quite thin - rather amazingly thin masking tape is the trick. There are a few spots where it wavers just a whisker, but in one location, to my eye, it's somewhat of a doosie. [the more I think and write about it the more I think of redoing it!]. Lou, it was quite some time that I was away from working on Arethusa and it is good to be back working with wood and brass. I look forward to getting the hull completed and starting on the masting and rigging. Cheers, Elia
-
Hi Alfons and Padeen, Thank you for stopping in on Arethusa. I hope to make more progress in the coming weeks. Cheers, Elia
-
Michael, I'm just catching up after some time away. I'm speechless. Your work is exemplary. All of those details built as would a true boat/ship. The blocks, that compass, and the companionway are stunning. Is this model a prototype for full scale fabrication? Come on, fess up. Cheers, Elia
-
Lou, Your Harvey looks tremendous. The revised mast head details are very good. I love the clean work on the channels, chainplates, and deadeyes. (And that hull and bulwark planking is outstanding). Cheers, Elia
-
Alfons, Rest assured there are schooner fans here very interested in you Smuggler build! That is beautiful detail work on the bowsprit and jib boom. Very clean and crisp. Those sheaves look very smart in the jib boom, as does all of the ironwork. I like that lower eyebolt 'nut' detail. Sweet. Very very nice sir. Cheers, Elia
-
Michael, Robert, Ron, Thank you very much for checking in on Arethusa and the very kind comments. Michael, I have been using Stay Brite solder and flux, purchased from Micro Mark. I have used true silver solder paste and flux in the past but have had difficulties and inconsistent results with it. I am sure its my technique and process that are at issue, not the product. I just seem to have far better luck/results with Stay Brite. I have also used TIX lower temp solder from Micro Mark in the past. I will likely use the TIX when I solder the pin into the strop and chainplate since those two elements already have Stay Brite solder on them (which fixes at a higher temperature). I also hope (to be tested shortly) that the lower temp doesn't do much, if any, harm to the stained deadeyes and partially painted strops. Robert, Yes she has a pretty hull. McManus was a fine designer. Once those white streaks are eliminated I think it will the paint job will be where I want it to be. I plan on using Dullcote as a protective layer over the relatively soft artist acrylics and a sheen duller (is that even a word?!). Ron, lots and lots of little parts. I'm nervously awaiting the time for soldering the tiny washers onto the bolt at chainplate assembly…those little washers are a challenge to use. Cheers, Elia
-
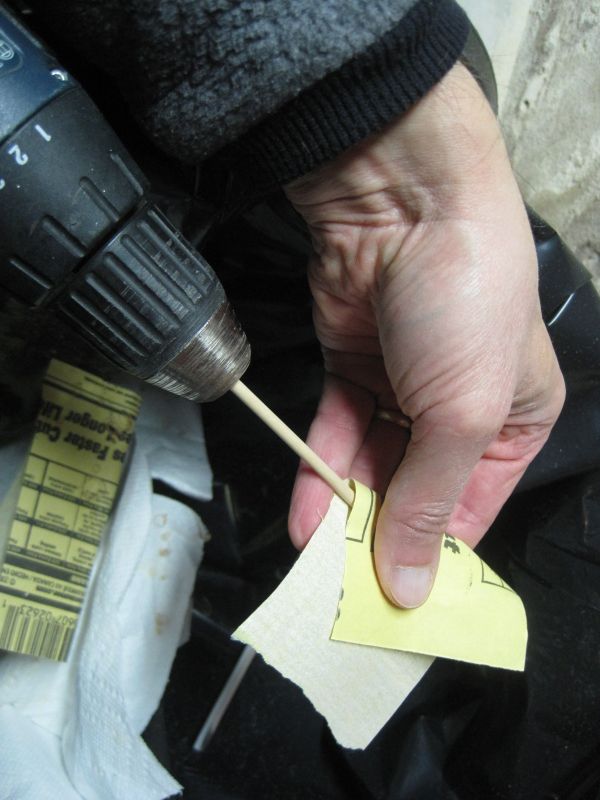
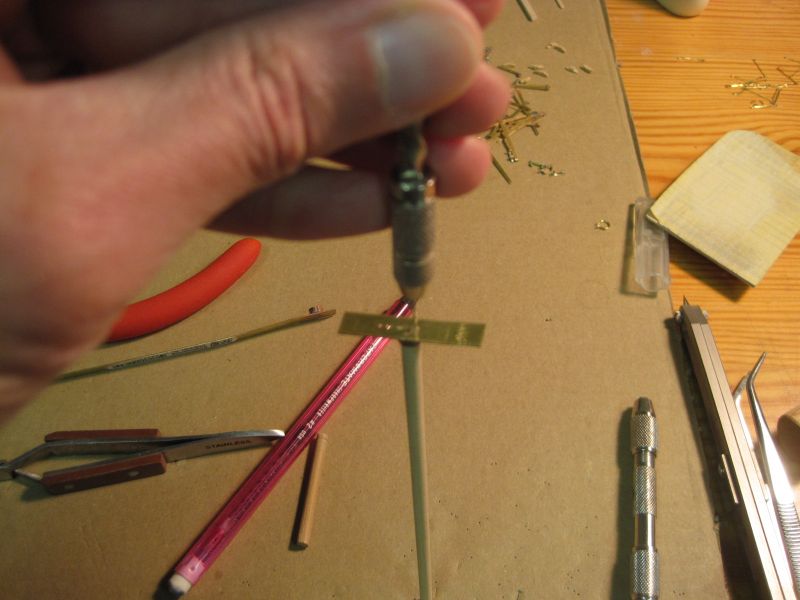
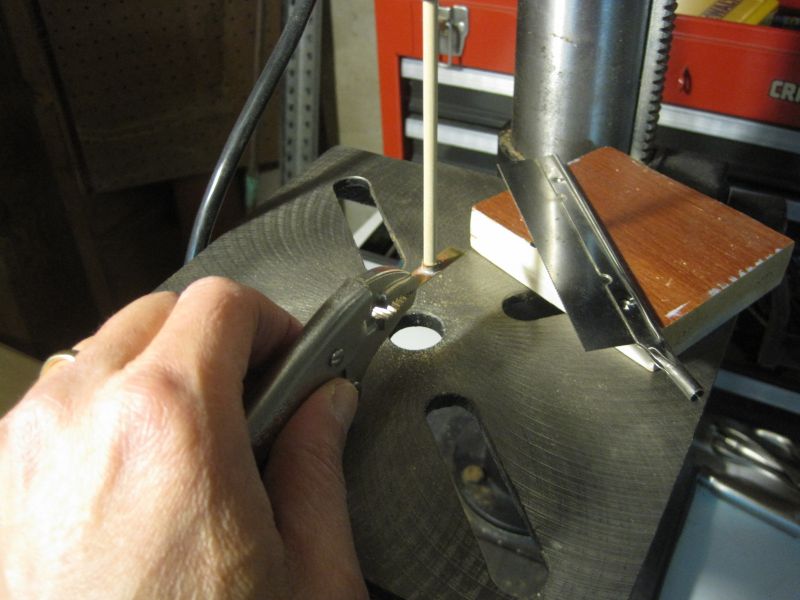
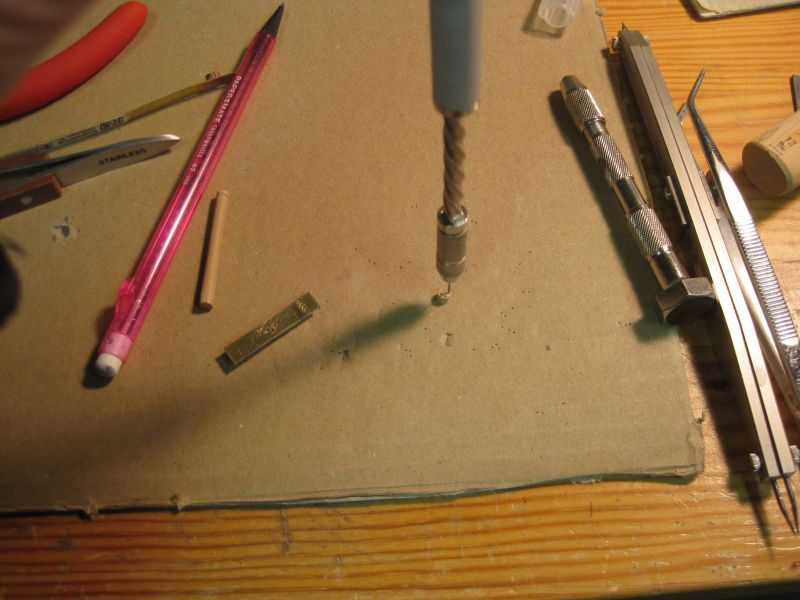
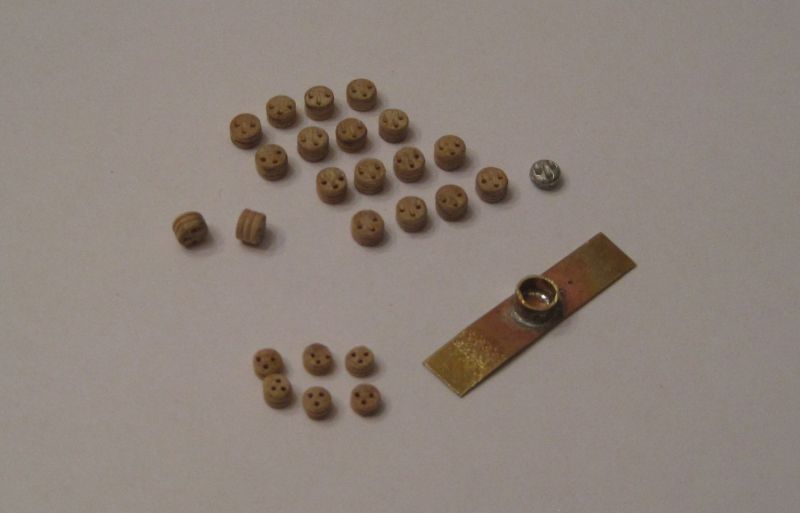
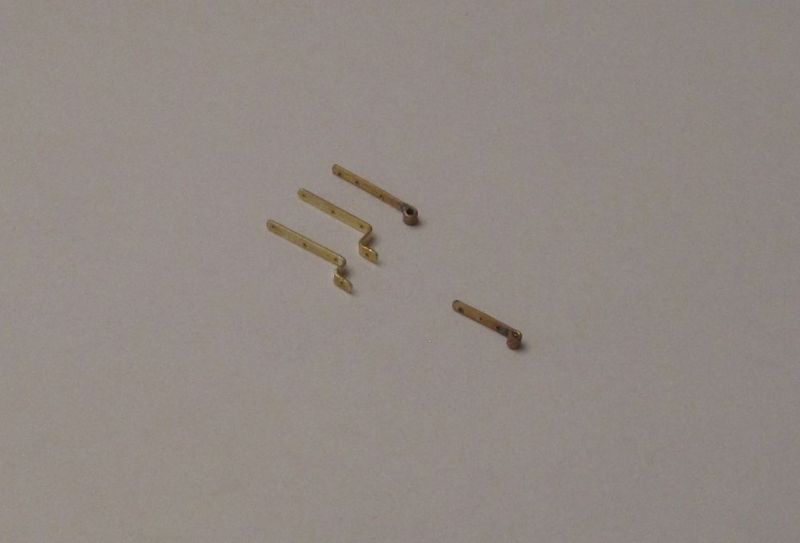
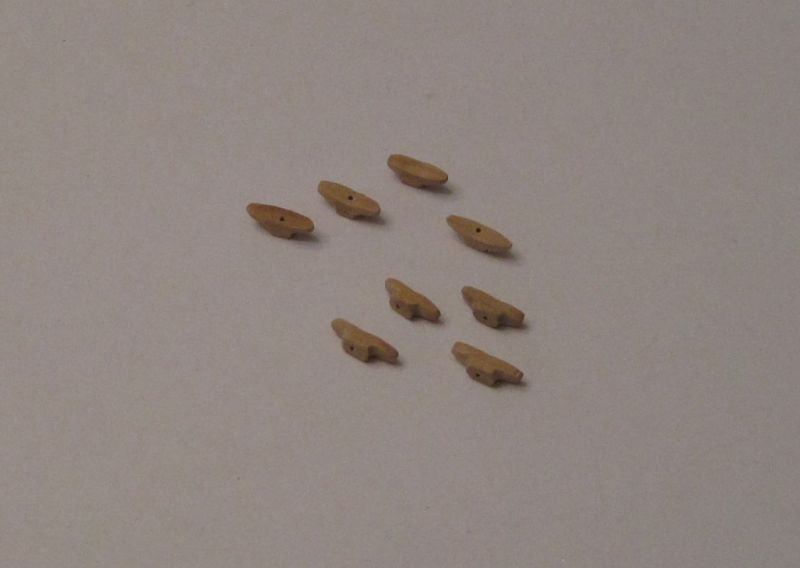
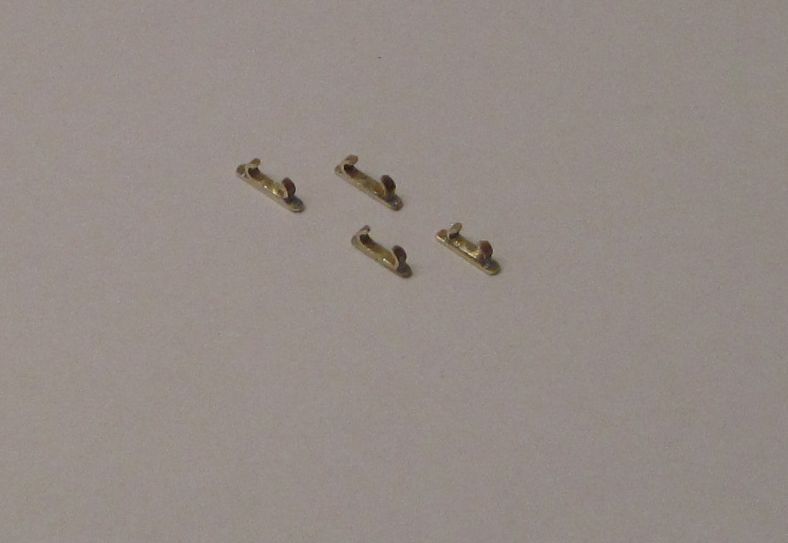
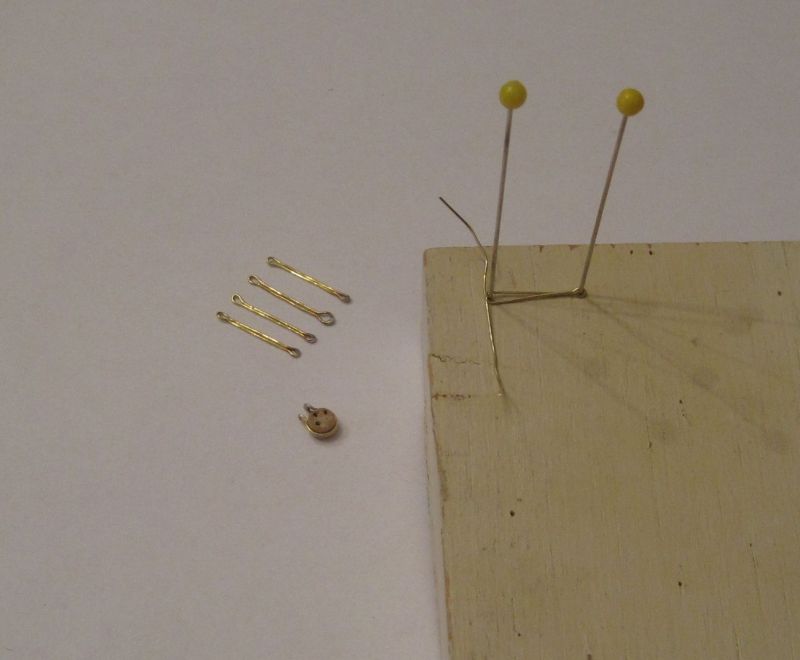
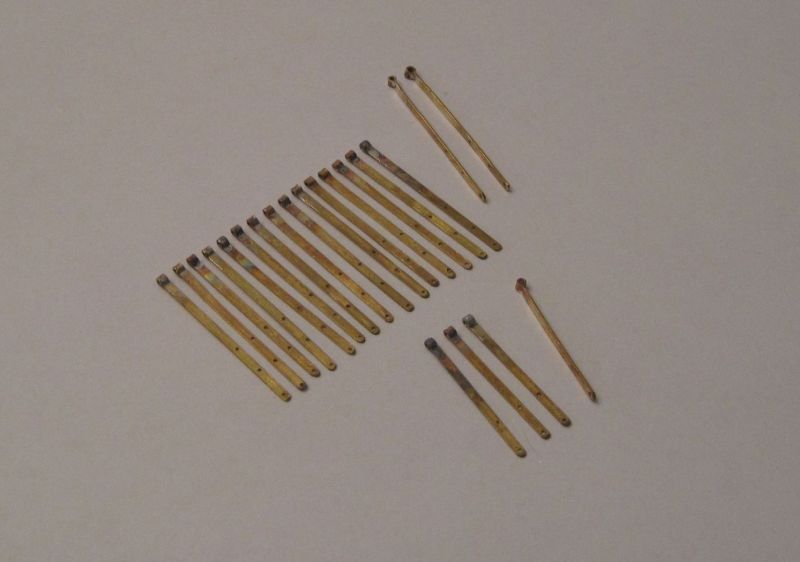
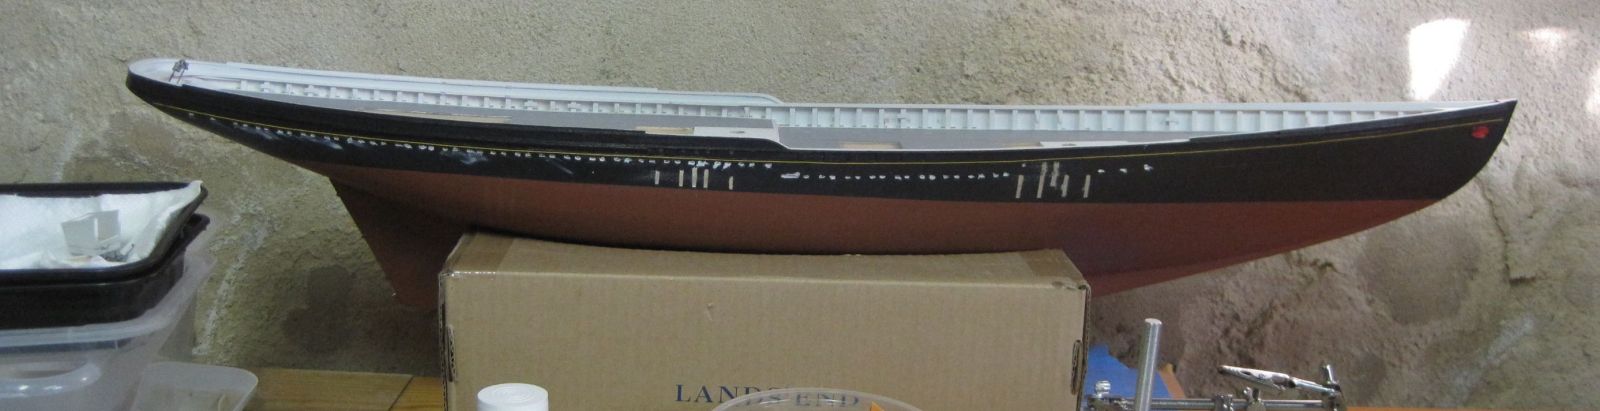
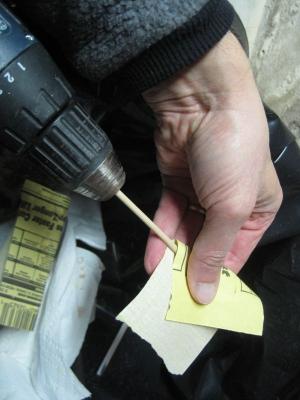
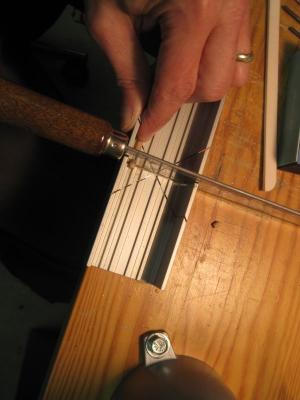
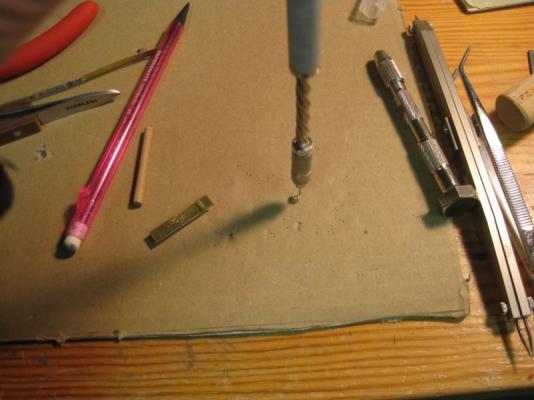
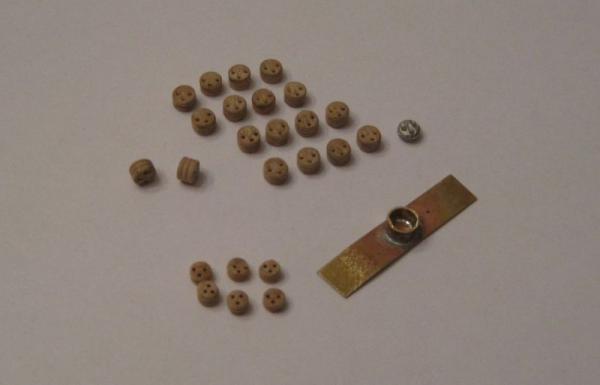
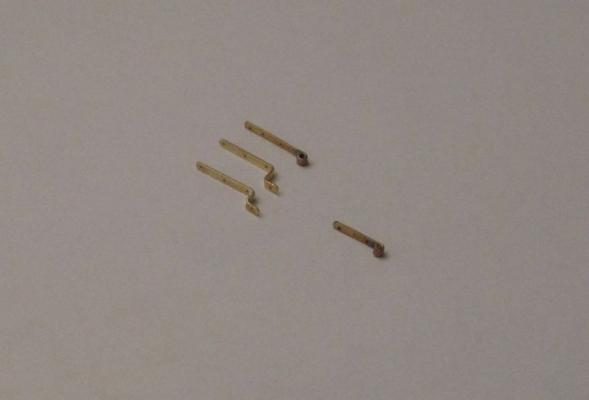
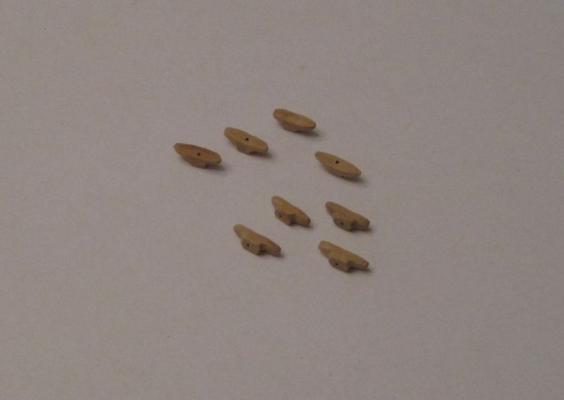
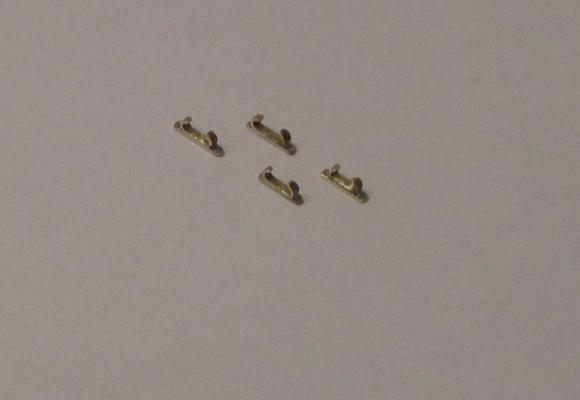
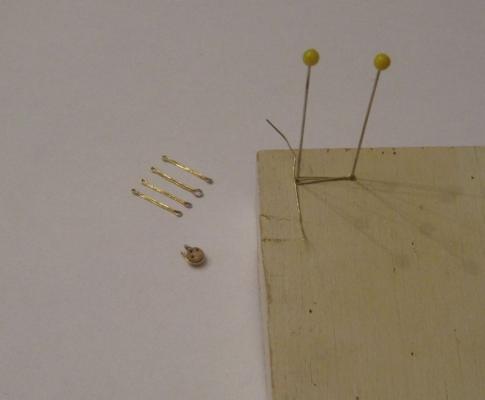
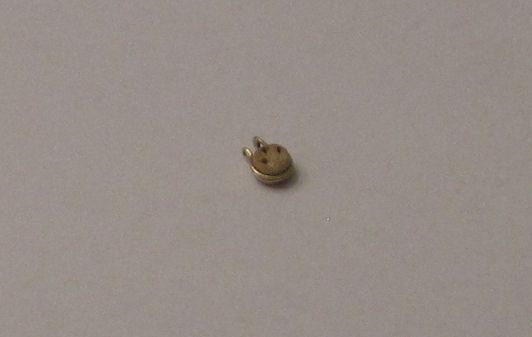
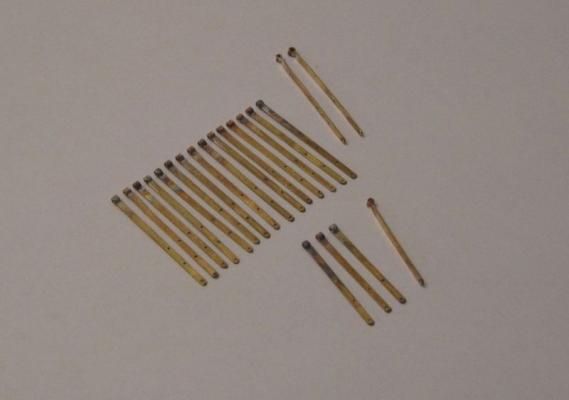
Shipwrights - it has been a long time since I last posted progress on Arethusa. I have been working away on her, in little snippets of time here and there. Springtime turned to summer, when my modeling usually all but ceases, replaced by outdoor activities. Autumn typically welcomes the shipwright (me!) back to his work shop. This year my wife and I decided to embark on a large home improvement project and it has taken far more time and energy than initially estimated. That resulted in less model time than I had hoped for. I am now getting a little modeling time in and following are some progress photos. The saga of the yellow cove stripe is almost over. I had removed the offending strip of wood, per my previous postings, glued in the repair strip, and spackled, sanded and faired it. I then painted the yellow stripe region. After the painted dried for a couple of days I applied the 1/64” wide masking tape. It was surprisingly difficult for me to get it to run straight and true along the new piece of wood. ?! Once in place I painted a light coat of the yellow over the masking tape to seal its edges for bleed under by the black topcoat, which followed. The resulting stripe looks thin and yellow, as desired, though it wanders a wee bit. I think I’ll live with it. As you can see if the accompanying photo I’ve added some white to the scuppers. All of my remediation work had filled in the scuppers with spackle, sanding dust, primer, and paint. I cleaned out the scuppers and applied some of my white paint as touch-up. Once the chainplates are attached I’ll apply black topcoat and it should look tidy (at least that is the plan). Speaking of chainplates - I have been working away on those details. First off was making the deadeyes. Ron (Oneida build) was very helpful in providing me a direction in which to proceed regarding making my deadeyes. I followed his lead, similar to Harold Underhill, in making a jig to locate the lanyard holes and setting the height of the deadeye. I don’t know if you shipwrights ever see a detail on the full size ship that just sticks with you and you find you need to model it, but that happened to me on the deadeyes. The large Gloucester schooners had deadeyes which were iron stropped to the chainplates. That in itself isn’t unusual. What is unique (in my mind at least) was that the strops were double wire loops. Not one, but two iron strops restrain the deadeye to the chainplate. I had purchased britannia deadeyes from Blue Jacket Shipcrafters for Arethusa but upon inspection I found I could not easily make the purchased deadeyes accept the double iron strop arrangement. Thus I set off on making the lower deadeyes. I used boxwood as it is hard, has little grain direction, and cuts and sands cleanly. The larger deadeyes on the larger schooners were 7” to 7 1/2” in diameter and the width was about 5”. On my model the ones I’ve made are 0.160” diameter (4mm) and 0.10” thick. The smaller lower deadeyes were 5 1/5” in diameter, and my model ones are 0.115” diameter (3mm). Interestingly these double stropped deadeyes are essentially flat faced, making fabrication a little easier. My deadeye fabrication process was as follows: Shape wooden rod from square stock using chisels to form first an octagon, chuck it in a hand drill, and use progressively fine grits of sandpaper to sand to the final deadeye diameter. Using the little jig and a pin vise drill the three lanyard holes. Chuck the dowel in my benchtop drill press. Use the jig to mark the final width/cut of the deadeye with a fine kerf saw (on the drill press). Use a triangular section file to create the strop grooves (on the drill press). This was the most inconsistent part of my process as I didn’t have (or use/implement) some ‘tool rest’ with which to steady the file. Remove the deadeye from the drill press and saw off the deadeye at the previously marked line. Finish drilling through the lanyard holes. I eased the holes with a micro “V” shaped gouge, followed by using the lanyard hole drill bit in the pin vise, rotated slowly, and angled to create a shallow groove. All edges were then lightly sanded. I have made the chainplates, both (16) longer ones for the lower shrouds and (4) shorter ones for the upper shrouds. I used a jig to locate the chainplates for drilling the bolt holes. The upper loops are soldered. A few extras were made as I typically lose or mess up some when working through the fabrication steps. I have fabricated the jumbo, jib, and flying jib stay ironwork from brass sheet stock. I have made some cleats: And some chocks: And for the deadeyes I have begun making the double iron strops. Here is a photo of my jig for forming the strop from 26 gauge brass wire. I solder the one loop end, trim off the excess wire, and file it to resemble a hoop end. I then use a larger drill bit shank to wrap the double strop around and straighten the hoop ends. Once the strops are complete I'll proceed with assembling the deadeyes to the chainplates. I intend to stain the deadeyes black and paint the strops (before attaching them to the deadeyes) dull silver (for they were galvanized). I'm scheming now on how to solder the bolt and nut hardware, joining the iron strops to the chainplate. Hopefully it won't been almost a year before I post further progress! Cheers, Elia


- 200 replies
-
- 16
-

-
Ron, So very nice. Those pin rails, the mast pads, and that aft skylight and companionway are excellent. Very crisp. I like that aft companionway addition and also the skylight configuration. I recall mulling that over for some time before picking a layout. Cheers, Elia
-
Ron, That is such nice clean detailing. Well done. Cheers, Elia
-
Pop jack, That painted hull looks great! Very clean work. It looks like you put a nice, fine cove modeling on her. The revision of the skylight looks good too. I'm not familiar with what the deck arrangement of Bluenose was, nor of the configuration of its deck furniture. Thanks for sharing the update. Cheers, Elia
-
Greg, Beautiful work. I'm glad to hear that unique framing will remain visible. Elia
-
What brand is a good head mounted magnifier,light.
Elia replied to kiwiron's topic in Modeling tools and Workshop Equipment
Guys, I too need to get something like an Optivisor to aid in the really small detail work. At 51 the eyes are what they used to be. I wear eyeglasses for far vision. I've got astigmatisms in both eyes, so glasses are a necessity. Do you have recommendations on which magnifiers to get for the optivisor? My guess that it ends up a personal preference. Without knowing even the ballpark to aim for any help or suggestions would very appreciate. I also so the LED clip light that Donegan makes for it. Is that worthwhile and of value for making subjects brighter when looking through the optivisor? Cheers, Elia -
Ed, Stunning work. What strikes me in looking at this build is the juxtaposition of the mechanical order and details of the frame subassemblies, fastened to the keel, and the flowing, "natural" or organic loft of the hull. Those forward most cant frames really highlight this. Beautiful. Cheers, Elia
- 3,618 replies
-
- 1
-
-
- young america
- clipper
- (and 1 more)
-
Rob, Very nicely done. Quite impressive. You've got more deadeyes on that one channel than my Arethusa has on either of her entire sides. Cheers, Elia
-
Ed, Thank you for the riffler file lead. Cheers, Elia
-
Ed, Do you recall what brand of riffler files you use? My file selection is rather limited. I have some fairly narrow files, a set of 10 or so, purchased from Micro Mark. The shanks for the plastic handle attachment are about .1" in diameter and the files are OK but not great. I'm always on the lookout for better equipment and wonder which you use and like. Many Thanks, Elia
-
Dave, That looks really really really nice. I think the warm medium/dark natural case compliments the painted model quite well. I think all of us fishing schooner modelers hope for such results. A hearty congratulations on her. Cheers, Elia
- 95 replies
-
- 1
-
-
- bluenose
- model shipways
- (and 1 more)