HOLIDAY DONATION DRIVE - SUPPORT MSW - DO YOUR PART TO KEEP THIS GREAT FORUM GOING! (Only 13 donations so far - C'mon guys!)
×


DelF
-
Posts
1,409 -
Joined
-
Last visited
Content Type
Profiles
Forums
Gallery
Events
Everything posted by DelF
-
 I’ve not tried the regular BSI glue. However about a year ago I developed an adverse reaction to the fumes given off by other brands of regular CA. I think it was because I used a lot of it over a prolonged period. I hope the odourless BSI glue will help.
 -
Thanks for the tip Glenn. I've just found I can order BSI glue in the UK, including the odourless version that I hope I'll be able to use without the adverse reaction I've developed to regular CA.
-
I'm just grateful you're leading the way on this one. Hopefully you'll have sorted out Sphinx before I've finished the Duchess, then I'll be able to follow your example🙂. Seriously though, thanks as always for sharing your thought processes and the steps in your build so helpfully. Derek
- 857 replies
-
- 5
-

-
- Sphinx
- Vanguard Models
- (and 1 more)
-
Simply beautiful. A model that would grace any museum.
- 263 replies
-
- 1
-

-
- Medway Longboat
- Syren Ship Model Company
- (and 1 more)
-
Proxxon DB-250 lathe extension bed
DelF replied to glbarlow's topic in Modeling tools and Workshop Equipment
It works with both -
Proxxon DB-250 lathe extension bed
DelF replied to glbarlow's topic in Modeling tools and Workshop Equipment
No problem. The lathe has a hollow headstock. That means dowels up to about 11mm in diameter can pass right through the machine, allowing you to hold the dowel close to the part you are working on. Here's a picture: Hope this helps Derek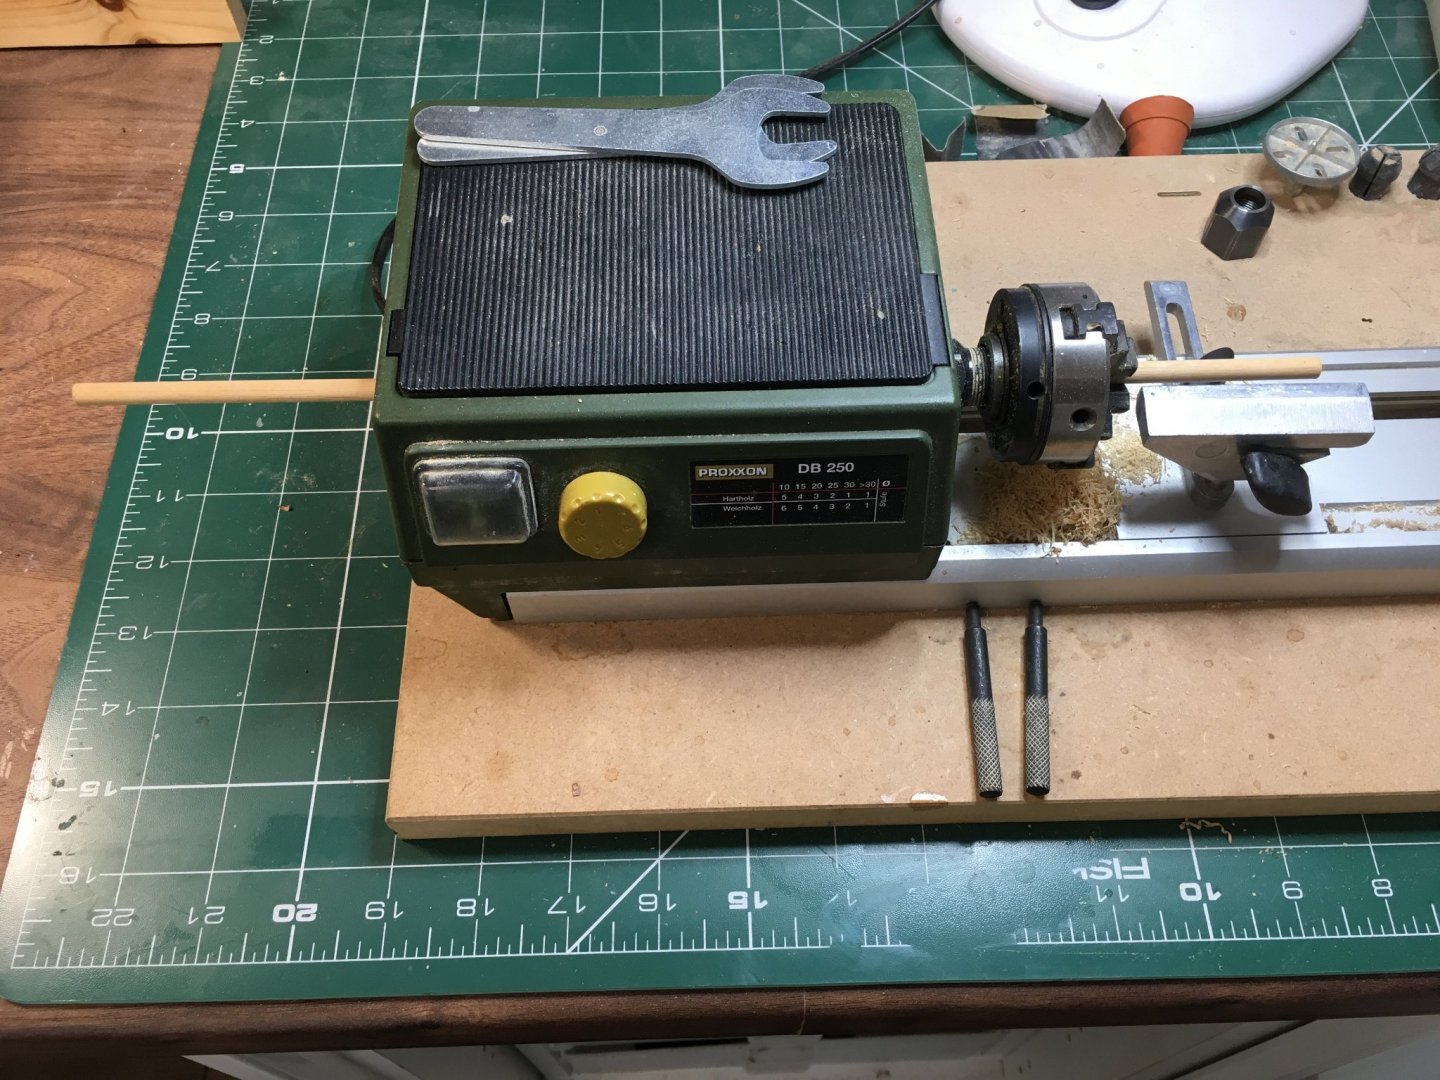
-
Beautiful work on the planking Glenn. Good to hear you're getting on well with the chisels and honing guide.
-
You'll have it built by Thursday! 😉
-
UPS parcel expected Tuesday. Whoopee!
-
Hi Joshua Allan raises some interesting points To quote from the text of the book "Anyone who starts trying to reconstruct (in the sense of faithfully reproducing) a ship no longer in existence would be at a serious disadvantage without a general plan. Our problem was the opposite; three plans of Royal Caroline are in existence, all reliable, but not in complete agreement". The plans they cite are from the NMM and Frederick af Chapman's Architectura Navalis Mercatoria. They also studied contemporary paintings and made extensive use of experts, especially James Lees. I won't go in to more details - suffice to say they did their homework and they explain the conclusions they reached from the various contemporary sources. Interestingly, Lees does have several of the lines Joshua mentions terminating in the tops. For example the topgallant lift "was taken to the lower top where it was made fast to a deadeye or cleat". Similarly with the cluelines, although he doesn't specify how they were made fast. Another option, cited in The Fully Framed Model Vol IV by David Antscherl, was for lines to belay on shroud cleats in the lower tops. Joshua, I think it's safe to suggest that you can adopt whichever of these methods works for you. Rigging on ships of the period, whilst highly specified in some respects (eg size of lines) was fluid in others, and would often be adjusted according to the preferences of individual captains. It's also worth noting that Royal Caroline had a big shortage of belaying points, given her unusual deck arrangement, which is why she makes so much use of pin rails in the lower shrouds. Keeping lines in the tops would have helped in that regard. Finally, I didn't fit all the lines you mention in my model of the ship as I felt including sail handling lines in a bare sticks model would have been over the top. No hard and fast rules on that of course, and in fact I included all these lines on my last model of HMS Speedy. I didn't keep a log of Caroline unfortunately, but here's a link to the gallery images. Hope this helps and good luck with your build. Derek
-
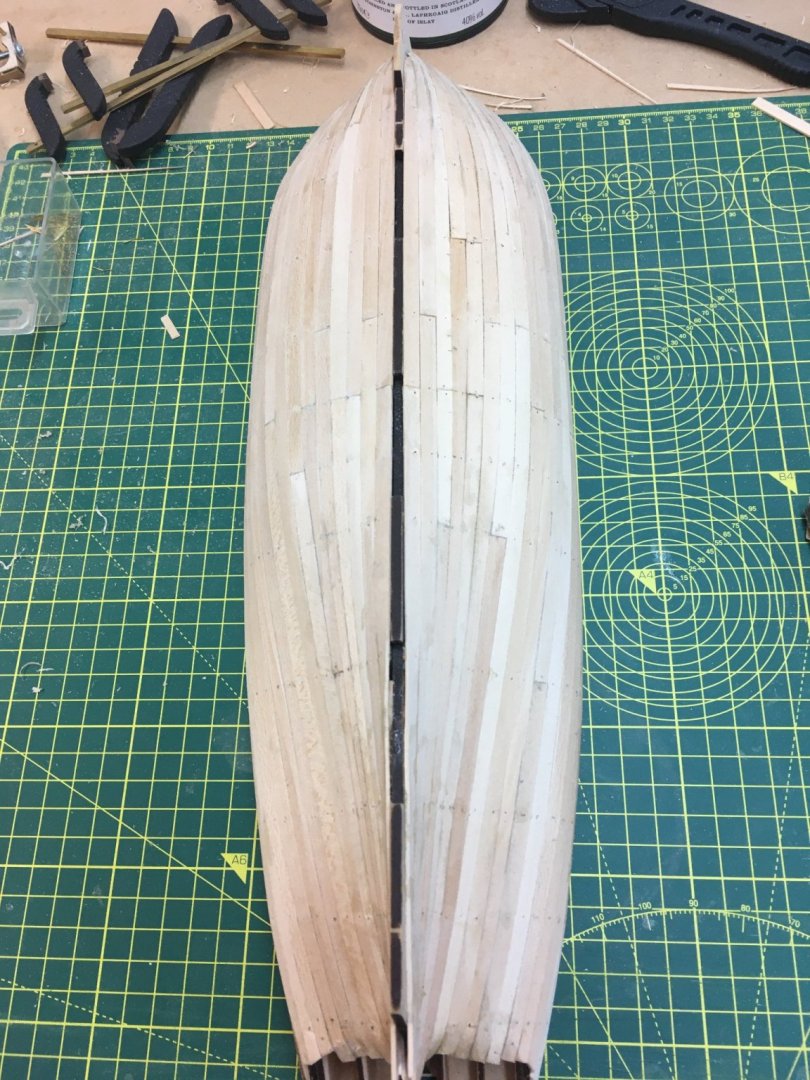
First planking sanded, keel and sternpost fitted I spent quite a bit of time on sanding the first planking to get it as smooth as possible. Actually, smooth is the wrong word as I used nothing finer than 120 grit; it's more a case of getting the lines of the hull as clean as possible by getting rid of all the bumps and dips. I used a small amount of water-based wood filler in a few places, then it was on with fitting the two-piece keel - helpfully labelled fore and aft: These fit into slots in the false keel, but I added a couple of clips just to make sure everything was aligned. Although most of the sternpost will be covered in the final model, I sanded it with 320 grit paper just to make it as smooth as possible prior to painting. Here's the result, showing the beauty of the boxwood... ...and that's without any finish applied. Here it is fitted: Mmmm... I may have to rethink the painting! I'll see how I feel after second planking. Derek


- 345 replies
-
- 11
-
-
- Duchess Of Kingston
- Vanguard Models
- (and 1 more)
-
I agree with all your points Dave. Chris has solved a lot of the problems for us, but I enjoy the problem solving aspects of the hobby so I'll probably have to go looking for extra challenges like making my own decks!
-
Well done. I believe this type of stern is called a round tuck, as opposed to the square tuck we’re probably both more familiar with, where the hull looks like a wine glass when viewed from aft. You’re still ahead of me!
-
What Gregory said! Excellent first planking. You’ve shown that using proper techniques needn’t take an inordinate amount of time, and will pay dividends in terms of providing a good base for the second layer without the need for excessive sanding and filling.
-
You'll be fine. First planking always seems more daunting than it turns out. It also helps having the person who built the prototype and wrote the manual on hand to point you in the right direction!
- 345 replies
-
- 1
-
-
- Duchess Of Kingston
- Vanguard Models
- (and 1 more)
-
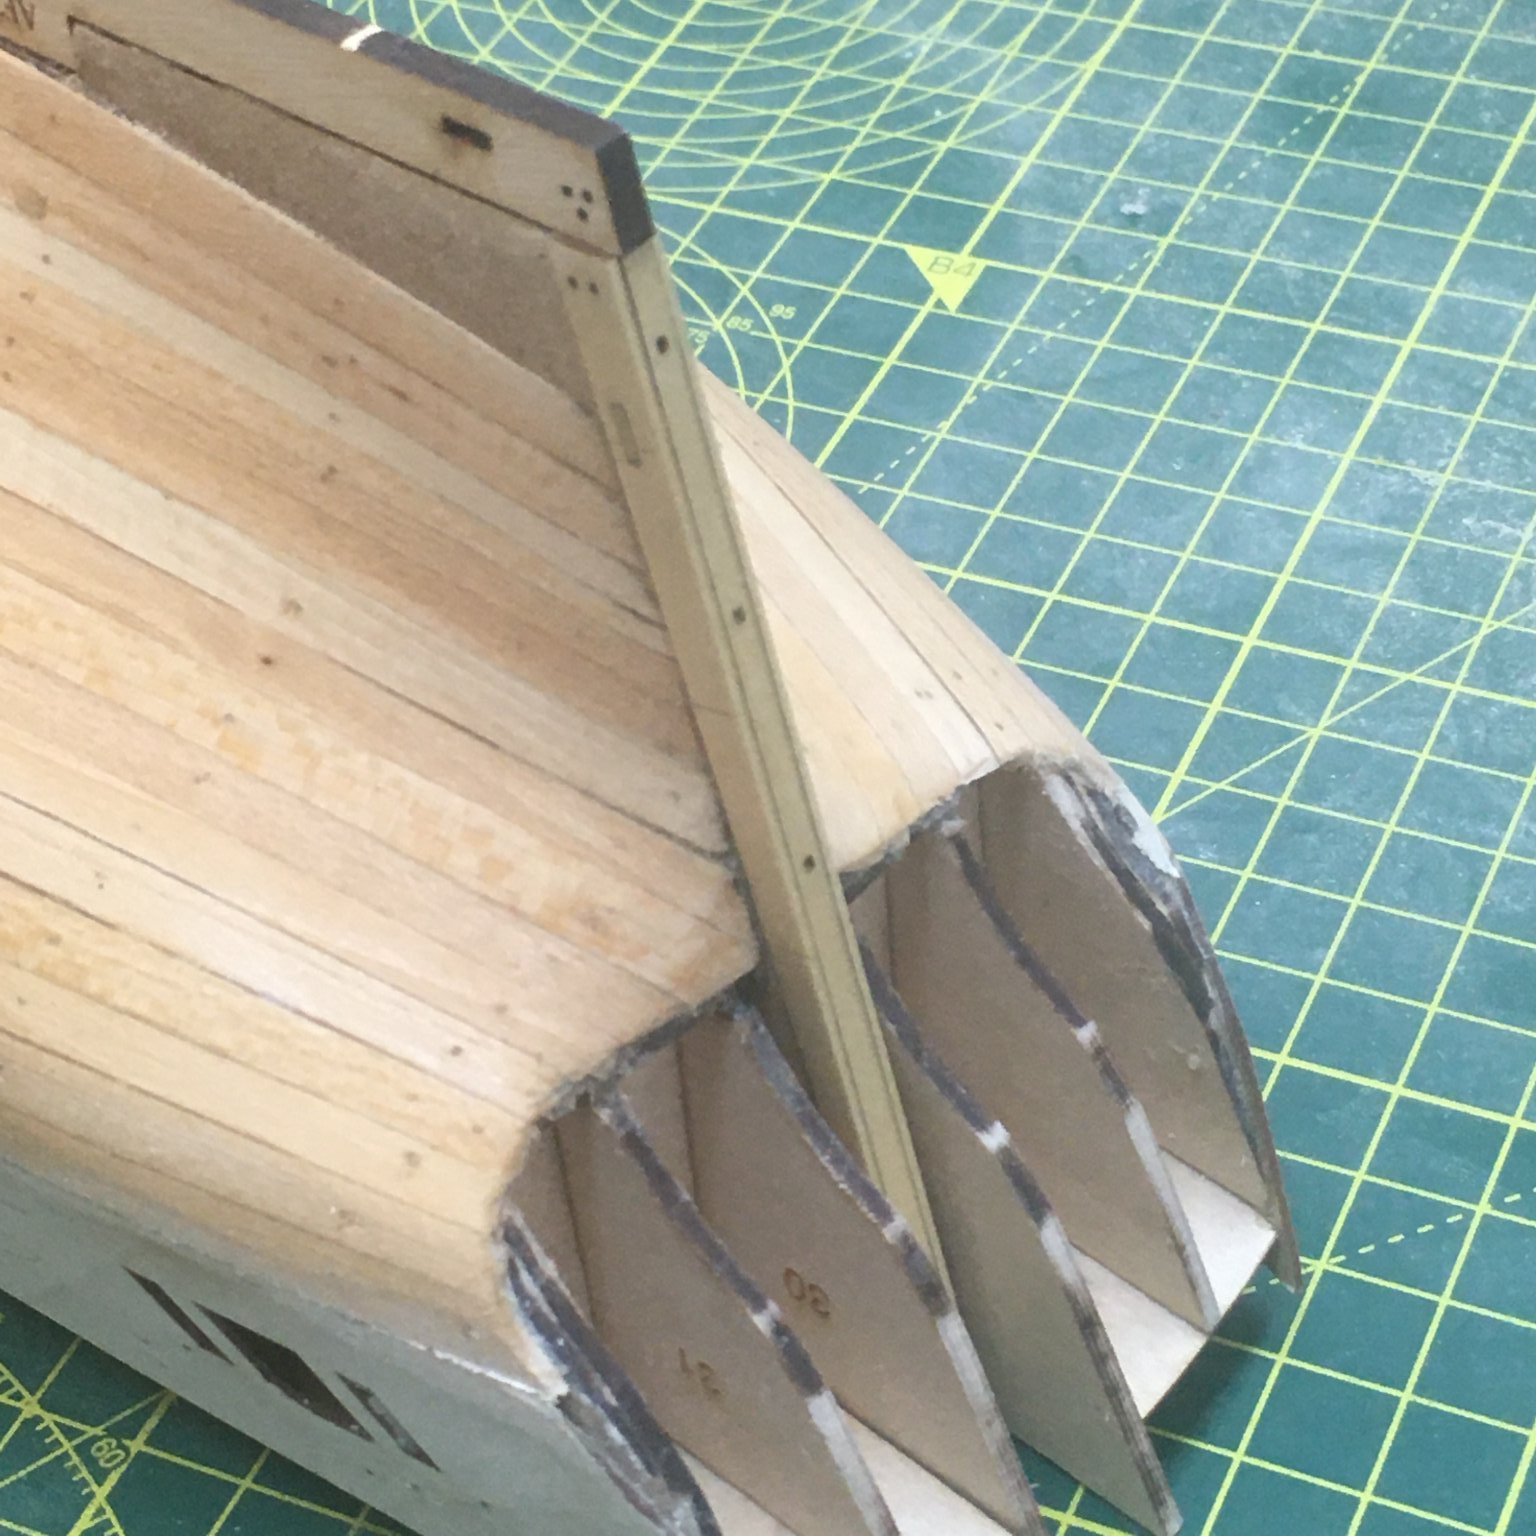
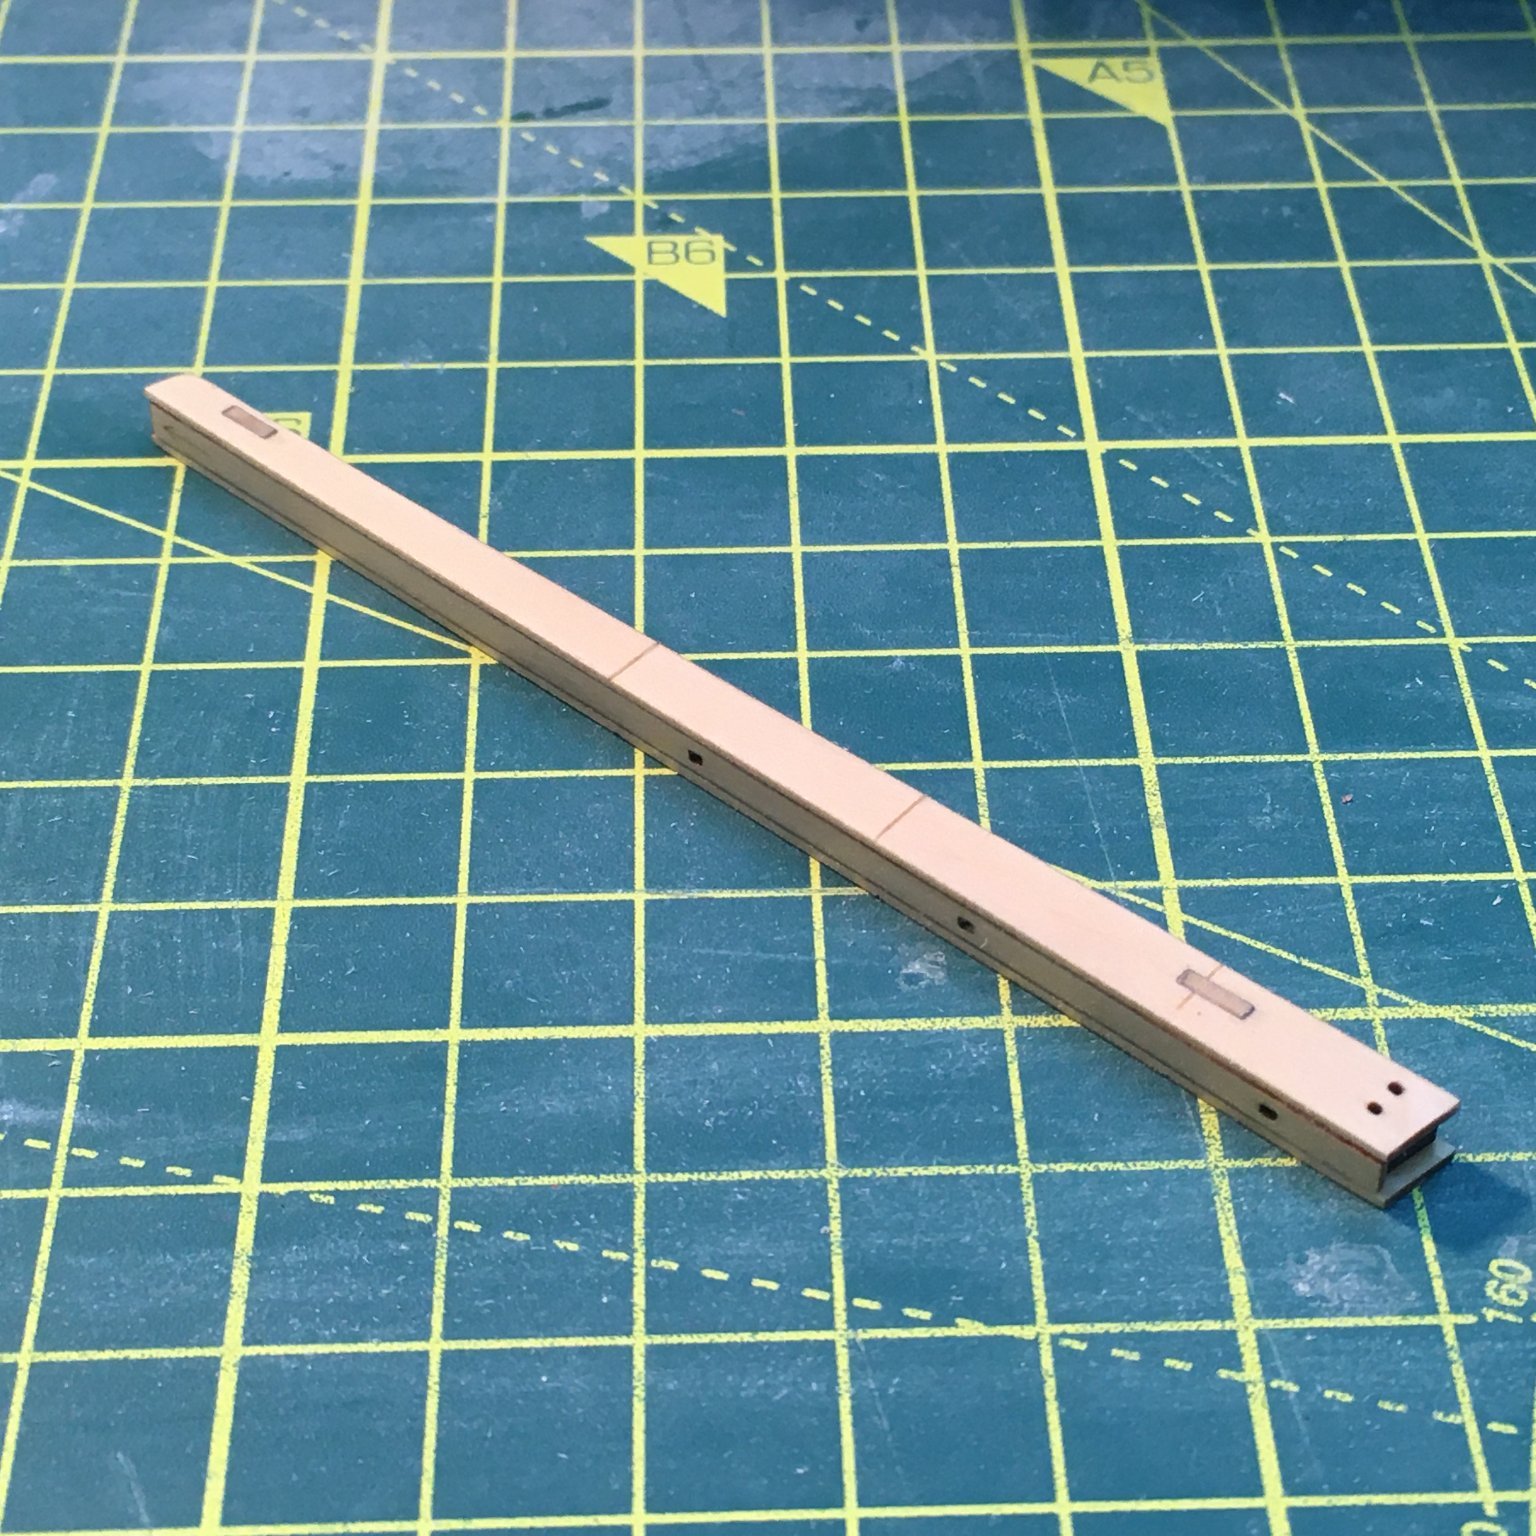
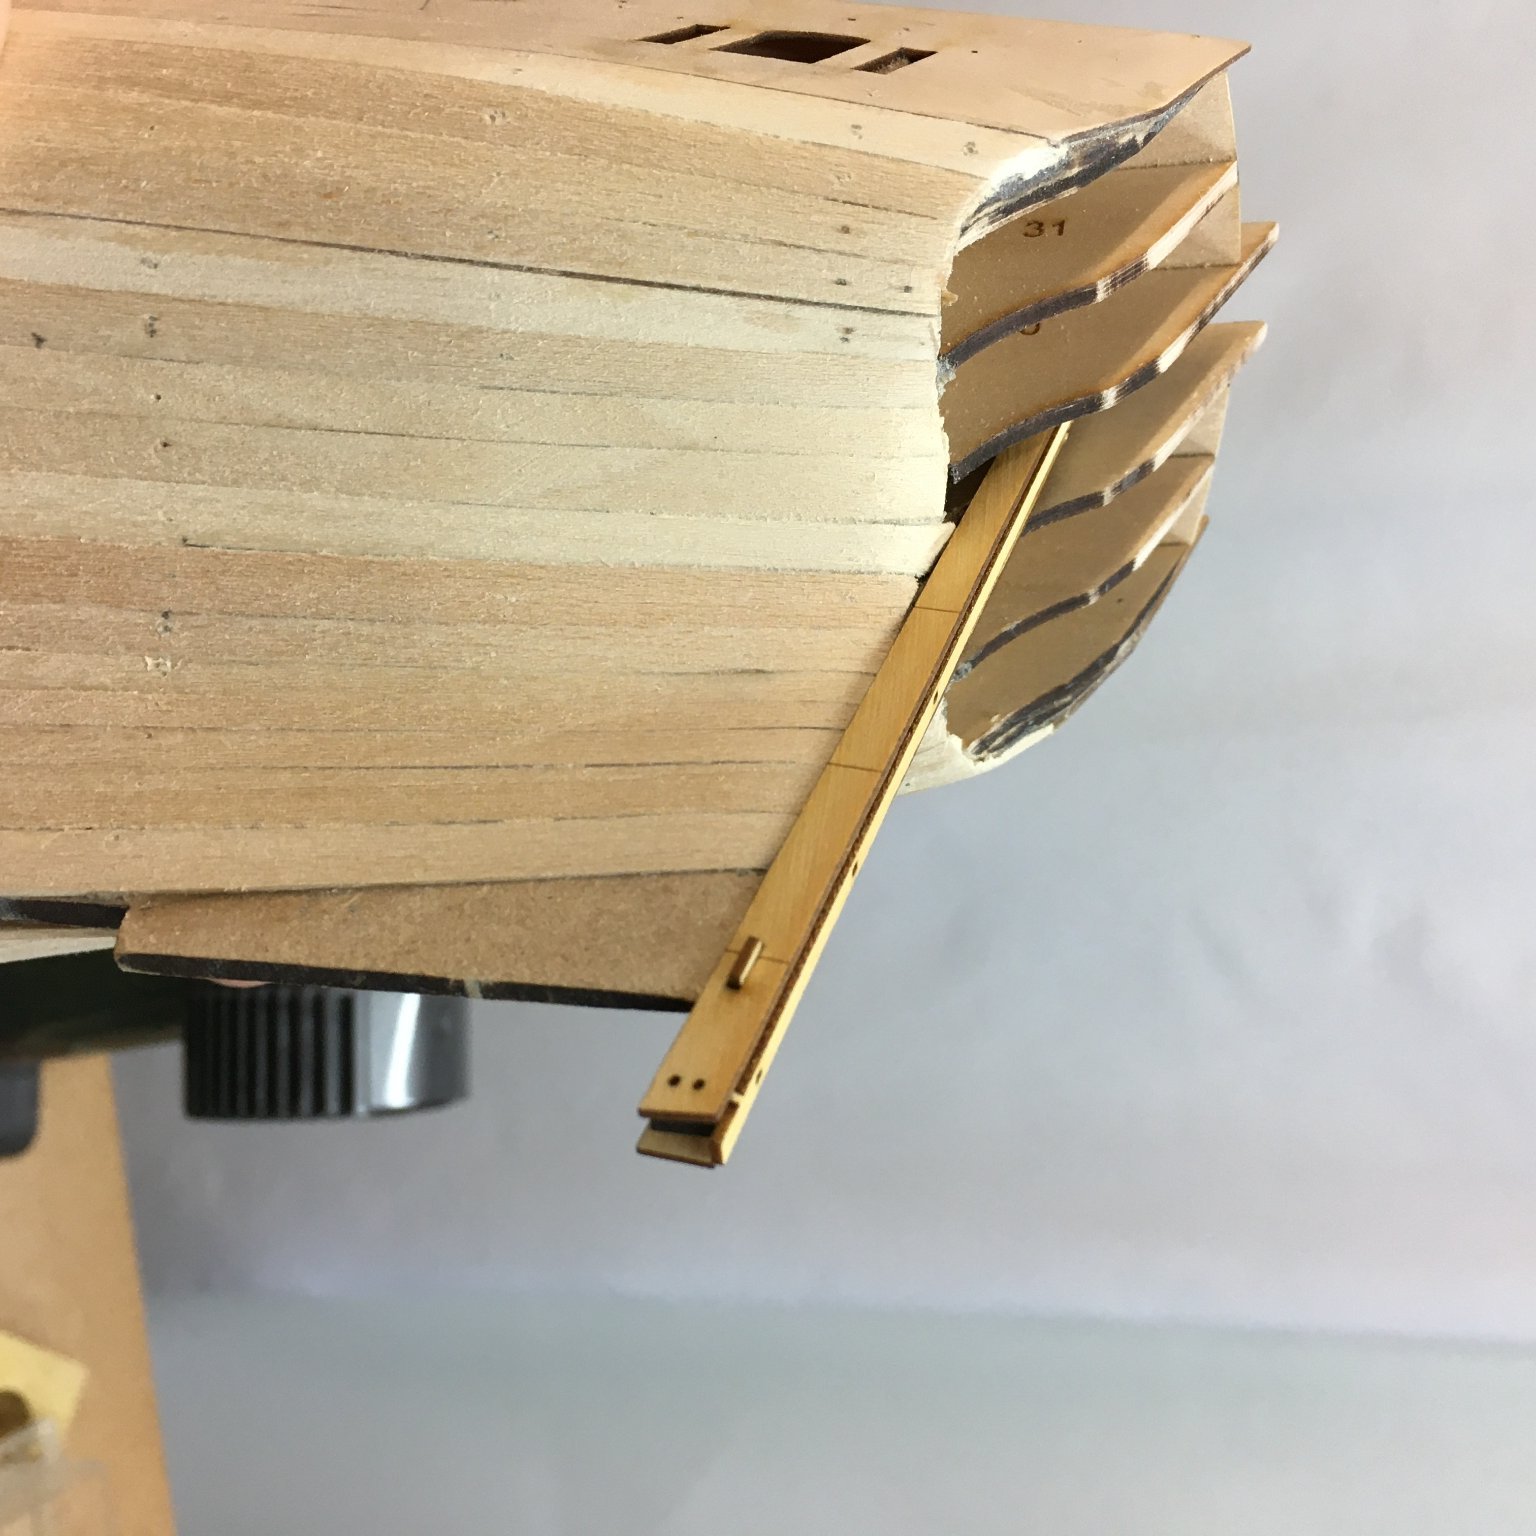
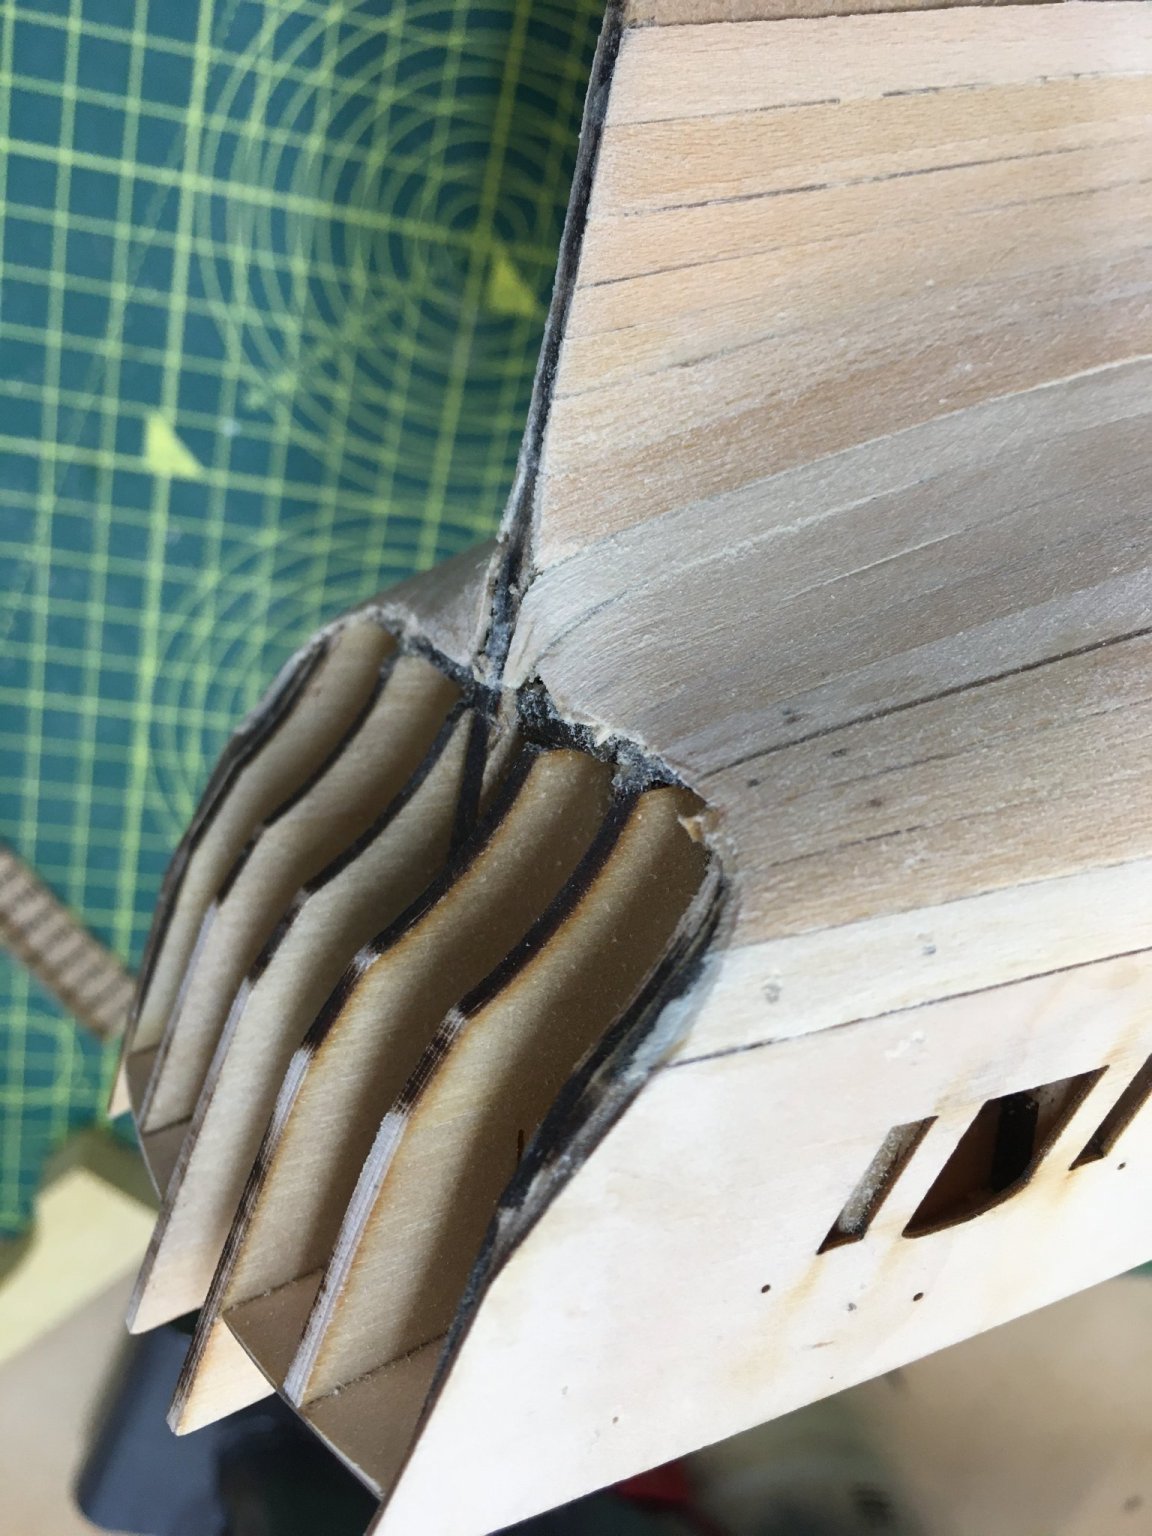
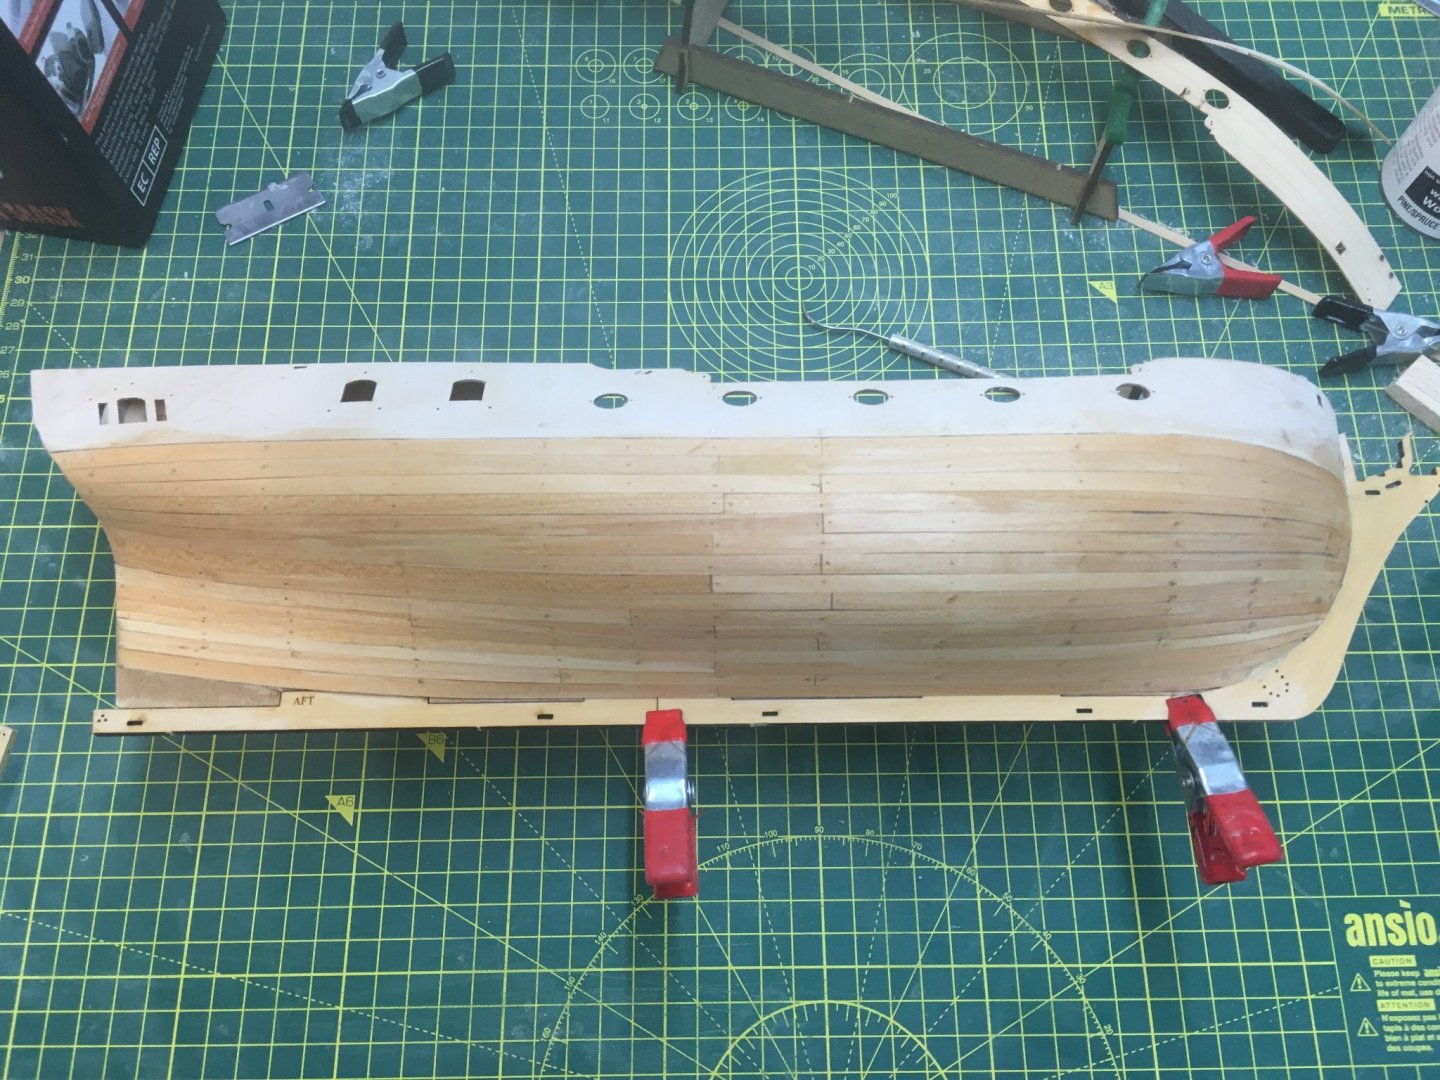
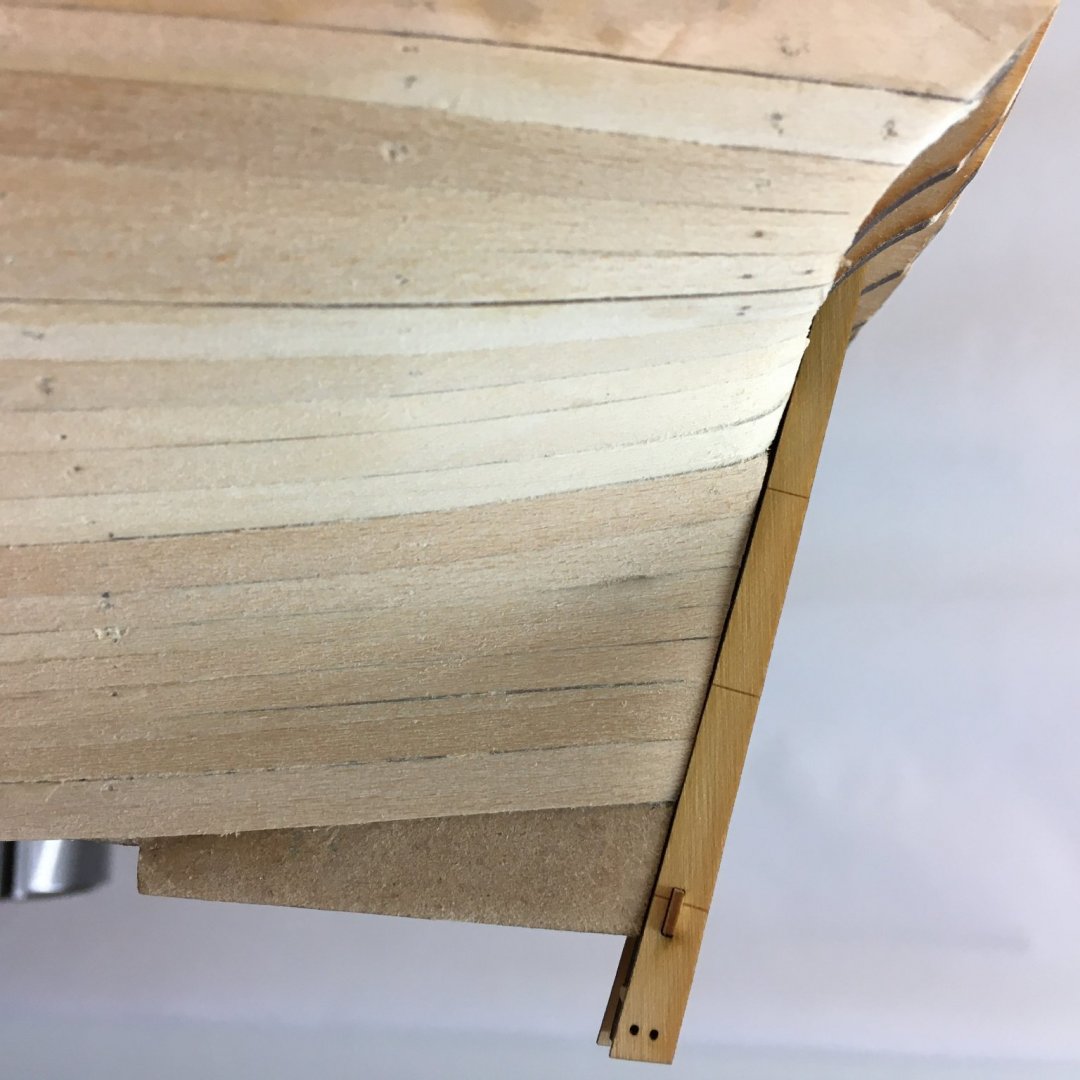
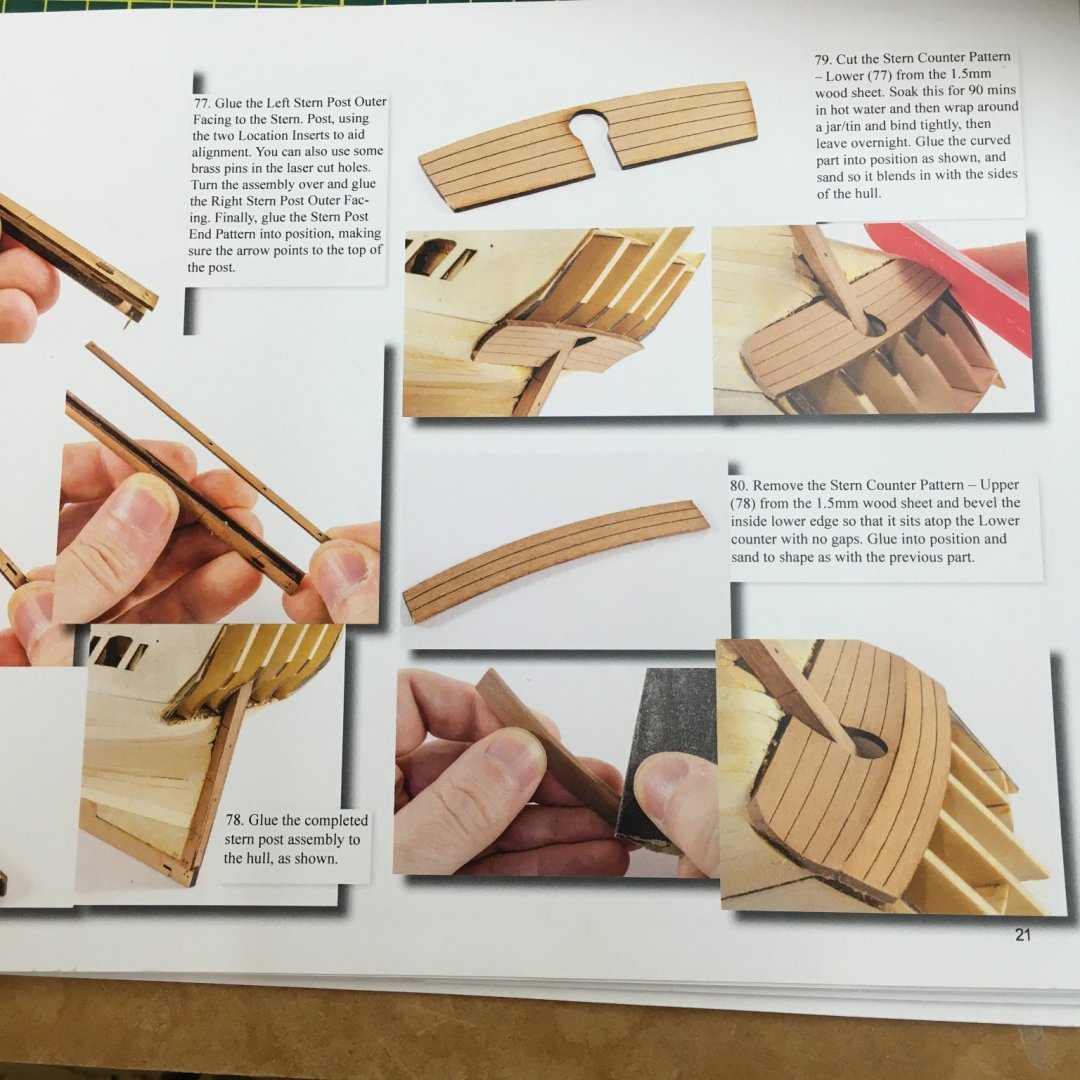
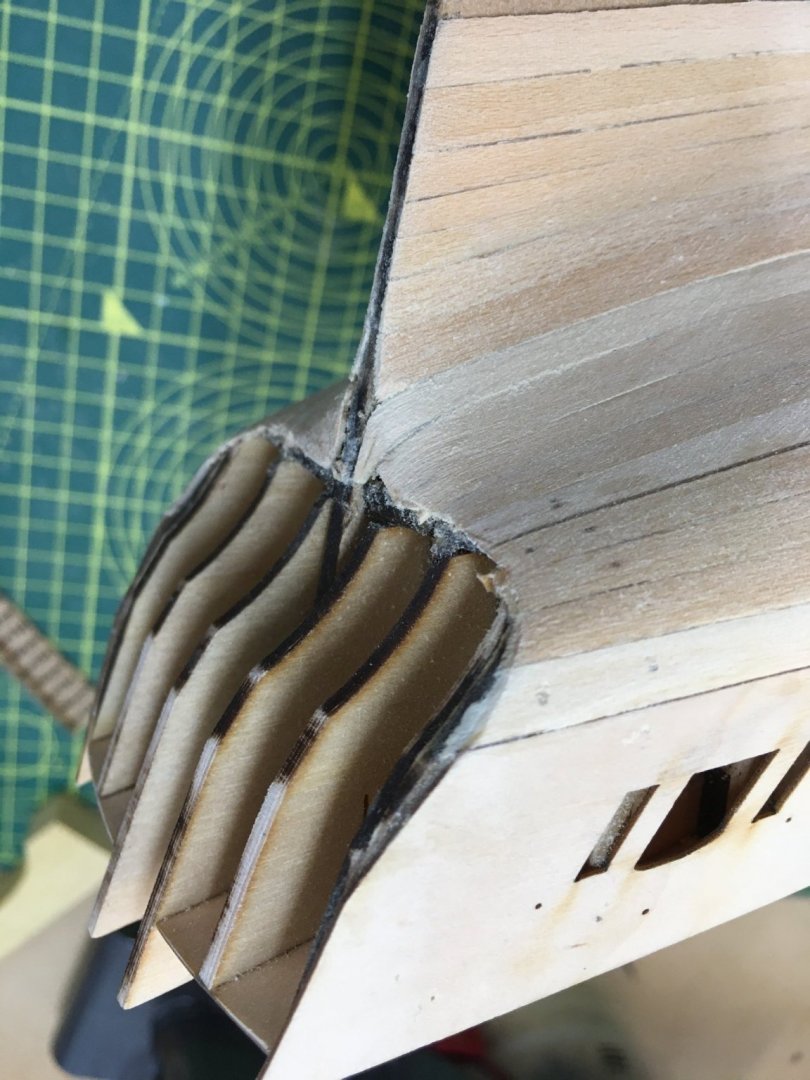
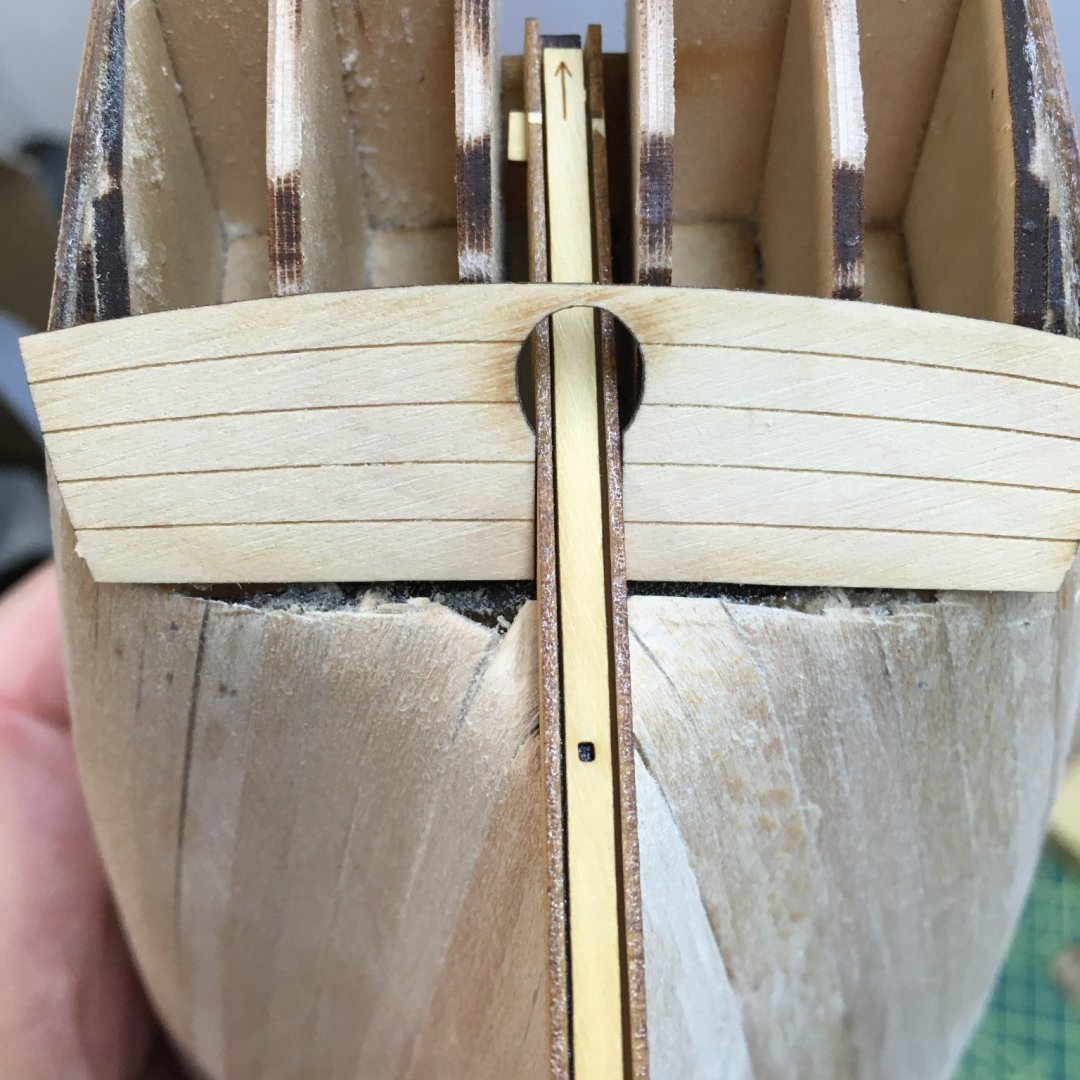
I agree, it's a tricky area. Looking at your log, I don't think you're a million miles from where you need to be. From your photos it looks like you just need to sand the ends of those stern planks a bit more so you end up with a nice curve up into the stern counter. When you've fitted the lower stern counter pattern and the stern post you may need a bit of filler if there are any large gaps. I've not finished sanding the stern on my model but this is where I'm at just now: Not very neatly trimmed, but it's only the first layer, and filler is our friend! Here's a couple of pictures with the stern post dry-fitted: I'm sure you know this, but it's worth emphasising that the second planking should end up flush with the sternpost, which means the first planking in this area must be thinned down gradually until it is flush with the mdf at the sternpost, which will leave sufficient gap for the next layer. Here's the lower stern counter pattern fitted along with the stern post: Plenty of scope for more sanding (and filling!). But I'm relaxed about that - James's prototype looked similar (albeit neater!) at this stage: Hope this helps Derek PS I should have mentioned that a decorative rail goes under the lower stern counter. That should cover a multitude of sins.

- 345 replies
-
- 9
-
-
- Duchess Of Kingston
- Vanguard Models
- (and 1 more)
-
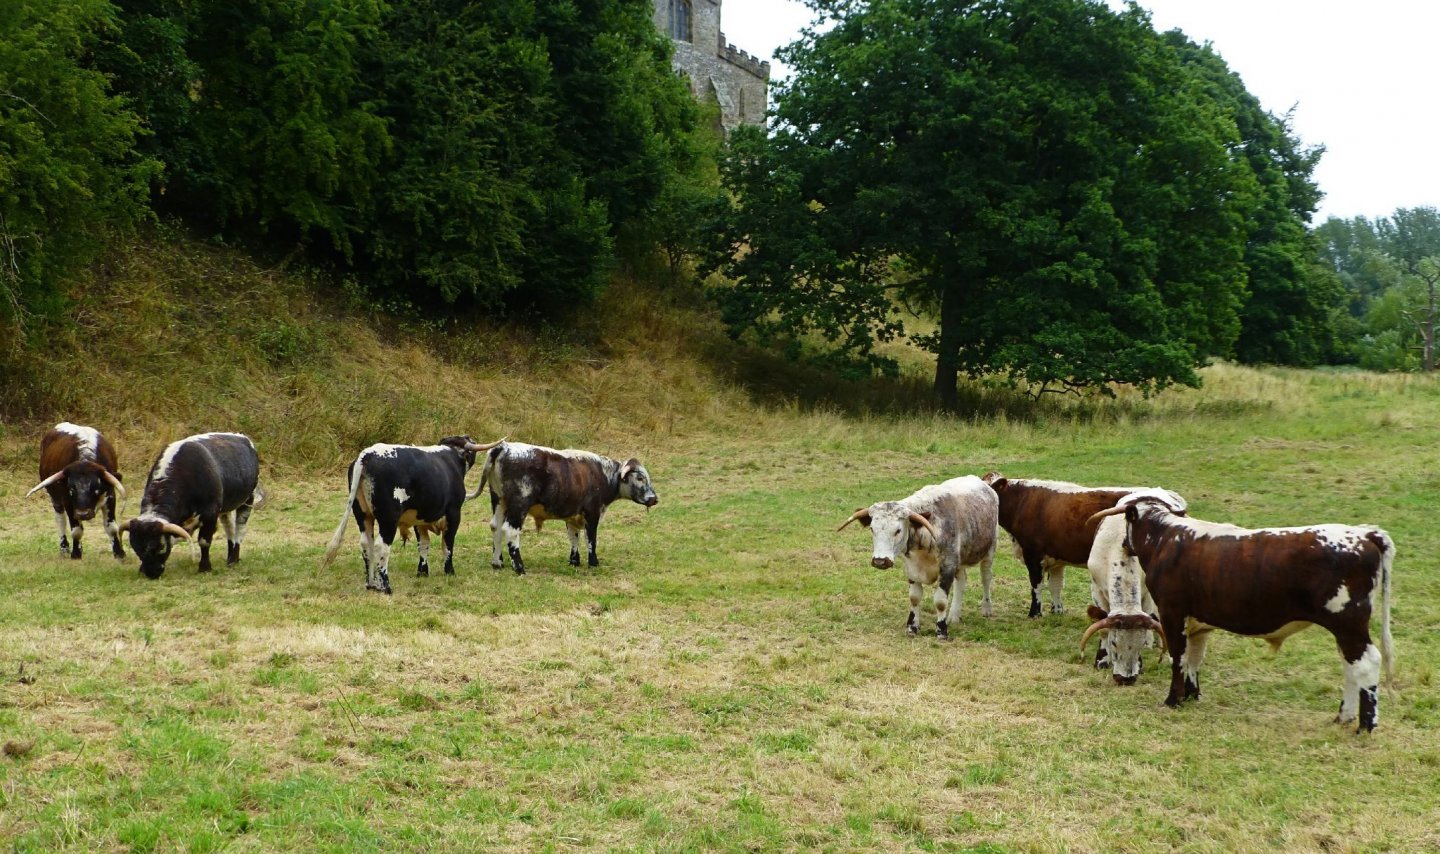
Hi Glen Yes, they're an old breed, originally used as draught animals. This Wikipedia entry gives more information, explains the differences between the Texas and English Longhorns, and mentions the Thoresby Estate herd which is the one I know. I envy you having your own herd of such beautiful animals. Derek
-
Hi Glen, and welcome to MSW. We have a herd of English Longhorns near us. Their horns vary greatly in size and shape, but these are fairly typical: Derek
-
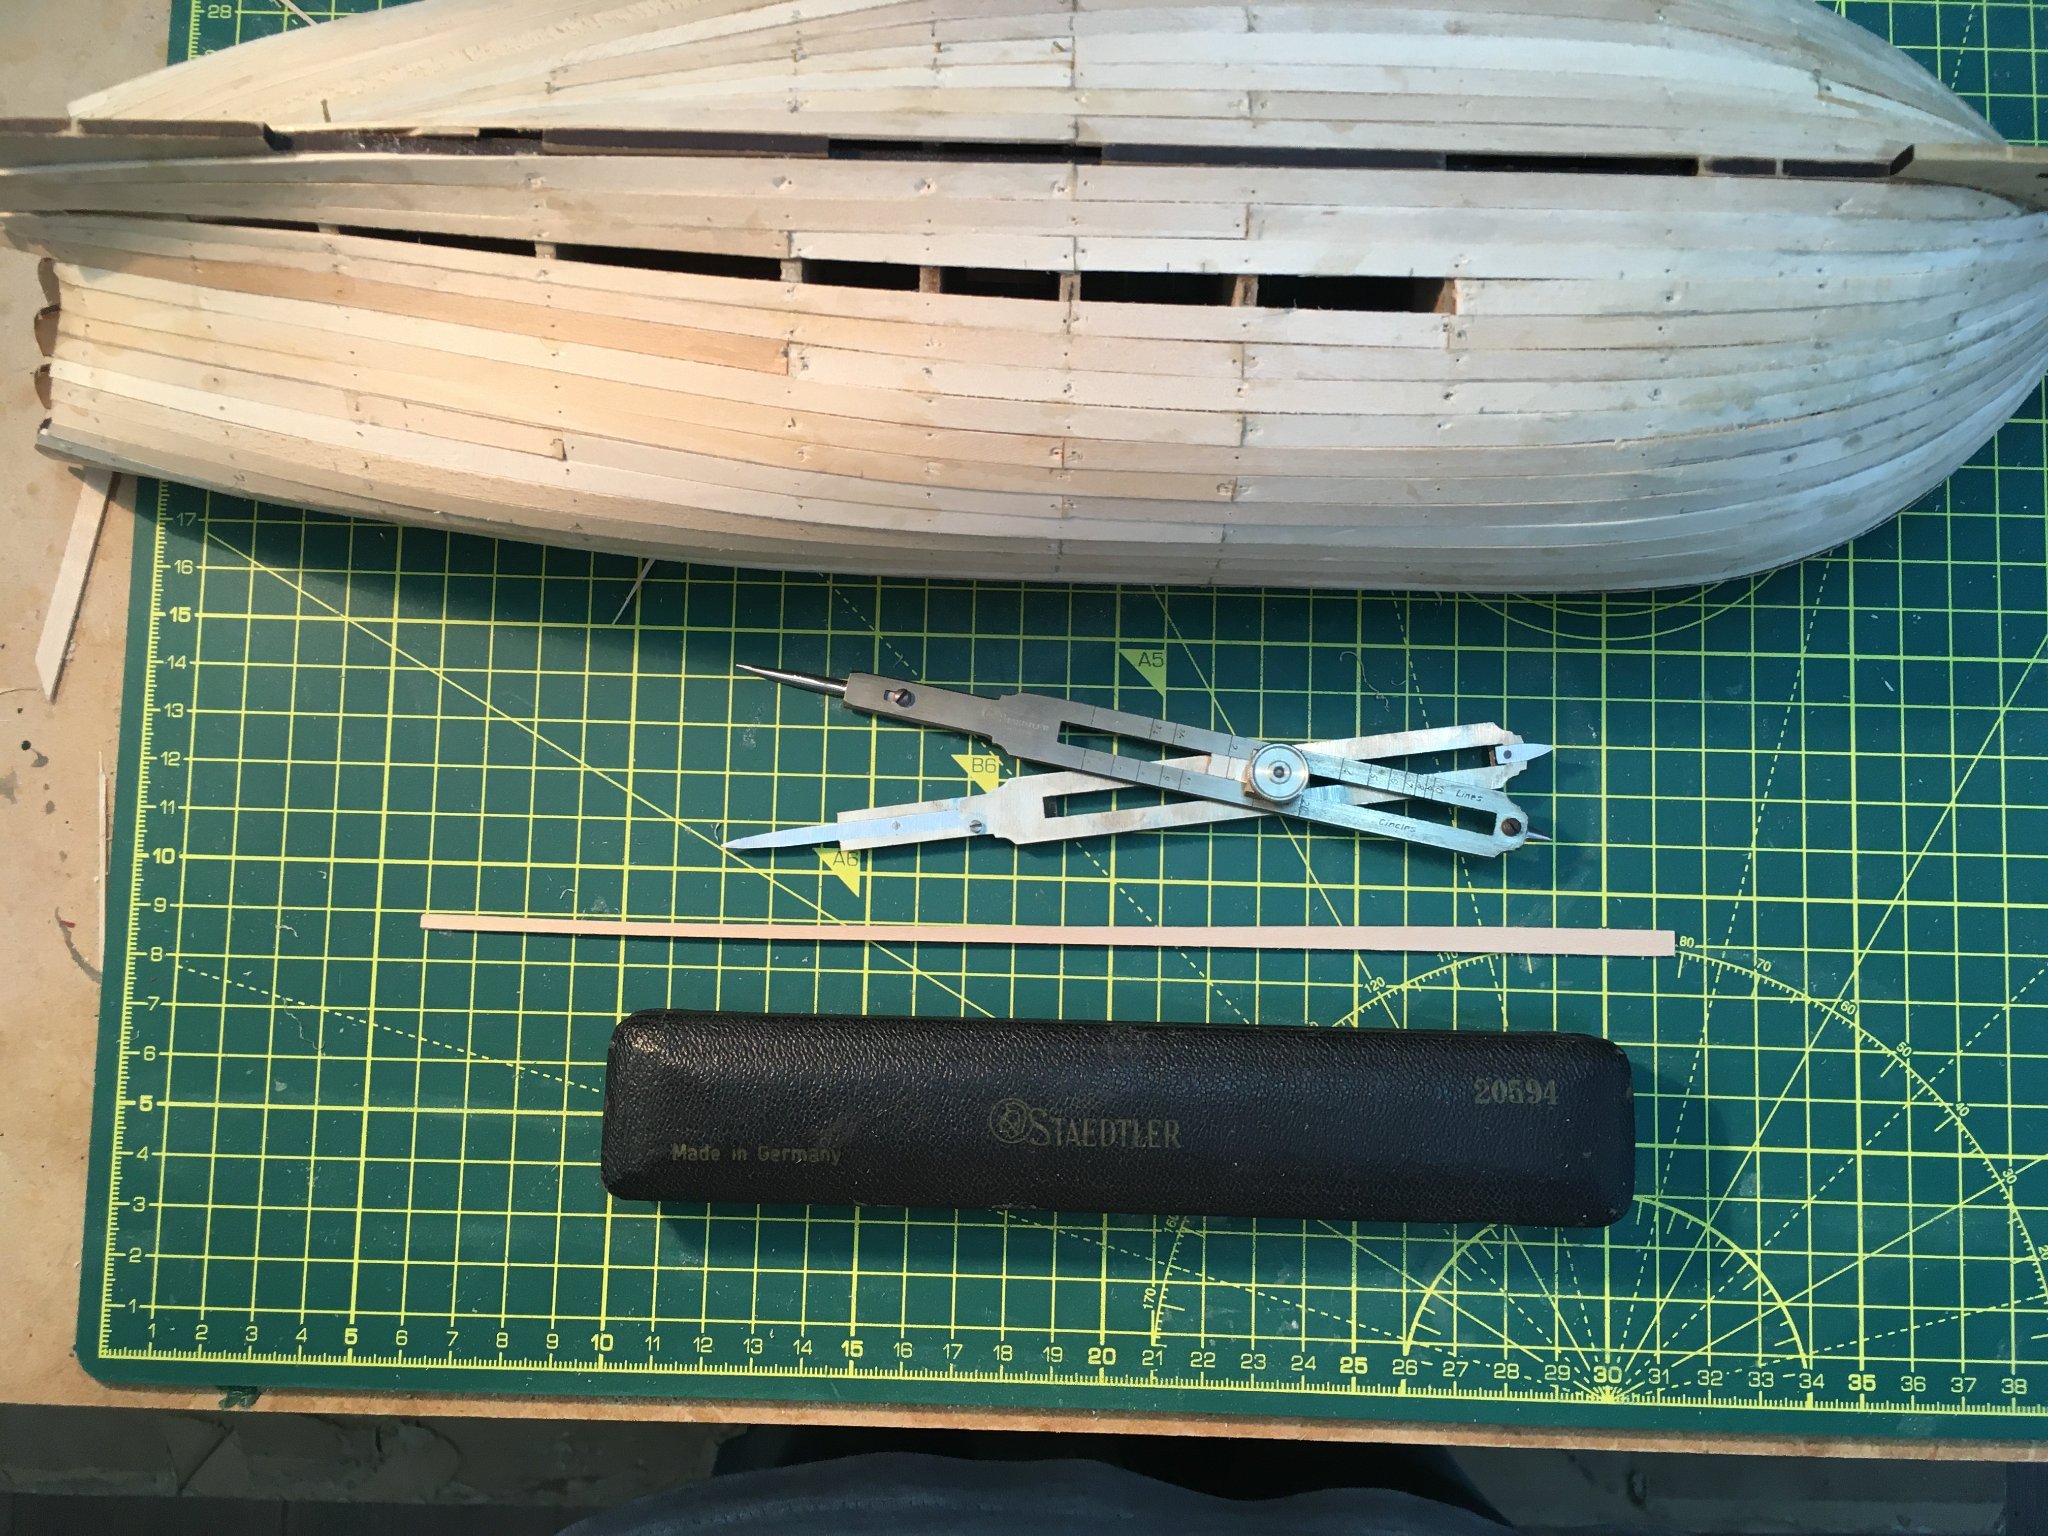
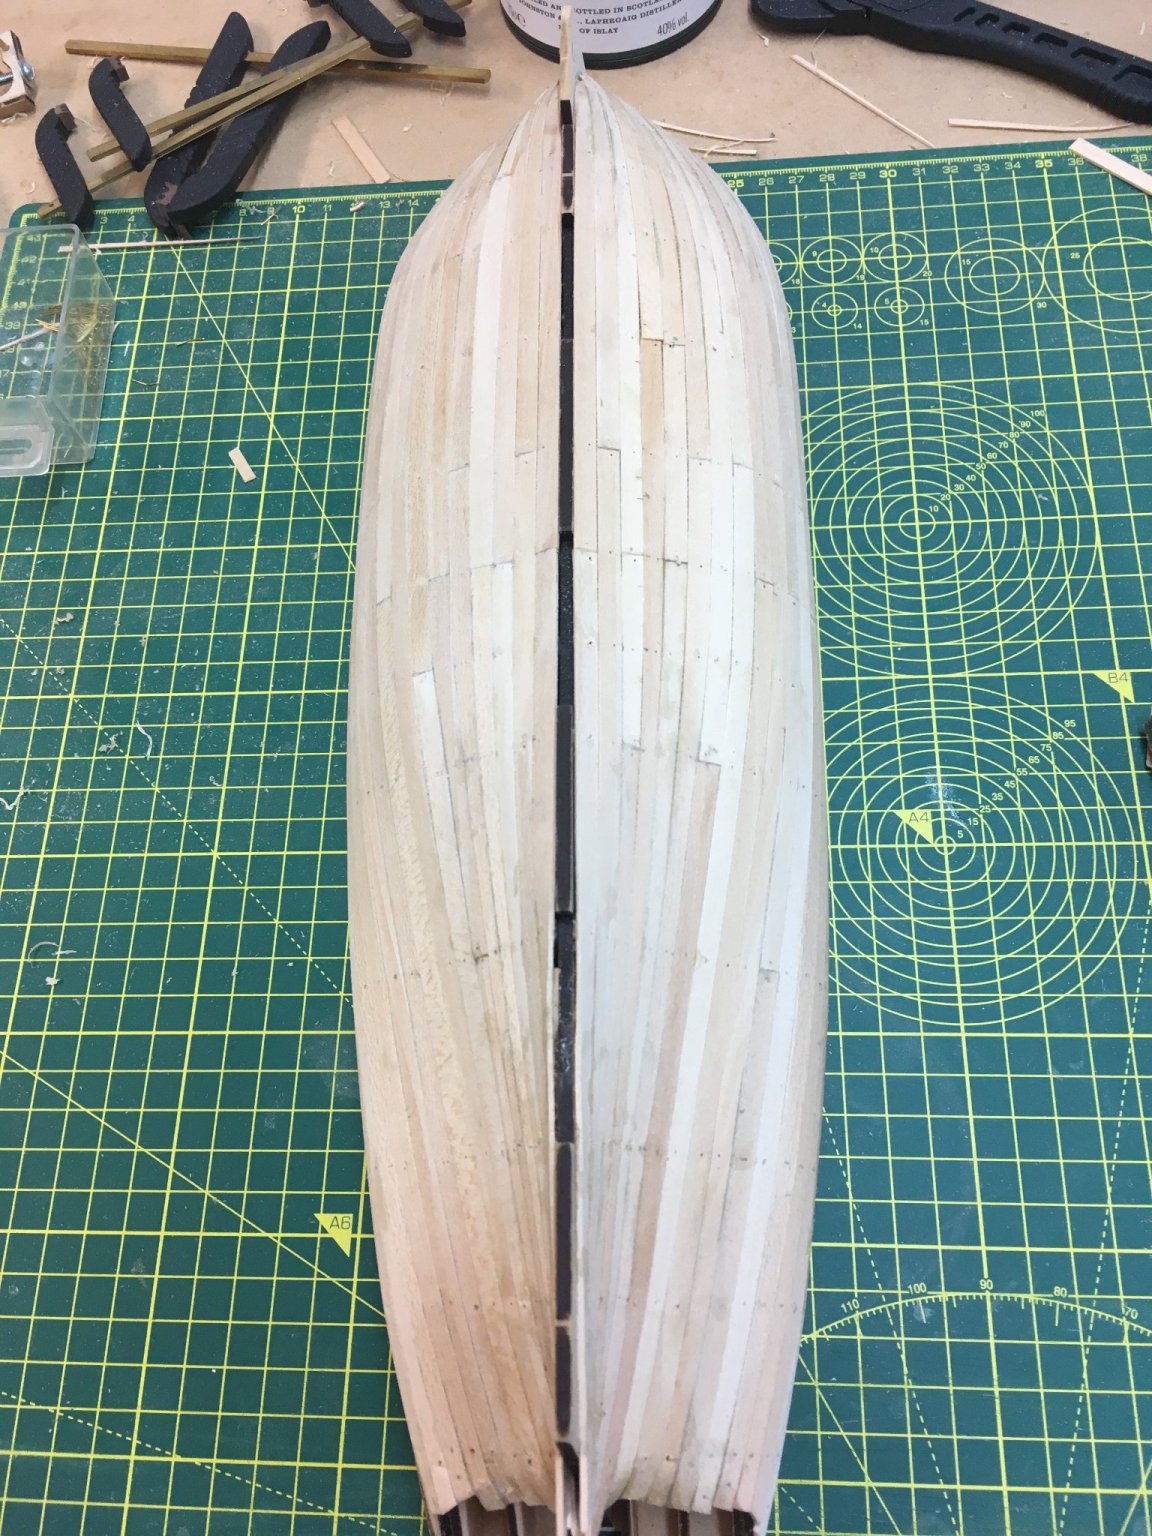
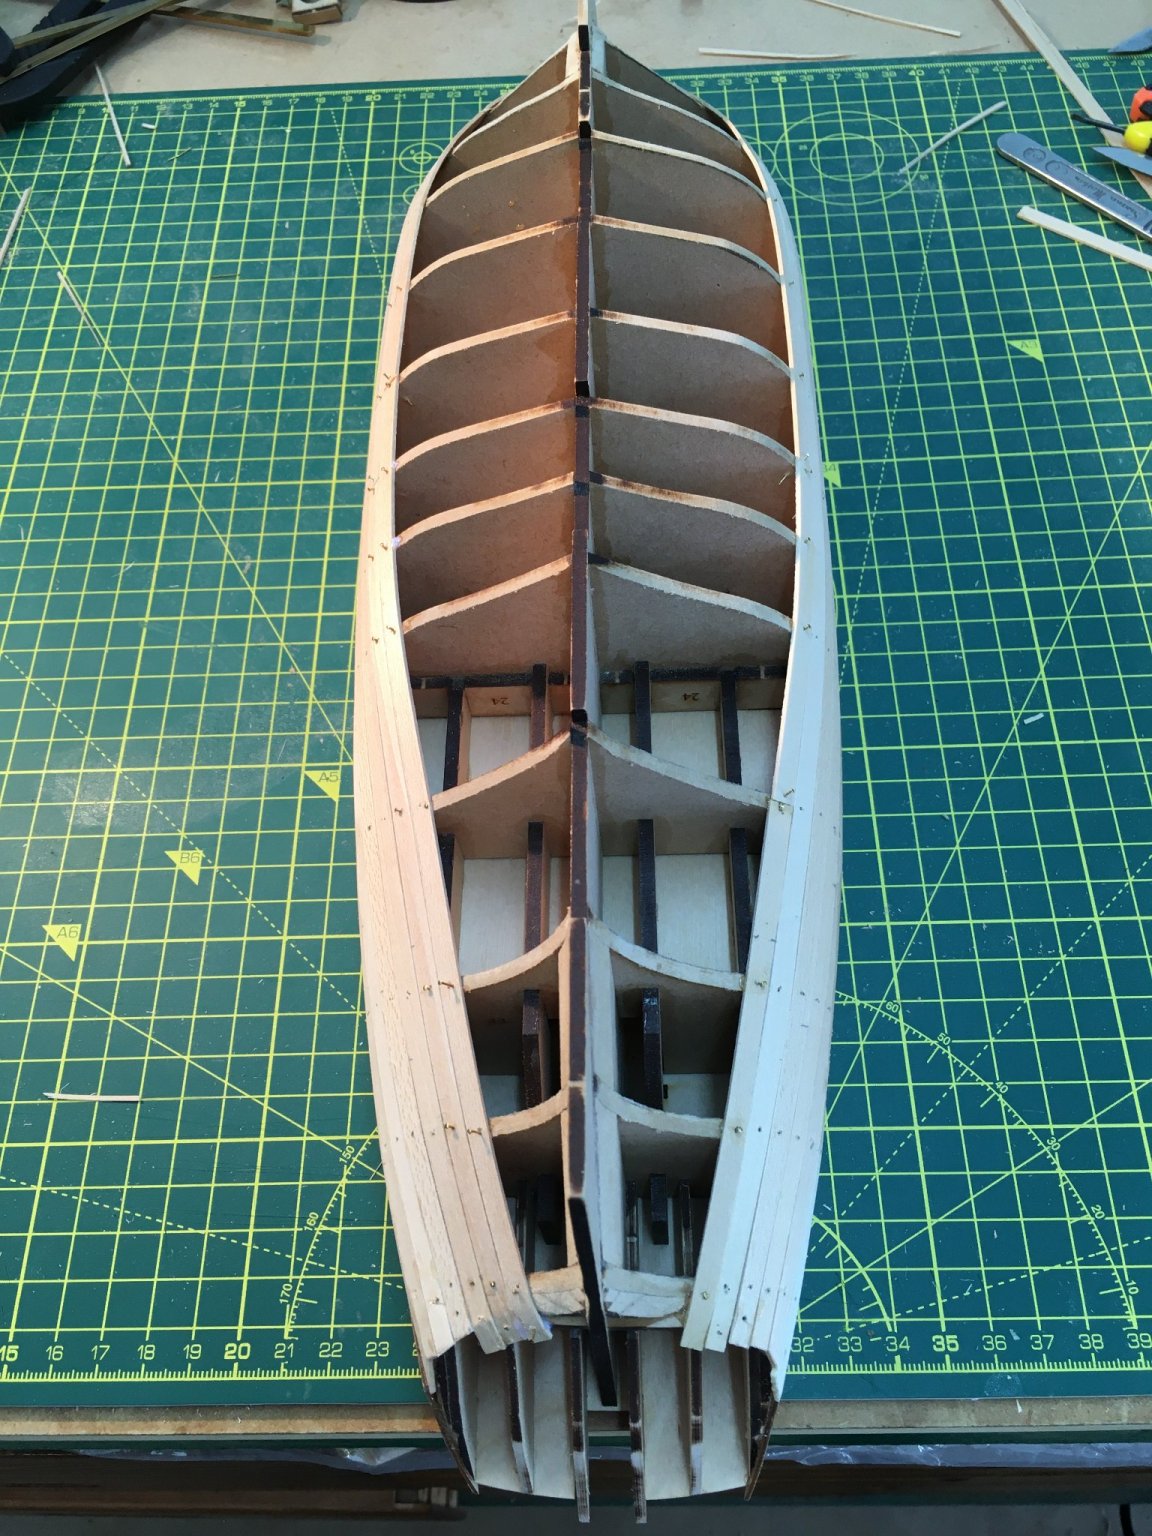
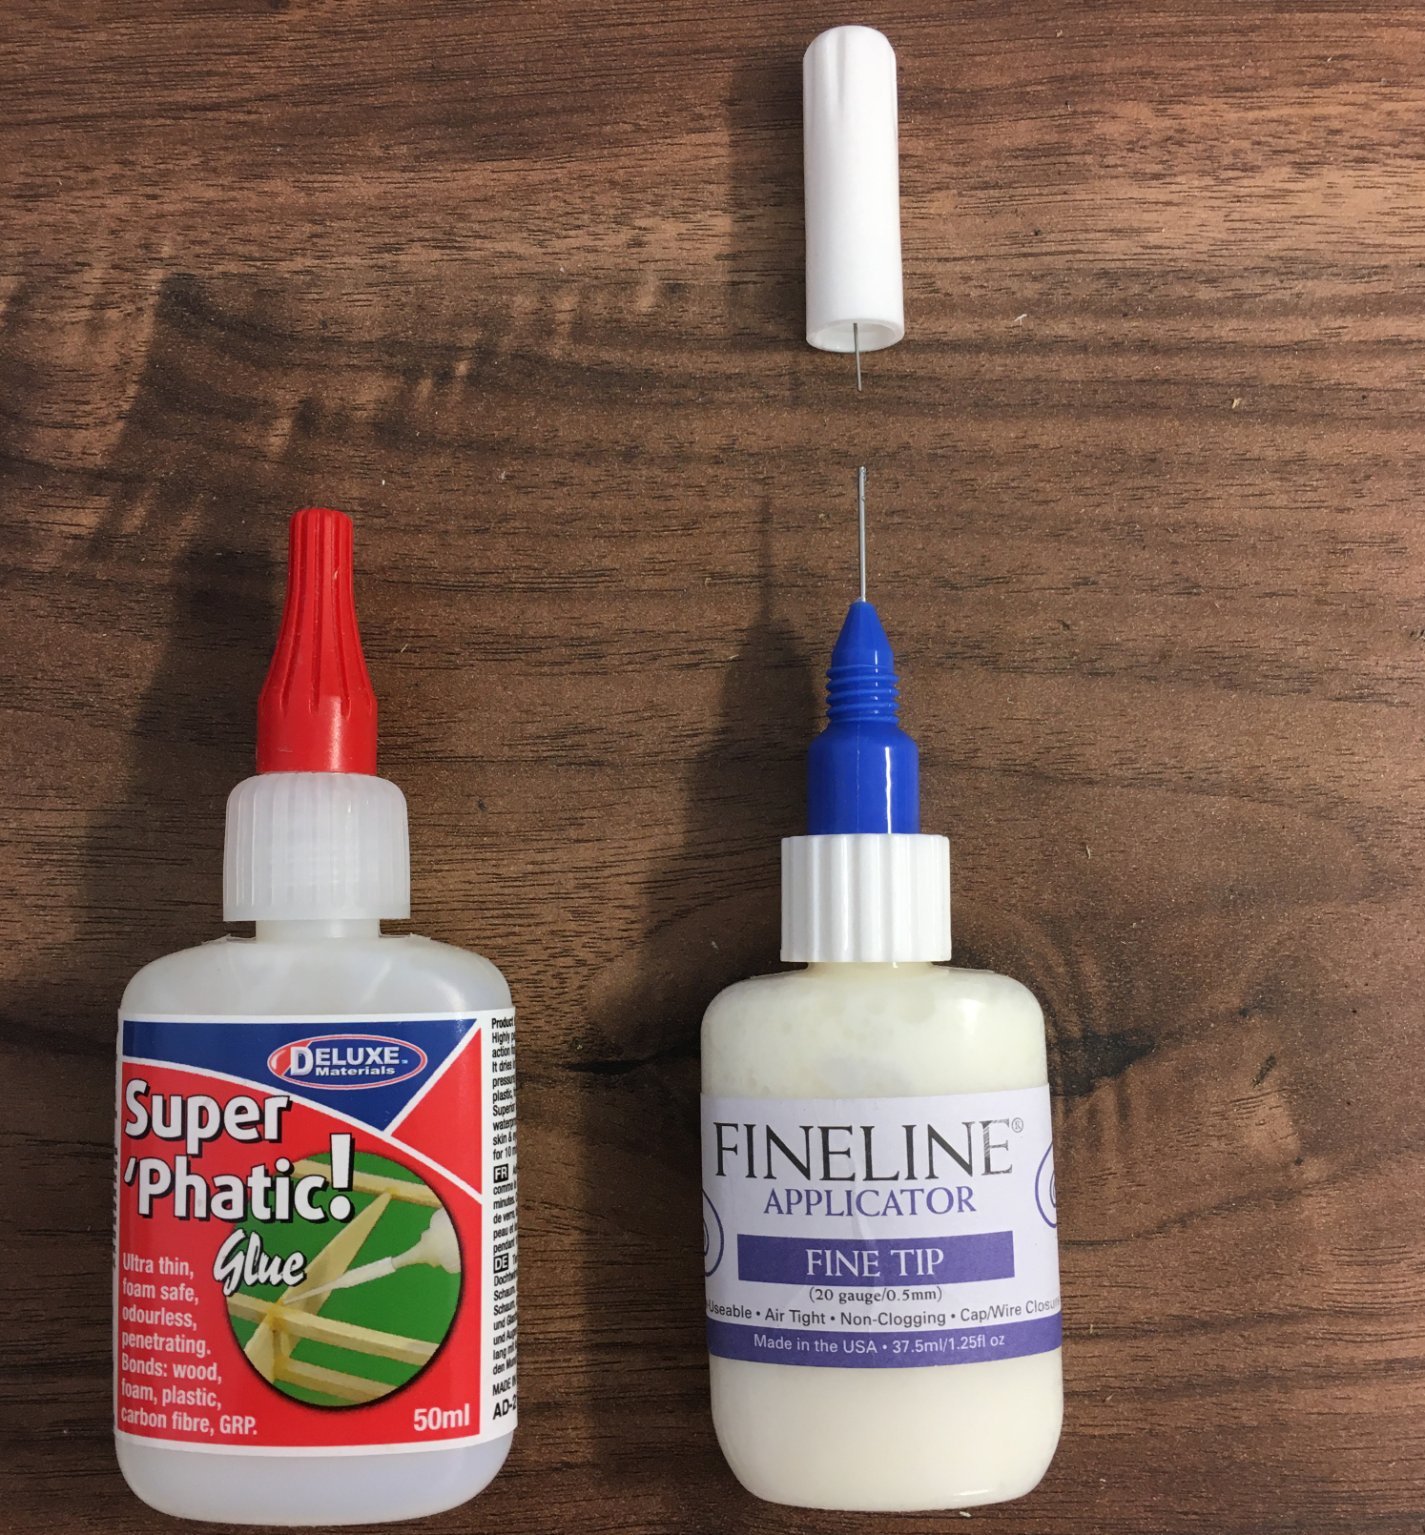
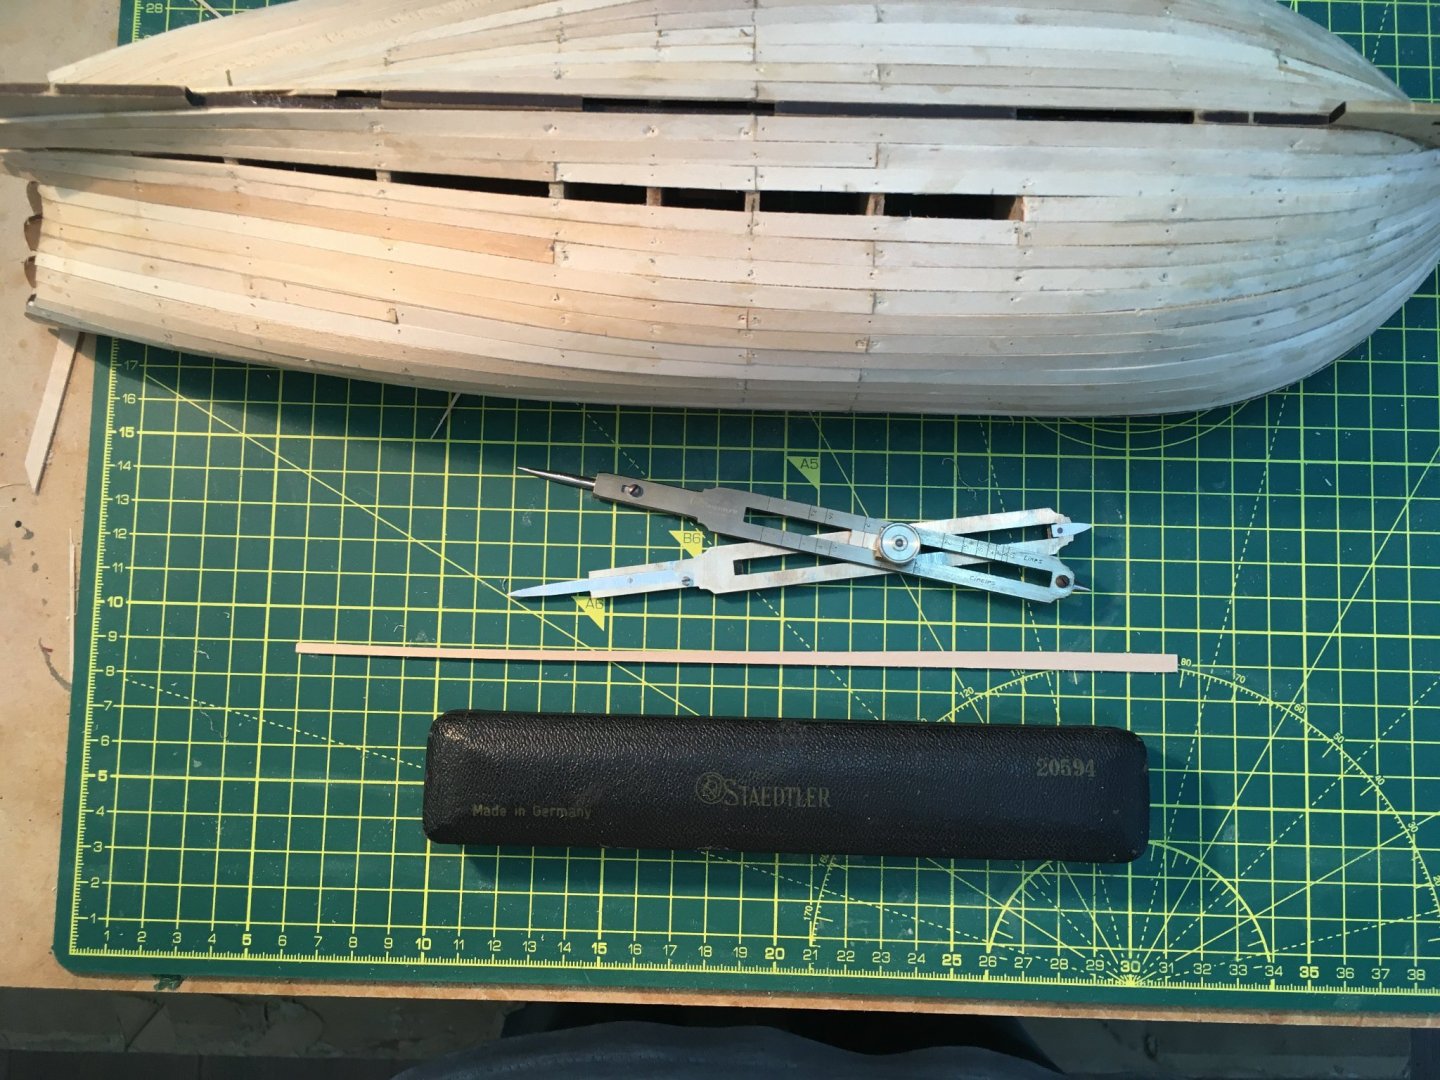
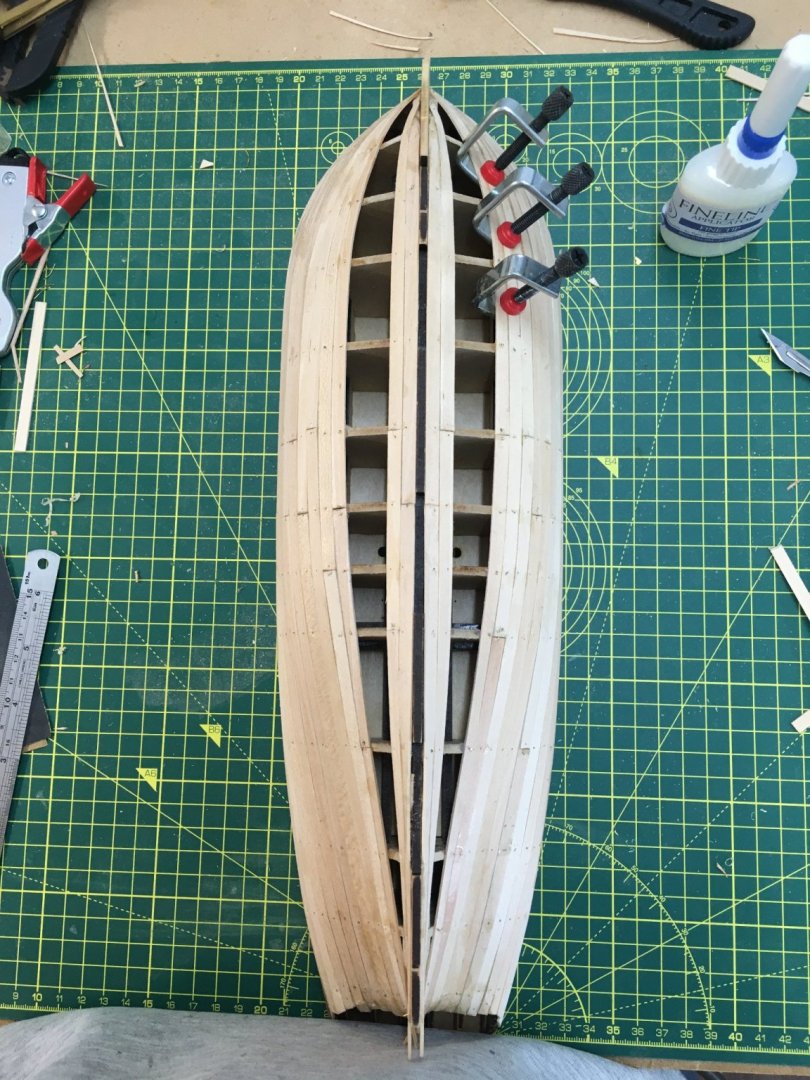
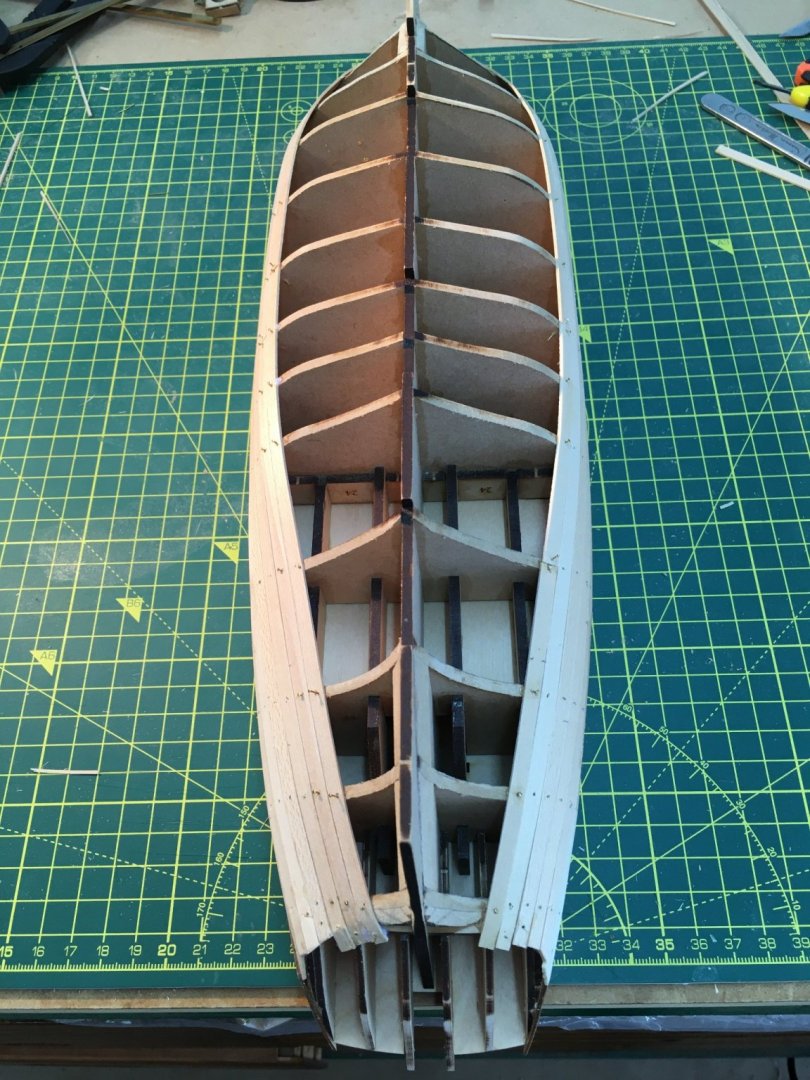
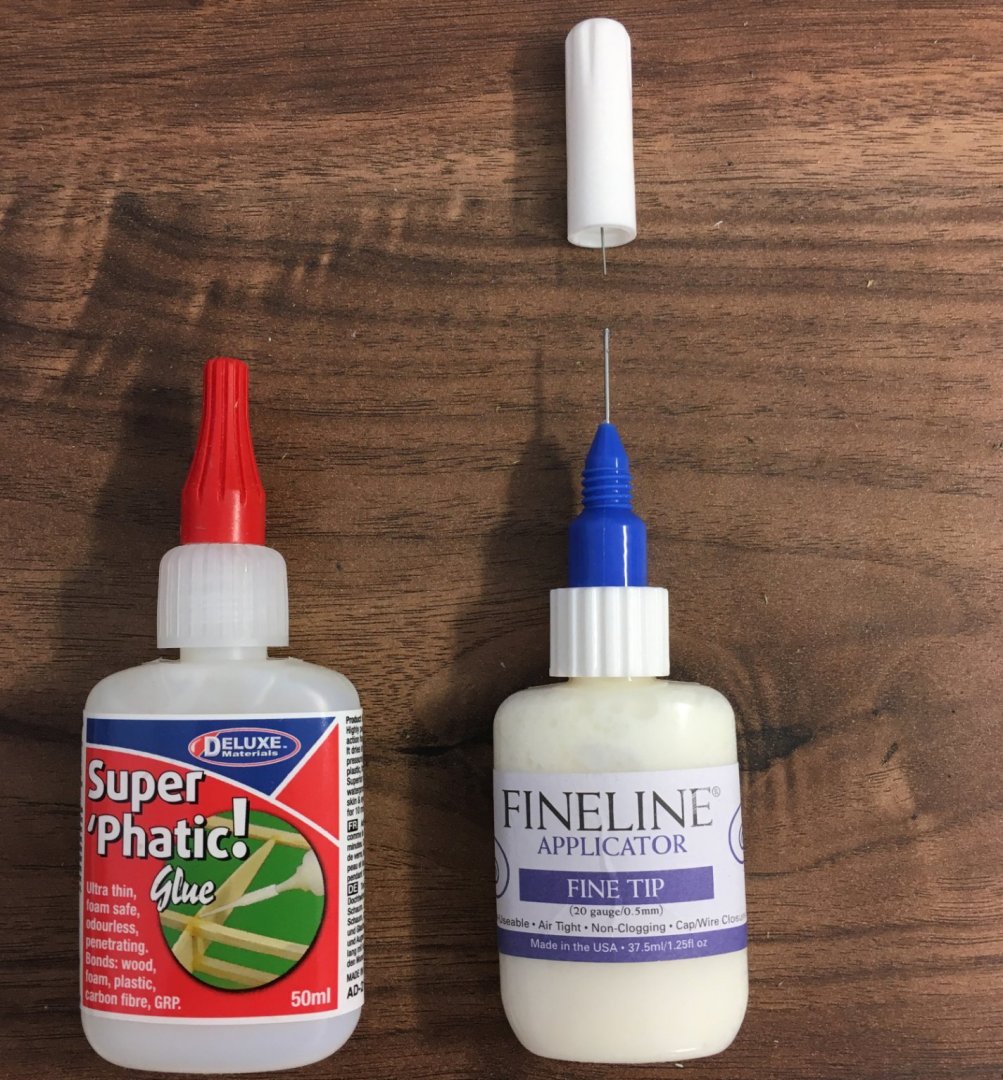
First Planking Finished I've just finished the first layer of planking, which went relatively easily. The good quality limewood certainly helped, and @chris watton worked his magic again by designing the kit so that an exact number of planks was required at the midships frame - no awkward 2mm gaps to fill! I had five strips of lime left over, despite having spoilt a couple along the way. I tried to keep the first planking as neat as possible to minimise sanding and filling. Where necessary I used clamps as well as pins, with occasional edge bending: I've decided to try to follow best practice on the second planking so I've been going over the various tips and tutorials on the forum and books on the subject in my library. To get my eye in I started using a set of Staedtler proportional dividers I got on ebay a while ago. I'll cover these in more detail when I get to second planking, but in brief they simplify the transfer of measurements from the hull to planking strips, and (as far as I can make out) they do away with the need for aids such as tick strips and planking fans. I'd not used them in earnest before, but found them easy to operate and accurate. In the picture below I've used them as conventional dividers to mark out the shape of the final plank. I transferred measurements at every frame - and halfway between where the gaps were wider - joined the dots and trimmed to the resulting line. Experts advise using ships' curves or flexible curves to connect the dots, but I joined mine with straight lines. My dots were close enough together so that when I planed, spokeshaved and sanded my way towards the lines the result tended towards a smooth curve: Here's the final result, awaiting sanding: I was pleased that I didn't need to use a single stealer anywhere on the hull - each strake runs whole from the bows to the stern. Hope I can do the same on the next layer! On a final point, I said I would report back on the use of Super 'Phatic glue. Well, it's produced a rock solid result and I'm surprised how little I used, despite gluing the edges of many planks as well as the frames. This shot show how much is left in the applicator - and there's still about 1/2 inch left in the original glue bottle: I'll let the hull dry thoroughly before I start sanding, and I might start preparing the keel and the other components that need to be fitted before second planking. I'm looking forward to the next stage, as she starts to achieve her proper shape. Derek

- 345 replies
-
- 10
-
-
- Duchess Of Kingston
- Vanguard Models
- (and 1 more)
-
Very tempted to follow your lead (not for the first time!) and go down the Navy Board route when I get mine.
- 857 replies
-
- 6
-
-
- Sphinx
- Vanguard Models
- (and 1 more)
-
She’s looking fine - you’ve produced a really good surface for the second planking.
-
Looking good Glenn - I found the gun port patterns quite nerve wracking but you’ve come through relatively unscathed. (Bob - be reassured, they’re never as difficult to fit as you think they’re going to be. I added glue to the bulkhead tabs for extra security; they still twisted off OK).
-
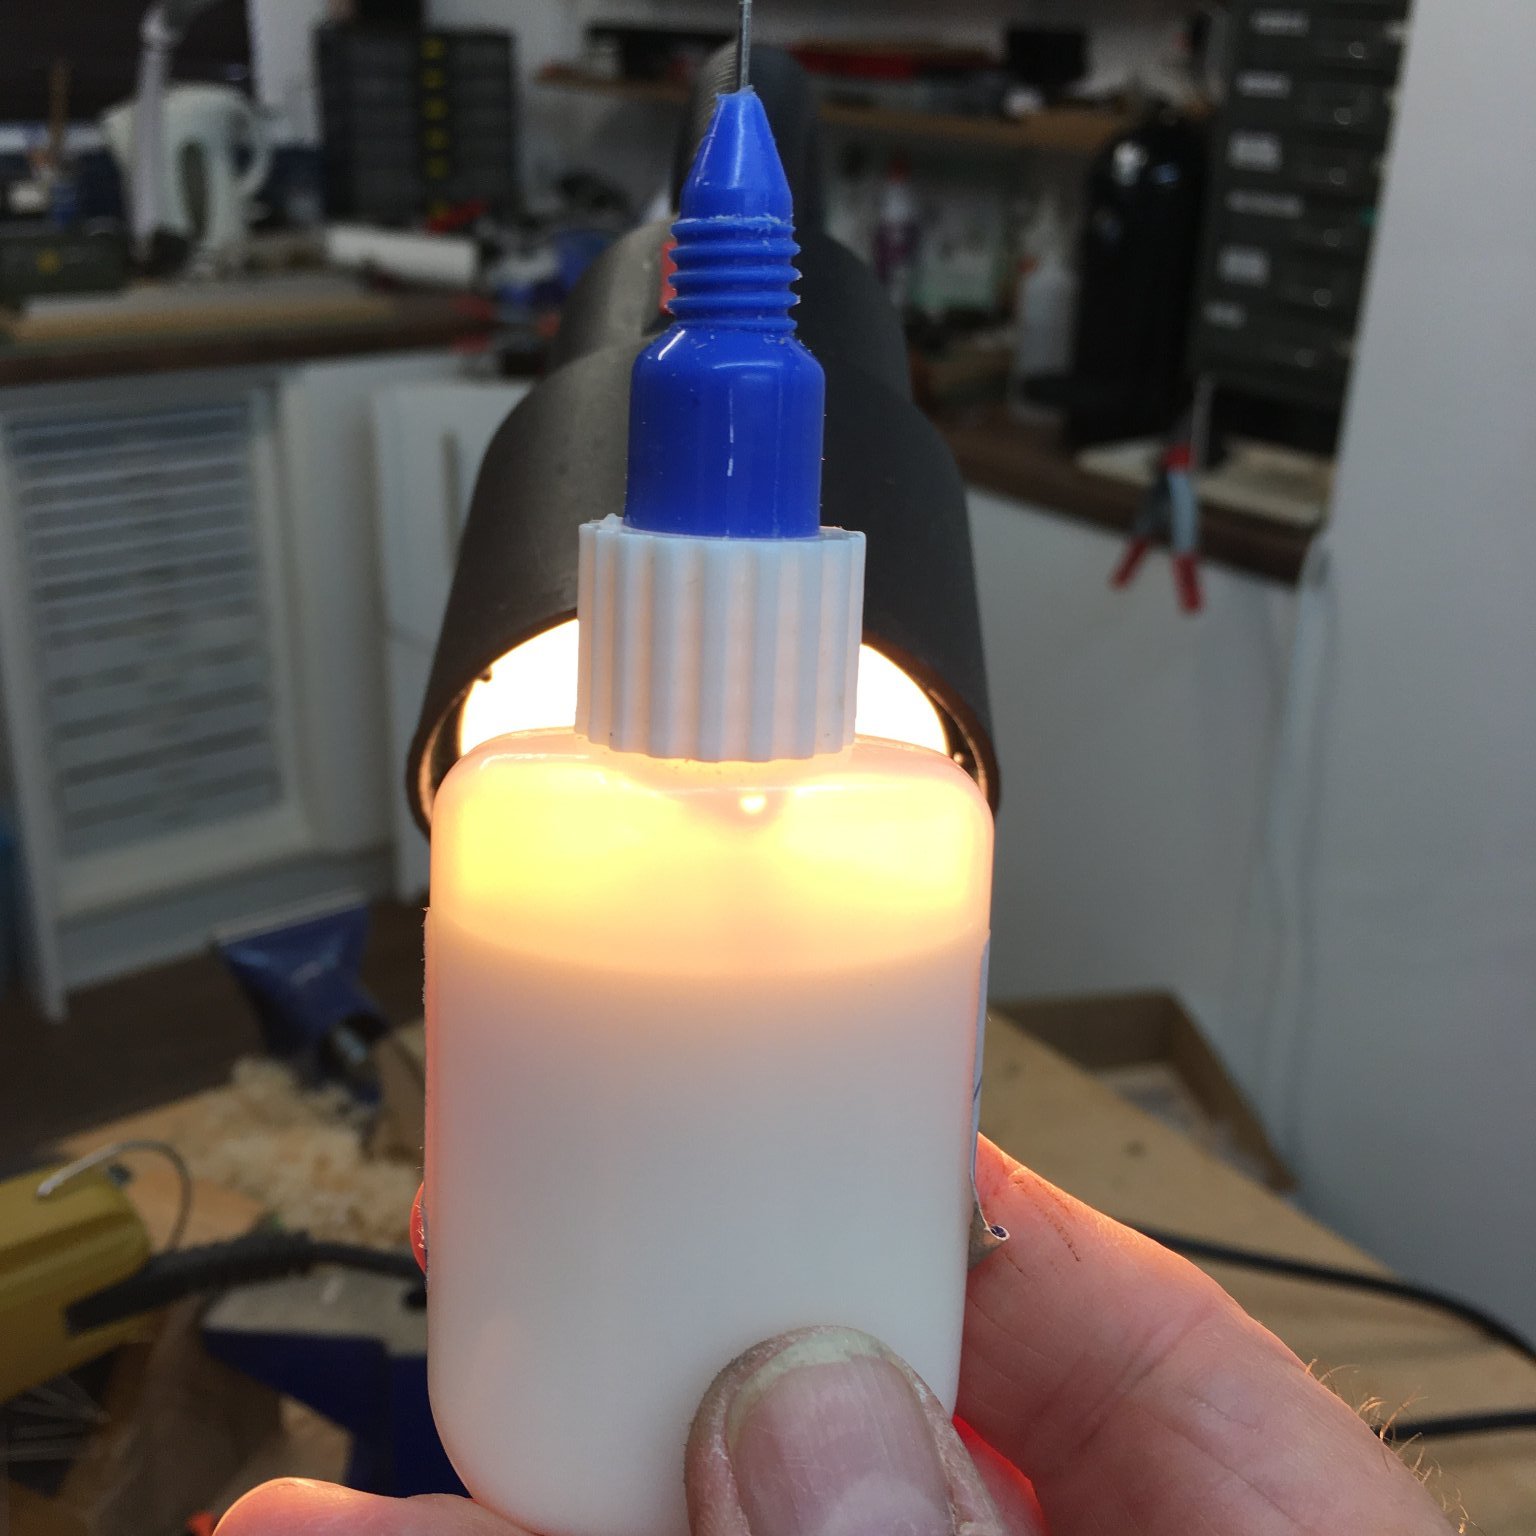
No problem - @glennard2523 put me on to it. On the applicator, I should have pointed out that it clogs very easily if you leave the cap off as the nozzle is so fine. I find I have to replace the cap after every application - if I forget I have to disassemble the nozzle and poke it through with a thin wire. I should also mention that it works well with thicker glues such as PVA.
- 345 replies
-
- 3
-
-
- Duchess Of Kingston
- Vanguard Models
- (and 1 more)
-
Hi Bob. One of the reasons I started using the aliphatic glue was because I developed an adverse reaction to CA when I was copper plating Speedy, probably as a result of using it for hours at a time without proper ventilation. The Super 'Phatic isn't quite as fast as CA, but it does grab pretty quickly. For example I used it to stick a thin batten to the waterline on Speedy, gluing a few inches at a time (see here). I was able to hold each section against the hull with finger pressure for a minute or so and it held fine. Another example on Speedy was gluing the deck planks (here) where I got good adhesion and a stable result across the whole deck. On Duchess I'm using it for first planking and it's working very well without problems, although with the additional help of pins. I'll try it on the second planking without pins but if it doesn't work so well my fallback is odourless CA which doesn't cause the adverse reactions. I should add that I'm only using the aliphatic glue on the planking as an experiment. Ordinarily I'd be quite happy using regular PVA. It's a lot cheaper and works fine for routine jobs like first planking. Normally I'd reserve the Super 'Phatic for special jobs where quick grab is important and where pinning or clamping isn't easy (eg the battens) and where I'd prefer not to use CA. I can't say I've encountered the problems you have read about. Super 'Phatic forms a solid bond quickly and cleans up well if you get it on the surface of your timber. I've not tried sanding it though (I'm not sure why I would?). I'll be interested to hear how you get on.
- 345 replies
-
- 3
-
-
- Duchess Of Kingston
- Vanguard Models
- (and 1 more)
-
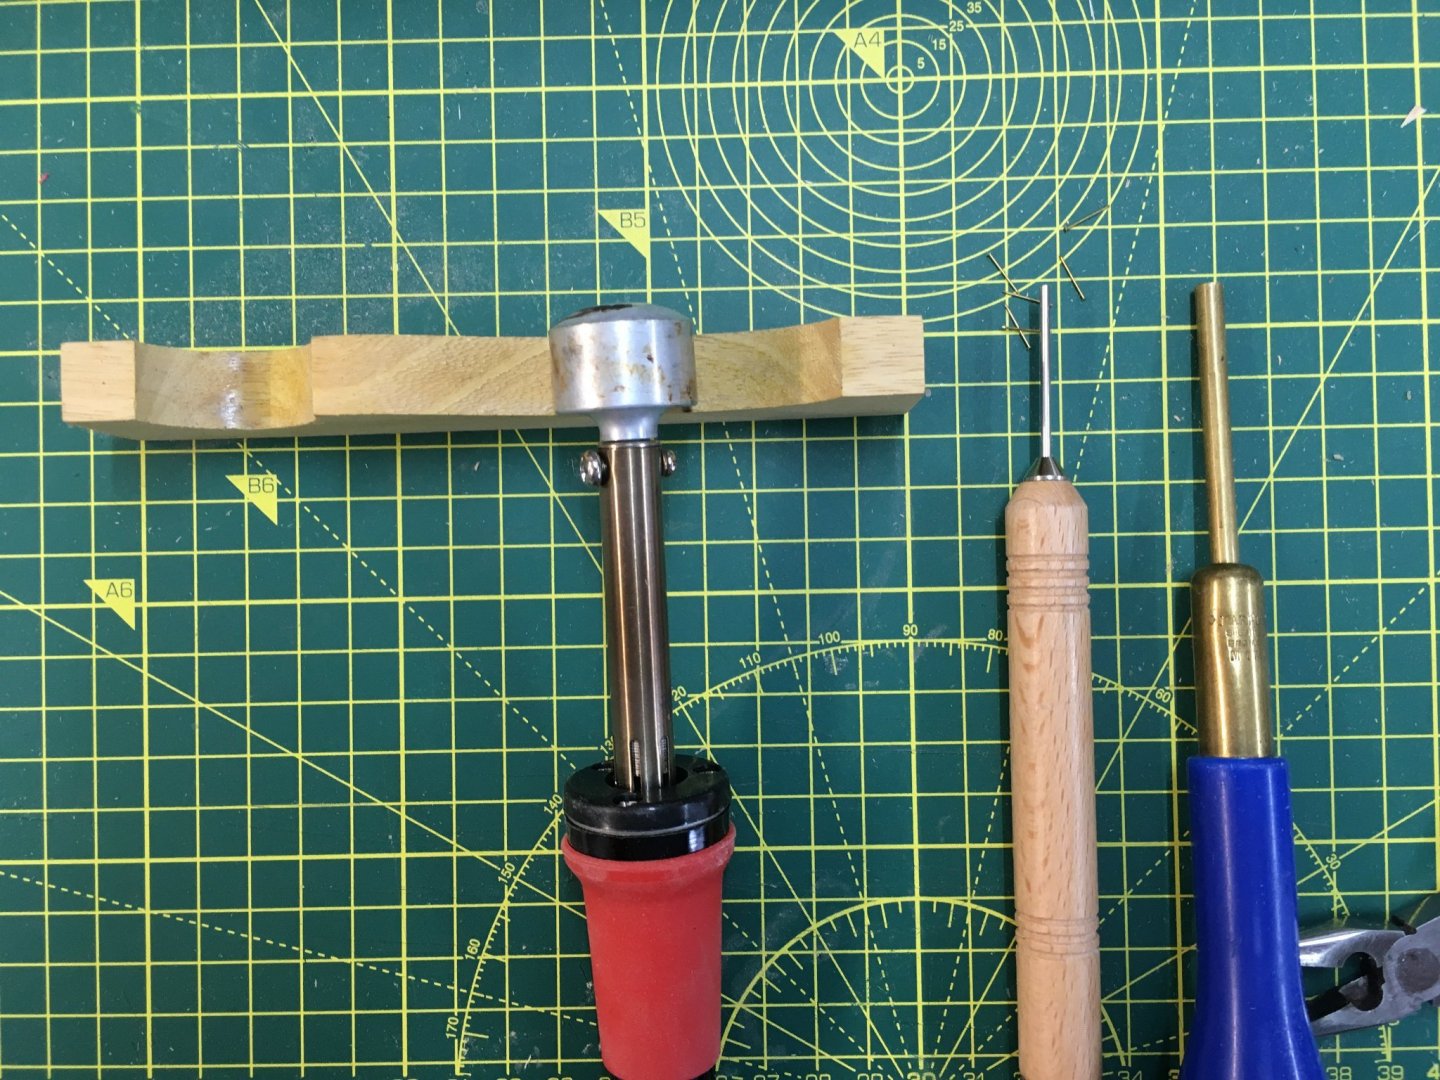
First Planking Many thanks for the kind comments and 'likes' - they're always much appreciated. The first layer of planking is proceeding slowly and steadily. Slowly because a surprise visit from my youngest daughter and her family has provided an unexpected but welcome opportunity to spend time with grandchildren rather than the Duchess; steadily because that's the only way I know how to plank. So, just a short note on techniques. I'm gluing and pinning the first limewood layer. As an aside, I'm pleased with the high quality of the timber supplied - much better than the softer basswood that lime is often bracketed with. For glue, I'm using Super 'Phatic, an aliphatic glue which looks like a thin PVA but grabs very quickly. Scarborough Glenn put me on to this glue on my Speedy build and I now swear by it. I started applying it with a modified hypodermic needle as mentioned earlier, but I've now 'borrowed' a Fineline applicator from Mrs F's craft kit. This delivers the glue very precisely through a 0.5mm nozzle and the cap has a needle built in which slides into the nozzle and prevents blocking. I note that it is made in the USA so no doubt many of our American members know about it: I usually use fine nose pliers to push the pins in as my old Marples pin pusher is too big to handle the Amati pins Chris supplies. However I noticed Vanguard are now offering a much slimmer pin pusher so I thought I'd try it out. It arrived yesterday and it's ideal. Vanguard are also selling a version with an adjustable stop so you can drive each pin to exactly the same depth. It looked chunkier than the one I bought but may well suit people using beefier pins. I experimented with achieving the same function by inserting a short length of brass rod into the pin pusher to limit the downward travel, and that worked tolerably well, the only niggle being the tendency for the rod to drop out. This picture shows the new tool with the old one on the right for comparison: Also shown is my trusty Amati plank bender. I'm not using edge bending as the sole purpose is to achieve a smooth surface for the second layer. The Amati is fine for this layer, even for the tight curves on some of the stern planks. So far I've done seven strakes on each side. After seeing some of the fine results achieved by previous Duchess builders I decided to make each strake from two separate planks. This was a novelty for me but I found that having to focus just on the bow or just on the stern rather than on both on the same plank made things quite a bit easier. I'll do the same for the second planking, but will aim for more realistic plank lengths and spacing. Derek
- 345 replies
-
- 7
-
-
- Duchess Of Kingston
- Vanguard Models
- (and 1 more)