No Idea
-
Posts
1,025 -
Joined
-
Last visited
Content Type
Profiles
Forums
Gallery
Events
Everything posted by No Idea
-
 Your right it is rubbing alcohol and this is what I use to thin my epoxy resin and also clean my tools with. I’ve been using it for years but anything more than a 10% dilution just doesn’t seem to work well for me. I buy a litre of IPA which is 99% pure if that’s the correct term for about £5
 -
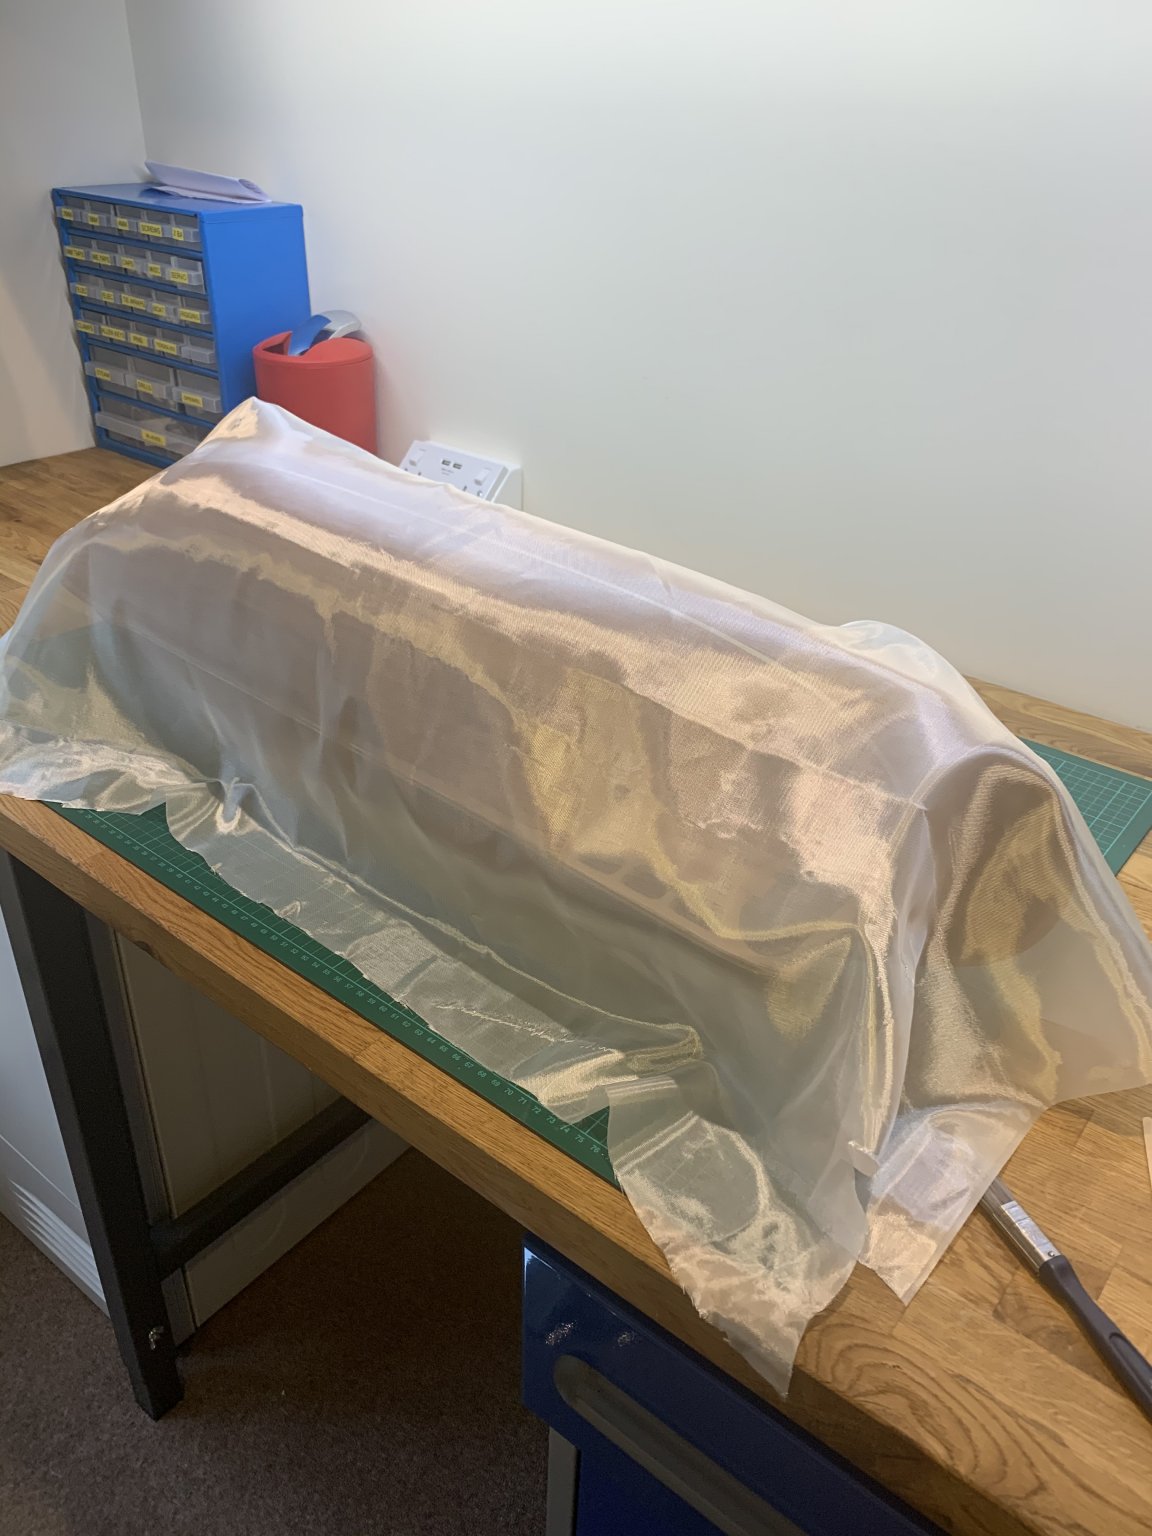
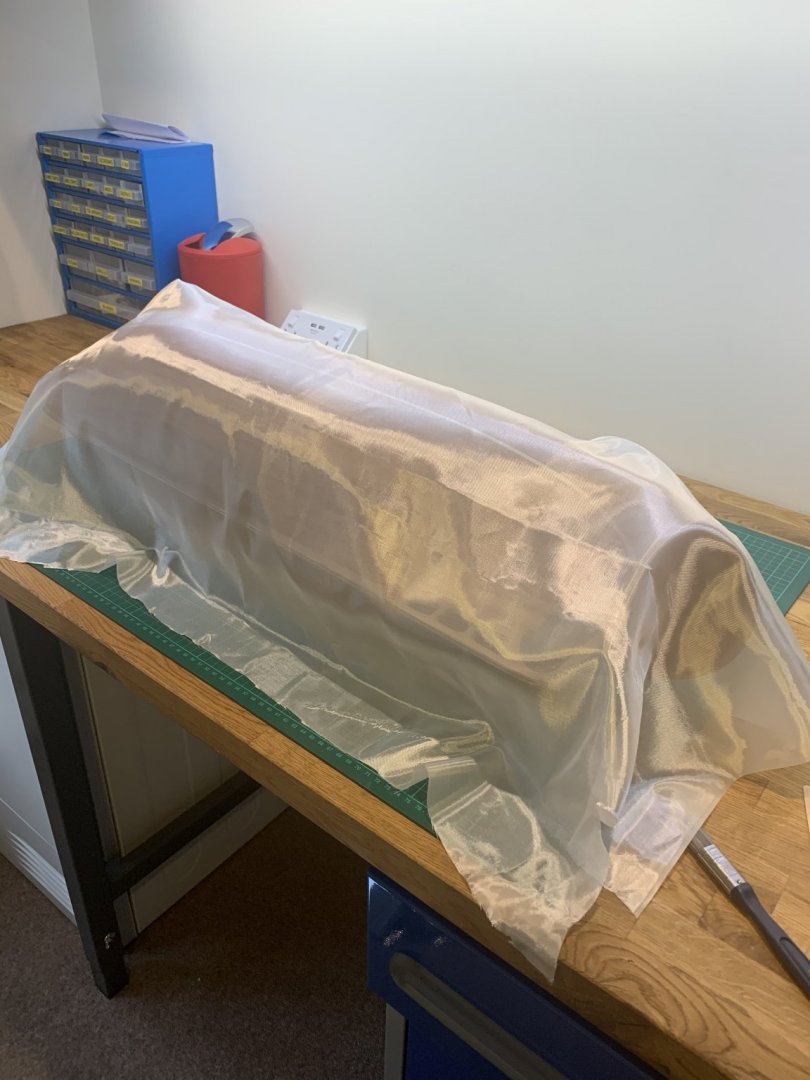
Just realised I should have included a picture of the cloth with the resin applied before it was trimmed otherwise it doesn’t make sense - sorry. The resin has just been applied and is wet.

-
It’s called IPA in the UK and is very cheap on eBay.
-
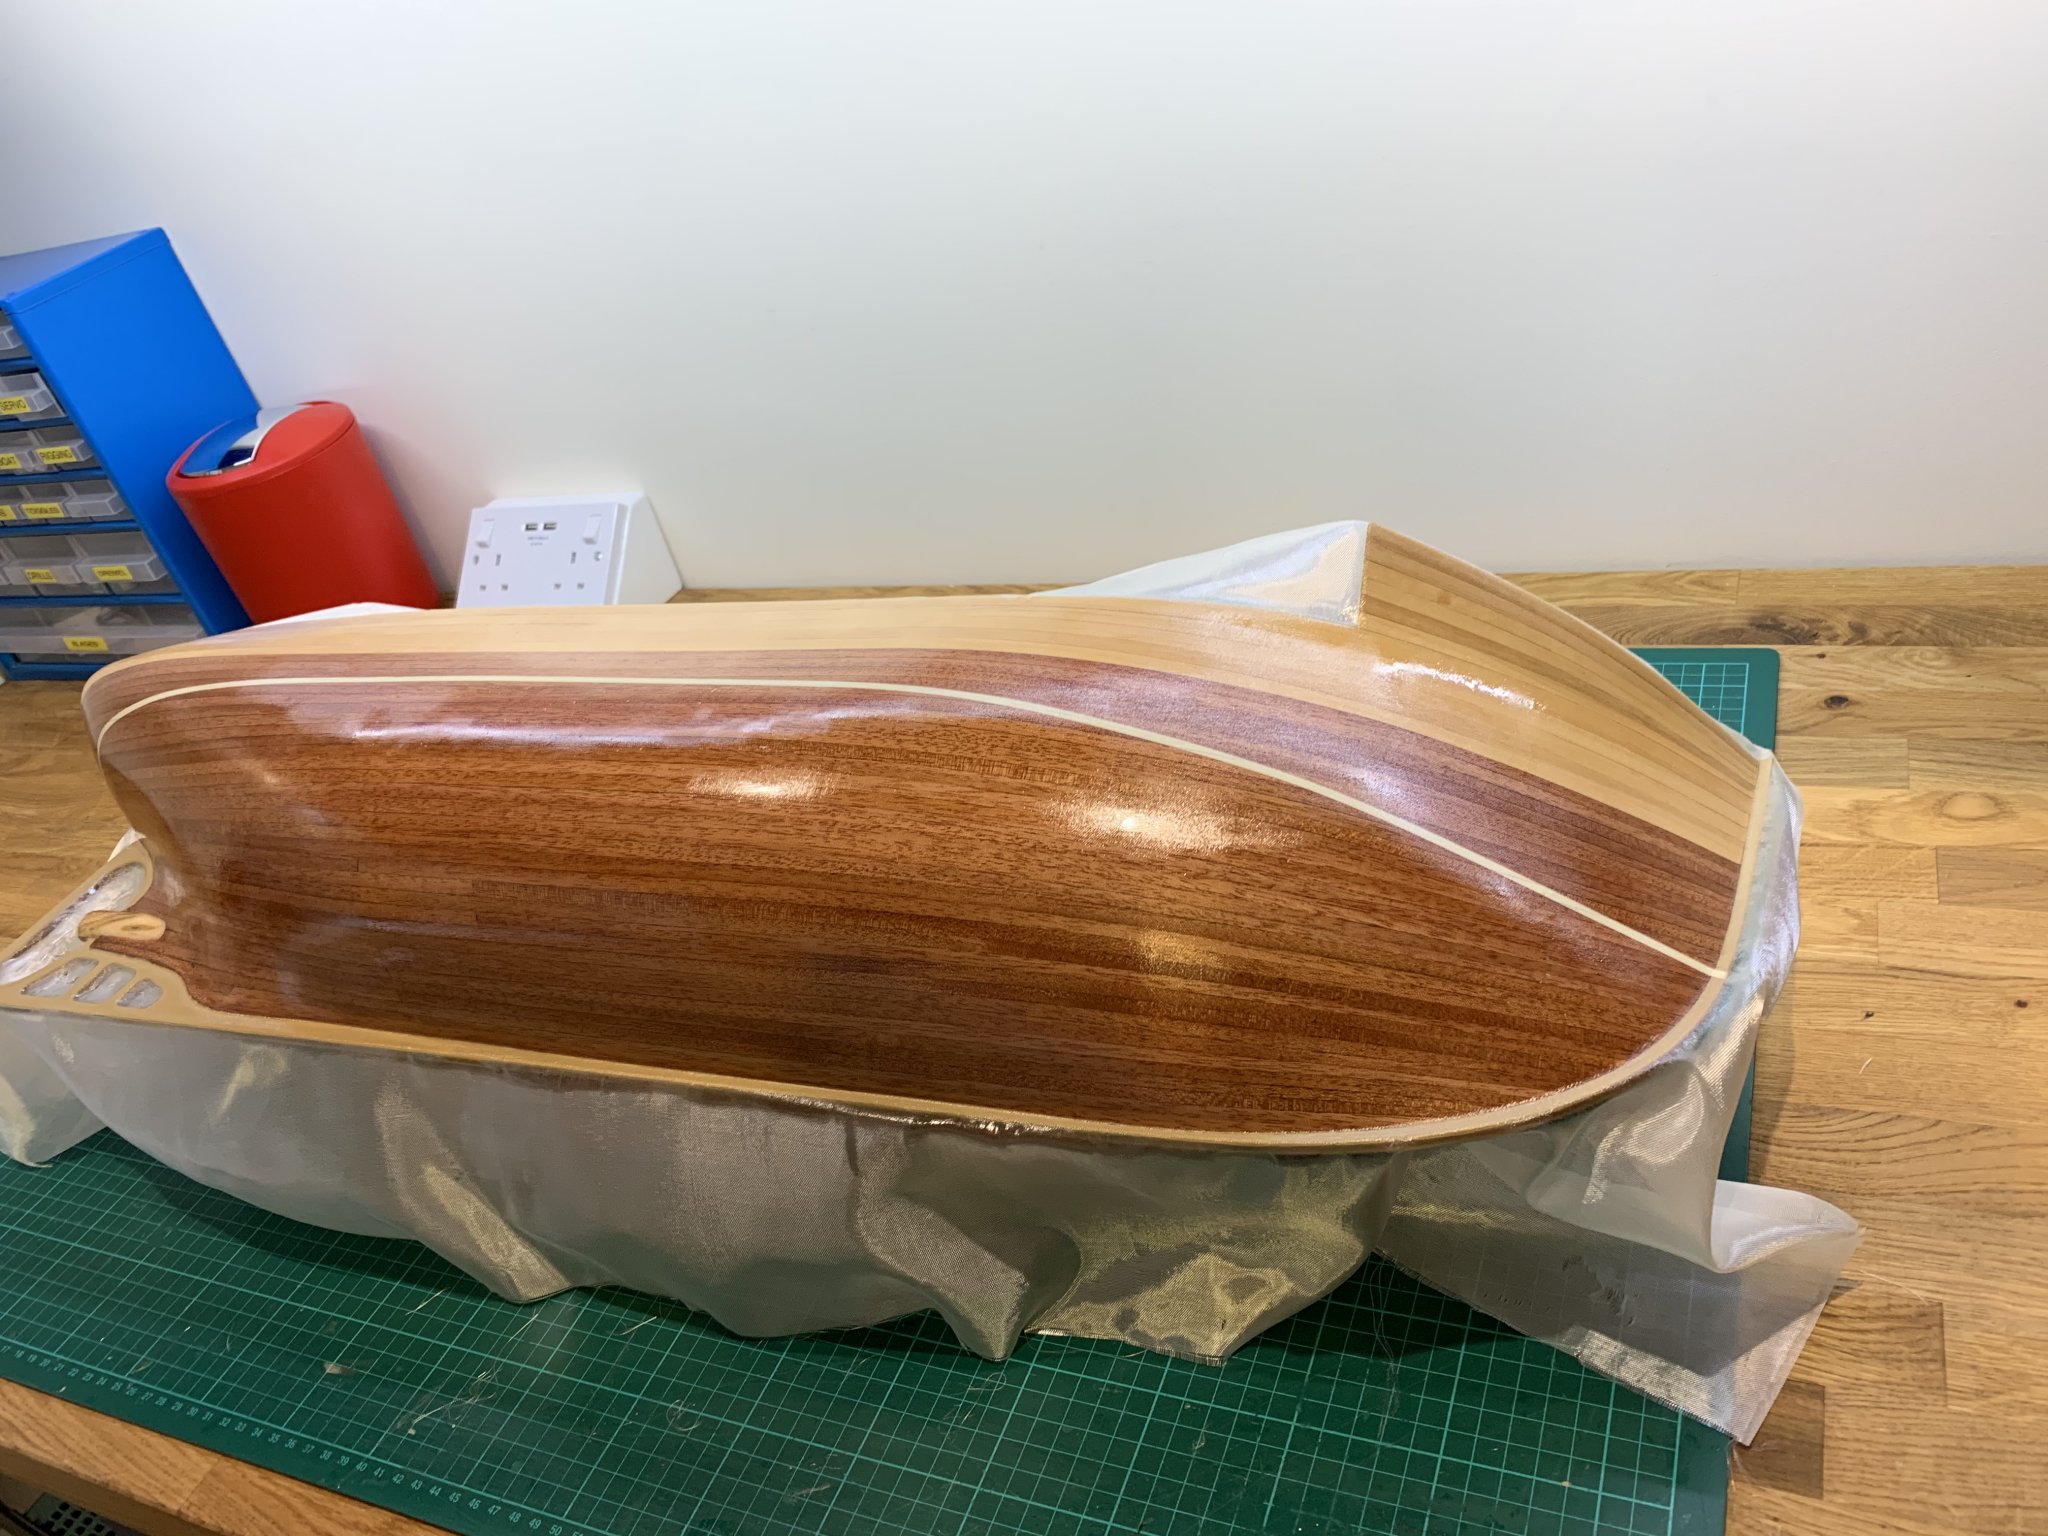
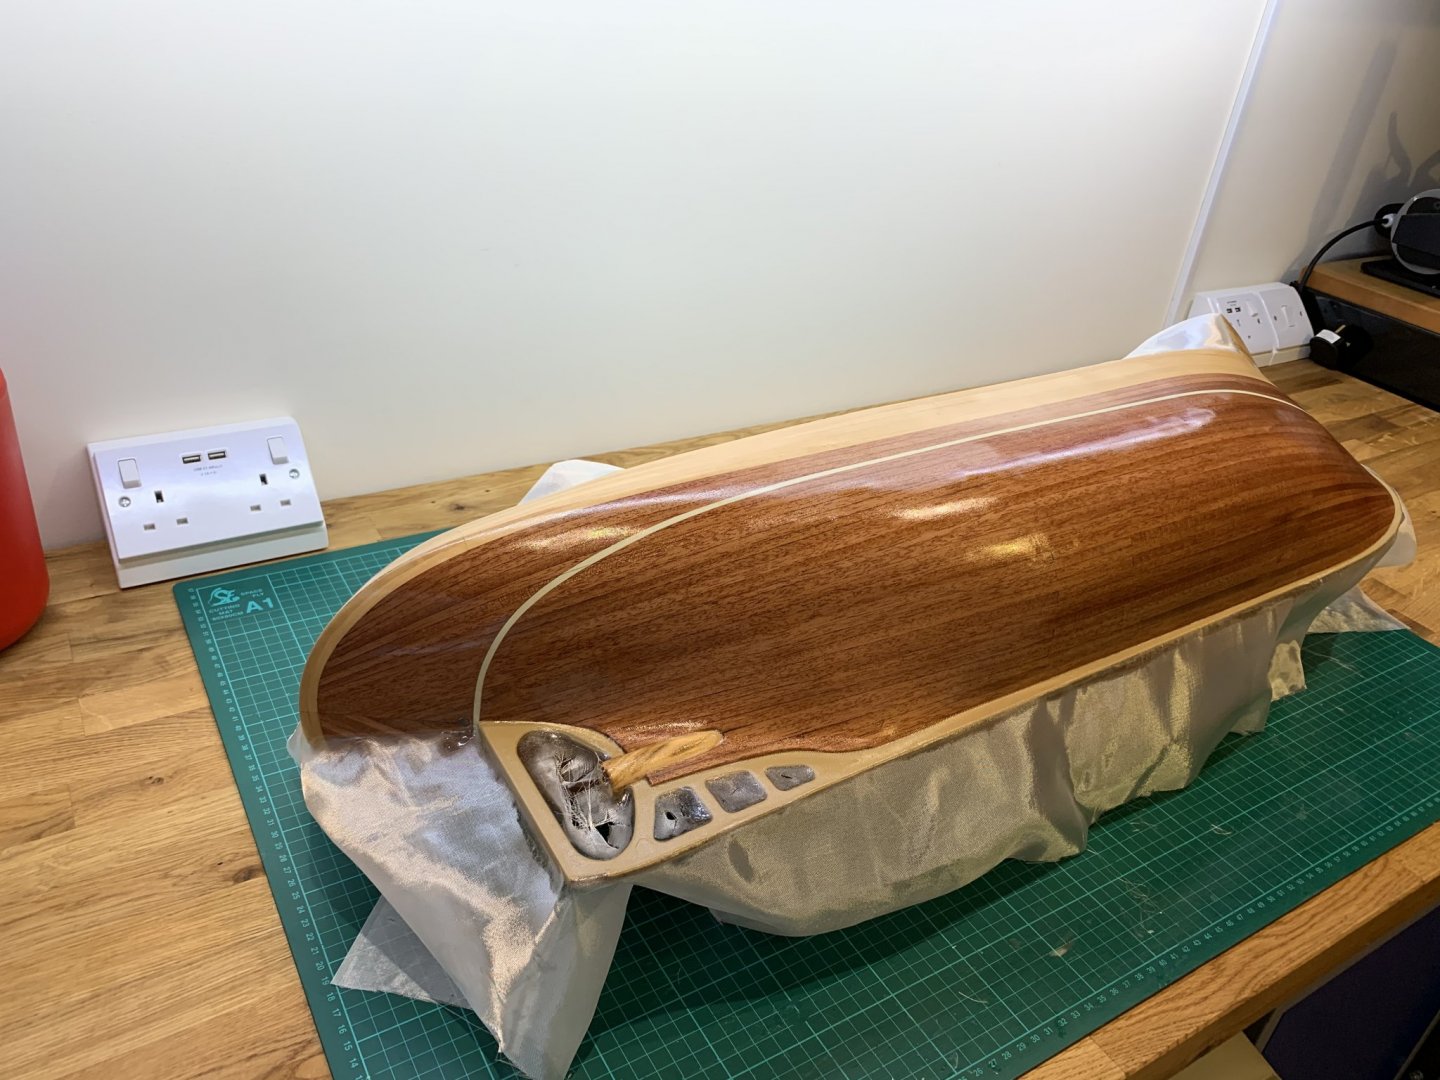
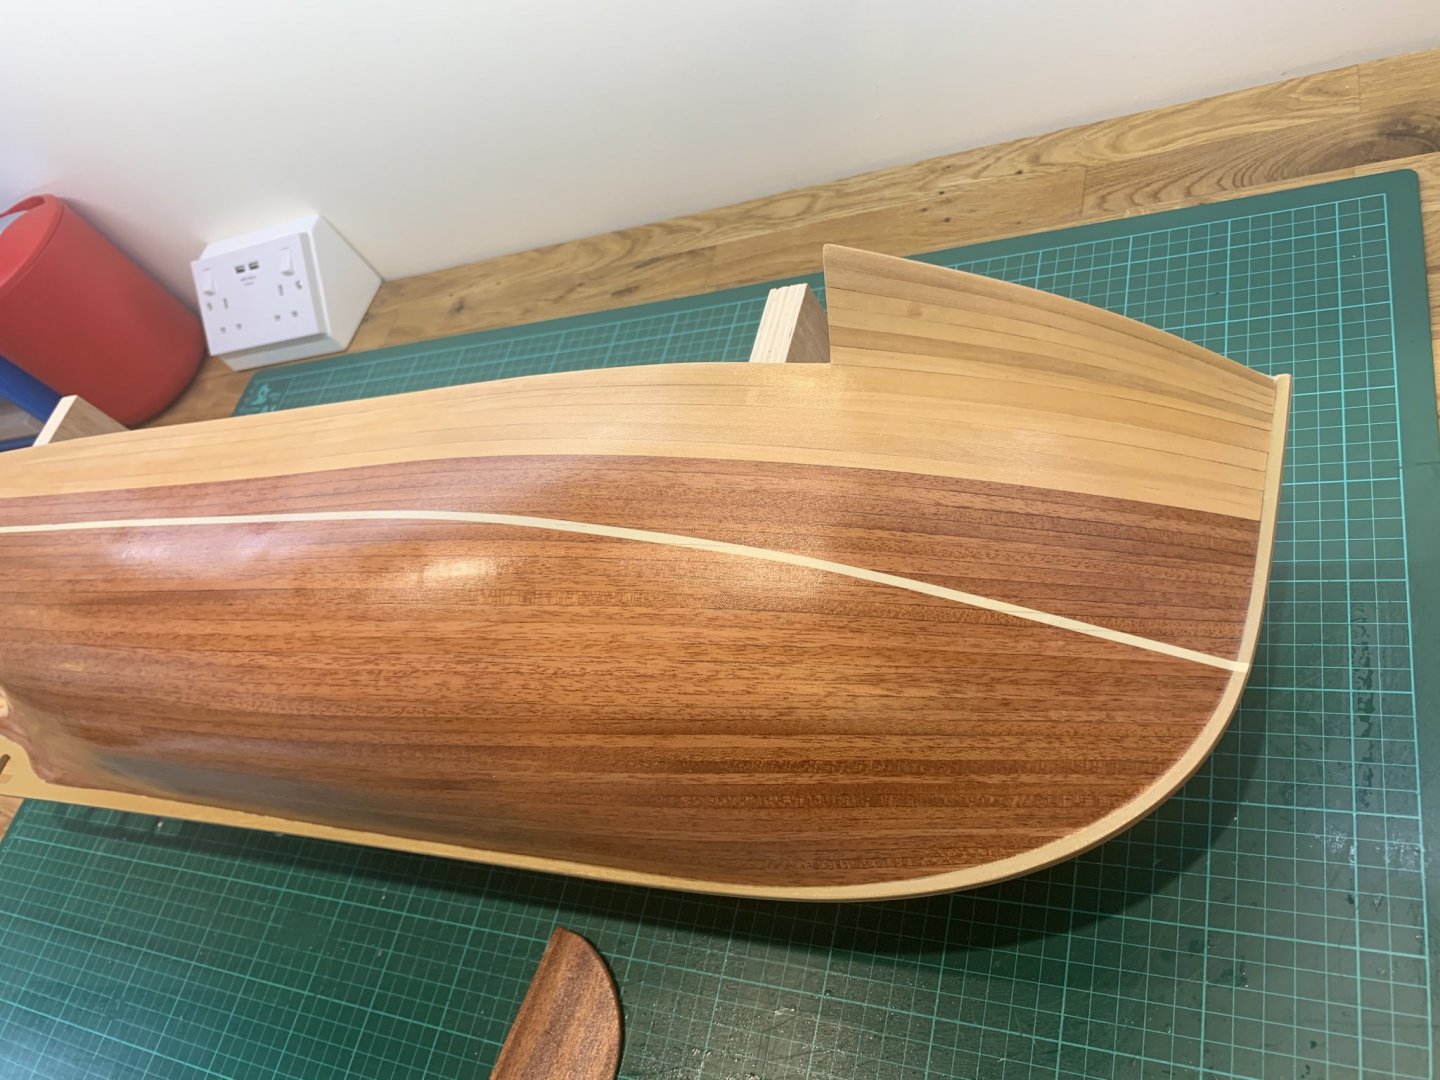
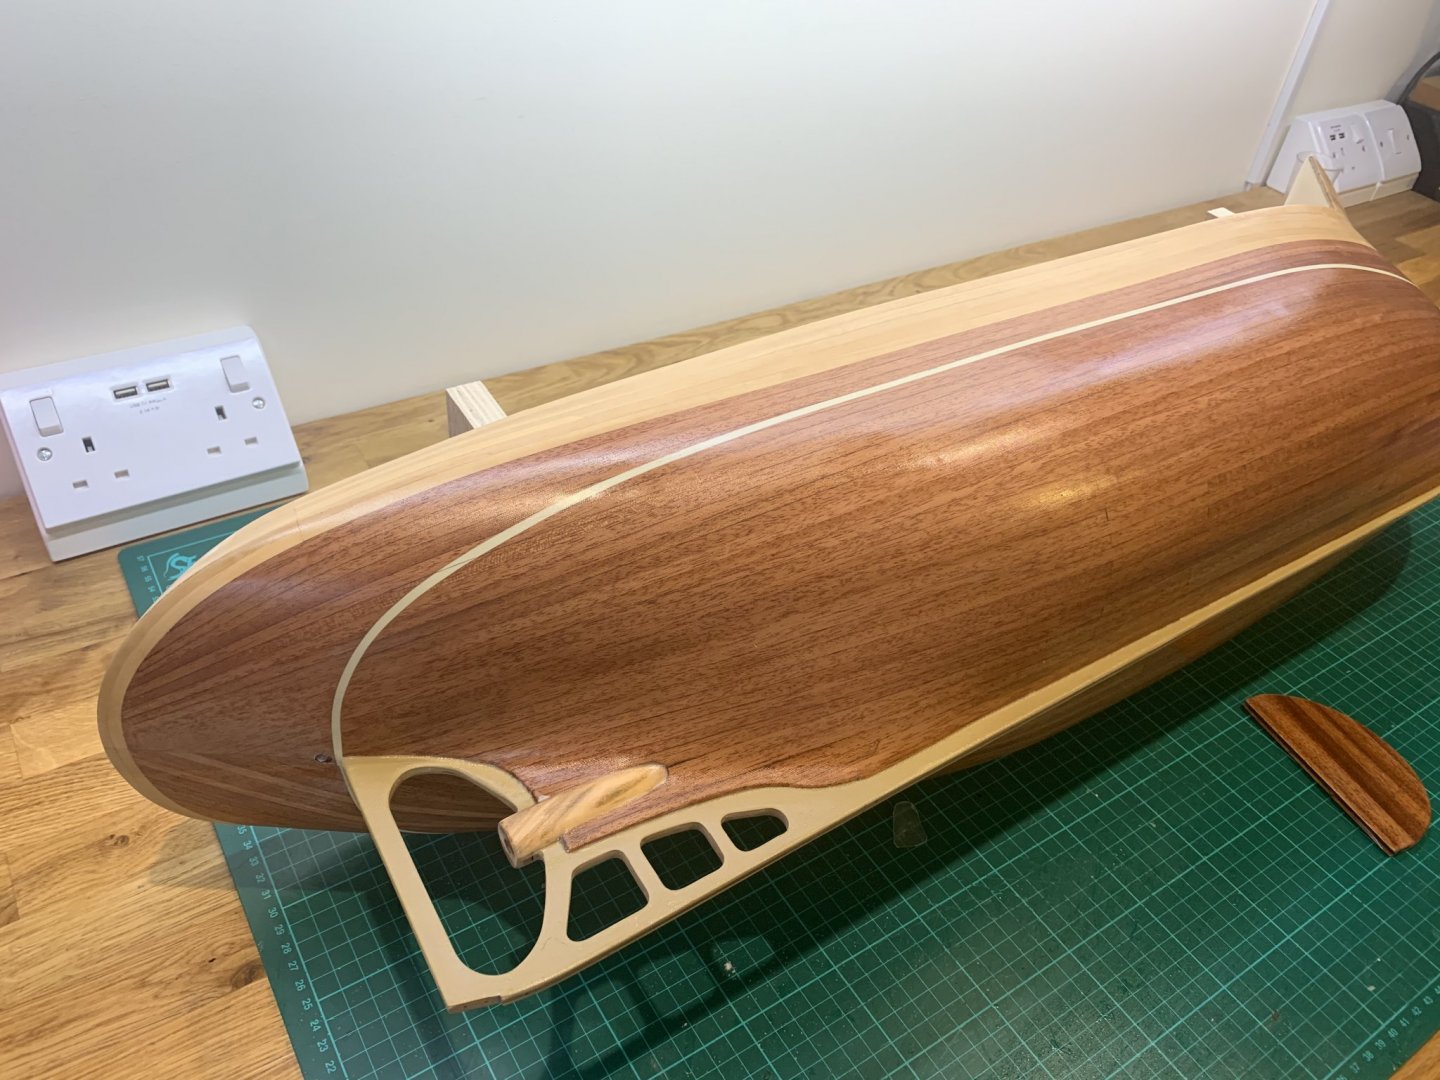
I use 49g fibre cloth and finishing epoxy resin. The cloth really does make all the difference for a smooth long lasting finish. It takes 3 coats of resin to get an immaculate finish. The first just coats the hull. The second is used to apply the cloth and the third fills the weave of the cloth. Here’s a few pictures of what I’m working on at the moment. It hasn’t had its last coat yet but it’s coming out ok. The best results I’ve had is applying the resin using a 1” roller and using thin coats. The last two pictures are of the second coat dried and the excess cloth removed. I hope this helps you
-
Can i live without a BYRNES TABLE SAW
No Idea replied to shihawk's topic in Modeling tools and Workshop Equipment
I agree with all of the above. The micrometer adjustment is what this saw was built for. The sled makes the job really easy and very safe too. Just double up on your blades as they are not that expensive and you’ll go through a few except for the carbide blades. These seem to stay sharp for a very long time. -
Can i live without a BYRNES TABLE SAW
No Idea replied to shihawk's topic in Modeling tools and Workshop Equipment
Yep I use my table saw every week and I use my thickness sander about the same too. Derek you will not be disappointed -
Bench Top 5" Disk Sander
No Idea replied to DocBlake's topic in Modeling tools and Workshop Equipment
Sorry I clicked on the wrong quote - its an age thing! Here you go - £21 plus £7 postage - be quick https://www.cashconverters.co.uk/shop/product/parkside-disc-sander-ptsg-140-a1-140w-240v/245647 -
Bench Top 5" Disk Sander
No Idea replied to DocBlake's topic in Modeling tools and Workshop Equipment
Here you go - £21 plus £7 postage - be quick https://www.cashconverters.co.uk/shop/product/parkside-disc-sander-ptsg-140-a1-140w-240v/245647 -
Bench Top 5" Disk Sander
No Idea replied to DocBlake's topic in Modeling tools and Workshop Equipment
These sanders are great. We get them here in the UK from the Lidl supermarket for £29.99. Great value! -
The only thing that the manufacturer reckons this tool won't cut through is bull sh*t - if you've got £400 quid to buy one of these you seriously need help or medication. I've loved this thread its made me laugh so much can't wait for the next one like this
-
Seriously how can a glue dispenser that costs £28 be any good what so ever for the every day modeller. Do you know how much glue I could buy for that much money. Enough to build two complete ships and a lot of brushes to spread the glue too. Come on I understand that we should embrace technology but thats like buying an atomic clock. Its good but so is my £1 Casio and isn't an improvement in real life.
-
Ha ha Kurt that is cruel - but oh so true. The really do peddle expensive c**p. Please feel free to insert your own vowels and consternates to create the word crap
-
I just watched the video on their website and just burst out laughing!!!! I really like the way the guy is suddenly wearing glasses when using their tool like it makes him smarter for using it. He also starts smiling so it probably gave him wind too. Any tool that comes in blue for men and pink for women - well enough said. So in my opinion its an over priced tool that you just do not need. Buy a decent knife - in fact for that money you could buy many decent knives!
-
Drilling 2mm Brass Rod
No Idea replied to spill50's topic in Metal Work, Soldering and Metal Fittings
Some good advice there but can I add that when I do this type of work I hold the piece in a very small vee block. It holds the brass very centrally and makes the job that little bit easier. I also use cobalt tipped drills when drilling brass. They go through without any bother even when the brass is hard. -
Can i live without a BYRNES TABLE SAW
No Idea replied to shihawk's topic in Modeling tools and Workshop Equipment
If I see any more I'll post it on here I've been cutting some planks on mine today and every time I use it I just get a huge smile on my face. Its so accurate and a pleasure to use. I wish Jim would build a spindle sander - I'd buy it in a heart beat! -
Try Cornwall model boats they do it https://www.cornwallmodelboats.co.uk/acatalog/Model-Boat-Timber-Stripwood.html
-
Is there a Beginner’s Guide to Metal Work?
No Idea replied to VTHokiEE's topic in Metal Work, Soldering and Metal Fittings
Kurt you are right silver soldering is really easy as long as you keep it spotlessly clean. Also when you clean the joint do not use any kind of sandpaper or emery paper as this will contaminate the surface. Always use wire wool and you'll get a really clean surface. To save loads of hassle try using a silver solder like this https://www.cupalloys.co.uk/low-temp-silver-solder/index.asp It comes in a syringe and has the flux already built in. You just clean the joint and then apply a little paste and get it really hot. You will know when the joint is hot enough because the solder suddenly looks like very shiny molten silver. I've seen a lot of unsoldered joints simply because the heat was taken away too soon and the solder did not flow. Just practice on some old bits of brass and you'll get there and wonder what the fuss was all about. -
Dust port - hoover connector
No Idea replied to Matrim's topic in Modeling tools and Workshop Equipment
I too had this problem with my Byrnes tools so a good friend of mine turned a couple of reducers for me in his lathe. It makes hooking up so much easier. They are made of aluminium and are an interference fit on my hoover hose.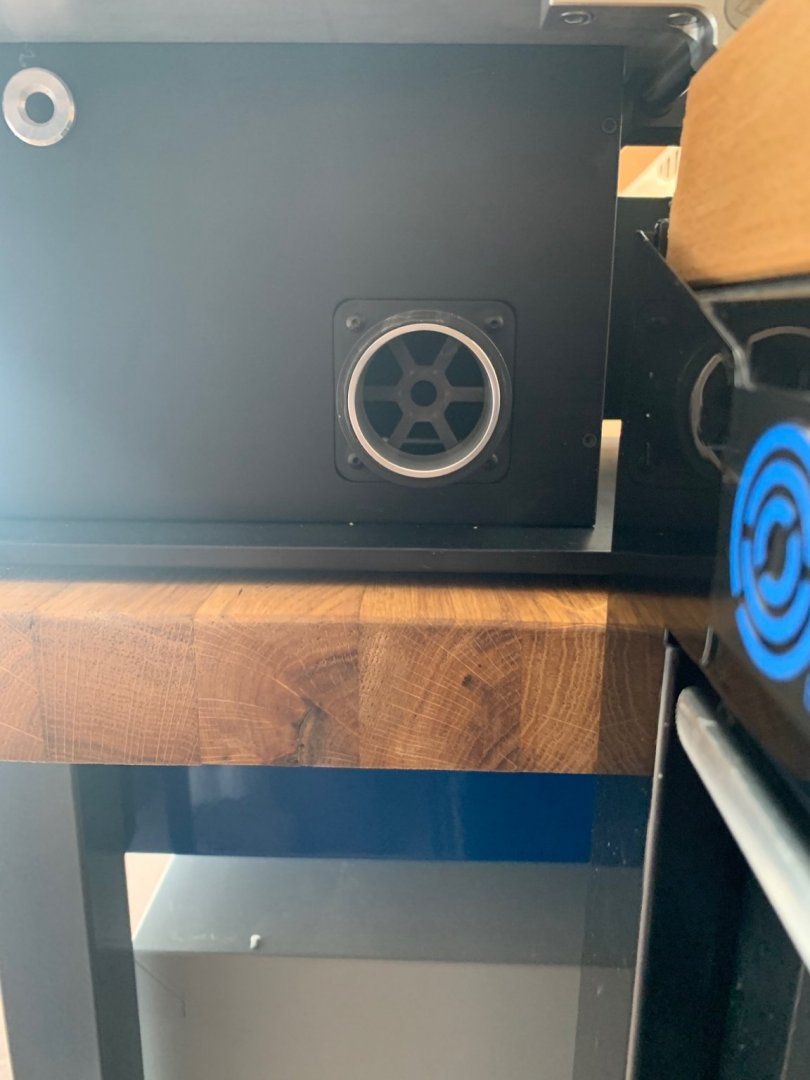


-
Small but handy hammer
No Idea replied to BETAQDAVE's topic in Modeling tools and Workshop Equipment
I’ve got one of those and they are great. I have found it a bit to big though for my everyday modelling hammer. This is my favourite- it’s tiny and has changeable heads https://www.amazon.com/Tamiya-74060-Micro-Hammer/dp/B000BN6AAU -
Which way are you trying to bend the wood?? With the grain or laterally?? I have just bent some boxwood through 90 degrees laterally and it was very time consuming. The only way I could do it was by soaking the wood for 24 hours and then applying heat with a heat gun as I bent it around a former that I had previously made. I cannot tell you the amount of wood I wasted working this out so feel your pain. Soak for as long as you can so that the wood really absorbs the water and then apply heat as you form the wood. It will steam as you do it - its very satisfying once you've done it though.
-
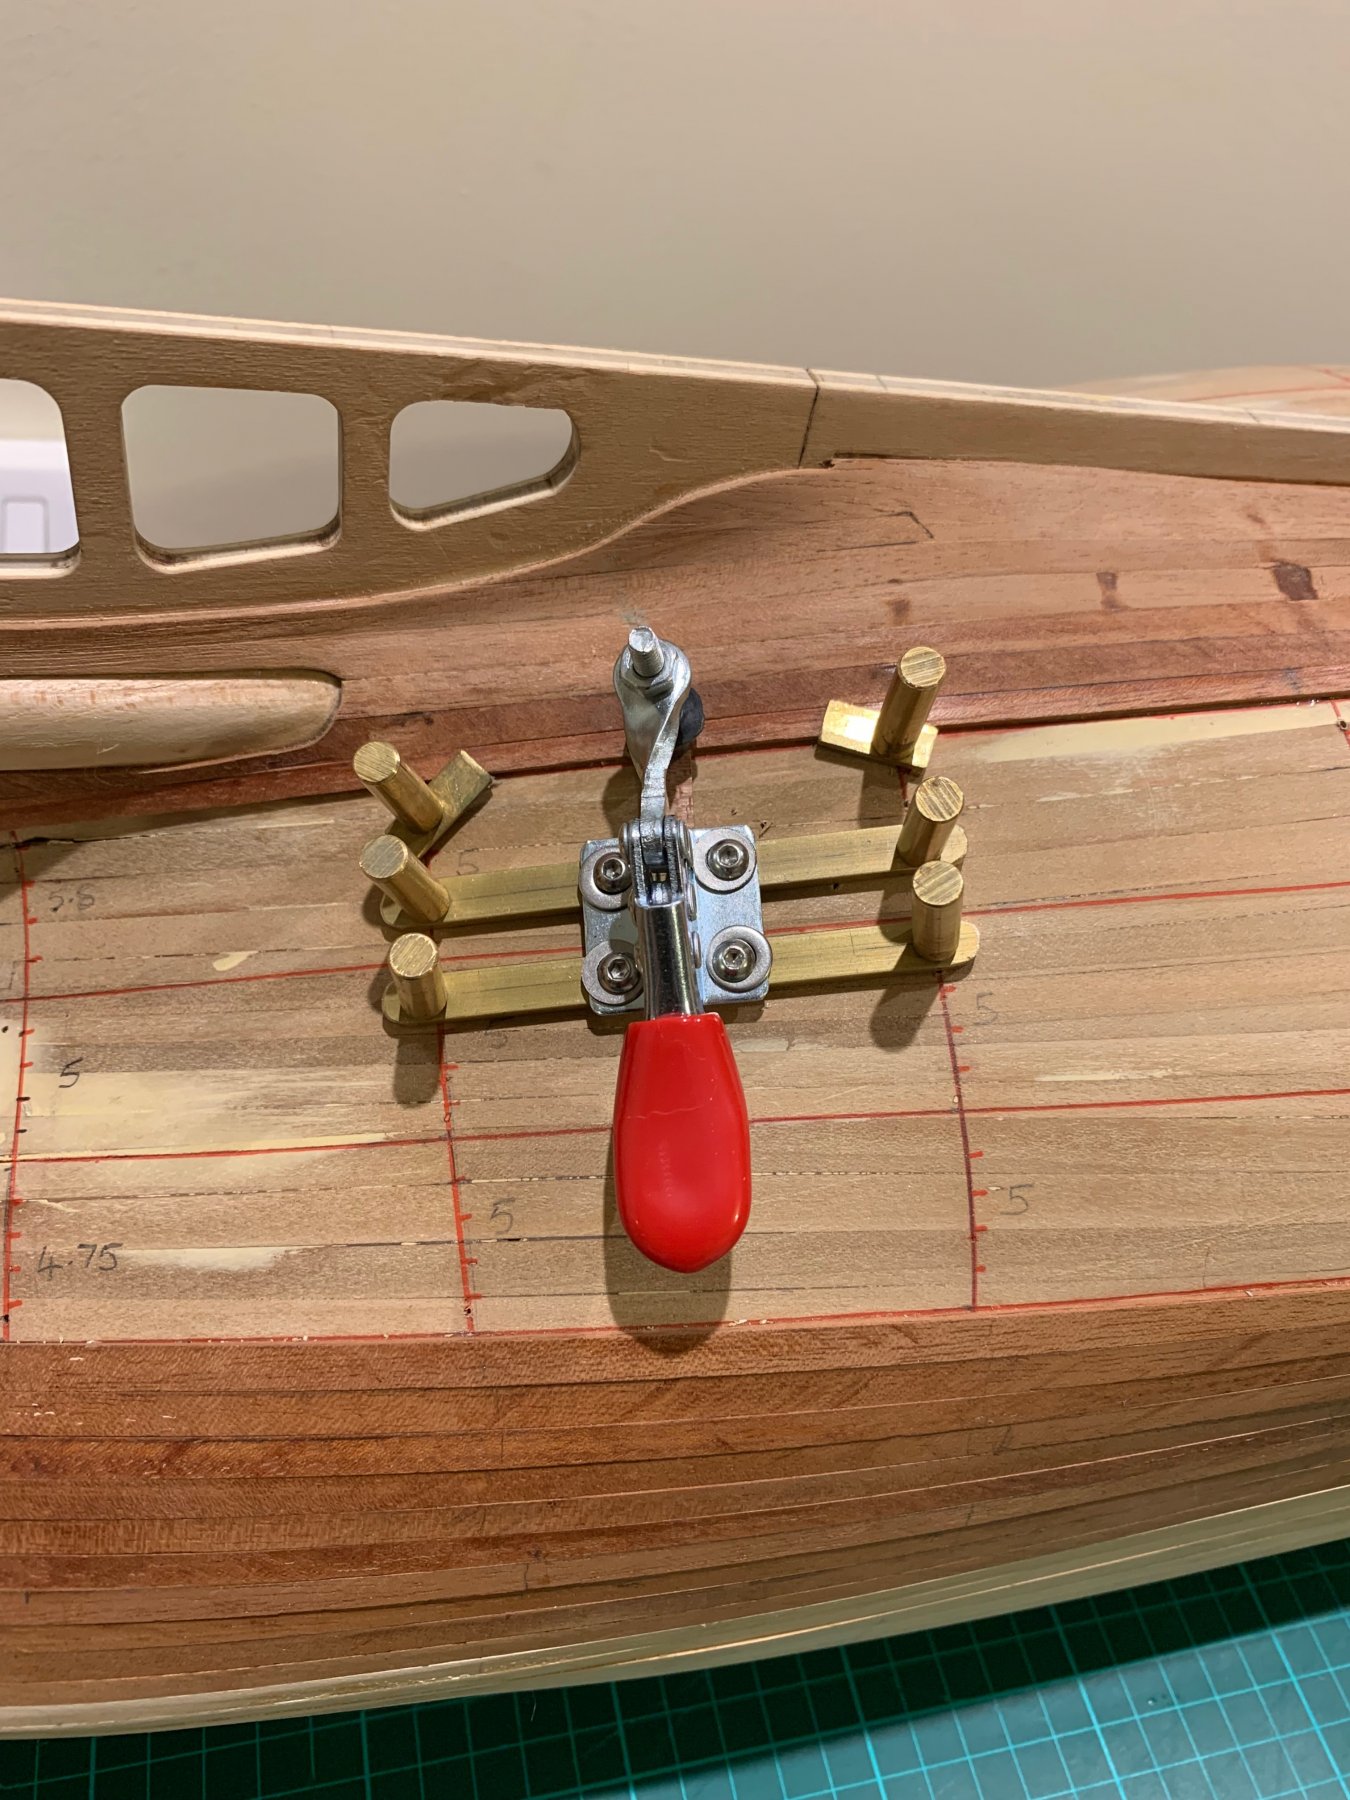
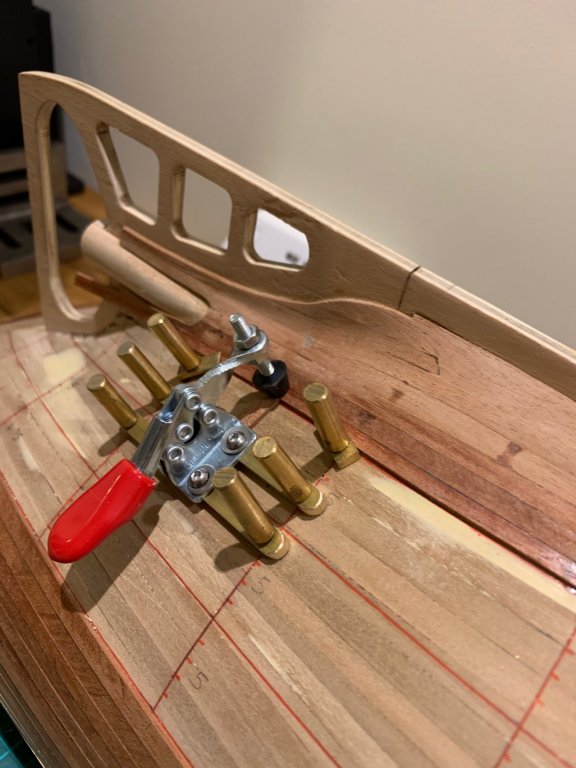
Hi All At the moment I'm planking a steam tug and came across a problem that I needed to solve. Just around the prop shaft the hull has a depression in it and no matter how a bent the planks, I could not get them to sit tight against the first layer of planking. The planks needed to be pushed into the hollow and my usual clamps just would not do this. So I made a simple clamp using a toggle clamp - Its fixed to two pieces of 1/8 thick brass which is then fixed to the bulkheads. It gives a nice gentle push down and solved my problem so I thought I would share it on here. I hope this helps someone else

-
- 13
-

-
Yea I've never seen these before but I've just ordered one off of Amazon in the UK - Cheers mate for the heads up :)
-
Hi Mike Good decision Iwata make nice airbrushes but I like to buy from a dealer so that I get a proper guarantee. I don't know the US so I can help you there. As for the compressor I have no experience of Iwata compressors but this is the one I use https://www.ebay.co.uk/itm/Titan-Precision-22L-Silent-Quiet-Dental-Medical-Clinic-Oil-Free-Air-Compressor/302941915256?epid=26027212772&hash=item4688bec878:g:QOsAAOSw42dZMVbQ Is very very quiet and has enough CFM to power a small professional airgun should you need it. You would probably never need another compressor. Your question about paint and vapour removal is very important. There are many small spray booths available for small parts that work very well - but if your only spraying say water based acrylics its not so important. As long as you are ok cleaning up any overspray a mask will suffice inside and a very understanding wife! For large parts I use my mates garage or just go outside as long as the weather is ok. If you want to spray solvent based paints then extraction is important. The fumes are explosive and very toxic to us so the correct extraction is required. I only use acrylics now as its so much easier and safer.
-
I've quite fancied buying a Paasche Talon airbrush - the one that comes with 3 different size tips. In theory you could airbrush the tiniest part to a complete hull using the fan tip. But it has so many mixed reviews which really puts me off taking the plunge.
-
Trawler deck planking
No Idea replied to Kevin's topic in Building, Framing, Planking and plating a ships hull and deck
Hi Kevin - Your work looks really nice and far nicer than a trawler would be. I think I prefer your version though as modern trawlers can be really basic vessels without much thought about the finer side of carpentry joints. Its more about practicality over looks due to the battering they get whilst out at sea earning a living. Your doing a great job and I'm looking forward to seeing your progress.