No Idea
-
Posts
1,025 -
Joined
-
Last visited
Content Type
Profiles
Forums
Gallery
Events
Everything posted by No Idea
-

Holding small parts for soldering
No Idea replied to BETAQDAVE's topic in Metal Work, Soldering and Metal Fittings
I've done this type of joint many times and my solution has always been in the flux that you use. You are trying to solder copper to brass but in a very small dimension. There is no need for silver solder this is only required when strength or excess heat is present so soff solder is more than adequate. Use a very acidic flux such as "power flow" which plumbers use but don't breath the fumes in. Once the flux has turned to fluid just touch the joint with any type of soft solder and its job done. You can either use a small flame or soldering iron it really doesn't matter - its all about cleanliness of the joint and the acidic flux does this job nicely -
Hi ir3 - can I ask is this sander 240v? If it is I would be very interested
-
Another way to make shackles
No Idea replied to vaddoc's topic in Metal Work, Soldering and Metal Fittings
Thats is very inventive and the results looks great well done. Can I ask what make of soldering block do you use? I've not seen one like that before -
Admiralty model query
No Idea replied to iMack's topic in Building, Framing, Planking and plating a ships hull and deck
Hi Bob what an amazing and thorough answer..... so basically if I wanted to build a beautiful ship like the one in the picture, I would need to have a working understanding of lofting theory. Then apply this understanding to my drawings as best I can, given the limitations of my information. Which would mean plenty of bedtime reading, research and some technical drawing practice. The reason for my interest in this thread is I too want to improve and build ships like the one above. I think I’ll order some more books -
Putting a loop on block ends
No Idea replied to Antonio Vasquez's topic in Masting, rigging and sails
Or buy some fishing hooks from your local tackle shop and cut the eyes off the hooks. Leave a little bit of the shank on and then drill a shallow hole into the top of the block to make locating it easier when gluing -
Byrnes Table Saw Tips (requested)
No Idea replied to Matrim's topic in Modeling tools and Workshop Equipment
Hi Bob that’s just the Allen key laying on the saw. I think the type of keys supplied now are different to the old ones. It’s got a sleeve locitited over the short end to give you a better grip -
Byrnes Table Saw Tips (requested)
No Idea replied to Matrim's topic in Modeling tools and Workshop Equipment
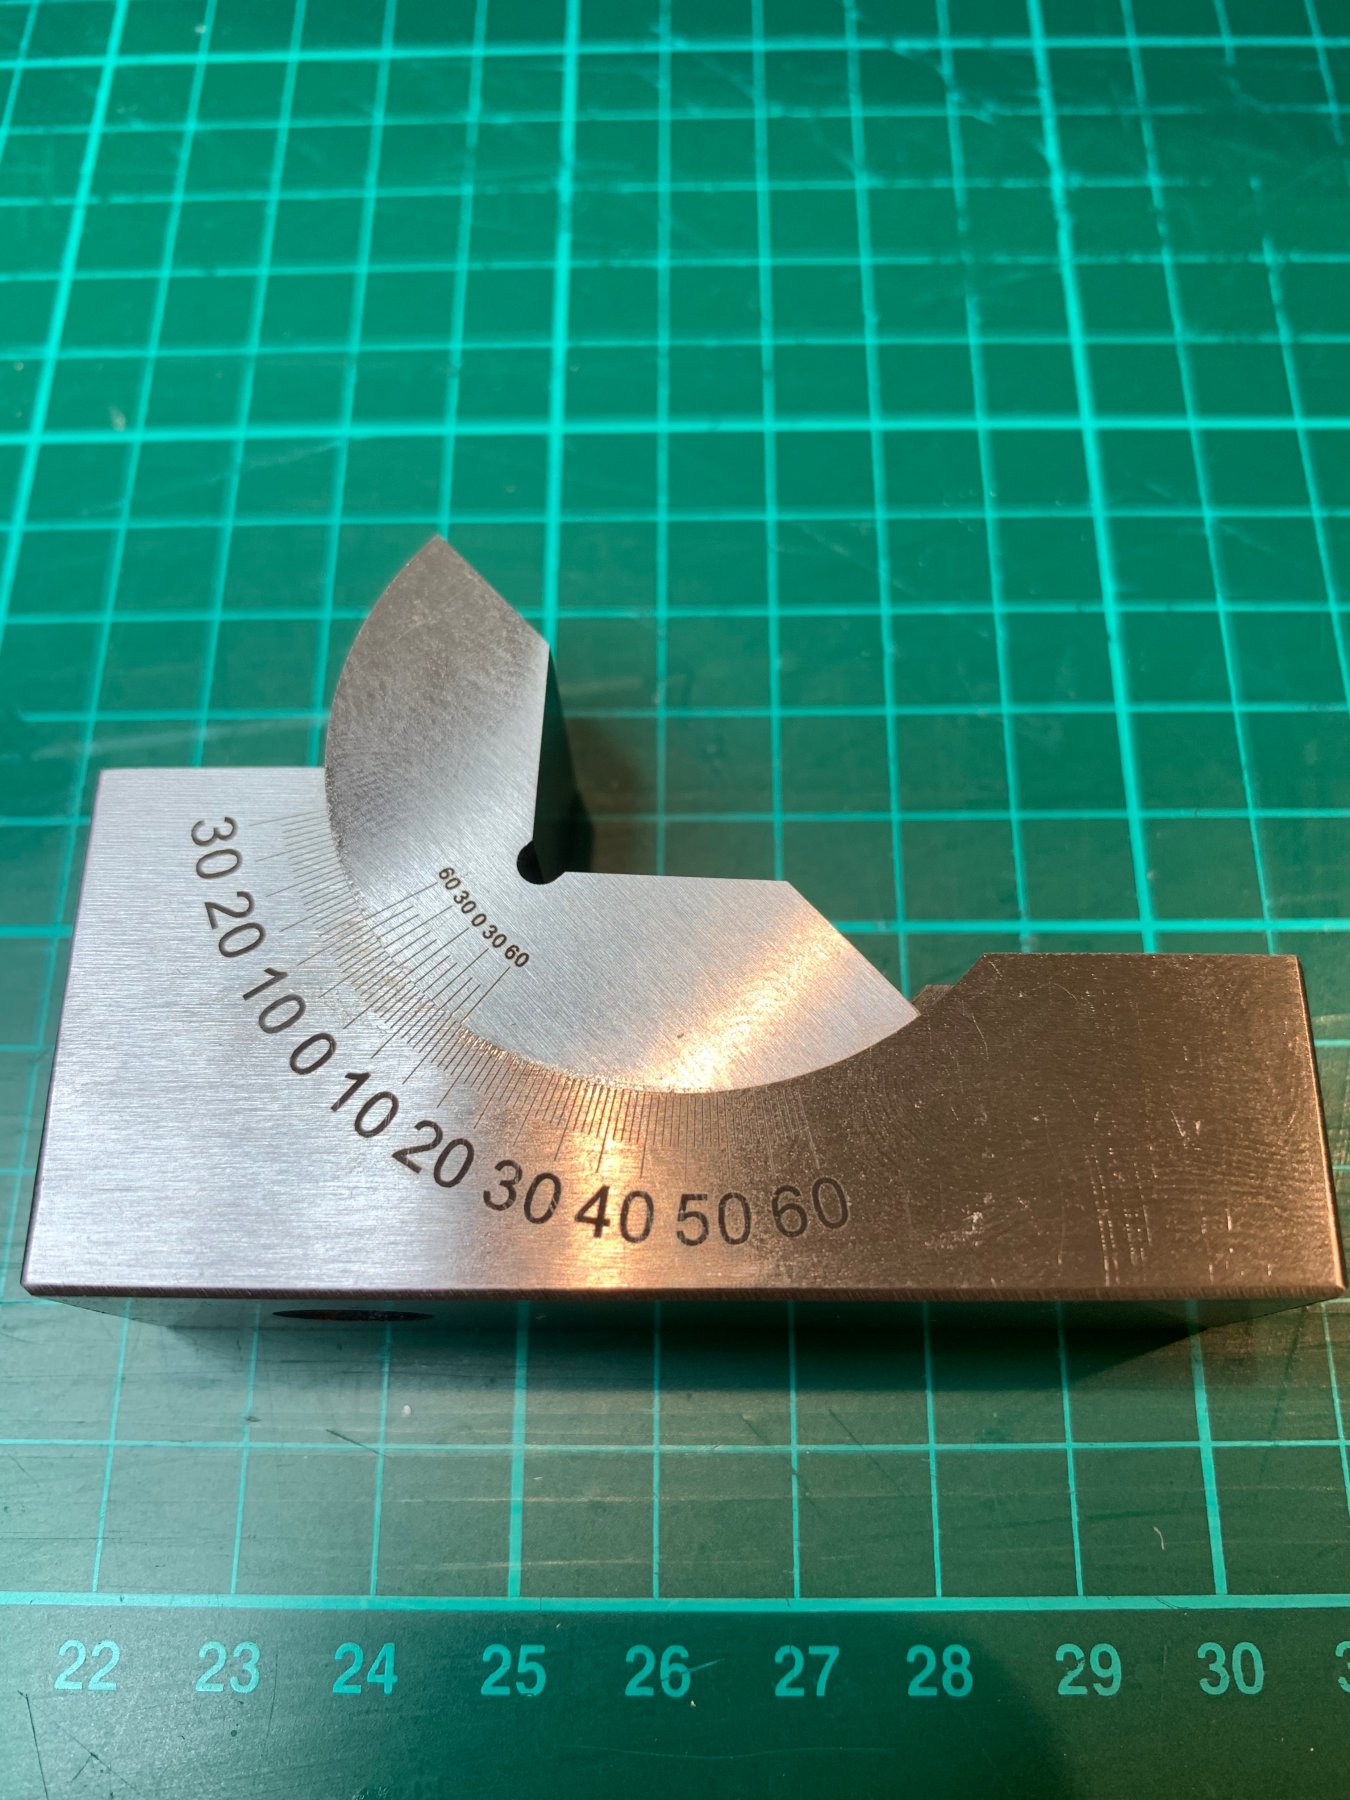
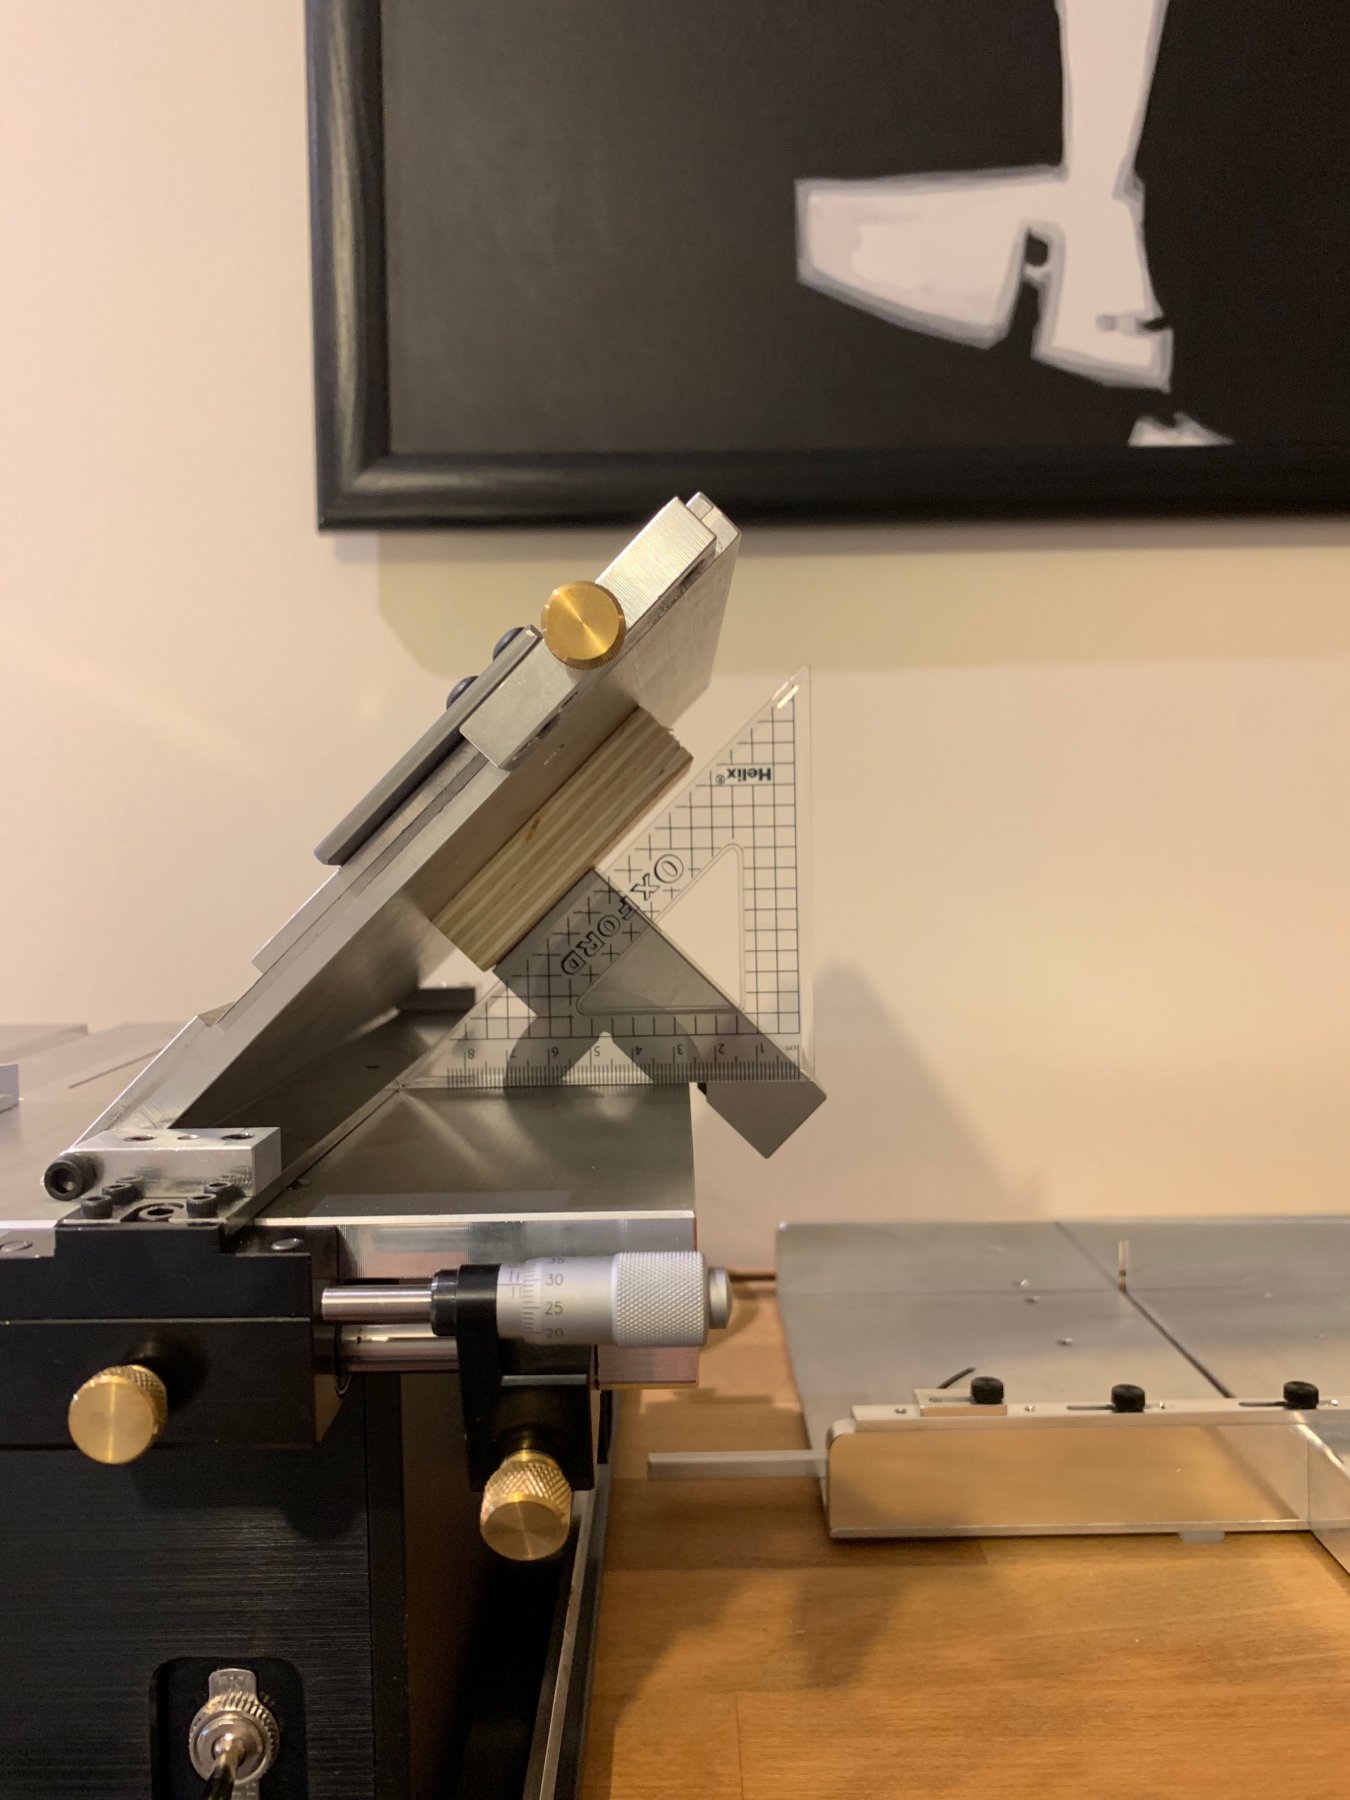
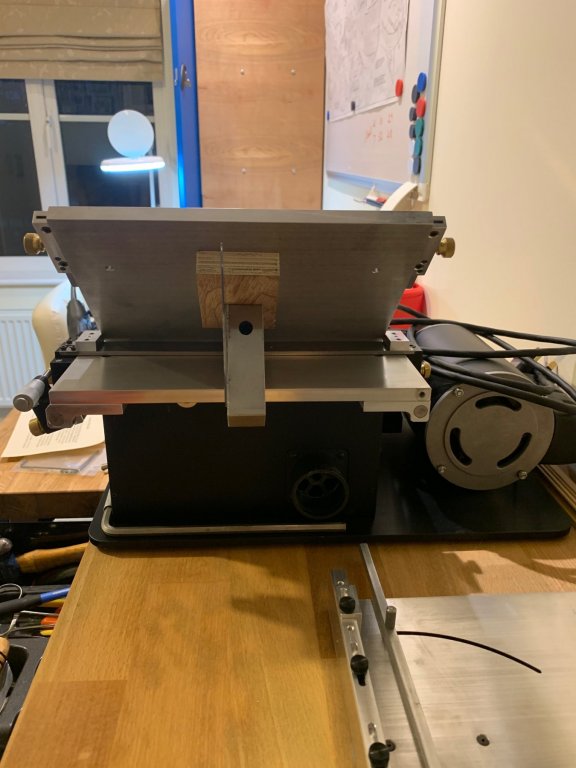
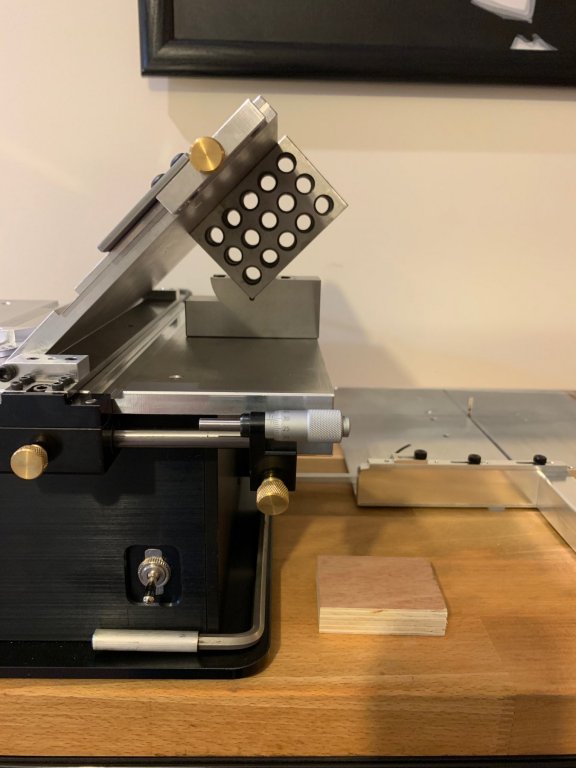
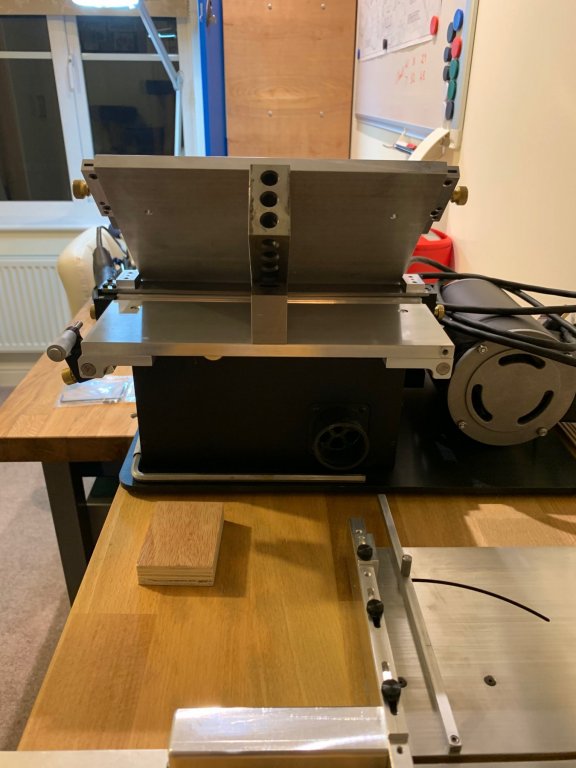
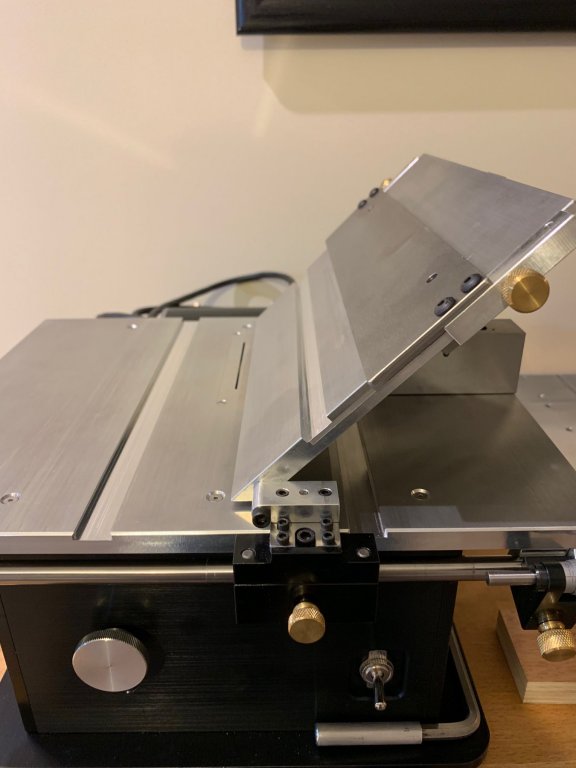
Hi All I've been playing with the tilting table to try and find a reliable way of setting an angle. I've come up with this idea of using an adjustable Vee Block which seems to work quite well. Its simple - set the angle that you want on the Vee Block and then slide it under the table. On the first pictures I used a small piece of 19mm plywood as a parallel to space it out, and on the second example I used a steel 3-2-1 block which worked ok as well. This could easily be clamped in place to give extra support when the saw is in use. I've taken pictures of a simple 45 degree angle but I guess any angle could be dialled up. What are your thoughts? Would this make life easier for some users or not? Edit - Sorry the pictures are not in the correct order but I guess you get the idea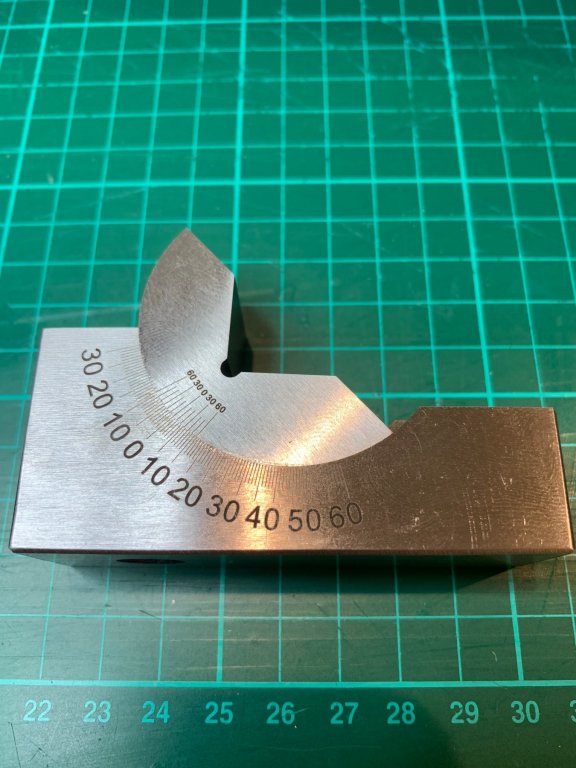

-
Which Glue: cooper wire on wood
No Idea replied to MESSIS's topic in Metal Work, Soldering and Metal Fittings
Hi Messis - Just a thought; if I was doing this I would twist the copper around the blocks and leave nice long twisted tails just like the drawing. I would then solder the very ends together to stop them untwisting. Then to fix them to the mast which looks like an aluminium tube, I would place them all on the mast and hold them in place with tape. Next I would fill the mast with epoxy resin. This would fix them all at the same time and they would be going no where. -
Byrnes Table Saw Tips (requested)
No Idea replied to Matrim's topic in Modeling tools and Workshop Equipment
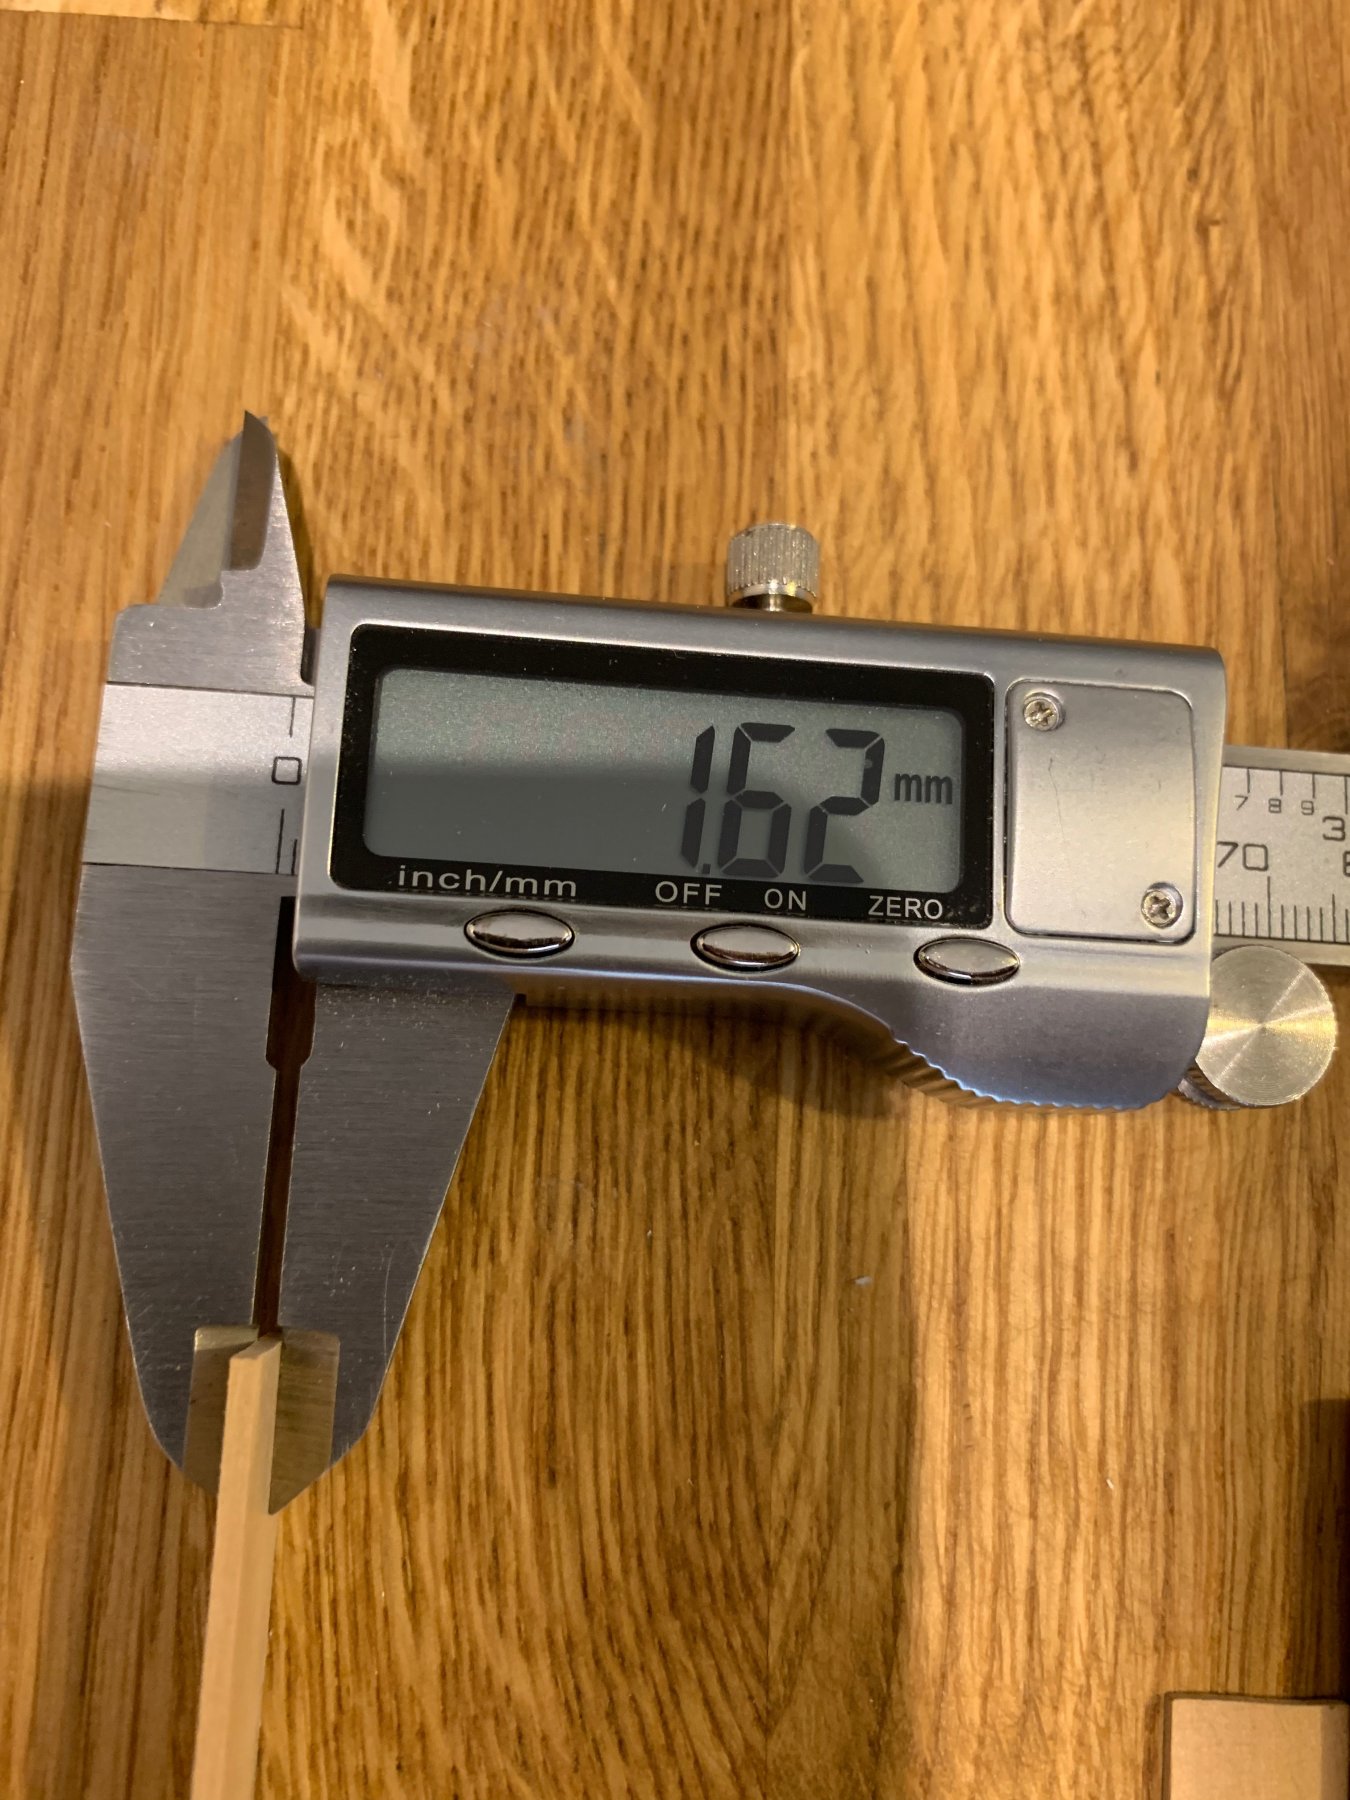
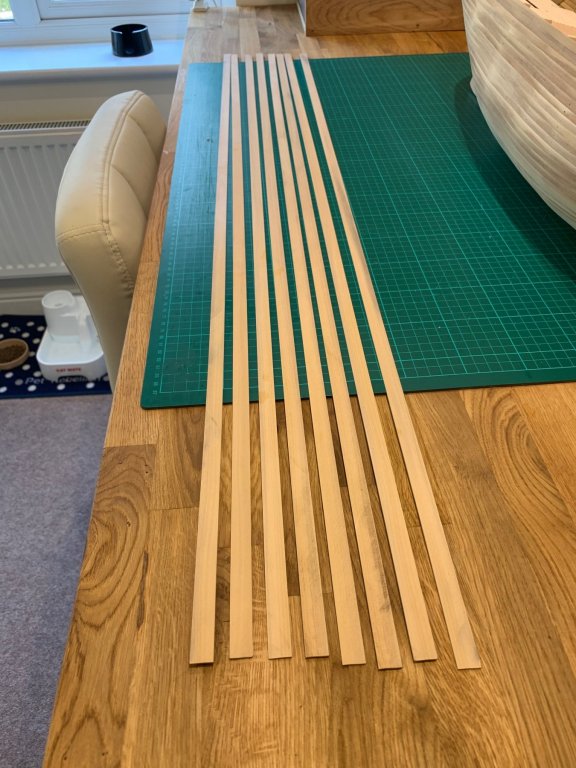
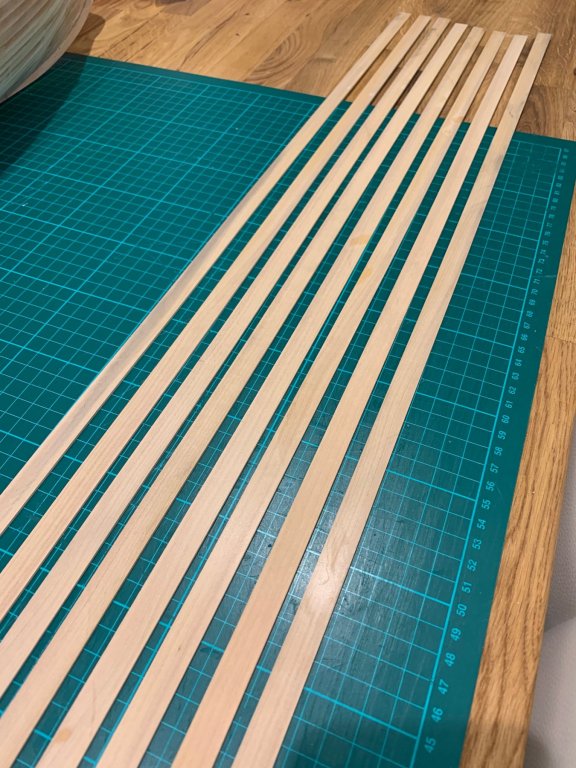
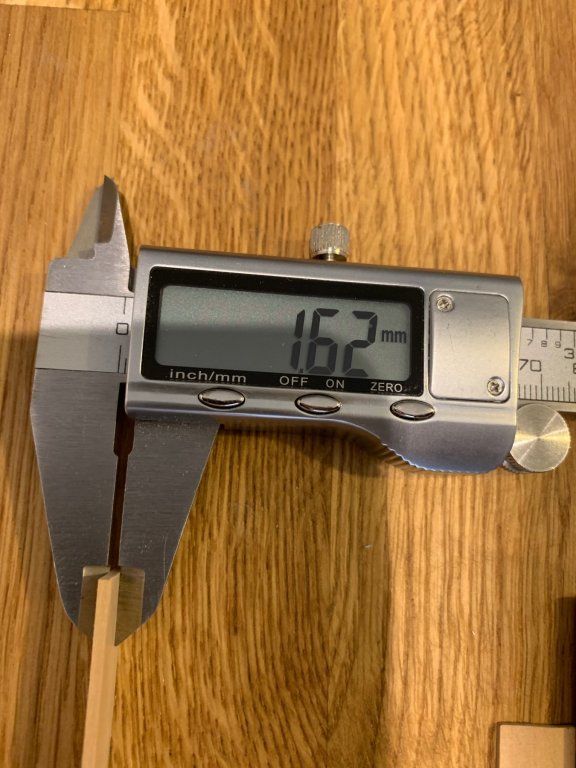
Well I'm glad to say that at last I've managed to have a go with my Bynes saw and I'm really impressed with both the quality and power of such a little saw. I firstly read the instructions and just generally became familiar with the saw and gave the table a good clean and a coat of wax. I also changed the plug to a UK three pin plug as it came supplied with a two pin Euro type plug. I had three large pieces of timber which were mahogany, pear and boxwood. I first ran each piece through to make them into manageable widths and also to make sure that the sides were parallel with each other. I used the supplied blade for this purpose which plowed through all of the different woods with no problems what so ever. The finish actually was surprisingly good even with this blade and with a little sanding I think you could easily use this blade for making planks; that is of course if you could afford the waste as the kerf is wide. I then changed the blade to a slitting saw. I fitted the .40 - 4" blade and ran this through a zero clearance insert which was very easy to do. I fitted the 4" blade as my timber is 13mm thick and the small .30 - 3" blades would not be strong enough in my opinion to make this cut. After a couple of trial runs with some scrap timber I set the fence to 1.6mm which again is so easy with the micrometer adjustment. Anyway enough chat here are pictures of my first few go's at cutting planks on my new saw, I did get a little surface burning but this is my technique which will improve and not the fault of the saw. The planks are 1150mm (3.75ft) long, 1.6mm thick and 13mm wide and are boxwood. The final width will be 6mm so I can get two planks out of each strip. Wow what a machine I'm extremely impressed so far!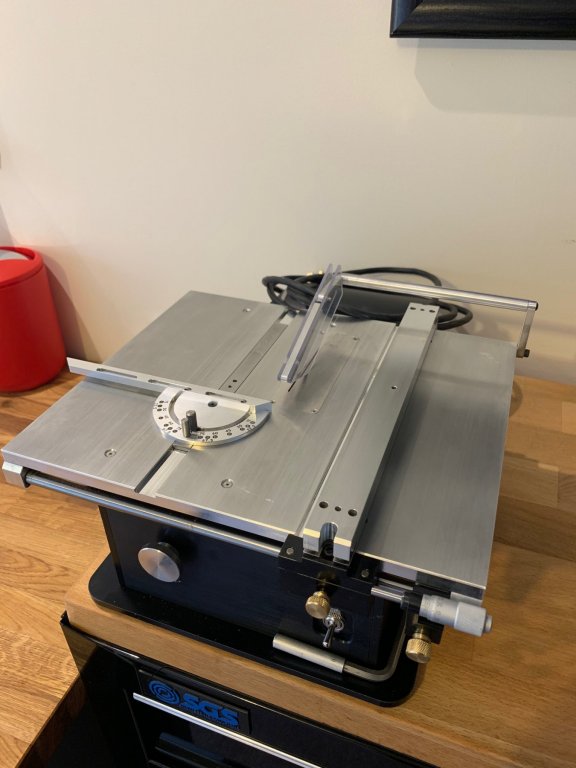

- 53 replies
-
- 11
-

-
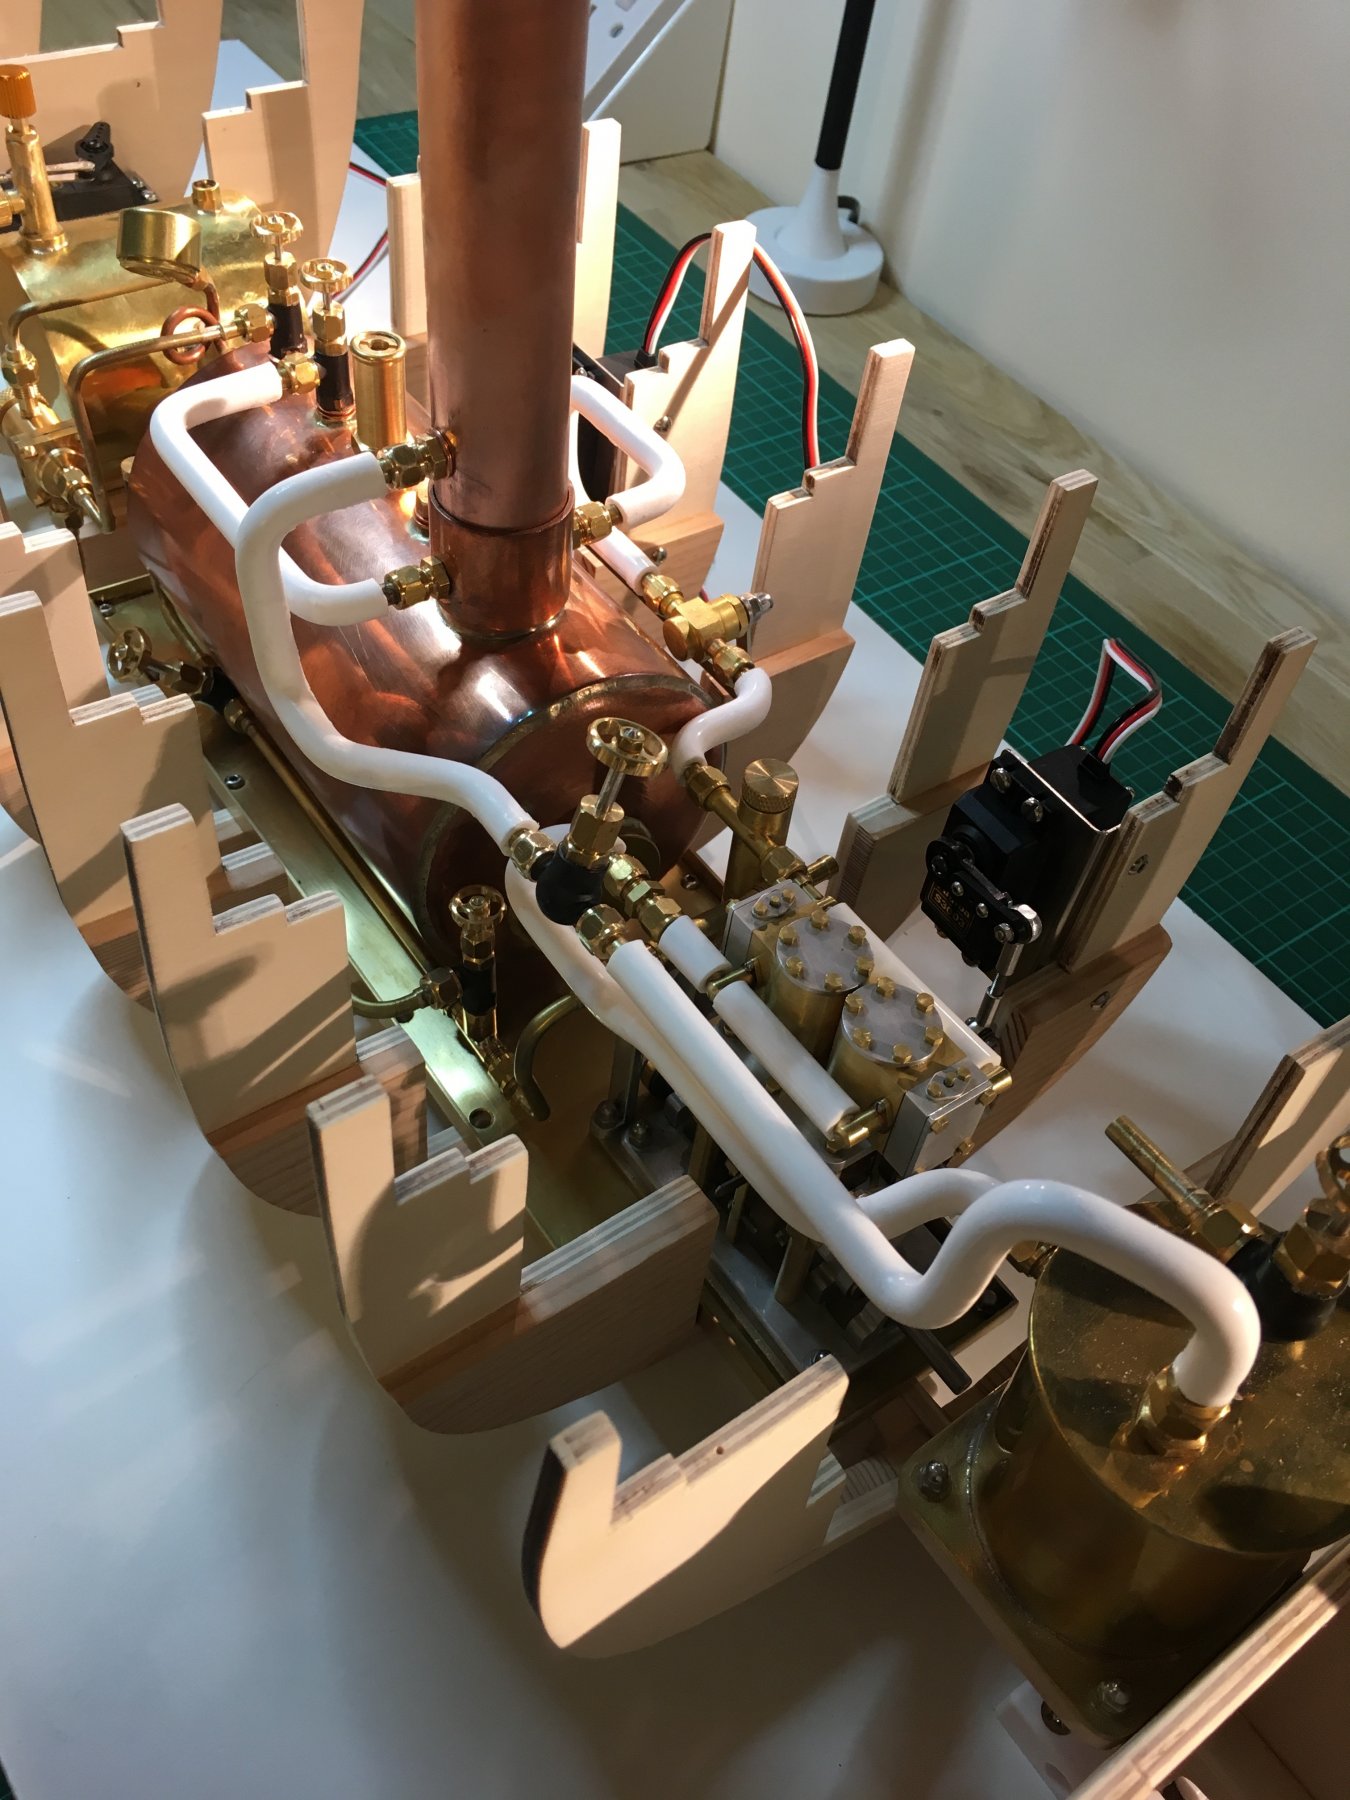
Hi druxey thanks - I really do like steam but it has to be done right otherwise its very dangerous not just to the builder but also people around them. We have very strict regulations over here and all boilers must be certified. In fact the regulations have just been updated and now all gas tanks must be tested and certified to 400PSI. Here's a picture of my current steam build.

-
Hi Bob if you just need to simply connect the two units together so that it runs you will need to consider a few things. Firstly lubrication will be needed for the engine so an inline lubricator filled with steam oil will be required. Without this your engine will suffer serious internal damage. Secondly you will need a way of controlling the steam pressure that arrives at the engine to control the RPM. There are quite a few commercially available steam throttles that will do the job nicely. Lastly the pipework can be copper or brass its entirely up to you but all joints will have to be sliver soldered due to the heat. If you want to fit it in a boat there are many other considerations such as collecting the waste steam and oil so that it does not polute the water. Here's a company that I have used many times and there components and advice are great. They know Stuart boilers and engines inside out. http://www.clevedonsteam.co.uk/products.html#Firetube
-
My top 4 most useful tools
No Idea replied to Tim Moore's topic in Modeling tools and Workshop Equipment
Ahhh got you its a bit lost in translation sorry mate.......Now don't think I'm a bit dim but for some reason I thought that honing could only be carried out with a leather. I didn't realise that I've been honing my blades on a very fine plate for years I just call it sharpening. I will look on the Lee Valley site though and thanks for the info - Mark -
My top 4 most useful tools
No Idea replied to Tim Moore's topic in Modeling tools and Workshop Equipment
Hi vossiewulf thats a very interesting post and something that I would like to have a try at in the future when I get some more time on my hands. Over here in the UK I guess the most popular knife would be a Swan Morton scalpel as the blades are so cheap. I get 100 blades for about £9 and you can buy a little tool that helps change the blades without cutting your fingers. I have a question though - could you tell be how to hone a plane blade correctly? I use diamond plates to sharpen them but I have never actually honed a blade before. You mention a strop; is this just like a leather belt? -
My top 4 most useful tools
No Idea replied to Tim Moore's topic in Modeling tools and Workshop Equipment
They can’t be one of my 4 best tools as my wife keeps them safely locked away 🤣 -
My top 4 most useful tools
No Idea replied to Tim Moore's topic in Modeling tools and Workshop Equipment
I can only echo what Joe has said. I used to sand planks and the results were mixed and getting a straight edge was very difficult. Now I only really use the plane as it’s so good a getting down accurately to a line. If the line is concave just twist the plane to 45 degrees and you can get in there no problem -
My top 4 most useful tools
No Idea replied to Tim Moore's topic in Modeling tools and Workshop Equipment
What a great topic 👍 mine would be 1. My Veritas plane it’s great for just about everything and makes so little mess 2. A very sharp knife 3. An Icraruler which is a pleasure to use and so accurate https://www.incra.com/measuring_marking-marking_rules.html 4. Permagrit sanding tools which are just so useful Thanks for the tip about the glue bottle I’ve never seen one of them before so ones on order and should be here this week -
Its your first planked model so well done in getting this far. I think your solution to see planks in a painted hull is a great idea but use a decent two pack polyester filler. Its easy to sand and sticks to wood perfectly. Skills are learnt over time and many builders use filler blocks between the frames to help remove these dips before they do any planking. If I had your problem I would do as you have suggested as it will look great if done with care.
-
Hobby/micro drill press suggestions
No Idea replied to bigcreekdad's topic in Modeling tools and Workshop Equipment
I have the Dremel drill stand / press and I must be honest the the slop and play in the mechanism isn't good. It moves in most directions and I have found that you need a really big centre punch mark to get it to drill where you want. Would I buy another one - NO. Unfortunately I do not have experience of the Proxxon version so I cannot comment on that. I am currently looking for a far more accurate replacement. -
Cheers Maurys I've not had time to really trawl thorough the forum that much. Don't suppose you have a link?
-
I found this thread a few days ago and watched Chuck making the lateral bends on the video. I must be honest and thought that it seemed just a bit too simple but I really liked the idea. So I thought hell why not lets give it a try and see if it works for me. There are not very many threads that I've read that have probably changed the entire way I do things but this is one of them. I set up three clamps on my bench and made a lateral bend using the wife's hairdryer to see what happened. The results were eye opening for me as a straight plank sat perfectly flat on the bulkheads and the plank maintained its shape and did not spring back very much at all. Crickey this is a game changer for me so thank you Chuck as I have always soaked my planks; then clamped them in place so that they dried before gluing in place. This is so simple; and now that I've done it completely makes sense. I've ordered a hot air gun as although one issue has been solved; using the wife's hairdryer is a step too far for her and as brave as I am I'm not that brave or stupid to keep going there so I'll get my own. I'm new on this forum and I am a cynical middle aged fool but goodness - this solution is just on point for all builders who want to get their planking flat and uniform without lots of wasted wood as its getting so expensive. I think the next step for me is to make a jig that makes this process even easier. Thank you to all that have contributed to this post
-
I have to agree that it would be a real chore to spile all of the planks. I think that I will mark it out and see what it looks like with the hull lined out and go from there. This is quite a big hull at 890mm long so its got a lot of planks to be made.
-
Thanks Jaager there are some good ideas there so maybe it’s doable. It’ll probably involve quite a lot of spilling too.
-
Hi All I was wondering if anyone has had any experience of planking using the ships waterline as a datum. I’ve nearly finished the first layer of planking and was thinking about using two different woods for the second layer. It would be nice if I could make the transition of the different woods on the waterline as this is a working RC boat. My initial thoughts are that it would change how I lined out the planking but then my mind started working far too hard for its own good and I started finding issues that maybe just aren’t there. Hence my question to the forum. If you have any thoughts I would be very grateful and I was thinking about using Castello boxwood on the keel changing to Pear at the waterline. Thanks all - Mark
-
Hi andante there is no definitive answer to your question that I know of. My current build has the garboard strake as the same width as the following planks as it just so happened that it worked that way. The best way to discover its width is to place the next plank out from the garboard strake and see how this fits running from stem to stern. It also needs to be parallel to the keel so that all of the following planks are also parallel. Its at this point you can see just how wide your garboard plank needs to be bearing in mind that it also fits into the keel rabbet and must fill the gap between. Some builders will say that this is working backwards but it works for me.
-
Tools, tools and more tools....
No Idea replied to CPDDET's topic in Modeling tools and Workshop Equipment
John you missed out a third group mate and they are "All the gear and no idea"...............oh hang on a minute that's me 😂..............I'll get my coat 😜