No Idea
-
Posts
1,025 -
Joined
-
Last visited
Content Type
Profiles
Forums
Gallery
Events
Everything posted by No Idea
-
 Give the wood a coat of Z-poxy finishing resin and once dry lightly sand it down. It will give you a glass like finish that’s ready for painting. You will definitely not see any grain at all
 -
Just beautiful work I am truly amazed. It looks like you have two mills now too or have you upgraded your proxxon mill? I like mine but find the indexing is not that accurate.
- 589 replies
-
- 3
-

-
- le gros ventre
- cargo
- (and 1 more)
-
I buy all of my blades from Model Machines I just tend to order quite a few at a time because its expensive to import into the UK. My view is if I buy from the original supplier it keeps them in business. I have too many friends who buy cheaper from China and then wonder why their favourite model supplier has gone out of business. I had a load of blades from Jim about 6 months ago and they will keep me going for the next year
- 68 replies
-
- 10
-
-
I currently use a Paashe Talon 3.......the best airbrush I've ever owned. It's a double action with an internal mix. But the best bit is.....its easy to use, comes with 3 different size needles including a fan cap for big jobs but its also so easy to clean. Great bit of kit for the money.
- 40 replies
-
- 2
-
-
- best airbrush
- compressor
- (and 1 more)
-
Kurt this is spot on - I should have said this in my post. If you tip the saw so that the fence is parallel with the floor it makes the job so much easier. When I first used my tilting table I did struggle a bit as it does take some getting used too. But when you get it sussed what a great addition to the saw. My advise to anyone using this attachment is to have a good play with it until you are happy with your use of it. Once sorted you won't look back as any angle is achievable with a clean cut that can be repeated as many times as you like.
-
The arbor on these saws is fixed so this adapter tilts the table instead. I use mine quite extensively and like all tools - the more you use it the easier the use and set up become . I can set my tilting table up in minutes now and I wouldn't be without out it.
-
1930 BENTLEY 4.5 LITRE by MadDogMcQ - AIRFIX 1:12th Scale
No Idea replied to MadDogMcQ's topic in Non-ship/categorised builds
Awesome!!! I remember building this kit when I was 10 years old in 1977!!!! I think your skills are top notch! -
Mill Speed to Avoid Chipping
No Idea replied to ChrisLBren's topic in Modeling tools and Workshop Equipment
Hi Pete you are right - but the main reason that I use sacrificial backing though is to stop the cutter making contact with the machine slide bed -
Removing Laser Burn?
No Idea replied to Shaft's topic in Building, Framing, Planking and plating a ships hull and deck
If the part is a tricky shape a red scotch bright pad works well to remove the char -
Mine has too but I’m away from home until tomorrow so I’ve got to wait a little longer. I went a bit mad and also bought the deluxe 1/24 boxed version of the Le Rochefort monograph. It’s going to be my next build 😎
-
Thanks Mark that's a very good idea and I'm sure that I have seen these at our local hardware superstore.
-
Hi Jaager Thanks very much for the information it really has helped. I think you are right about the timber being a bit wet but I'm learning as I go. I think when I order my next batch of wood from my supplier I'll pick up the phone and have a good chat with them regarding my needs rather than just ordering online. Thanks again - Mark
-
Hi Charles and Jaager Thanks for your replies they have been quite insightful for me. Firstly saving the wood that I have seems to be working using the technique as described above. I'll find out for definite tomorrow but so far things look ok. I've also looked at the end grain and yes it does look like they were cut by flat sawing. If I look very hard I can also see how the grain was affected the wood too. I think one of the biggest mistakes that I have been making is stacking all of my wood in one block with no ventilation between them and also different lengths so some are not supported at the ends at all. I like the idea of using boxes too. This does seem a bit counter intuitive thought as surely the wood gets no ventilation when inside the box? I have plenty of room to store the wood and the humidity in the room doesn't really change that much. It's a new home with all of the best insulation and triple glazing so the temperature and humidity is quite constant. If you could give me a steer on my understanding of using boxes that would be great Mark
-
Hi I hope that this has not been covered before and if it has I apologise. I have seen quite a lot of information regarding the storing of rough cut wood that needs to dry over a period of time, but how do you store you cut and planed wood. I'm talking about thin planks that are maybe 6mm thick, 150mm wide and 1000mm long? The reason I ask is because I have a couple of boxwood planks of this size that I have simply put on the top of a flat cupboard directly on top of each other. I got them down today and they have warped across their width? Should I have separated them with some battons or something like this? The room is well ventilated and just like the rest of our home remains quite a constant temperature. Your thoughts would be very welcome as I was just about to buy quite a lot of timber just like this for my next build. I need it to stay in good straight condition for a period of time and don't want to waste my hard earned money through a lack of understanding. Mark
-
Kevin that really is a lovely build - a fantastic job and I agree the case really shows off your work.
-
I've started looking at the Vcarve tutorials on YouTube as this is probably the way forward for me. I have a huge learning curve so I'll see where it goes. Keep the pictures coming marsaly as they are amazing!
- 589 replies
-
- 2
-
-
- le gros ventre
- cargo
- (and 1 more)
-
I fully agree with this - The level of carvings that can be achieved by CNC is astounding. Although I do not have the required IT skills to do this sort of thing I would happily pay someone to do it for me. I tried carving a figurehead and it turned out looking like a bad zombie holding a skateboard. There is no way my carving skills would end up on a ship.
- 589 replies
-
- 6
-
-
- le gros ventre
- cargo
- (and 1 more)
-
That really is such clean and precise carving - I have to ask how you did it? I wish I could achieve such a nice crisp finish
- 589 replies
-
- 3
-
-
- le gros ventre
- cargo
- (and 1 more)
-
Thanks for the review of this book. I’ve ordered mine today and happily await it’s arrival
-
Byrne's saw accessories question..
No Idea replied to CPDDET's topic in Modeling tools and Workshop Equipment
Bob spot on - Tools are only as safe as the user and their experience. Whilst experience has to be earned, knowledge can be gained through YouTube and many other places. In the demo above she is using a soft wood which is pretty forgiving when you get things wrong. A hard wood on the other hand is far less forgiving but this should not put anyone off. Get reading and watching and then put some time in on the table saw. You'll get it in no time and the results are worth the learning. -
Byrne's saw accessories question..
No Idea replied to CPDDET's topic in Modeling tools and Workshop Equipment
To prevent this type of kick back when cutting thin planks you still need to push the wood on the thin side. This stops the wood from turning in toward the blade which is dangerous. All you need Is a sacrificial push stick that passes over the blade and carries the thin piece through. Use a nice big piece to keep your fingers well clear of the blade -
Byrne's saw accessories question..
No Idea replied to CPDDET's topic in Modeling tools and Workshop Equipment
It is but just don’t follow her technique as it’s dangerous. Lots of kick backs due to pushing the wrong side of the work piece and using the fence and mitre together. Get a good book on table saw practice as these little machines are quite powerful for their size -
I agree razor saws are great and come in different teeth per inch too. I quite often like to cut too long and then sand back to my required length.
-
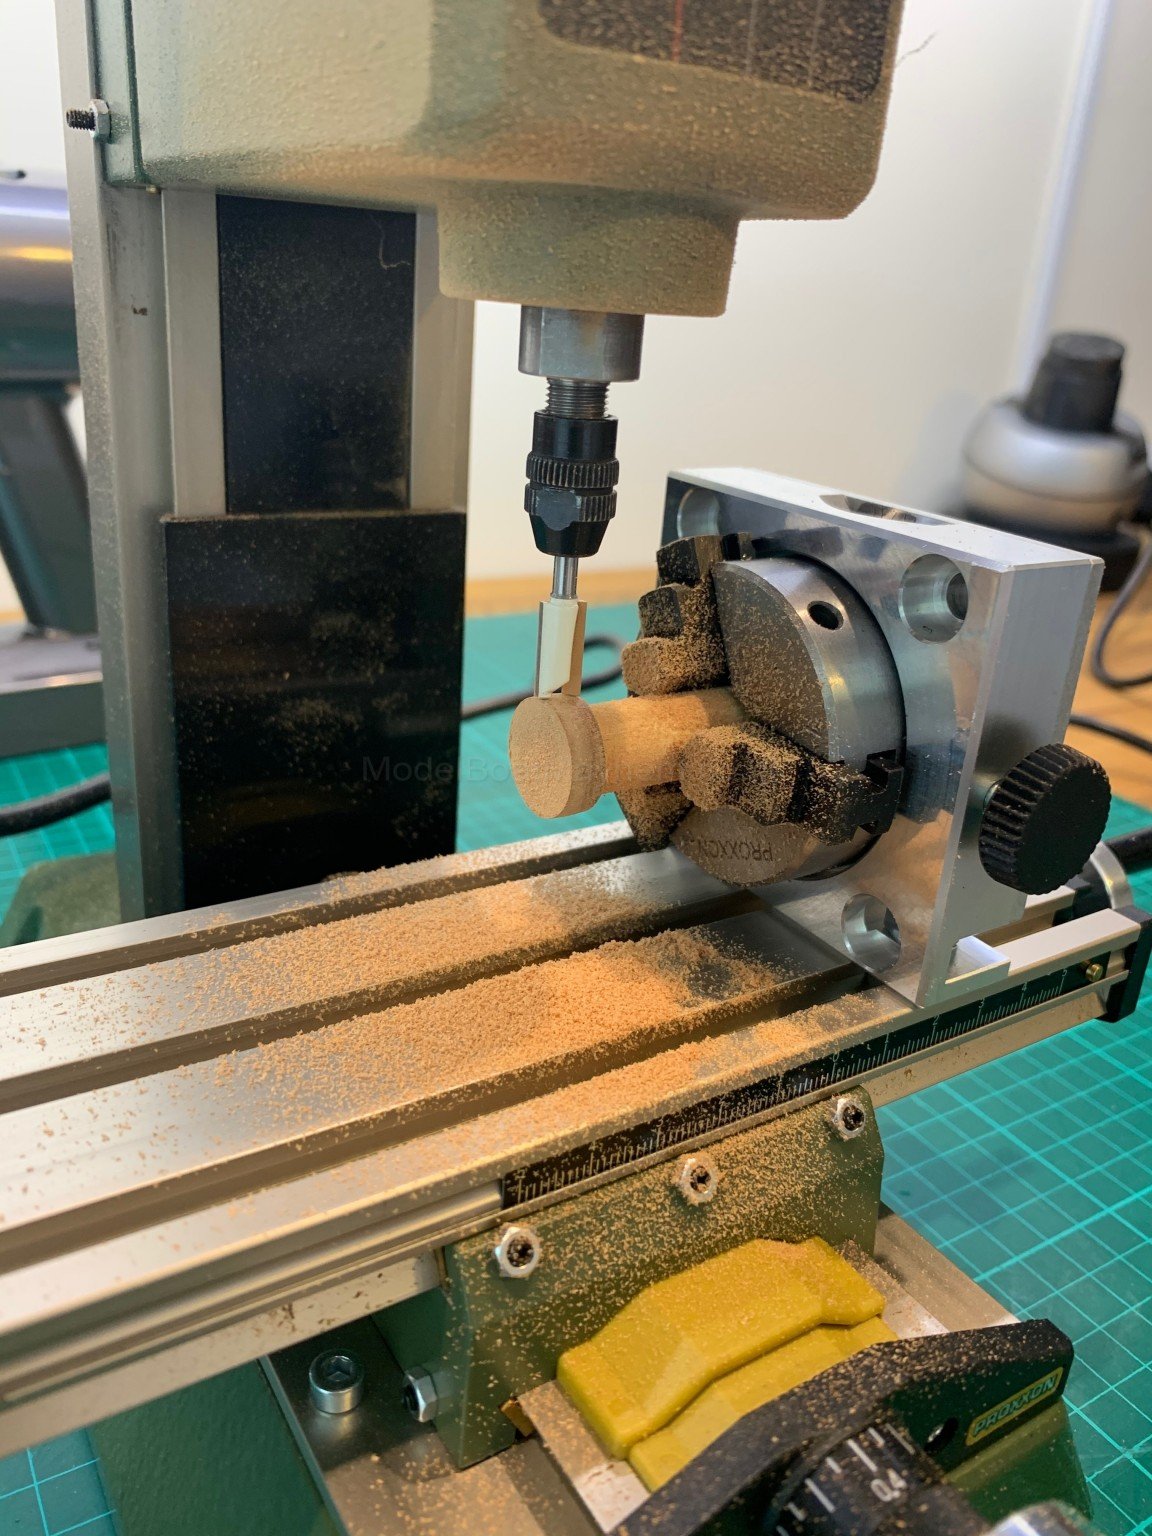
Here’s another example to help you though this time the head is in the horizontal position. I’m milling the cap for a bow bollard and I also cut a shallow rebate in it too. Have the cutter at high speed and take lots of shallow cuts. After I had cut the correct diameter I then set the head vertically and milled the correct thickness.