druxey
-
Posts
13,373 -
Joined
-
Last visited
Content Type
Profiles
Forums
Gallery
Events
Everything posted by druxey
-
Your first attempt at carving will probably go in the scrap box, as will your second or third. But don't be discouraged; your skills will rapidly improve with experience. I've found that making a maquette of modelling clay first helps sort out problems in 3D much better than 2D sketches. If really desperate and you've the budget for it, commission a carving!
-
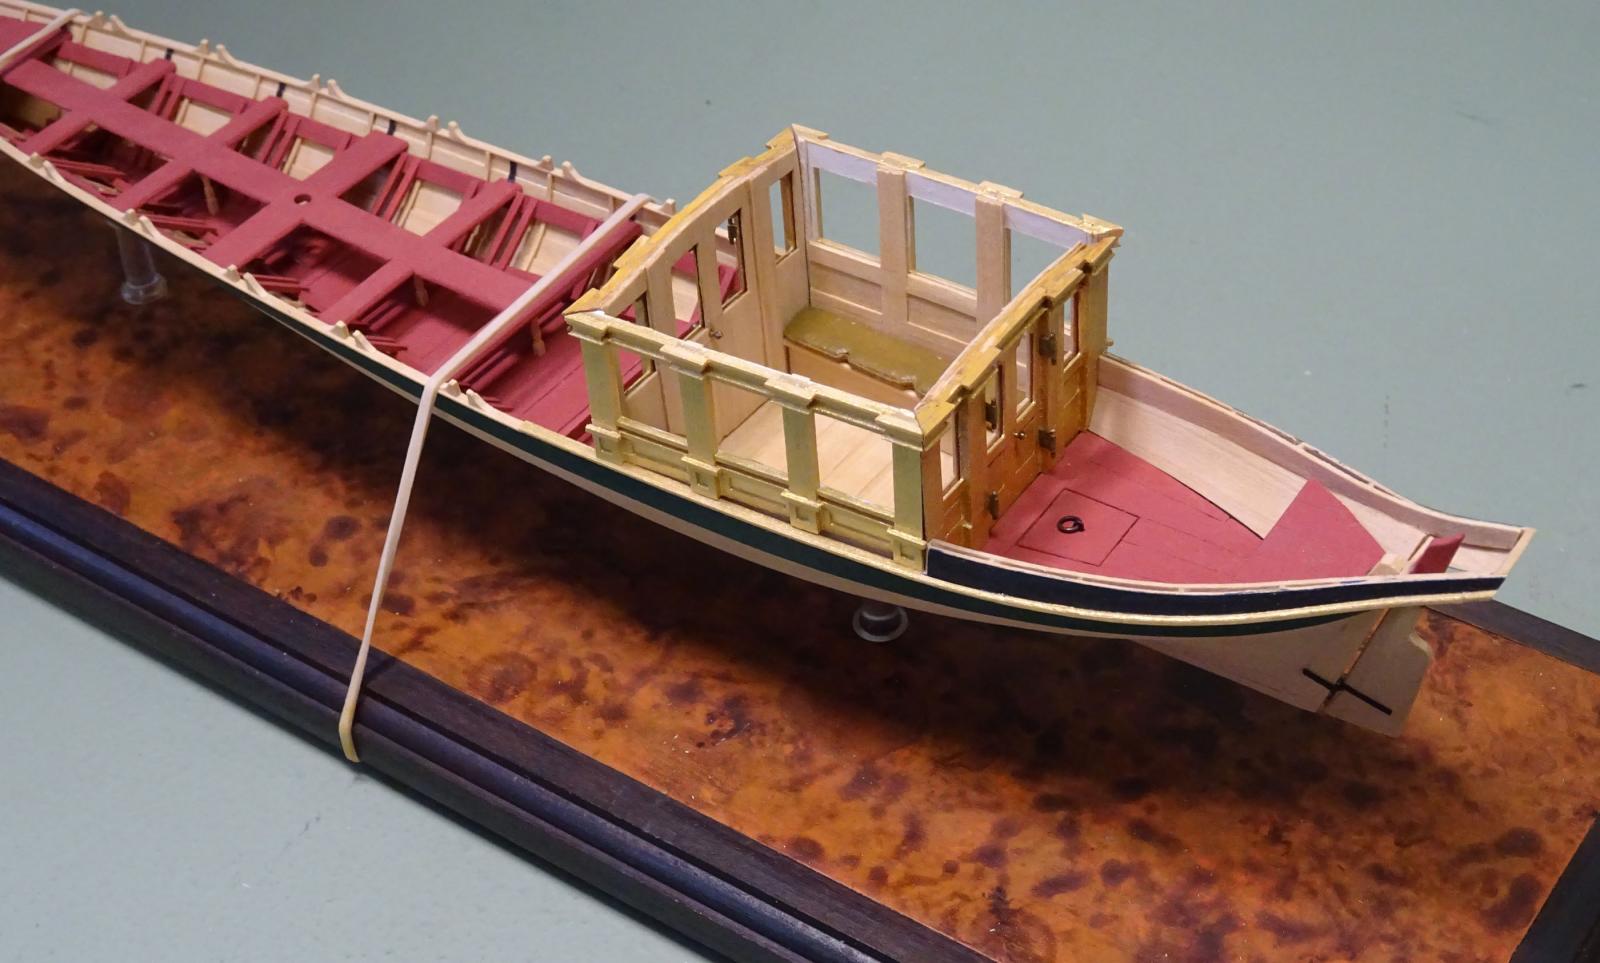
 There are also doors forward, Dan. You'll see them from another angle. The VIP's came aboard via the aftermost thwart and stepped down. I assume that the aft pair of doors were for a servant to hand things through. They are quite narrow: 20" at most.
- 641 replies
-
- 5
-

-
- greenwich hospital
- barge
- (and 1 more)
-
I believe that 'braces' here refer to the gudgeon straps. Steel, Naval Architecture, page 11: BRACES. Straps of iron, copper, or mixt metal, secured with bolts and screws to the stern post and bottom planks. In their after ends are holes to receive the pintles by which the rudder is hung.
-
Thank you, everyone. Still a way to go, though. There's those twelve sweeps (oars) to make as well.... Gerhard: the elegance you see is that of the barge's designer, not mine. Jack: if you Google 'Prince Frederick's barge', you'll see that faux copper roofing color.
- 641 replies
-
- 8
-
-
- greenwich hospital
- barge
- (and 1 more)
-
Yeah, macro photography shows up every tiny blemish! I think most of us understand this and 'filter' these micro deficiencies out.
-
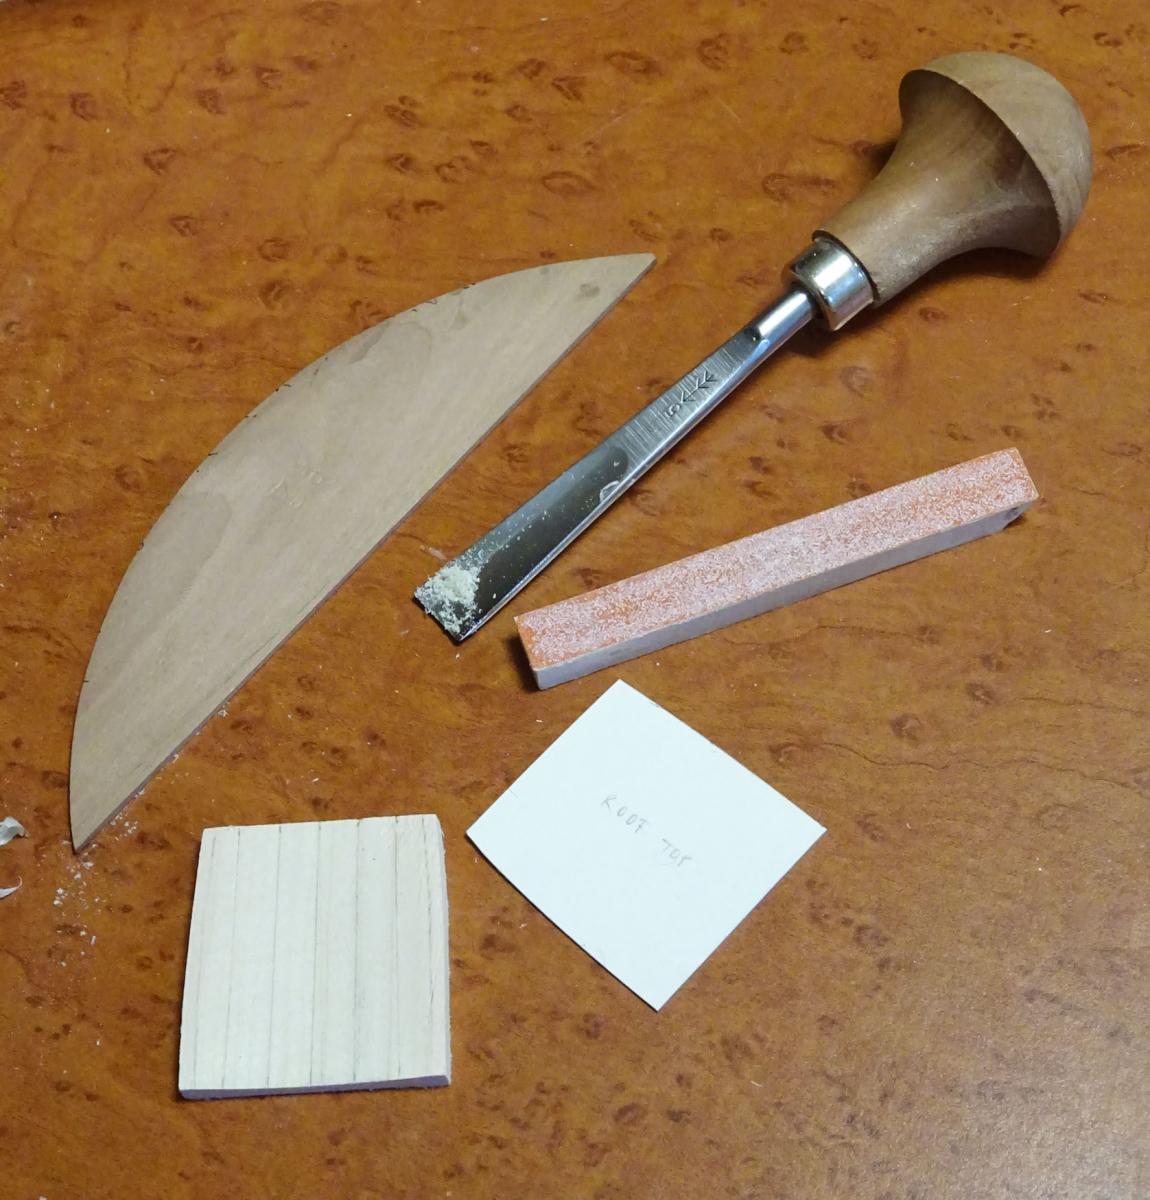
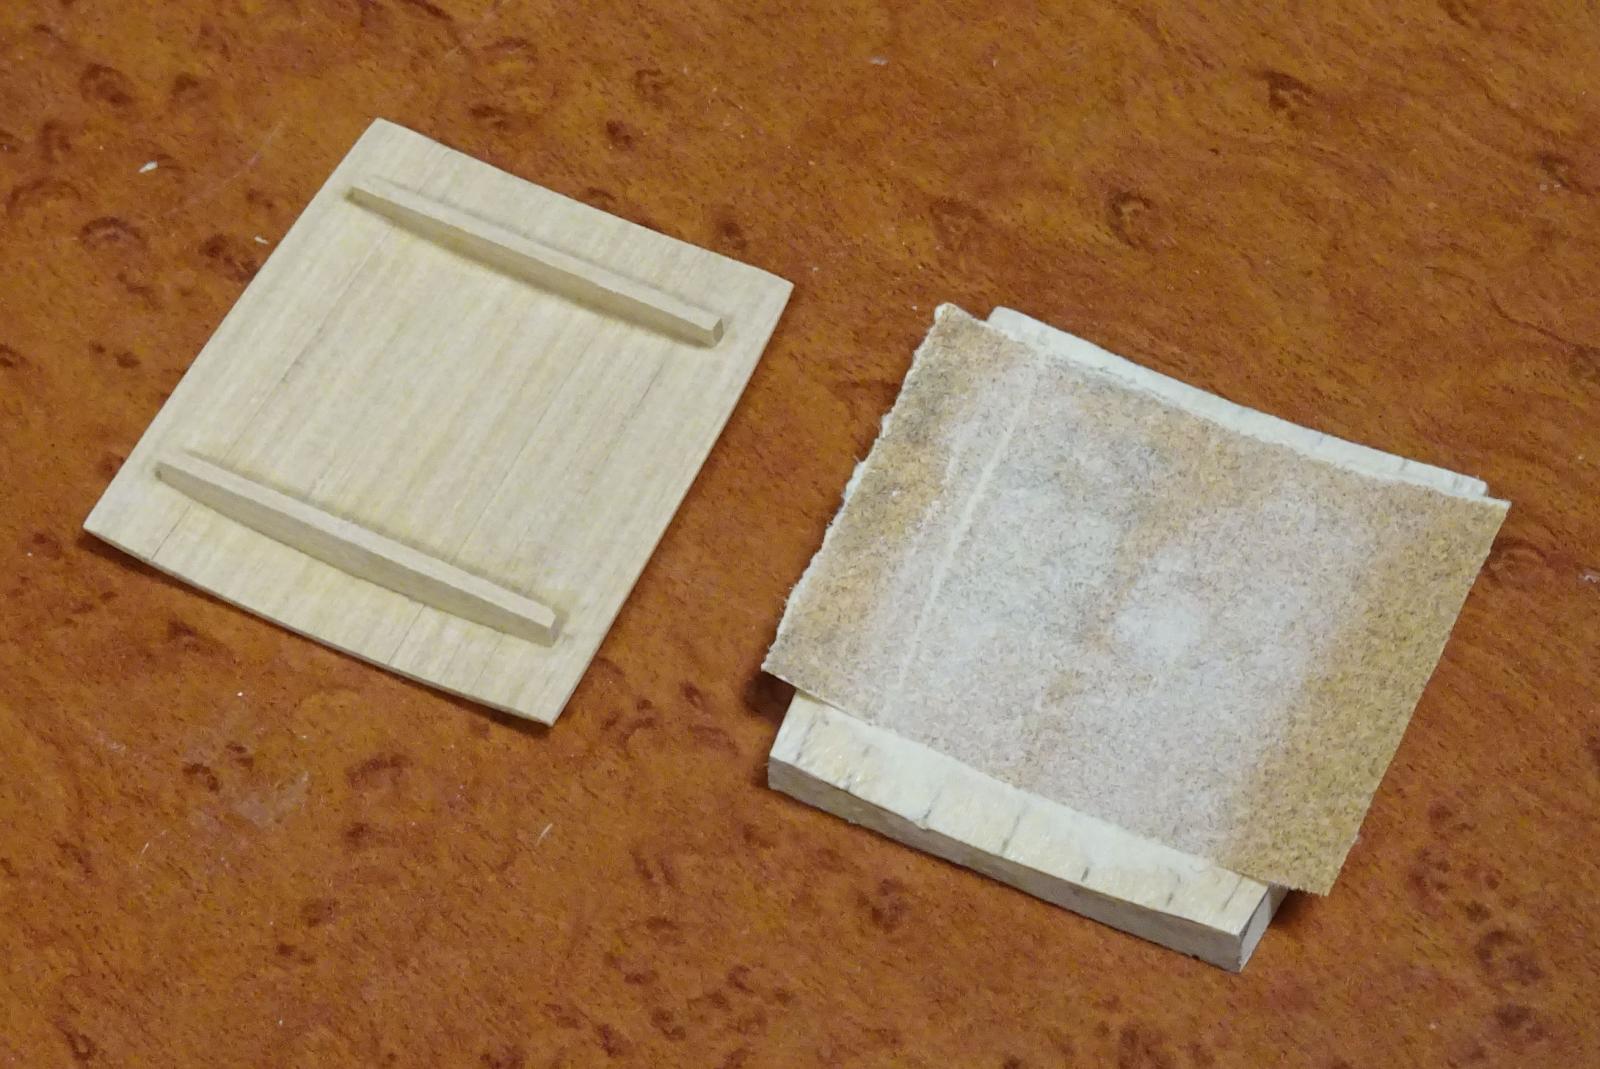
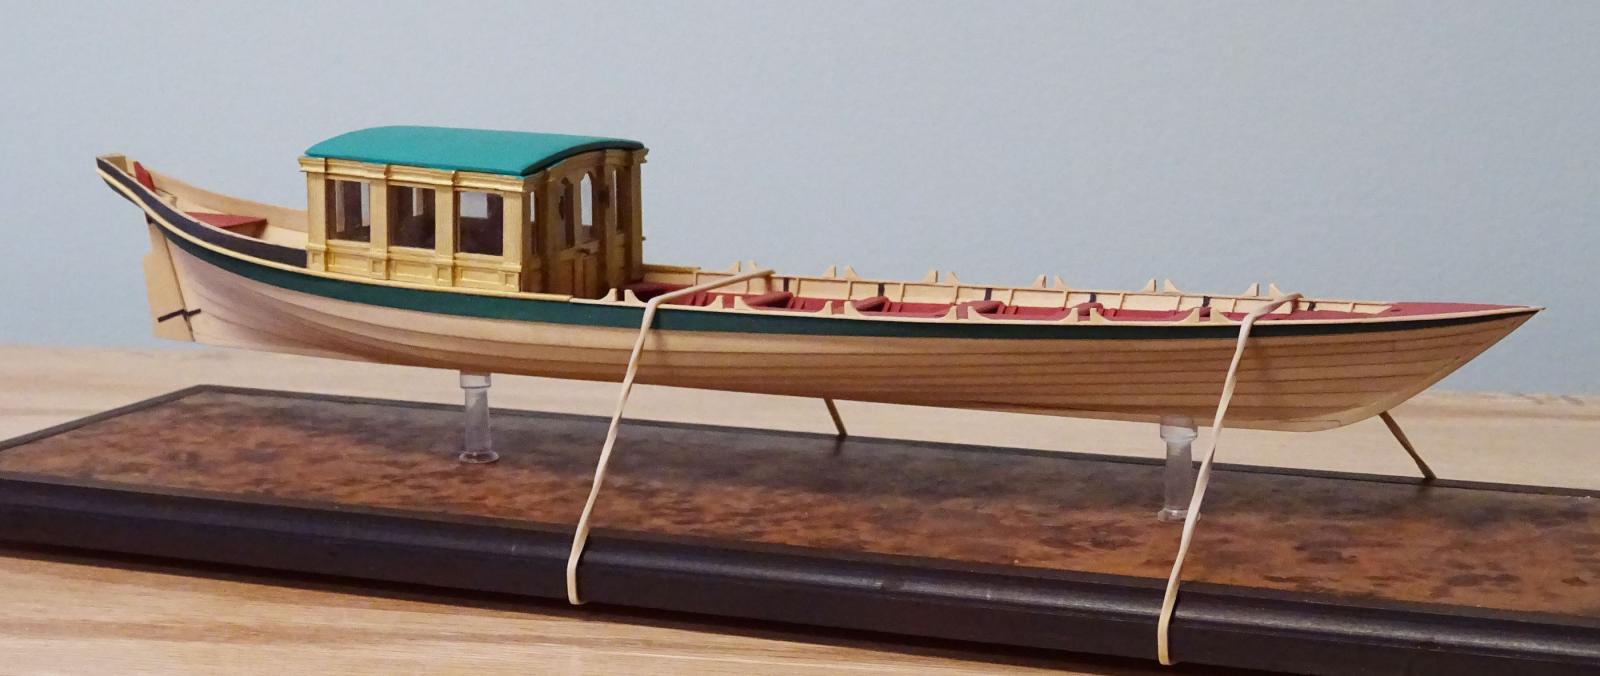
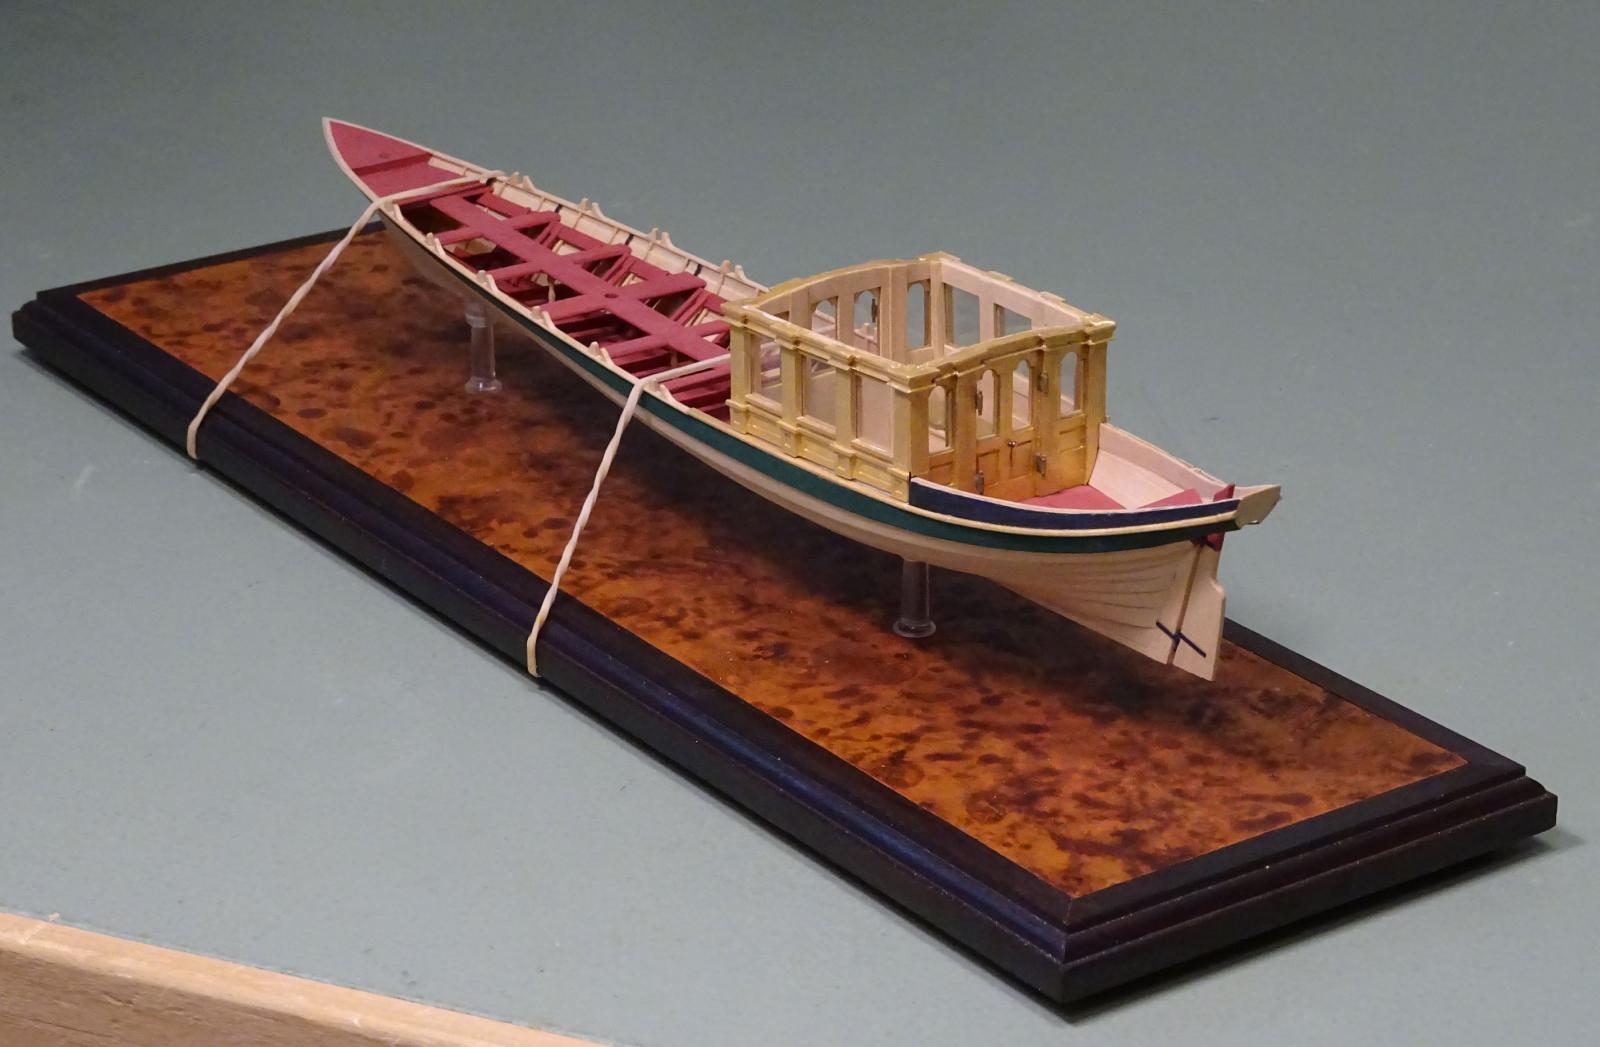
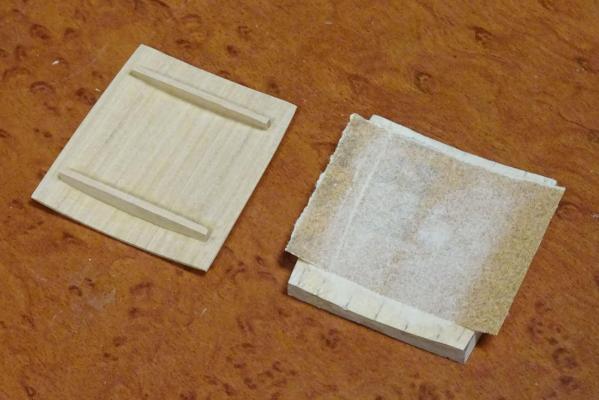
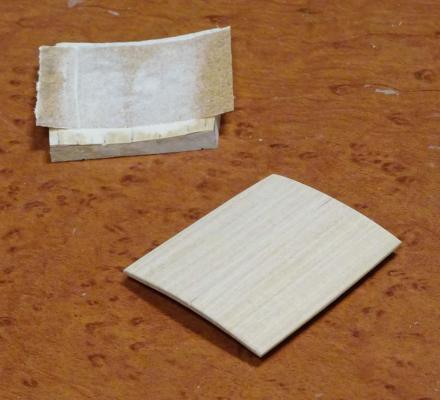
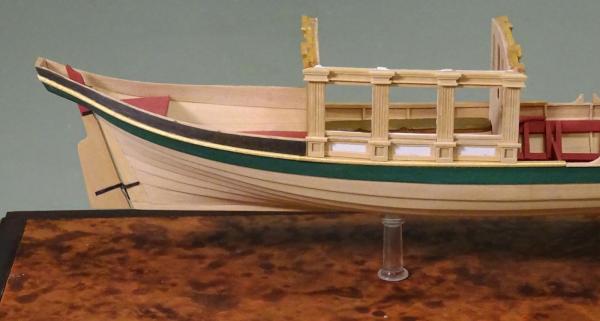
The roof of the coach has been completed and installed. As this is curved, a suitable strategy for building it is needed. I considered carving it from solid, but this would be difficult to keep a consistent thickness. I decided to cooper it, that is to say, build it up as one would a barrel. The first step was to carve a form to build it on. I hollowed a piece of basswood to the appropriate radius, which in this case was 3½" full size (first photo). It was then shaped to the shape of the roof and marked out for the six planks that are nominally 1' 0" (scale) wide. These were cut and shaped with a slight bevel on each edge. They were then glued up on the form. Once complete, two 'rafters' were glued on the underside to maintain shape and integrity. A piece of fine sandpaper was rubber cemented to the form and the upper side of the roof sanded (second and third photos). The outer side edges of the roof were sanded flat, to fit the coach top edges. Following the color used on Prince Frederick's barge, I painted the roof a blueish green to imitate a verdigris copper roof. On the actual barge, the roof appears to be covered with painted canvas. I used a mix of viridian green, some white and then toned down with the addition of a touch of black. The top of the capitals on the coach were also painted this color and the roof glued in place. Next is the decorative work at the stern.

- 641 replies
-
- 53
-
-
- greenwich hospital
- barge
- (and 1 more)
-
Saturday again already! Thank you for this week's update and inspirational work, Glenn!
-
ancre Le Rochefort 1787 by Niklas - 1:36
druxey replied to Niklas's topic in - Build logs for subjects built 1751 - 1800
Great beginning, Niklas. -
Paul: A 'rockhound' shop that sells mineral specimens will have samples of mica.
- 641 replies
-
- 3
-
-
- greenwich hospital
- barge
- (and 1 more)
-
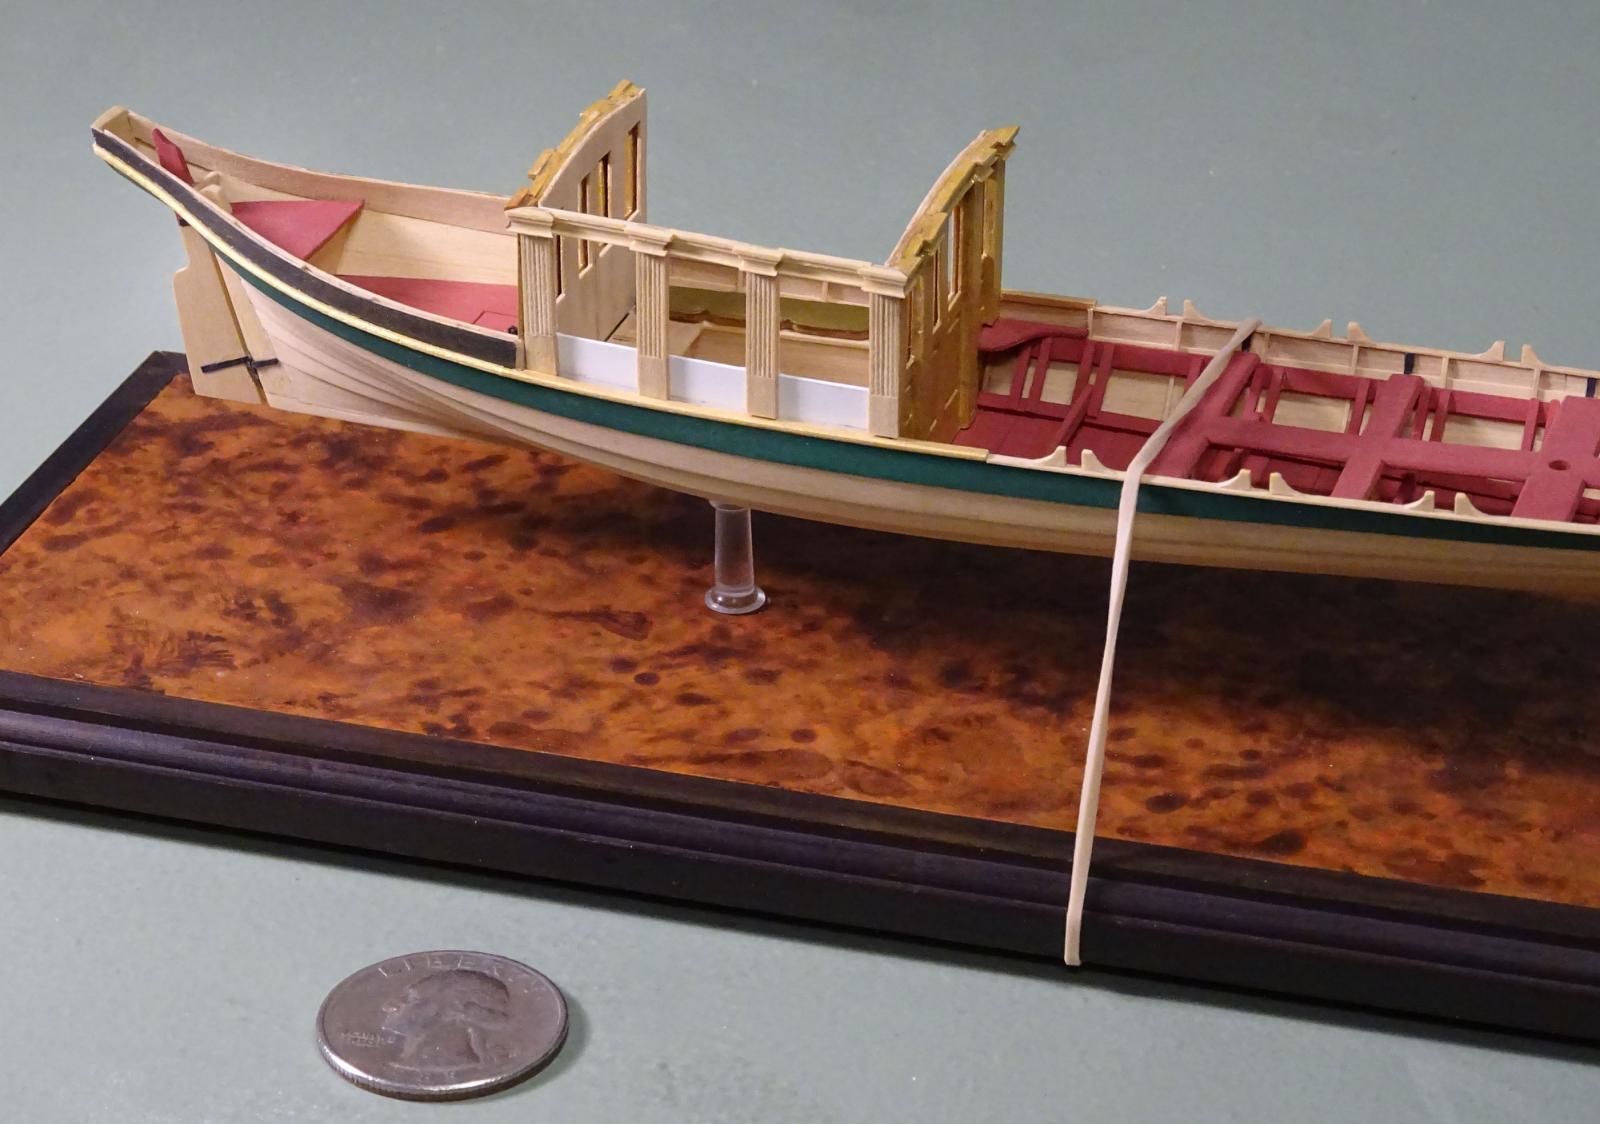
And... the coach sides and ends have been completed, the 'glass' installed and the four sides permanently assembled. After some fien adjustment, the corners came together quite nicely. For the statisticians among us, there were 53 separate parts required just for the outer surfaces of one coach side alone! Next, the coach roof.

- 641 replies
-
- 38
-
-
- greenwich hospital
- barge
- (and 1 more)
-
Looks like you've already answered your own question!
- 649 replies
-
- 5
-
-
- dunbrody
- famine ship
- (and 2 more)
-
Thanks, gentlemen. Joel: The access scuttle was, I believe, for bailing. There were lockers beneath the coach seating. Glenn: Mica was traditionally used on many contemporary models so, nothing new under the sun! Paul: The hinges are simple to make. Cut a strip of paper whose width is the height of the hinge leaf. Lay it down on a flat surface and place a length of 'pin' of suitable diameter across it at right angles. Glue the strip for a little way on one side of the 'pin' and fold over. Press the paper strip snugly against the pin. Let this dry. Paint the assembly a suitable color. Trim the pin and leaves to length and install.
- 641 replies
-
- 9
-
-
- greenwich hospital
- barge
- (and 1 more)
-
Are you sure you don't want to build the whole hull? Looking very neatly done, Frank. One way to ensure the frames are plumb is to glue a temporary cross-spall across the top of the frames and mark the centreline. This will ensure symmetry across the hull. Two set squares will ensure plumb as well as at right angles to the keel.
- 649 replies
-
- 7
-
-
- dunbrody
- famine ship
- (and 2 more)
-
Thanks for dropping by, everyone. The outer sides of the coach have been completed and gilded. The coach is only test-fitted together at present. I'm now in the process of panelling the inner sides and refining the fit of the corners of the coach. The latter needs particular care: take too much material off a corner and.... The door hardware has been added. The door knobs are of brass wire whose ends have been melted. If done correctly, the ends of the wire will form a small spherical ball. The 'bronze' hinges are pieces of bamboo treenail and paper, acrylic painted.

- 641 replies
-
- 37
-
-
- greenwich hospital
- barge
- (and 1 more)
-
It's nice to break the monotony of framing, isn't it?
-
Thanks for the clarification over the direction of the keel scarph, Frank.
- 649 replies
-
- 5
-
-
- dunbrody
- famine ship
- (and 2 more)
-
Learner: I didn't miss the panels: I simply took the photos while the sides were in the process of being built up! Grant: Yes, it's true. Even professionals have to re-do things. Errare humanum est and all that. Thanks for looking in, everyone.
- 641 replies
-
- 9
-
-
- greenwich hospital
- barge
- (and 1 more)
-
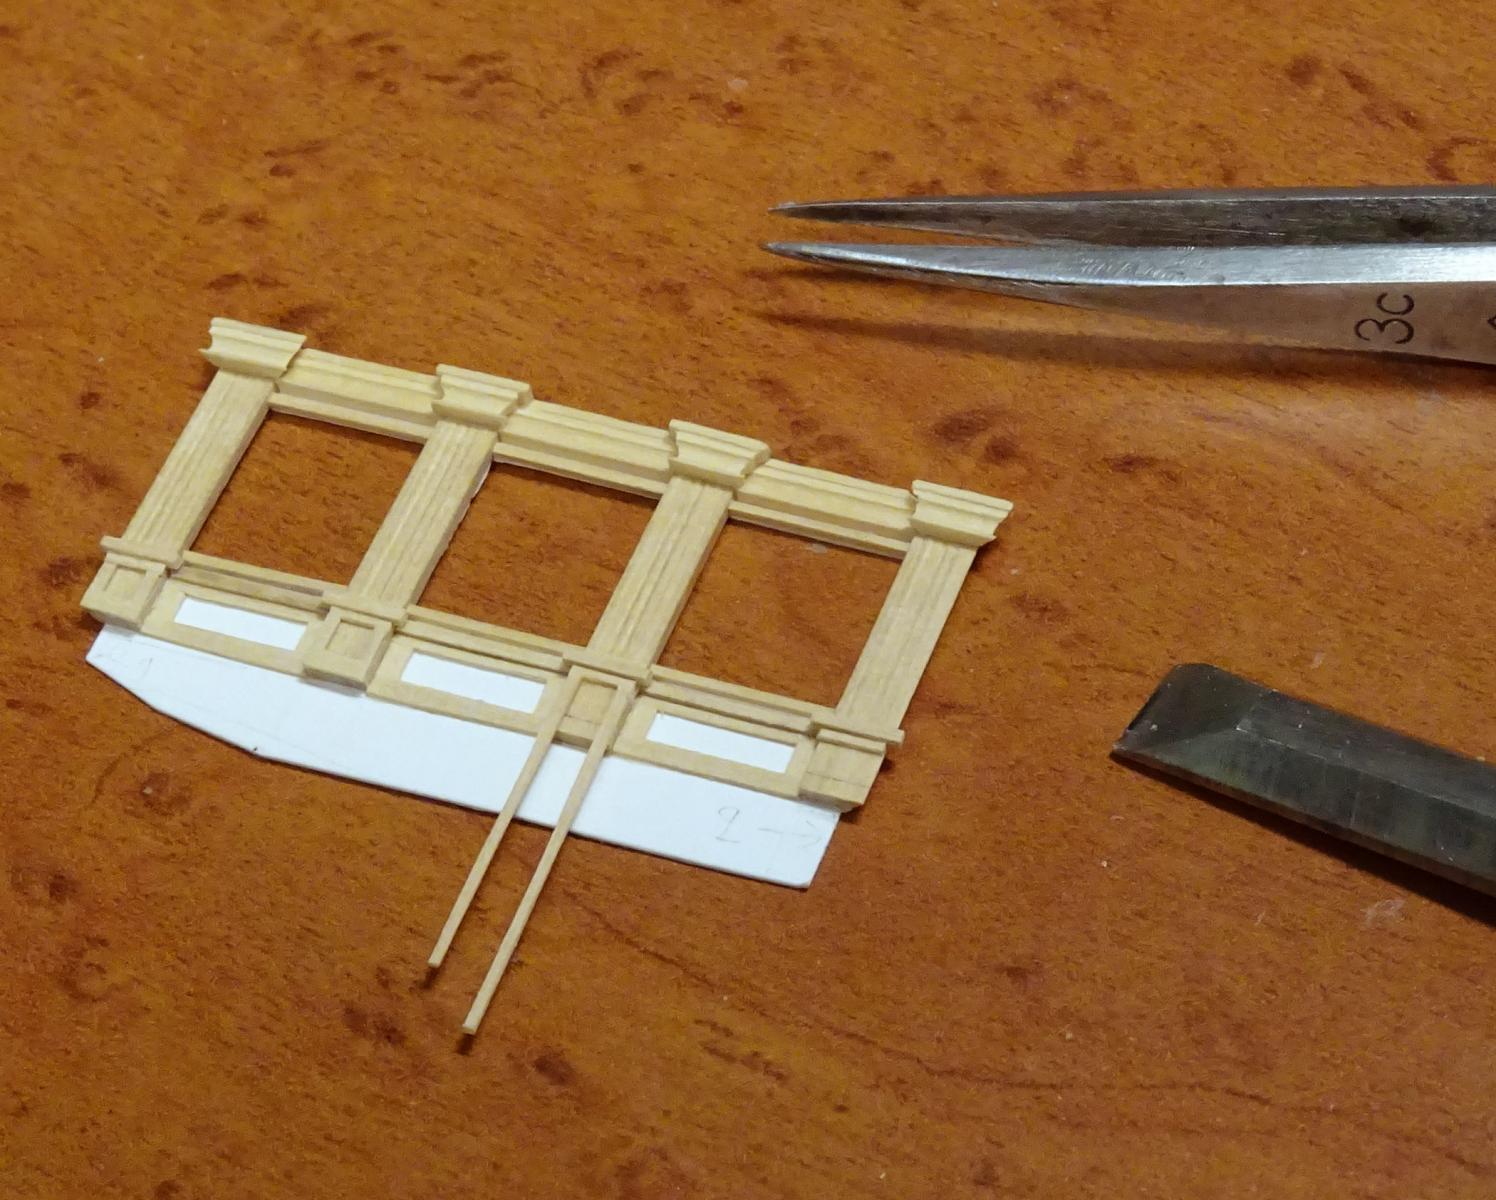
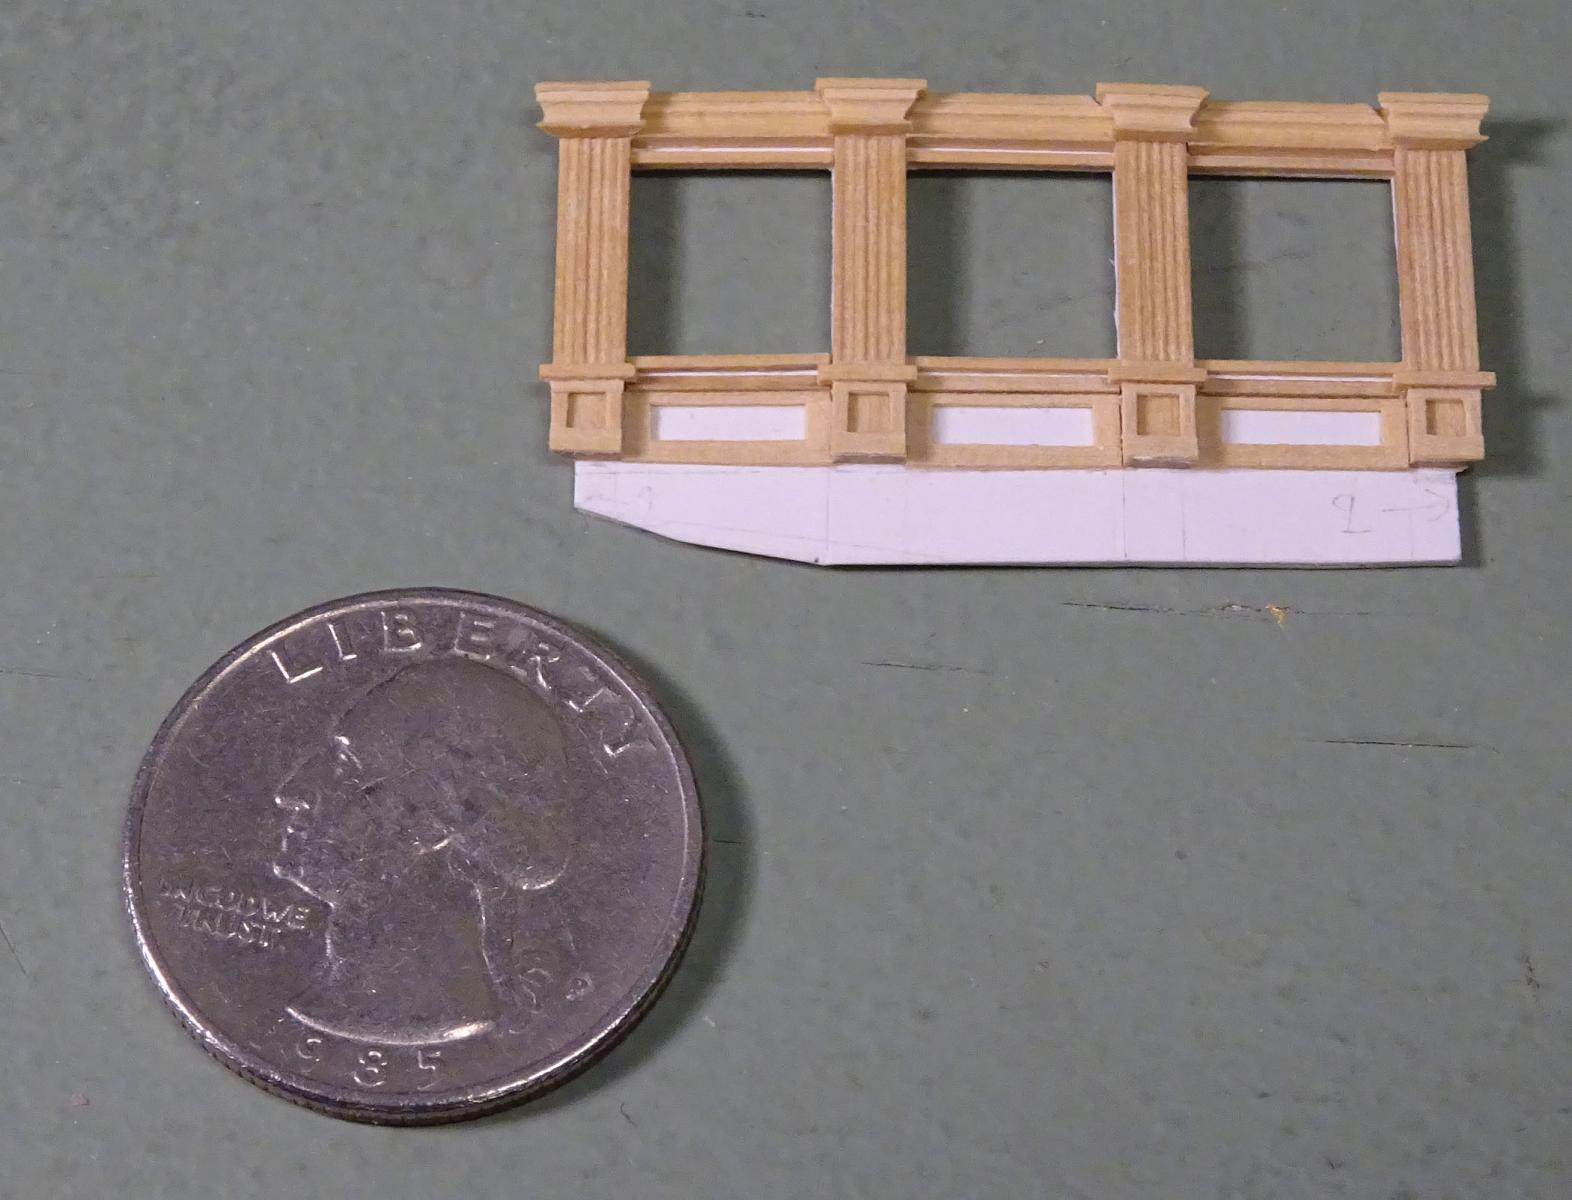
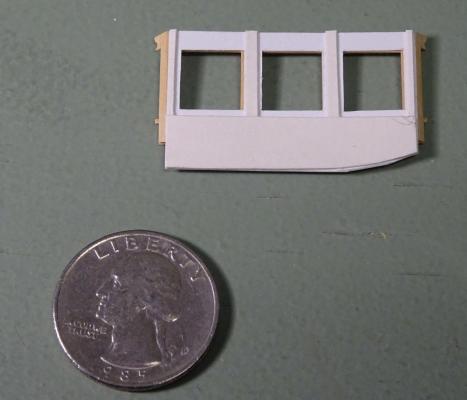
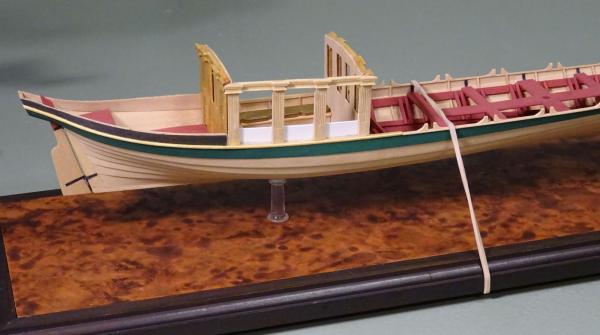
Thanks once more for the likes and comments, everyone. I had to re-do the side of the coach. I found that I had cut the lights to the wrong depth. In addition, the lights were uneven in width. So, a second round. When dealing with tiny pieces, I've found it easiest to leave them over-length to glue them on (top photo). I then use a chisel to cut the pieces to exact length. The top and bottom pieces of the panel frame were cut a little overlength, then sanded using a sanding stick to trim them to exact dimension (second photo). The inner side of the piece has had card strips glued on to leave channels for the glazing (third photo). In this case I shall be using mica. This is a naturally occurring mineral that is fairly transparent. It can be peeled into very thin layers and cuts easily. The pieces will be slid into place from above before the roof is installed. The cutaway at the bottom of the side is because the hull curves inward here and this allows for the changing interior contour. The last photo shows the work to this point. Next will be the inside panelling and the other side piece.


- 641 replies
-
- 43
-
-
- greenwich hospital
- barge
- (and 1 more)
-
Hmm.... If I may make another suggestion: at midships, the lines of the joints shouldl be spaced apart about equally. The uppermost line should move down so that it is just below the wale. Then I think you are gold.
- 525 replies
-
- 3
-
-
- anchor hoy
- hoy
- (and 1 more)
-
The first of the two coach sides is now in the process of being constructed. These are built up in the same way as the fore and aft ends of the coach. As there is a slight curve to the sides, allowance is made for some flex between each of the three lights. Toni: to answer your question, I'm delaying a final judgement on the degree of reflectivity of the gold until the model nears completion. Also, the photographs don't really give the effect of the actual appearance to the eye.

- 641 replies
-
- 40
-
-
- greenwich hospital
- barge
- (and 1 more)
-
Frégate d'18 par Sané , la Cornélie
druxey replied to JohnE's topic in CAD and 3D Modelling/Drafting Plans with Software
Looking good, John! Now all we need is some representative decorative work....