druxey
-
Posts
13,392 -
Joined
-
Last visited
Content Type
Profiles
Forums
Gallery
Events
Everything posted by druxey
-
 Looking good and symmetrical, Erik.
 -
Nicely coiled and hung, Chuck. Looks very convincing. Well done!
- 1,051 replies
-
- 4
-

-
- cheerful
- Syren Ship Model Company
- (and 1 more)
-
Very nice carved work, Fam. For a fully round figure, try modelling a maquette in clay (or Fimo) first. This will help you visualize things from any angle.
-
Clean and ship-shape work as usual, Mike. Very nice indeed.
- 452 replies
-
- 4
-
-
- cheerful
- Syren Ship Model Company
- (and 1 more)
-
That's remarkably well done if you had no lathe or mill. Impressive!
-
ancre La Salamandre by tadheus - 1:24
druxey replied to tadheus's topic in - Build logs for subjects built 1751 - 1800
The weathered look is very well done, Paul! -
Guy: it's an optical illusion, I think. Thanks again, everyone, for dropping in. There may not be another update for a week or two, as other more pressing work has to be completed first. Please check in again toward month's end.
- 641 replies
-
- 8
-
-
- greenwich hospital
- barge
- (and 1 more)
-
I've seen one other example of circular or oval plate at the bow, rather than a horseshoe plate. Interesting artifact! Thanks for posting.
-
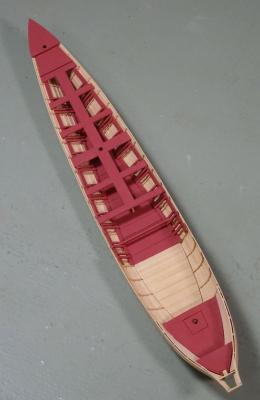
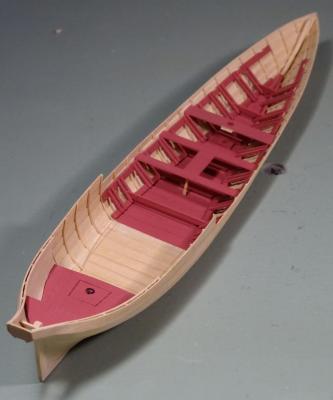
Well, you'll all have to wait a bit yet. The forward deck/platforms are made and fitted. The same card template strategy was used as for the footwaling and aft platforms. There are a few more details on the thwarts to take care of: iron strap standards that attach them to the side. Then there are small corner benches to make and fit just forward of the coach (cabin).
- 641 replies
-
- 47
-
-
- greenwich hospital
- barge
- (and 1 more)
-
Certainly it isn't a stealer - that term applies to planking. Could be called a sistered toptimber. However, Waldo is more fun, if terminologically inaccurate!
-
Patience, gentlemen, and all will be revealed in time!
- 641 replies
-
- 6
-
-
- greenwich hospital
- barge
- (and 1 more)
-
If you want a book, The Fully Framed Model, Volume II contains one method of doing this (among many other techniques). See the SeaWatchBooks web site.
-
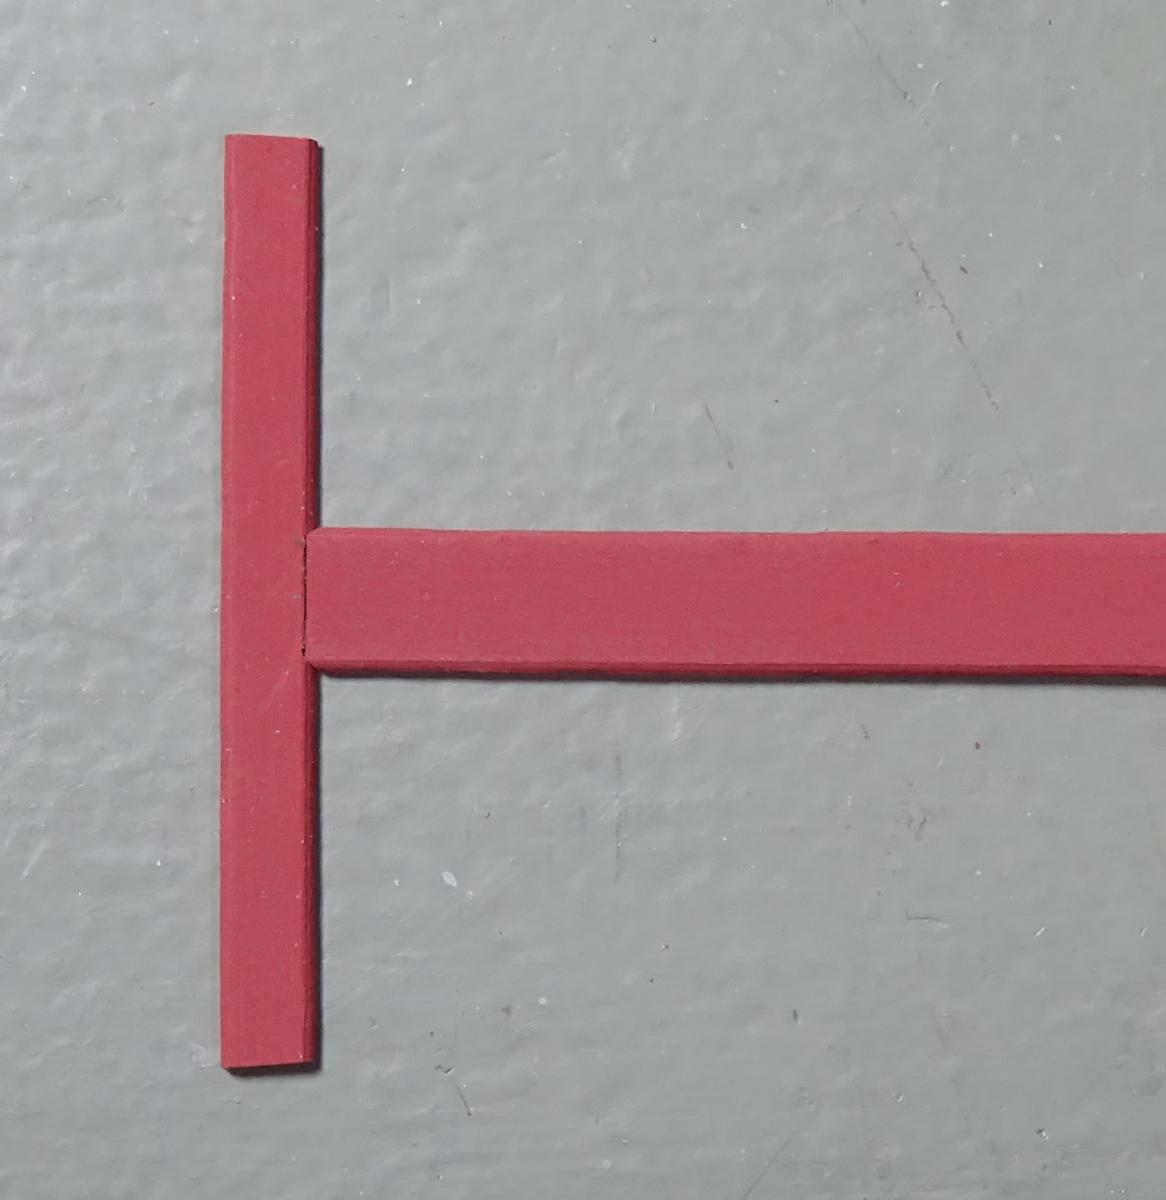
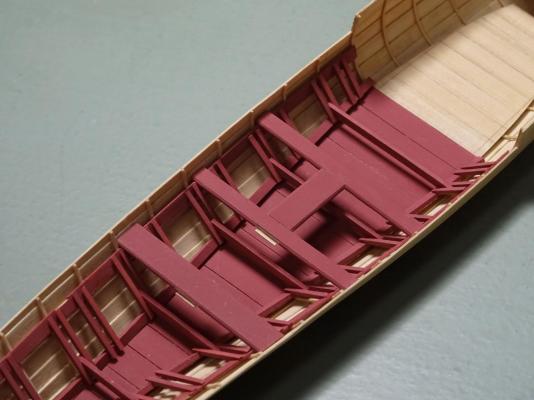
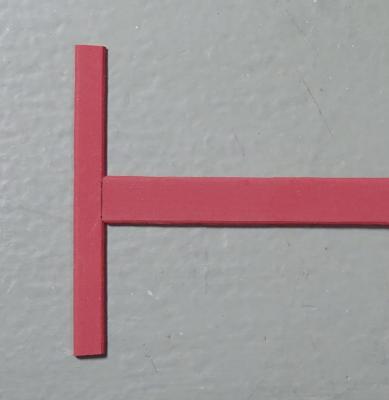
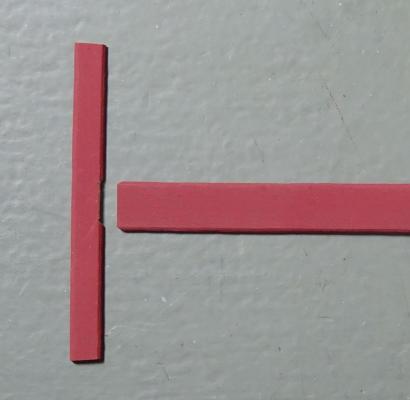
Thanks again for your encouragement, folks. All the thwarts are now in, along with their longitudinal pieces. Once I figured out my strategy, this was easier to accomplish than I thought. After marking out and cutting recesses in the thwart, a small tongue was glued underneath. This prevents the longitudinal strip from falling through and allows it to sit flush to the thwart. The recesses are carefully marked and cut using a scalpel. The longitudinal is cut to length and the corners bevelled to 45 degrees using a fine sanding stick. I found that using a chisel here was difficult, as I could not cut the corners consistently. Next are the two small platforms or decks forward of the first thwart. That will complete internal work at the fore end of the model.


- 641 replies
-
- 35
-
-
- greenwich hospital
- barge
- (and 1 more)
-
It is possible to rig to those bolts in place but, having been caught in that trap once, I wouldn't recommend it! Your work is lovely and clean. That is a first-class model on the way.
- 452 replies
-
- 3
-
-
- cheerful
- Syren Ship Model Company
- (and 1 more)
-
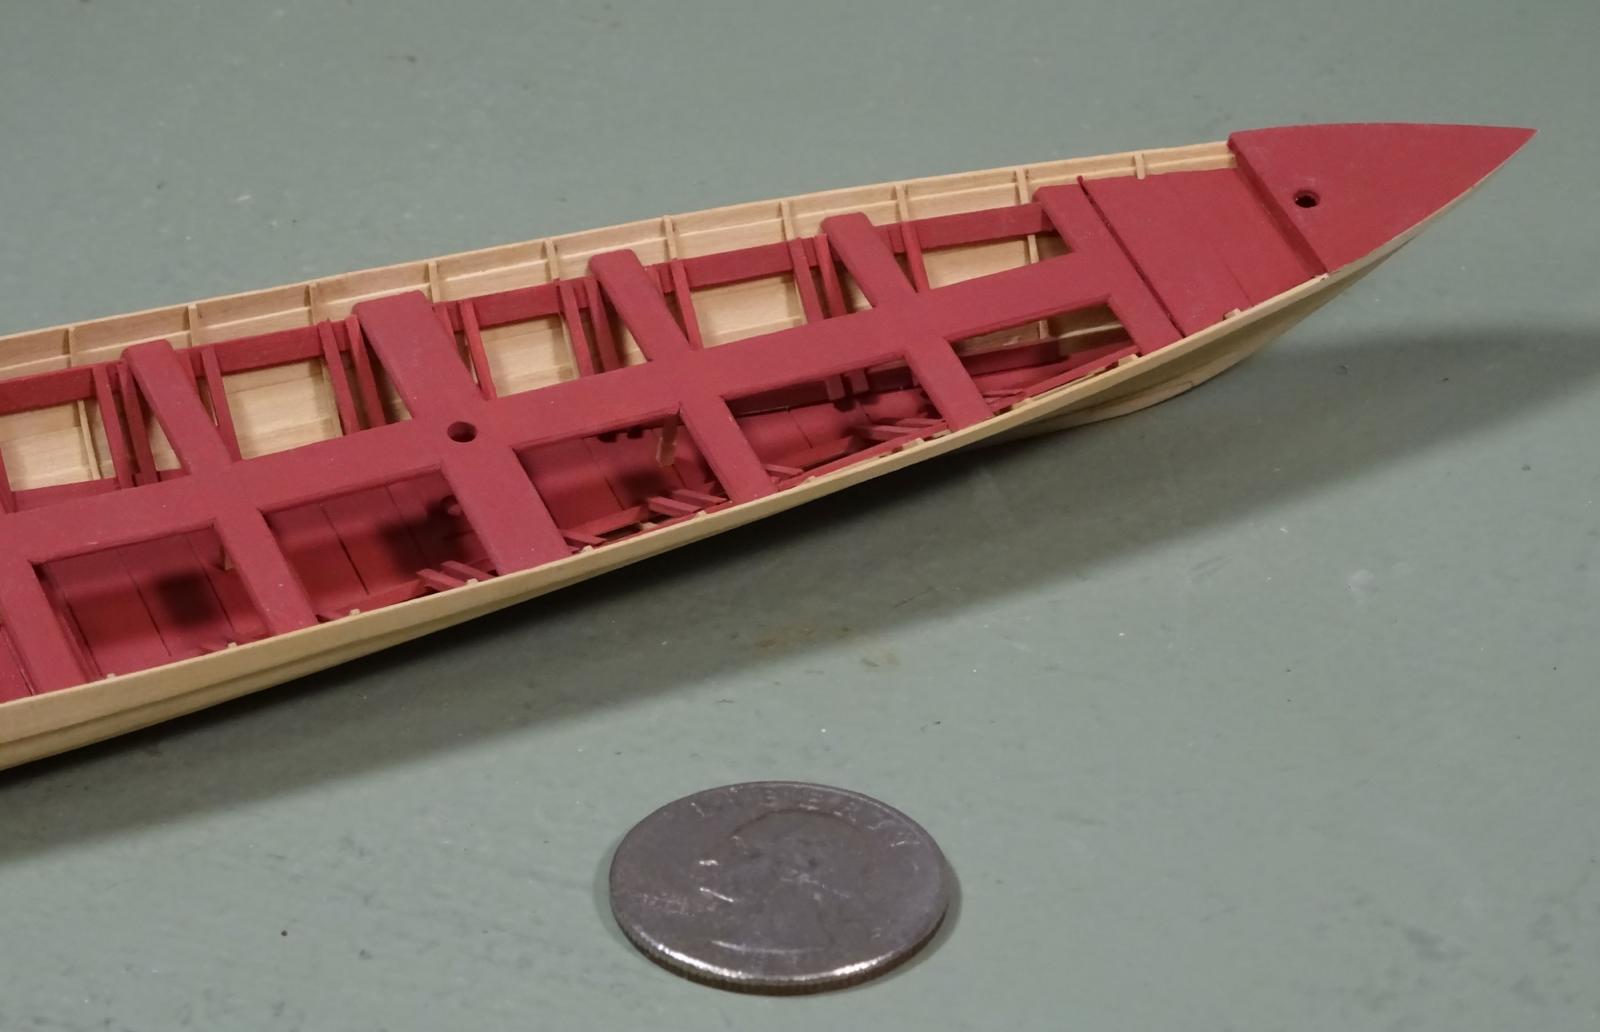
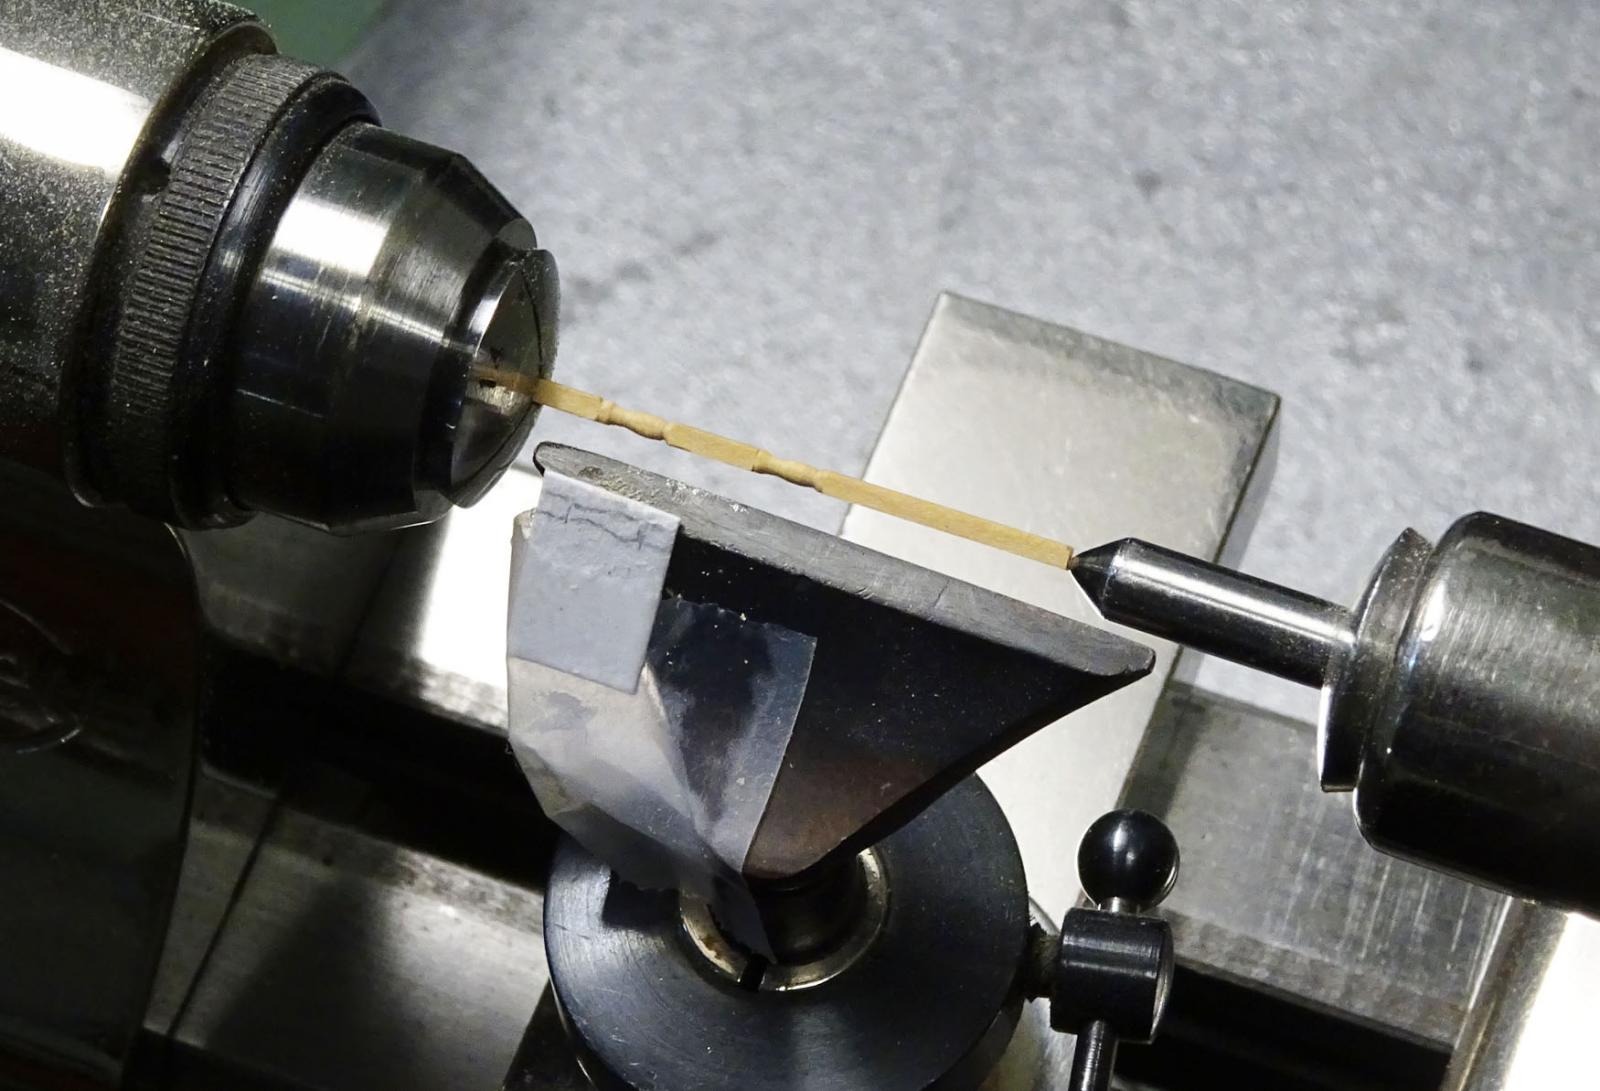
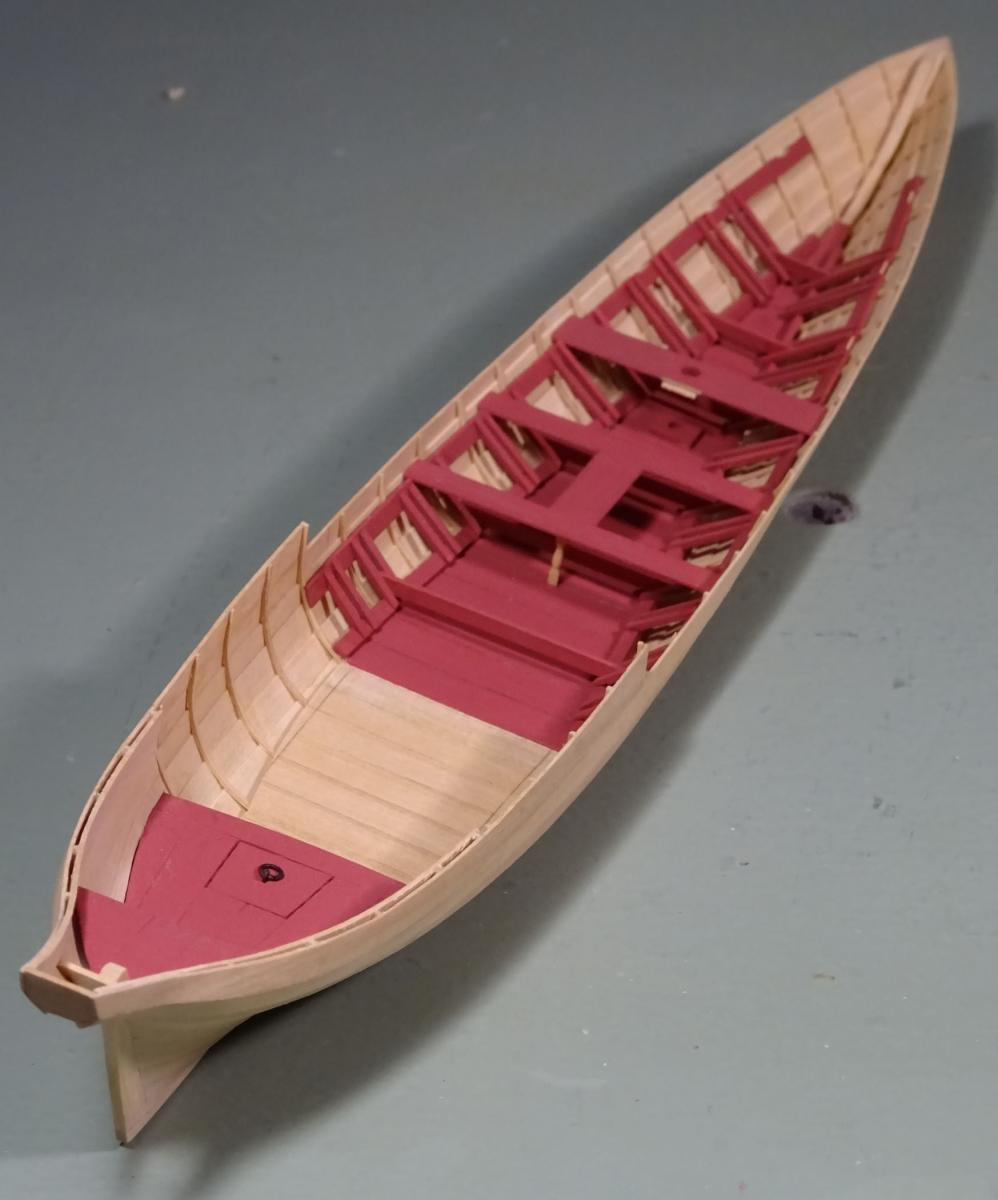
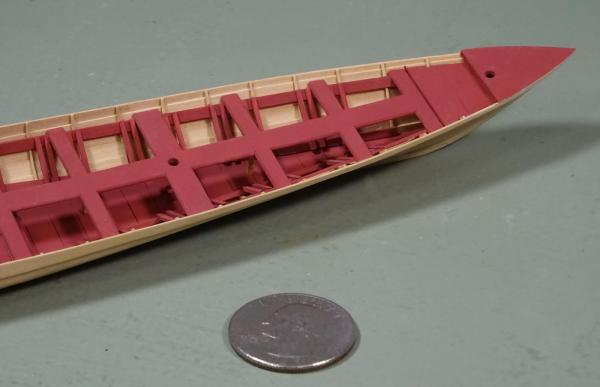
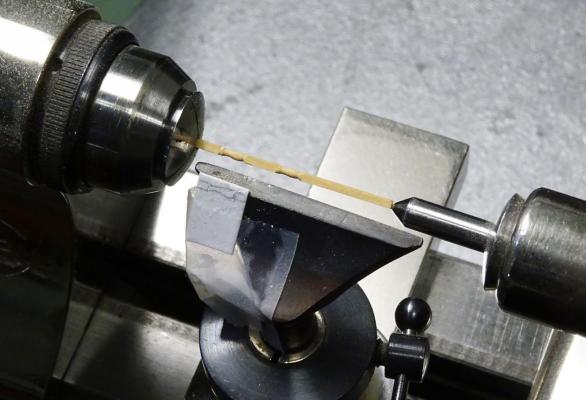
Turned some pillars for under the thwarts freehand with files. As there are only five to make, it was not worth the effort to make a contour pattern. The pillars will be almost invisible in the finished model anyway! The stock was 2" square. Started cutting and fitting thwarts. The ensign staff step was also added under the wider thwart before the area became inaccessible. The thwart itself has now been drilled for the staff and installed (third photo).
- 641 replies
-
- 48
-
-
- greenwich hospital
- barge
- (and 1 more)
-
Kind of rough and ready! Thanks for these informative photos, Glenn. The 'aft part of the wreck' model is superb.
-
I don't disagree with your posts, Rob. The 3 bolts per that you indicate in Steel are certainly there! However, what bothers me is the wording, "in each scarph". This implies a further three bolts through each scarph rather than between the floors and futtocks of the frame pairs. Now, to confuse you further, I looked things up in Steel's Naval Architecture. The three bolts you indicate (square in section, BTW) are specified as having the same dimensions as the keel bolts. BUT, (page 378) Steel mentions treenails, not bolts, through each part of the chocks! "The frames, when bolted together, have chocks fayed in the seats at the heads and the heels, and fastened with treenails..." I rest the case, m'lud.
-
Very nice, Mark. Just catching up with your log. I didn't know about 'rudder retrievers'. Must be a new breed?
-
Effie M Morrissey by allanyed
druxey replied to allanyed's topic in - Build logs for subjects built 1851 - 1900
Very neat, Allan! That row of stanchions must be very satisfying to look at now. Of course, there's the other side of the ship to do yet.... -
Thanks for the information, Steven. I'm sure that the actual oars varied slightly from each other and were not the result of mass-produced casting (although it's a tempting thought)! I applaud your wanting to keep the model of wood.
-
Thank you for your positive comments and encouragement, everyone. Test made the joint required for the thwarts. A little tricky, but not impossible. The critical thing will be to have all the longitudinal pieces line up nicely!
- 641 replies
-
- 25
-
-
- greenwich hospital
- barge
- (and 1 more)
-
One piece at a time. Take Remco's motto to heart: "Treat each part as if it is a model on its own, you will finish more models in a day than others do in a lifetime."