-
Posts
13,405 -
Joined
-
Last visited
Content Type
Profiles
Forums
Gallery
Events
Everything posted by druxey
-
I think, while you are correct, Michael, in saying the damp towel will expand the wood; once the humidity level returns to ambient, the wood will shrink back again. This treatment is only a temporary fix, unfortunately.
- 889 replies
-
Interesting conundrum, Bill. Two out of three sources don't show this port. The VdV and Boston images look more accurately rendered than the Payne.... The more forward-pointing catheads of that era look as if they would be almost immediately above such a port, if it existed. My inclination would be to omit it. However, its's your model, your call! Beautiful work again, Bill. It's nice to see the head of your model finally being populated!
- 382 replies
-
- sovereign of the seas
- carving
-
(and 1 more)
Tagged with:
-
Lovely metalwork, as always, Ed. You could always make another one for blackening....
- 3,618 replies
-
- young america
- clipper
-
(and 1 more)
Tagged with:
-

Pandora by marsalv - FINISHED - 1:52
druxey replied to marsalv's topic in - Build logs for subjects built 1751 - 1800
Very nice monograms indeed, Marsala. How did you make and apply them? -
I'm sure that this is a disappointment to you. However, none of us reach perfection. Somewhere in every model, lurks an 'oops'. One possible (non-destructive) solution might be this: the actual scarph will be hidden under the mast step. As the bolting pattern is regular, could you scribe a scarph in the correct position and slightly darken this with a fine pencil point?
- 649 replies
-
- dunbrody
- famine ship
-
(and 2 more)
Tagged with:
-
I'm sure that much is salvageable, Ben. Just get out the isopropanol bath!
- 889 replies
-
Impressively researched and well modelled, Dick. Just catching up with your last few posts.
-

Pandora by marsalv - FINISHED - 1:52
druxey replied to marsalv's topic in - Build logs for subjects built 1751 - 1800
That is a lot of machining! Well done, Marsalv. -
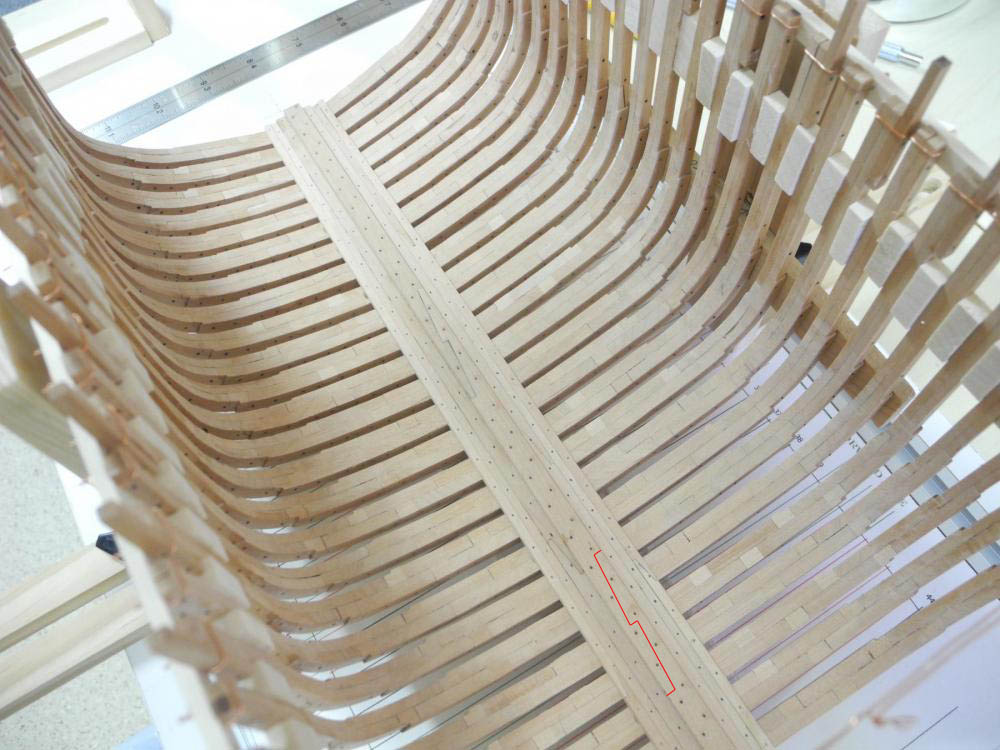
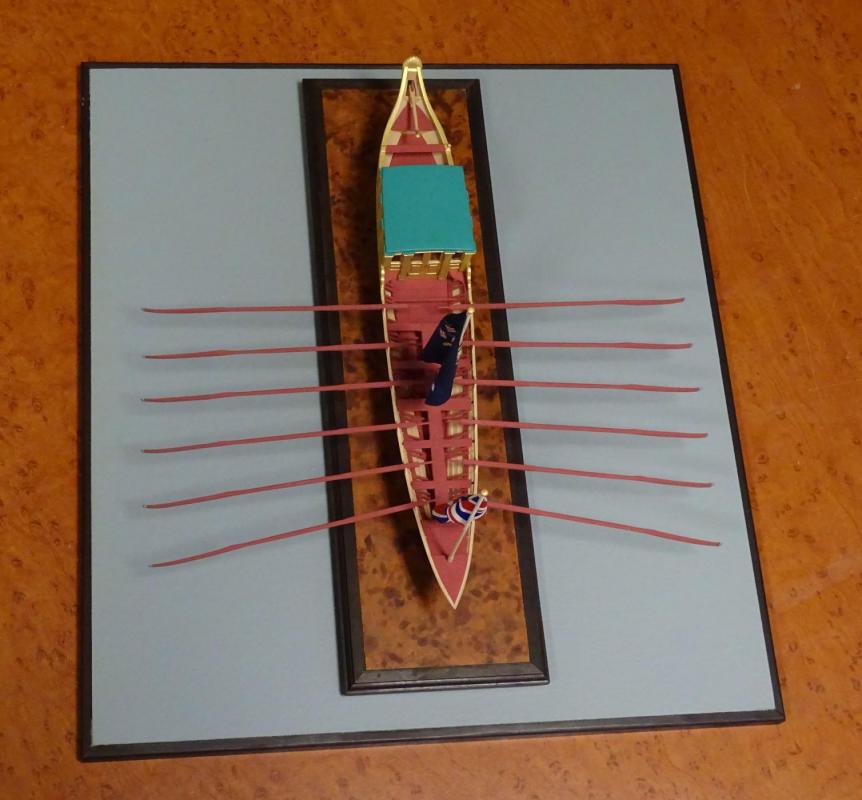
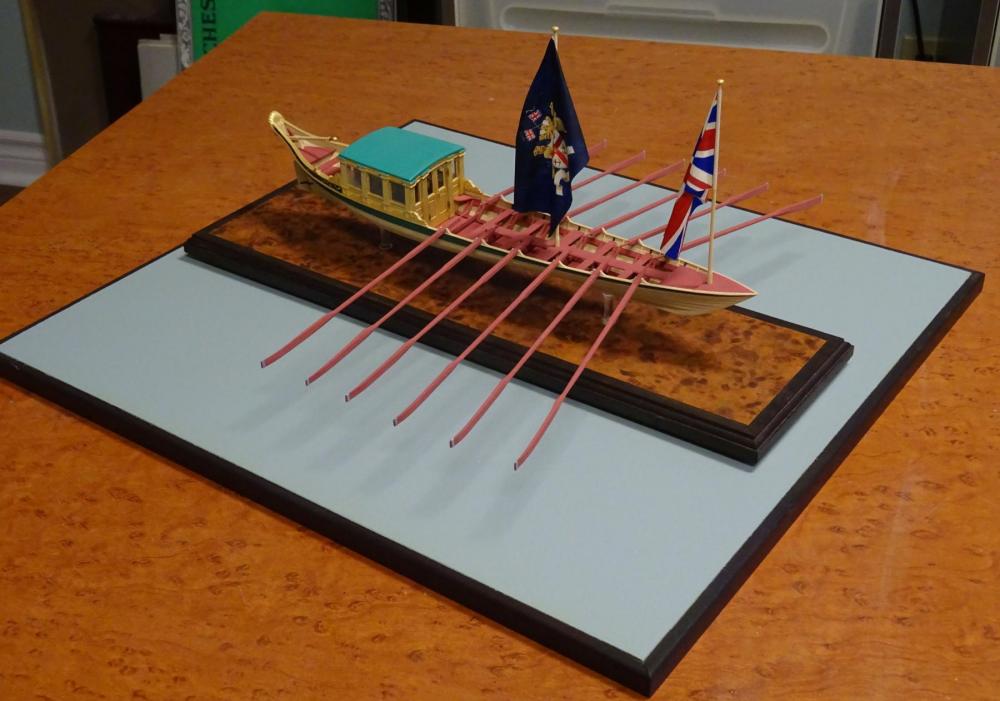
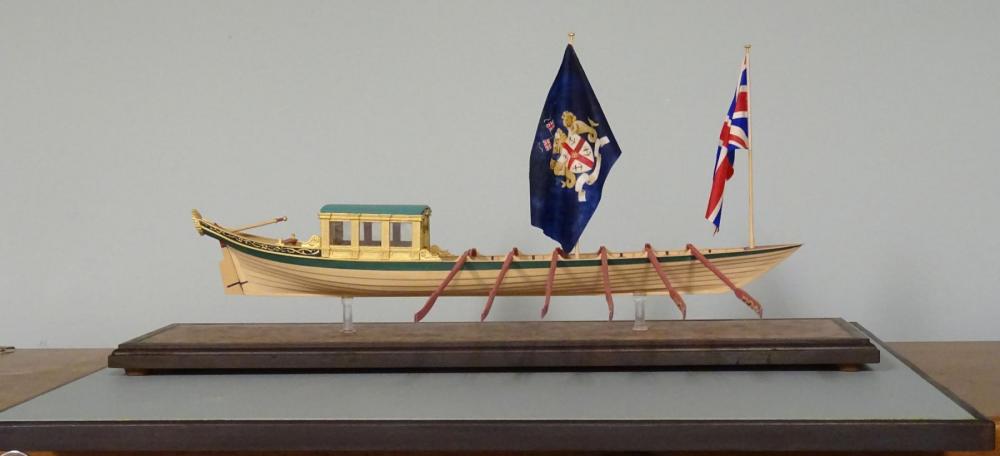
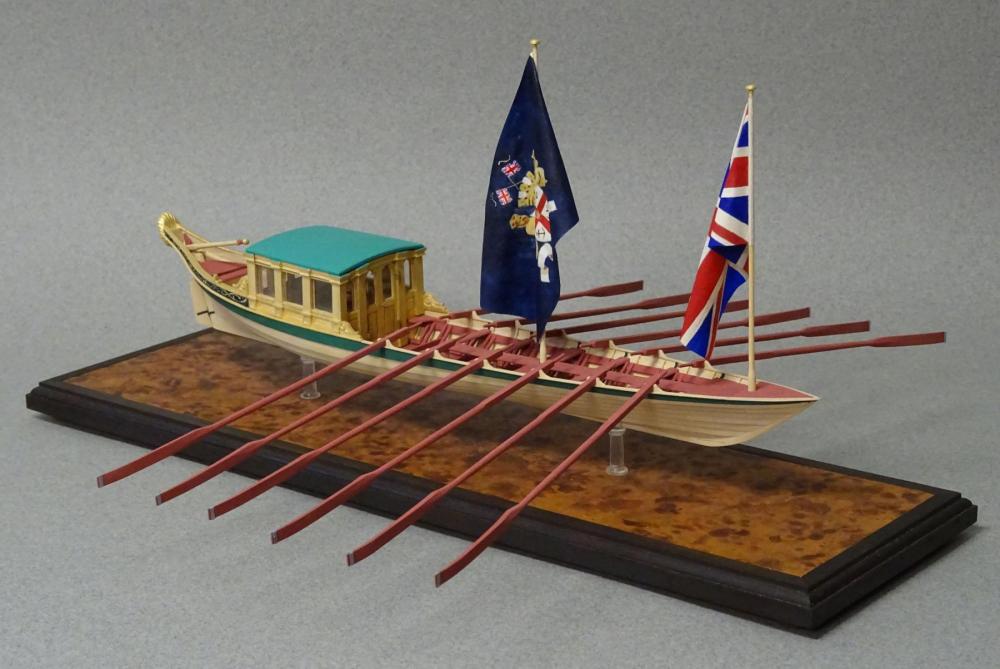
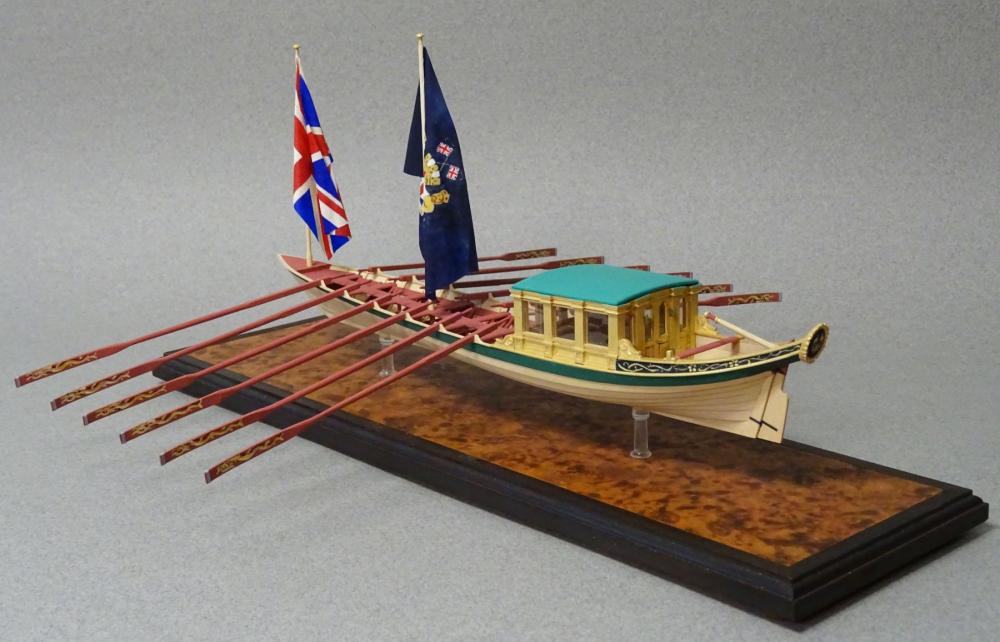
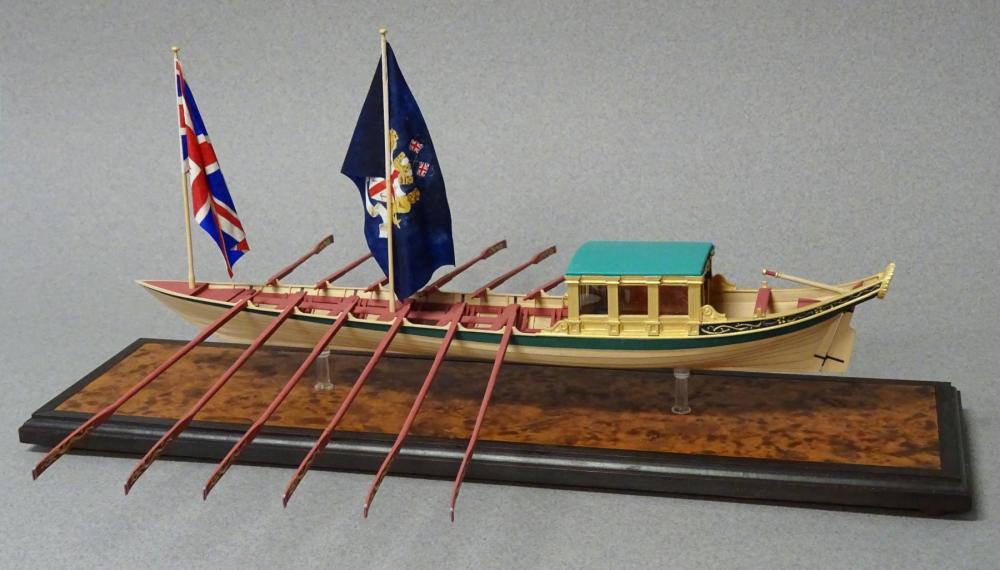
'Positively final farewell appearance!' So the old theatre posters read. And this is true for the Greenwich Hospital barge. The sub-base has been made and finished, and so is this log. My profound thanks to all who looked in, 'liked' and commented. You are a great world-wide network of craftspeople with whom I am proud to be associated. Happy model-making! Serious enquiries of interest only for acquiring this model are invited.
- 641 replies
-
- greenwich hospital
- barge
-
(and 1 more)
Tagged with:
-
Nice photo: it should go on the flap or rear of the next volume's dust jacket!
- 3,618 replies
-
- young america
- clipper
-
(and 1 more)
Tagged with:
-

Caroline's bottom
druxey replied to GrantGoodale's topic in Building, Framing, Planking and plating a ships hull and deck
I might add that perhaps 'pease' was intended to spell 'peace', as Britain was not at war at the time. Either way, a pease/peacetime bottom is still a mystery! -
Another possibility is to have a ledge above (below, when inverted!) the line of the gunwale, inset the by thickness of the frames. Then you can glue the frame extensions to the ledge's side and cut them off when the planking is completed. It would only not work if there is tumblehome to the hull.
-
Beautifully rendered, Glenn! Your posts are one of the highlights of my week. Thanks for sharing.
-

Caroline's bottom
druxey replied to GrantGoodale's topic in Building, Framing, Planking and plating a ships hull and deck
Interesting possibility for 'pease'/'petit pois'. The reference I came across was dated July, 1753. "...a pease Coat bottom upon her, which will last very well until Spring." This was for a small sloop. The reference to spring suggests something less permanent than copper nails, though. -

Caroline's bottom
druxey replied to GrantGoodale's topic in Building, Framing, Planking and plating a ships hull and deck
Very entertaining, Robin! There was also some other 18th century bottom preservative called 'pease'. I've not been able to determine what this was. Anyone any clues? -
Thank you, everyone, for your kind comments, compliments and questions. Your interest certainly spurred me on and the model was completed sooner than expected. What's next? When I have the time, another open boat, this time a Royal barge. In the meantime, I'm working on restoration of several yacht models and both writing and illustrating a book on modelling open boats. Part of the book will be an amplified version of this build log. It aims to cover both clinker and carvel construction. Joel: what keeps the oars up? Invisible oarsmen. Seriously, the sweeps are glued in position in the tholes and on the gunwale.
- 641 replies
-
- greenwich hospital
- barge
-
(and 1 more)
Tagged with:
-
Well, folks, we've come to the conclusion of this log. The Greenwich Hospital barge is about to row off, colors flying. Thanks to all who have looked in, 'liked', commented, complimented and discussed her. It's been quite the experience. I really appreciate the support of this electronic community over the past months. Thanks to each and every one of you, world-wide. So, what's next, I wonder?
- 641 replies
-
- greenwich hospital
- barge
-
(and 1 more)
Tagged with:
-
I suspect the number of reef bands differed depending on the depth of the topsail: fewer in smaller ships, more in larger ones. The upper illustration (unattributed) is from Volume IV, The Fully Framed Model by D. Antscherl, adapted from Steel's Rigging and Seamanship. The latter showed the topsail for a 20-gun ship. The TFFM illustration is for a 14- or 16-gun ship. For what size ship is Lees' illustration? I also notice that the reinforcements are different in the examples illustrated - Lees omits the top lining.
-
As usual, it's a pleasure to follow your progress, Frank. Seeing your scrap bin is a nice reminder that even expert modelmakers have a failure rate!
- 649 replies
-
- dunbrody
- famine ship
-
(and 2 more)
Tagged with:
About us
Modelshipworld - Advancing Ship Modeling through Research
SSL Secured
Your security is important for us so this Website is SSL-Secured
NRG Mailing Address
Nautical Research Guild
237 South Lincoln Street
Westmont IL, 60559-1917
Model Ship World ® and the MSW logo are Registered Trademarks, and belong to the Nautical Research Guild (United States Patent and Trademark Office: No. 6,929,264 & No. 6,929,274, registered Dec. 20, 2022)
Helpful Links
About the NRG
If you enjoy building ship models that are historically accurate as well as beautiful, then The Nautical Research Guild (NRG) is just right for you.
The Guild is a non-profit educational organization whose mission is to “Advance Ship Modeling Through Research”. We provide support to our members in their efforts to raise the quality of their model ships.
The Nautical Research Guild has published our world-renowned quarterly magazine, The Nautical Research Journal, since 1955. The pages of the Journal are full of articles by accomplished ship modelers who show you how they create those exquisite details on their models, and by maritime historians who show you the correct details to build. The Journal is available in both print and digital editions. Go to the NRG web site (www.thenrg.org) to download a complimentary digital copy of the Journal. The NRG also publishes plan sets, books and compilations of back issues of the Journal and the former Ships in Scale and Model Ship Builder magazines.


