druxey
-
Posts
13,368 -
Joined
-
Last visited
Content Type
Profiles
Forums
Gallery
Events
Everything posted by druxey
-
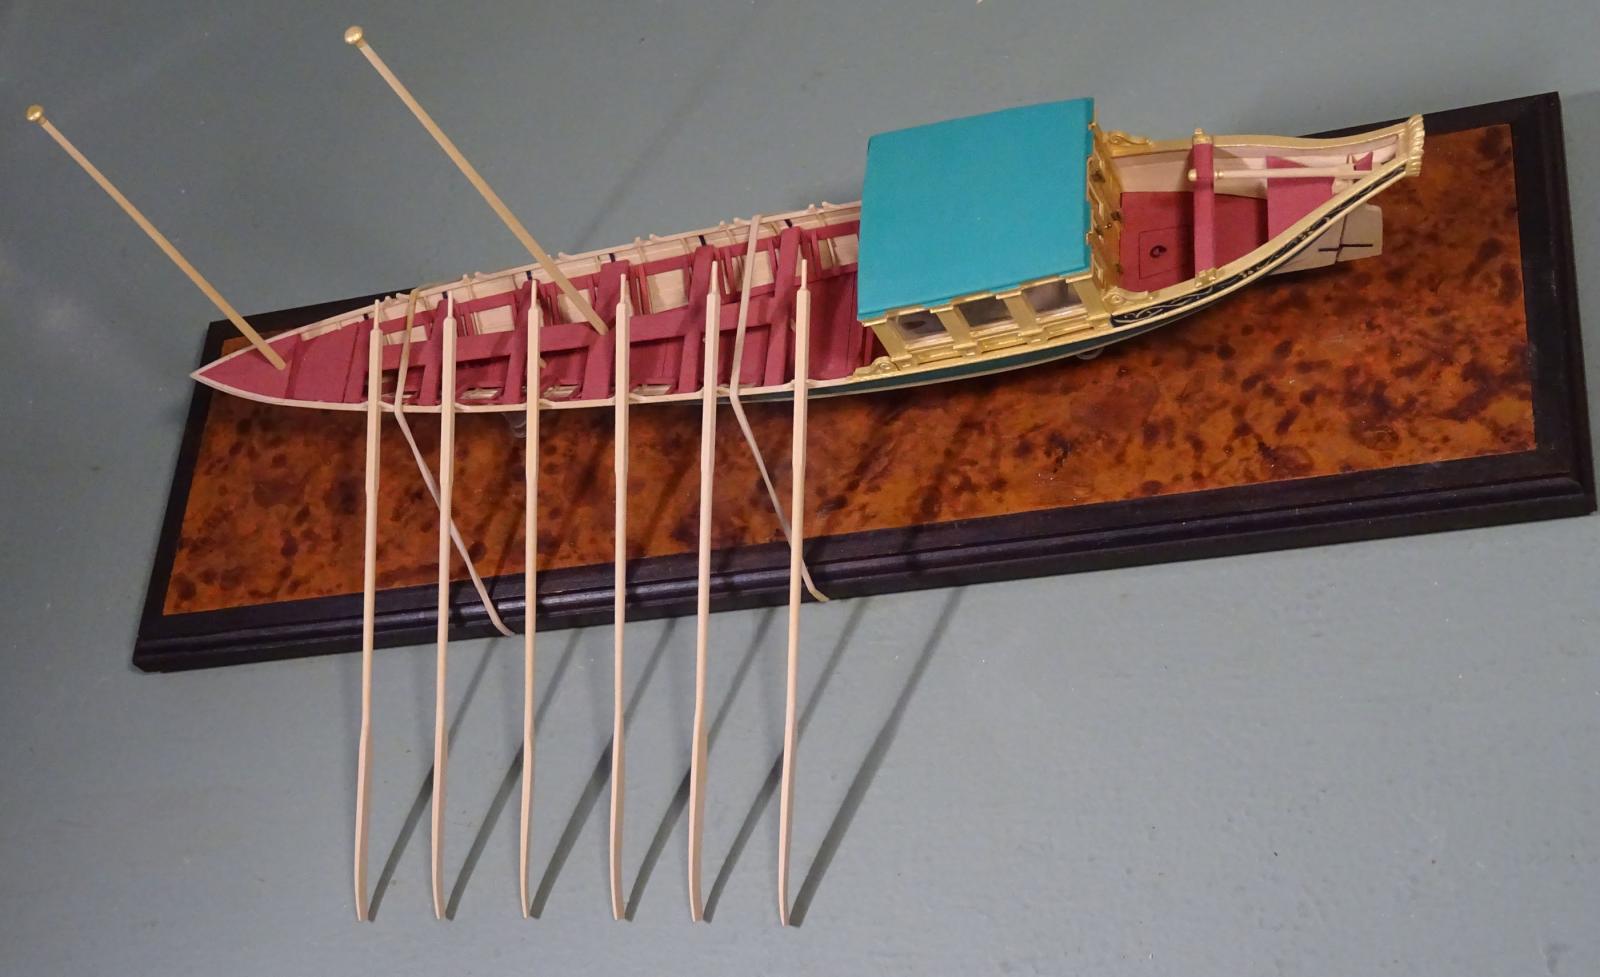
 Thanks again, all. Further to the sub-topic by Alan (AON), a contemporary model (c.1808) with oars definitely shows squared looms to the sweeps. This is a model of the 18 oared Lord Mayor's barge, in the London Museum Docklands.
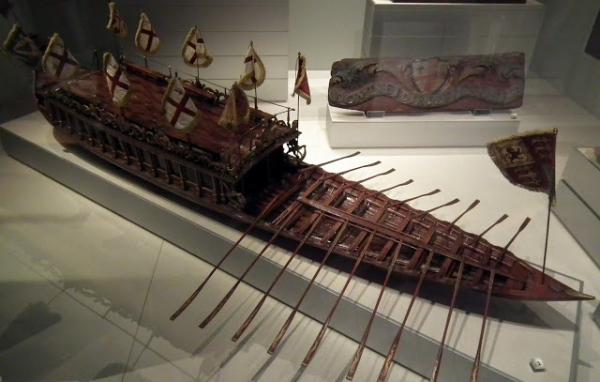
- 641 replies
-
- 9
-

-
- greenwich hospital
- barge
- (and 1 more)
-
Well folks, a variety of solutions to my dilemma! Thanks, everyone, for all the input and positive comments. Although I'm still undecided, one of my correspondents AON (Alan) questioned the loom (squared portion) of the sweep. I looked up my source (Steel, 1816 edition) and found that the loom was often made round, not square, in section. I suspect that, given the limited clearance of the sweeps in the tholes, that this was the case here. I may now re-work those looms.
- 641 replies
-
- 4
-
-
- greenwich hospital
- barge
- (and 1 more)
-
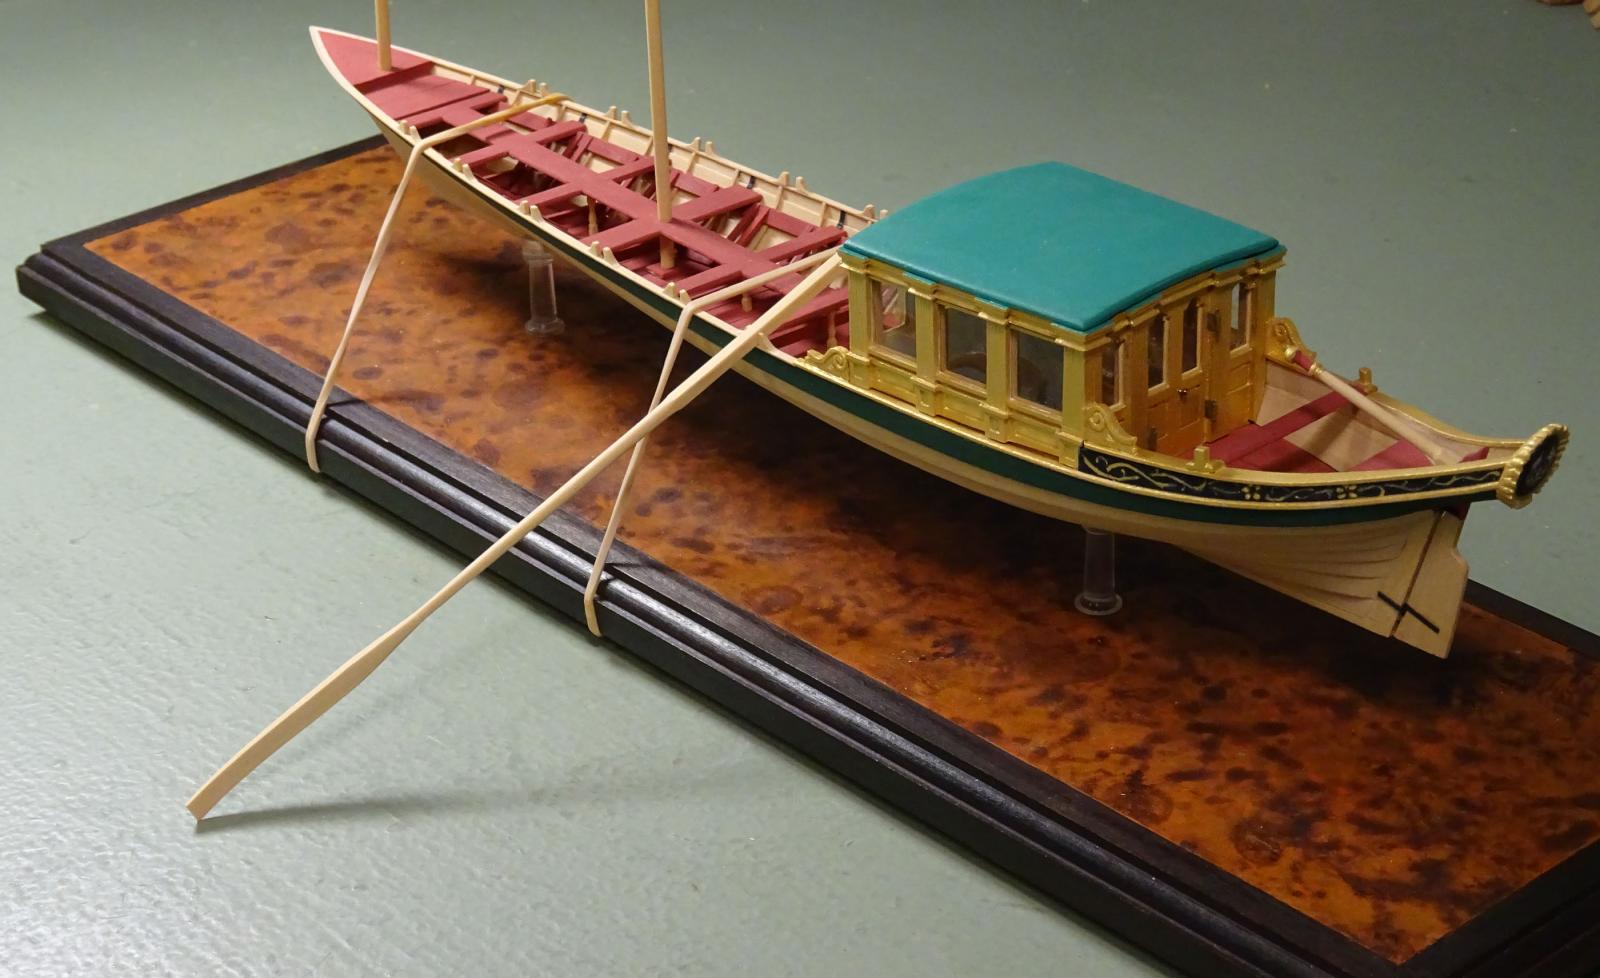
Thanks again for the opinions expressed so far. I've now shaped half the sweeps. Perhaps comments on the accompanying photograph? I've simply staged the sweeps resting on the workbench. Also, they will be painted dull crimson when complete. I did try laying them out on the baseboard, but it looked rather crowded.

- 641 replies
-
- 26
-
-
- greenwich hospital
- barge
- (and 1 more)
-
ancre La Salamandre by tadheus - 1:24
druxey replied to tadheus's topic in - Build logs for subjects built 1751 - 1800
Is the 16mm difference a drafting error or plan reproduction problem? That's annoying! -
Good to see you back at work, Nils. That mast looks beautifully done.
- 2,625 replies
-
- 5
-
-
- kaiser wilhelm der grosse
- passenger steamer
- (and 1 more)
-
Breaking news! I am pleased to announce that SeaWatchBooks will publish a book on the construction of open boats. The clinker planked example will be the Hospital barge, and the book will also cover construction of a carvel planked open boat. Now all I have to do is write it....
- 641 replies
-
- 32
-
-
- greenwich hospital
- barge
- (and 1 more)
-
Thanks for all your ideas and opinions on displaying the sweeps. I really appreciate your varied thoughts on this. At the moment, I'm tending towards mounting the sweeps in racks on the baseboard, six each side. However, the jury is still out... and I've a bundle of sweeps yet to complete!
- 641 replies
-
- 12
-
-
- greenwich hospital
- barge
- (and 1 more)
-
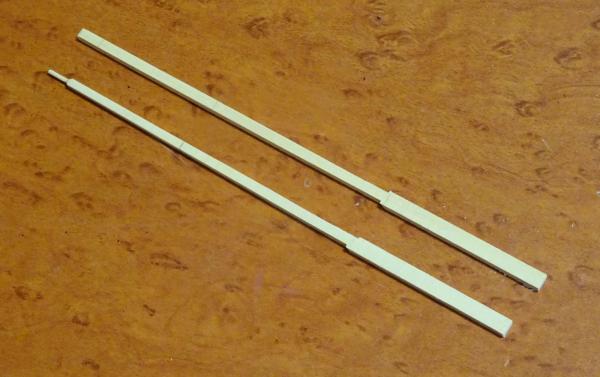
Thanks yet again, everyone. Now for the repetitive part; twelve sweeps. These were 19 ' 0" long. The blanks have been cut and roughed out using a mill. The first - my prototype - has been shaped. There will still be details to add such as the reinforcing strap at the end of the blade and the leather at the thole. These sweeps would be relatively simple to make, but for the curved blade.

- 641 replies
-
- 41
-
-
- greenwich hospital
- barge
- (and 1 more)
-
Actually, Mike, it was done this way so that if the ship touched ground, the false keel would pull off easily and spare the actual keel. It was a deliberate break-away system.
-
Futtocks and riders
druxey replied to toms10's topic in Building, Framing, Planking and plating a ships hull and deck
Interesting question, Tom. The riders (not risers!) are roughly as you have drawn, where the scarphs are staggered relative to the floor/futtock joints. They are, however, bolted over the ceiling planking, which seems counter-intuitive. The internal planking contributes to longitudinal strength and, although it might be a source of rot behind the rider, would considerably weaken the structure if interrupted as you've sketched on the left. Does that answer your question? By the way, there was never more than about 3" of air space between frames - certainly not 16". To see contemporary plans of framing, go to the Royal Museums Greenwich Web site, go to 'Collections' and search 'Framing plans'. There you'll see how this was done. For scantlings (dimensions) of all the components in a ship, you should get a copy of Allan Yedlinsky's book from SeaWatchBooks. -
A hand-grip should be about 1½" to 2" in diameter. Is that what those are, DIck? I'm really enjoying seeing this build as it is a different subject.
-
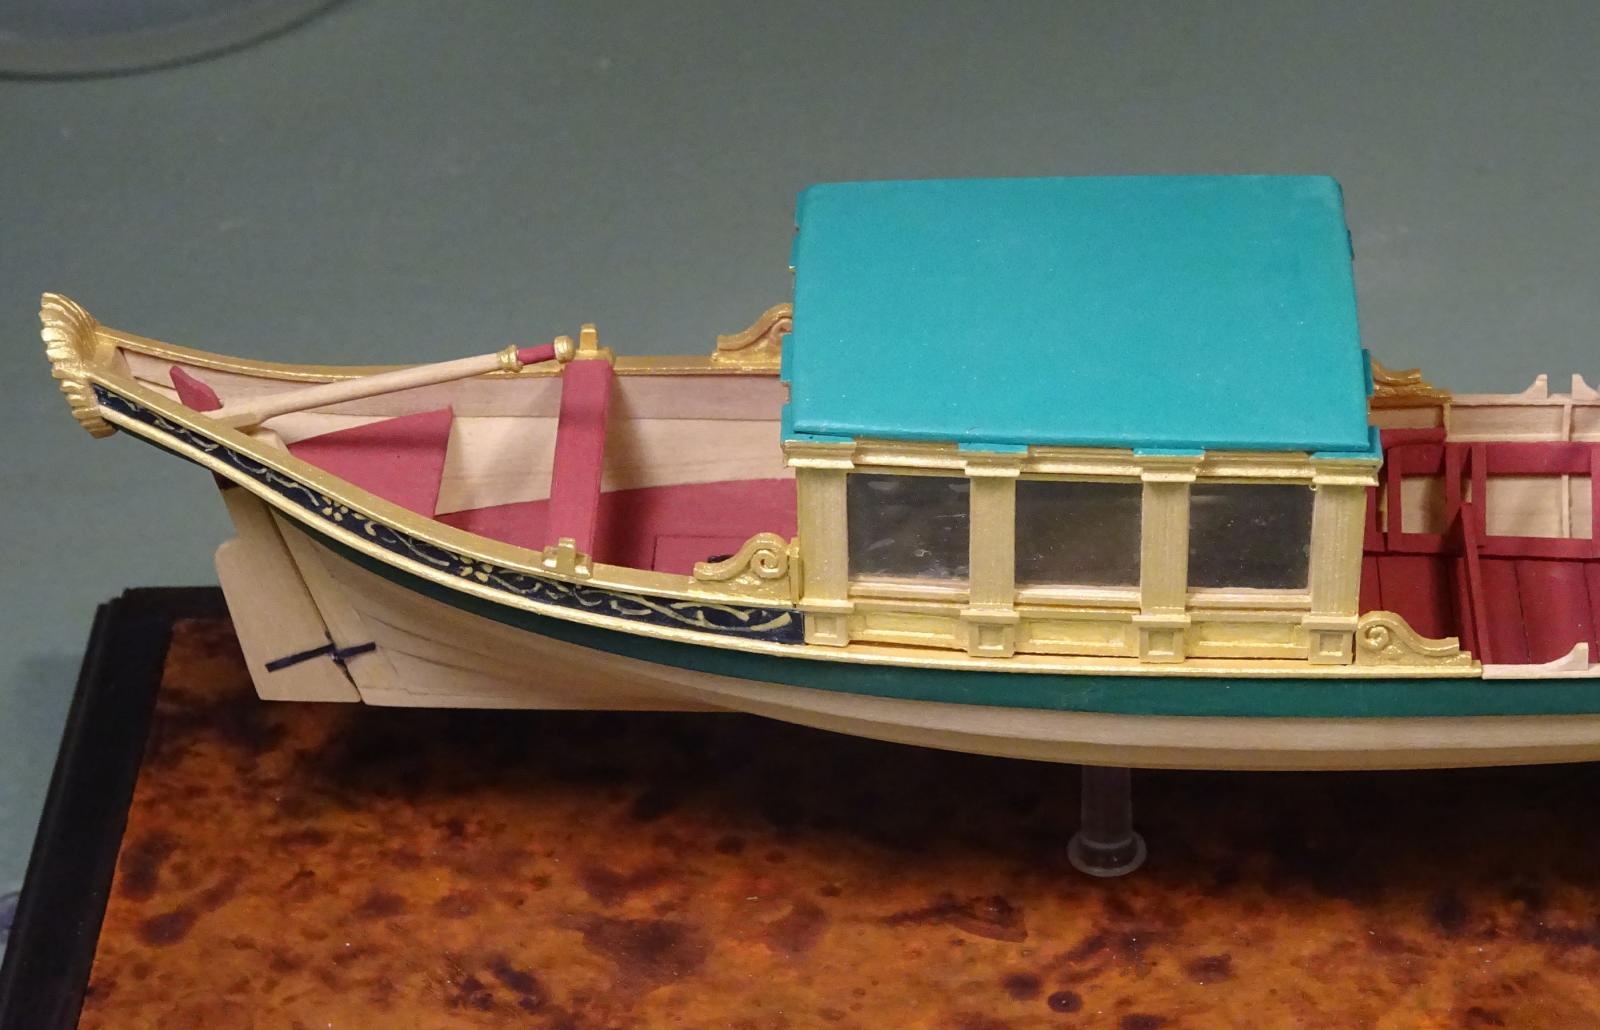
Thanks again for looking in and all the positive comments. Mahuna: I try to avoid sanding carved work whenever possible. If a smooth surface is required, I scrape it. The scrolls are completed and the brackets installed and gilded. All that are left now are two ensigns and twelve sweeps! I'm still undecided as to how to display the latter. I could bundle them and lay them the thwarts, display them 'tossed' (upright) or in their tholes spread out on both sides. Decisions, decisions....

- 641 replies
-
- 46
-
-
- greenwich hospital
- barge
- (and 1 more)
-
Just catching up with your progress, Johann. Very delightful and neat!
-
Seeing your reference, Gaetan, have you tried melting the end of the brass rod to form the 'bouton'? I've found that by holding the rod or wire vertically (not with my fingers!) and holding the torch at about 45 degrees, the tip of the metal will melt and form a round ball. You could then flatten it if you want.
- 728 replies
-
- 6
-
-
- le fleuron
- 64 gun
- (and 1 more)
-
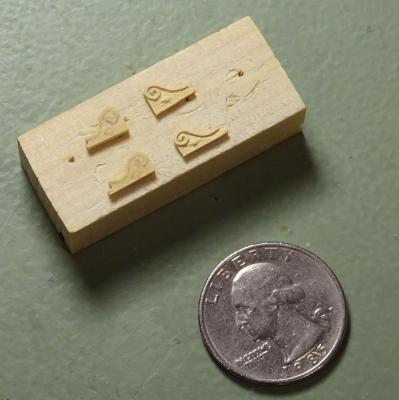
Steven: the ornamental work and stern were simply symbols of affluence and power. Practically, they were of no use whatsoever, other than providing windage! Some further progress on the ornamental brackets. They are glued to a scrap base and the first sides carved. They will then be detached, turned over, and the other sides completed. As you can see, they are rather small and fiddly things to produce.
- 641 replies
-
- 34
-
-
- greenwich hospital
- barge
- (and 1 more)
-
Glad to read you are back at the model and hopefully not too much worse for wear, Frank. Hopefully frame alignment won't be a big issue for you. She's looking good.
- 649 replies
-
- 5
-
-
- dunbrody
- famine ship
- (and 2 more)
-
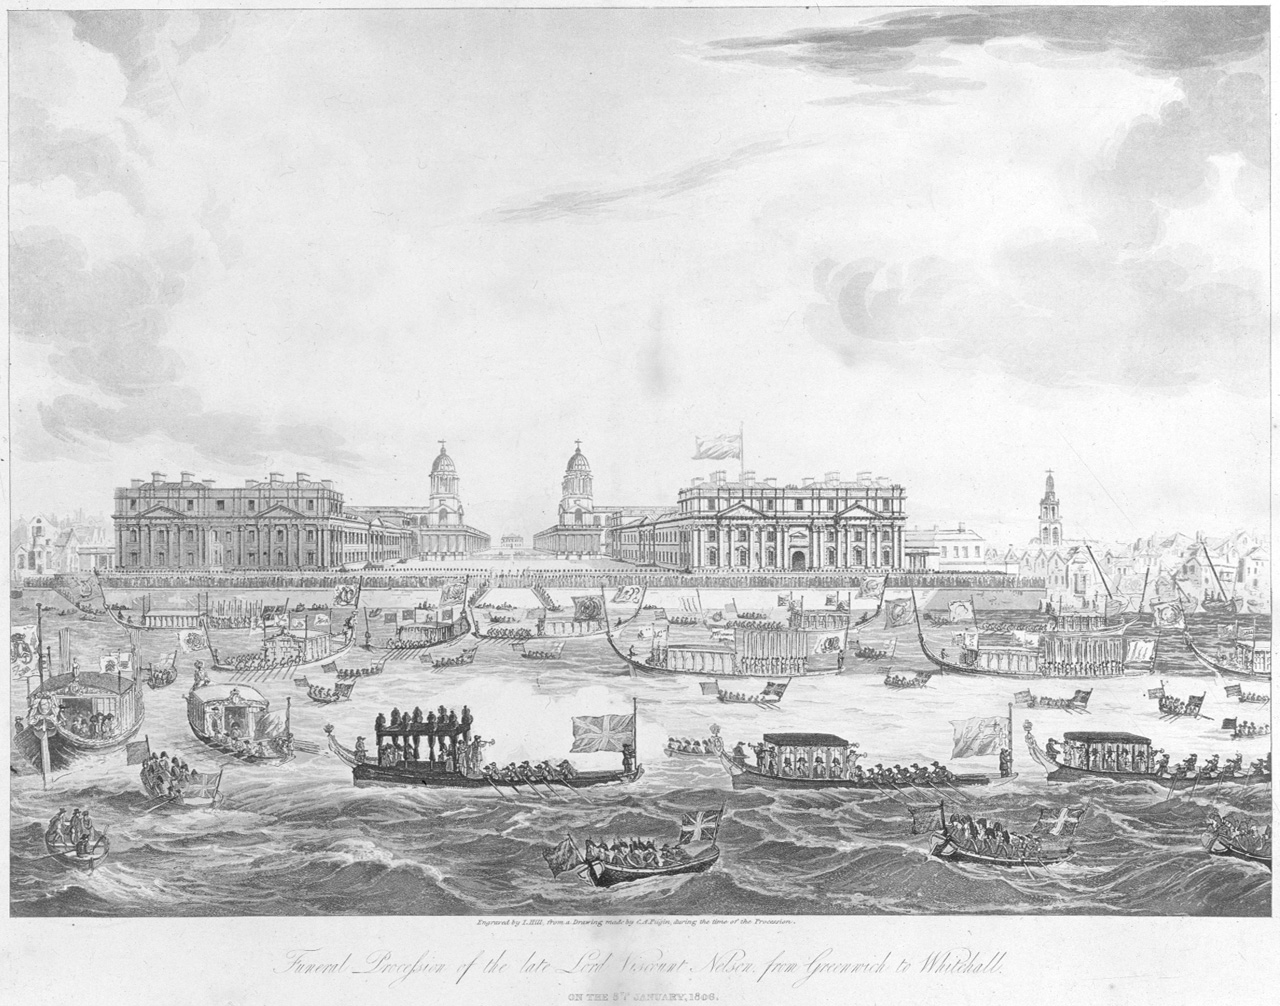
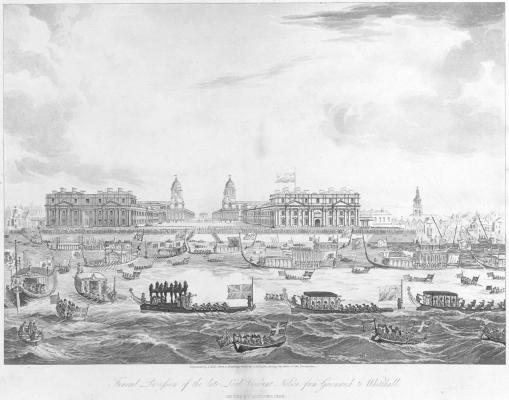
Steven: That is a rather naive engraving of the procession, of which many different images were published at the time. The date of this was January 8. 1806. It must have been a cold, miserable day for this. The canopied, ostrich-plumed barge, (lower centre) is the one carrying Nelson's coffin. A more sophisticated and perhaps accurate version of this scene at Greenwich as the cortege departs is also in the RMG Collection (PAH 7324)
- 641 replies
-
- 13
-
-
- greenwich hospital
- barge
- (and 1 more)
-
Aie! So many small pointed ends, so easy to break off. That is amazing, Bill.
- 382 replies
-
- 1
-
-
- sovereign of the seas
- carving
- (and 1 more)
-
On the other hand, perhaps a re-do of the piece if the gap is that large?
-
If you really need strength, silver solder the joint.
- 1,051 replies
-
- 5
-
-
- cheerful
- Syren Ship Model Company
- (and 1 more)