Check out our new MSW Sponsor Innocraftsman
×


Dfell
-
Posts
251 -
Joined
-
Last visited
Content Type
Profiles
Forums
Gallery
Events
Everything posted by Dfell
-
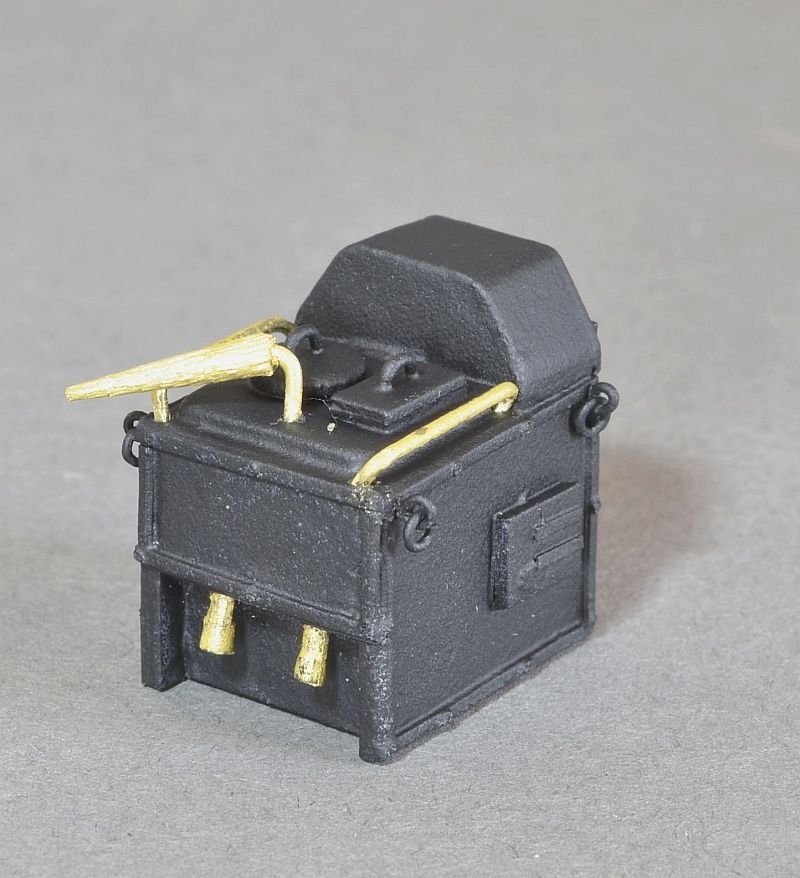
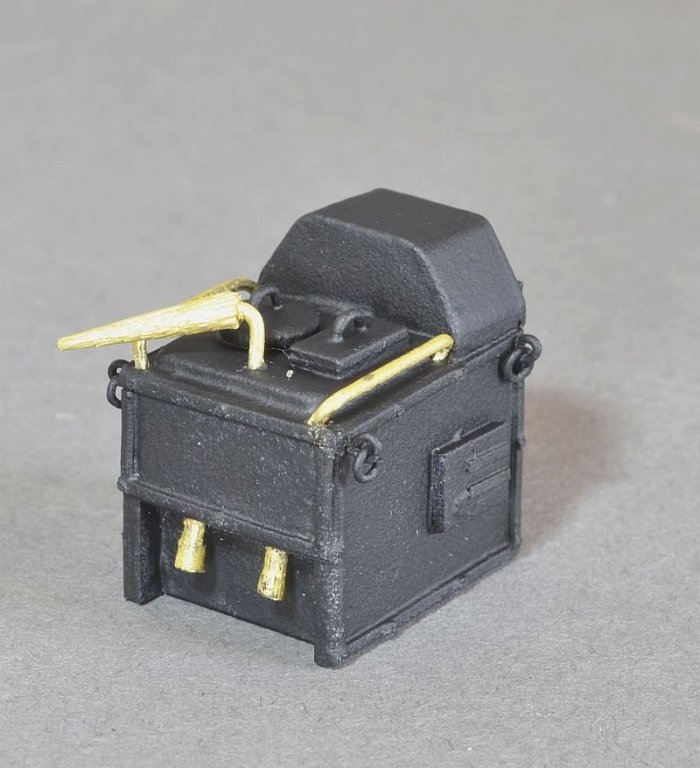
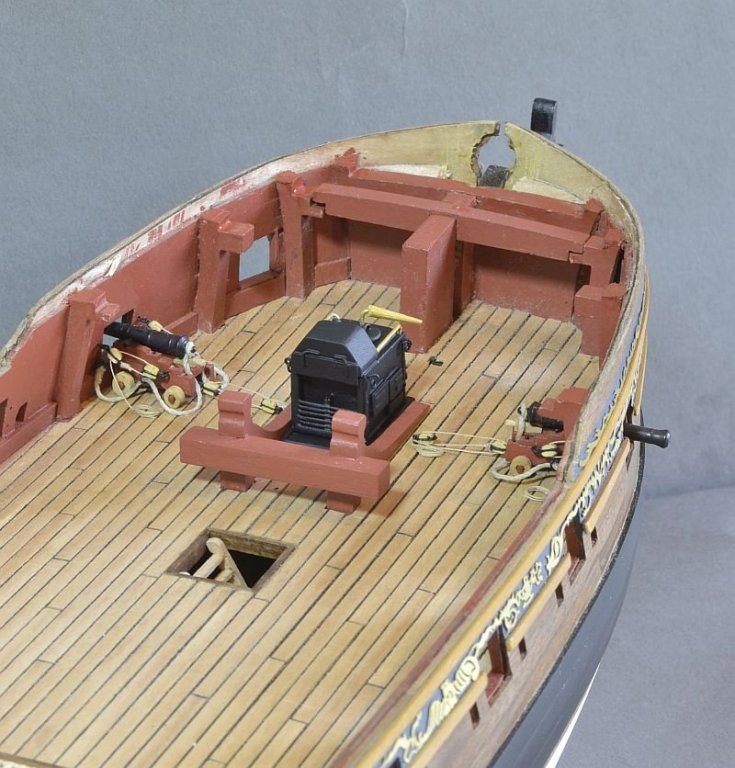
Thank you Martin. And the stove looks a bit too long as I think Blue Ensign had spotted that and I am embarrassed to admit. It does sort of sit under the chimney position but does really need to be moved over a few mm but would cause a problem with the mast bits . This is presuming I have the stove going in the right direction. Have followed Martin W and Aliluke on this but have noticed Aliluke changed his around. If it should be the other way round then the length is good but height not so good due to the overhead beam. Now need to see what should be done next - been concentrating hard on cannons and rigging and stove and have lost sight of the next stages..... Anyway thanks for the looking and comments. Doug
-
Thank you Blue Ensign - yes I have checked 🙂 And the stove is just dry fitted at the moment and will get it right when putting the upper deck in place.
-
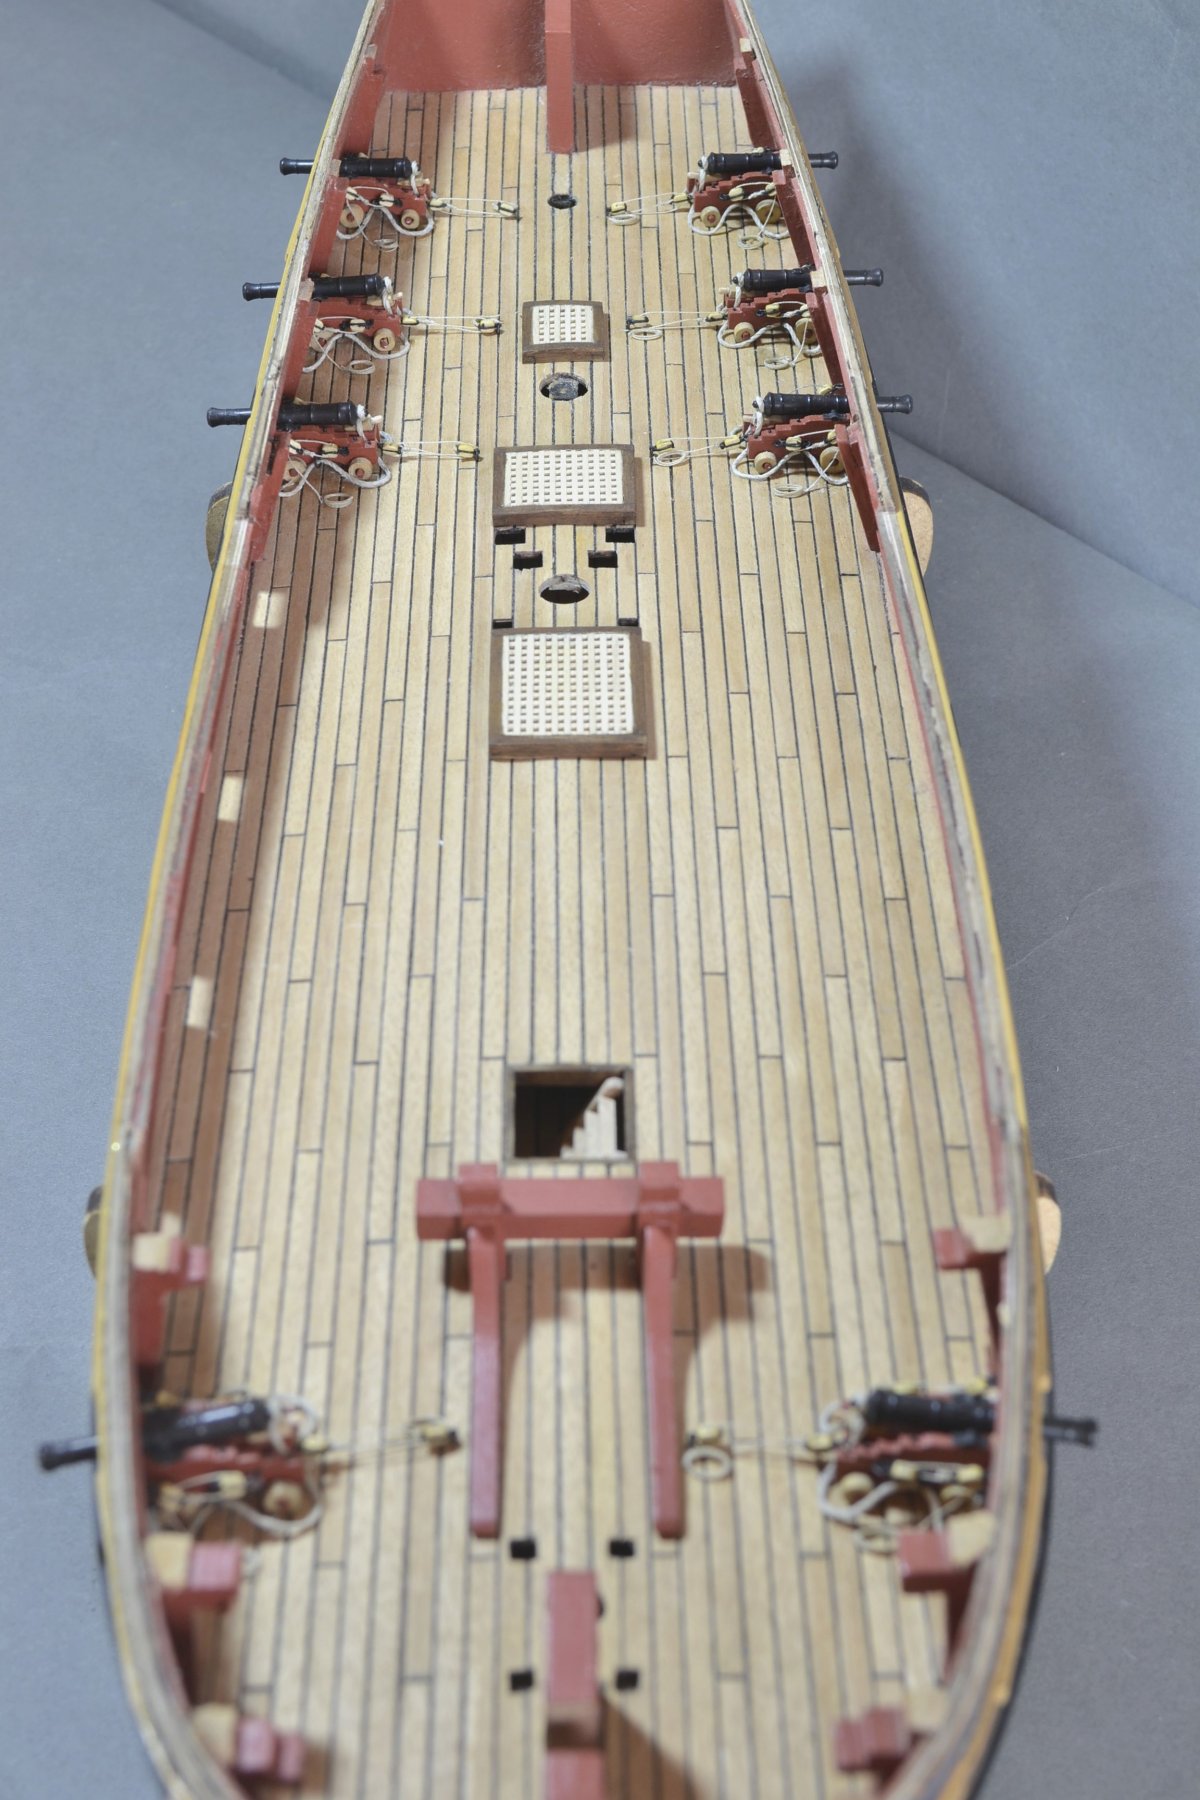
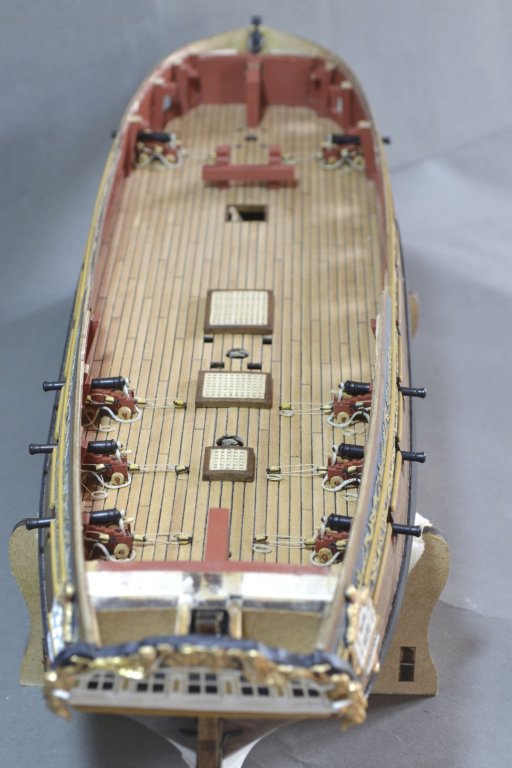
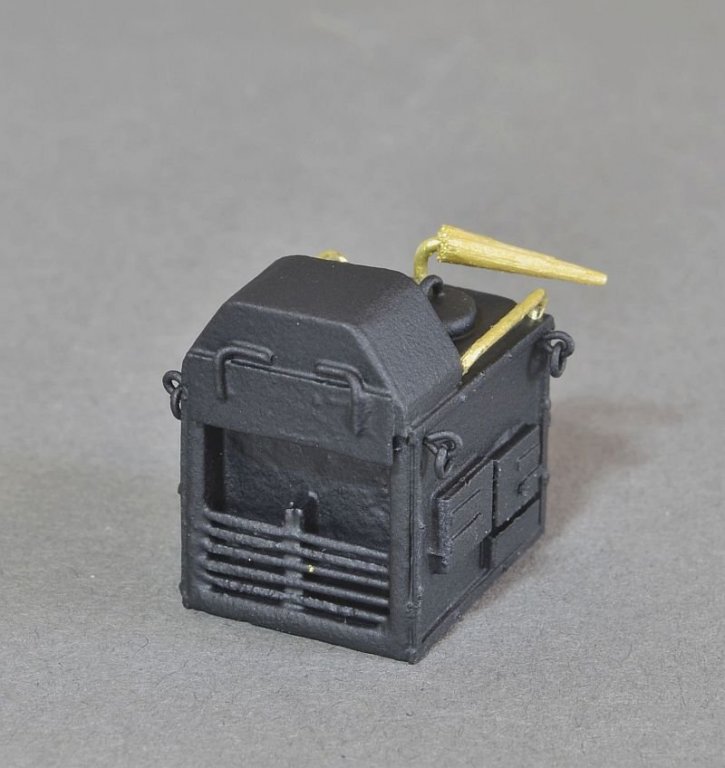
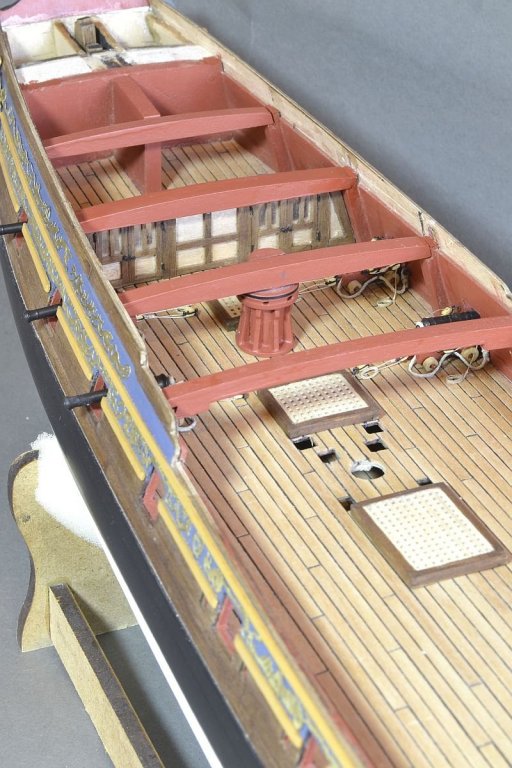
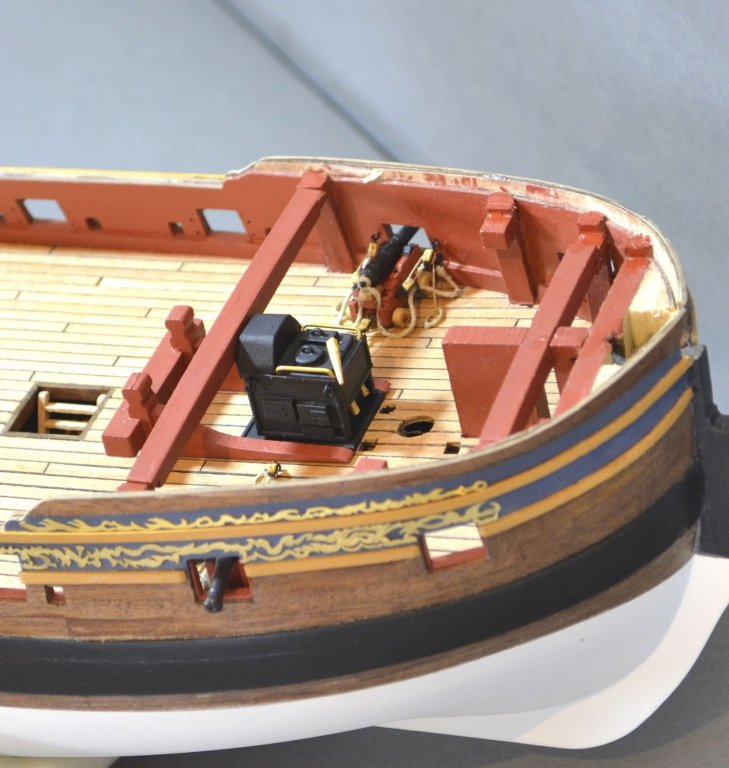
Hello and thank you Blue Ensign and mcpesq817 for the comments concerning the cannons. It is good there are other suppliers for these things otherwise we would have to make do with the kit supplied bits. The 8 cannons below the upper decking rigged - using the upgrade kit 2 mm blocks and rope. One barbecue / camping stove / or even vaguely a 'Brodie' stove. Copied from Martin W / Aliluke /and Lloyd Matthew http://hmsfly.com/brodieGalleyStove.html#sectionTwo The galley stove was made from a block of balsa wood then covered with thin plywood. Cross beams, Partition, capstan etc fitted in place. Sorry a lot of photos..... Regards Doug

-
Martin - a big thank you for the the pictures It's all looking good and the boat.
- 467 replies
-
- 1
-

-
- fly
- victory models
- (and 1 more)
-
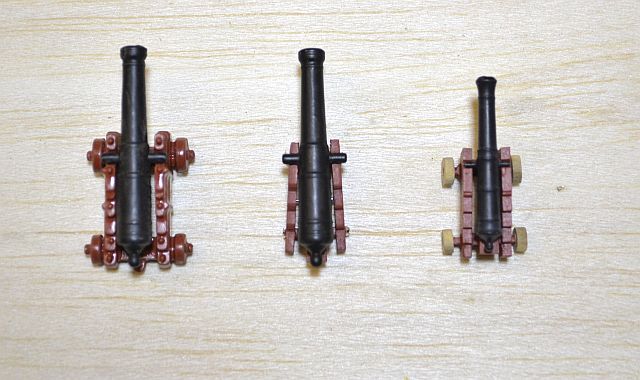
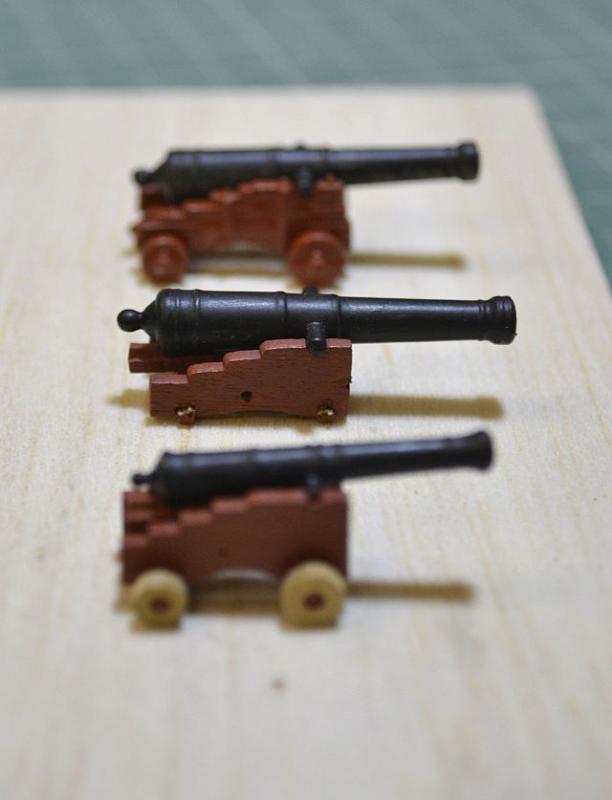
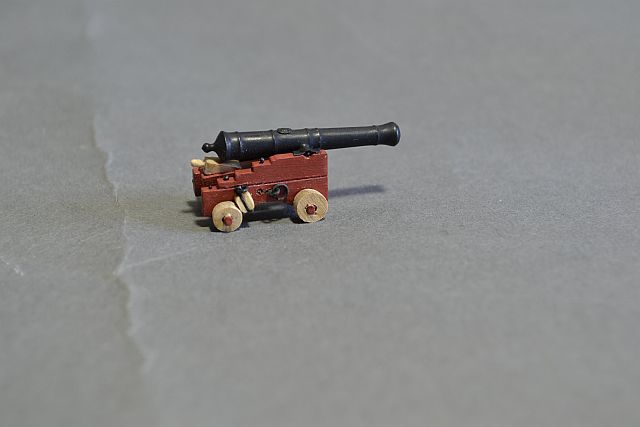
Hello - have been assembling the cannons this last month. The 6 lbs cannons and carriages I have used are from the Syren company and the picture below shows the kit supplied metal carriage and cannon, the upgrade kit carriage with original cannon, and the Syren carriage and cannon. Felt I could have done with something slightly larger than I had. Syren 6 lbs carriage and cannon partly rigged, using 2mm block supplied with upgrade kit, black tape used for the brackets holding cannon to carriage and 0.4 rivets (from model train shop) on the top of the carriage. Thank you for the previous comments and the likes. Regards Doug

-
Just incredible work!! It's a pleasure to see......
-
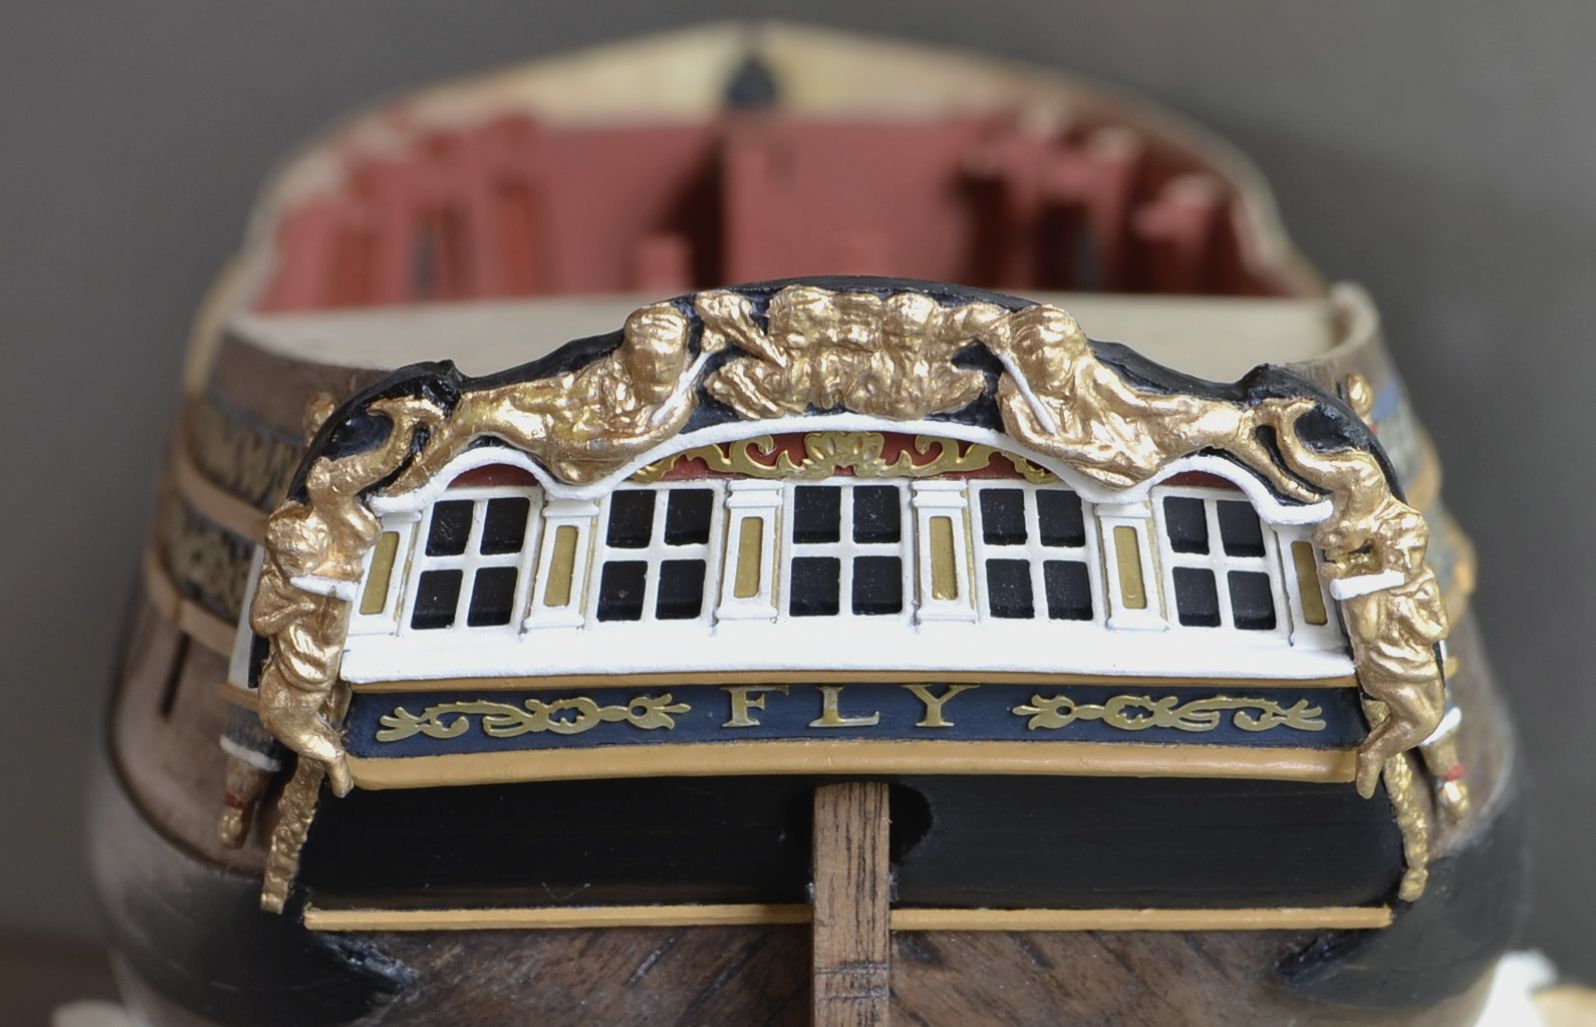
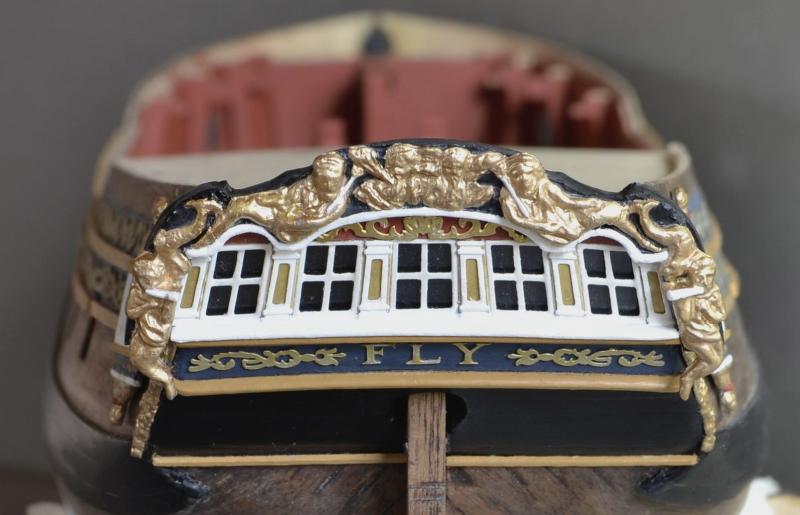
Finally the stern done. Lost the letters a few times - hours on hands and knees searching. Glad to have them stuck down. Thanks for looking Regards Doug

-
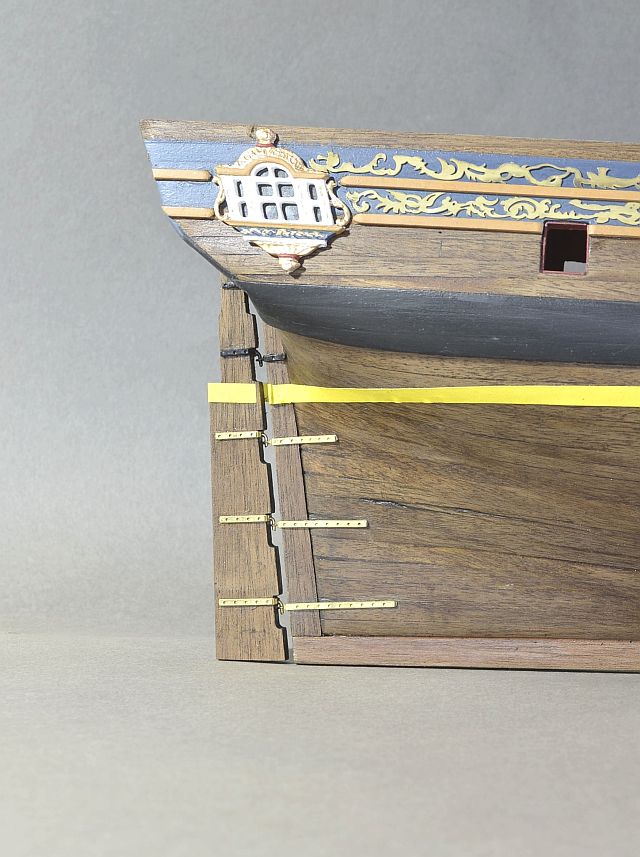
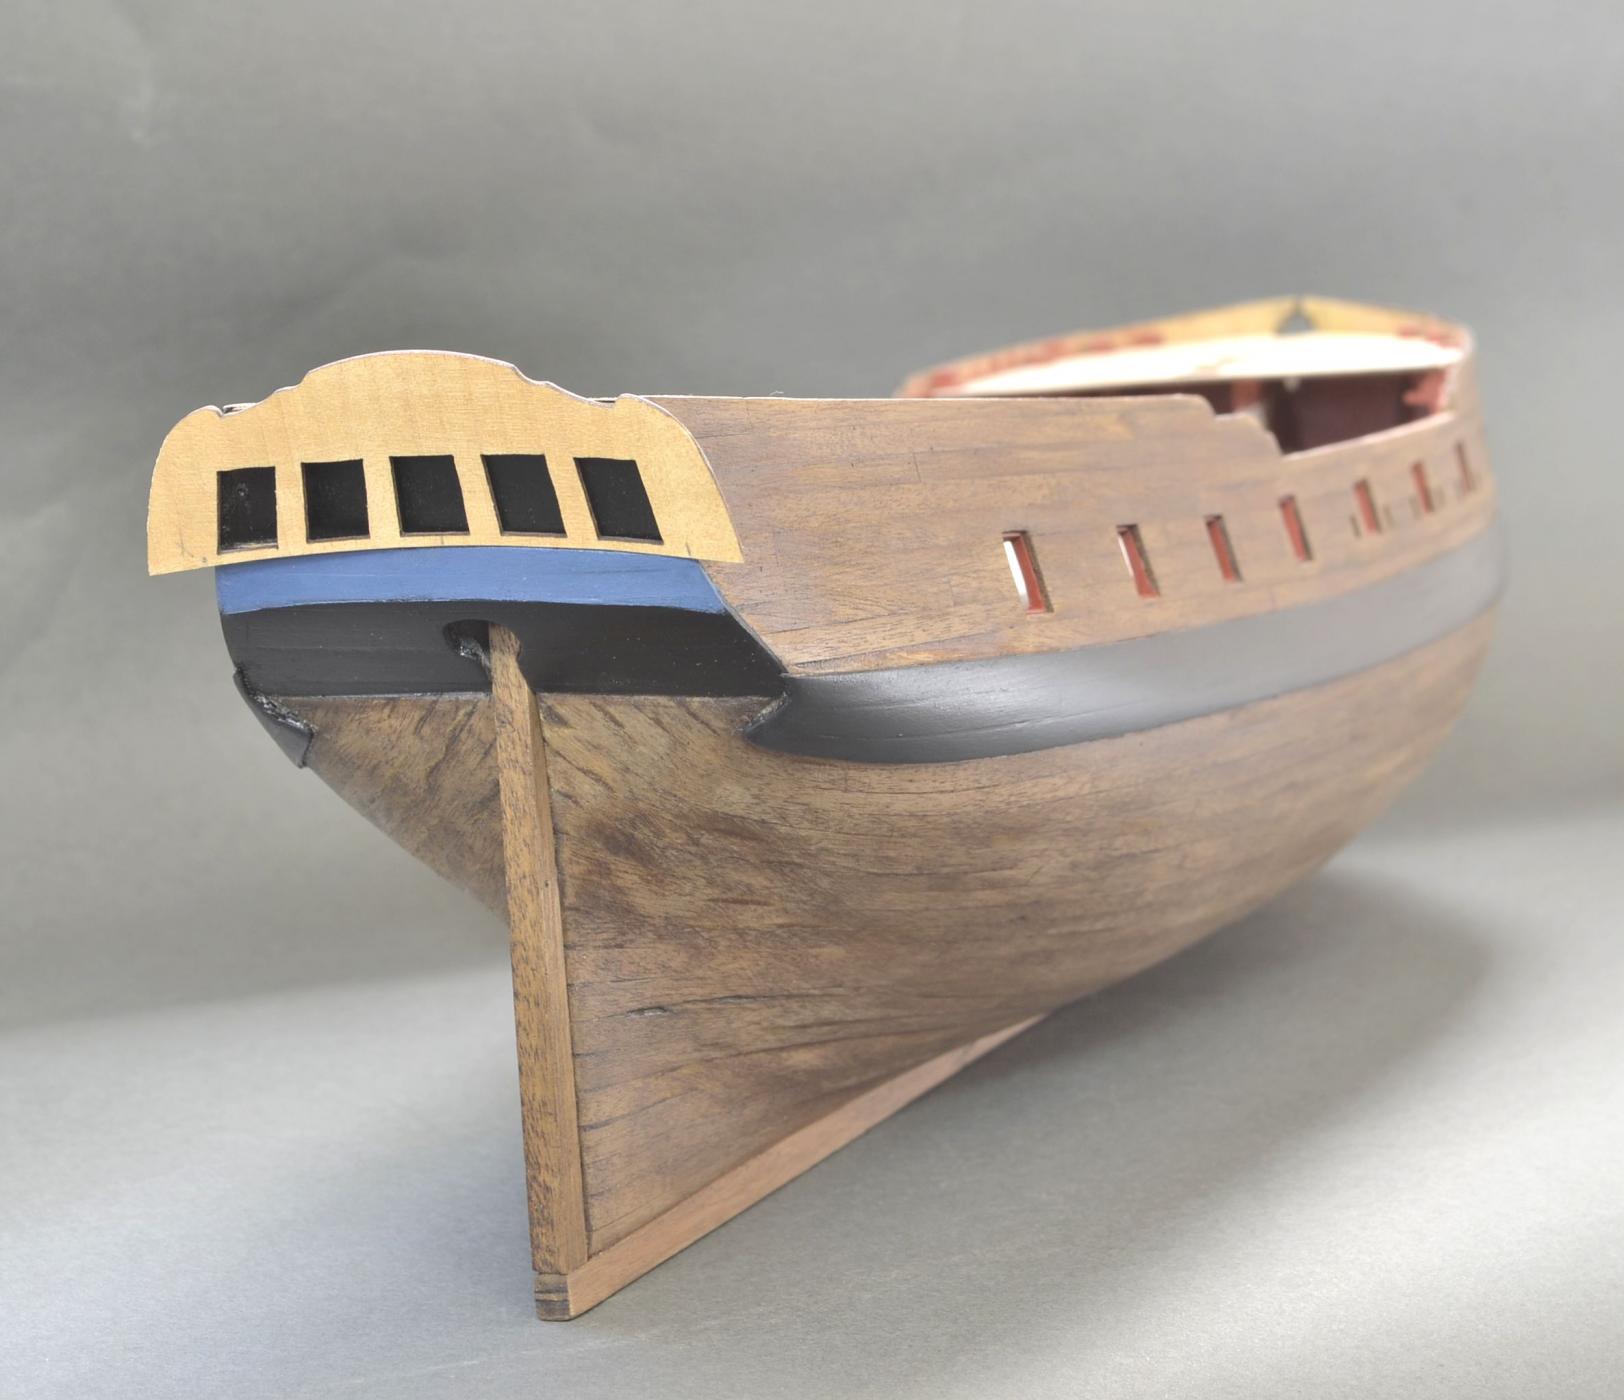
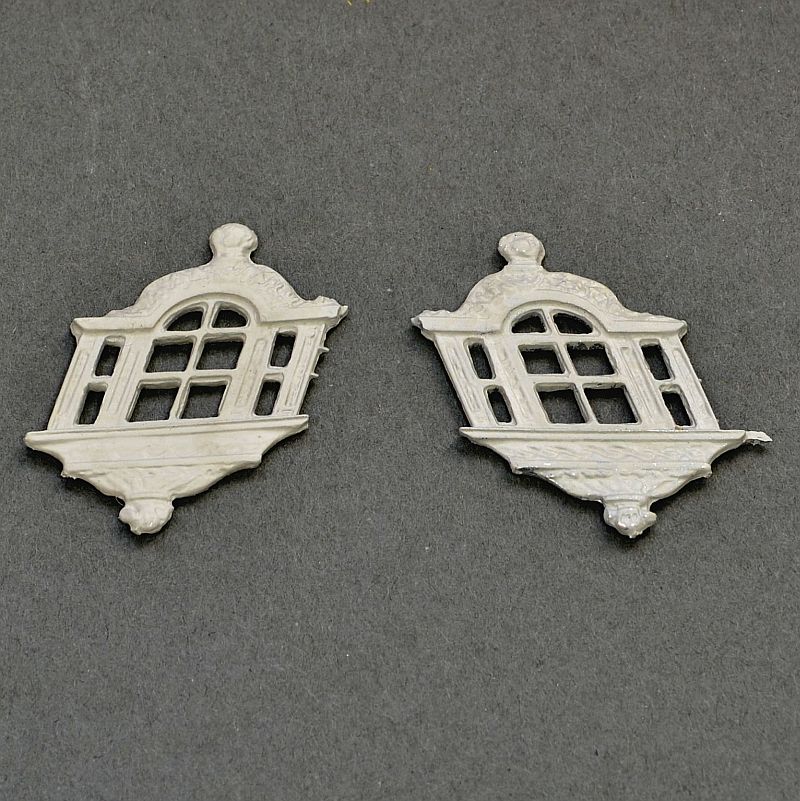
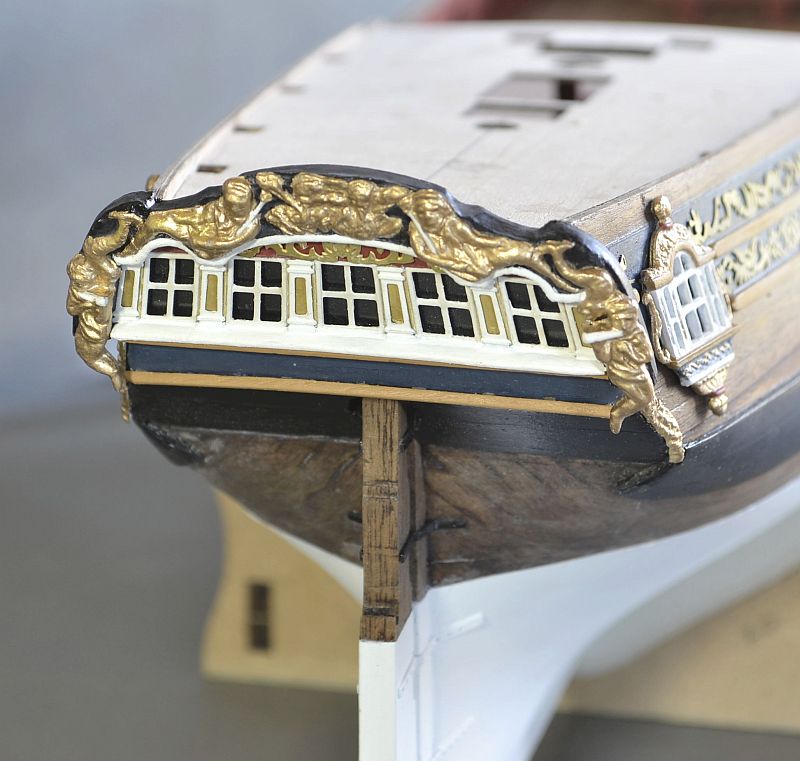
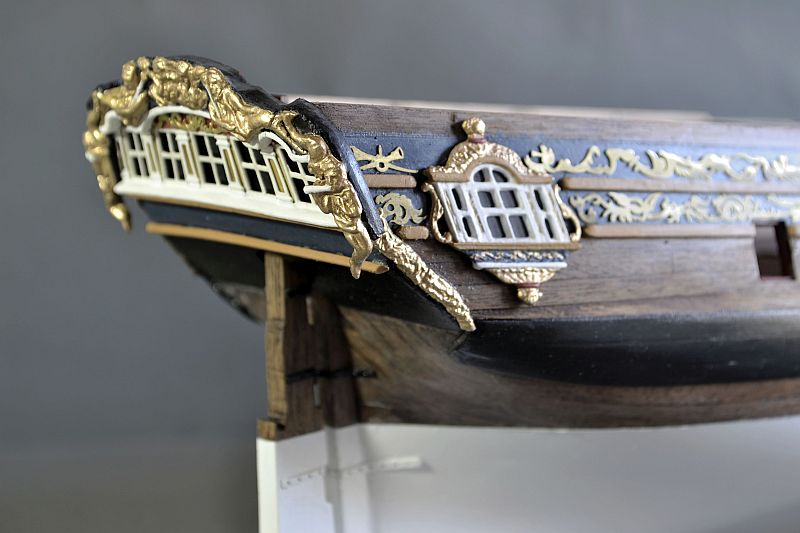
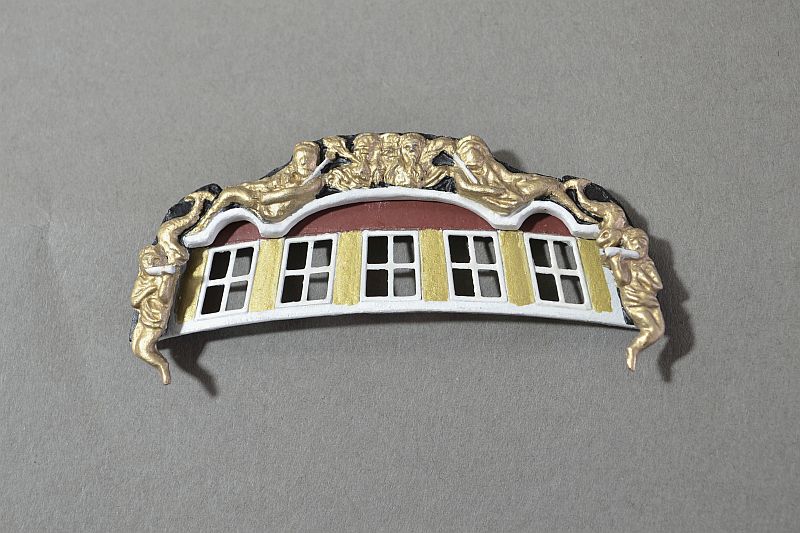
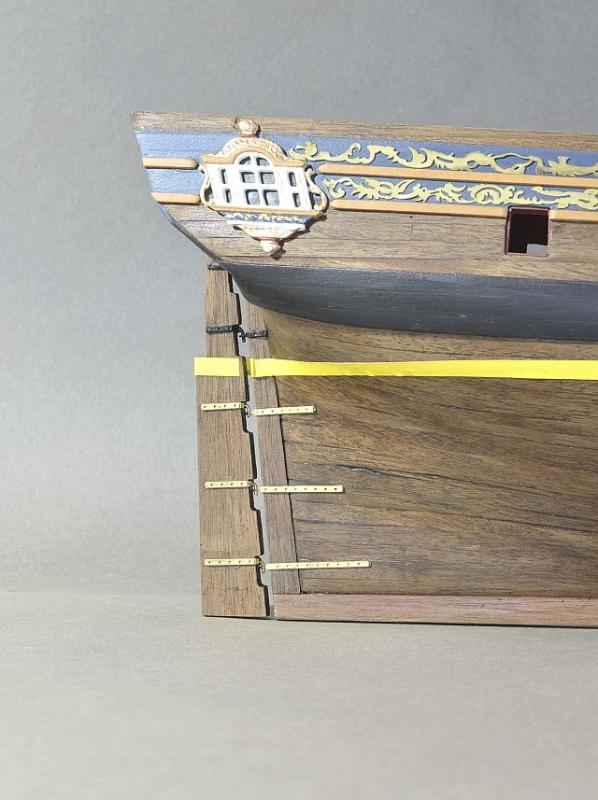
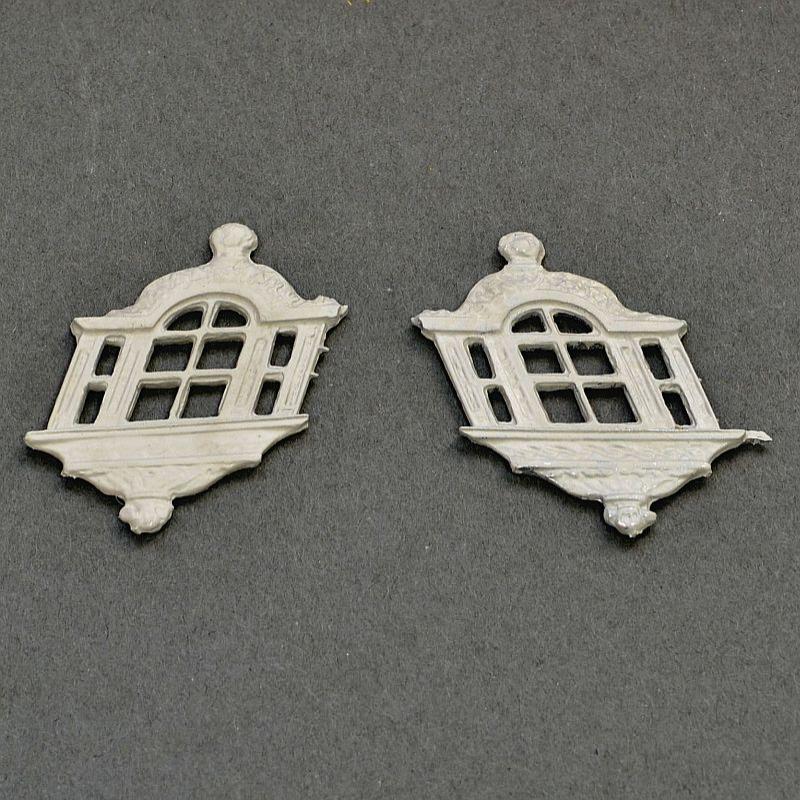
Stern windows fitted plus window ledge. The decorations above in arched section left off as they did not quite fit in - besides it was nice to see some of the red colour. Still a bit of touching up needed as glue is showing. The side decorations were snapped in two places so as to get them to fit the curve of the hull and I can see in the picture that I haven't hidden the join so well. Thanks Gahm for looking in and the nice comments. Just wished I could take really close up pictures without showing some wobbly work unlike your incredible work which really is a pleasure to see. Also thank you Martin W. Couple of other great builders - vths and pnevrin - seem to have disappeared? Regards Doug
-
US Brig Syren by Gahm - Model Shipways
Dfell replied to Gahm's topic in - Kit build logs for subjects built from 1801 - 1850
Yes 'wow' and amazing!! Think I will go and just put my build in the bin ..... -
Thank you very much for the lovely comments - Blue Ensign / Landlubber Mike / SpyGlass / Tigersteve / probablynot and to all those that pressed the 'like' button. Thank you. Yes it is a shame the metal castings are not good. The blue is the French navy blue with quite a bit of white, some black, and bit of red. The white waterline was sprayed with acrylic matt paint. First with a couple of coats of grey primer, sanded then couple of coats of the white. Then clear matt lacquer. So as to not to get any bleed under the masking tape - having stuck the tape down - I paint on along the edge of the tape (that the new paint goes up to) the colour that is under the masking tape thus sealing it. In this case it was clear matt lacquer. probablynot - maybe Pegasus might be a better build as the fitting may be better and you will have master builders (Blue Ensign / Landlubber Mike - among others ) to follow. Talking of great builders - what has happened to Aliluke (Alistair)? Regards Doug
-
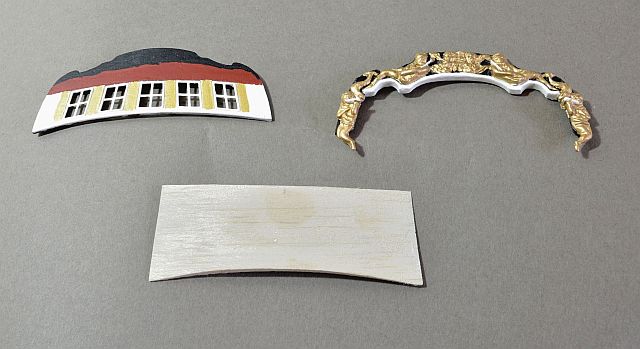
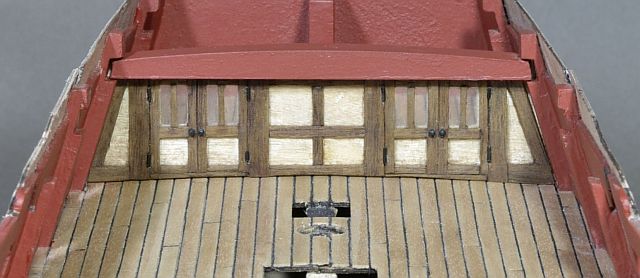
Hello Glennard - thanks for looking and your comments. Have been looking at all the Pegasus and Fly builds - I need all the help I can get. Felt that I have taken a big step forward with painting below the waterline - which means I can get on with the fixtures and fittings. Just finishing the stern windows - next update. The stern fascia was bent over a shaped bit of balsa wood and soaked with diluted PVA to get the required curve. The metal carvings were broken in two places and stuck back together and filed away at centre area on the back - also to try and achieve a slight curve. Thanks for looking Regards Doug


- 158 replies
-
- 12
-
-
Thank you - Blue Ensign - for your comments. Not sure if anyone noticed I had the design on the bow replicated onto the case stand. Again thank you very much to everyone who looked in, commented and the likes. Regards Doug
-
Terry - Hello. Been following your build - nice build! The brass column mounts came from Cornwall Model Boats (made by Amati) Regards
-
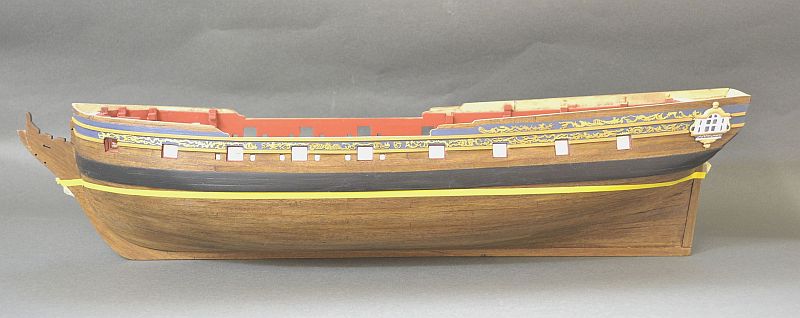
Thanks SpyGlass and Martin W for the information - that's a relief as with this build there seems a lot of measuring and re measuring and more measuring and I kept thinking what have I done wrong again........ The blue I am surprised it's liked - it is a bit of a lighter colour than on other builds although it appears brighter in the photos. I do put bright lights on when photographing. Thank you to everyone looking in, the likes etc. Now to paint the hull white. A bit scary - the waterline needs to be accurate (more measuring / checking) Regards Doug
-
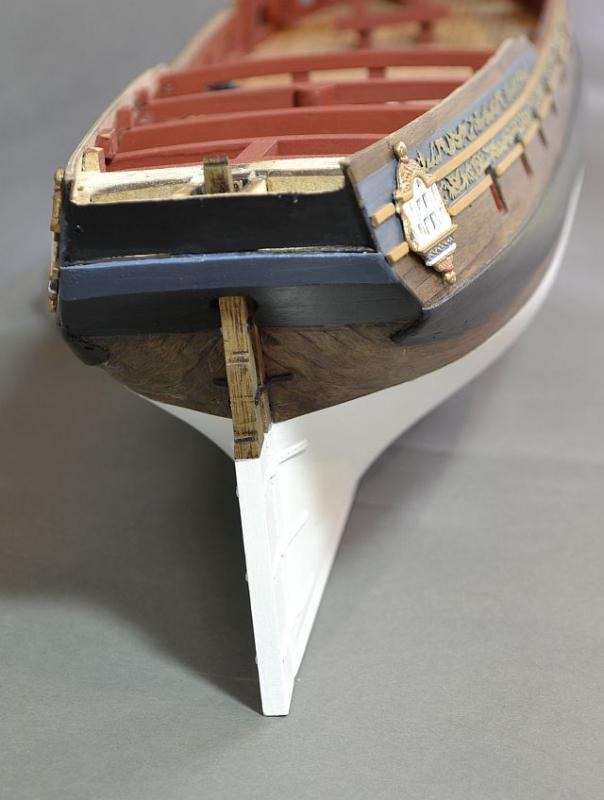
Hi - small update. Rudder attached with the gudgeons and pintles although the top gudgeon is not there as stern counter (part 146 which on the parts list says 'not in use'?) is in the way. Maybe not enough inward curve on the counter part although it is fixed properly to stern bulkheads. Thanks
-
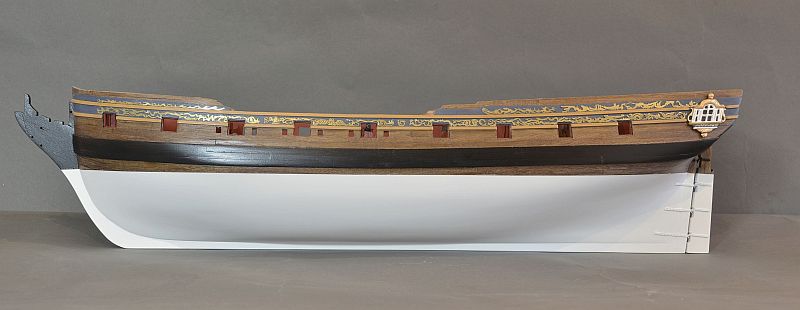
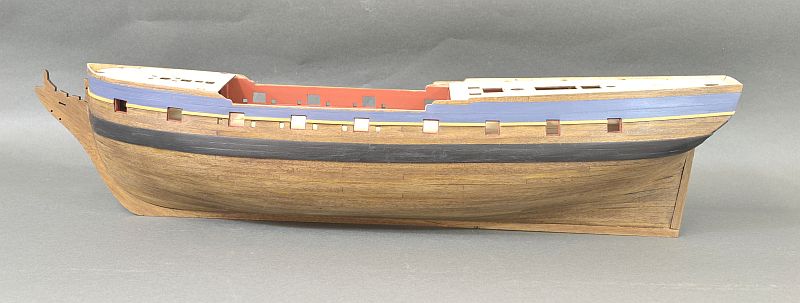
Thanks Cobr@ - although I feel I am not quite building this time as well as I did with the Supply build. Also thanks to probablynot and Beef Wellington for your comments, Thank you. Probably doing everything in the wrong order -side windows in place - not looking so good close up. The lower design was hard to see on one window - the moulding was very bad but slightly better on the other window and also found it hard to paint it correctly so did a bit of bodge job - tried to replicate the brass design along the side. Had painted the brass designs along the side with brass paint to tie in with the metal moulds that had to be painted a brass colour. Not a good idea so had to take the paint off which mucked up the brass strips Masking off to paint the hull below waterline. Have done the waterline about 4 mm lower than it should be - mainly as did not like the look of it nearly up against the wale and besides it was easier to fit the masking tape Regards Doug

-
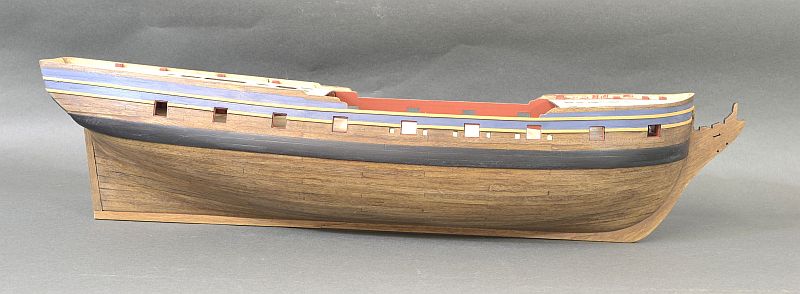
Sorting out the decorations strips. Using masking tape to get the correct positioning of the two 2 x 1 mm walnut strips. Many hours spent measuring and rechecking—quite challenging The instructions says to paint black between the strips if using decoration and blue if not. Have painted the areas blue even though will be putting the decorations on as I have seen most builds have blue as it does look good (And then again maybe not in my case...........) and the walnut strips have been painted yellow ochre whereas the instructions say just varnish. Where the side windows will be positioned the strip will be cut to fit, as strip is not glued in that area. Thank you Blue Ensign and Martin W for your helpful comments and certainly learning a lot from both of your builds. Regards Doug

-
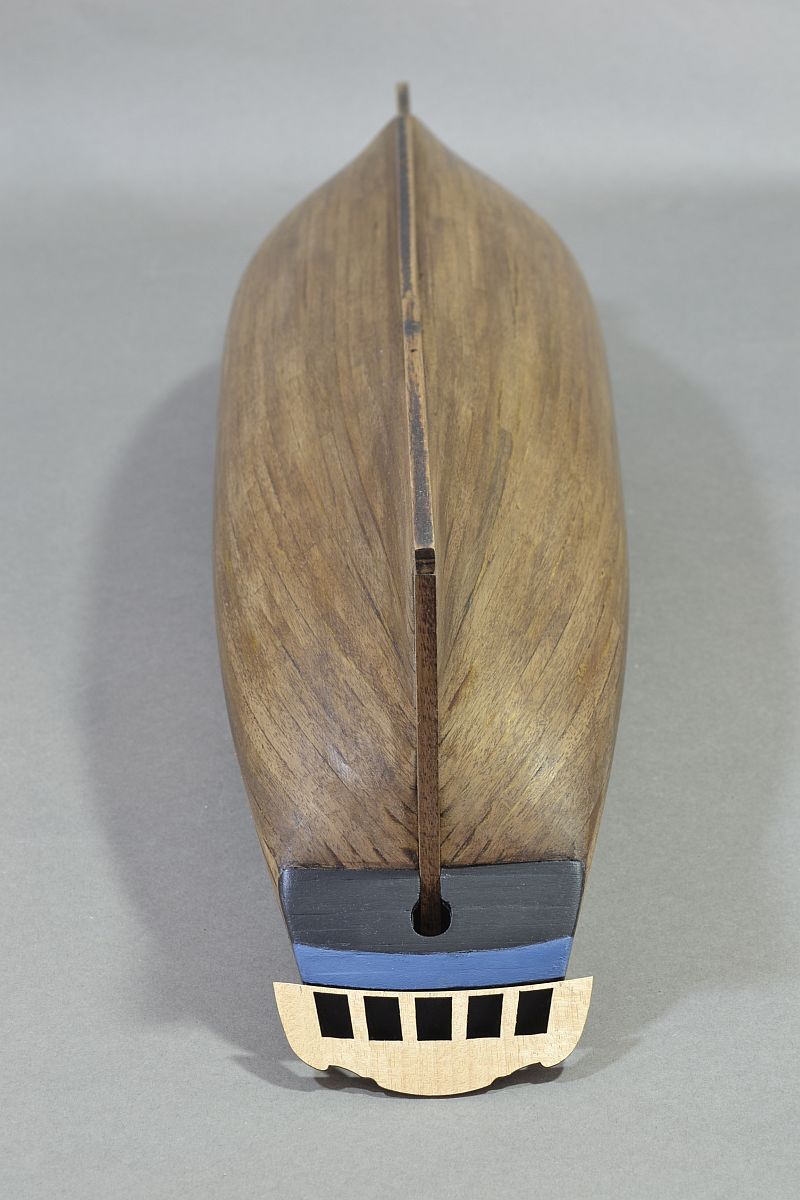
Hi - Wale now done. Little bit uncertain how it should finish it at stern. Blue colour in the photo looks a lot brighter than it is. Have cut out the infill to windows - a little more filing required...... I know I have not done the captain's cabin - just thought it may make the windows have a bit more depth than looking like a thin piece of metal. I am also going to put acetate behind for glazing. Regards Doug

-
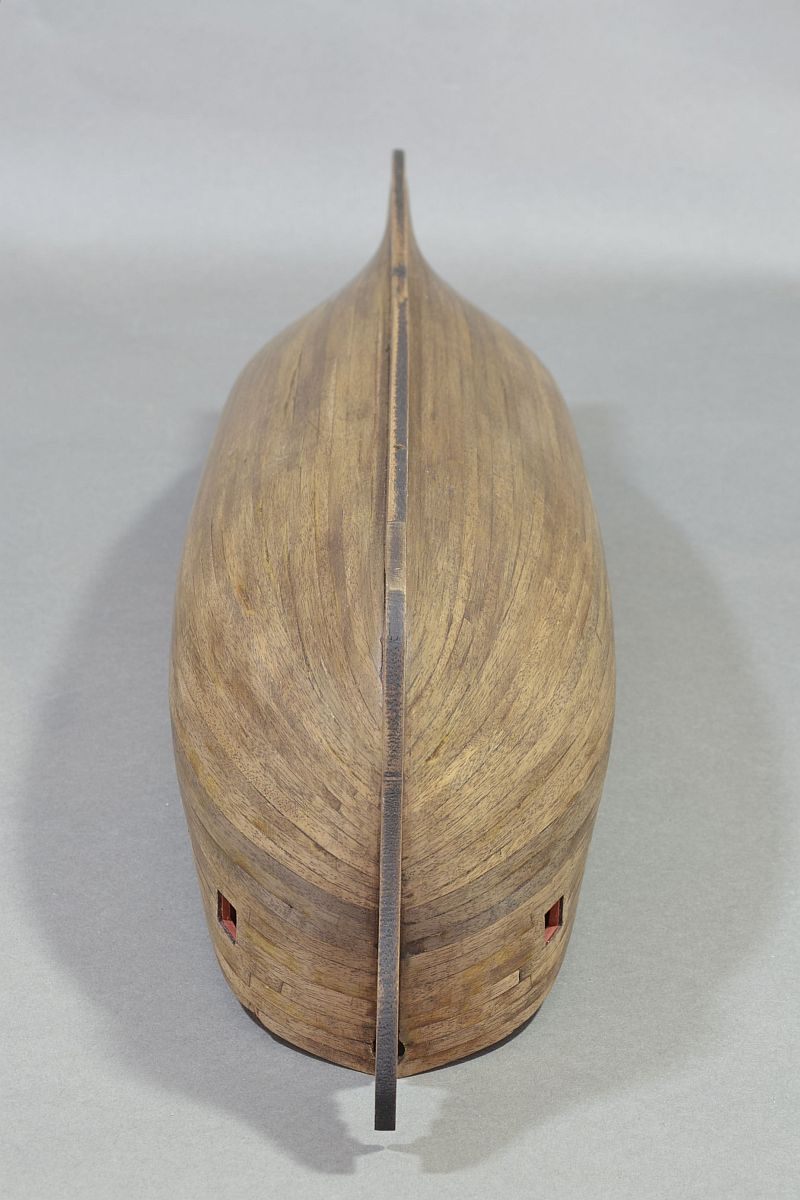
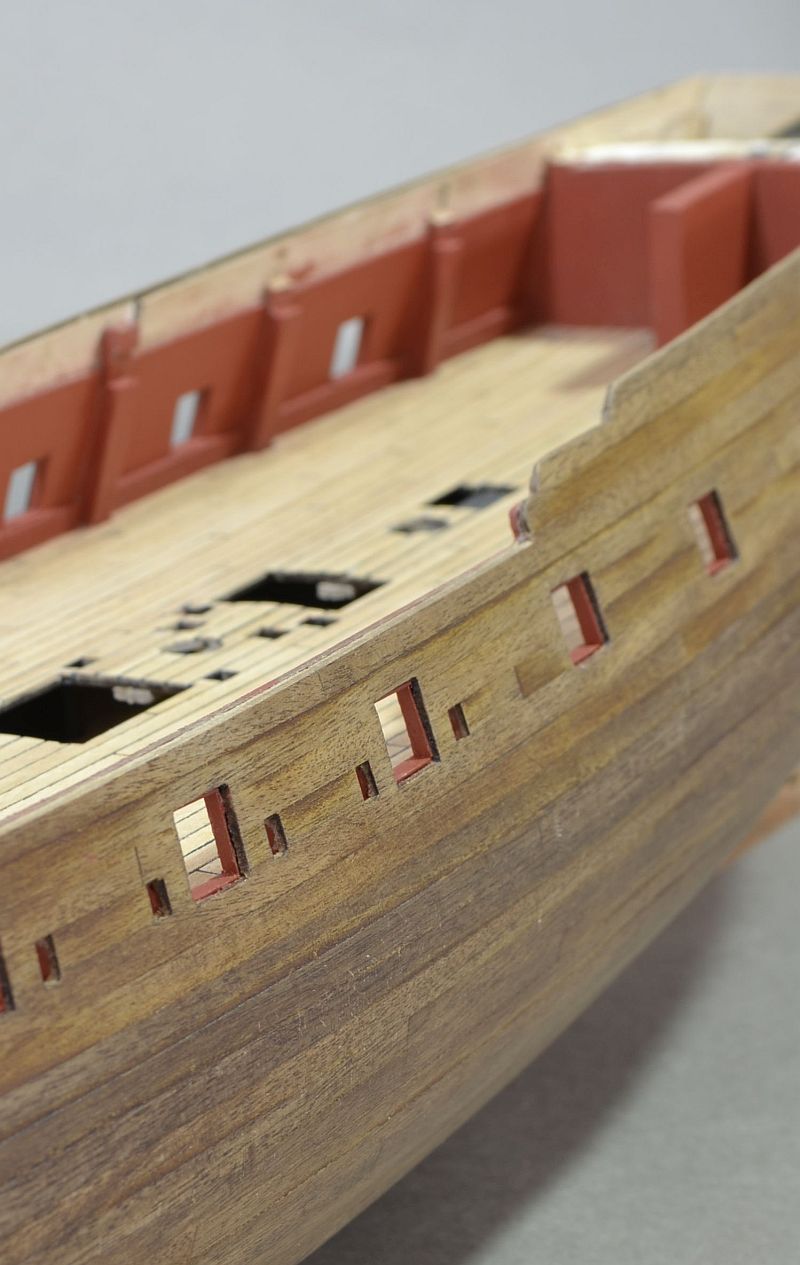
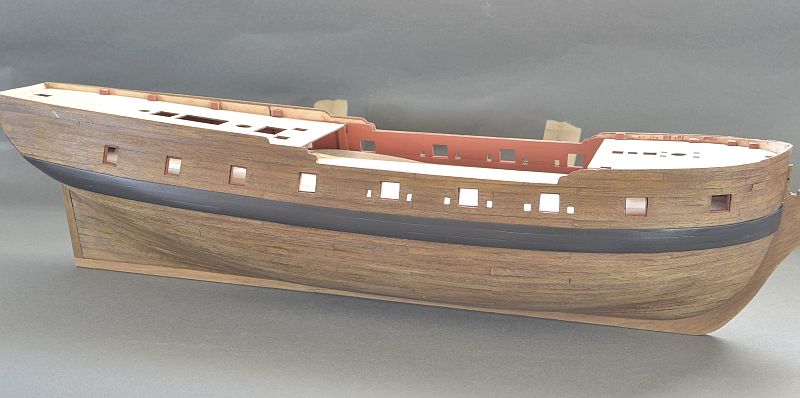
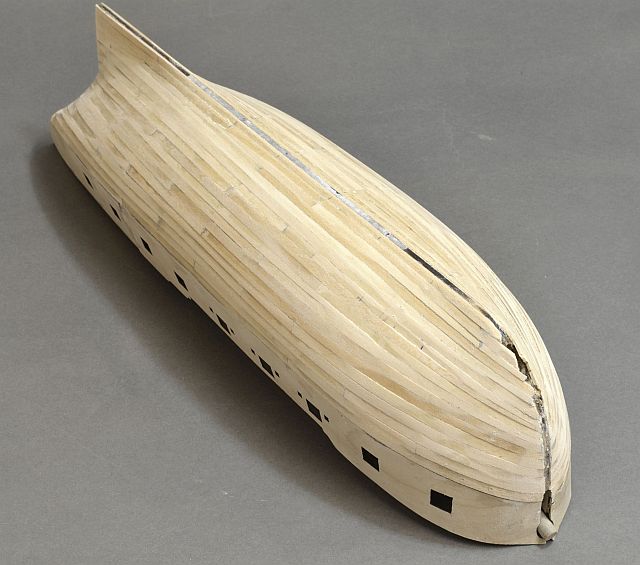
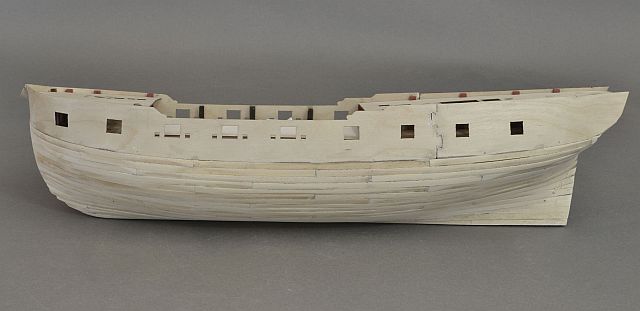
Further progress—2nd planking done. Feels now like one has a ship / boat. The darker band is where the wale will be positioned. The hull has been stained with oak colouring although the lower section will be painted white. Gun ports lined. Used the deck planking timber which was not a great idea as it had a tendency to splinter. Thank you for previous comments Regards Doug


-
Absolutely beautiful work !!
-
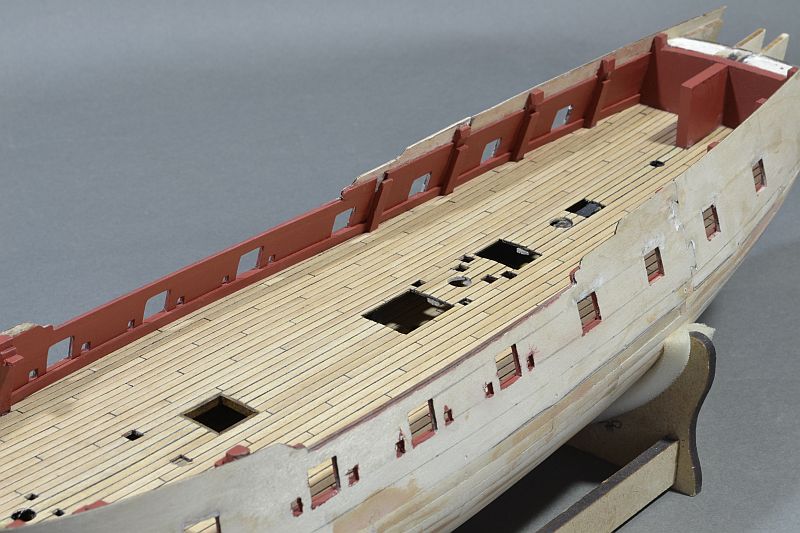
Right - an update. Hull sanded ready for 2nd planking. Bulkhead stubs removed and main deck planking finished to edge. Inner bulkhead planked, sanded and painted. One cabin partition made with acetate for glazing. Not sure if there would have been glass in the doors, thought it would let more light in. Have no historical reference has to how the partition should look - just copied what was done by everyone. Guess the next thing to do is the stern and then the wale. Thanks for looking in. Regards Doug
-
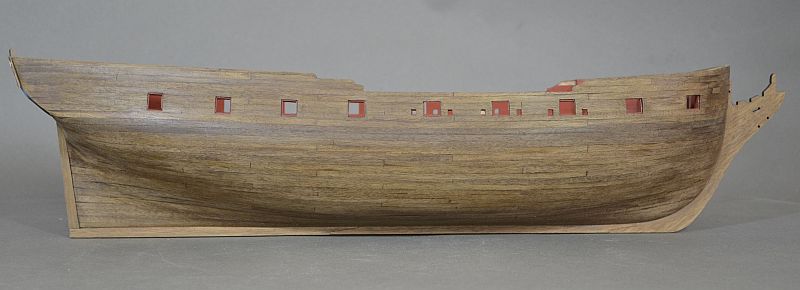
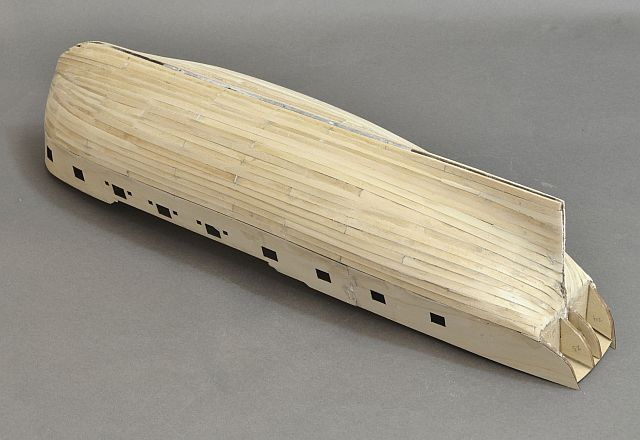
Hi - First planking done using kit supplied wood. Have just given the hull an initial light sanding with coarse paper just to give me confidence that it is in a reasonable state and not too bad Regards .
-
Hello - Have now received upgrade kit. Thanks for the advice and offer of cannons - will see how things turn out. Hopefully everyone else who have been waiting have now got the upgrade.
-
Hello Cobr@ - Thank you for the information. Had last contacted Andrew Horne (Euromodels)at the end of August last year and nothing in and had given up. Have now contacted him again as I can see they could be available on his site. Thank you for letting me know and thanking for your offer on the barrels. I will see if I can get an upgrade kit and take it from there. Regards Doug