-
Posts
1,858 -
Joined
-
Last visited
Content Type
Profiles
Forums
Gallery
Events
Everything posted by CaptainSteve
-
Food for thought, Matt. Soooo ... If I'm reading your picture (and Sheet 5) correctly, then essentially, the only actual connection between mast and spar is the lift rope/line running through the upper block (??).
- 625 replies
-
- bounty launch
- model shipways
-
(and 1 more)
Tagged with:
-
Your lantern looks pretty darned fine from where I'm sitting, Buck. (O'course, if you don't want it ....)
- 515 replies
-
- artesania latina
- whaleboat
-
(and 1 more)
Tagged with:
-
Matt, thanks for those. Very informative, indeed-eth !! Some twenty minutes of reading later, and I'm left with the distinct conclusion that a loop of parrels shall be required for each mast. No matter, I'm guessin' they'll be a lot easier to make than the 1:60 and 1:93 scale ones on earlier builds. (As for yours being "jacked", just remember that mine is "creative", to say the very least !!
- 625 replies
-
- bounty launch
- model shipways
-
(and 1 more)
Tagged with:
-
Ken, I'm slowly working my way through my own list of Every-Power-Tool-I've-Ever-Wanted. Am currently saving dollars for a Table Saw (probably Byrnes, tho' now I see Proxxon have one) and a Disc Sander. Plans are being made to take the lathe up to CaptainAndrew's next weekend for the express purpose of making sawdust (and barrels), so I'll let you know my thoughts on it afterwards. Meantime, back to the rigging and I have questions regarding how the cross-spars are attached to the masts on these type of boats. Does the mast just sit in-between the two blocks on the spar, essentially being attached only by the lift rigging ?? Were parrels employed, as per the spanker yards attached to mizzen masts ?? Enquiring Bounty Launch builders (with zero sailing experience) need to know ... (Sorry, Crackers)
- 625 replies
-
- bounty launch
- model shipways
-
(and 1 more)
Tagged with:
-
WoW !! Just WoW !! Thank you for your work, Bill.
- 382 replies
-
- sovereign of the seas
- carving
-
(and 1 more)
Tagged with:
-
Err guys, before this gets too much further out of hand, may I remind people that the point of Kit-Bashers is for ship-modelling ideas ... Please, there are forums for discussing our old computers ... and desks. And, Keith, there's definitely one for old jokes with punch-lines that make ya groan ... I know, coz I contribute to it a lot !! (Gotta admit, I hadn't heard that one before)
- 396 replies
-
- Idea
- Bright Idea
-
(and 1 more)
Tagged with:
-
There just be no comparison between Chuck's ropes and the kit-supplied crap. The Syren stuff looks better, feels better, and cuts better. As well, it falls in place better than the shiny cord which MS supplied. Can't say that I've seen that which Corel supplies for their kits. As to the lathe, patience young Padawan ... it be not going anywhere.
- 625 replies
-
- bounty launch
- model shipways
-
(and 1 more)
Tagged with:
-
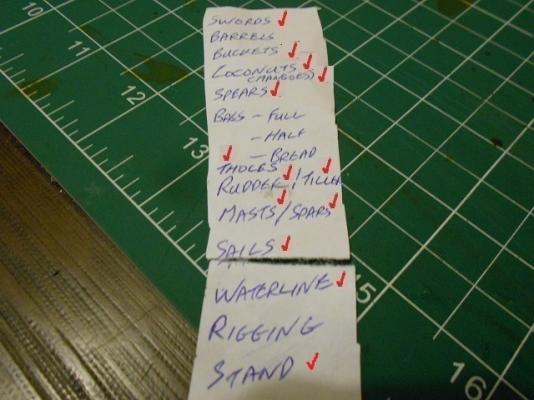
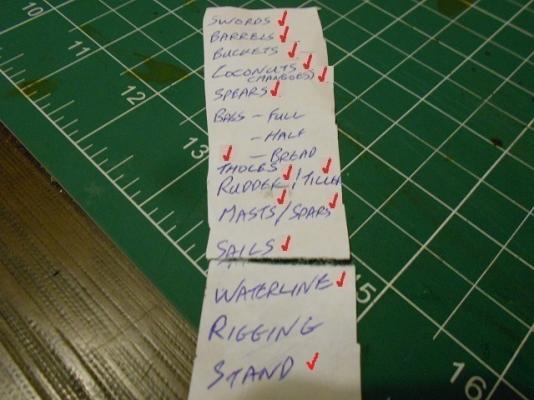
Work shall most verily be continuing on the rigging lines, but here be an updated version of the List ... (Barrels re-added)
- 625 replies
-
- bounty launch
- model shipways
-
(and 1 more)
Tagged with:
-
Nice, Tom ... I be thinkin' that some scrap lace pieces laid between your frame and the disc windows would make nice curtains.
- 396 replies
-
- Idea
- Bright Idea
-
(and 1 more)
Tagged with:
-
Matt, Essentially, beyond the lifts, and using some of the blocks for bunt-lines to lift the foot o' me sails, I be planning on using your work as my guide. (By the way, I'm yet to take my lathe out of the box. Once the arm heals up a bit, I plan on taking it for a test-spin a-fore working on a re-do o' the barrels.)
- 625 replies
-
- bounty launch
- model shipways
-
(and 1 more)
Tagged with:
-
In truth, had you not pointed them out, I would hardly have noticed your massively over-sized tre-nails. Never fear, once you have added some ballast rocks and a few barrels, I would imagine they shall hardly be noticeable (a trick which we not-so-good modellers use).
- 255 replies
-
- granado
- bomb ketch
-
(and 2 more)
Tagged with:
-
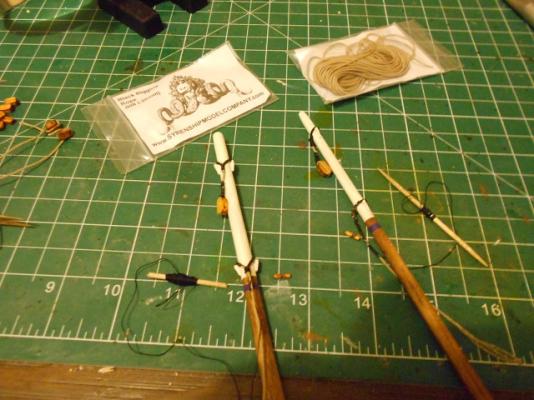
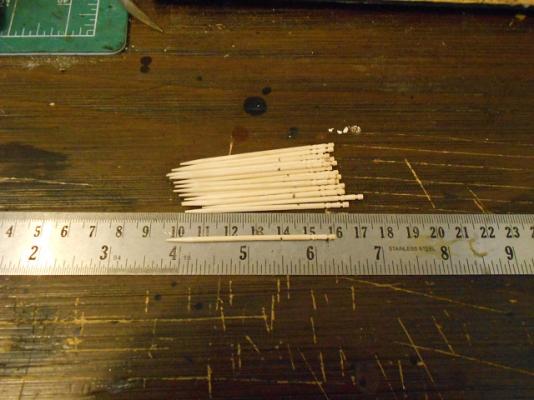
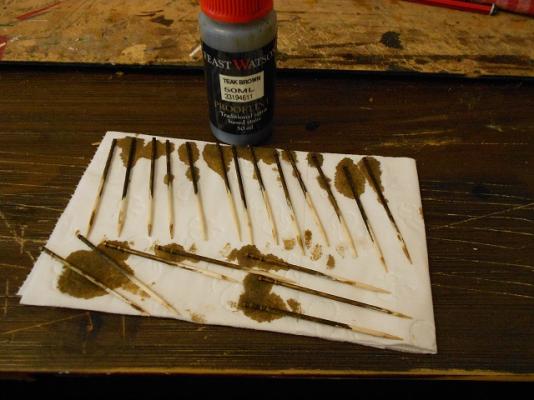
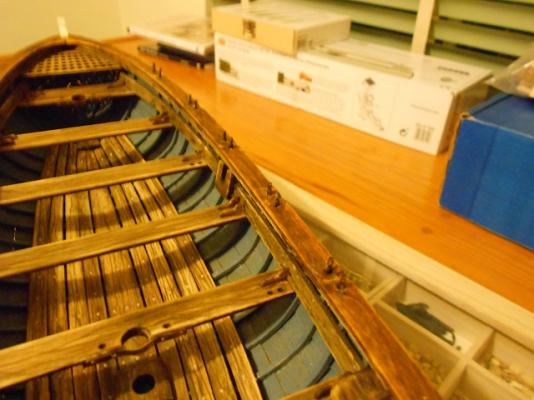
“Interesting that Ye should be a-mentioning the rigging, Patrick,” CaptainSteve were to open with. “For I has been givin’ a lot o’ thought to that matter over these past weeks.” Indeedeth, Our Hero didst reason thusly, “That at the scale o’ 1 to 16 that this kit be, ‘tis my thinkin’ that I shall verily be needin’ to look most closely at the nitty-gritty o’ the riggin’.” But a-fore we doth progress with that, there be the matter o’ these pics of the newly installed tholes. “Rather than just a-using the kit supplied dowel (1/32nd inch),” CaptainSteve didst explain, “I be choosing instead these toothpicks which I doest keep in abundance for use as glue spreaders.” “I doth liketh the pre-engraved grooves around the top o’ each,” he didst enthuse. These were first dipped in Teak Brown stain … … and thence trimmed to size and a-fixed into position …. Those with long memories may recall-eth a-mentioning (back in Post #256) o’ time-worn oar grooves etched into the wales …. "Hmmm ...," CaptainSteve were to complain. "These pics be of very poor-eth quality !!" “But getting back to the matter of the riggin’ o’ me Launch,” he were to continue. “I be a-figuring that I really must be a-displayin’ the seizings an’ servings as much as be possible.” O’course, this could prove-eth to be a most difficult path for Our Hero … “Just how many o’ the Horde are aware that CaptainSteve doest, verily, possesseth nought in the manner o’ real-life sailing experience ??” he were to query, a-fore showing this latest – in-progress – photograph … It be Our Hero’s intention that the upper block on each o’ the masts shall be the lift for the corresponding spar. “The lower line, which doth still require more servin’, be a stay, and shall be looped around a wooden peg, and thence lead down to a pin." Given his complete lack of sailing knowledge, Our Hero wouldst greatly appreciate any suggestions that wouldst improve upon the rigging. Incidentally, CaptainSteve didst happen to mention, the sails now be re-fitted to the spars using Chuck’s rope. “I hast decided,” Our Hero didst begin to close, “to be a-goin’ with a complete re-fit using ropes from the Syren Shipping Co.” Finally, to the left o’ the Syren packages, can be seen some blocks which hath been stained and stropped, but doth await serving.
- 625 replies
-
- bounty launch
- model shipways
-
(and 1 more)
Tagged with:
-
Arrr ... it be OK, George. But I think it is time to get back to the ship-modelling.
- 625 replies
-
- bounty launch
- model shipways
-
(and 1 more)
Tagged with:
-
Sapph'. I just used a piece of brass wire (0.8mm dia) for the pintles, and a piece of 1.5mm (outside diameter) brass tubing to form the gudgeons (also, the outside of the pintles). Small pieces of each were clipped to fit inside the shaped brass straps, and then glued into place with two-part epoxy glue (others solder the parts in place). Check out pictures RUDDER7 and RUDDER8 in this post, back on page 29. Also, check this post in Kit-Bashers. And you can try this one for Nenad's tips on building these bits.
- 625 replies
-
- bounty launch
- model shipways
-
(and 1 more)
Tagged with:
-
Hahaha ... I'd pay money for a copy of that picture to hang on the wall in my modelling room. Talk about "inspirational" !!
- 625 replies
-
- bounty launch
- model shipways
-
(and 1 more)
Tagged with:
-
Now here's a most fortunate conundrum, George ... Normally, one would be a-leaving the hospital and expect to be laid up for many a day. In CaptainSteve's case, however, the saw-bones didst suggest a most rigorous program of rehab exercises. Within a very short span o' time, Our Hero beganeth to realize that his rehabilitation couldst most quickly be turned to fashioning a few tholes, the touchething-up of paint-work and the makething of rigging blocks. No pictures as yet, but there doest appear to be an update to the List ...
- 625 replies
-
- bounty launch
- model shipways
-
(and 1 more)
Tagged with:
-
Geezer, As built from the box, I do believe it would be the 1927 re-fit. But many of us have bashed/are bashing to other time frames, with 1812 being a popular choice. Hard as it may be to hear, I think George has given you some good advice. For myself, over the last two years, I've made the ship's boats to this build. Apart from marking-up some frame pieces, that's it !!! Although, I have followed a heap of other builders to see how they are doing it, and I've picked up an awful lot of the history of this ship. That's all part of the fun.
-
Phil, I suspect you mean this model.
About us
Modelshipworld - Advancing Ship Modeling through Research
SSL Secured
Your security is important for us so this Website is SSL-Secured
NRG Mailing Address
Nautical Research Guild
237 South Lincoln Street
Westmont IL, 60559-1917
Model Ship World ® and the MSW logo are Registered Trademarks, and belong to the Nautical Research Guild (United States Patent and Trademark Office: No. 6,929,264 & No. 6,929,274, registered Dec. 20, 2022)
Helpful Links
About the NRG
If you enjoy building ship models that are historically accurate as well as beautiful, then The Nautical Research Guild (NRG) is just right for you.
The Guild is a non-profit educational organization whose mission is to “Advance Ship Modeling Through Research”. We provide support to our members in their efforts to raise the quality of their model ships.
The Nautical Research Guild has published our world-renowned quarterly magazine, The Nautical Research Journal, since 1955. The pages of the Journal are full of articles by accomplished ship modelers who show you how they create those exquisite details on their models, and by maritime historians who show you the correct details to build. The Journal is available in both print and digital editions. Go to the NRG web site (www.thenrg.org) to download a complimentary digital copy of the Journal. The NRG also publishes plan sets, books and compilations of back issues of the Journal and the former Ships in Scale and Model Ship Builder magazines.


