JesseLee
-
Posts
1,694 -
Joined
-
Last visited
Content Type
Profiles
Forums
Gallery
Events
Everything posted by JesseLee
-
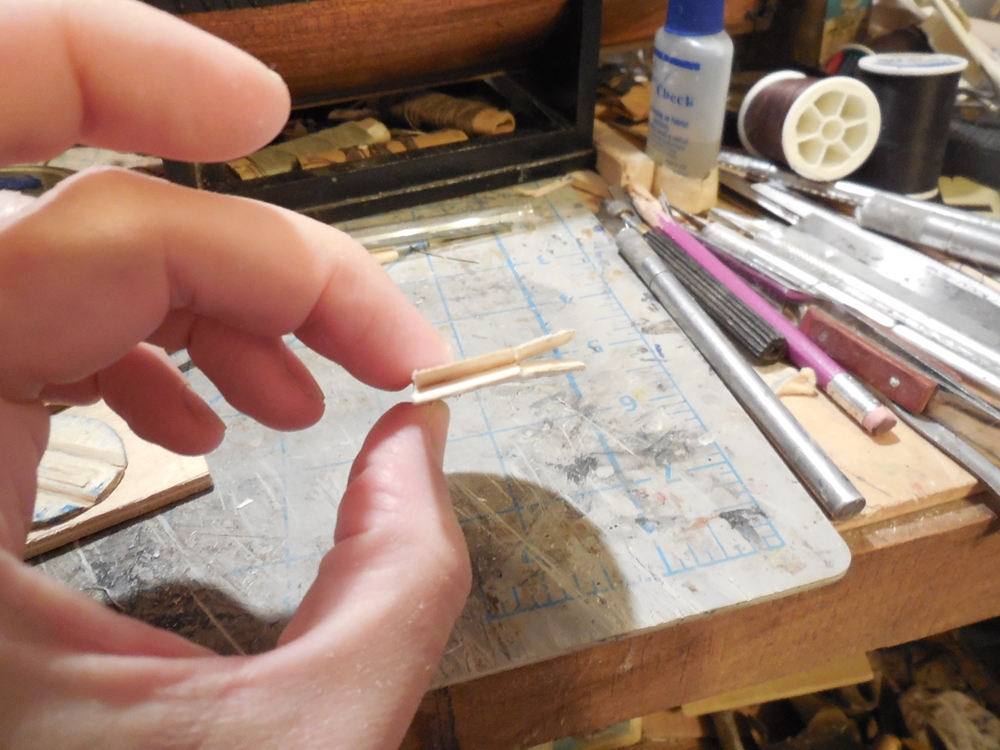
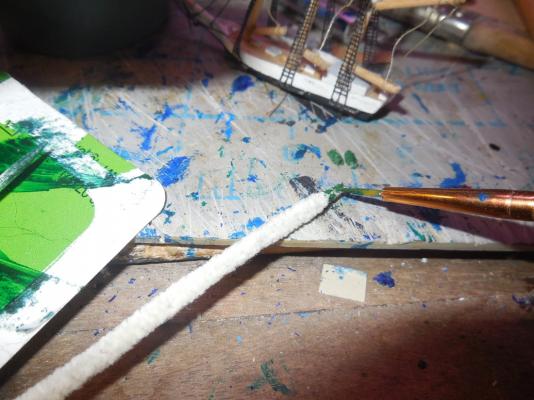
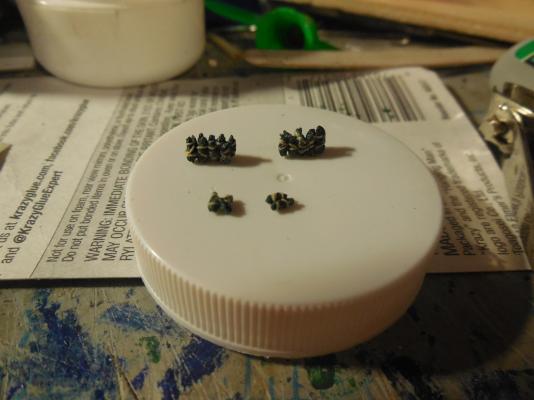
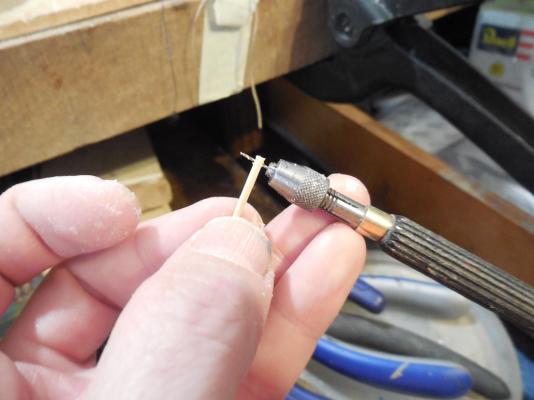
 Got a different set of Christmas bulbs made by a different company from a different store this year, Began the process over again. glued the bottom label disc in. Painted the space between, got the sea bed base in. The Rouse Simmons carried Christmas trees so I wanted to show some on this build. Made some Christmas trees to put on deck by trimming the tip of a pipe cleaner- (being a pipe smoker I've got these laying around). Clipped them off & painted them. They were shipped bundled by tying them up with ropes so I rapped some very thin thread around them.
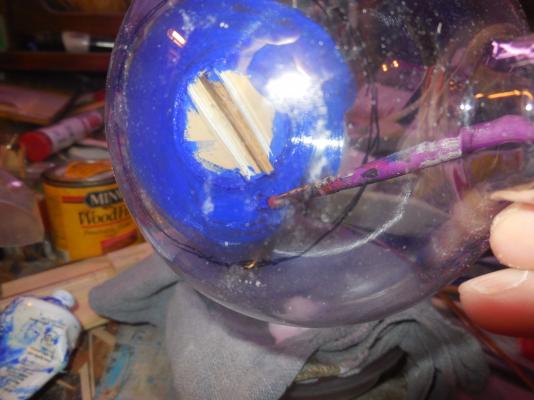


- 56 replies
-
- 6
-

-
- rouse simmons
- bottle
- (and 1 more)
-
Just caught up with you over here at this build Dave. This Wolfpack fan is loving what you are doing for your Dr. at UNC!
- 209 replies
-
- 7
-
-
- cheerful
- Syren Ship Model Company
- (and 1 more)
-
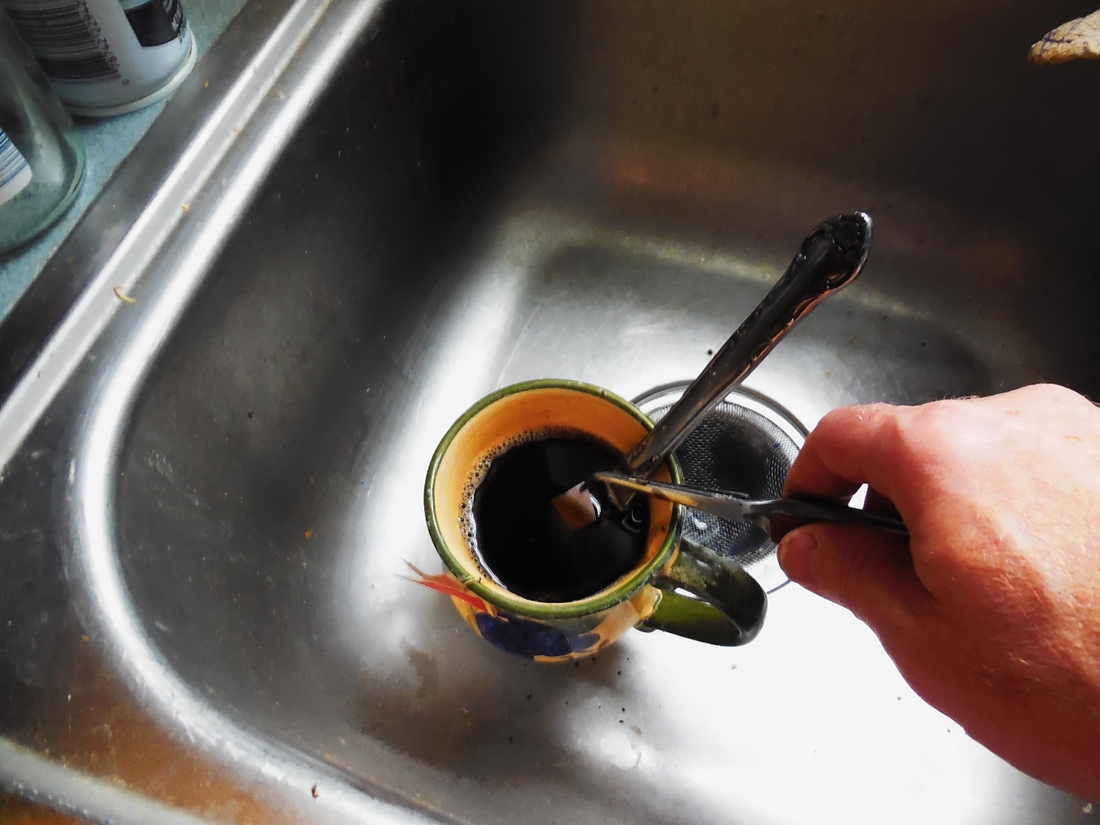
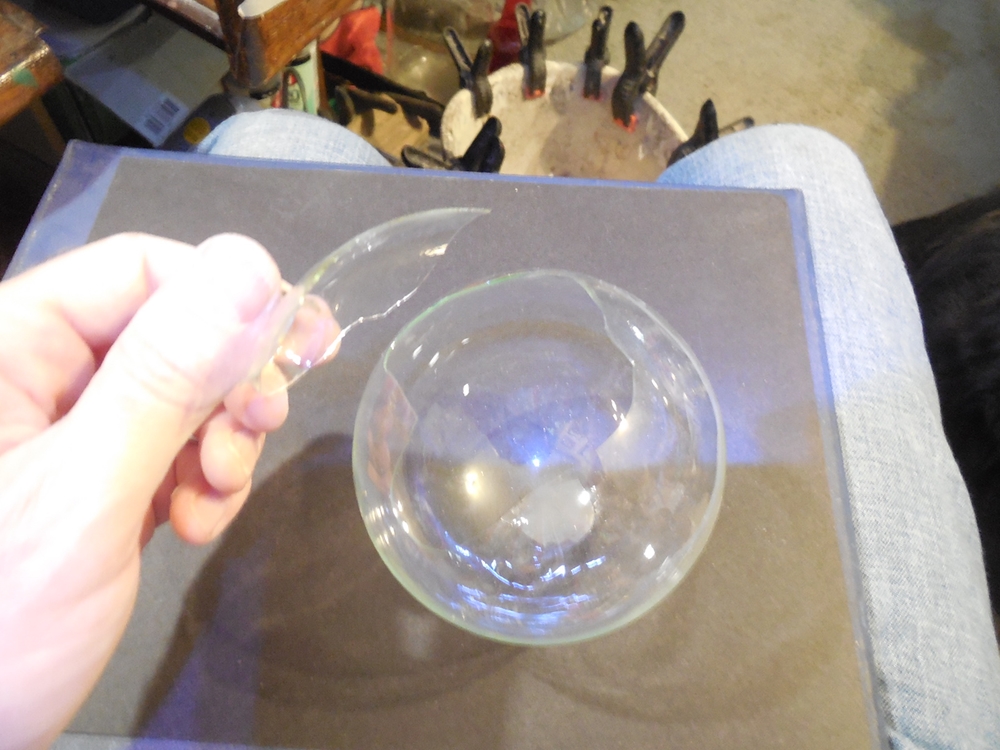
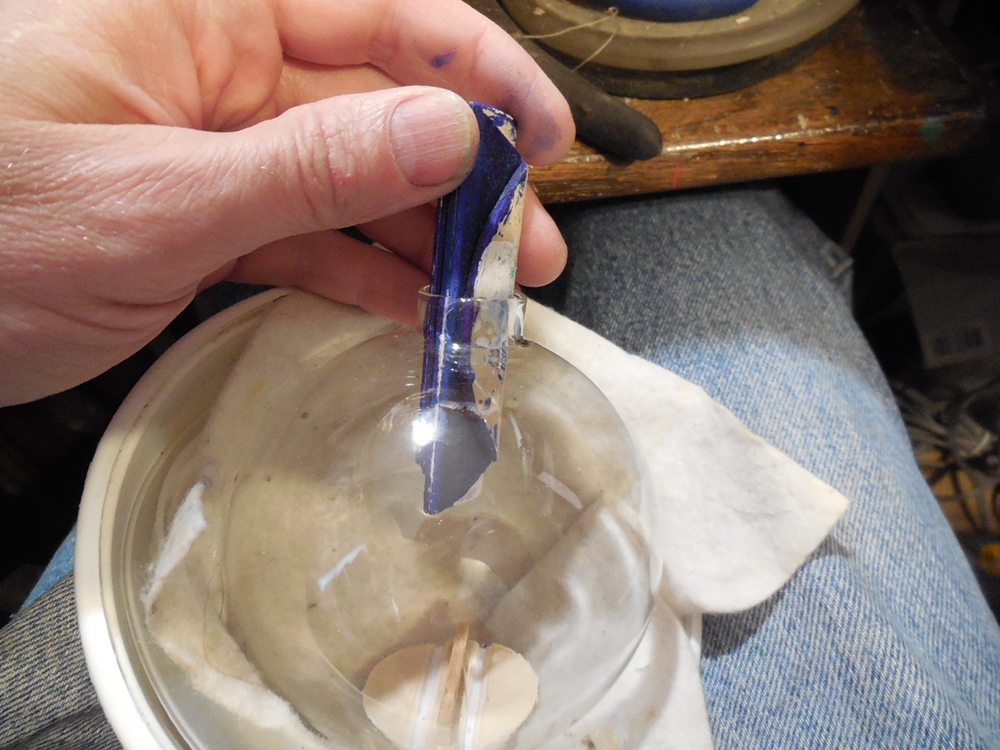
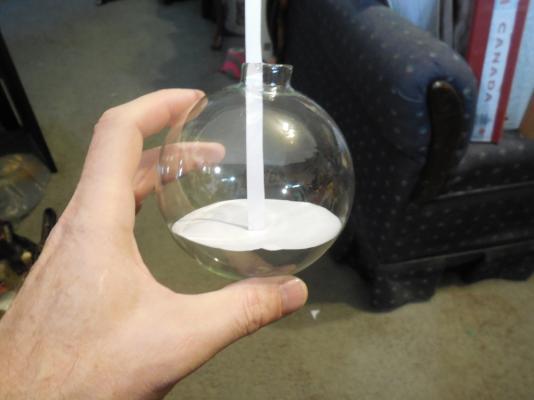
Started making the sails. Dipped them in coffee. As always when coloring sails with coffee or tea do a dip/wash with baking soda in water to neutralize the acids. Sometime during these steps the glass bulb I was working with broke. They had come in packs of 4 & this was the 4th one. This ended the build last year. Sometimes the glass would break while working with it & sometimes it would break on it's own when I wasn't even at the workbench. The picture shows how a typical break was. I was very upset because I didn't get it done in time to put on the Christmas Tree. This pack of Christmas bulbs were bought at Wal Mart. Decide to Try some from a different store the next season & try it again. One year later (about a month or 2 ago this year) got some more from Hobby Lobby hoping they wont be as thin. The next posting will be where I picked the build back up this year.


- 56 replies
-
- 6
-
-
- rouse simmons
- bottle
- (and 1 more)
-
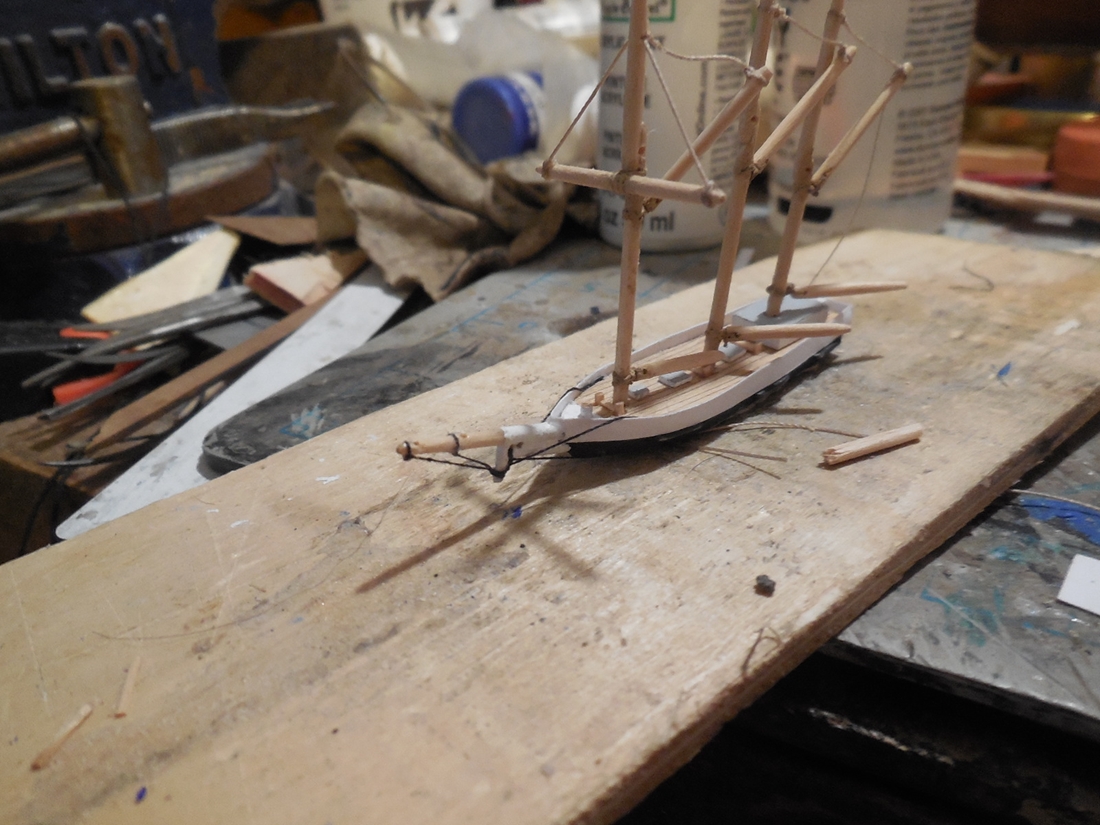
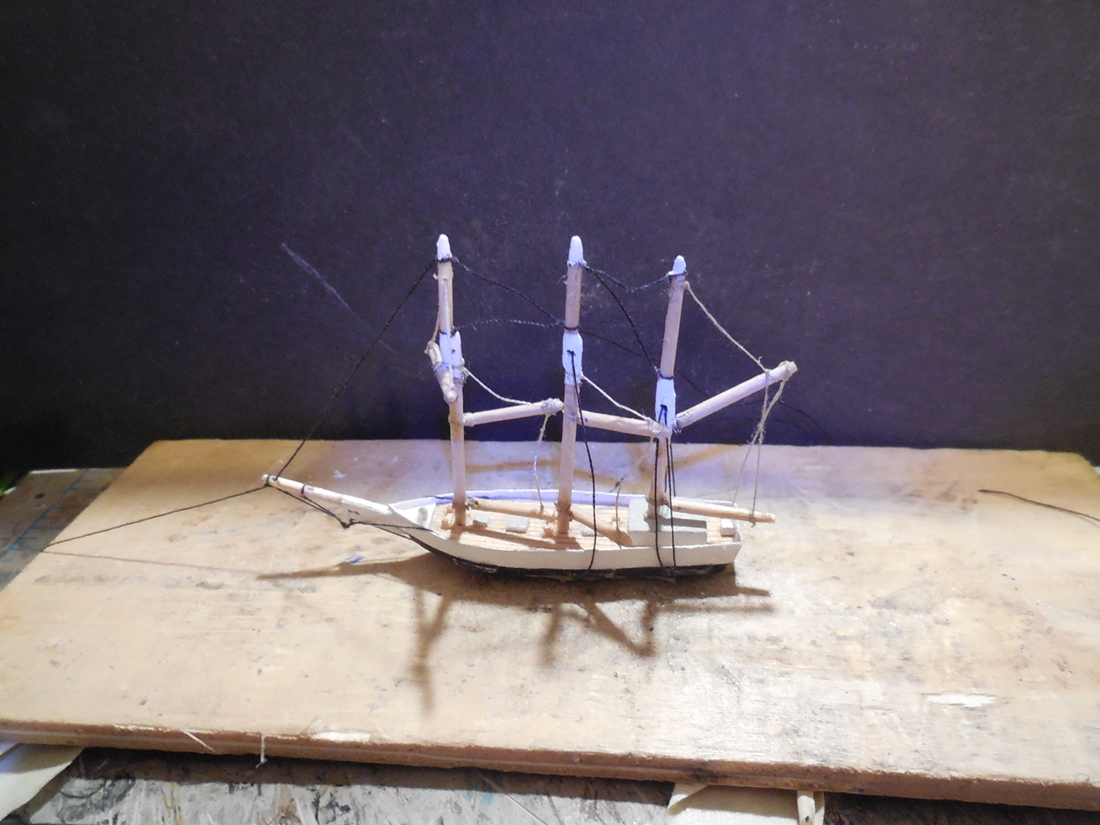
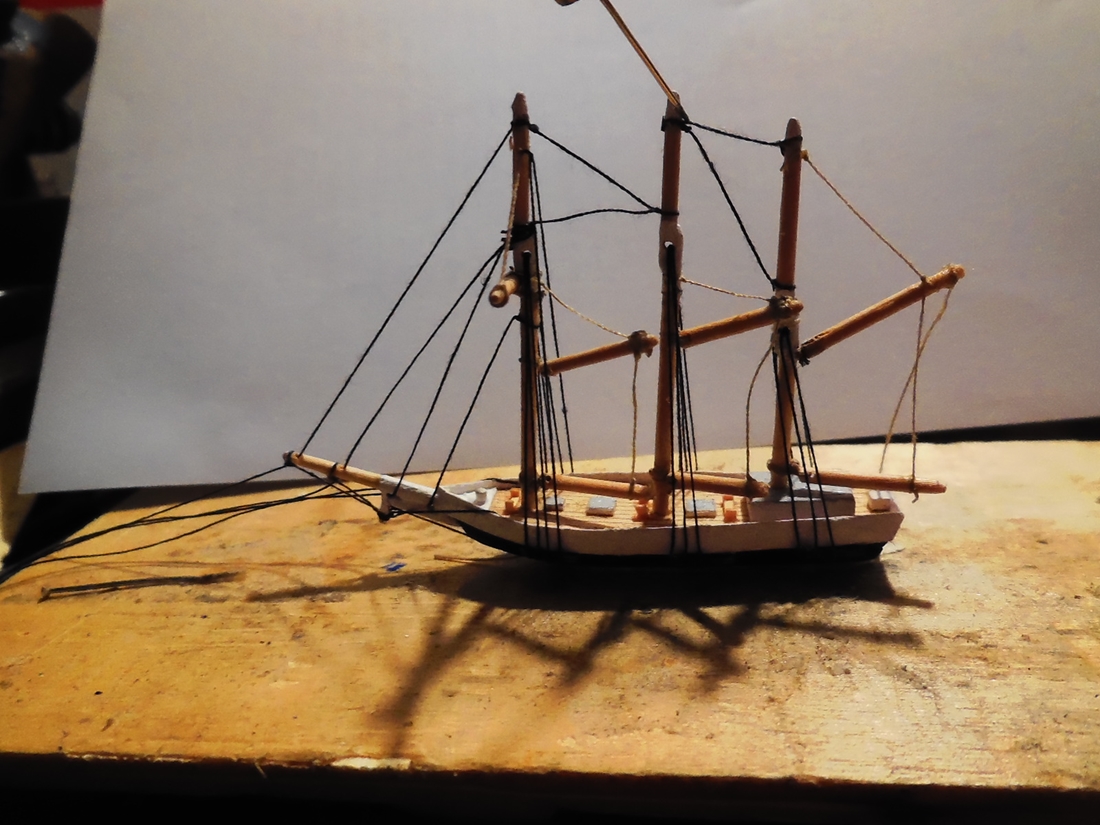
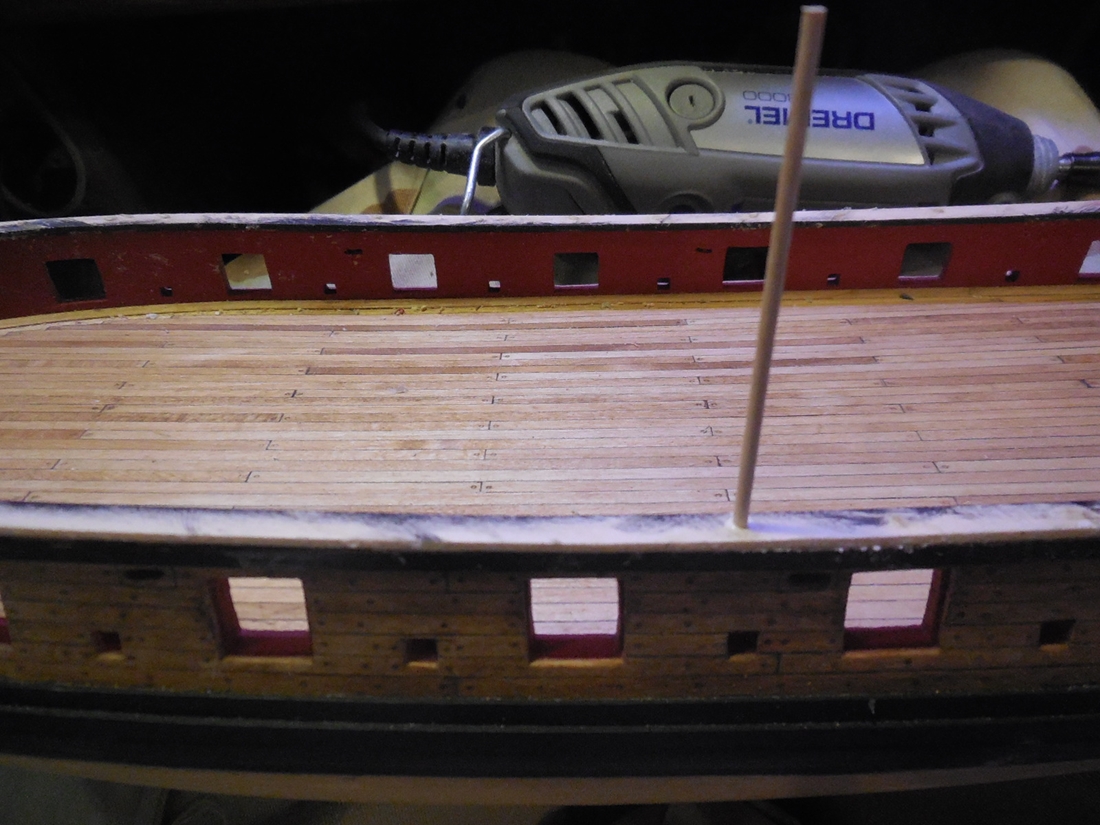
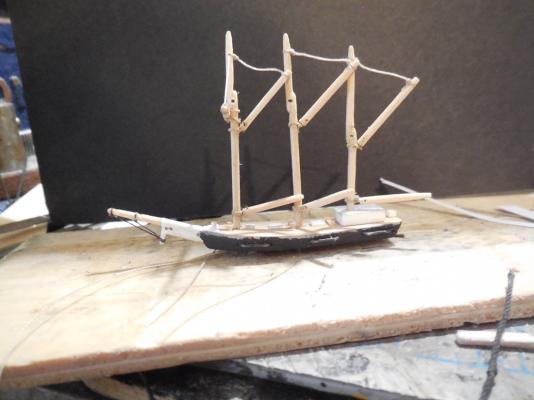
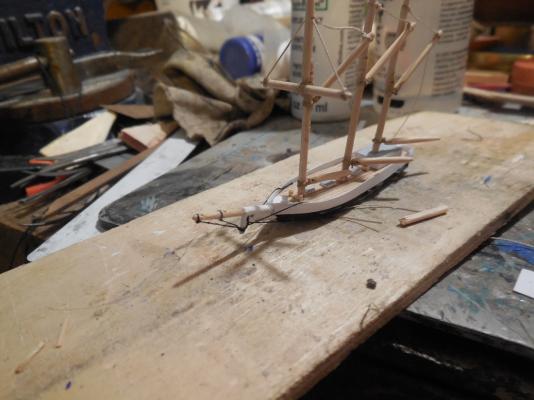
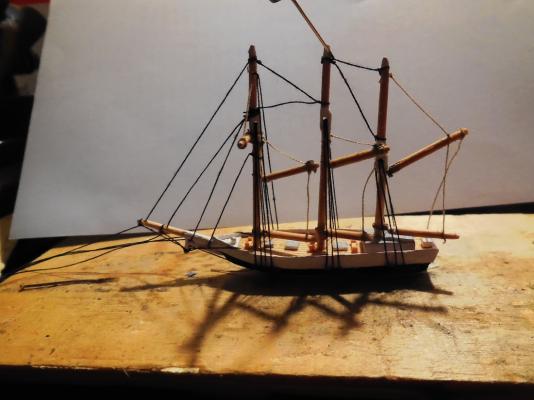
Made the masts & spars. I tied an old method of tying thread through the bottom of the masts & through 2 small holes through the hull (in the mast holes). Forgot to take some close-up picks of this. The thread "hinges" are knotted in a small hollowed out spot underneath the hull. Adding rigging as I went.....

- 56 replies
-
- 5
-
-
- rouse simmons
- bottle
- (and 1 more)
-
Thanks for the input Richard & George, Gary, I plan on letting the copper weather like it really would so I wonder if the wipe on poly would be ok for that. Thanks for the tip & encouragement Marty! Jesse
- 1,306 replies
-
- 6
-
-
- syren
- model shipways
- (and 1 more)
-
Awesome!
-
I've been wondering about that. I'm finding that if it is rubbed against in the wrong direction the tiny corners will snag & fold up.
- 1,306 replies
-
- 5
-
-
- syren
- model shipways
- (and 1 more)
-
Just found this & went through the whole build several times -WOW! This was an amazing build Danny. The fine detail in everything from construction to the painting is incredible! This makes me want to learn more about using plugs (something I've never done) to make small hulls. Very, very nice!
-
Johann, I have been following your build with awe! You somehow make every piece of wood look so precise, crisp & smooth. Just about as close to perfect as humanly possible! Some of the finest modeling I have ever seen - I wish I could make something look this good! It is a pure pleasure to see. Jesse
-
Wow, your deck furnishings are looking so good & detailed. I'm studying all of this to help me do better when I get to these steps. Jesse
- 659 replies
-
- 3
-
-
- syren
- model shipways
- (and 1 more)
-
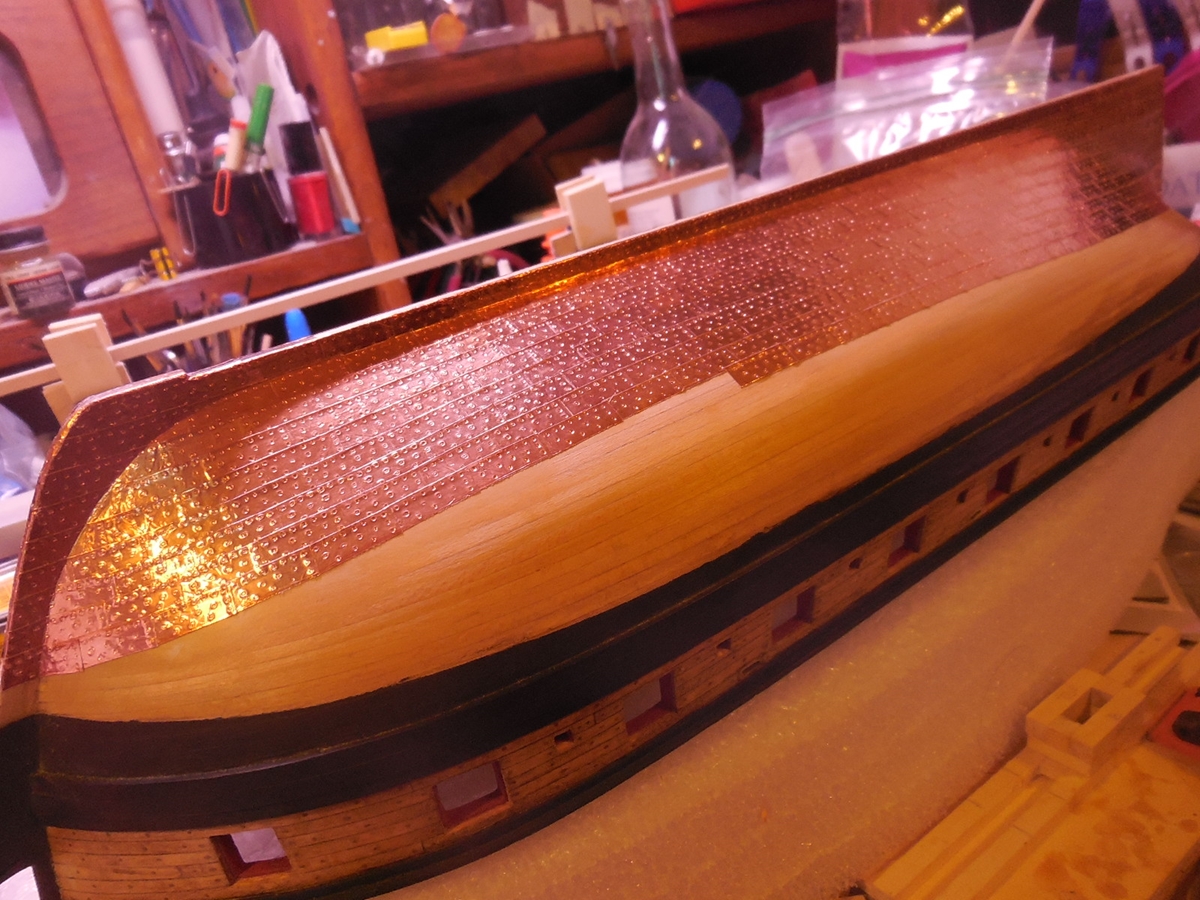
Thank you everyone! This is my 1st time using copper plates. They will wrinkle like aluminum foil very easily. I guess in real life they get scratched & dented some. I have found that they can be smoothed out some with small scrap pieces of balsa wood. A toothpick or other small wooden stick with the end cut off the same diameter of the rivet size will re-stamp the rivet dimple if you smooth one of them out by accident. The instructions say not to touch because fingerprints will show as the patina develops. I'm trying to use medical latex gloves but I hate them. Cant work well with it if I cant "feel" it. The other day they bothered me so much that I coated all my fingerprints with CA glue & laid the gloves aside. I liked it that way better. Hope no fingerprints show up later. A few times the glove fingertips got torn open & my fingertips touched them anyway. David, I haven't decided whether I will let the patina develop on its own or if I will do something to speed it up. The 1st plates at the bottom are already starting to dull so I might let it develop on its own. Again thank you all for the encouragement & all the likes! Jesse
- 1,306 replies
-
- 9
-
-
- syren
- model shipways
- (and 1 more)
-
Been working on the copper plating. Going very slow. I'd hate to show a very close-up pic of the plates. I am having a very hard time not bending them. Mine look very beat up in some spots.


- 1,306 replies
-
- 18
-
-
- syren
- model shipways
- (and 1 more)
-
Never tried that David. Will have to look into it. Nigel, This is actually already completed. I ended up using Plastalina putty.
- 56 replies
-
- 5
-
-
- rouse simmons
- bottle
- (and 1 more)
-
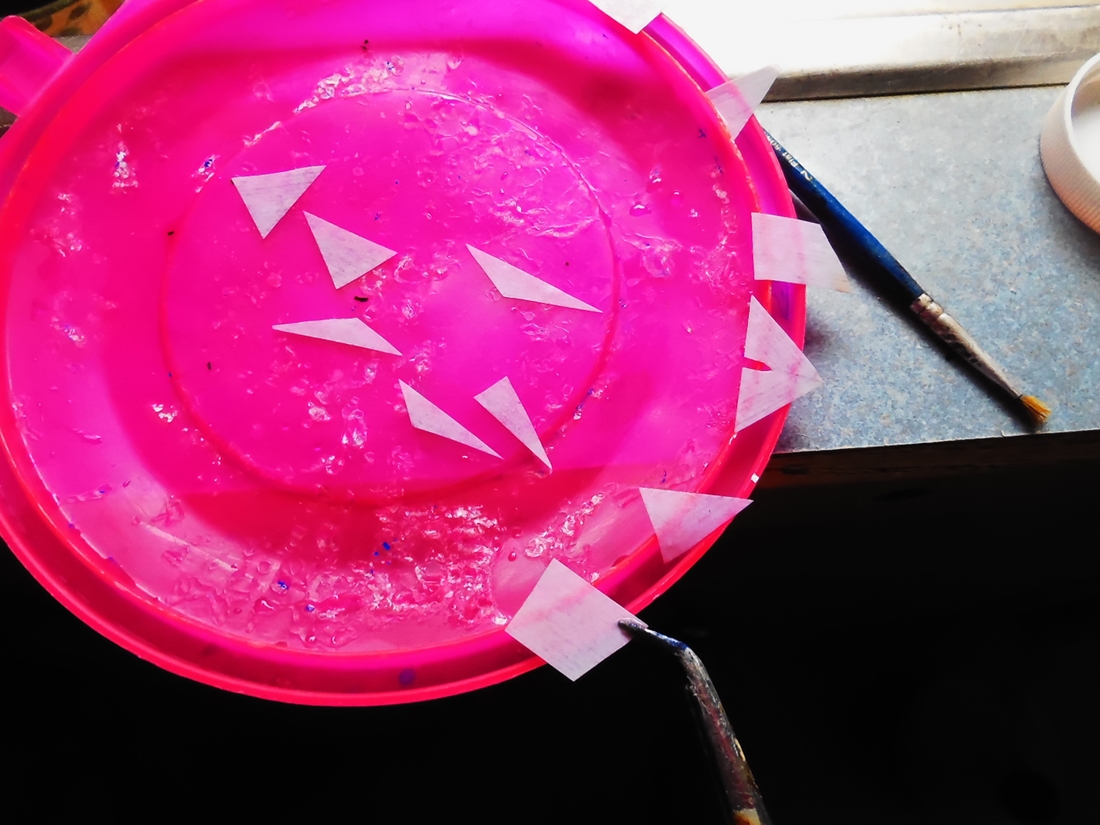
I did some experimenting with this build. Some didn't work out. Wanted to keep things as light as possible. Tried making the sea out of silicone. It shaped great & looked very much like a slightly choppy sea surface. Painted it & it looked very well. It could roll up to be put in the ornament & open back up flat inside for putting down. The problem is nothing will stick to dried silicone. the paint eventually starts peeling & flaking off in spots. It really disappointed me because it had looked so good & it was so light. I hope I can find a way for this to work in the future. It formed the perfect looking wave caps. I had tried not painting it but having the blue paint just underneath it. That didn't look quite right so that's why I tried painting the sicone surface itself.

- 56 replies
-
- 7
-
-
- rouse simmons
- bottle
- (and 1 more)
-
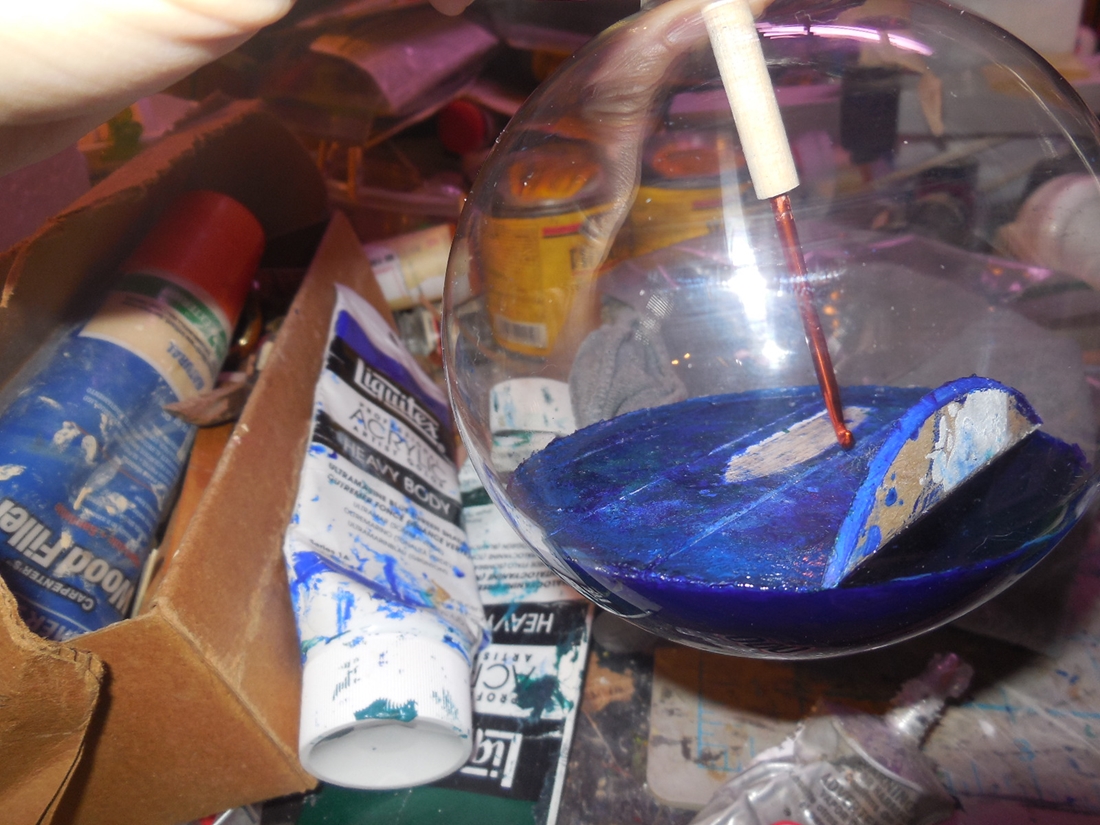
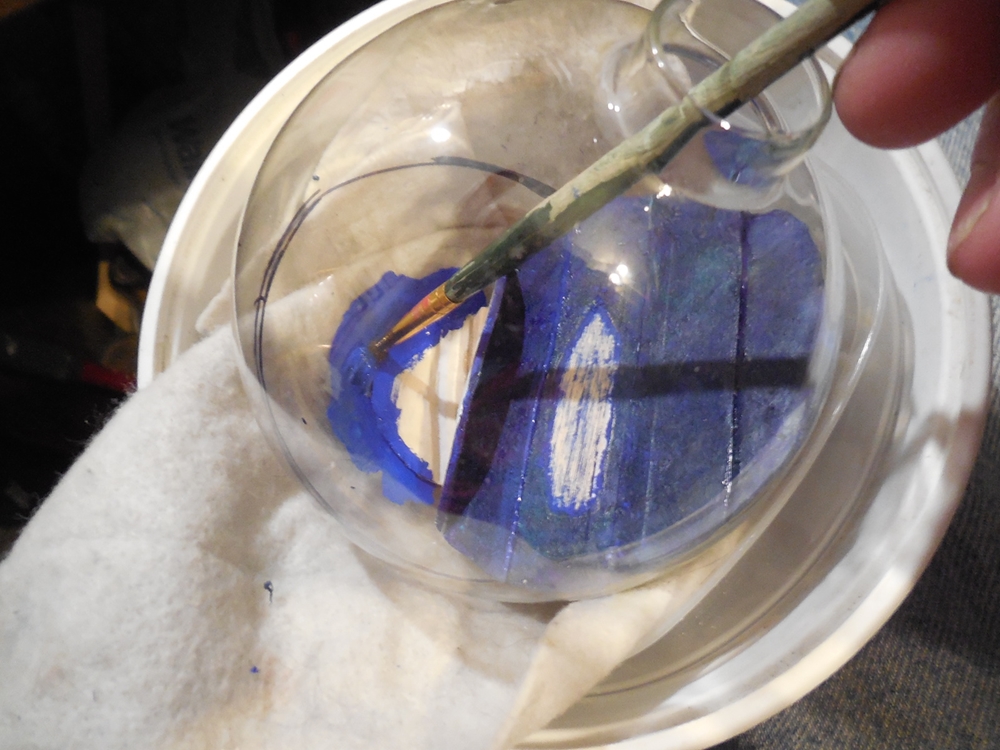
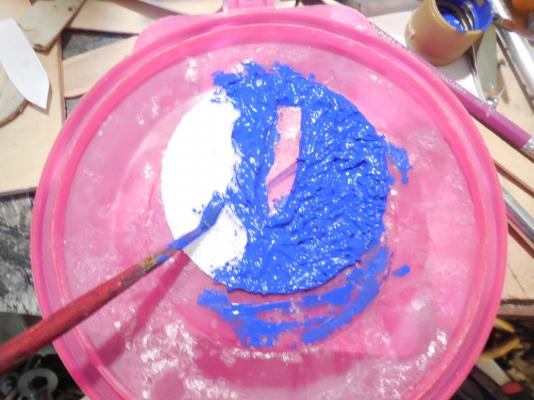
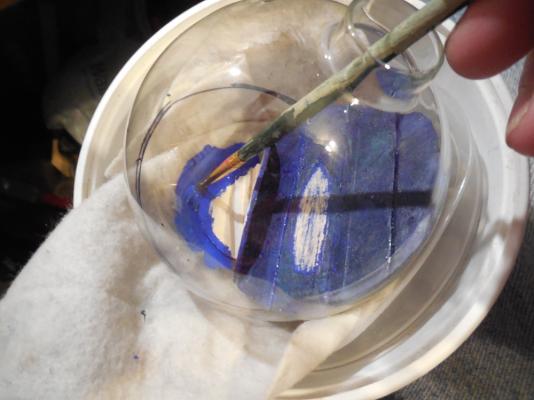
Painted blue inside glass between bottom label disc & sea base disc
- 56 replies
-
- 7
-
-
- rouse simmons
- bottle
- (and 1 more)
-
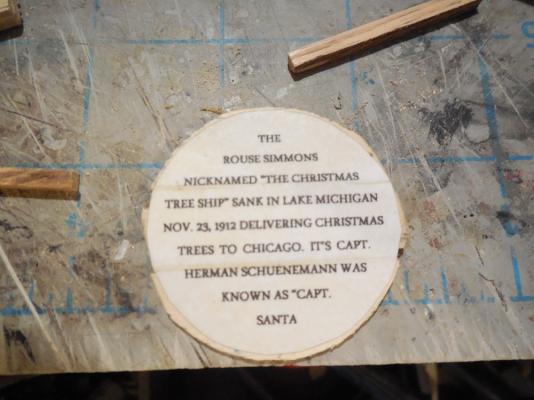
Re-did bottom label disc. the 1st one was too oval so I made another one round like it should be. I also added a wood tab on it so I could hold it with locking tweezers making it easier to install & glue in place. Glued it to the bottom.

- 56 replies
-
- 6
-
-
- rouse simmons
- bottle
- (and 1 more)
-
Sorry you are having this problem but I know your great talents will overcome it like you always do! Jesse
-
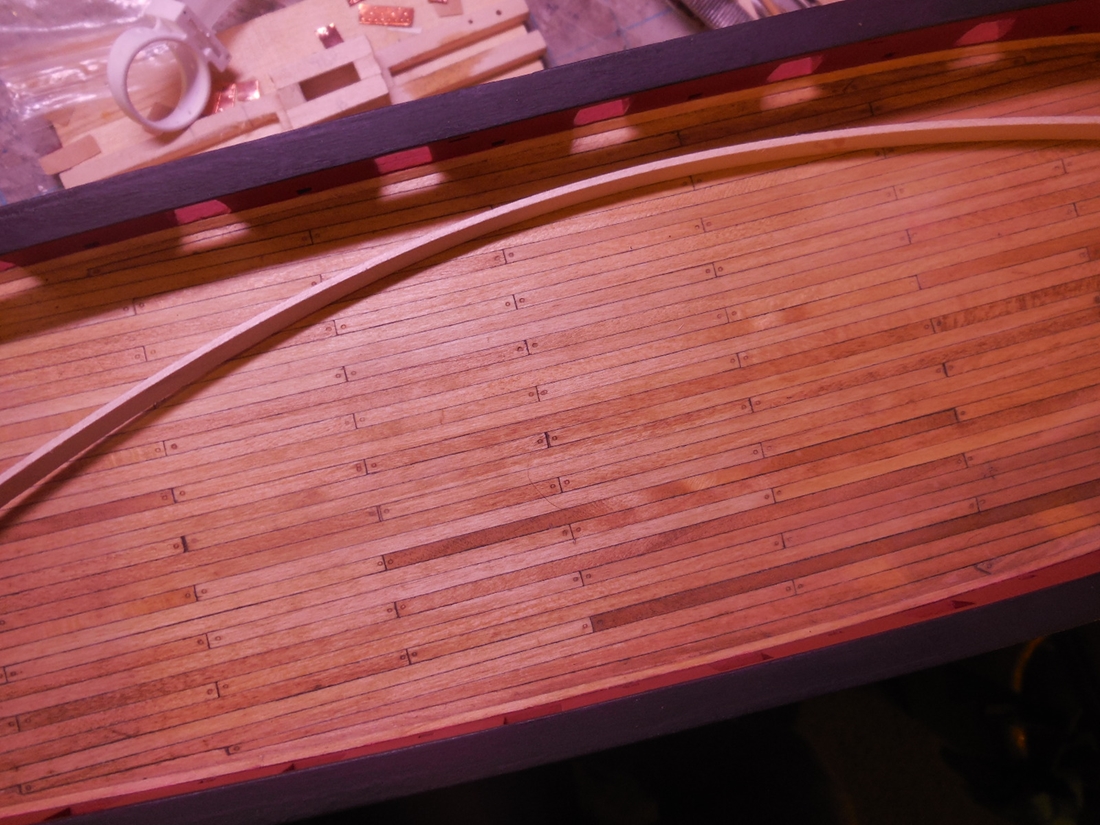
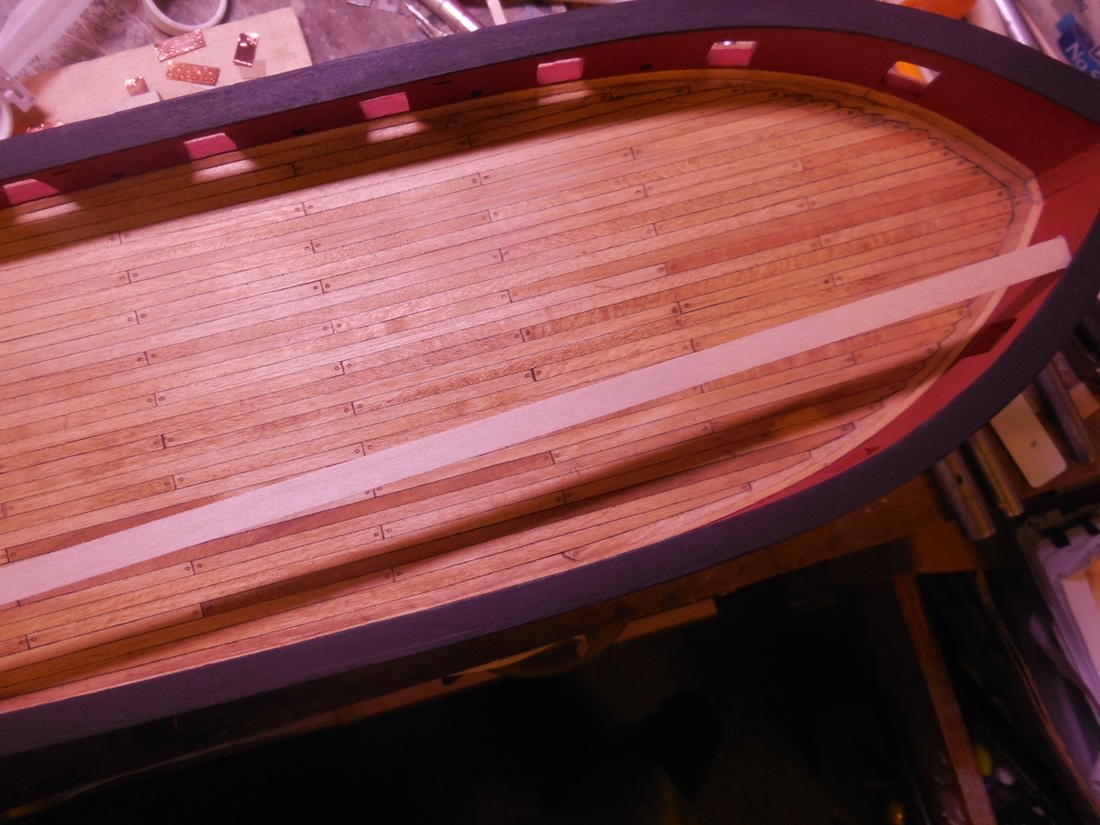
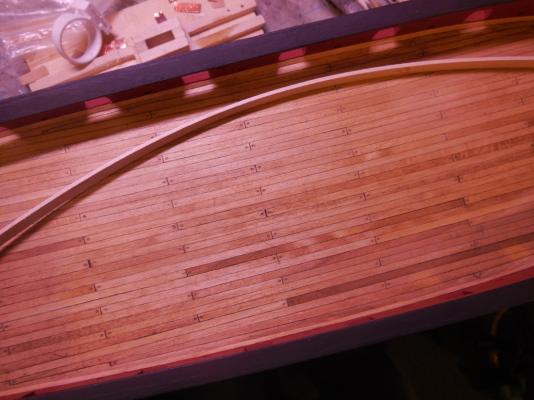
I regularly bend wood with old curling irons the normal way - the wider side up or down like the 1st picture shows. This was difficult because I bent the wood the other way. Look at the 2nd pic. The wider side up but bent sideways to the curve of the cap rail.

- 1,306 replies
-
- 14
-
-
- syren
- model shipways
- (and 1 more)
-
Denis, I would love to try it along with some various other wood types but currently don't have the funds for ordering much of anything so I'm stuck with left over scraps from previous builds & whatever I can pick up at the local Hobby Lobby store which is nothing but Basswood which is what I used here. I have heard so many sing the praises of Pear, Holly, etc. & now the Flexible Beech. Ahhh, maybe some day, till then I can dream!
- 1,306 replies
-
- 5
-
-
- syren
- model shipways
- (and 1 more)
-
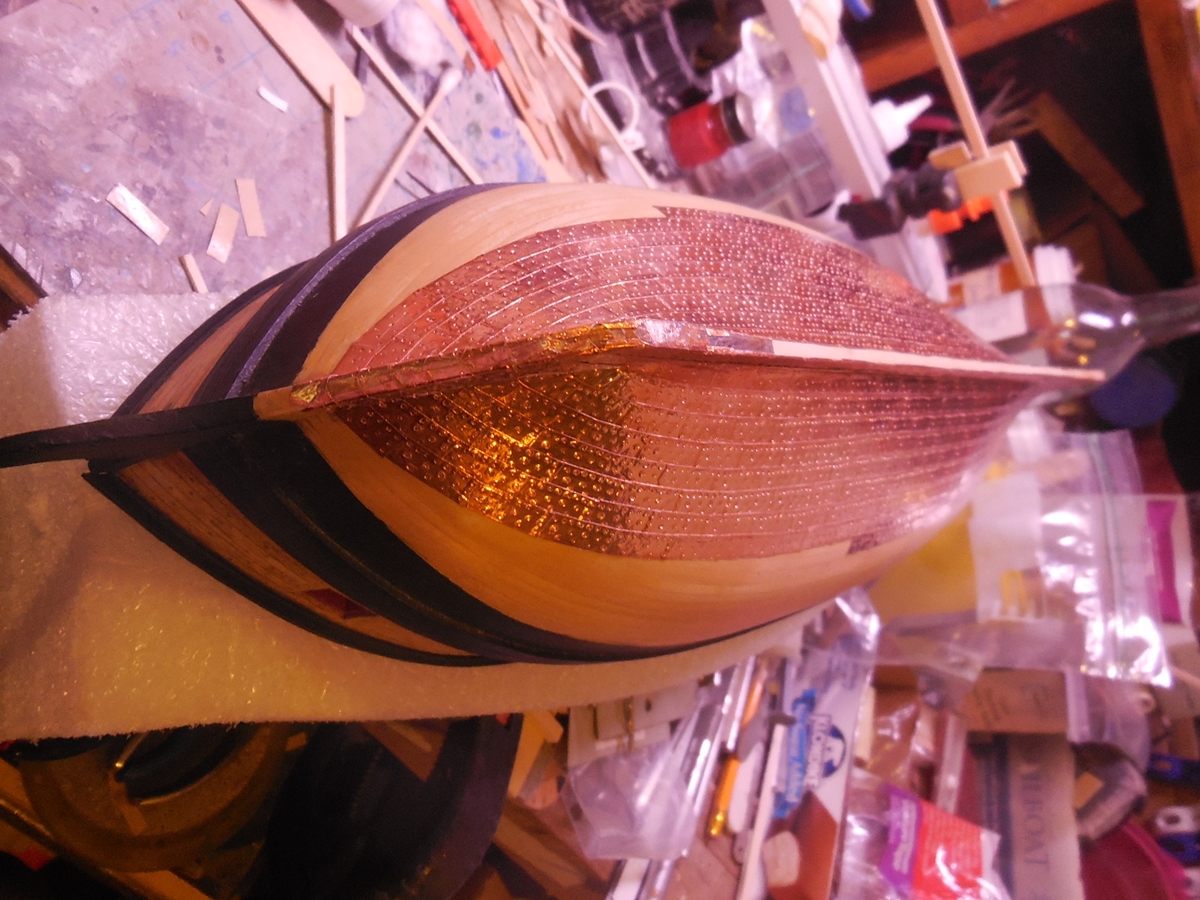
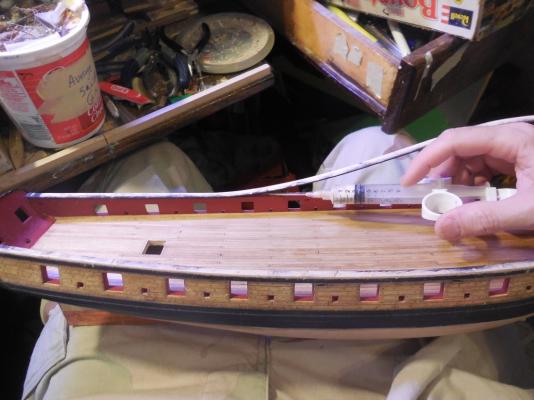
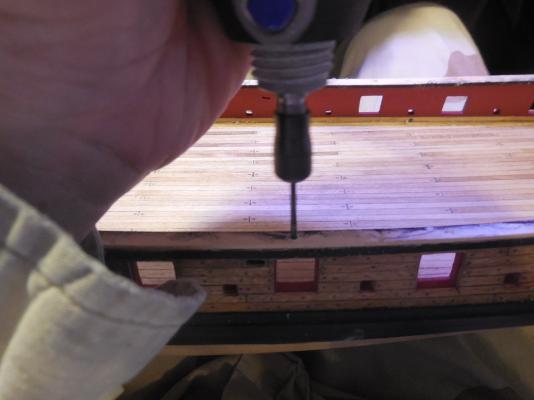
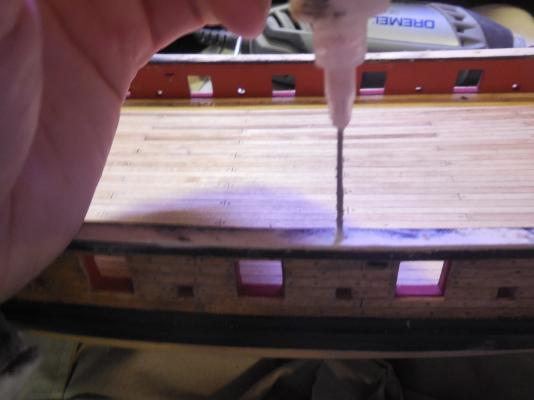
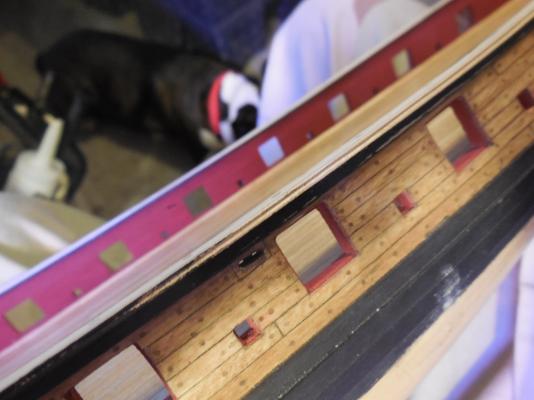
Thanks Ken & Bug! While working on the copper plating I have finally put the cap rails on. I wanted to test the limits some so instead of piecing them or cutting them out to shape I tried soaking & bending 1/4" strips. Not the usual way to try to do that but I just wanted to see if it could be done. It can, took more than one soak & bending. The strips still wanted to straighten out some so I drilled holes & held the rail down in place with wood pegs & glue. Even though I did make this work, I wouldn't recommend it. It did make the wood buckle & it took some wood filler & sanding to make it flat. Then added the smaller molding strip & grooved it using a small triangle file & a folded piece of fine sandpaper.

- 1,306 replies
-
- 17
-
-
- syren
- model shipways
- (and 1 more)
-
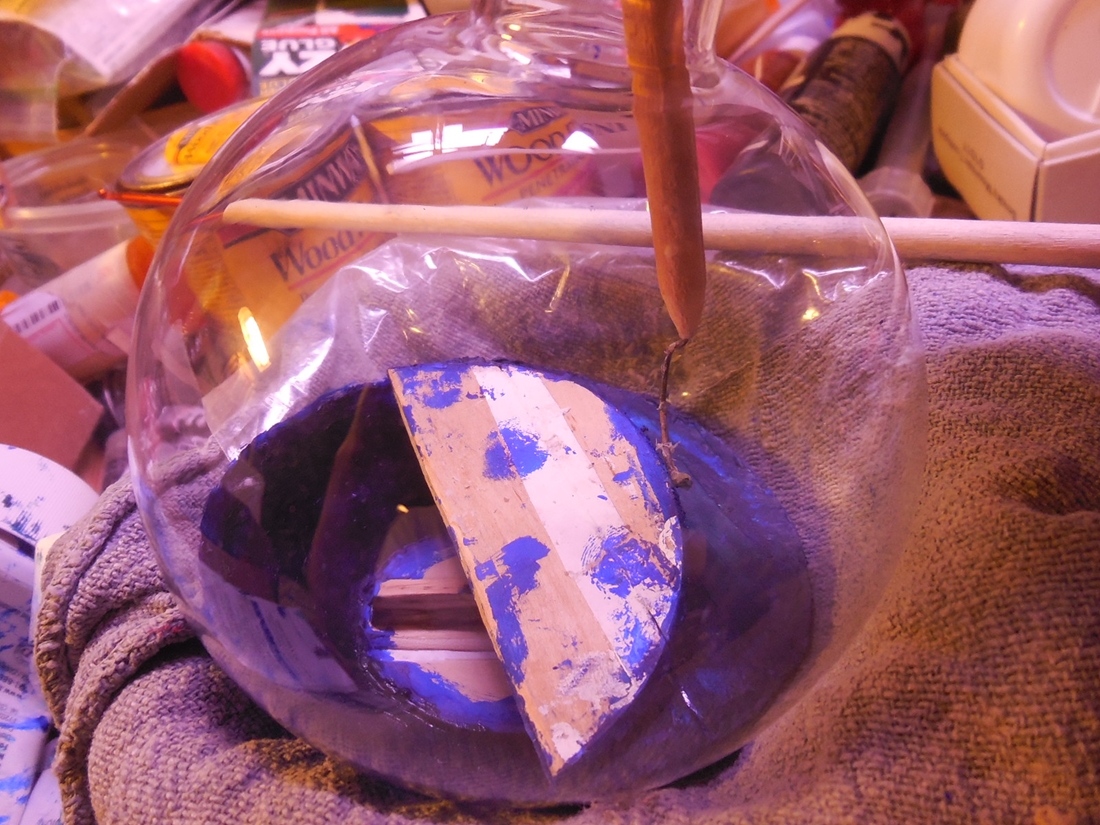
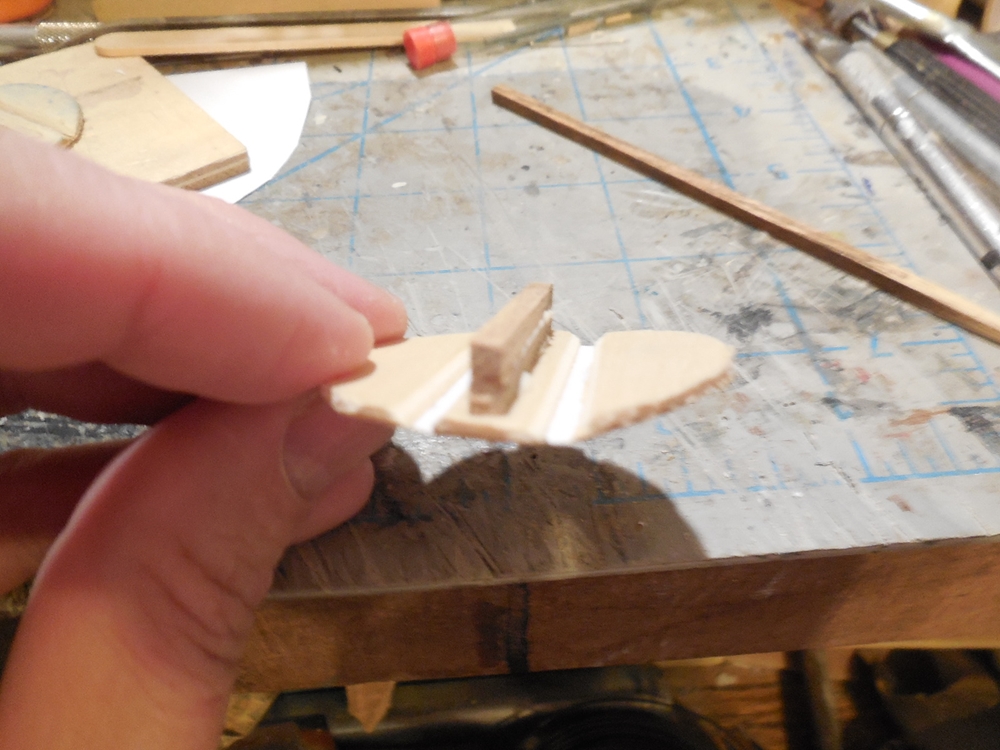
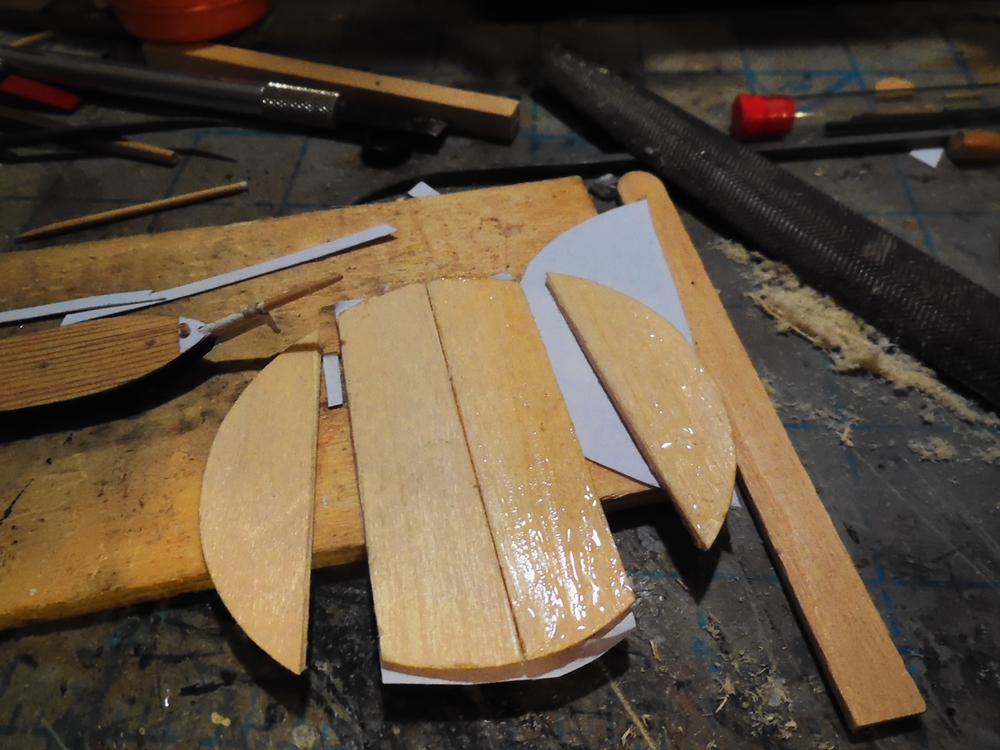
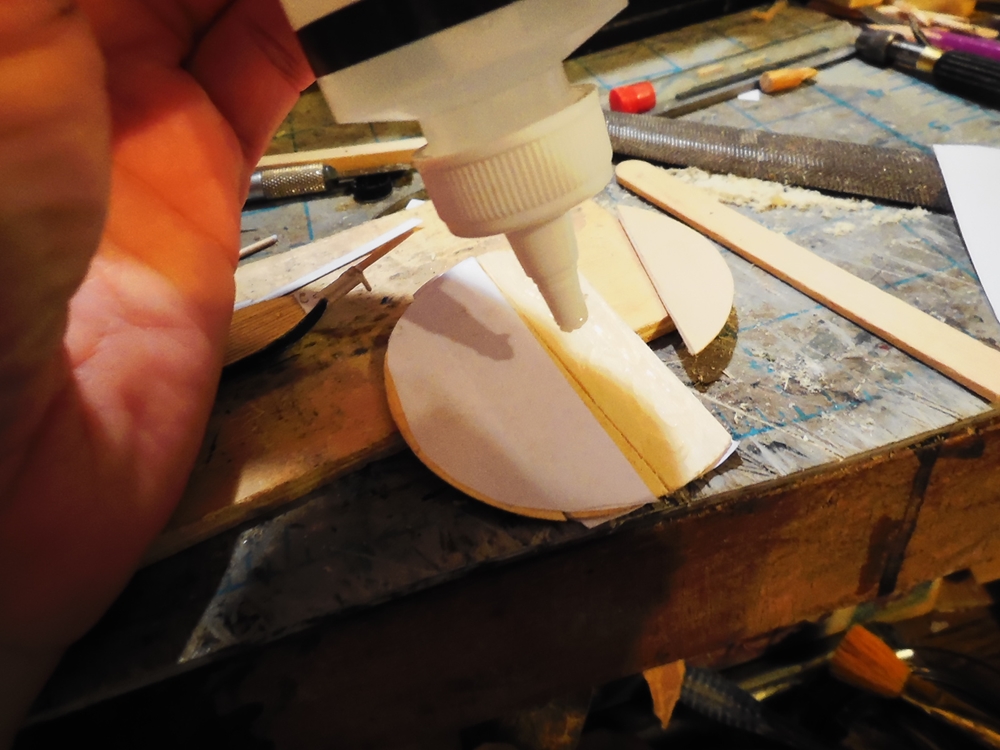
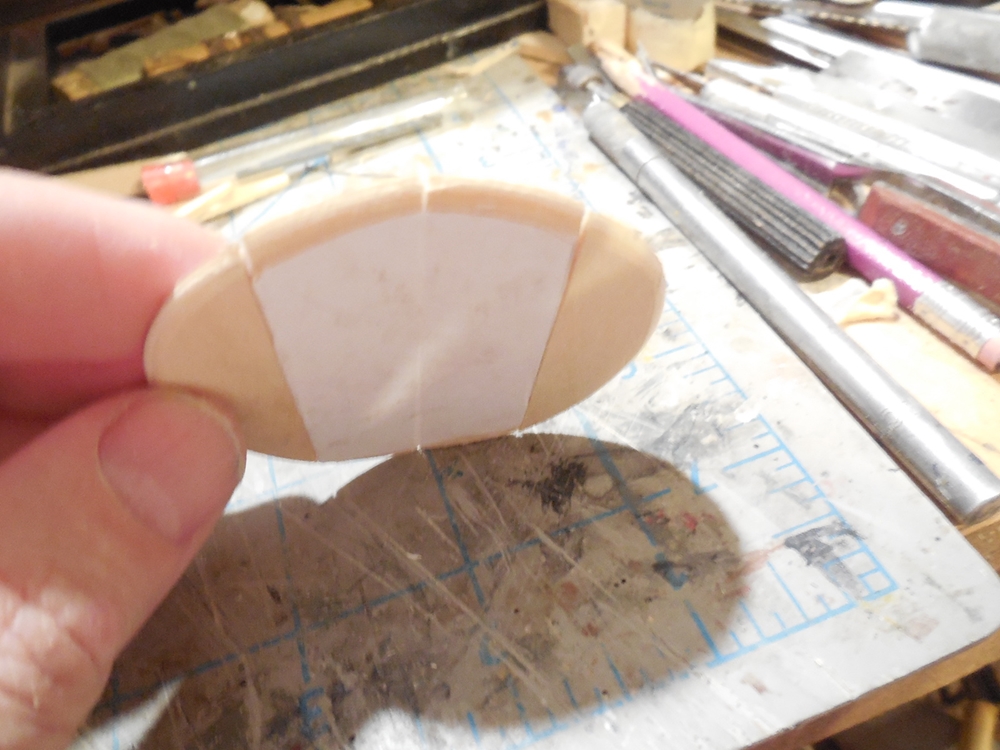
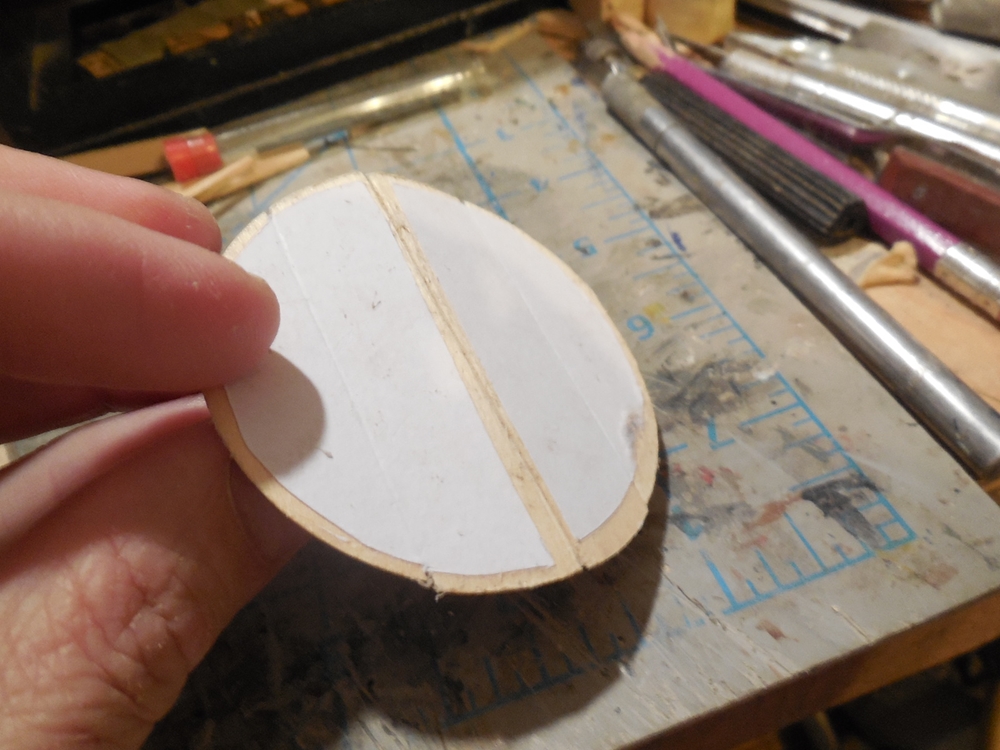
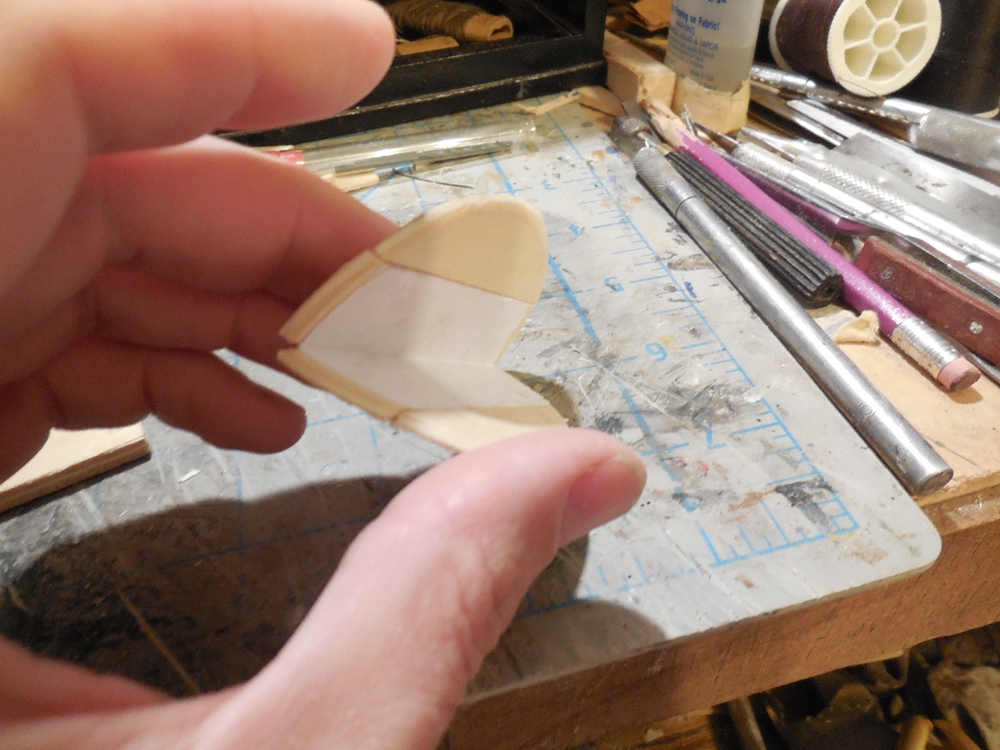
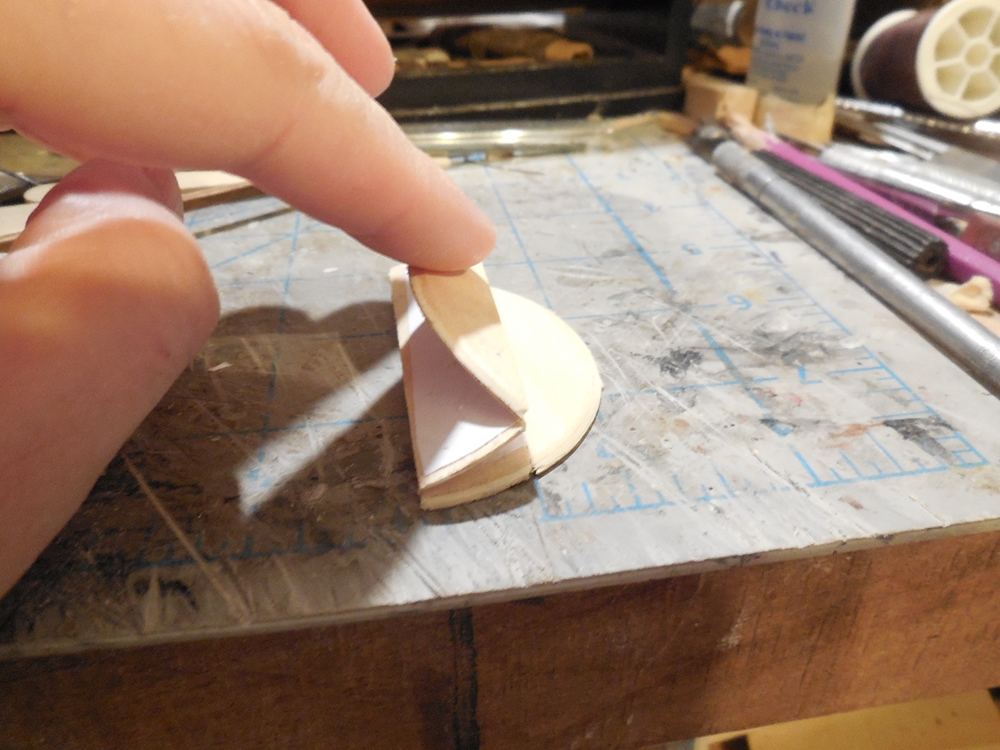
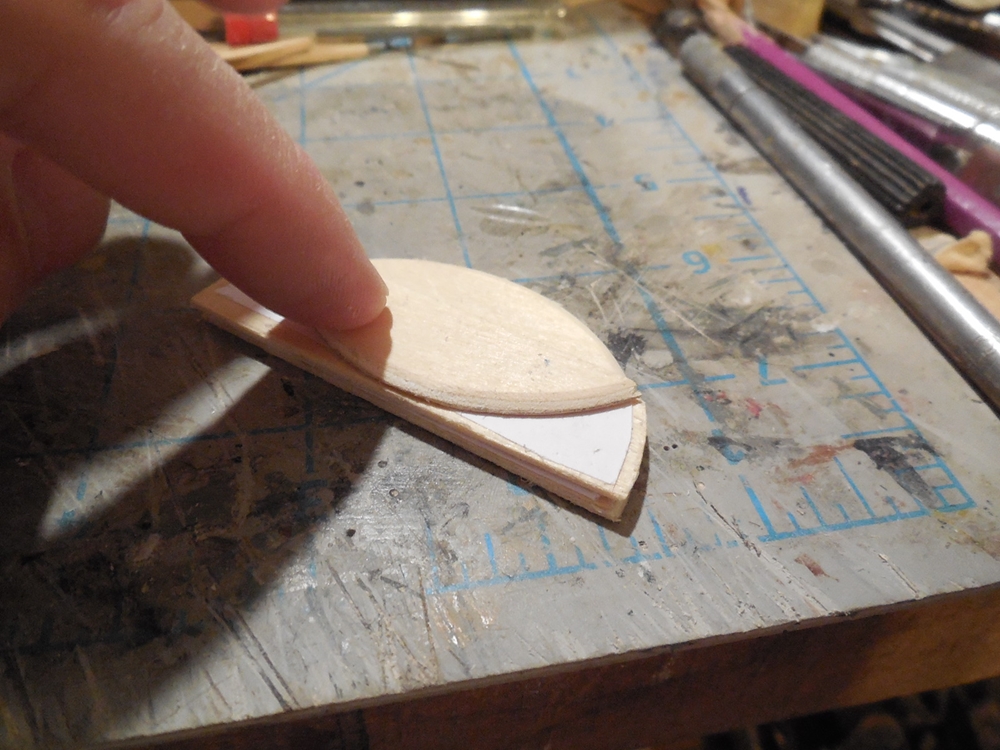
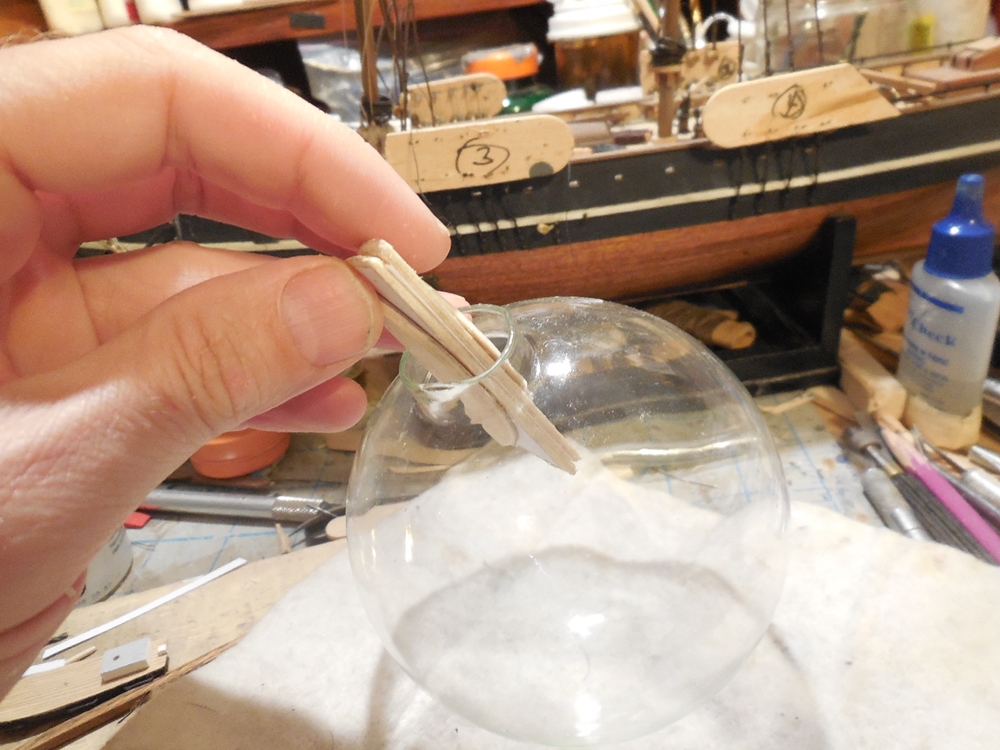
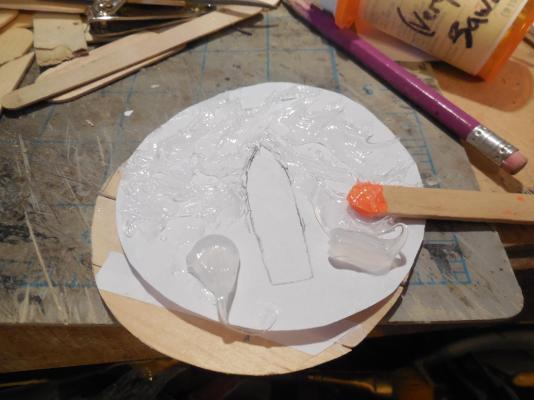
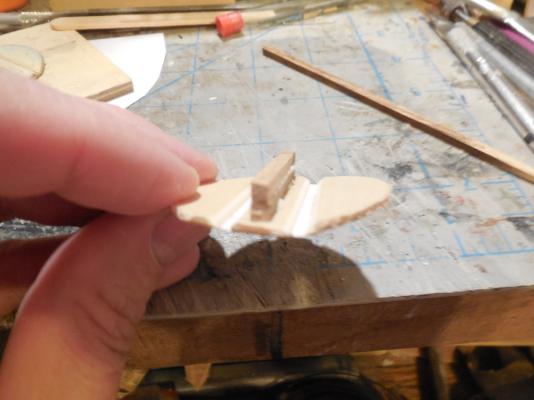
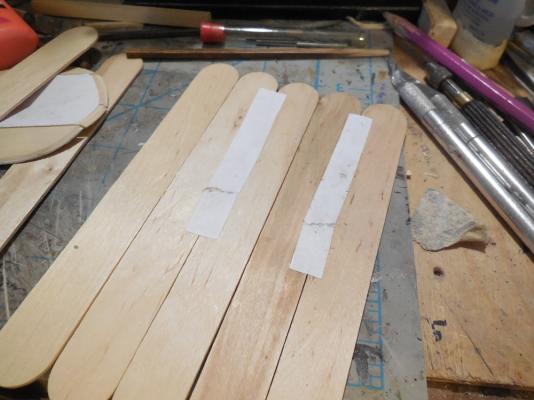
The hull is somewhere around 2 1/8 " (5 1/2 cm) long without the bowsprit, 9/16 " (14mm) wide & 4/16" (6 mm) thick. Now on the 3rd globe after the 1st two broke. I asked Daniel last year for some advice on how to make a raised sea surface without adding so much weight. He referred me to another SIB builders trick of painting the open space below the sea surface & making a thin disk that would be the sea surface & sit higher in the glass globe. I measured the size I would need by inserting a round paper cut out & trimming it until it fit. Made the wood sea base out of tongue depressor sticks with paper glued on as hinges so it will fold up to fit in the neck & unfold out flat when inside. More pics of the process to follow....
- 56 replies
-
- 4
-
-
- rouse simmons
- bottle
- (and 1 more)