HOLIDAY DONATION DRIVE - SUPPORT MSW - DO YOUR PART TO KEEP THIS GREAT FORUM GOING! (Only 13 donations so far - C'mon guys!)
×


JesseLee
-
Posts
1,694 -
Joined
-
Last visited
Content Type
Profiles
Forums
Gallery
Events
Everything posted by JesseLee
-
 I'm curious to see what yours looks like with the yellow ochre paint. I'm trying to decide whether to paint or to use golden oak stain.
 -
Slow progress right now. As I neared completing the upper planking I had another area where the planks didn't line up with the top & bottom of the gun ports the same on both sides so I got out the alcohol & unglued the planks again to rework it so they lined up the same on both port & starboard sides. (pics to come later). As I am working on that I have been studying ahead & going over others Syren builds. I noticed the plans instruct to make simulated sheaves in the hull sides. I was thinking of making them go through like the real ones and realized that I don't know how to rig this. In the simulated version I would be gluing the end of a line into a false hole. If I were to have a real sheave where does the end of the line go to? Does it pass through the hull to the deck side to a cleat & tie off? Does it end in a coil? Any info that could be provided will help me decide which way I want to do this. If I do real sheave I think I should go on and build them in now before I complete the planking.
- 1,306 replies
-
- 6
-

-
- syren
- model shipways
- (and 1 more)
-
I just found your log. I am building the Syren too. Another method I use is old hair curling & straightening irons that women use for their hair. I soak the plank in warm water maybe 10 min. then use the curling iron to bend & dry the plank into shape. It works pretty fast. Practice with some scrap first to get the hang of it.
-
You're right about the chain plates. The kit's way would too bad & cheap like a toy. I made my own out of blackened wire I already had. On the lifeboat you can try wiping it with thinner or brush cleaner or something like that to tone it down some. If it takes more off than you want you can always stain it back again. You can probably order replacement parts but I don't know how AL's customer service is- I've never contacted them.
- 389 replies
-
- 3
-
-
- scottish maid
- artesania latina
- (and 1 more)
-
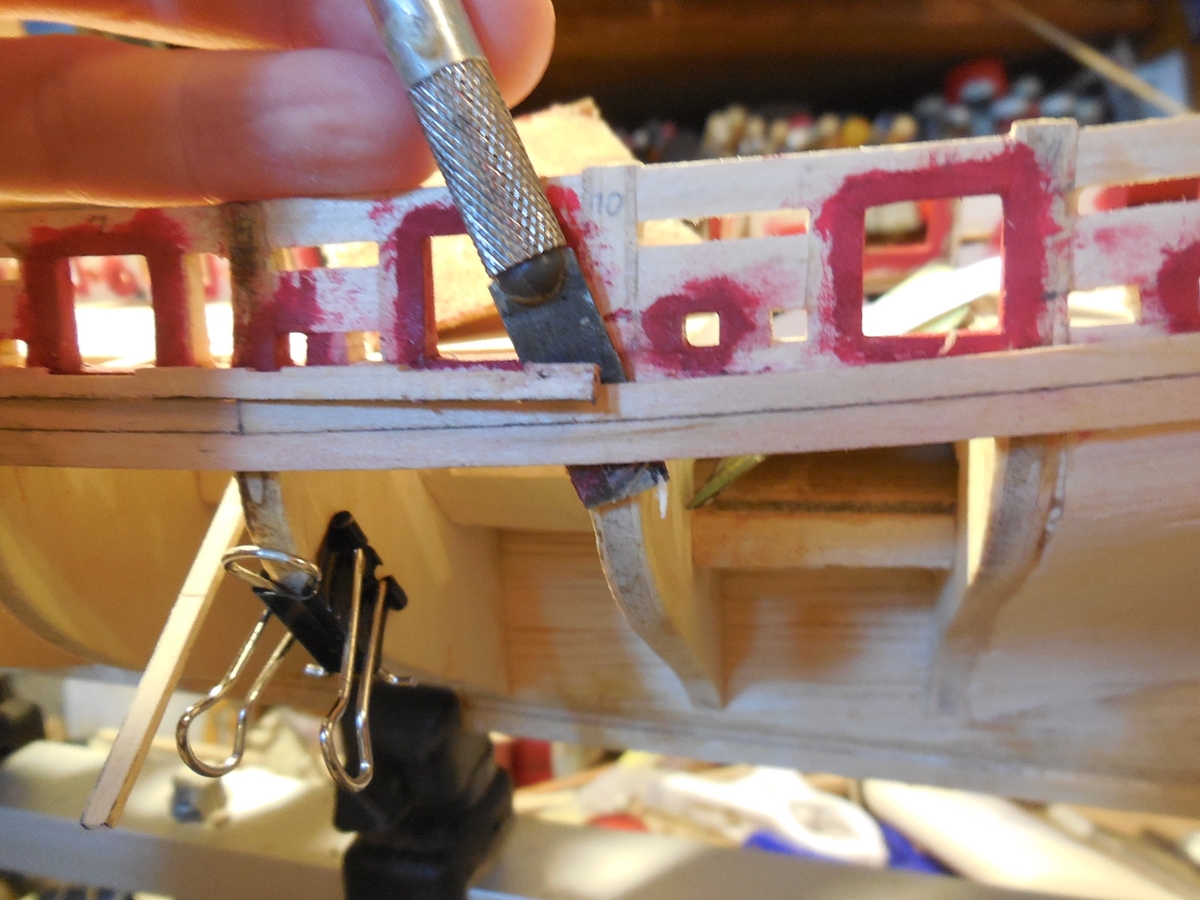
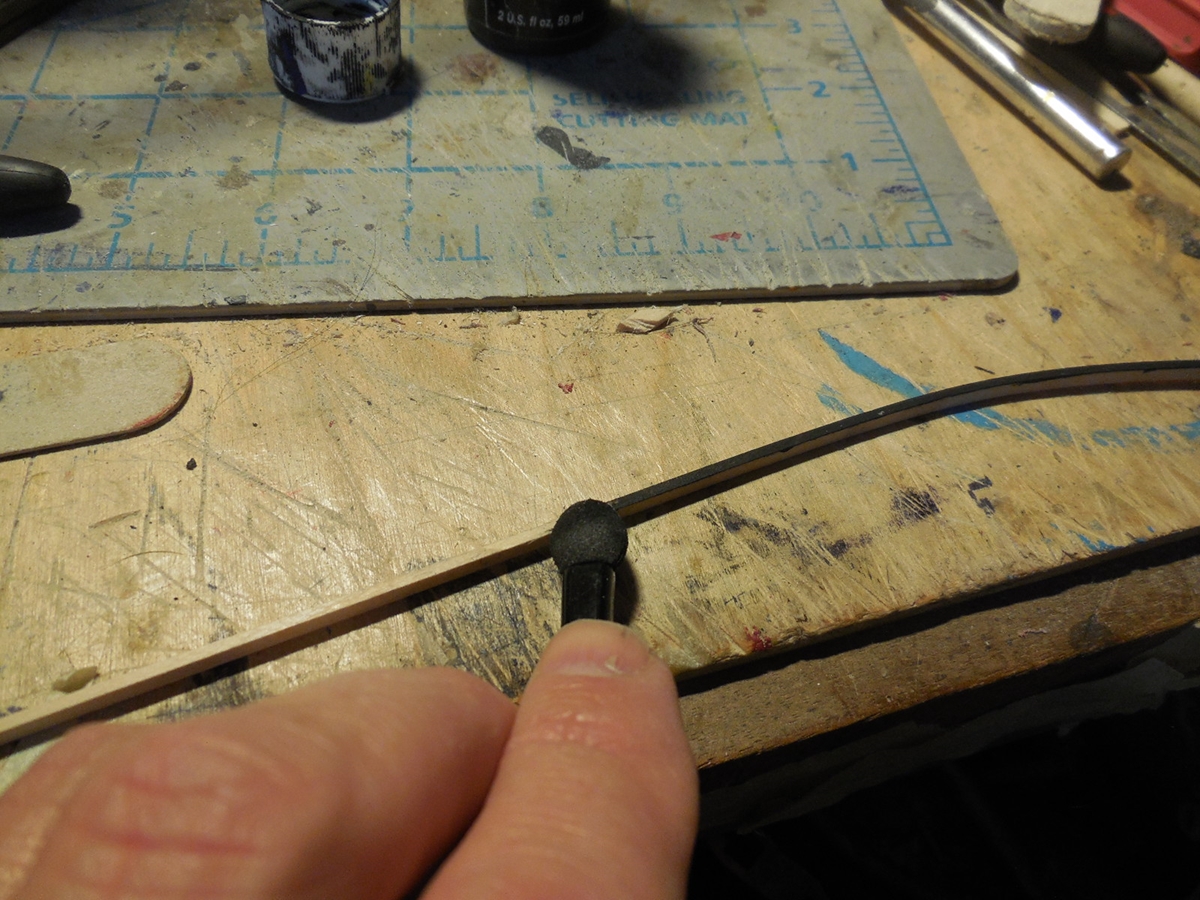
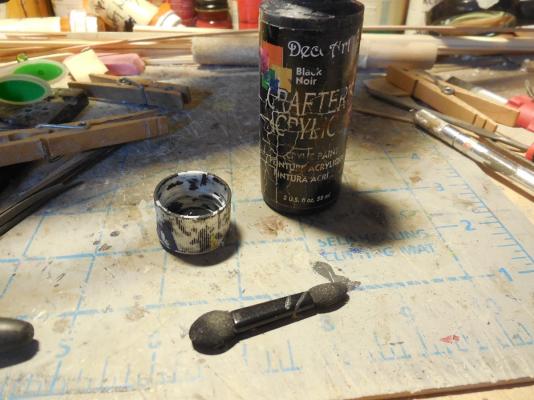
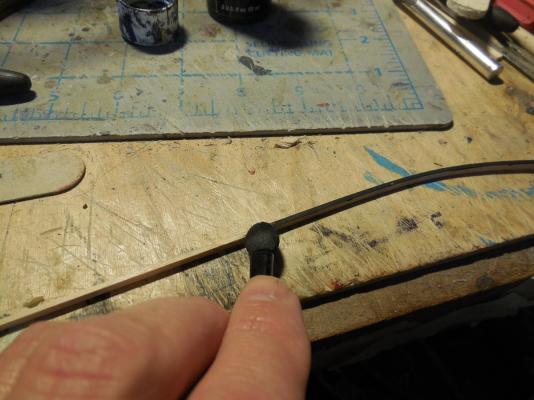
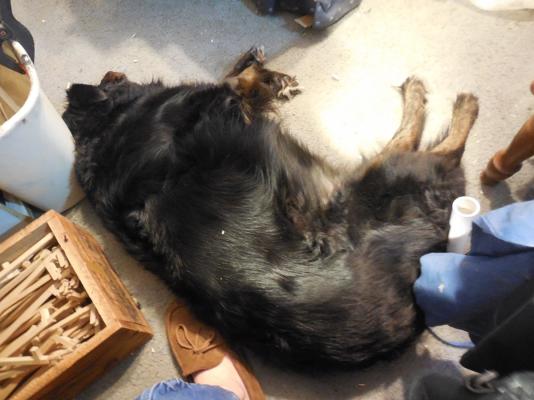
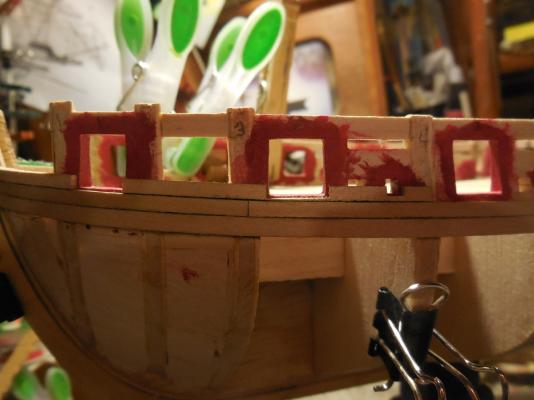
Haven't posted much- have been plugging away at the upper planking around the gun ports. This has been going slow for me. I can only work on it so long & my pain sets In & I have to stop. Anyway I noticed that there was too much of a dip in the planking curve on one side. The planking wasn't lining up at the same height on both sides. A little alcohol & a thin blade got this corrected. Re-glued it & continued on. Oh, almost forgot to show the method of caulking I ended up using. I tried to do the pencil but I kept indenting the edges of the planks because I couldn't seem to maintain an even pressure as I marked the edges. I also smudged it all over the place. I experimented with a few things & settled on this. I use a makeup sponge applicator thingy my wife dropped on the floor & paint the edge with some black paint. I smear this with my thumb to keep it thin. This seems to work well for me. Every day as I work on the ship one of our dogs, Lucy, faithfully lays at my feet as long as I work there.


- 1,306 replies
-
- 23
-
-
- syren
- model shipways
- (and 1 more)
-
I grooved mine. It was impossible to tell on the instructions.
- 389 replies
-
- 3
-
-
- scottish maid
- artesania latina
- (and 1 more)
-
ROYAL CAROLINE 1749 by Doris - 1:40 - CARD
JesseLee replied to DORIS's topic in - Build logs for subjects built 1501 - 1750
Absolutely amazing!- 883 replies
-
- 1
-
-
- royal caroline
- ship of the line
- (and 1 more)
-
Sorry I missed that last question. Your solution looks fine. Yes, I would make the block a little longer. You're doing a good job!
- 389 replies
-
- 2
-
-
- scottish maid
- artesania latina
- (and 1 more)
-
I actually dry brushed mine with brown paint & smeared it sort of like staining then did the grey washes
- 389 replies
-
- 2
-
-
- scottish maid
- artesania latina
- (and 1 more)
-
You can stain the boat first then do watered down ( 50/50 or so ) grey paint washes to weather it.
- 389 replies
-
- 2
-
-
- scottish maid
- artesania latina
- (and 1 more)
-
On the lifeboat George's suggestion about the glue is good. You can also put scrap wood or some kind of hard rubber between the boat & the vice grips. That boat looks very good! For the gunwales, mine was like that too. I tried a very light stain on the lighter pieces but they still looked a little different. I ended up leaving them as they were & it sort of blended in after some wipe on poly. I didn't really like it but didn't know what else to do. The pictures don't show it so it's not far off. I did hit the edges with a very fine sanding but not much.
- 389 replies
-
- 1
-
-
- scottish maid
- artesania latina
- (and 1 more)
-
Now starts the planking. Cutting & filing out around the gun & sweep ports. Glued on some of the first few planks. Here is where you find out if you got the spacing on both sides right on the previous steps. Looking at the sliver of planking under the gun port on each side looks like I am very slightly off by a millimeter or less. Think I can live with that!

- 1,306 replies
-
- 26
-
-
- syren
- model shipways
- (and 1 more)
-
Hmm.... Other than cut out a new one I would go with your first option. I looked at mine & if you get a good tight fit it doesn't show much in this area because the wood is darker unless you look very closely. It is so close that to notch it you would most likely have to cut more off the sides anyway. If you fit it between the main gunwales no one but a master builder would know the difference.
- 389 replies
-
- 2
-
-
- scottish maid
- artesania latina
- (and 1 more)
-
I had the same problem with mine. Most of the pre-cut parts did not fit in this area of the ship. I had to soak & bend some parts & others I just re-made myself like you did. You're doing a good job! Jesse
- 389 replies
-
- 3
-
-
- scottish maid
- artesania latina
- (and 1 more)
-
Thanks Edwin & all the Likes. Thank you Chuck - I should have asked you first!
- 1,306 replies
-
- 5
-
-
- syren
- model shipways
- (and 1 more)
-
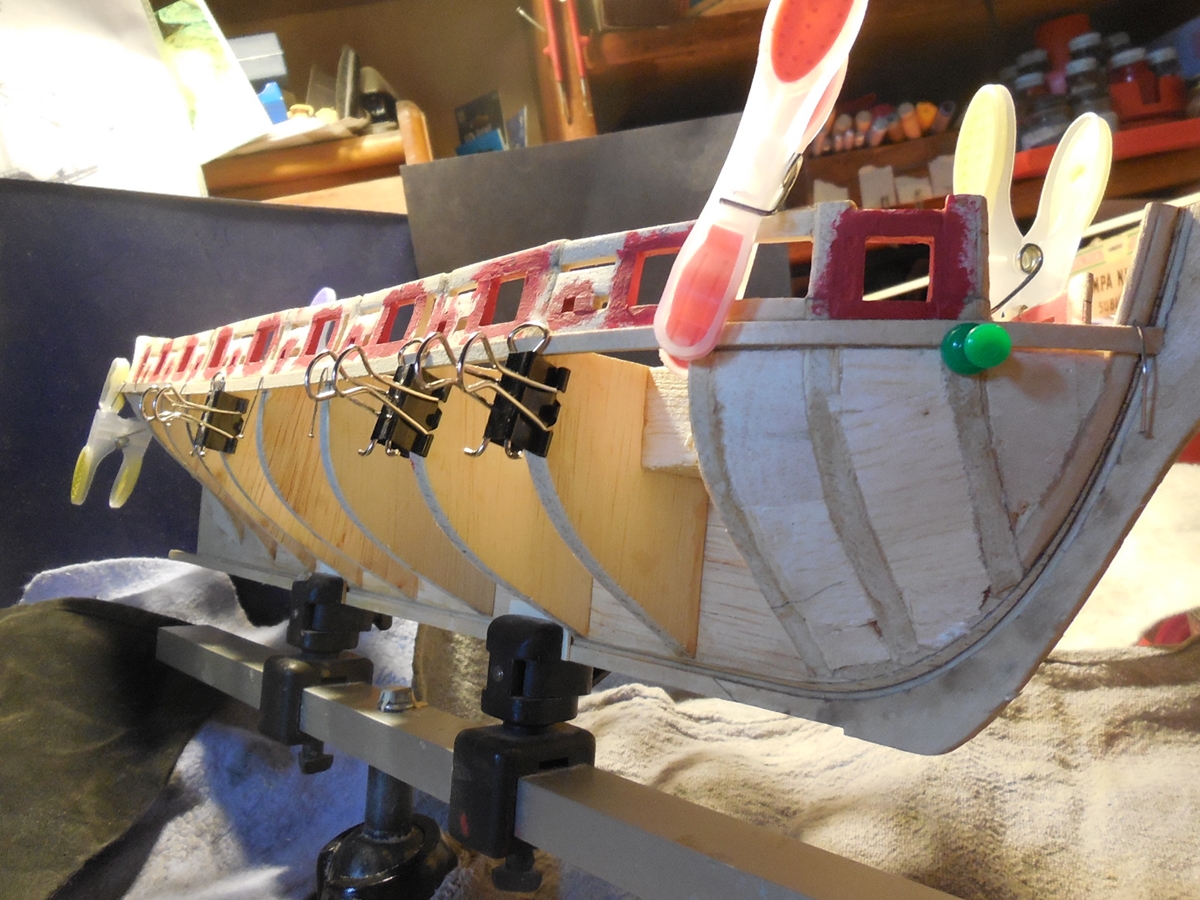
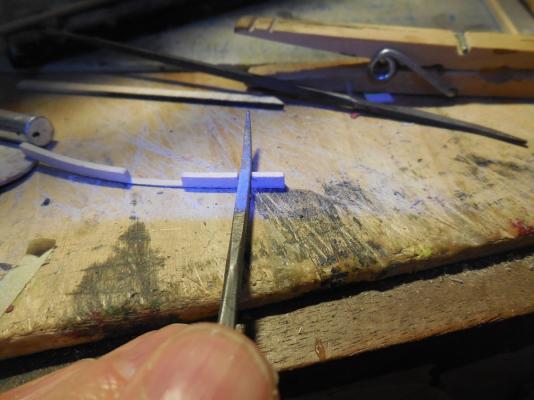
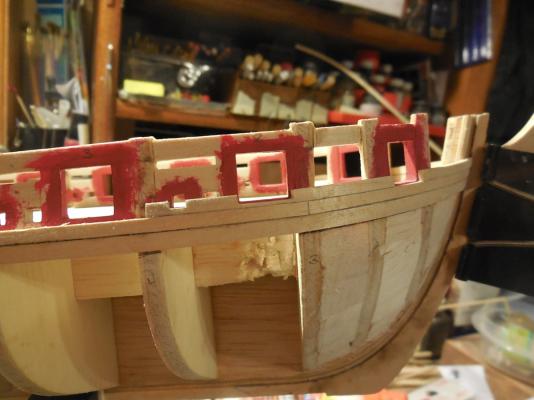
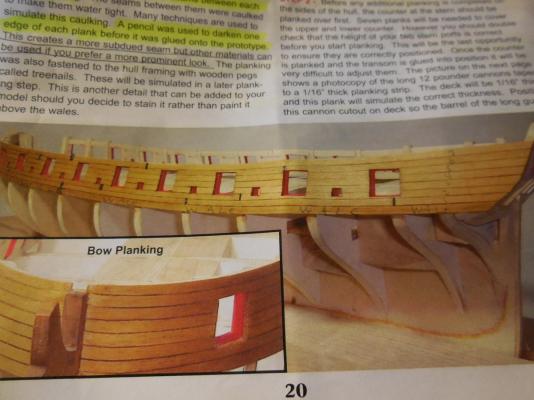
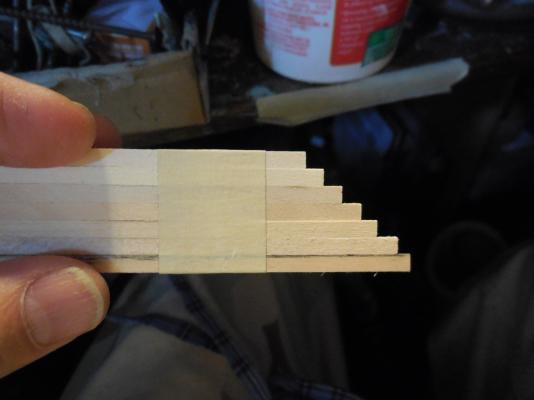
Made a plank bending jig with wood pegs for the wales & planks. As I was about to glue on the upper wale I stopped & thought about how can I be absolutely sure I have it in all the right places the whole length of the ship? I looked at the instruction manual showing 7 planks above the upper wale & where they are at each gun port. I made a jig out of plank ends to measure at each gun port to make sure everything would line up where it is supposed to. I realized something was way off - my plank jig didn't line up the way the pictures in the manual did. I couldn't squeeze 7 planks in that space. Figured out that I was using 5/32" pieces for my jig. Only the wale is 5/32". The planks are 1/8". Correcting this I made a new jig with the 1/8" pieces. Now It all fit right. This jig helped me get the correct marking for the upper wale correct. Good thing too as it showed I would have been off a little bit in the middle sections. Glued & clamed upper wales on each side.


- 1,306 replies
-
- 20
-
-
- syren
- model shipways
- (and 1 more)
-
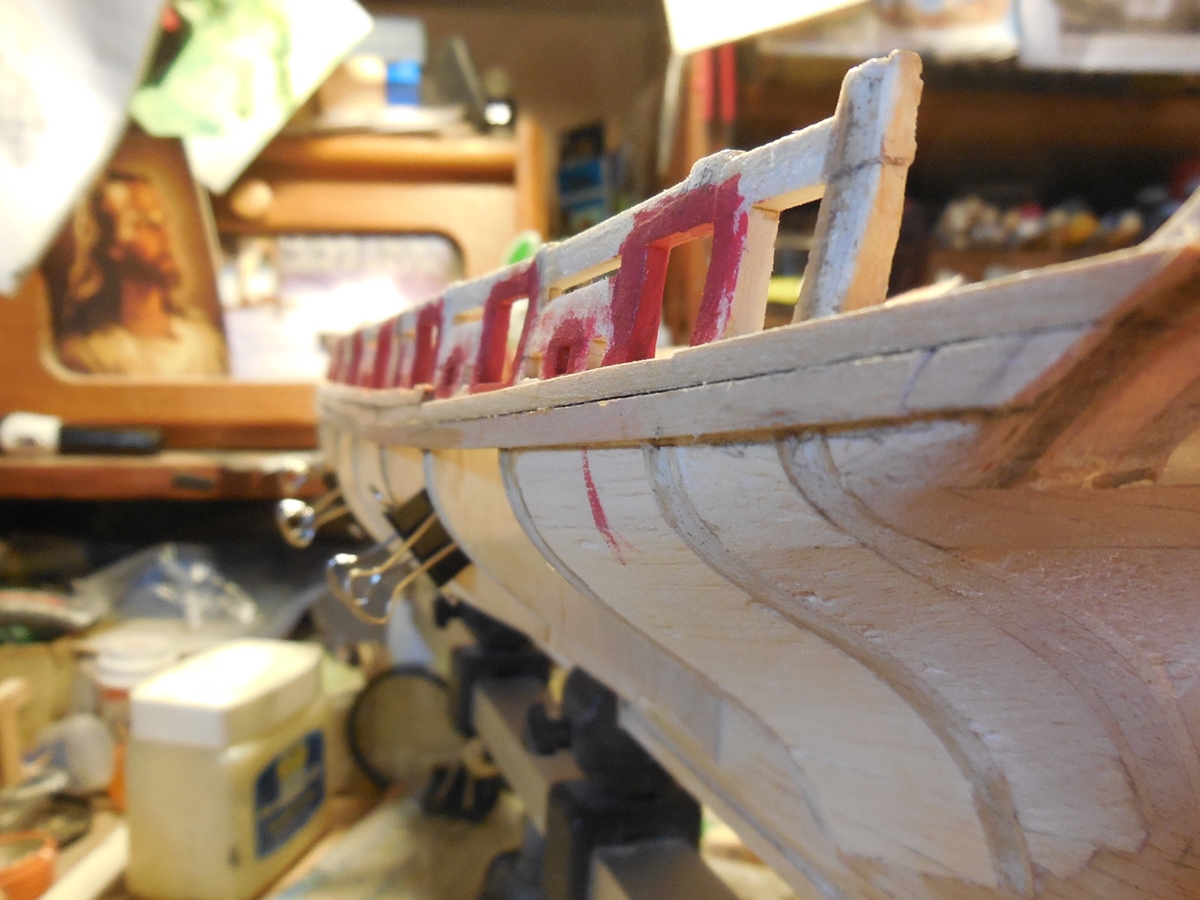
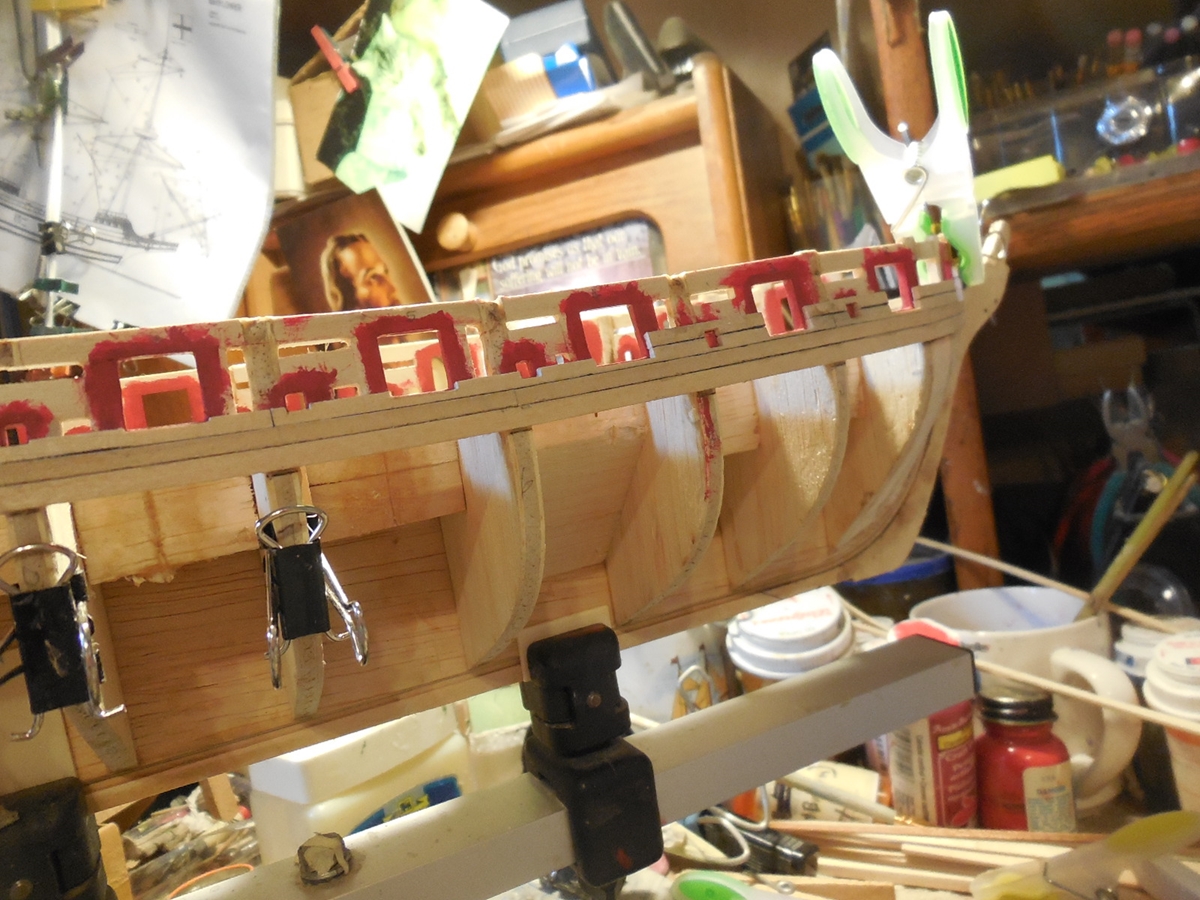
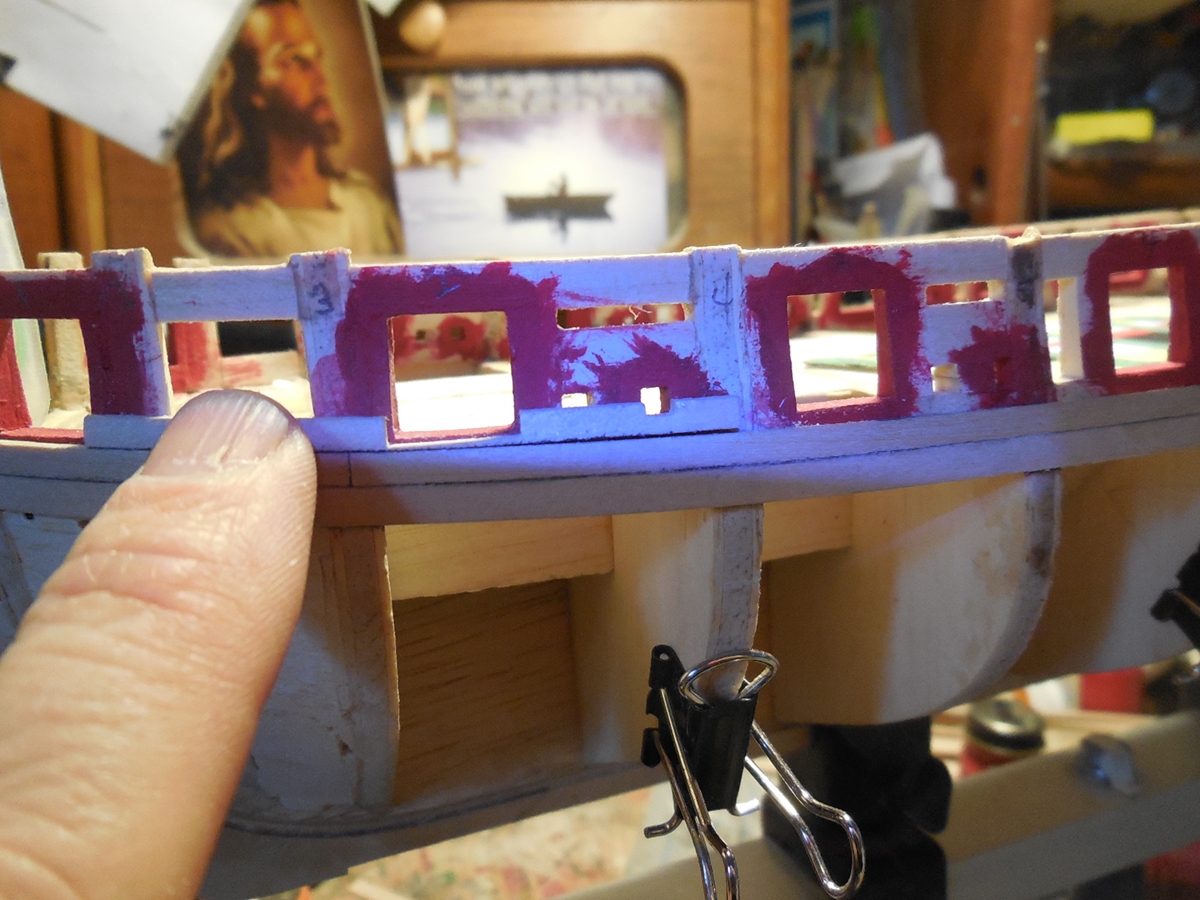
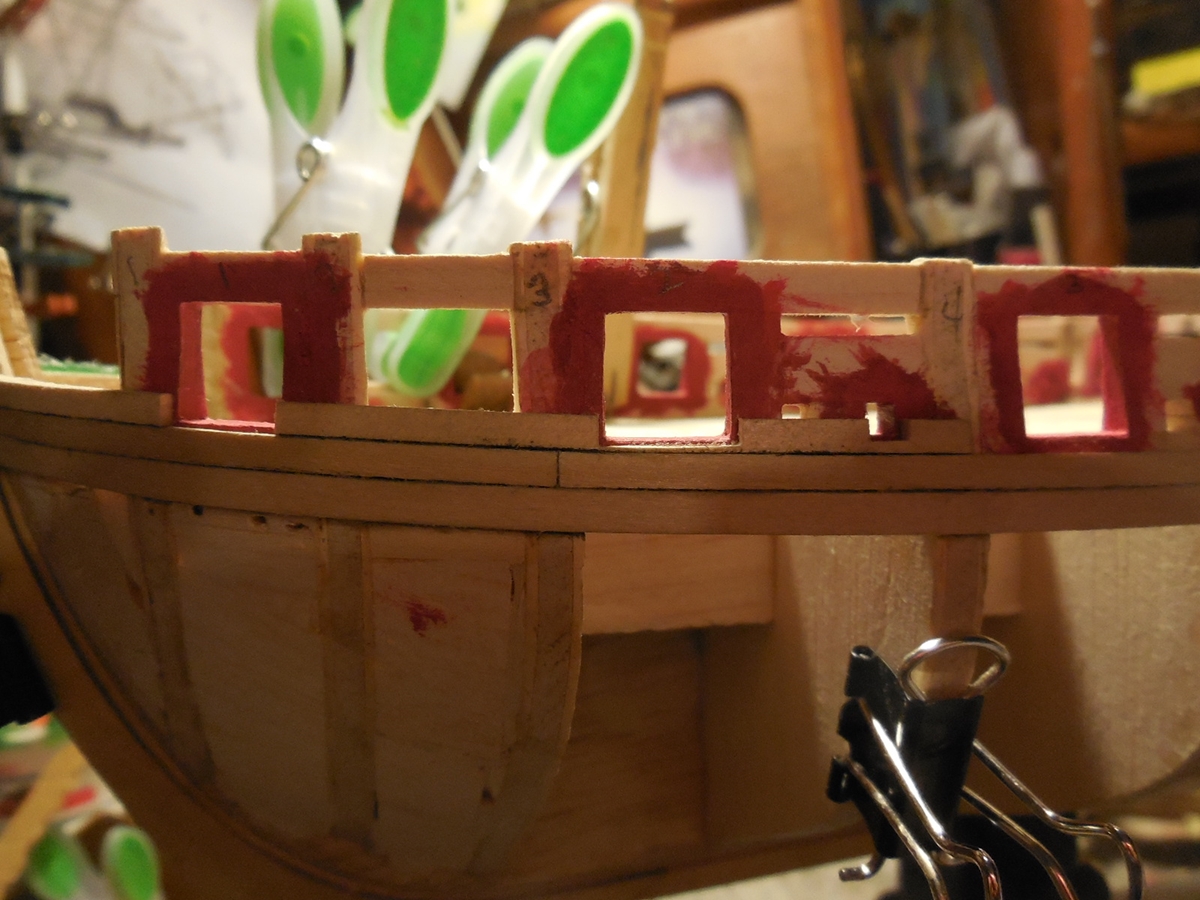
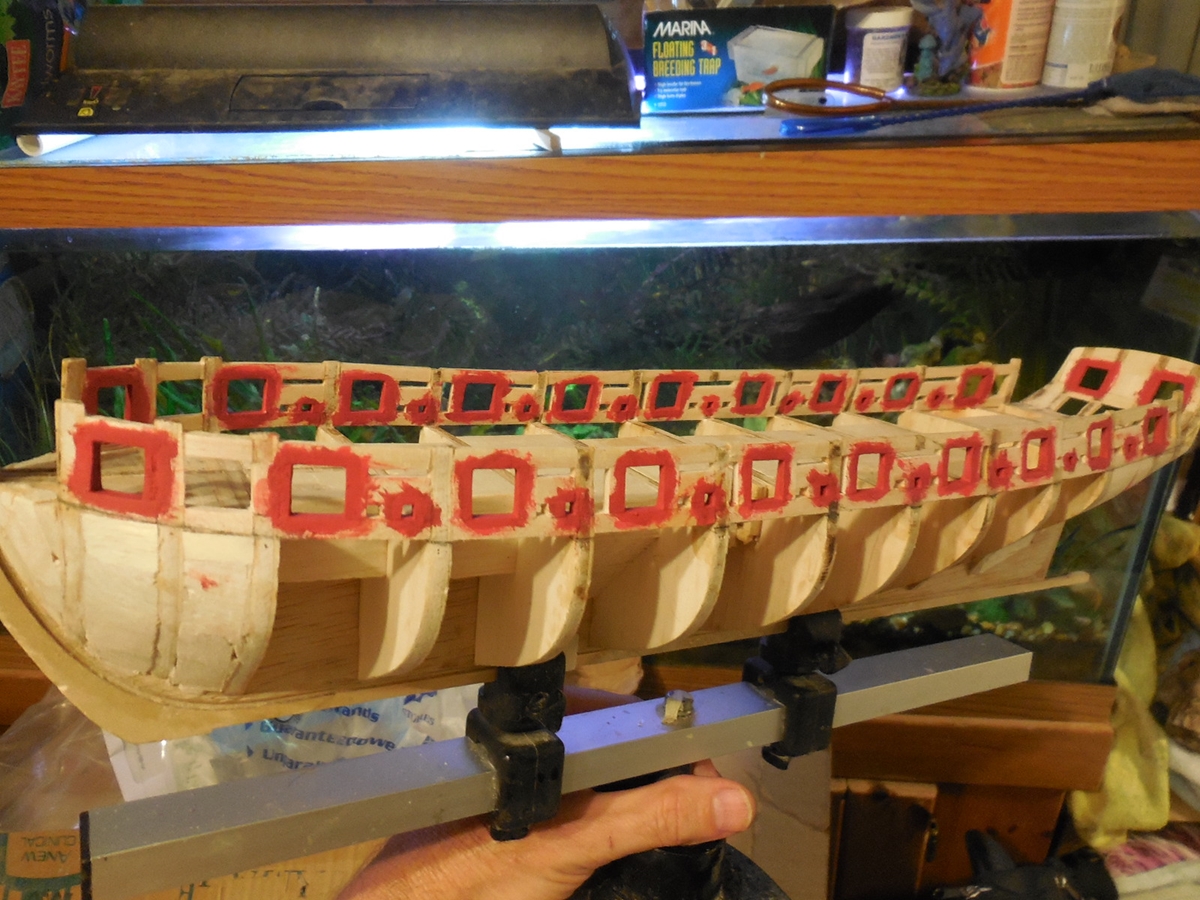
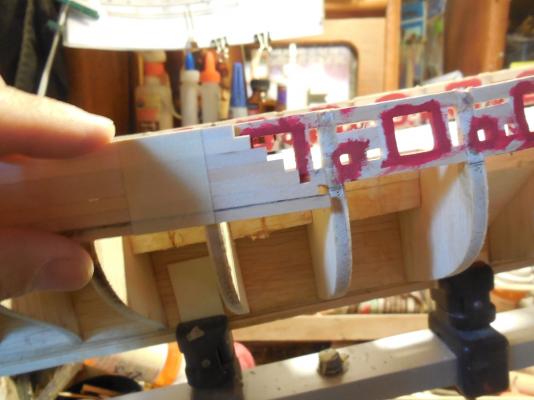
Thanks for the input everyone. After cutting out a pattern from the plan sheet I came to the same conclusion that Jason did & re-shaped it to slope up more gradually from the last bulkhead so the planks will end up being shaped more like the last pic. Didn't get much done today. Someone showed up unexpectedly & kept me from my much planned work day in the shipyard. I did get the gun ports painted in preparation for the next step.

- 1,306 replies
-
- 19
-
-
- syren
- model shipways
- (and 1 more)
-
When I worked as a bench jeweler I used a Foredom at work. Never did get one of my own. Have always had Dremels at home because its cheaper. I had a foot petal to control speed on my Foredom & if I had a choice I would take the Foredom if I could afford it. Dremel works just fine though. Foredoms use a flex-shaft which is very nice. You have to buy it as a separate accessory with the Dremel. I wish I had it with my Dremel now.
-
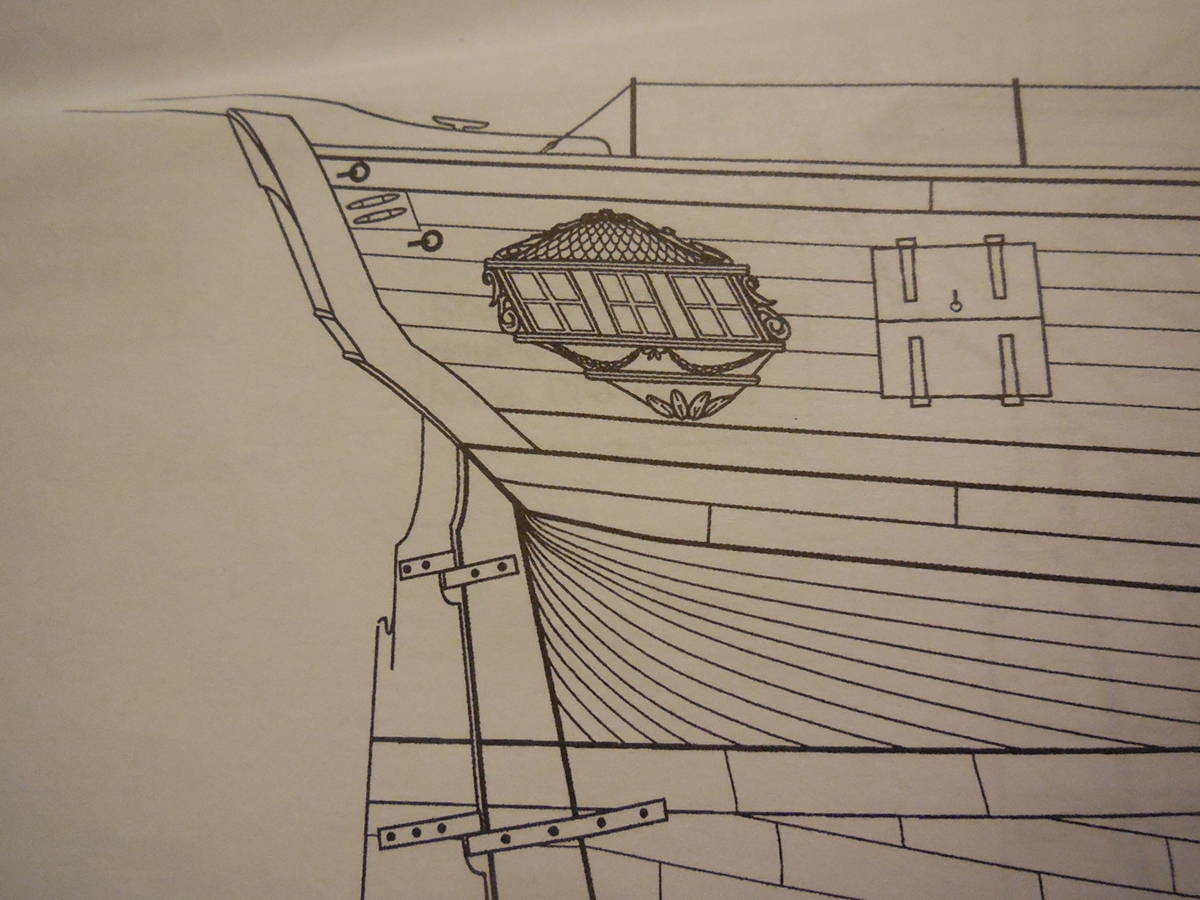
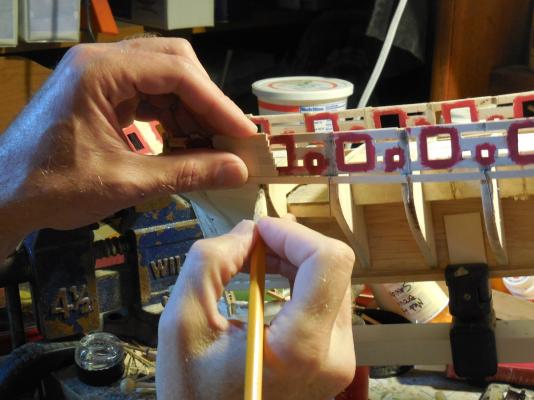
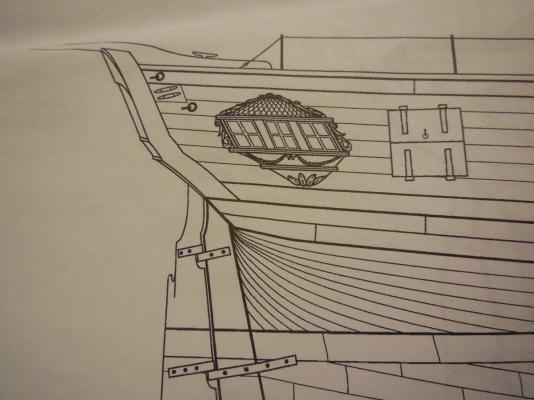
Thanks for the link. From those pics & the plan sheet it looks like maybe the curve up should start just past the bulkhead a little more instead of farther up where mine starts at now? Maybe not? I'm having a hard time seeing the same thing on a flat sheet of paper & on the 3D wood hull in a spot like this. Going to try to copy the outline from the plan & cut out a pattern I can hold closer to the hull to see if I can eyeball it better that way.
- 1,306 replies
-
- 9
-
-
- syren
- model shipways
- (and 1 more)
-
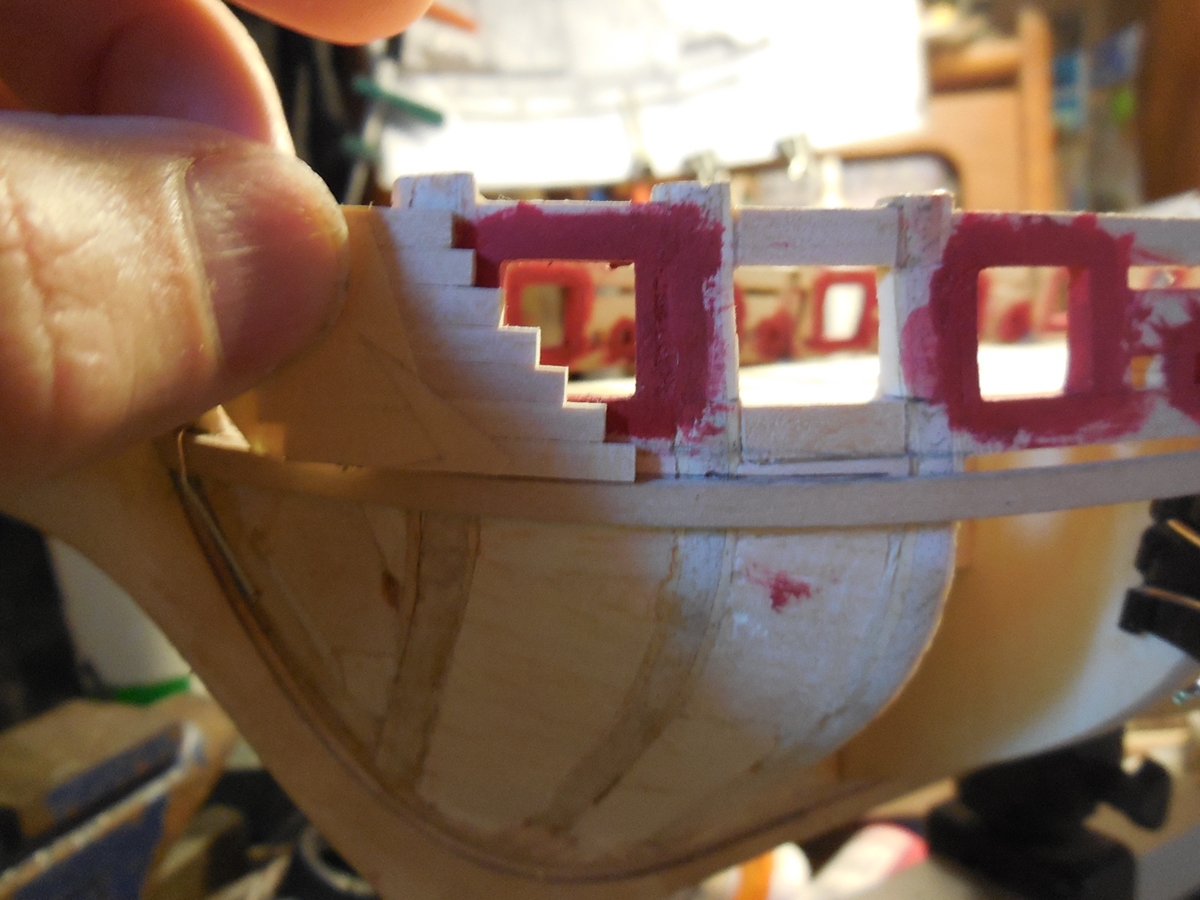
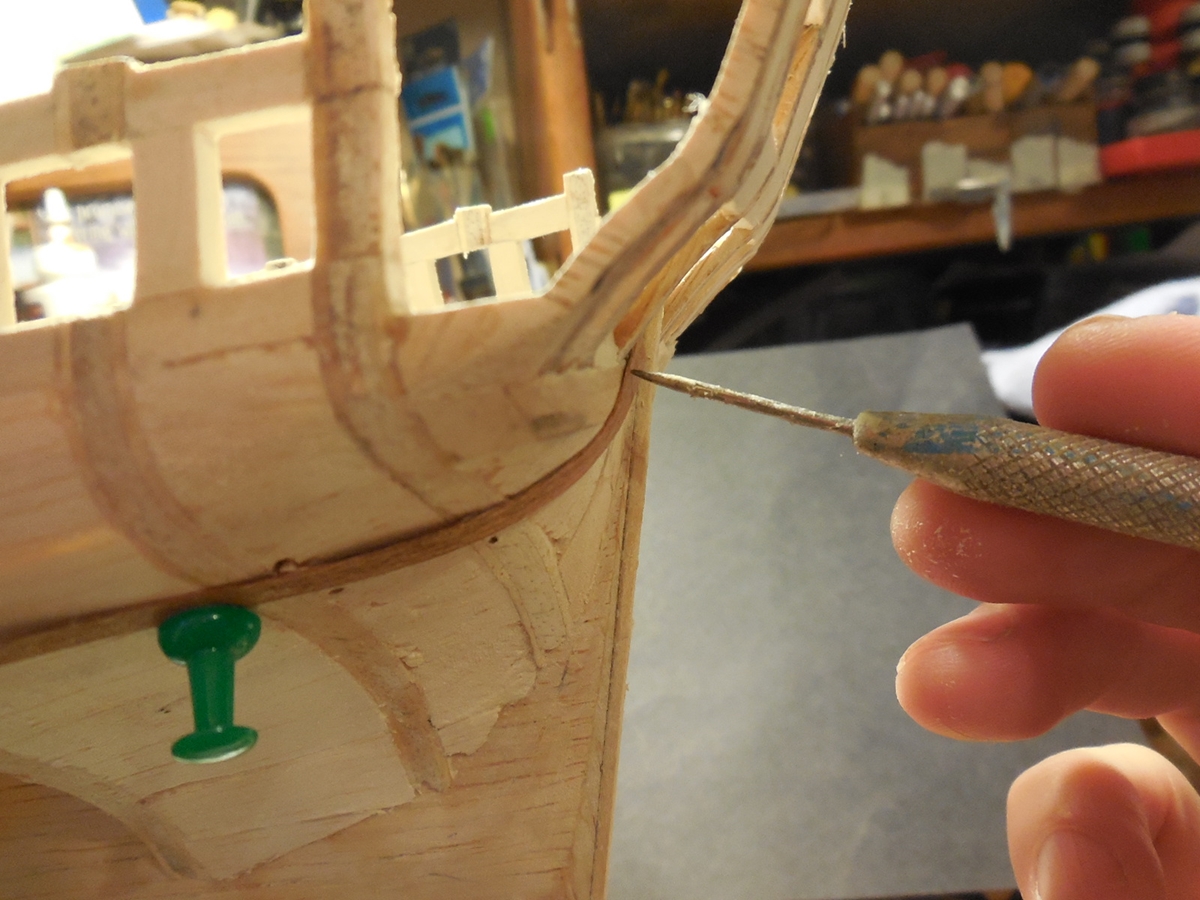
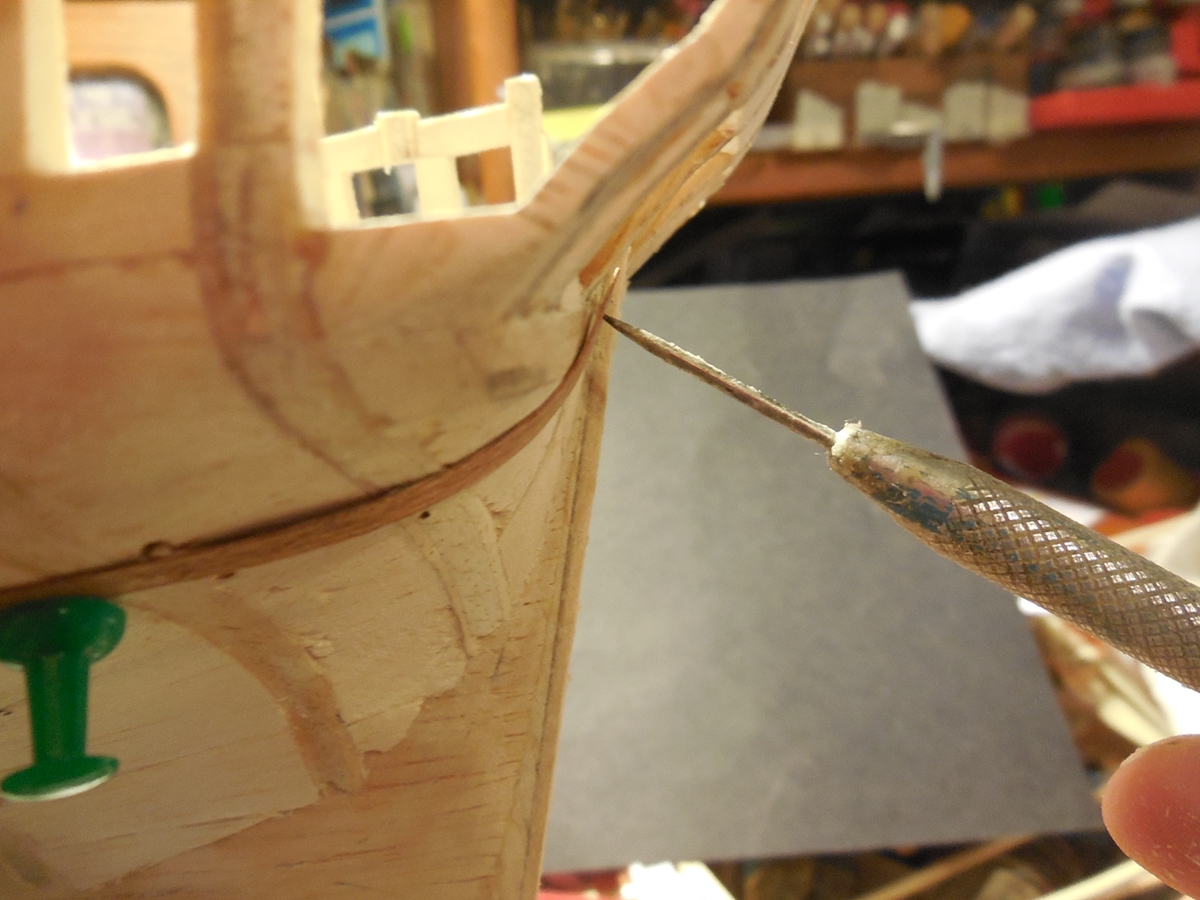
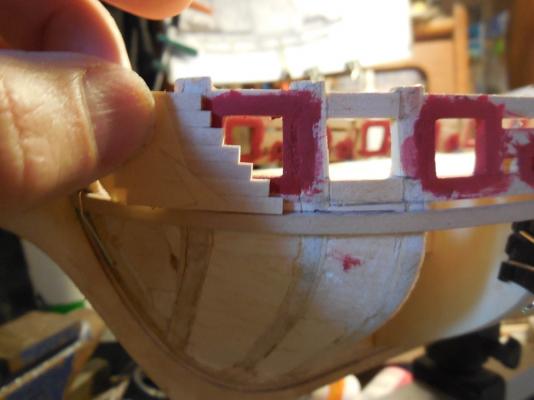
Should it bend up this sharp as in the 1st photo? Or, should I sand some of the corner down & make the plank bend at more of a slope like the last 2 photos?


- 1,306 replies
-
- 9
-
-
- syren
- model shipways
- (and 1 more)
-
I have on the sides. I'm not sure about the bottom side of it.
- 1,306 replies
-
- 1
-
-
- syren
- model shipways
- (and 1 more)