

.jpg.f26acc9a74319261612561bfa7da1303.jpg)
vaddoc
-
Posts
1,528 -
Joined
-
Last visited
Content Type
Profiles
Forums
Gallery
Events
Posts posted by vaddoc
-
-
Thanks Patrick! Yes, it's a girl!
- Mark Pearse, Elijah, mtaylor and 3 others
-
 6
6
-
A small milestone reached today, time for another update. Progress has been very slow and with a stork flying again around my house, it is bound to get even slower!
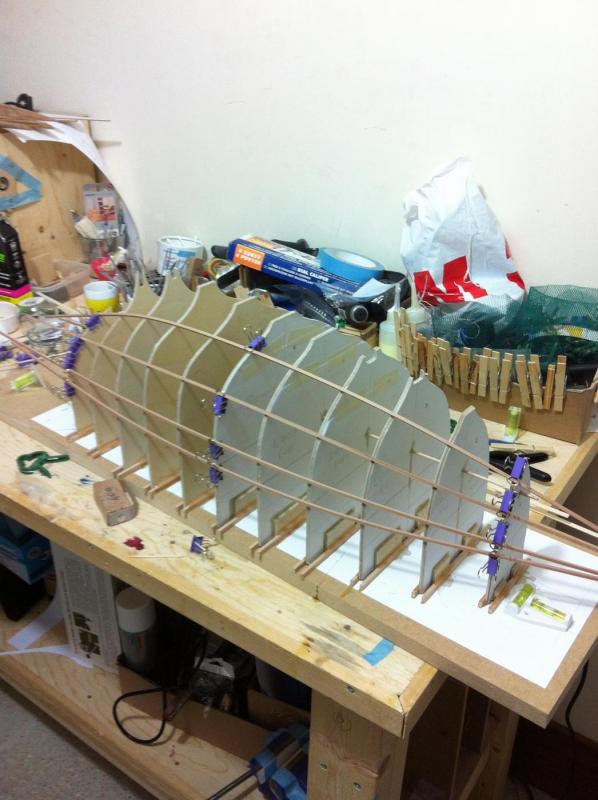
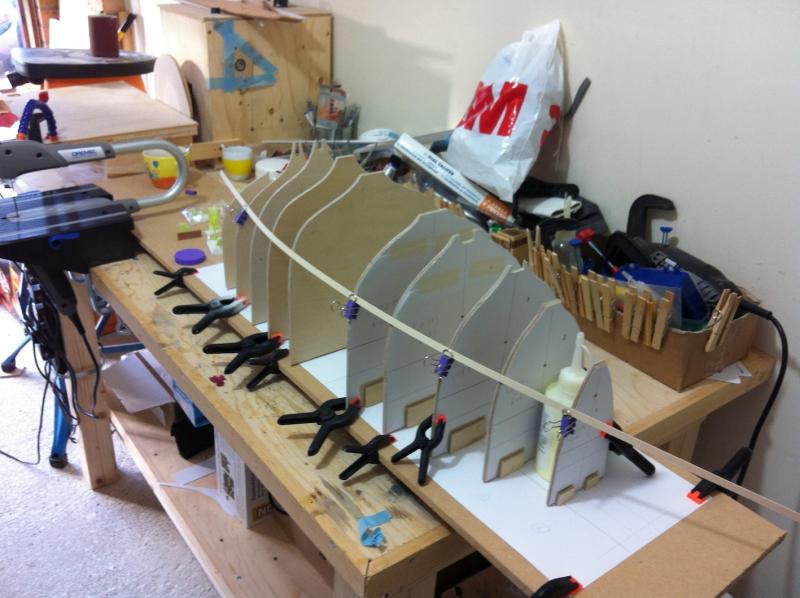
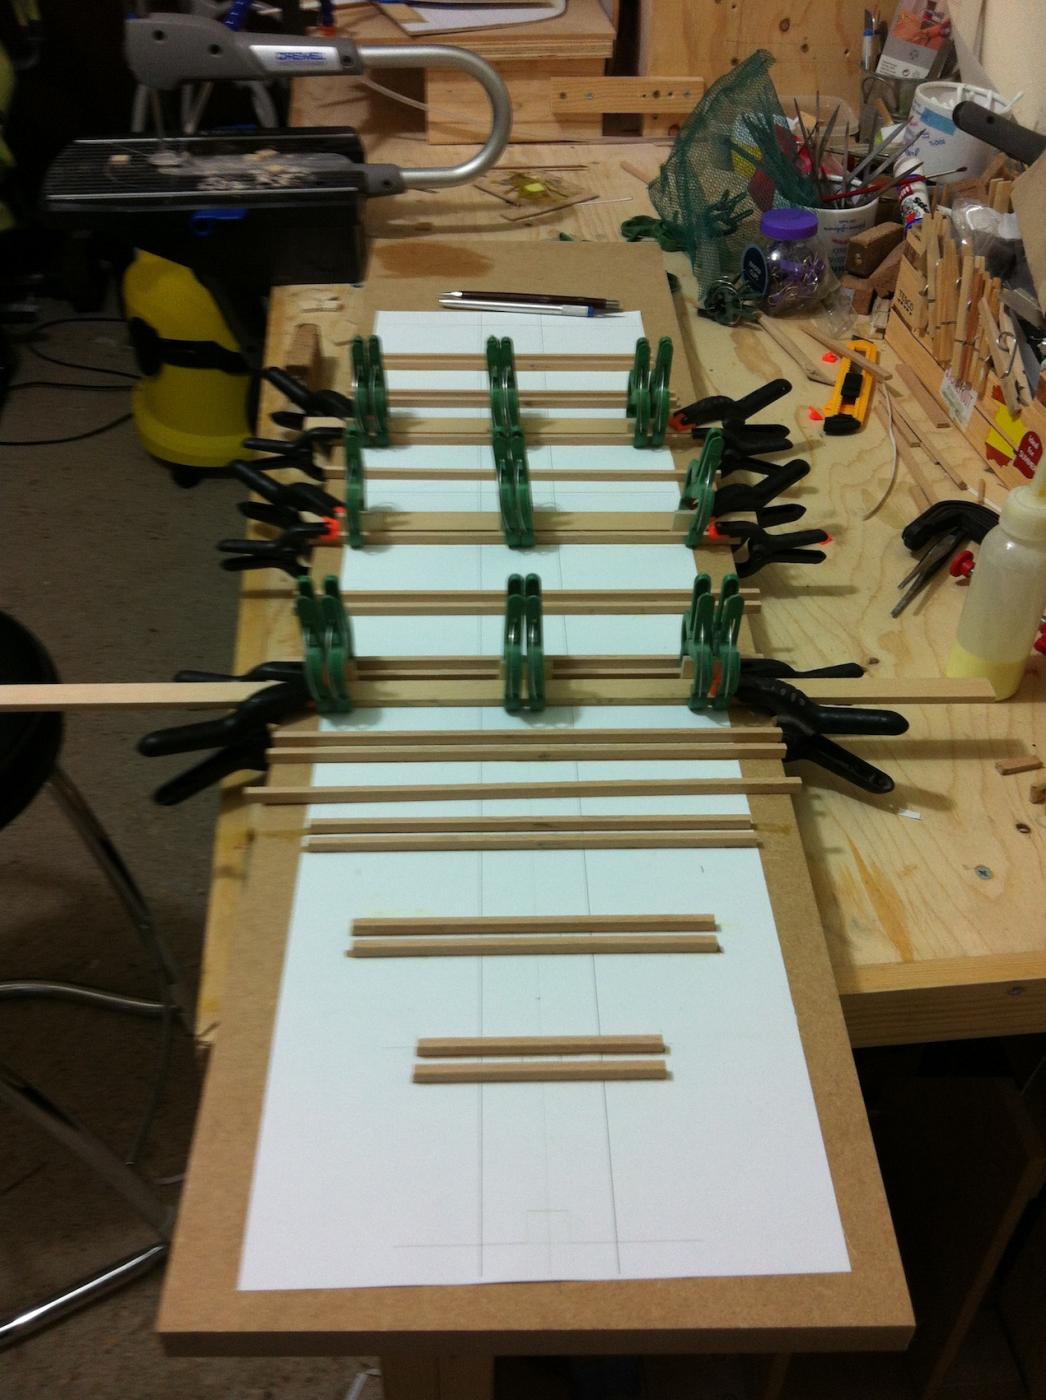
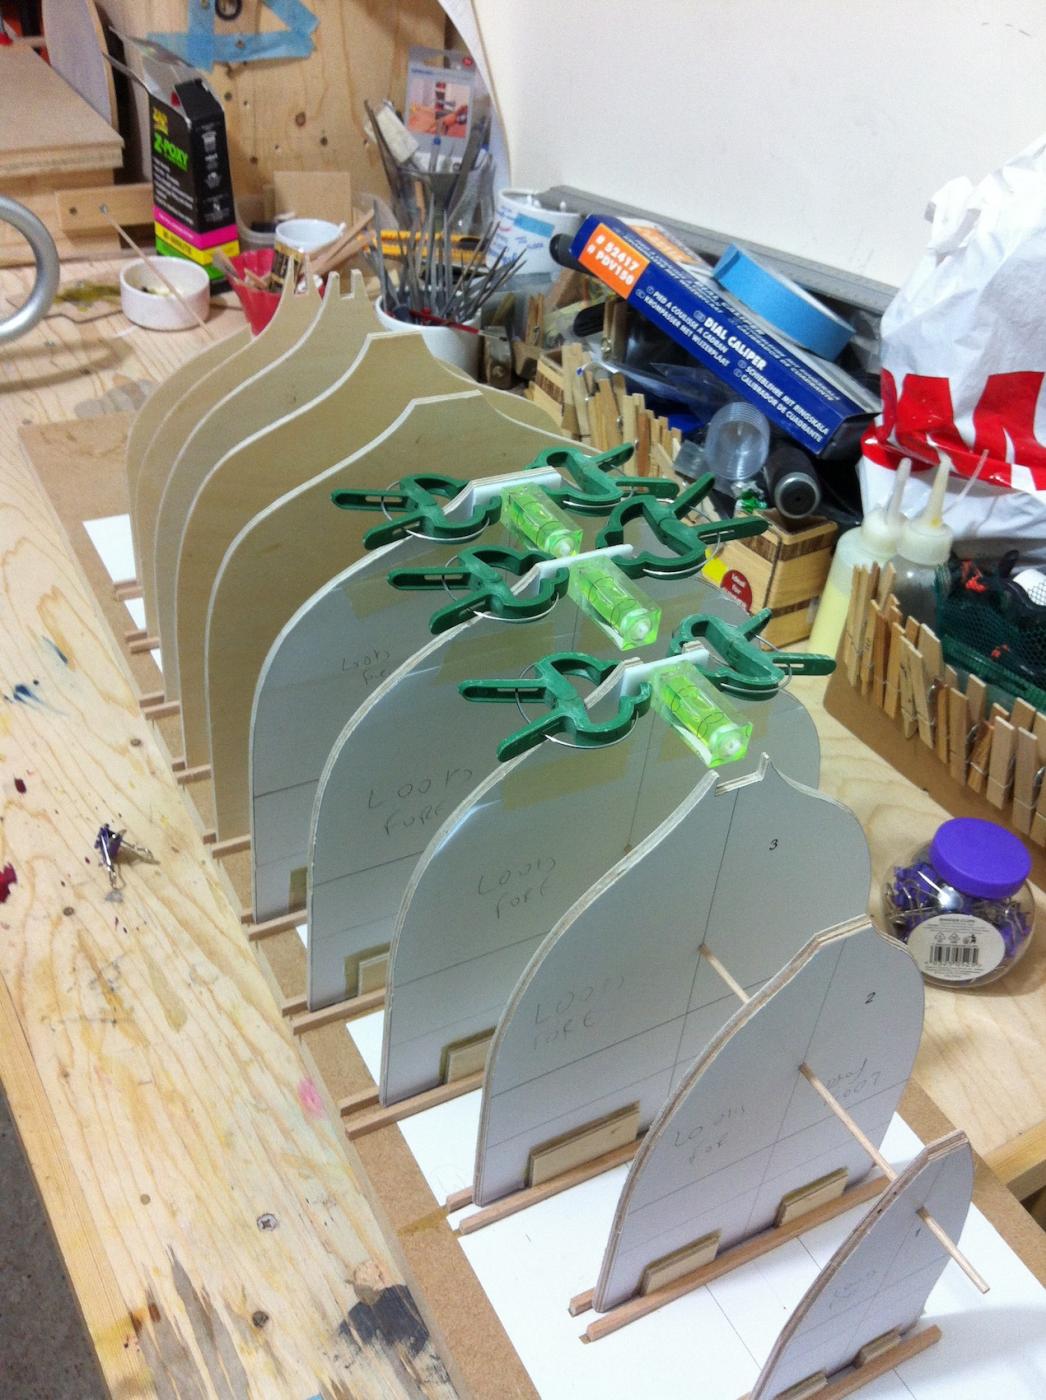
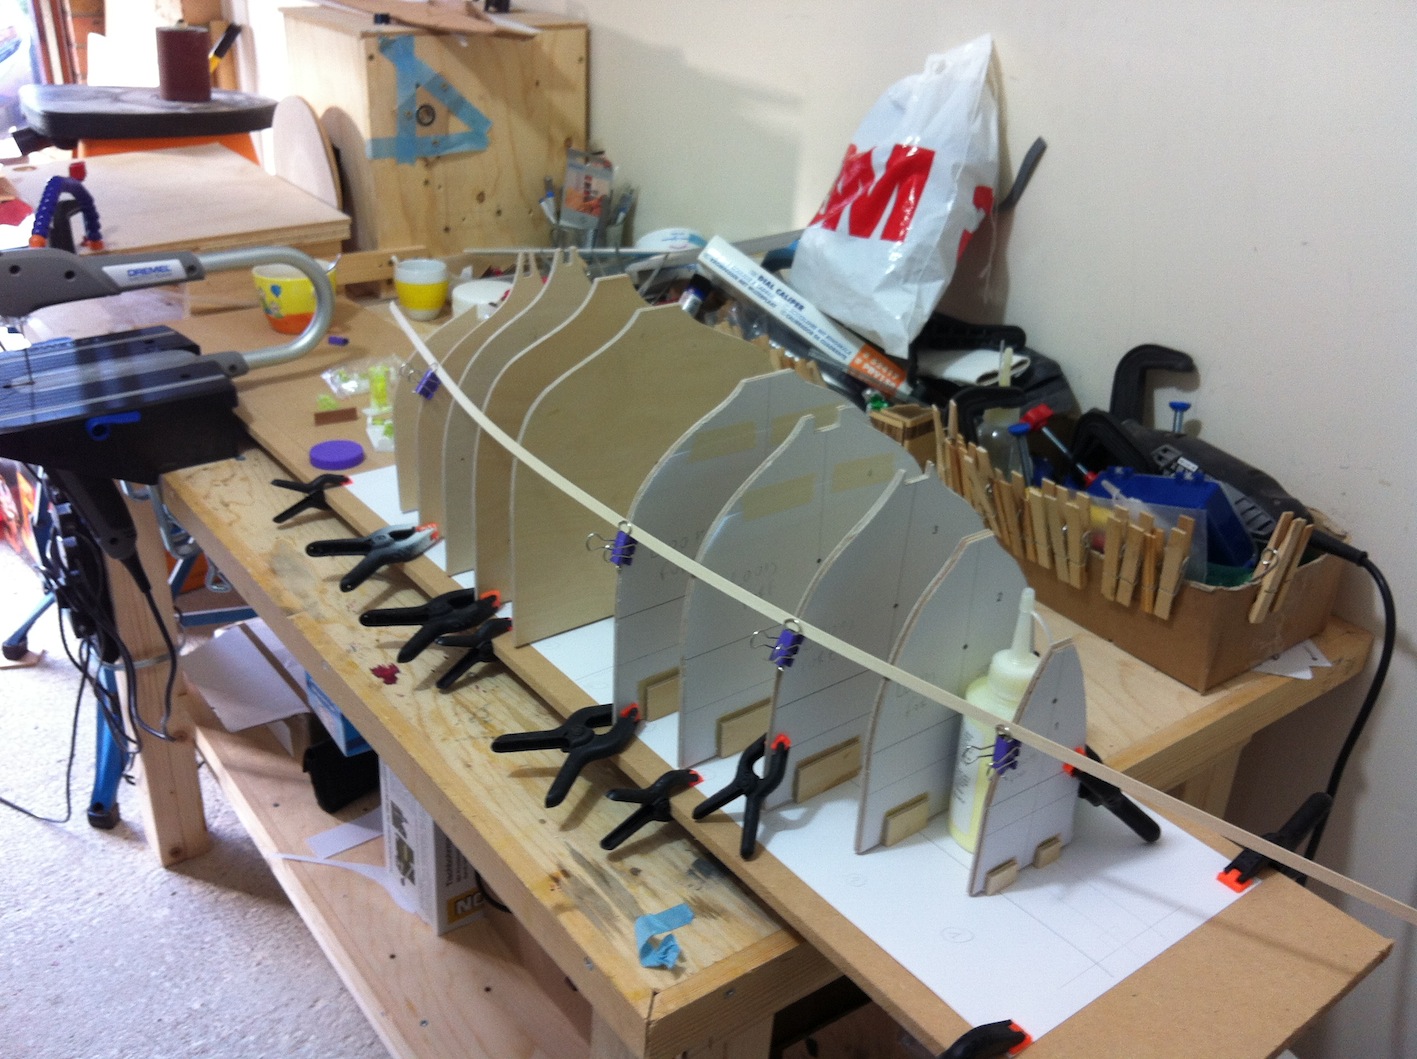
It is important for the temporary frames to be firmly fixed in place as there will be a lot of pressure applied with all the battens, ribs etc. The best way probably would be to epoxy everything down. I used a flat piece of MDF and glued the paper pattern, cutting windows to expose the mdf so that PVA and epoxy could stick. It took a while but worked ok.

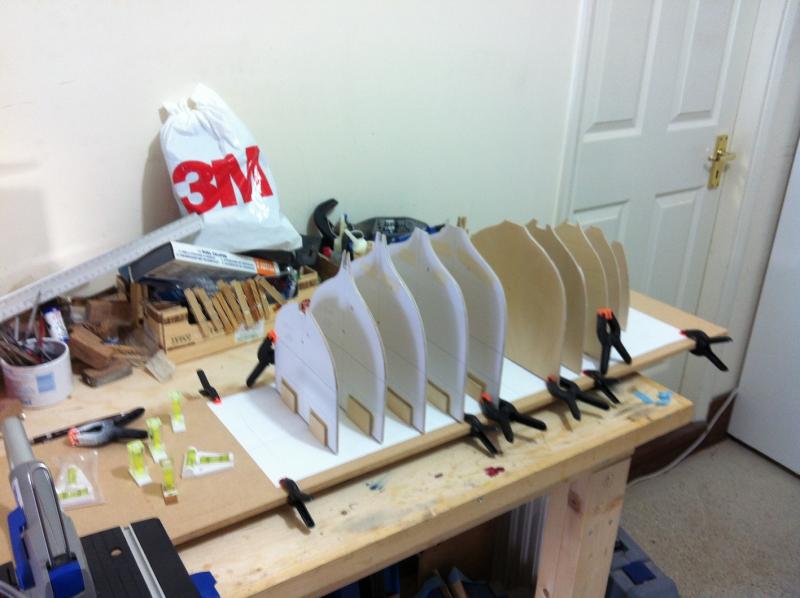
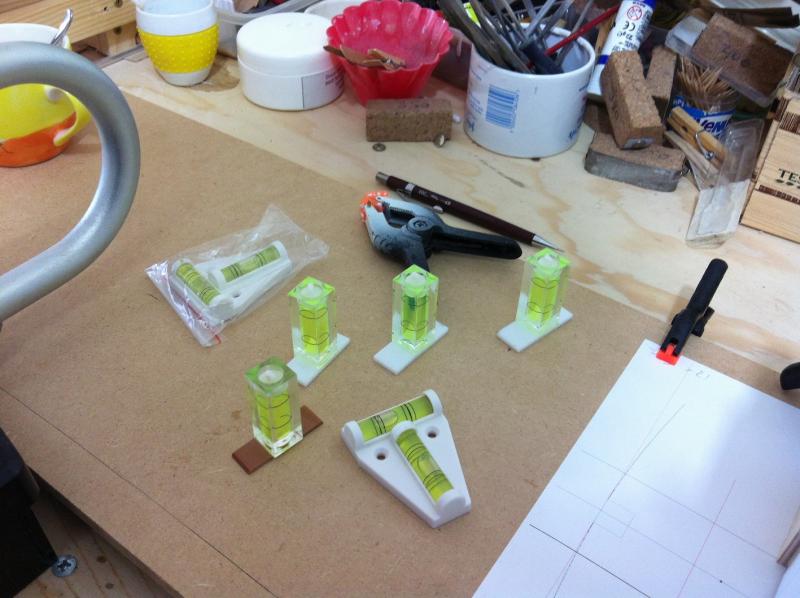
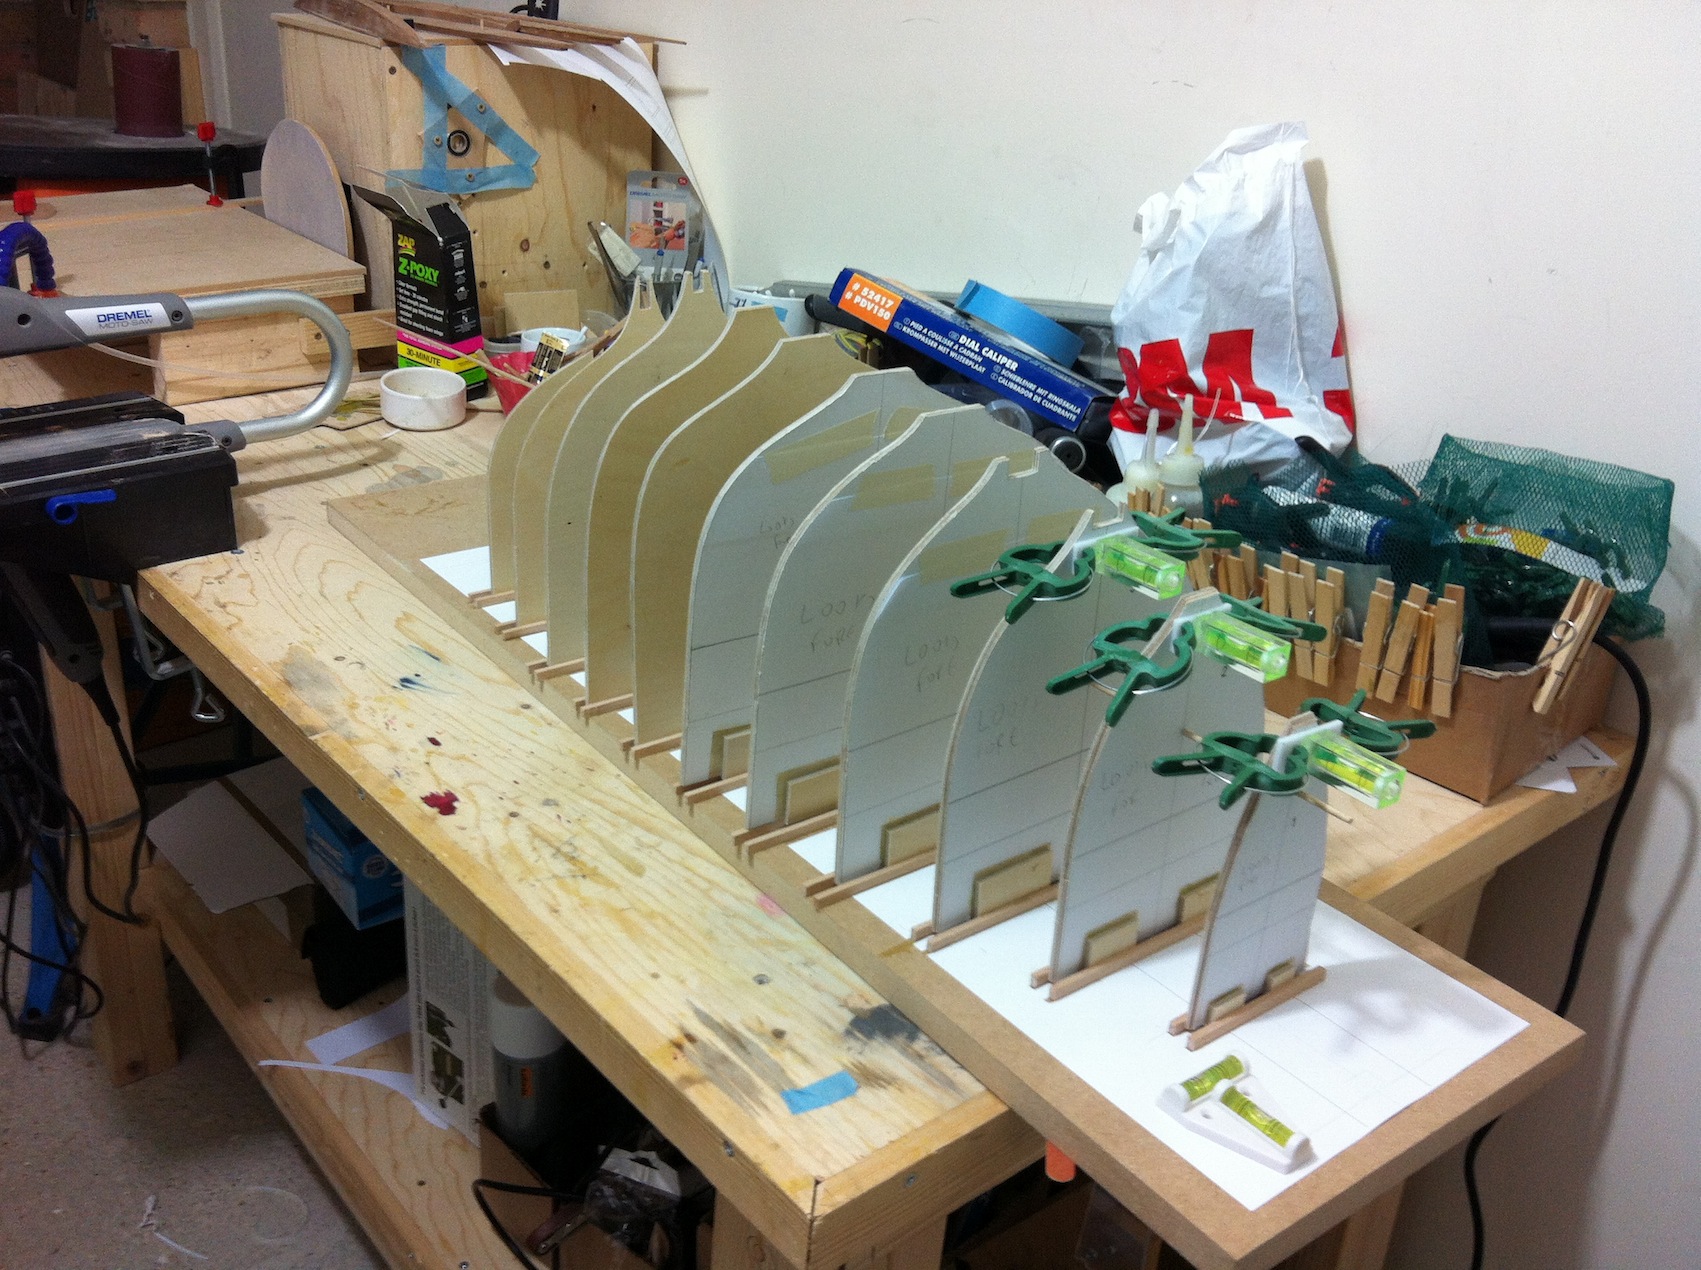
Then I installed the frames, some needing a bit of sanding as the fit was very tight. A dowel running through all frames make the whole thing very rigid. I used spirit levers I modified to make sure the frames are vertical. A couple came out a few degrees off but it will not really affect anything.


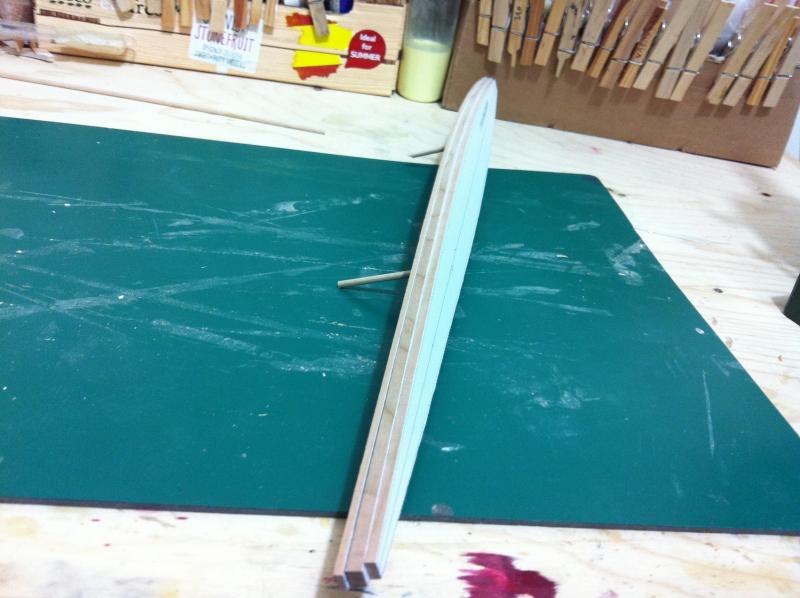
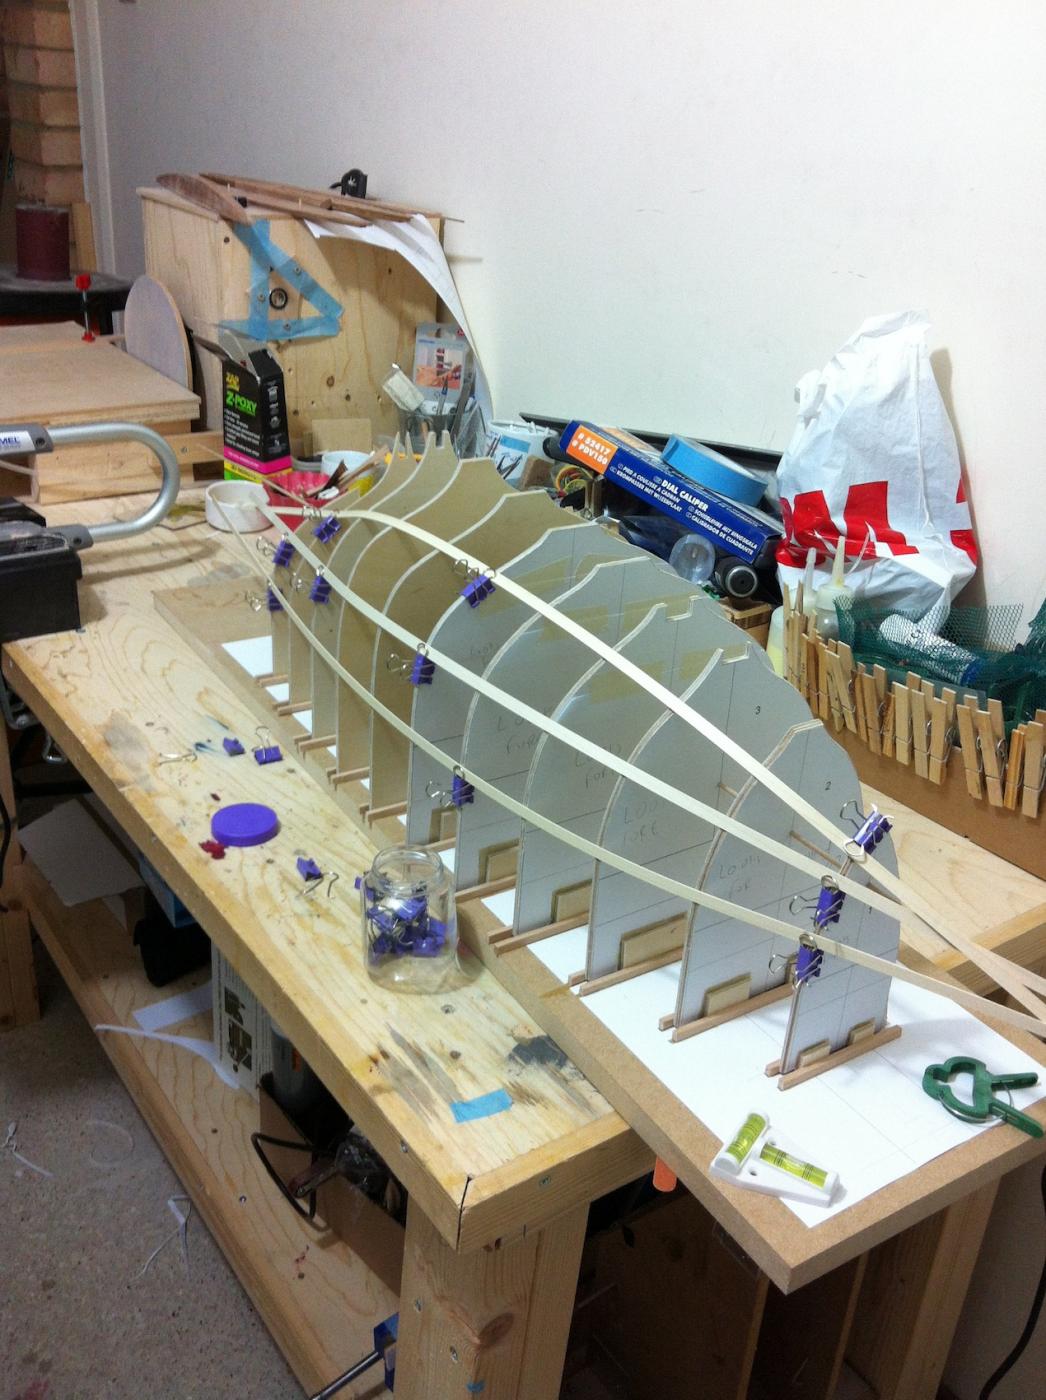
I attached a few strips and they seem to lie ok. However the planks will definitely need spilling which I thought I might do without.

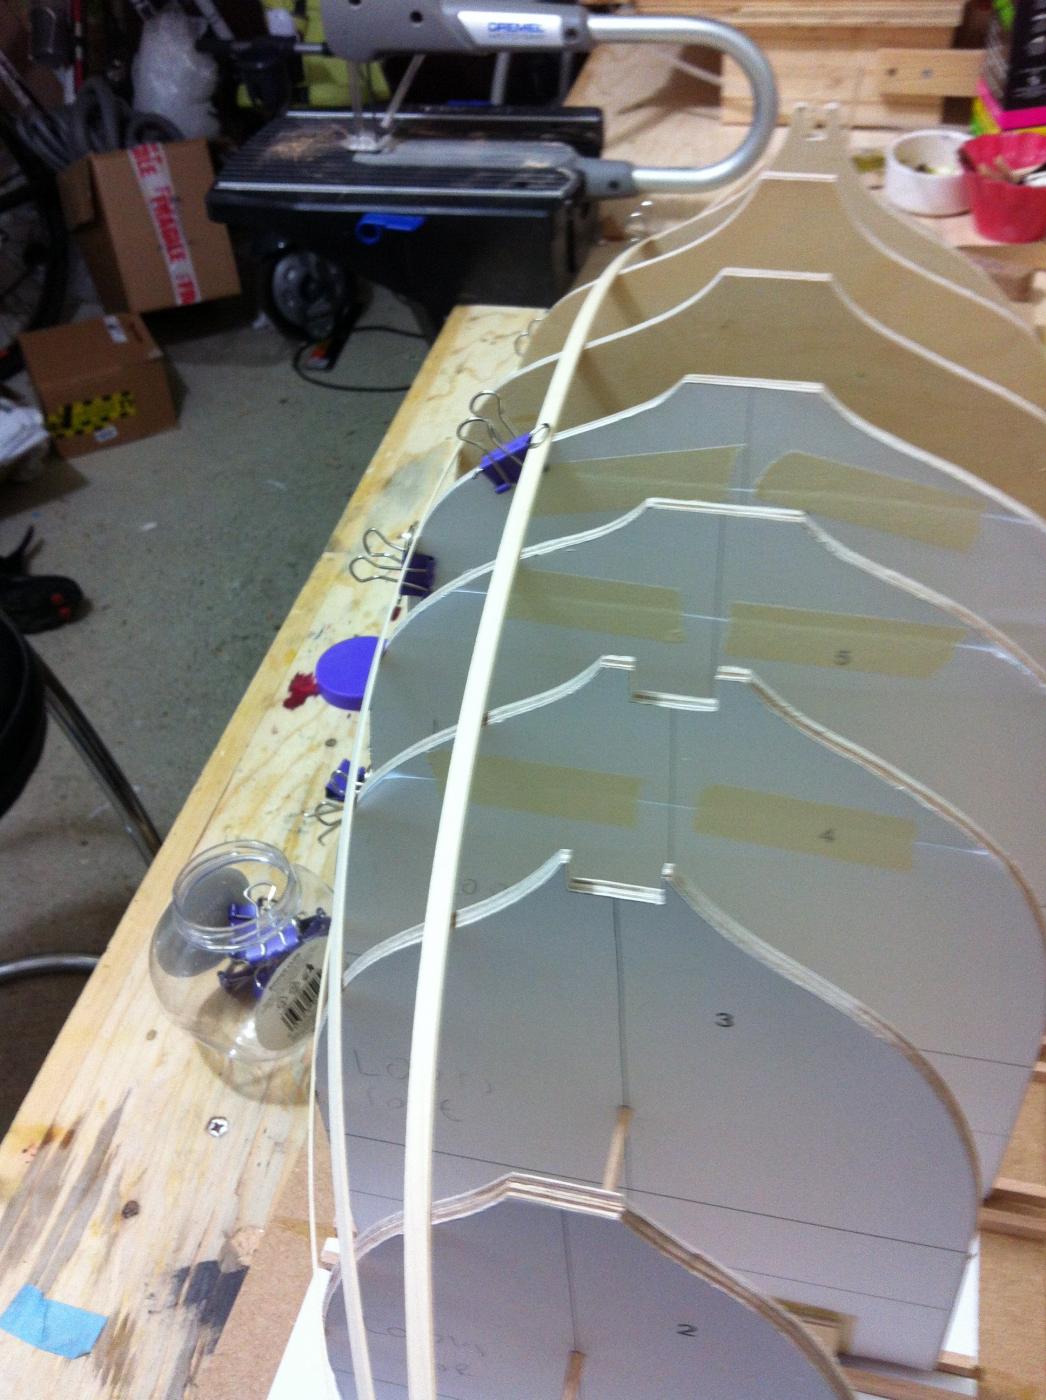
I attached the 3x3 mm pear strips I intend to use as battens. The stern and transom are missing but the hull seems very fair.
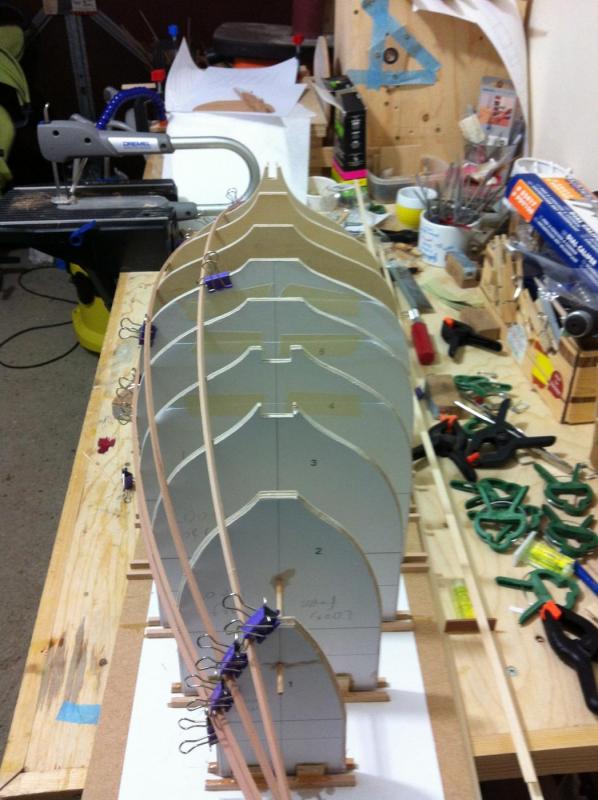
Towards the bow the battens changes direction but this I think is fine as this is the shape of the hull in the plans.
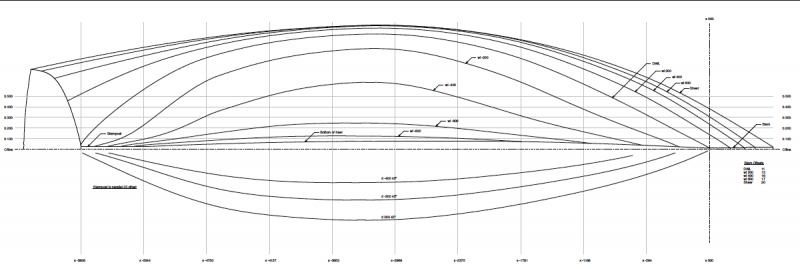
As I have the whole boat on CAD, I think it makes more sense to spill and define all planks, then cut patterns out of cardboard and test the fit. I hope this will work out with only minor adjustments needed. Then I could install the battens, then install the ribs and start planking, progressively removing battens and nailing ribs.
-
Dear all
I am about to laminate the stem and I would like your thoughts whether I could use PVA glue. The boat is 1:10 scale, there will be 14 laminates, each 0.5 mm thick and 20 mm wide. It will be a big stem!
I can use epoxy and I am sure it will come out fine with no spring back. However, working with epoxy is a dirty business, takes ages to dry and it will be a very hard stem, difficult to cut bevels etc.
Could I use PVA? Will there be appreciable spring back, glue starved areas, will the short opening time be a problem and will it be strong enough?
Vaddoc
-
-
-
Dear all
I scraped a few minutes here and there and I achieved some modest progress.
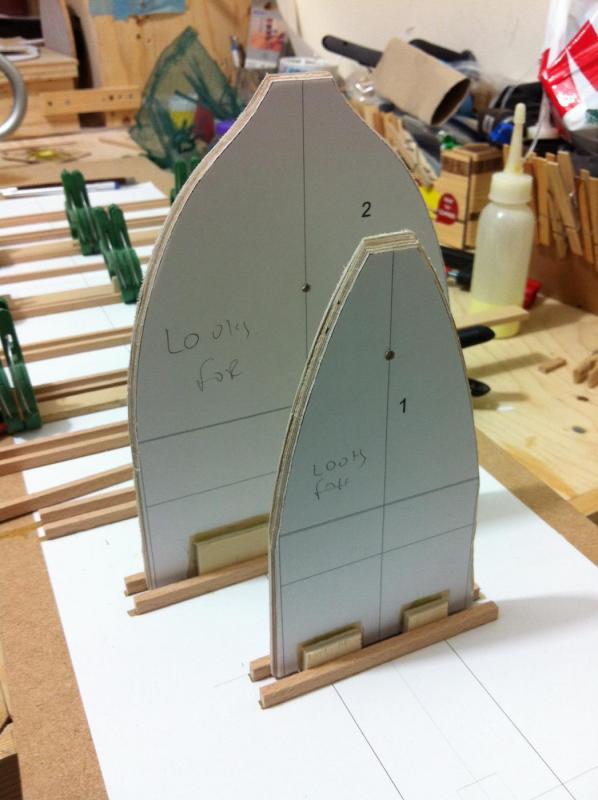
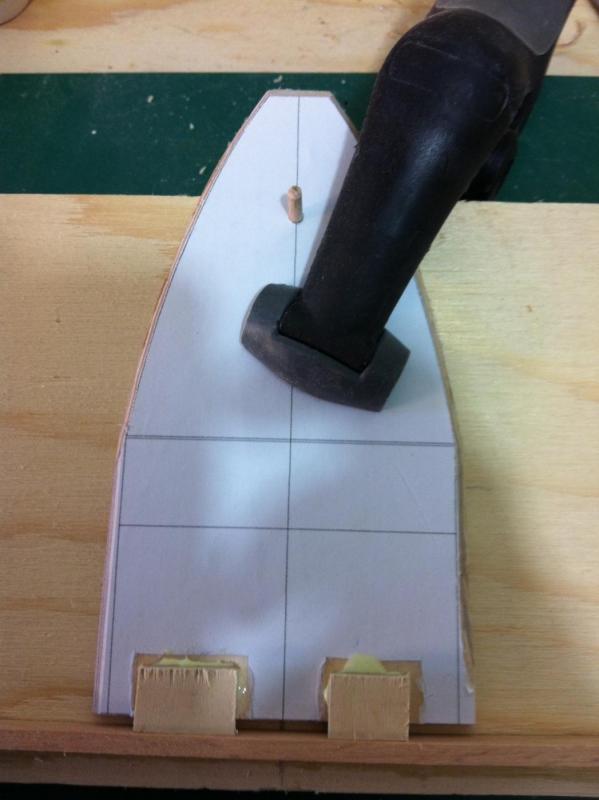
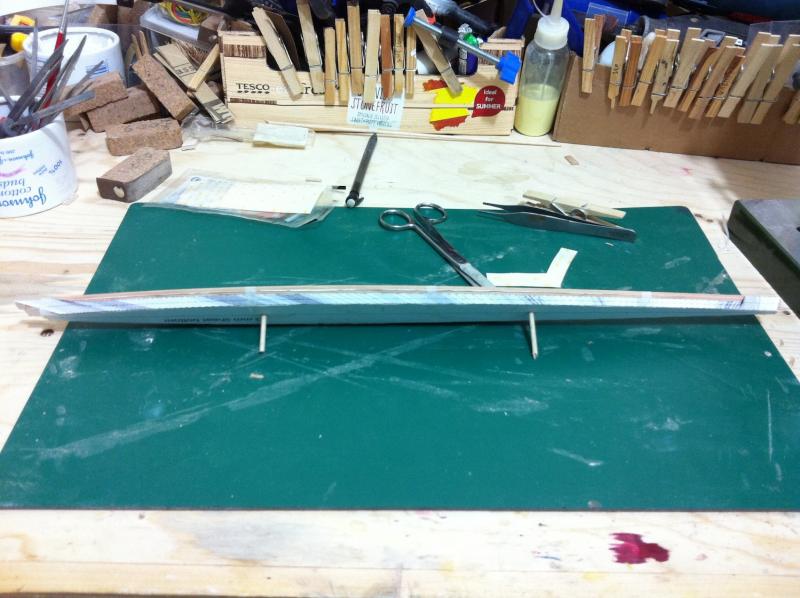
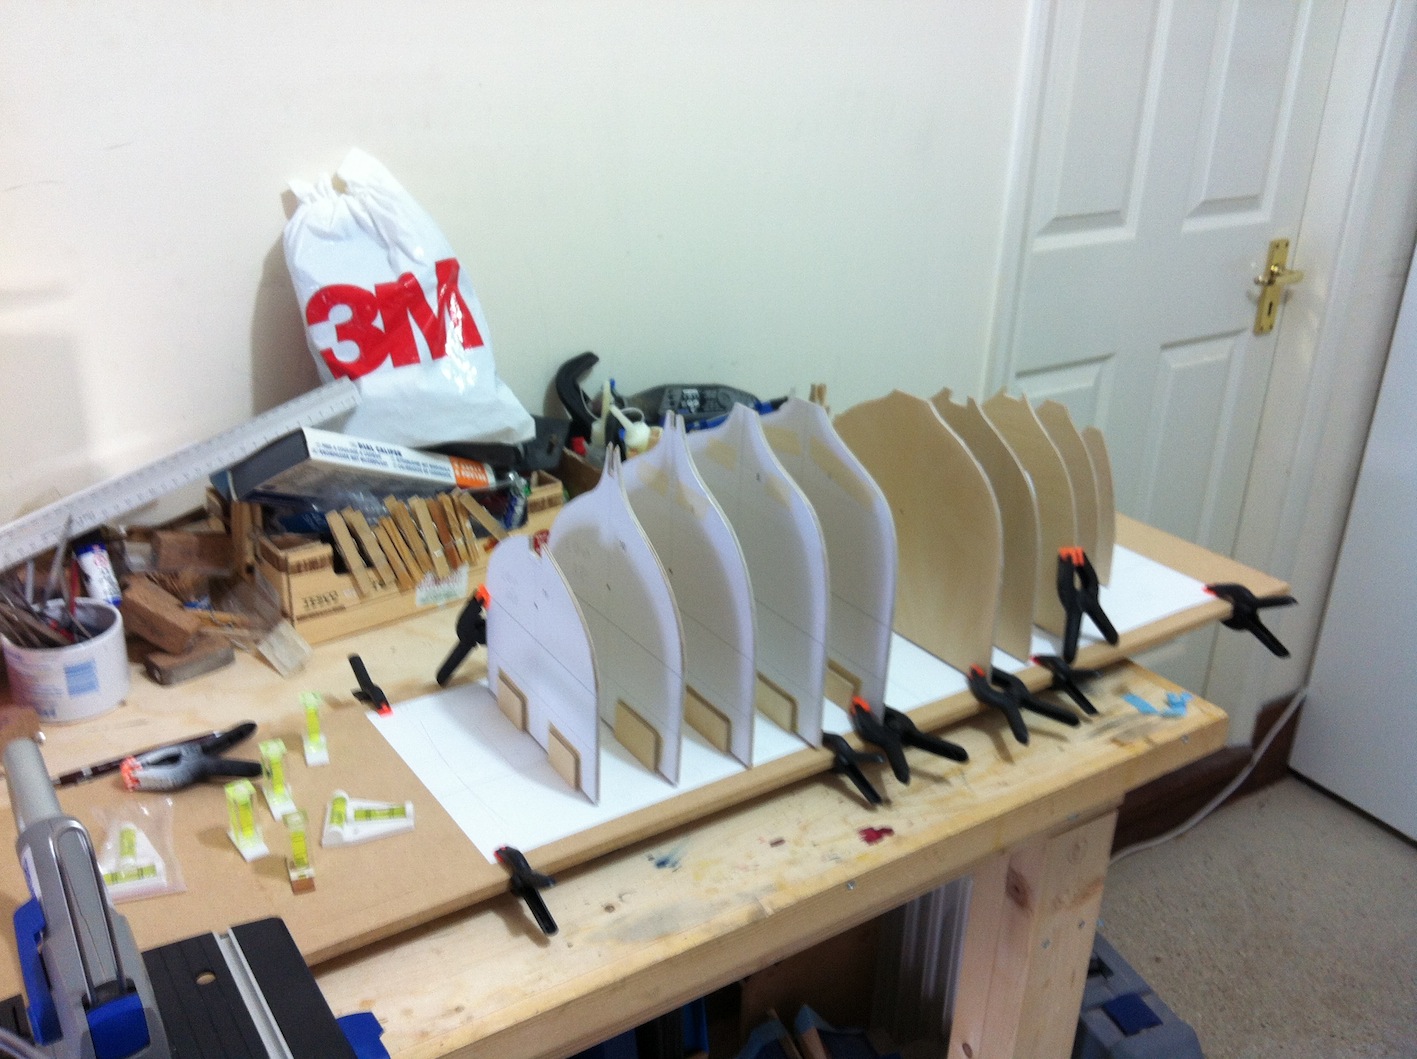
To maintain the alignment of the temporary frames, there is a 3 mm hole which has been drilled with reasonable accuracy, a vertical midline which again is accurate and the baseline which is very important as it sets the hight. I realised however that the heights were all over the place. I made a simple jig using the 3 mm hole as guide and added 2 mm to the height by gluing additional pieces of wood. Now all frames have identical heights with great accuracy.
I finished all temporary frames and sanded in the bevels. I temporarily erected the frames as I am very concerned that either my lofting and CAD design is wrong or that the tolerances in translating these to cut wood will be way too big. It will be a big boat, no doubt about this!
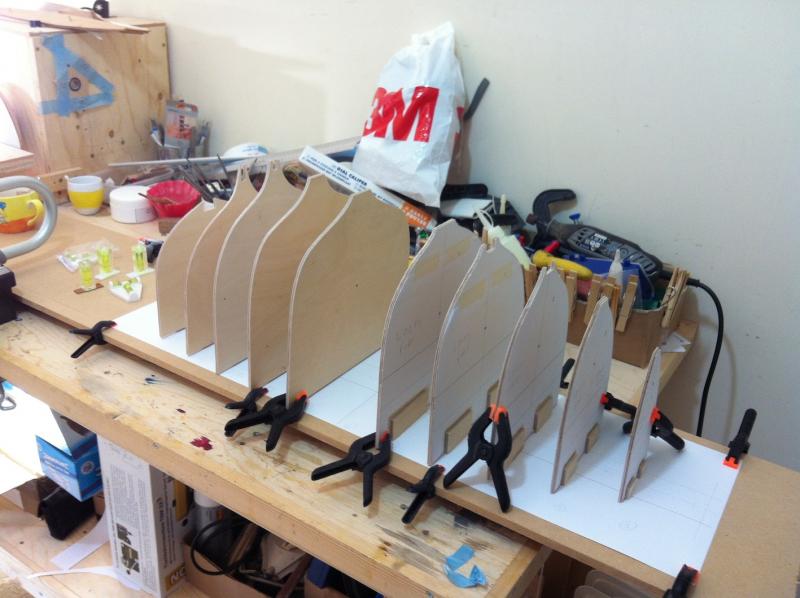
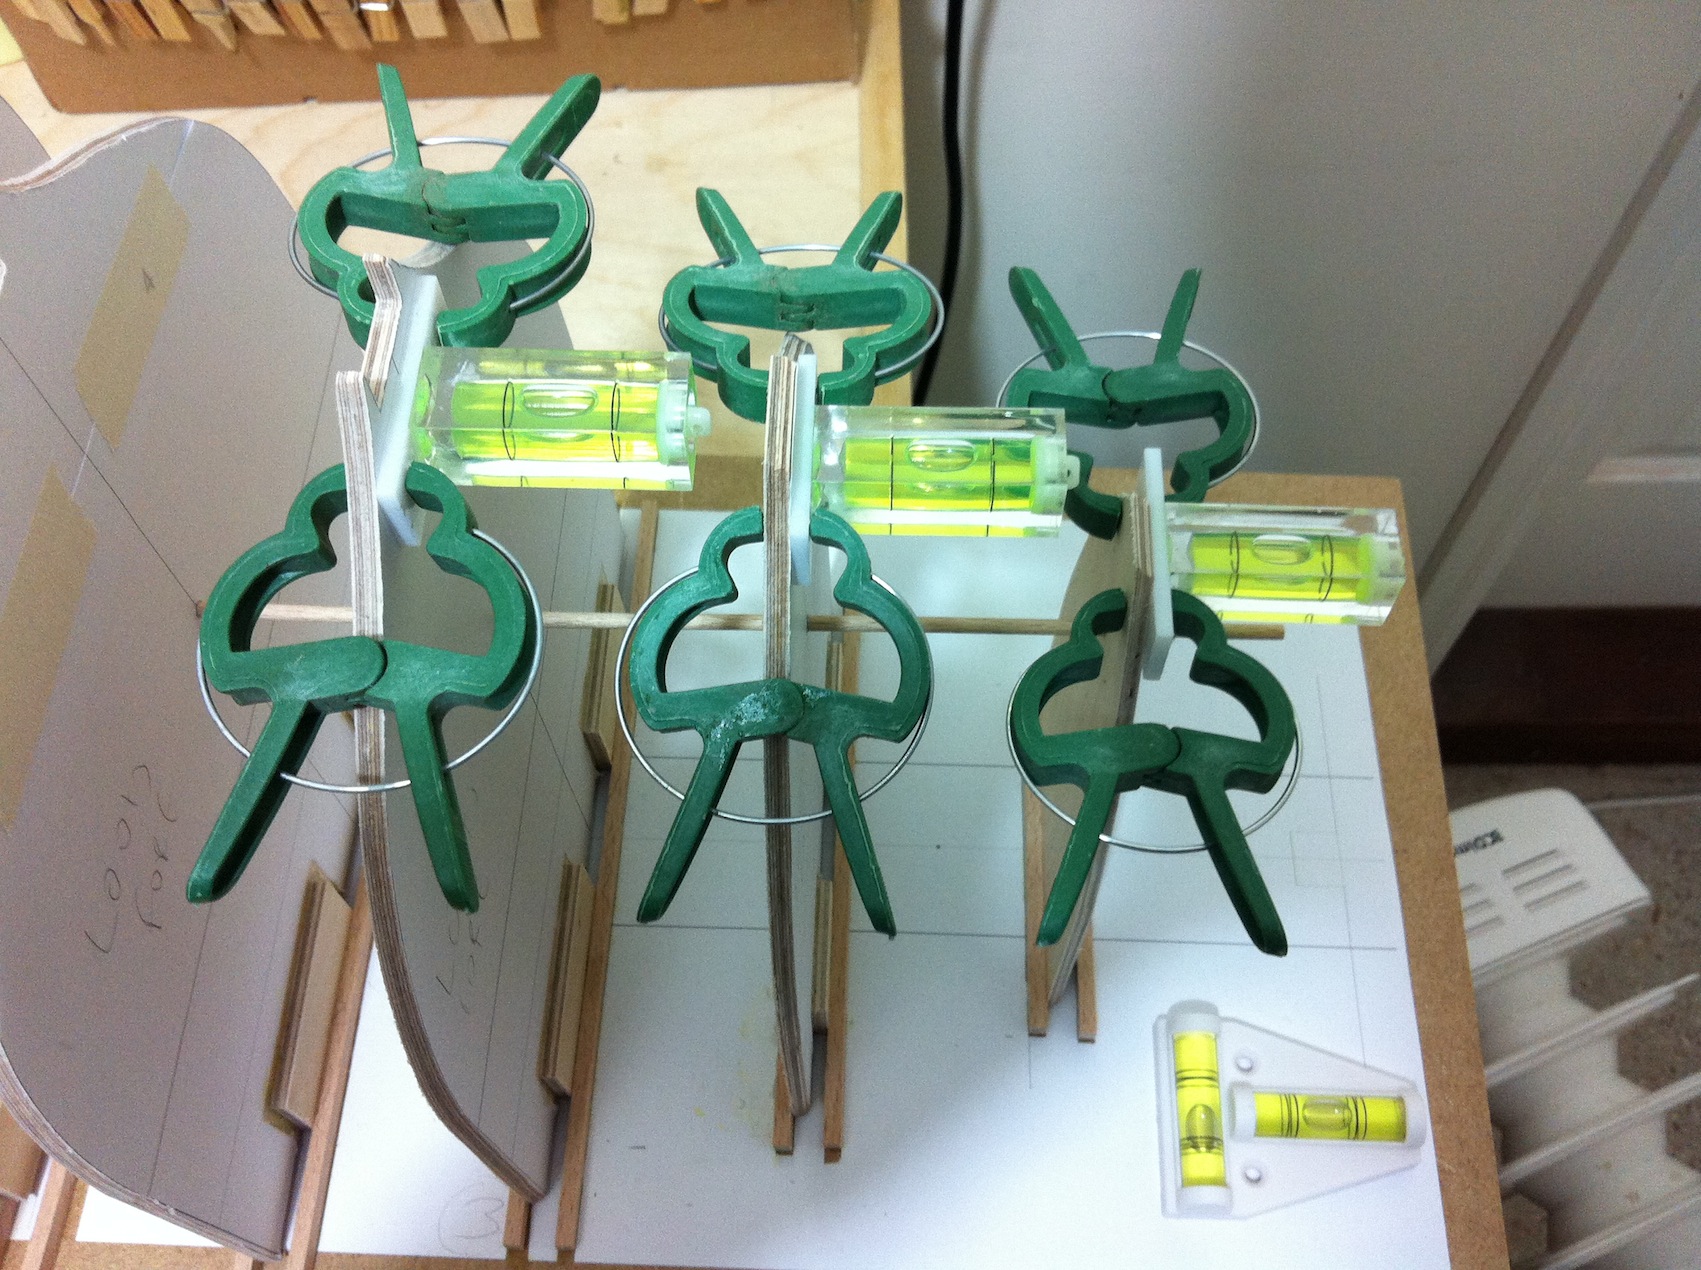
I also modified some spirit levels to assist in erecting the frames
Now, you might have noticed that there is a frame missing. I looked high and low but the No 6 frame has disappeared. I must find it though because making it again needs a ton of work.
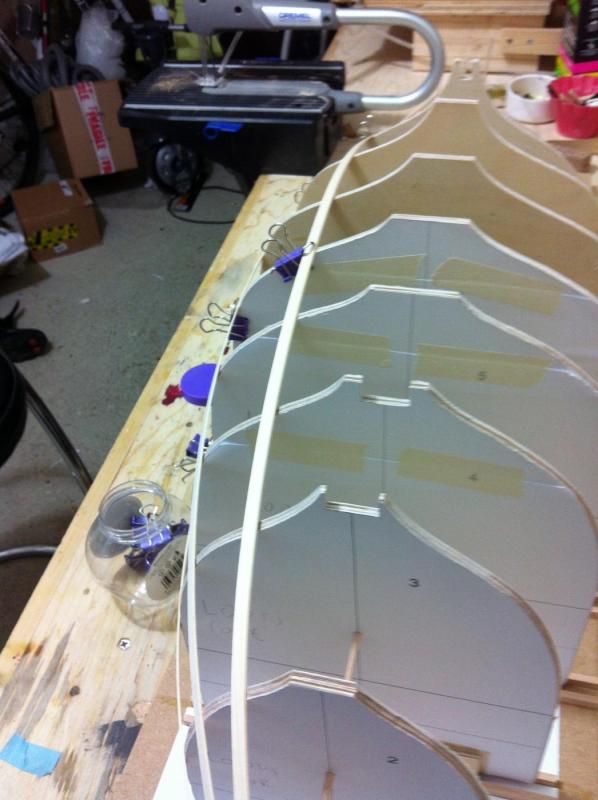
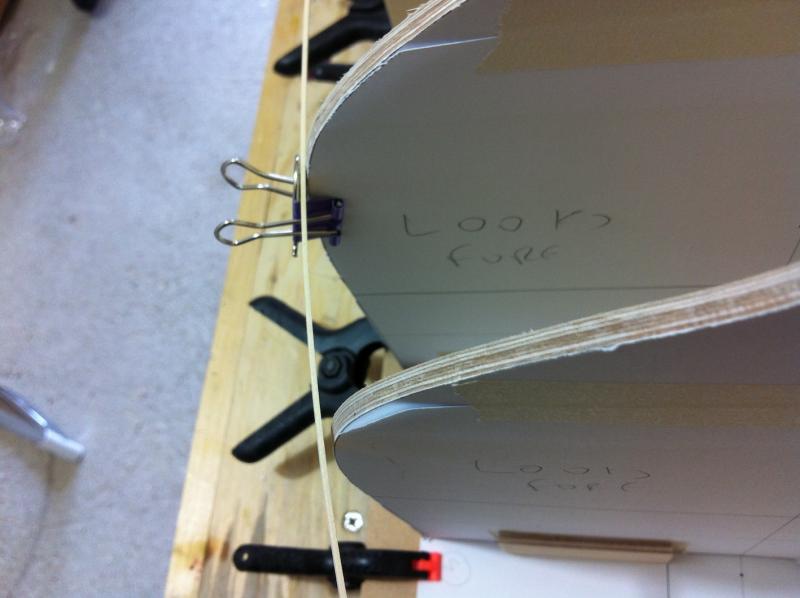
I also loosely fitted a strip to check the bevels. Towards the stern and bow the strip gets quite a twist which is worrying, I have no idea whether this is normal.
Also, No 7 frame seems to be way off. I checked though and it is cut accurately. The rest of the frames look ok, maybe the inaccuracy of the very loose fitting is the cause. Time will tell.
- Elijah, cog, captainbob and 5 others
-
8
-
-
This indeed has been my experience Carl
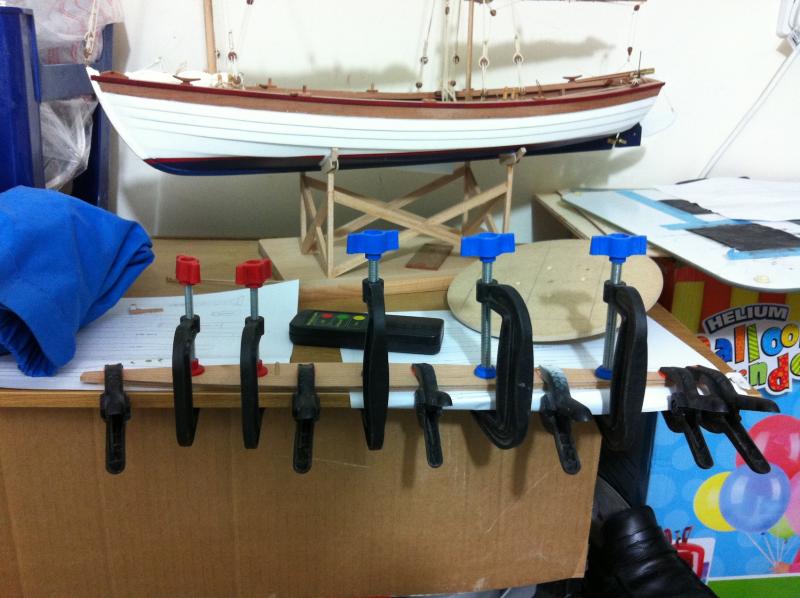
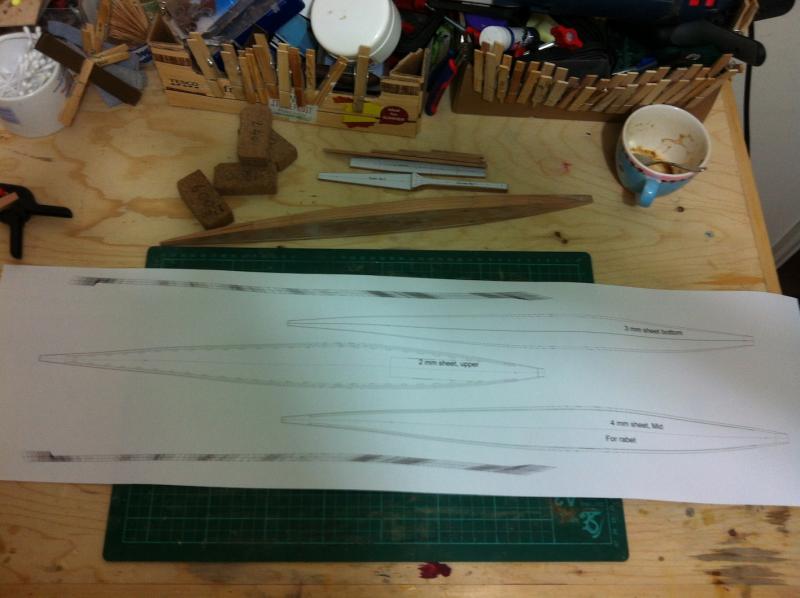
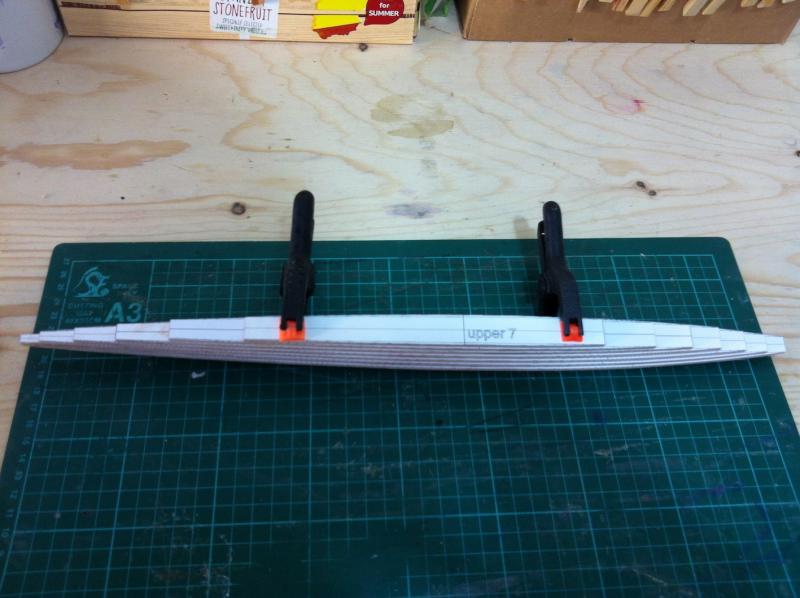
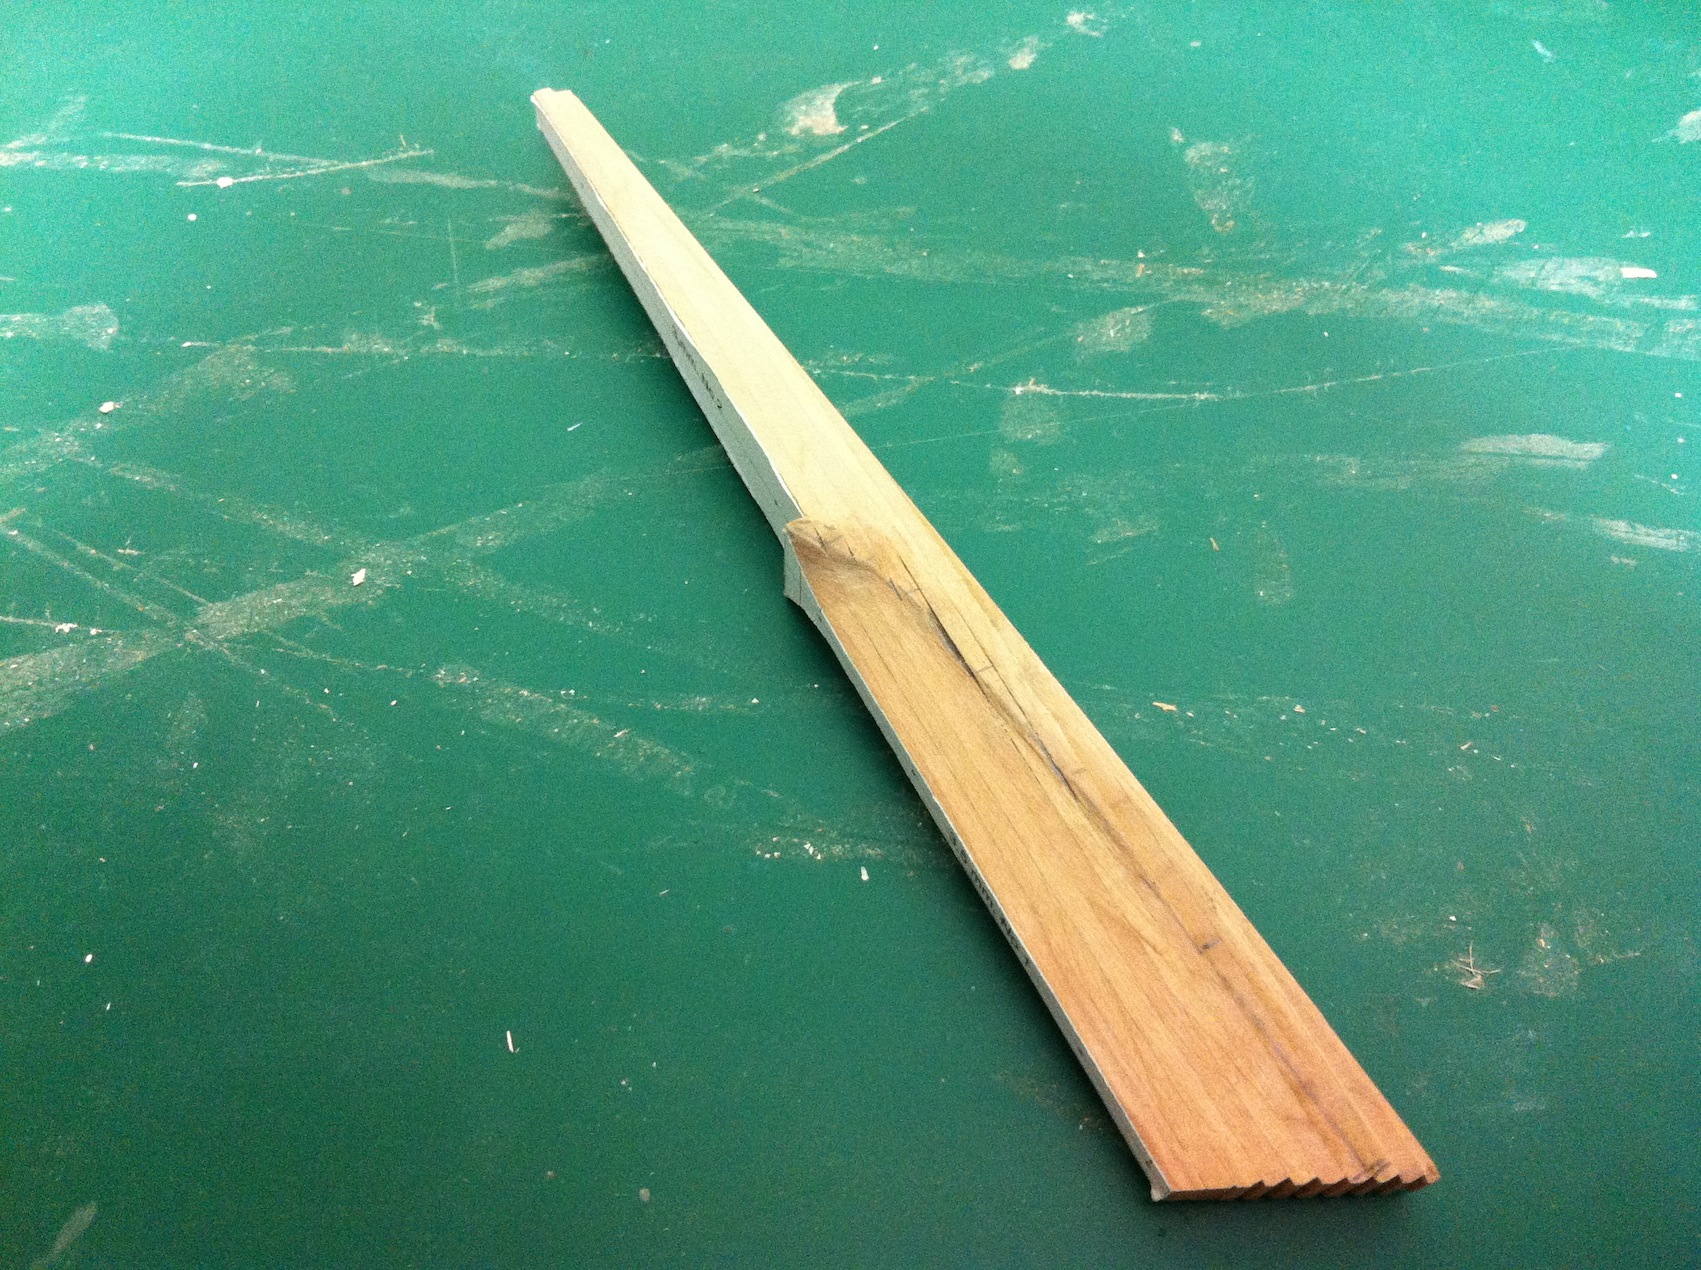
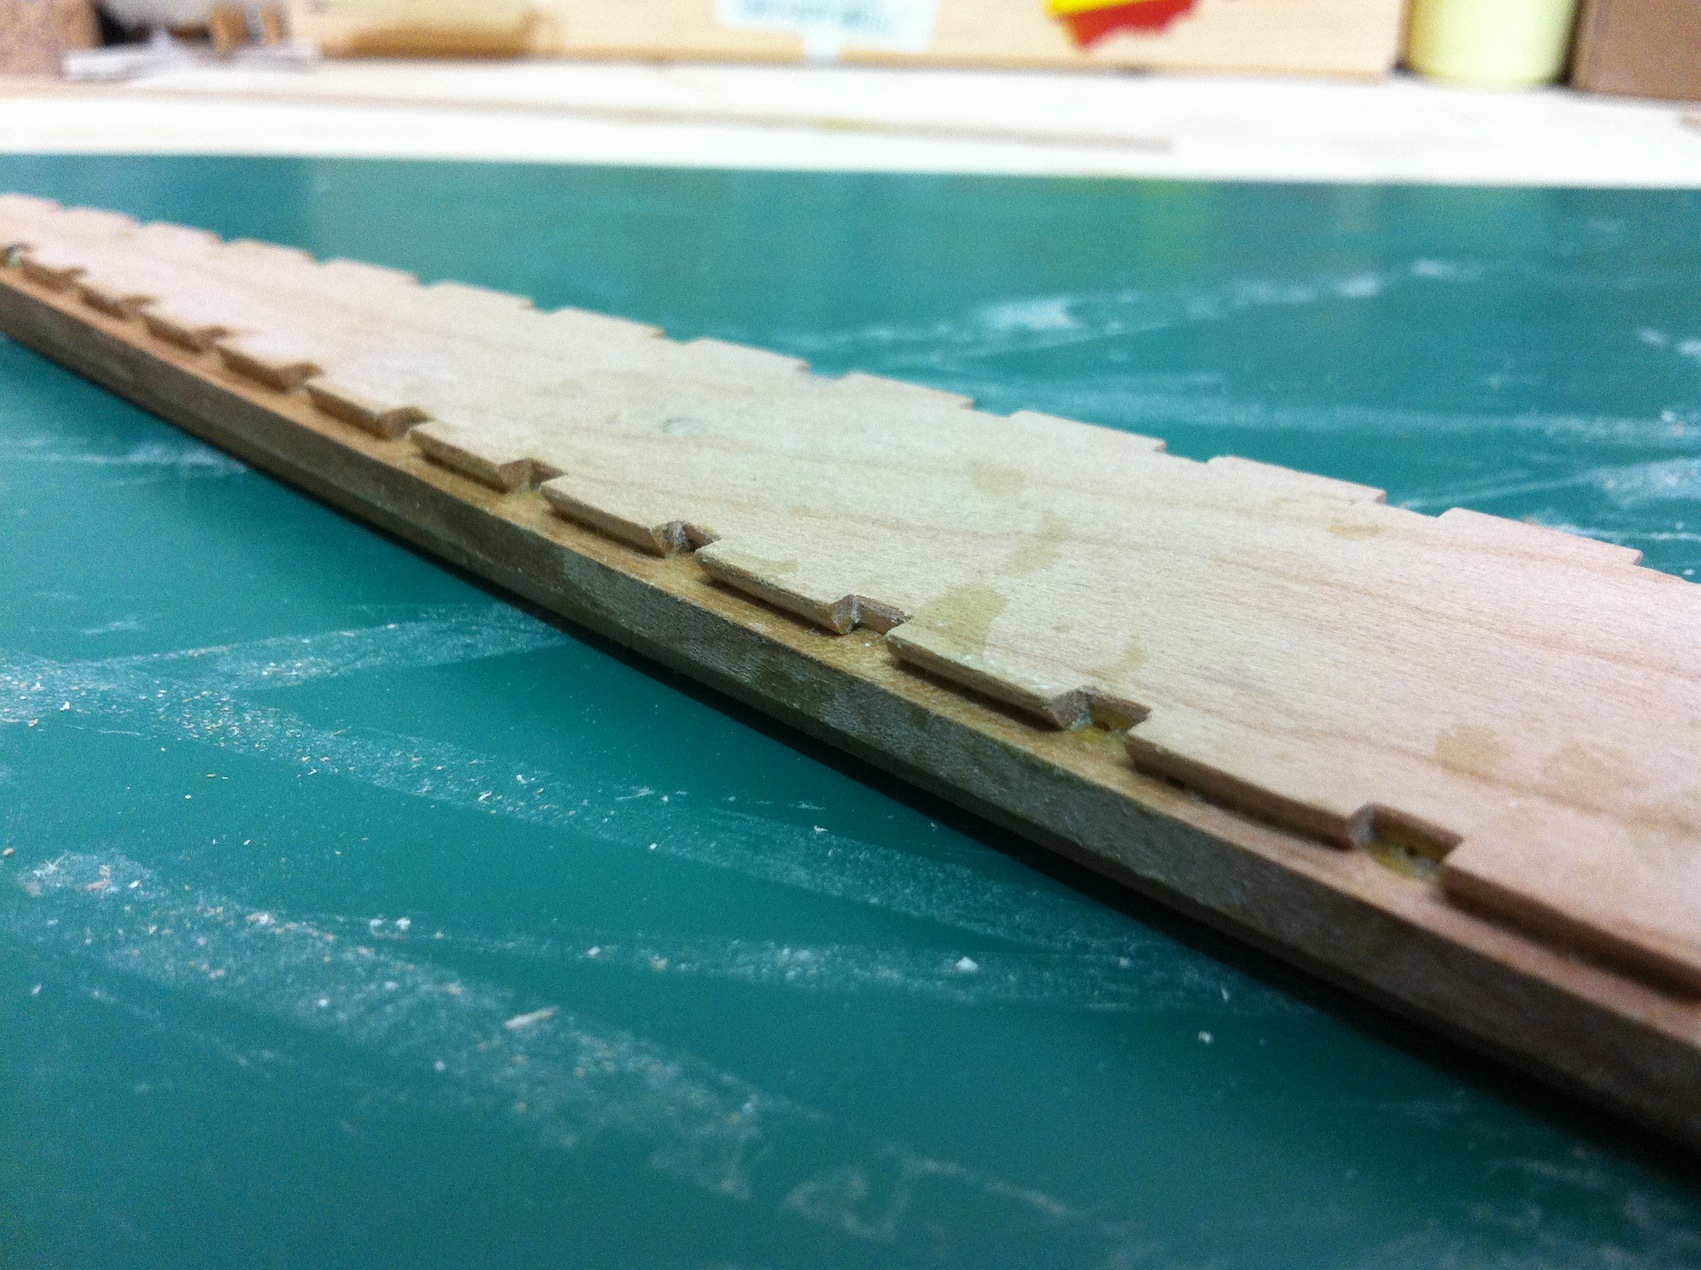
The sheets for the wood keel are cut and this time I did most of the sanding before gluing them. I also attached a paper pattern to the sloping side and marked the rebate line. There will be much more sanding however after the ribs are in place and the garboard plank test fitted.
I glued the bottom two sheets as the upper one needs still a lot of work to cut the notches for the ribs. The wood keel needs to be dead flat so everything is clamped on a flat surface.
Overall I am reasonably happy with my progress. There is beauty in the design but needs some more time to start showing!
- captainbob, druxey, hexnut and 6 others
-
9
-
-
Now, I must say I was a bit shocked with the colour. Gold? But then I googled it and there are some very nice boats out, gold goes very nicely with black white and blue. My aesthetics have changed my dear Patrick! Mind you,I still have not decided on the colour for my ugly duckling so who knows…
 What paint did you use? It looks sprayed on.
 -
Would alignment pins before/during assembly have prevented that problem? Looks good now!
I do use 3 mm dowels to maintain alignment druxey, the problem was that the paper pattern was glued to the wood badly so the parts came out wrong. When gluing large paper patterns (these ones were 40 cm long) one needs to be very careful and to check for alignment before cutting the wood.
Yes, now it is fine!
-
Time for another quick update.
I now realise how challenging is to work in a large scale. First of all, all details and mistakes are very visible. Tools reach their limit. And as I just found out, any mistake is very expensive both in time and wood cost.
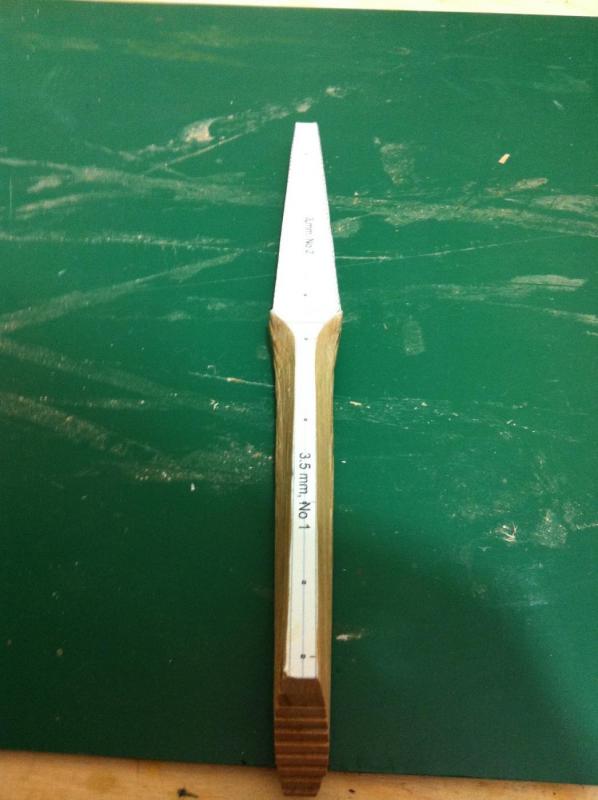
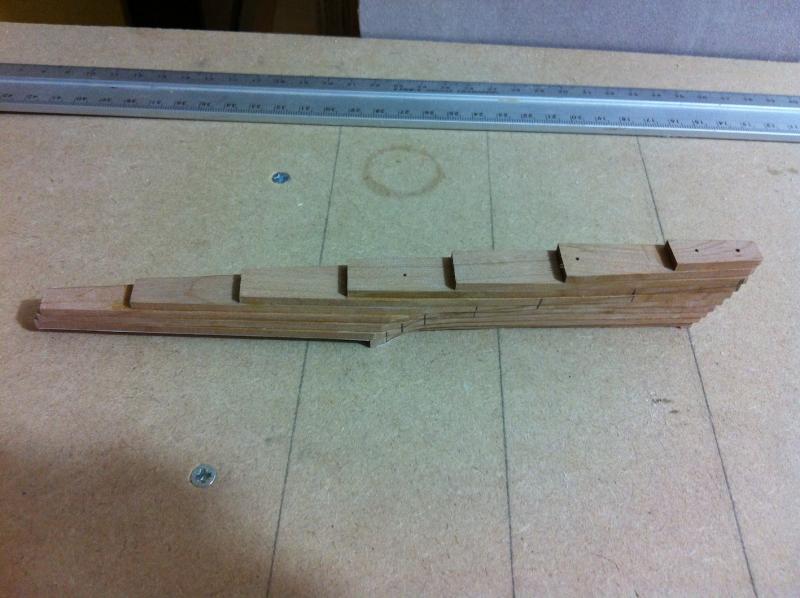
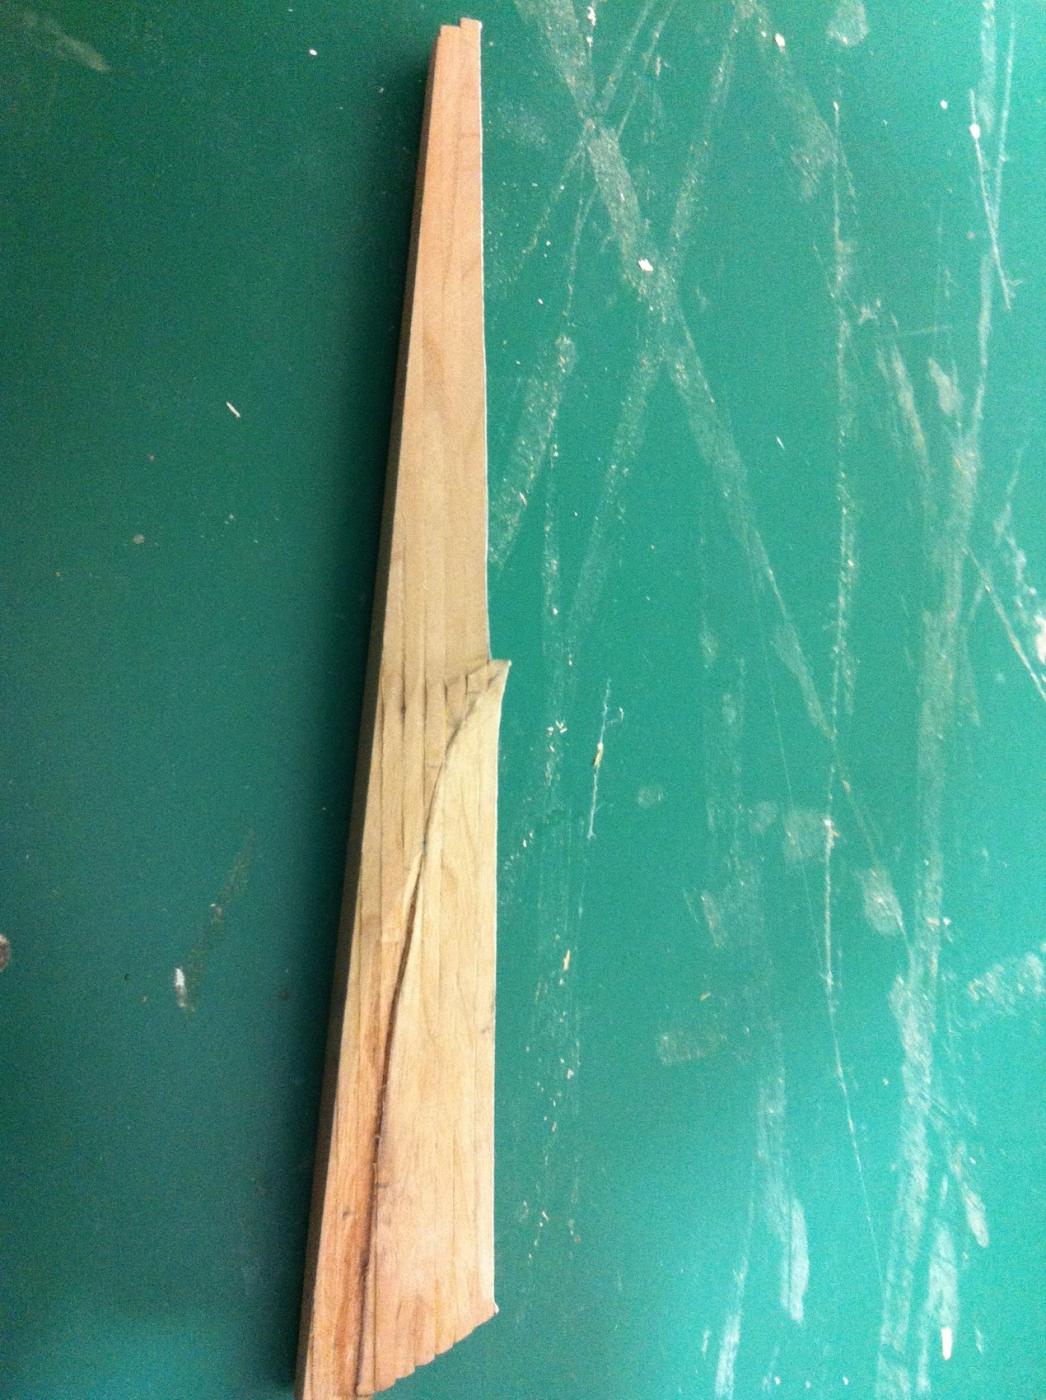
I did some more work on the sternpost. It looks very rough but I think the shape is about right and I have marked the rebate line which is about symmetrical in both sides. On one side I have started cutting the rabbet but the rest of the shaping really will need to be done after mounting on the wood keel.


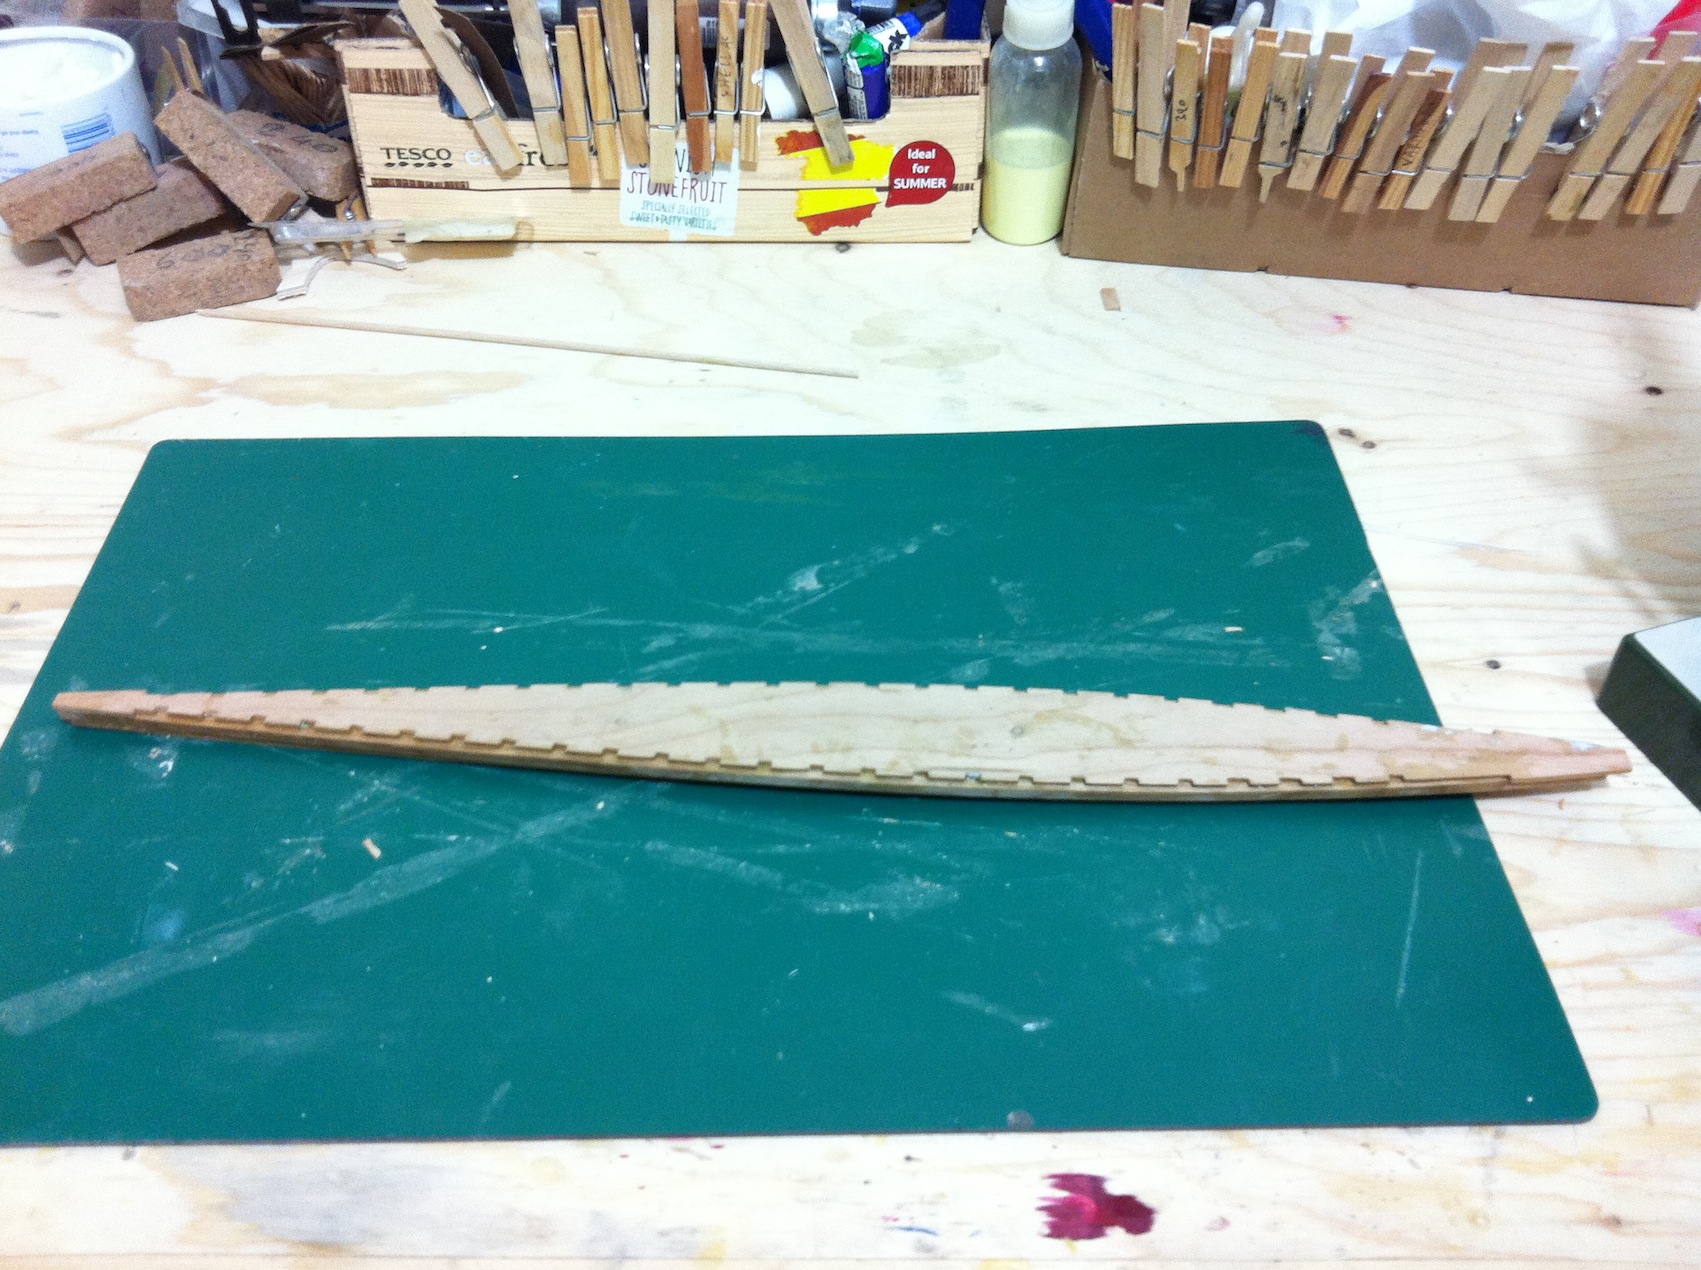
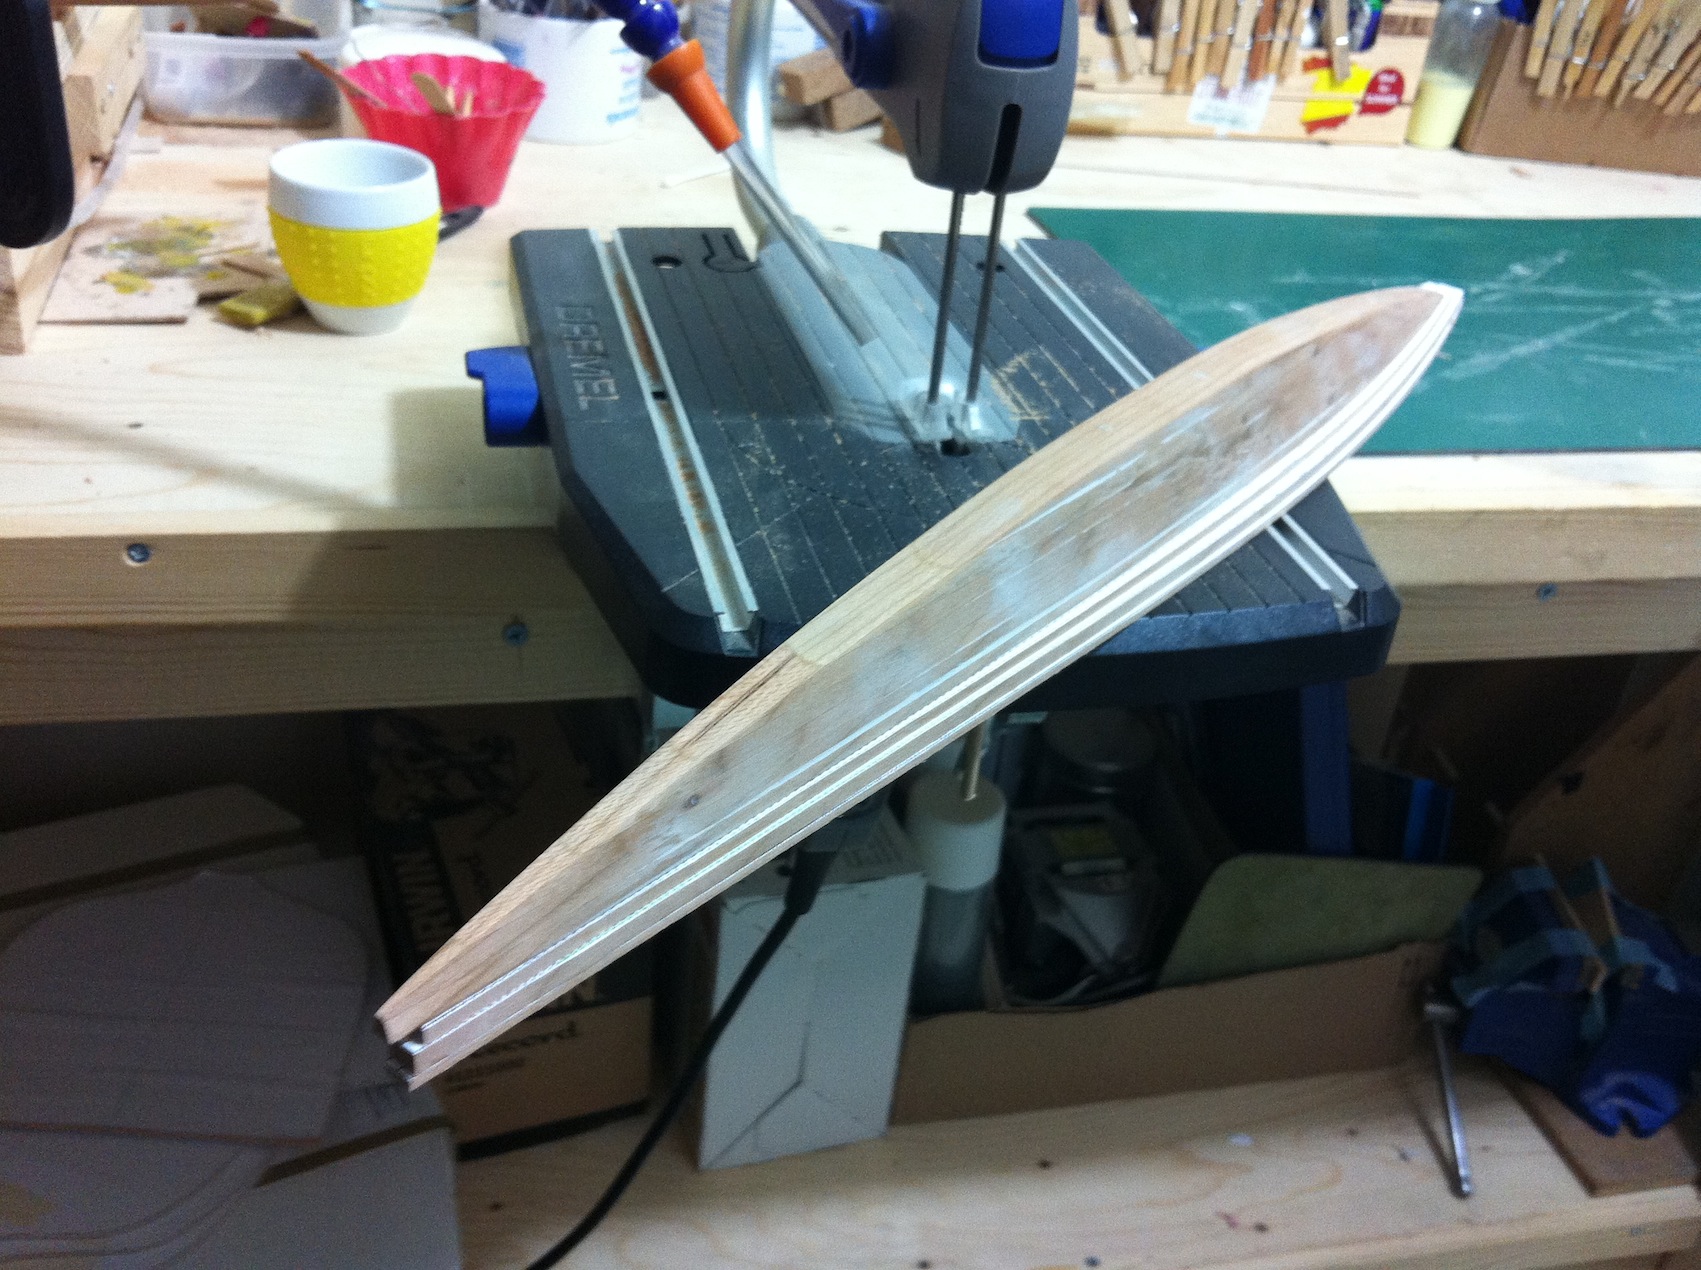
I progressed well in making the wood keel. By shaping appropriately the upper most sheet, when everything was laminated the notches for the ribs came out very nice as well as the upper part of the rabbet with the correct angles to fit the garboard plank.
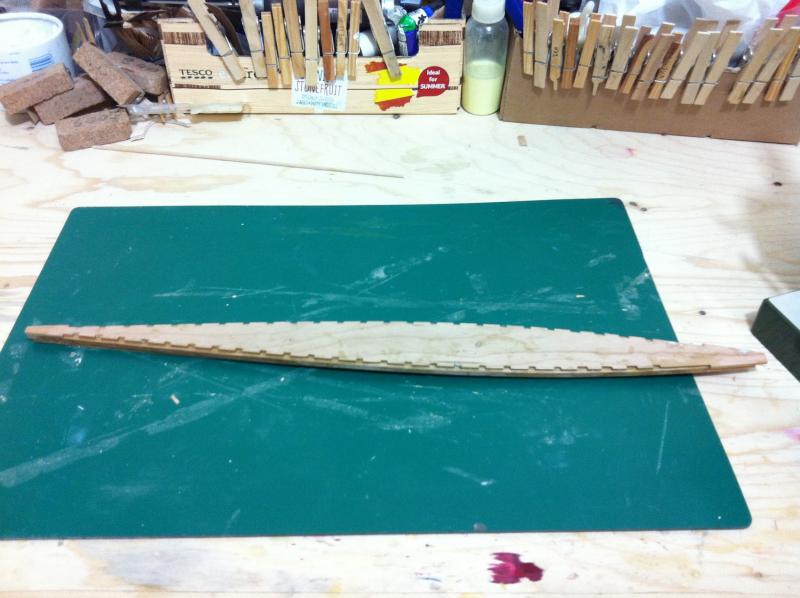

However, when I test fitted the metal keel I saw the problem. It would not align properly.
When I initially glued the paper templates to the wood, due to their large length they rested slightly towards one side and the parts came out asymmetrical. Especially the bottom one, where the metal keel would be glued, was quite bad. As the wooden keel essentially brings the whole boat together, I had to make it again. This was indeed an expensive mistake!
So, all 3 sheets were carefully cut and checked straight. Now the metal keel sits nicely aligned.

- hexnut, cog, Mark Pearse and 5 others
-
8
-
Thank Druxey and Patrick, yes it was about time to start building!
Patrick, I actually do not smell the wood at all as I have taken the dust issue seriously and wear the 3M mask all the time while I work. I already had to change the filters as they clogged so I probably produce massive amounts of wood dust. Small price to pay though!
I have started work on the wood keel which will be a laminate of three sheets. The uppermost will pre cut to incorporate the rabbet (or most of it as it is deep and will continue to the middle sheet) and also the notches for the ribs, all appropriately beveled. I must say it is hard and delicate work!

I also slowly progressing on the sternpost, I laminated all 10 pieces and I have marked the intersections with the rebate line. It still needs tons of delicate work but it looks promising.

-
Elijah, I would suggest hand sanding. Power sanding on things already glued can be risky as you can sand more than you would like in no time. I think if you use 120 or 150 grit you ll get it done vey quickly and have better control.
I usually take cork sanding pads from DIY shops and slice them in pieces and load strips of sanding paper with flat head board pins. For concave staff, I just use any round object to load the sandpaper strips.
Regards
-
Thanks Patrick, glad to have you along!
I have just started creating sawdust but it is clear that working in such a large scale is a challenge. My modelling tools are reaching their limit and sanding or filing by hand is difficult or even pointless in these massive timbers. My homemade disc sander is brilliant though and got the job done.
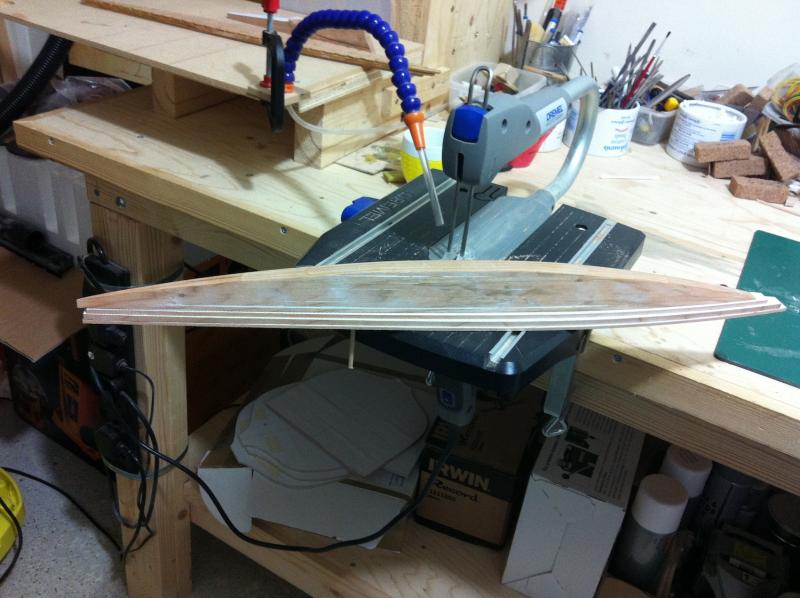
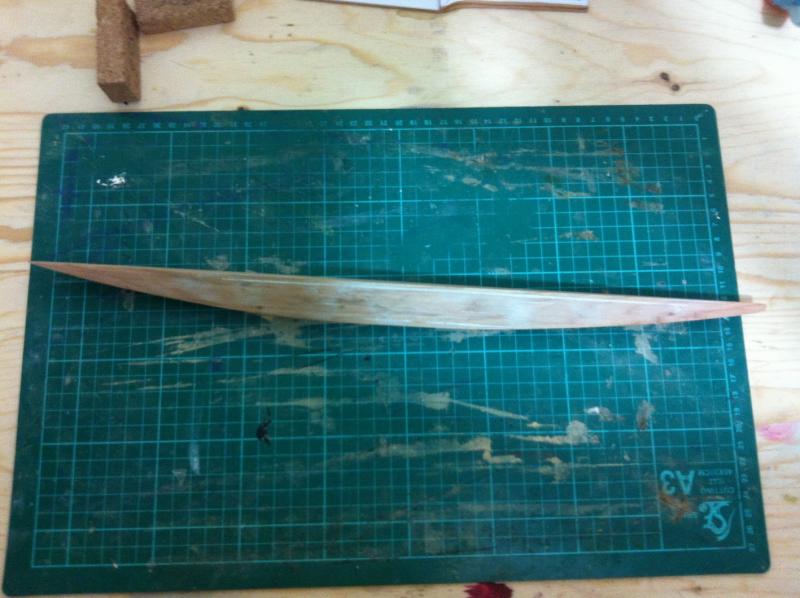
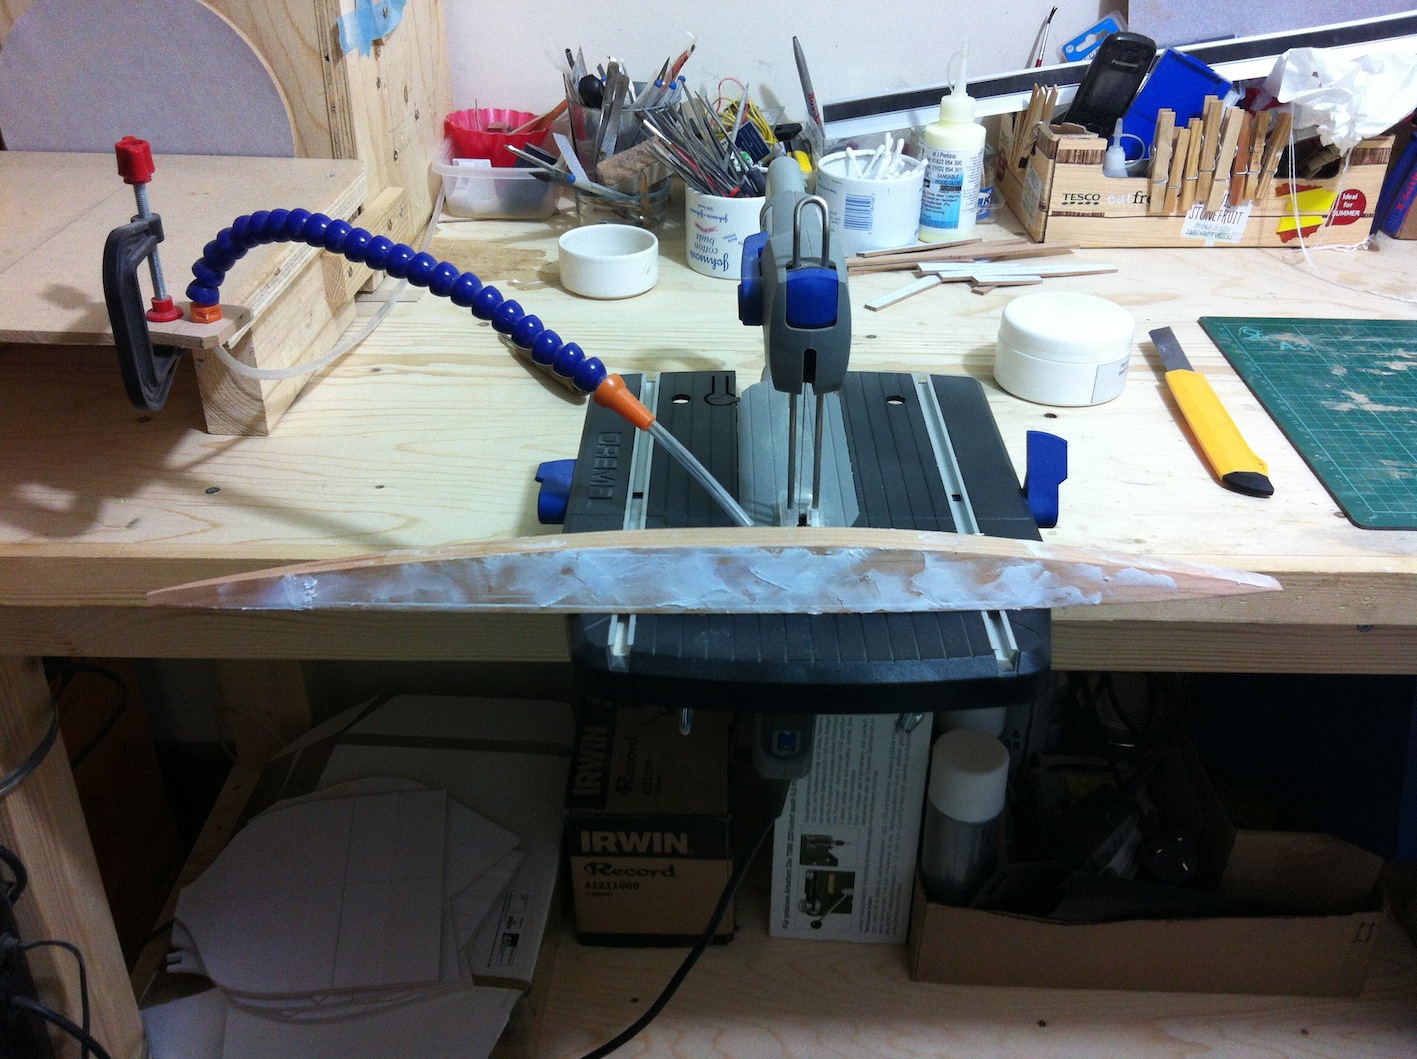
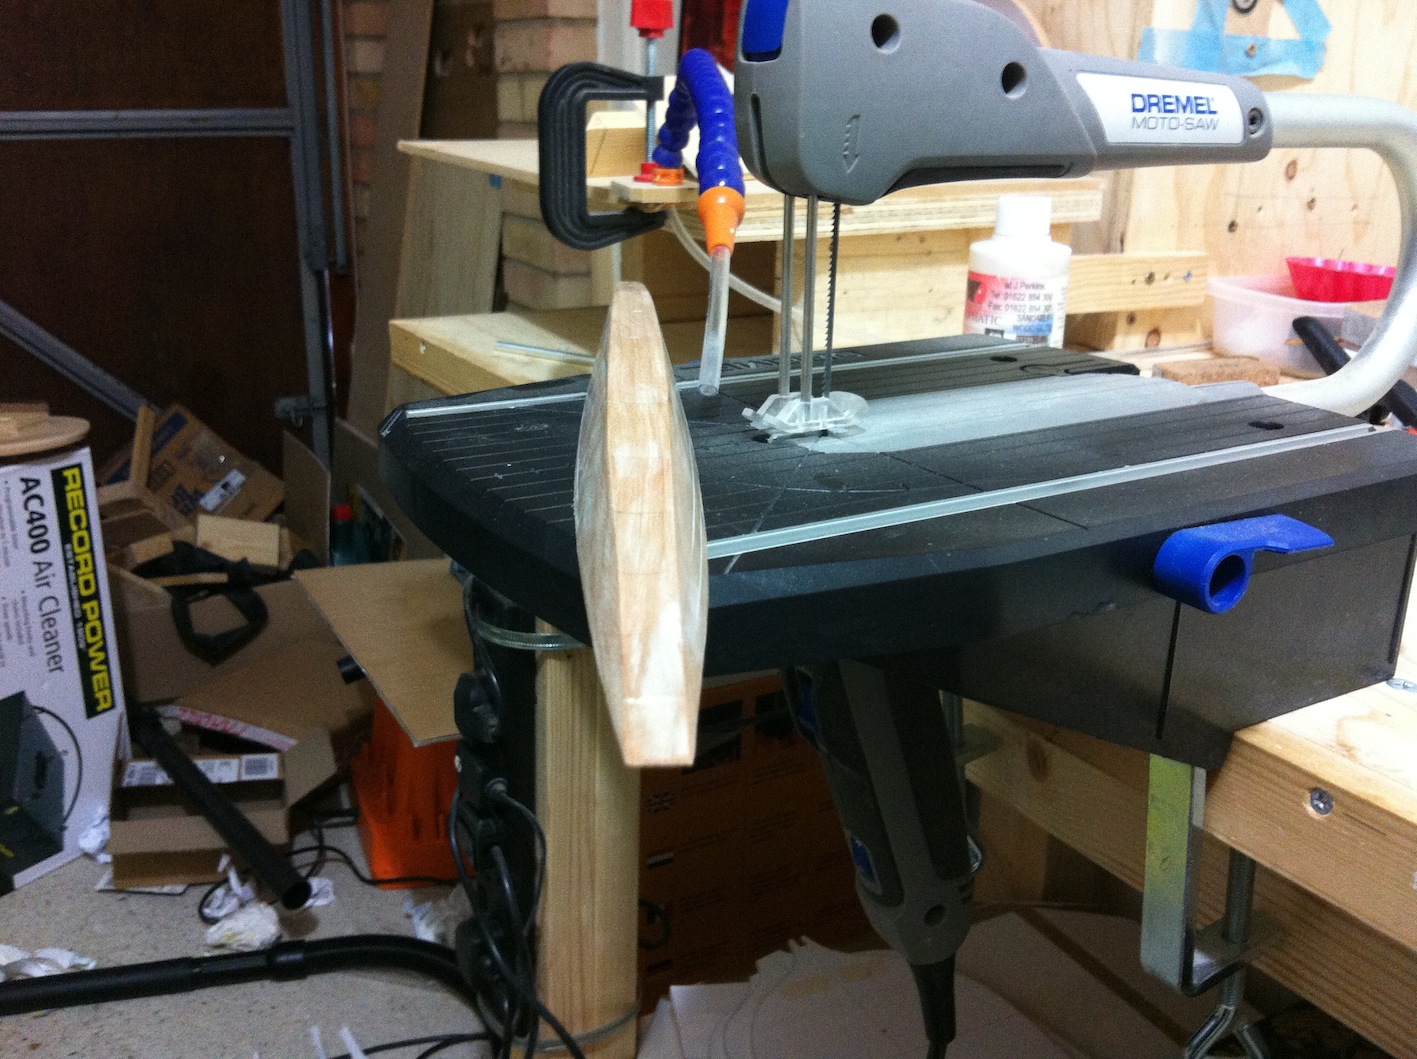
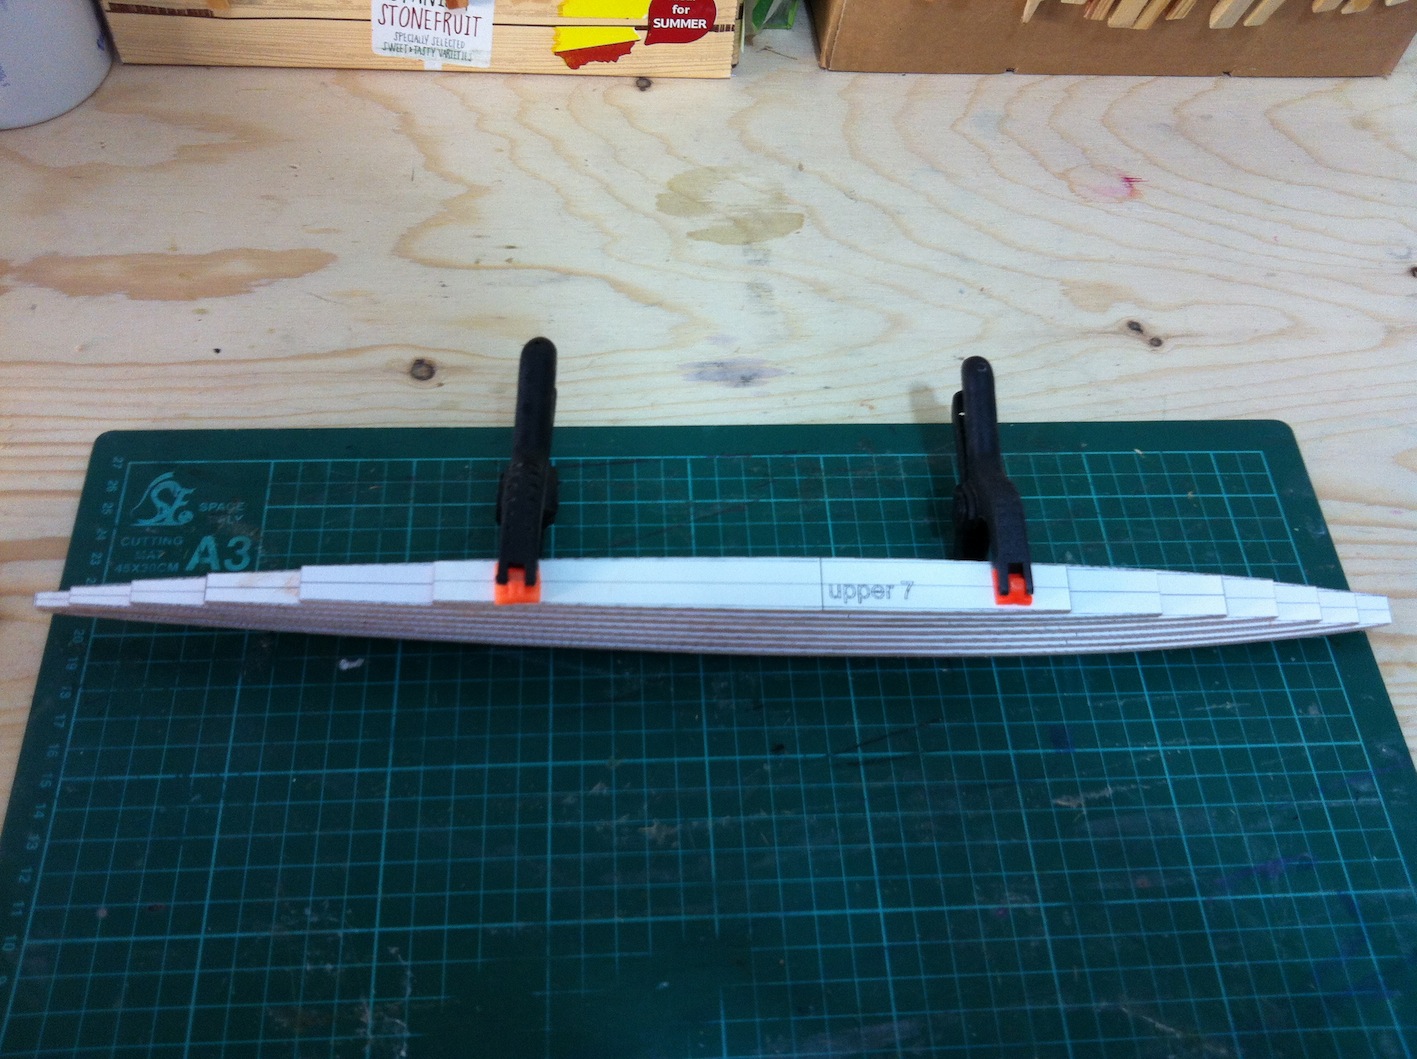
I laminated the sheets for the metal keel which was a surprisingly fiddly job. Surprisingly also, the laminate came out bent which I did not expect as the sheets were 4 mm thick! I managed to sand the base flat which needed a simple jig to keep square and then shaped and sanded it smooth. Then it was time for some fairing

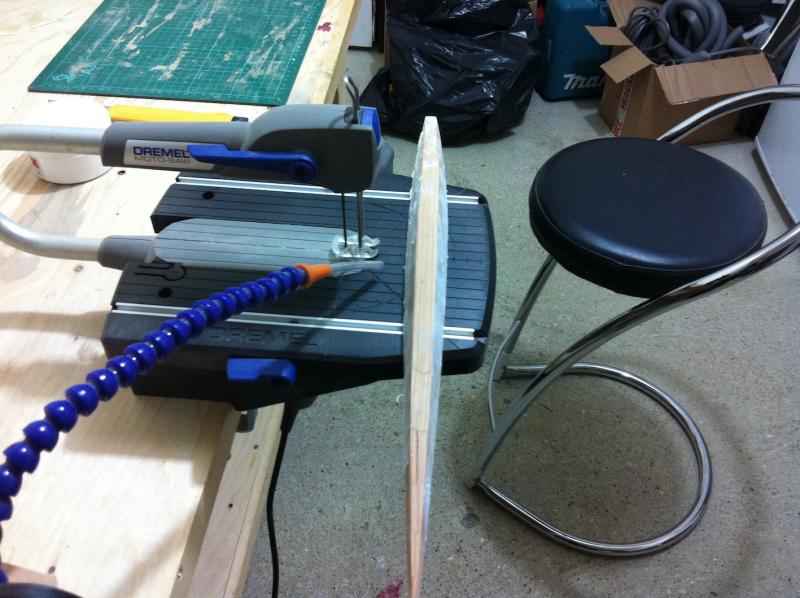
And after the final sanding to 400 grit, it looks symmetrical and smooth and has I think a reasonable shape.
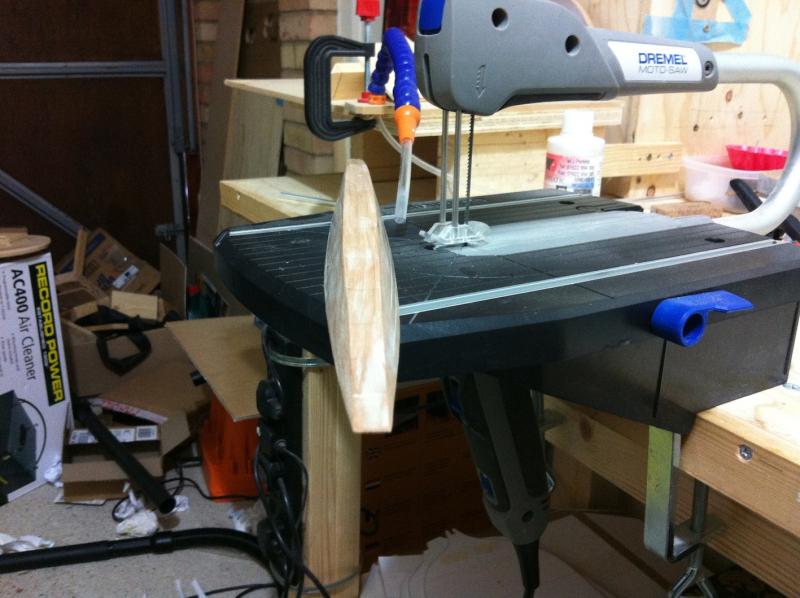
Now it is time for the wood keel which will be an even larger piece of solid timber! The rabbet and the notches for the ribs (most of them at least as some will be on the stem and sternpost) will also be cut.
I also started to laminate the pieces for the sternpost. Sanding it and cutting the rabbet will be much more complicated though.

By the way, cherry is a lovely wood to work with.
-
-
-
-
-
Ok, I would like to share my experience buying wood from Massiveholz on line shop which is based in Germany.
All orders need to be made via email and I must say there is a massive variety available. All wood I received so far has been great quality.
I asked initially for some wood samples, 10 strips of various woods 2 x 10 x 1000 mm. Then I placed a large order, however I received more wood in most dimensions (it seems that round everything to multiples of 10!) and some other dimensions were less or missing. I emailed Frank and I received the missing wood but also some more strips I needed and asked to be added on, free of charge.
Packaging was very good and I received all orders within a few days. I would think prices are competitive .
Overall this is an excellent place to buy your wood if you are this side of the pond.
- Canute, mtaylor and zoly99sask
-
3
-
Dear all
Finally some proper saw dust!
My massive wood order has come in, there are some issues which hopefully will be corrected. Also all my fine dust protection is in place and I have made arrangements for insulation of my garage as the winter is not far off.
It is the first time I used cherry but I think it is a very nice wood. Holds an edge well, cuts and sands well and is hard but less hard than pear so easier to work with. It has a nicer colour and slightly more grain than swiss pair.
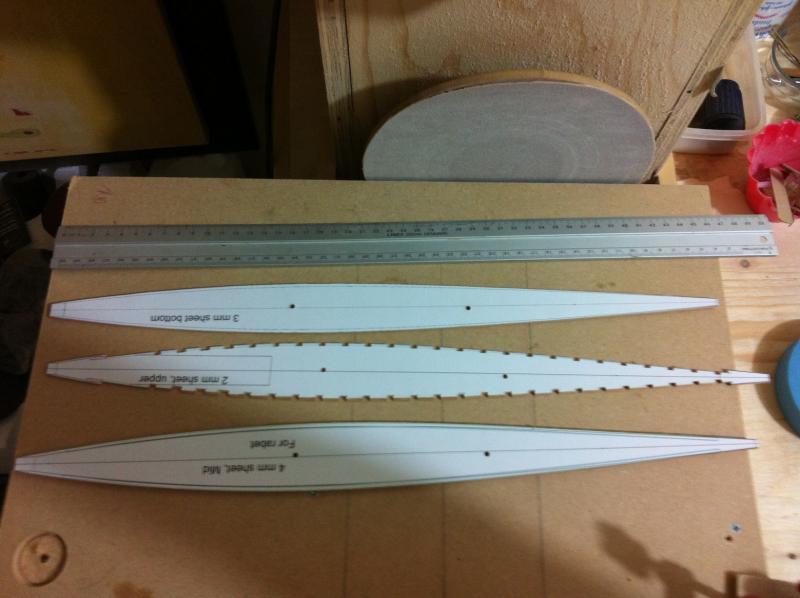
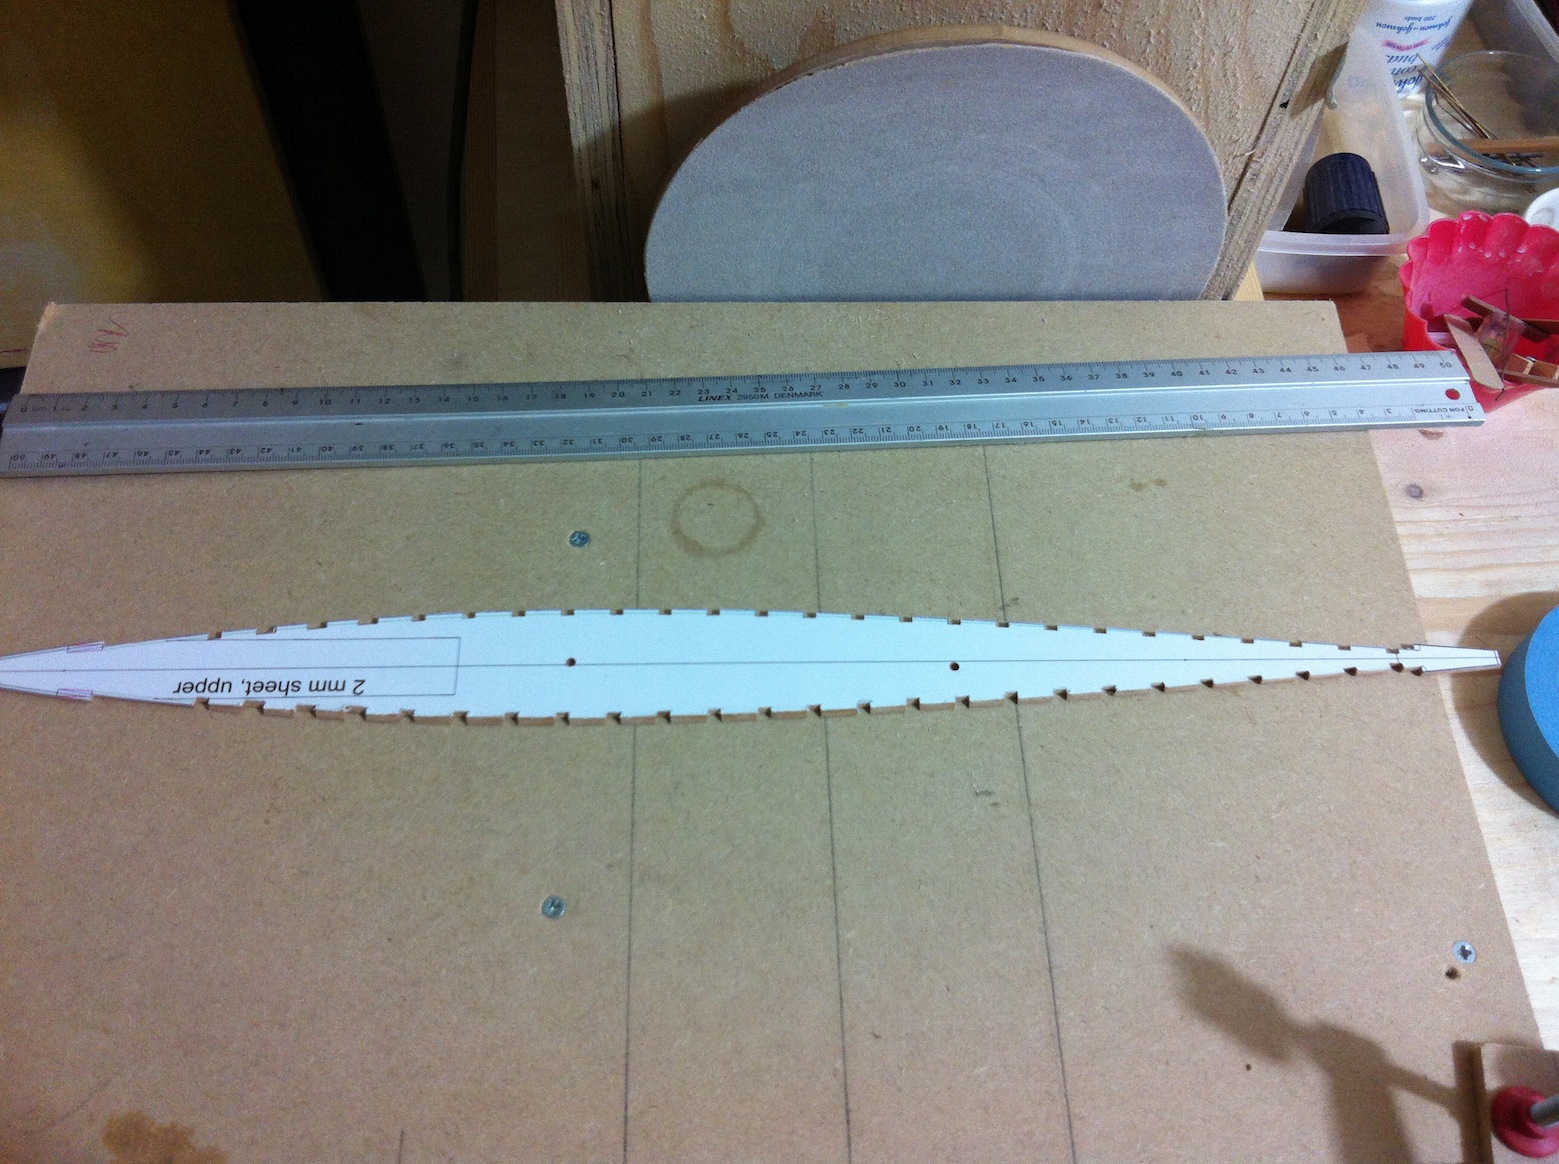
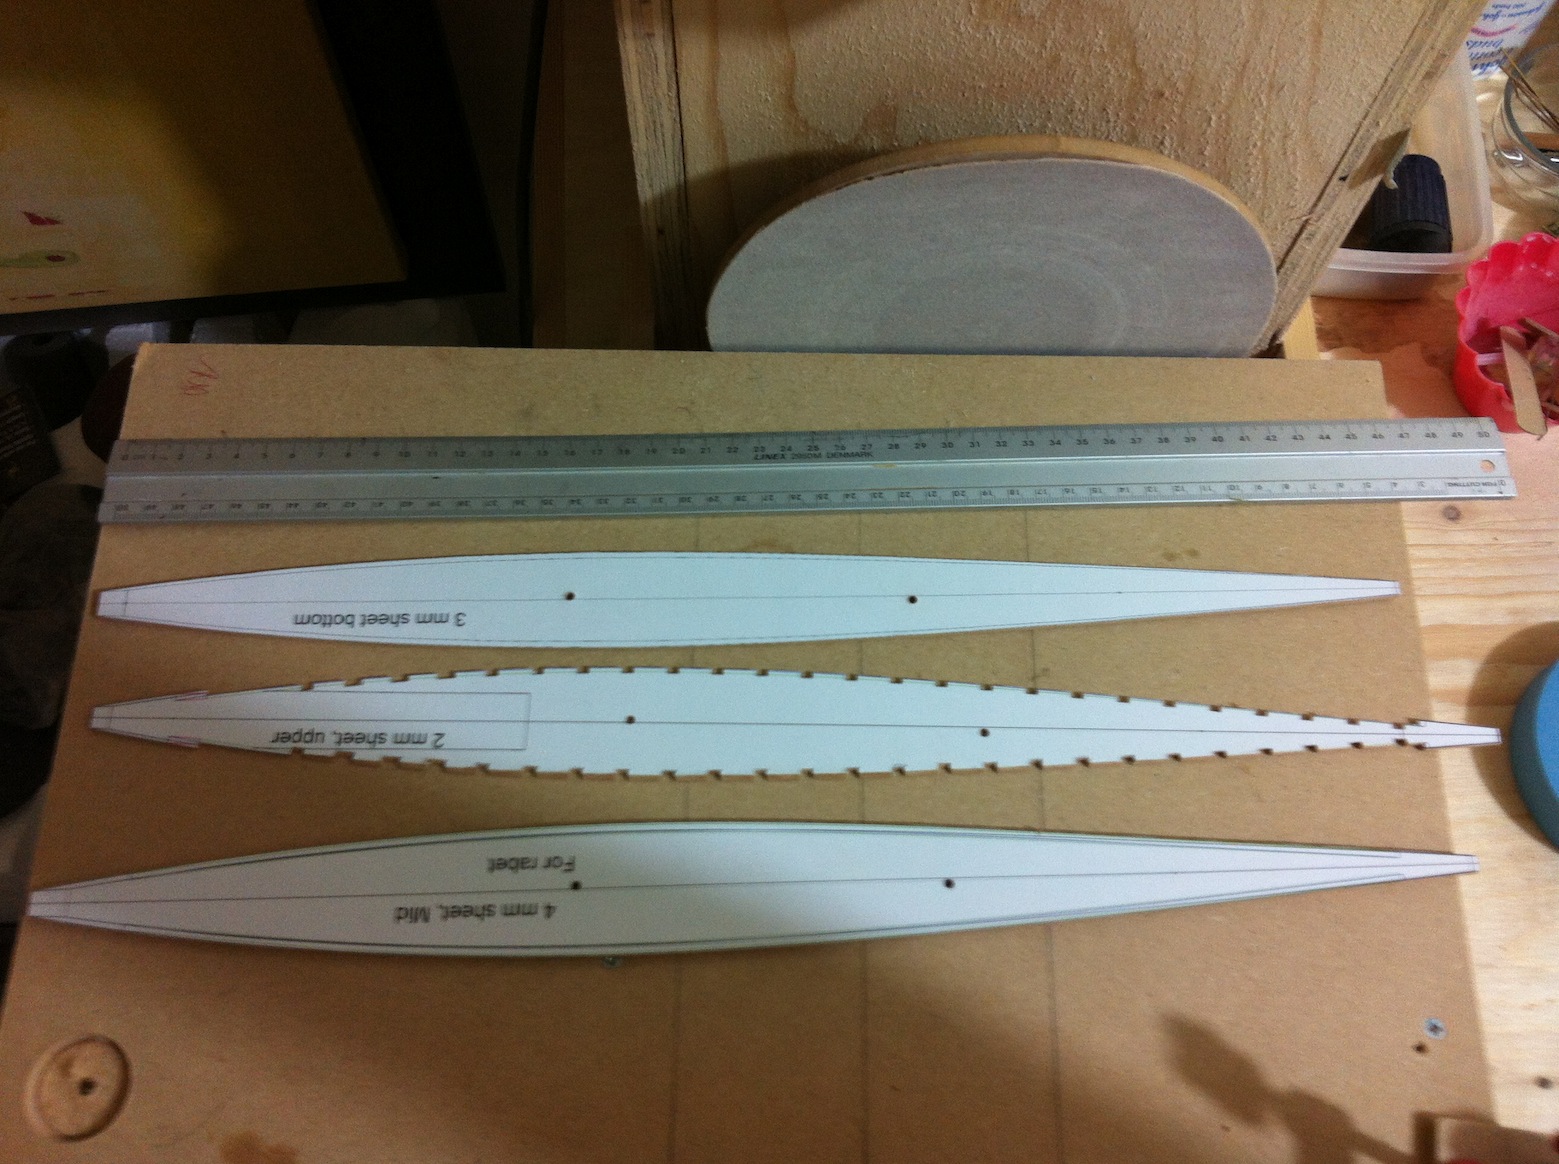
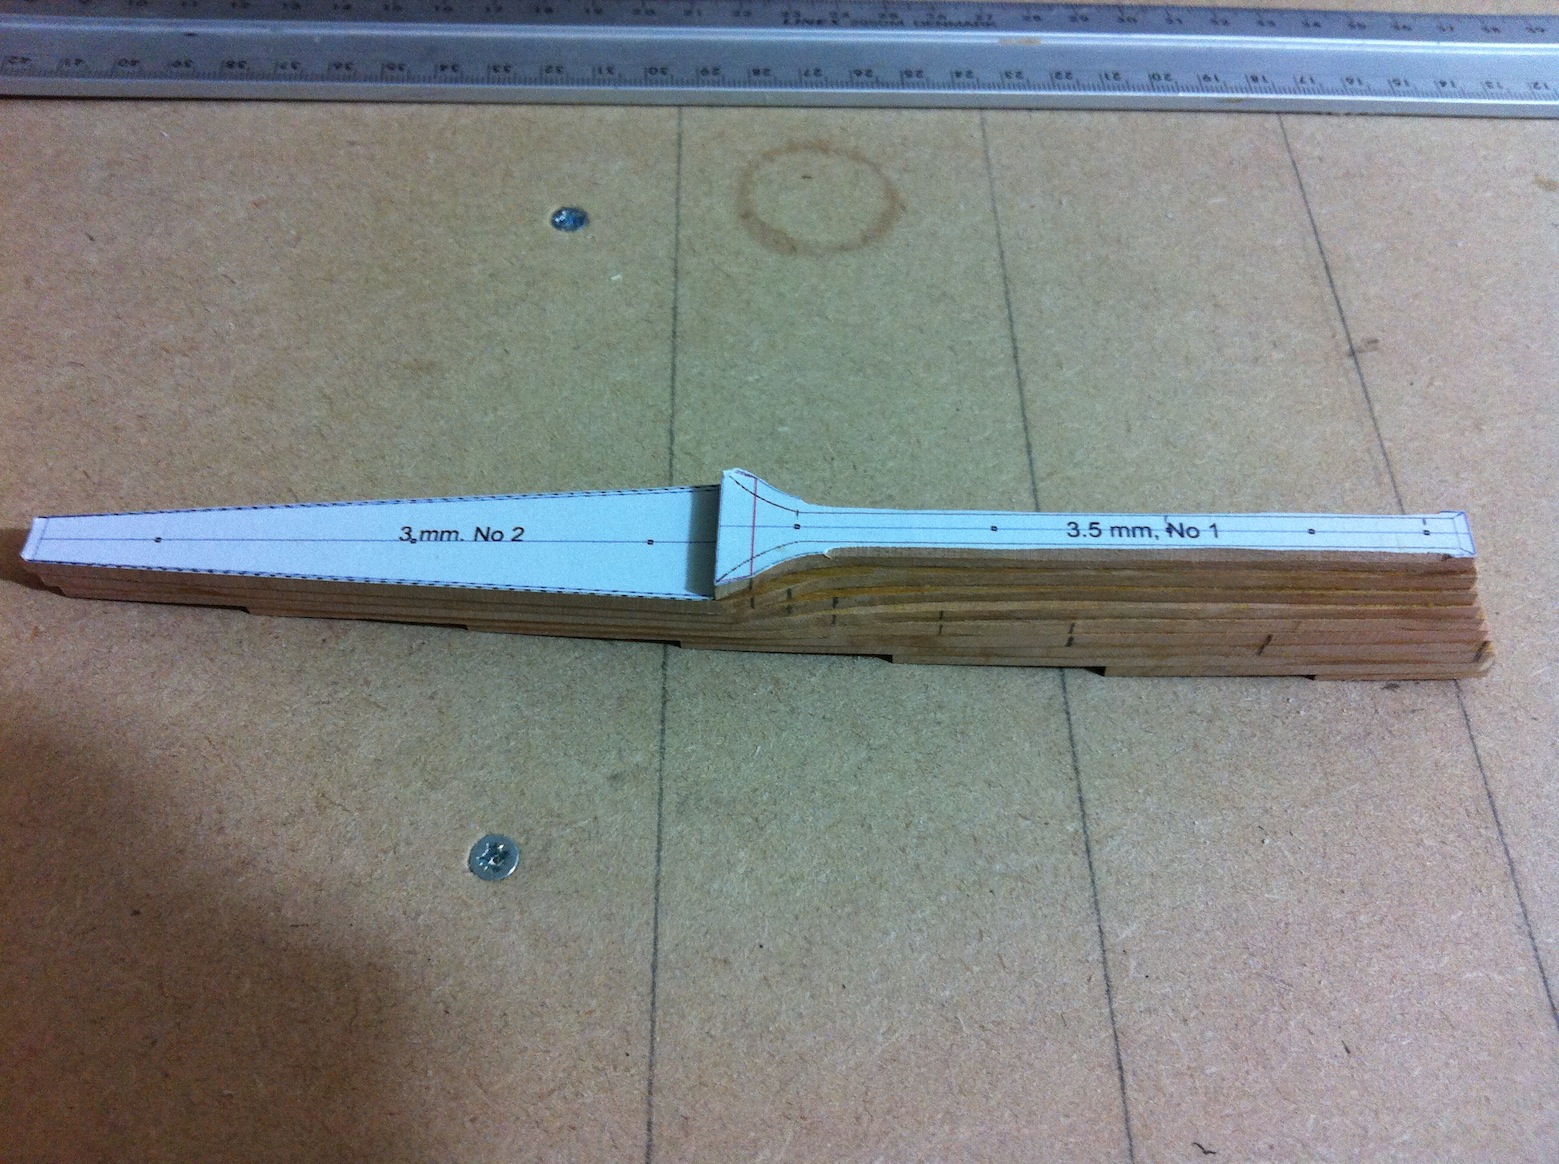
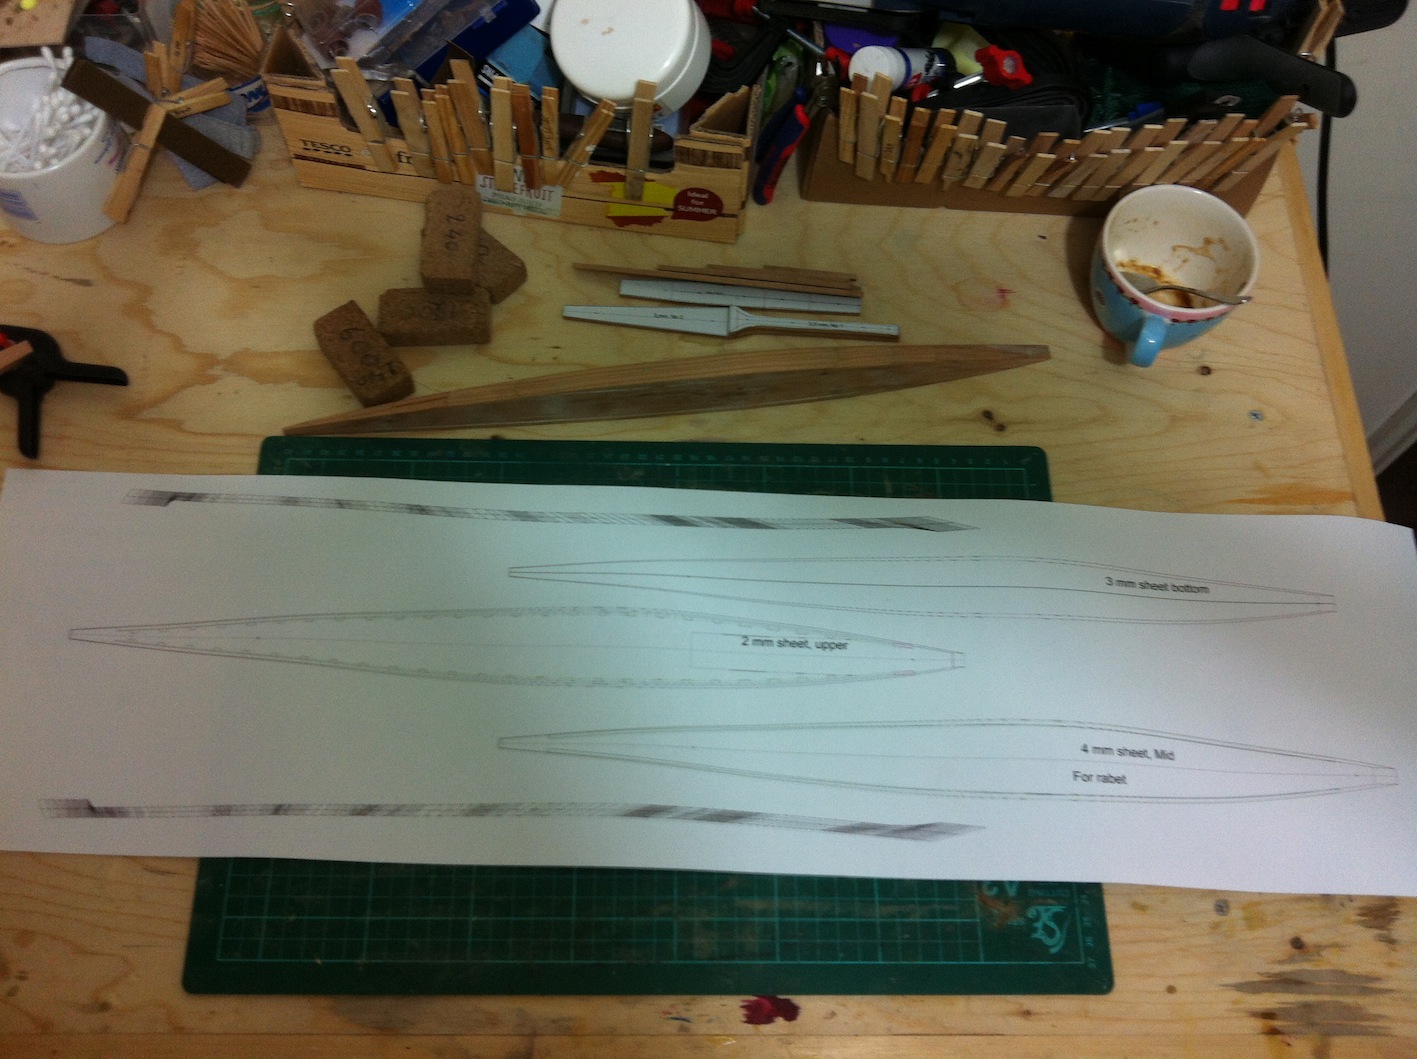
I cut the sheet templates for the metal keel and I think it will work out fine. There is still a lot of sanding to be done for the bevels so that when all are glued together and a final sanding is done, it will look like a solid piece.
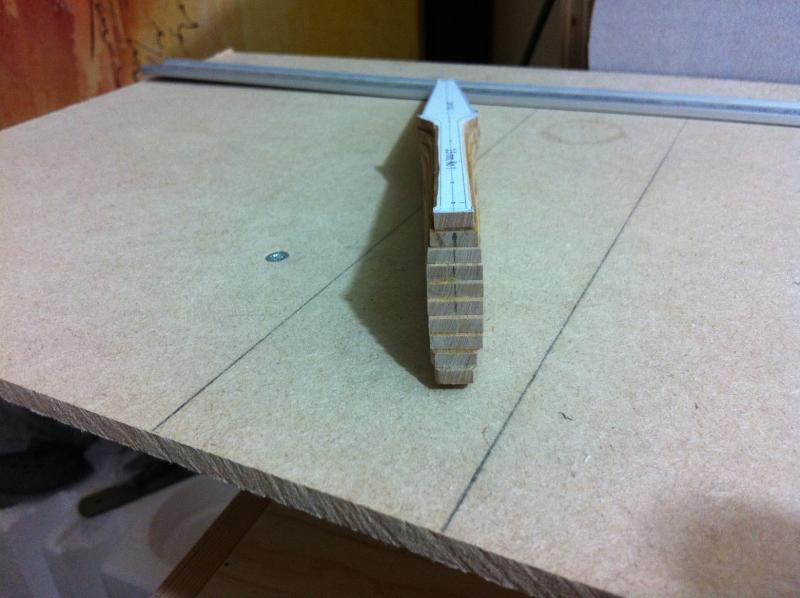
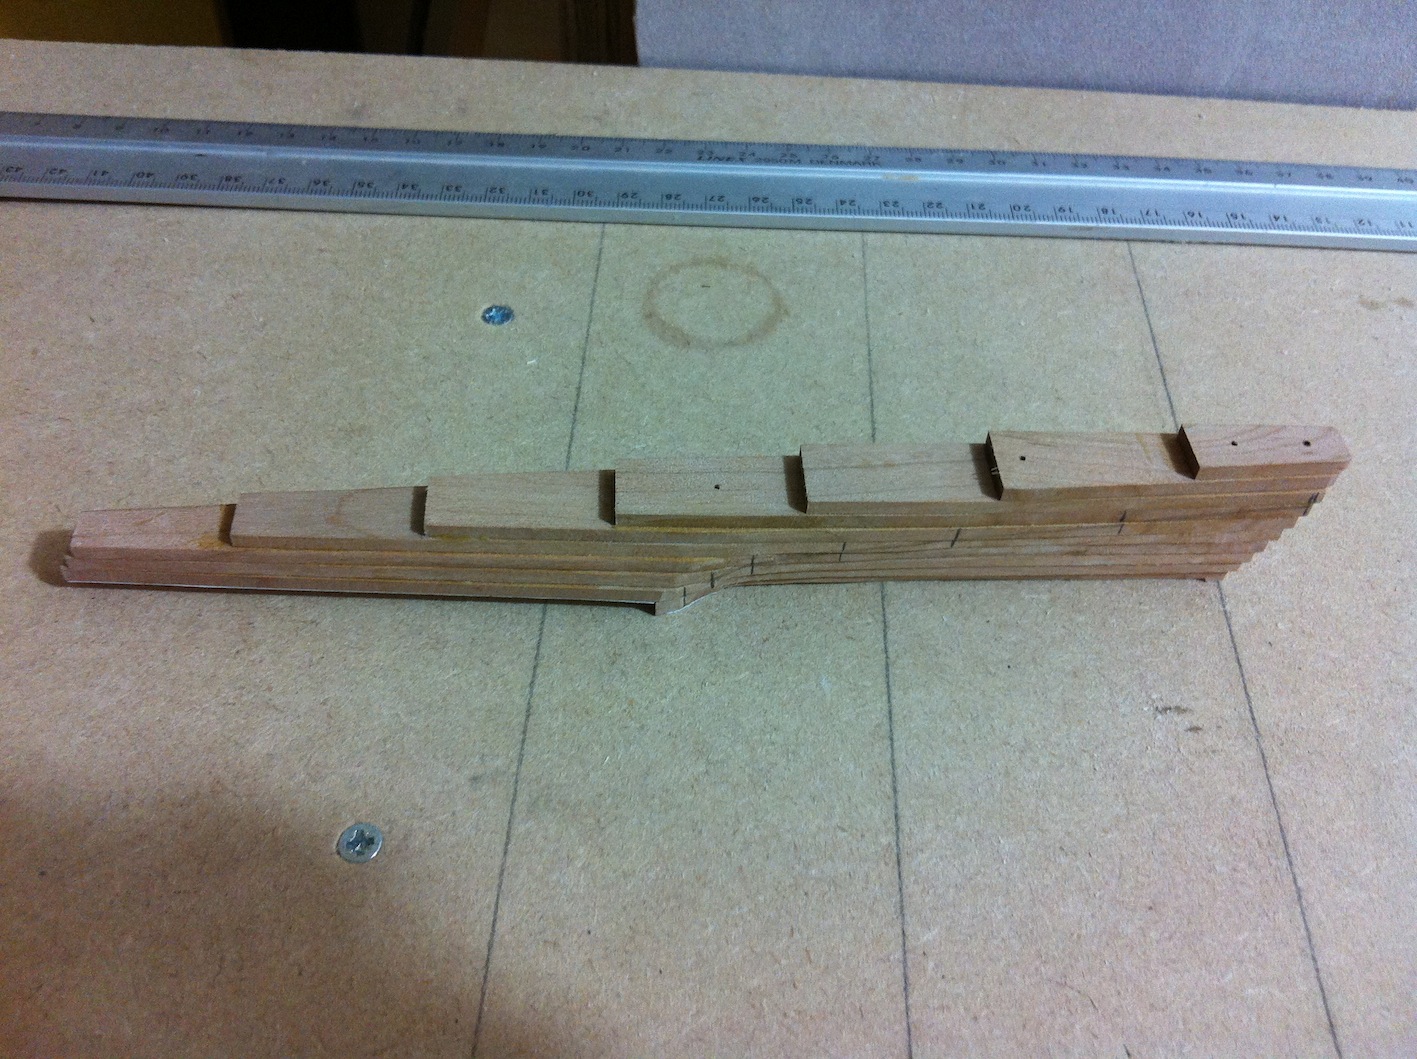
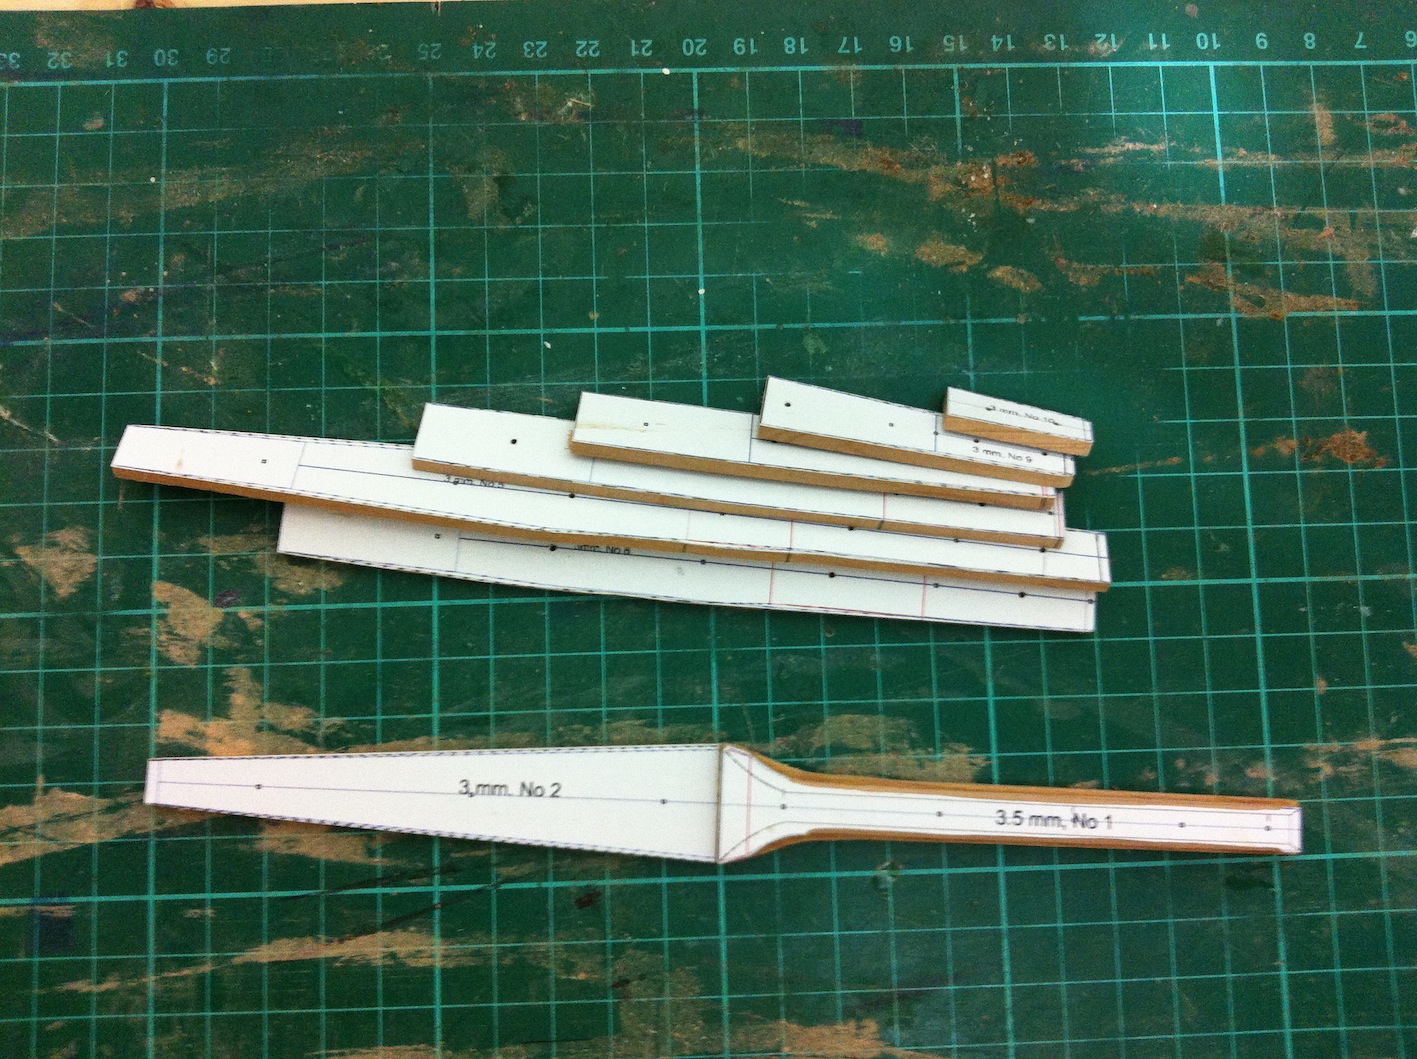
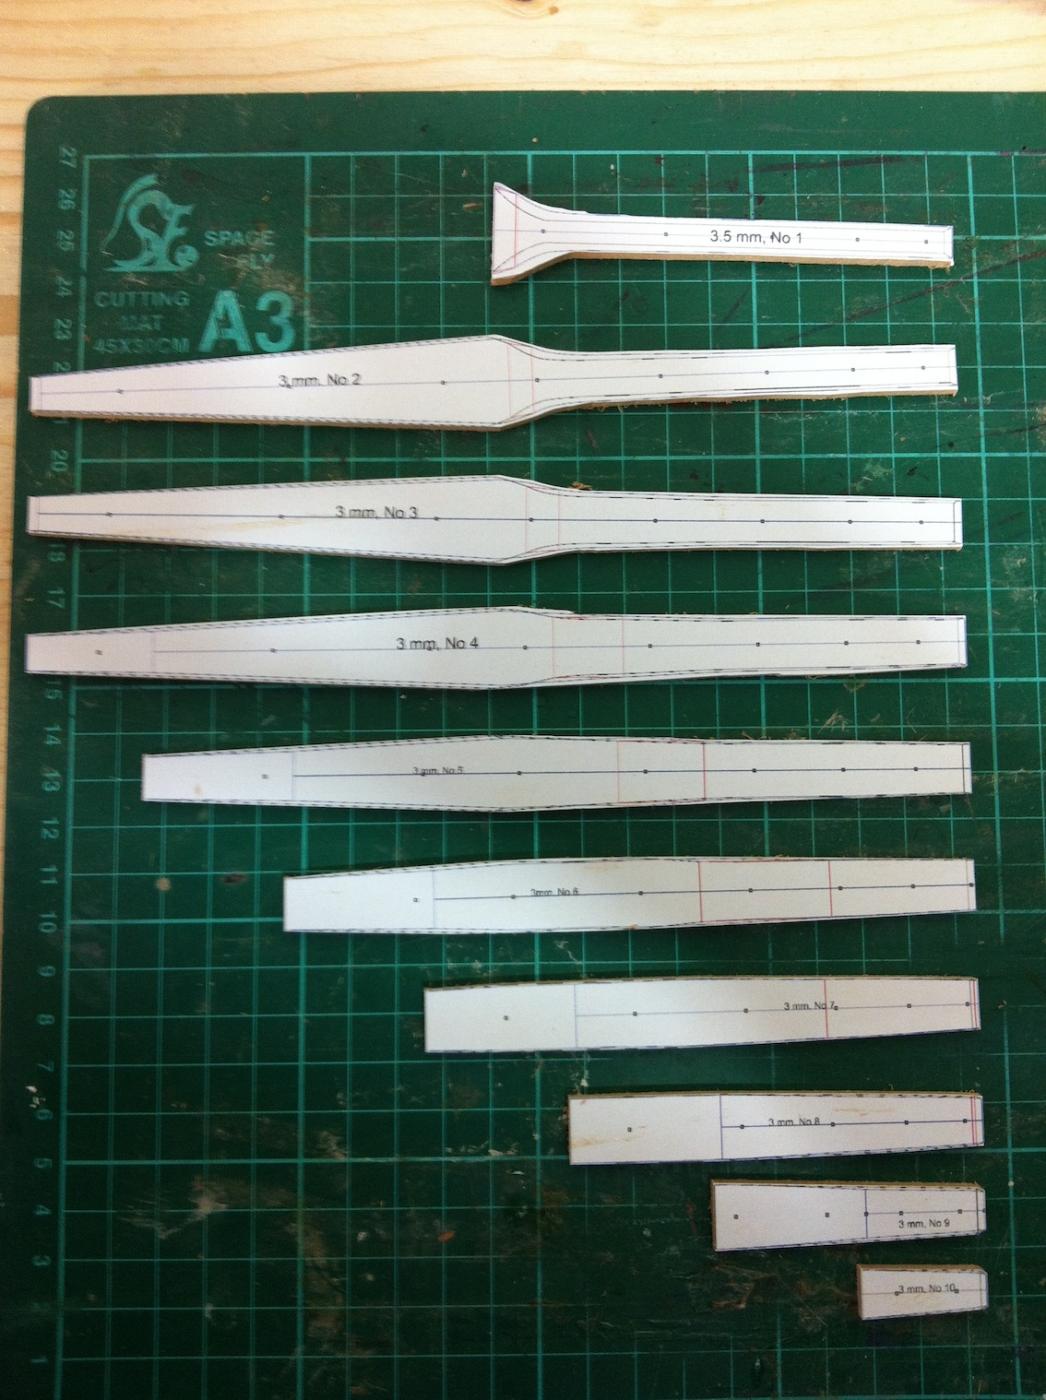
I also think I found a solution for my complex sternpost. As it is a huge piece of timber, even in the full size boat it would need to be built up of several pieces. So it will be made from 10 sheet pieces, all the bevels as well as the rebate line will be much easier to cut.
The next photo shows all 10 pieces cut, still needing final trimming and of course all the bevels to be sanded in.

- captainbob, hexnut, Omega1234 and 5 others
-
8
-
-
-


Deben 5-tonner by vaddoc - FINISHED - Scale 1:10 - a Whisstock yard design
in - Build logs for subjects built 1901 - Present Day
Posted
Thank you all!
Yes, I suspect building will slow down a lot but I will try not to give up. Another alternative might be to get a monograph of a 2 mast schooner or a frigate (I really want to make a fully frame model one day) and prepare the whole boat on CAD. By the time I am done, both girls (I have also an 1.5 year old) will be well grown up!
Regarding the spirit levers, I find these very versatile. I can leave them on and arrange the next frame, and just take a pick and know whether the previous one has shifted out of position. They are small and can fit anywhere. A set square could not be used as there are two thick strips of wood at either side at the base of the frames, plus a lot of epoxy everywhere. And for just a few plywood frames, making a jig seemed too much.