

.jpg.f26acc9a74319261612561bfa7da1303.jpg)
vaddoc
-
Posts
1,527 -
Joined
-
Last visited
Content Type
Profiles
Forums
Gallery
Events
Posts posted by vaddoc
-
-
Yambo and Bob, the primer certainly did its job, but I was surprised how bad my carefully sanded hull actually was.
Druxey, the caulking suggestion is an excellent one but I read your post after I had gone into a putty frenzy. Still, it might be needed as I can't get a clean edge at the joint. I tried steel wool but the improvement was marginal. What would you use for caulking? Would it need to be used also all along the keel and planks as well as the stem?
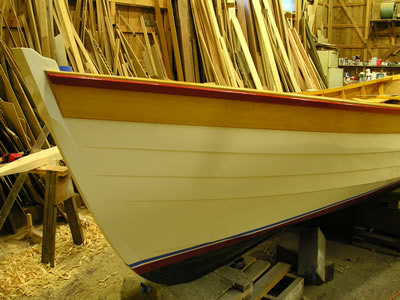
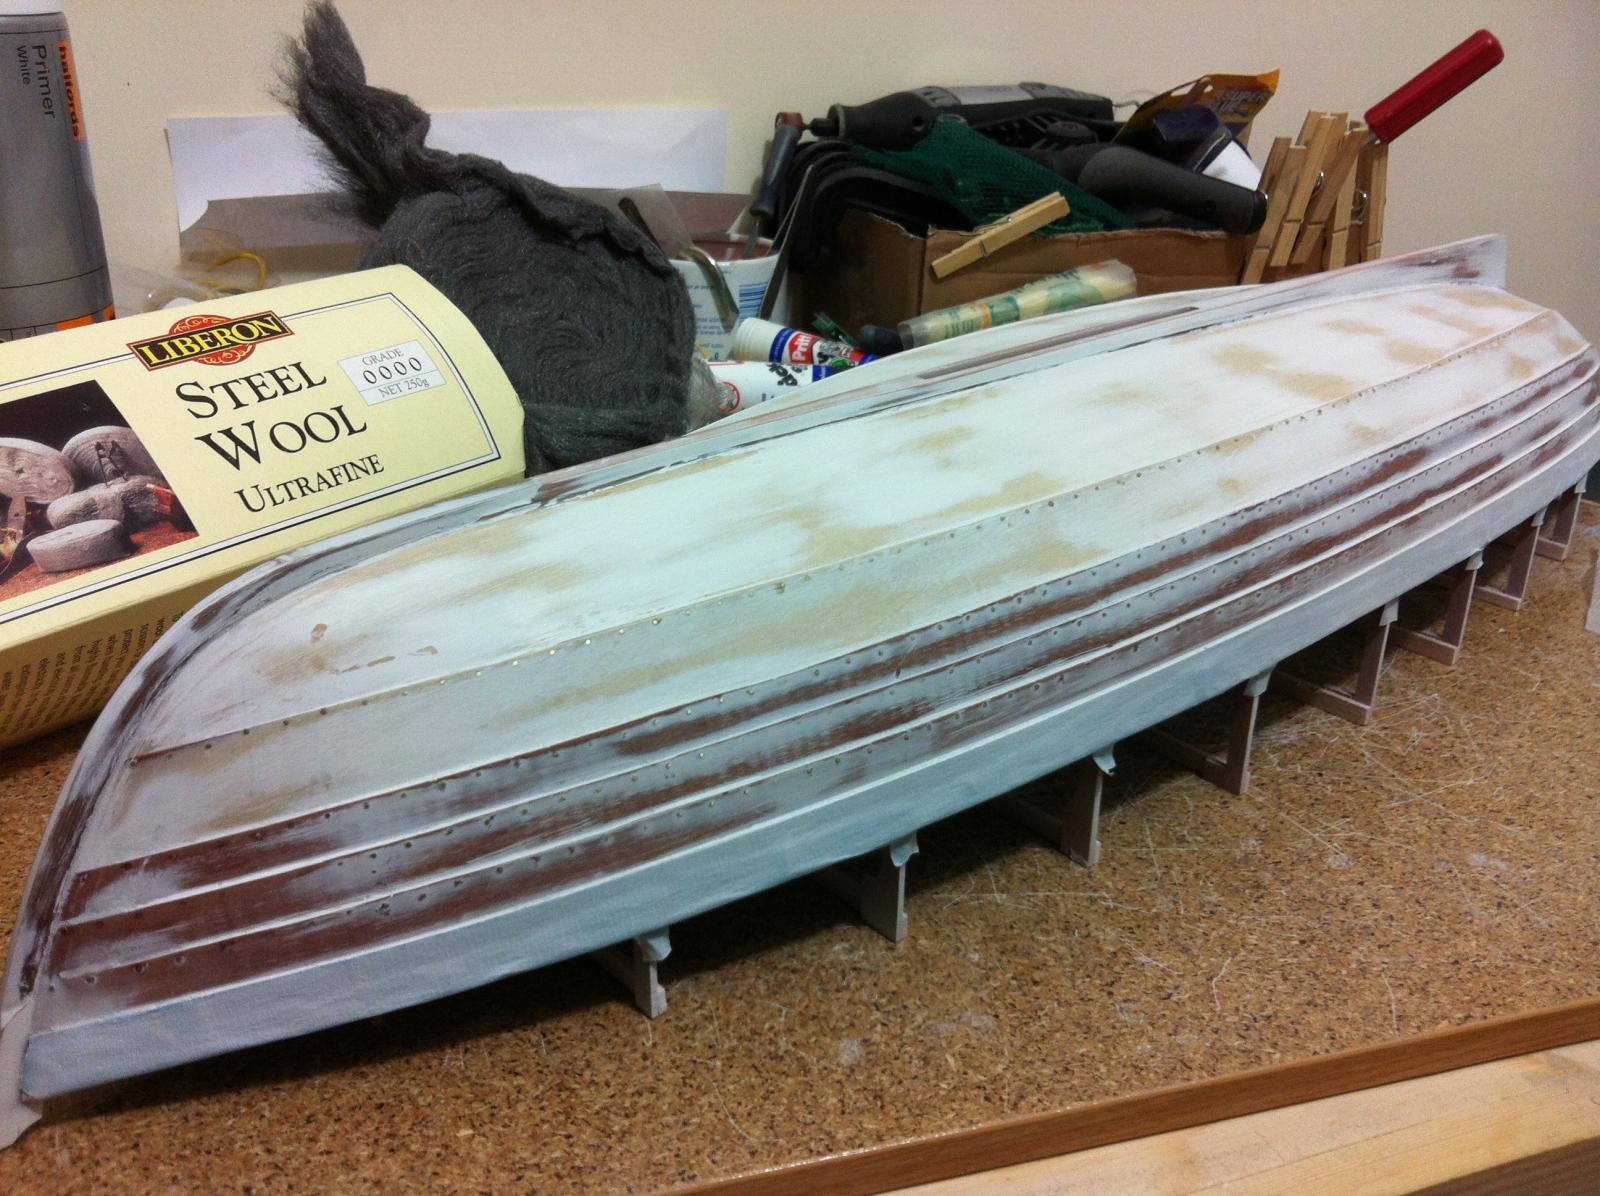
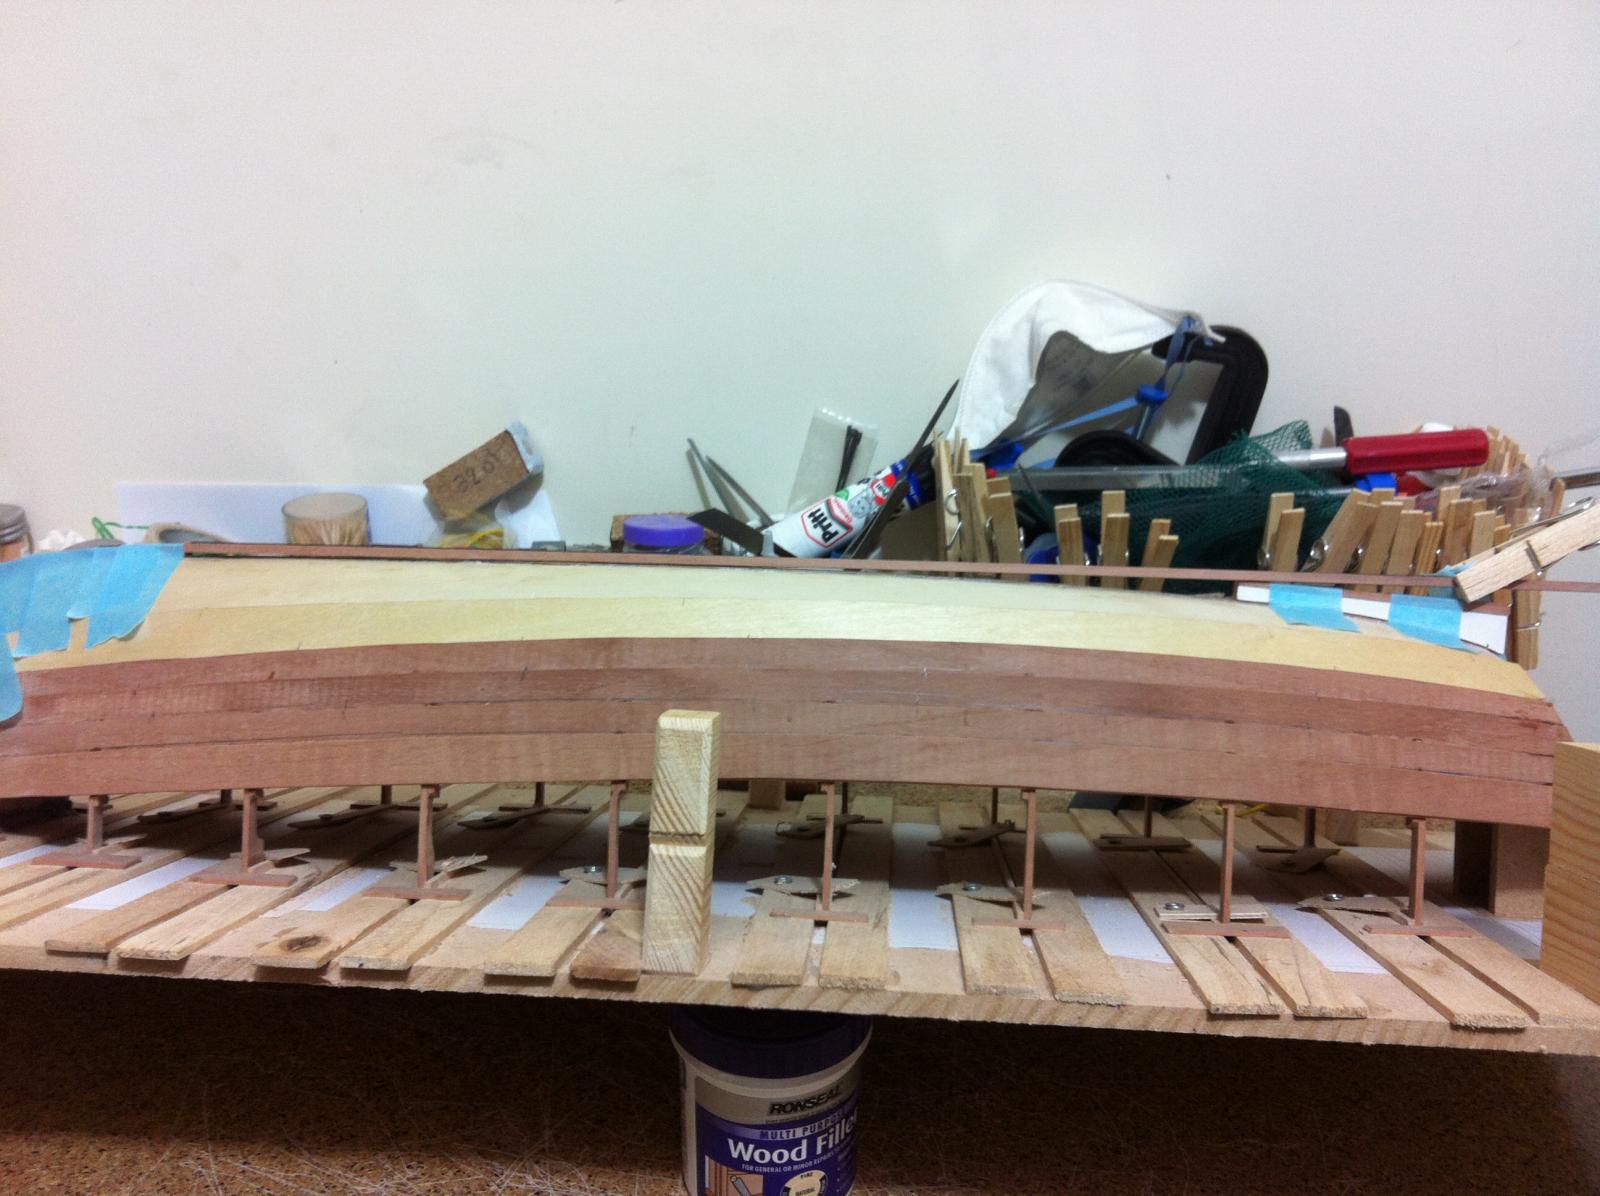
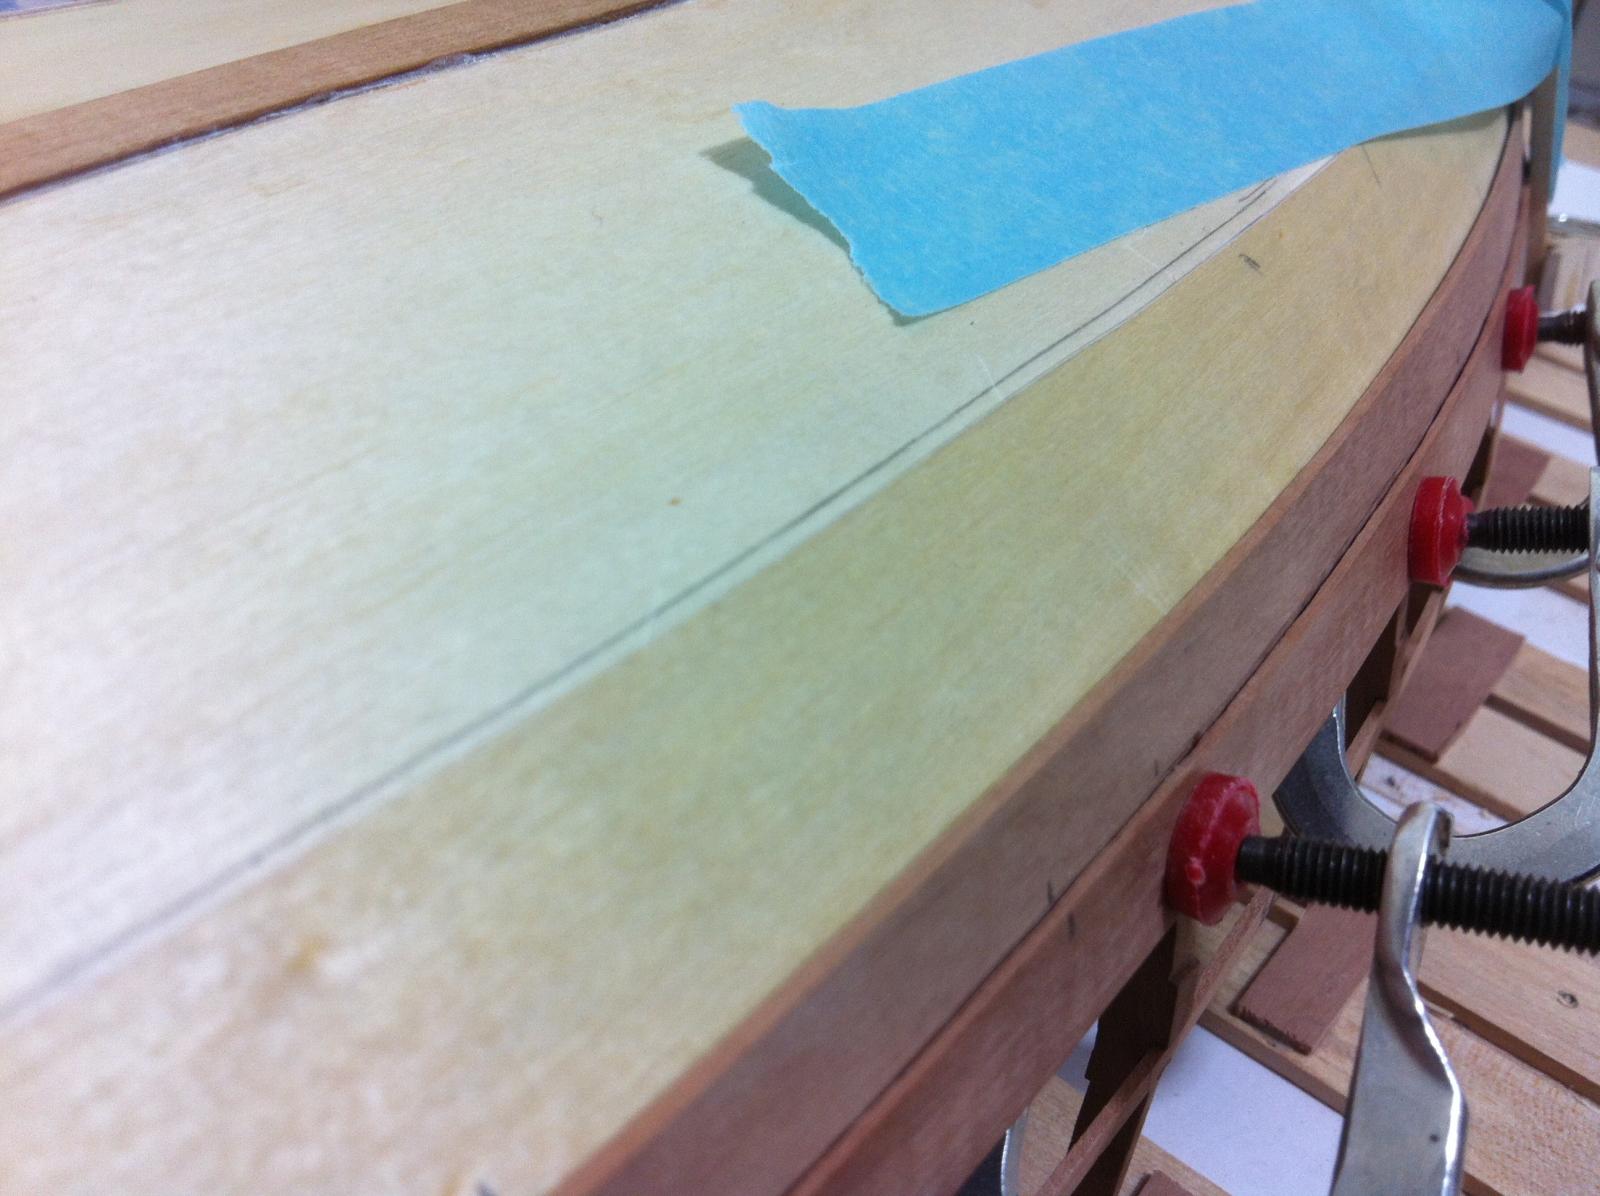
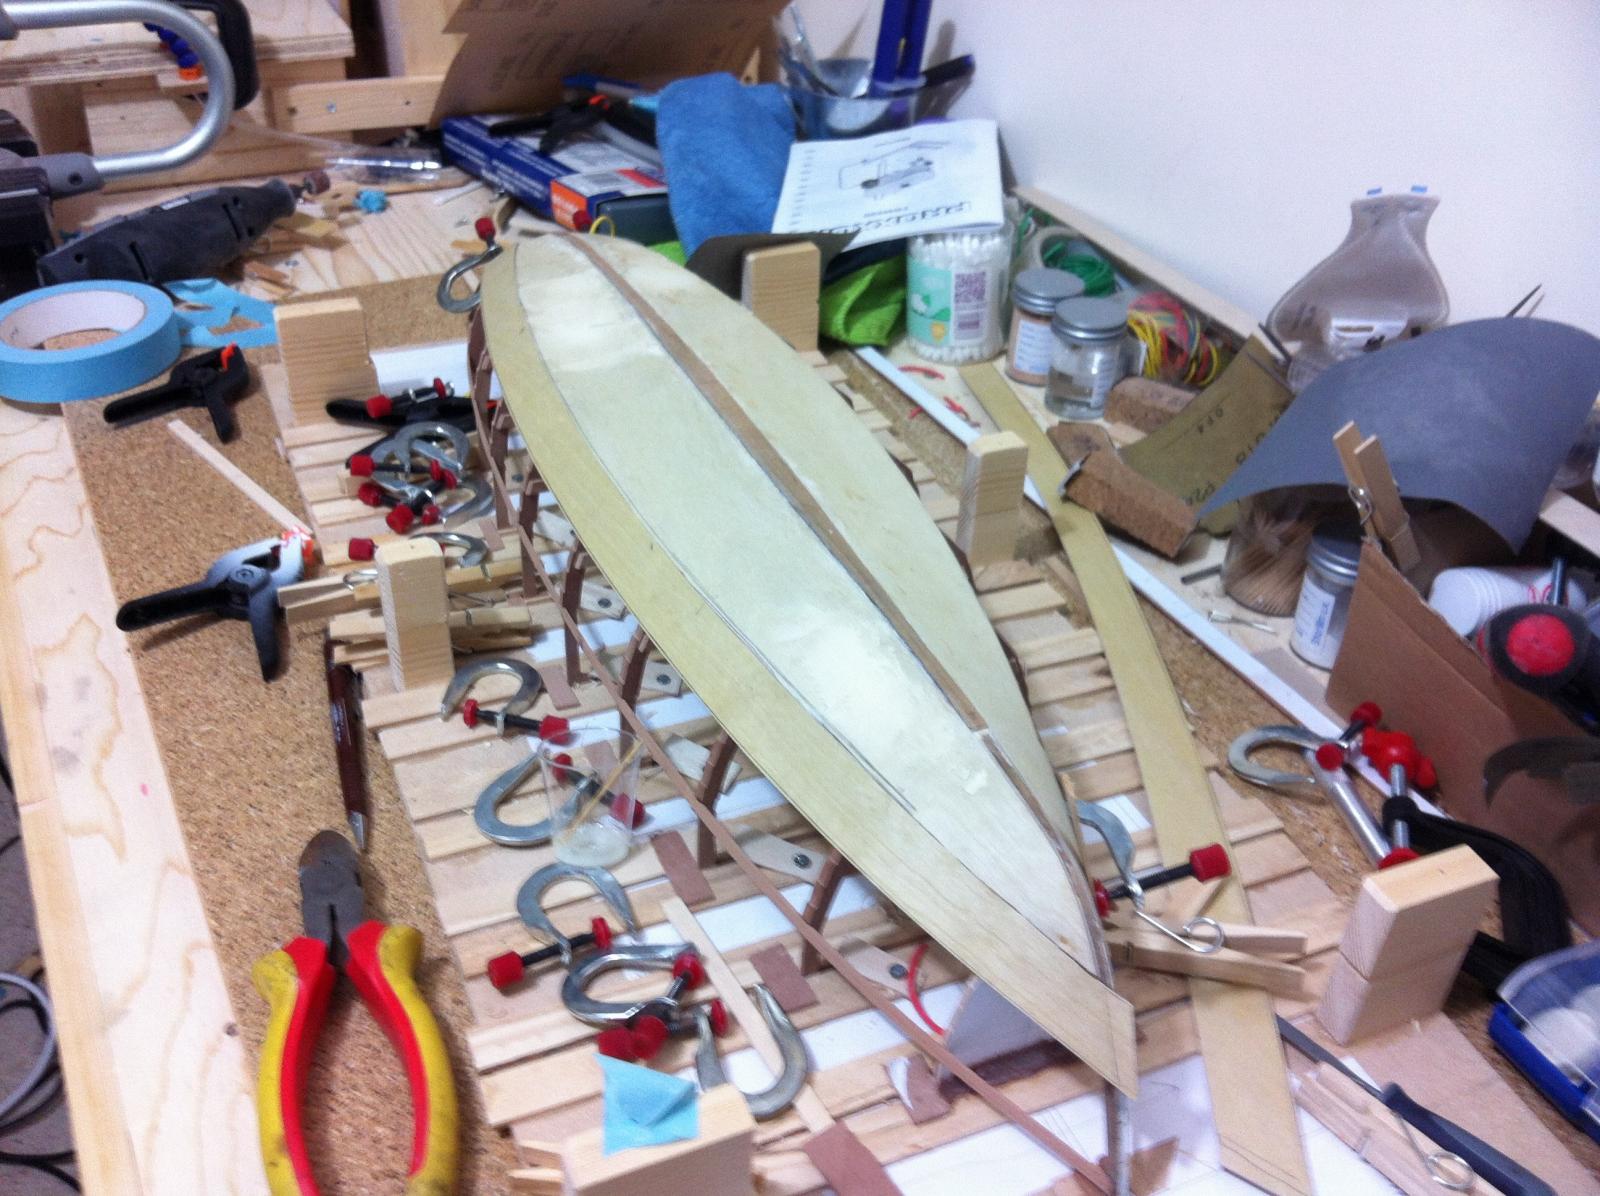
This is how it looks after the final sanding to 320 grit.
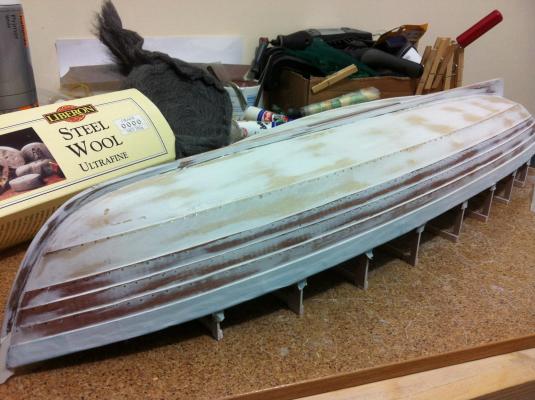
it looks smooth but still not perfect. This is a critical stage and time spent fairing will be paid back many times after painting. I am sure more sanding and fairing is needed. Also, I am concerned the edges of the planks might get rounded off with all the sanding.
-
Your suggestions are always most welcome Mark, looking at the pics I feel you are probably right. It did not cross my mind to weather the boat but it does looks like it has had years of use already. I am afraid though I do not have the skills yet for a proper weathering job and would not want to try on this particular boat, it has taken me 10 months to reach this point!
Besides, all the frames and interior woodwork have already been sanded to a shiny 400 grit. I ll give it a try to get a smooth surface and if not possible I will probably need to build another small boat out of the same wood to experiment with weathering.
But I do agree, a model of a beat up worn boat is so much more interesting than a shiny new one!
-
Many thanks to all for your support and comments!
The built continues but problems start pilling up again! I am afraid the photos that follow are not that great.
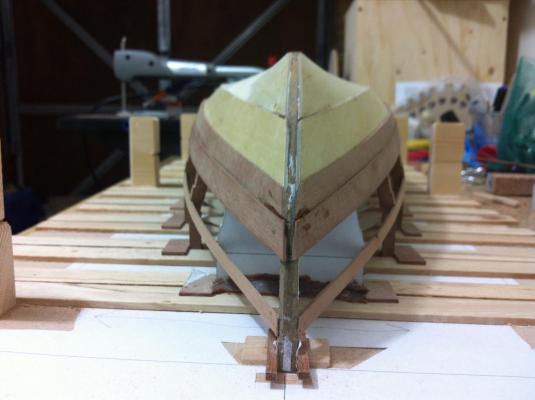
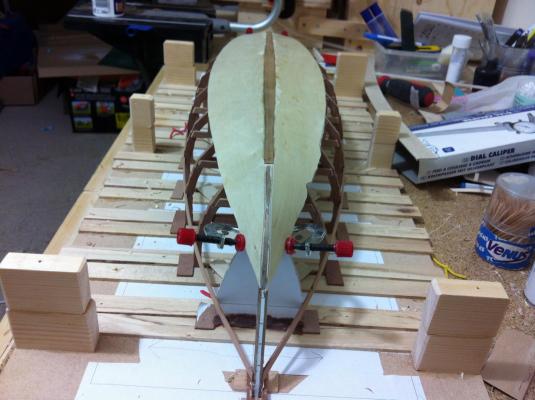
On the plus side, I seem to have avoided having a flat sheer towards the bow which I understand can happen if the plans do not compensate for this visual effect by increasing the curve.

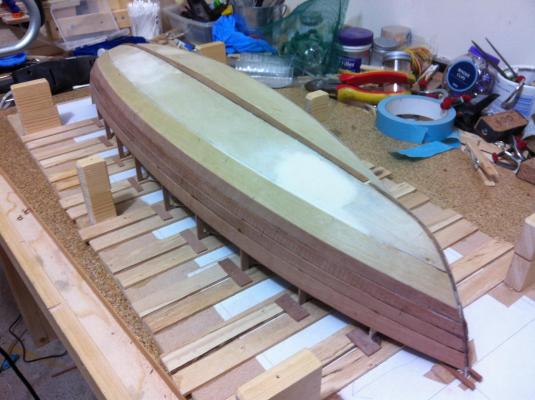
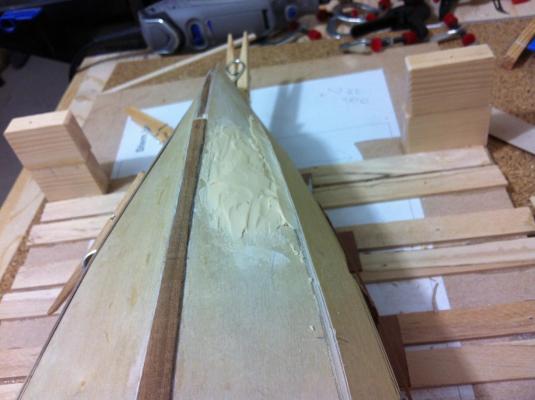
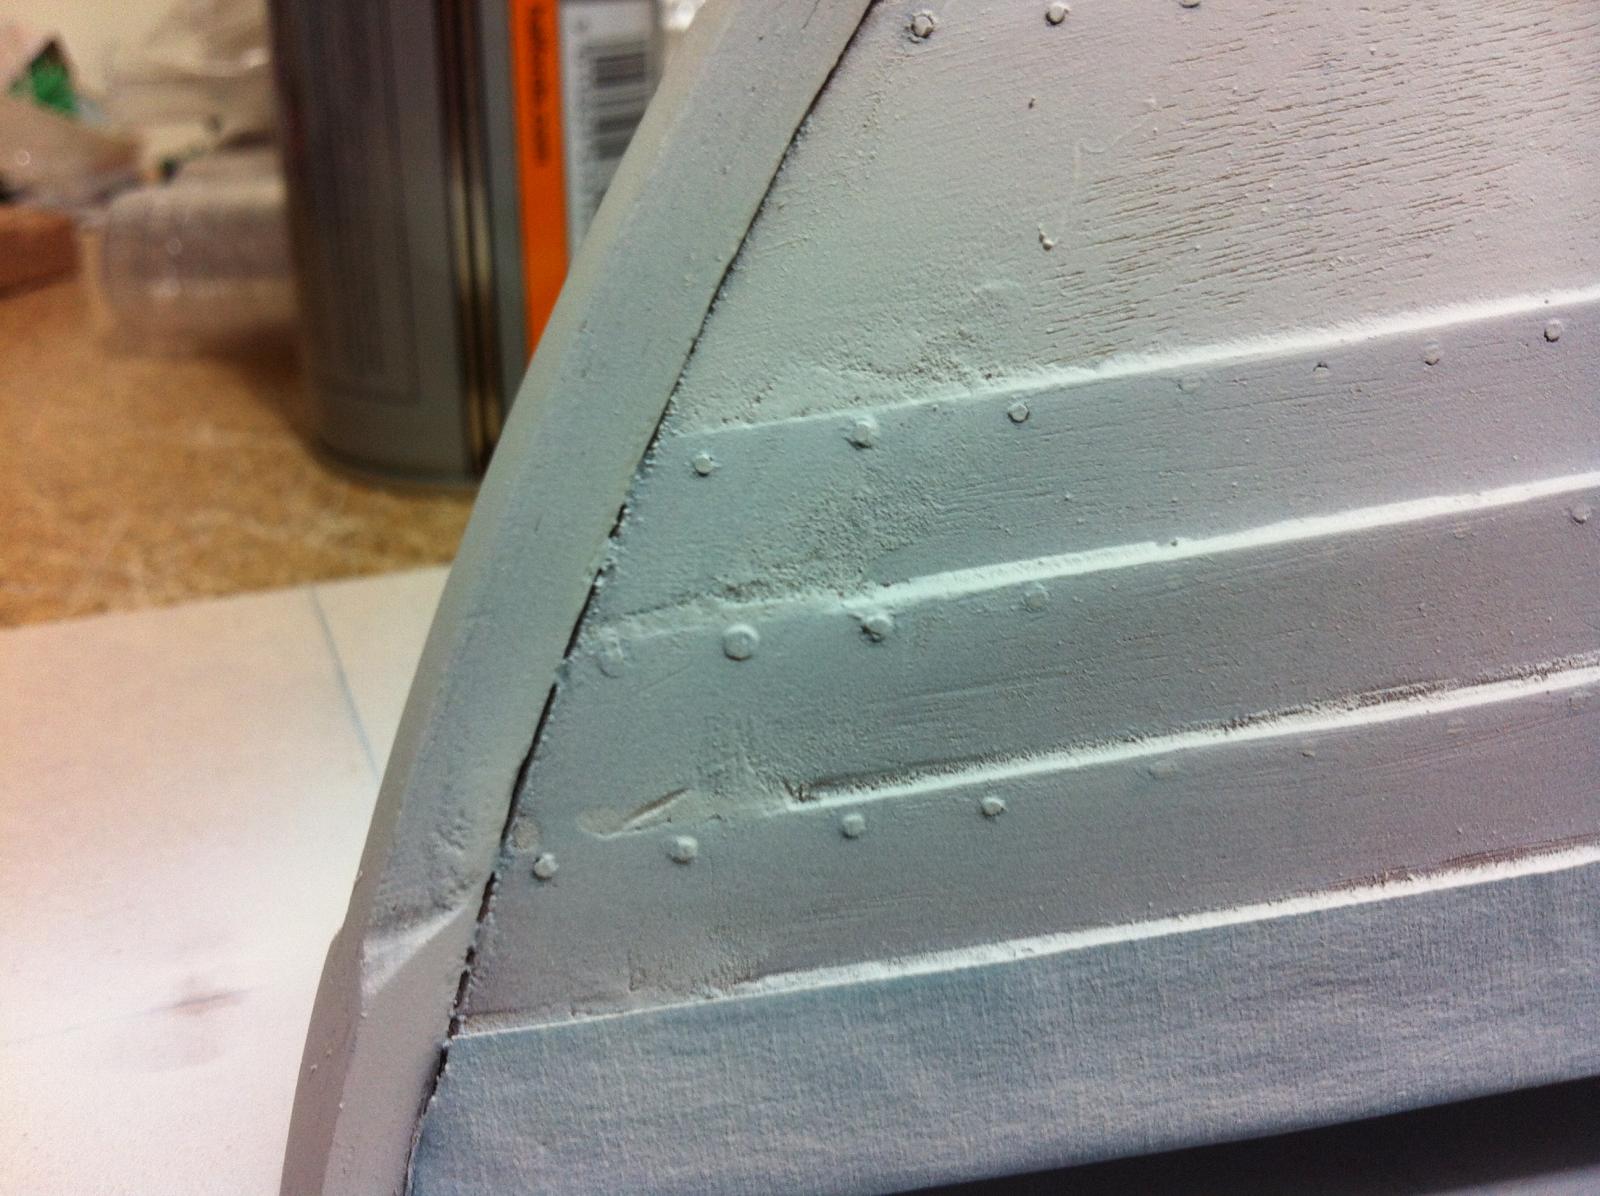
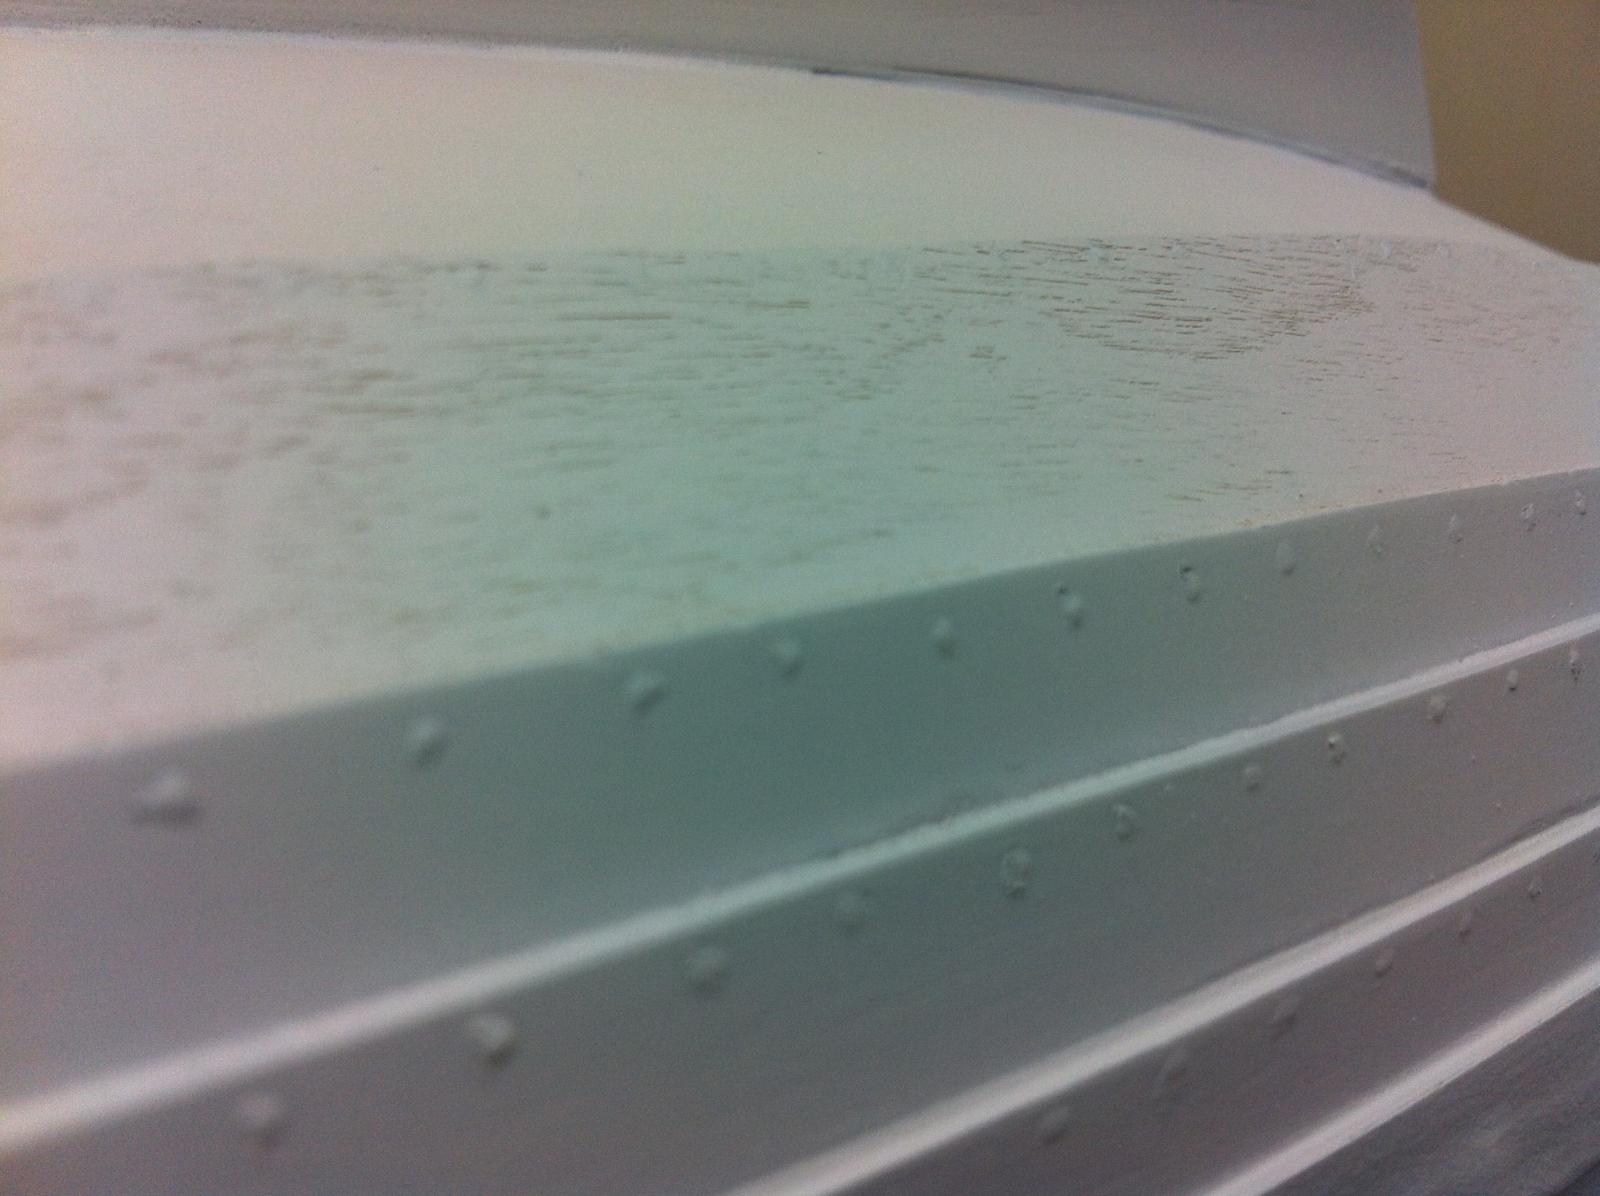
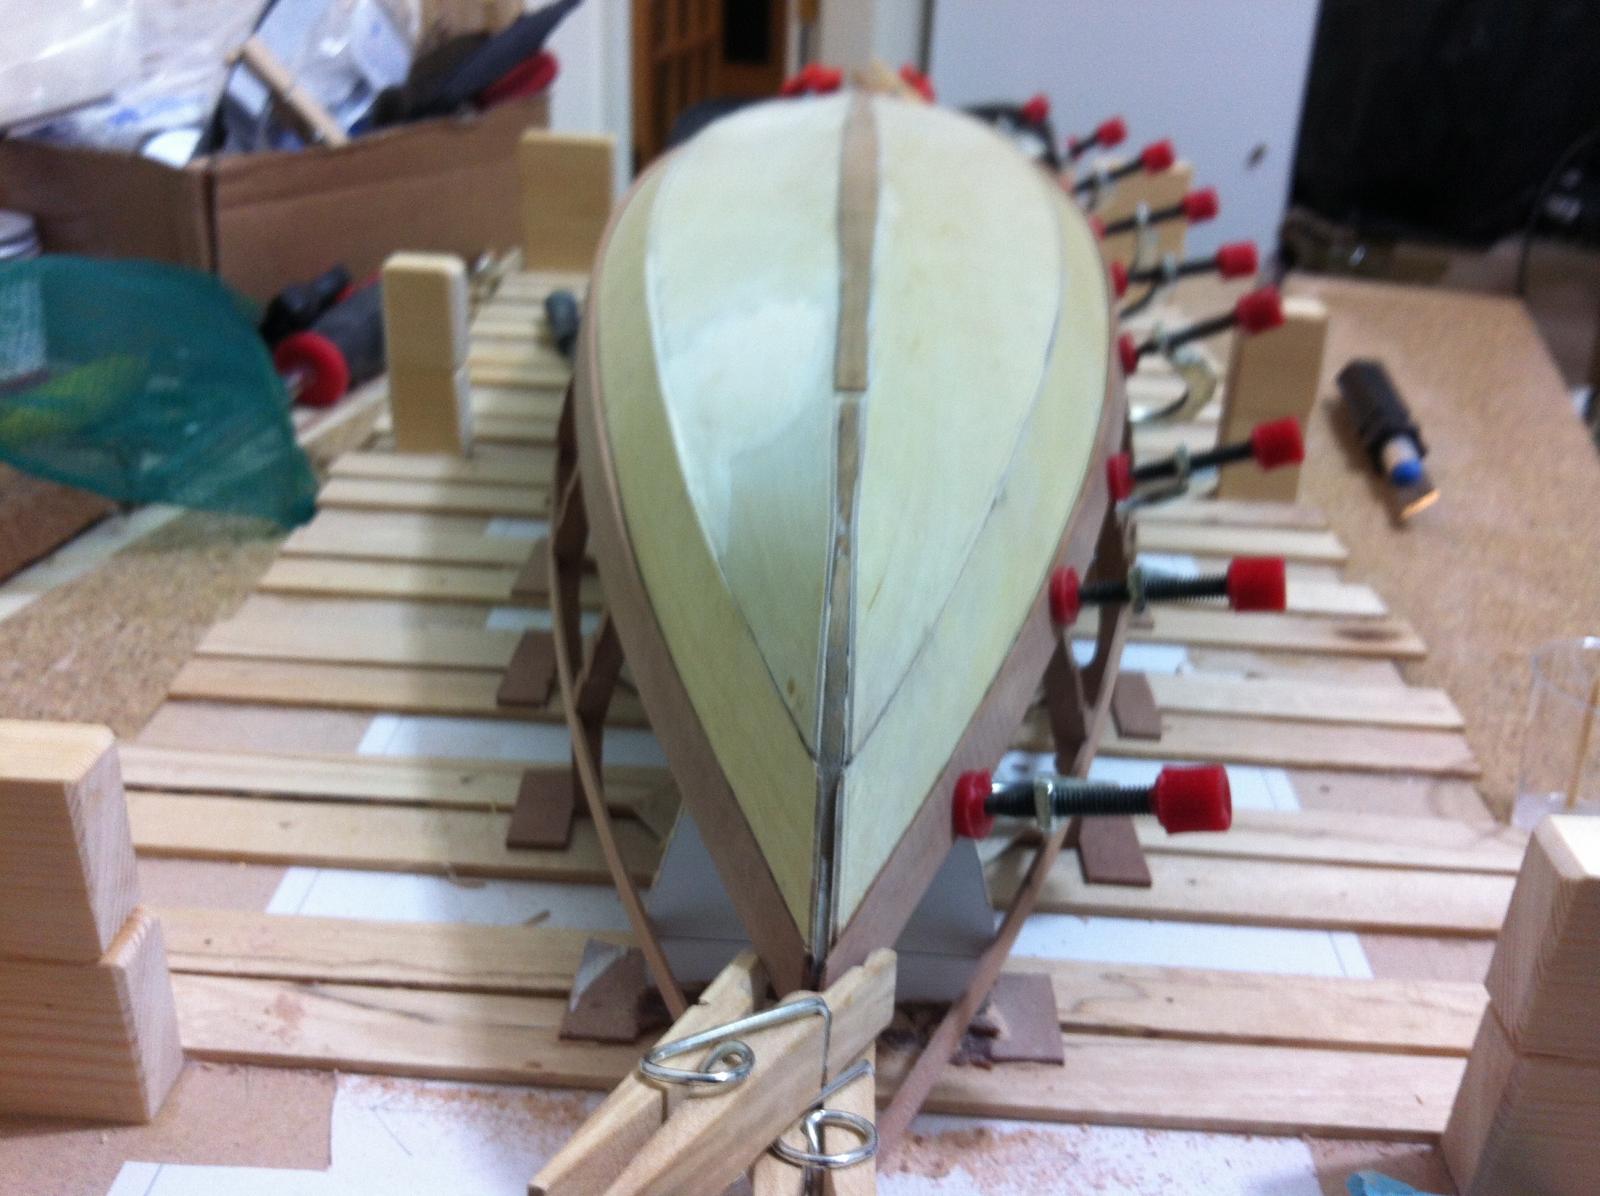
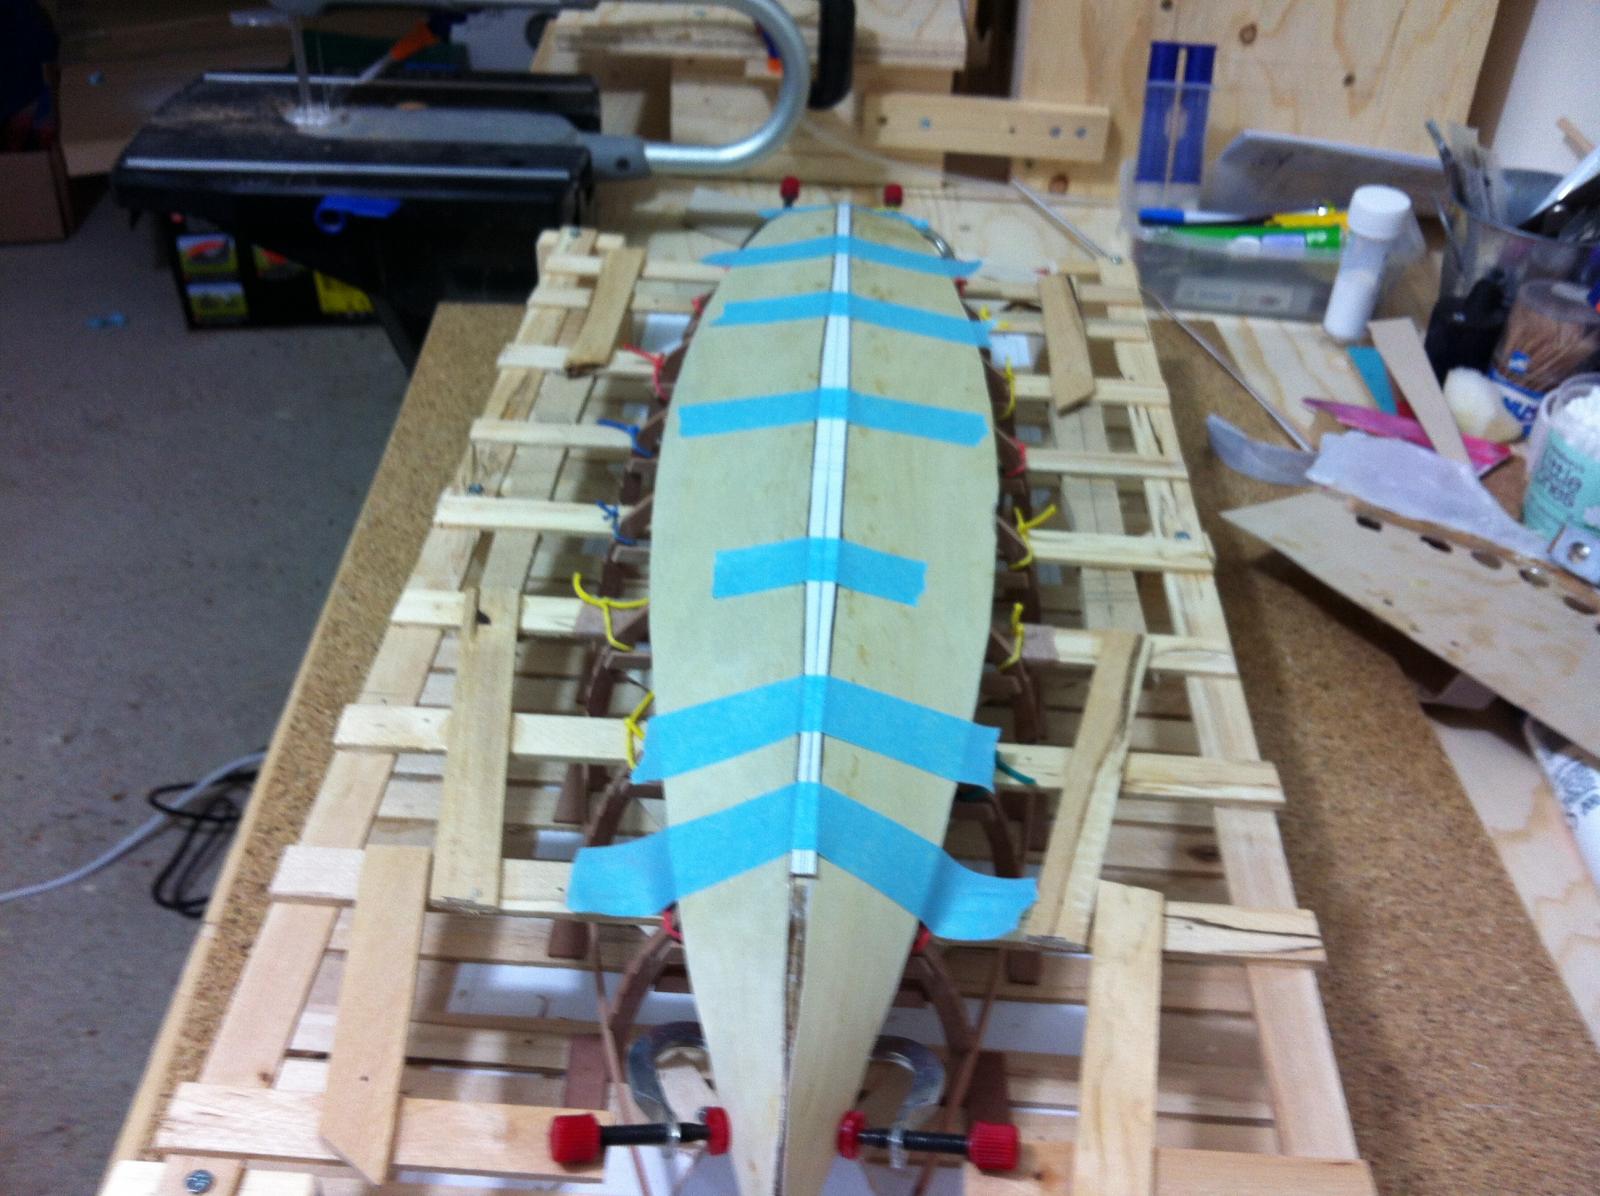
However the hull surface is far from ready to be painted. I did some fairing which I thought was adequate and I proceeded to shape the end of the stem and then mask the whole boat prior to spraying white primer.

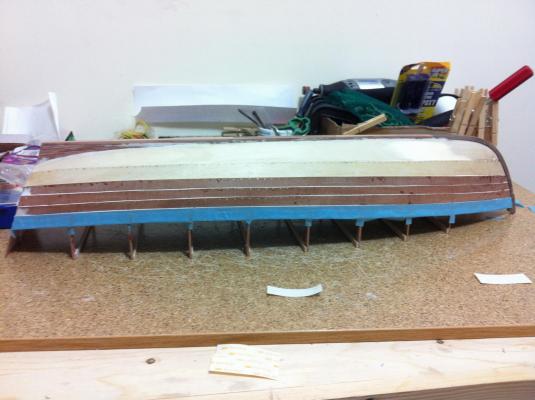

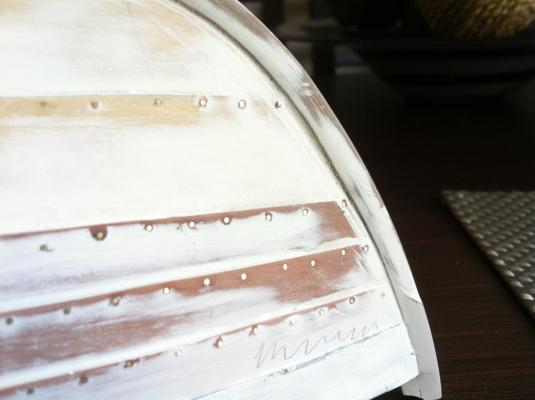
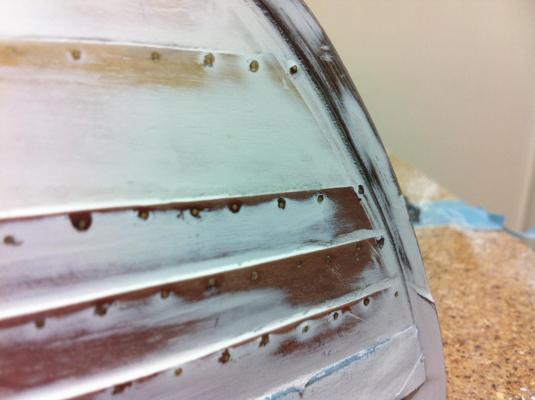
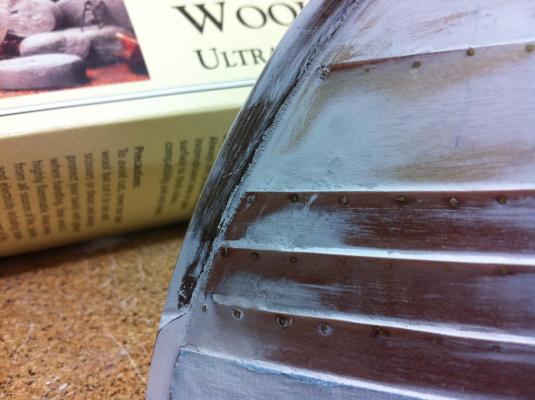
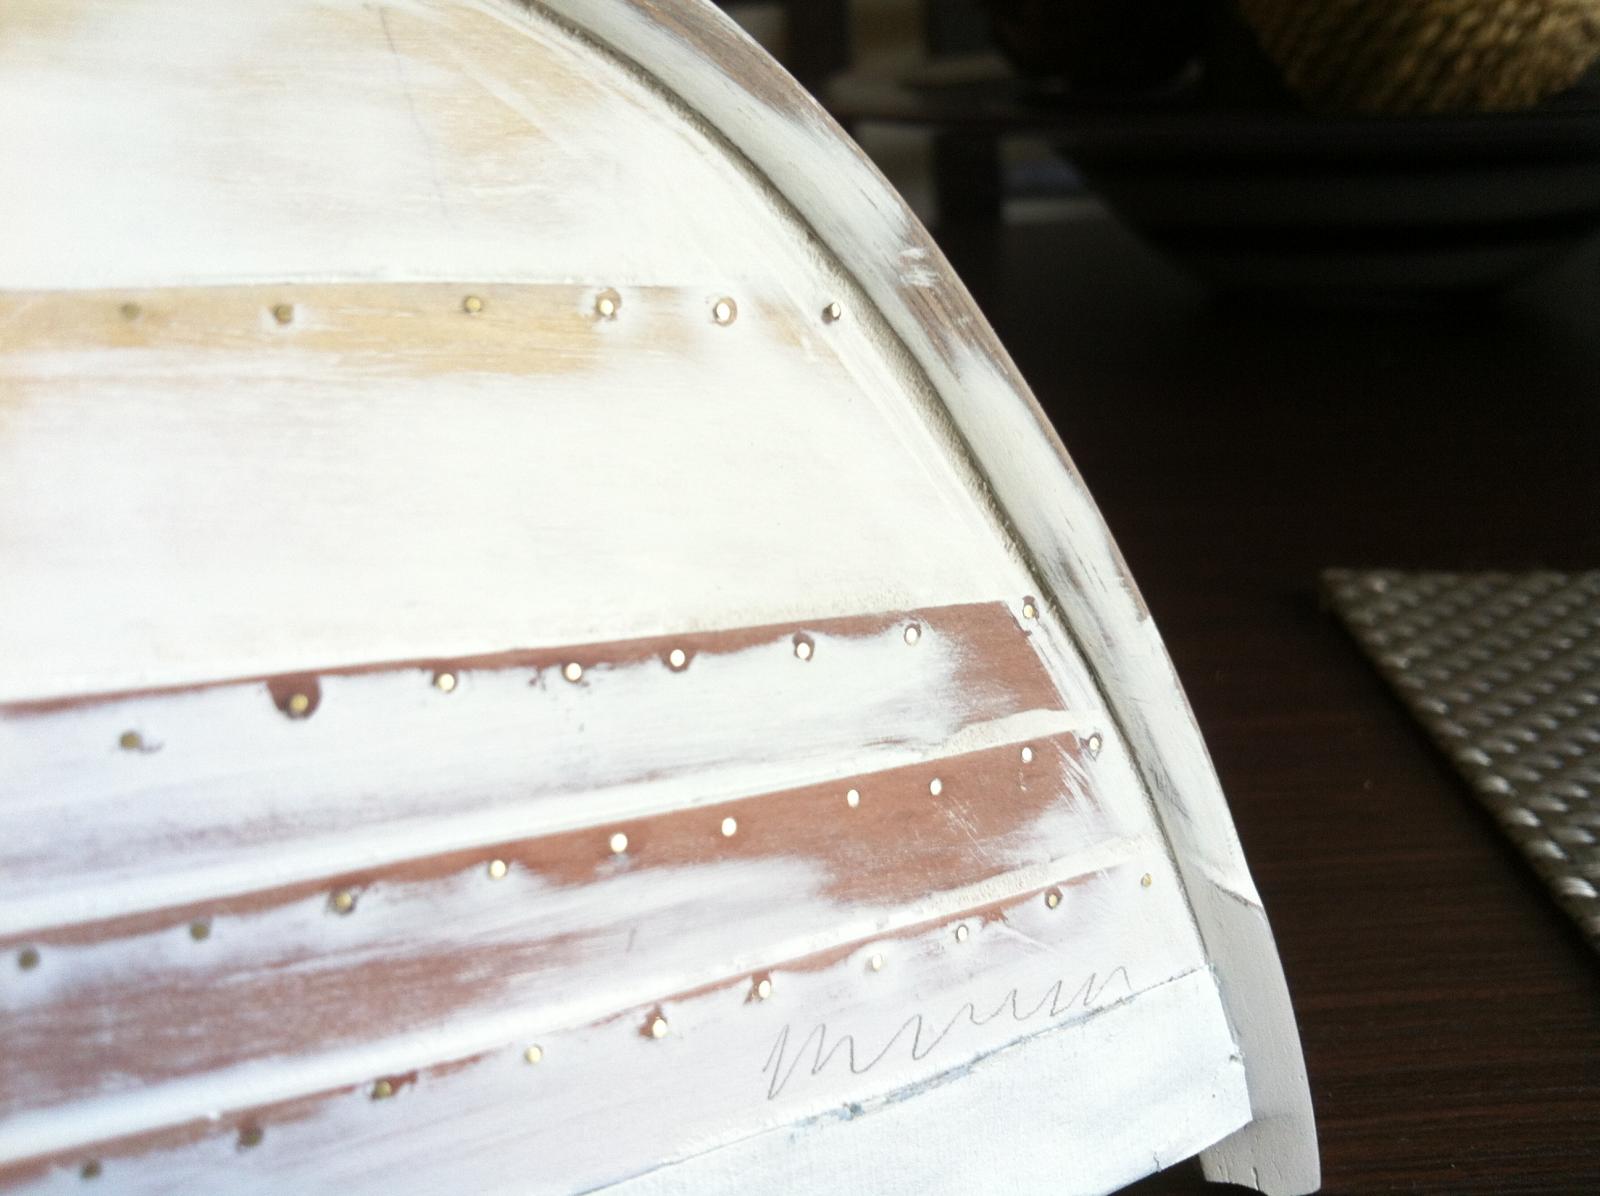
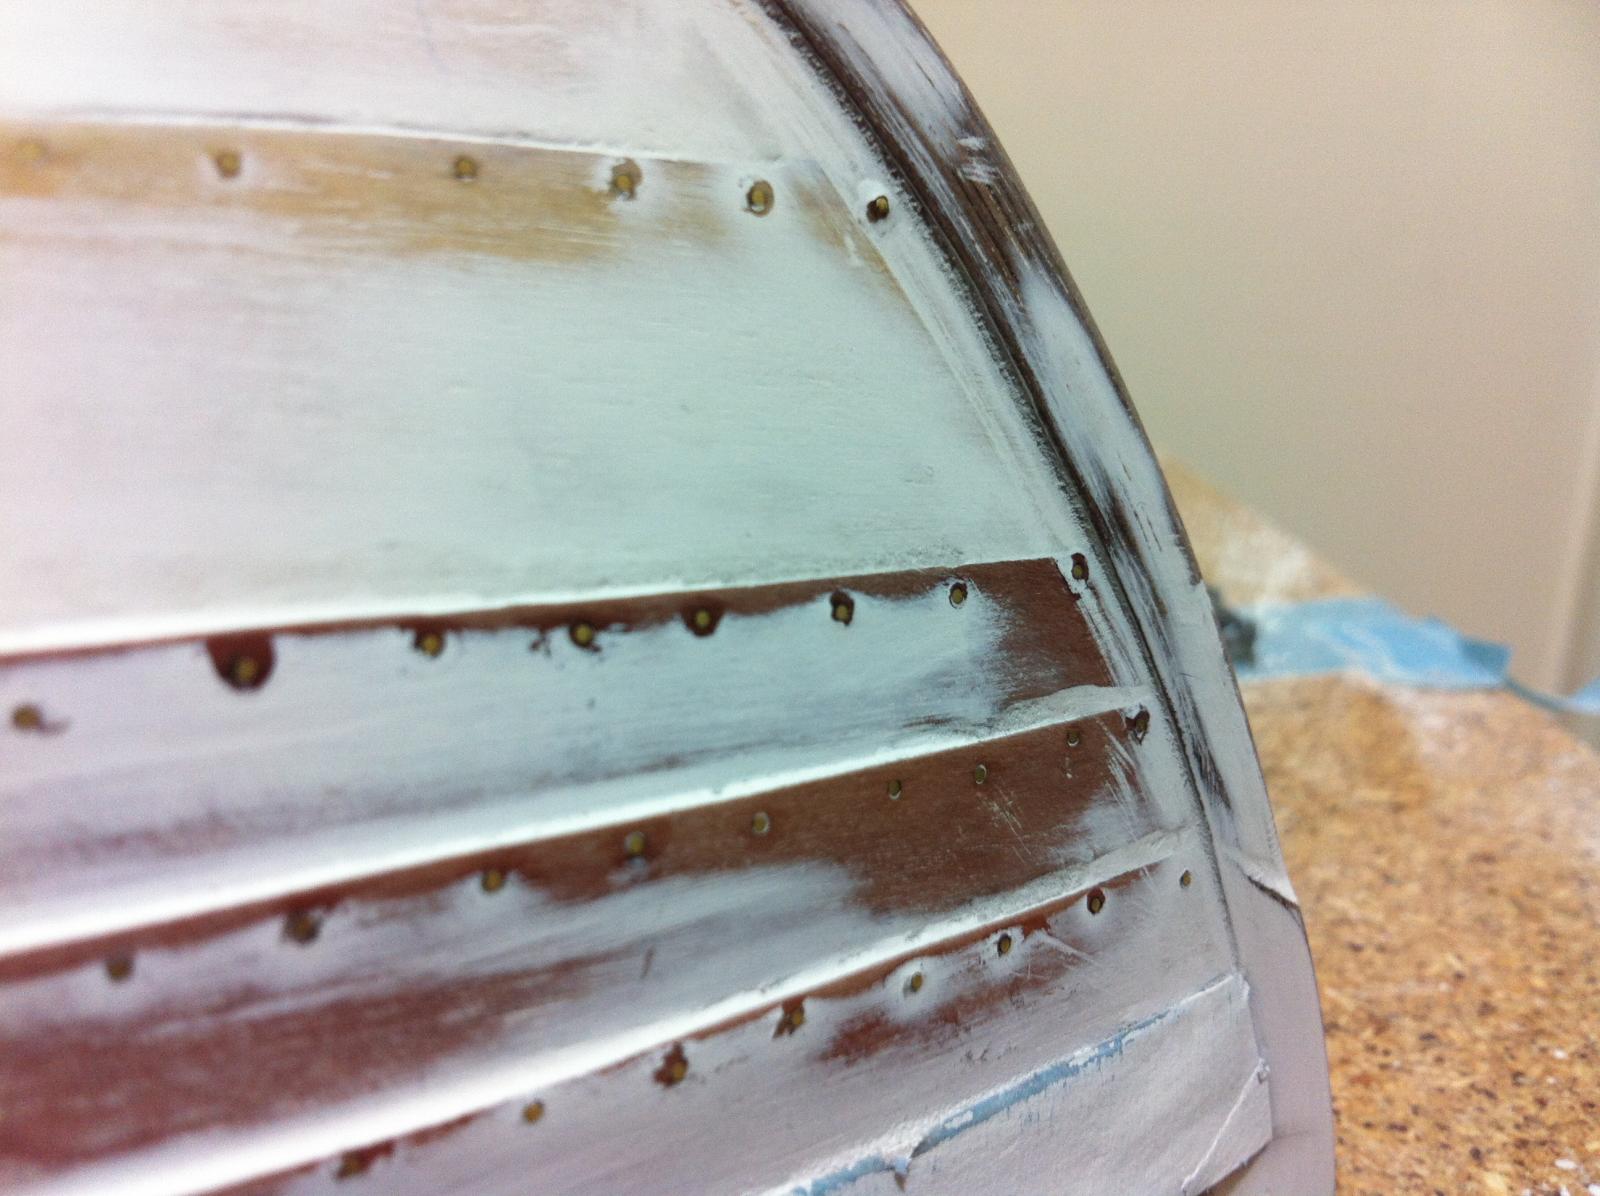
And then the primer went on which revealed how inadequate my fairing was.
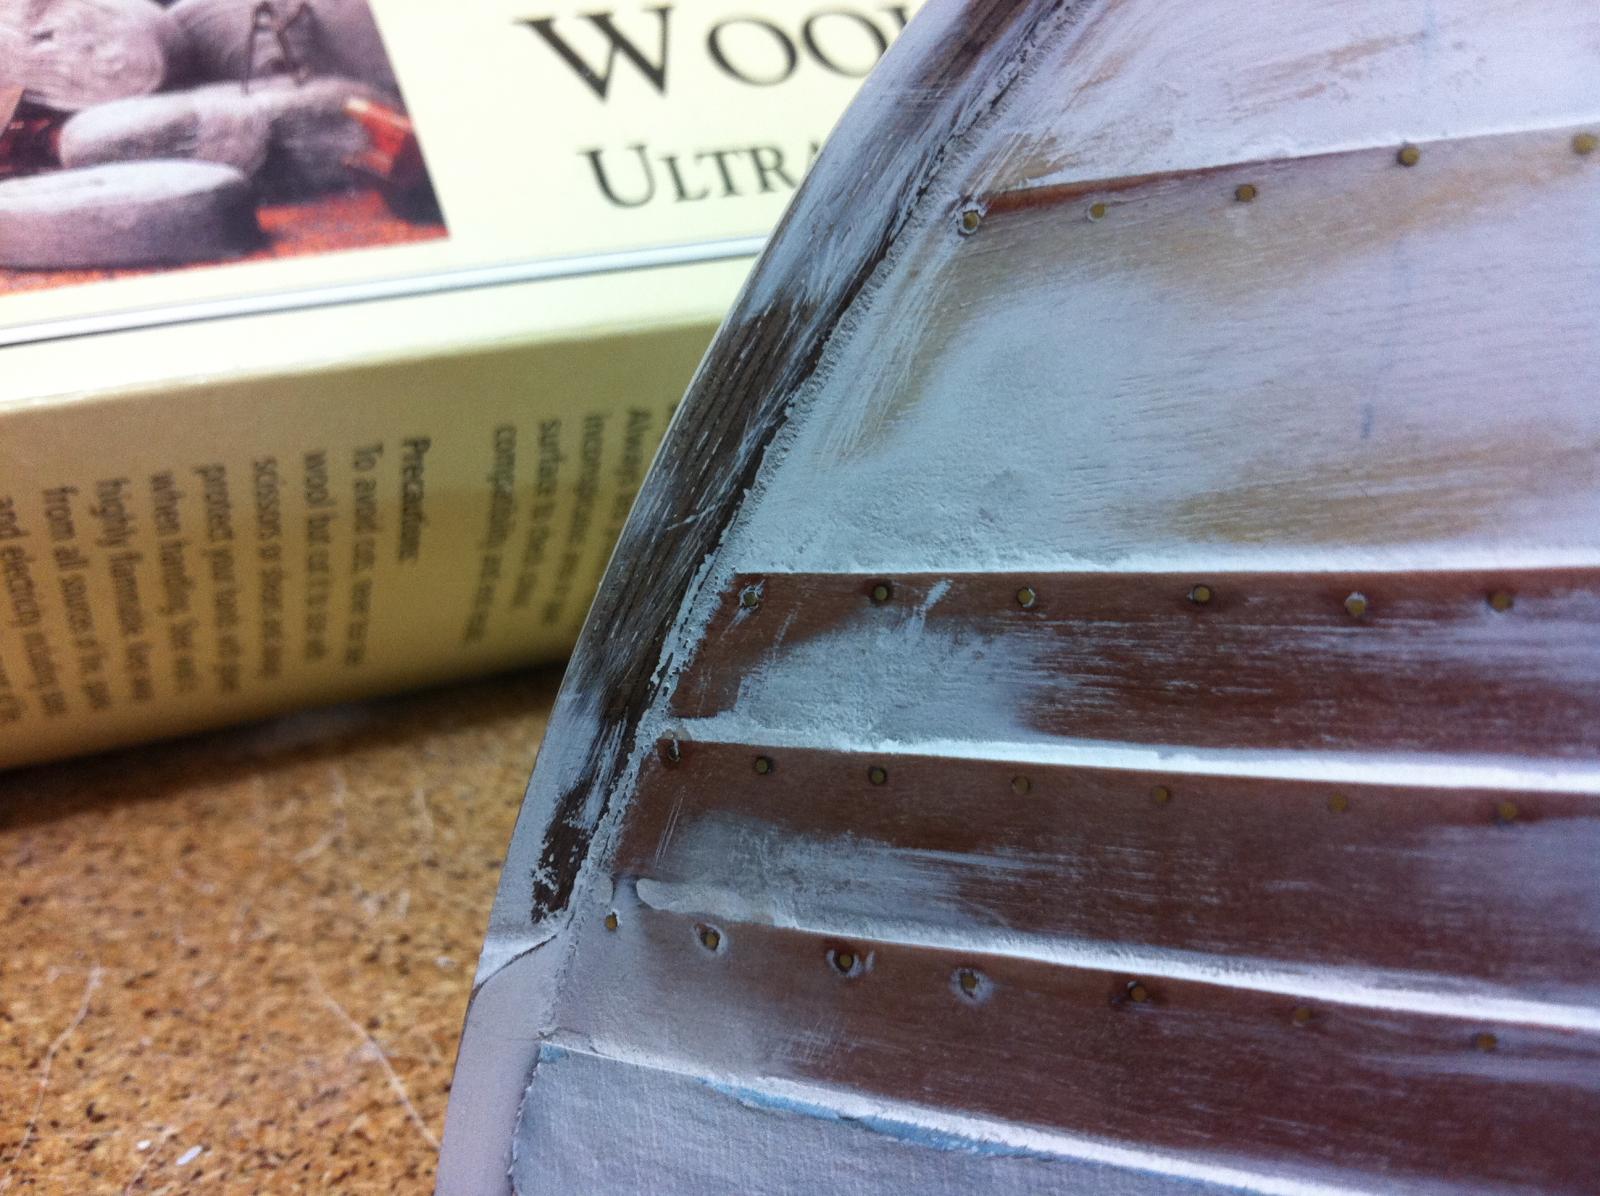
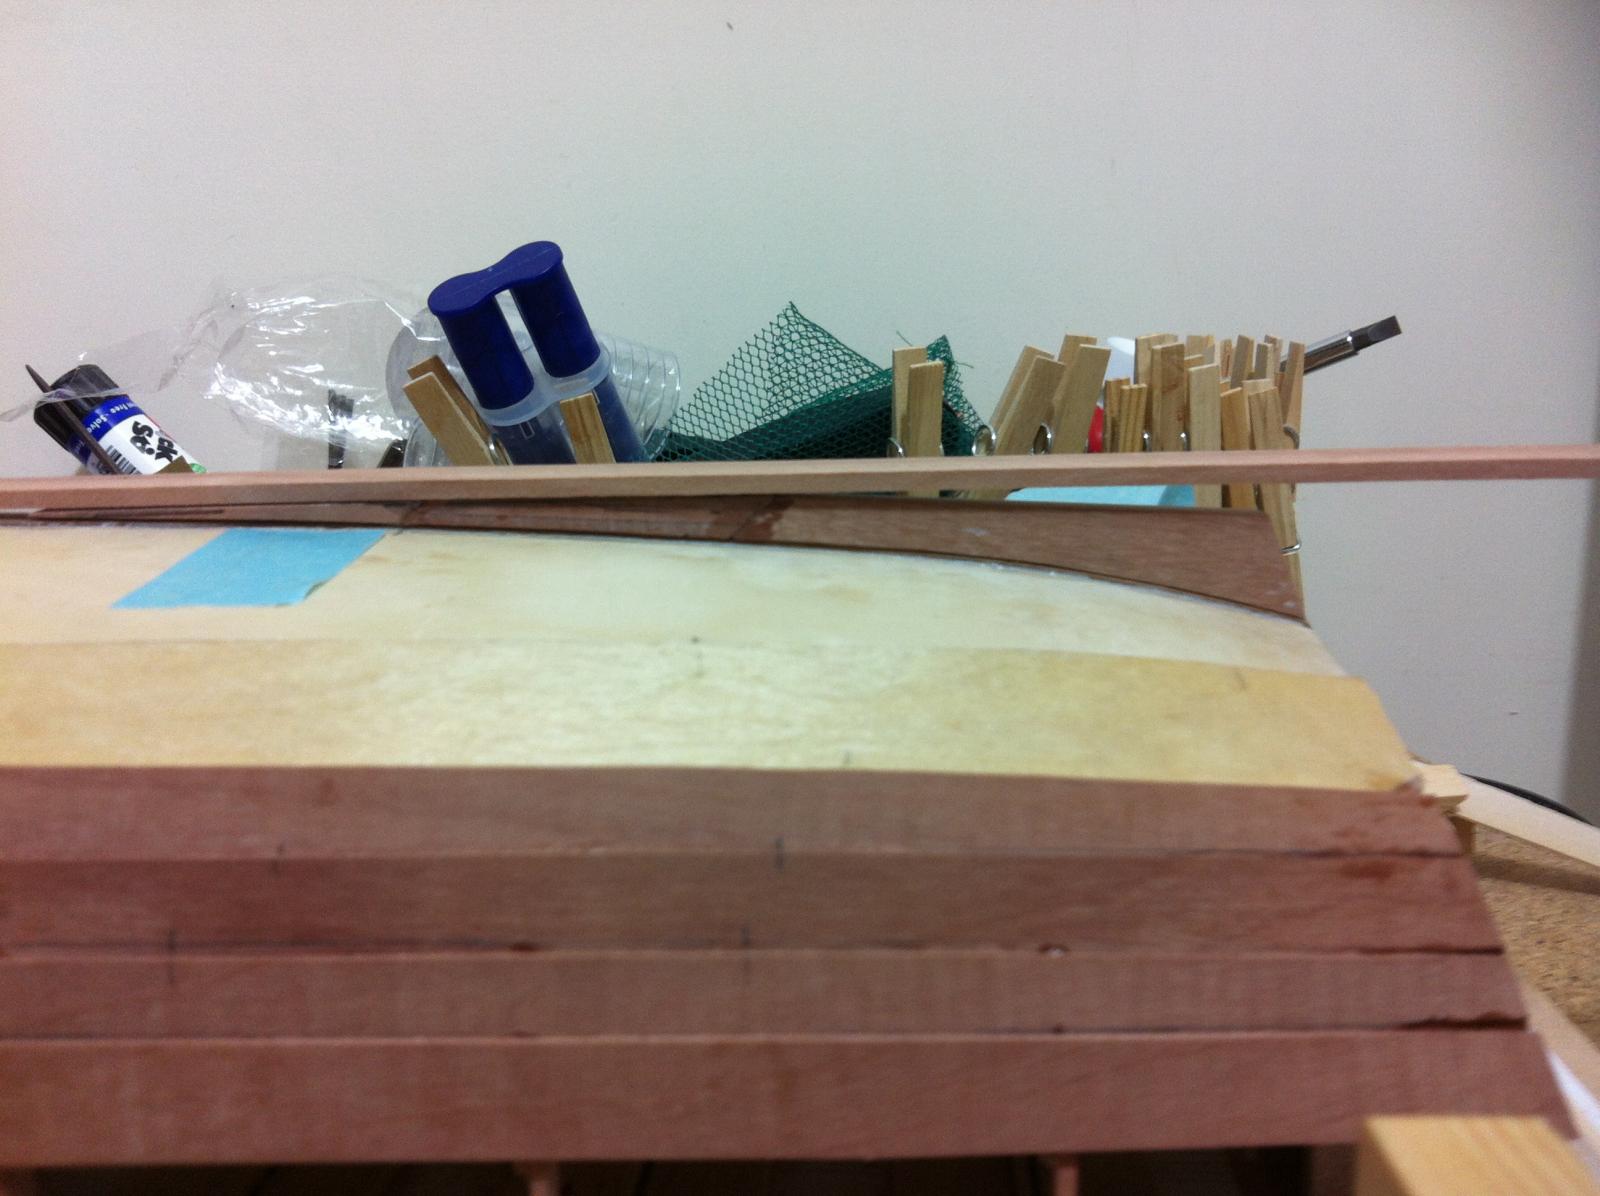
The bow looks rough and the rivets are standing out too much.

Deep scratches were revealed in two of the planks
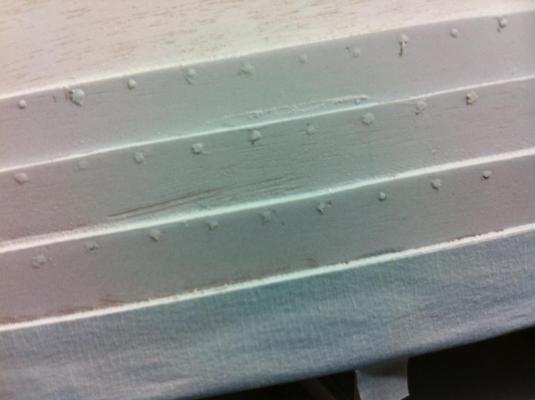
The plywood has a rough surface despite previous sanding

and finally the plank-stem junction needs some attention
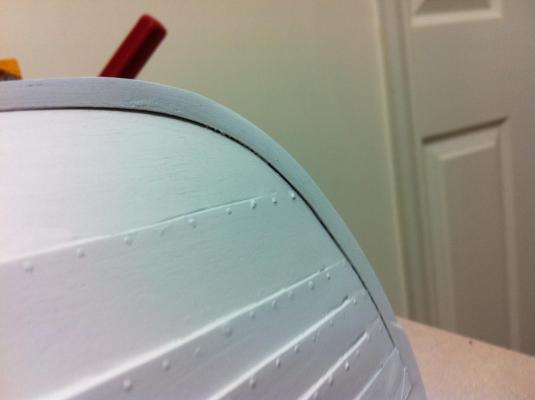
I think that with some putty and careful sanding will improve things. Certainly I will not (or should not) move on to painting the hull until I get a nice smooth primed surface.
- IgorSky, mikegerber and mtaylor
-
 3
3
-
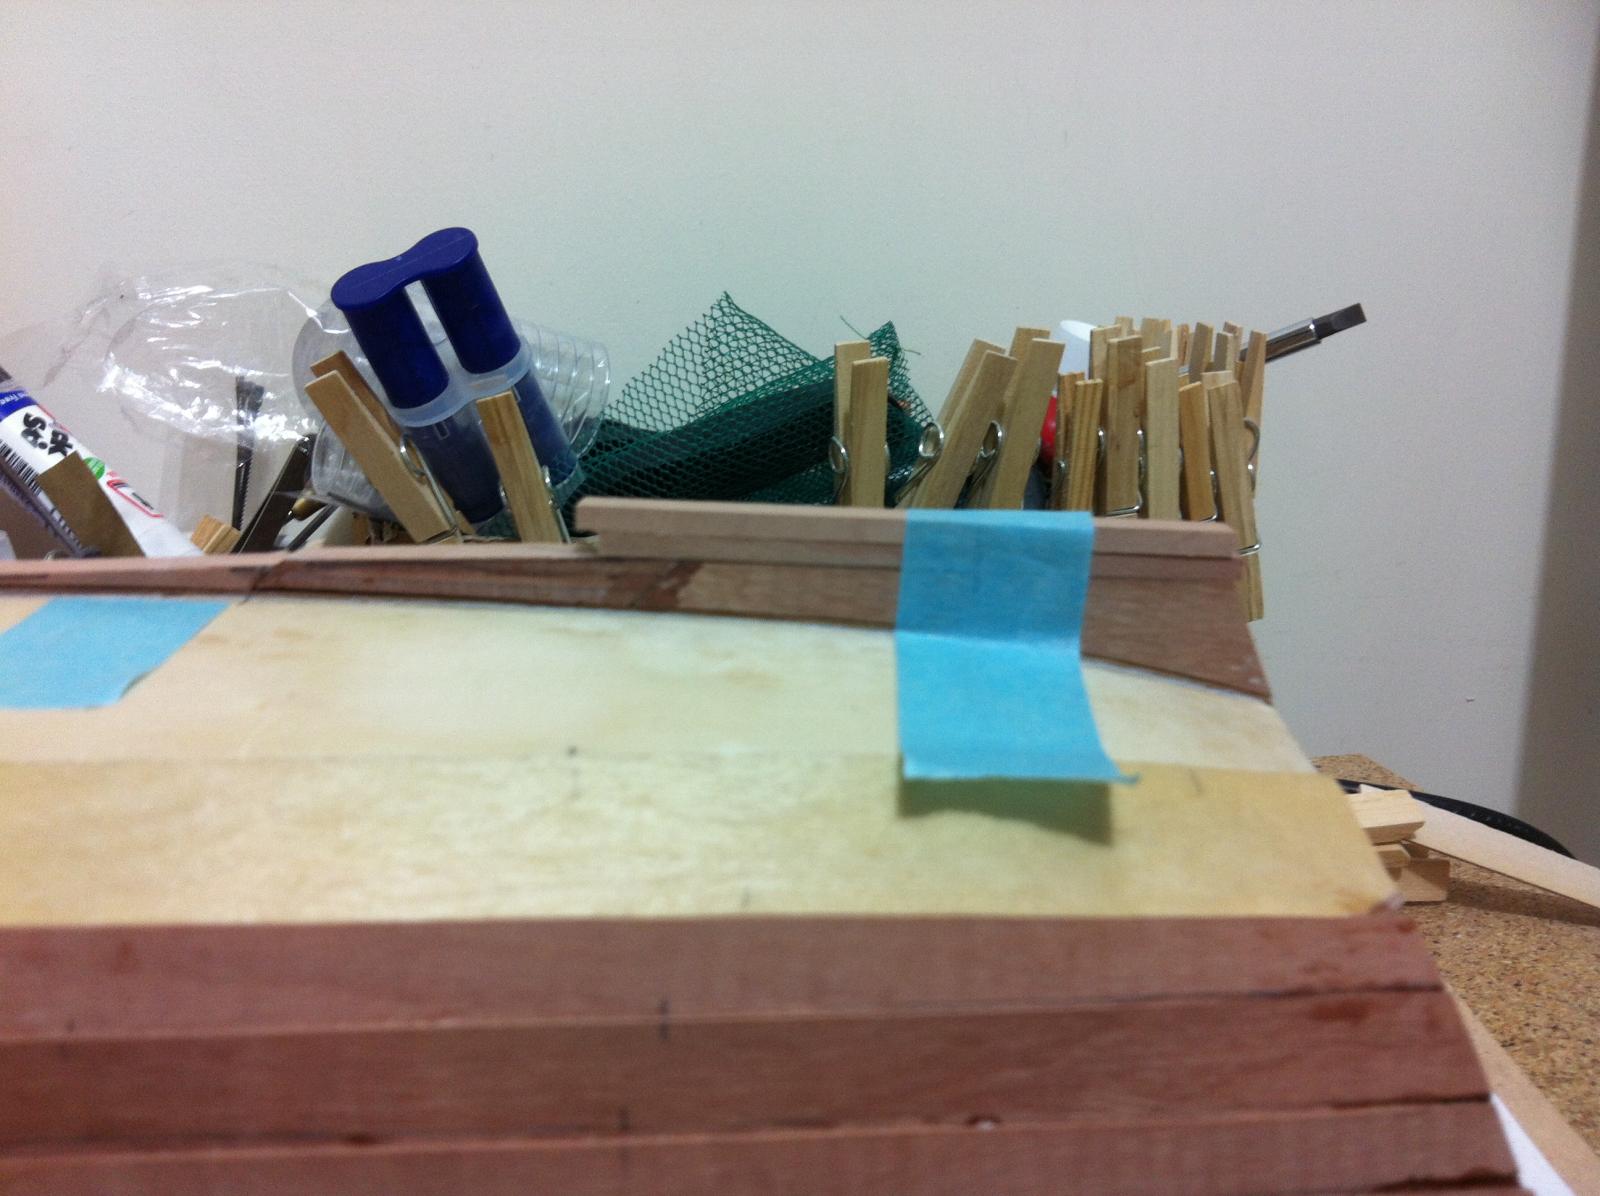
I just registered what the second picture shows following Row's comment and I caught my self smiling, this is style in modelling!
- Dimitris71, popeye the sailor, Piet and 2 others
-
5
-
-
I already made myself comfortable, looking forward for the show to start Patrick!
- Dimitris71, IgorSky and Omega1234
-
3
-
Thank you all, I really appreciate your support.
I must admit though I am not at all confident that the boat will end up looking as good as it deserves.
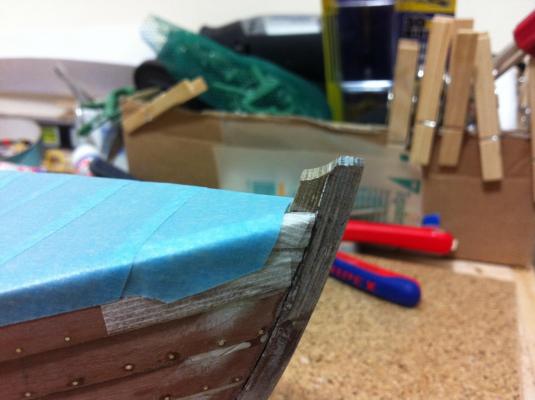
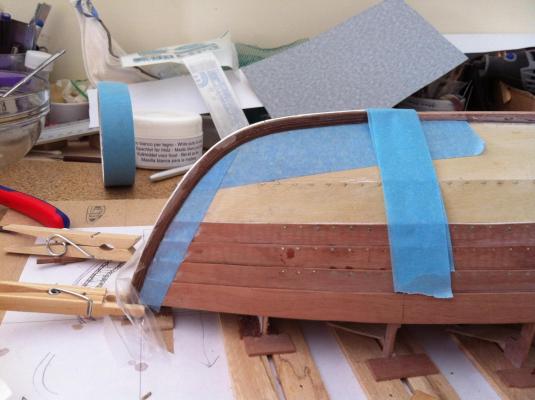
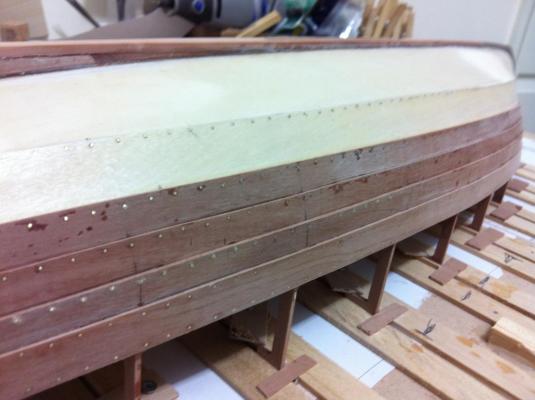
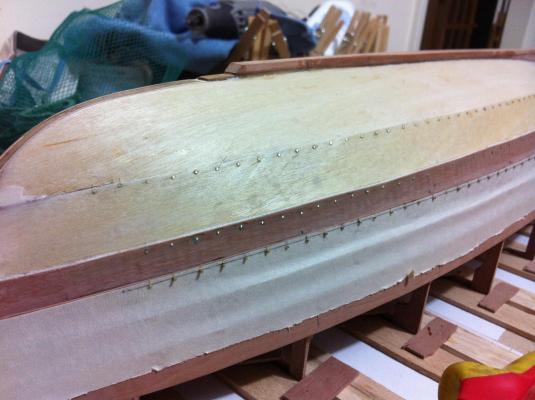
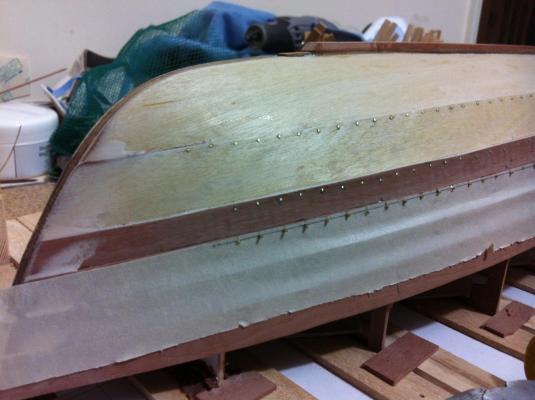
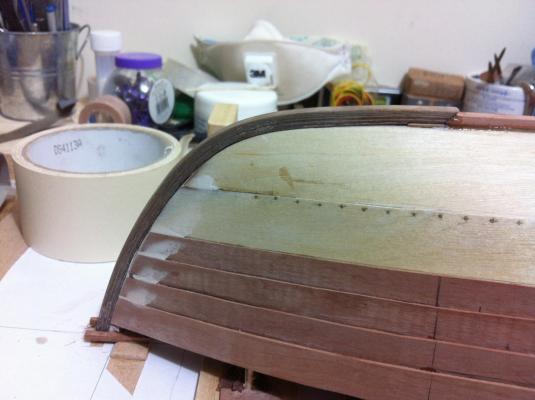
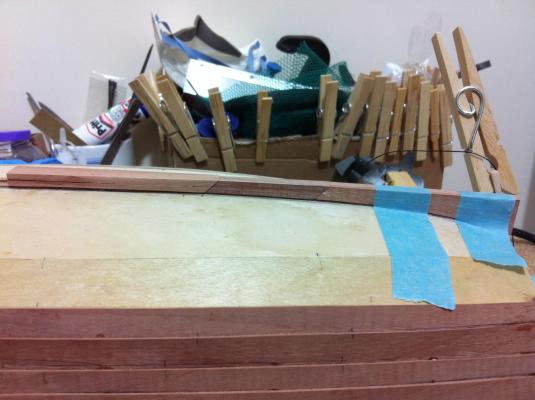
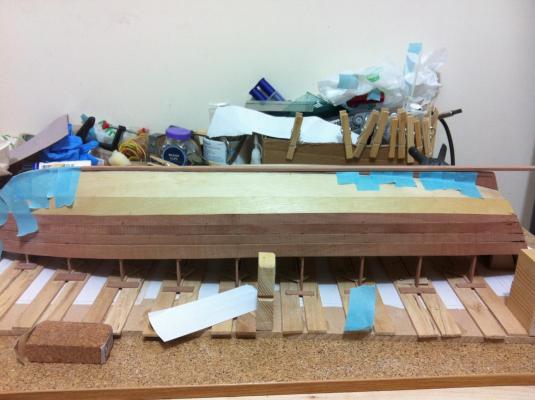
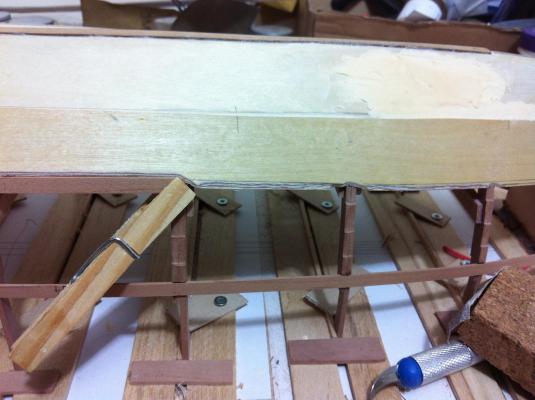
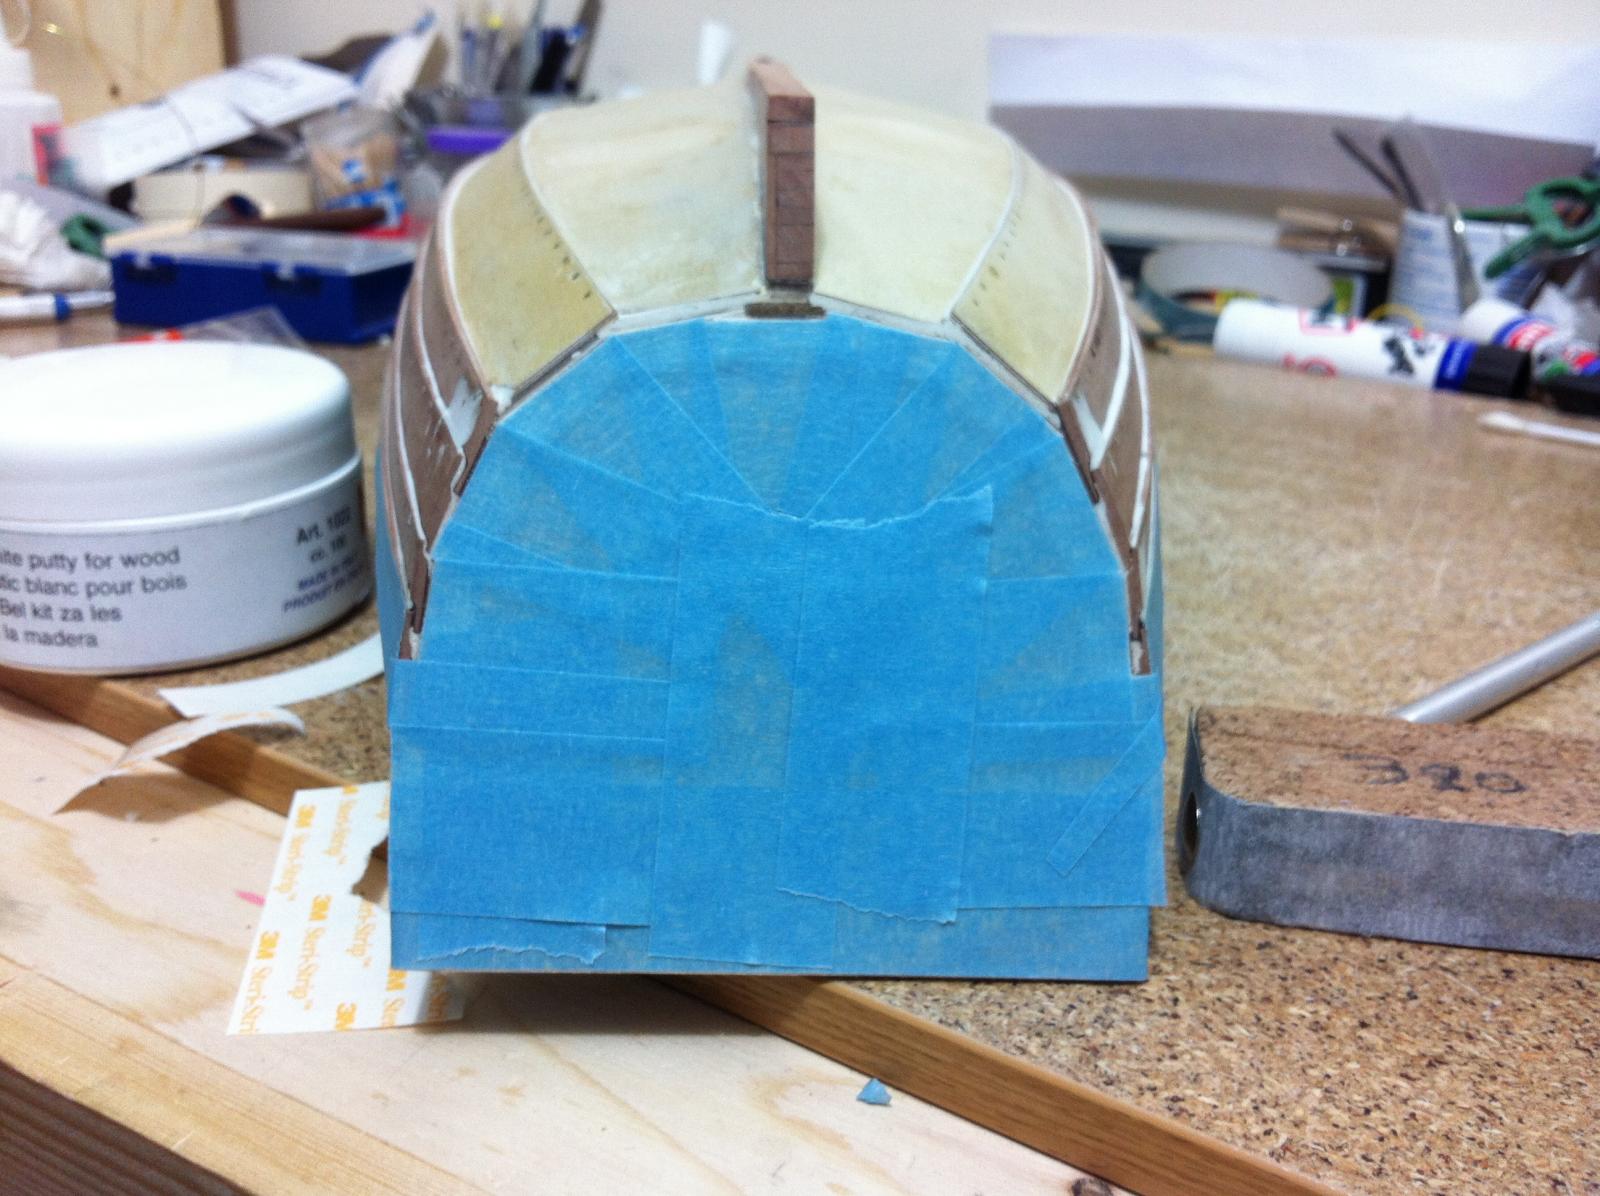
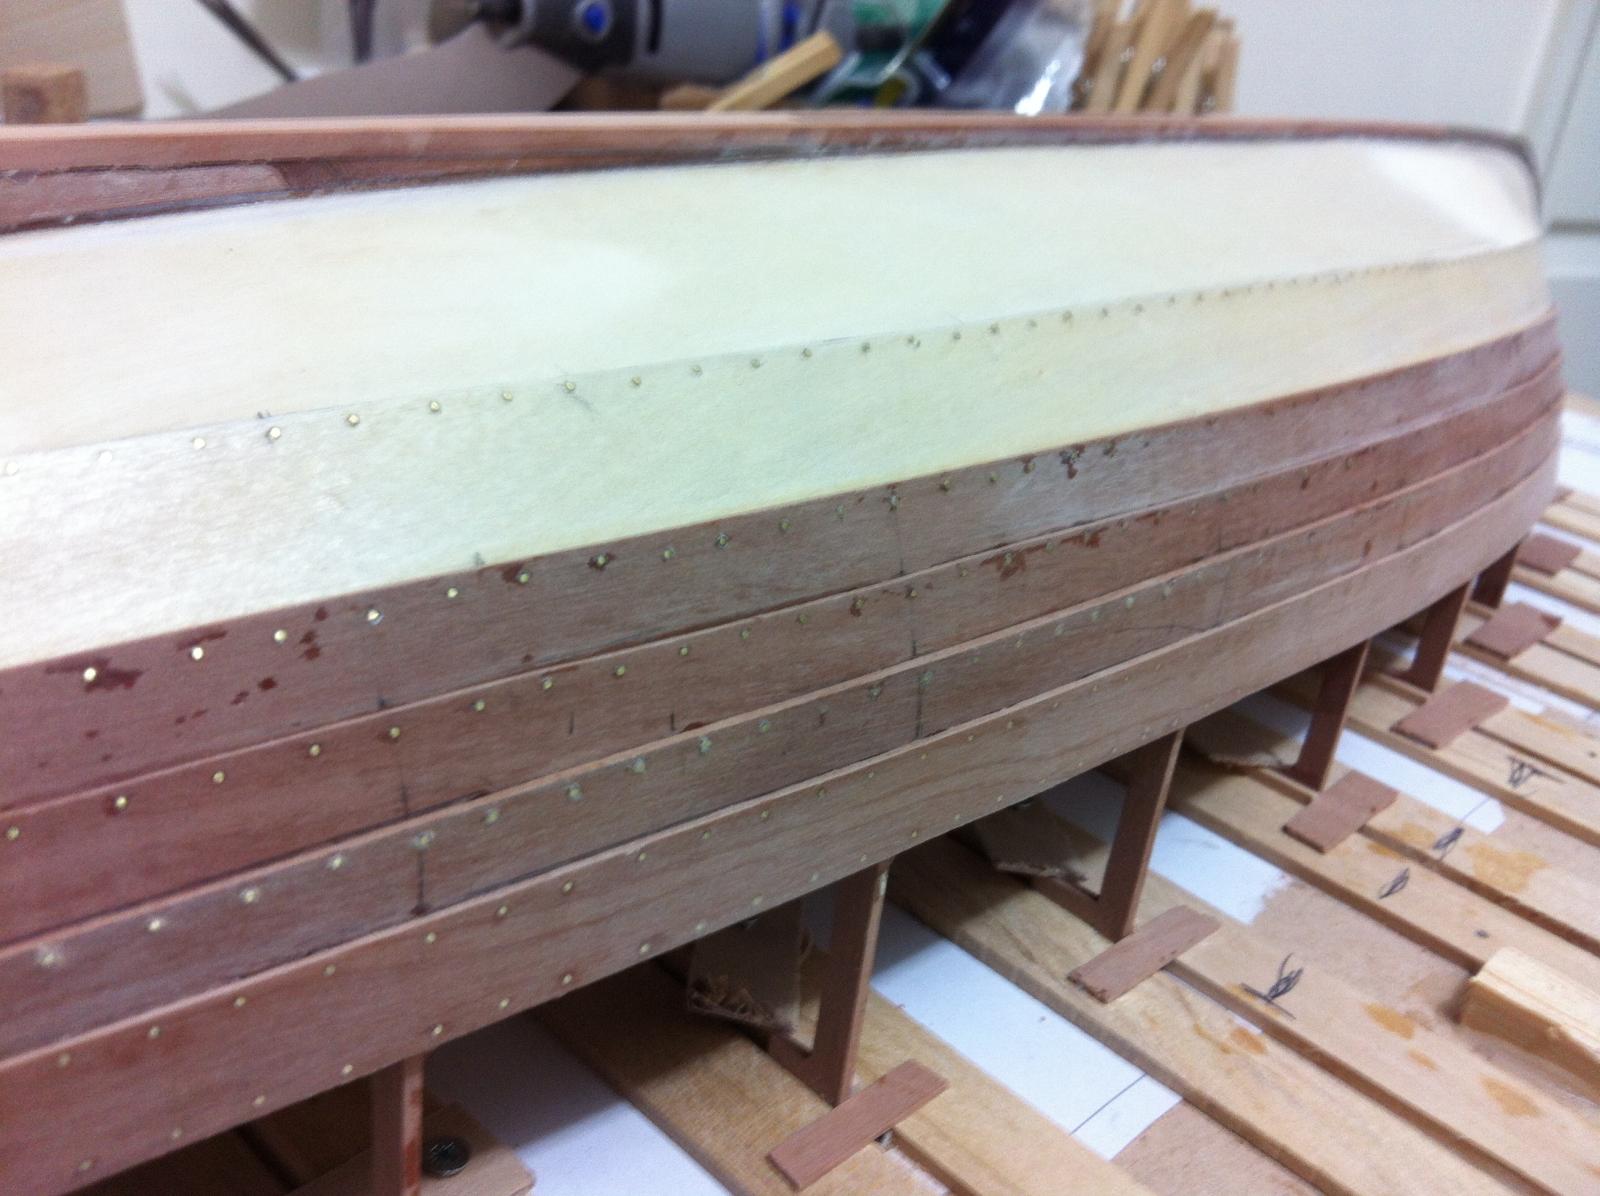
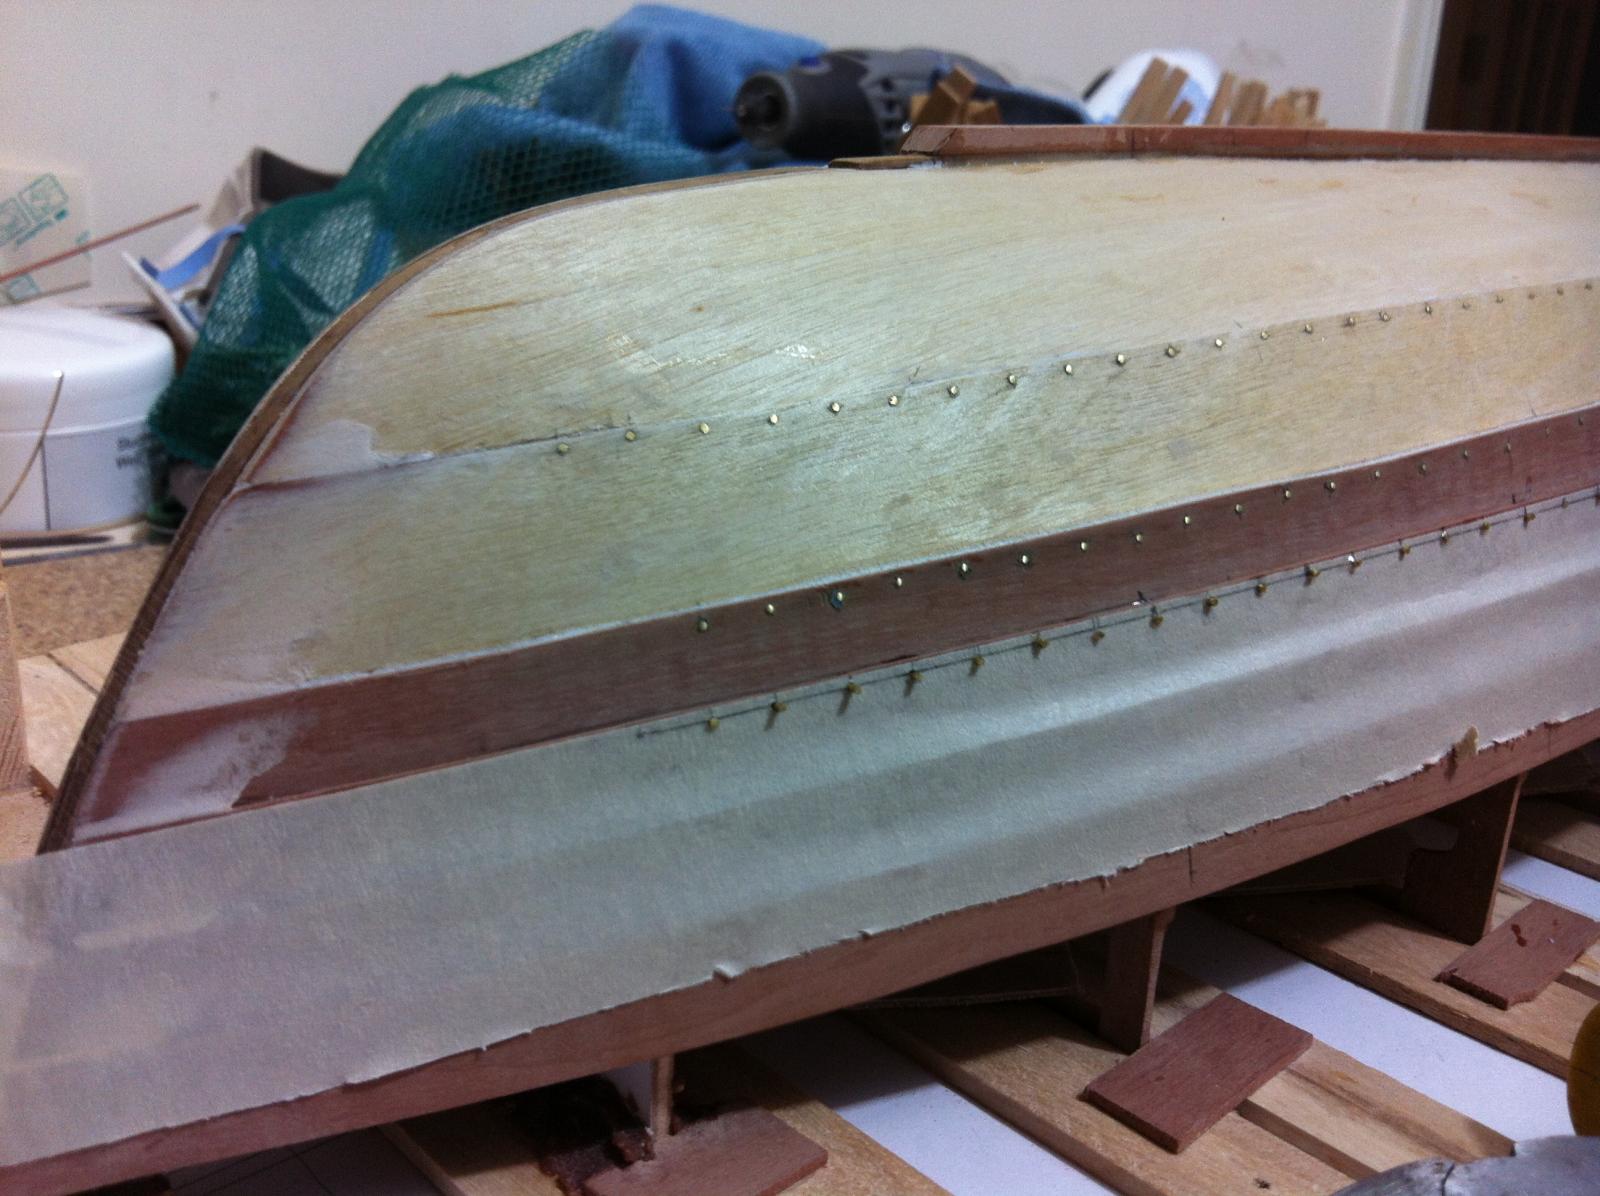
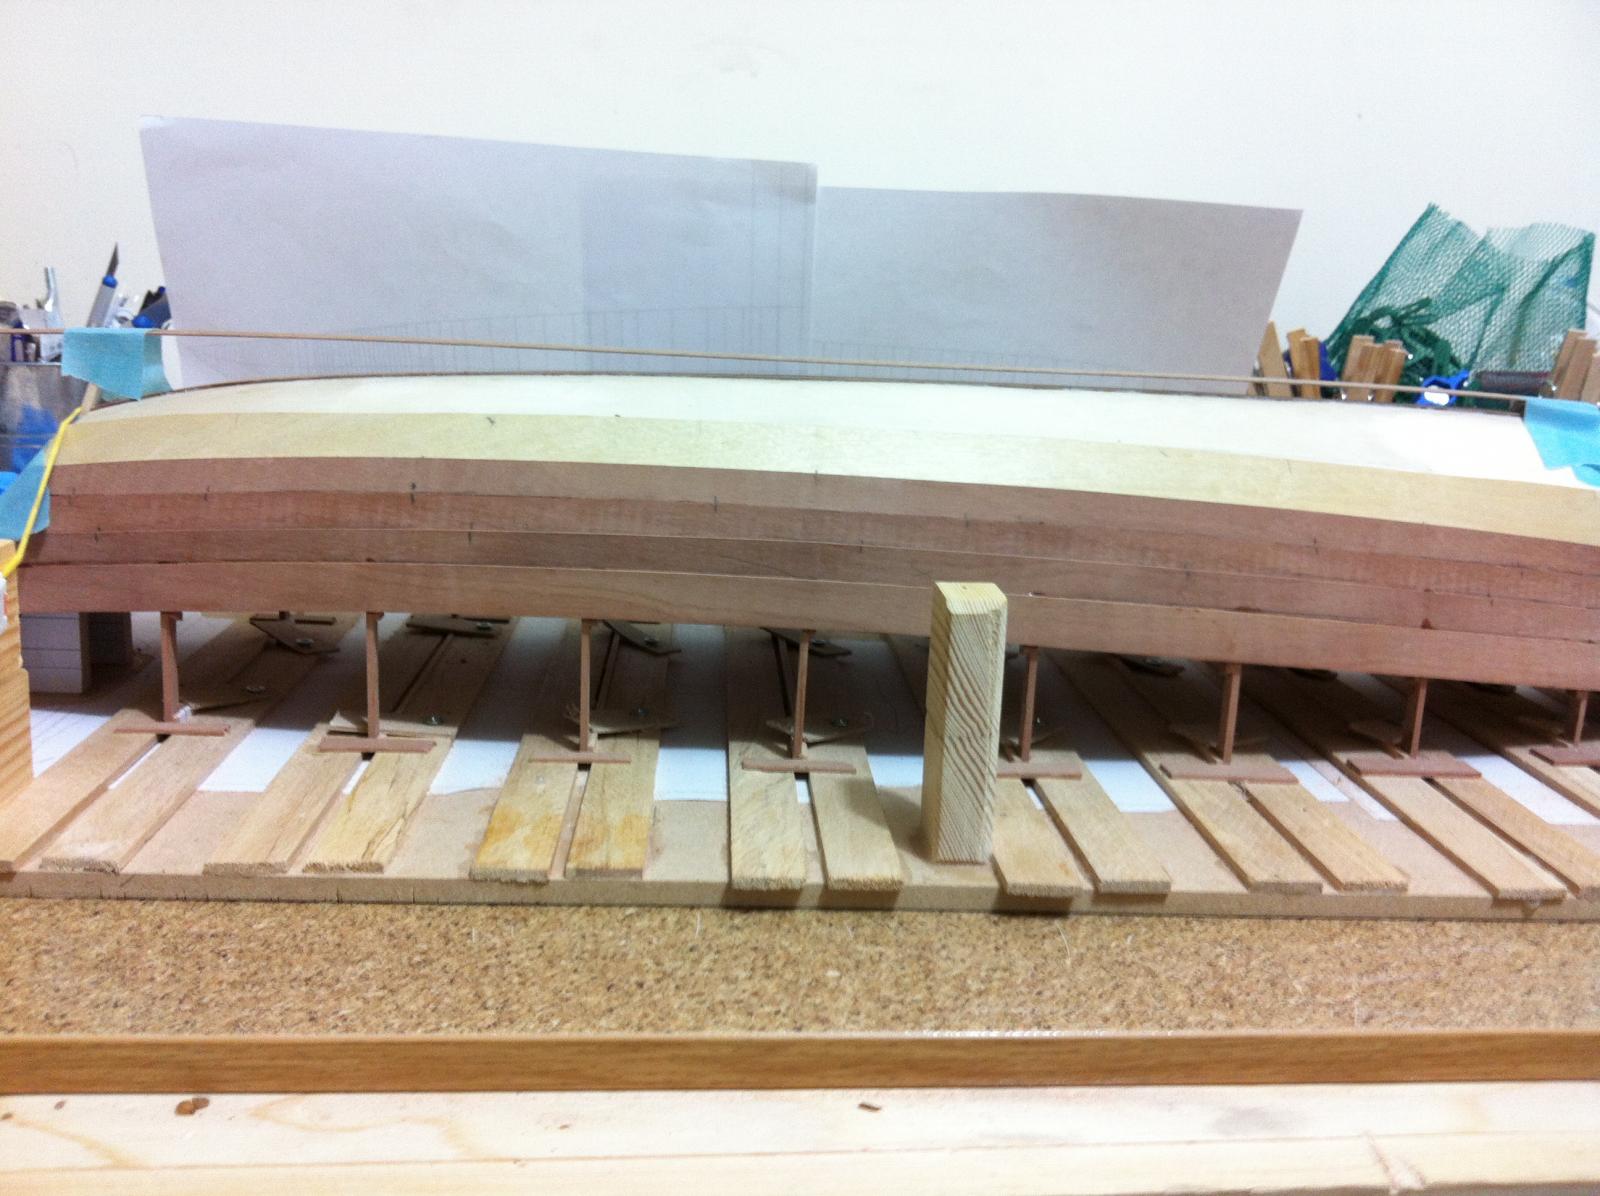
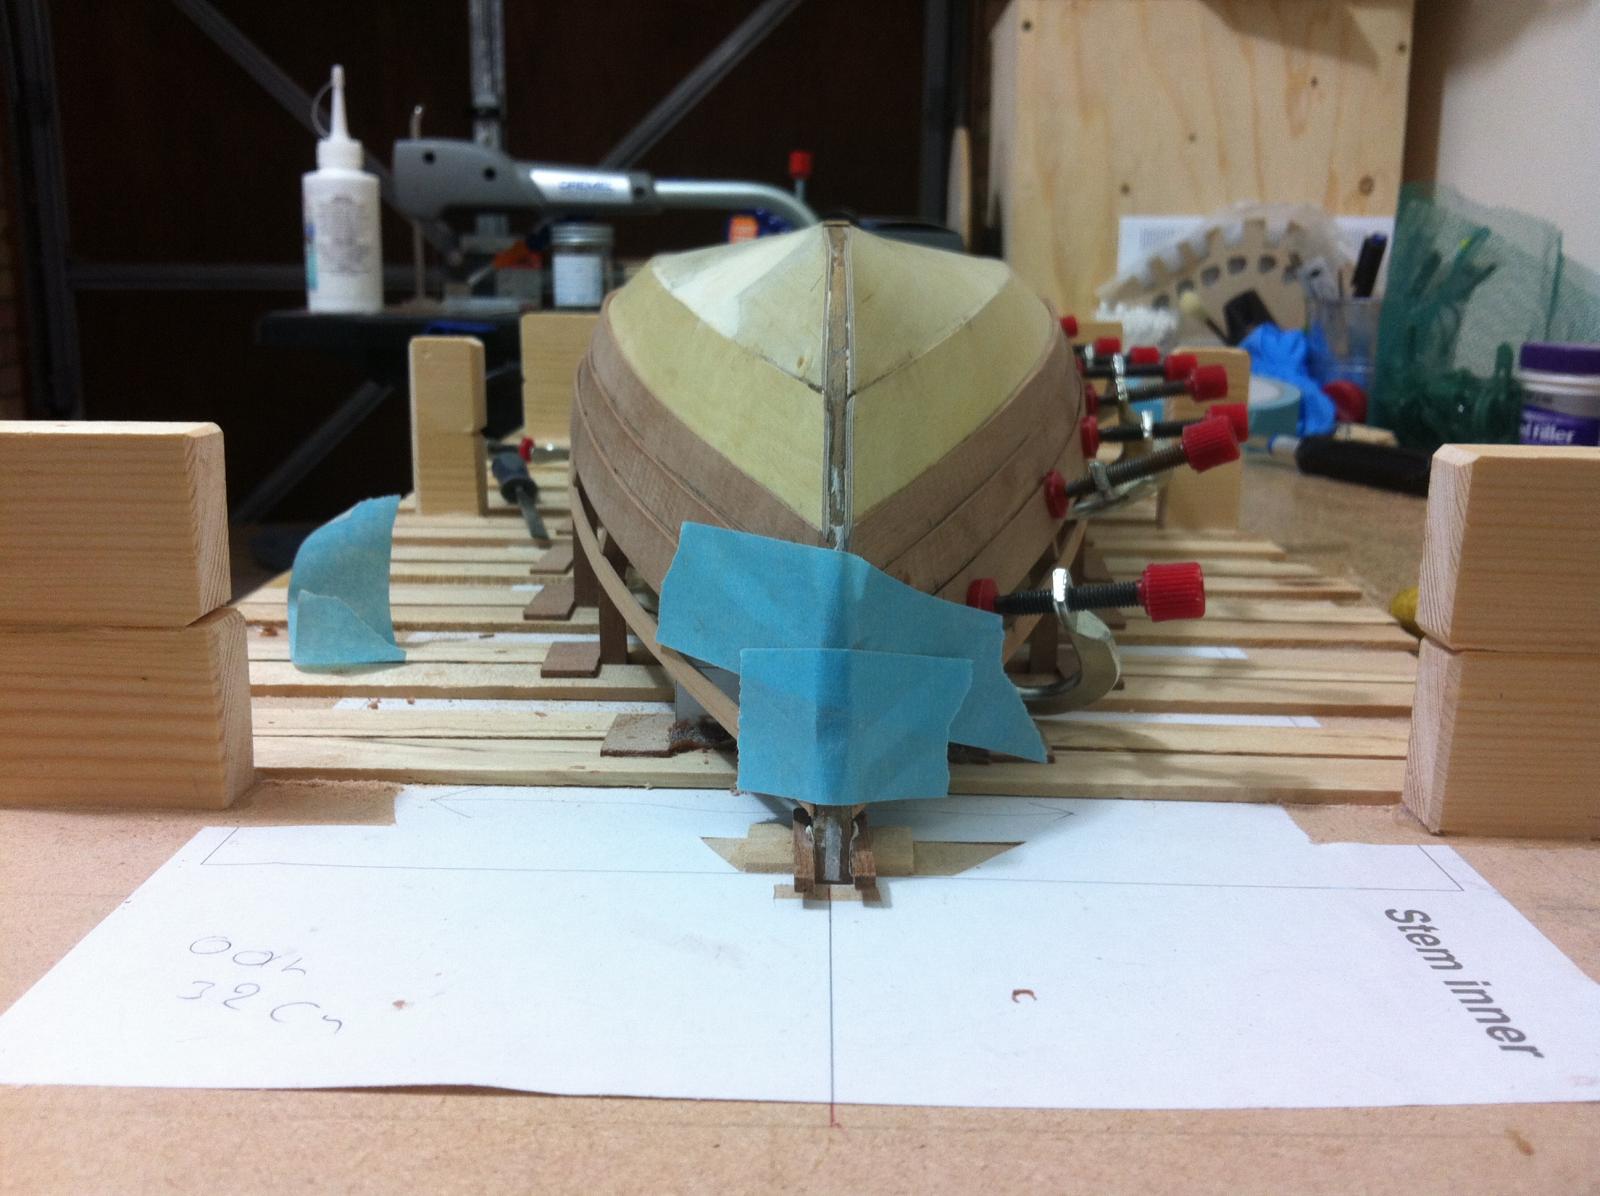
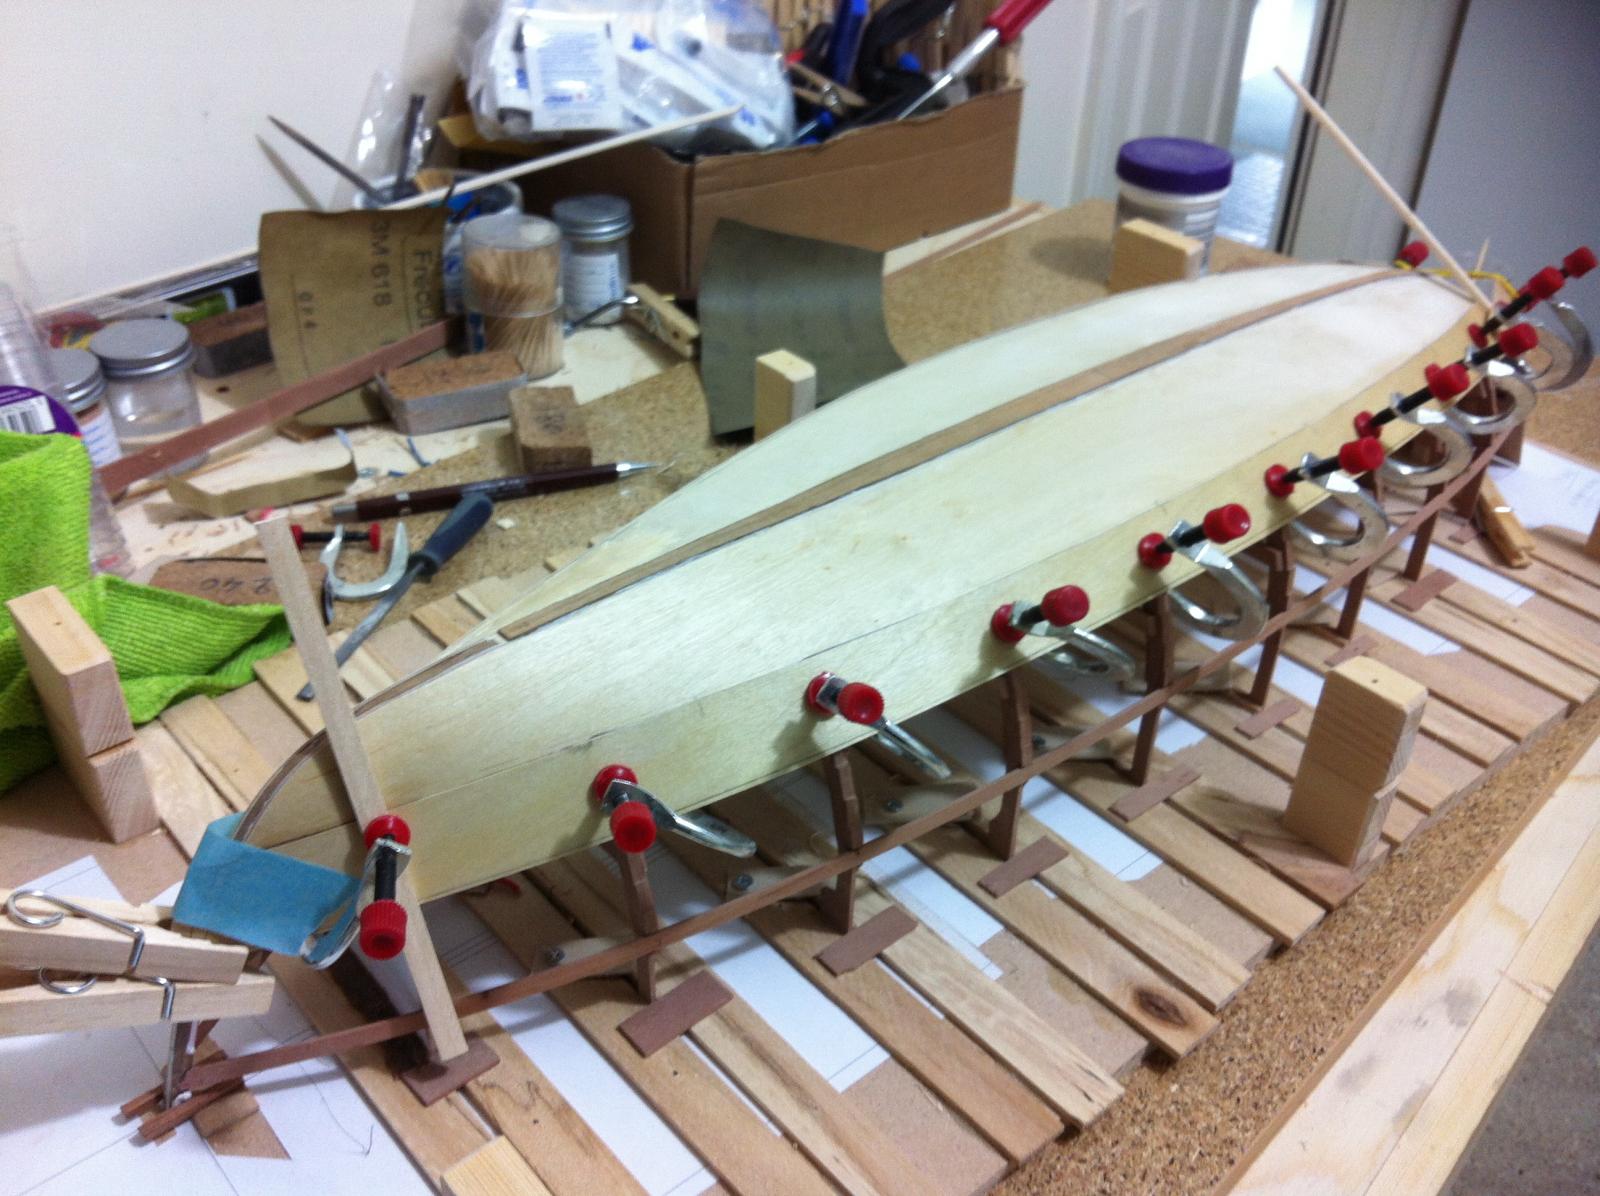
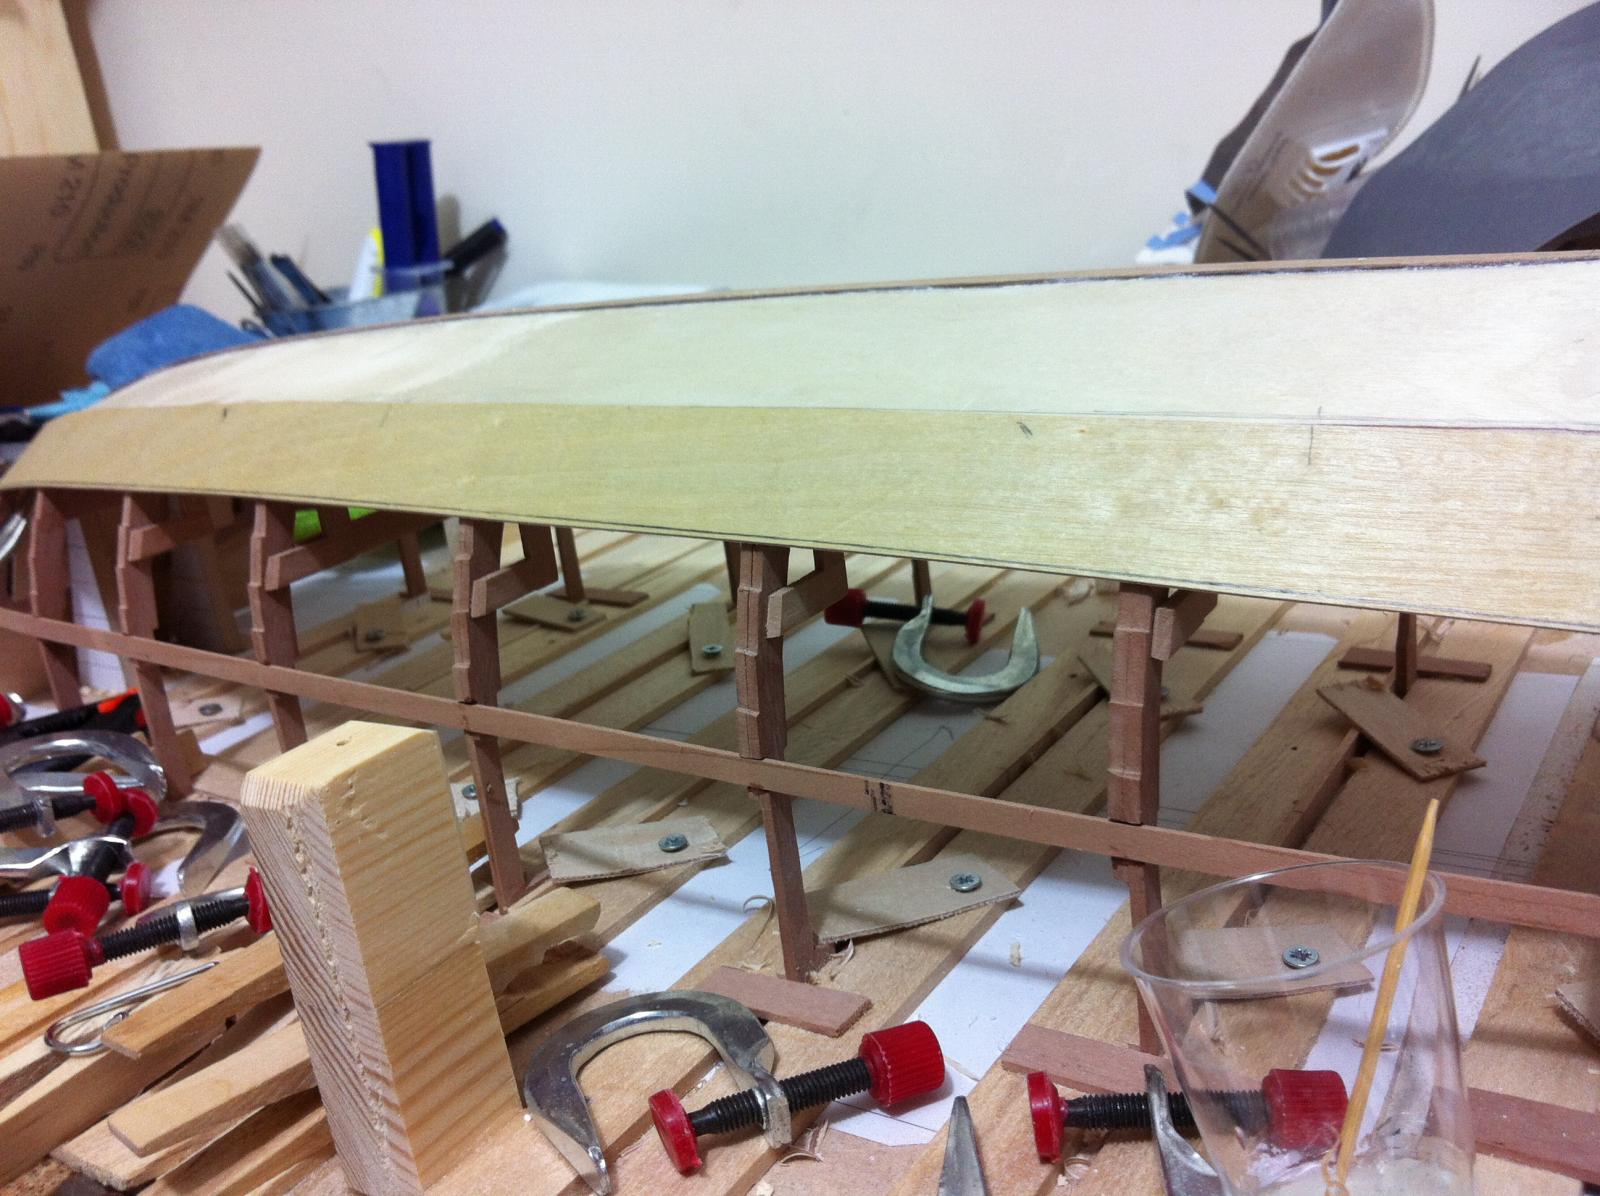
With a baby now in the house work progresses slowly. The sheer plank rivets are now left and of course all rivets forward of station 0 at the bow.

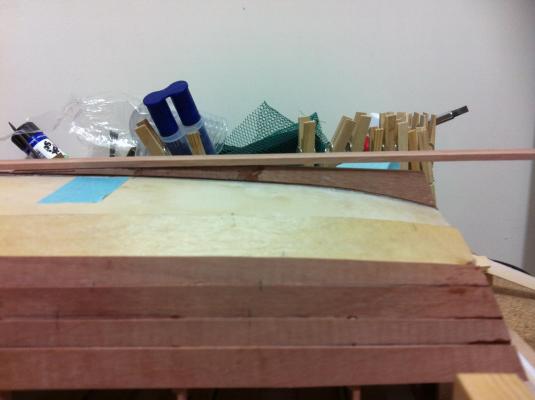
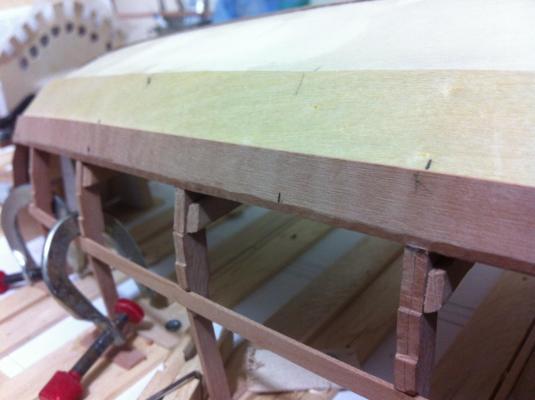
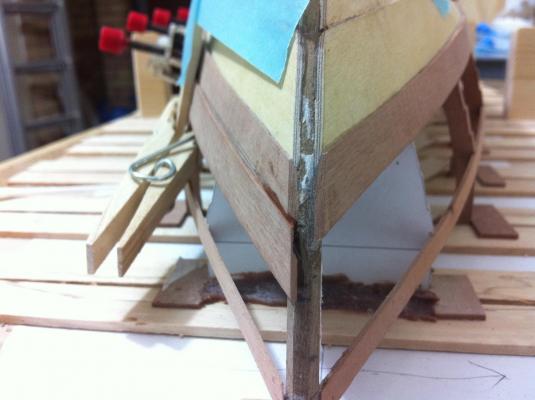
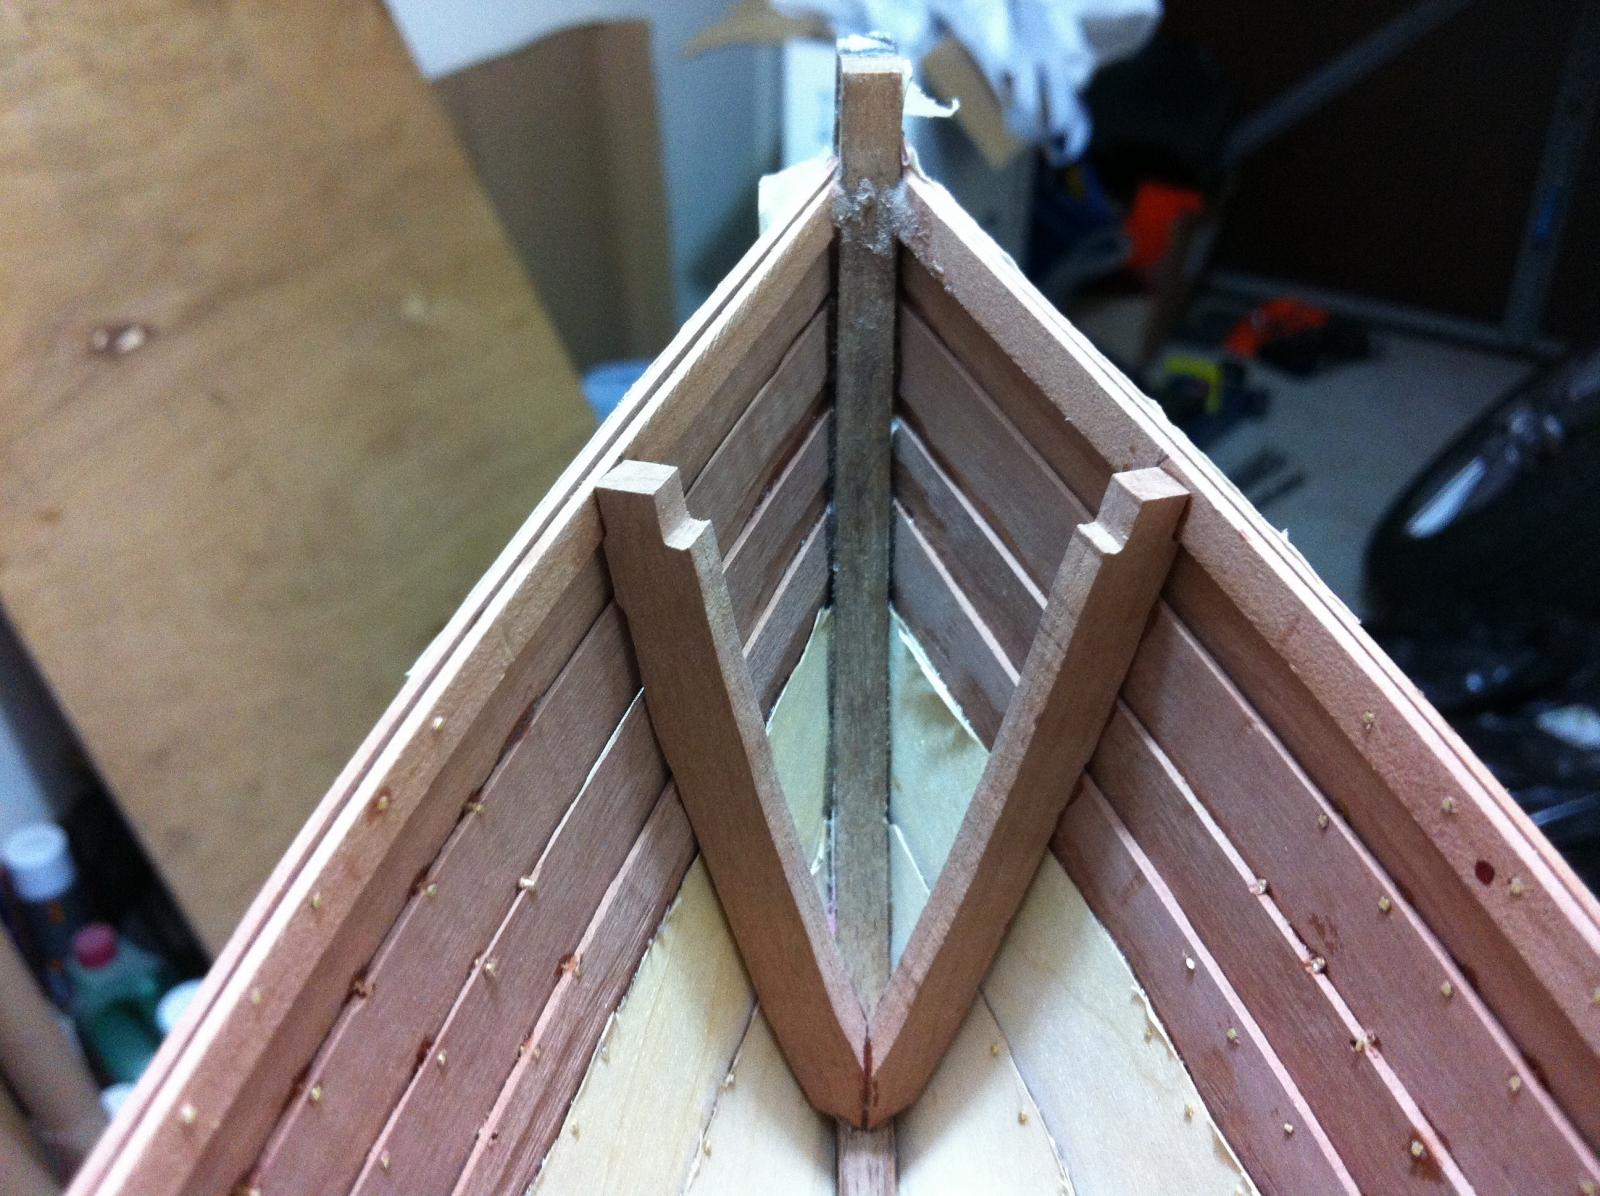
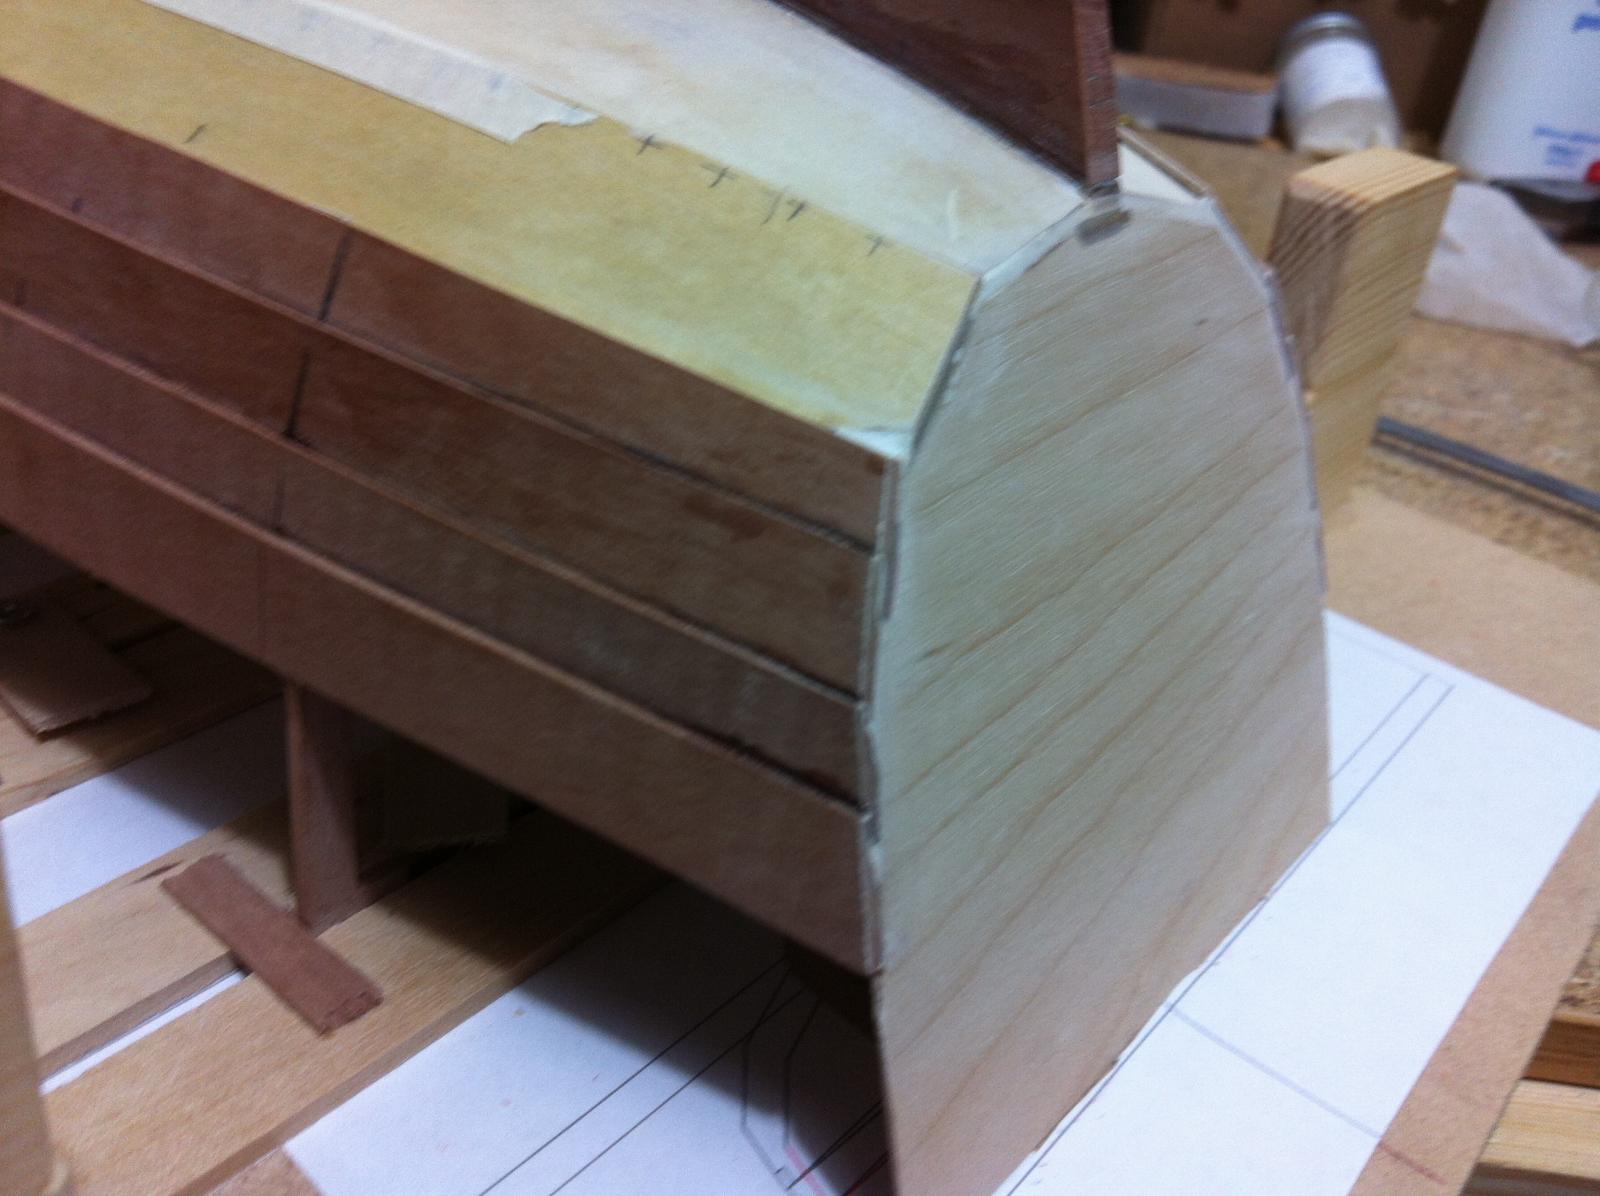
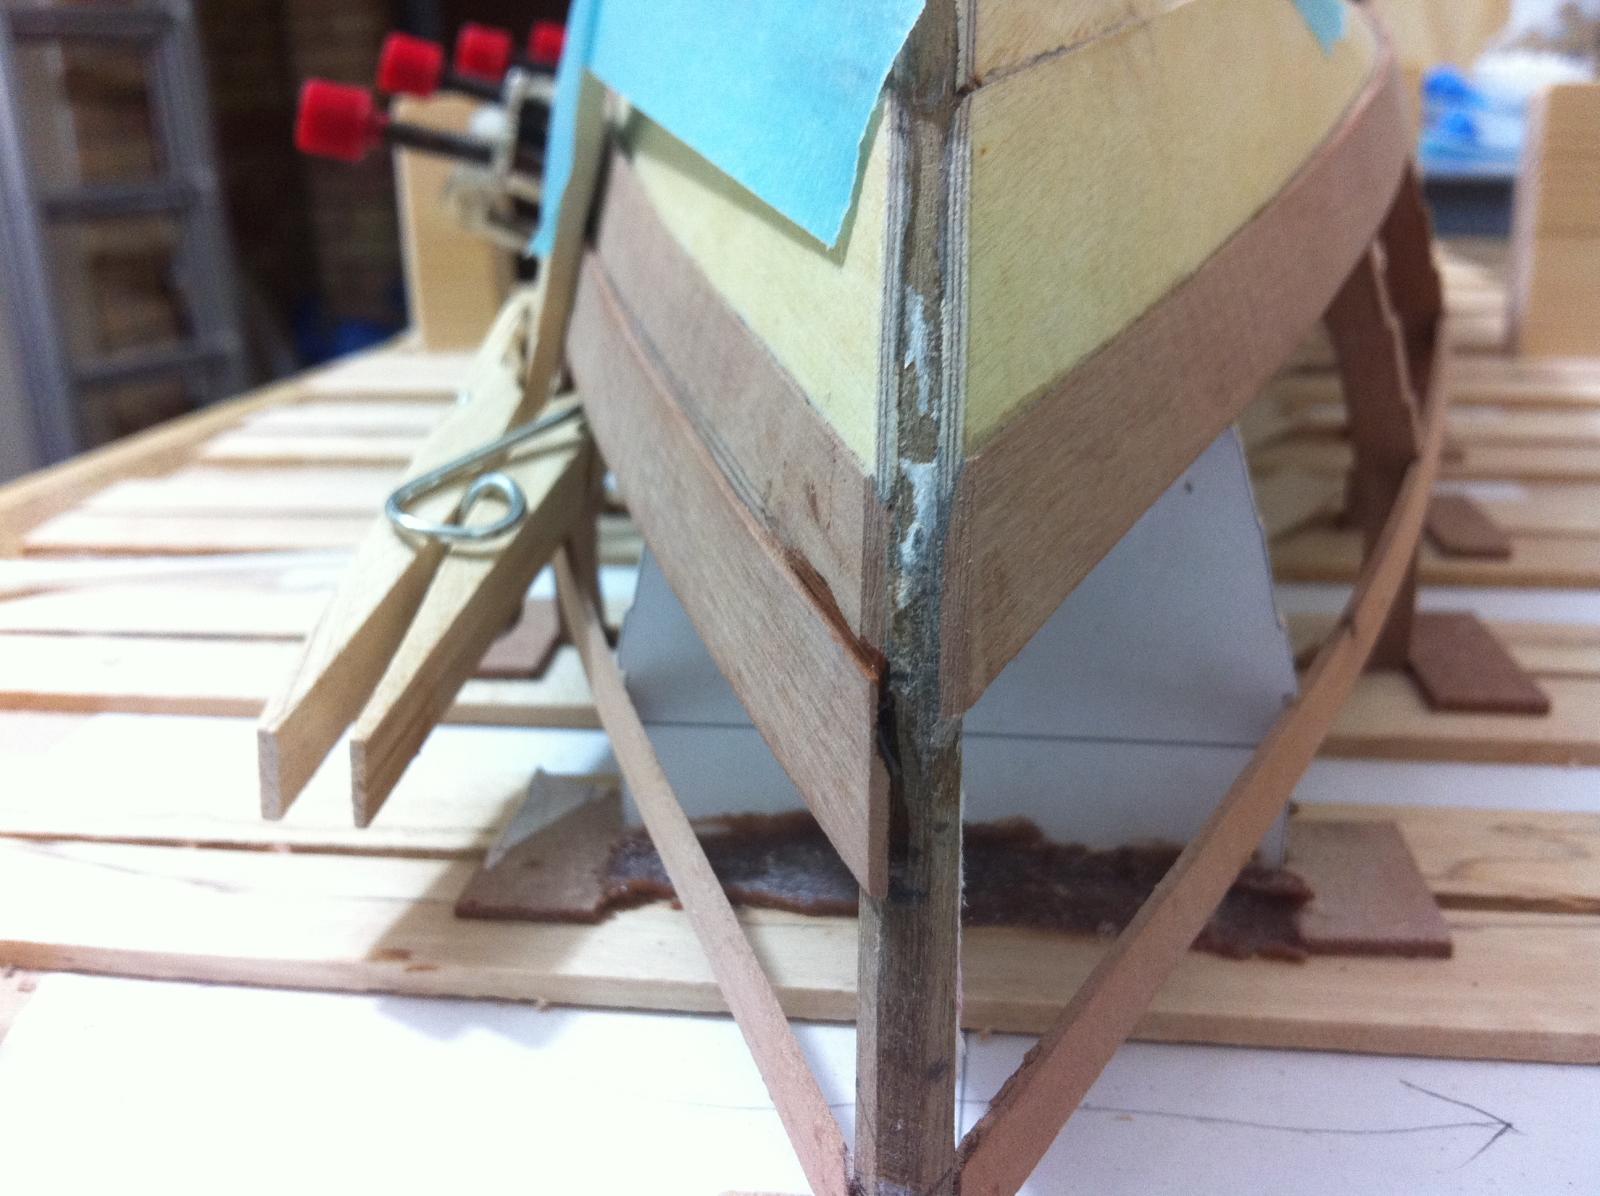
This plank was left unpainted by the american team and I am tempted to do the same. There will also be a rub rail added which will hide the uppermost rivet line. In the next picture also note the shaping of the stem which at the level of the sheer plank is left square.
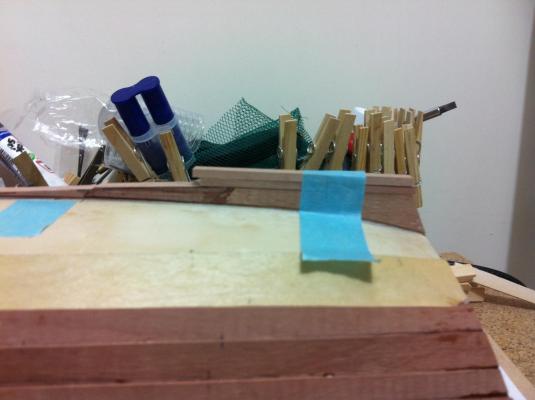
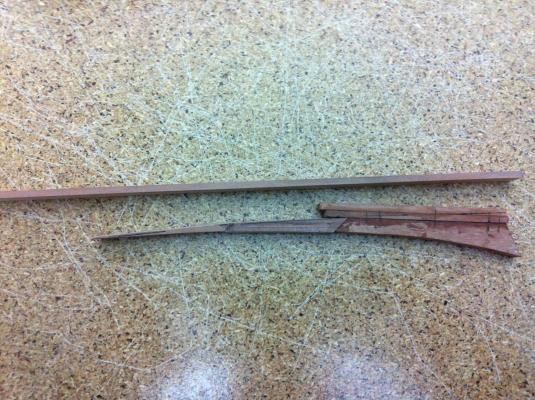
I needed a brake so I concentrated on the false stem. It was first shaped with the needle files and then glued to the hull. Hopefully there is some similarity with the previous picture.
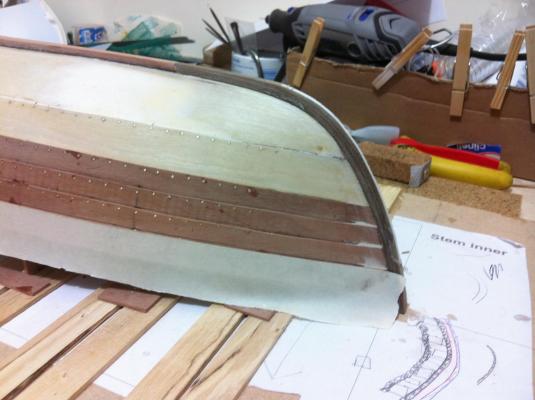
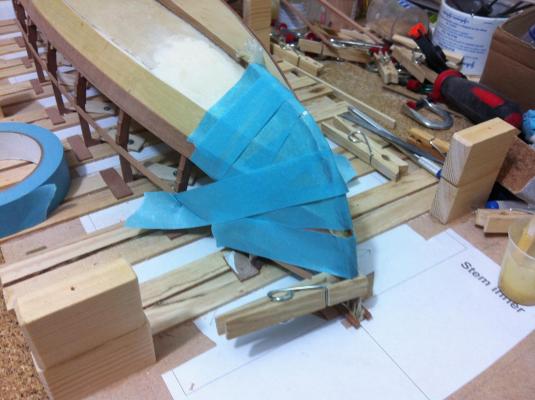
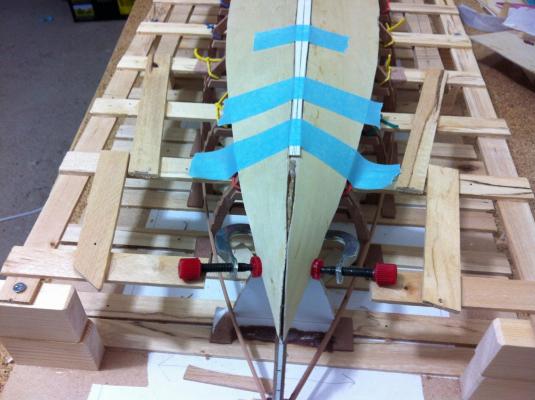
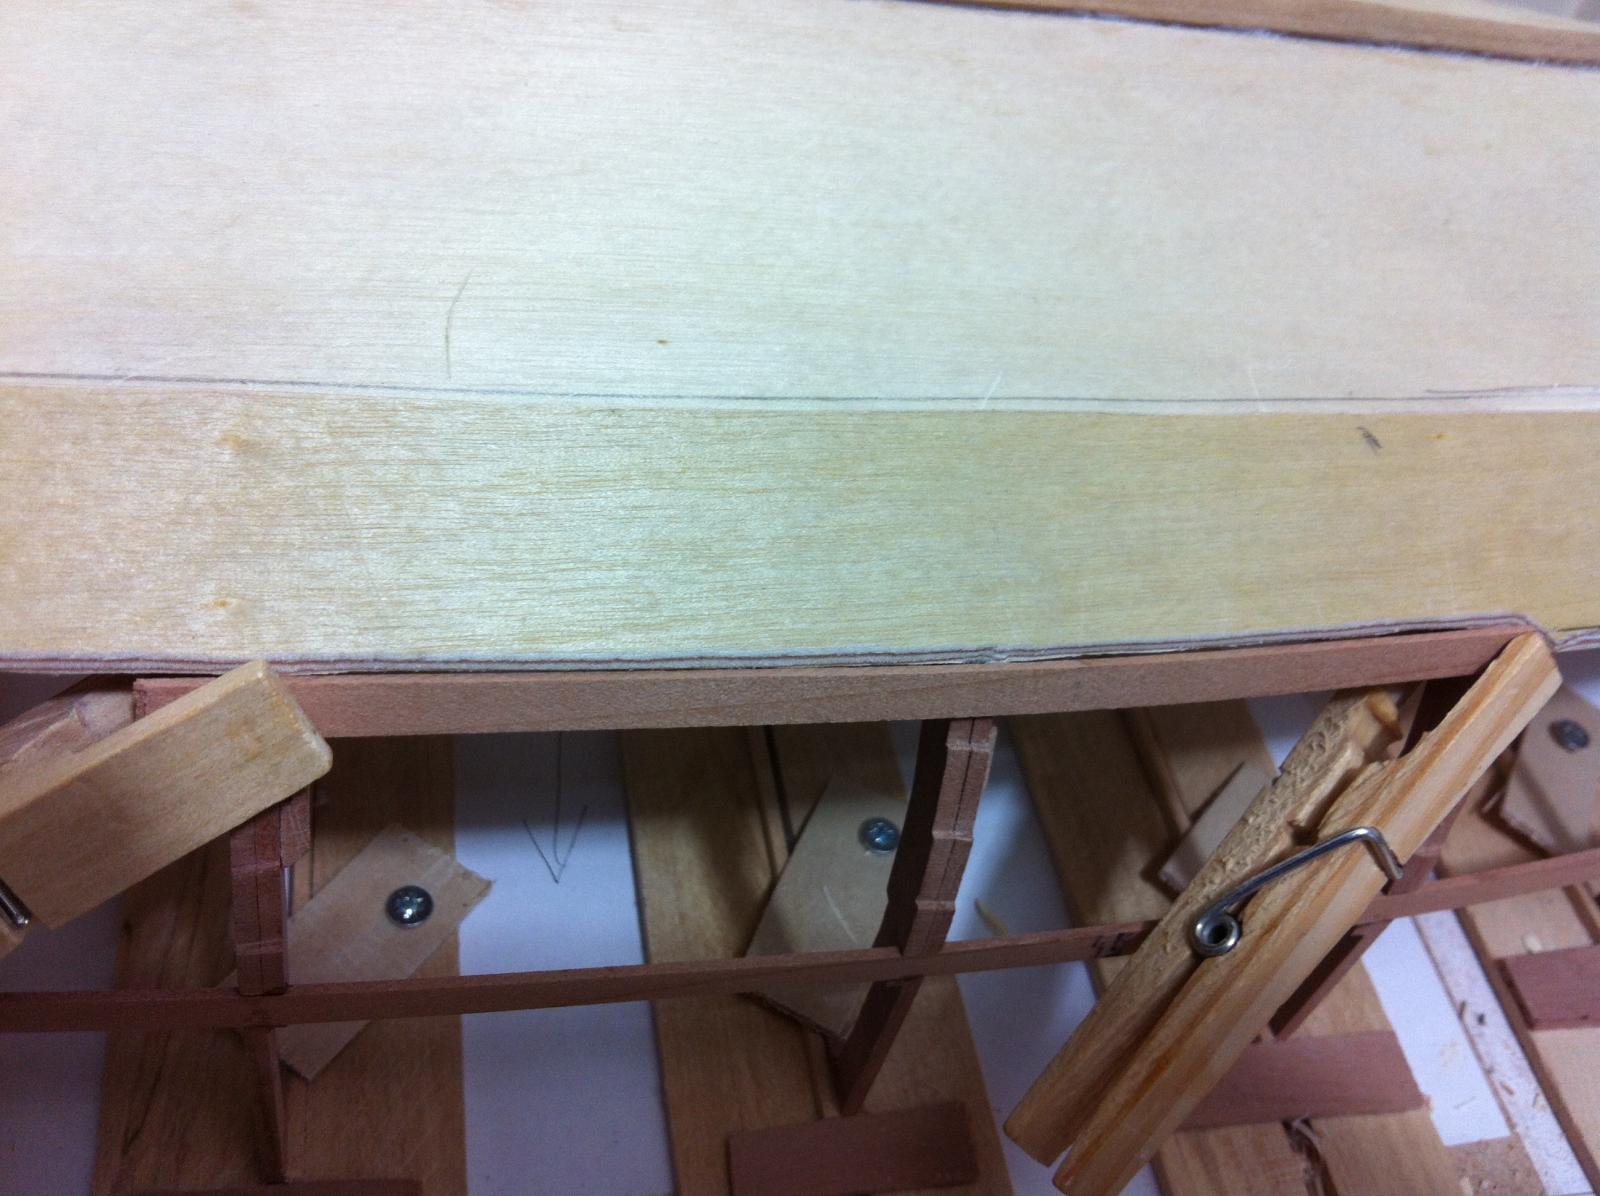
With this done its back to riveting. I am concerned that the CA glue will stain the wood and although this is not a problem for the lower planks, if the sheer plank is left unpainted it will need a lot of sanding which with all the rivets will be ddifficult. I am also concerned that there will be a lot of stains on the inside of the hull but there is no better alternative to superglue. So here it goes.
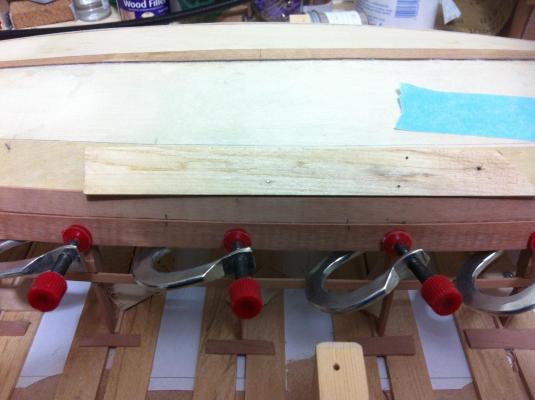
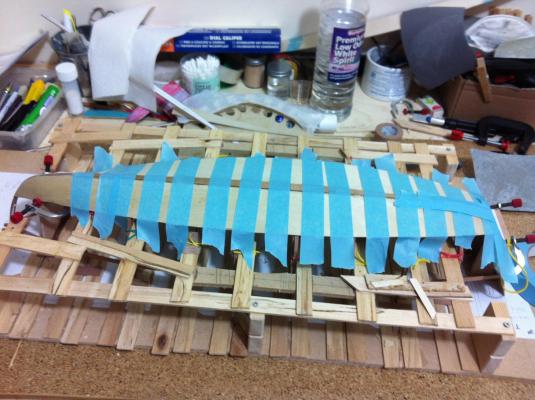
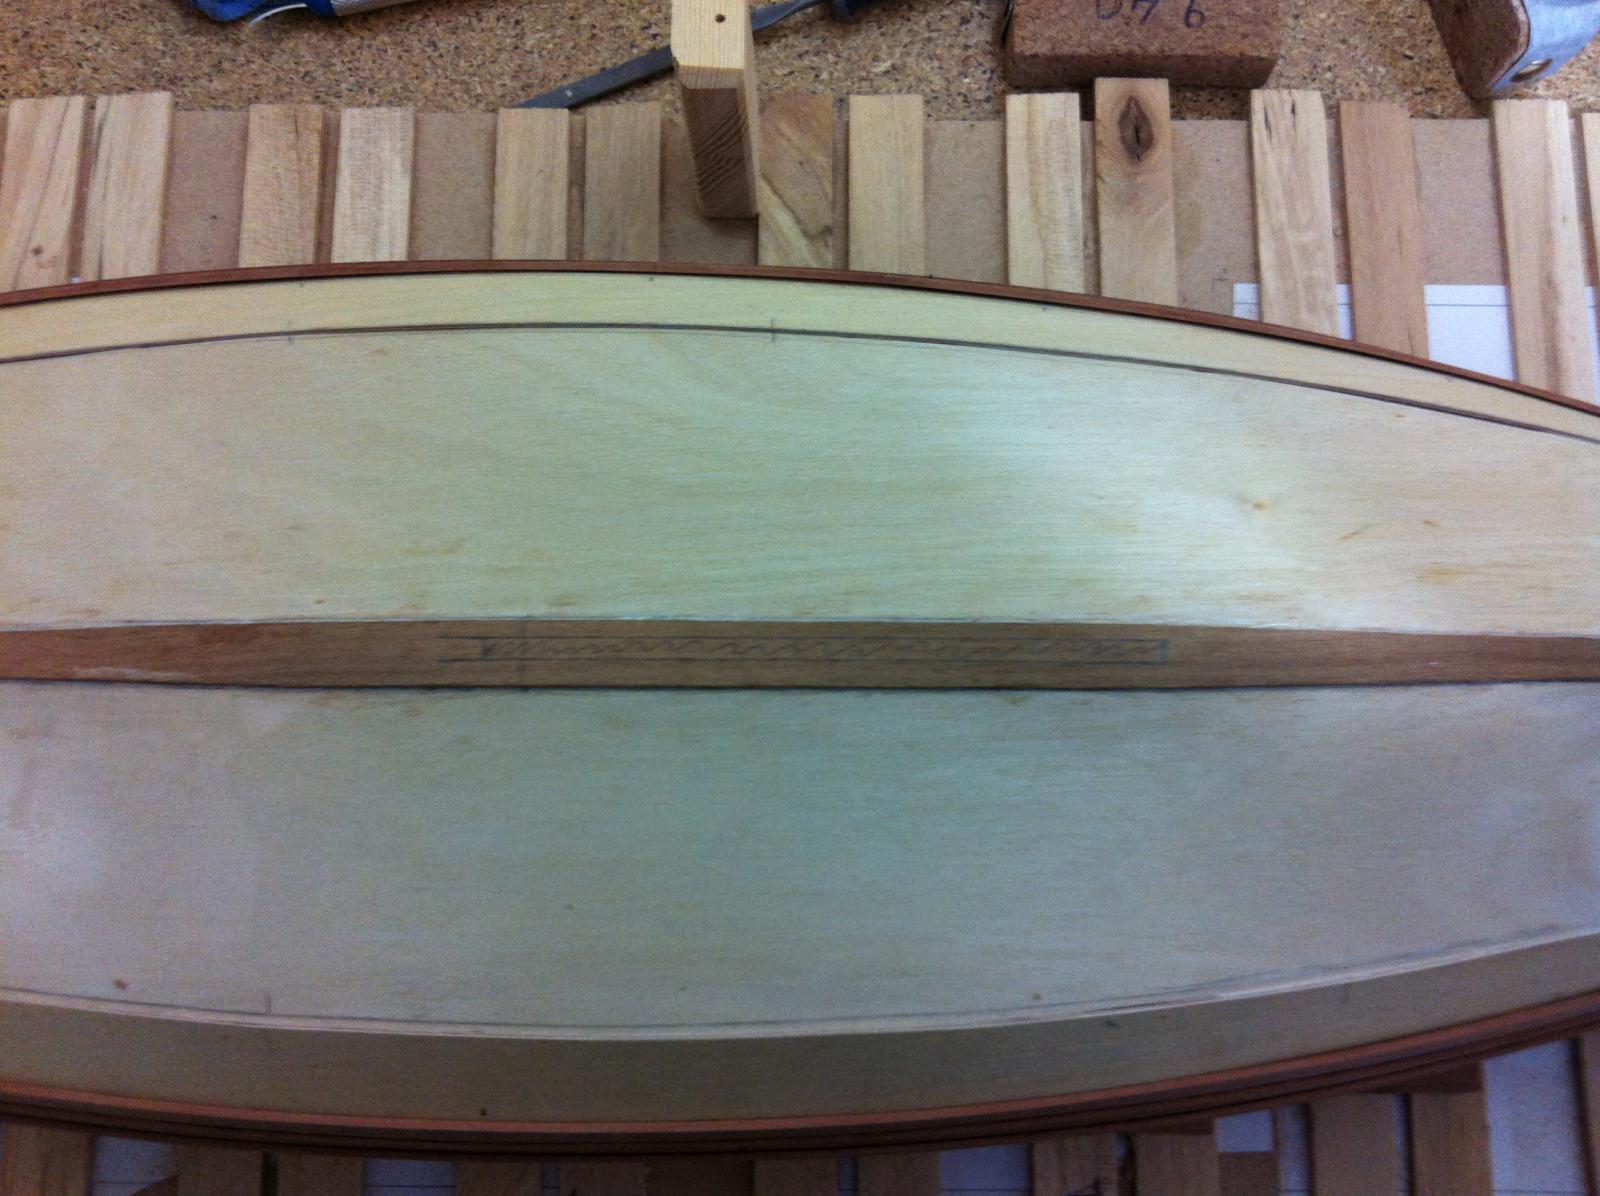
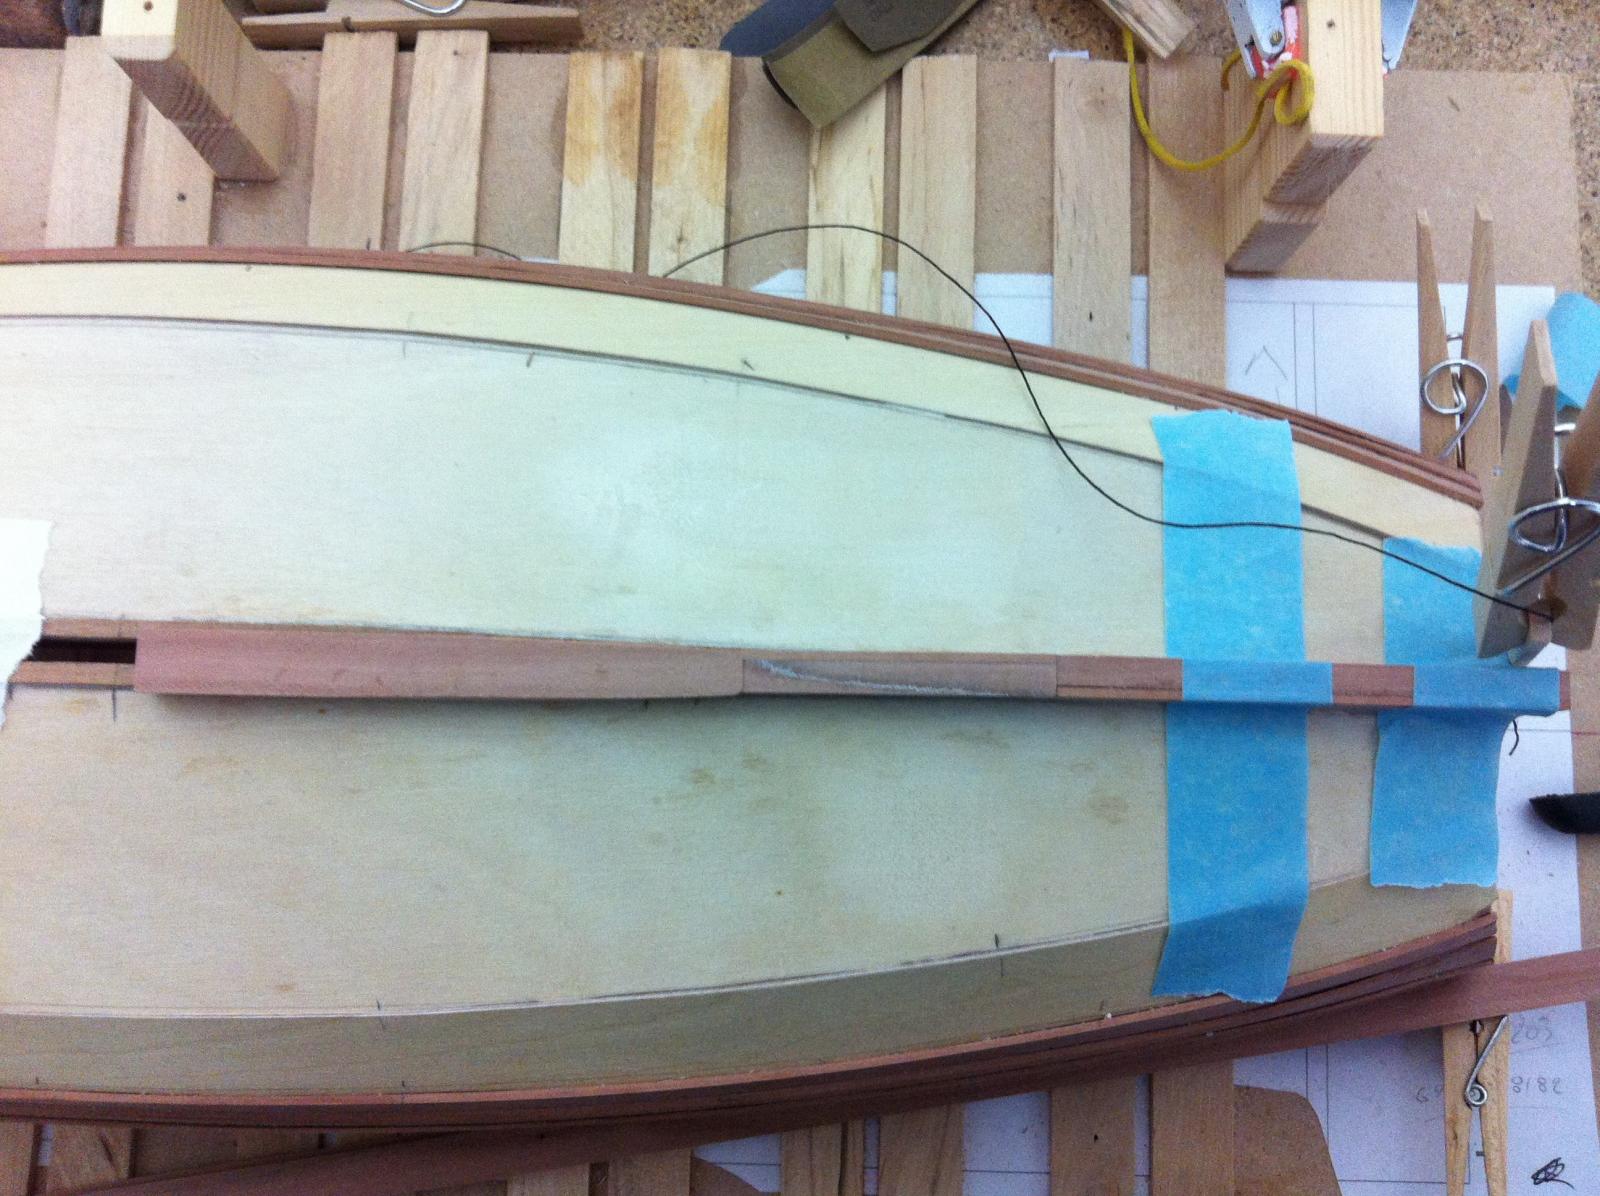
First I covered the plank and then marked the width of the rub rail to make sure all upper rivets will be hidden

And drill and glue and drill and glue and drill and glue...

Drilling 200 holes in a row is very satisfying

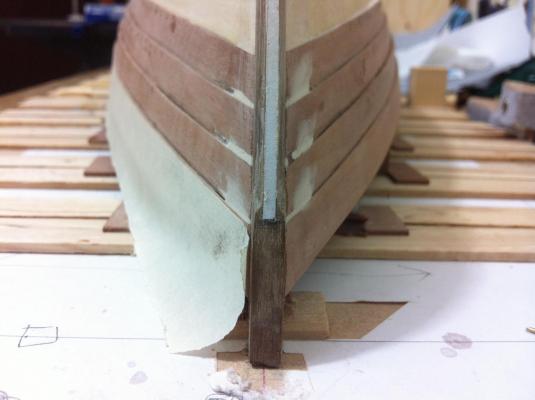
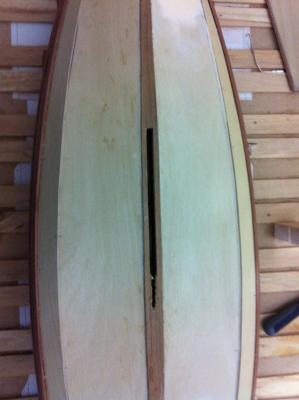
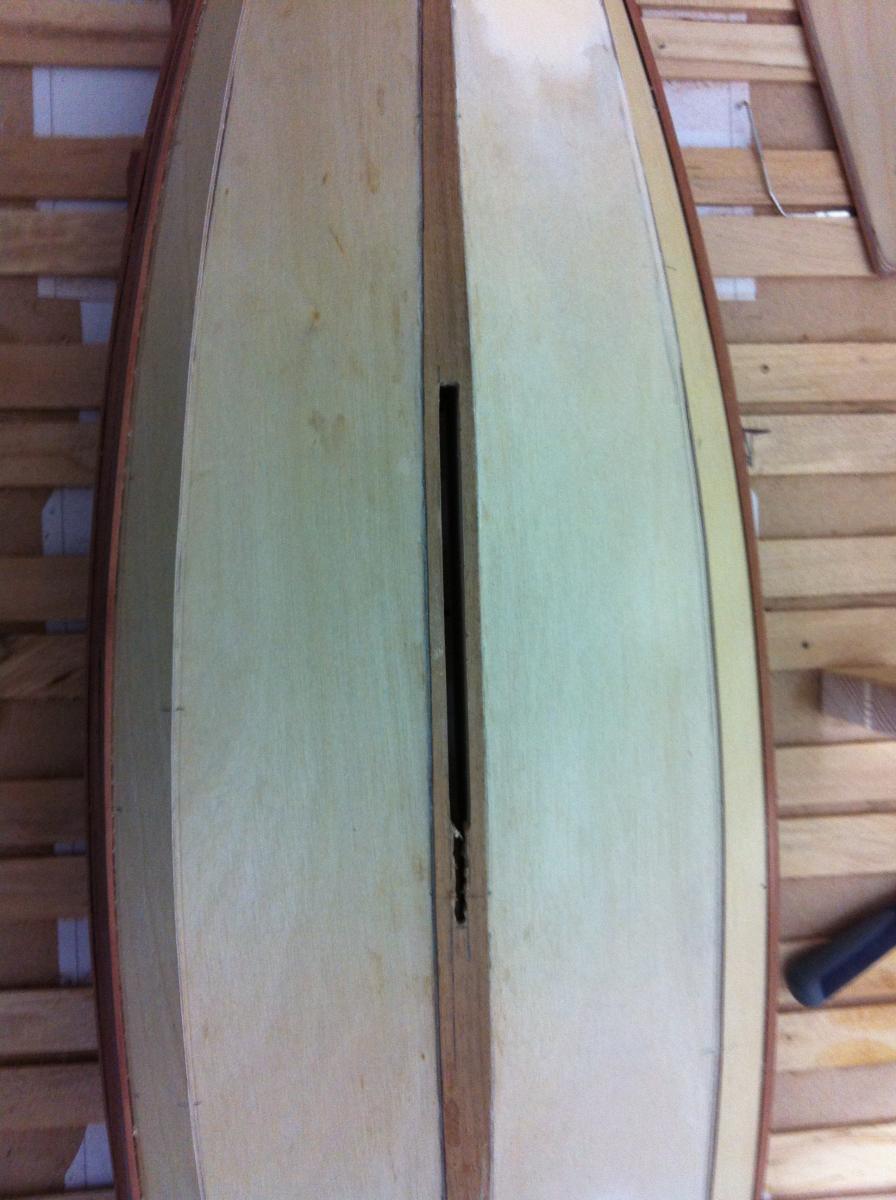
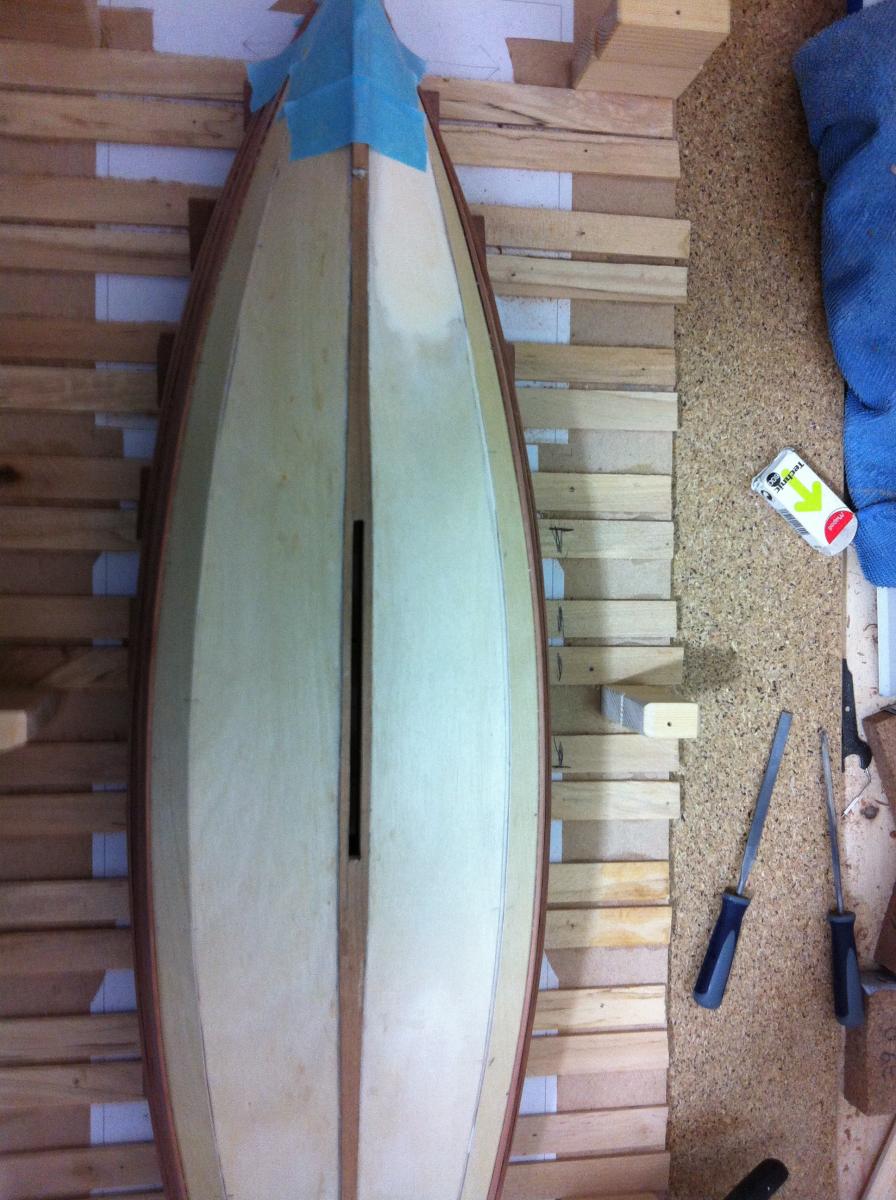
And another brake was necessary, so I finished cutting the centerboard slot

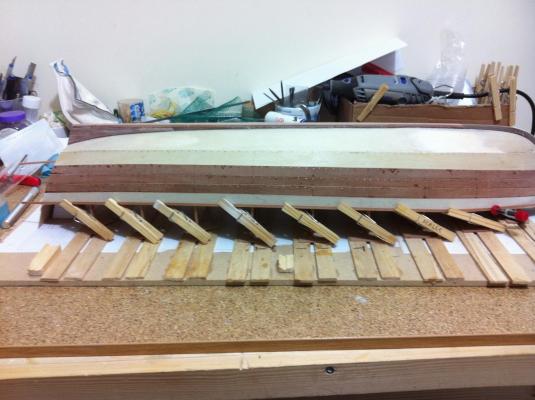
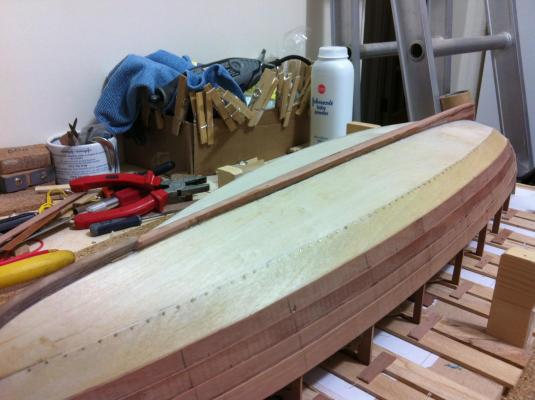
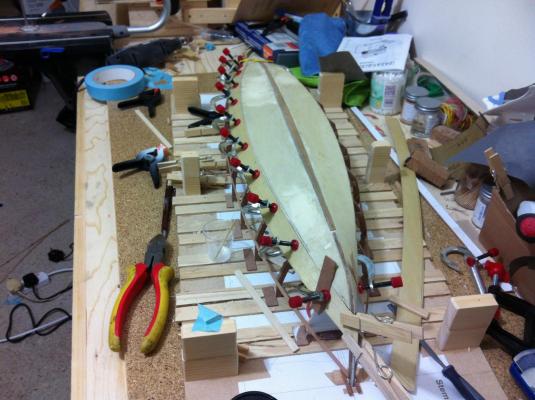
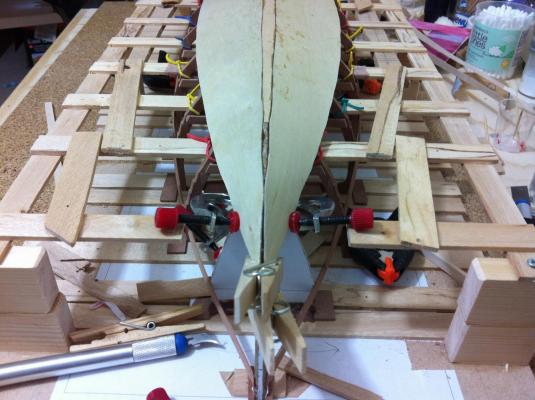
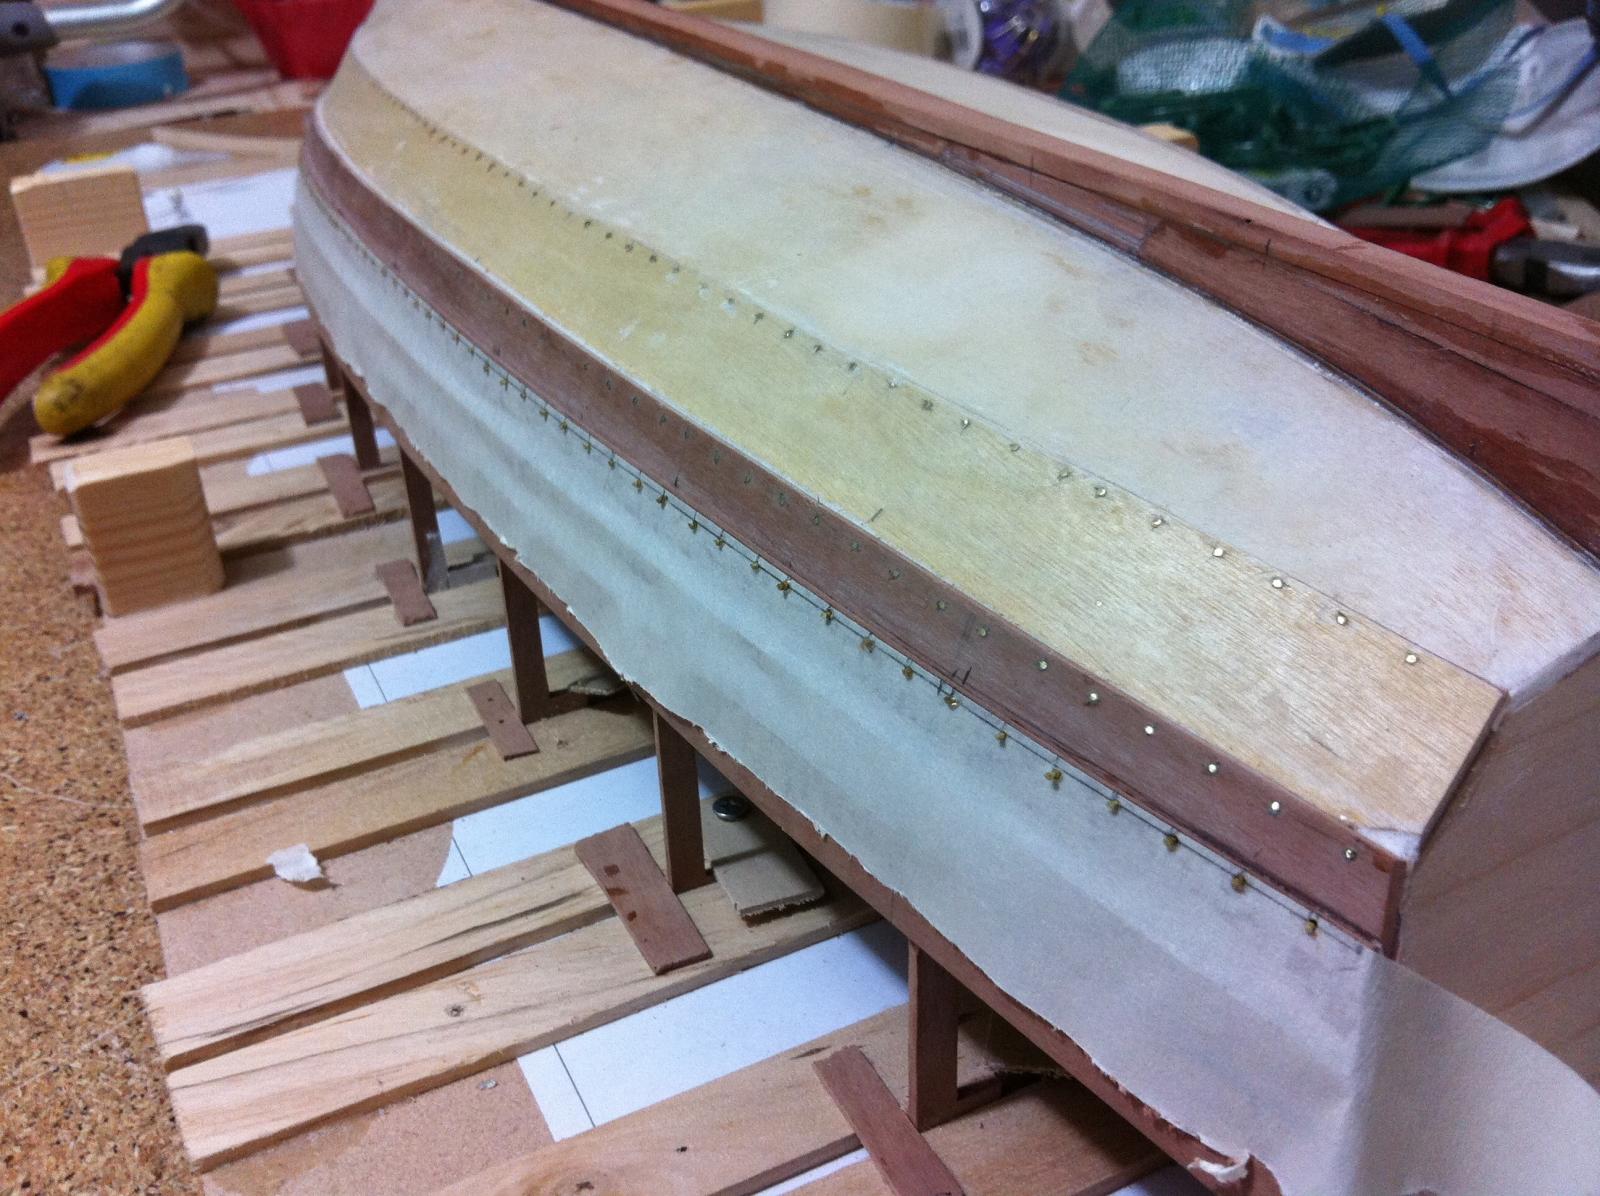
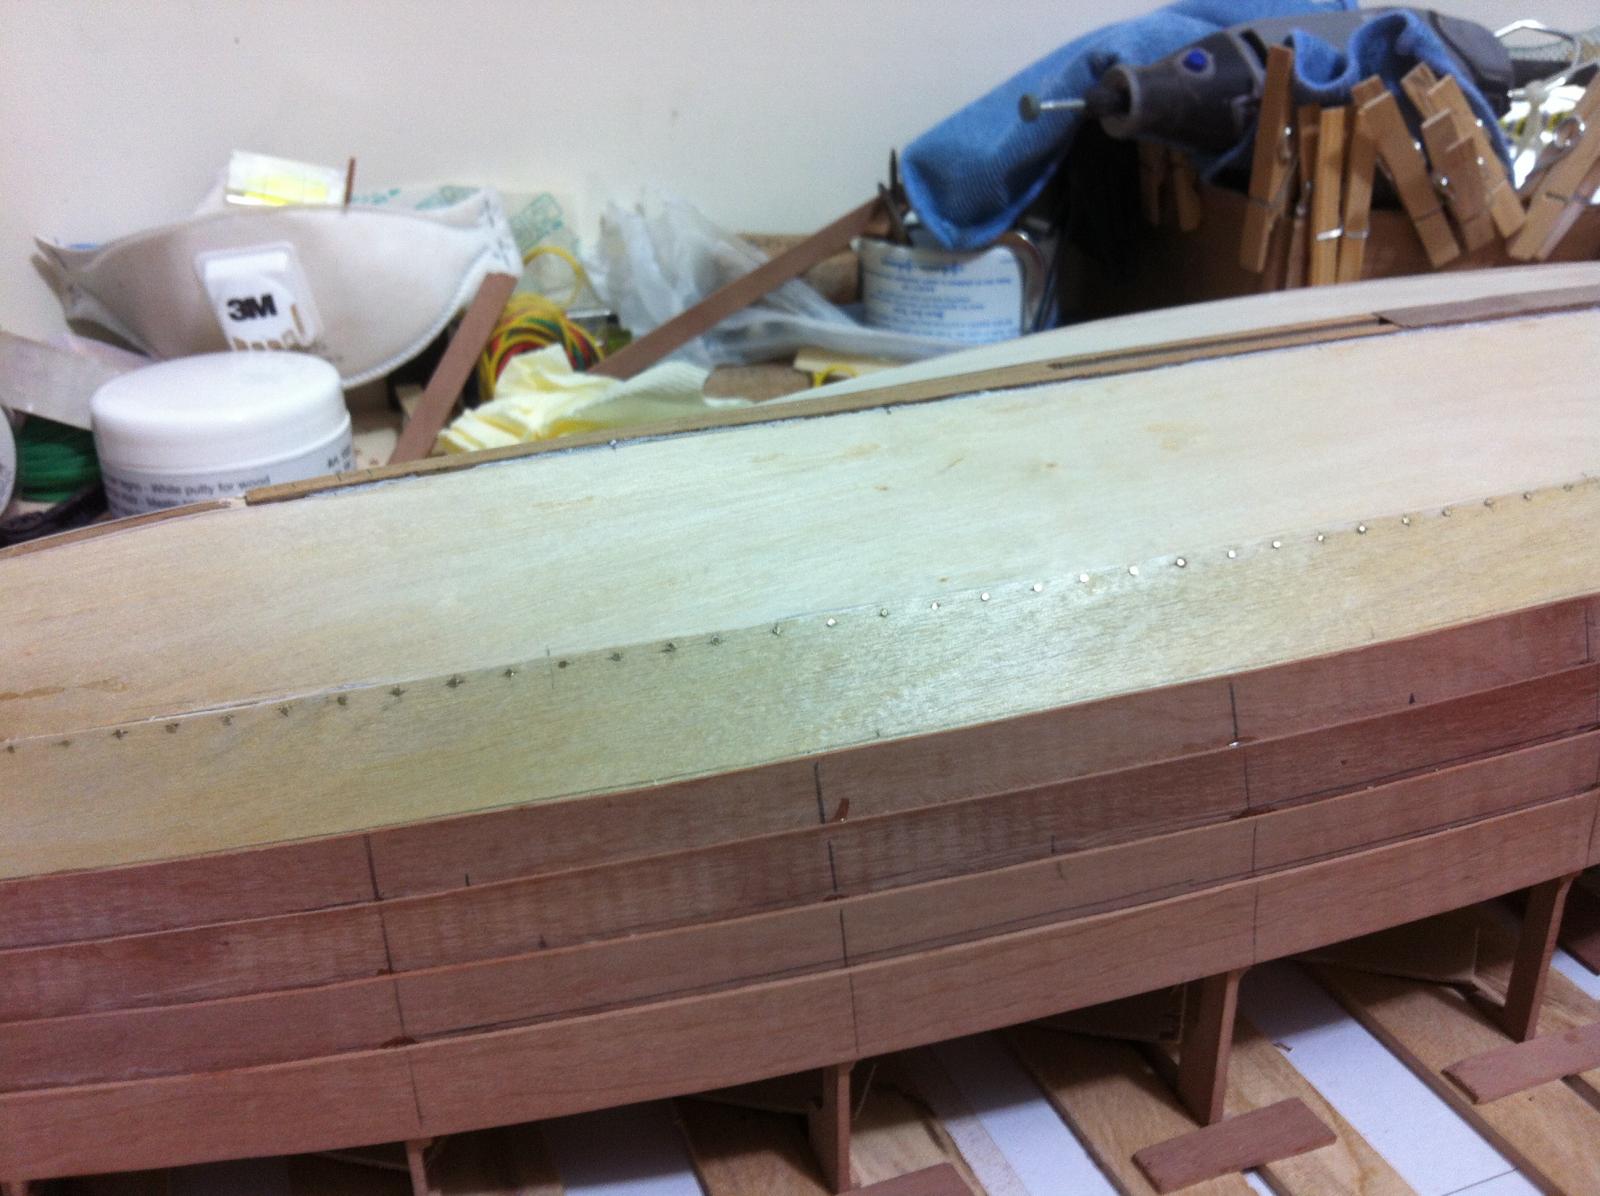
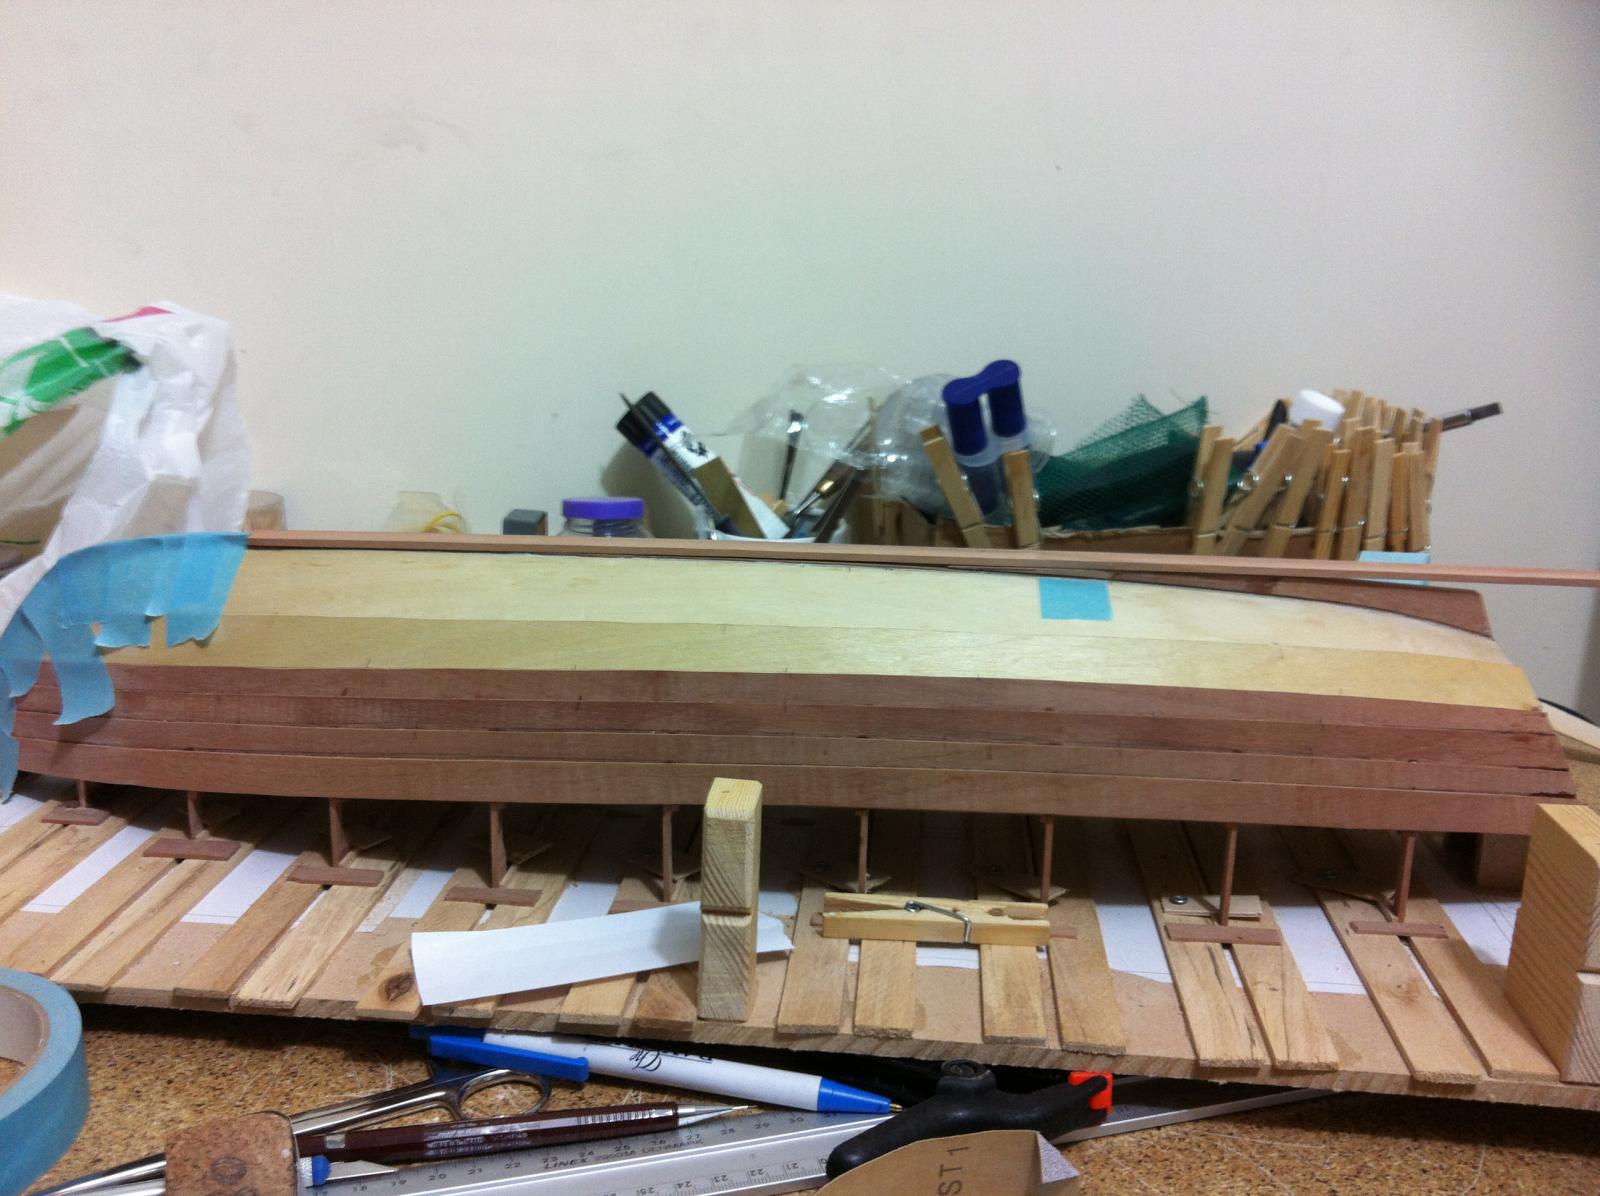
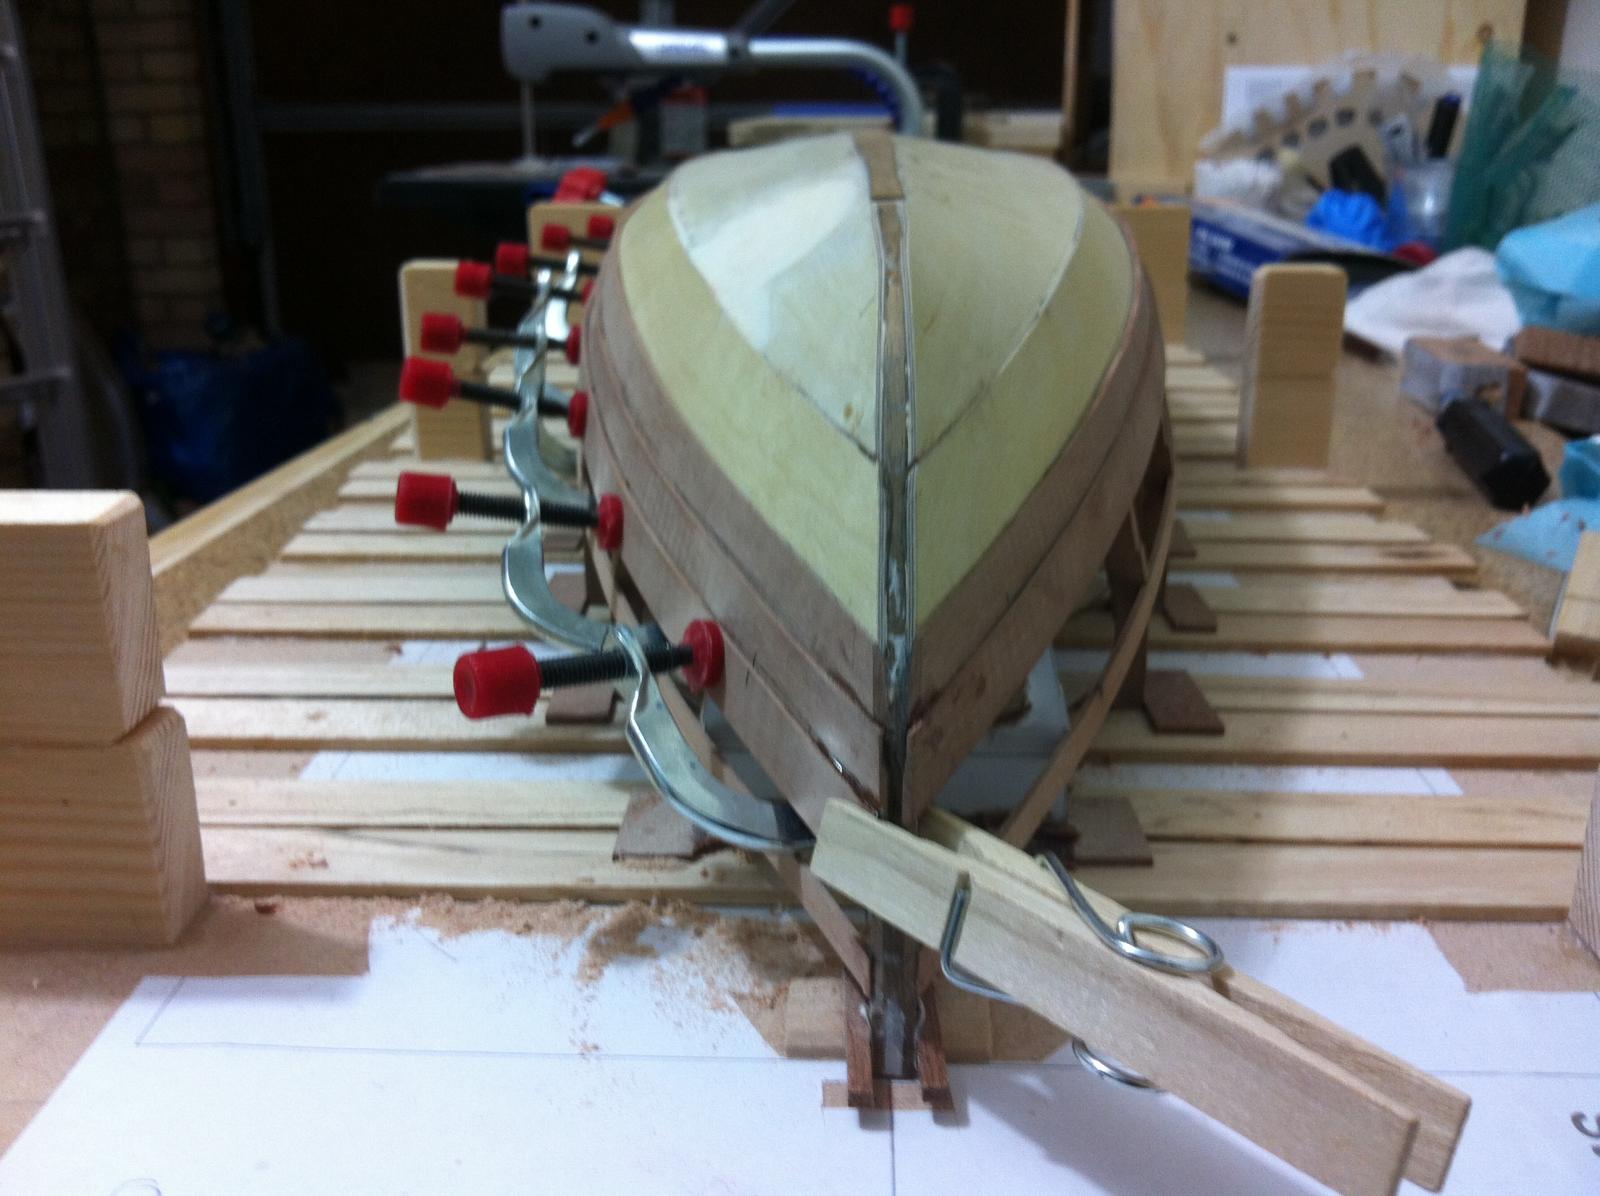
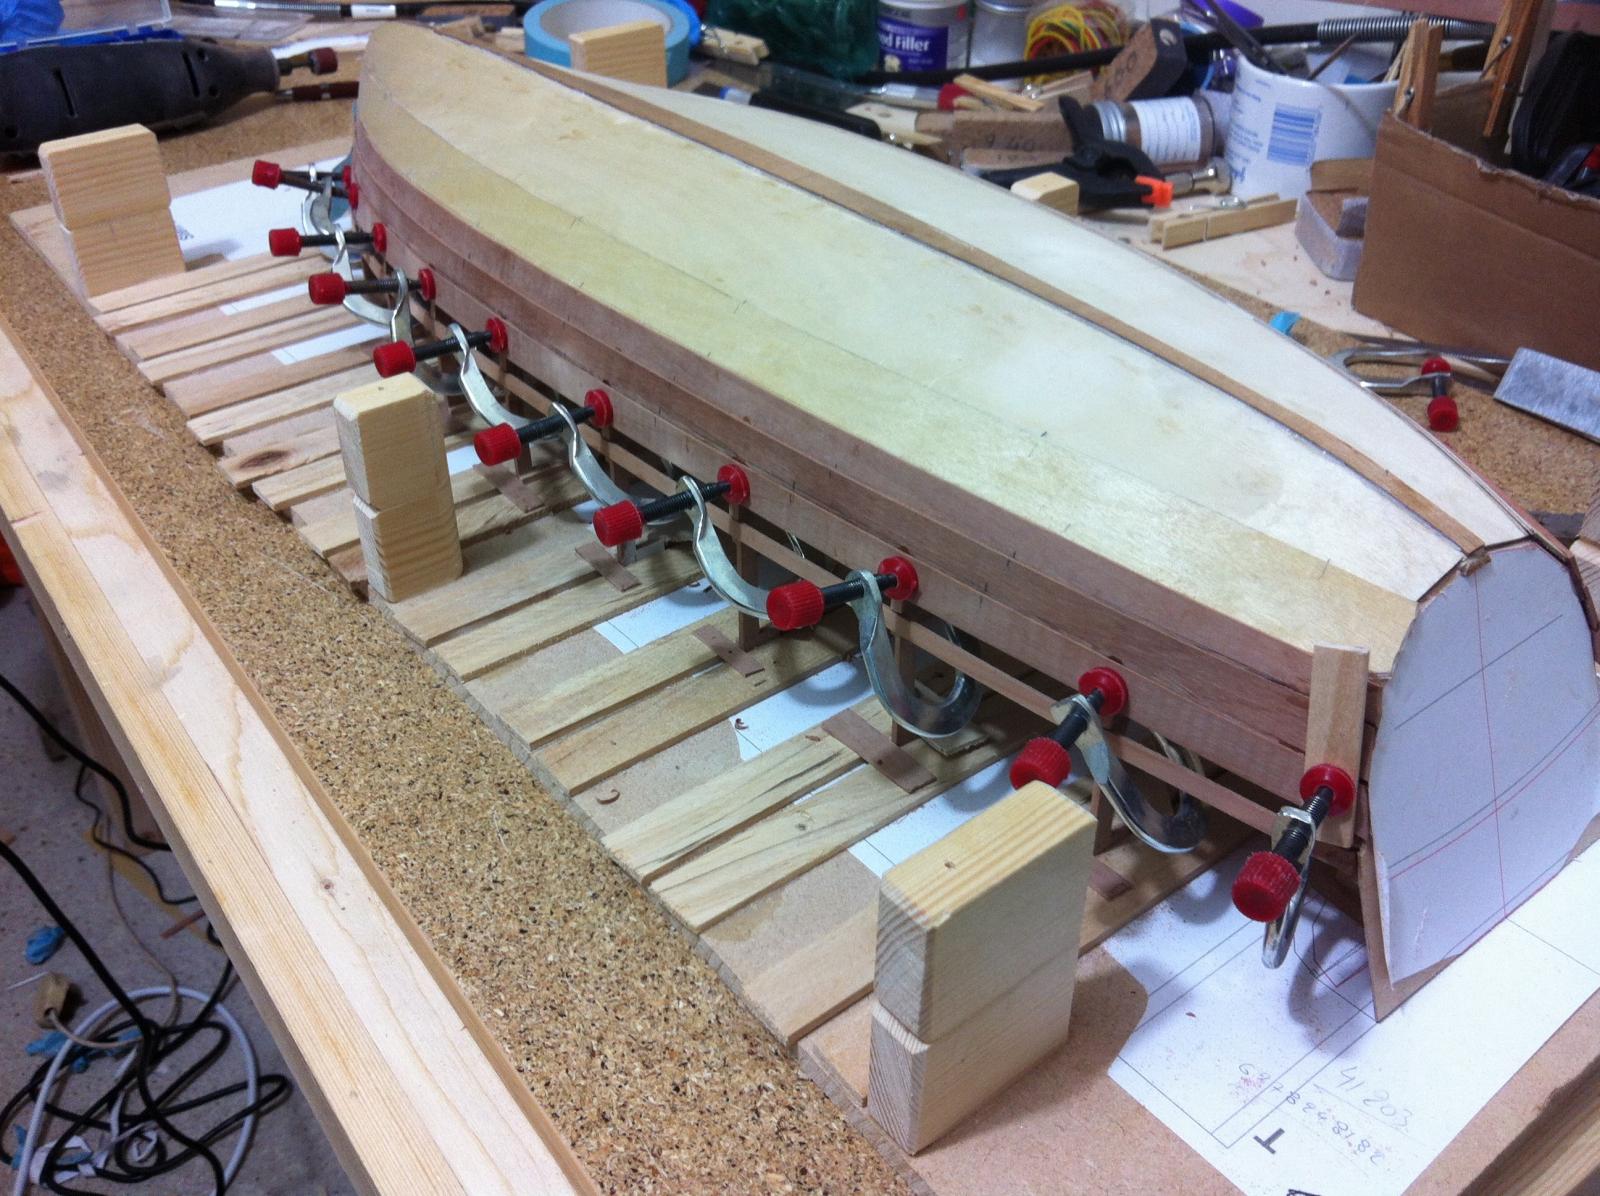
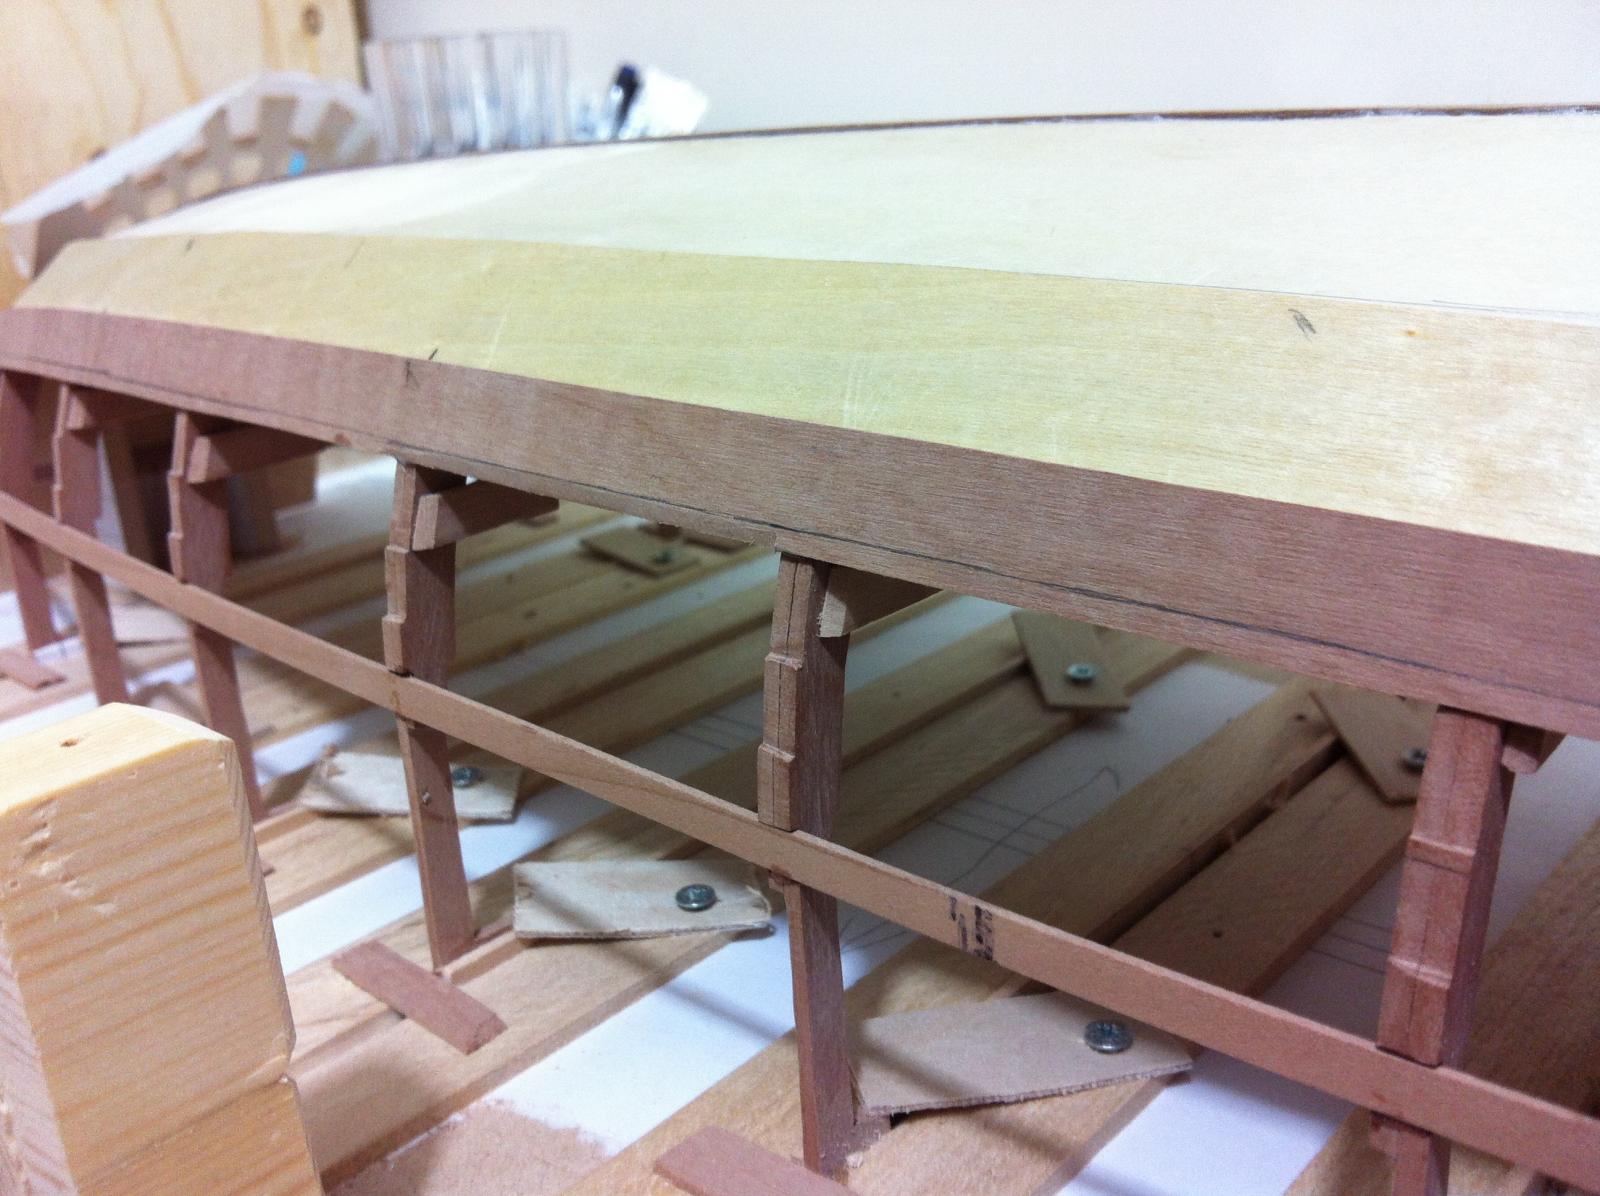
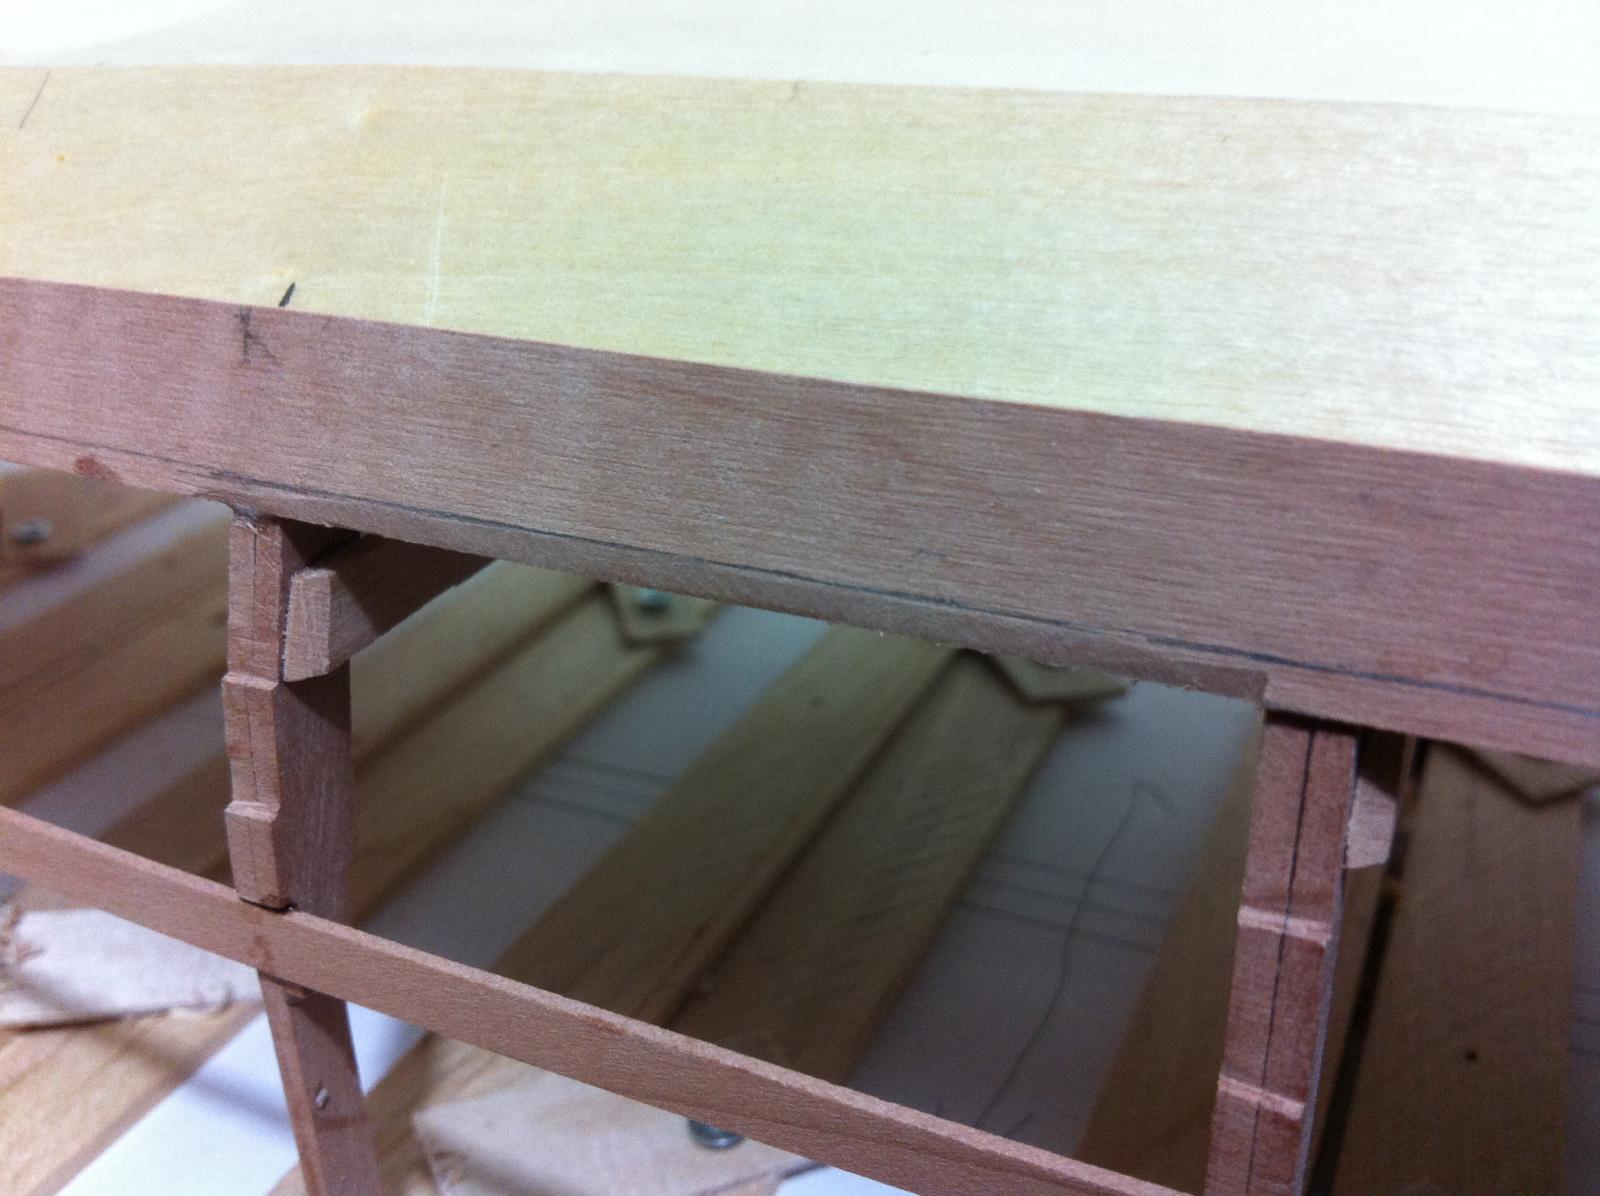
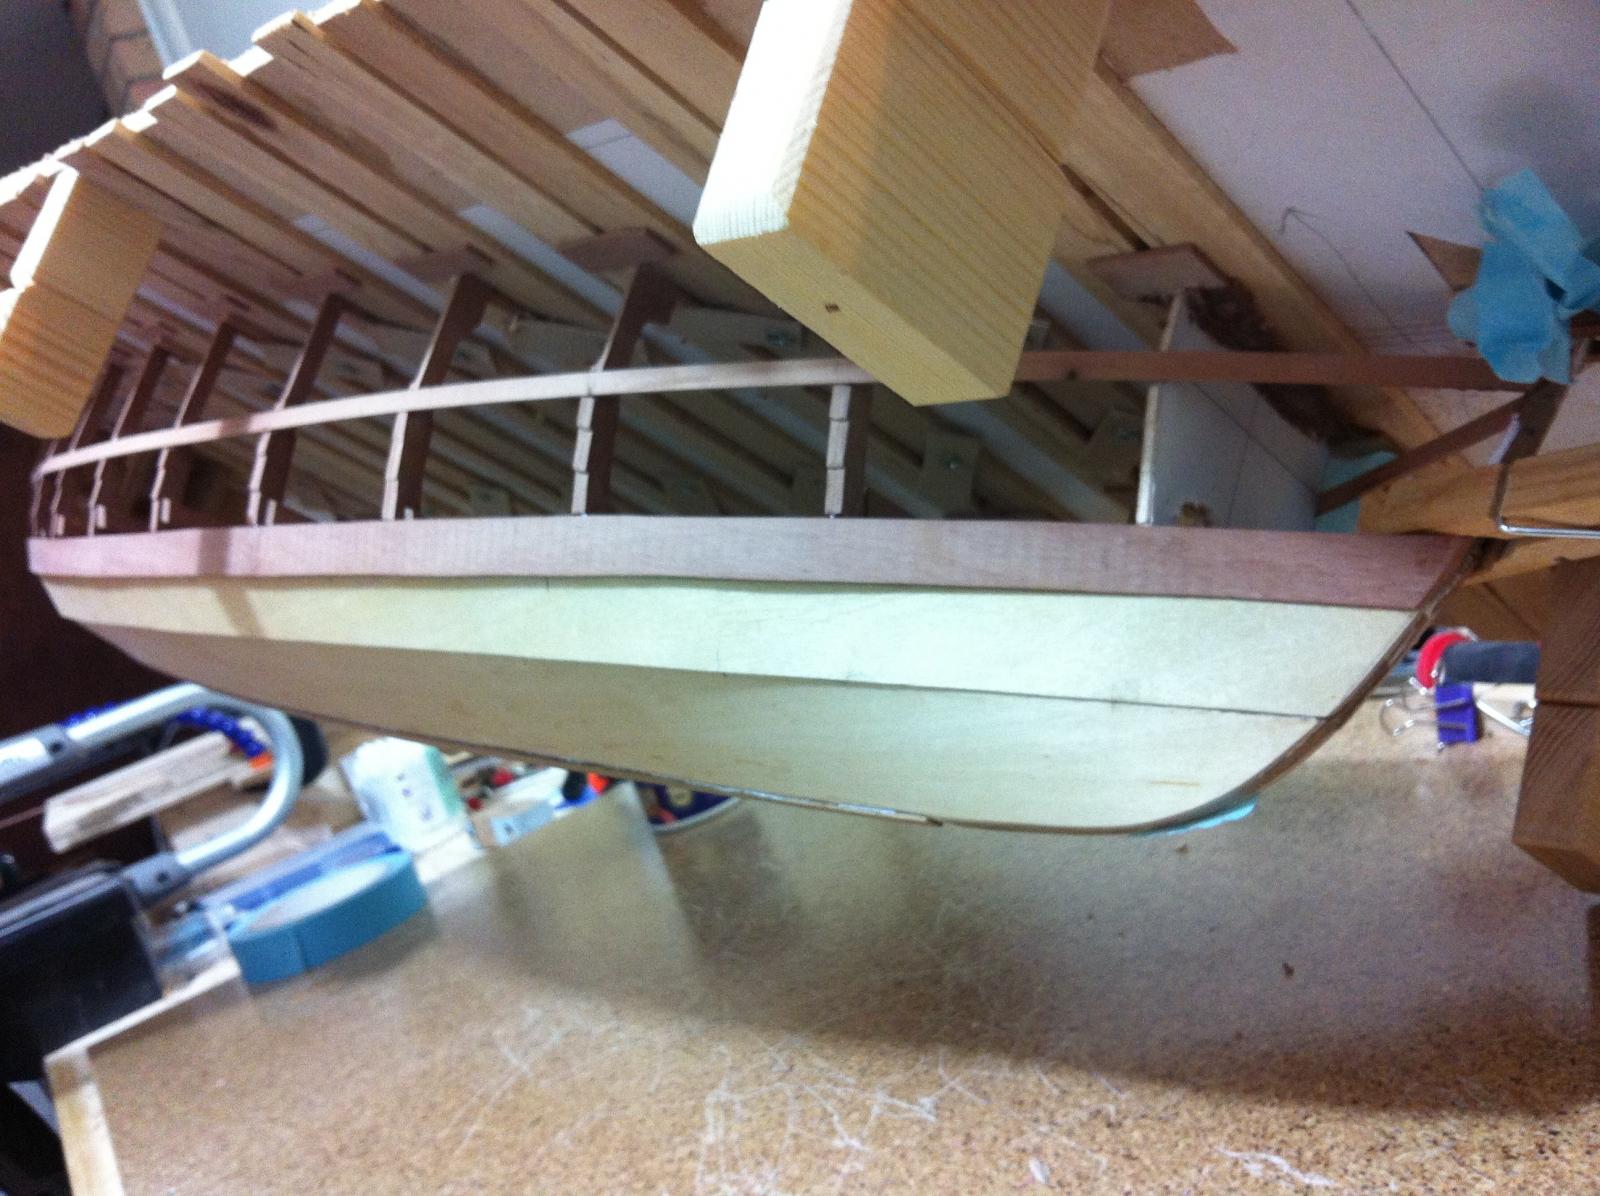
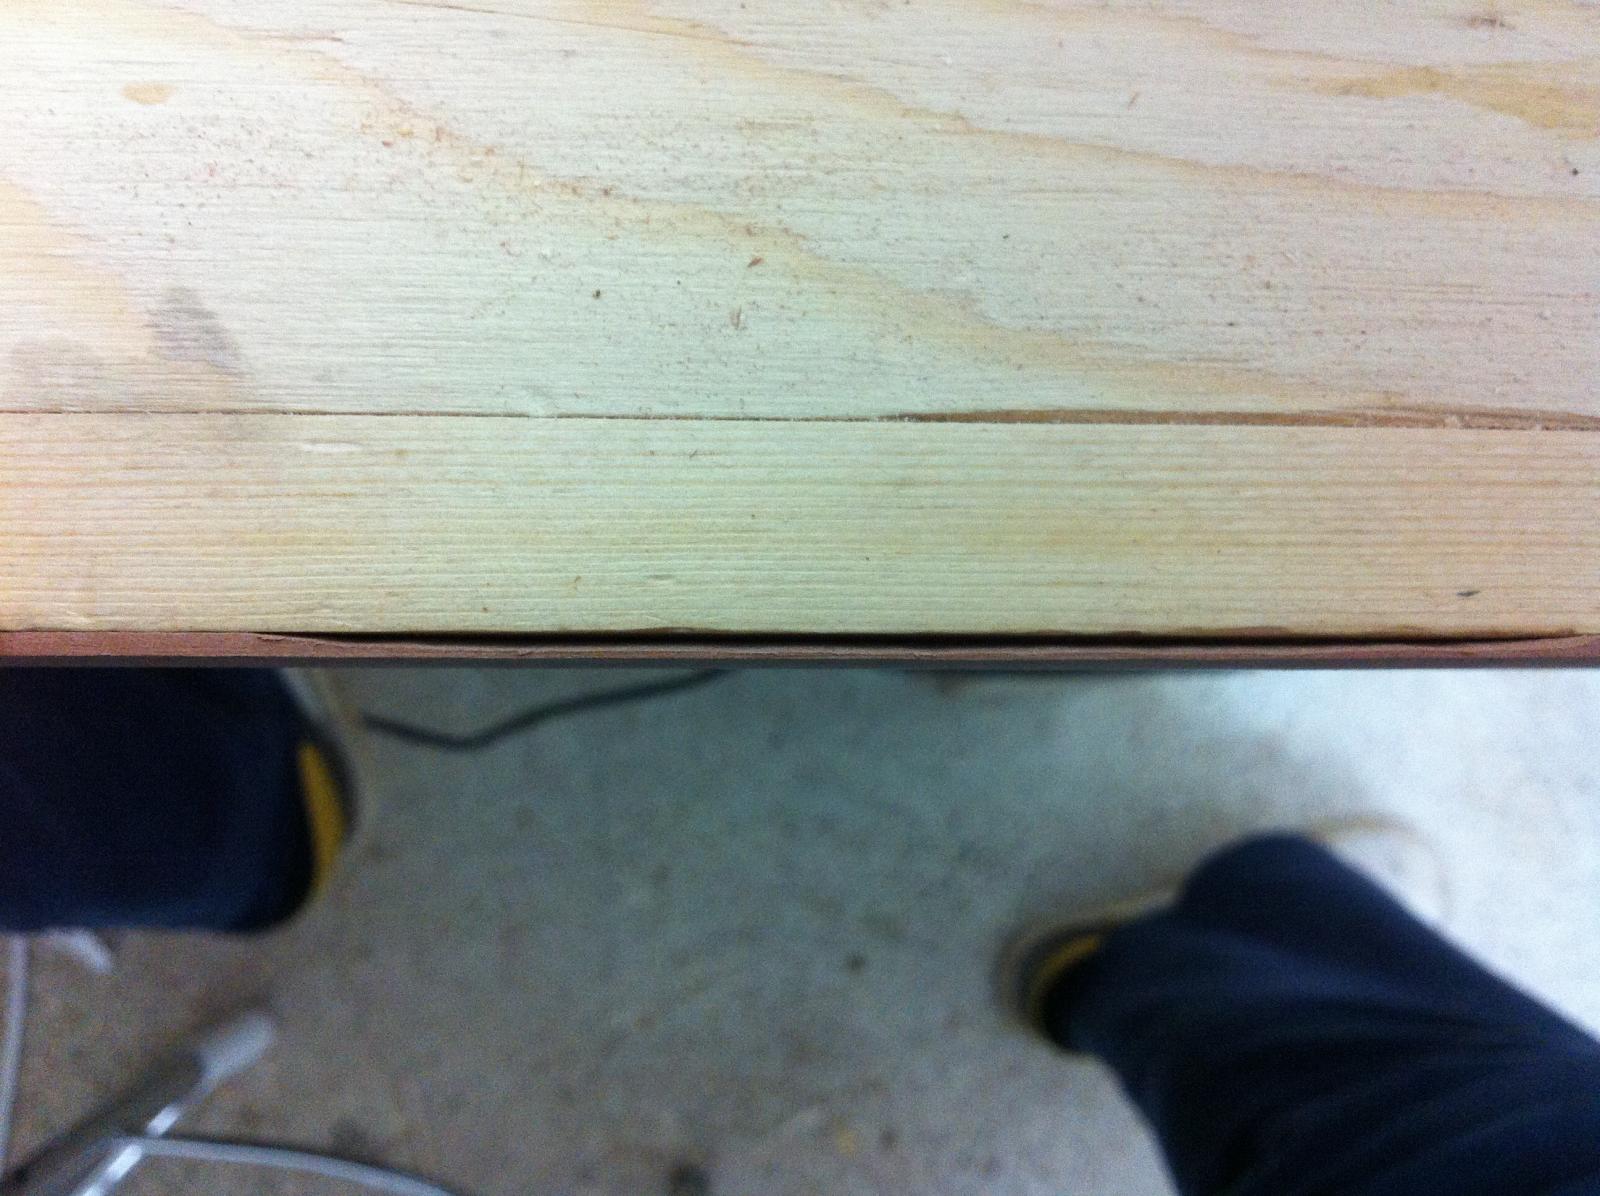
And finally all rivets done! There are a few left at the bow but the cant frames need to go in first. The sheer planks are sanded with 180 grit but the glue stains are still somewhat visible.
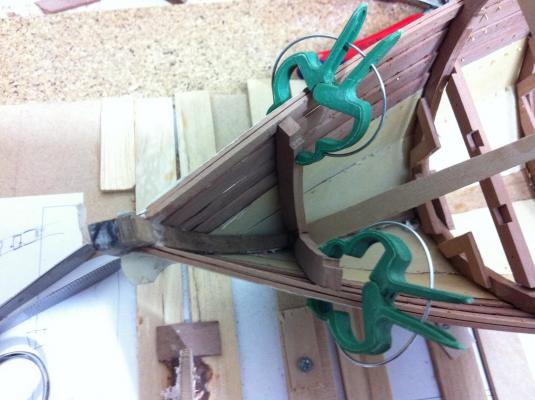
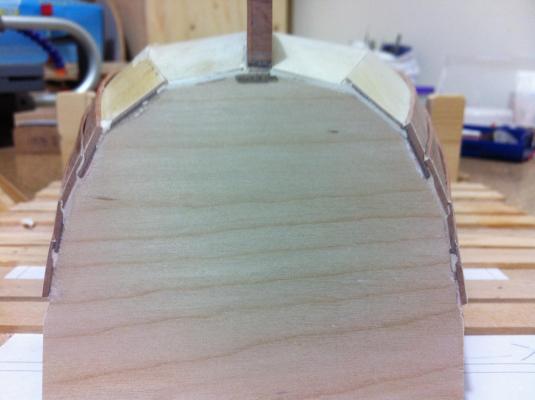
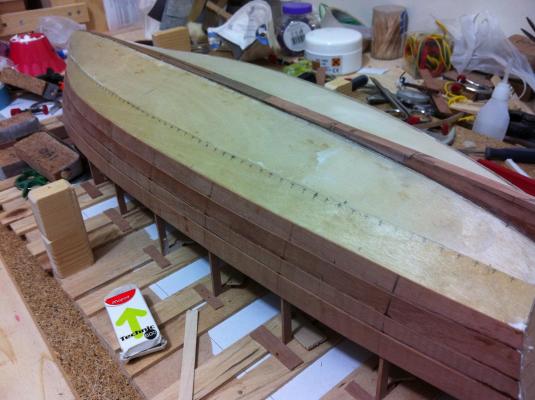
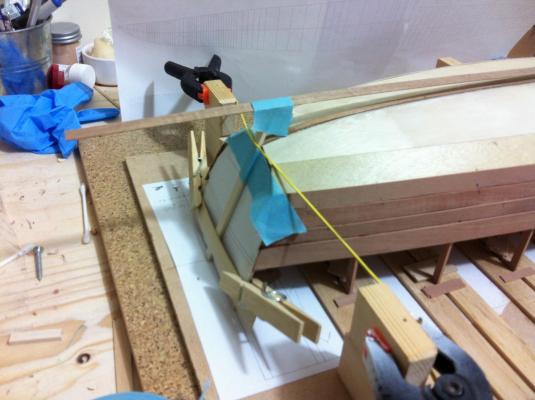
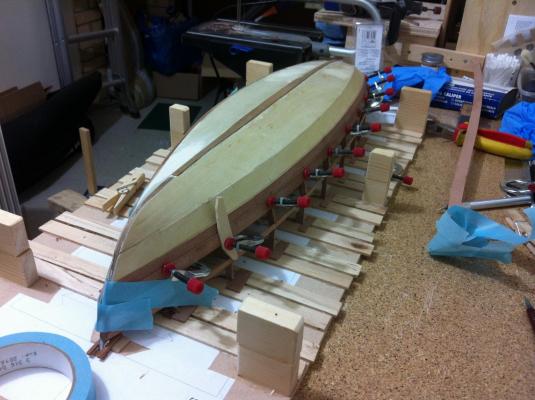
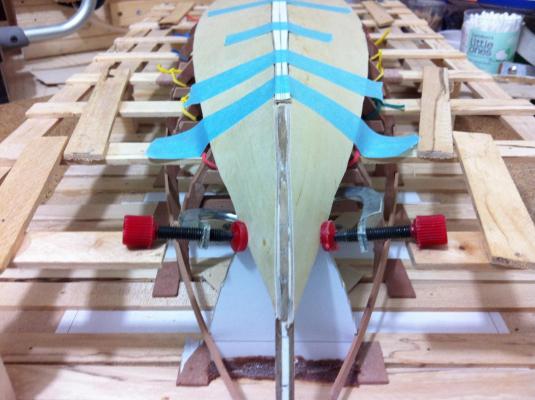
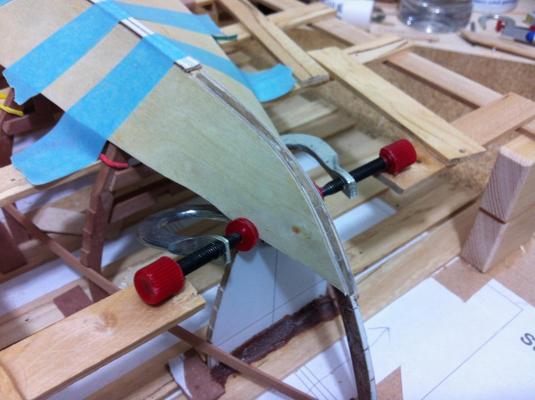
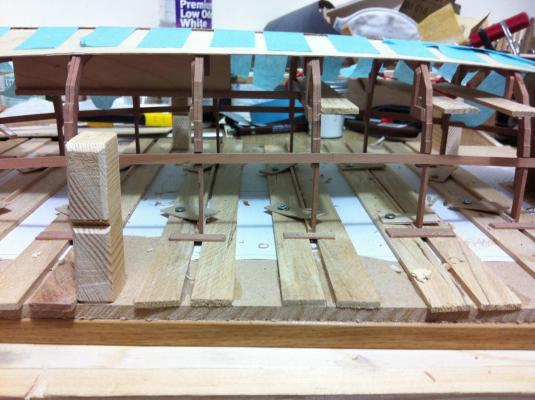
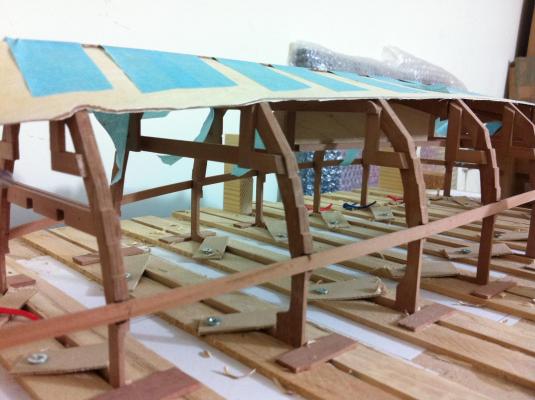
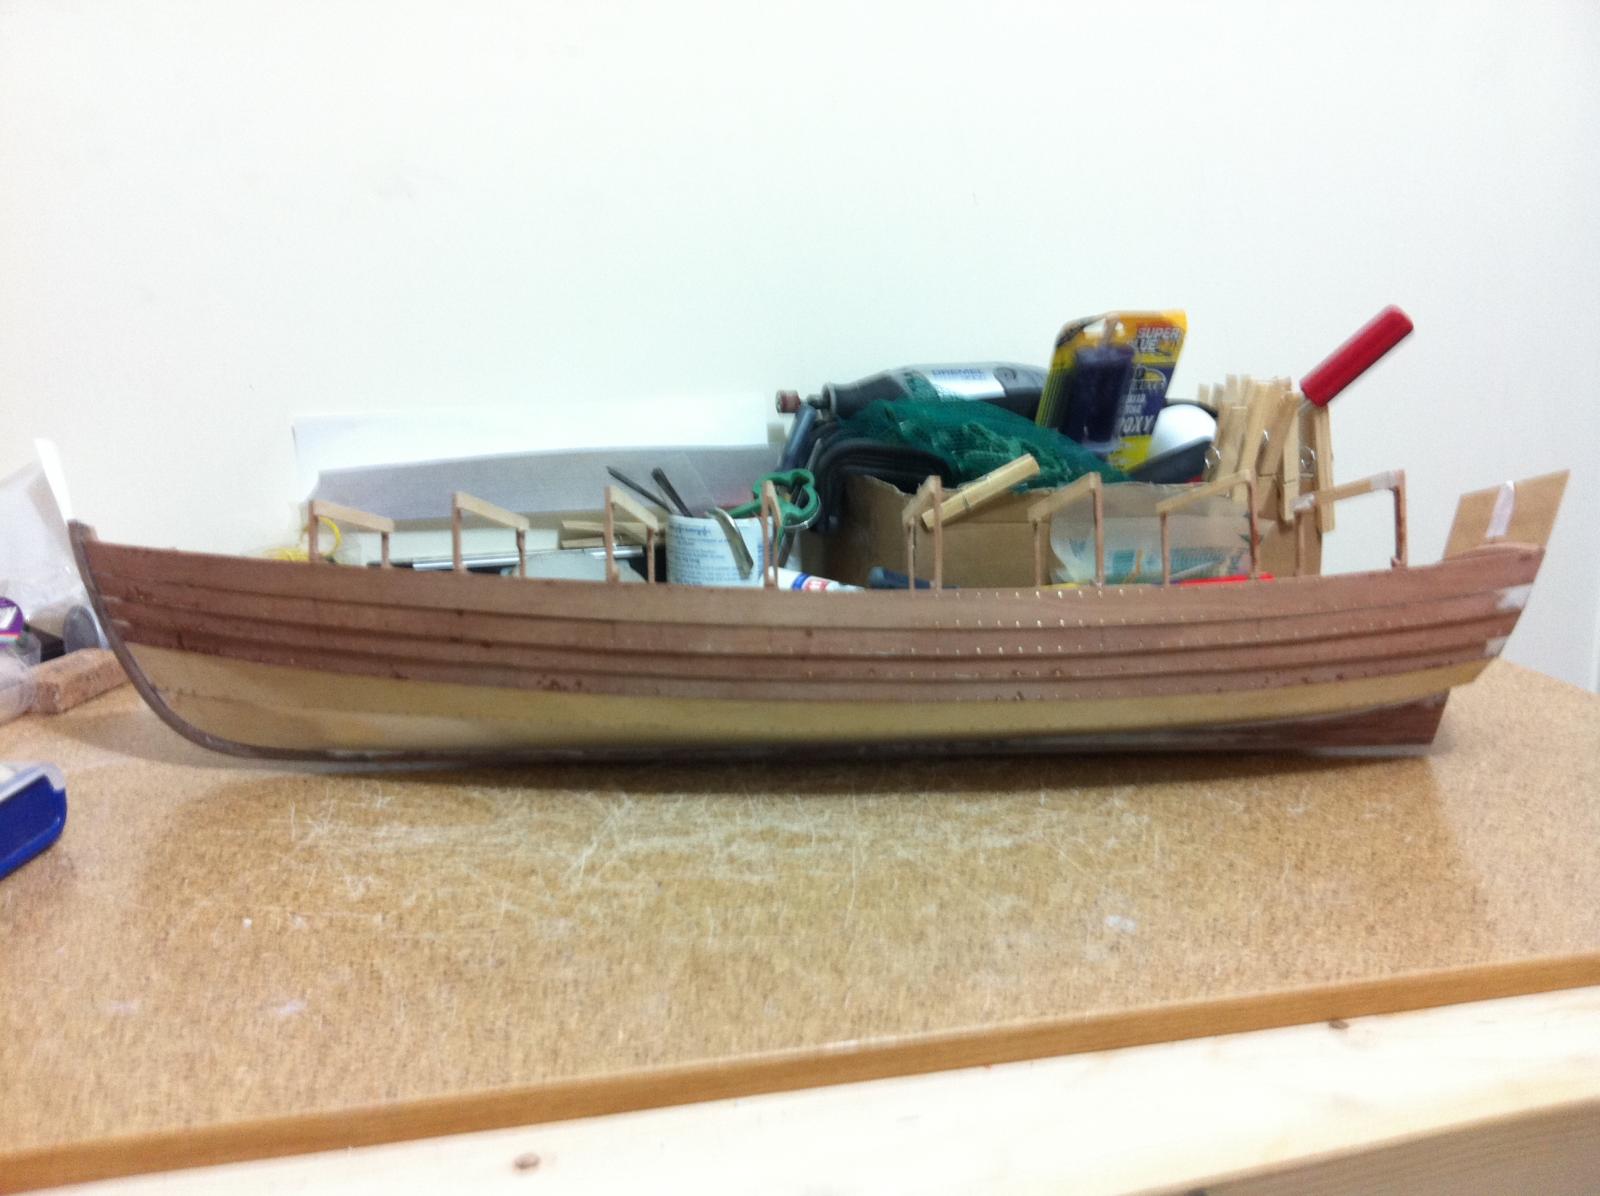
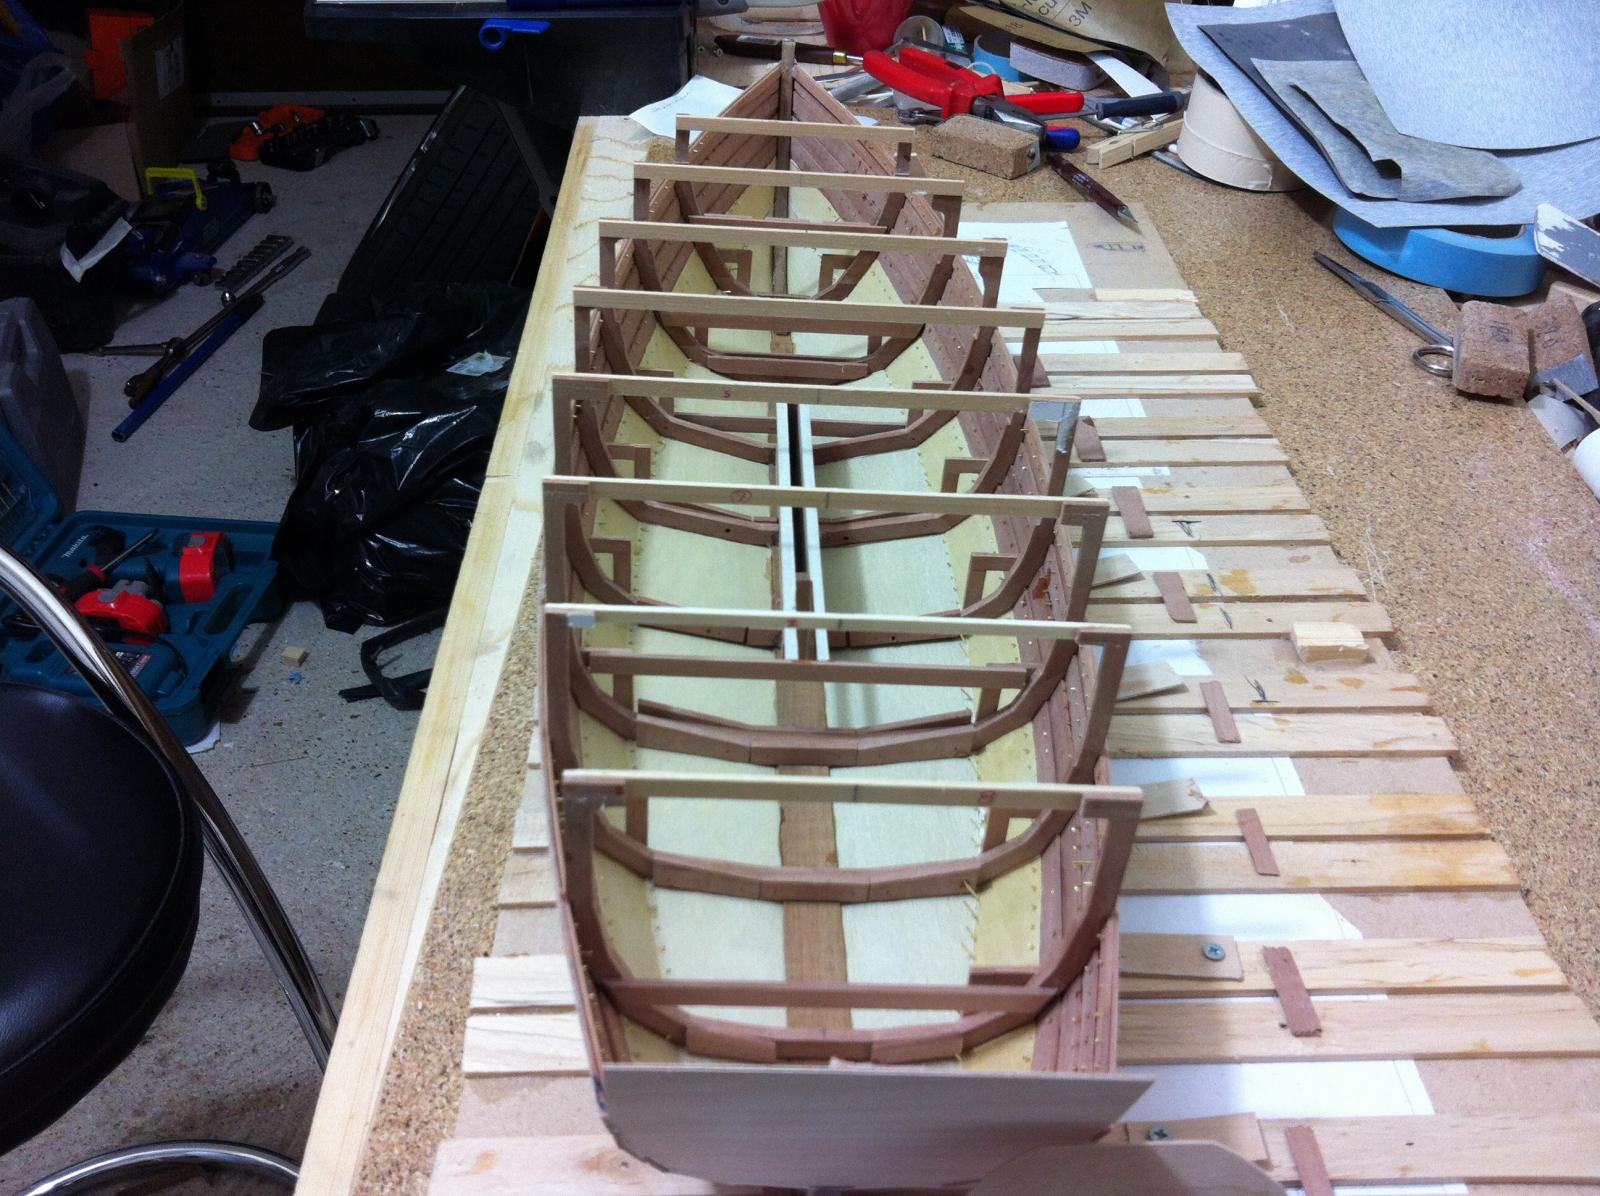
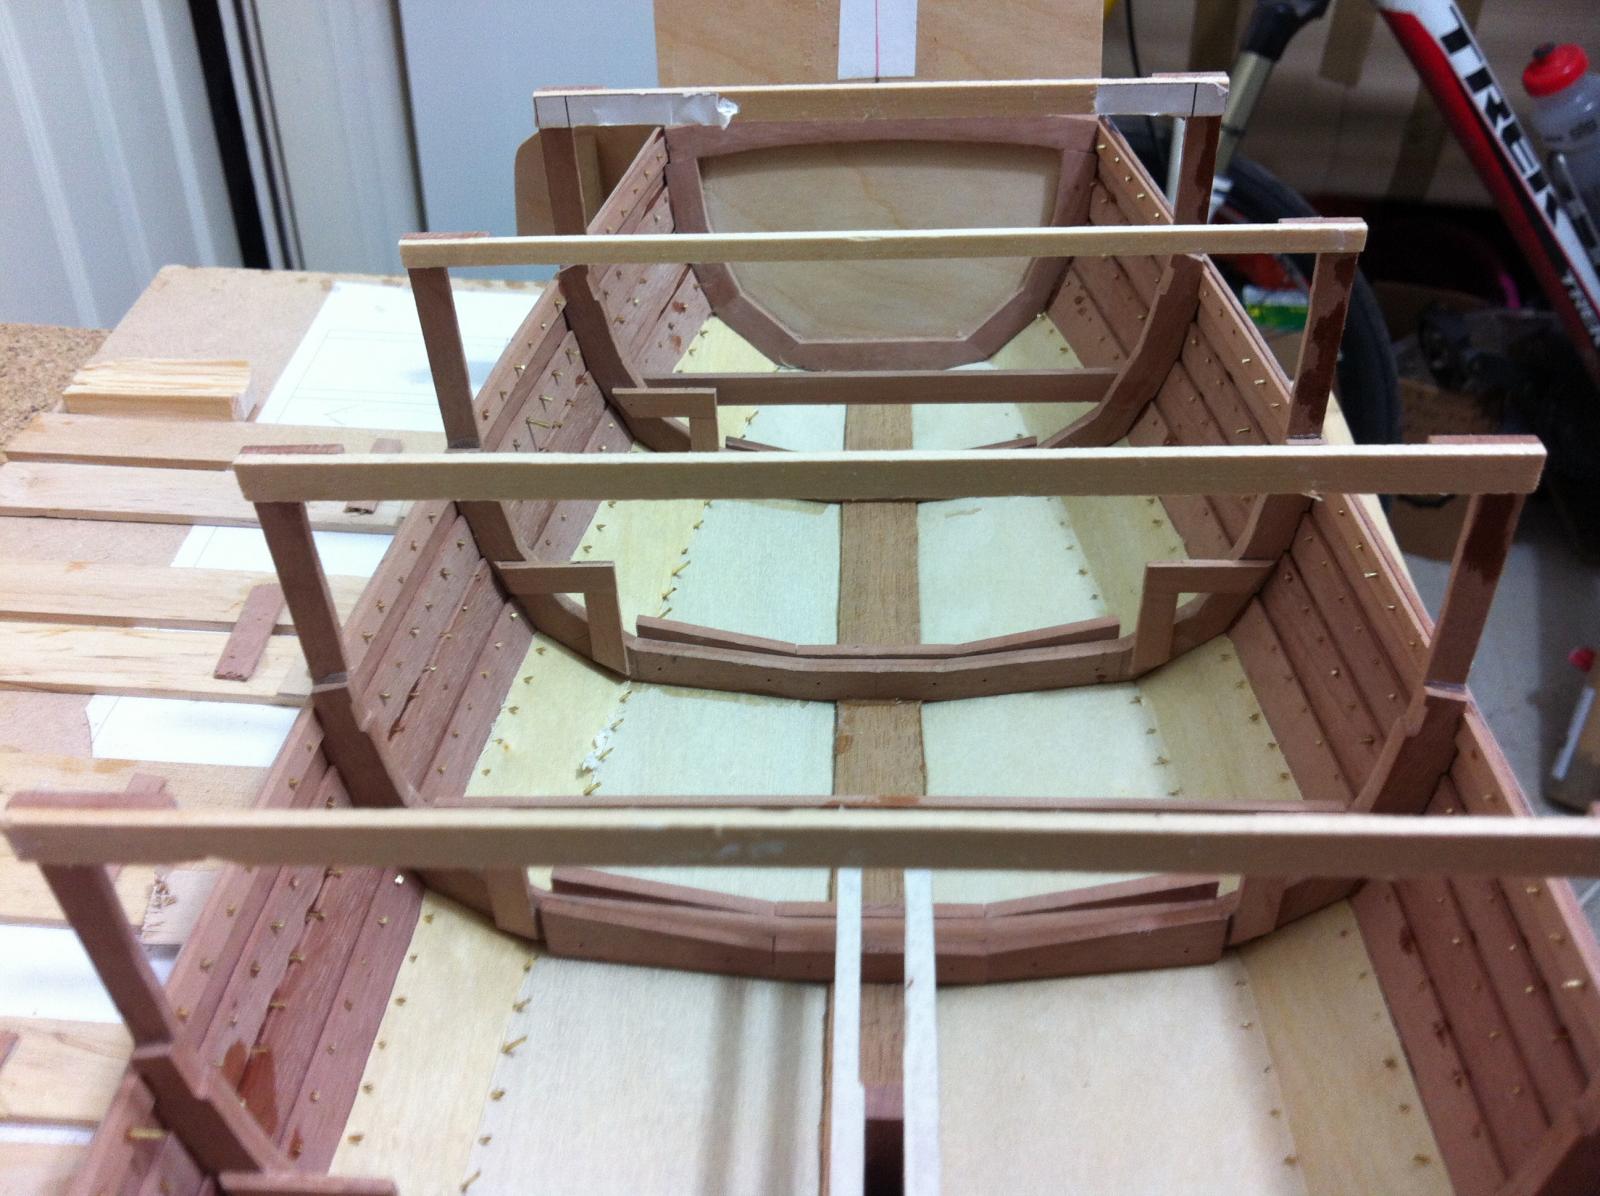
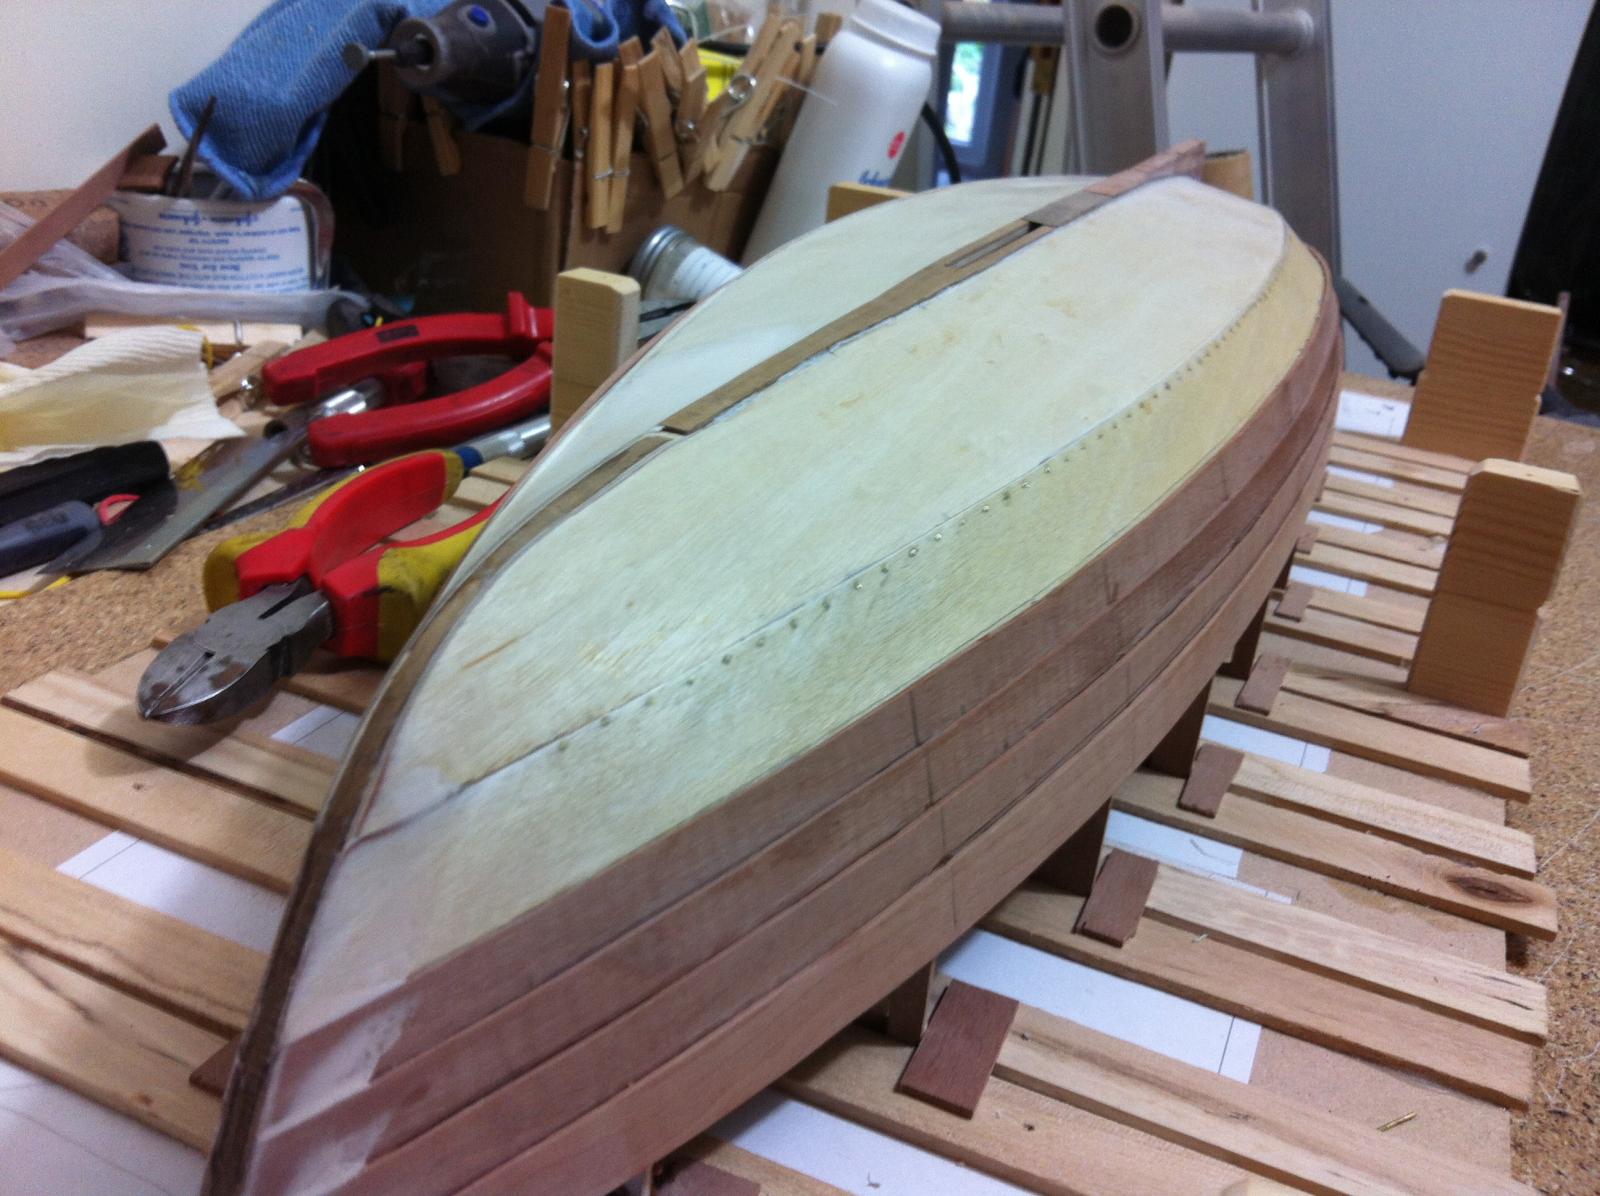
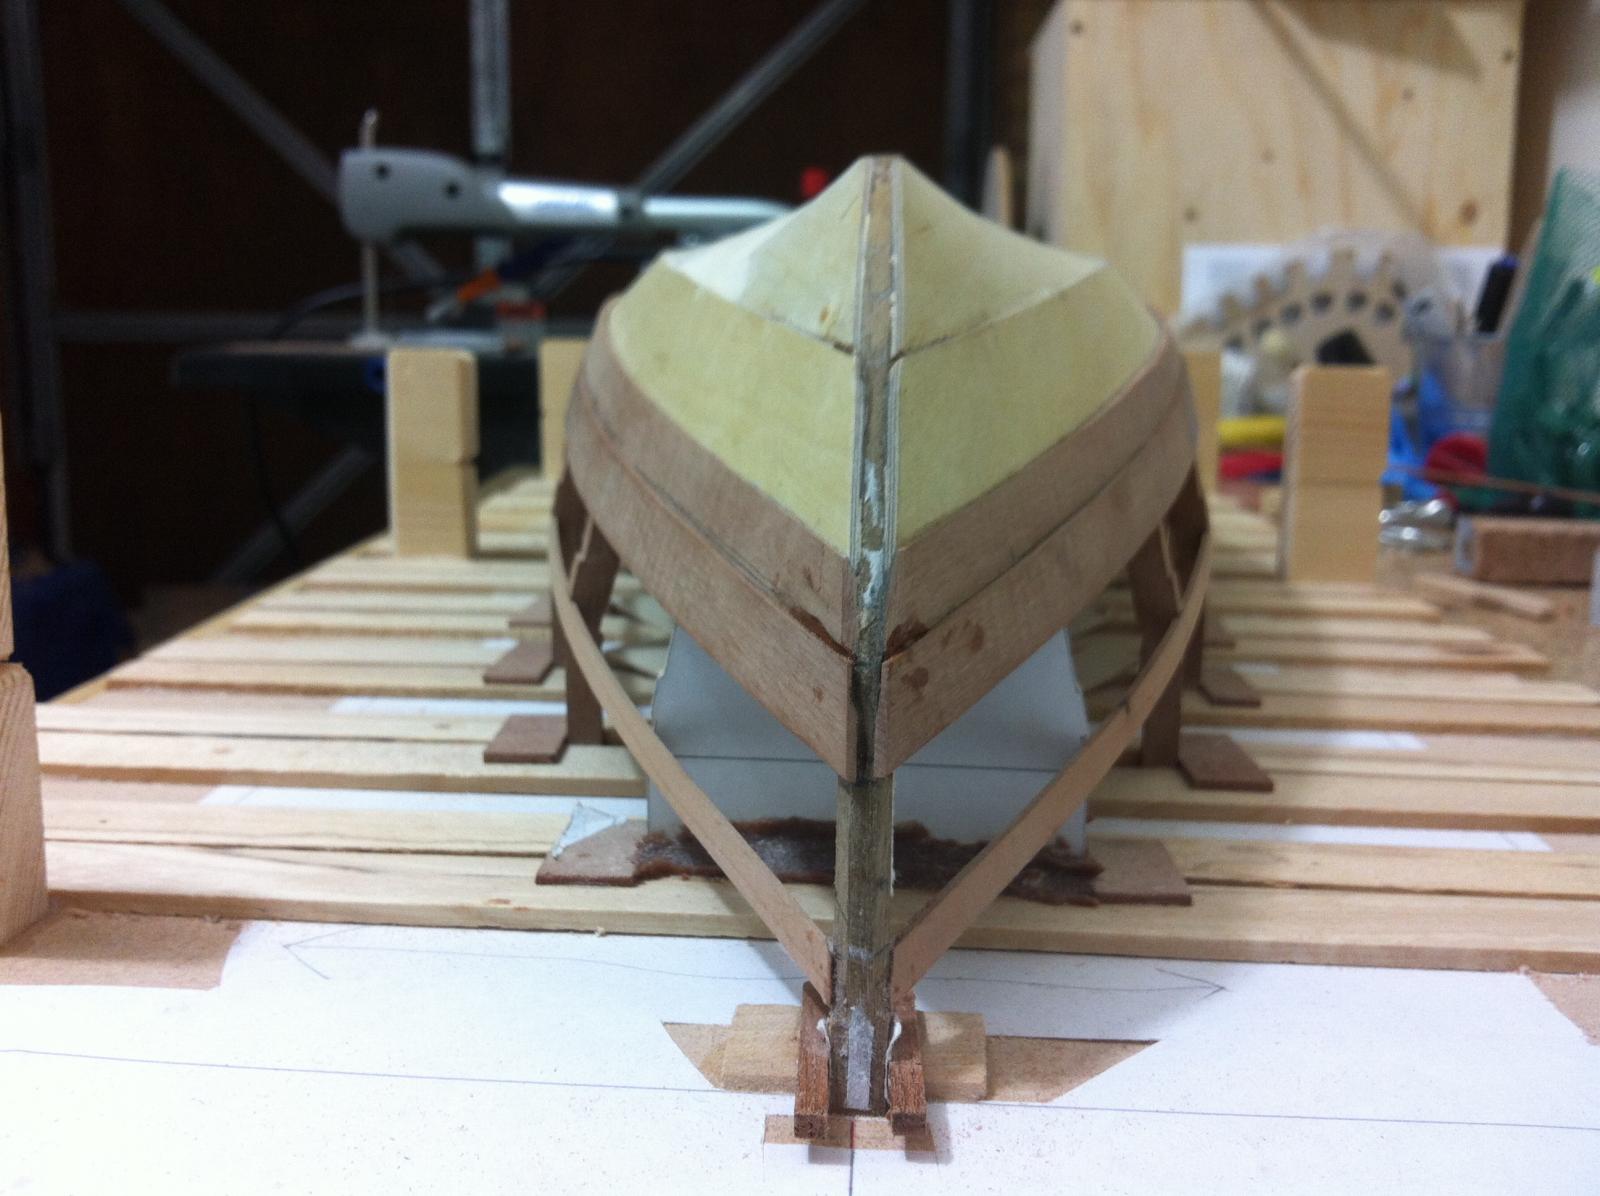
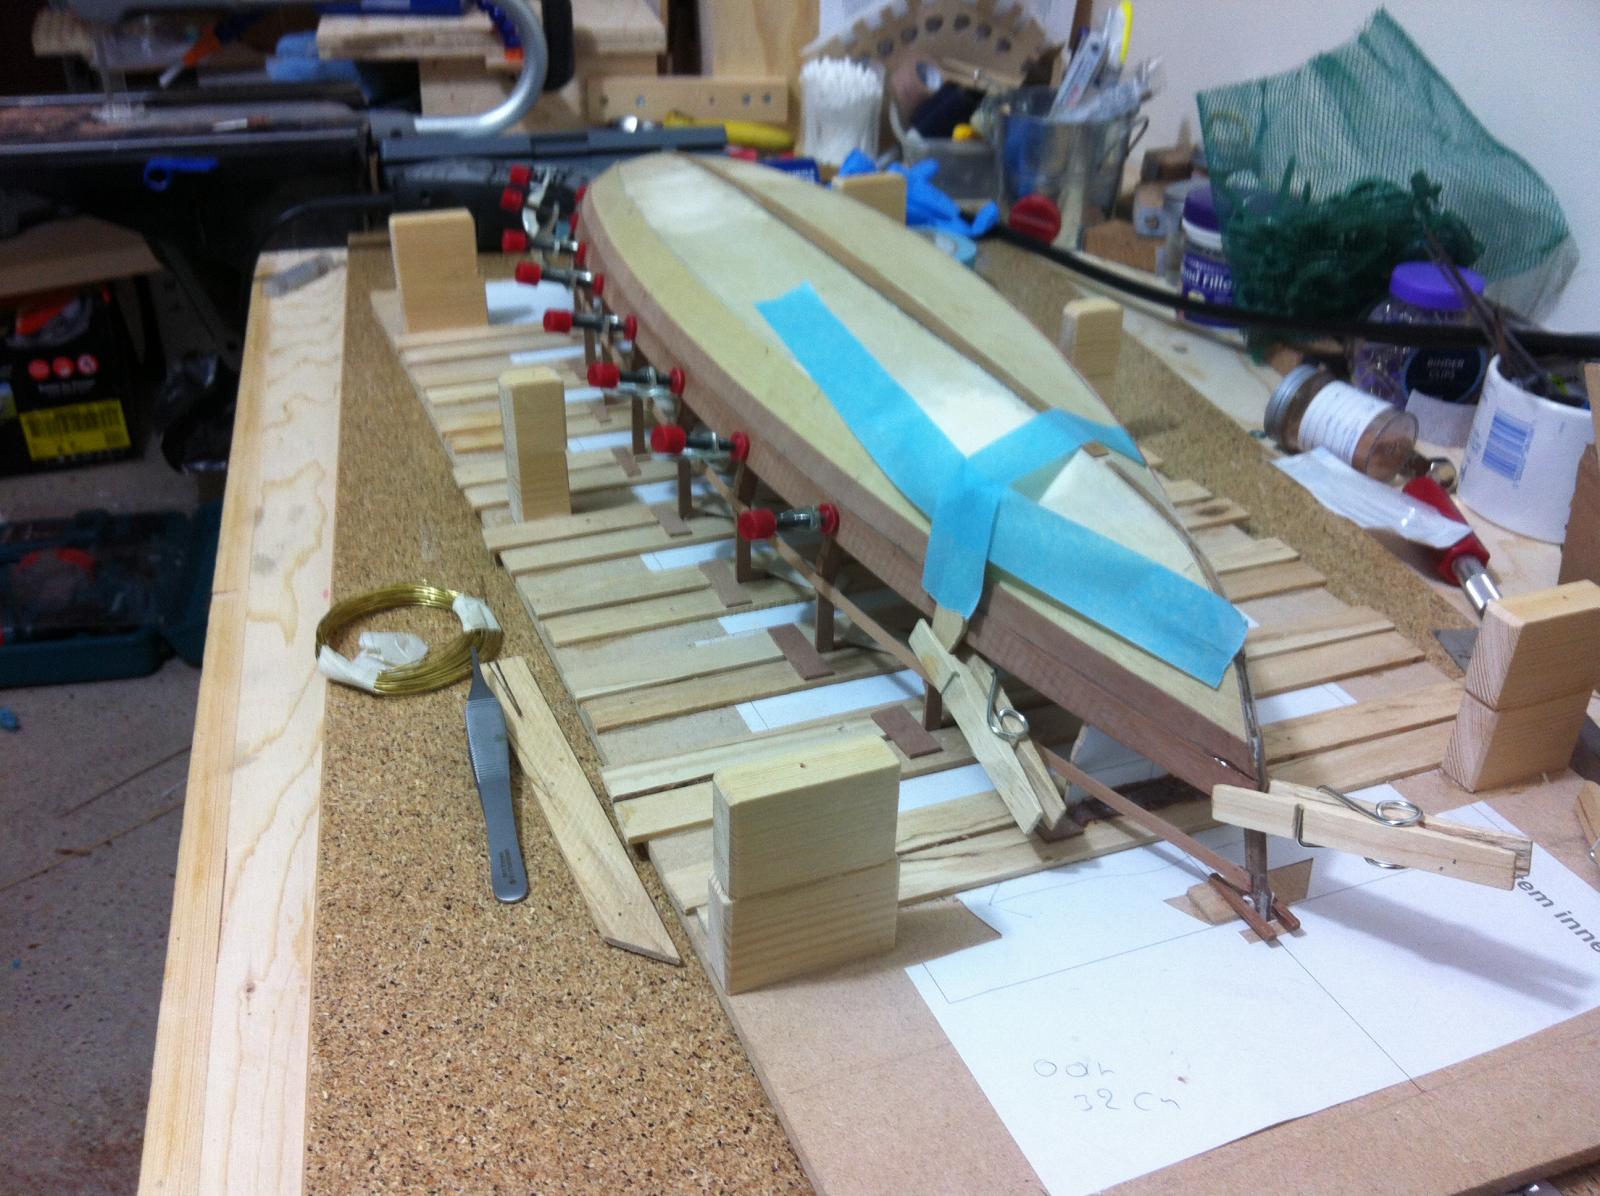
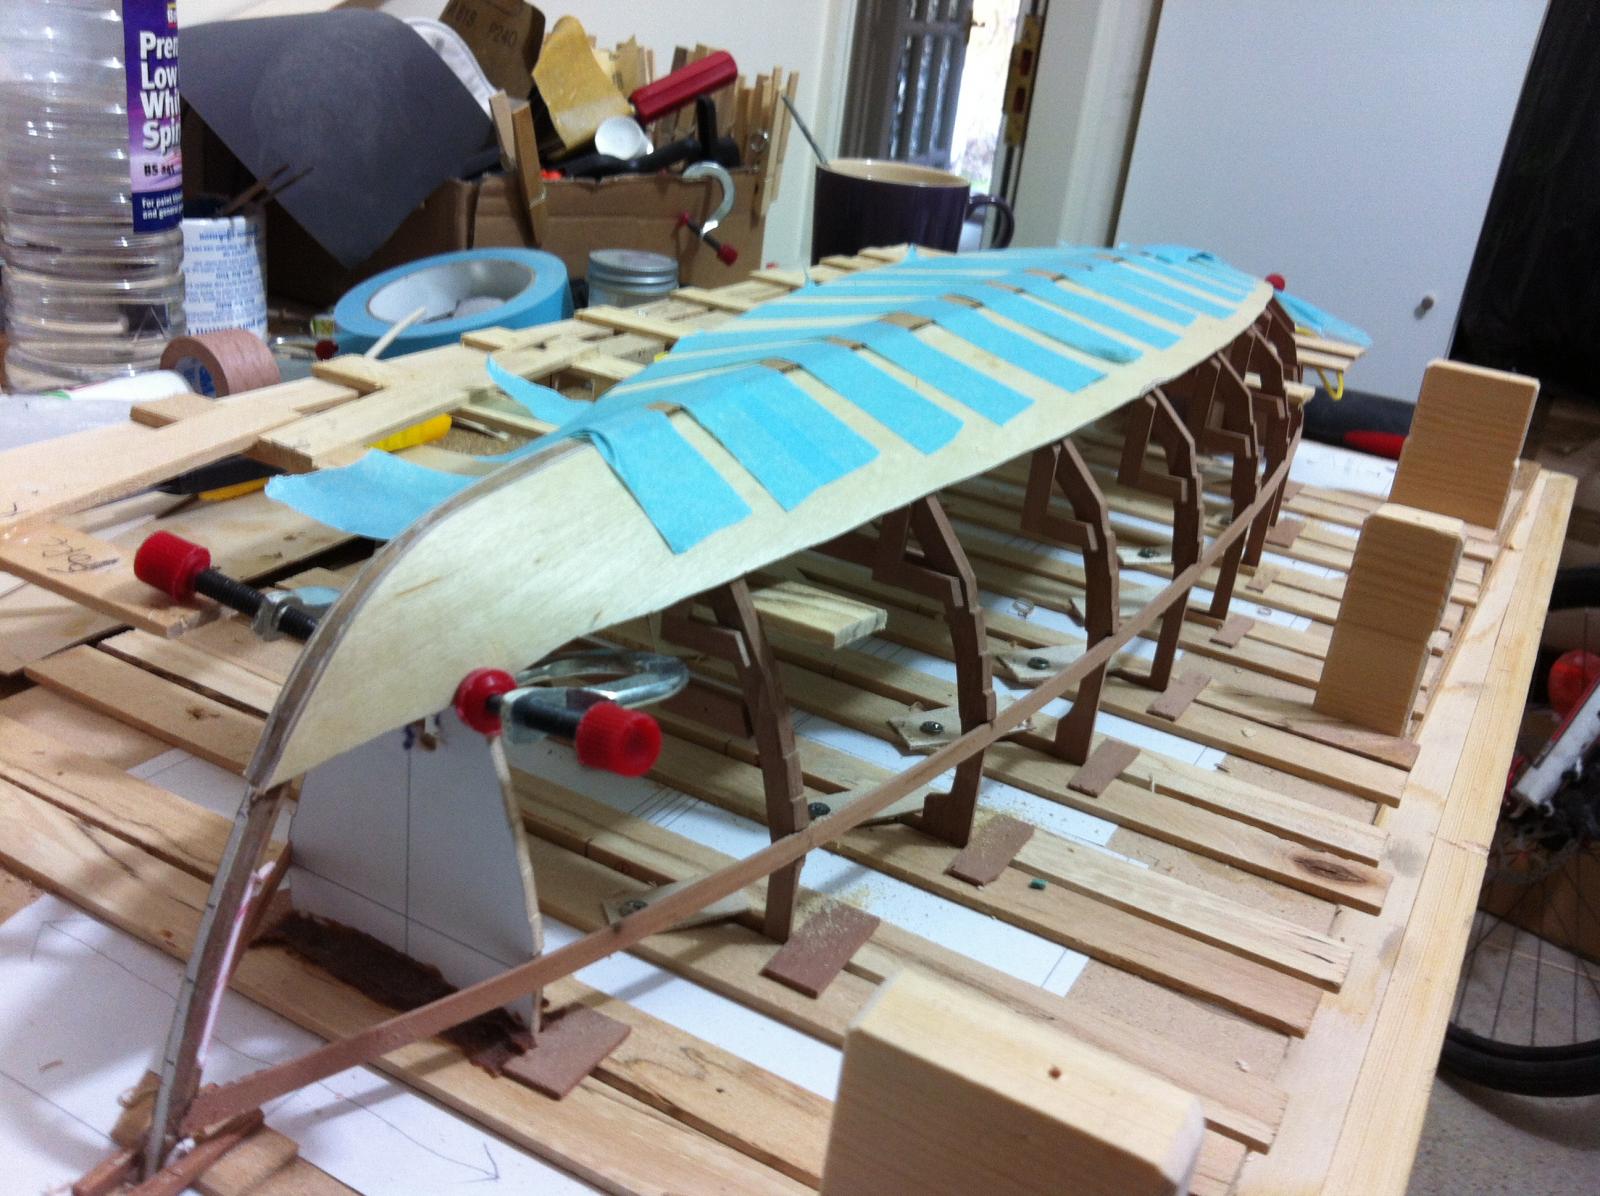
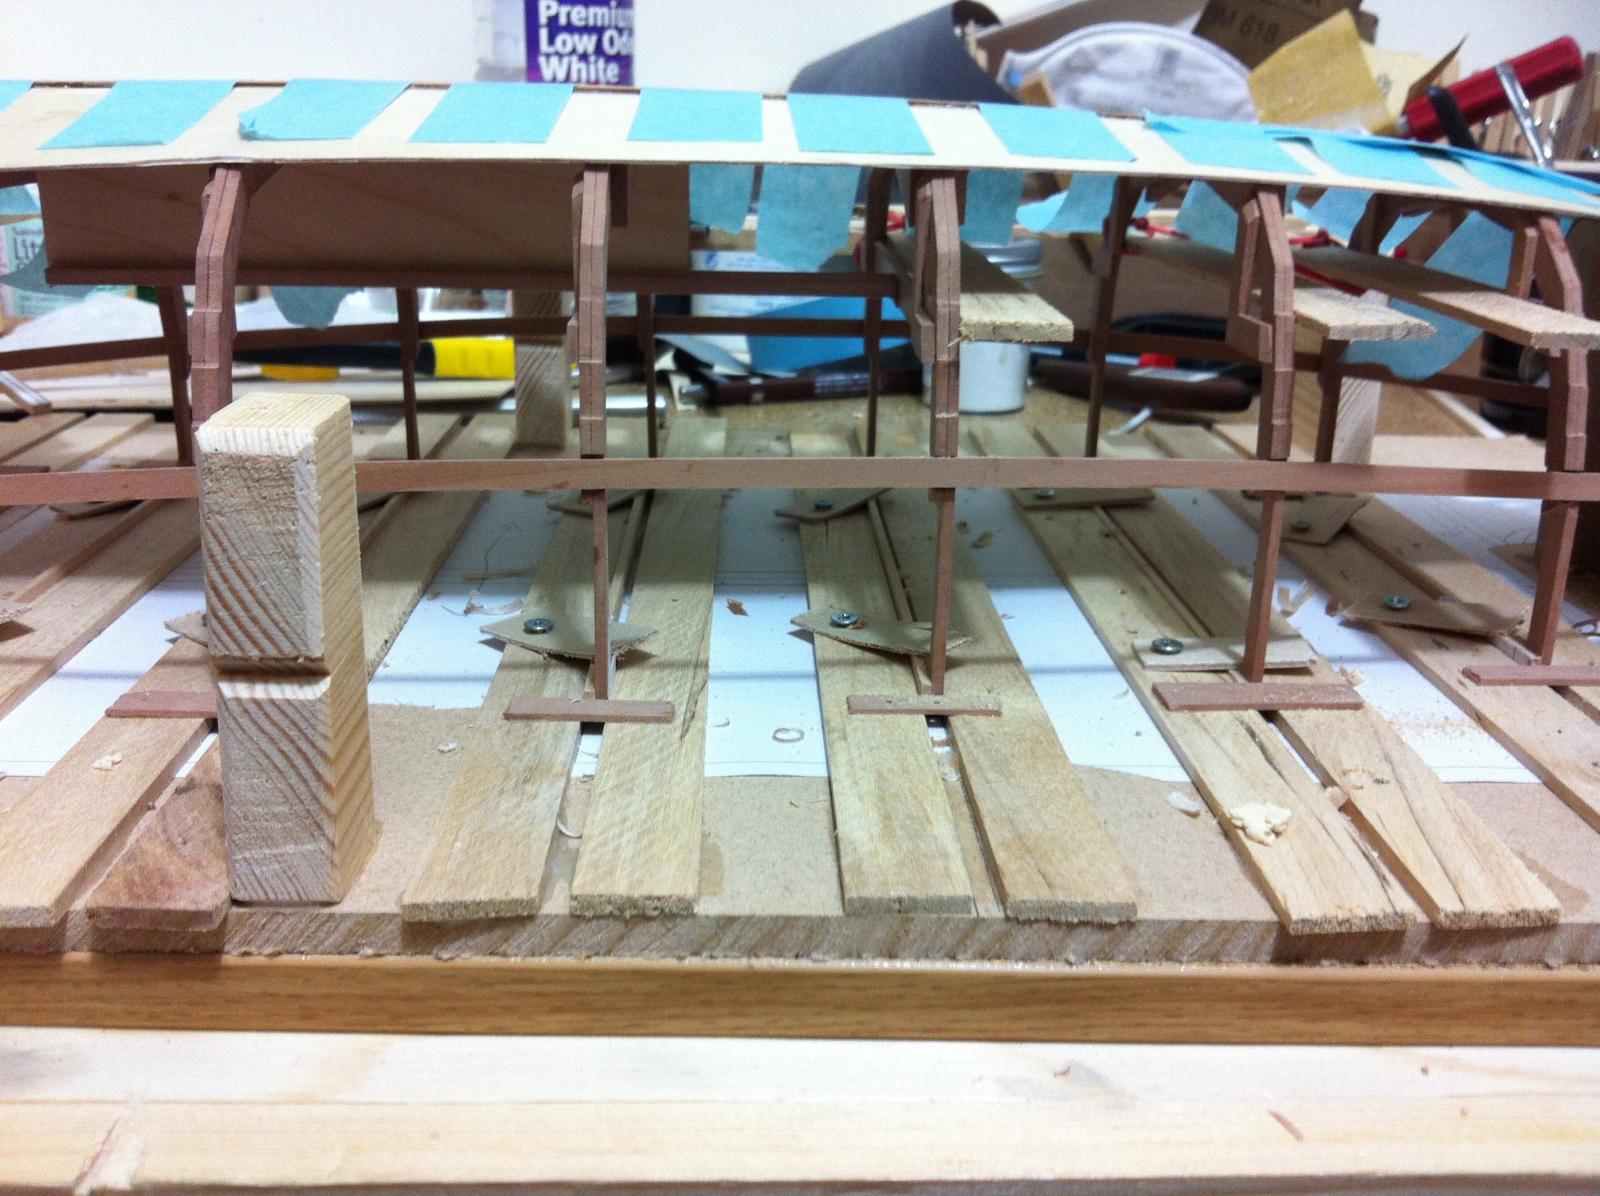
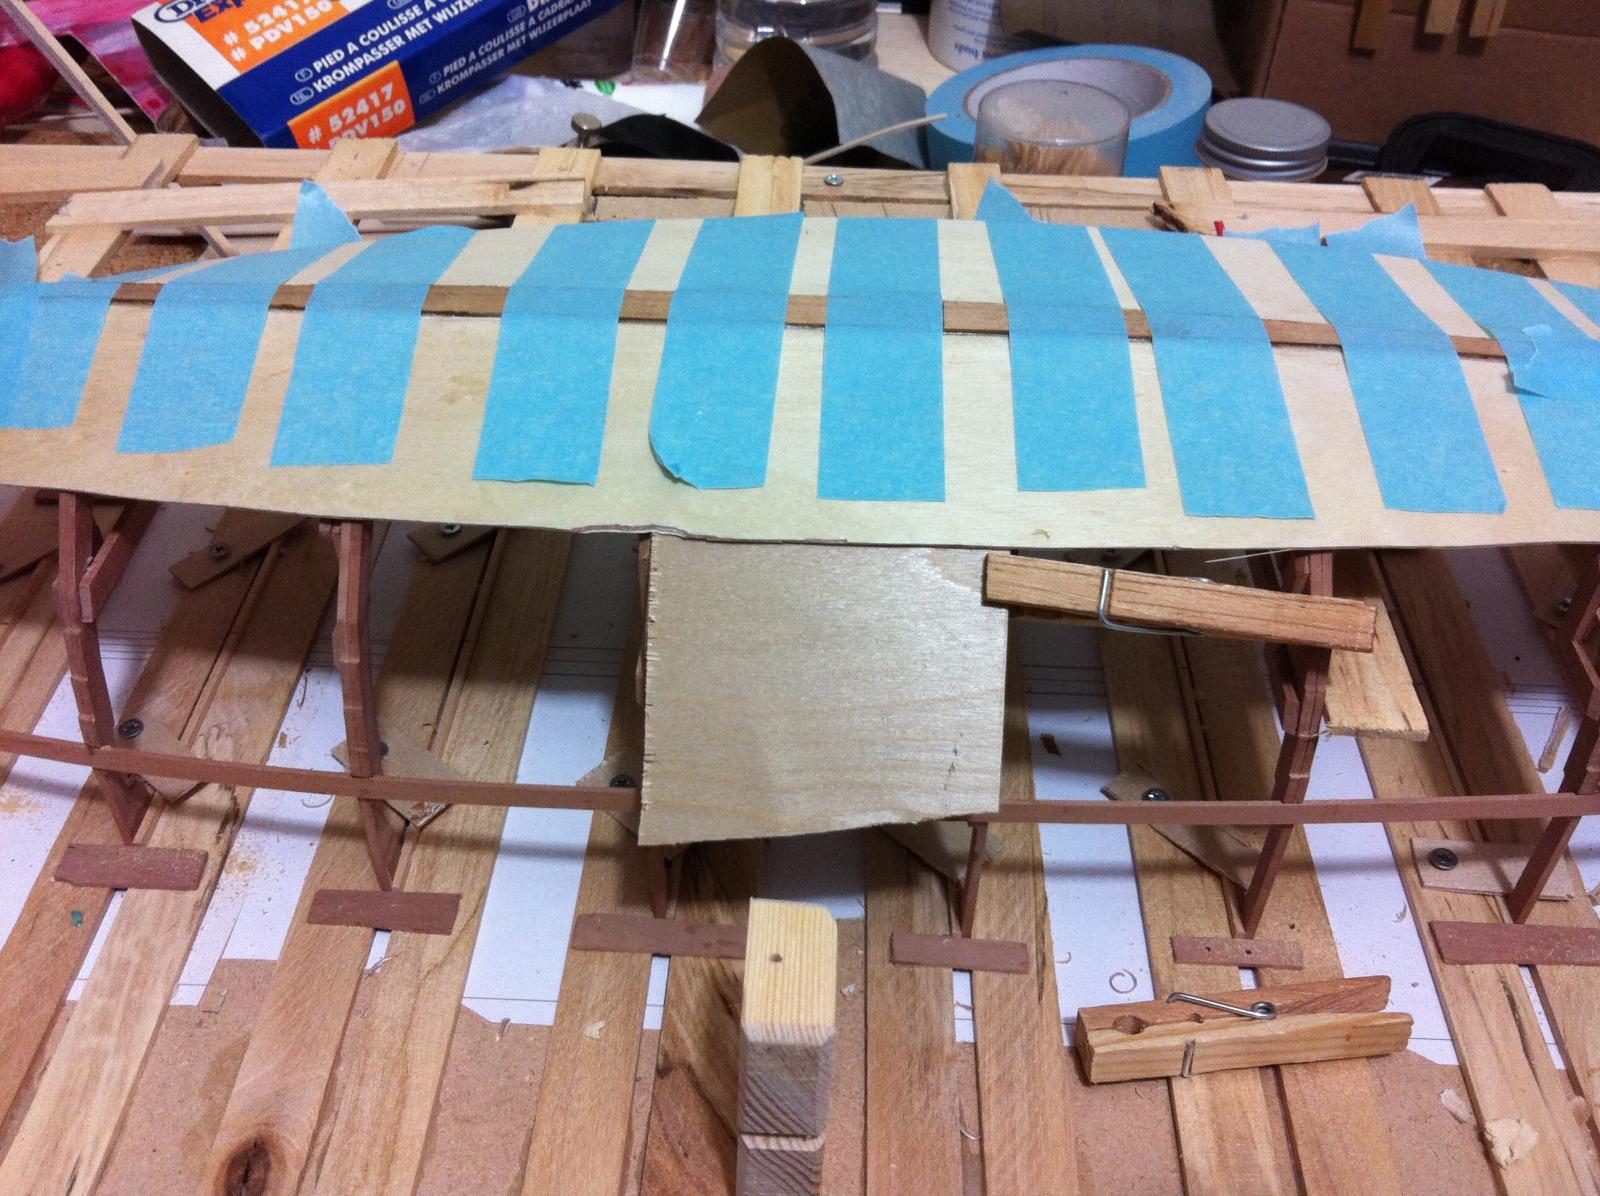
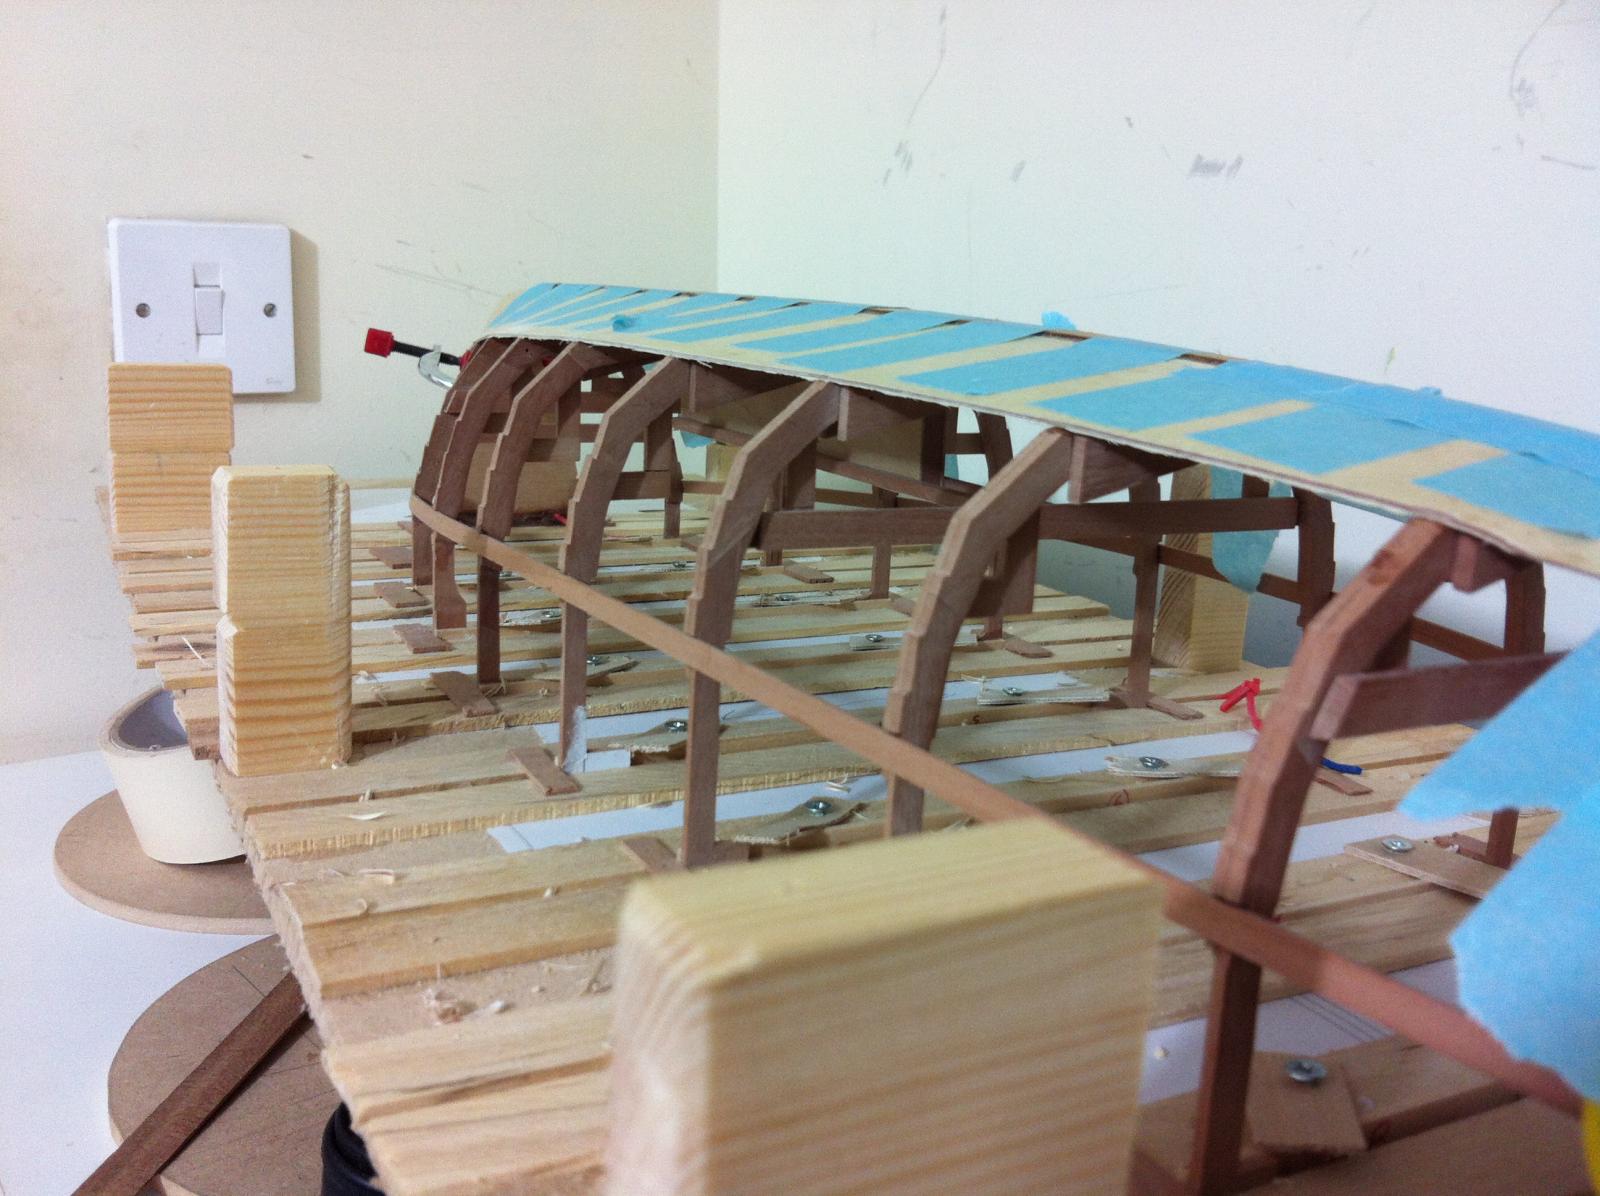
And finally, the long awaited moment has come. The boat needs to be taken off the jig, turned around for the cant frames to be installed and then positioned back to the jig for the rest of the rivets to go in and then fairing, priming and painting.
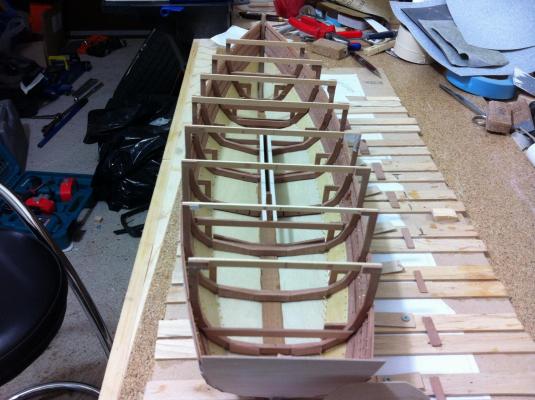


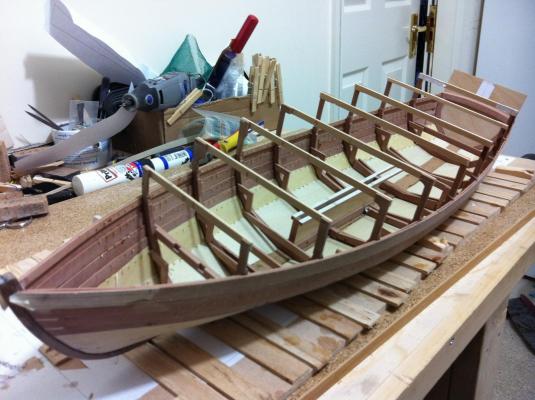
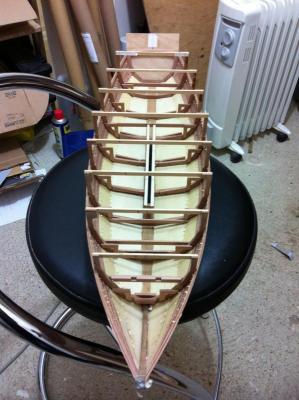
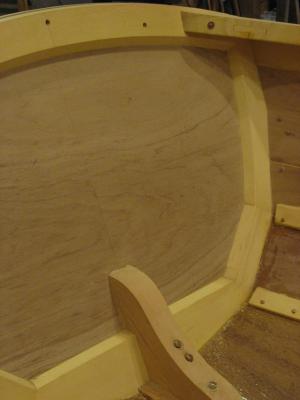
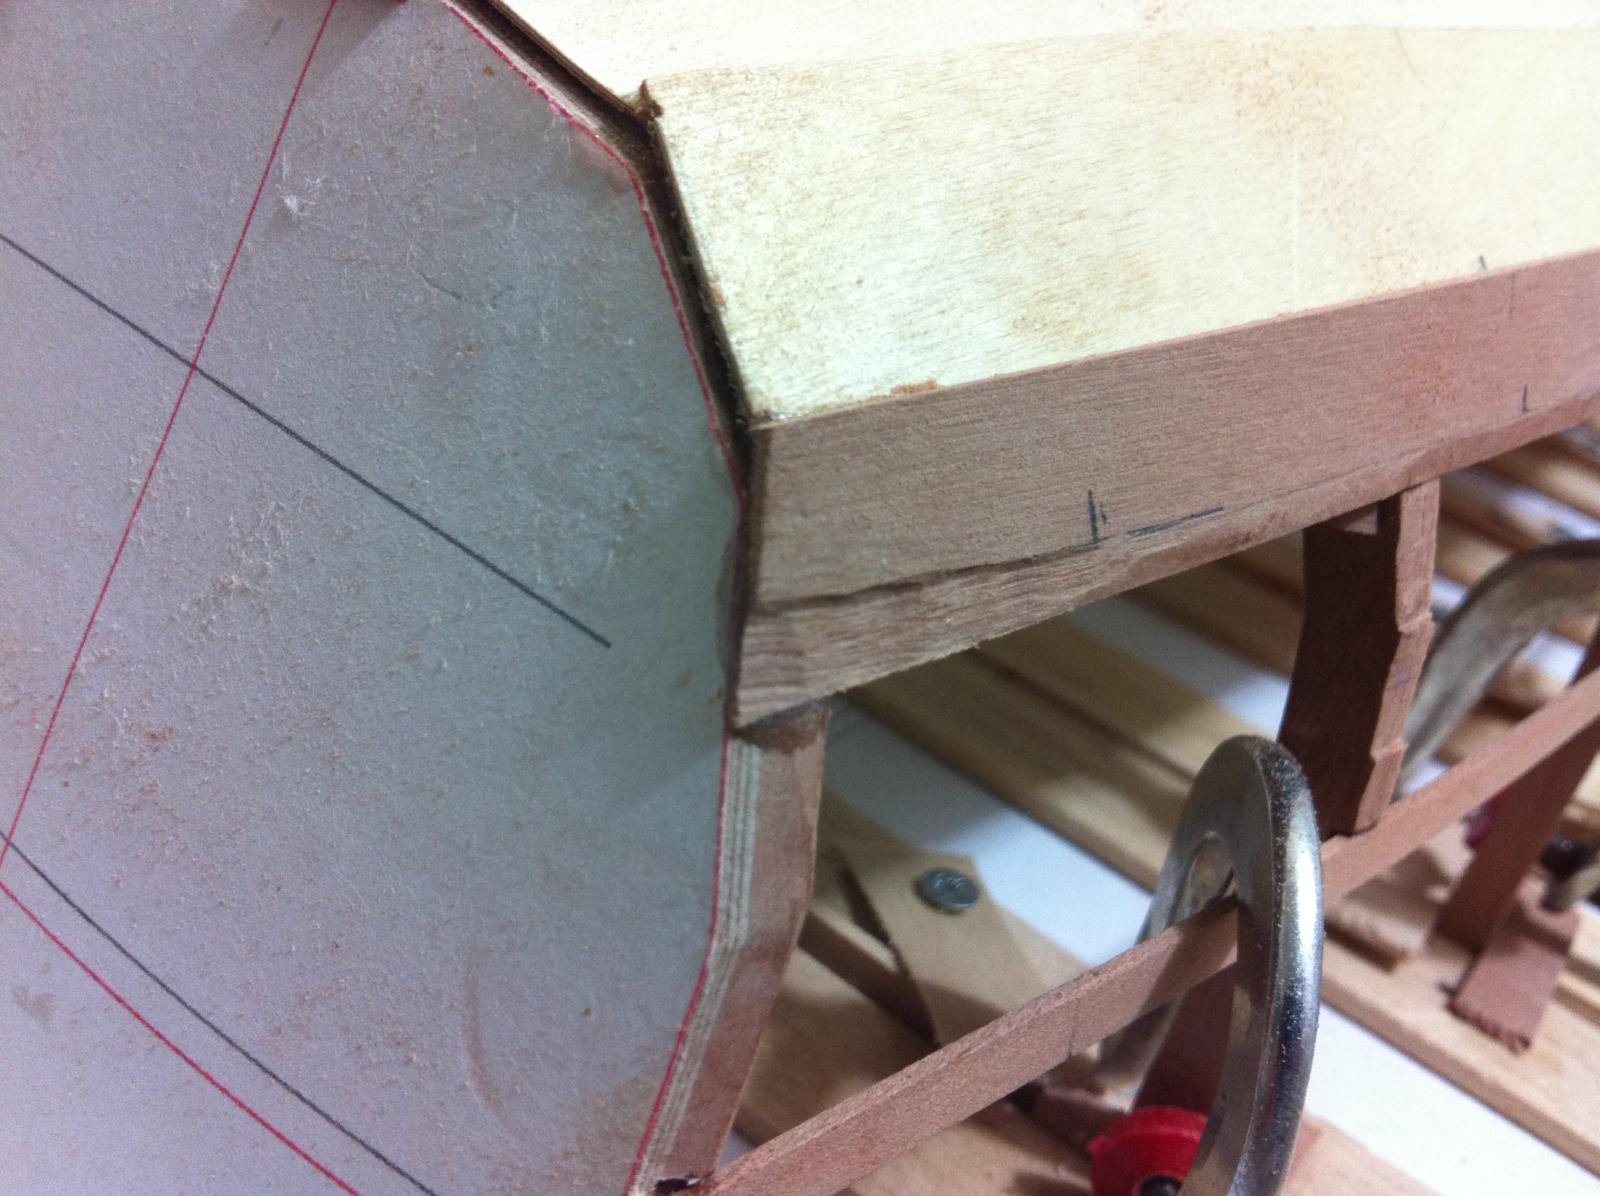
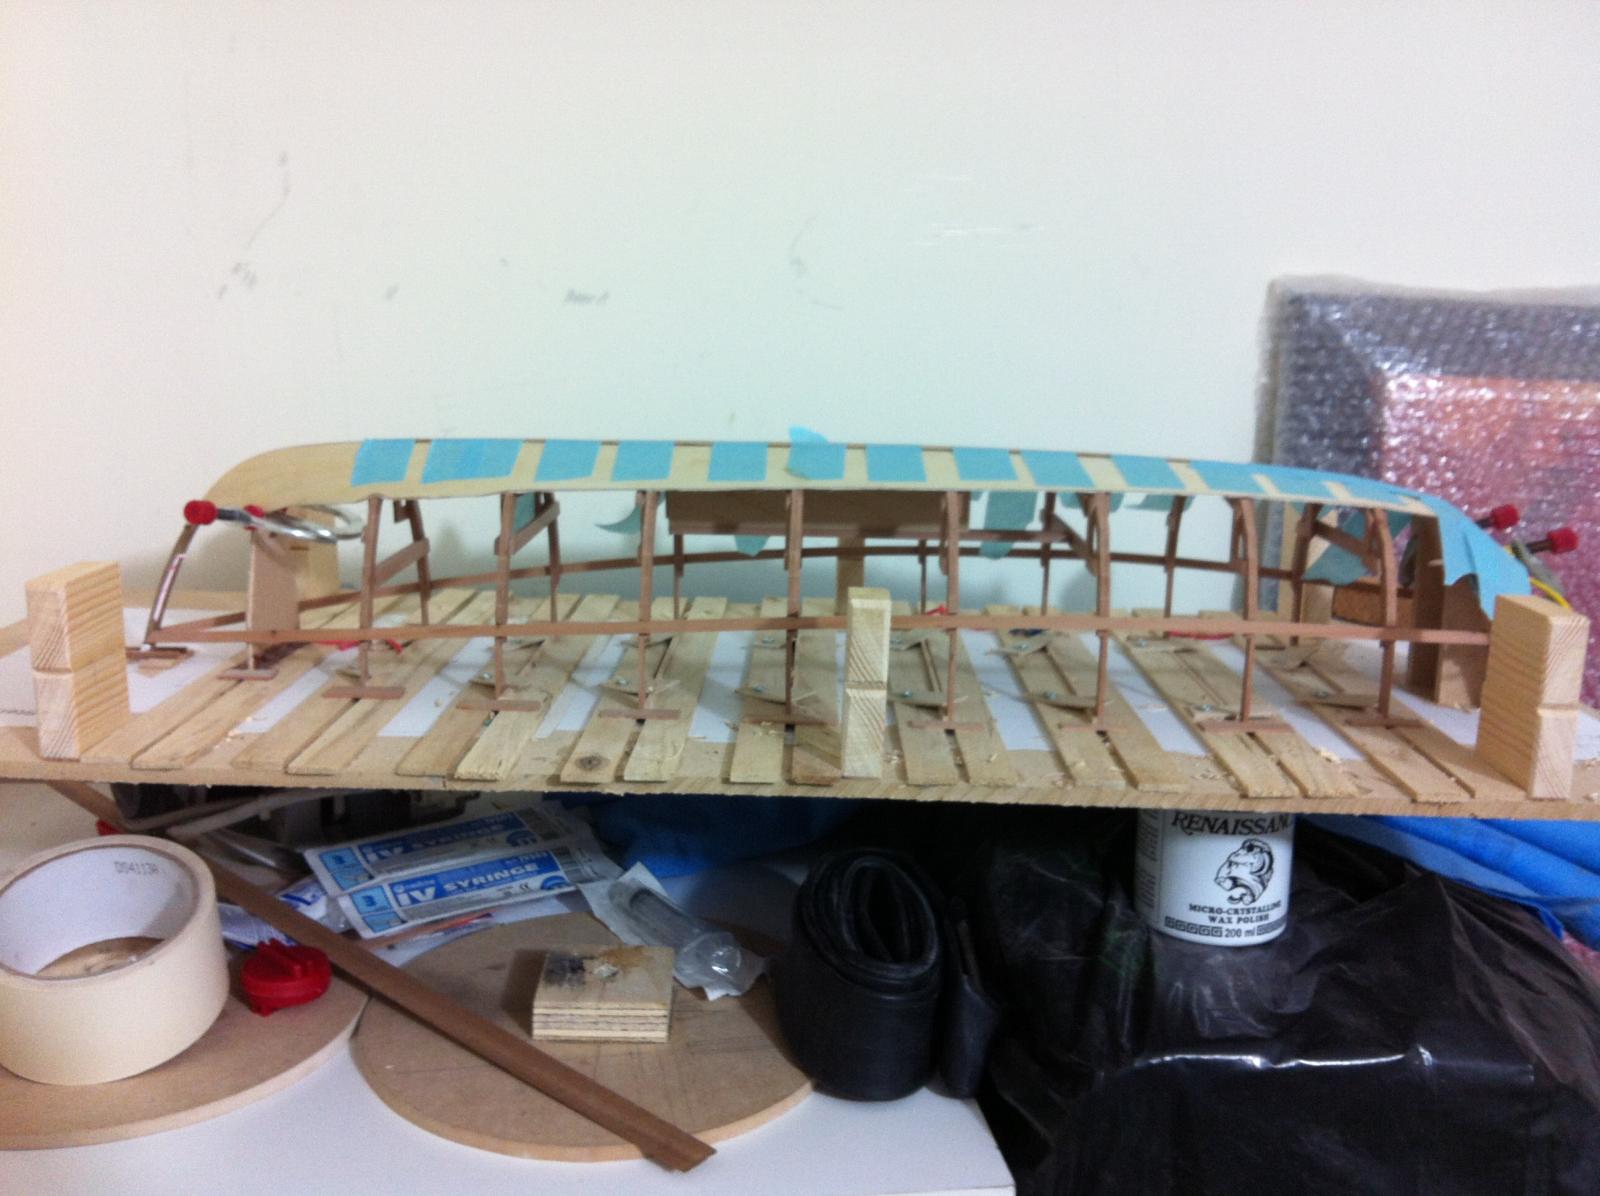
Picking up the boat I was surprised, the hull is very light but extremely rigid. Next the cant frames went in which took a bit of head scratching but I am happy with the result.

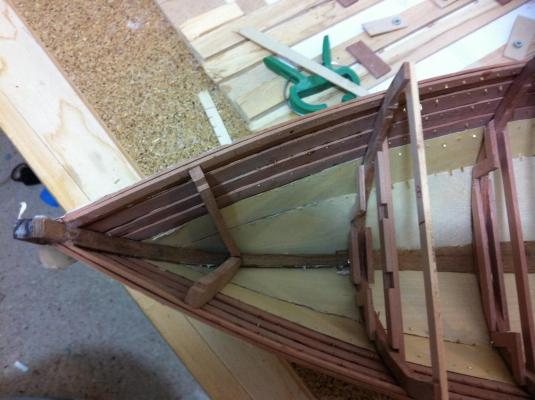
Lots left to be done but making progress at last!
- Yambo, SailorGreg, druxey and 4 others
-
7
-
-
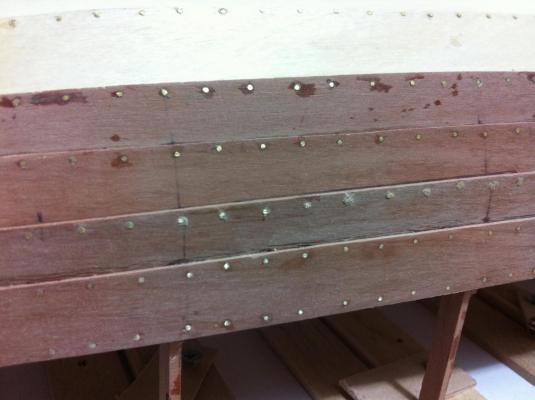
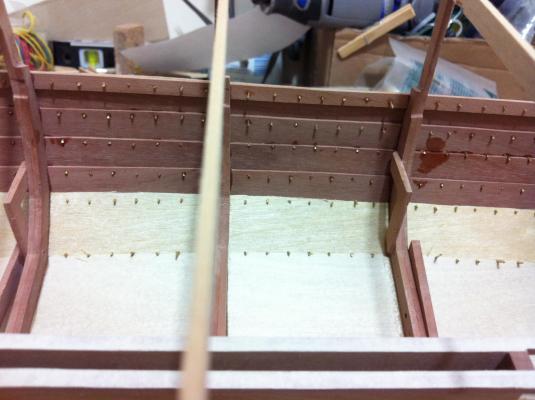
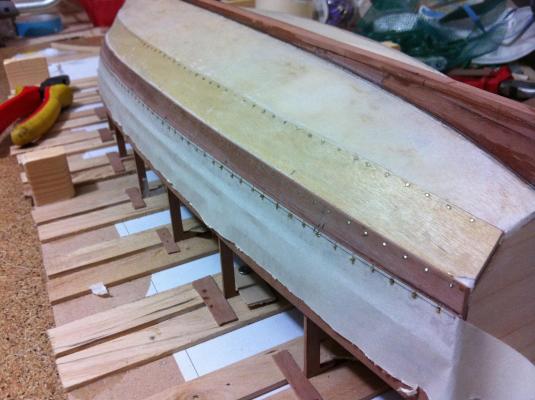
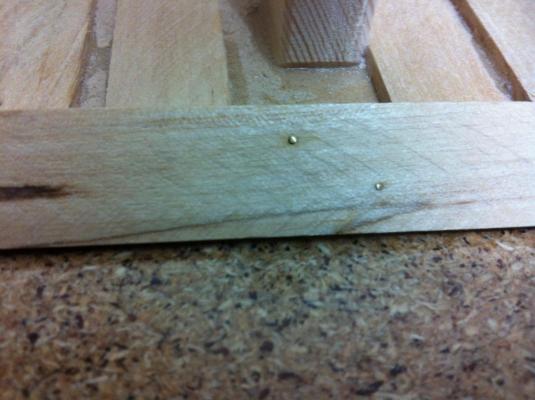
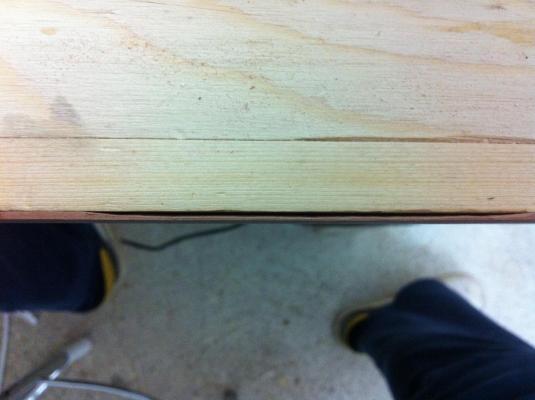
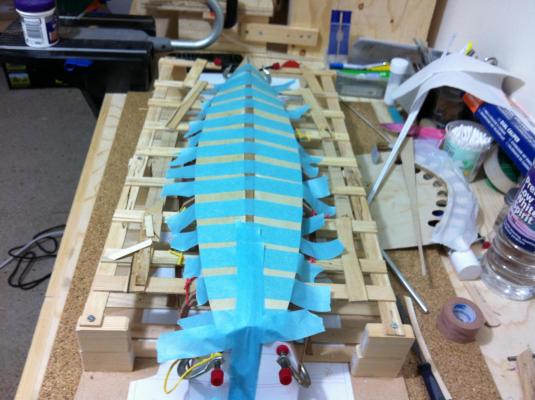
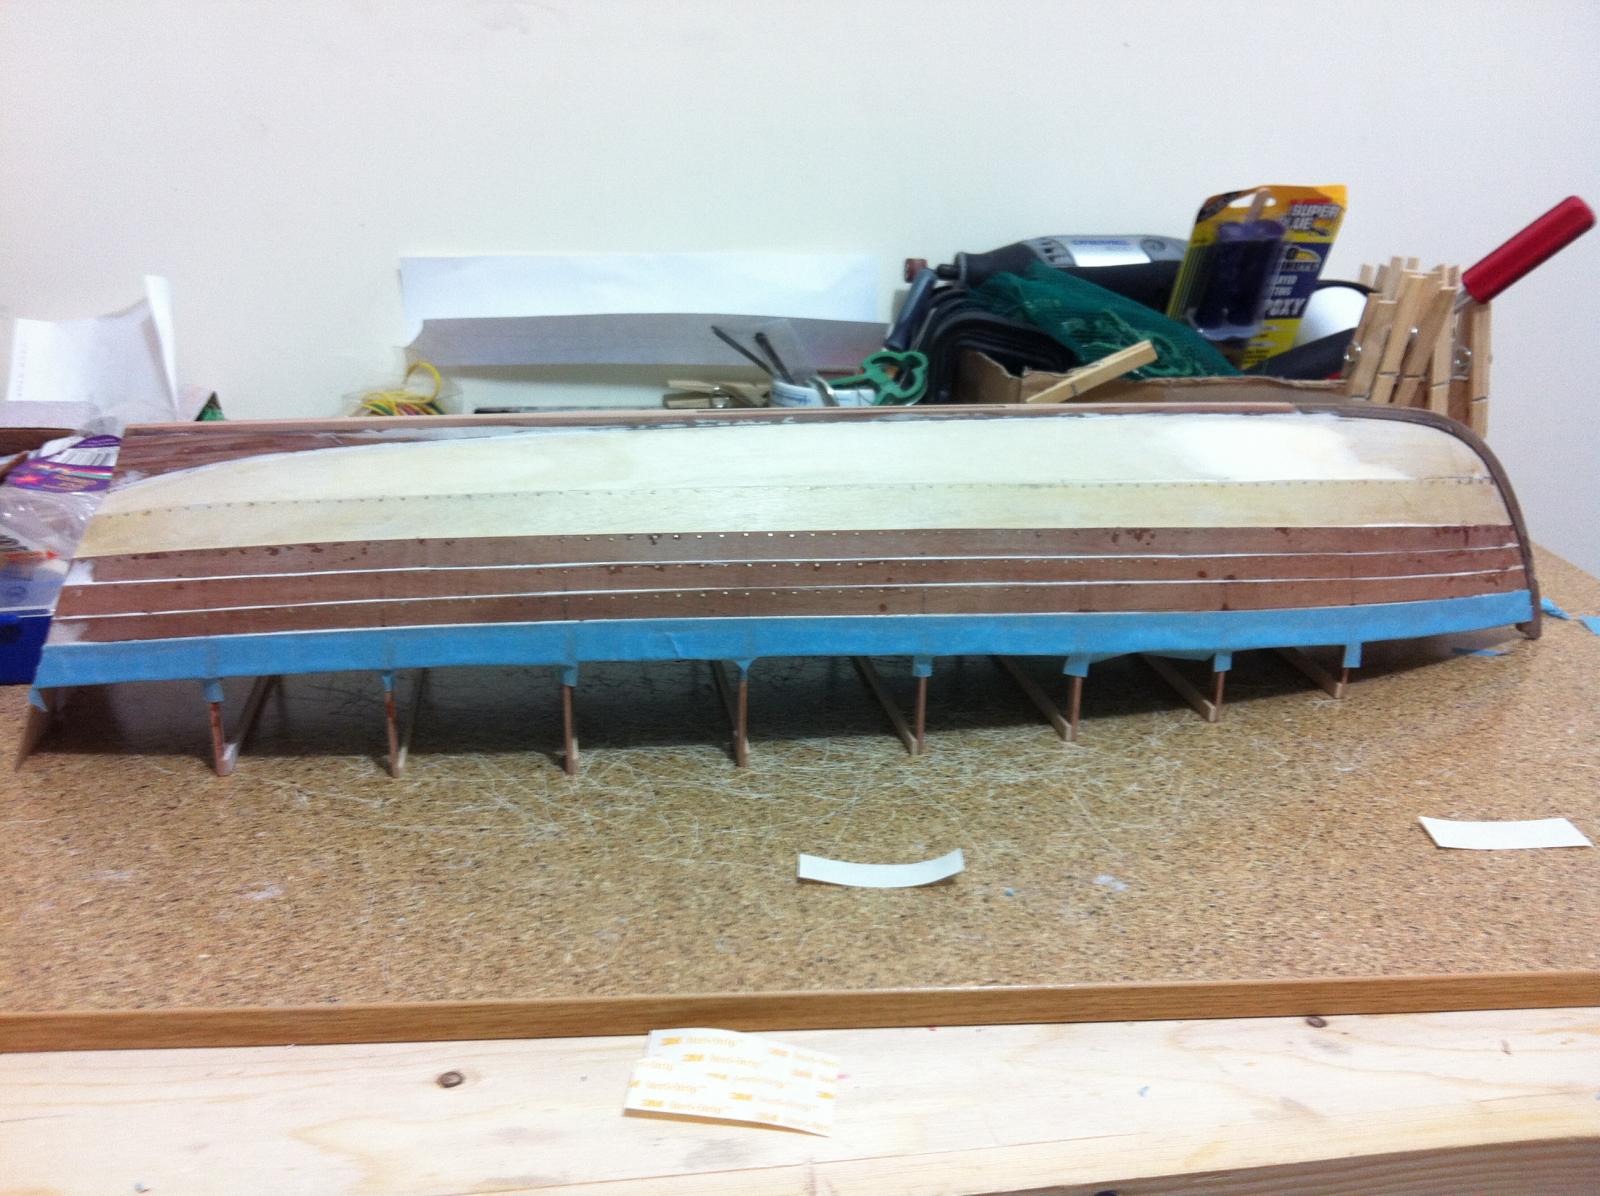
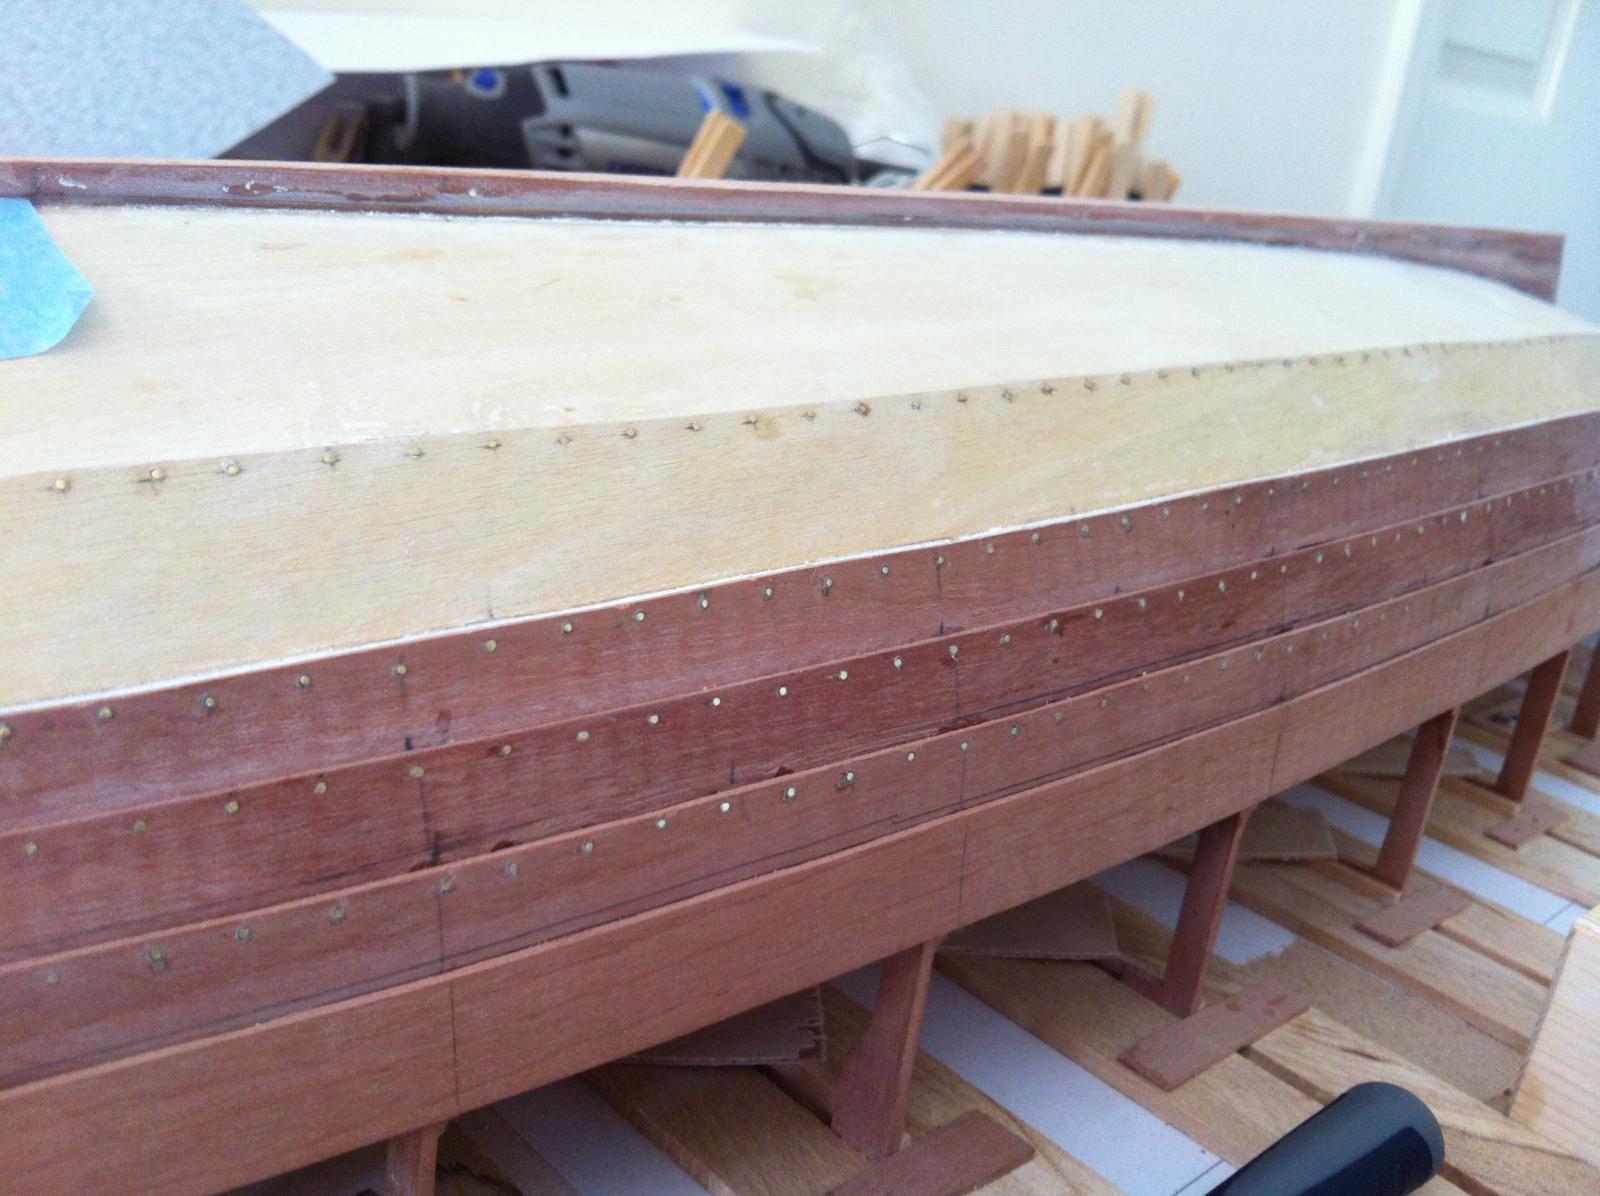
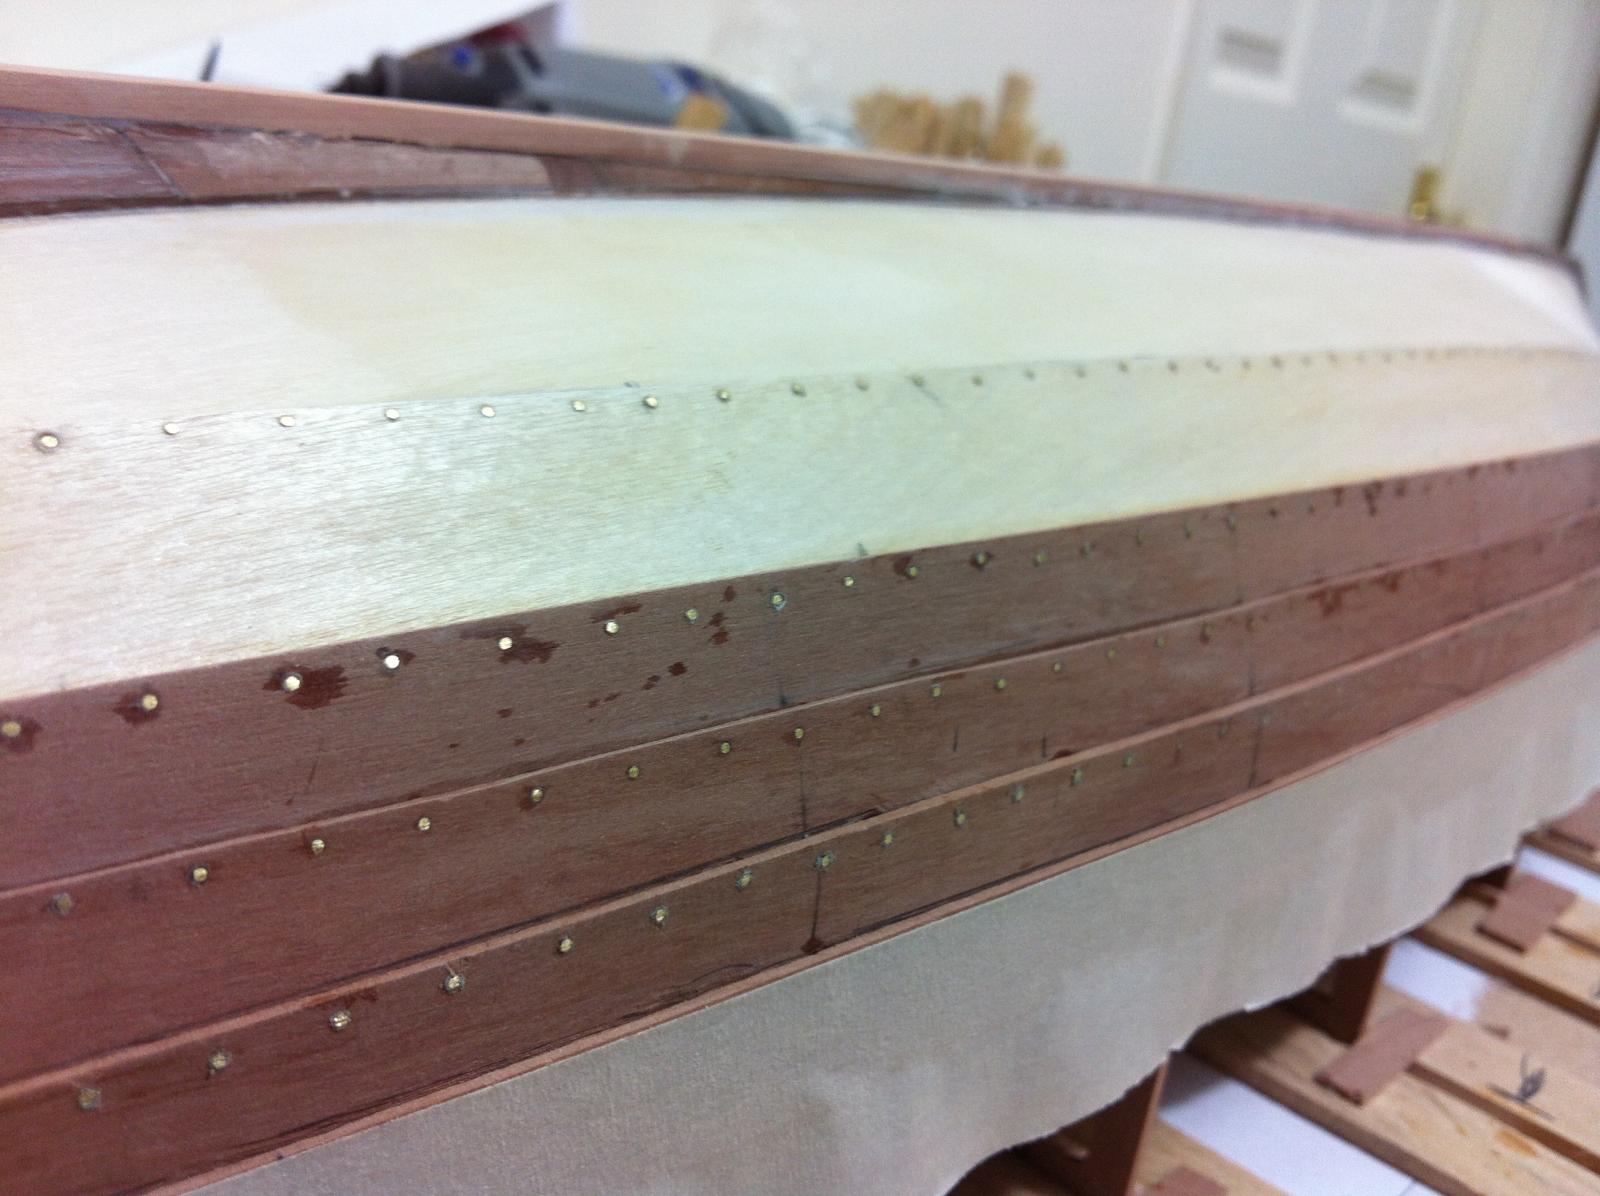
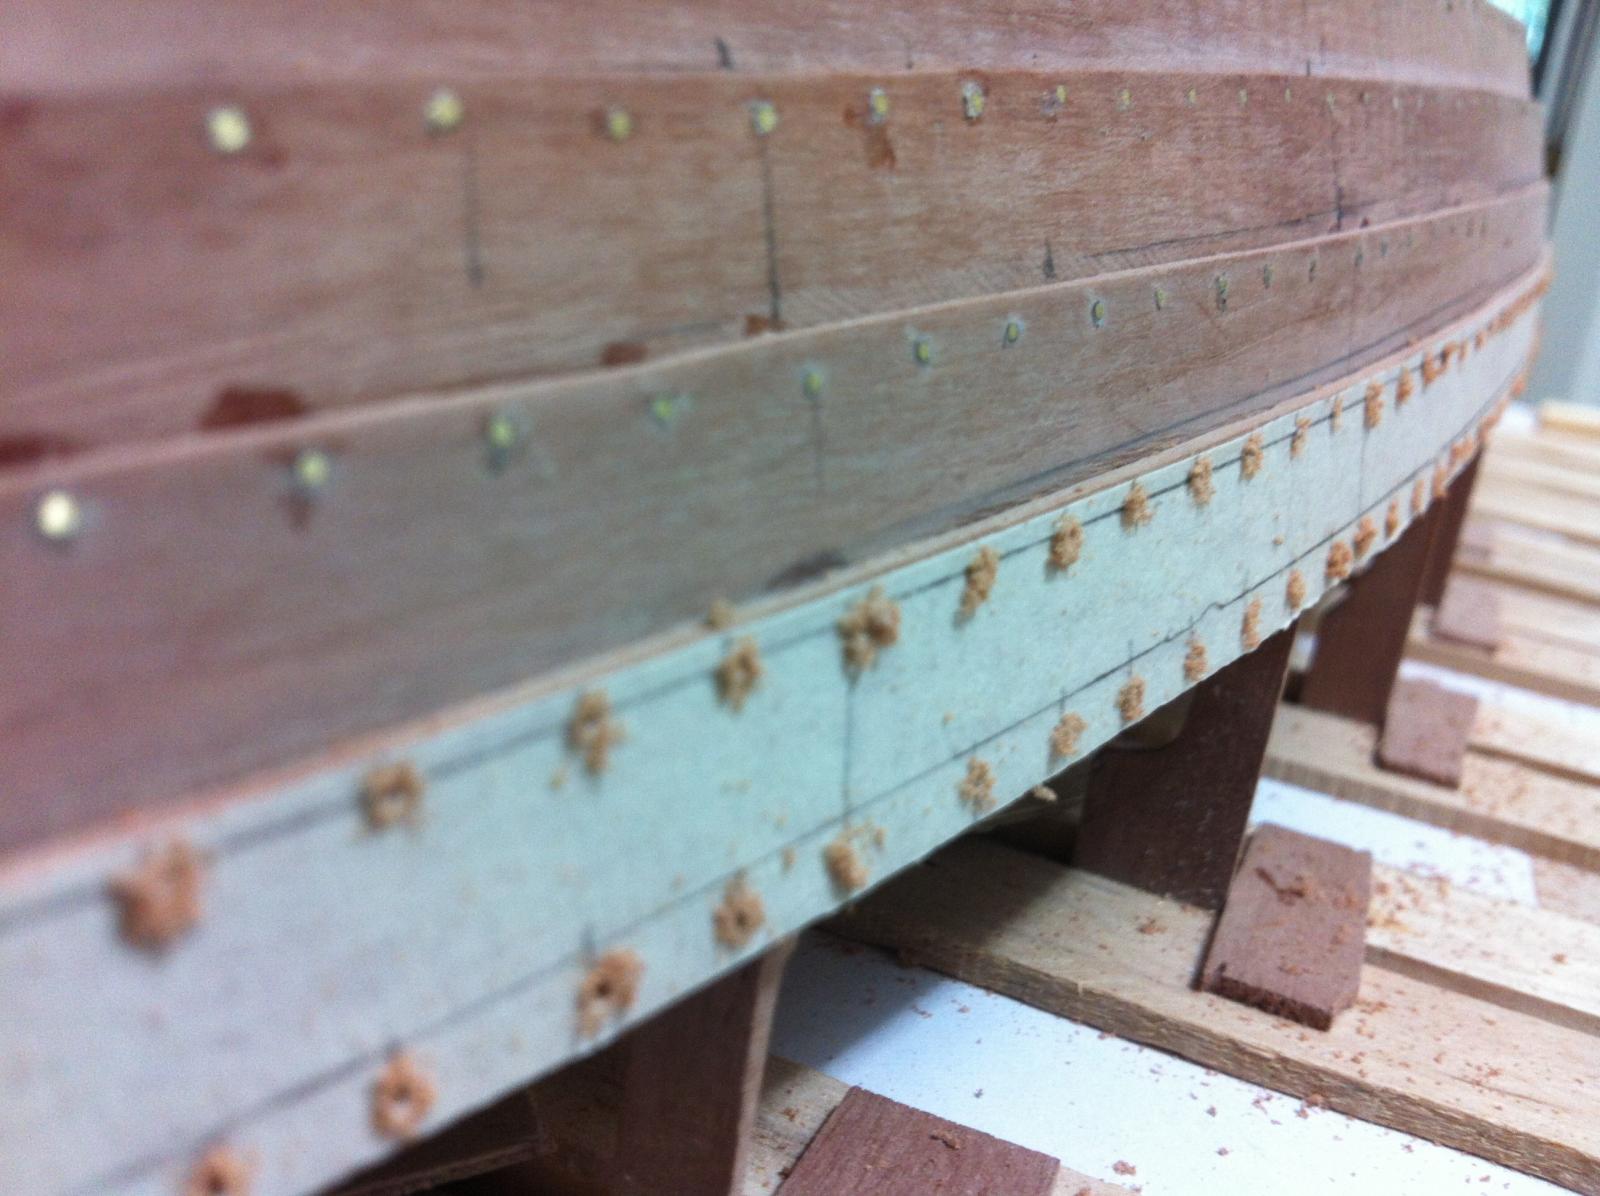
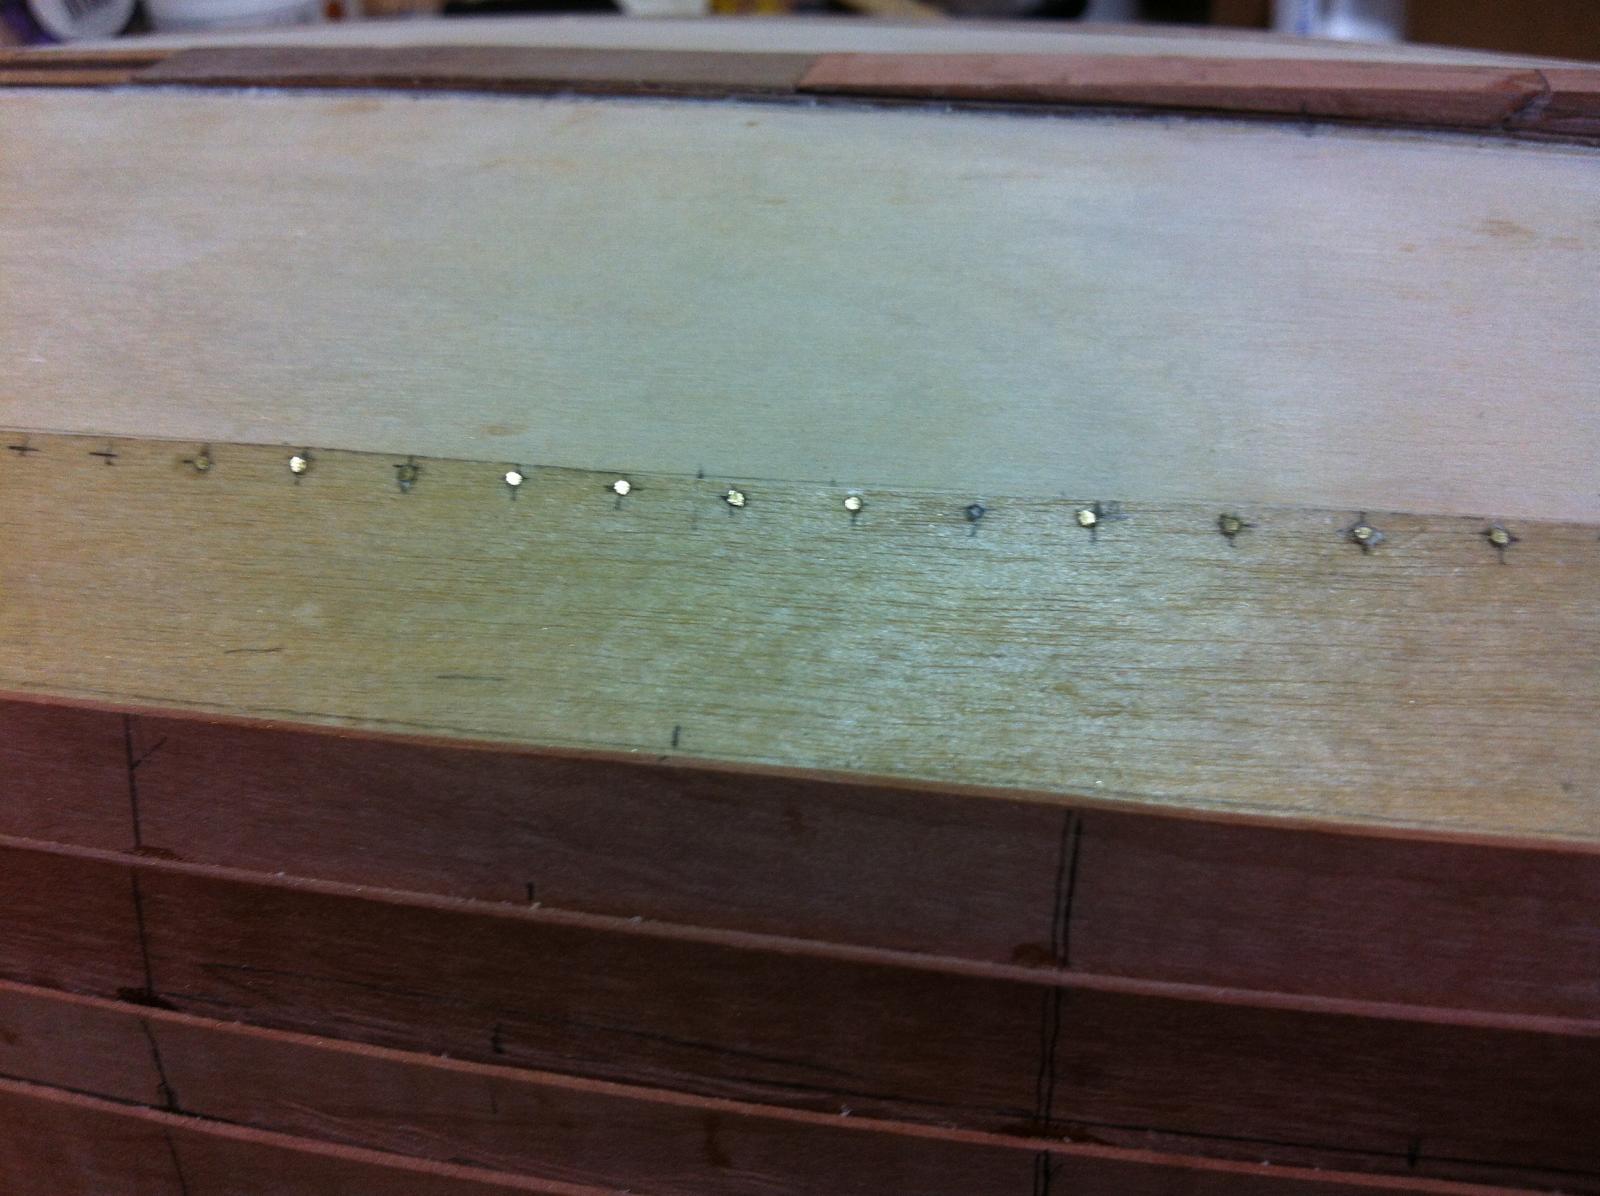
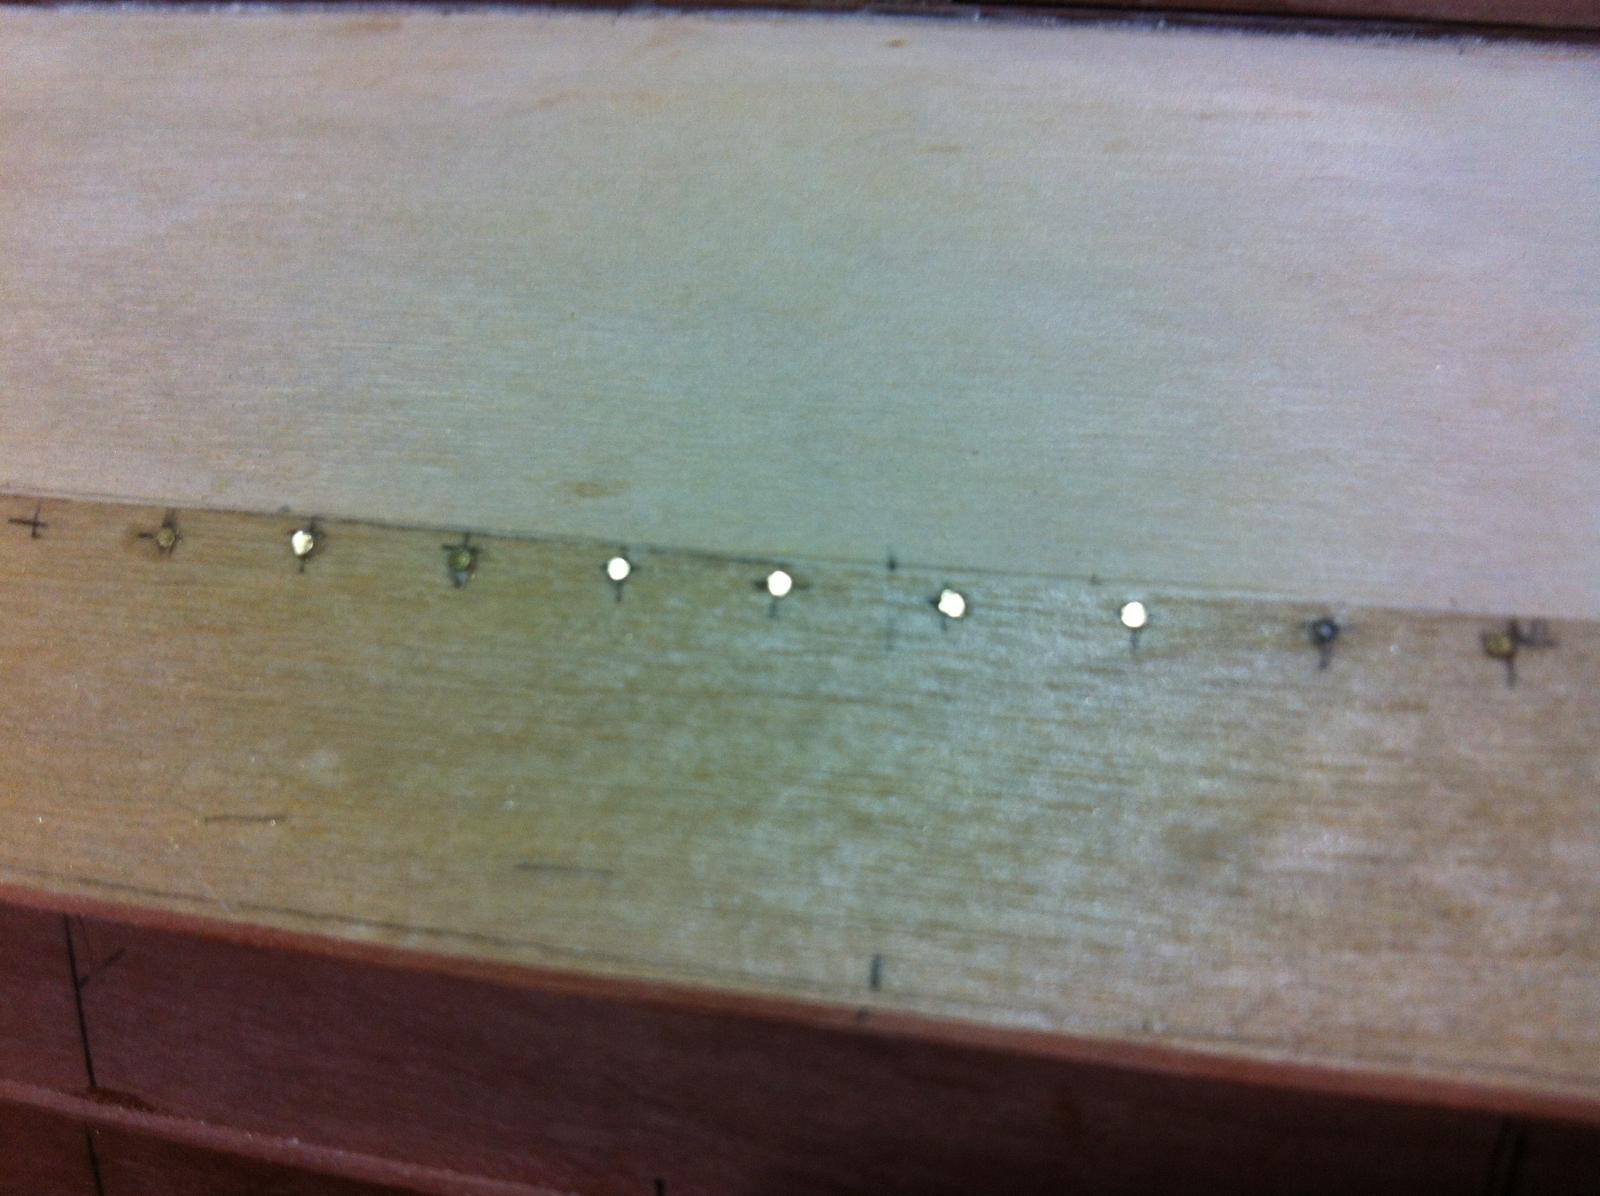
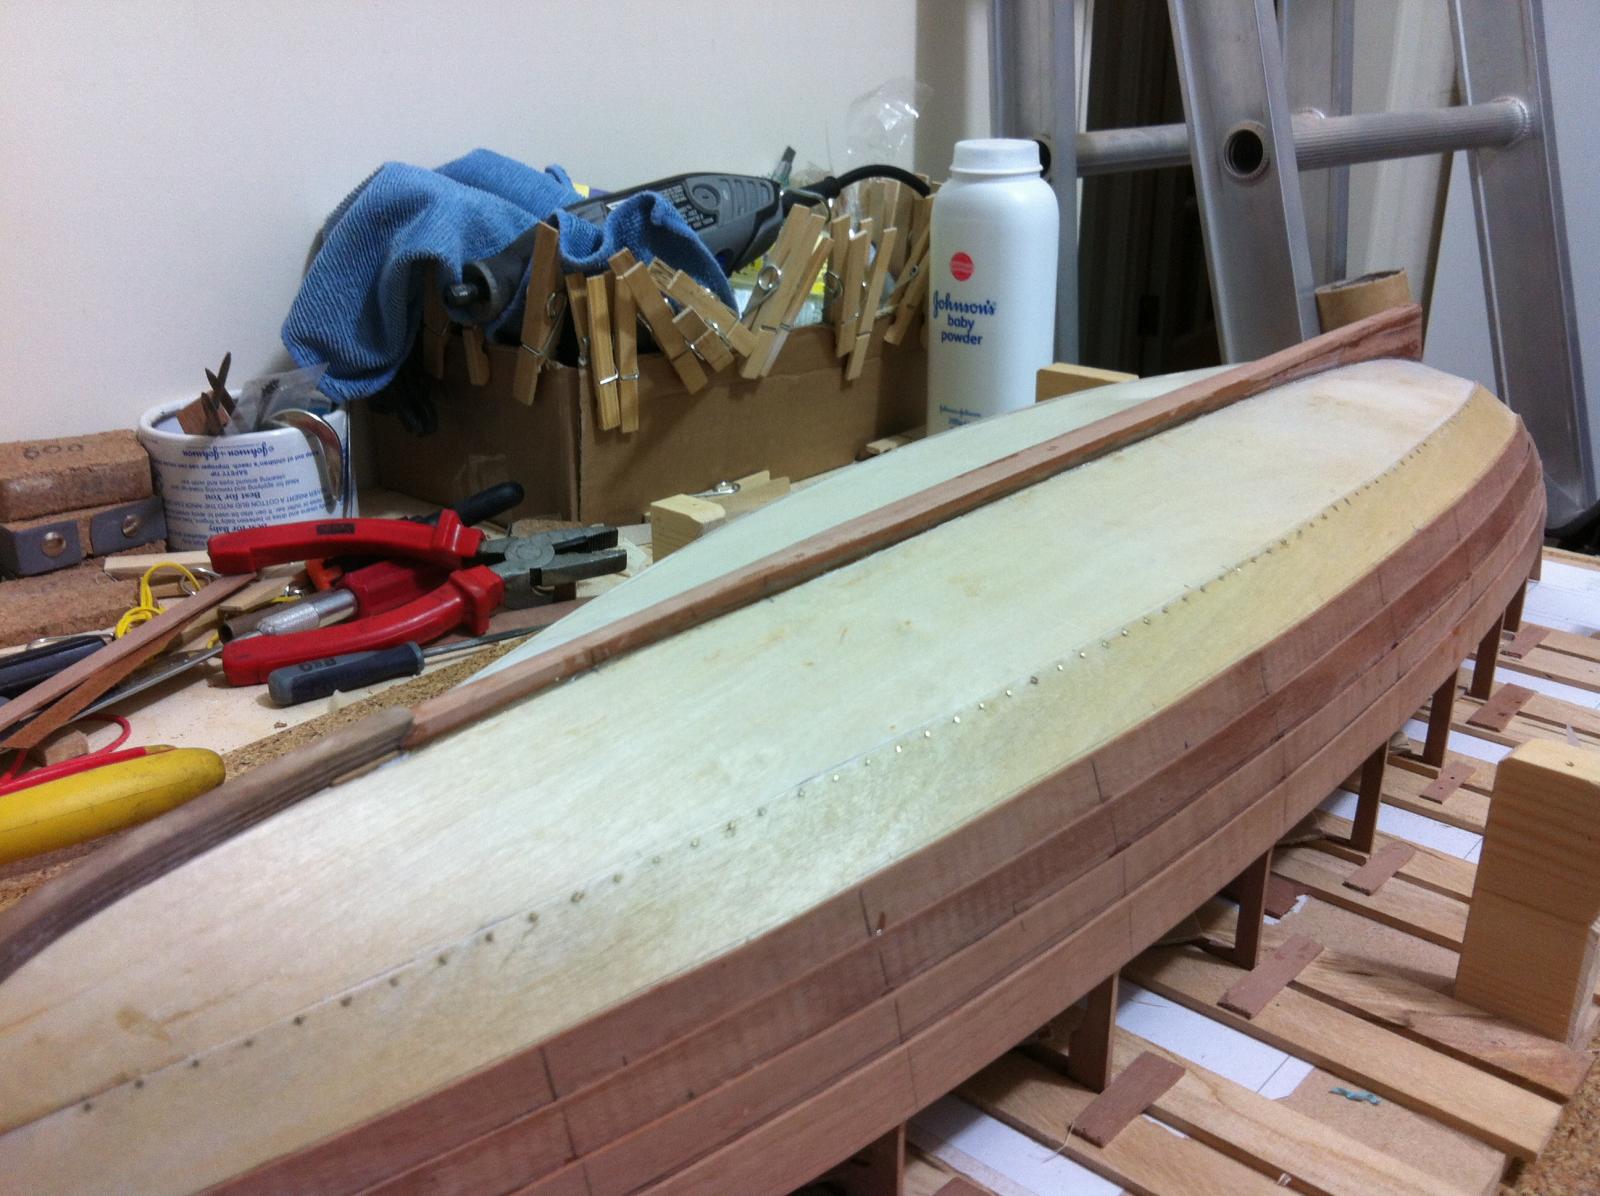
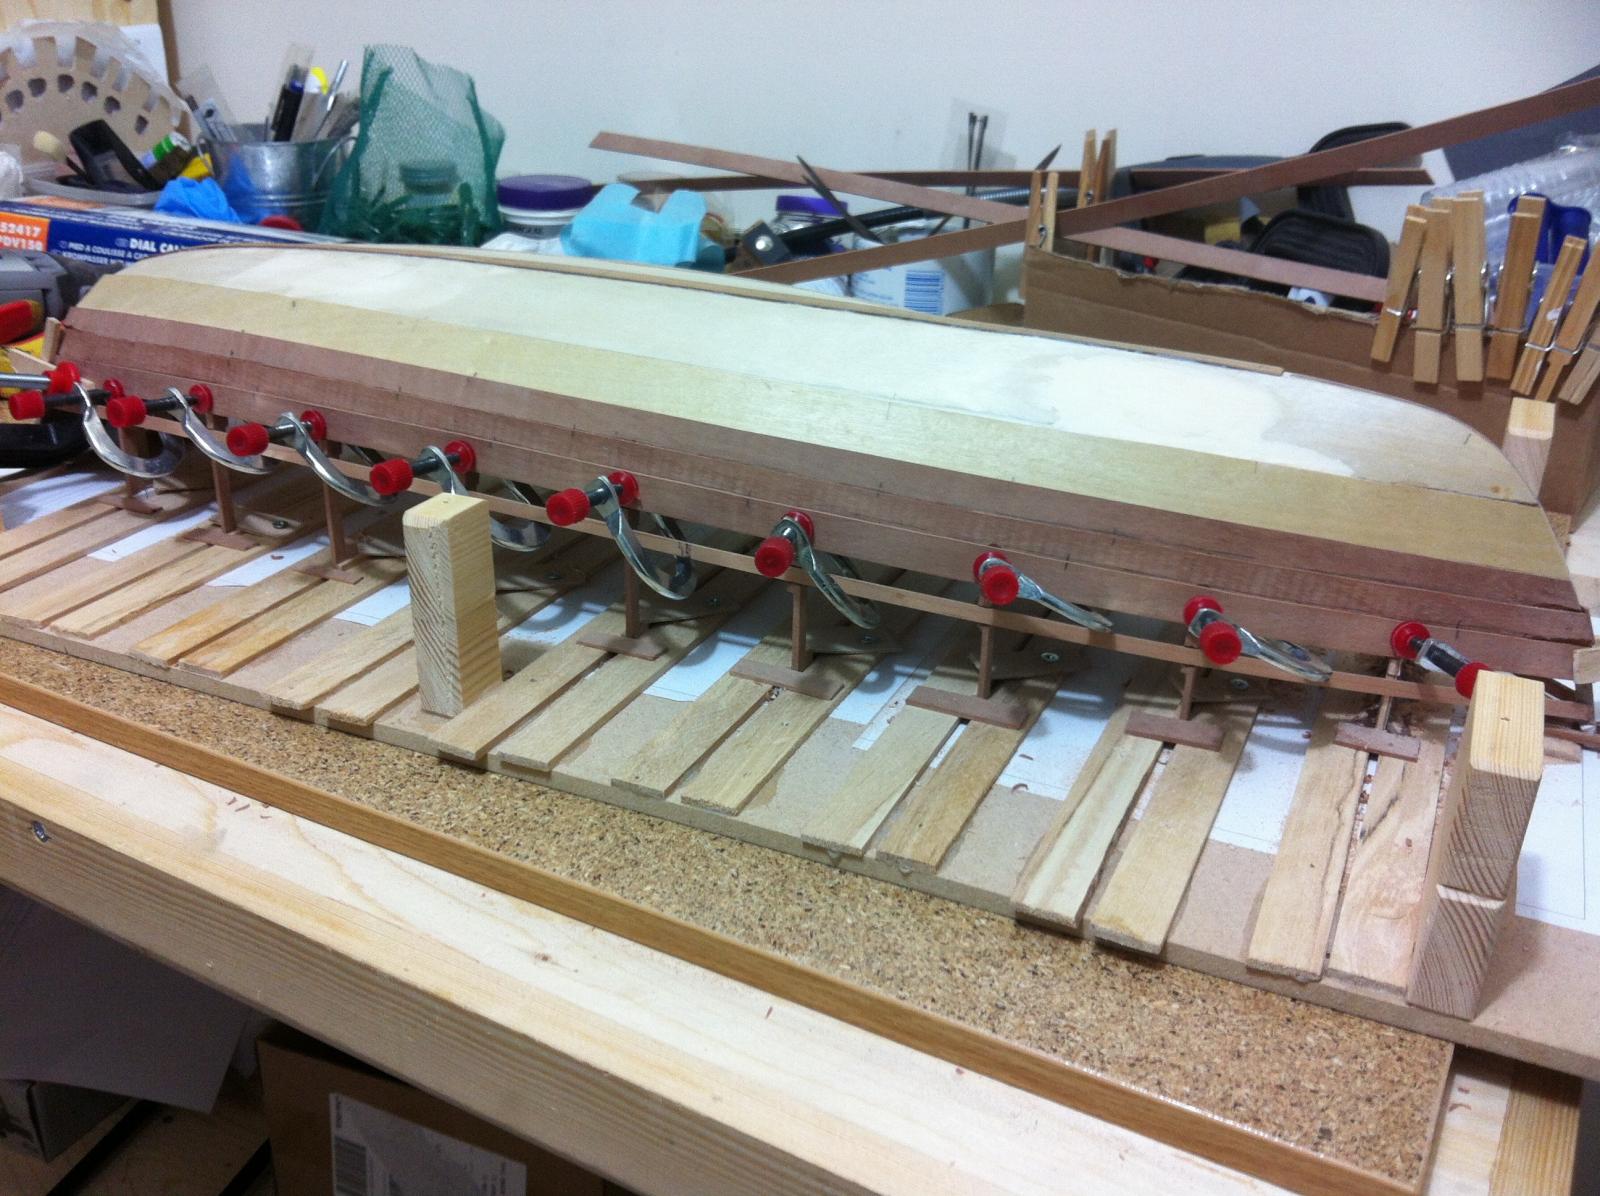
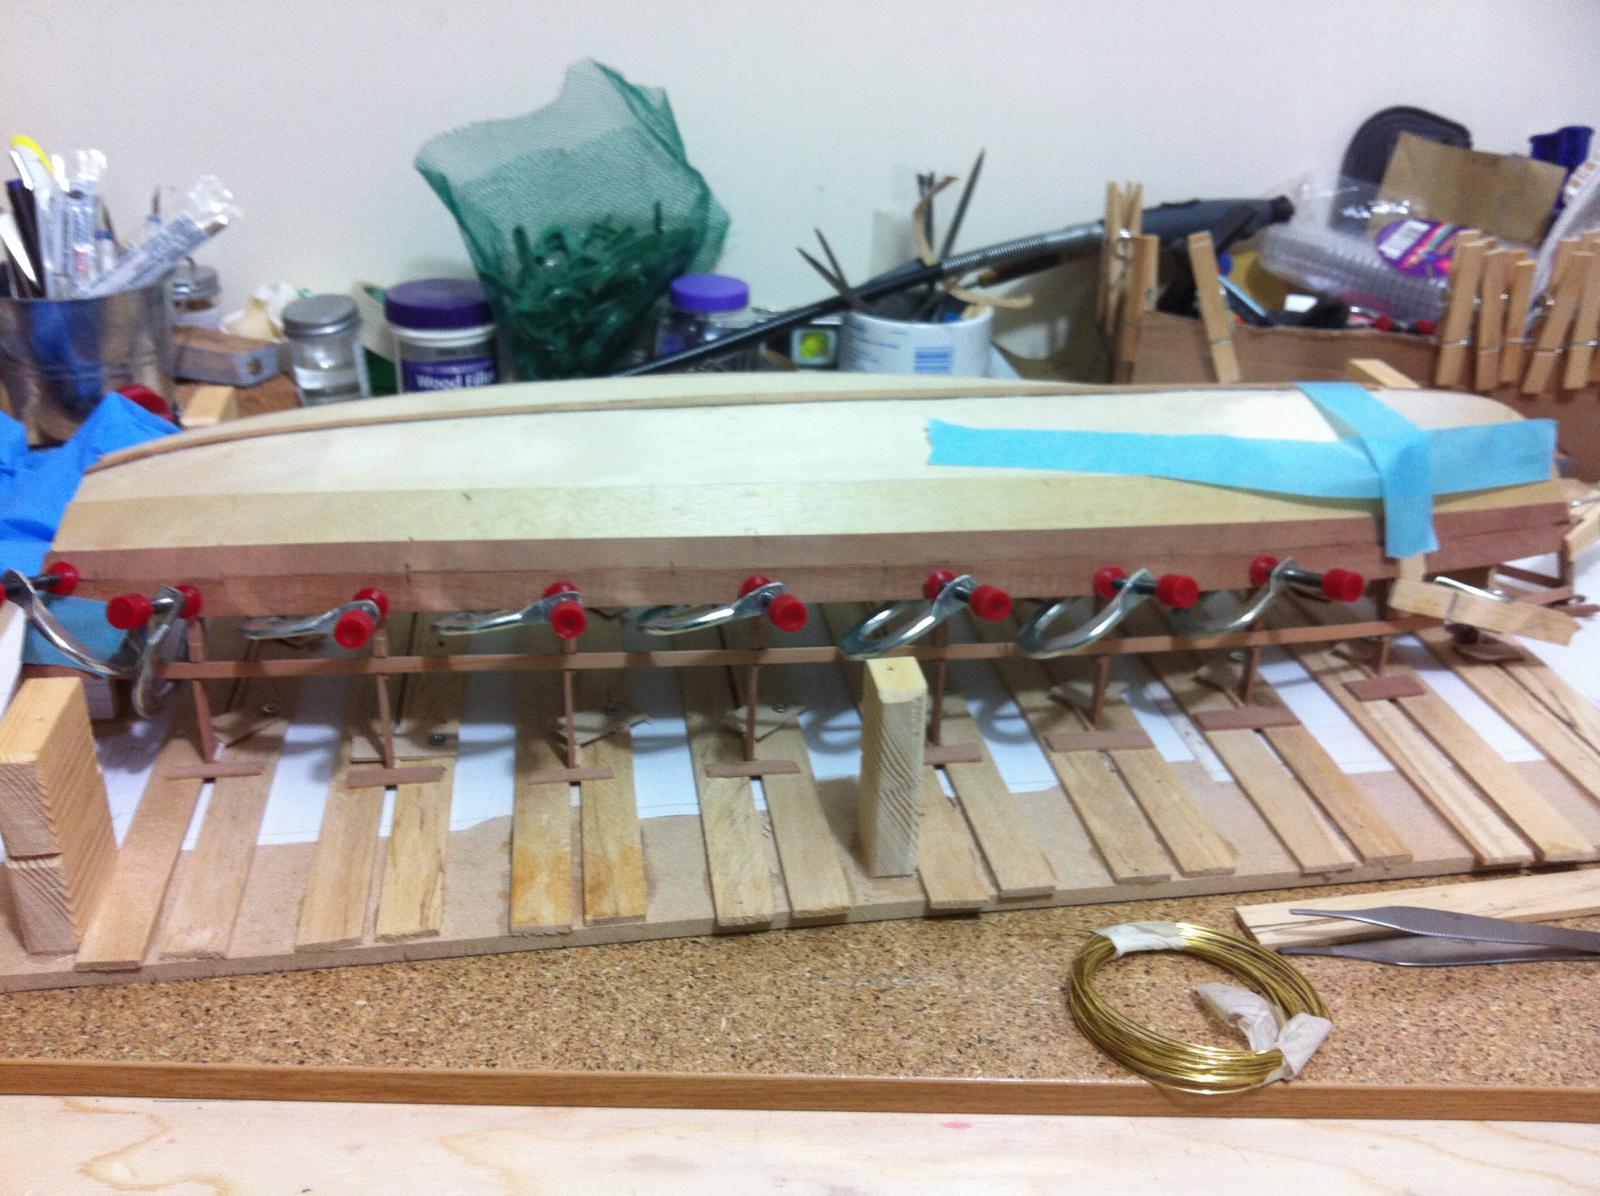
Nothing really exciting to show, life is a monotonous mask-drill-glue-file. But I think that the the first 500 rivets deserve a post!
I only took a photo of one side, no strength left to photograph the two rivet lines on the other side.
700+ more left...
- SailorGreg, aykutansin, IgorSky and 4 others
-
7
-
Patrick
Such elegant work and such a nice model! The sails add so much!
Looking forward to your next posts
Regards
Vaddoc
- IgorSky, Piet, Dimitris71 and 1 other
-
4
-
The work continues and new problems and challenges pop up all the time!
The fairing putty I got from the model shop is really good, much nicer to work with than the one from the DIY shop. I faired the bow and also trimmed the planks at the the stern and faired the transom.

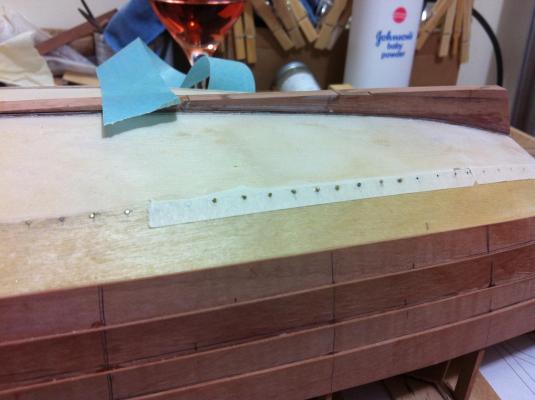
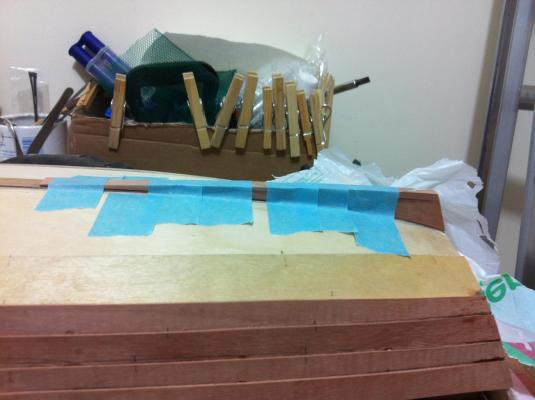
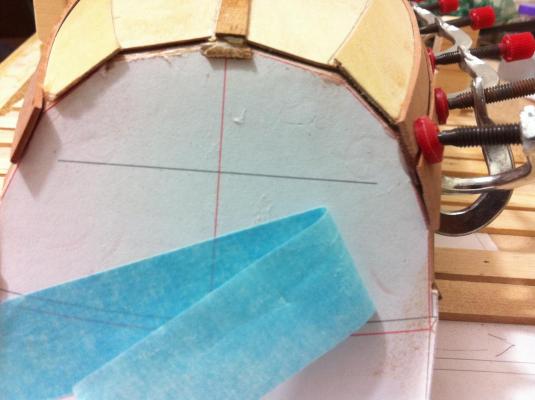
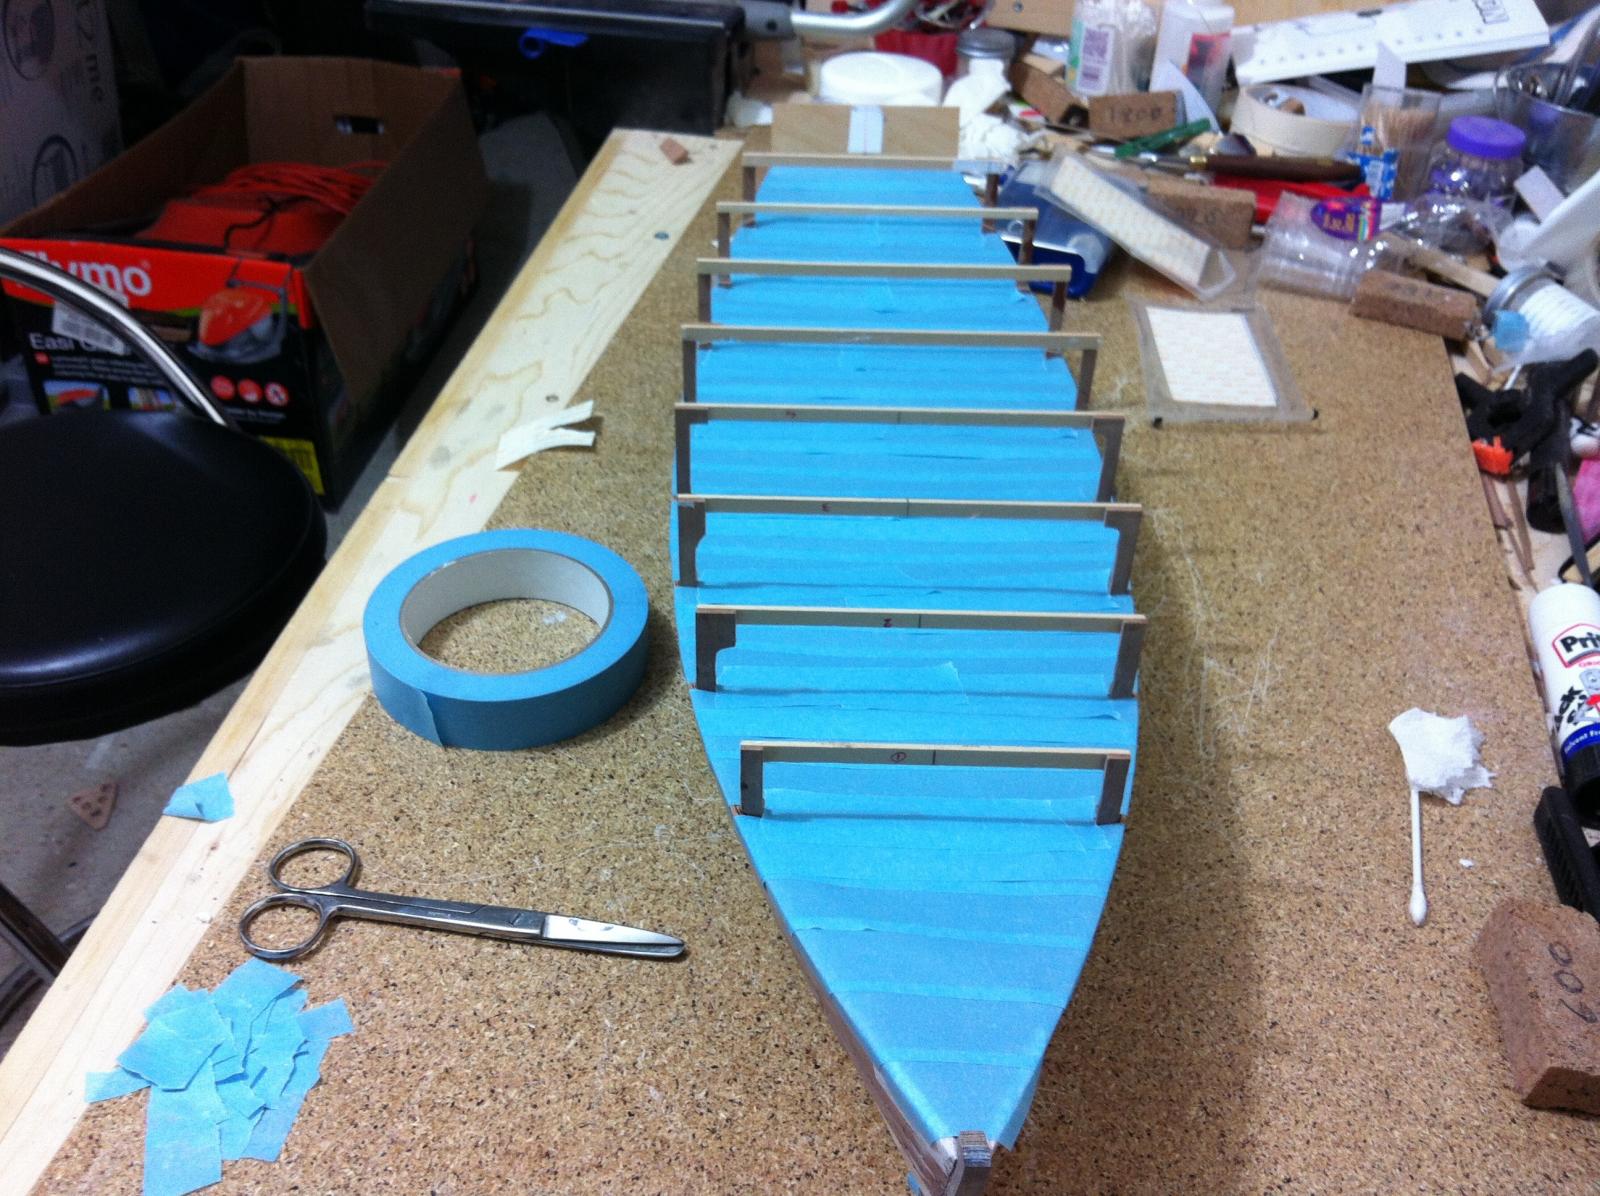
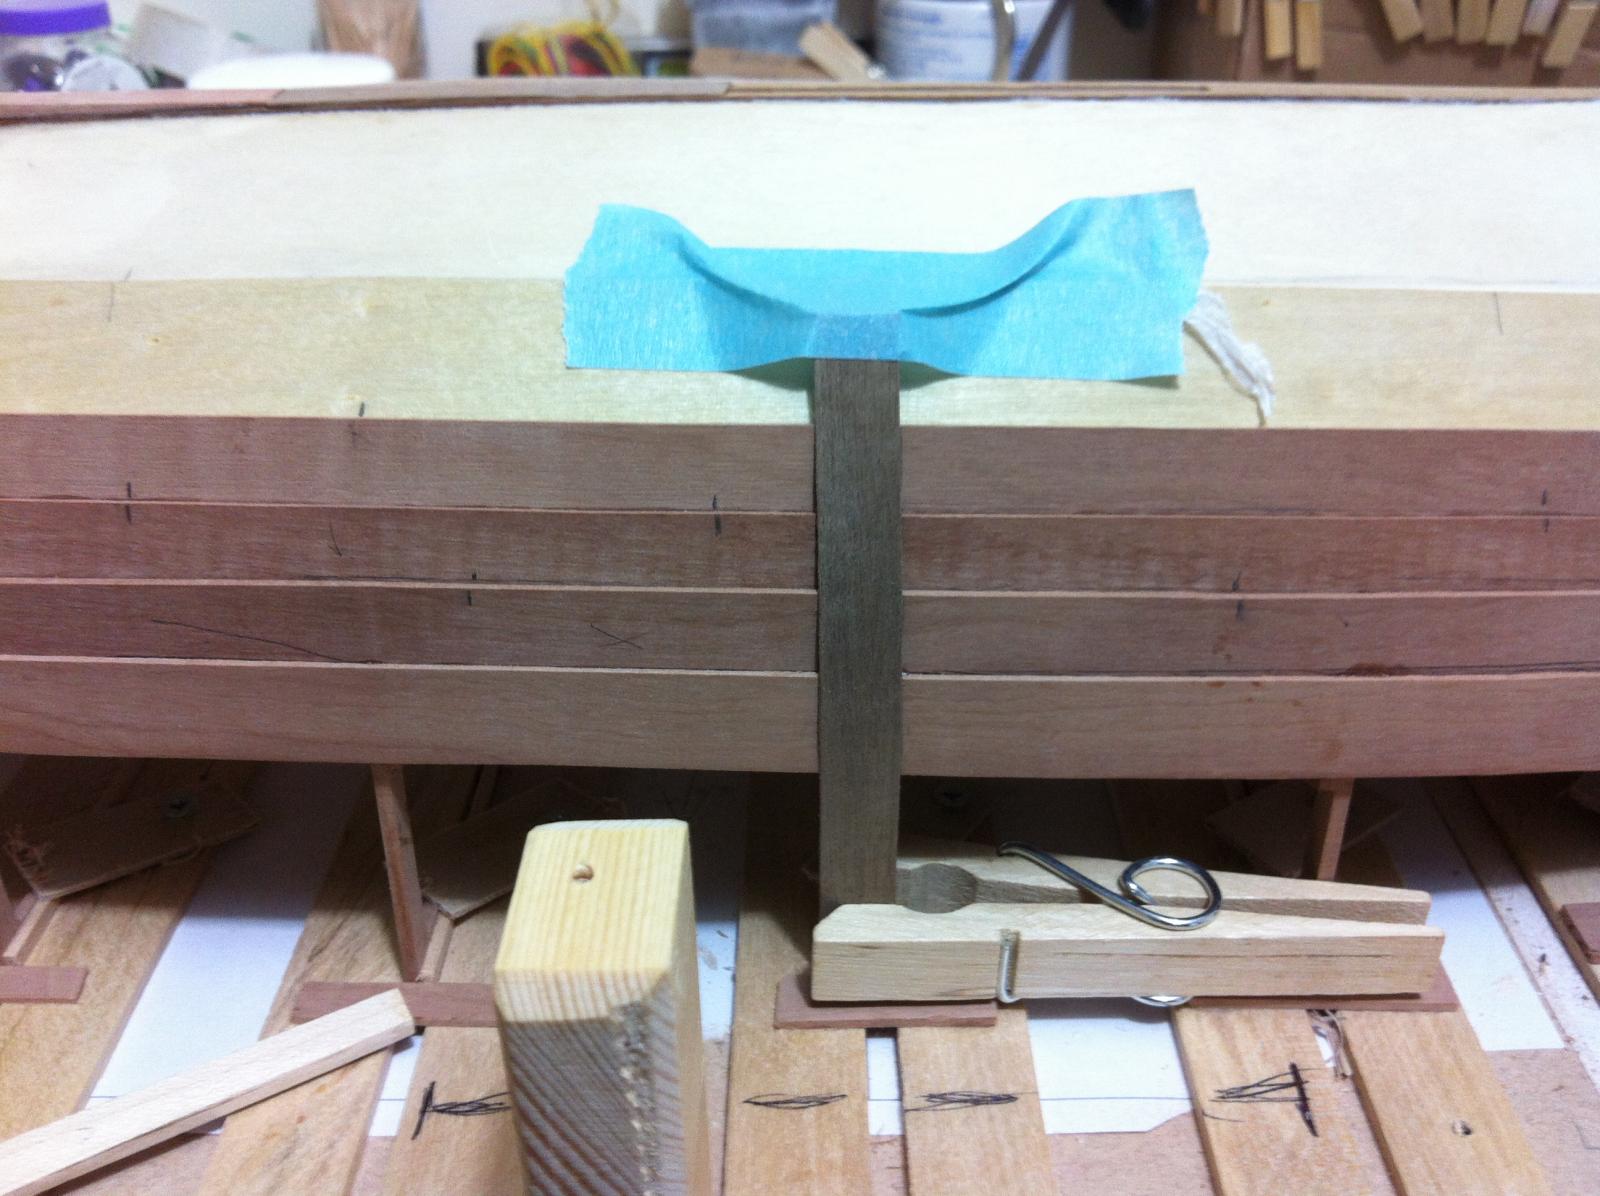
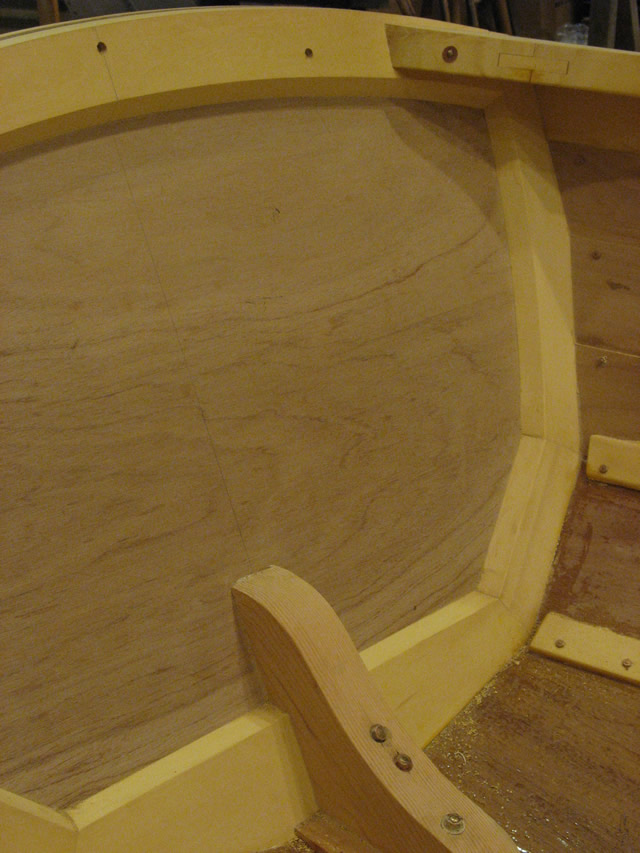
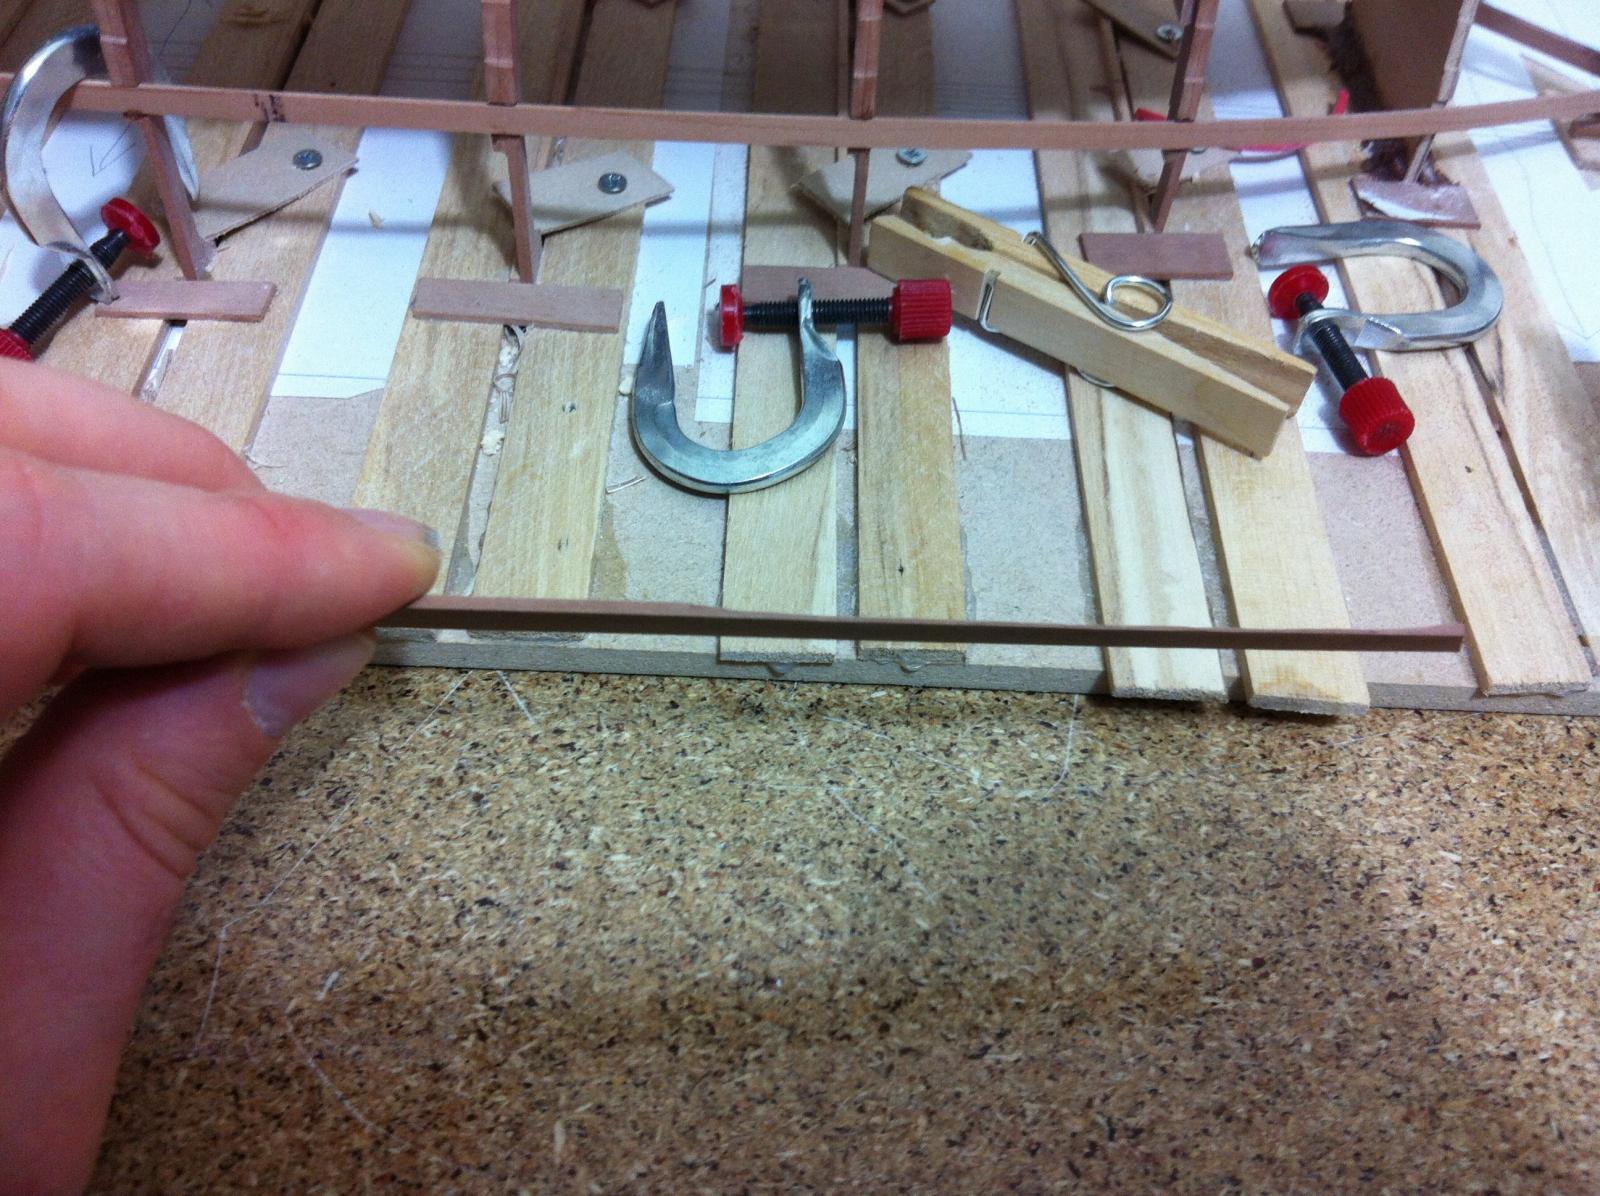
I have already decided to rivet the boat and I think I should tackle this now. Besides, it would be a nice change from all the laminating and woodwork. I realised however that I did not mark the position of the frames during planking. I tried a simple solution

This did not work due to the curvature of the hull so a more complex tool had to be improvised which worked fine. The positions of all frames is now marked.

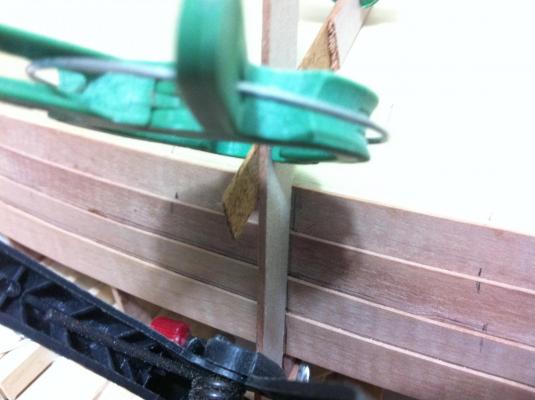
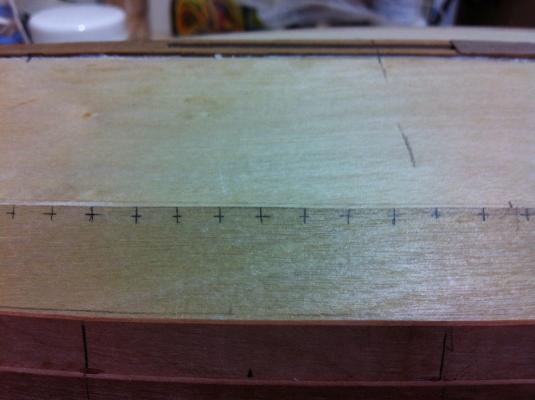
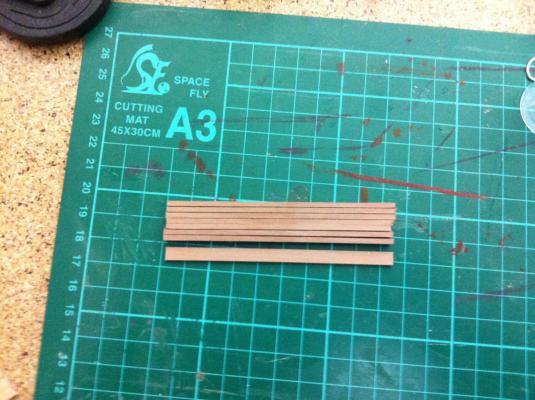
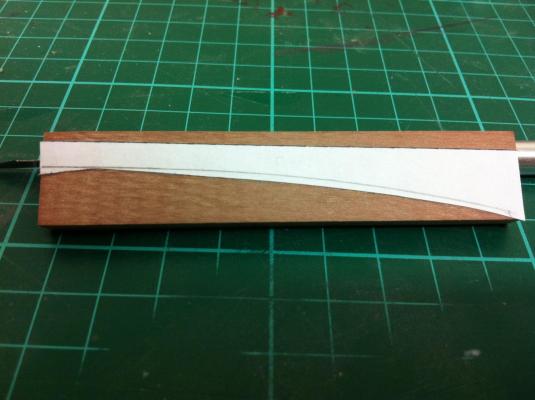
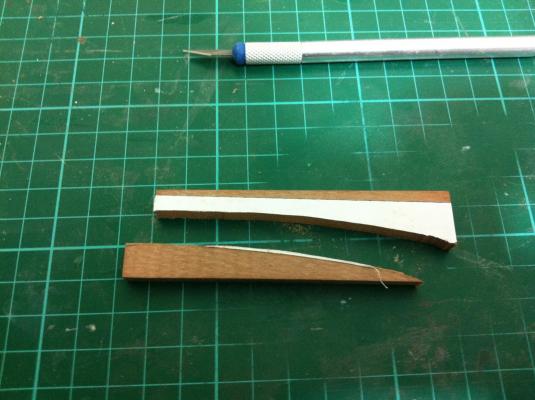
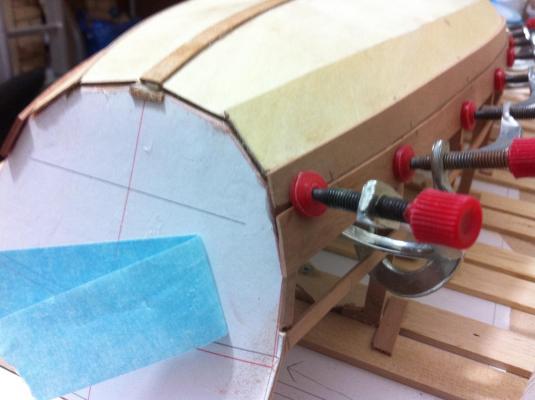
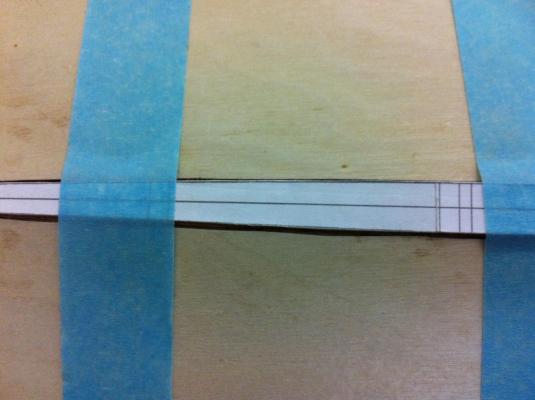
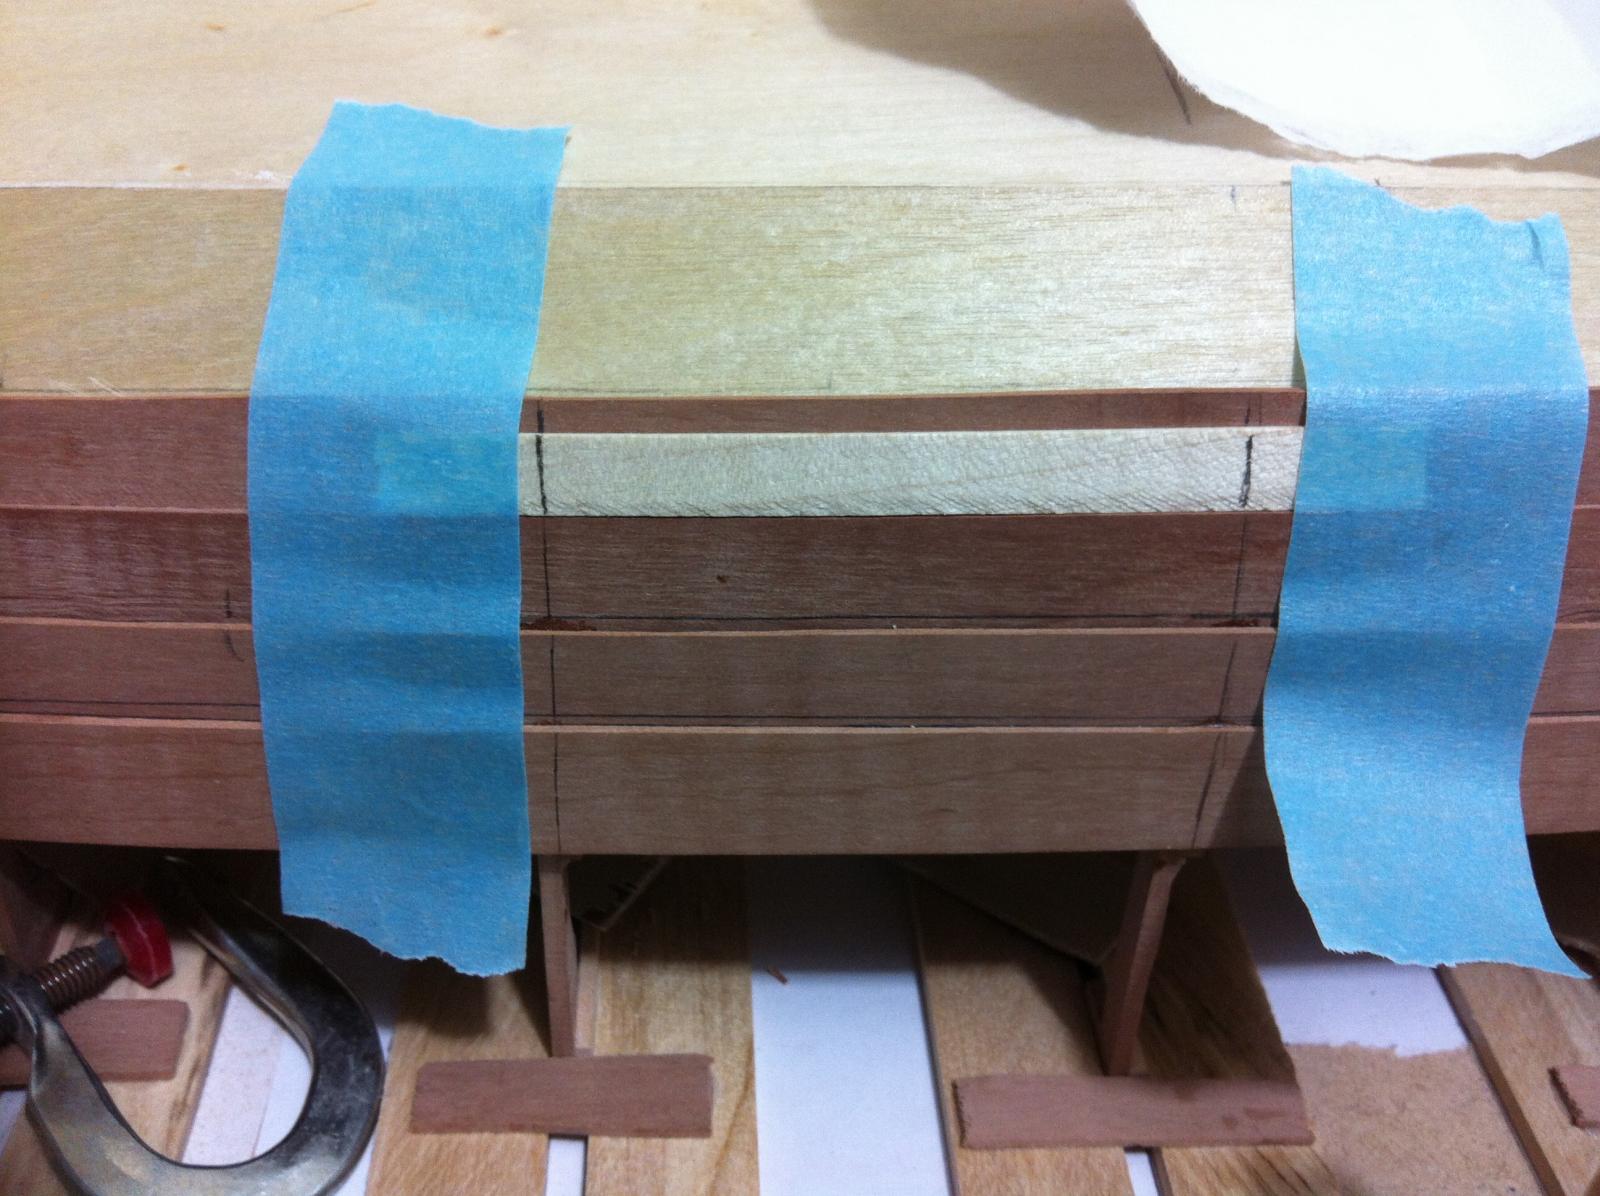
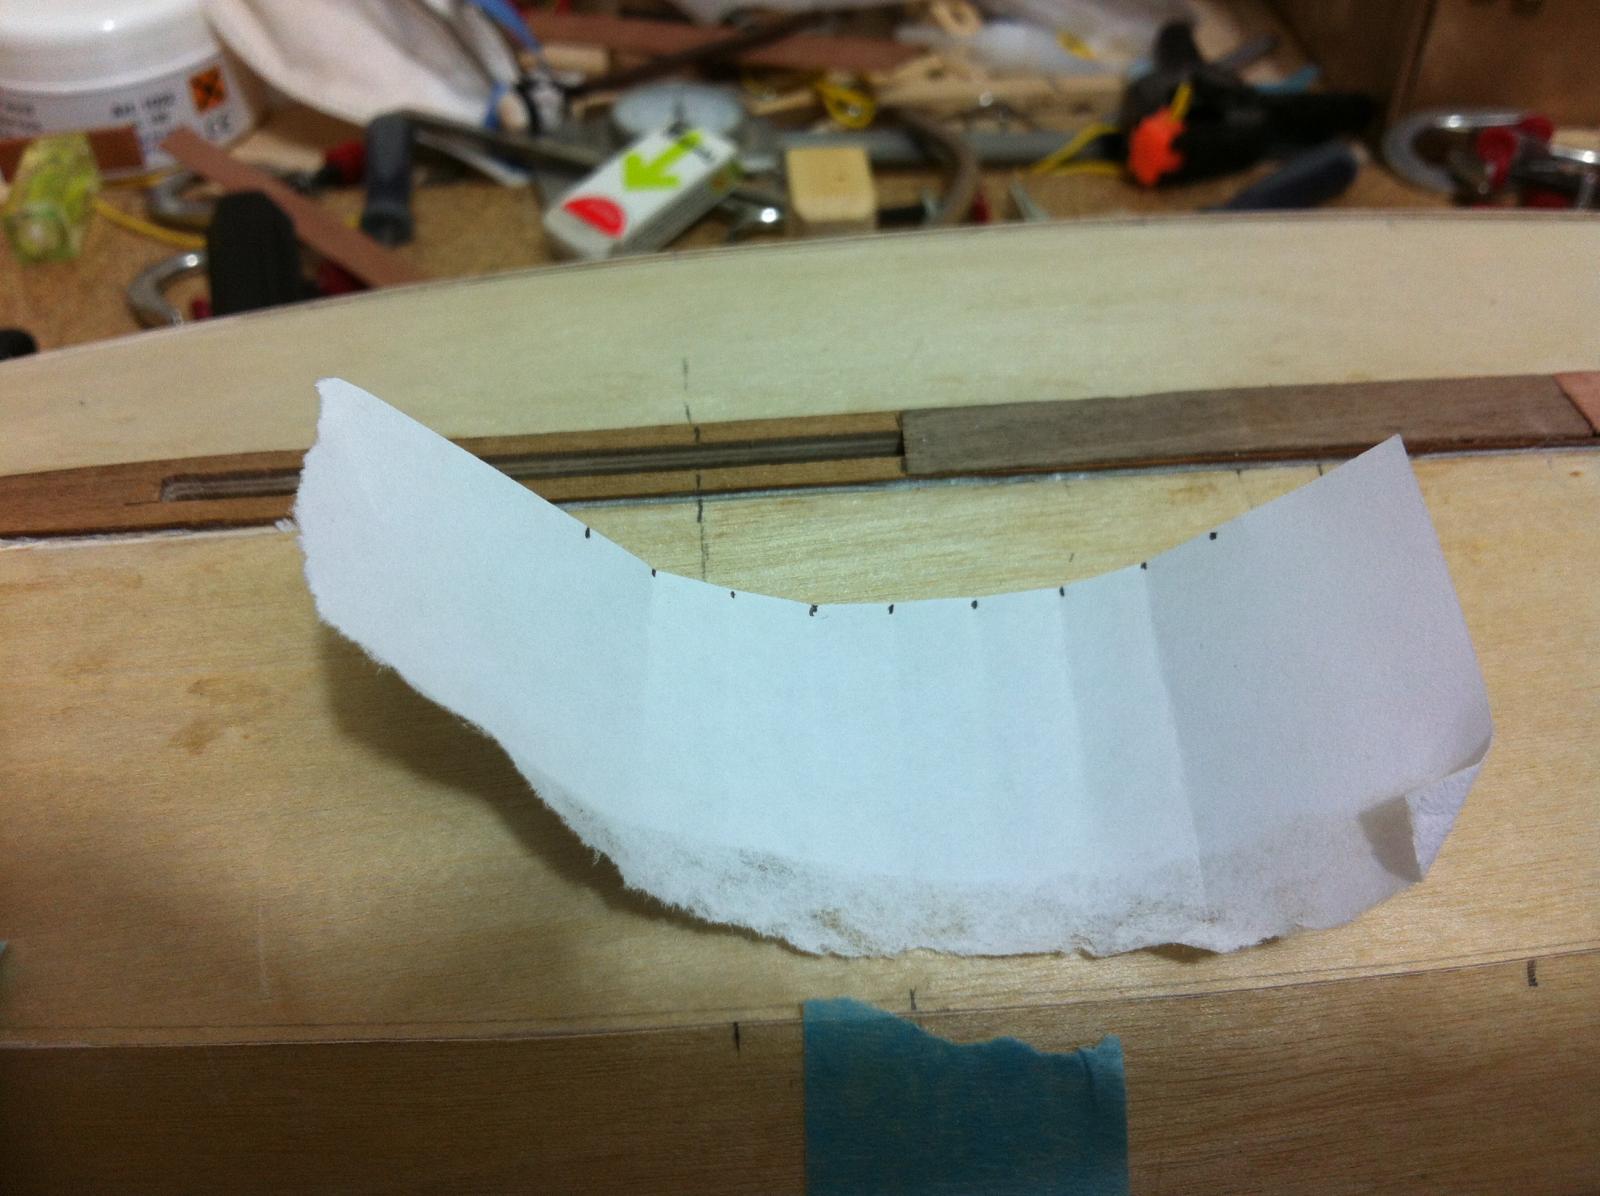
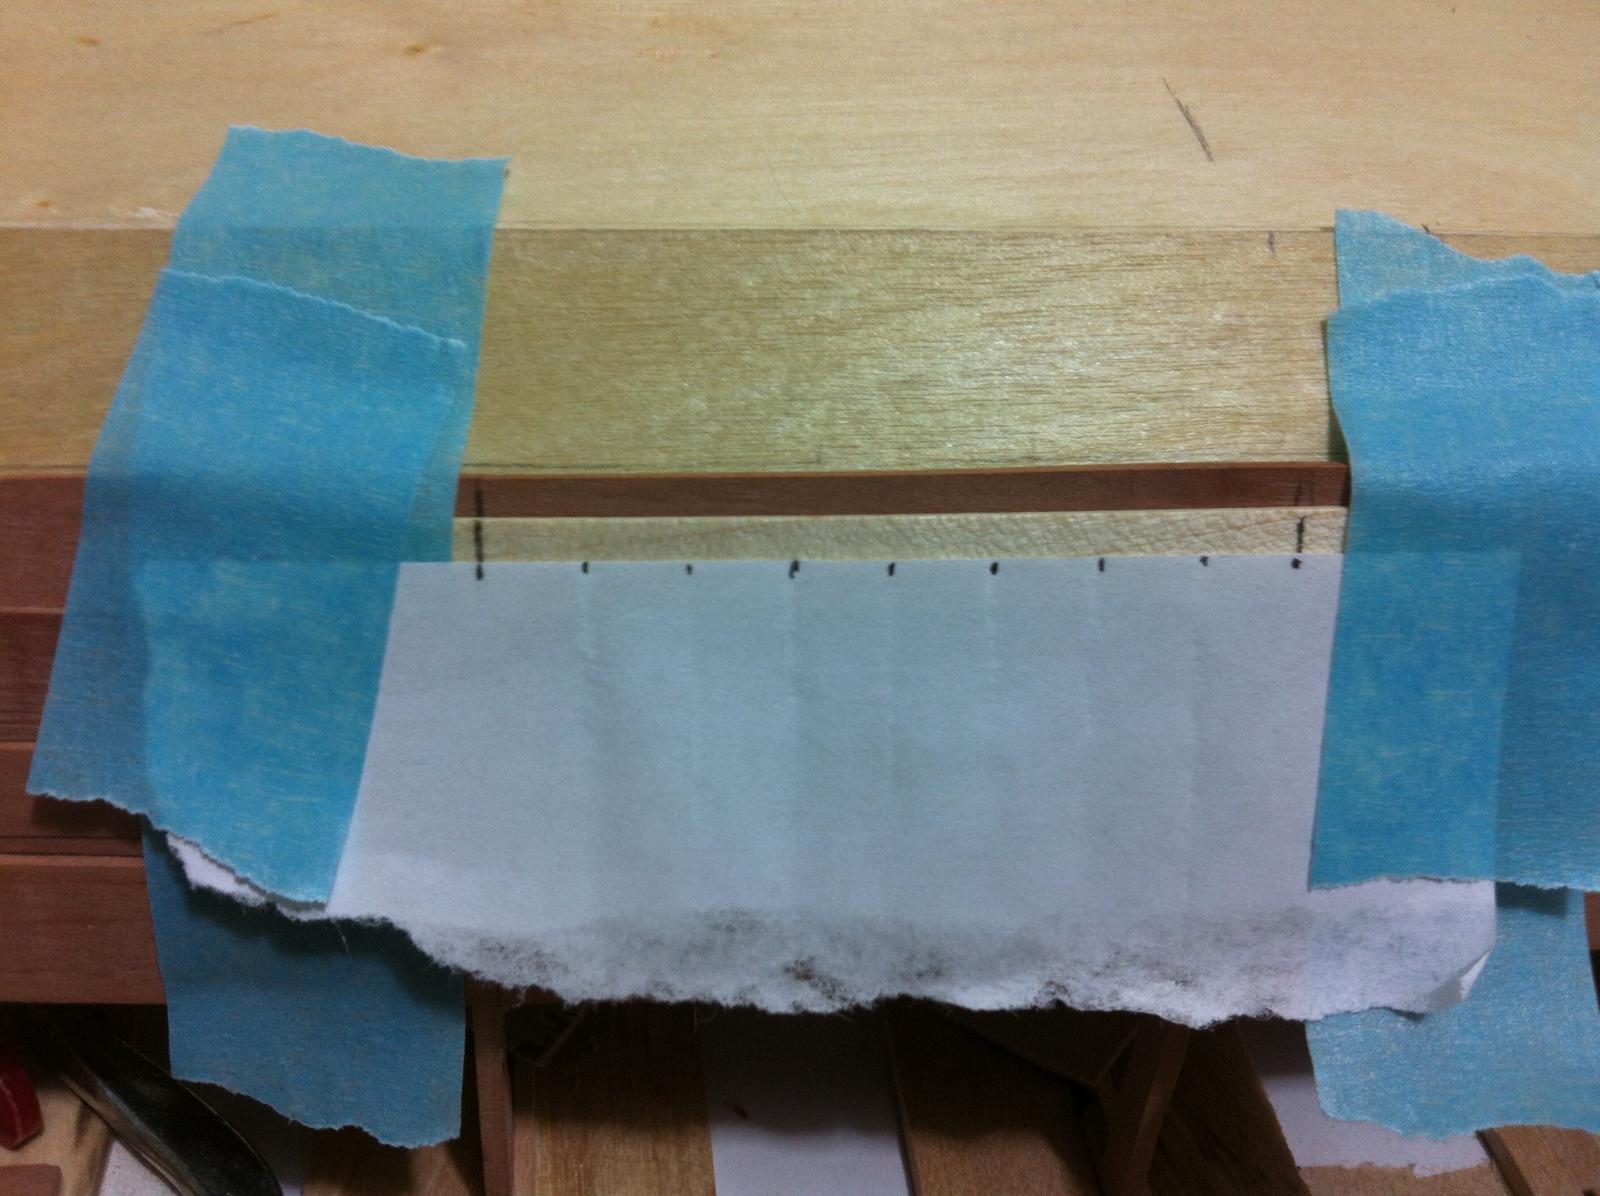
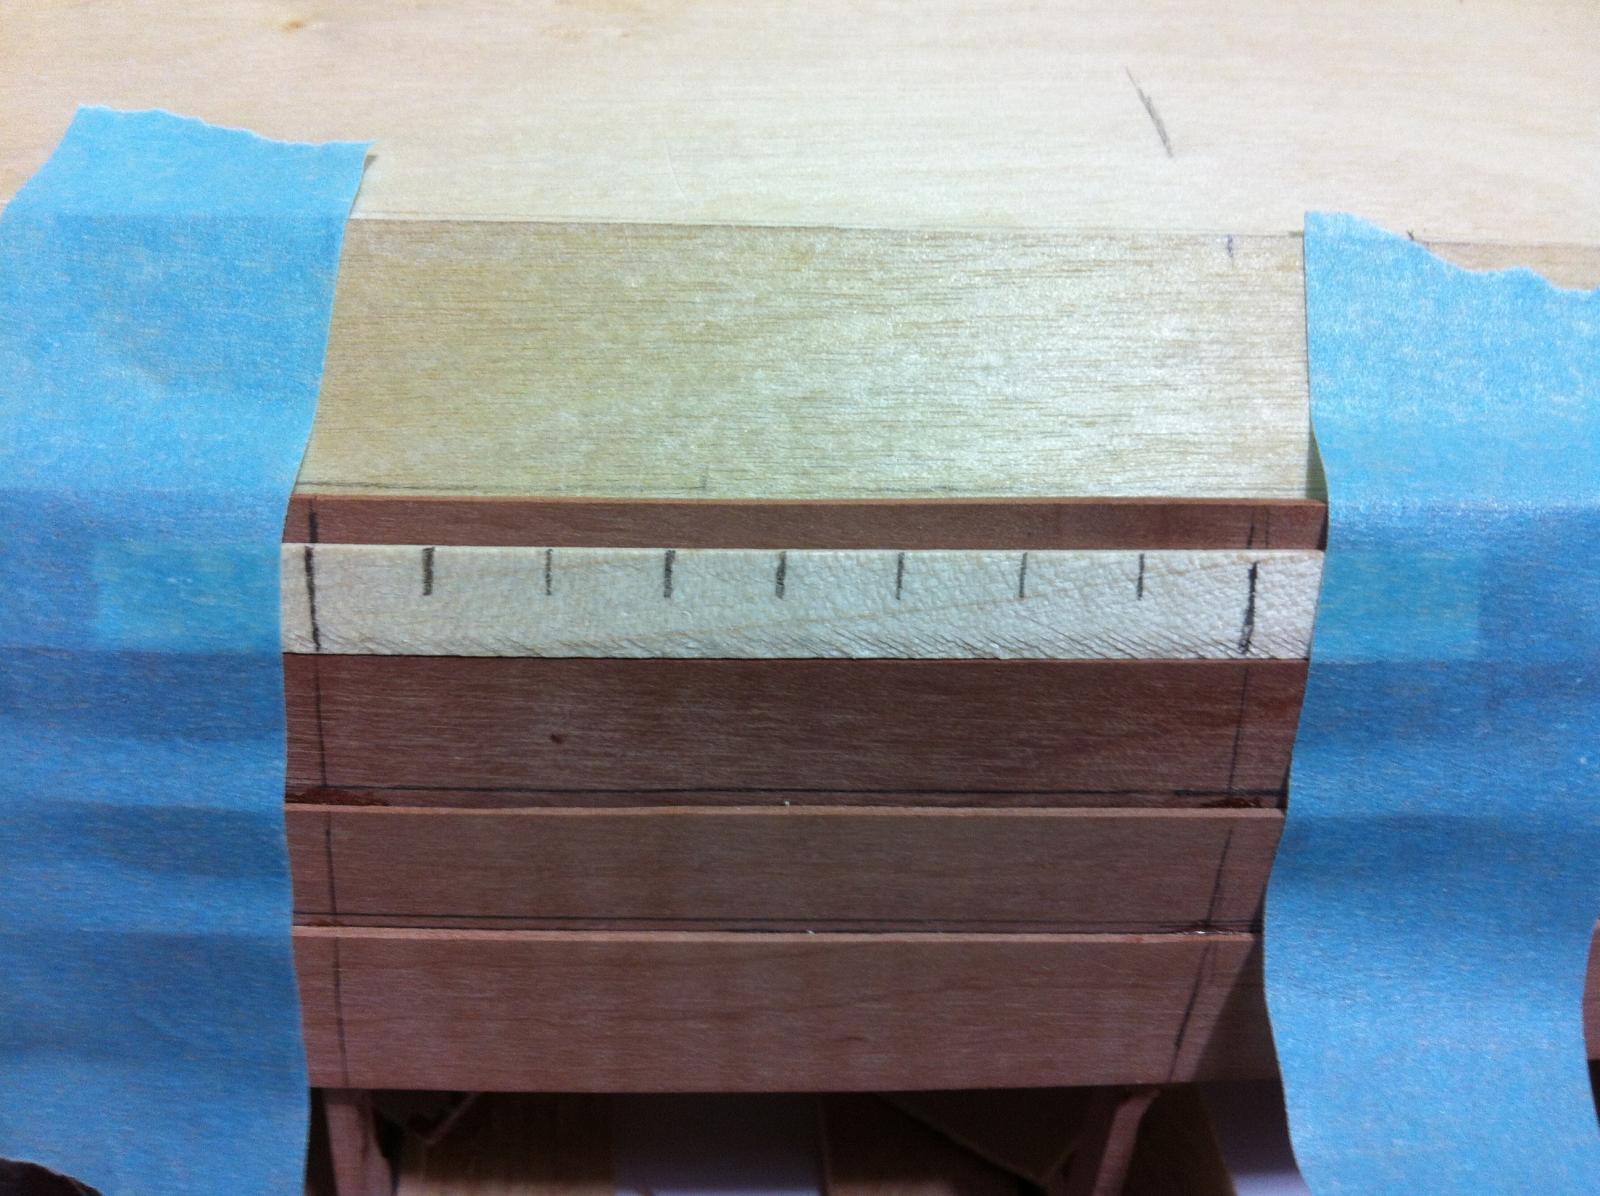
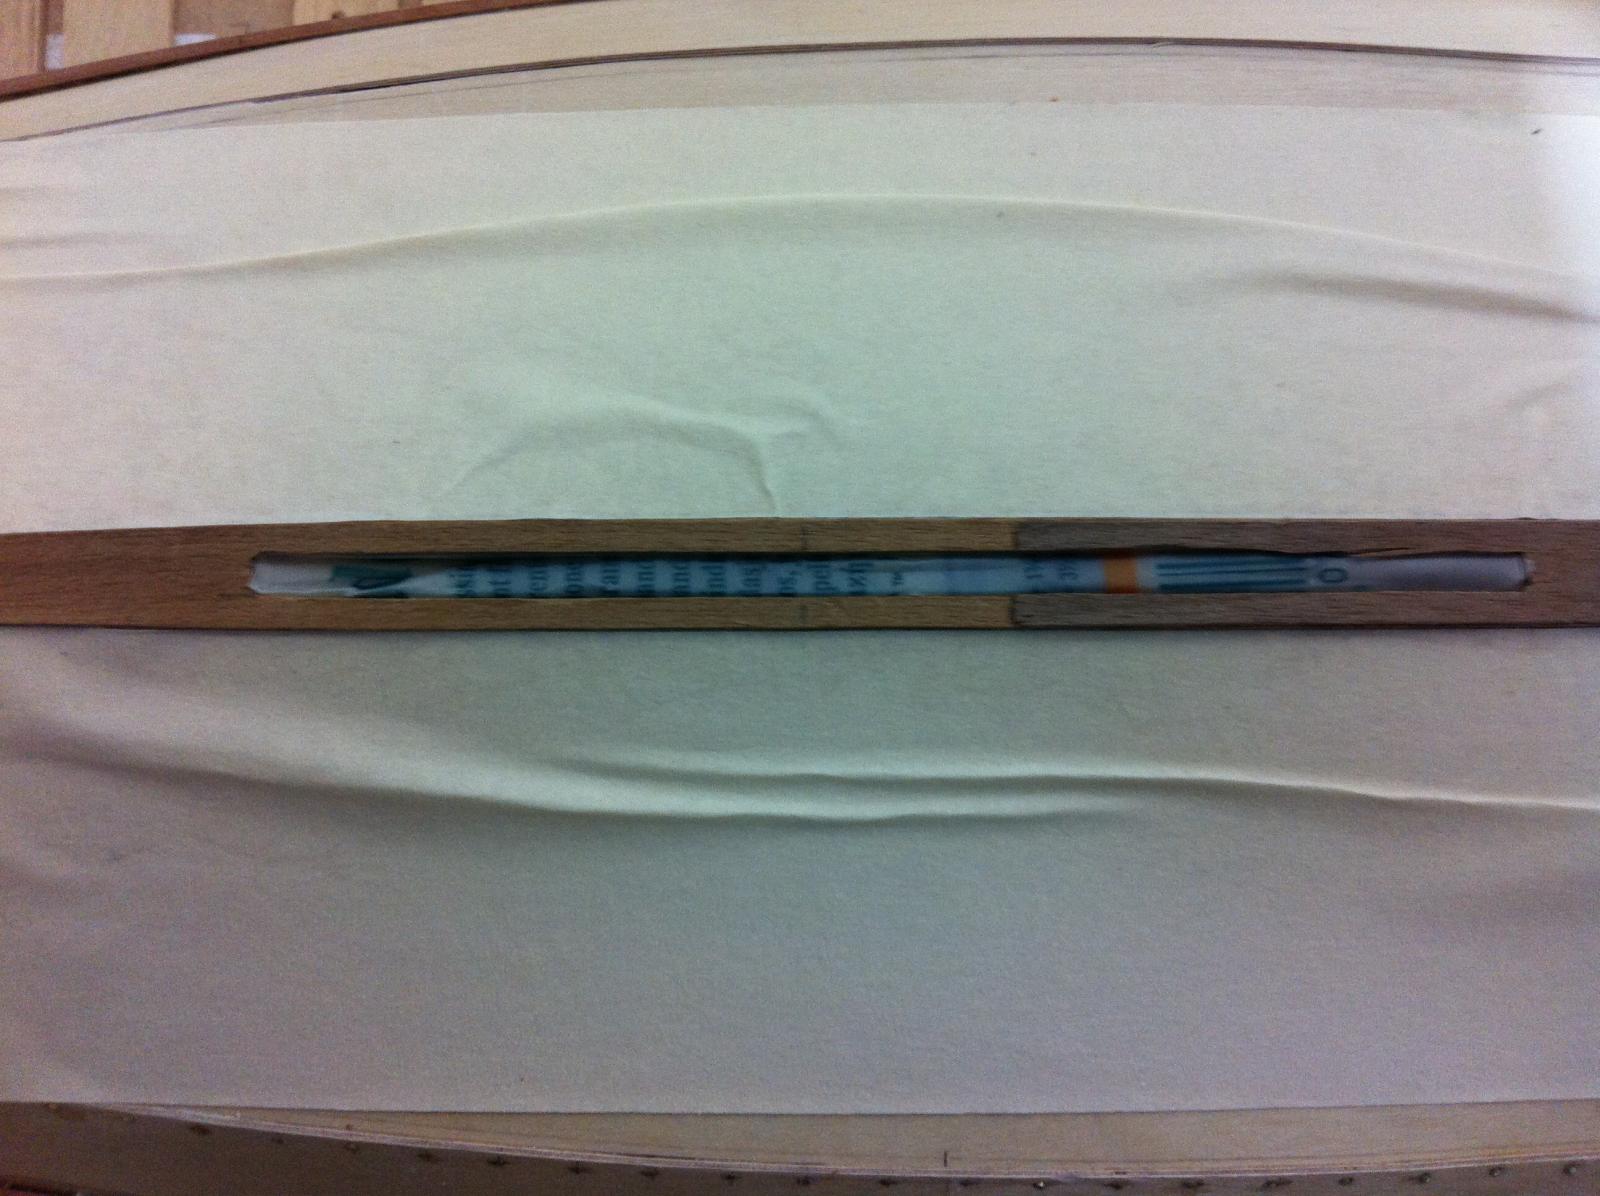
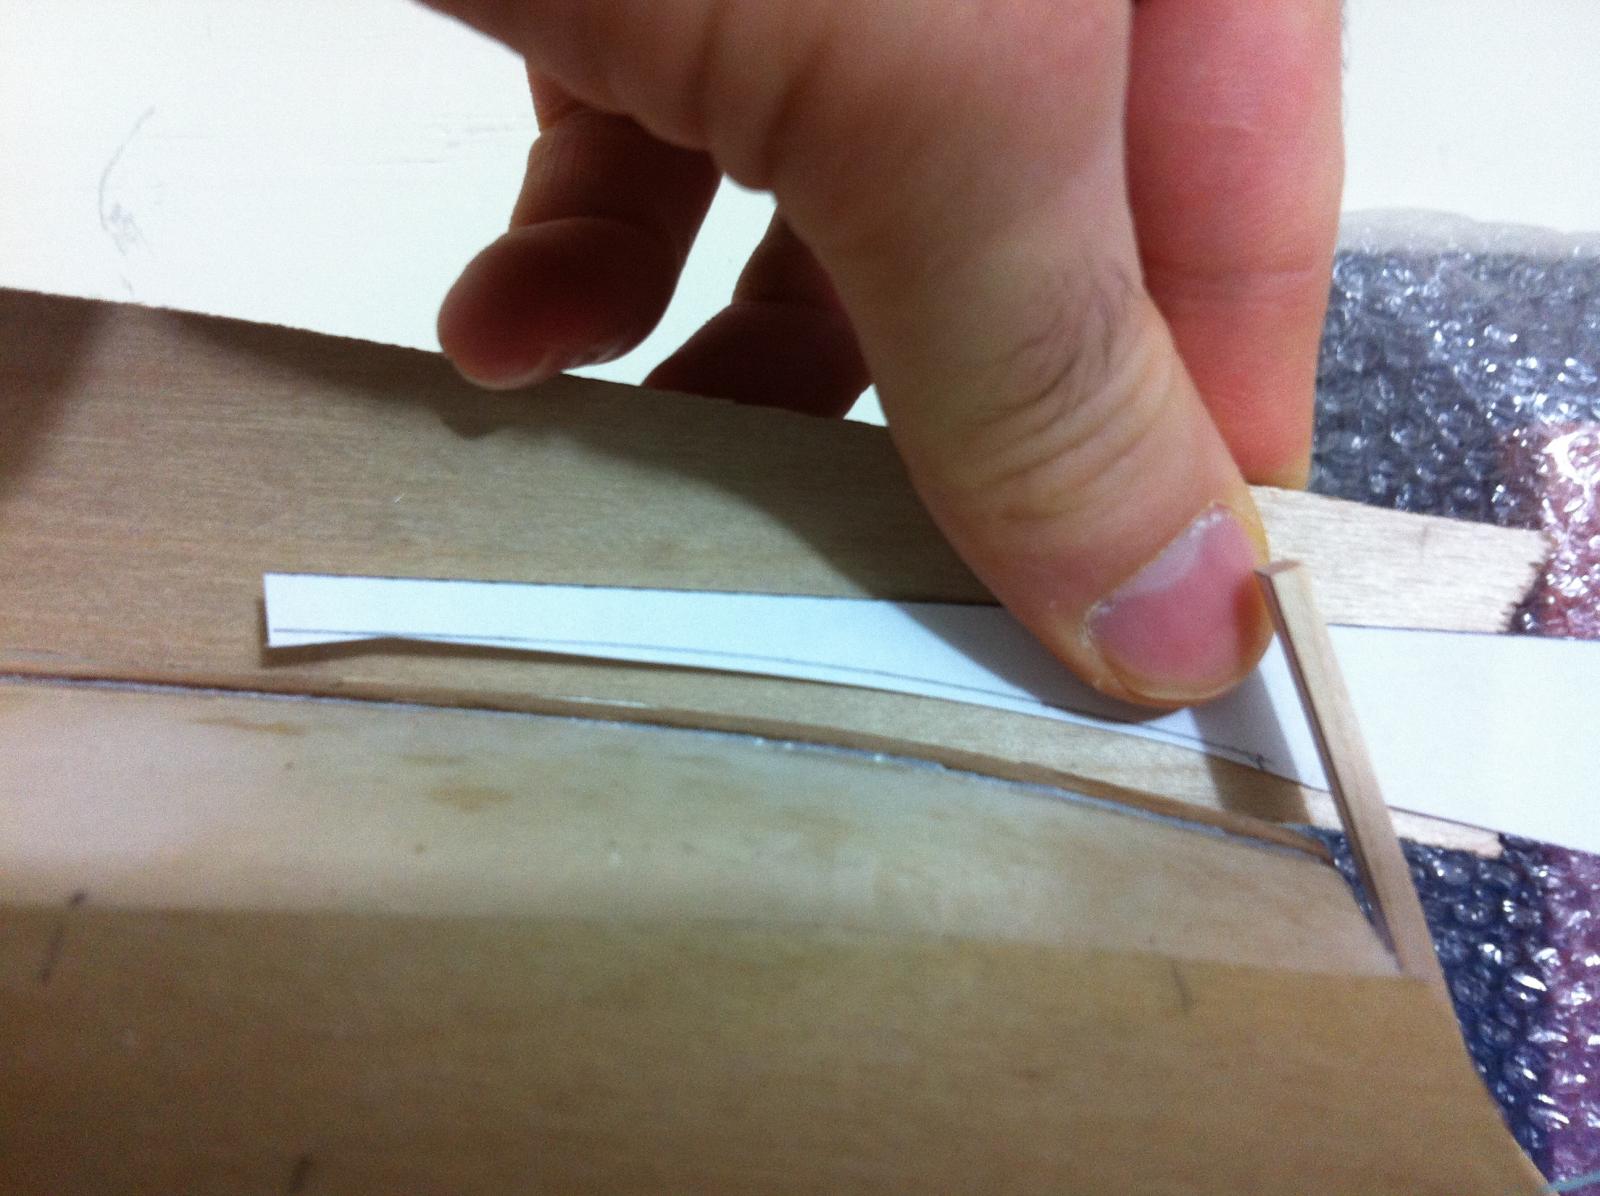
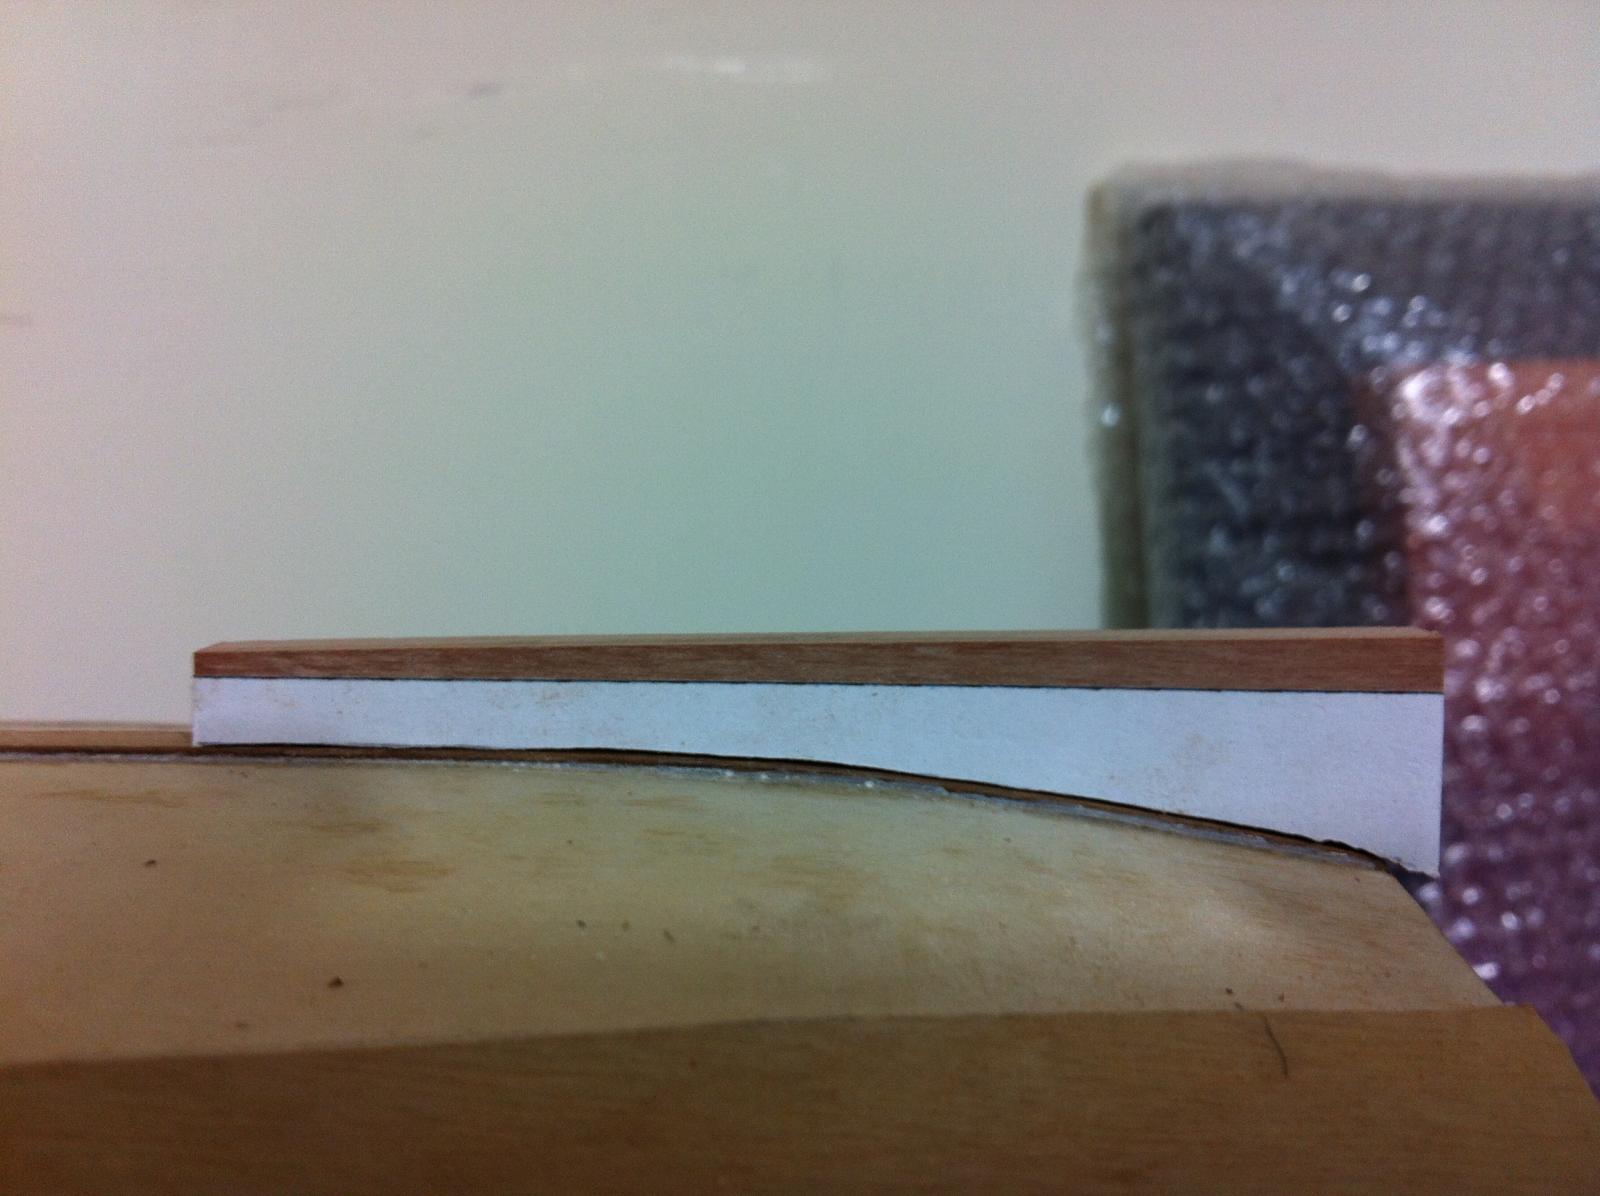
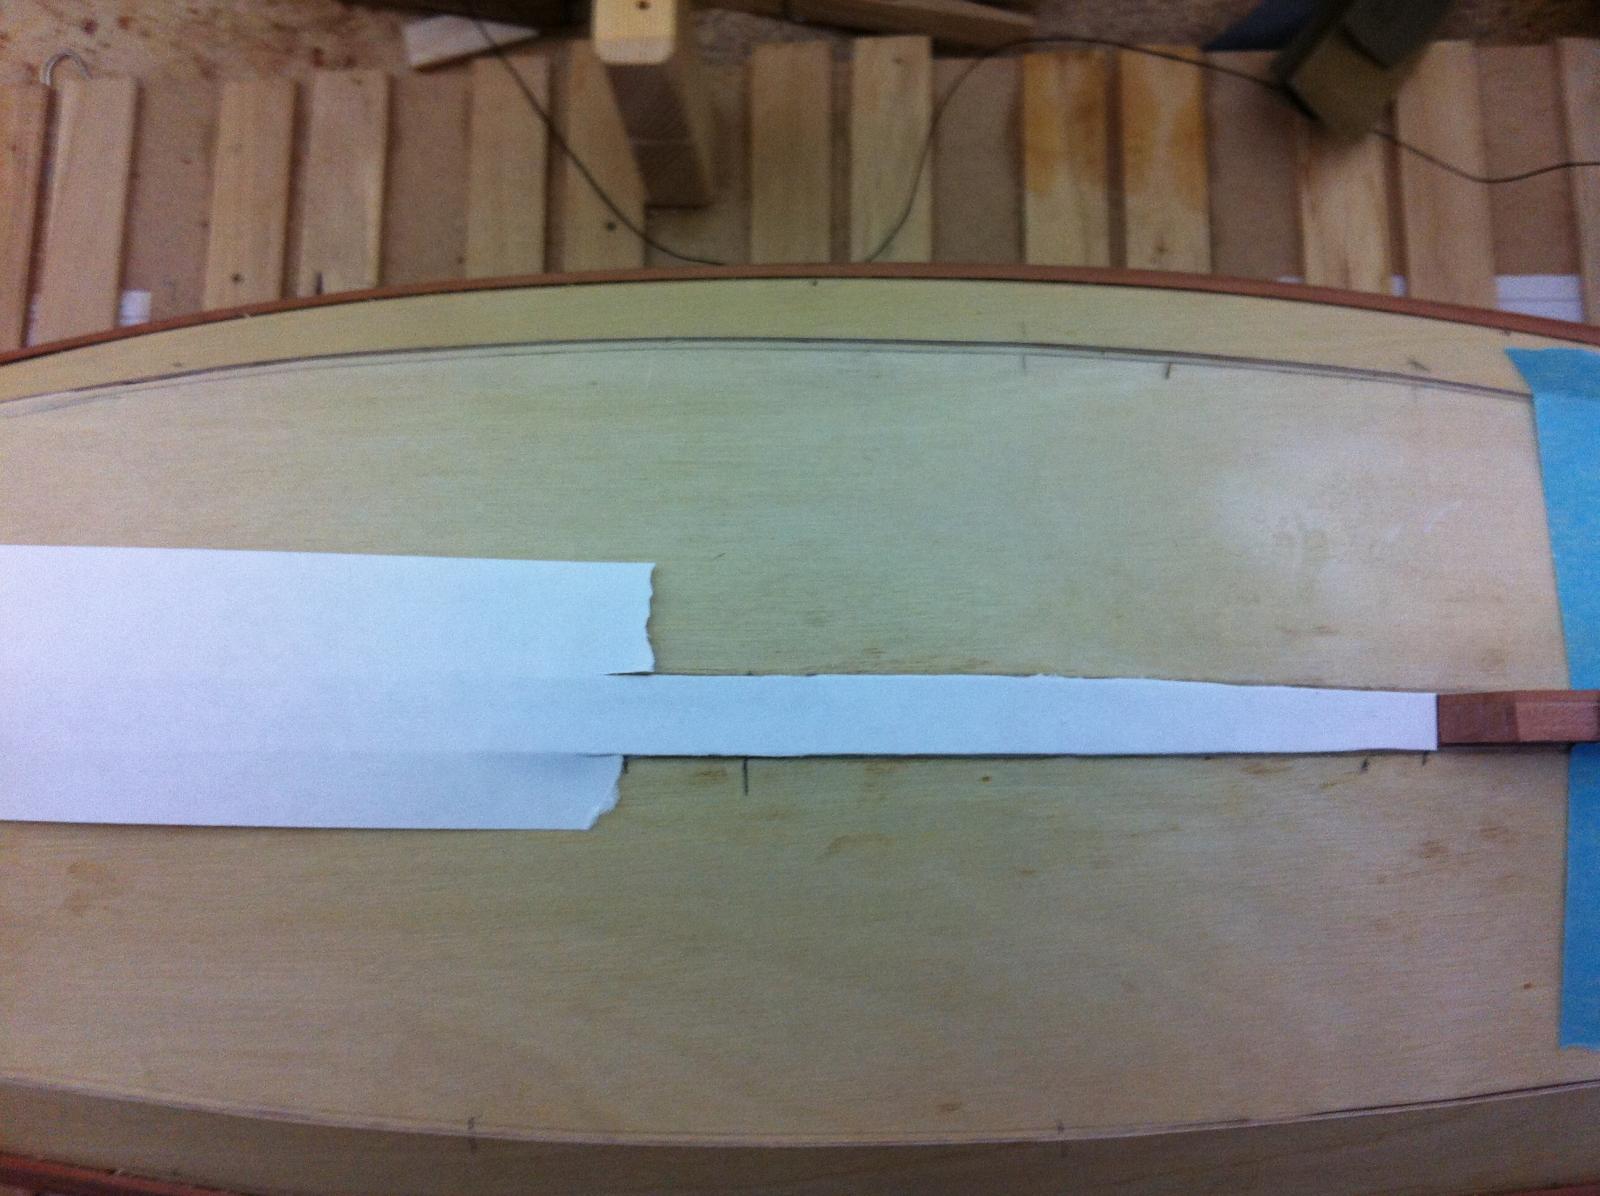
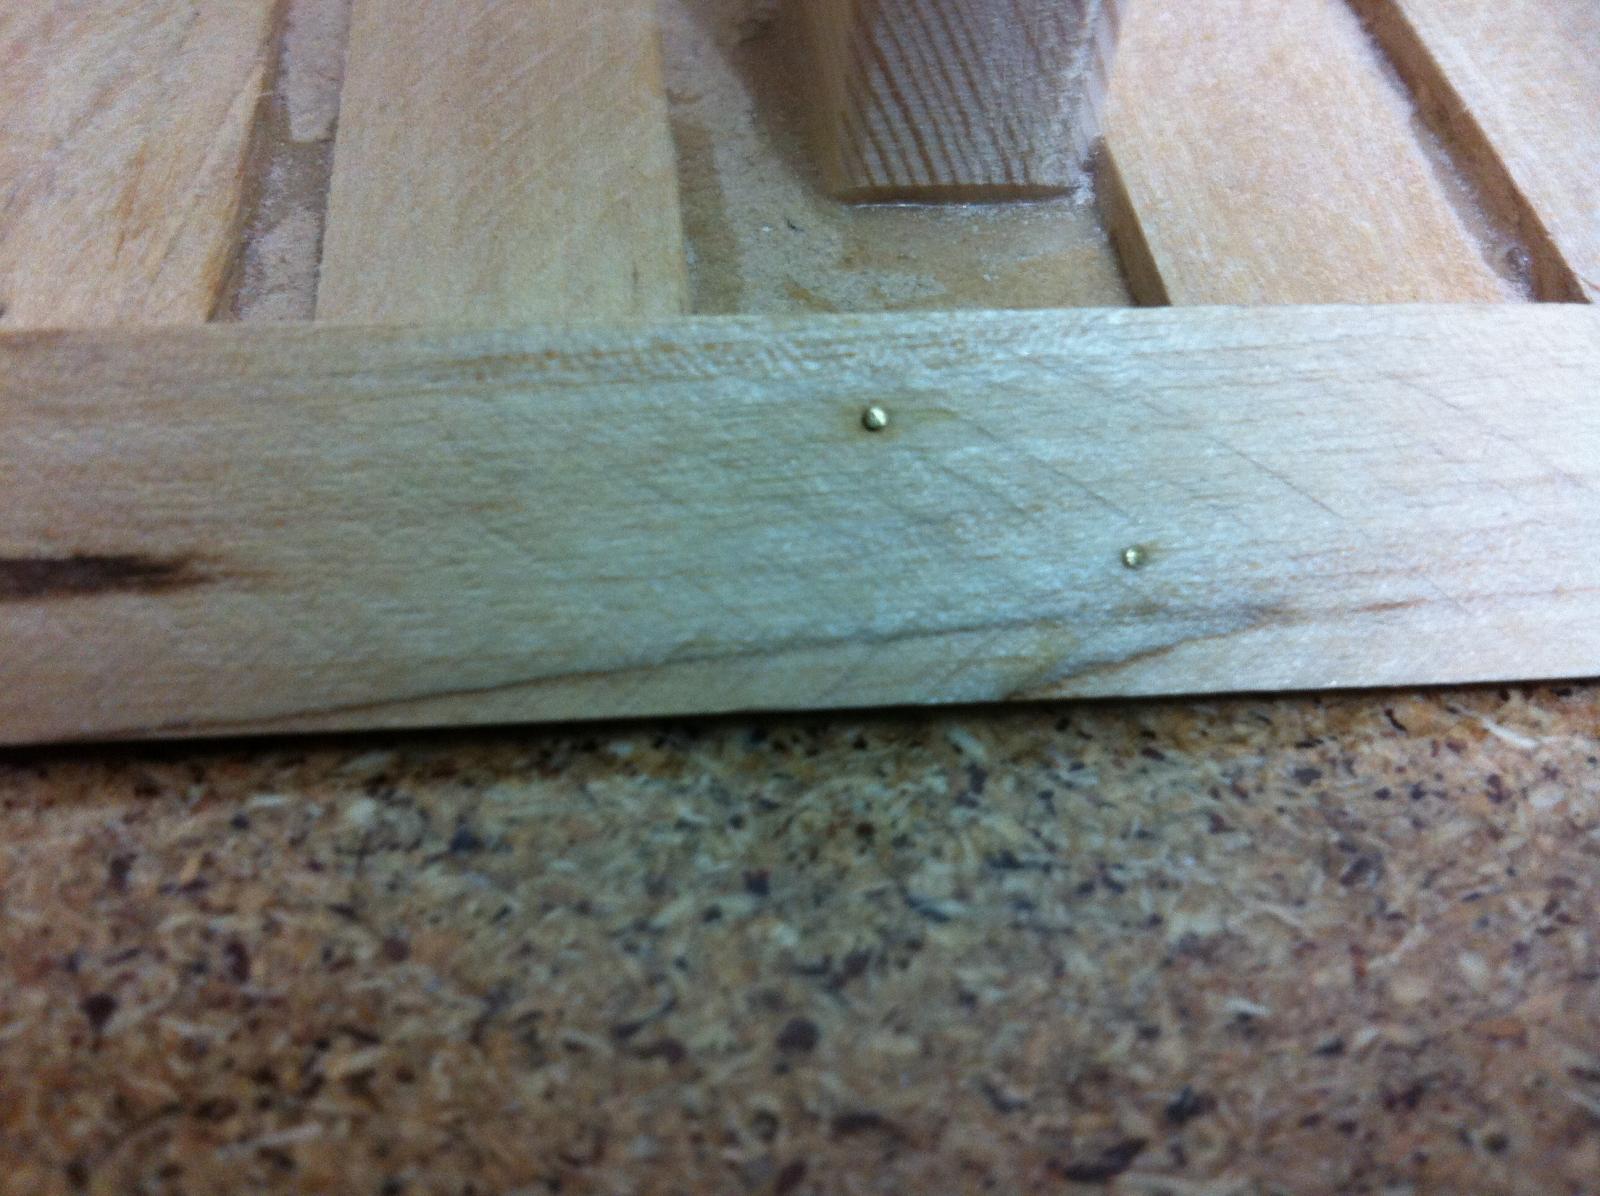
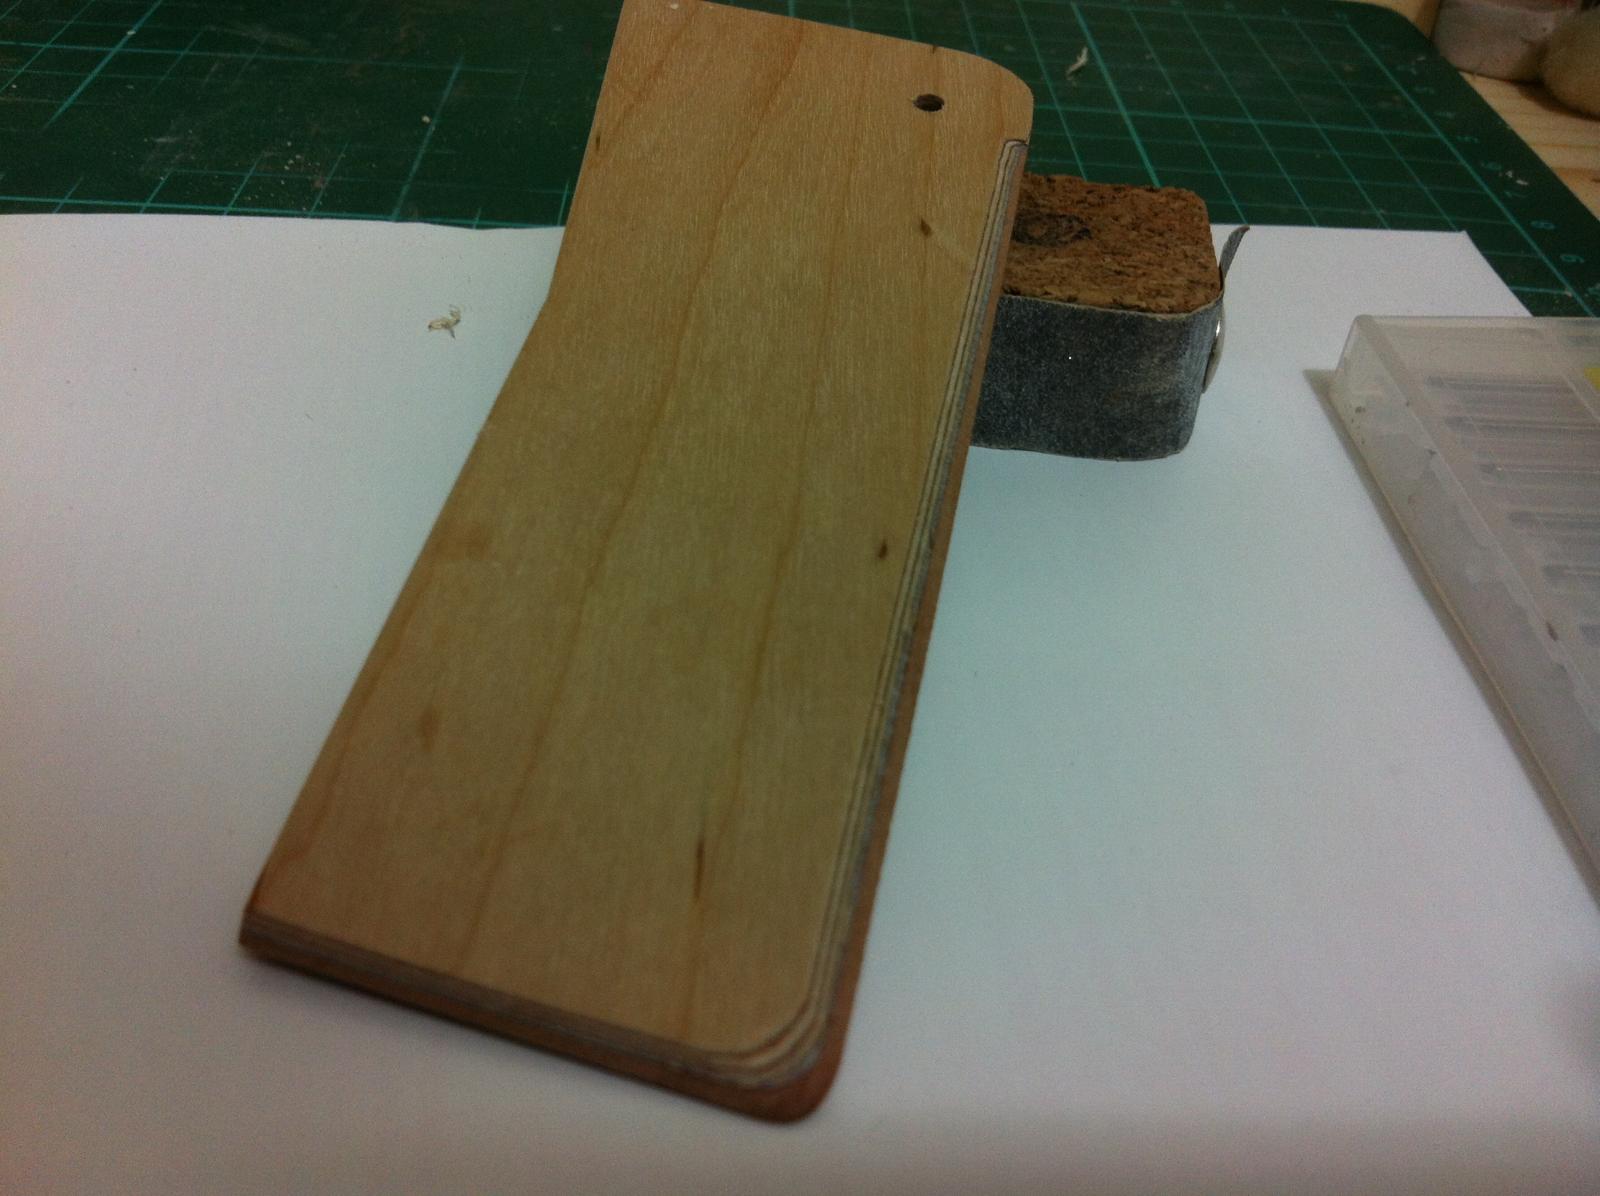
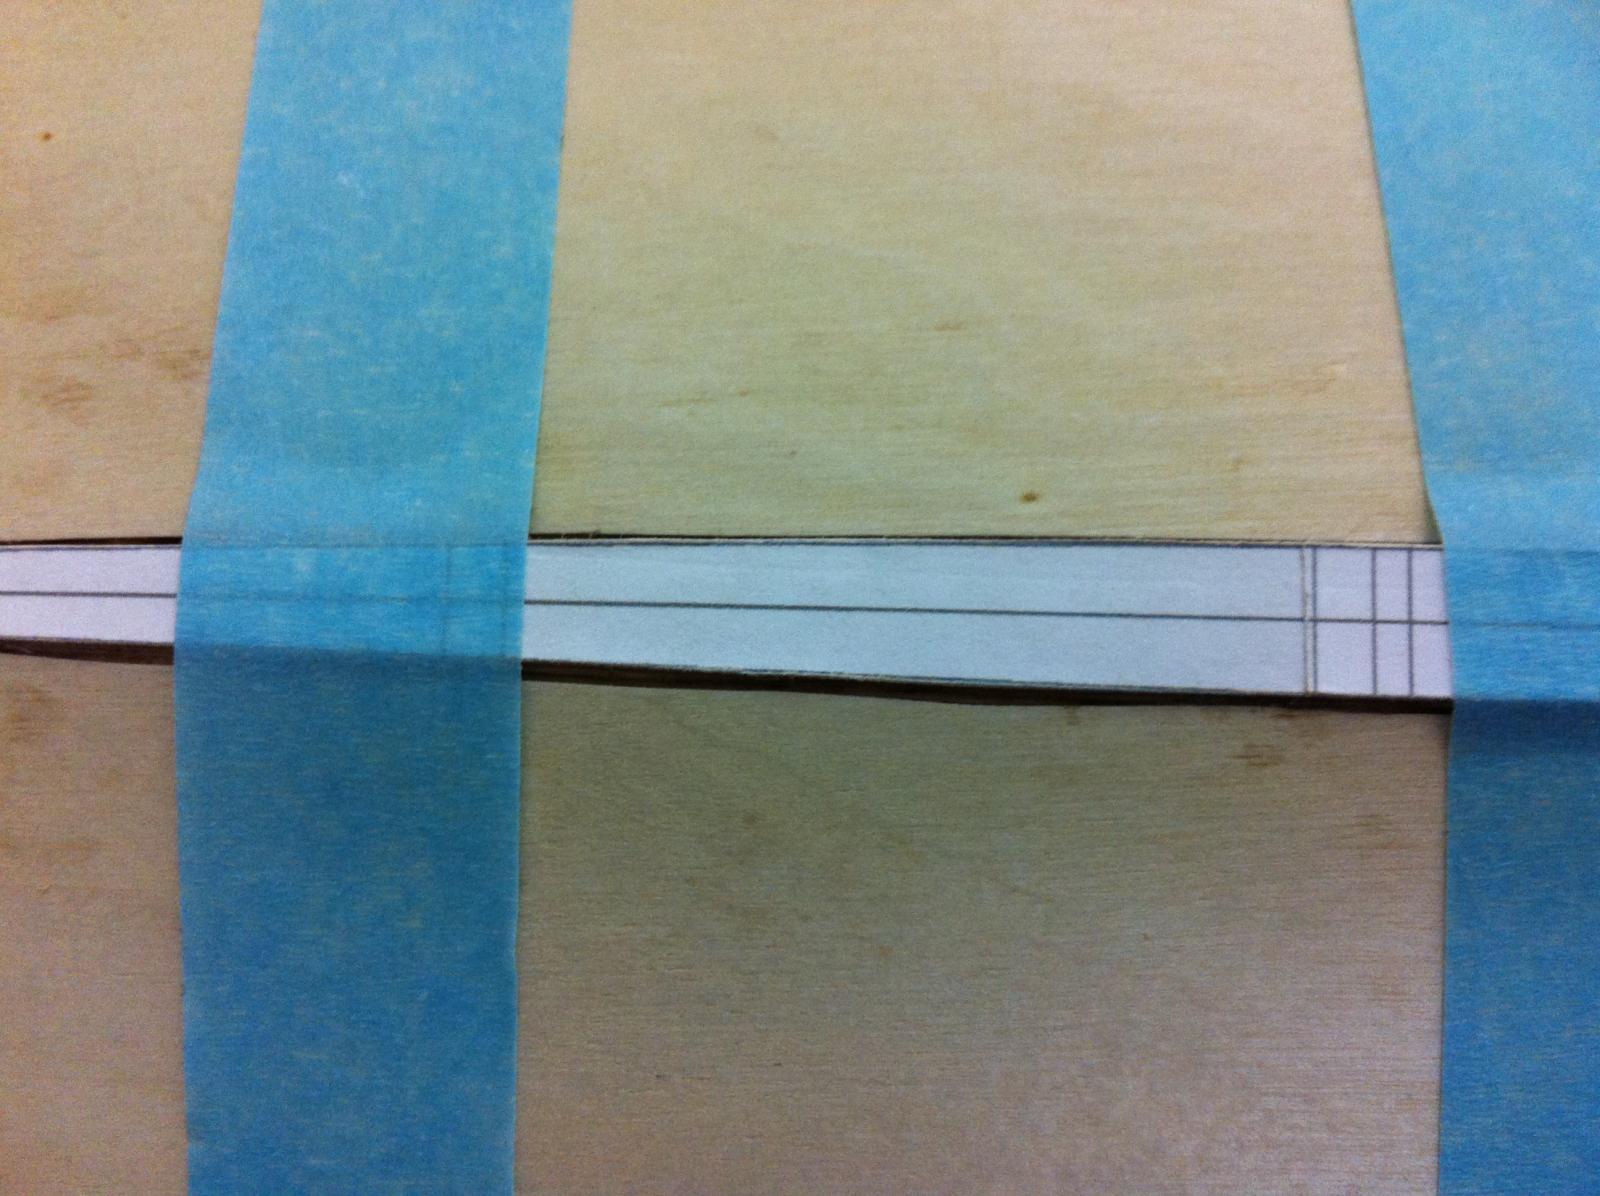
I next need to make a pattern so that all rivets all equally spaced. A short maple strip and a folded piece of paper was an easy solution.


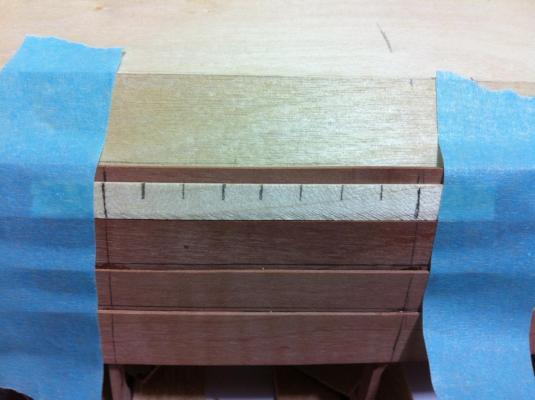
It was easy now to mark the position of the rivets.
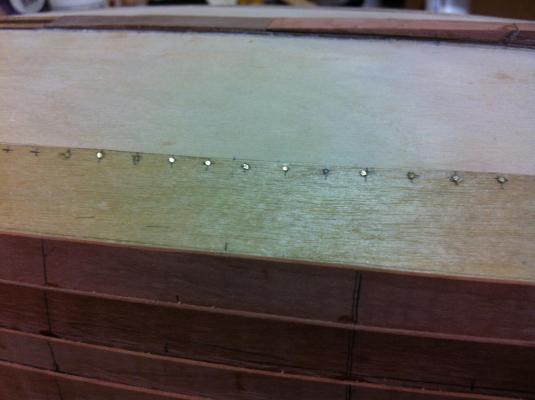
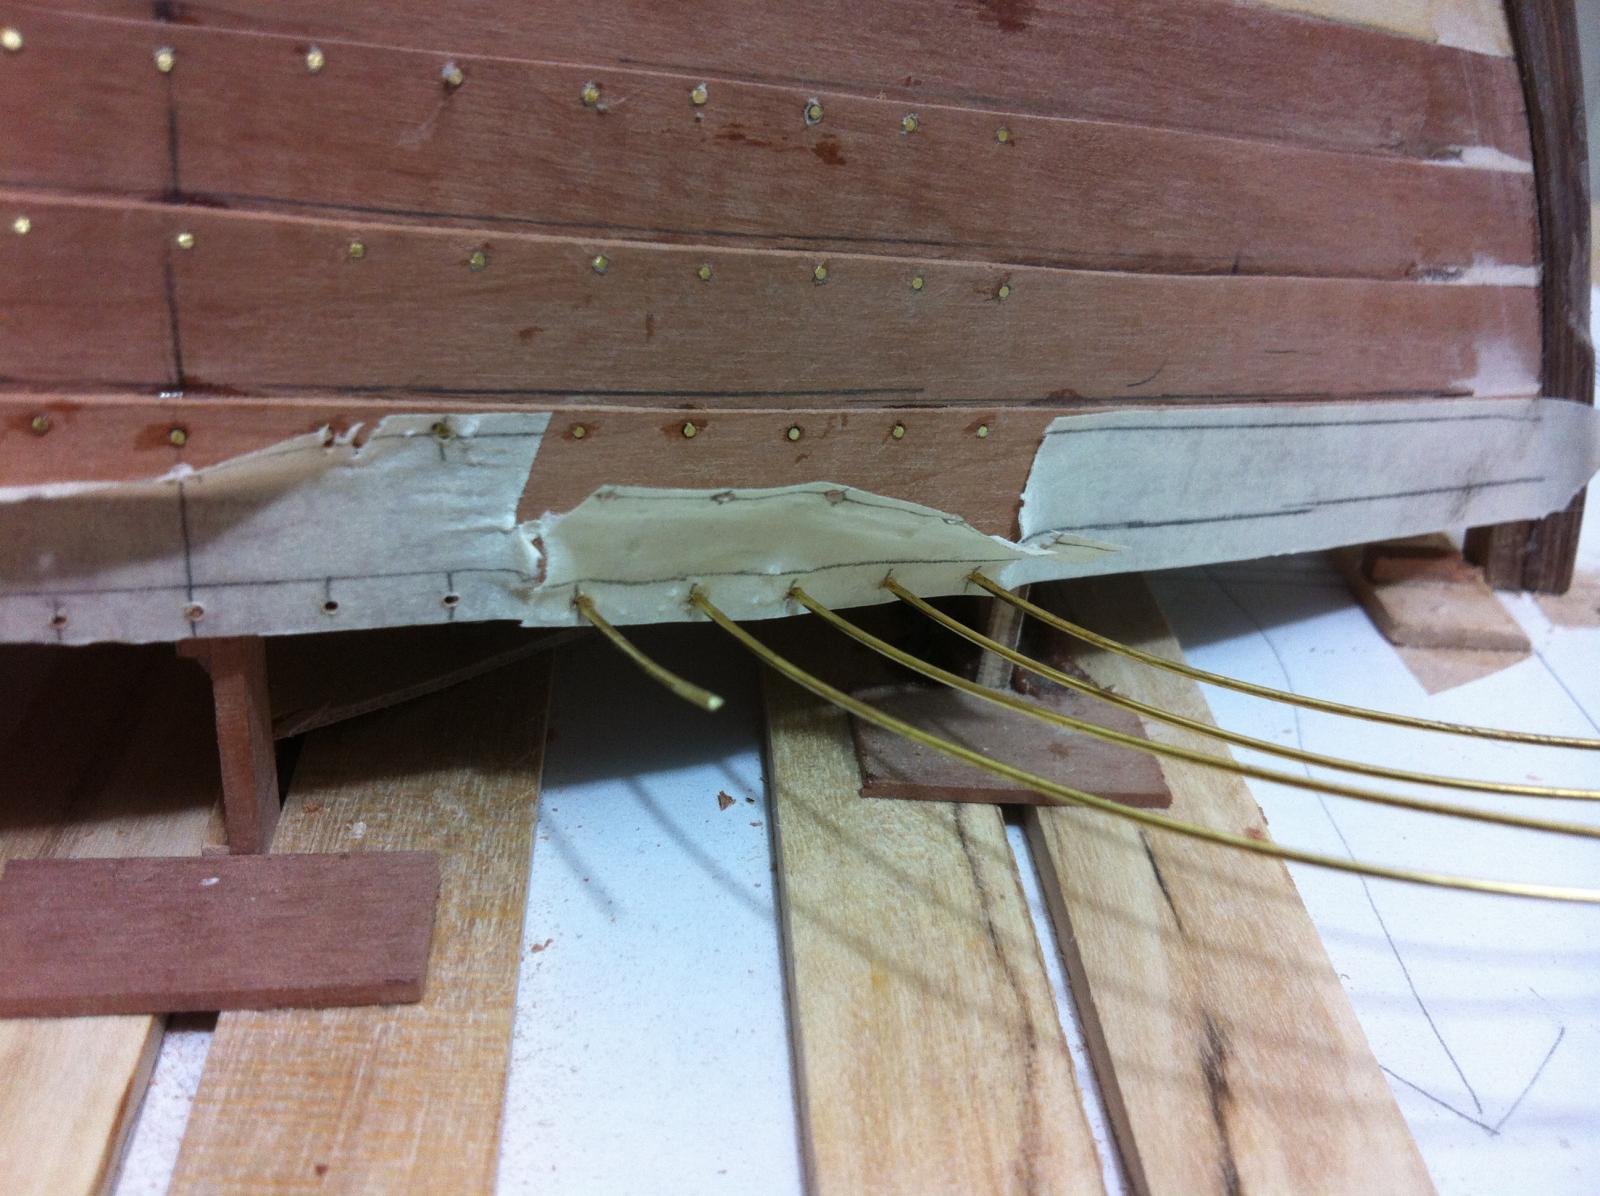
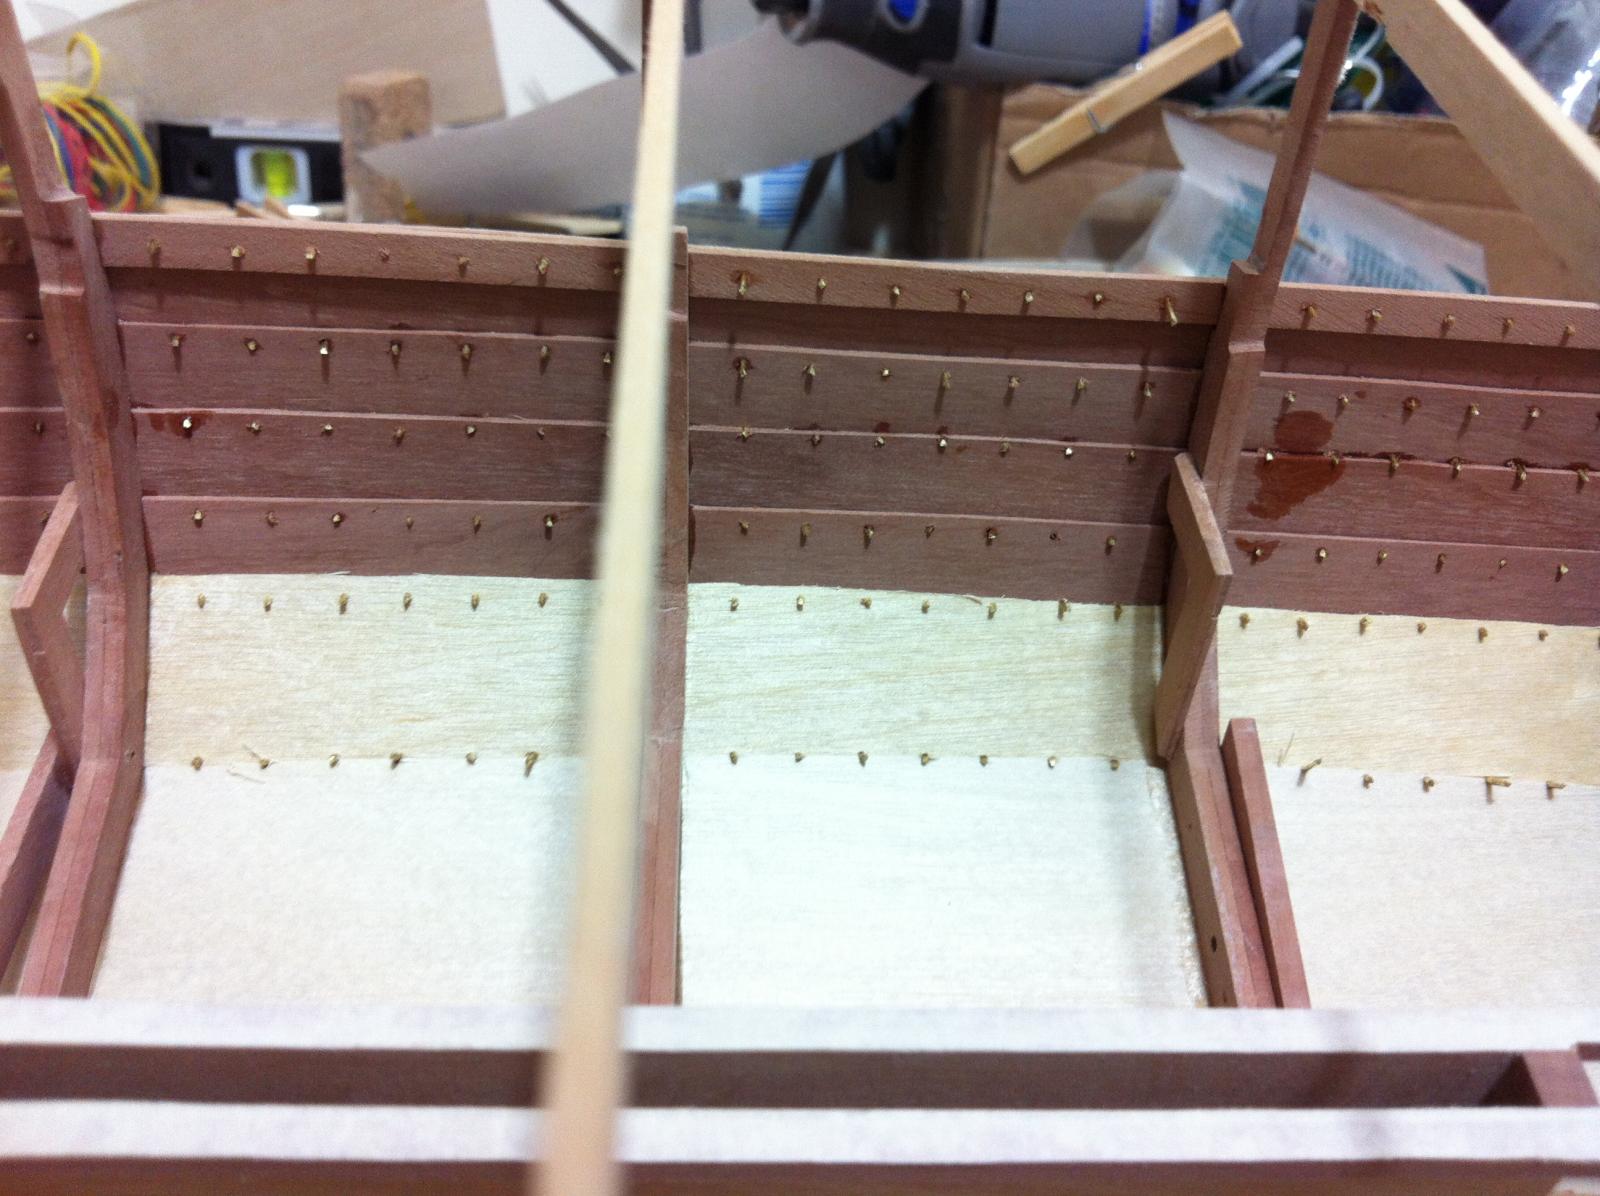
The thickness of the plywood is only 0.8 mm so the overlap is too small for the rivets to go through both panels so this line of rivets is not going to be too functional but it needs to be done to stay as close to the original design as possible. Interestingly, the american team added stringers at the lower chines, the next photo shows these as they reach the transom. Either way I think the floor boards will hide this lower river line.
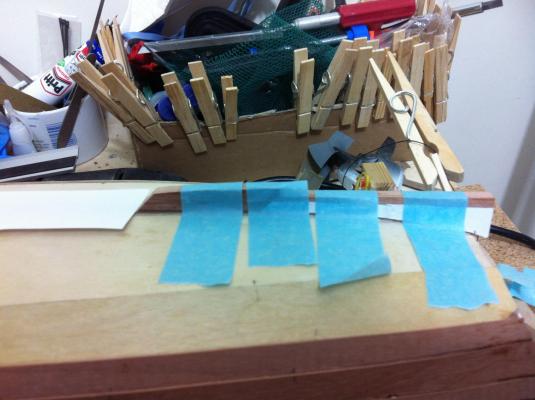
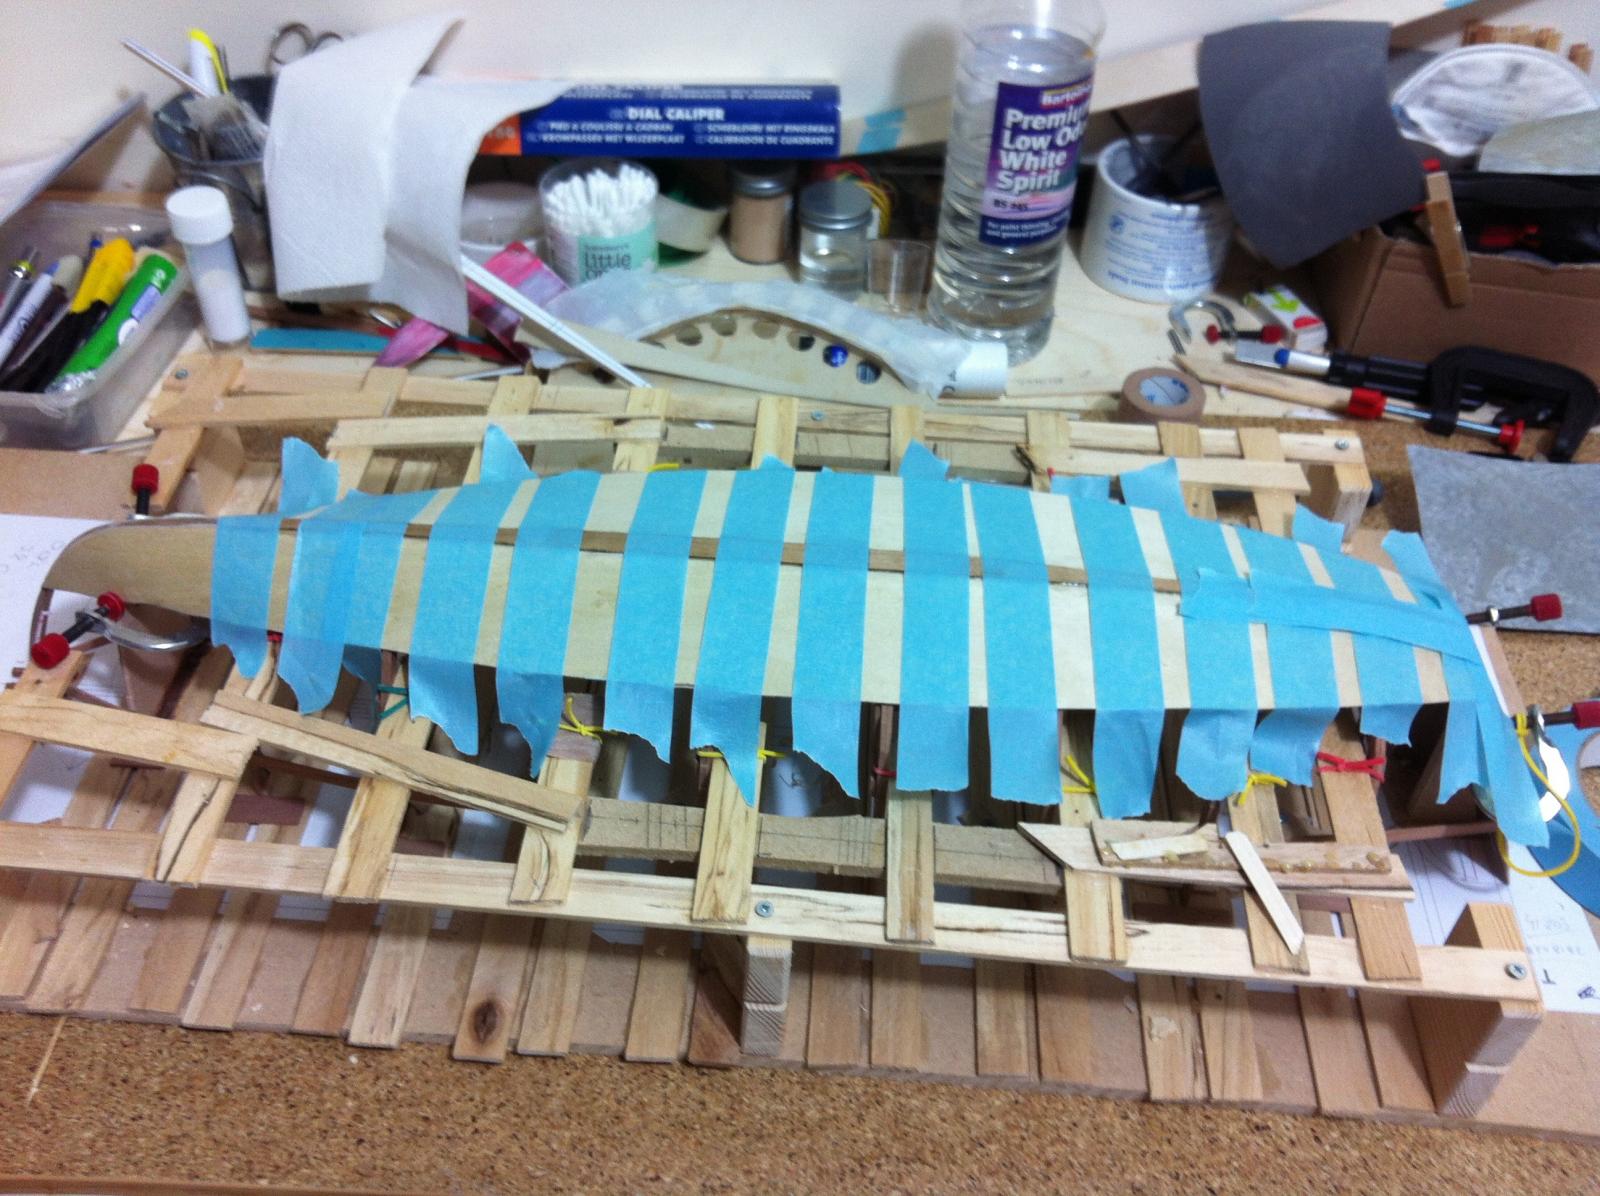
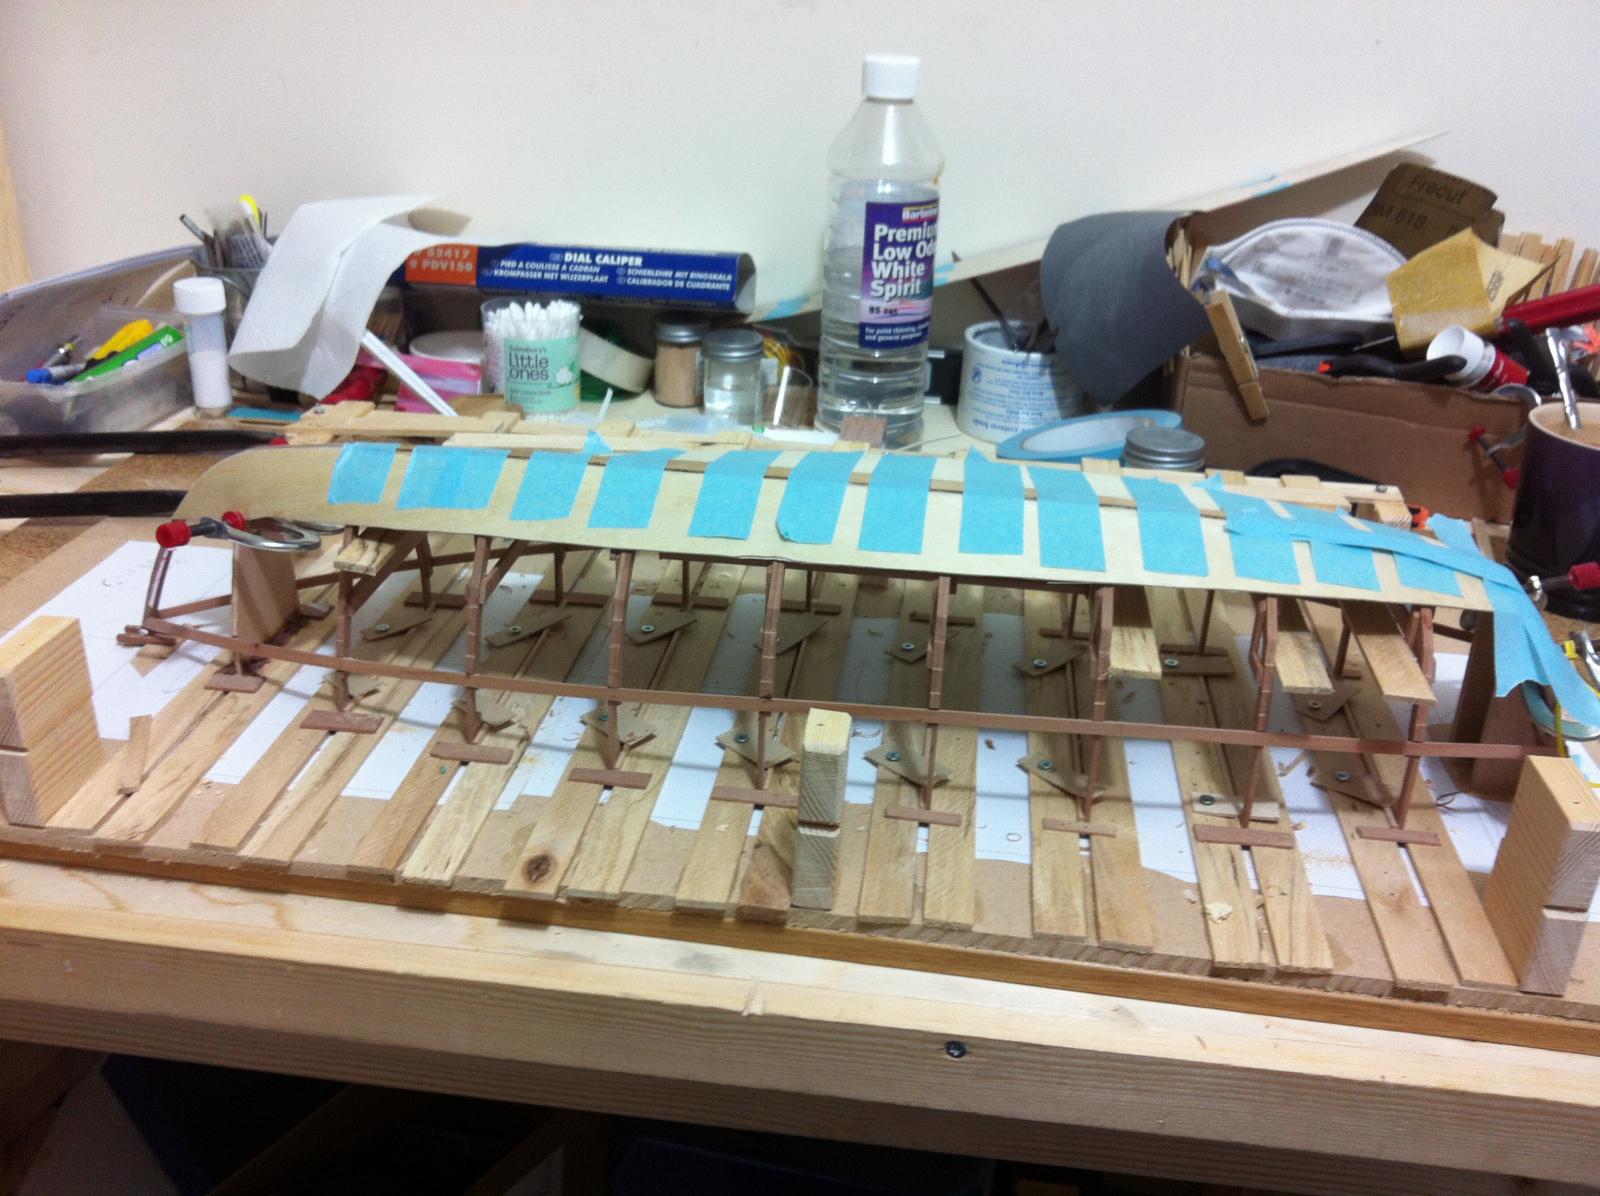
I drilled the holes with the Dremel and a 0.7 mm good quality drill. I used brass wire for the rivets and CA glue and used masking tape to prevent the glue staining the wood.
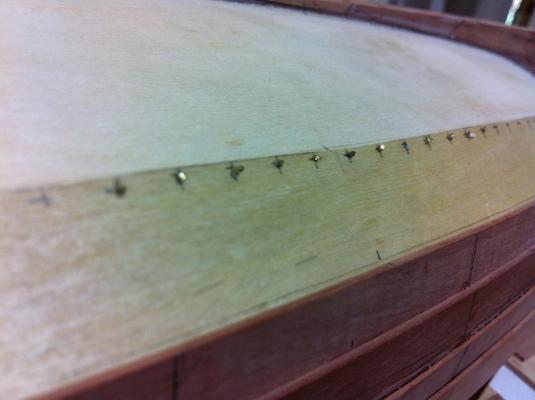
There was a learning curve to go through but it worked ok. A few of the rivets have a lot of material to be trimmed on the inside of the hull. I used the grinding wheel on the Dremel to trim the rivets flush with the planks but it did not work out, the wire gets very hot, the glue melts and the rivet just slides in. Trimming with the needle file was much more efficient.

There will be 6 rivet lines per side with approximately 100 rivets each, so around 1200 rivets! That's a lot! I will not rivet past Station 0 as I will complete this job after the cant frames are installed.

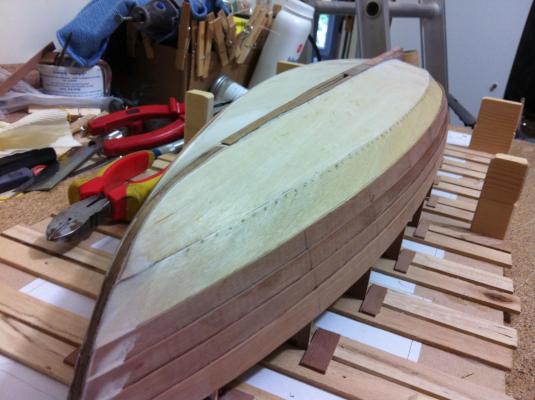
I also redid the false stem and added the final plank to the keel. I took the precaution of blocking the centerboard slot to make sure the epoxy does not drip.

Next job to glue in and trim the false stem, do some more fairing and of course more rivets!
-
Thank you for the encouragement Patrick, it really motivates me to push forward!
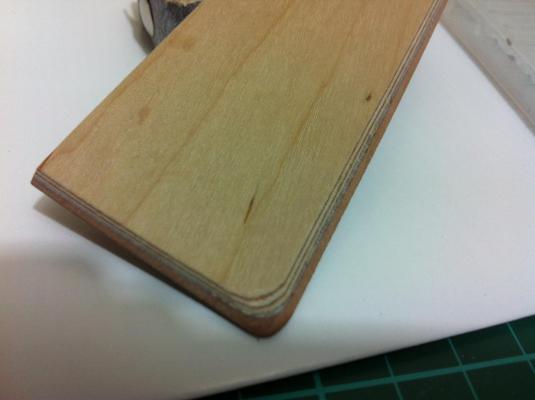
You are right about the keel, it is really hard work, it took 2 days of hard work to reach this stage and even sanding these small pieces was physically tiring as the laminates are really hard.
Yes, both me and the Butterfly Explorer are looking forward to break free of the support and sail into the horizon!
Not too long now I think.
-
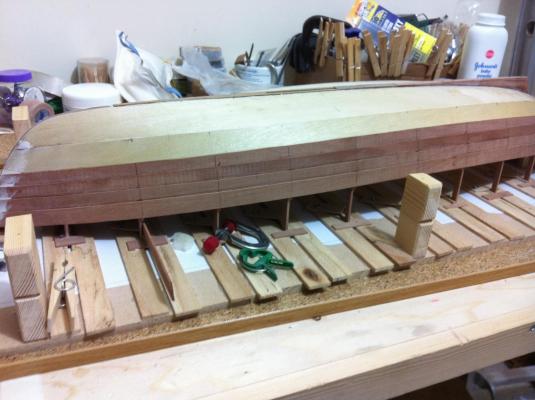
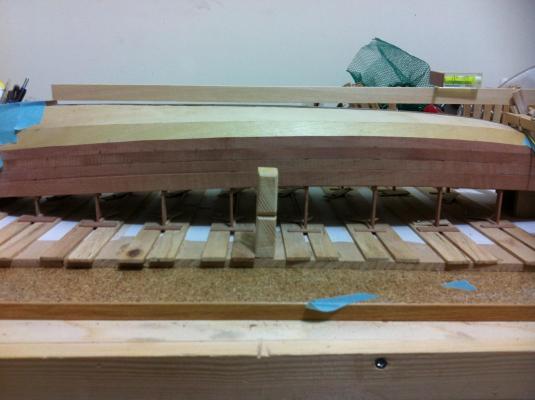
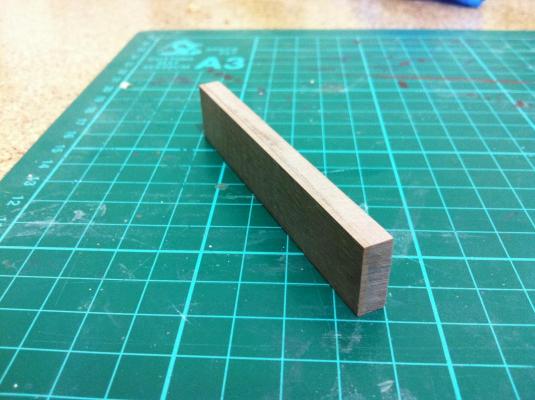
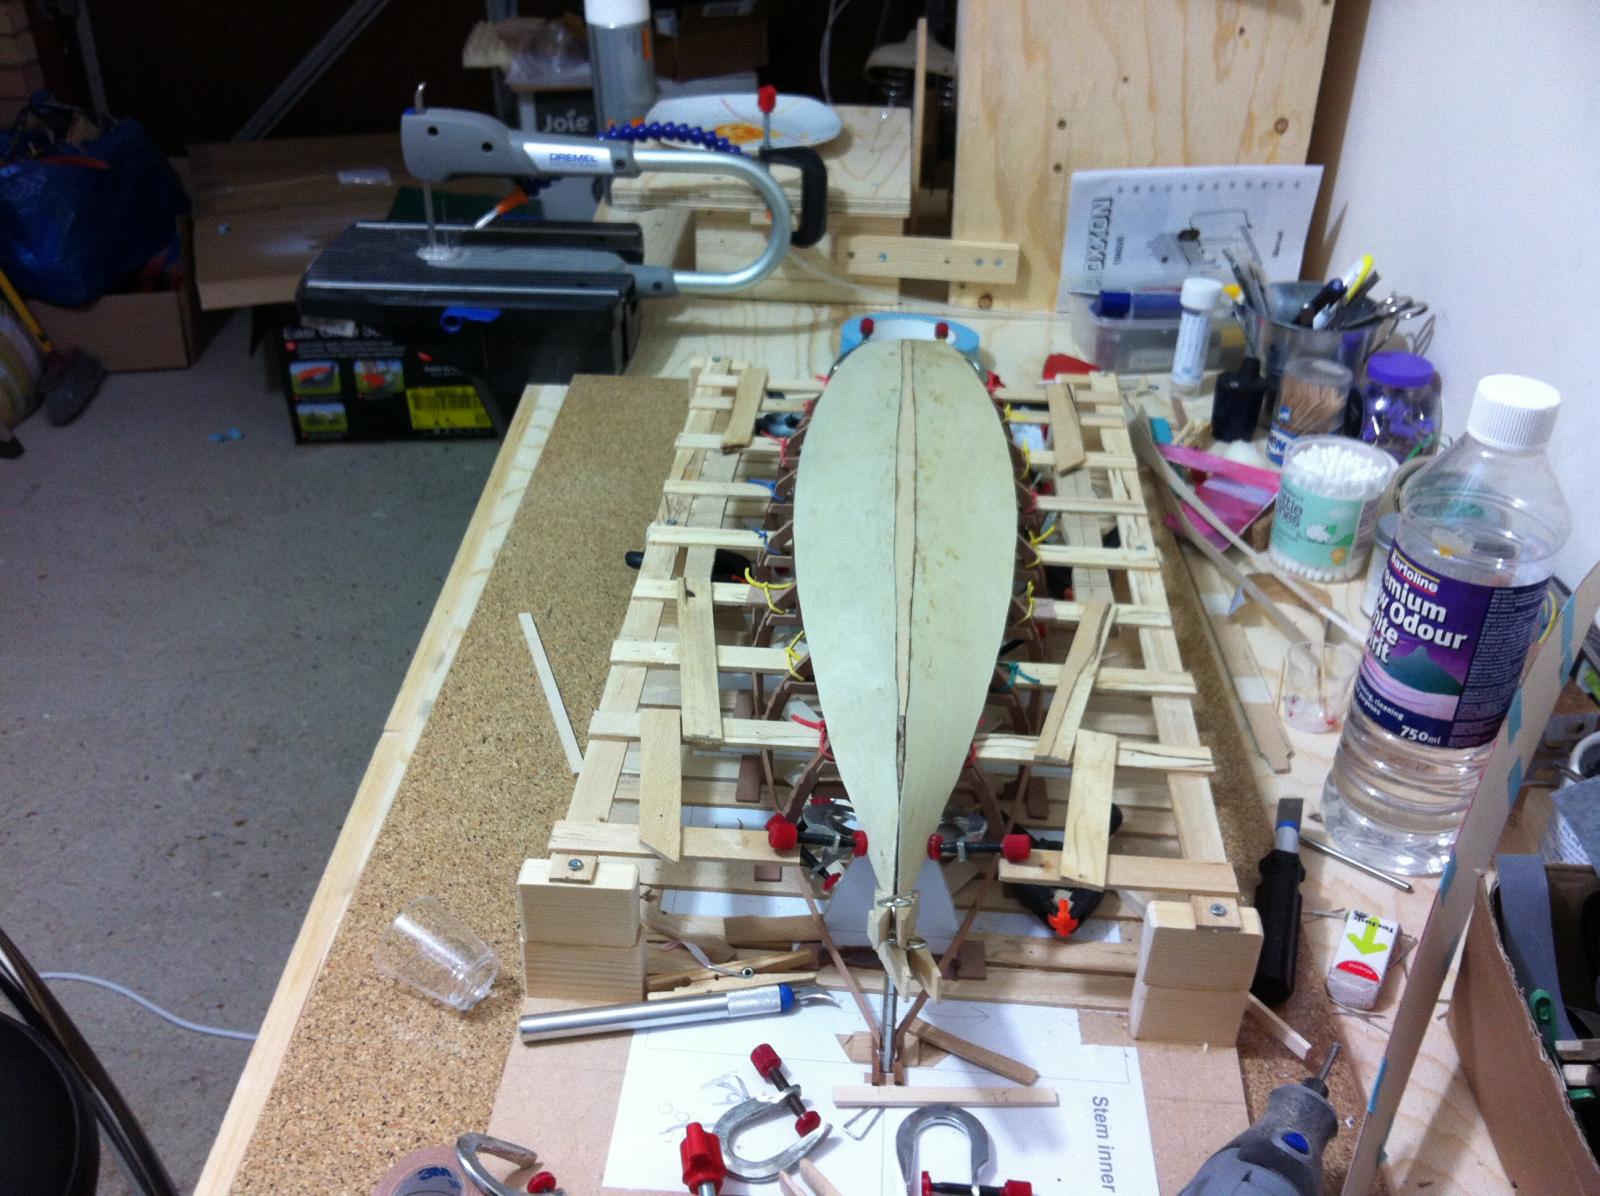
I somehow managed to find a bit of time to work on the boat. I am waiting for some timber to re-do the false stem and also some filling putty to fair the hull. It is time to concentrate on the keel.
The strip shows the shape of the keel and of the deadwood

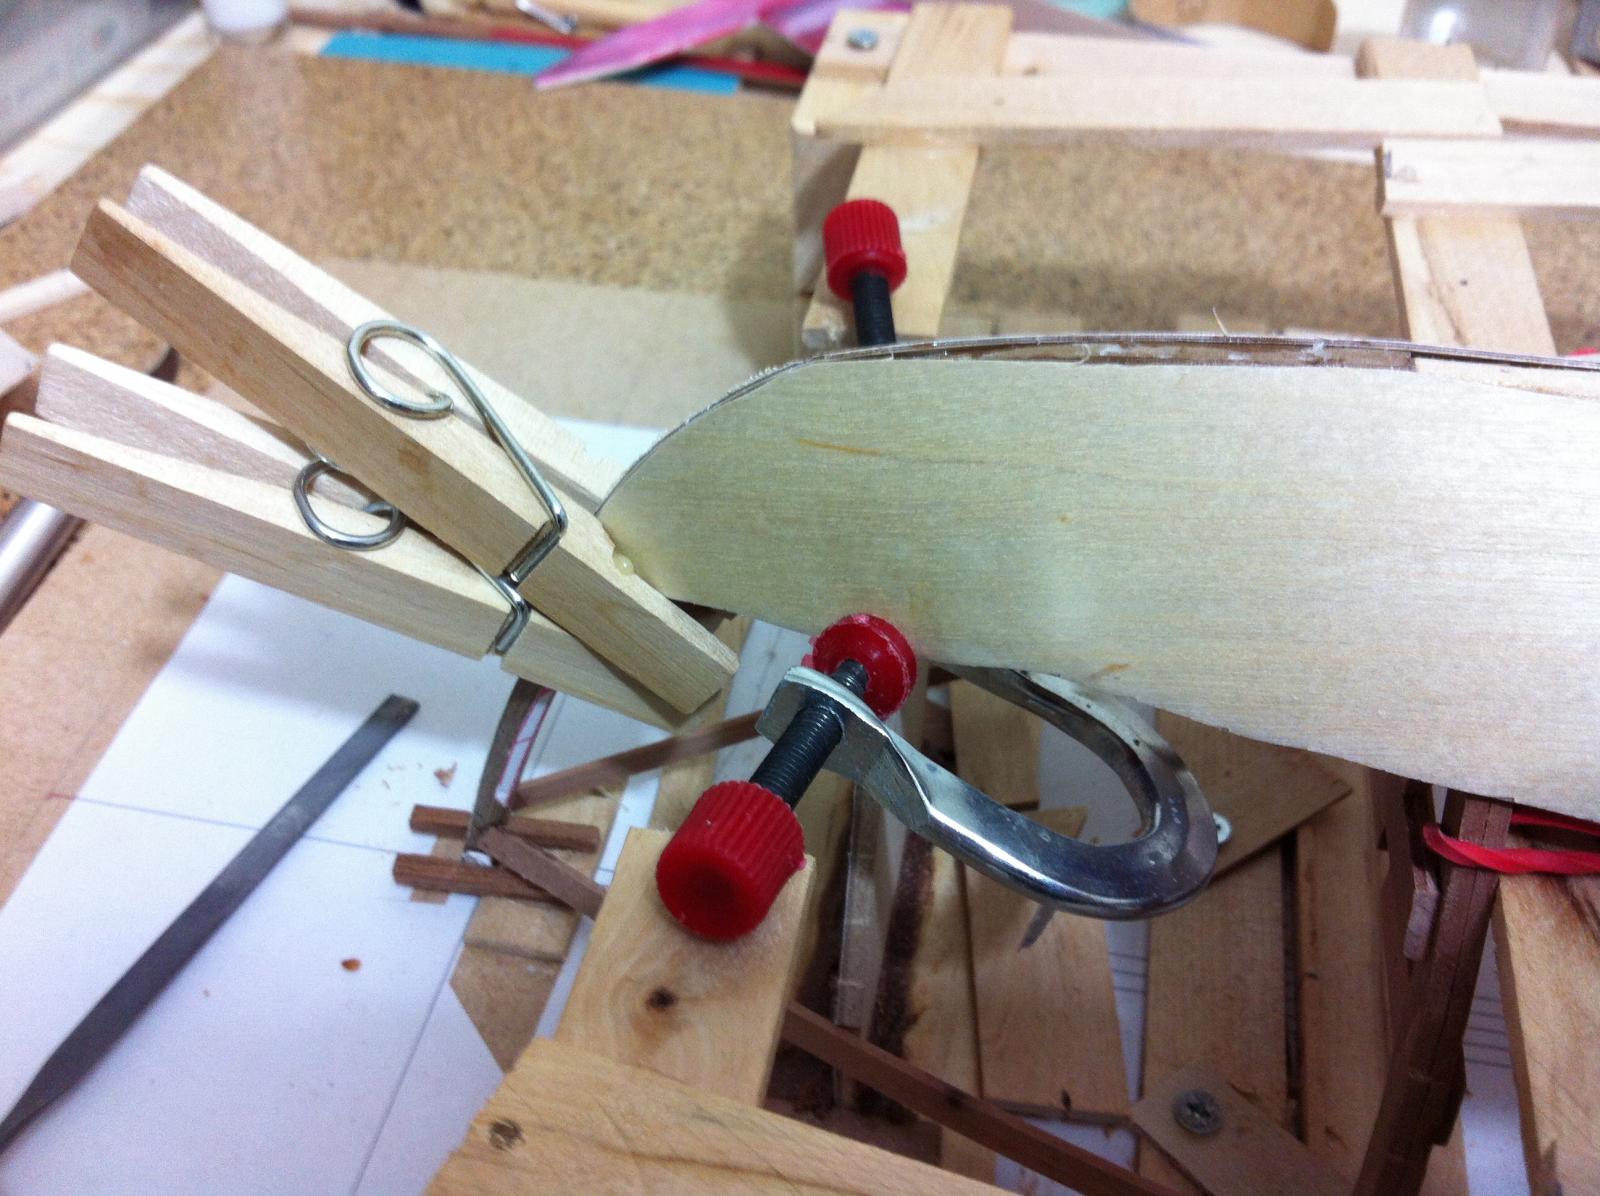
I decided to cut the centerboard slot, there will be more wood added but best to do it in two steps as pear wood is hard.

The job was done with the Dremel using a drill bit to remove the wood like a milling machine and finishing off with the hand files. I was surprised as it was a relatively easy job

Checking again the shape of the keel.
This is tricky due to the curve of the keel but also due to the fact that its width changes along its length. The best way of approaching this is to put it together in segments, which is how the full size boat would be built. A lot of laminating and sanding had to be done but it seems to come along fine.
I made a pattern of the keel near the Transom

Then I laminated some pear strips to make the deadwood
The deadwood was not wide enough so I added some more wood and also laminated another piece.
This is a nice solid piece of wood! The Dremel moto saw only just managed to cut it.
Fits reasonably well

The space is starting to fill up

I added the second piece, nothing is glued yet
I made a paper pattern of the shape of the keel to prepare the third piece

All three seem to fit OKish

Lots of sanding later it definitely looks better but long way to go

More wood needs to be added. There will also be another long plank added on top which need to be shaped

All segments so far, getting closer to the end
It only needs some more sanding so that the long plank fits flush but I think it is almost done. I will need to laminate and install the false stem before gluing everything together, and some serious fairing will need to be done first

- mtaylor, captainbob, druxey and 7 others
-
10
-
-
Thank you all, yes both are doing great!
-
-
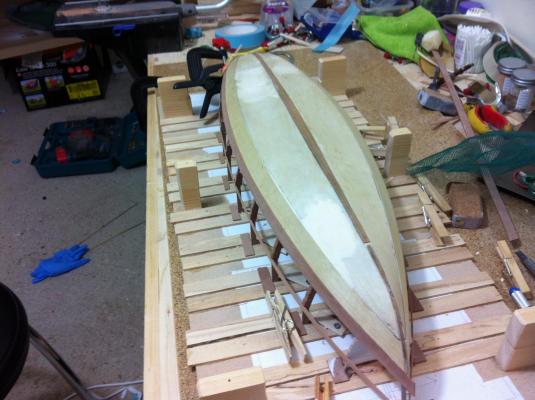
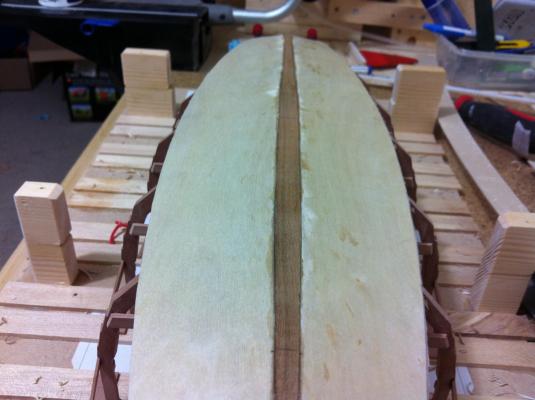
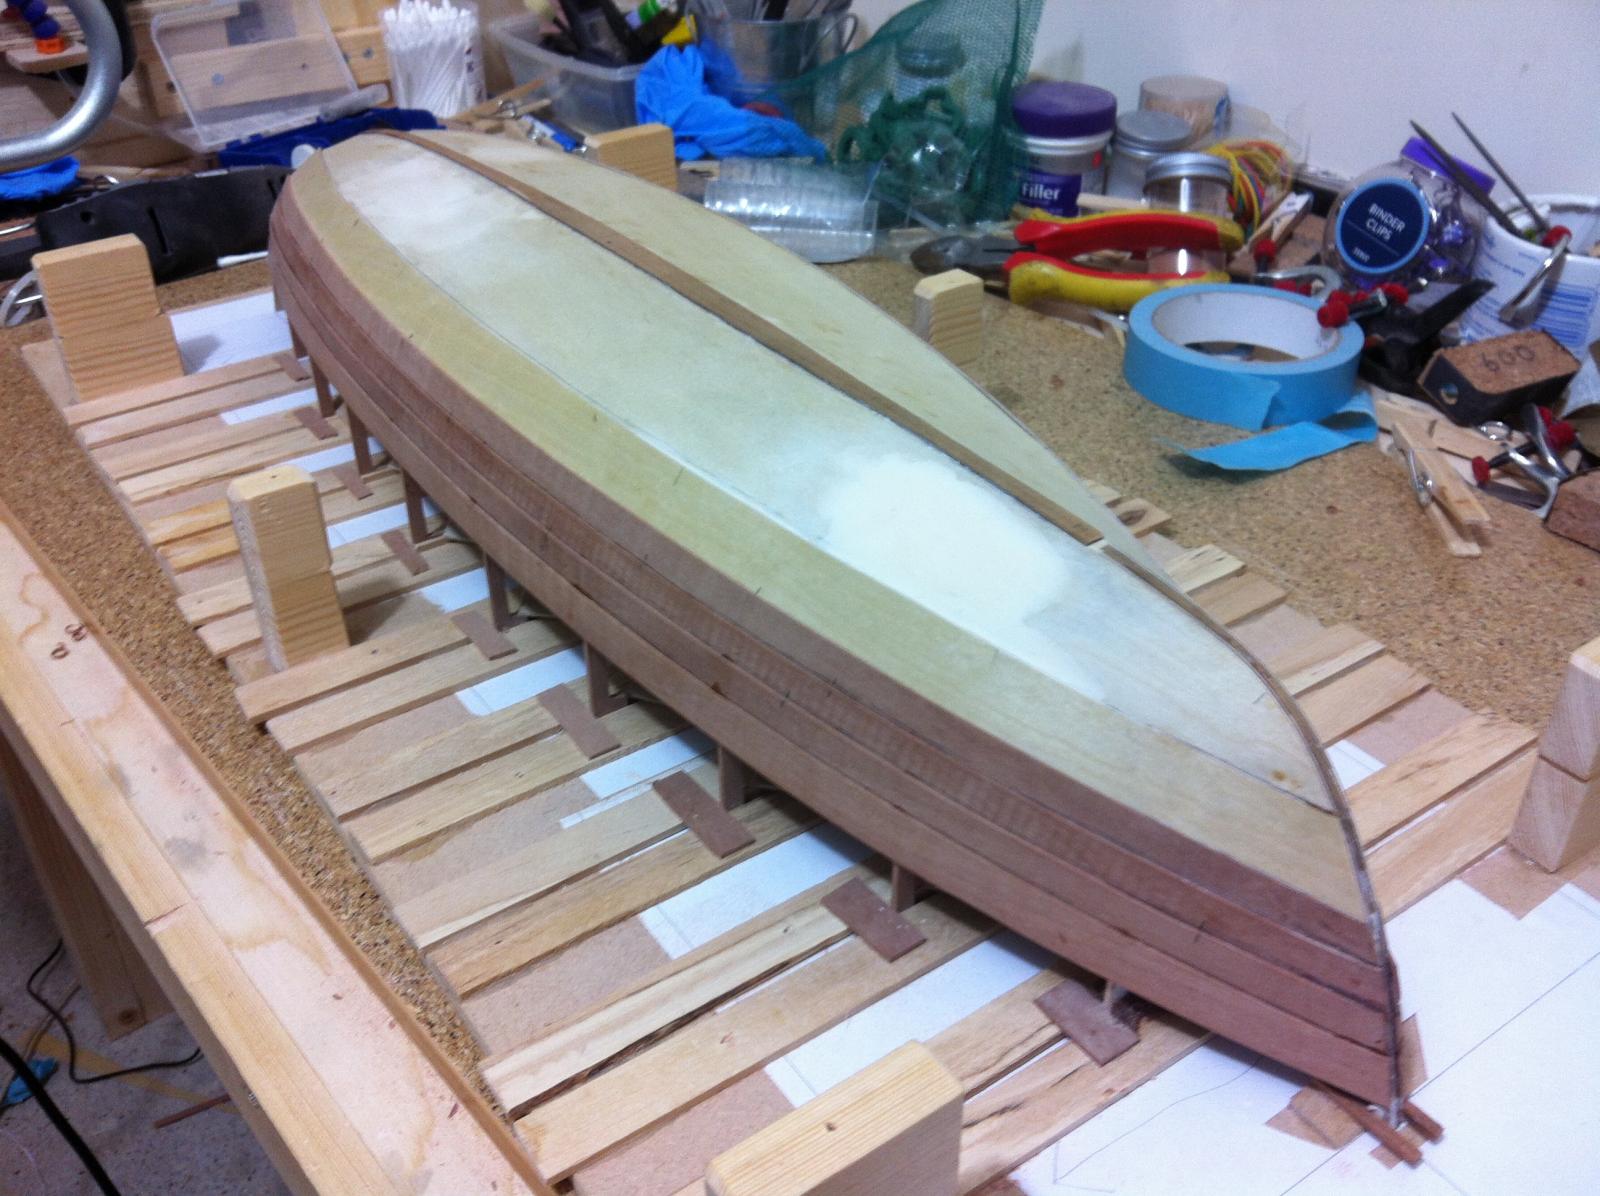
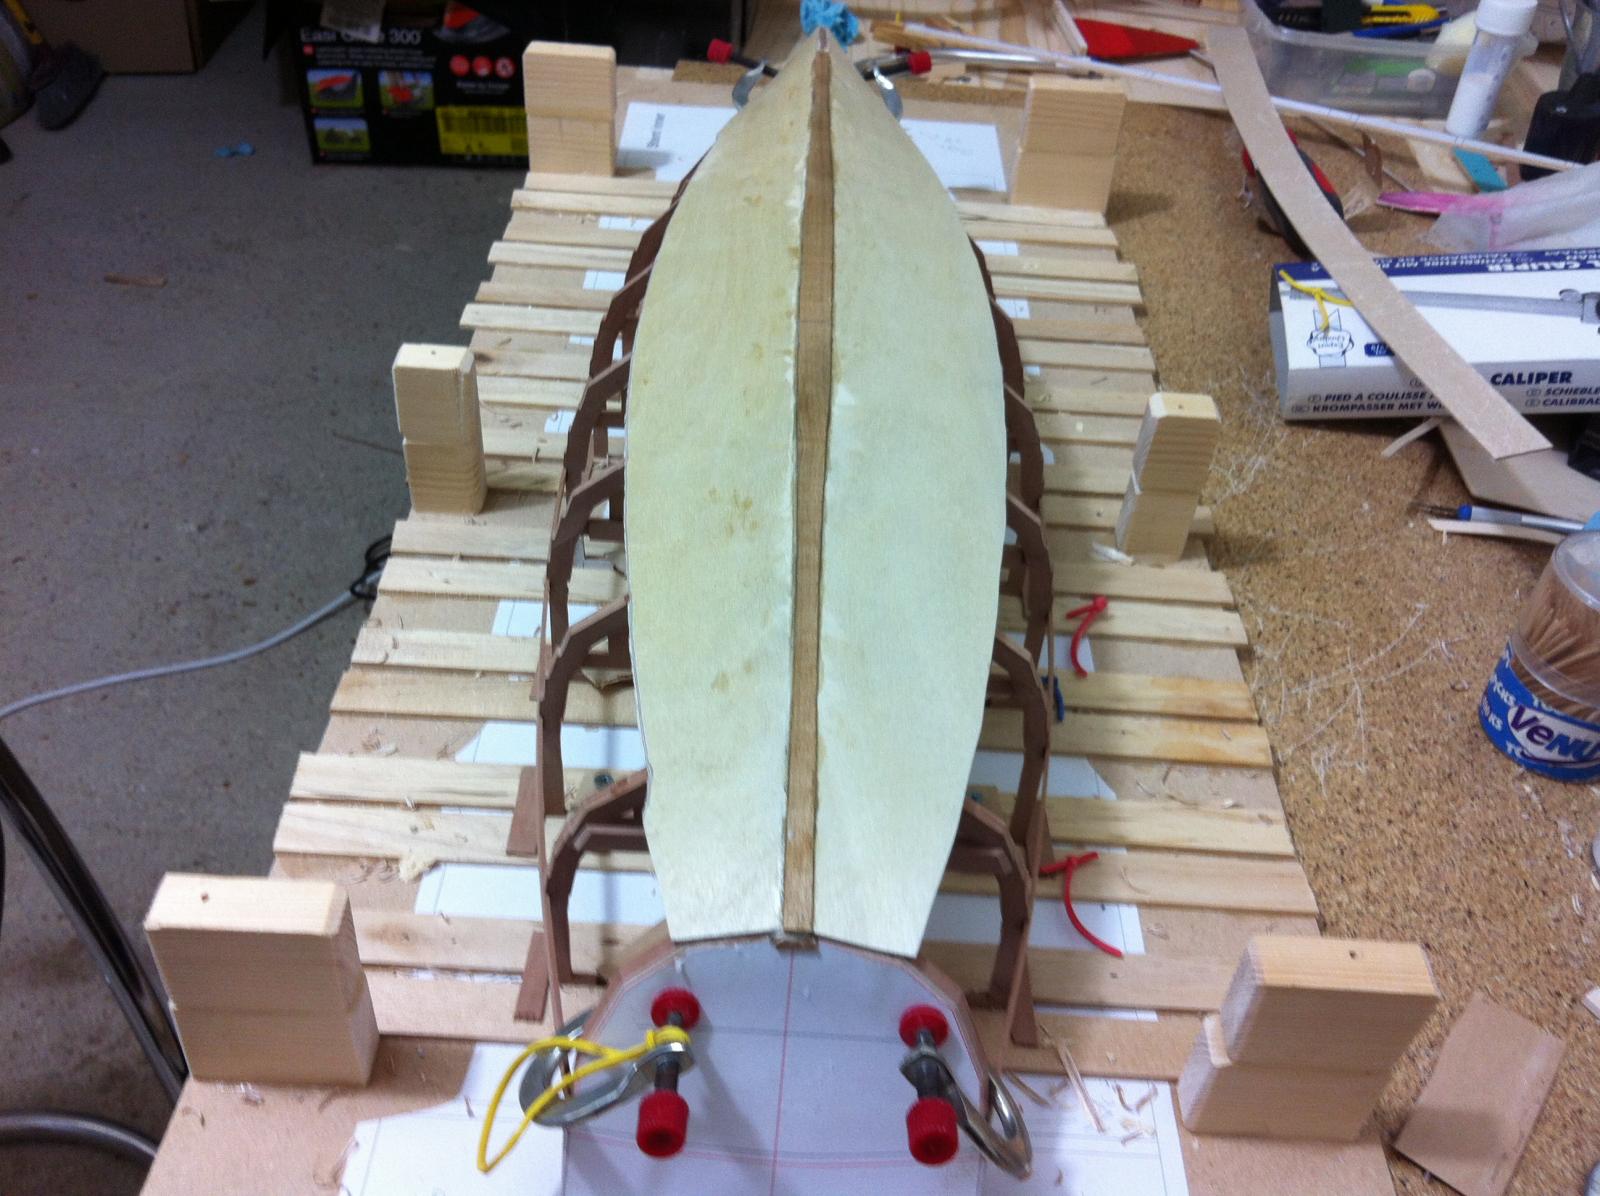
Planking is finished!
Still couple of things left, to trim the end of the planks at the bow, add the false stem, the keel and the rivets, do a massive amount of fairing and possibly paint.


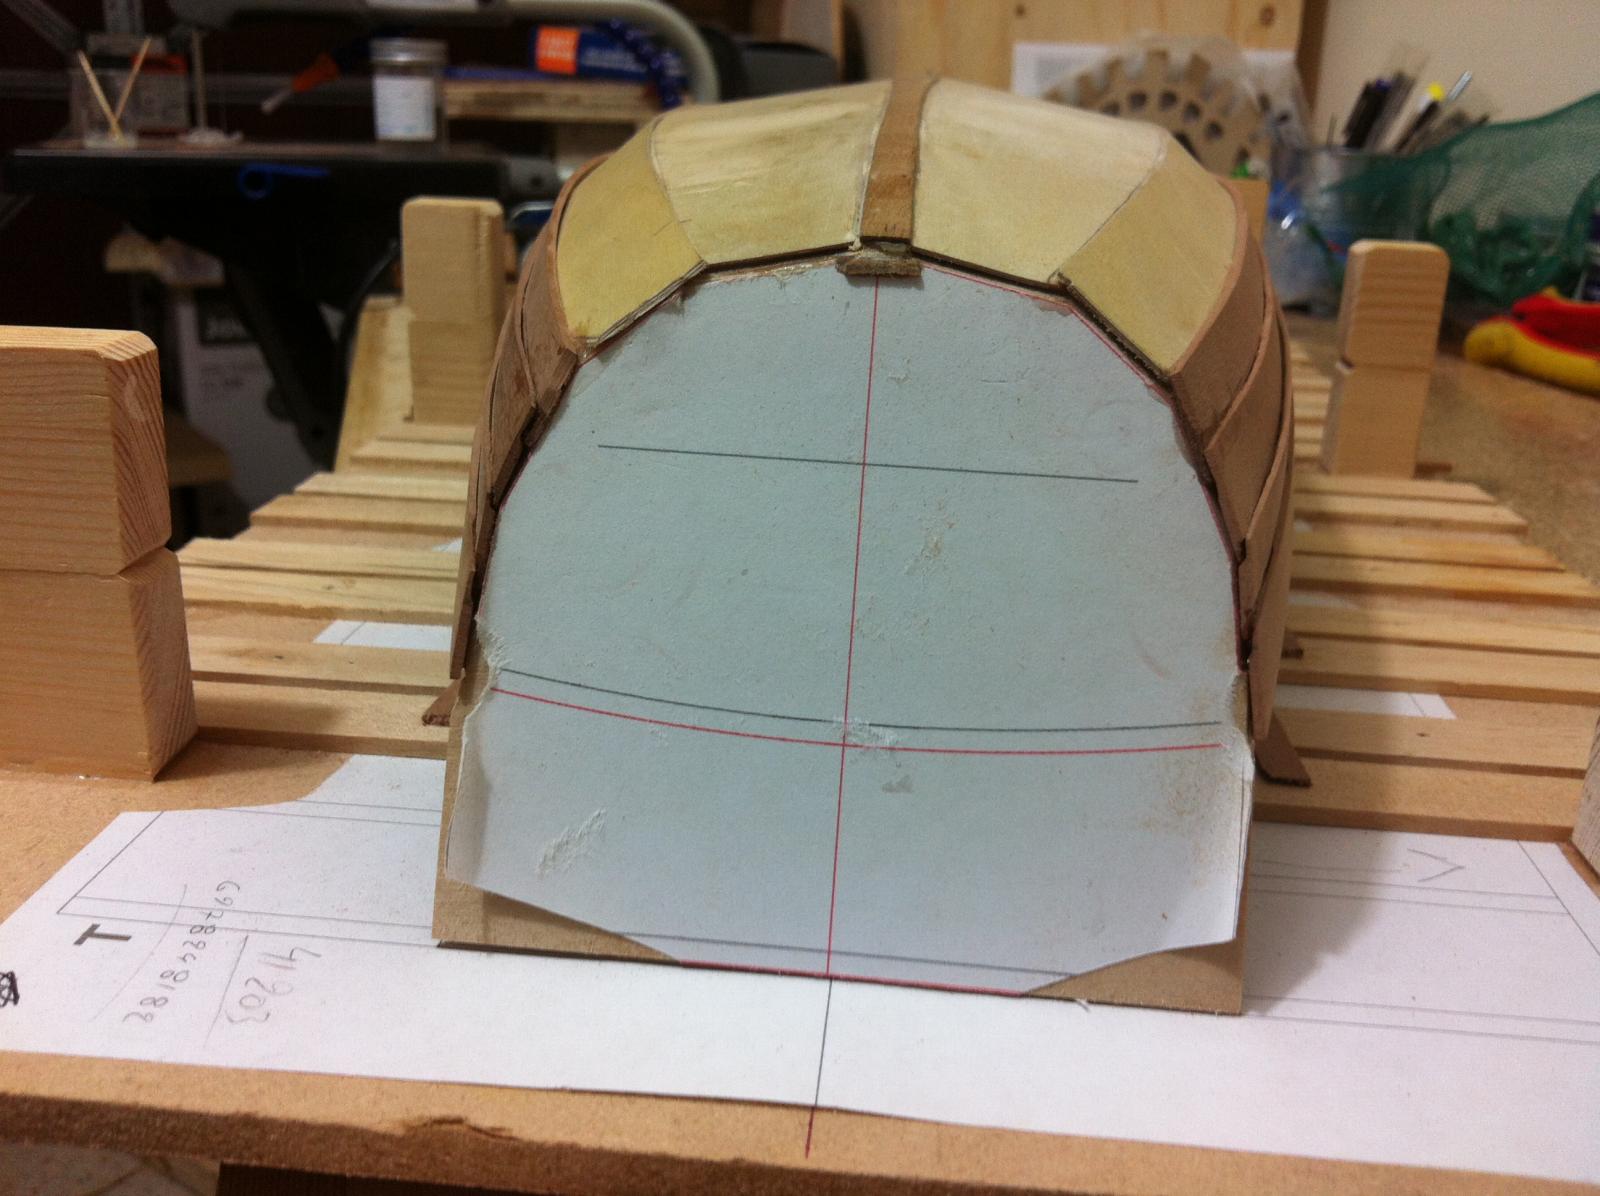
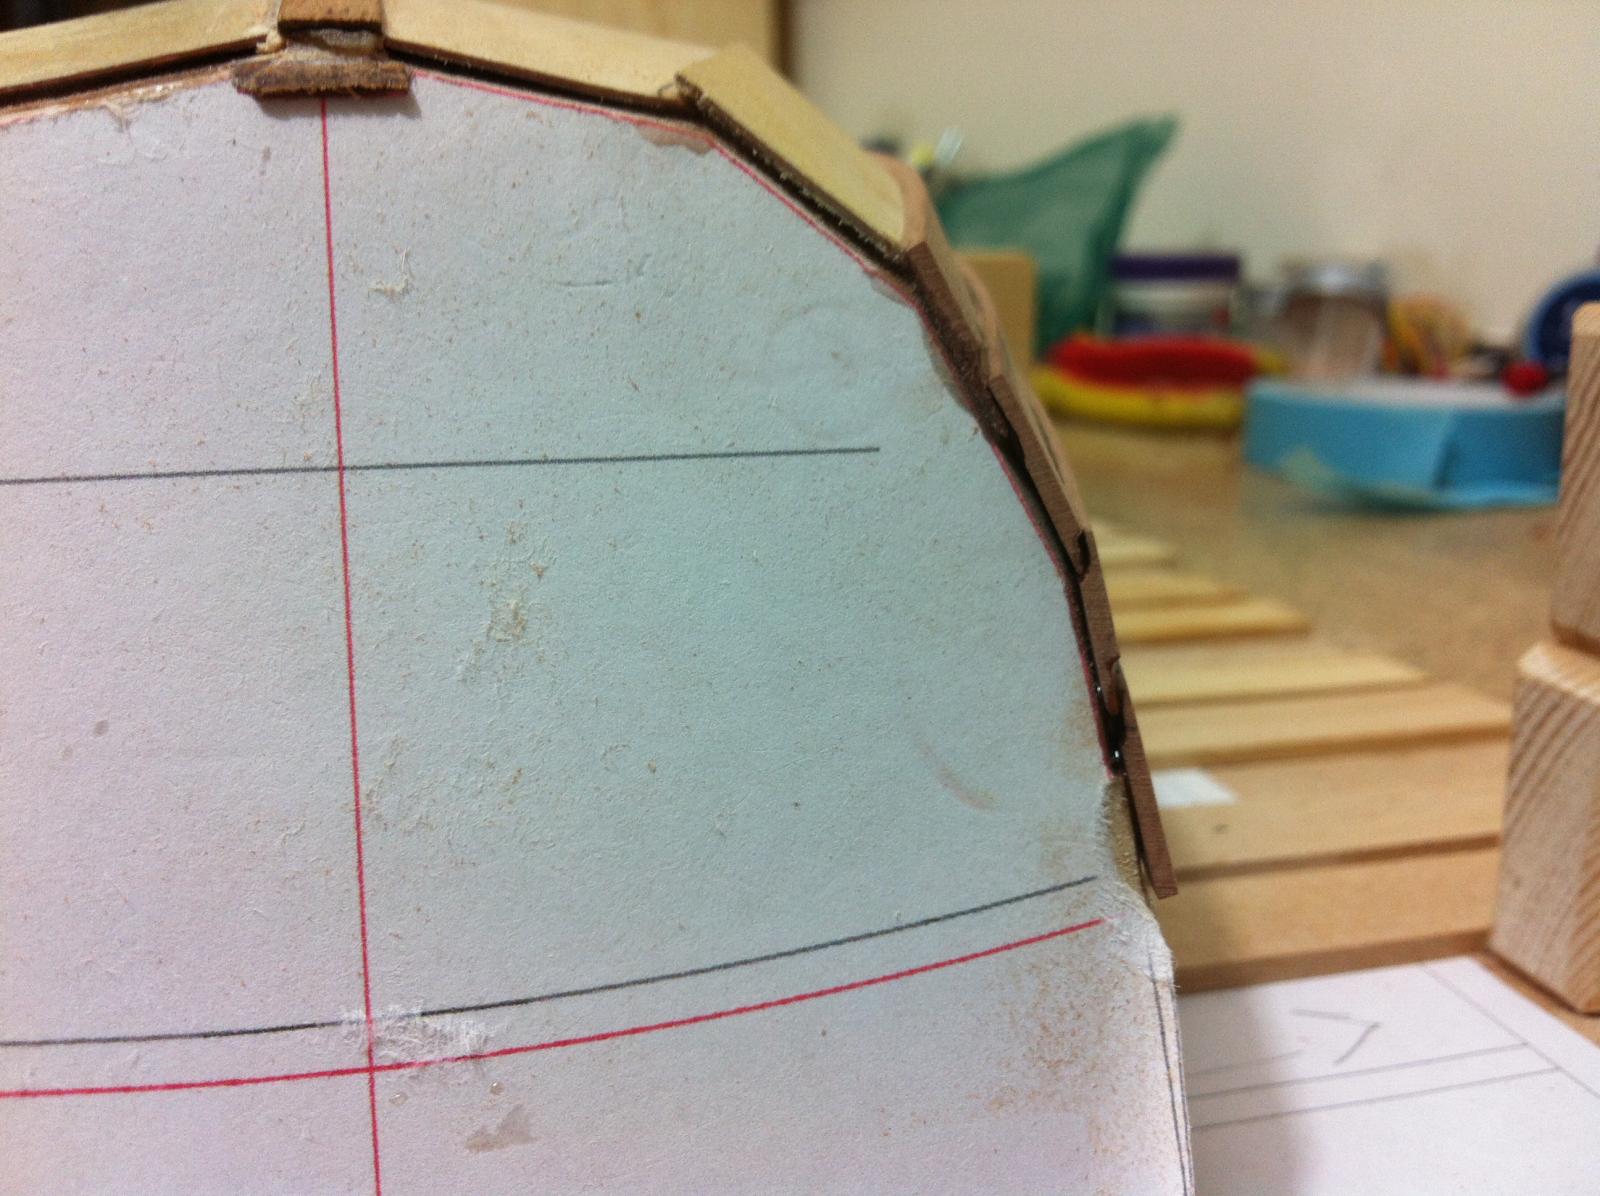
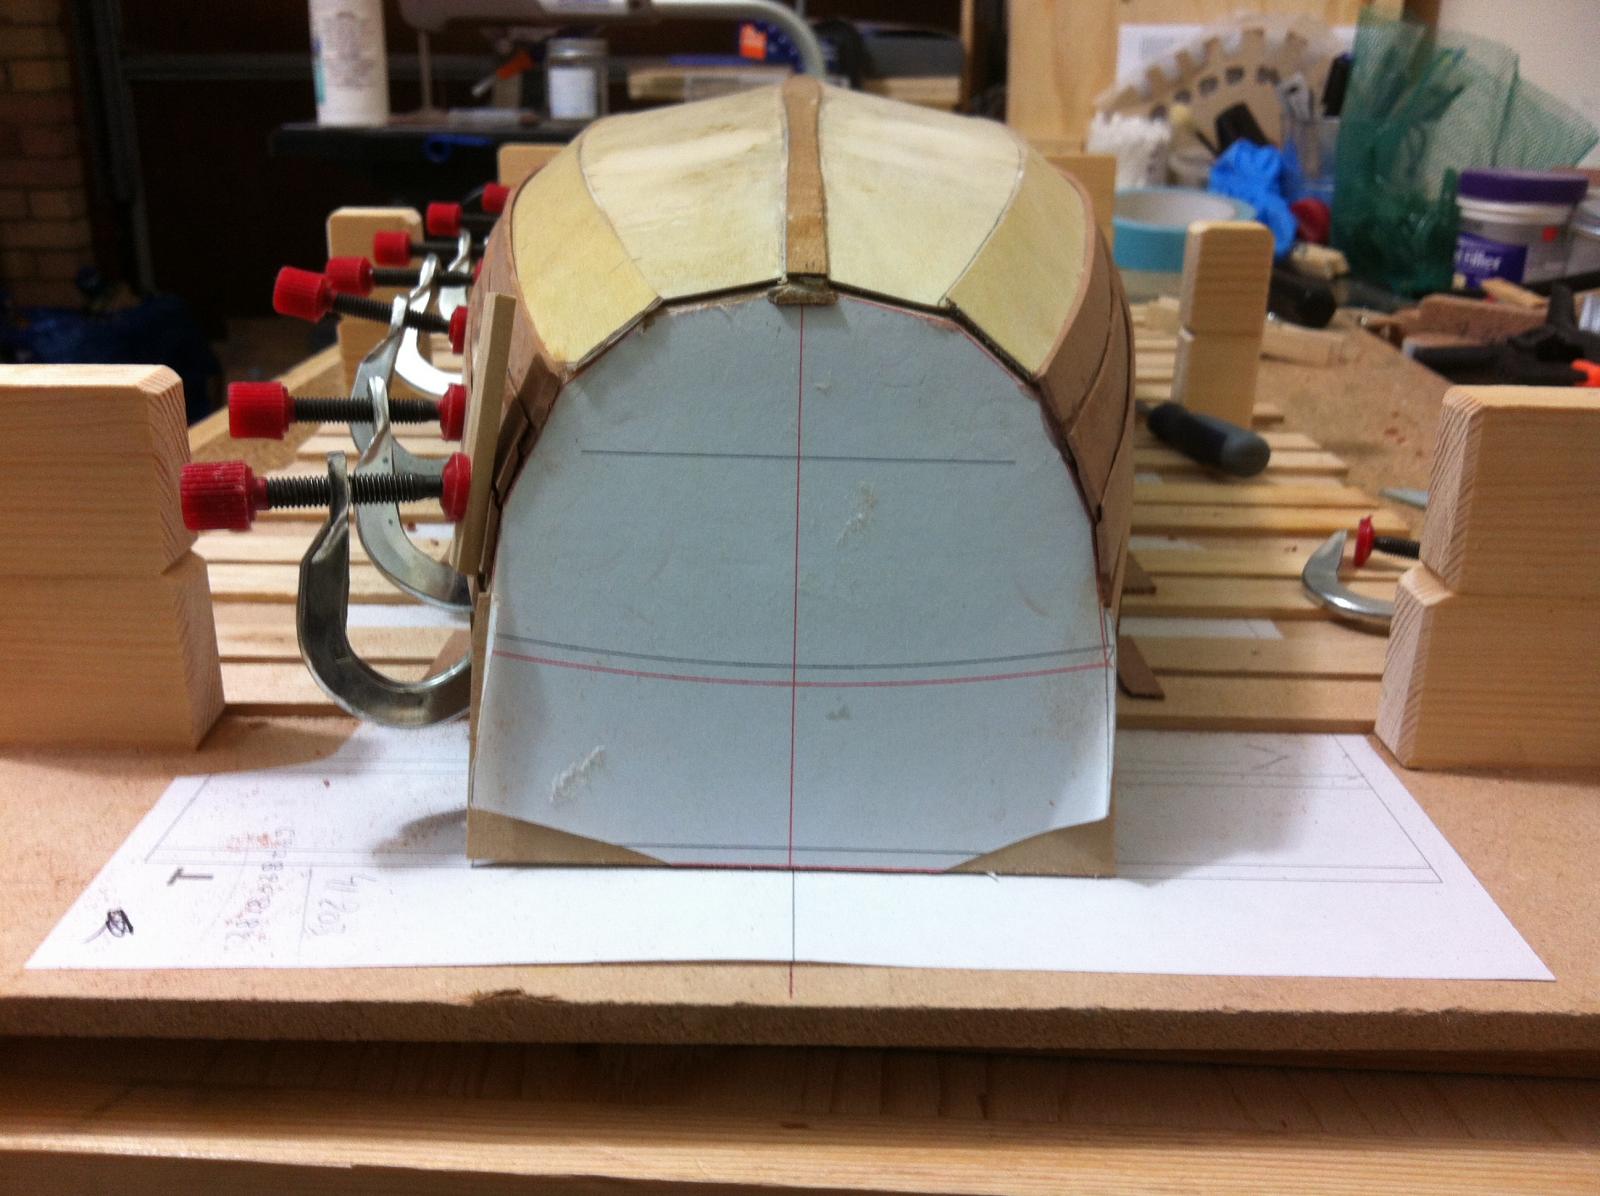
The transom looks ok, I think the important thing is the pair of planks at each chine to line up. Again a lot of fairing is needed.


- kees de mol, hexnut, druxey and 5 others
-
8
-
Thanks Patrick and Bob, I now have huge respect for the traditional ship builders of old that were lofting on floors and putting these boats together with hand tools!
Tad was right, planking goes faster now or maybe I go further in my learning curve. Two more planks to go!
Just a few more pics


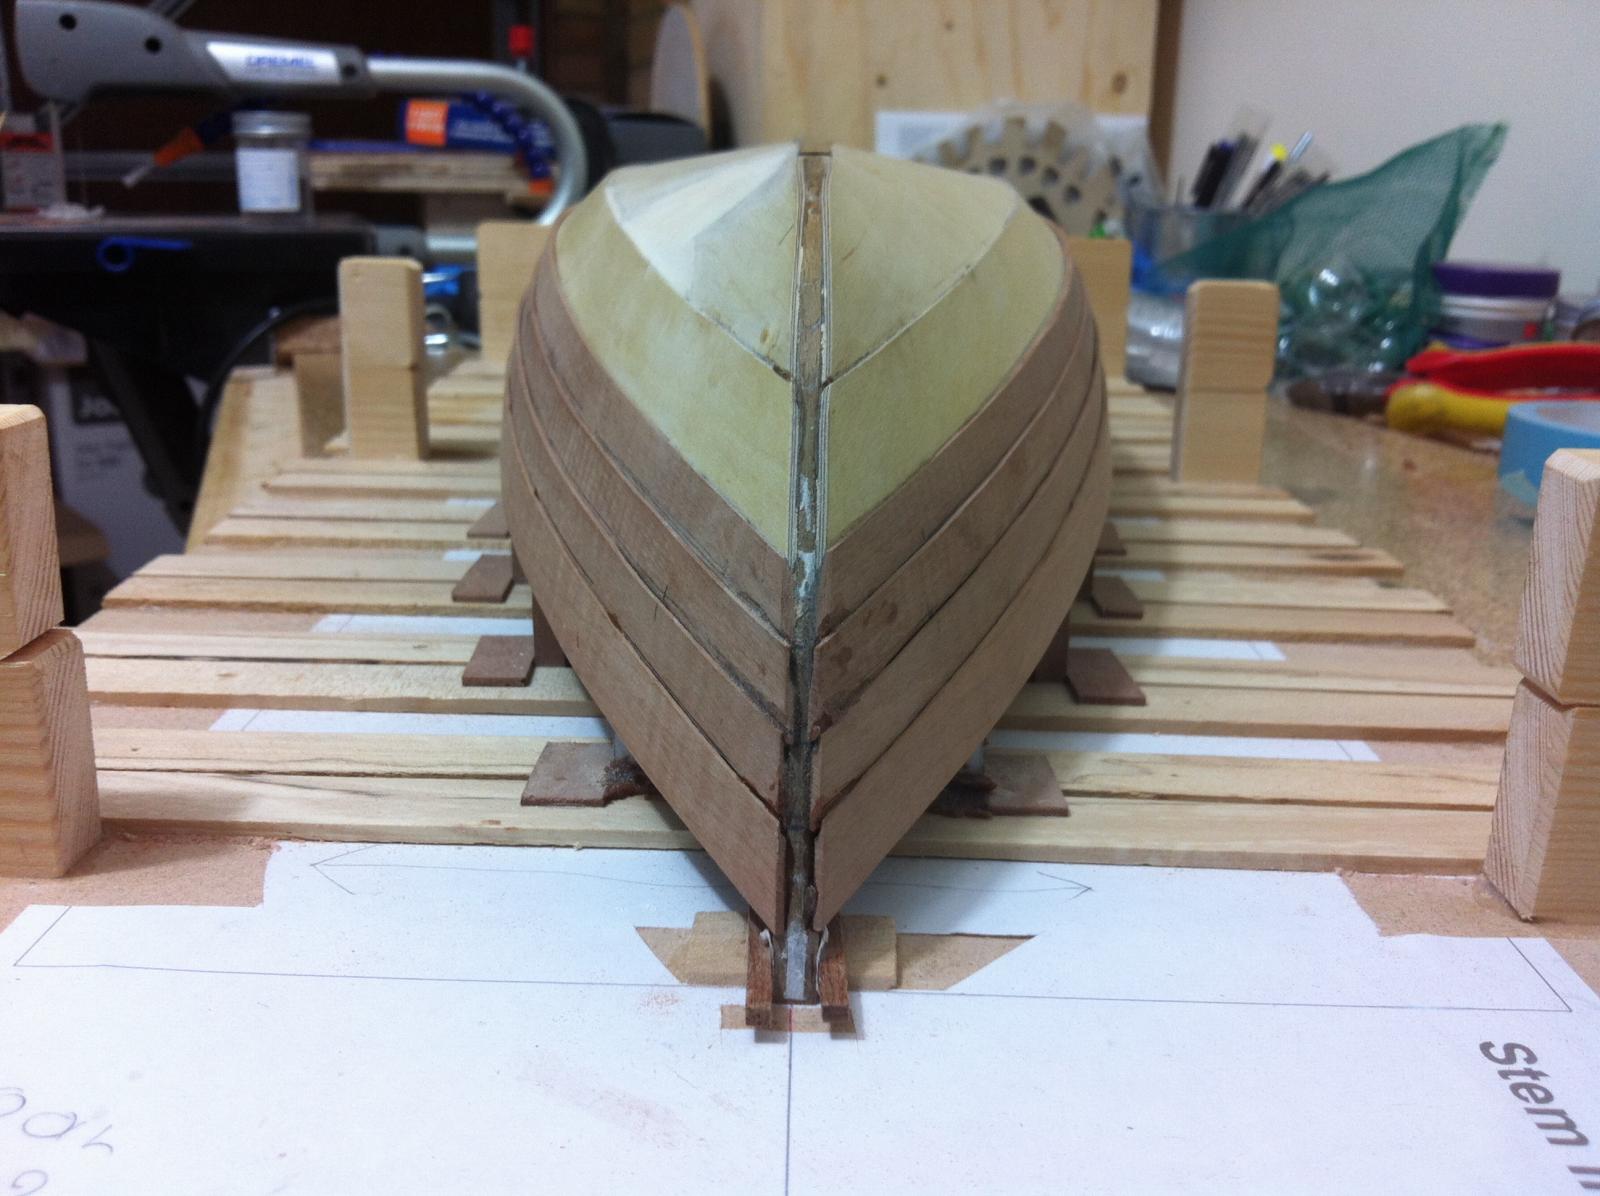
There are I think significant similarities to the photos of the american team at the same stages, if we overlook the abysmal difference in the quality of the work.
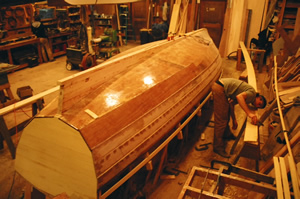
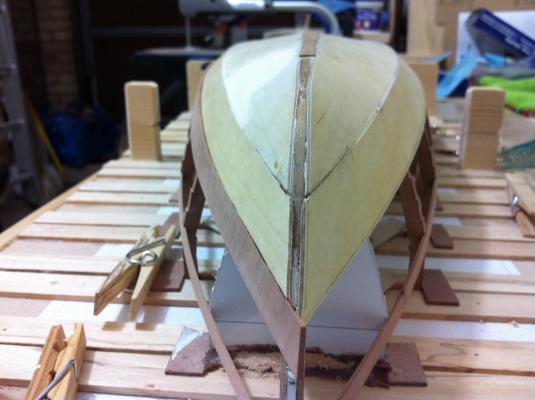
I hope the bow will come out like this!

-
Thanks Michael, I am following your Skipjack amazing project, thankfully no engine in this boat!
I decided to take a break from the stressful planking and laminate the false stem. I used again walnut which bents, glues and sands beautifully. It came out fine but maybe just not wide enough. It probably is just half a millimetre too narrow on each side but I d rather do it again than sand the planks, this is a decision for later. Even with all the planks fitted it will still be possible to laminate the stem.

The next job to be completed was to fit the next plank up, which was a mountain to climb and took 3 days! The plank would not sit properly and finally I realised it was 2 cm shorter than its pair! I had to do it again but still in order to sit properly the previous plank had to be bevelled and some of the notches slightly adjusted. Generous bevelling was needed at the stern and bow.


Finally I managed to get it into place and I am happy with the fit. I have no idea how the next planks will fit, hopefully they wont be far off.


The original plans call for riveting but it is very difficult to fit the planks just with rivets so I used a minute amount of epoxy to glue the plank to the frames. I experimented with 0.7 mm brass wire I had and it looks ideal to be used for rivets, using CA glue and the dremel with the grinding stones to grind the wire flush.
I couldn't resist a glimpse of the hull!

I need to get many spare drills and a collet for the dremel as there will be hundreds of holes to drill. I think I should finish planking and then do the rivets. Also I still have not decided what to use for fairing the hull, the options could be PVA glue with woodflour or some filling compound from the model shops. The putty from the DIY shops is really difficult to work with.
- mikegerber, garywatt, captainbob and 5 others
-
8
-
I don't really know what to say, I never expected such honours! Great to have you along in this journey Tad!
The pressure is really on now!
-
Thanks for the good words Patrick, actually I have not contacted him but you are right, he probably would like to know!
-
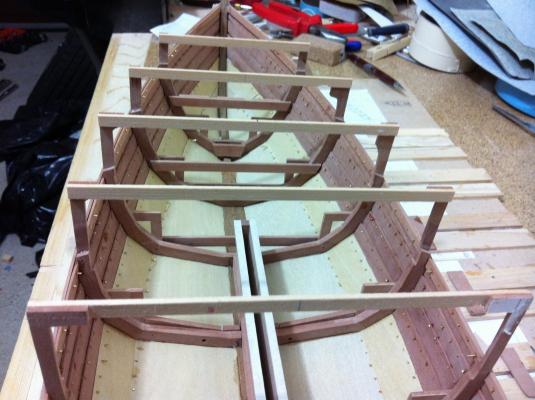
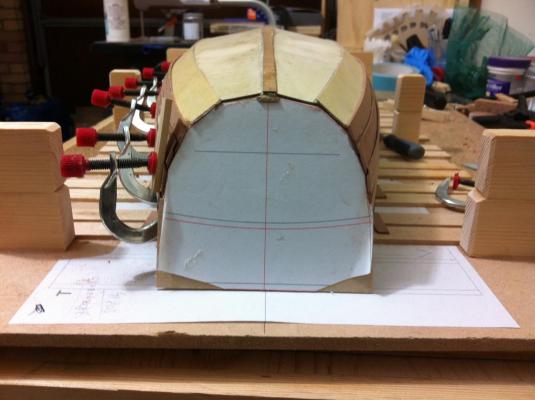
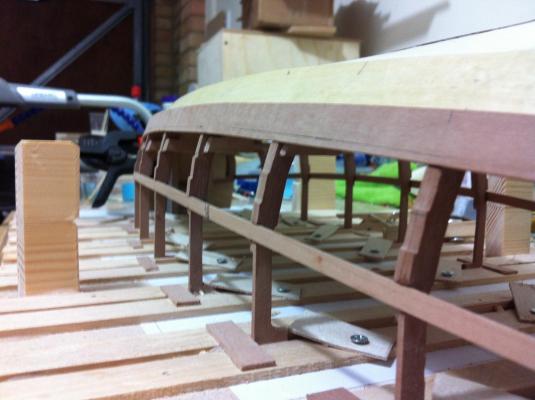
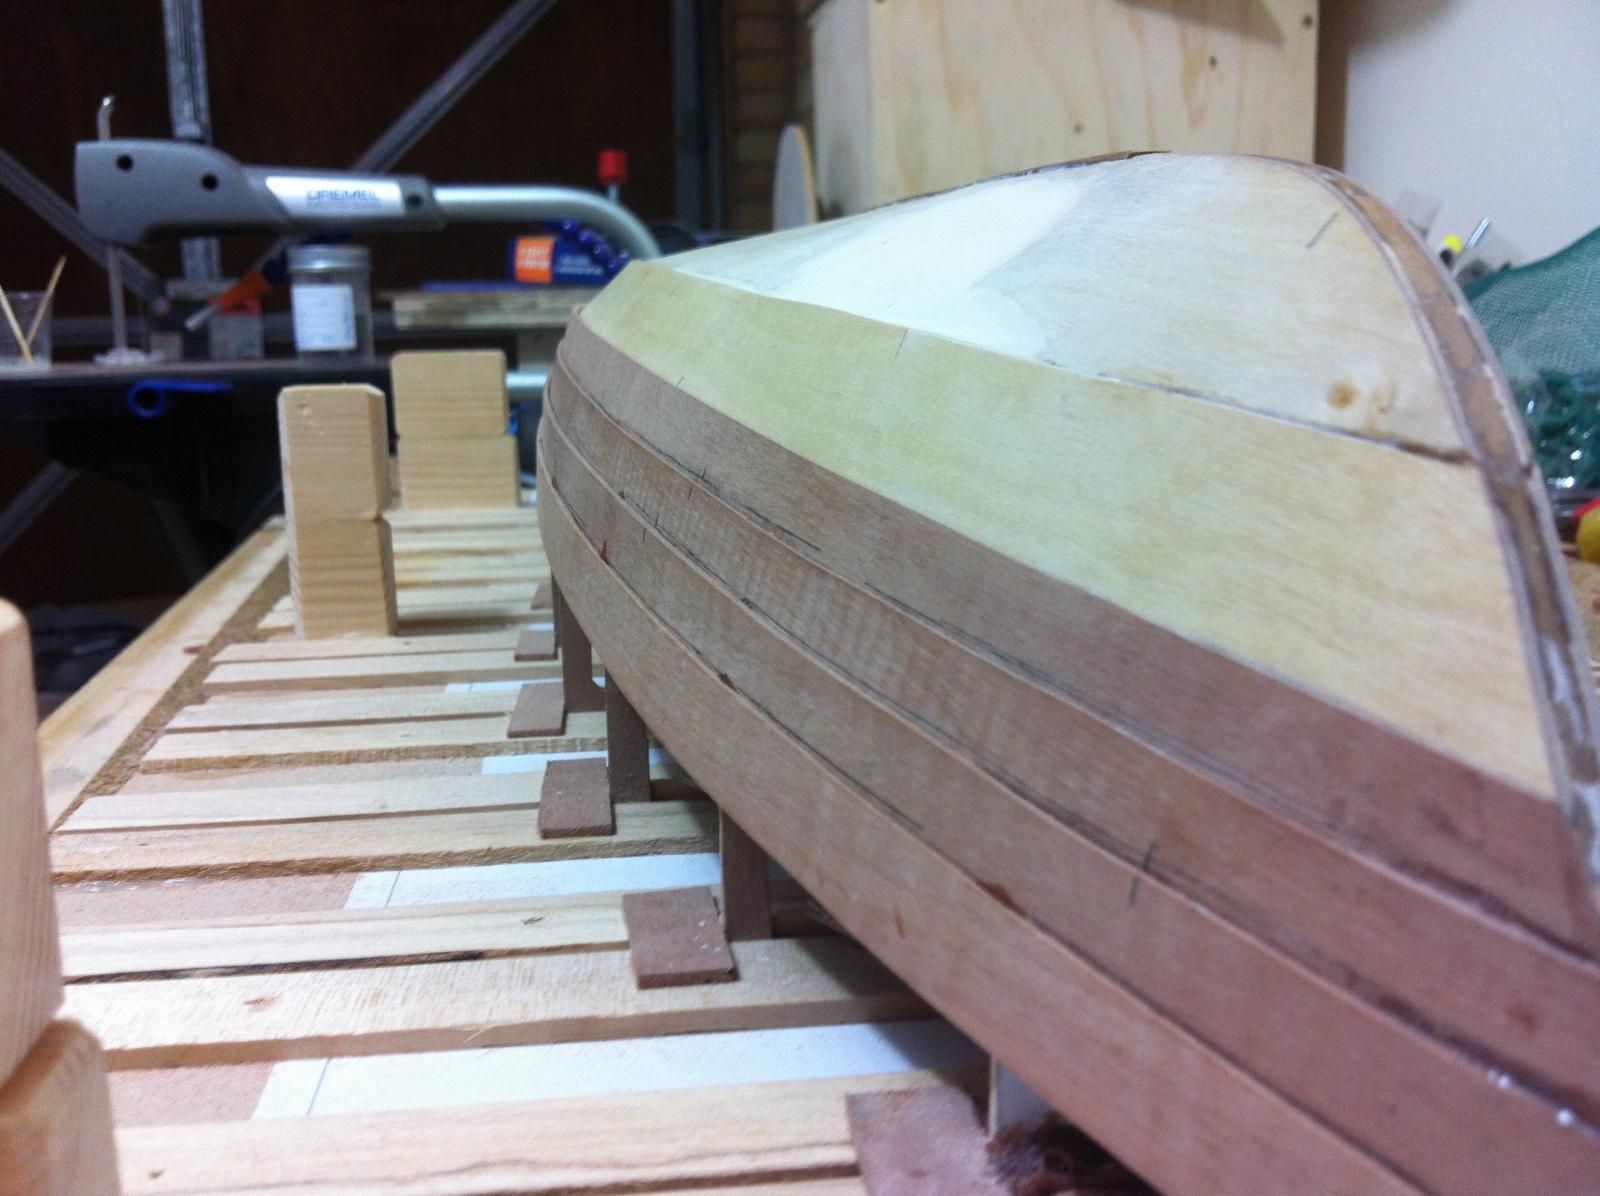
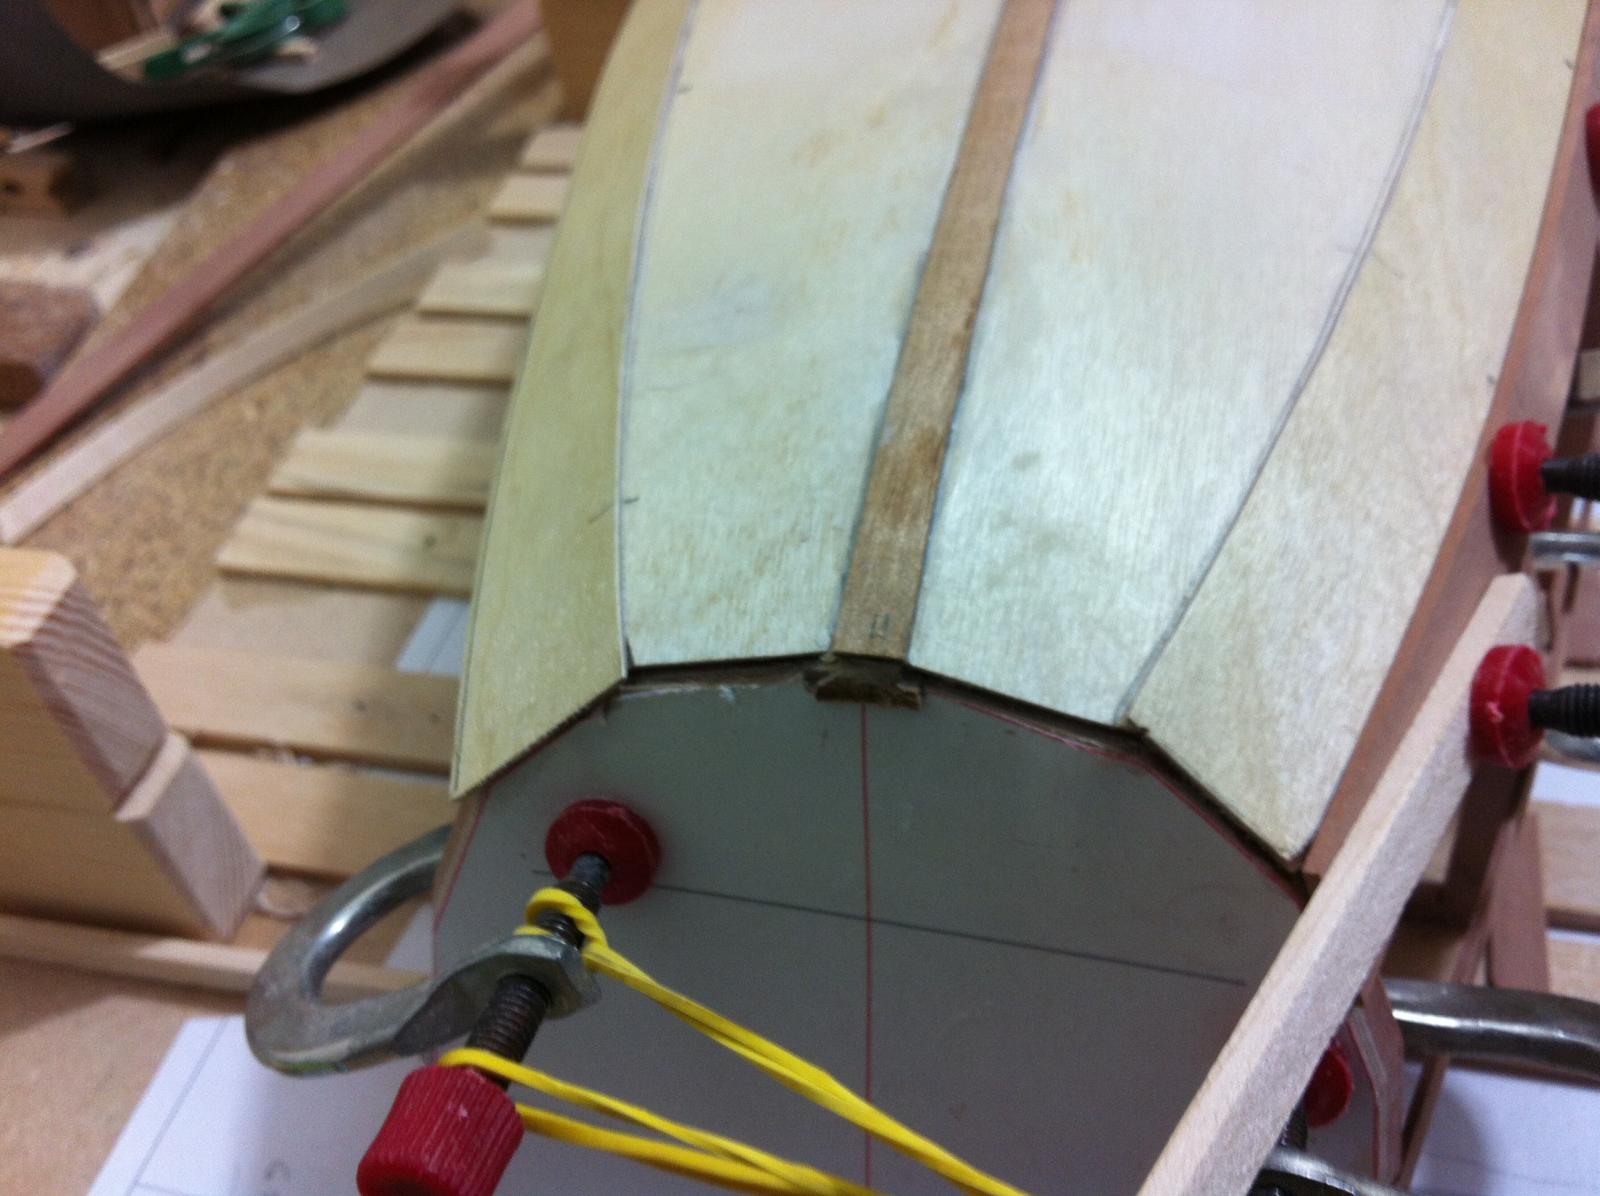
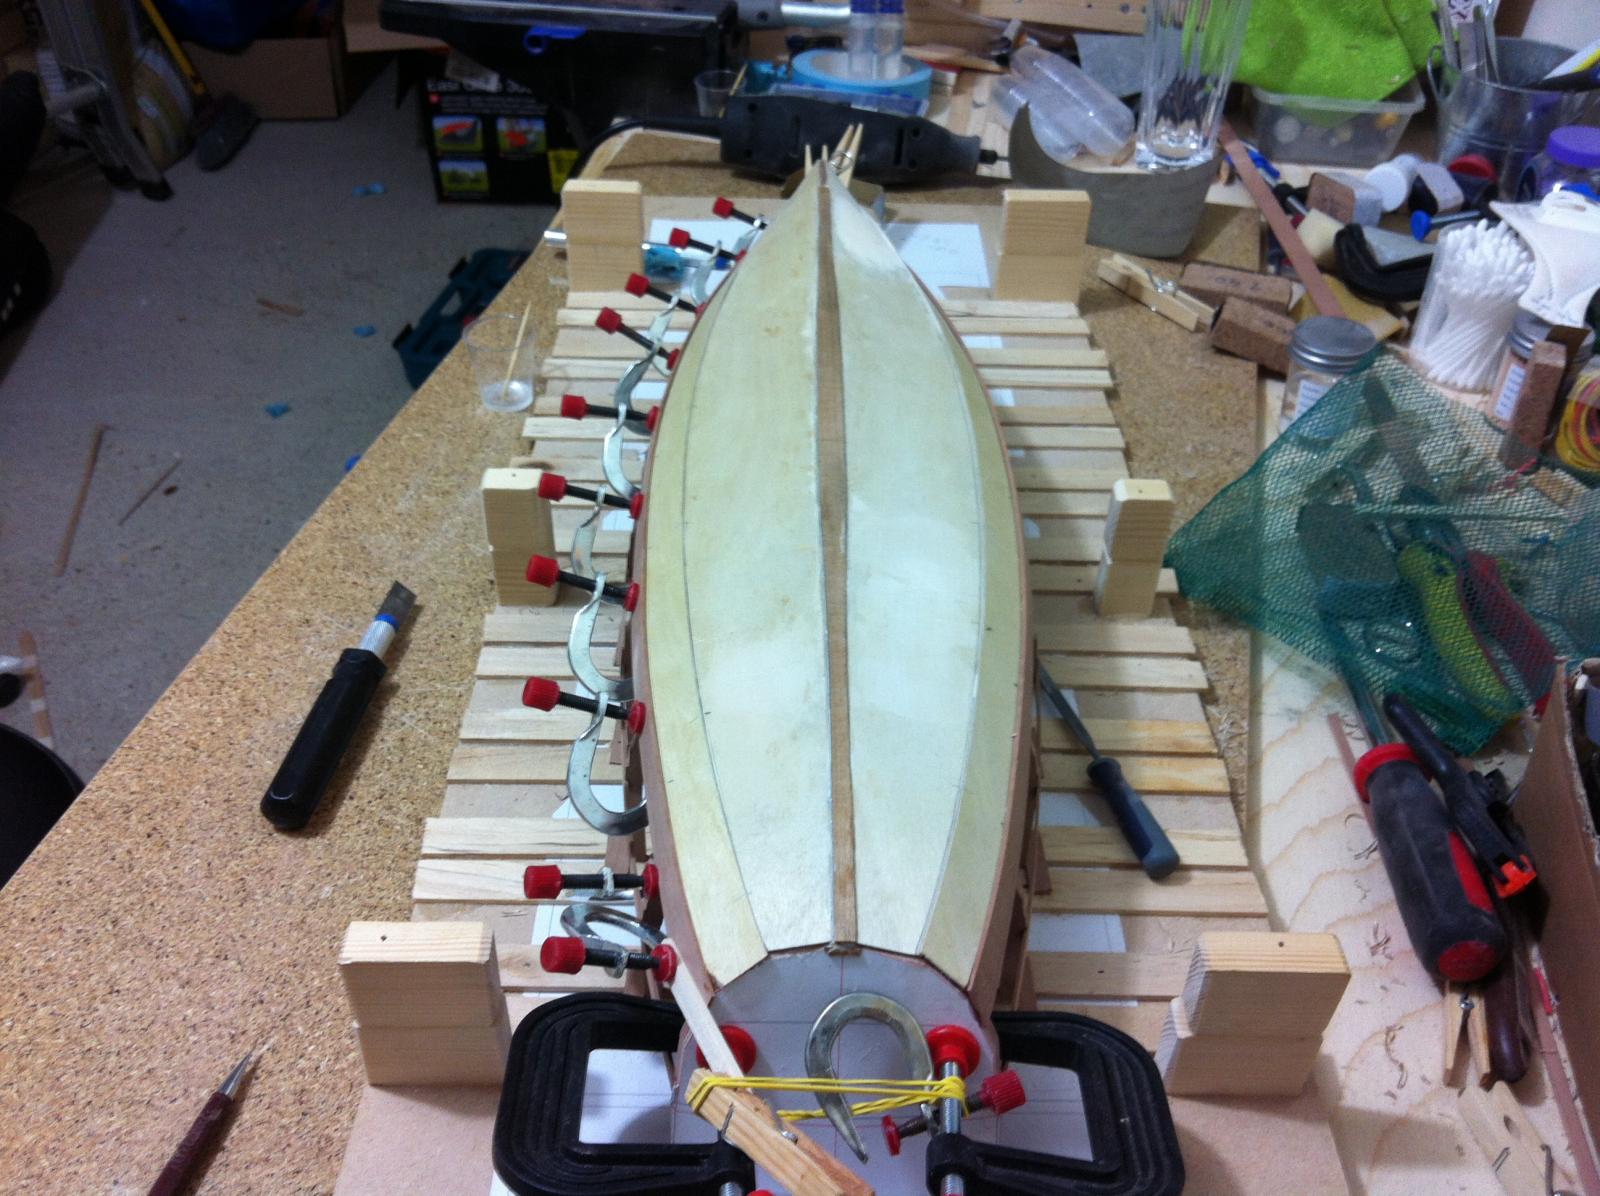
The boat is coming along slowly due to other commitments and also due to the complexity of the built. I finished trimming the sides of the bottom panels forward of frame 1, where the lapstrake should gradually fade reaching the stem. Then the lower chine panel was fitted, one side at the time.

The transom proves particularly challenging to address.

The fairing compound seen near the bow is to fill a large dimple which I think is the result of cutting the panels quite larger than needed to have plenty to trim, this probably did not allow the plywood to bend smoothly.
The lower chine panels also need trimming. The lower edge should not be touched in any of the boards and planks as it defines the shape of the boat.


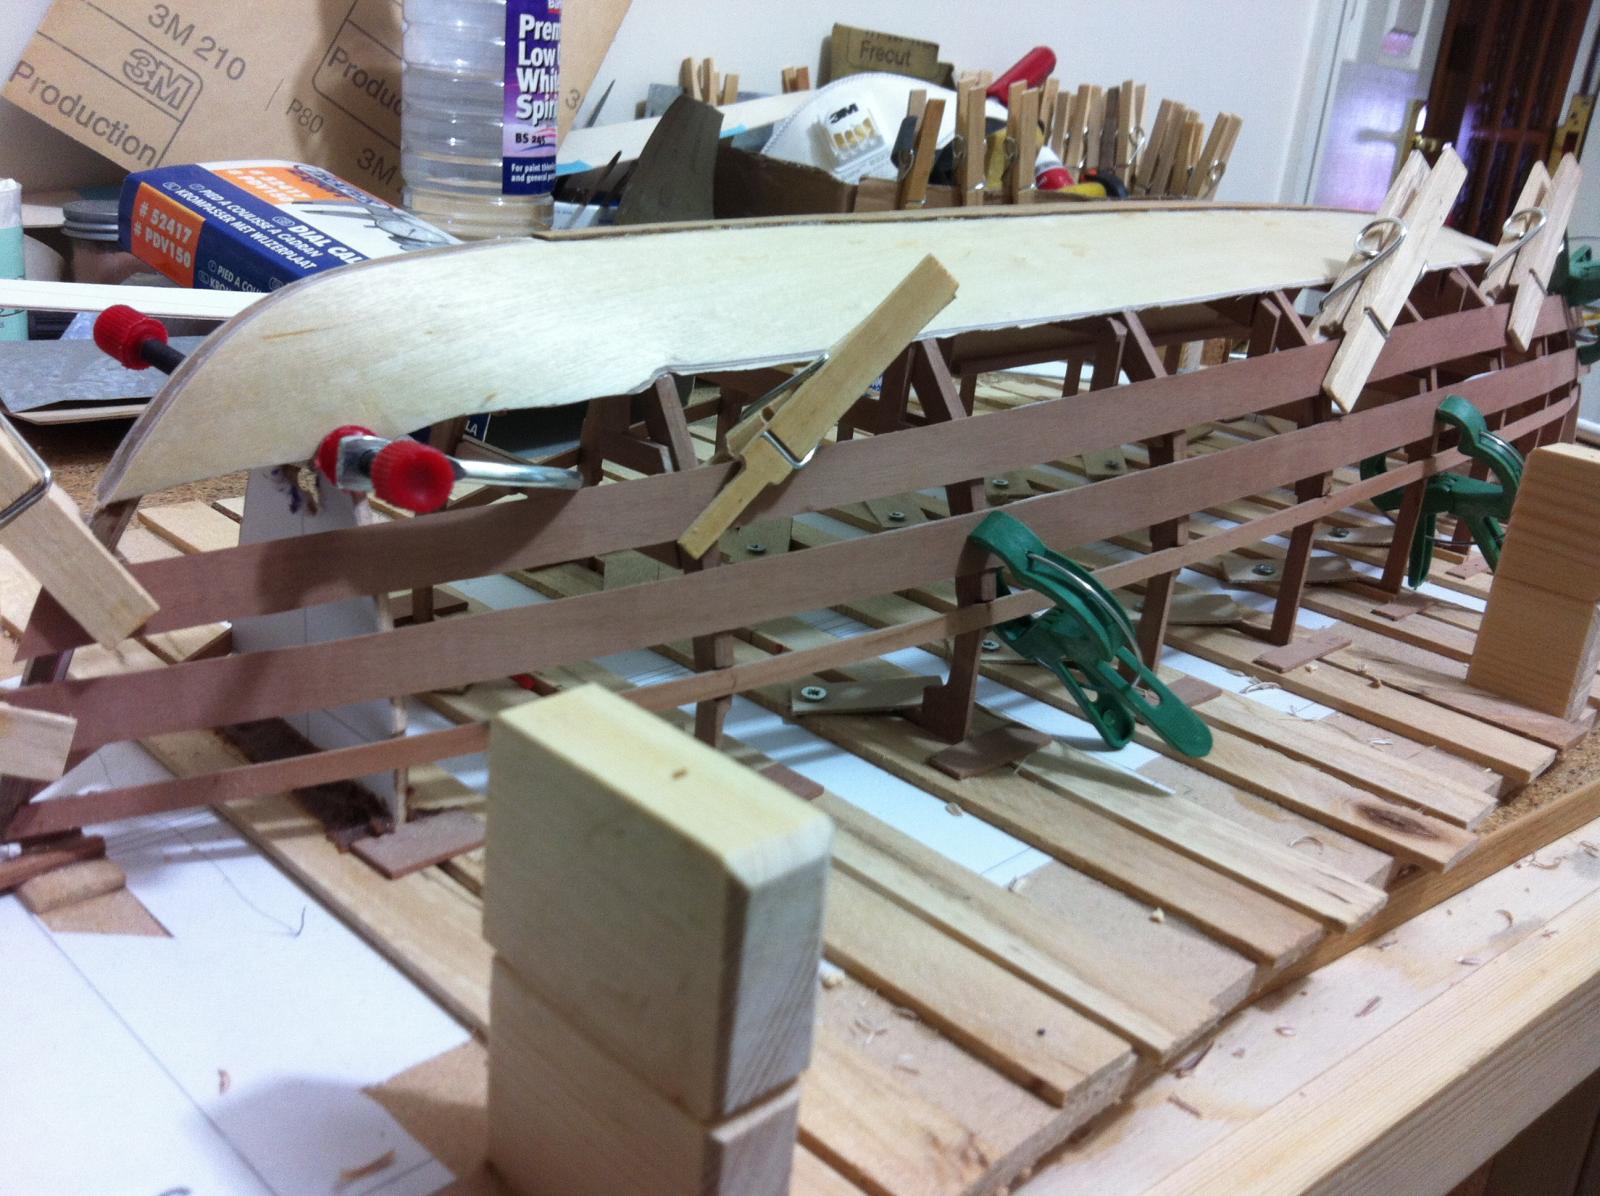
Next the lower of the 4 planks was fitted. The next photos show the bevel at the bow.
 Both sides done, again the transom area was difficult to tackle.One thing's for sure, I will need to fair the hull until my fingers bleed.
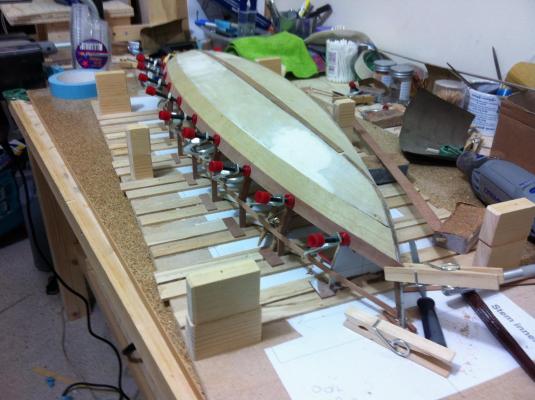


 The boat is now starting to show its size, It is really a large model but also the beam looks much larger than it does in the plans.
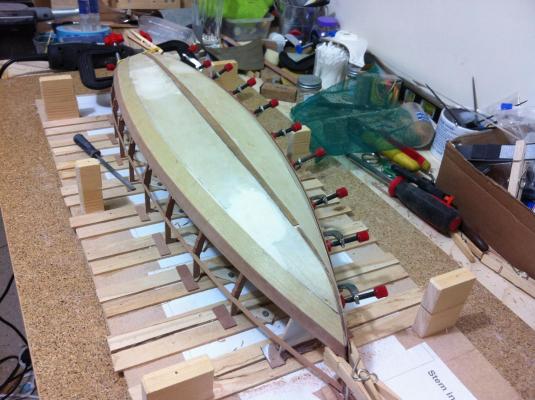 I think that I should laminate the false stem before adding the rest of the planks.
- Omega1234, mtaylor, michael mott and 5 others
-
8
-
I think we have the name there Patrick, "Butterfly Explorer" !!

-
The work progresses at a very slow pace now. At every step new challenges appear. Also, I try to plan as far down the built as possible to avoid finding my self in an impossible situation. I use a lot of epoxy at this stage which is a dangerous glue as it is impossible to undo in case of a mistake. Measure 10 times and cut one!
I did some work on the centerboard, the edges came out very nice.

It is time to think now about painting, as the centerboard will need to be installed before the floor boards. I will be following closely the american team so the top of the CB will be red, there will be a red strip on the sides of the boat and the planking will be white (or something like that). I used Acrylic paint in the past and found it very difficult to use due to visible brush strokes and extremely poor coverage. I found enamels much better. In any case, I got some acrylic paint from a DIY store, Valejo acrylic, artist acrylic paint and Humbrol enamel and tested it on plywood previously sealed using high quality brushes.
Enamel wins hands down, no brush marks, a single coat equals to 4 coats of acrylic, no nasty odour, at least not in my garage. Strangely, I did not find significant difference between the different acrylics.
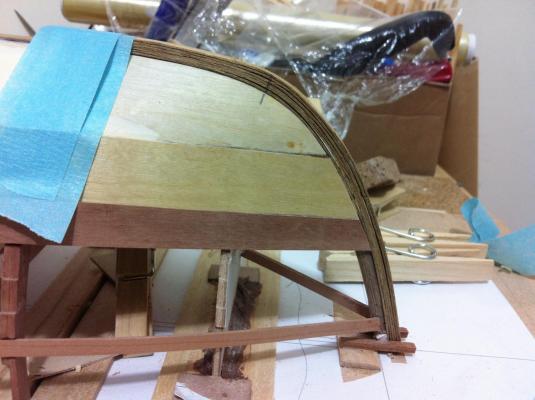
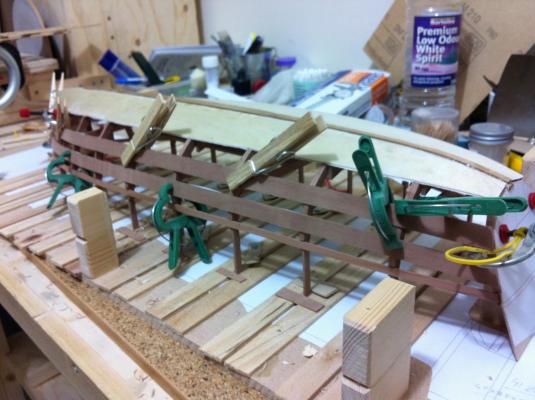
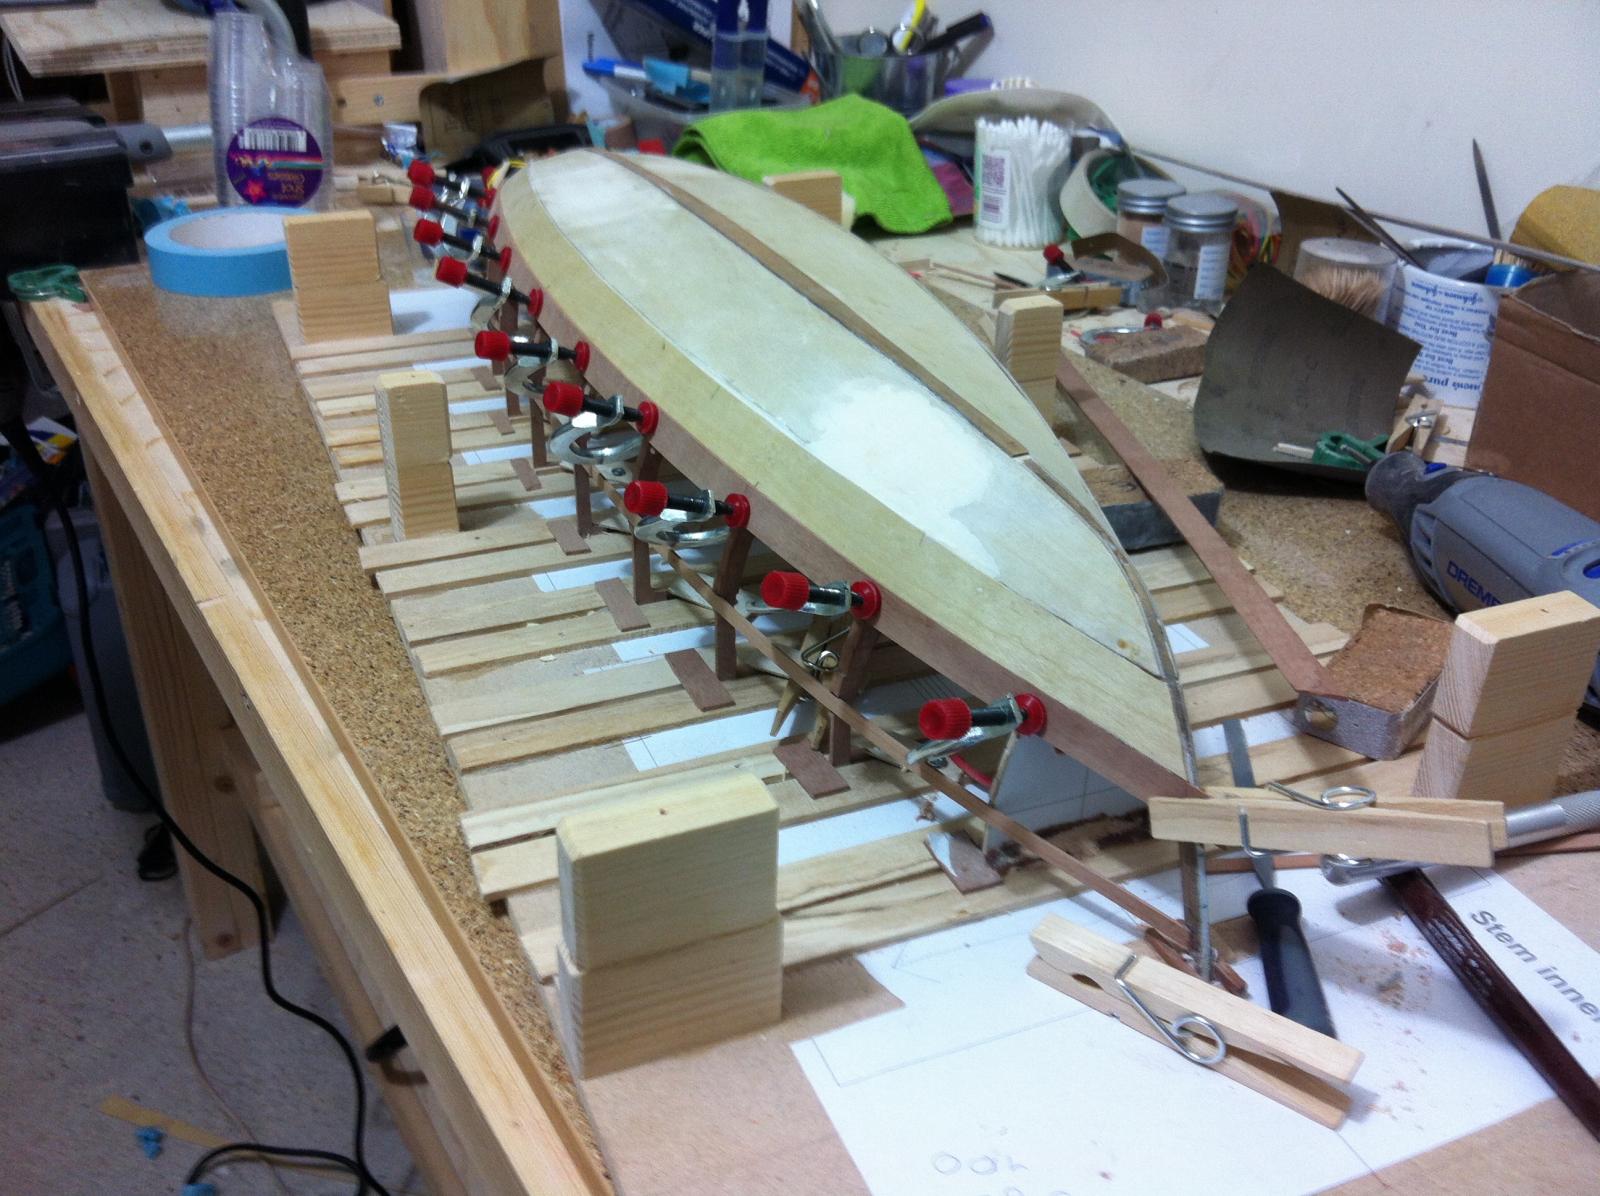
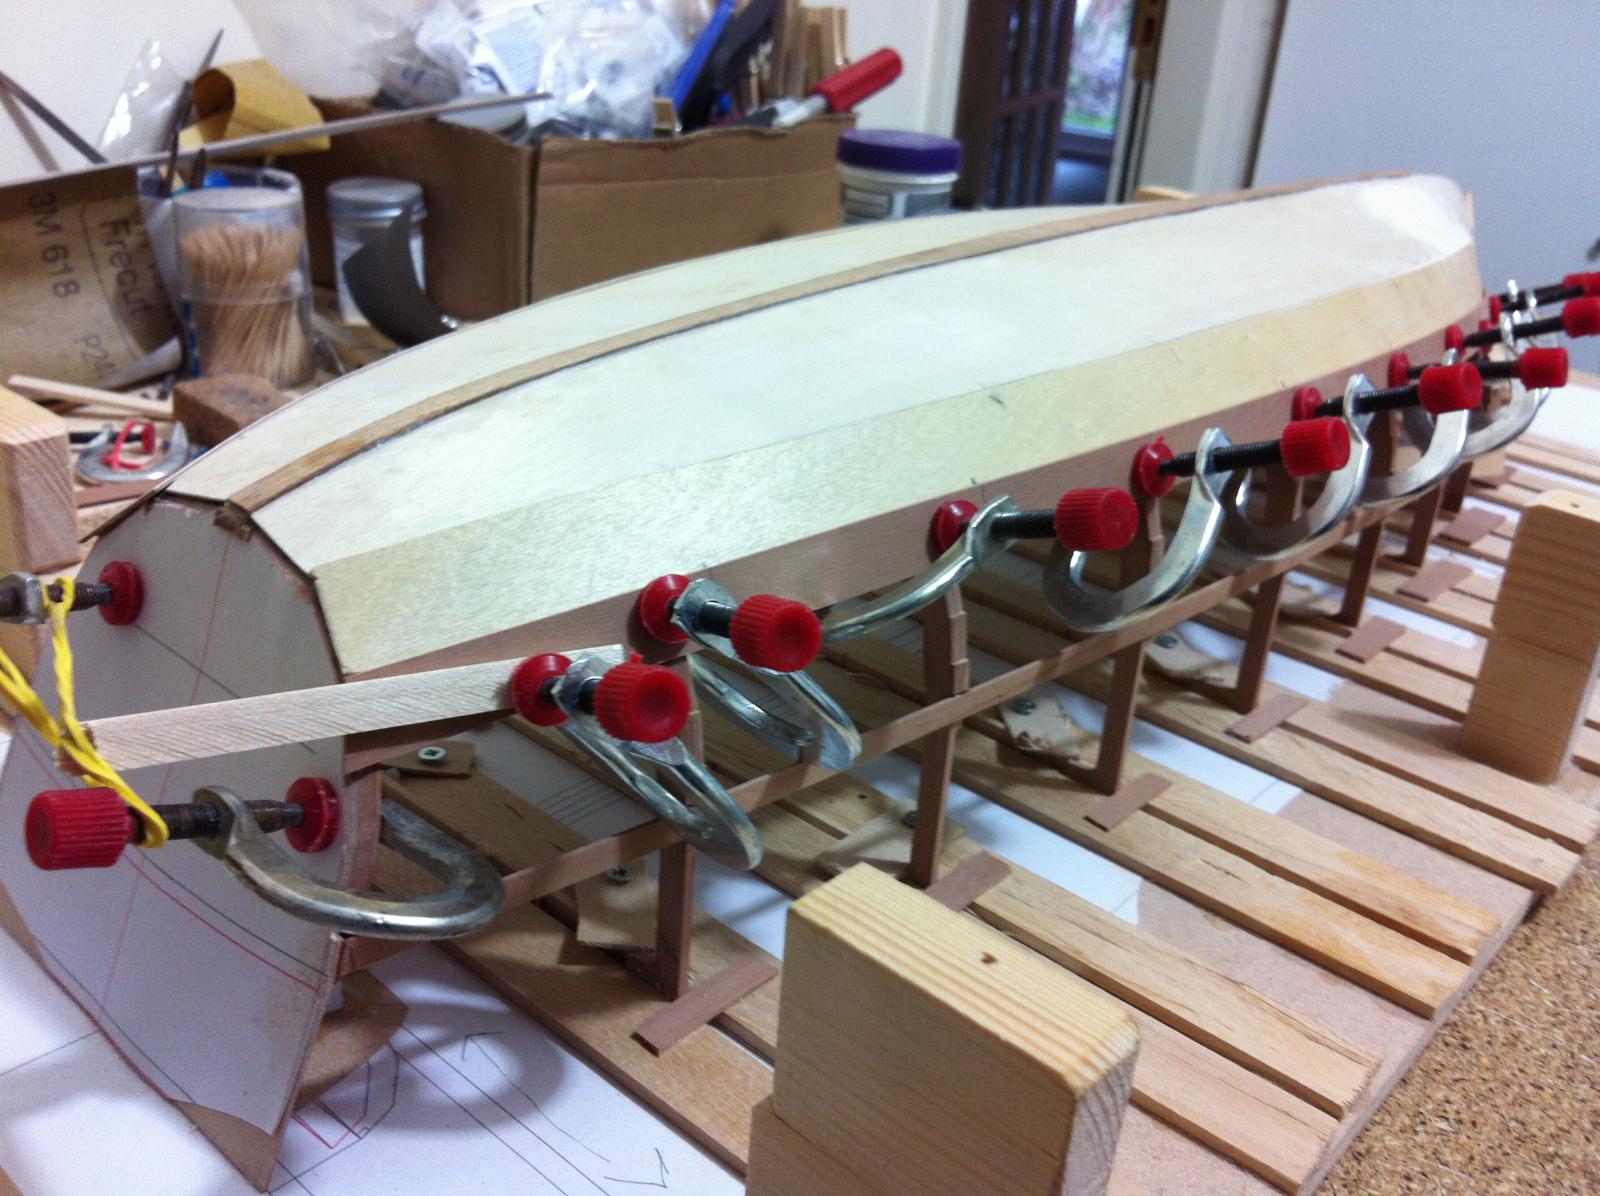
The bottom panels are now solidly glued to the frames and transom so it was possible to finally glue to the stem which was much simpler than I expected. I have cut the panels much larger, to be trimmed afterwards.


The apron laminate is still incomplete, there is 1 mm to be added. The structure is so strong that instead of two layers of 0.5 mm I will just add a 1mm walnut strip. The next photos show the test fitting

There is about 1 mm gap as fitting snugly the bottom panels to the apron was beyond my skills. This will be filled however later on. The panels will also need fairing and this will be done before adding the remaining planking.
Next I sanded the panels to the stem surface, preparing for the lamination of the false stem
And I added the final layer to the apron
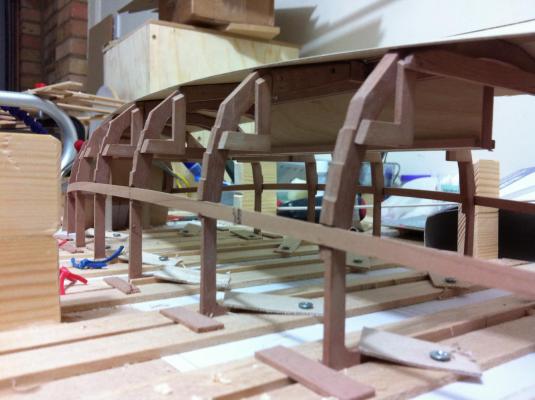
I suspect the structure now is very rigid. The jig is in the way so I cut it in half and removed one side to have more space to trim the bottom panel. There was absolutely no play in the hull.


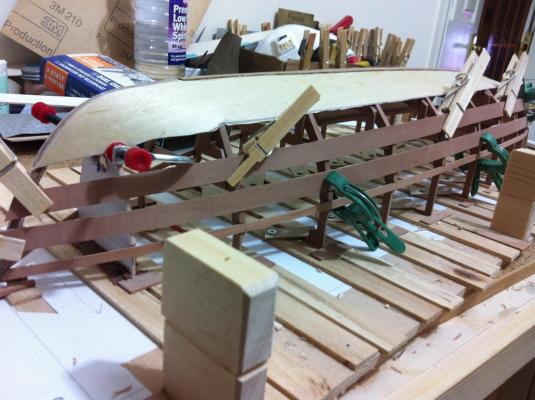
The next panel (lower chine) will overlap the bottom panel so I can use it as guide to trim appropriately. This is done very carefully as removing to much wood will lead to a hole in the hull and much excitement.

I realised though that the other half of the jig was still in the way, so I removed it. The hull is rock solid. Could not resist some photos though!


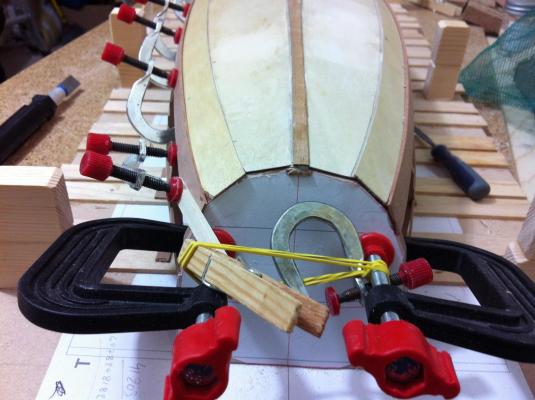
The apron is now fully laminated and I have a suspicion that the gap is actually filled by the excess epoxy that squeezed out but I ll check this later. I have also trimmed one panel but only up to frame 1 as trimming up to the stem will be a more complex issue.

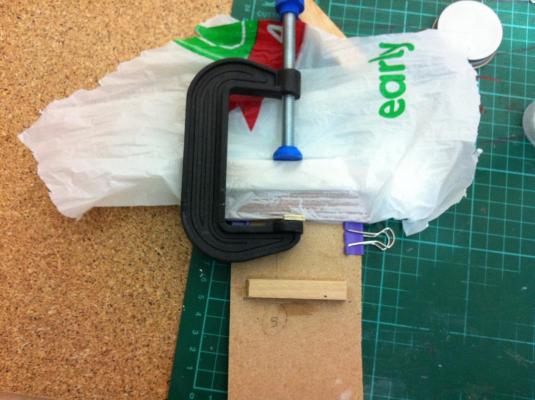
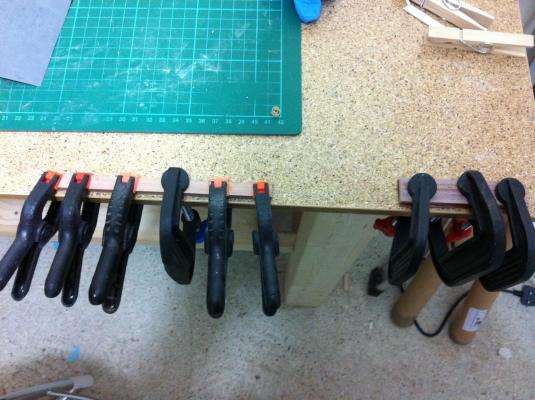
The last three photos show the outer clamp and the test fitting of planks No 2 and 4. I must say, they fit like a glove and rest effortlessly on the notches at every frame!
A rather pressing problem is what to use for fairing the panels. I tried some filling putty from a DIY store but it is not fit for purpose, it dries very quickly and is very hard to sand. Any suggestions?
- IgorSky, mtaylor, qwerty2008 and 4 others
-
7


24' gaff-rigged ketch by vaddoc - FINISHED - Scale 1:12- exploration - a Tad Roberts design
in - Build logs for subjects built 1901 - Present Day
Posted
Thanks, I know what you mean. Never thought of using it for modelling!