HOLIDAY DONATION DRIVE - SUPPORT MSW - DO YOUR PART TO KEEP THIS GREAT FORUM GOING! (89 donations so far out of 49,000 members - C'mon guys!)
×


Bedford
-
Posts
1,297 -
Joined
-
Last visited
Content Type
Profiles
Forums
Gallery
Events
Everything posted by Bedford
-
 Yeah I didn't think you'd make a mistake like that but thought it should be pointed out just in case. There are people who really can't get their heads around gears and the like.
 -
A lot of the ability comes from the machines and patience
-
Beautiful work Valeriy but unless I'm missing something it appears that one of the "V" cut gears needs to be turned the other way, those teeth won't mesh like that.
-
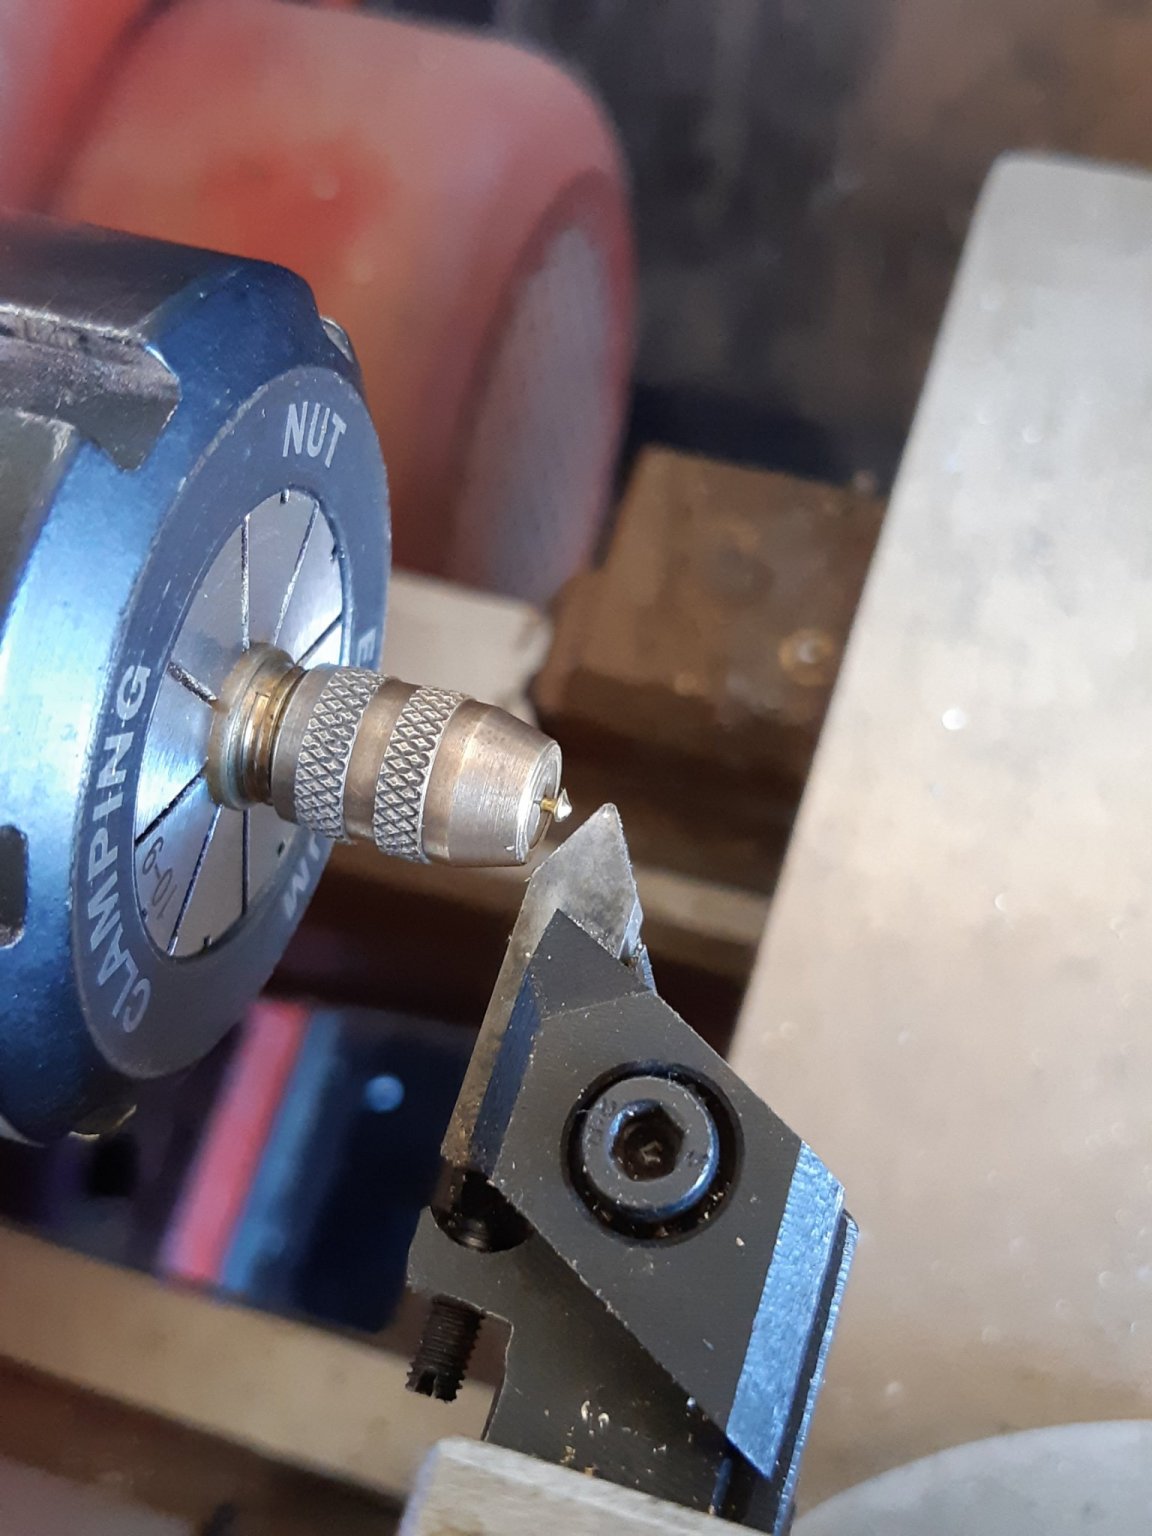
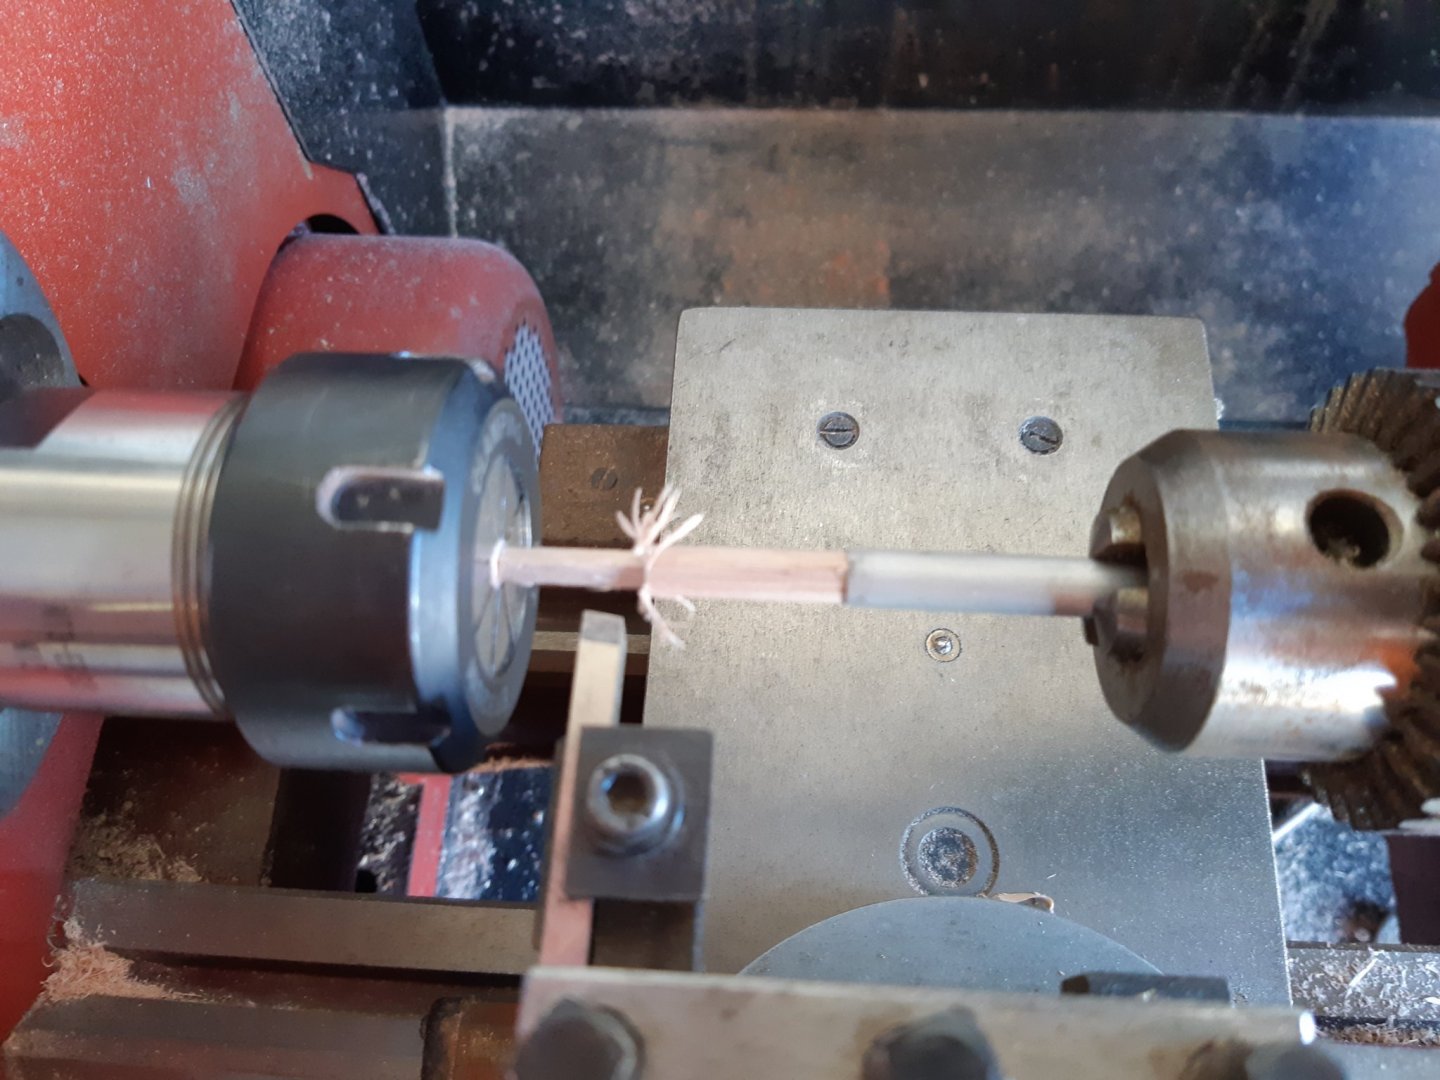
I found the perfect collet chuck for holding those tiny nails etc. It was the chuck in an elcheapo dremel knock off I used years ago. Glad I kept the motor part when I chucked the rest out. The chuck was held to the motor shaft with a grub screw so it was easy to remove and does a great job.
-
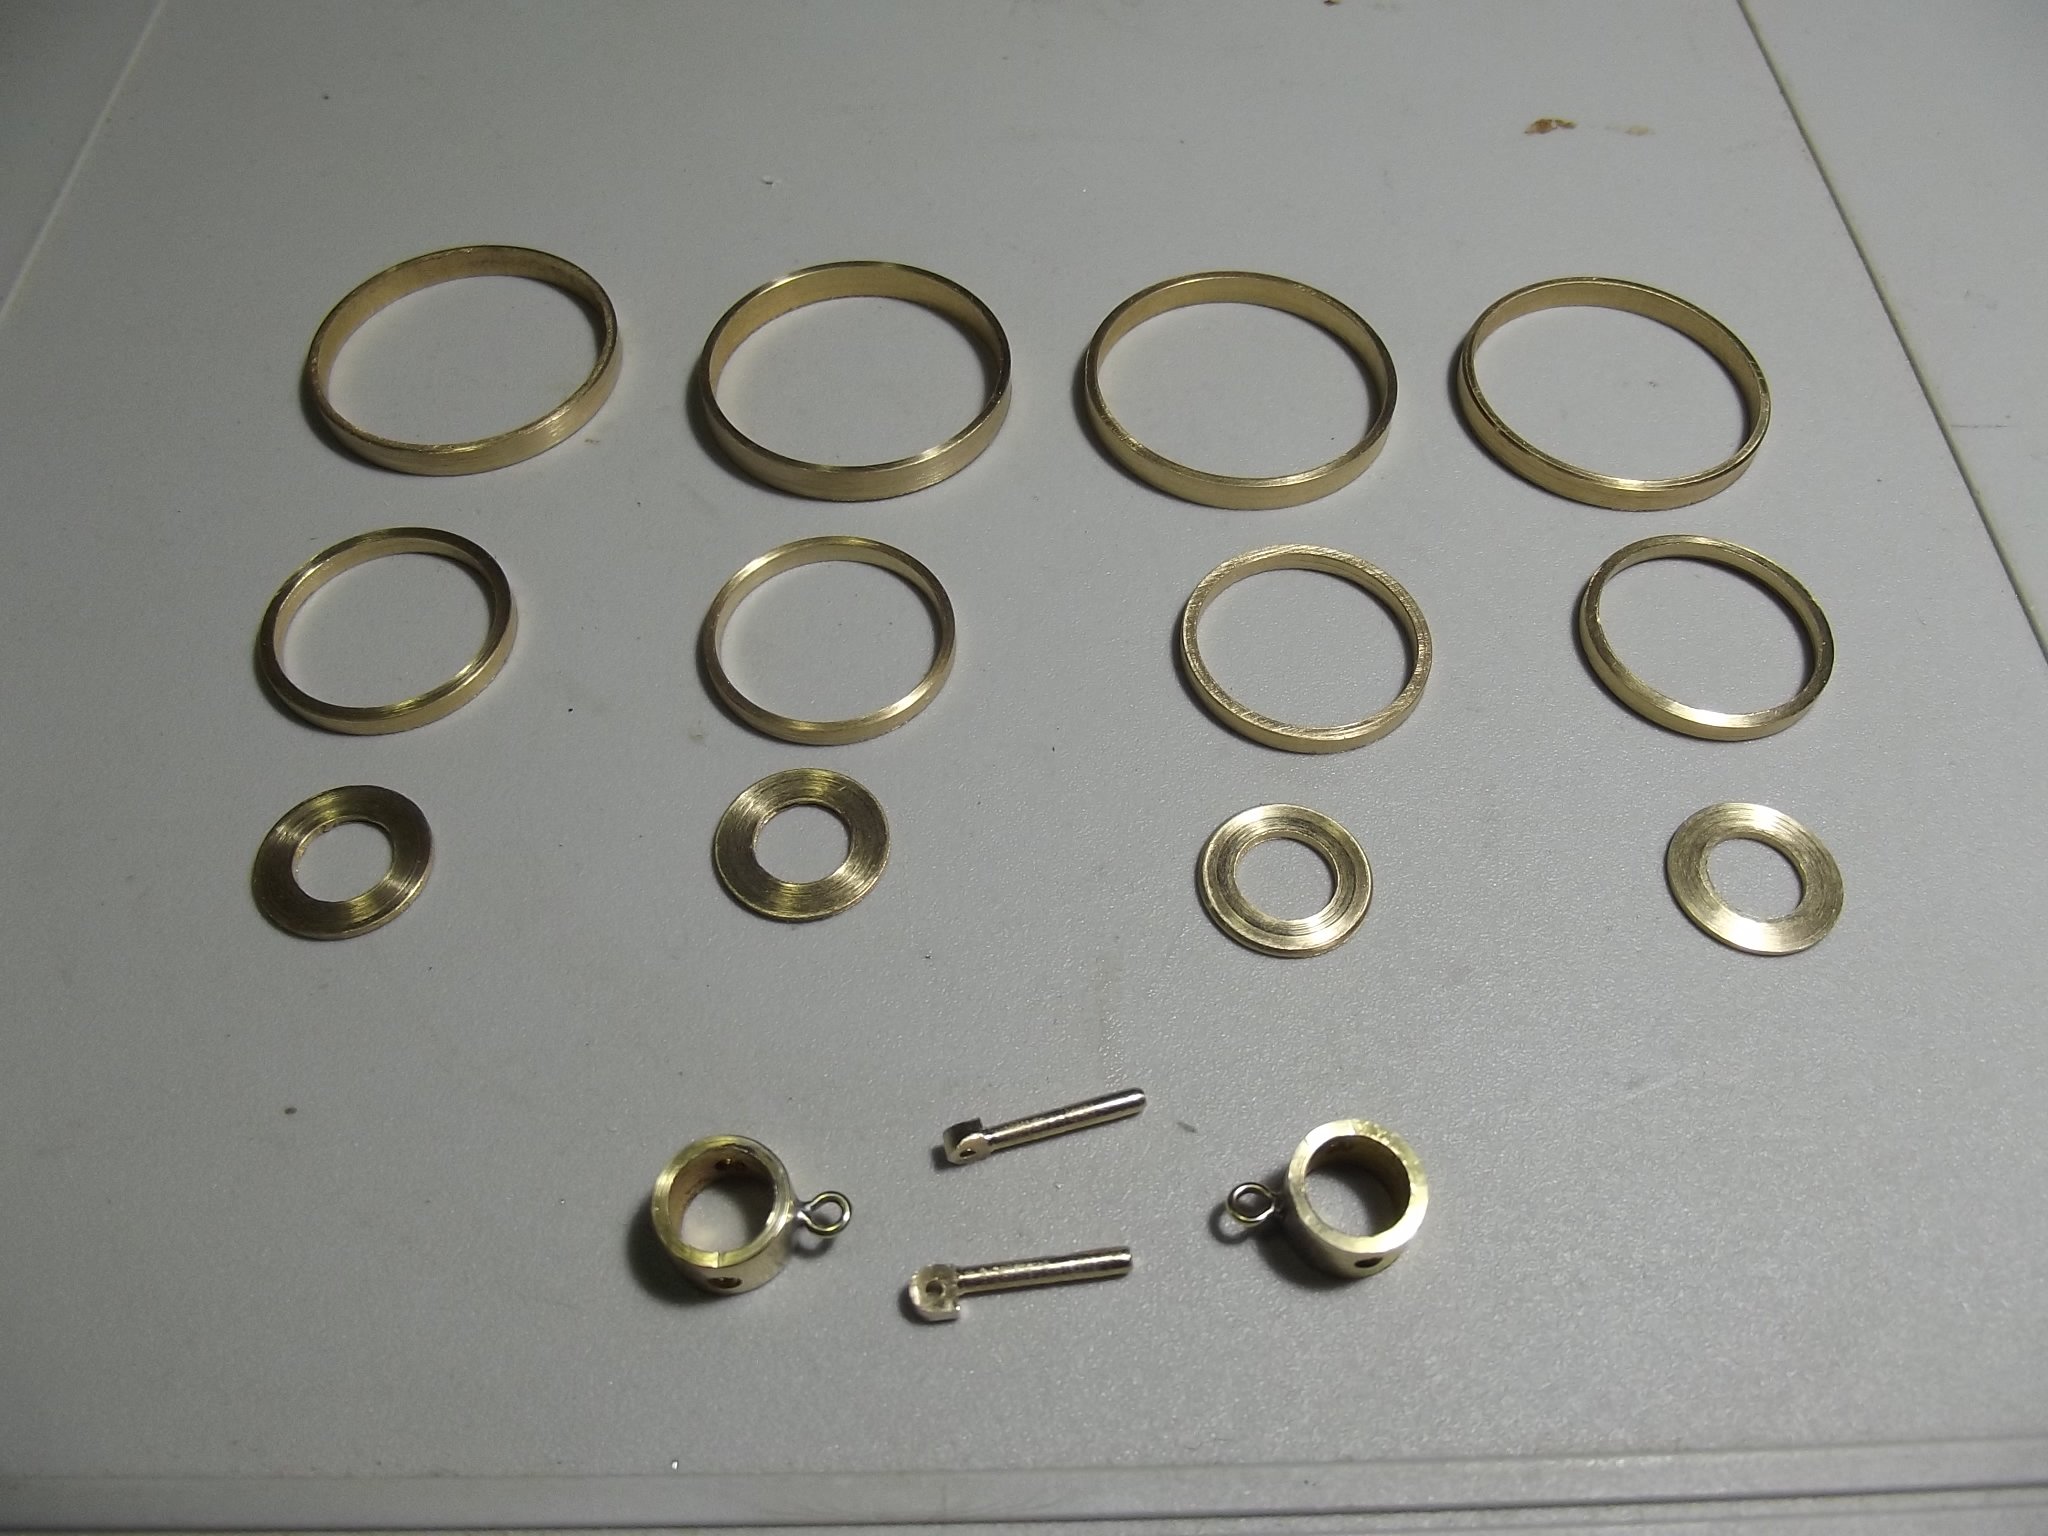
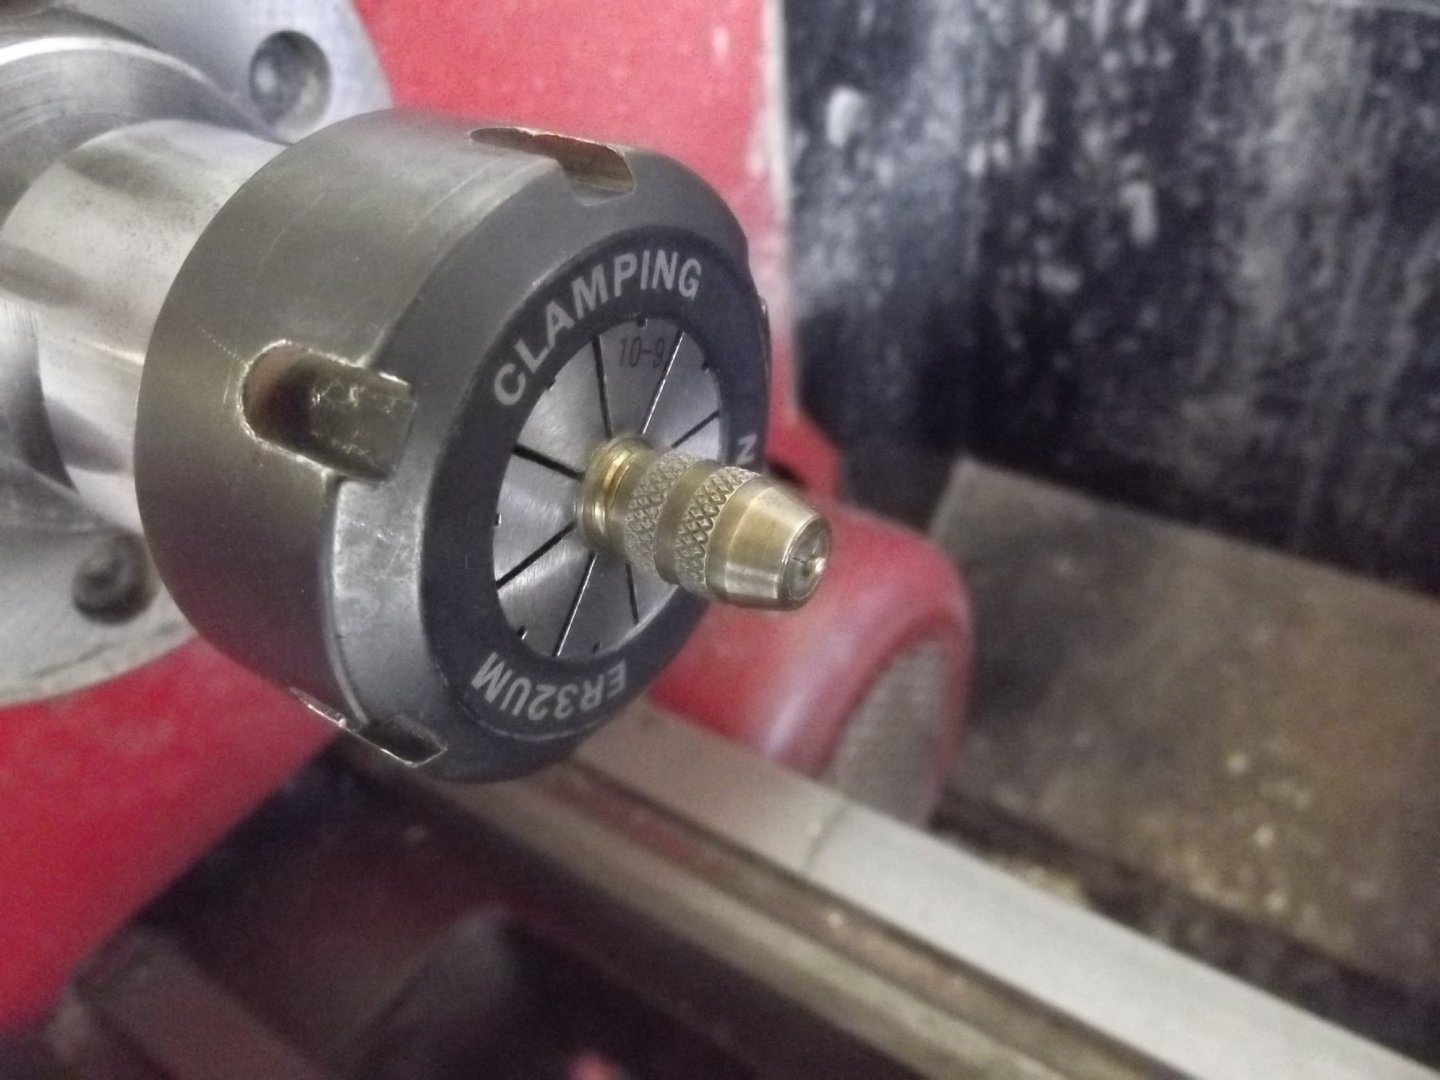
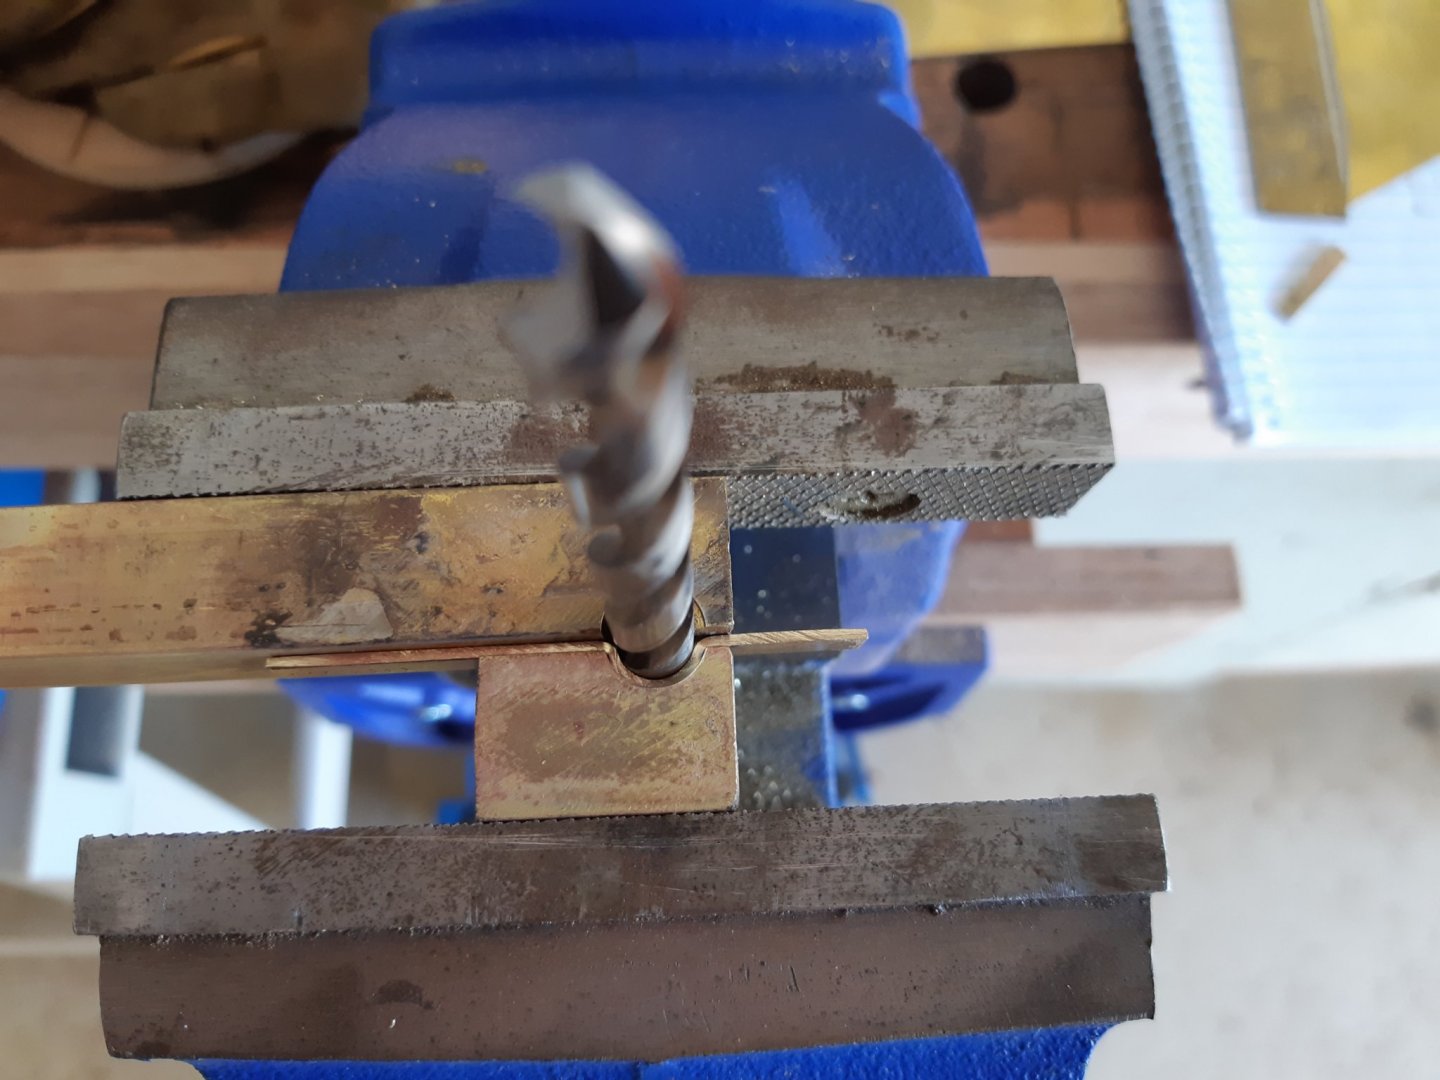
In the last pic above you can see two brass studs with conical heads. I have used these throughout the build and they are the small brass nails that come with ship kits. The heads on them are awful so I have reduced them in size and centered the heads by turning the angle into them. To do this in my lathe was difficult because even the jacobs chuck that fits the headstock would not hold them. After I bought a set of ER32 collet blocks and chuck I still couldn't hold them because they are only 0.87mm but I remembered a cheap old dremel knock off I had and the collet chuck was very easy to remove so it is now in the lathe tool kit and does a great job.

- 30 replies
-
- 13
-

-
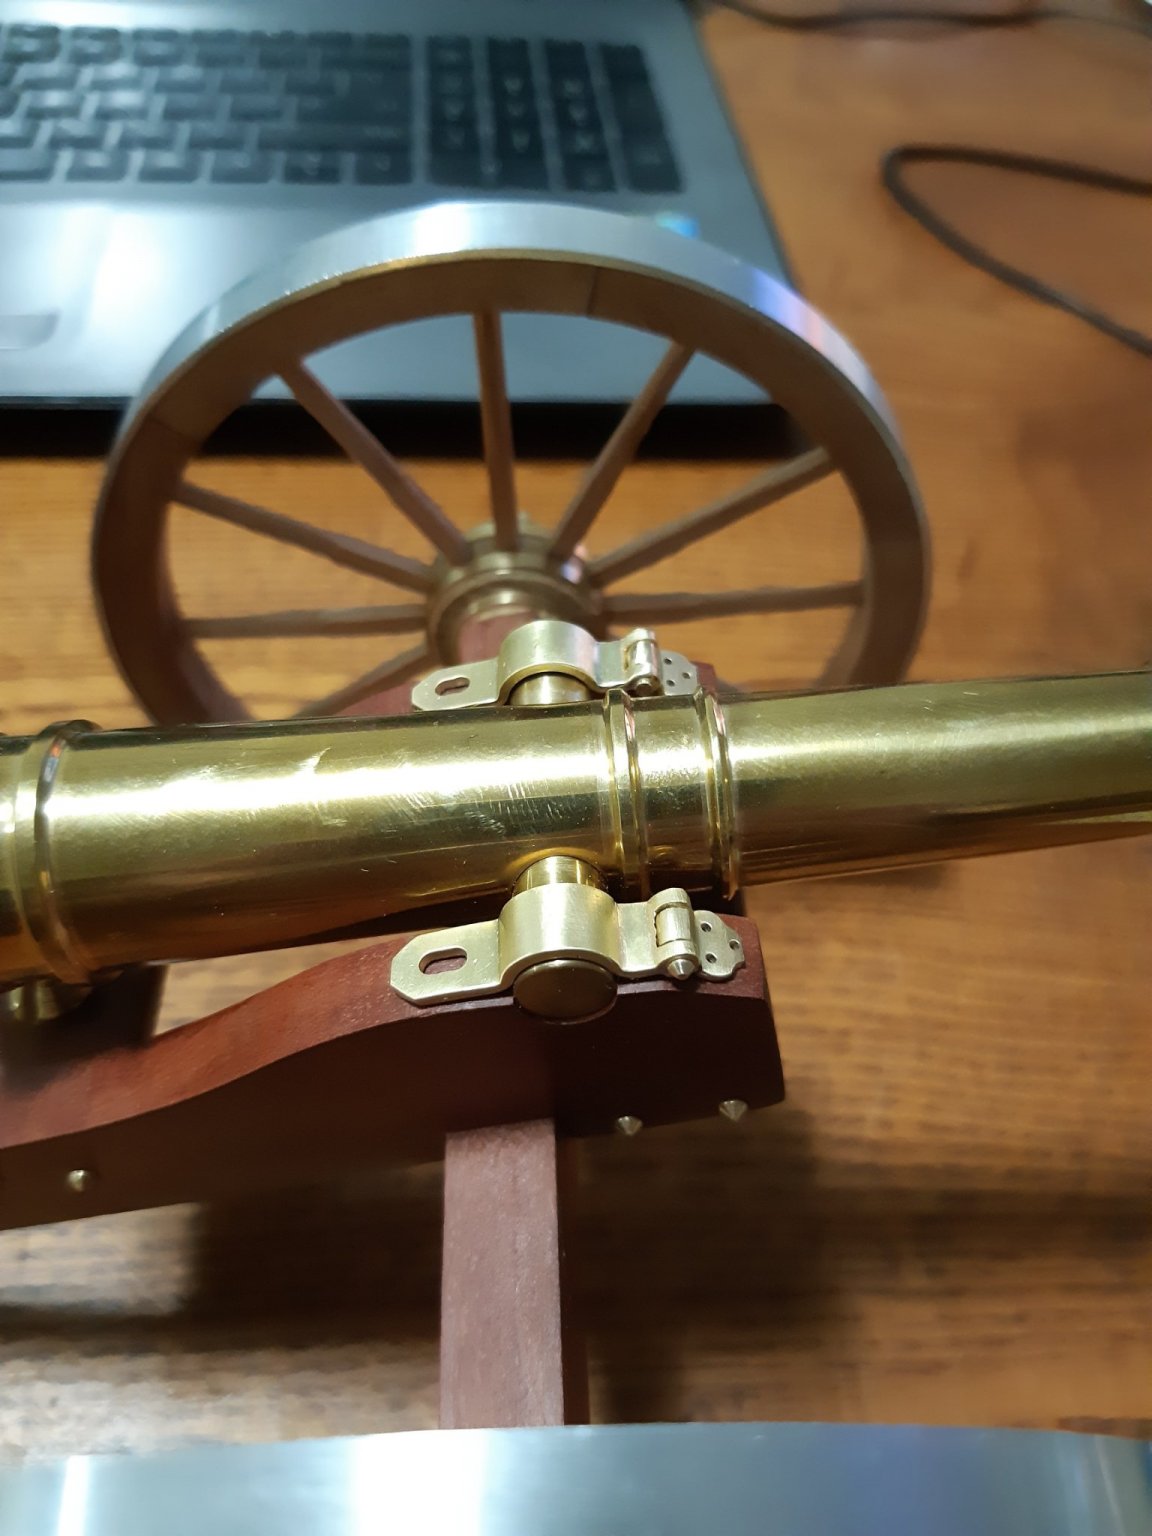
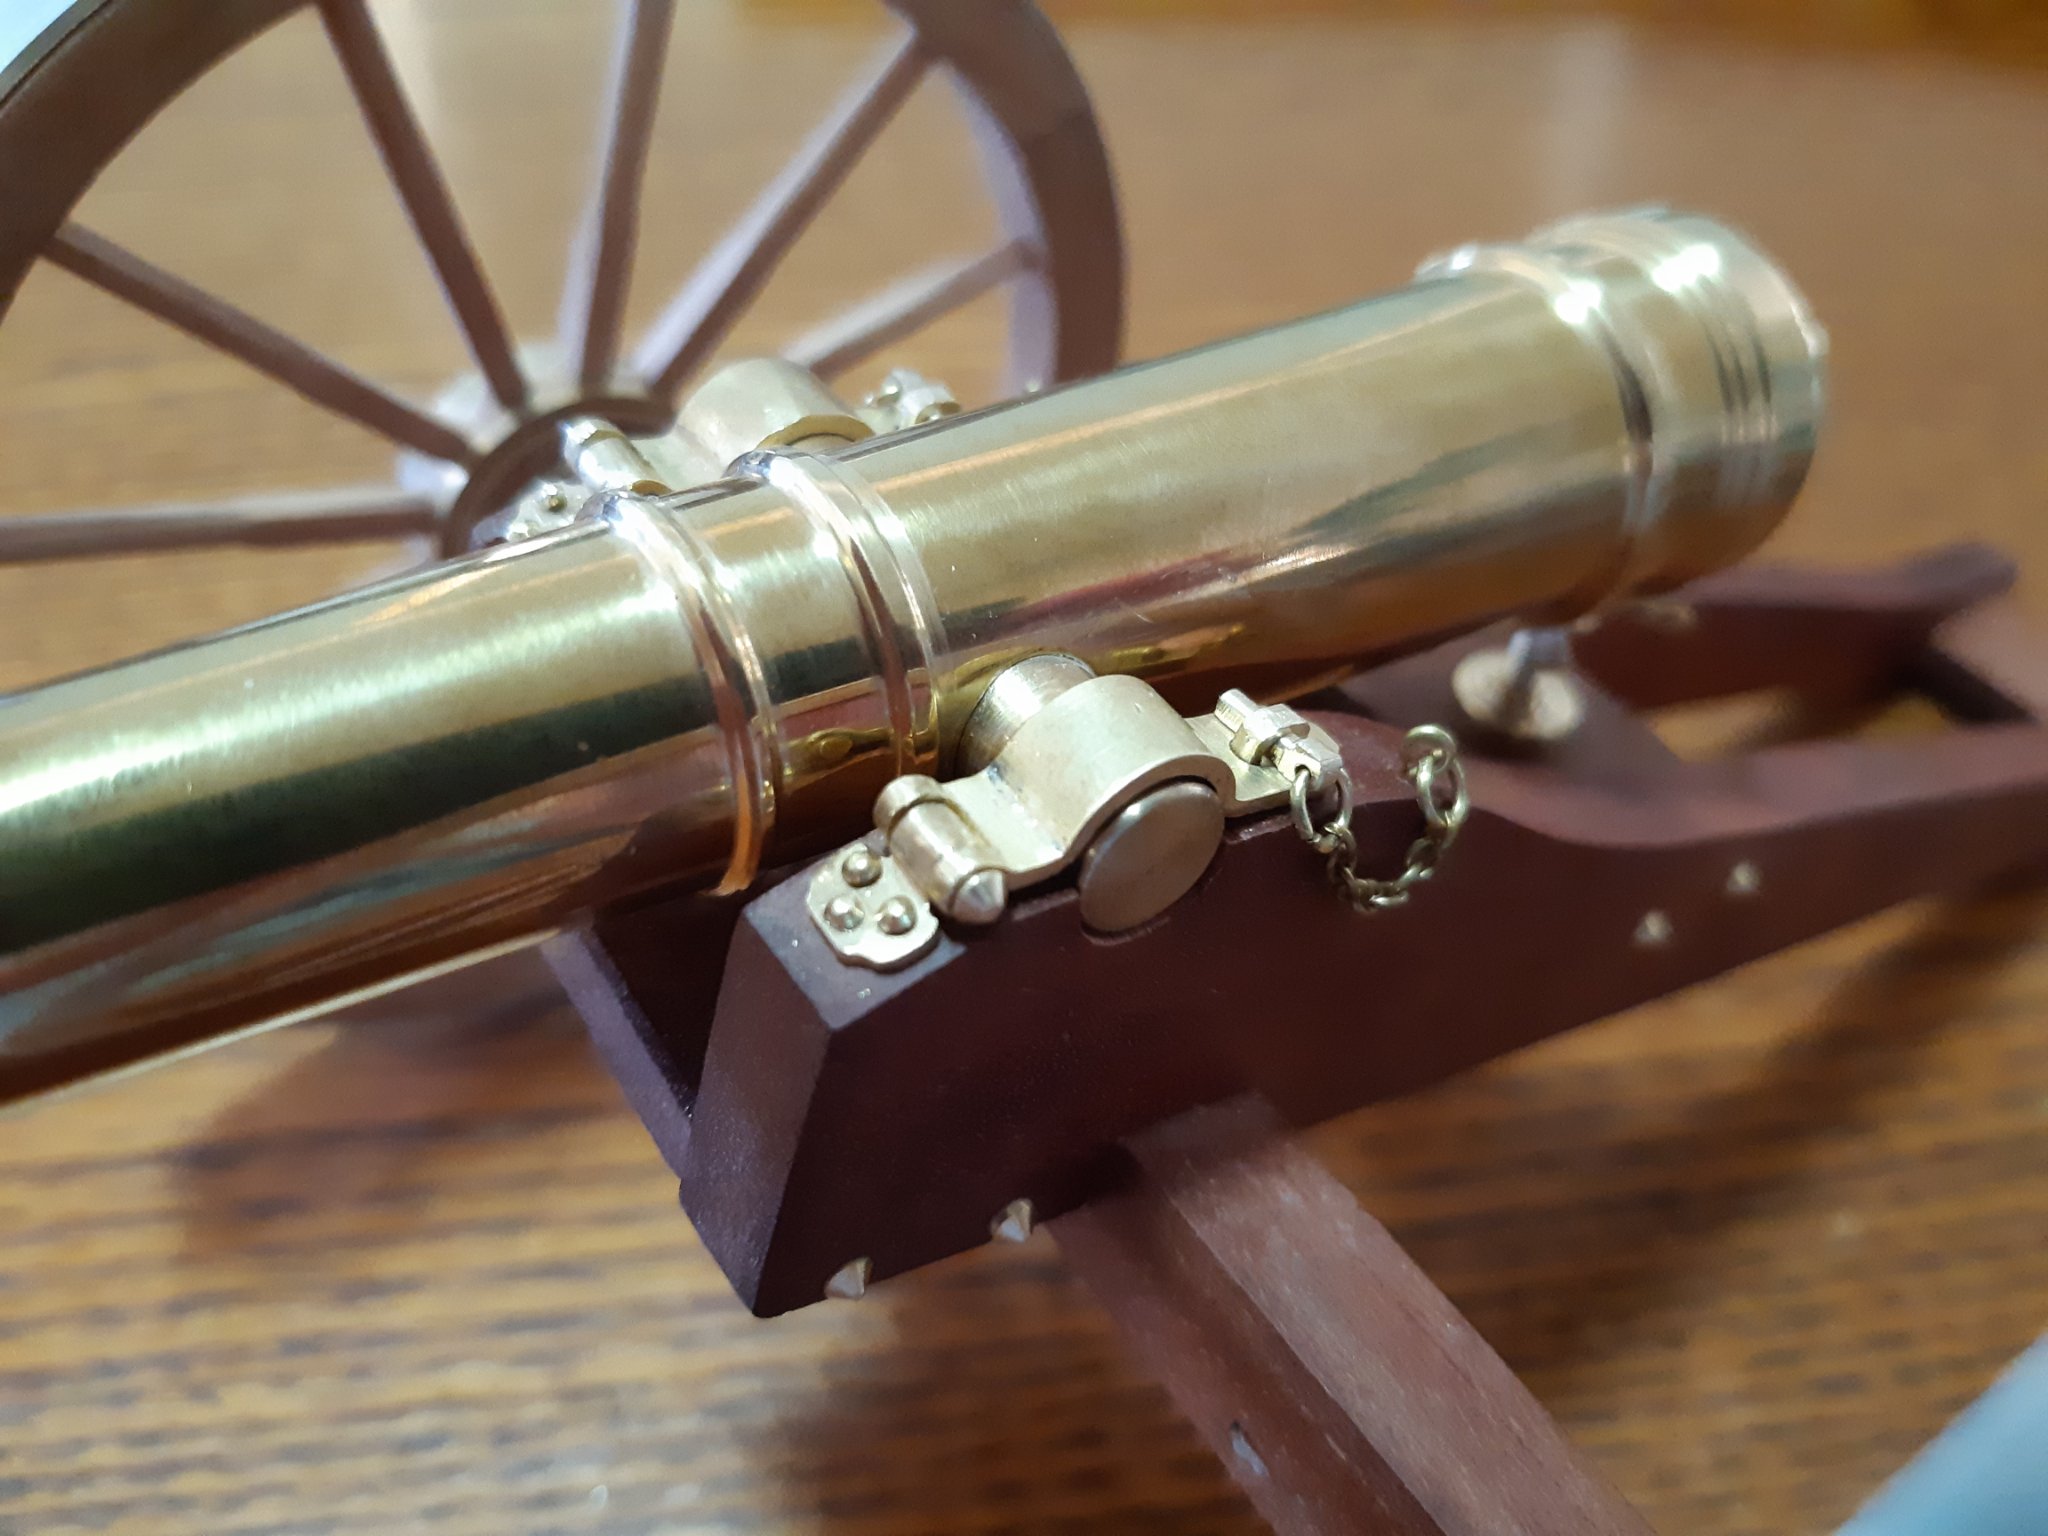
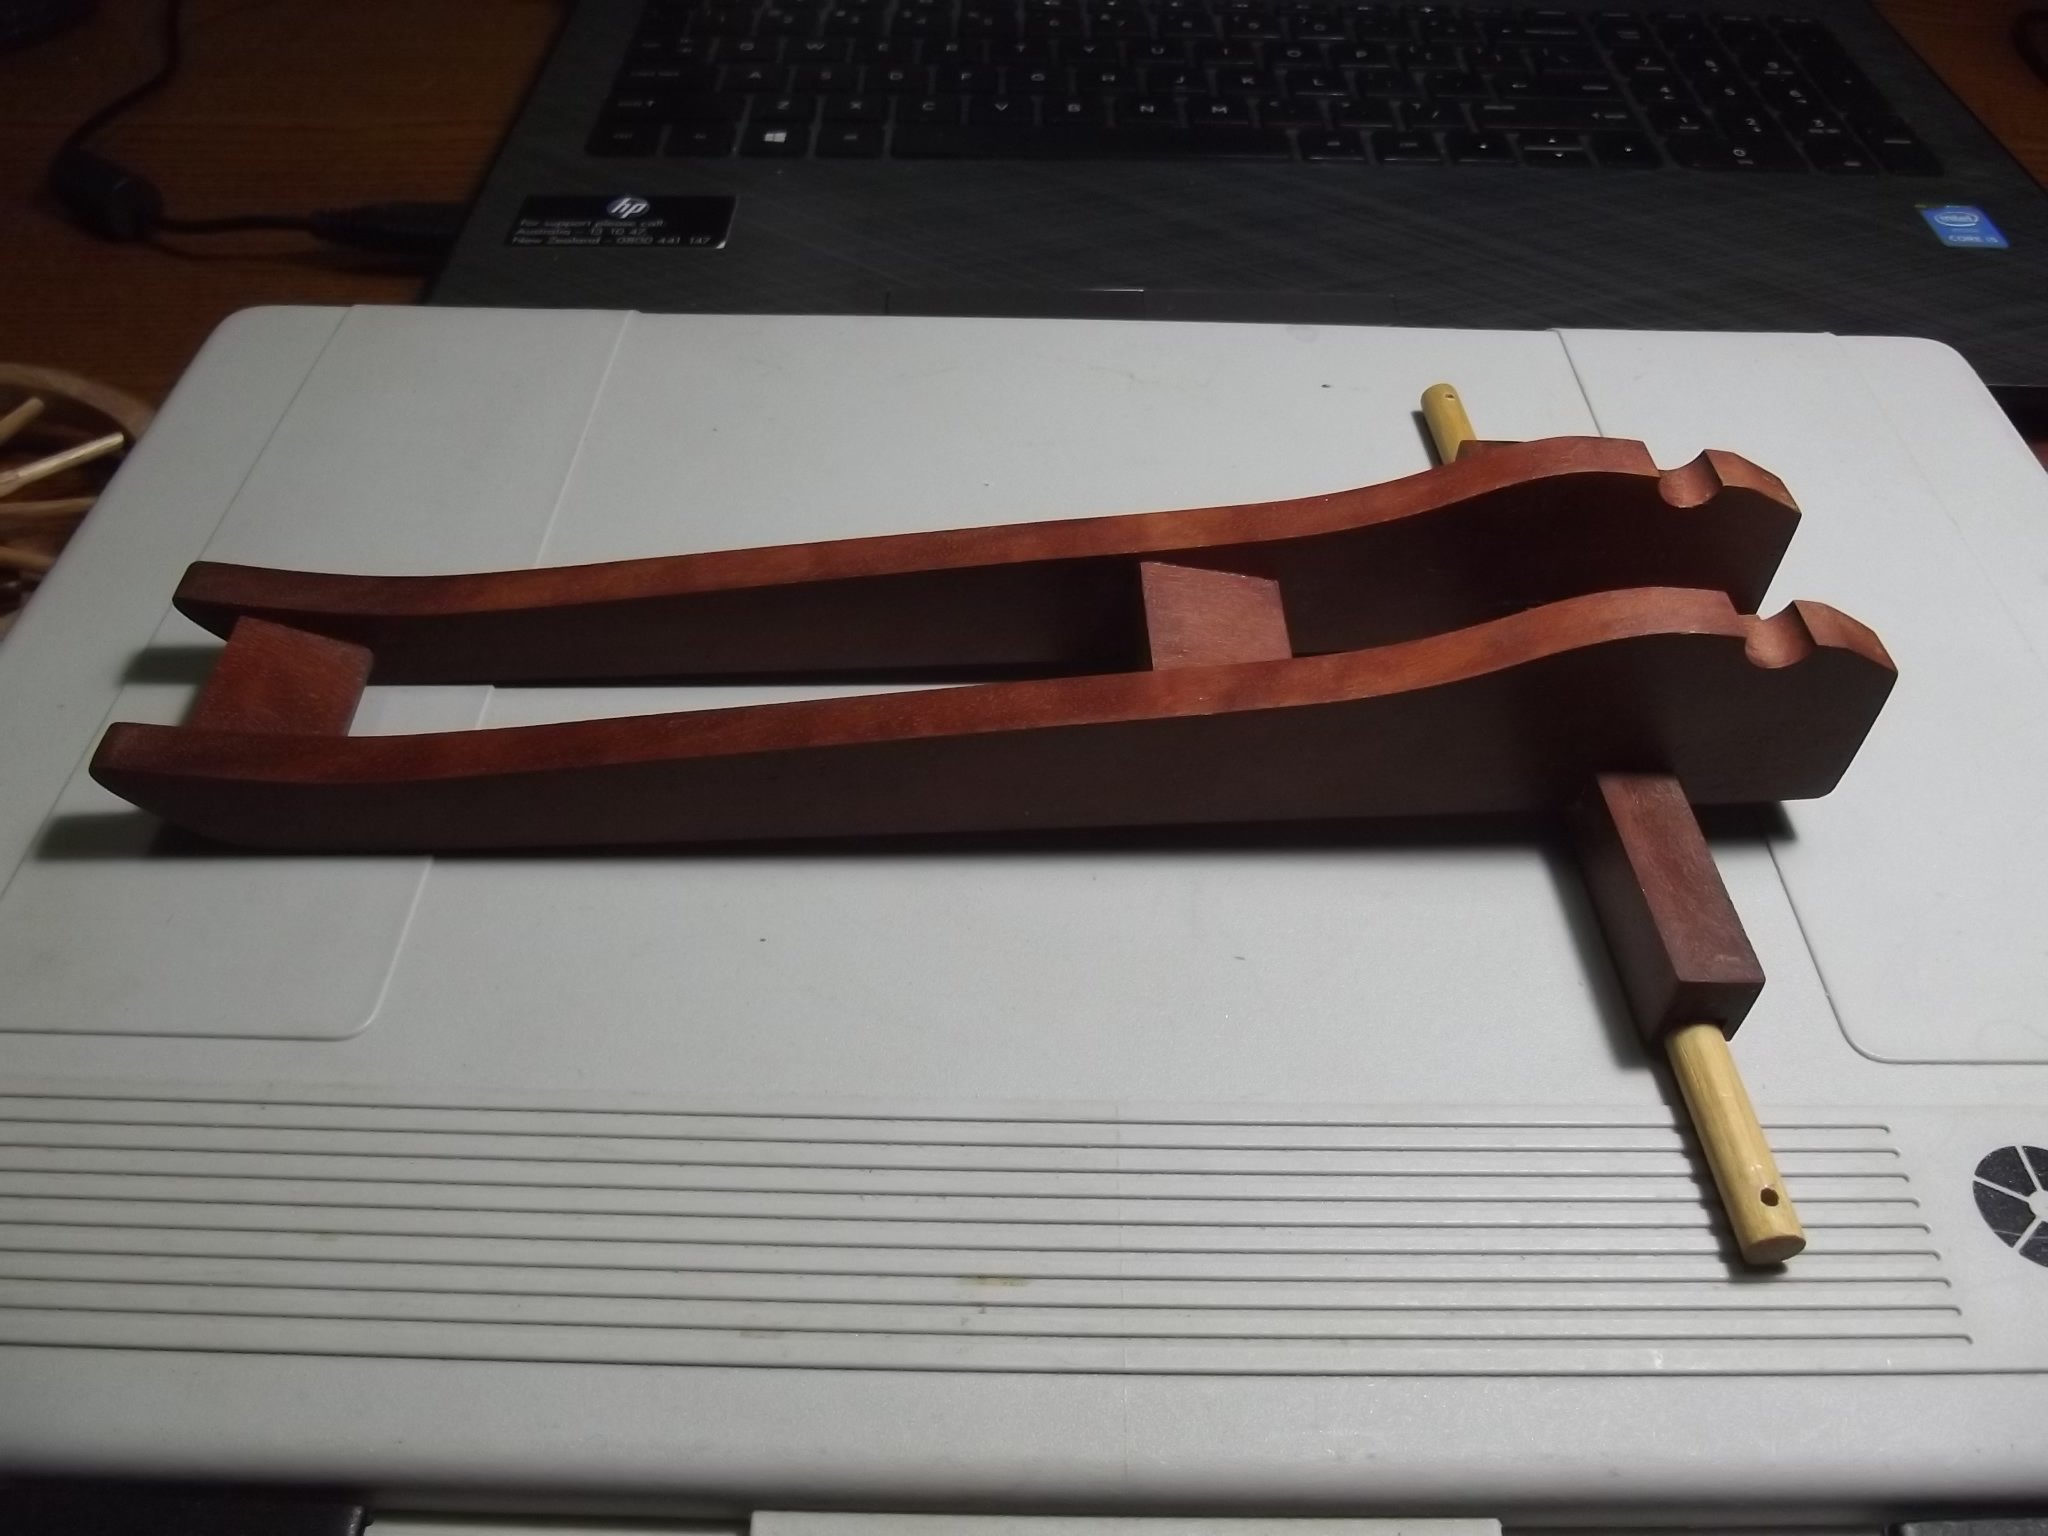
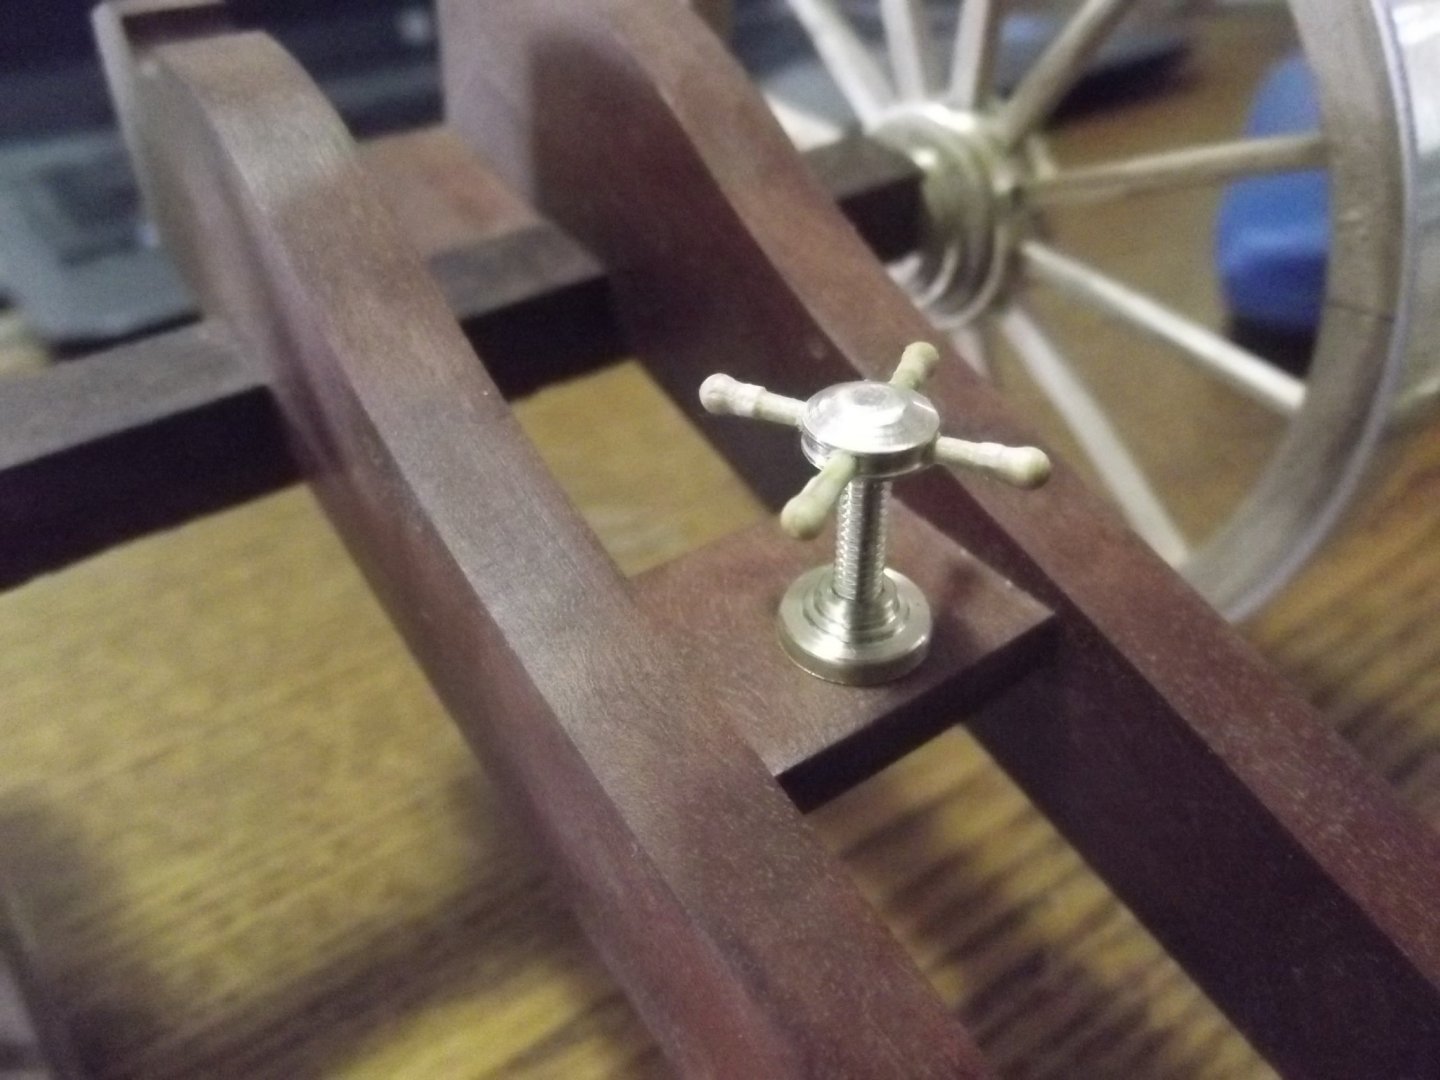
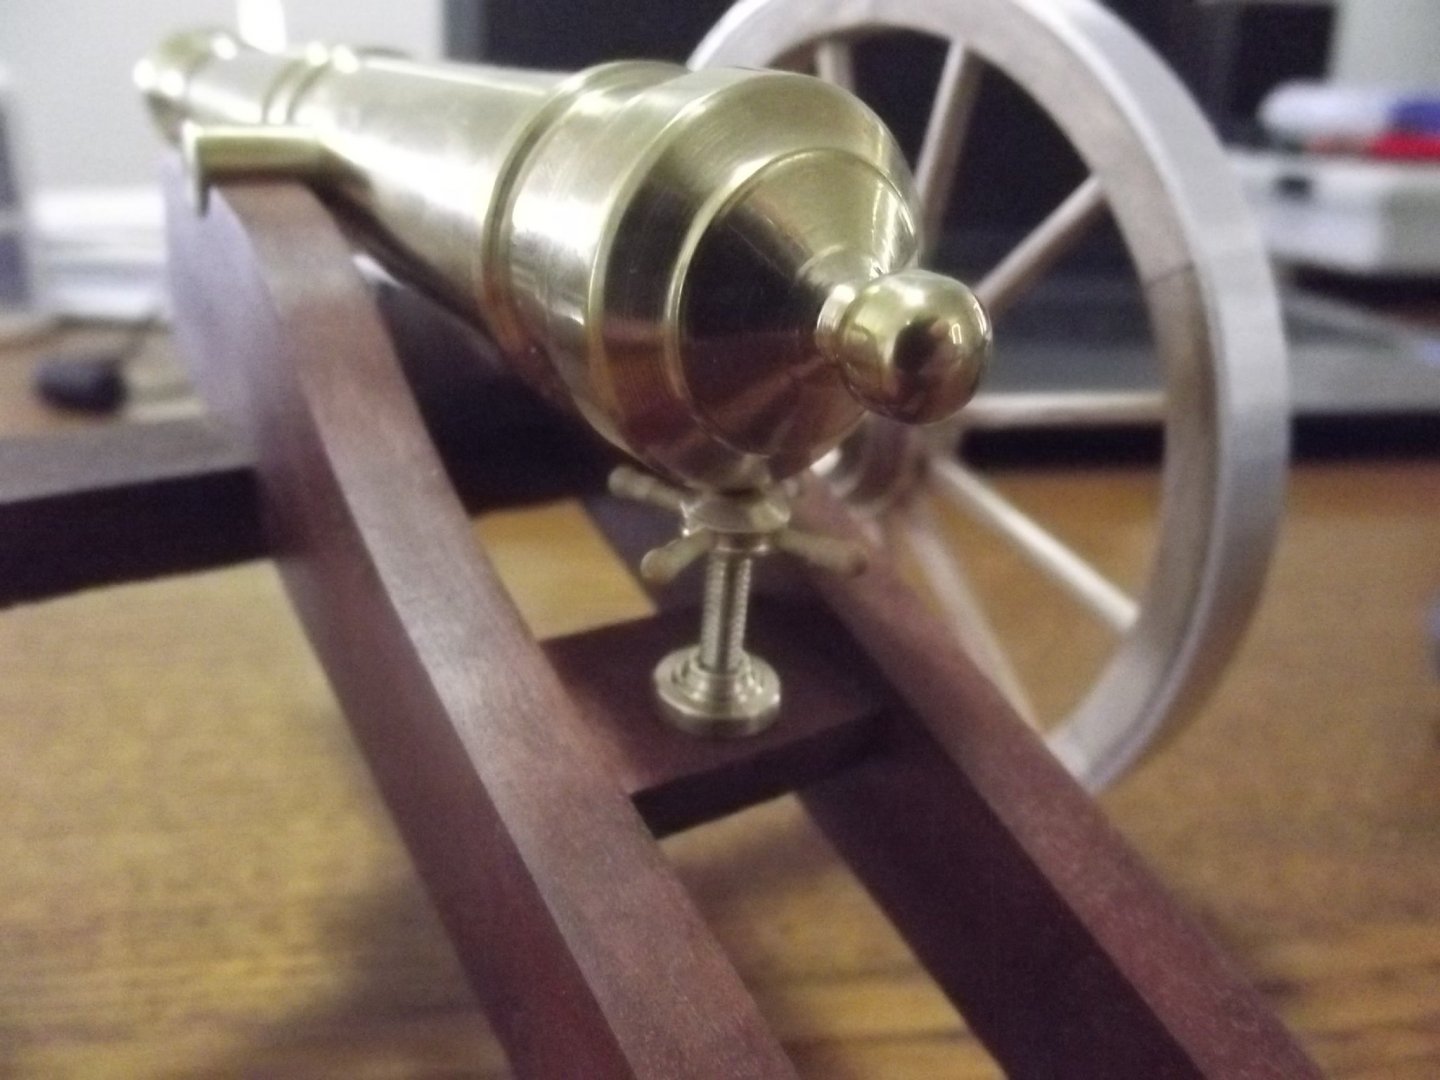
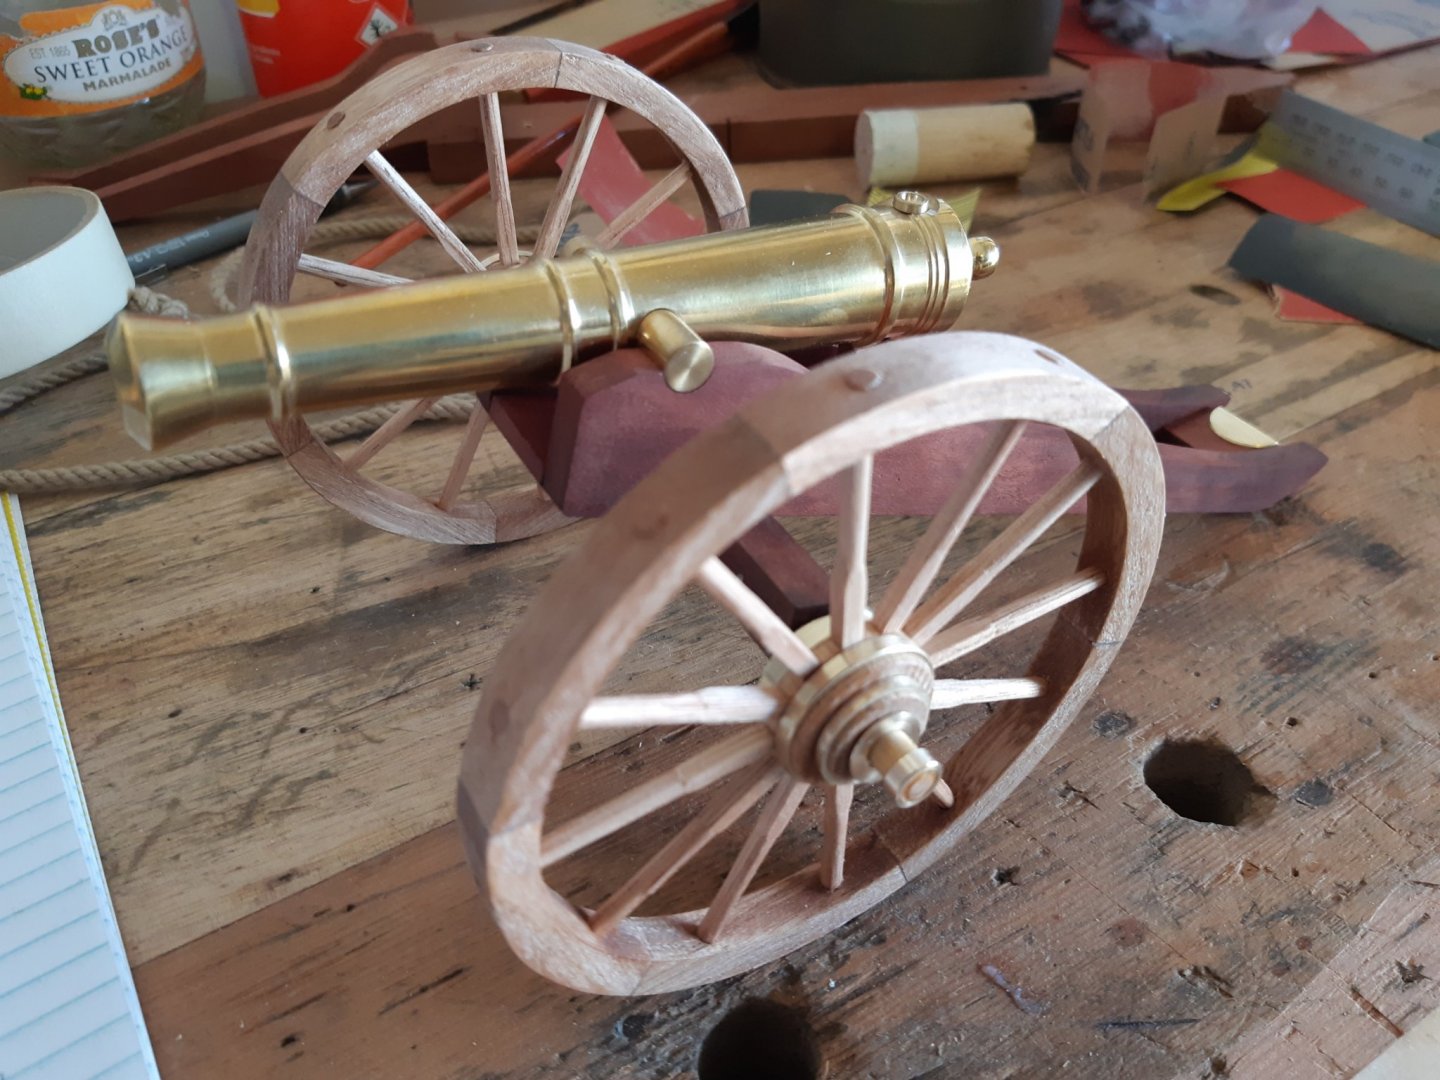
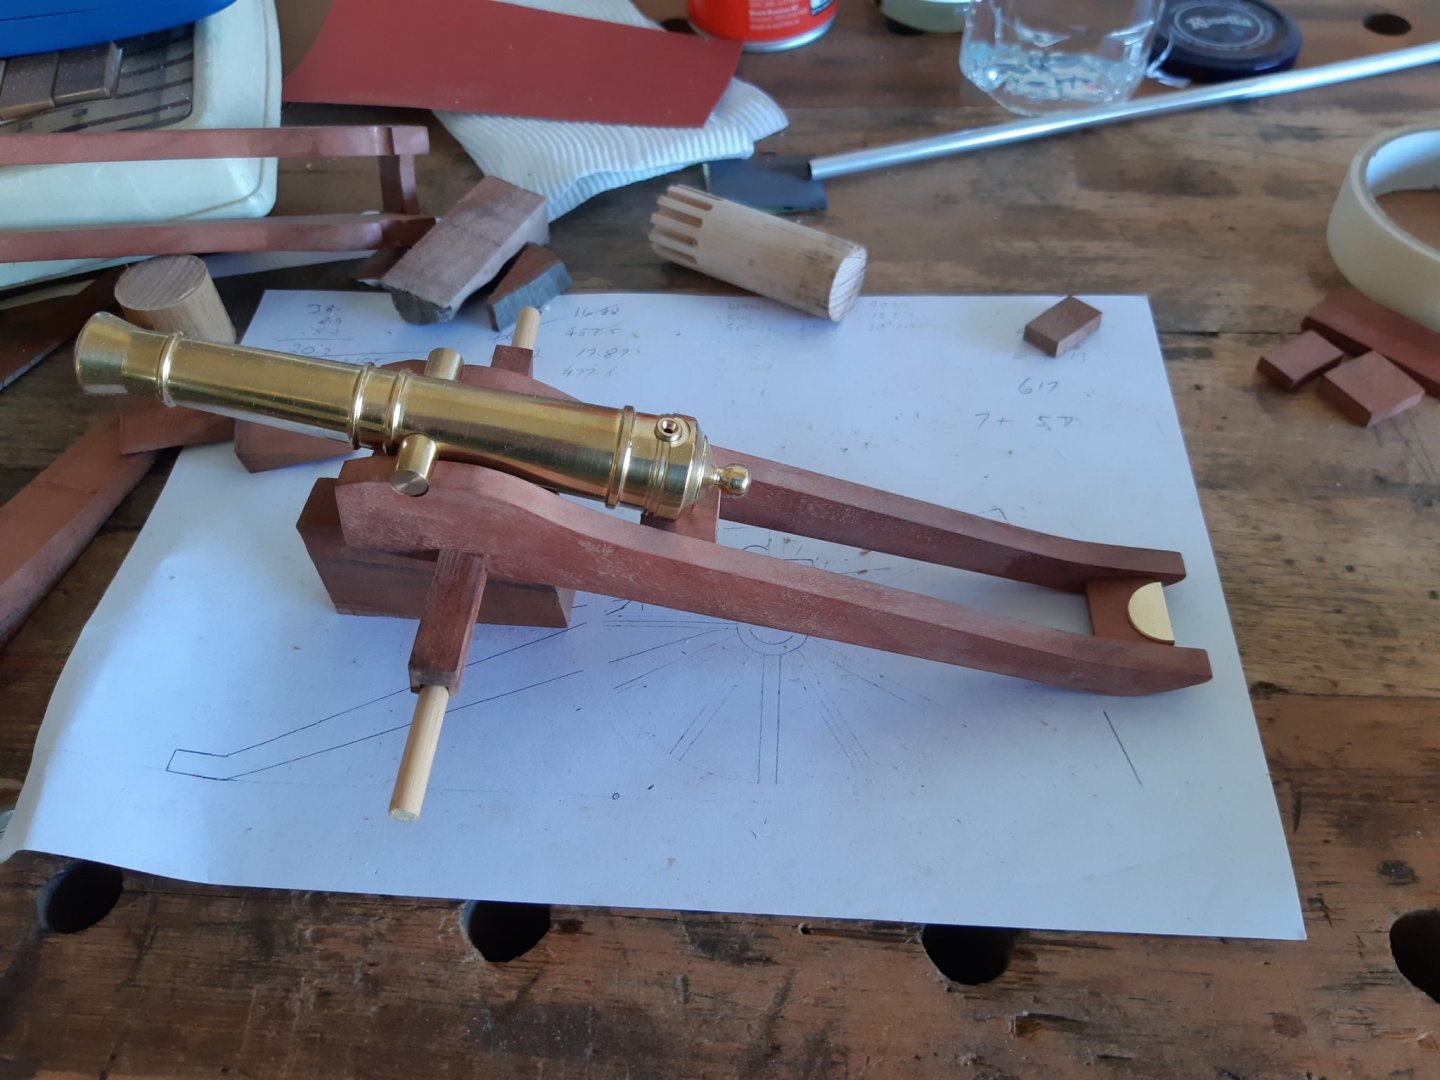
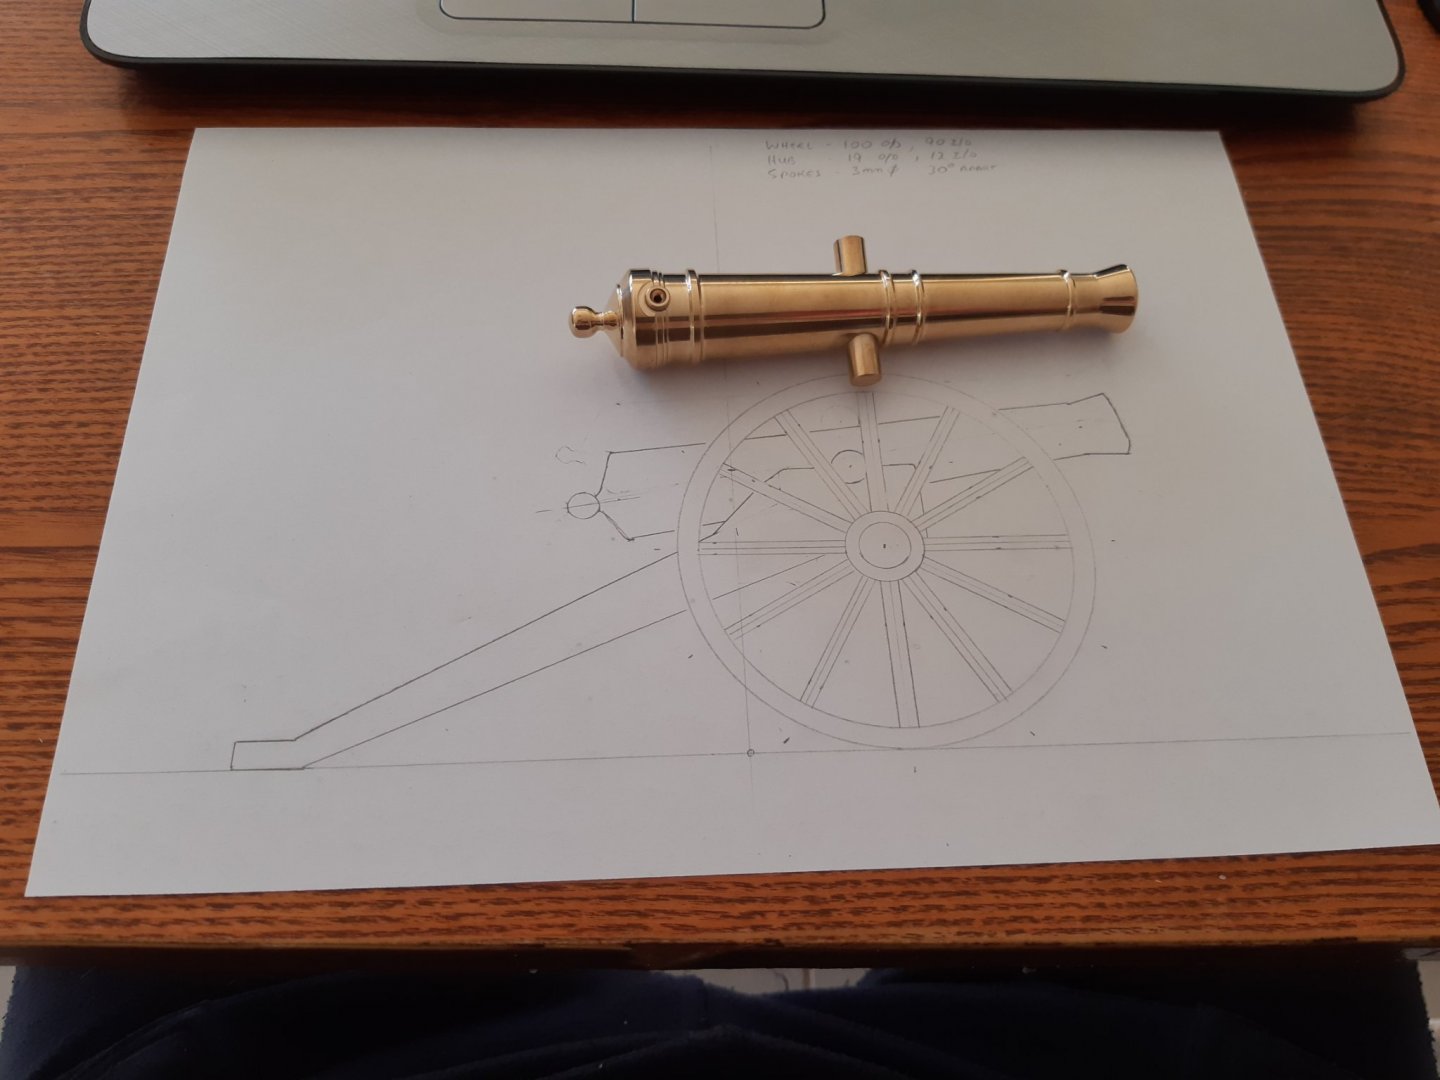
A little bit more hardware, the screw jack and socket for the arm used to turn the gun when aiming (so the vertical and horizontal aiming system) Yes, the wooden handles are belaying pins!

- 30 replies
-
- 14
-
-
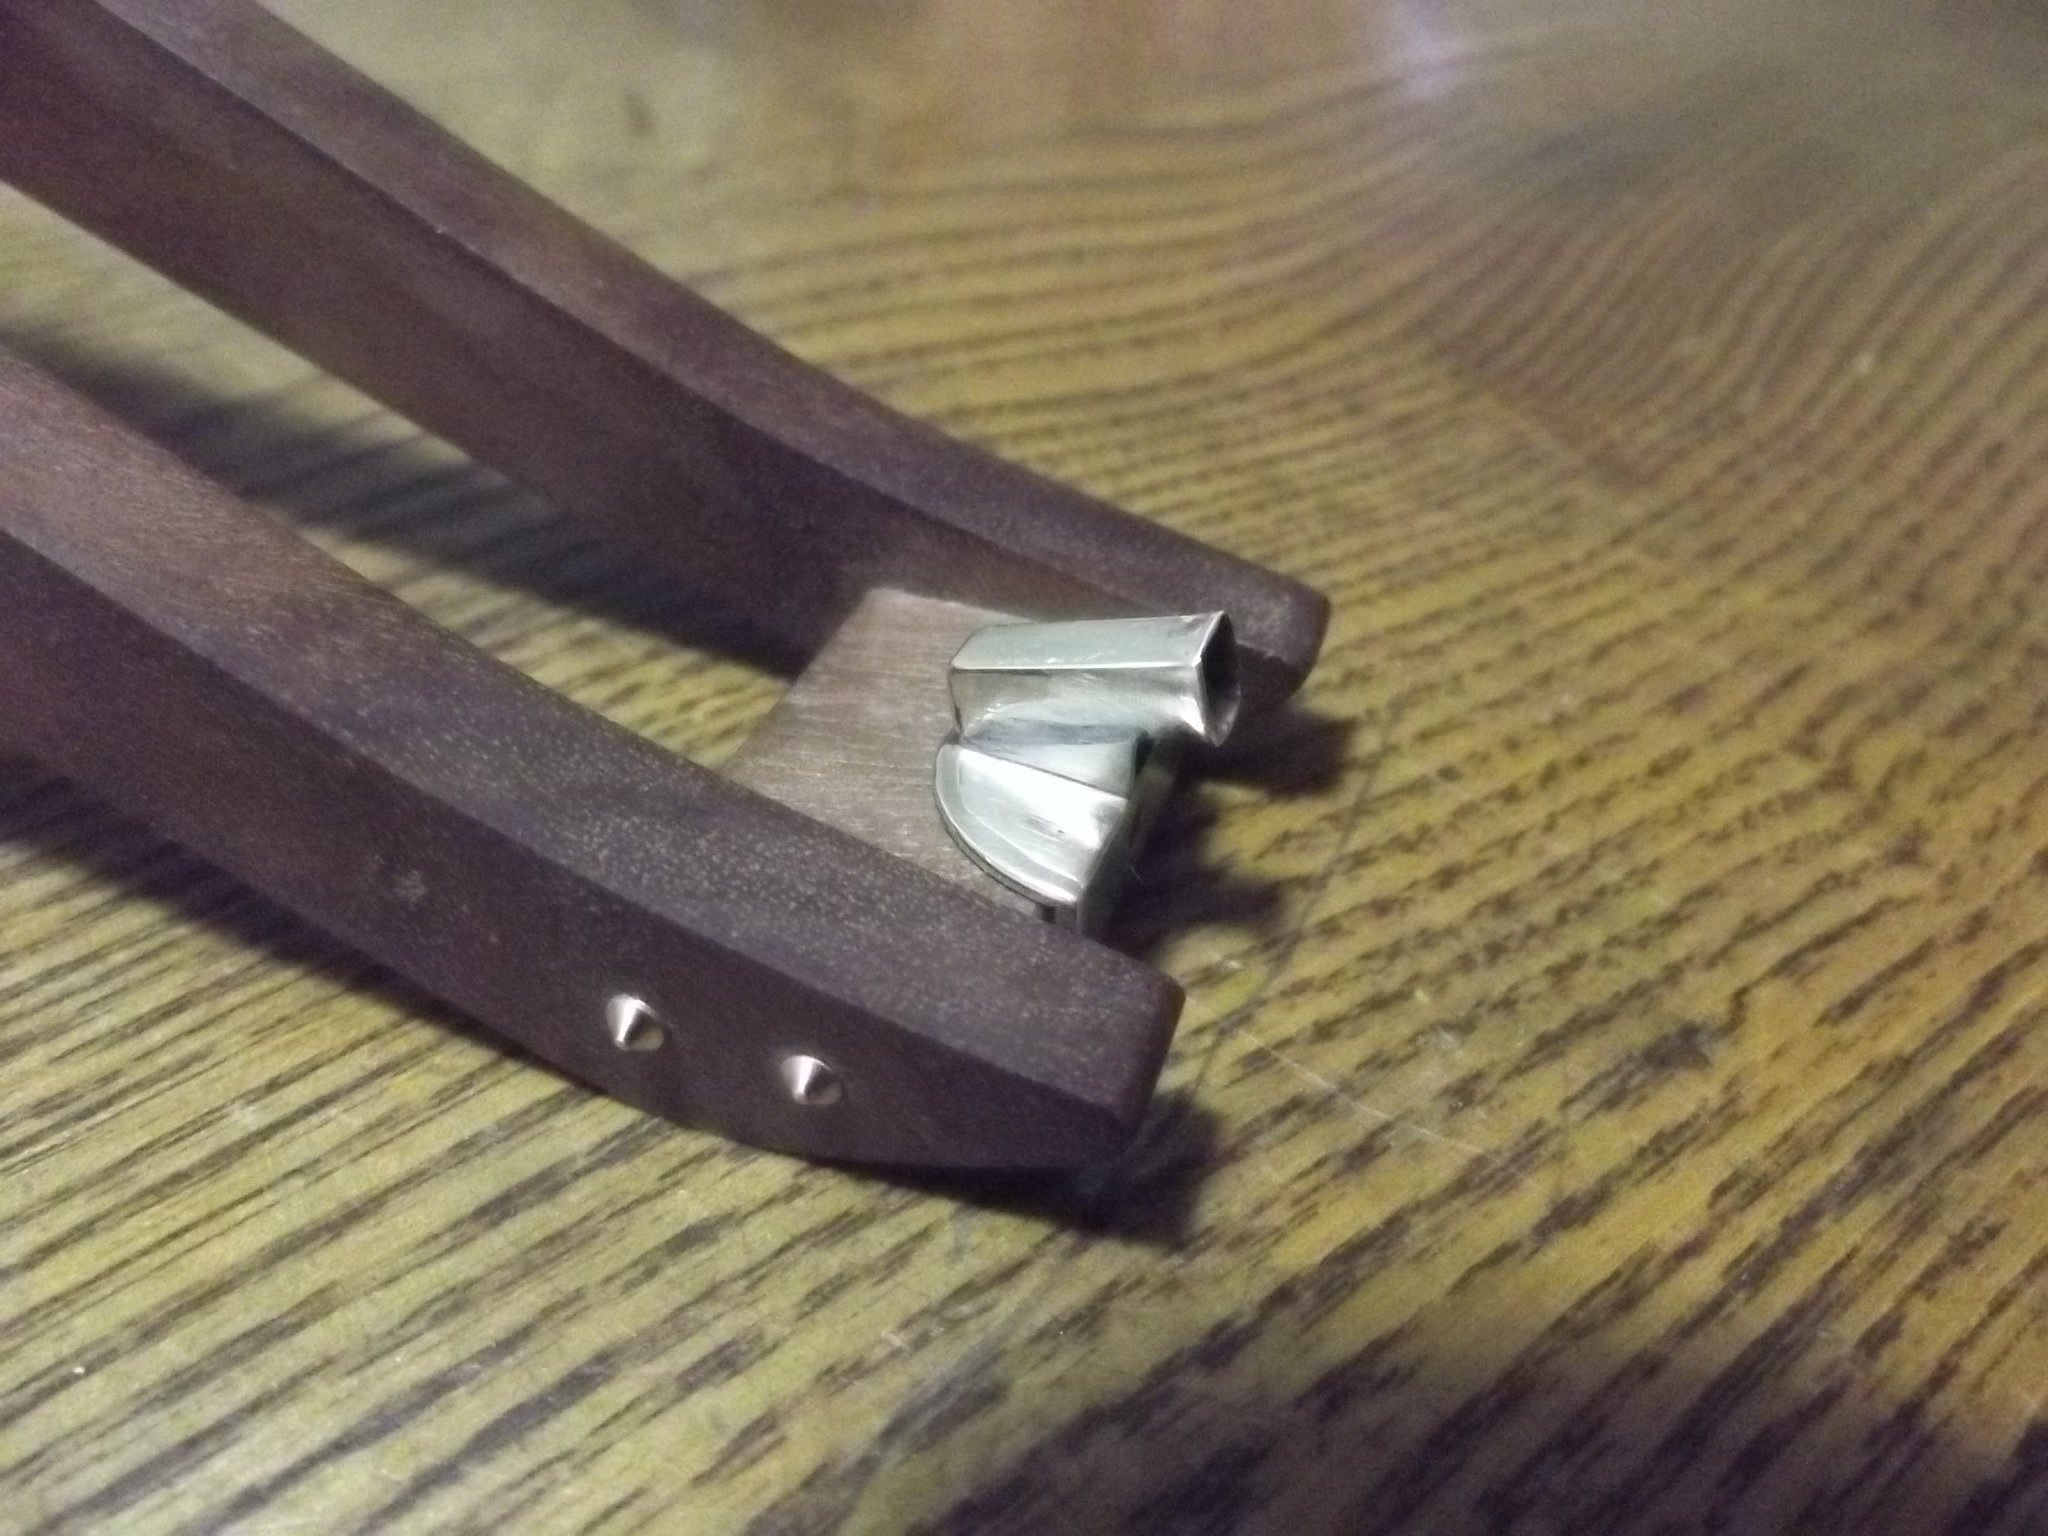
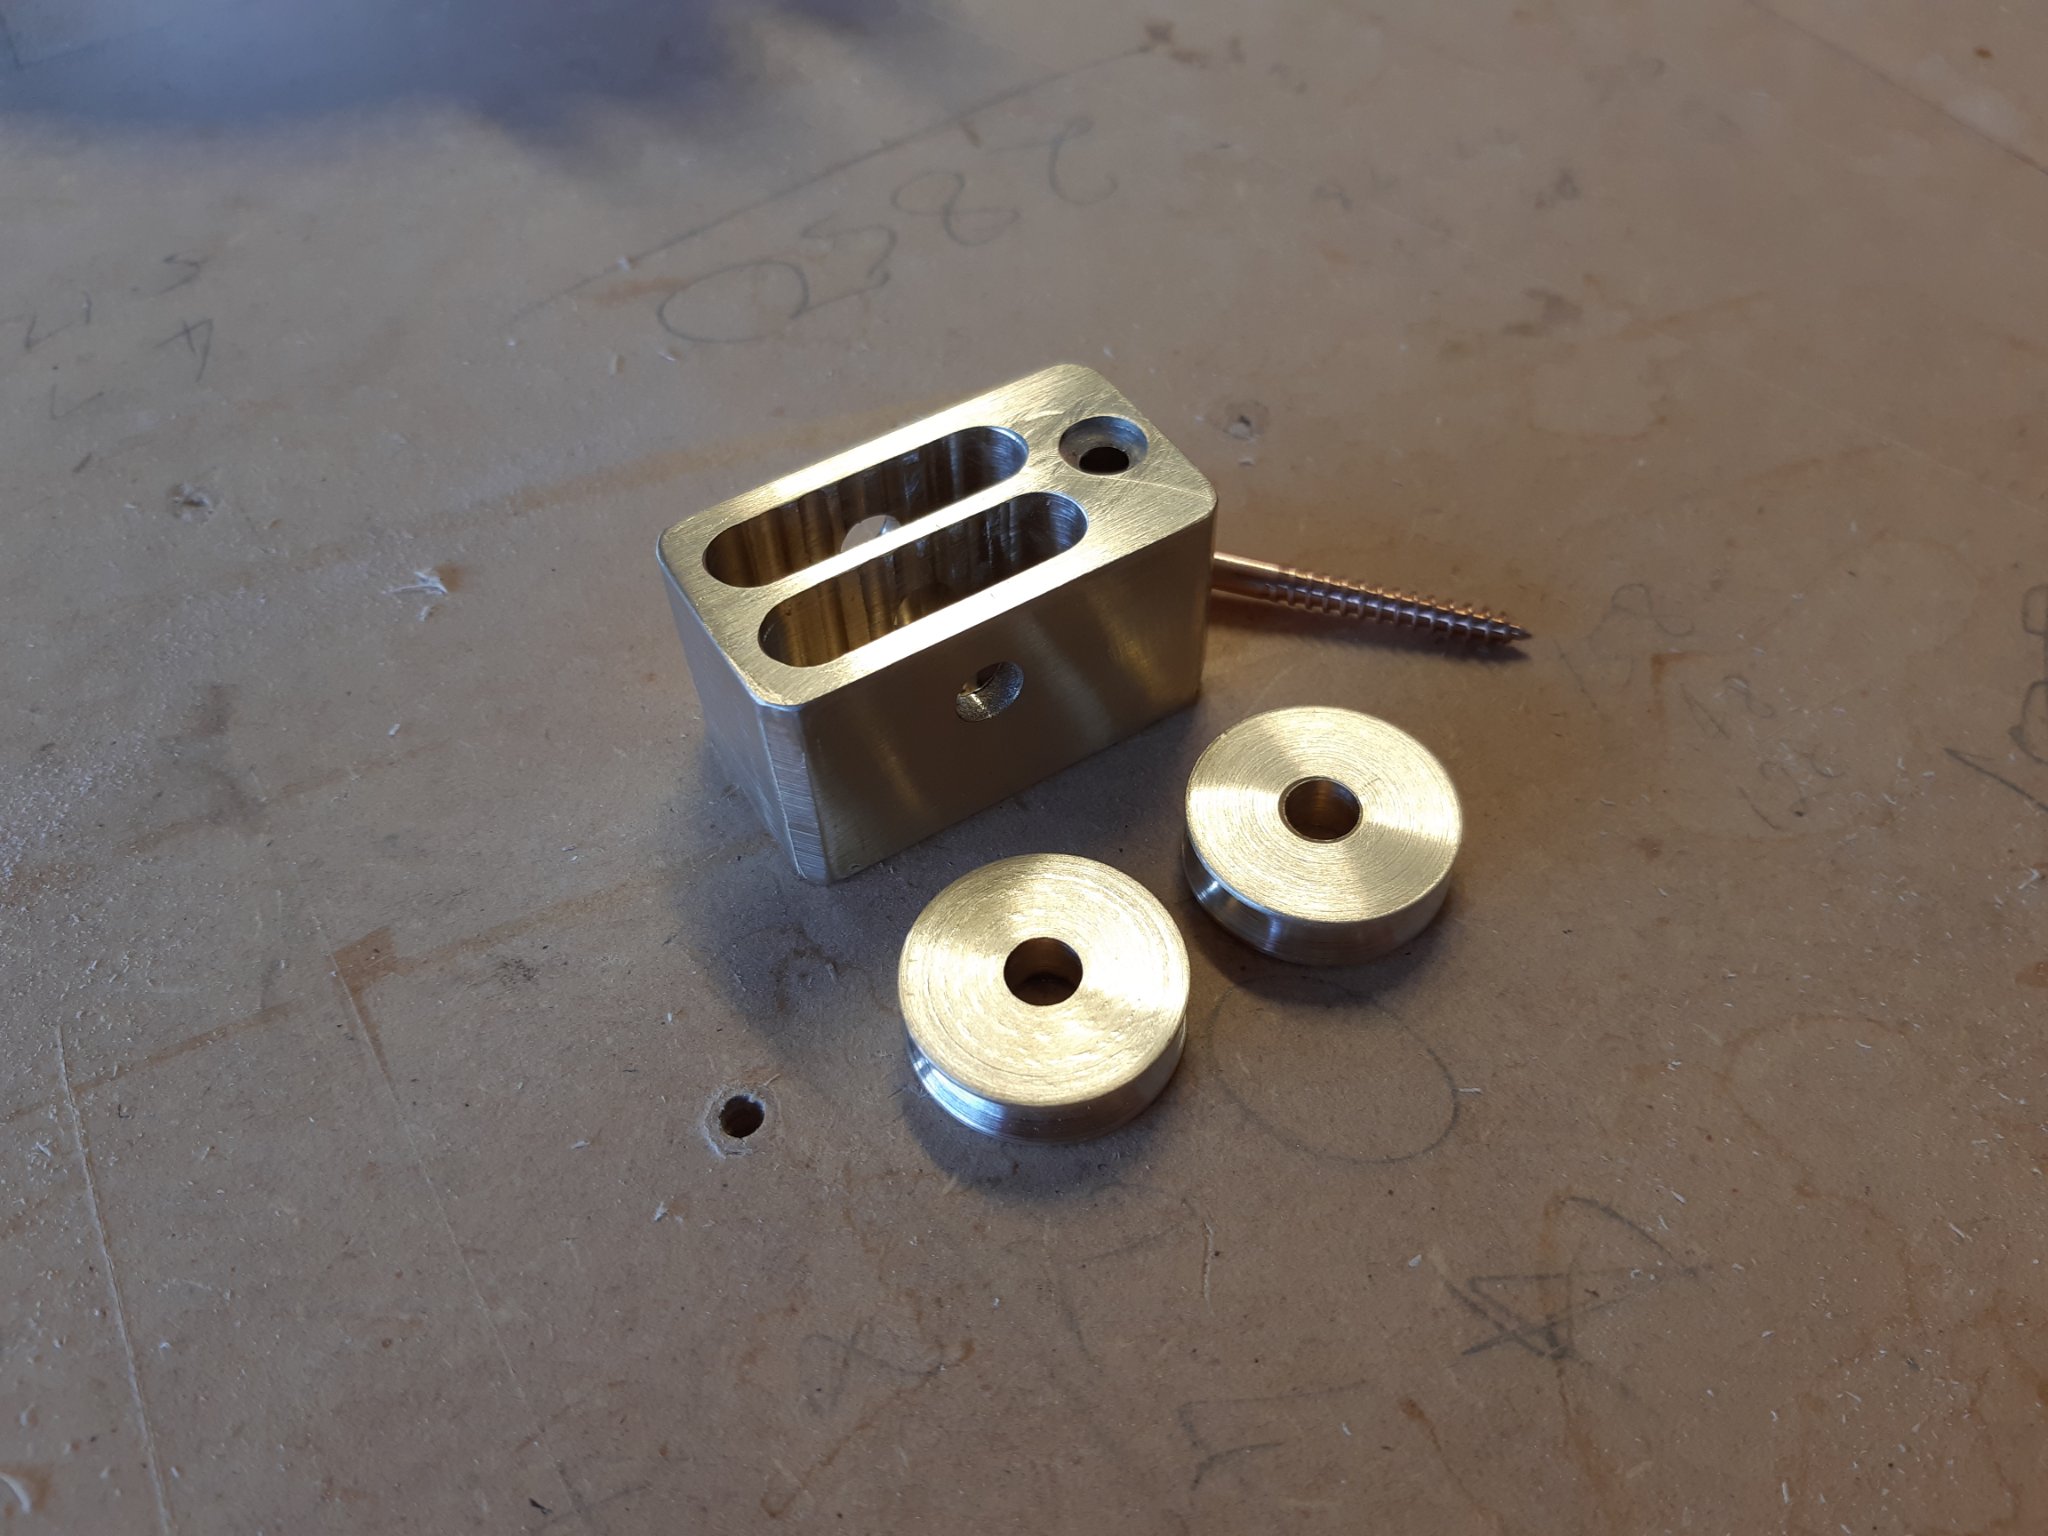
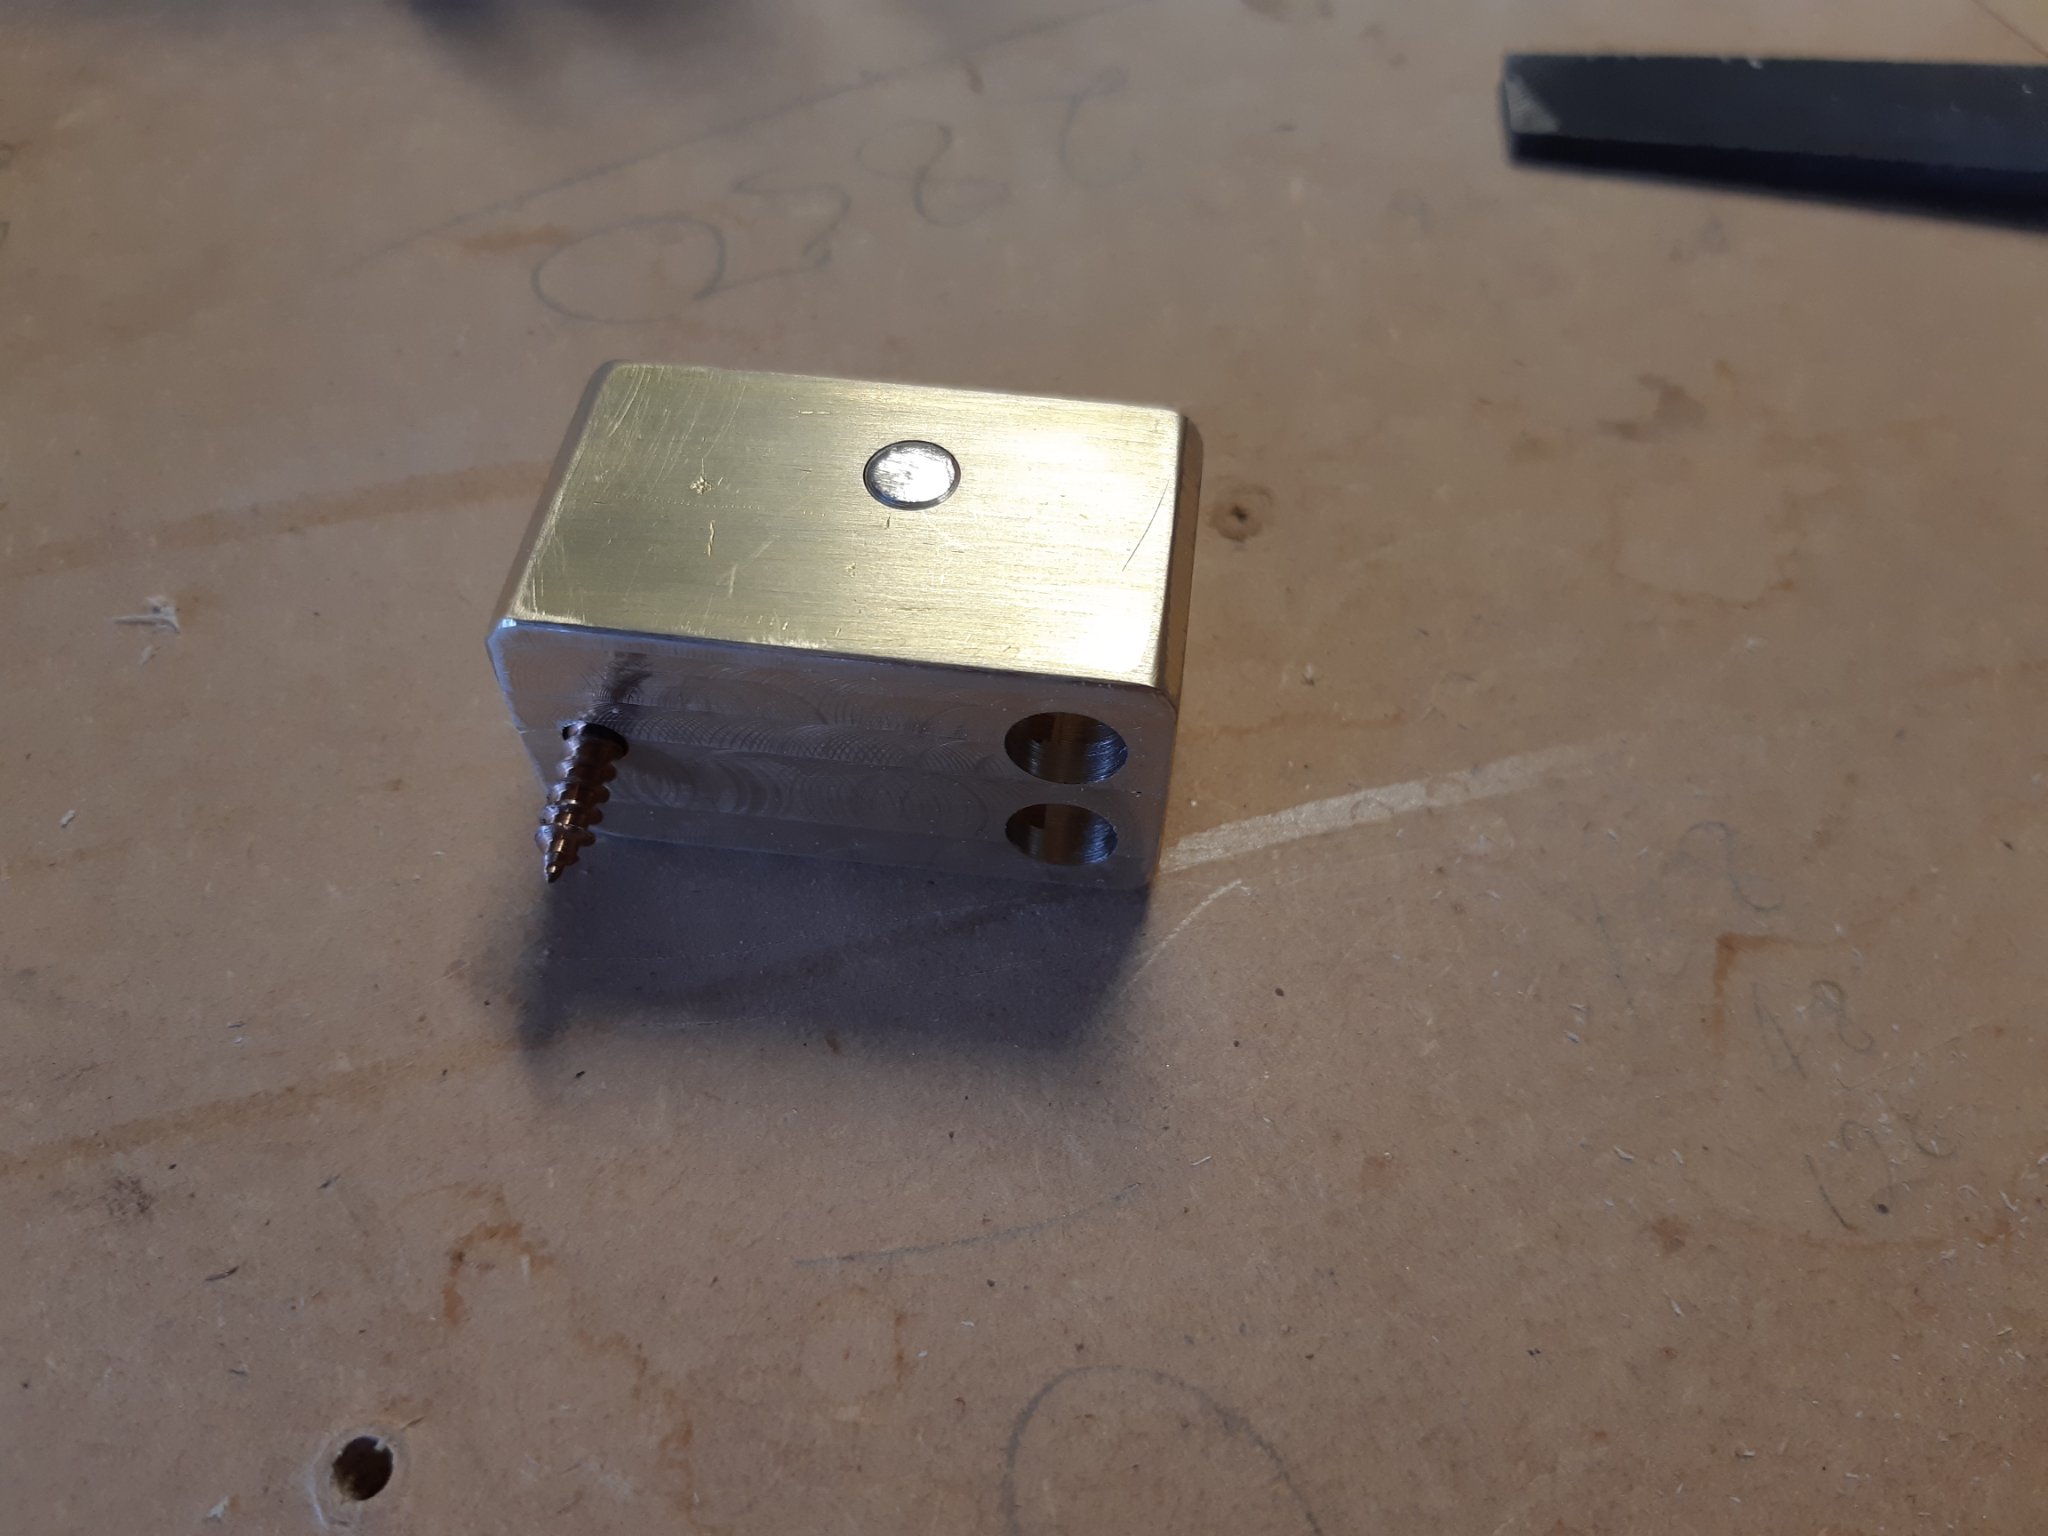
How about some trunnion clamps for want of a better word. I clamped two pieces of brass together in the mill vice, drilled through on centre, separated them and used them as press molds to shape the clamps before bending the brass around to form the hinge. I then filled the rolled brass hinge section with solder before running a drill through it to get a nice round body for the hinge pin. The fixed part of the hinge was milled from bar stock and drilled before being cut off with a slitting saw.


- 30 replies
-
- 14
-
-
15' Dinghy by Bedford - FINISHED - 1:1 scale
Bedford replied to Bedford's topic in Non-ship/categorised builds
Thanks Popeye -
More a display piece I think but it will have some of its associated equipment
-
The hub hardware was simply turned from brass stock and a few rings and some chain left over from ship models


- 30 replies
-
- 18
-
-
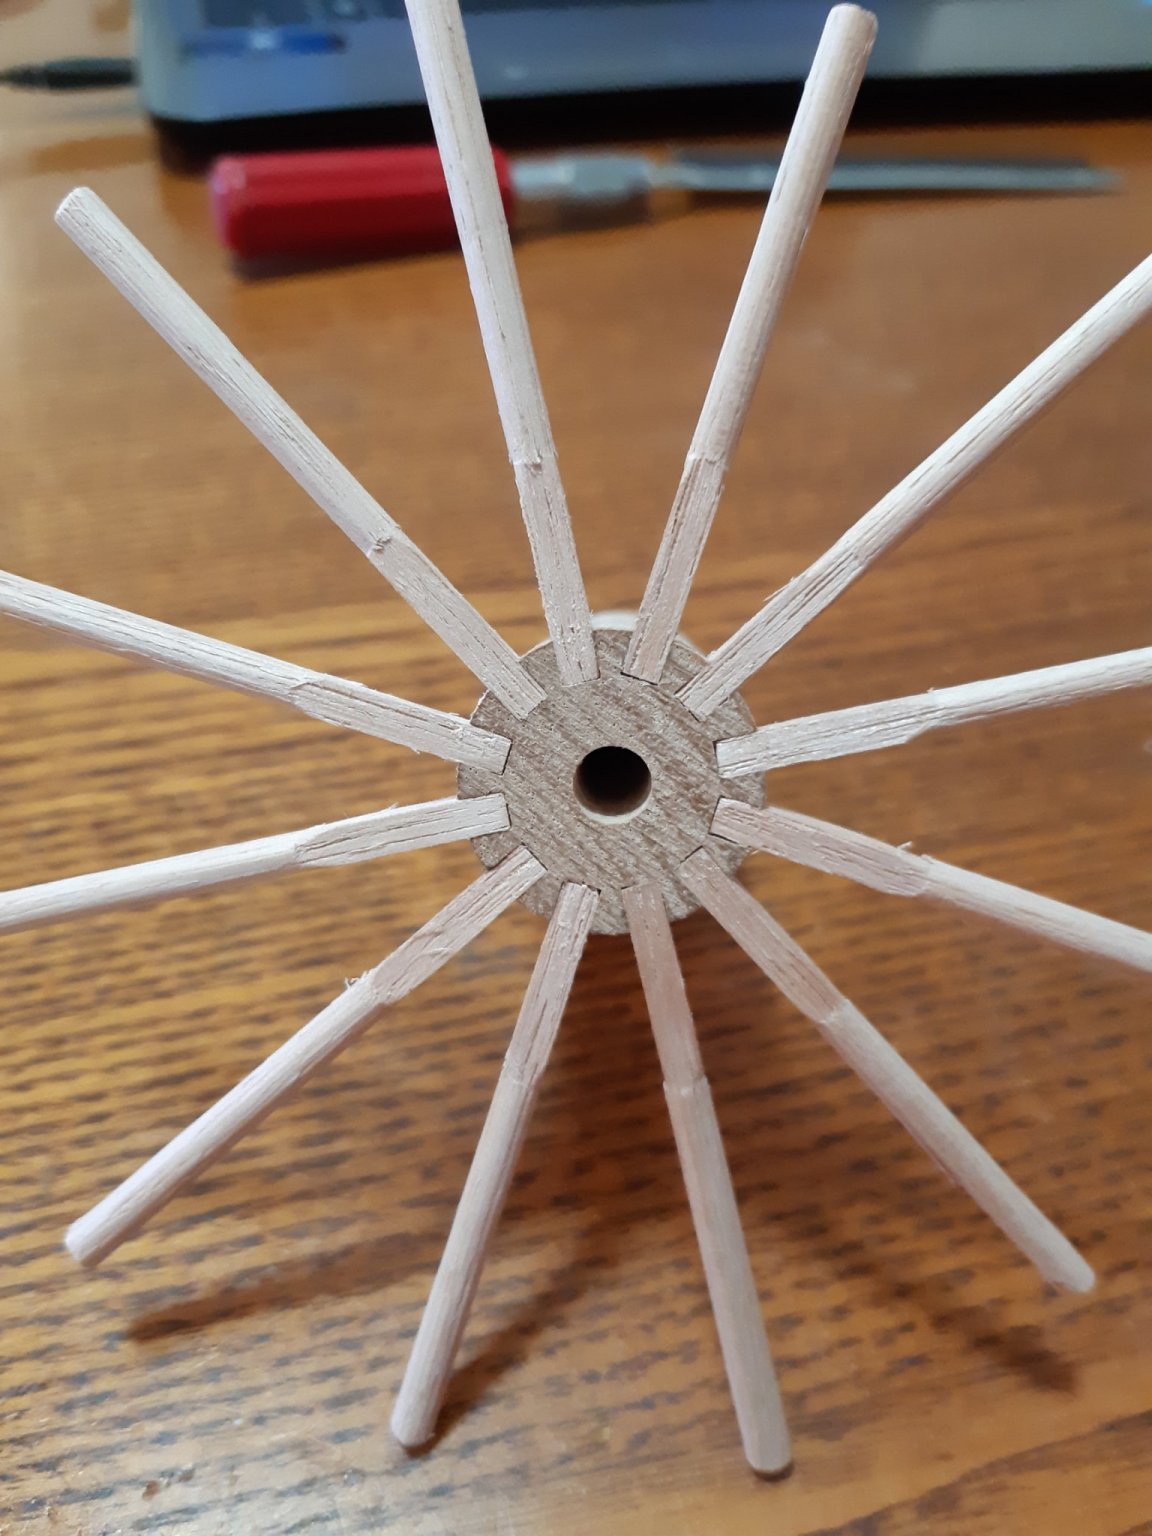
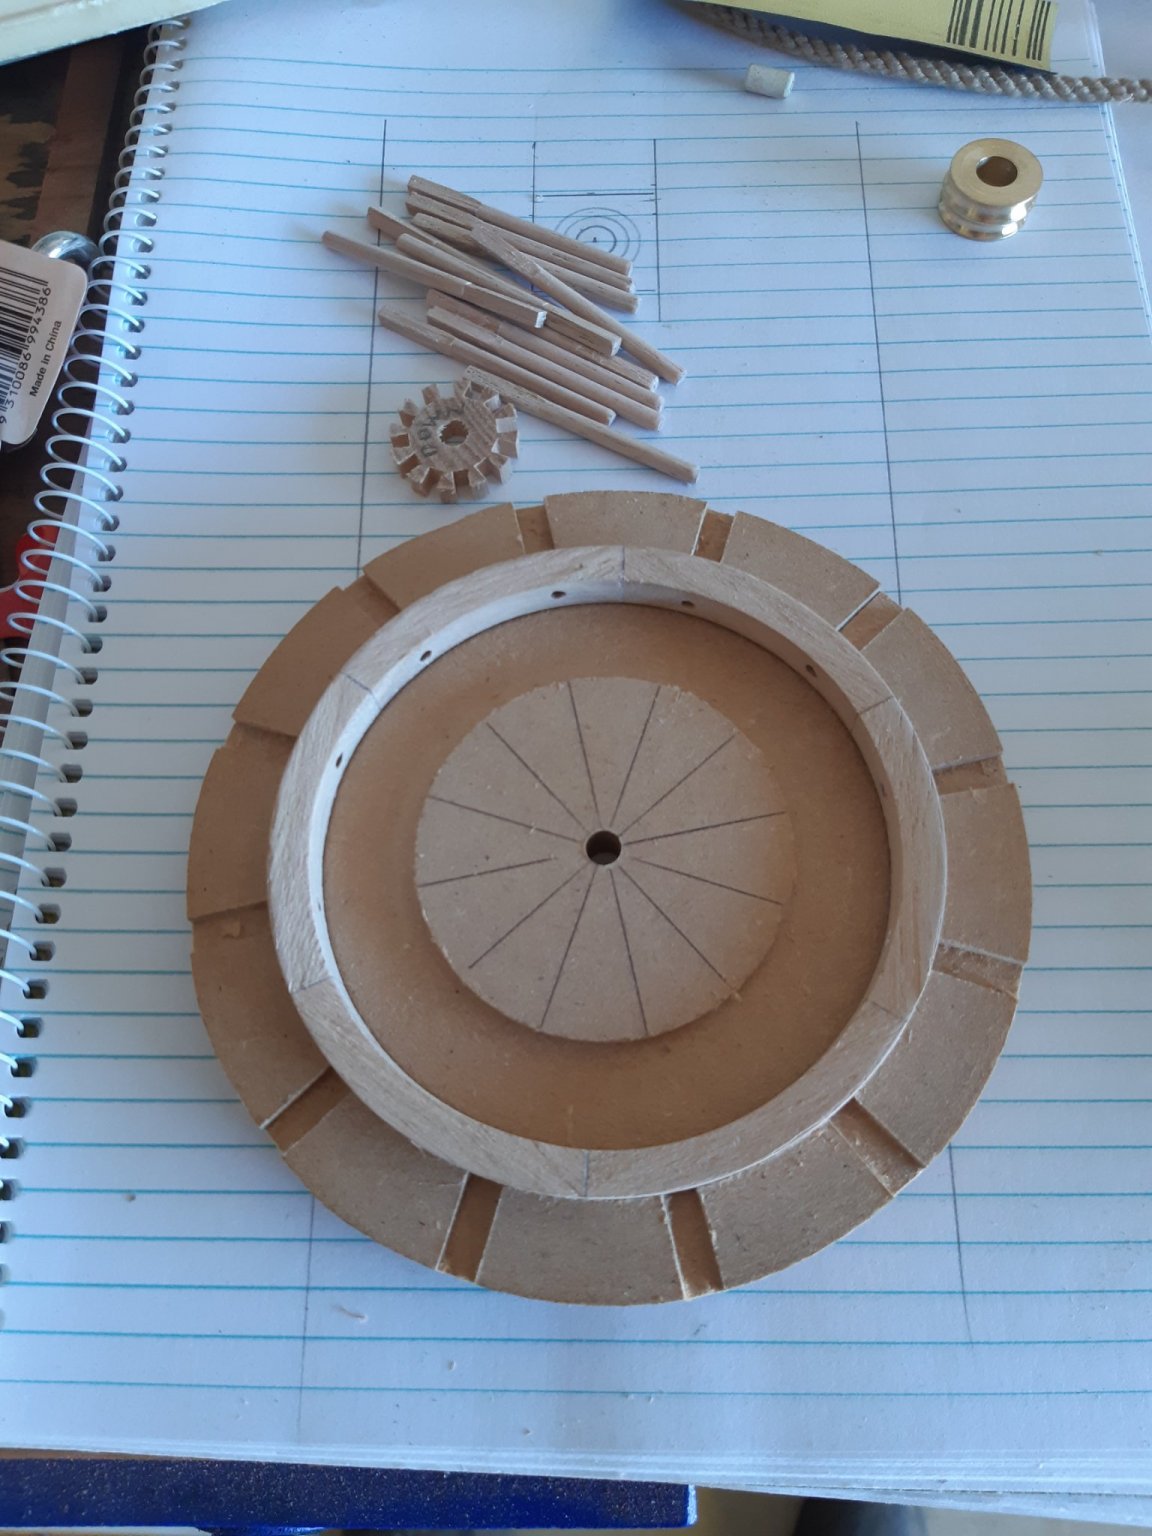
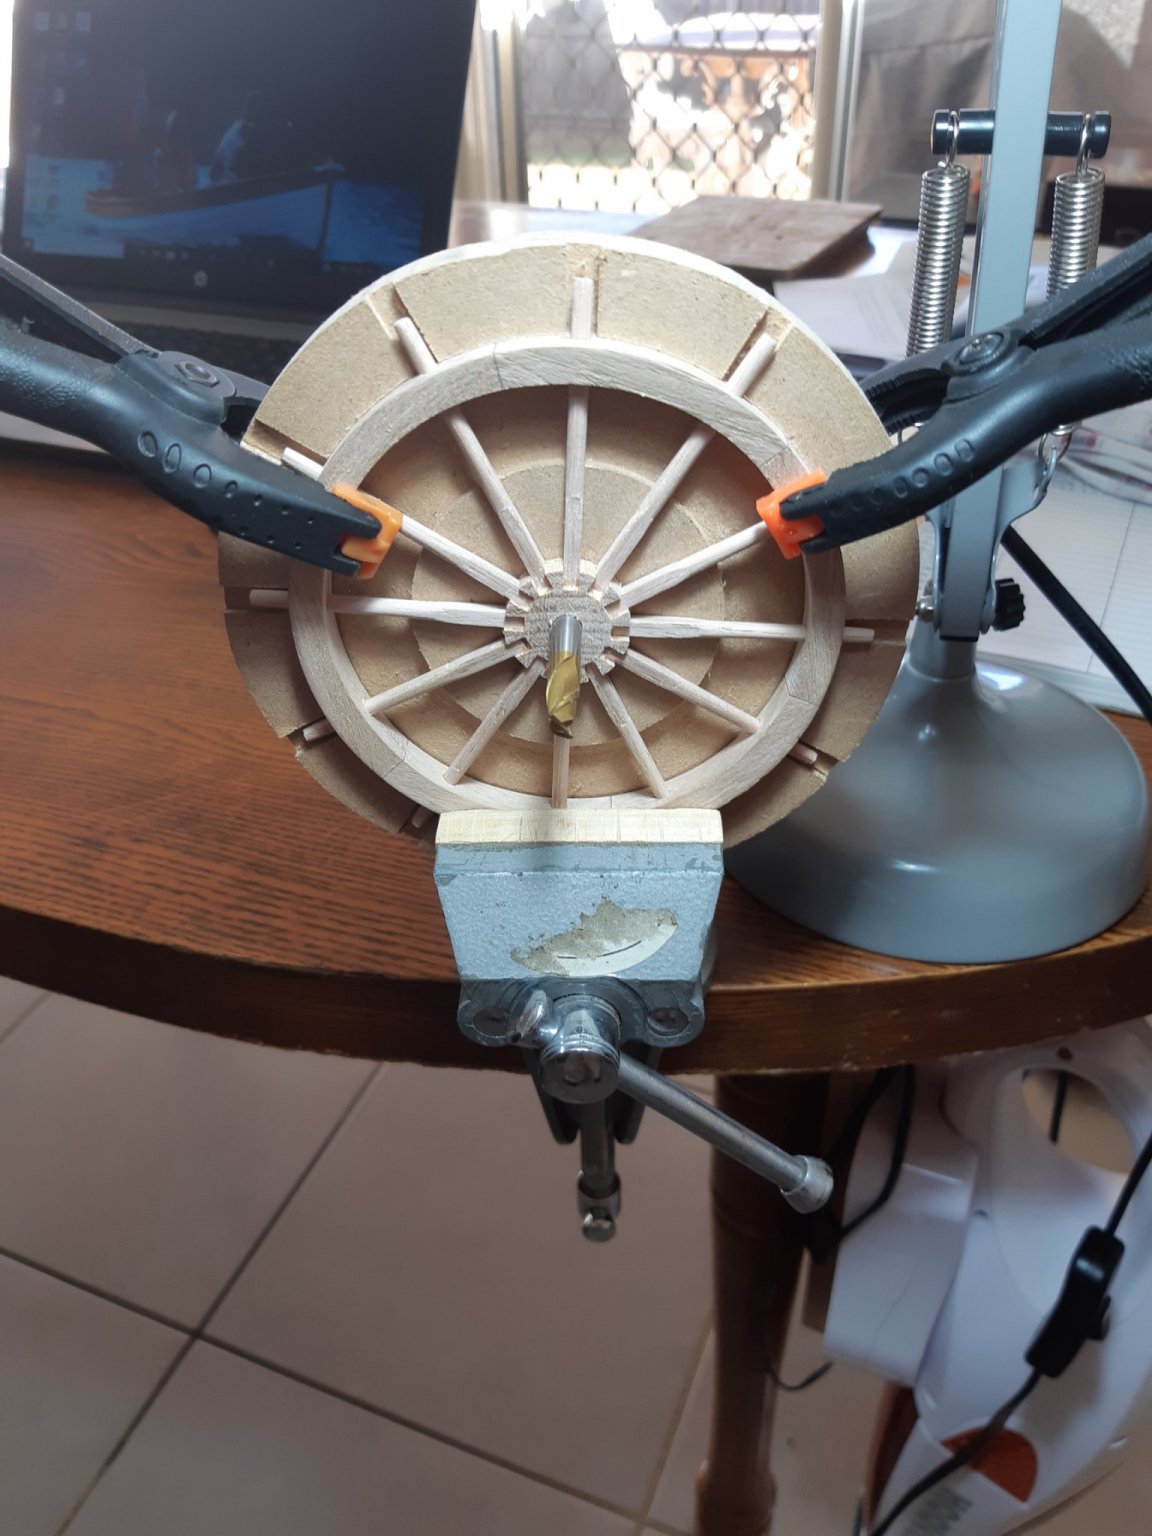
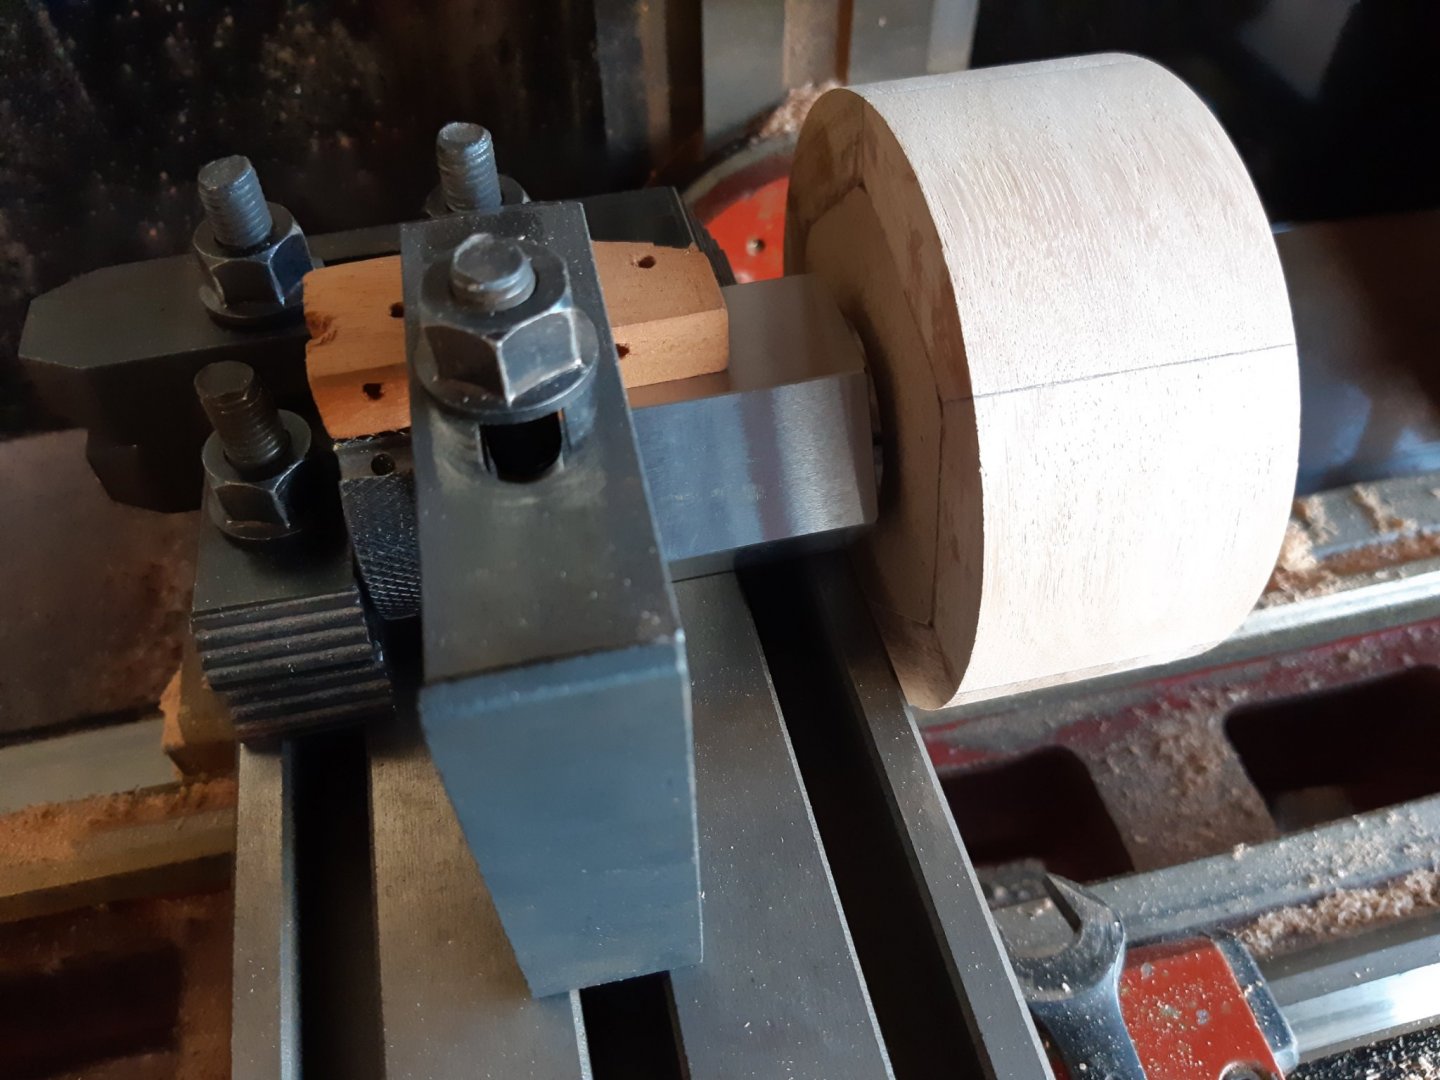
Then the hub and spokes, the hub was done in much the same way as the rims but instead of drilling holes I milled slots, again the resetting to allow the second set of cuts required a lot of measuring, checking and re-checking. The spokes where round stock (Tasmanian oak as with the rest of the wheel) which I set up in the square collet block to machine a 3mm square section before mounting in the lathe to round out the rest of the shaft. It was messy and Tas oak tends to splinter in the lathe so there where a few that ended up in the bin. The spokes are not glued to the rims or the hub. The built up body of the hub combined with the alluminium tyres hold it all together much like the real thing. On the subject of the tyres, I just happened to have a piece of alluminium stock that was just big enough to turn for the tyres at 110mm O.D. The tyres where heated in the oven to expand them prior to fitting. They are very tight on the rims and no glue was used.


- 30 replies
-
- 22
-
-
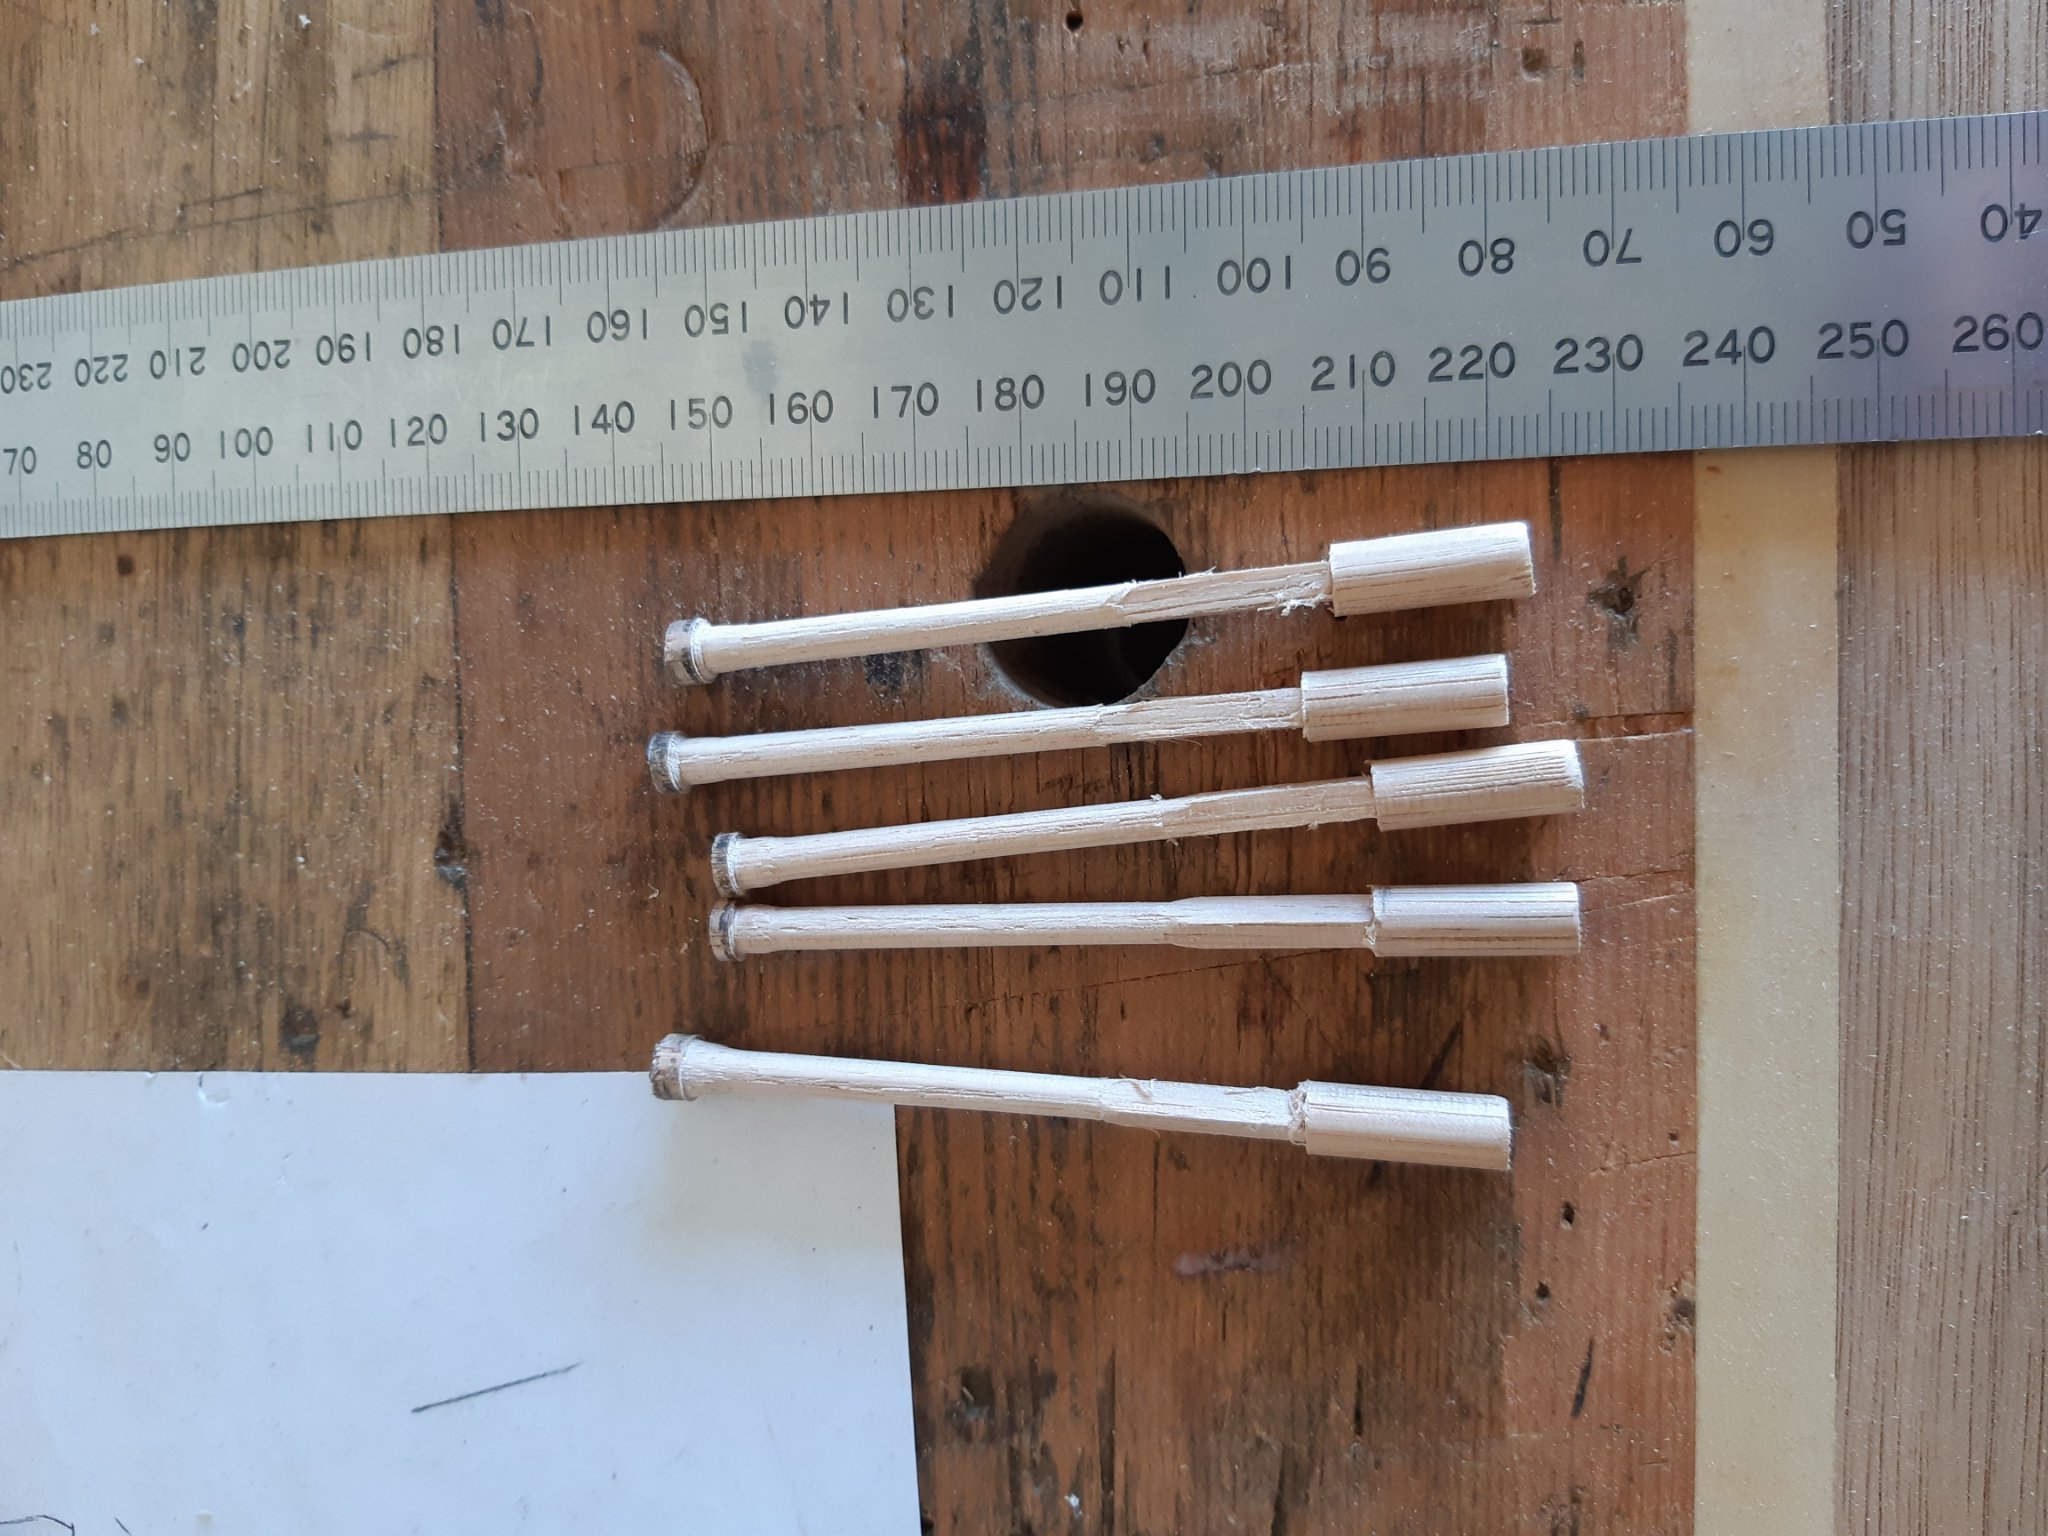
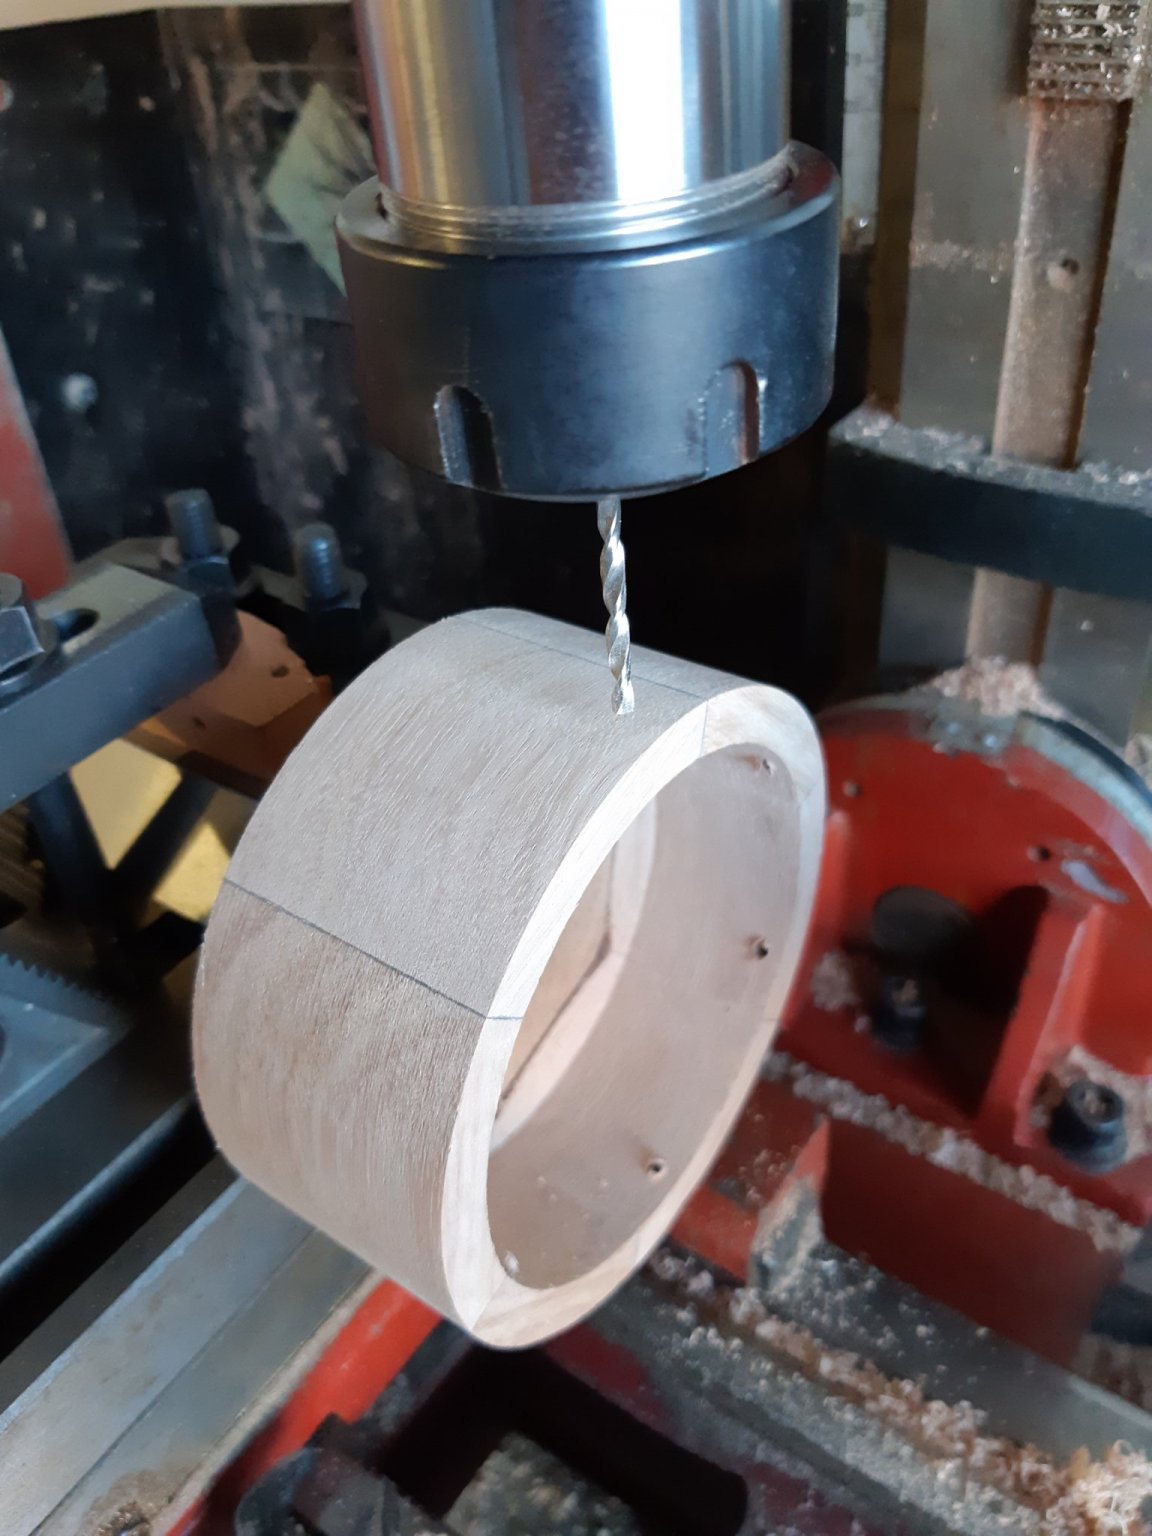
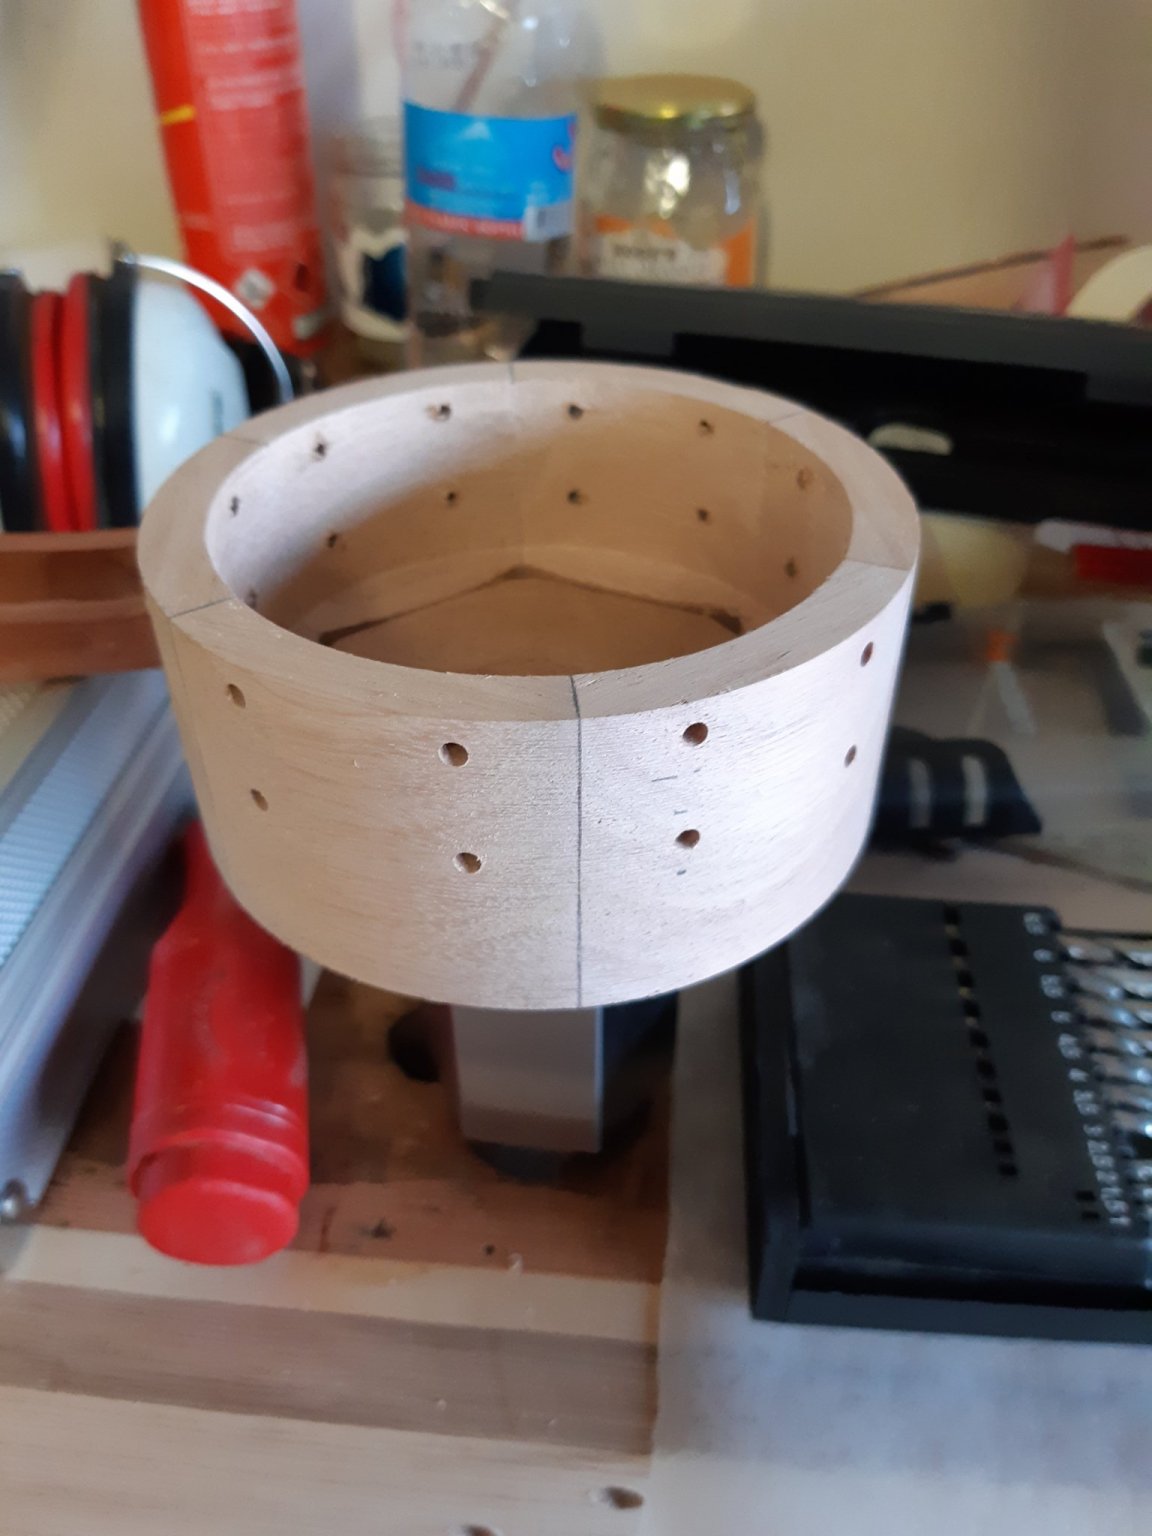
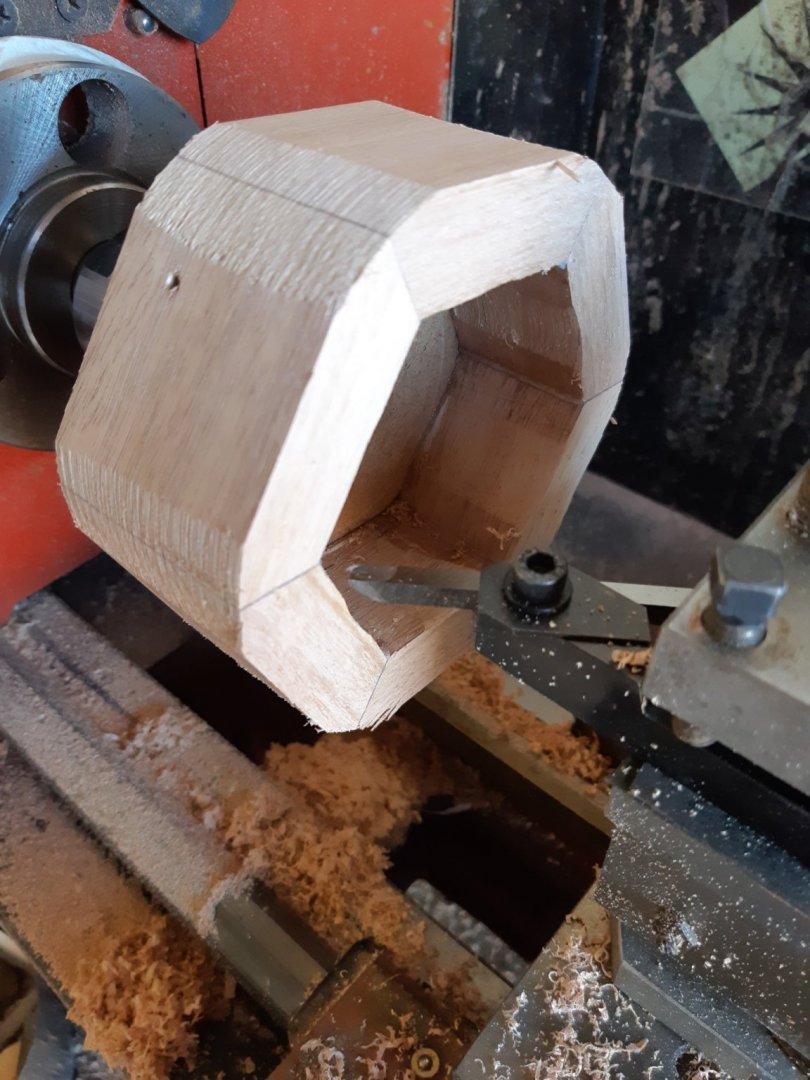
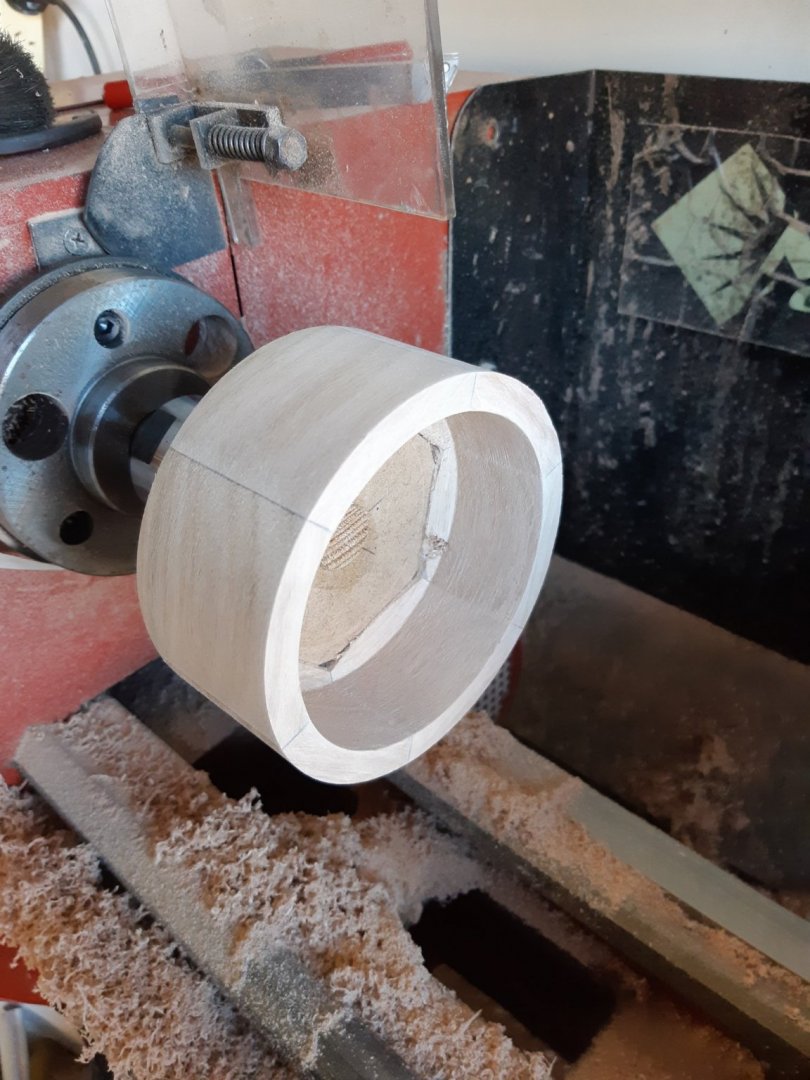
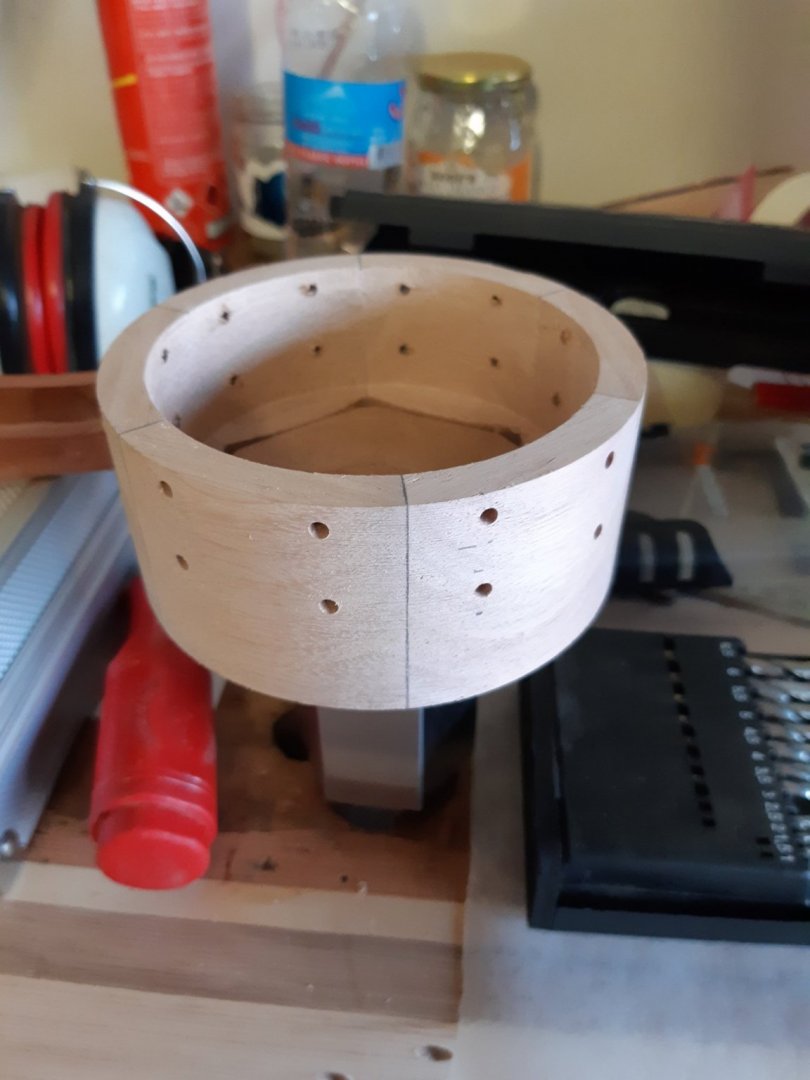
Next came the wheels, these are the tricky bits. First glue up a hex drum with a dowel centre that can be held in collets to allow all the processes required. Turn it to a nice round shape deep enough to cut two rims from then remount in the hex collet block and drill 2 rows of 6 spoke holes before resetting in the collet block to allow drilling of the next set of holes. This took a lot of fine measuring to get right. As a result the wheels have 12 spokes.

- 30 replies
-
- 16
-
-
15' Dinghy by Bedford - FINISHED - 1:1 scale
Bedford replied to Bedford's topic in Non-ship/categorised builds
Well I tell you what Eberhard, if you ever drop in for a scotch I'll take you rowing or sailing depending on the weather -
15' Dinghy by Bedford - FINISHED - 1:1 scale
Bedford replied to Bedford's topic in Non-ship/categorised builds
Thanks guys, Eberhard you're just going to have to build a boat when you retire. -
1930 BENTLEY 4.5 LITRE by MadDogMcQ - AIRFIX 1:12th Scale
Bedford replied to MadDogMcQ's topic in Non-ship/categorised builds
I've just found this and I have to agree it looks great. I always loved this car and wanted to build the model but never did. On a side note, I was driving home from Sydney to Orange years ago in my Defender and there was a big hill infront of me, the west bound climb out of Hartley for the locals, there is a side road that comes in at the foot of the hill and being infront in the Defender I really didn't want anyone to pull out of the side road and slow me down or I'd have been lucky to crest the hill at 70kmh in 3rd. I saw a vintage car about to pull out and thought NOOOOOOOOOOOO, then I recognised the profile. It was one of these Bentleys, well he pulled out and headed up the hill and I never saw him again. He left me for dead! I got over the hill at 90kmh in 4th. -
15' Dinghy by Bedford - FINISHED - 1:1 scale
Bedford replied to Bedford's topic in Non-ship/categorised builds
The next job was to rout out and plug the clew reefing sheave hole then rout the sides of the boom to accept reefing combs for which I turned another two sheaves. I then routed another sheave hole further aft so the original reefing sheave could be reused as part of an outhaul for the foot of the sail which it did not previously have. I've yet to use the reefing system while under way but it now has 4 separate downhauls, one each for the first and second luff reefs and the same for the leech reefs, these downhauls are led through fairleads on the boom with eye splices in the ends that simply get pulled to thumb cleats over which they are placed to secure the reef. It sounds and looks complicated but it's actually dead simple and importantly very quick to apply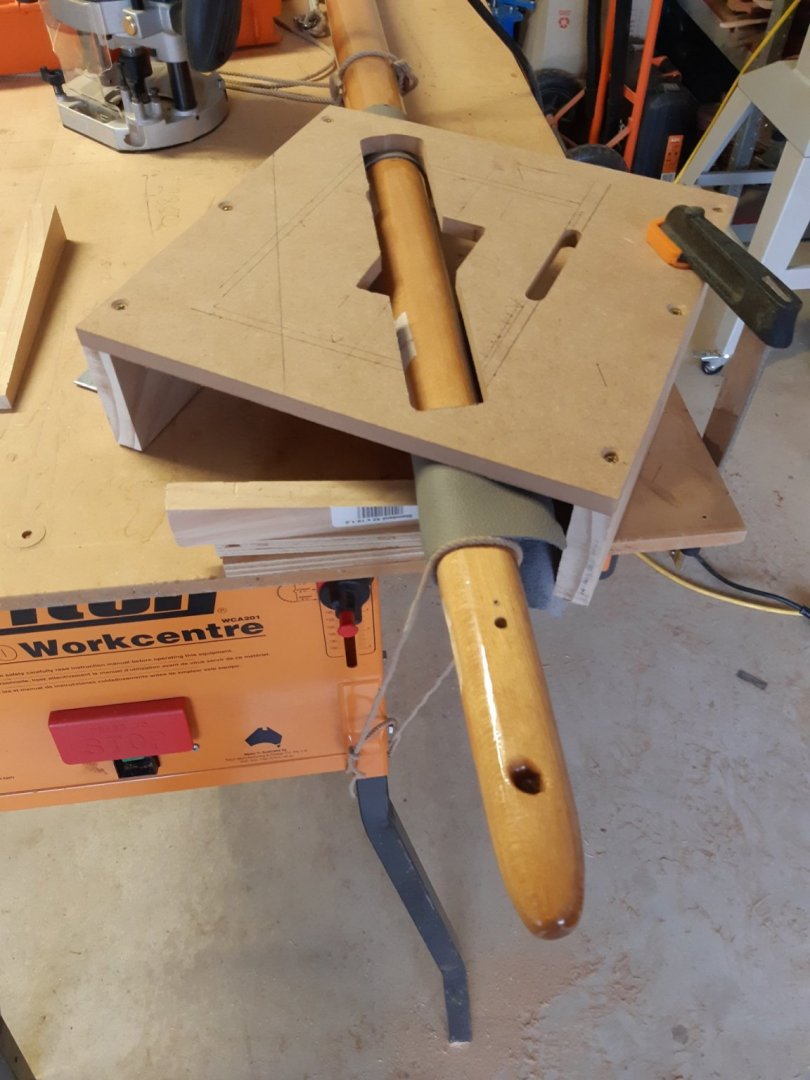


- 109 replies
-
- 12
-
-
15' Dinghy by Bedford - FINISHED - 1:1 scale
Bedford replied to Bedford's topic in Non-ship/categorised builds
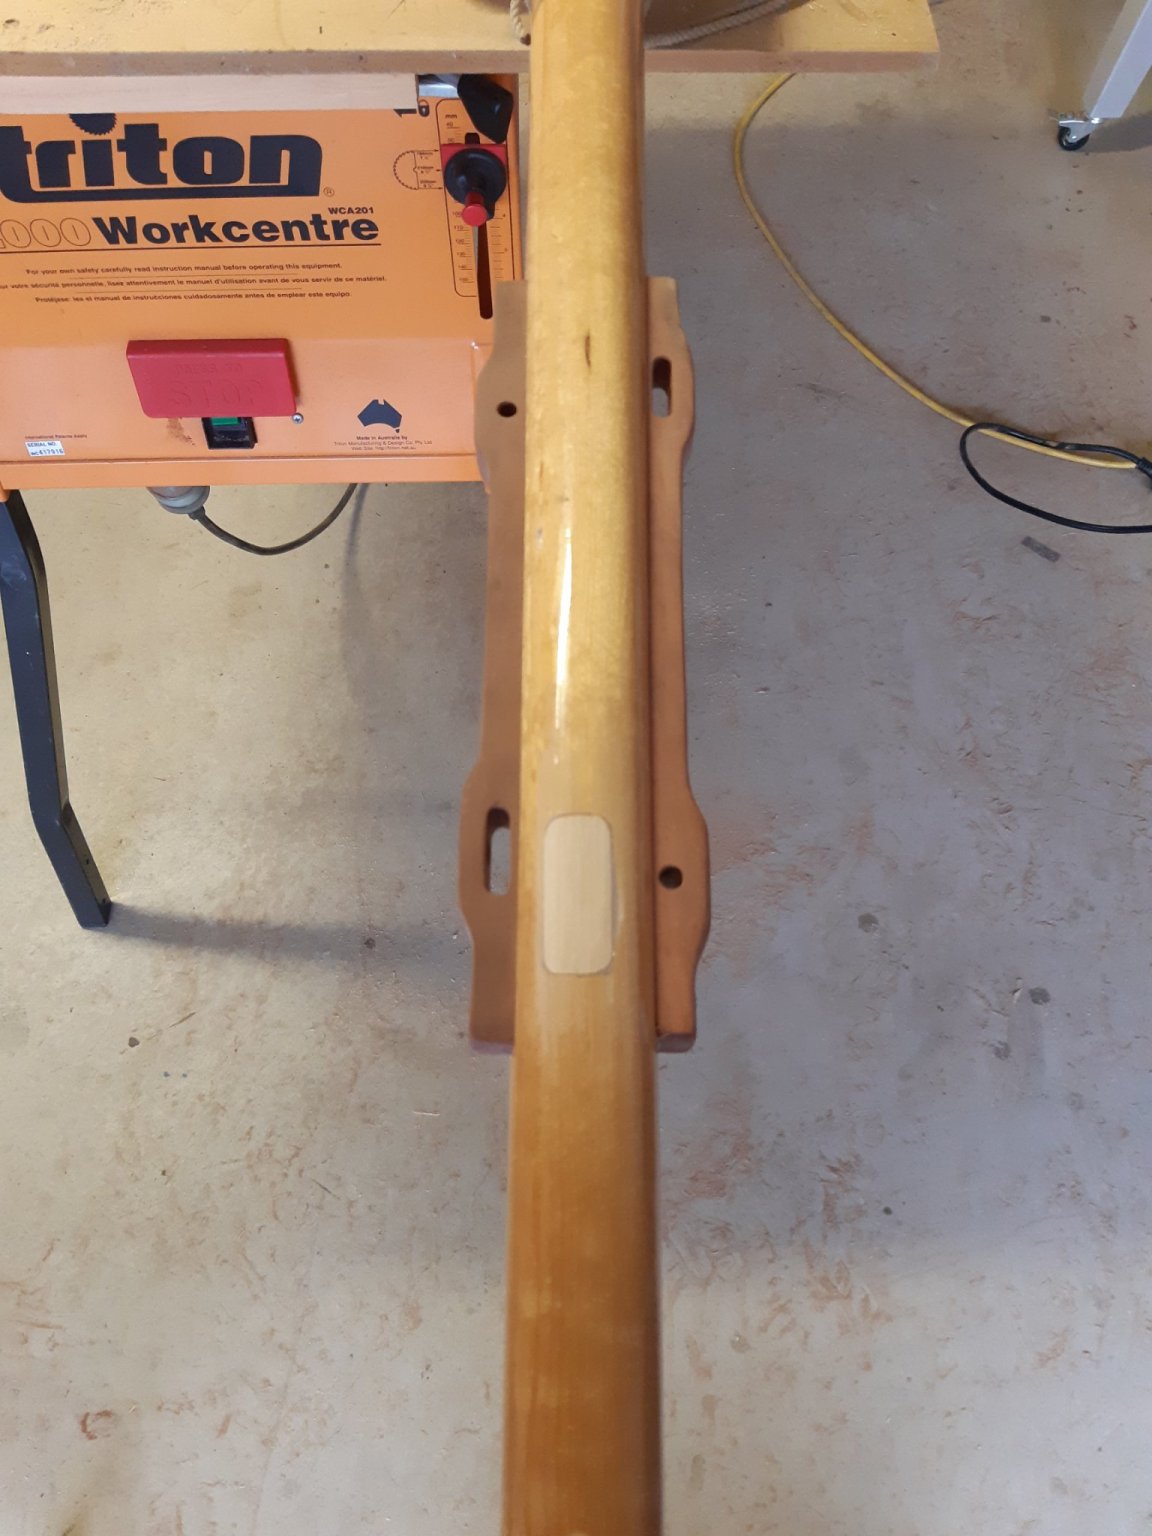
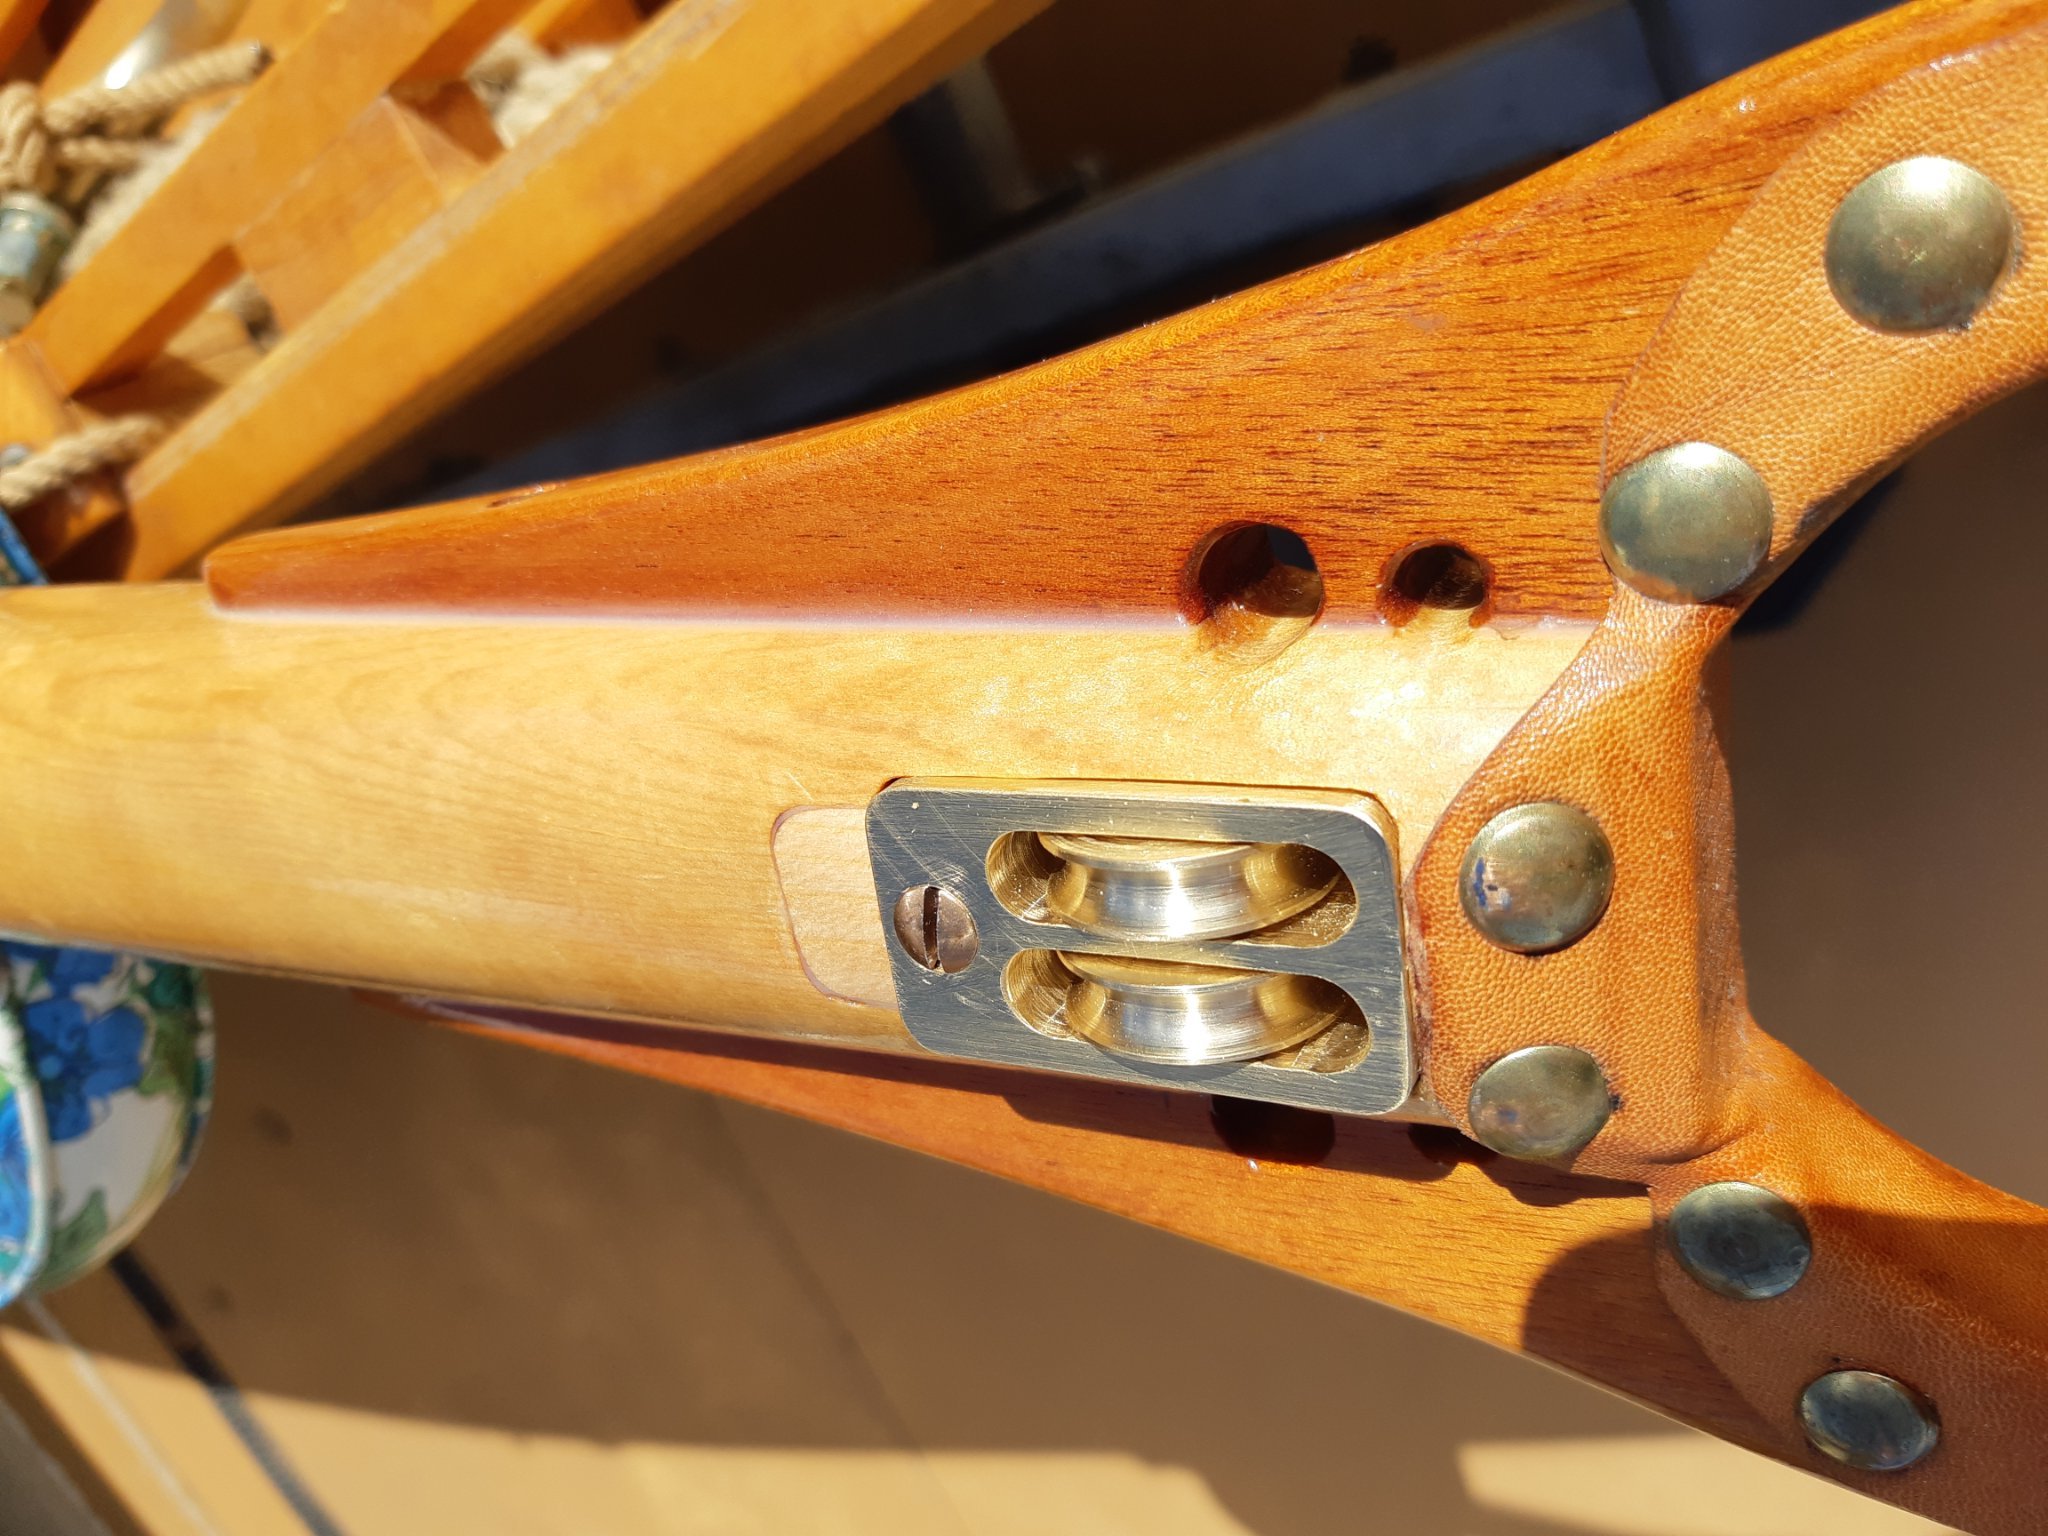
I've made a few more improvements, this time to the rigging I was never happy with the single line reefing system because it was hard to get good tension at the clew and it meant standing up to move the reefing hooks up to the second reefing line if required. Not a great idea in a small round bilged boat when the wind picks up. First I made what I'll refer to as a sheave cassette to go into the boom in way of the yoke, this allowed the single sheave to be replaced by 2 that allow permanent attachment of both luff reefing downhauls. By clamping the boom to a bench and building a bridge table over it I could attach fences so the router cut exactly where I needed to accept the cassette after first routing out the previous single sheave hole and epoxying a spruce plug in. This is the underside of the boom


-
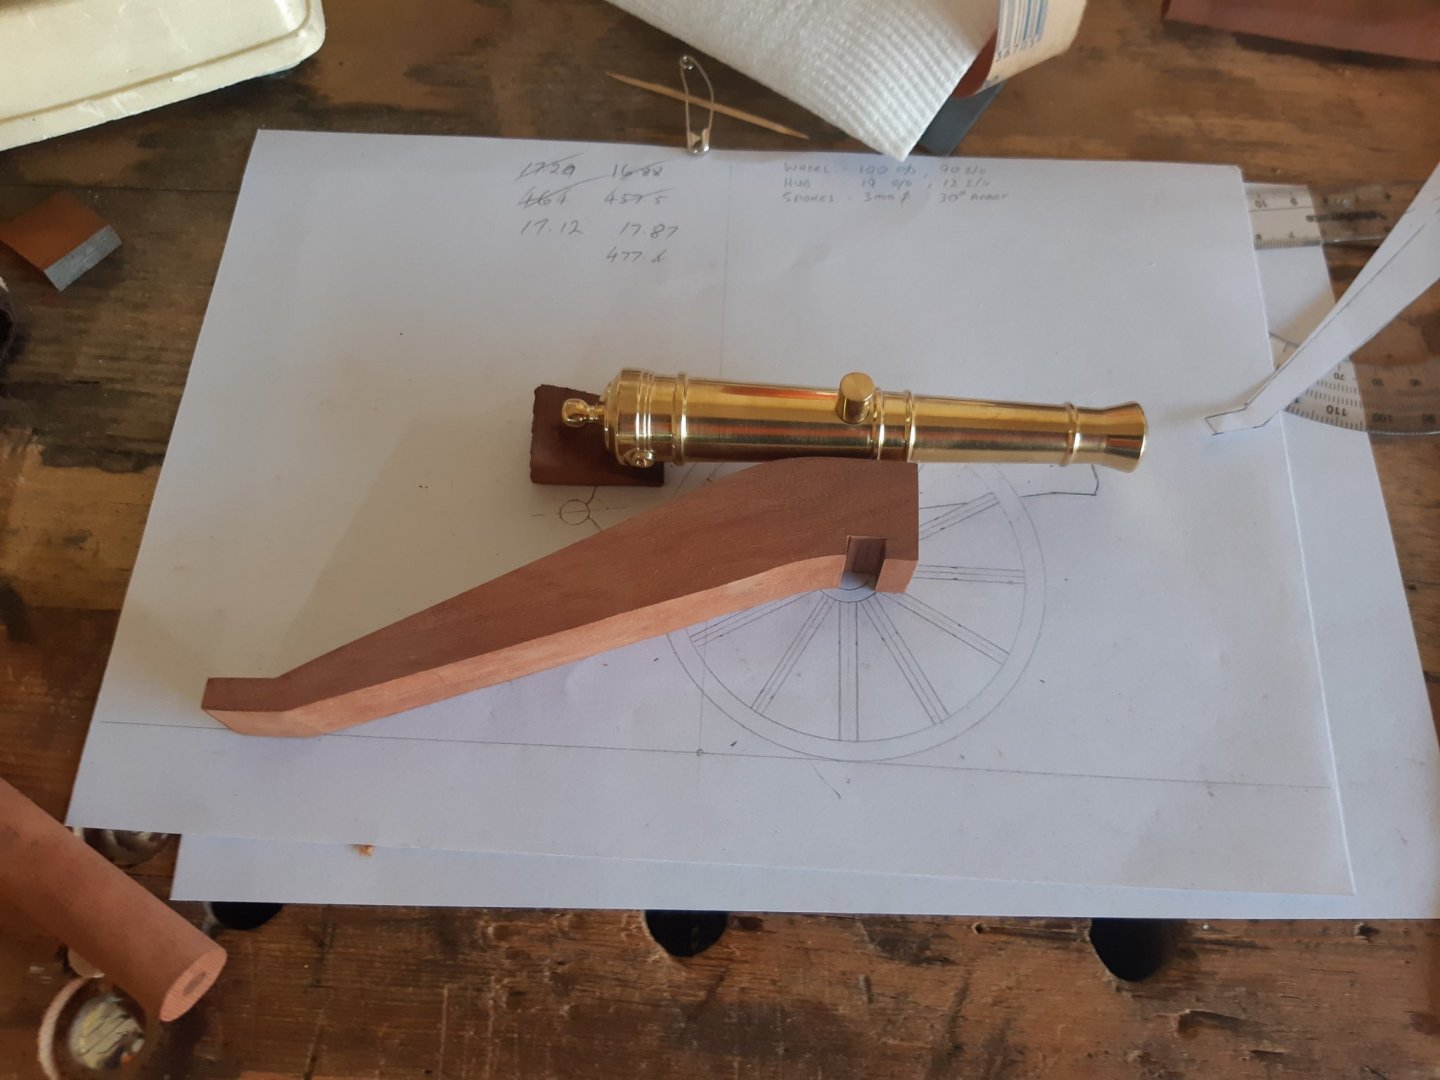
The Carriage, this is made from an old block of river red gum I've had for three decades and use little bits now and then. It's a very fine grained hard wood that finishes very easily and when waxed could be mistaken for a cast resin fake timber so I always leave a few very slight imperfections.


- 30 replies
-
- 17
-
-
Yes epoxy is fun isn't it but the best 3 lessons you'll learn about it are :- Lesson #1: After a certain period (dependent upon the type you're using) you can smooth the edges with a gloved finger dipped in alcohol Lesson #2: After it has cured some more and is no longer soft you can use a sharp tool to easily slice off excess before it hardens completely Lesson #3: After it has hardened completely you can use a hot air gun to soften it so a sharp tool can remove excess but be careful not to heat too much or you'll weaken the joint.
- 299 replies
-
- 12
-
-
Having built a 12 inch to the foot model myself I'll tag along. While I'm on the subject my "Twelve inch to the foot dinghy" thread was moved to masting and rigging some time ago, can't figure why. As a moderator can you put it back in this section ?
-
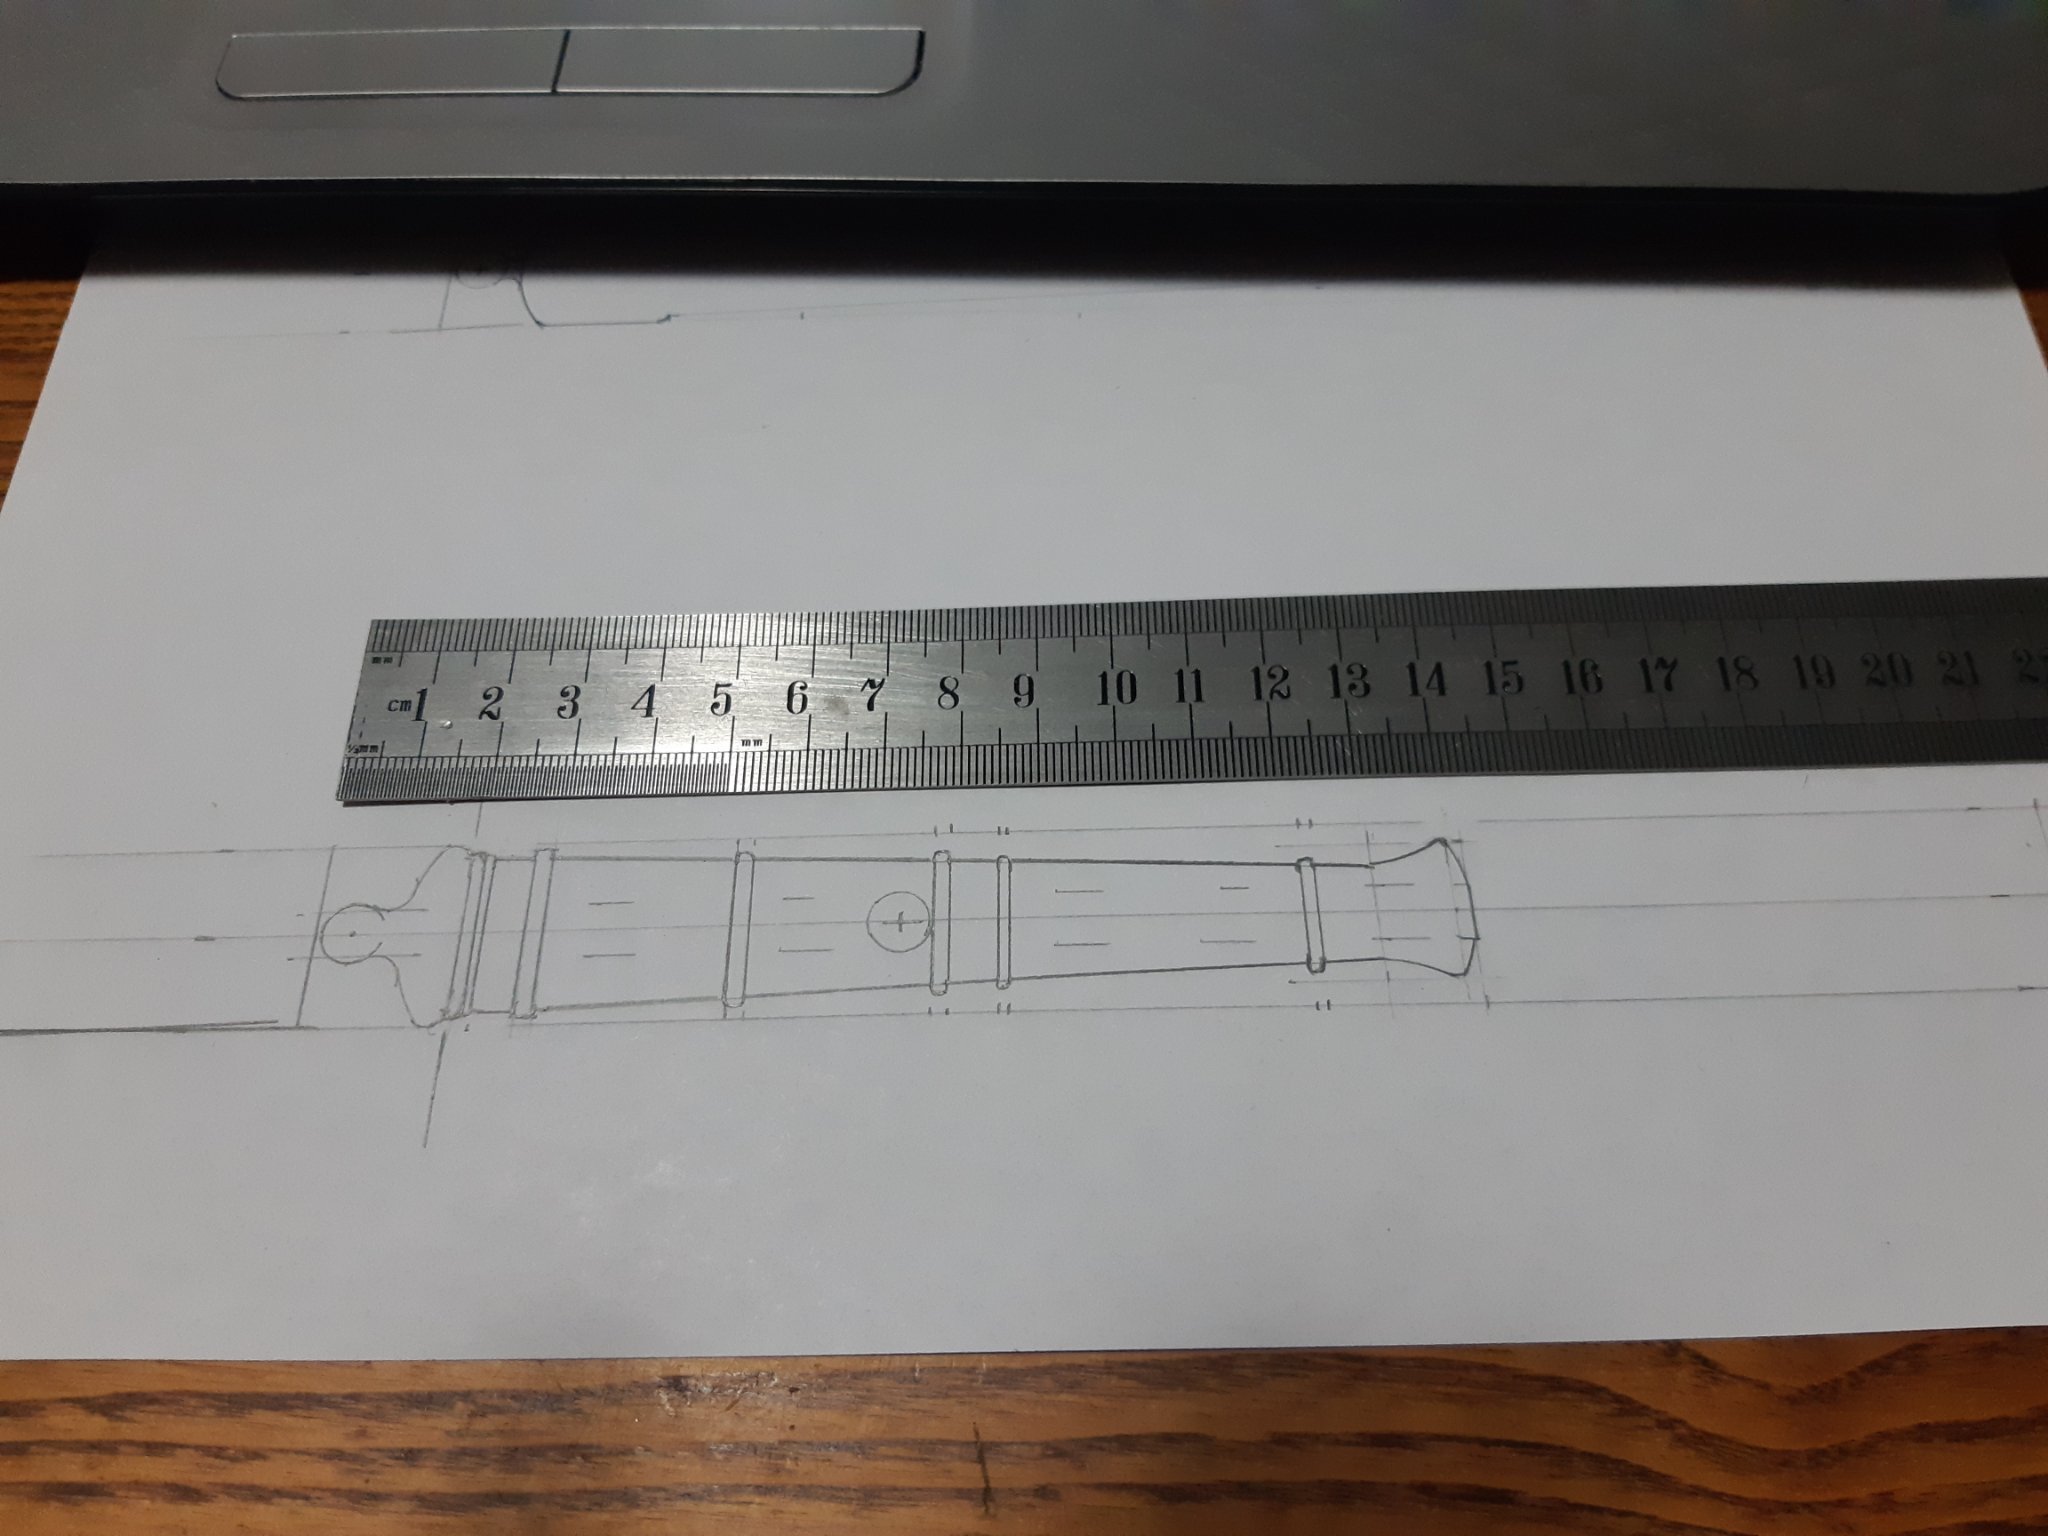
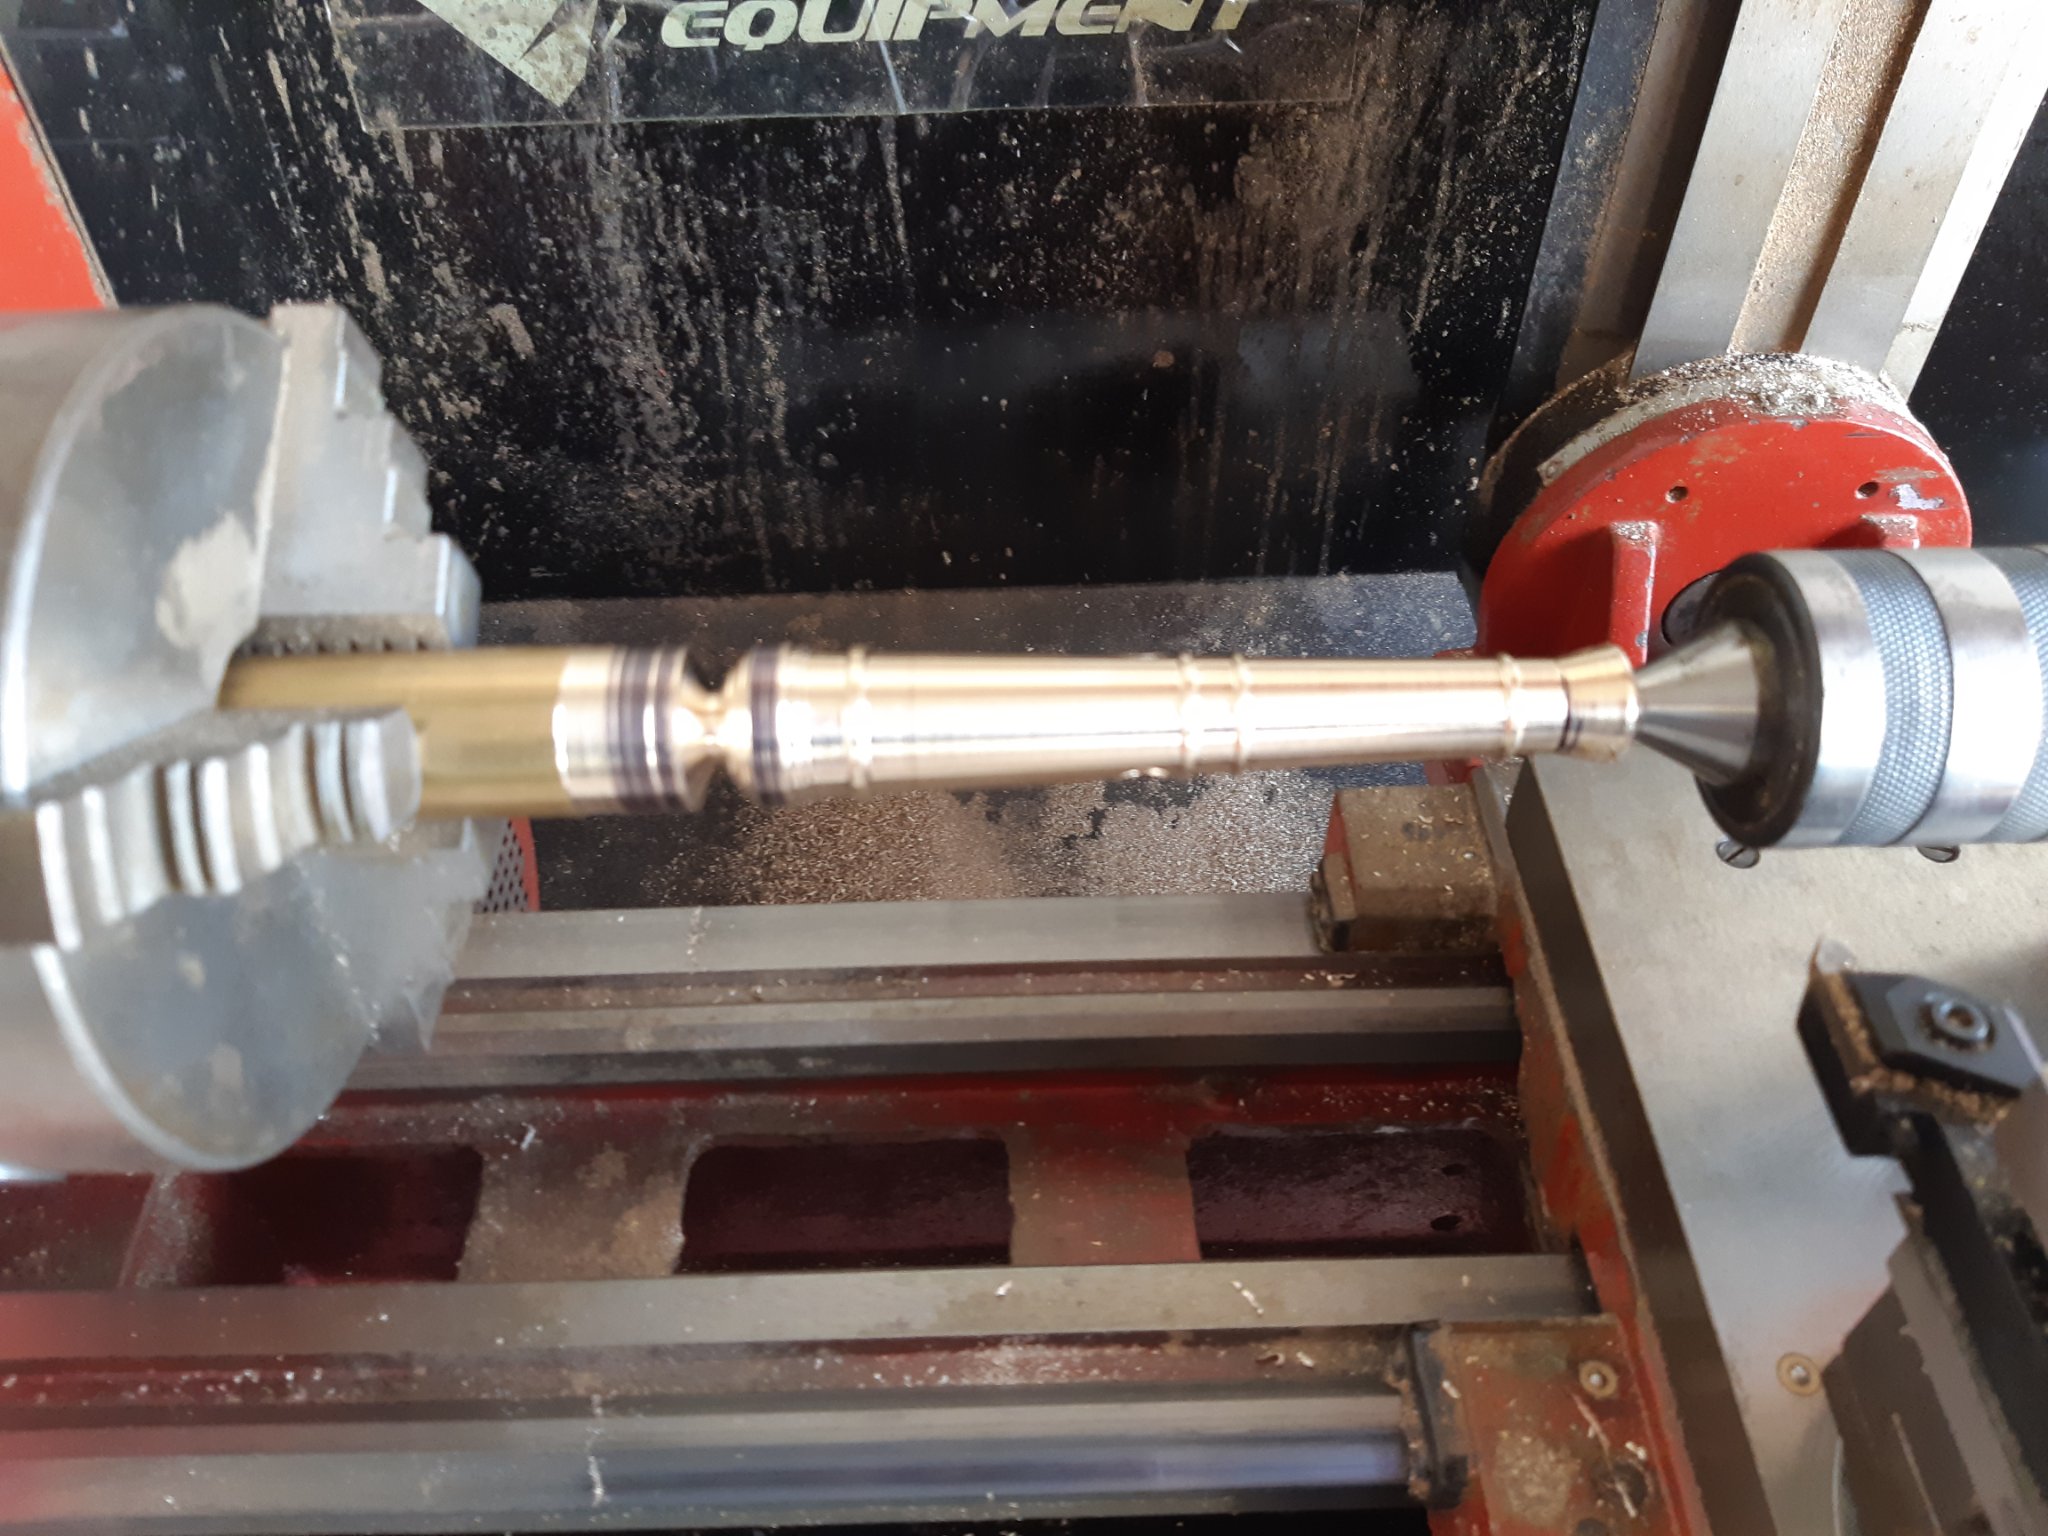
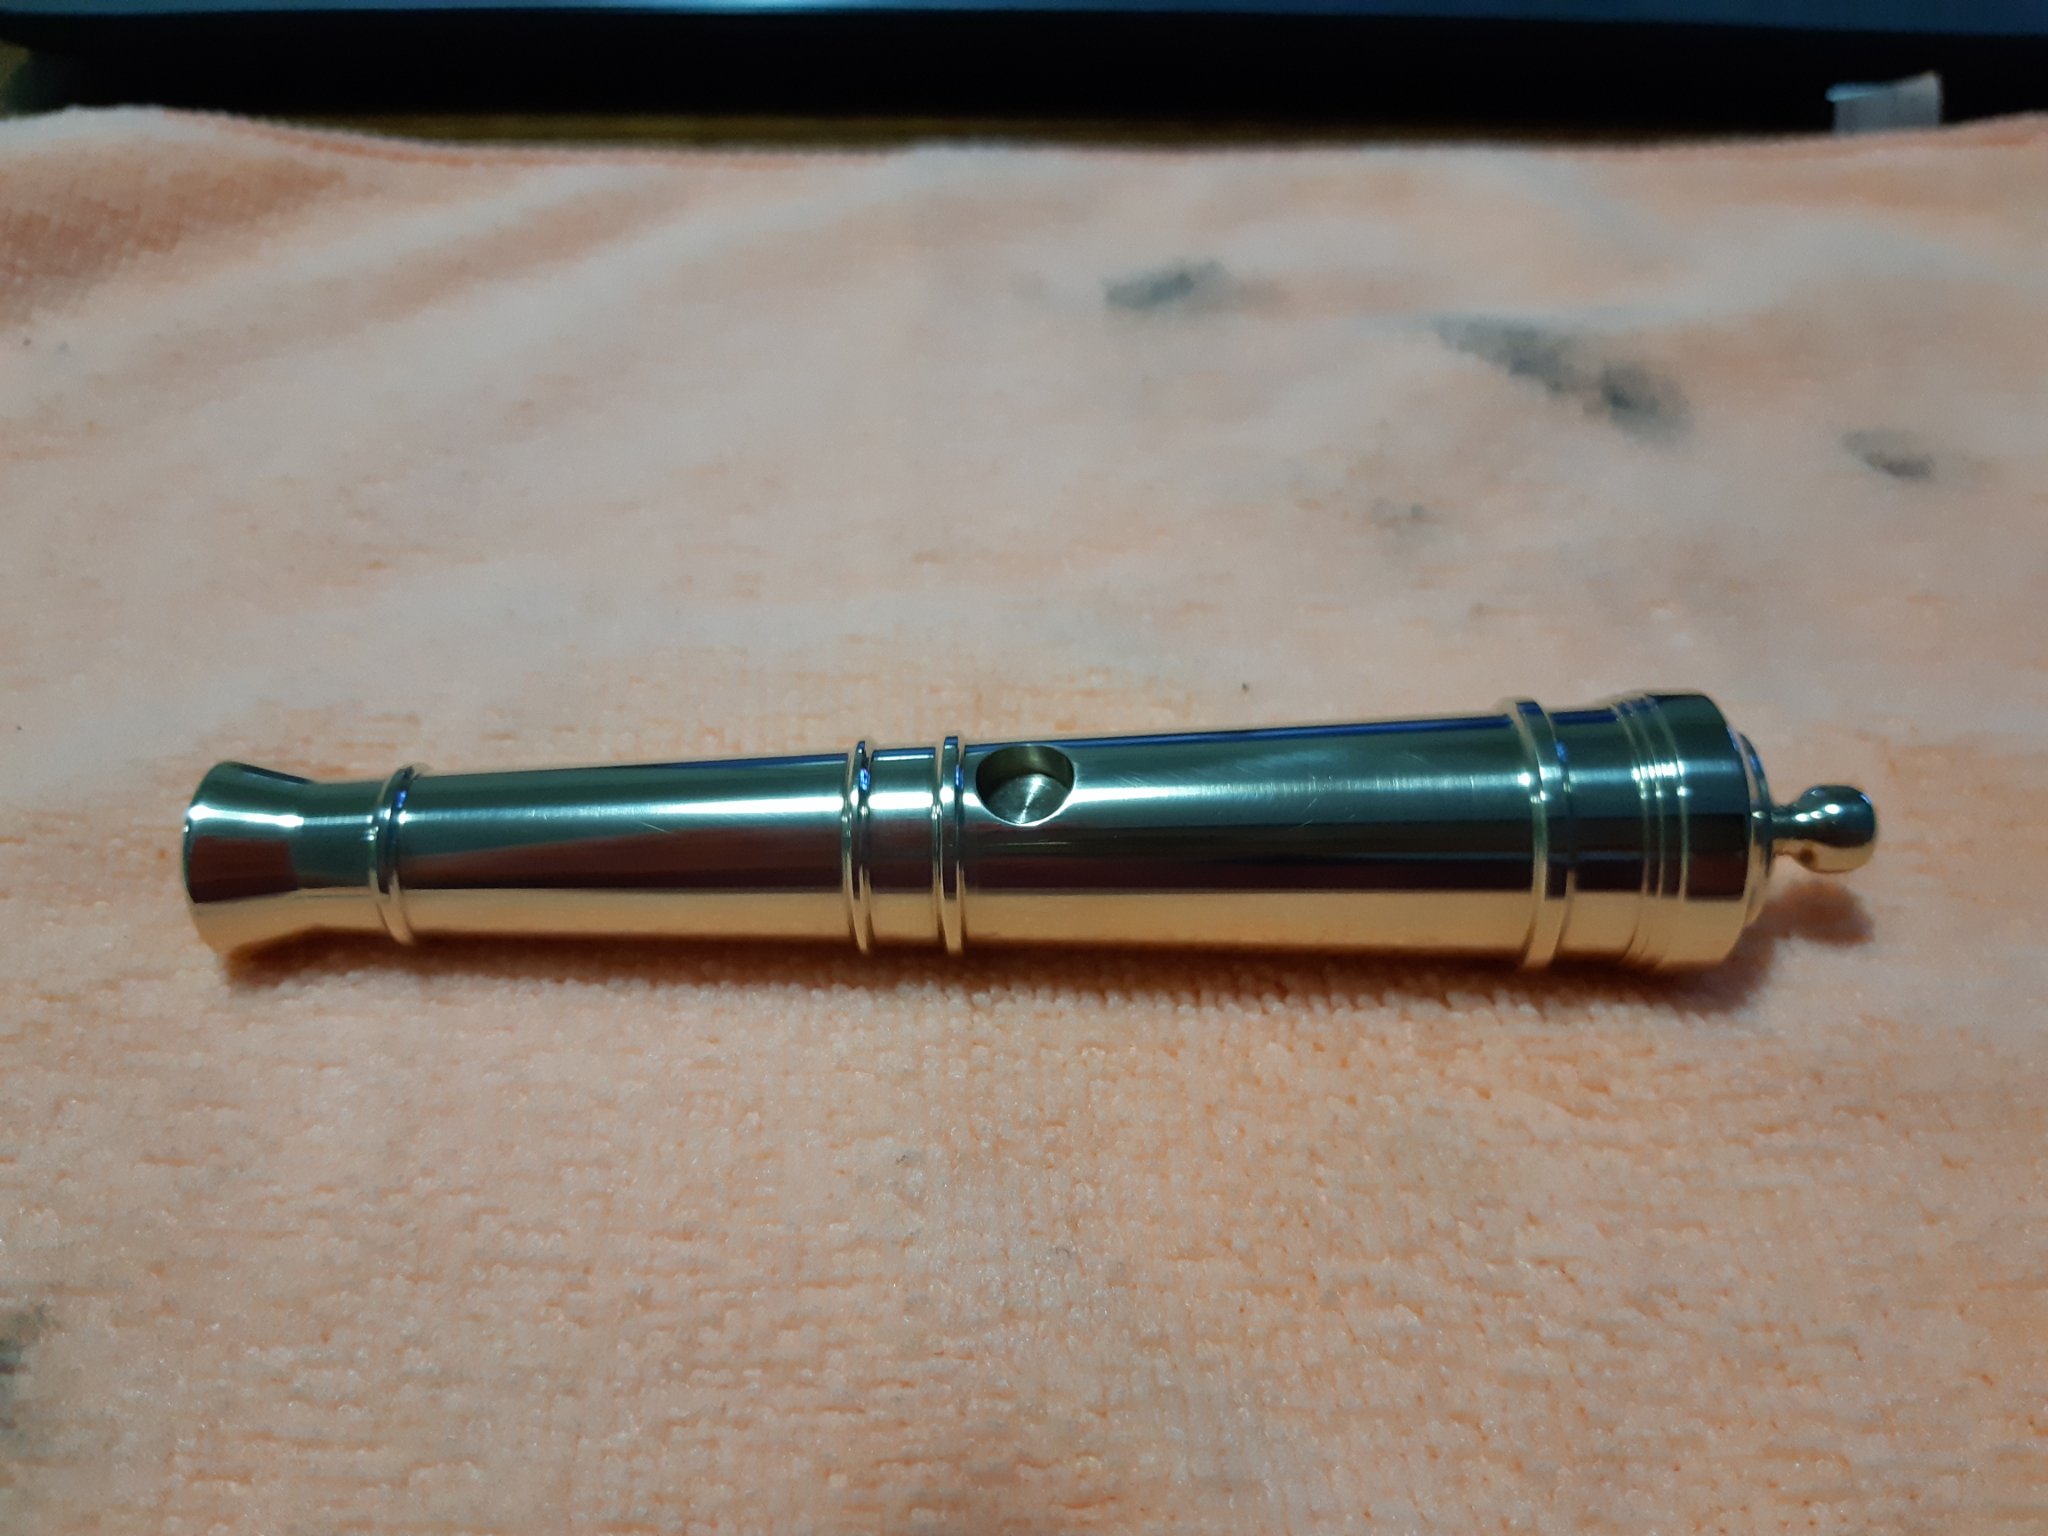
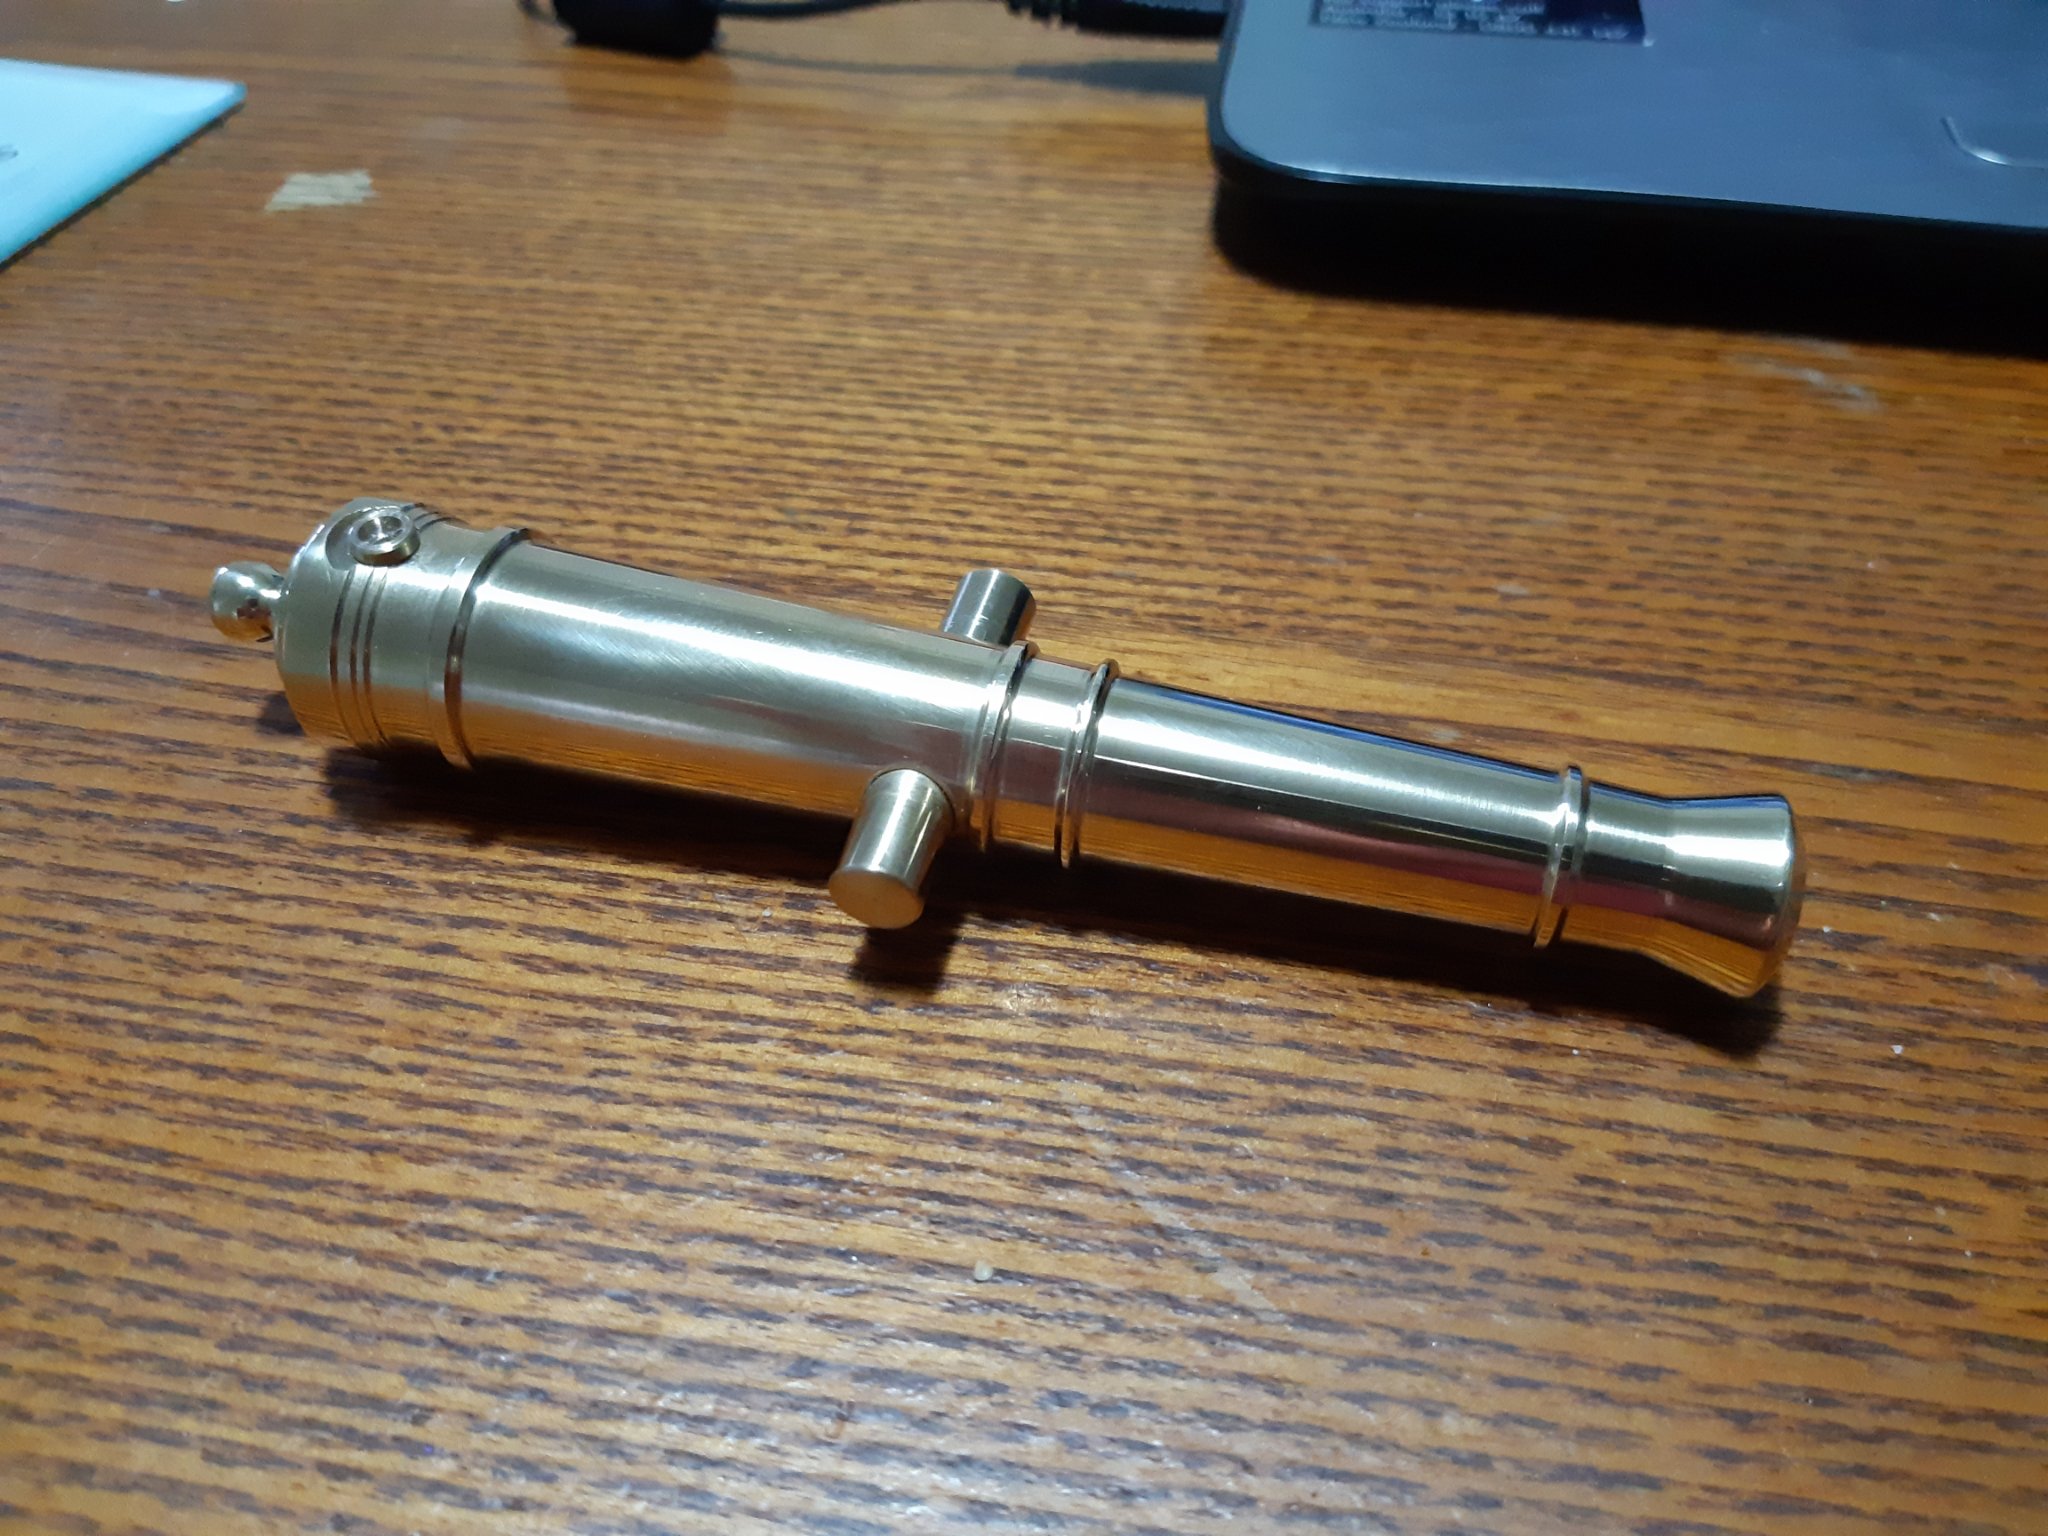
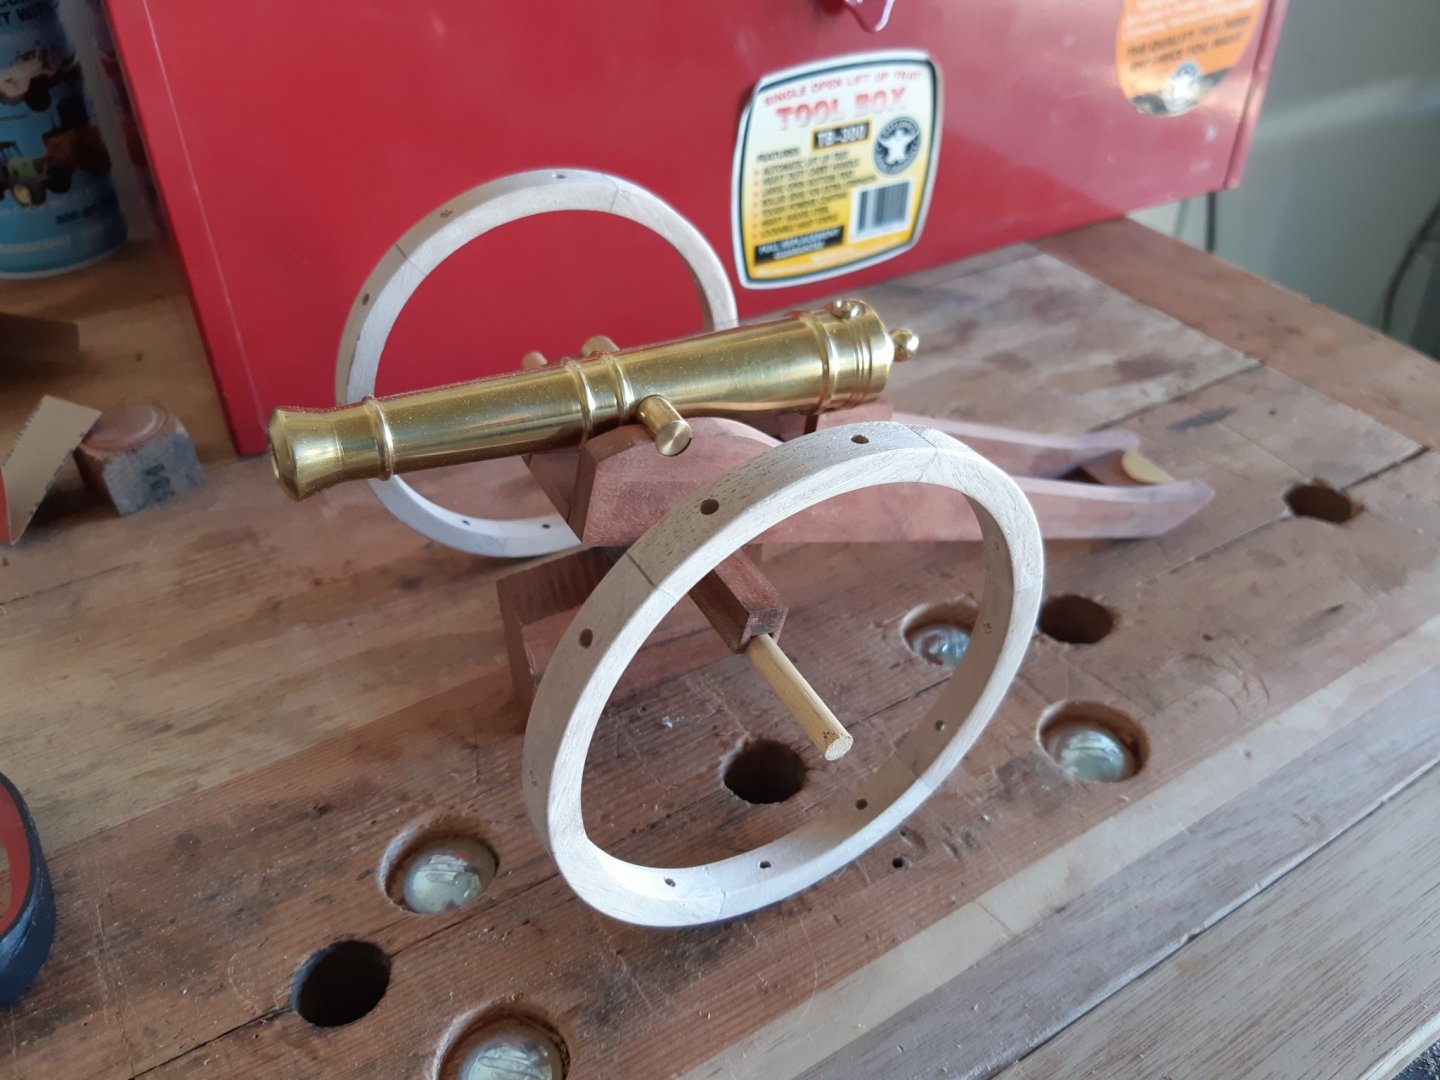
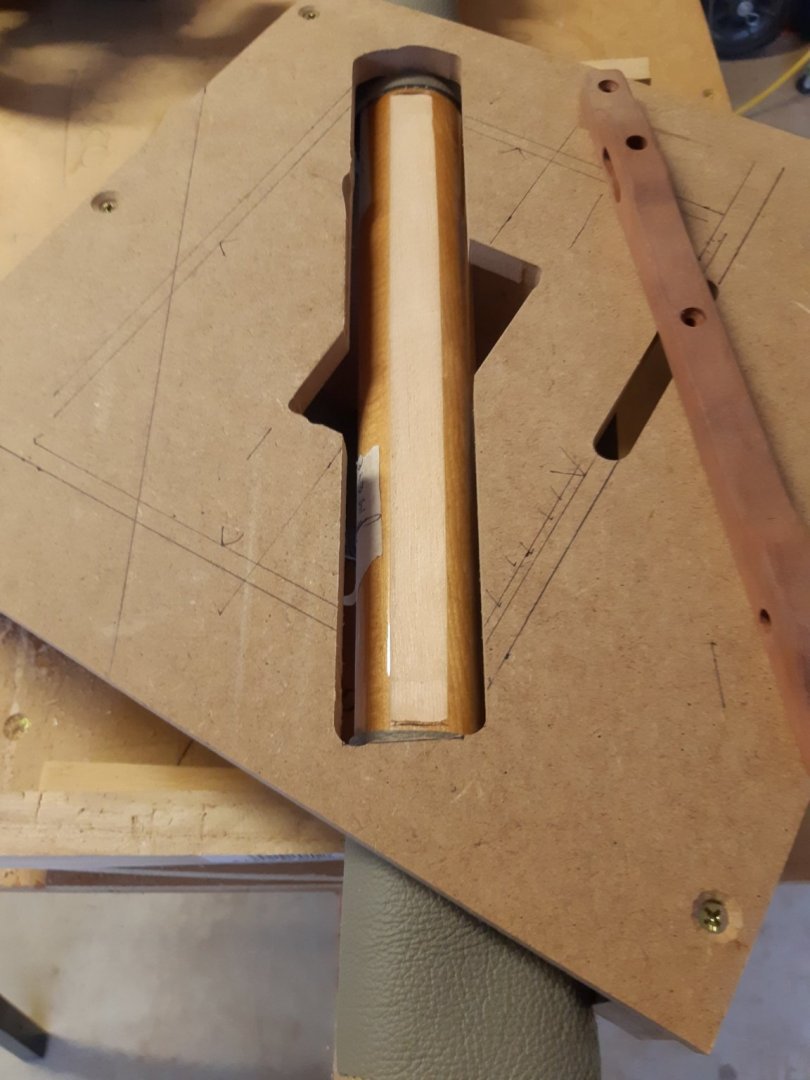
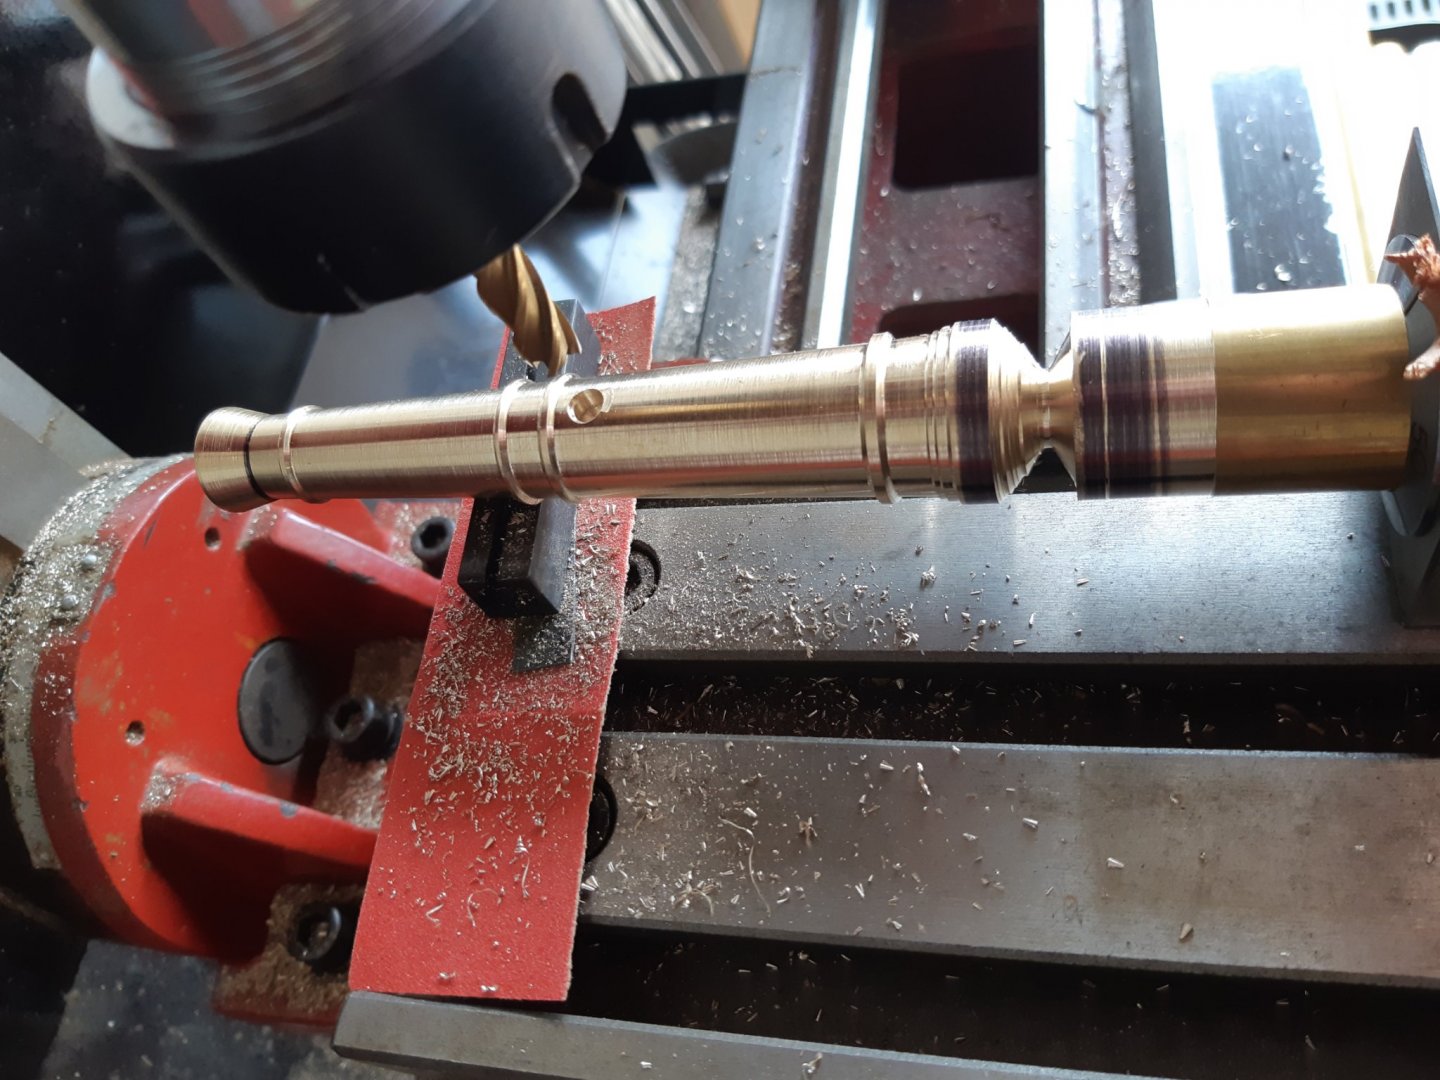
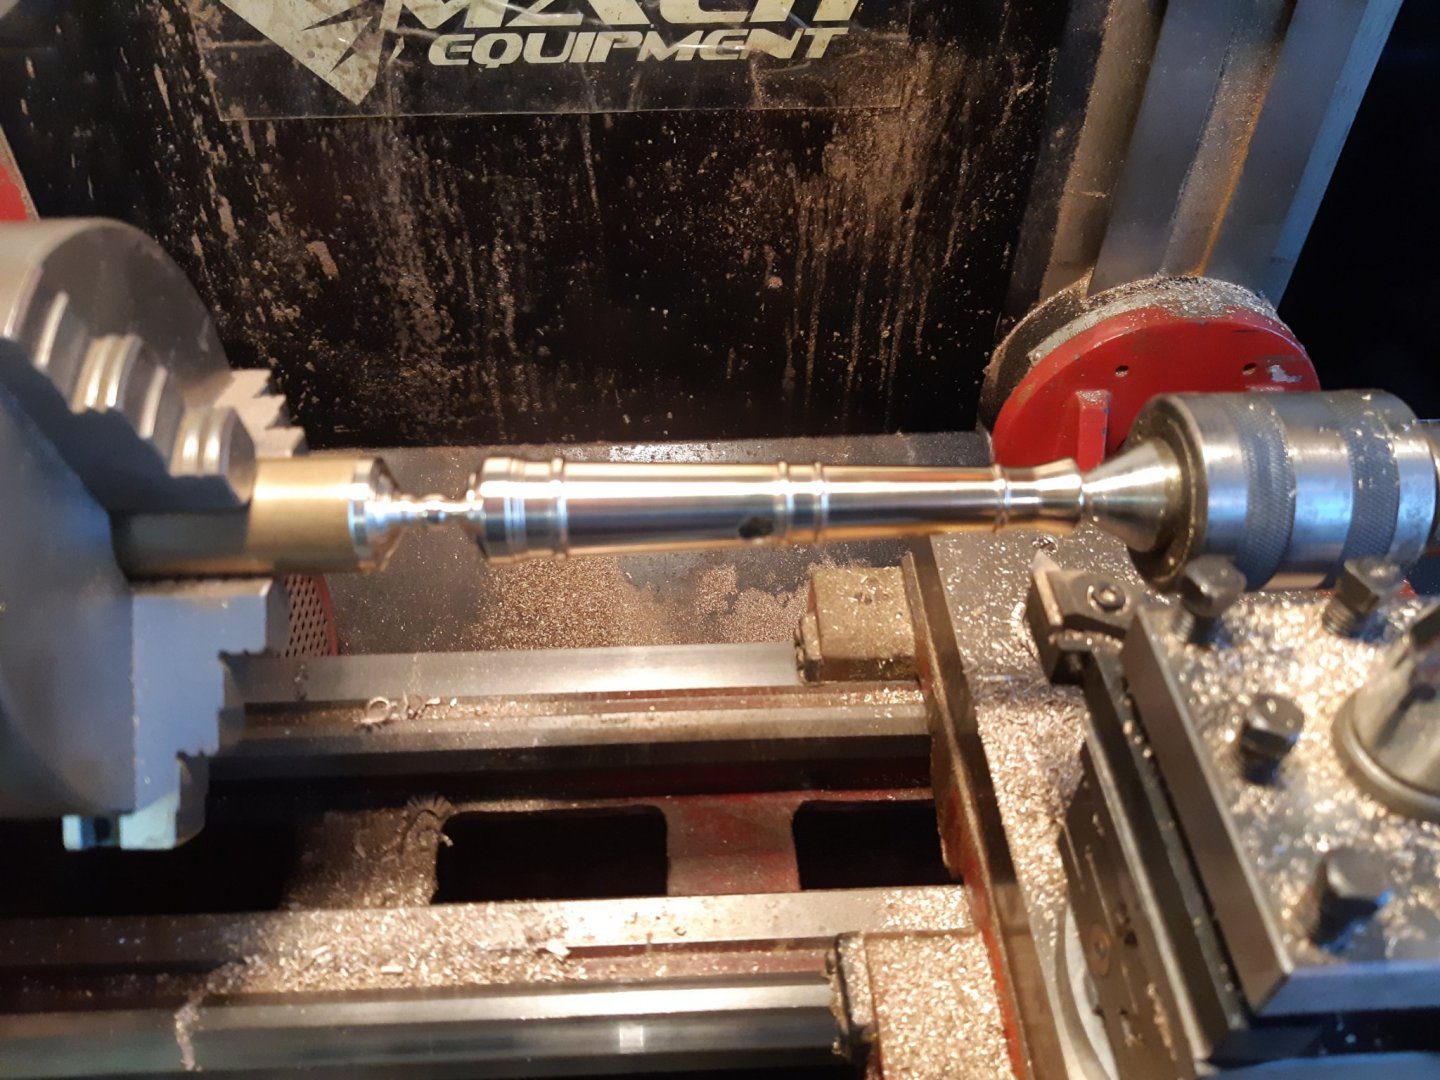
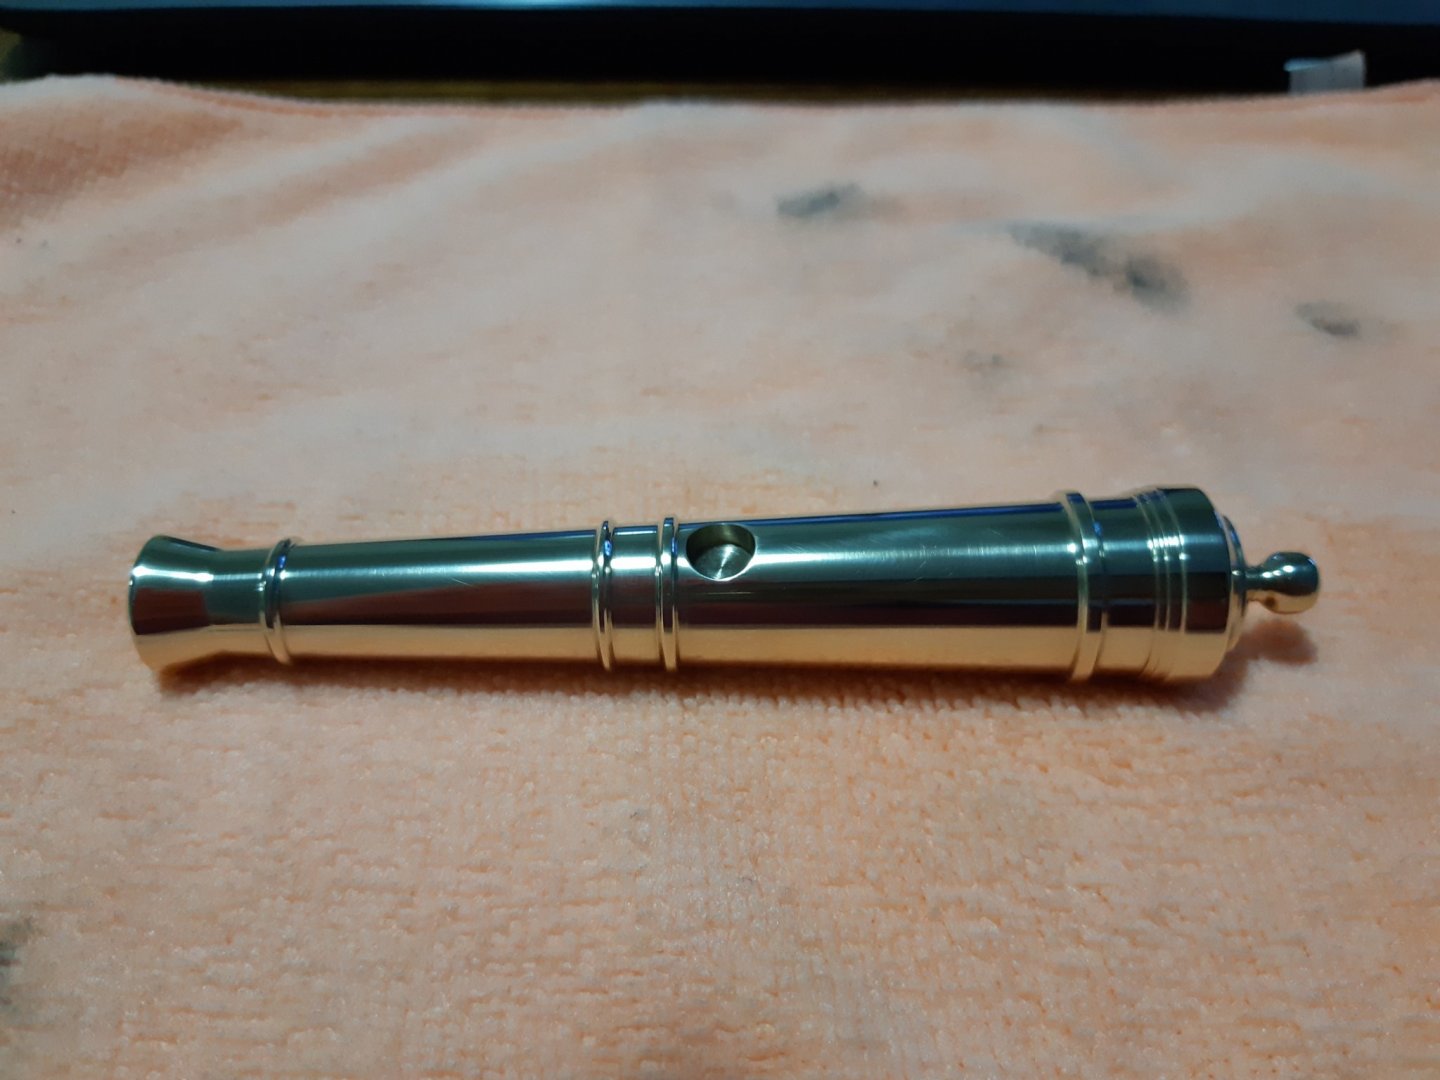
I have wanted to make a field gun and wooden wheels for ages and now that I have a hex ER collet block I thought I'd give it a go. This is a generic design of my own inspired by pics found on the net. It's as much about the exercise and learning opportunities such a project presents as anything else. Basic shape turned Mounted in square collet block to drill trunnion holes at 180 degrees Back in the lathe to finish turning Trunnions pressed in


- 30 replies
-
- 18
-
-
If more "Honey dos" come your way might I suggest answering with the Beatles classic "Honey don't", you may then wish to duck
-
Yeah that's an interesting concept, you've set yourself another challenge. It will be interesting to watch it take shape and one to remember I think