HOLIDAY DONATION DRIVE - SUPPORT MSW - DO YOUR PART TO KEEP THIS GREAT FORUM GOING! (89 donations so far out of 49,000 members - C'mon guys!)
×


Bedford
-
Posts
1,297 -
Joined
-
Last visited
Content Type
Profiles
Forums
Gallery
Events
Everything posted by Bedford
-
 The following is intended only as food for thought. Should all the planks (strakes) be the same width or should they appear to be the same width? Granted my full size lapstrake boat is epoxied ply construction and the strakes appear to have similar width relevant to where you look along the hull but the strakes themselves are wildly different and some really strange shapes are used to achieve this. This is demonstrated by the second photo in your post above, the midway batten looks "wrong" because of the curves but look at it from a level side view and it looks perfectly fair. The point is, you can look at the batten from any angle to ensure it is fair with the flow of the hull but the only angle you can view from to decide if it's following the correct line is a level side view. I've included a pic of some of the strakes for my boat
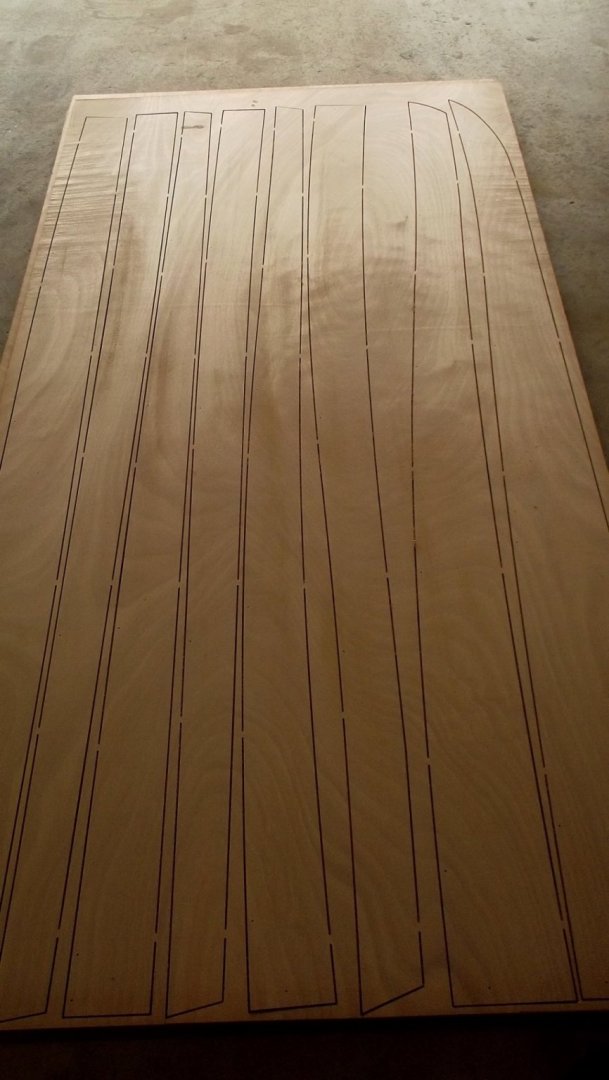
-
I'll pull my chair up again. nice to see some progress on this little beauty
-
Chris that blue looks great in the sun, sets the whole thing of very nicely! As for your concluding thoughts, I couldn't agree more with the last two.
-
Yeah Chris, I'm not trying to correct the designer and I'm sure there will be plenty of quiet drifting/slow paddling where the seated position will be highly desirable. Just thought it reasonable to let you know the other option. I wonder if this is designed to be paddled more like a kayak which, by the way is far more efficient than the single paddle and "J stroke". I had a 15 foot Old Town canoe and always preferred the kayak paddling style. Either way, you'll work it out and get a great deal of pleasure from it.
-
Yes I was thinking the same thing. Sitting in it kayak style will not allow proper power strokes or control whereas kneeling as above gives a great deal of control and power. Even if you aren't going for power it will give you better bang for your muscle buck so you will not fatigue anywhere near as quickly. There is also the benefit that when kneeling it is easy to tip the canoe to one side which will help it turn. A comfort tip for kneeling:- take two car washing sponges to kneel on, they also double as bailers to remove excess water.
-
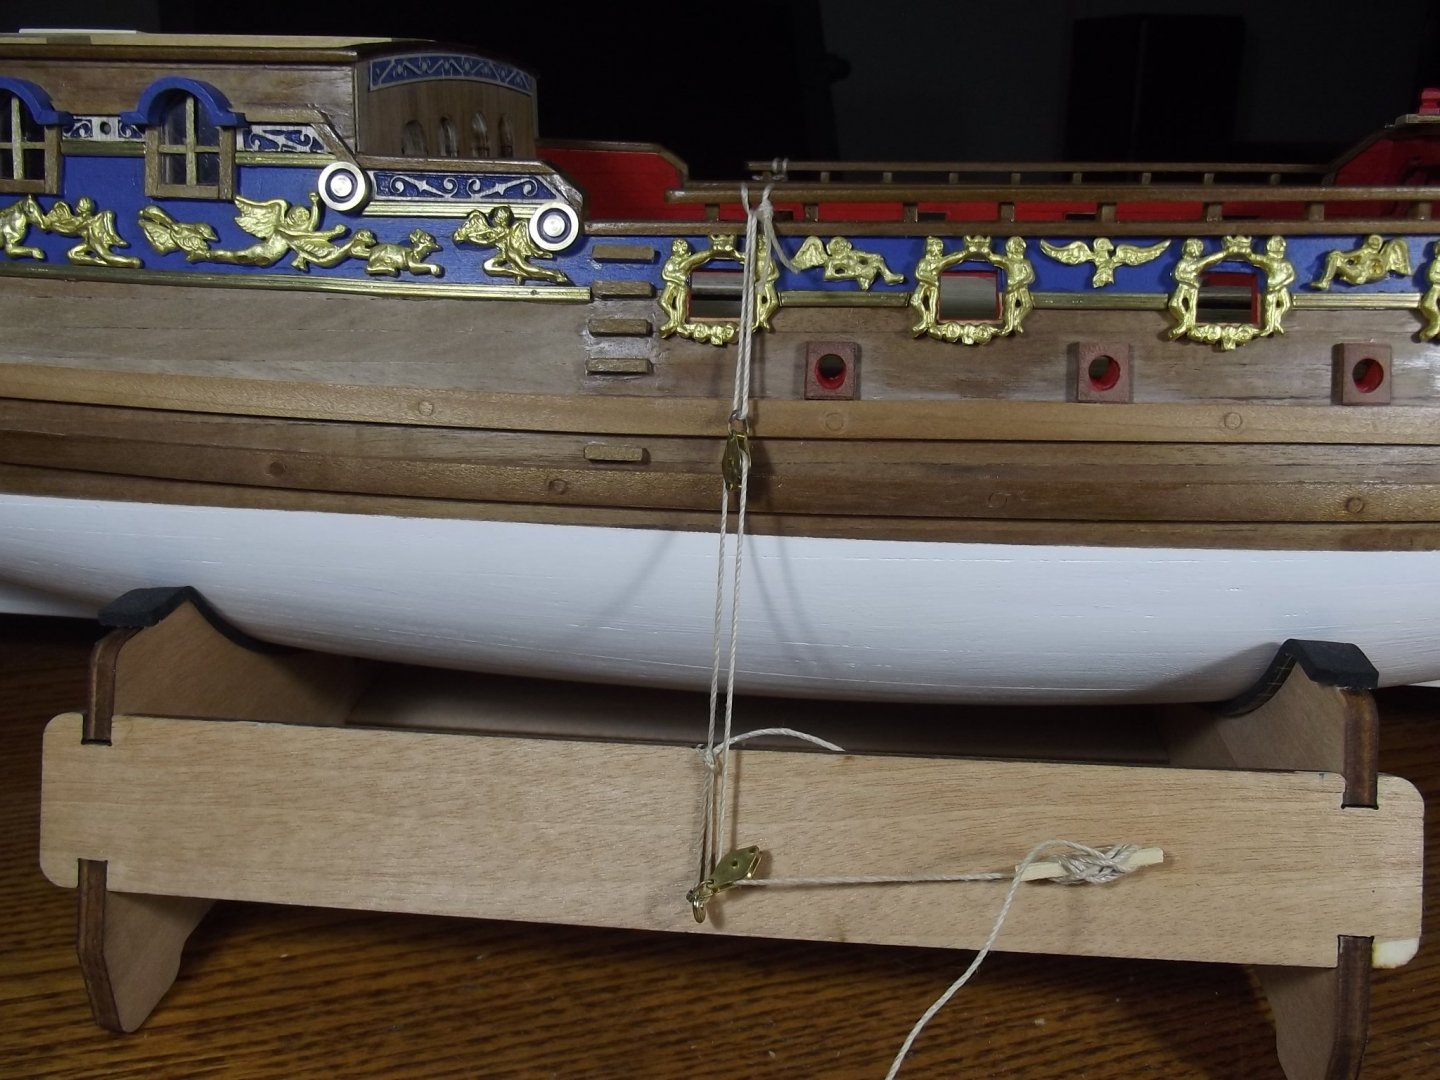
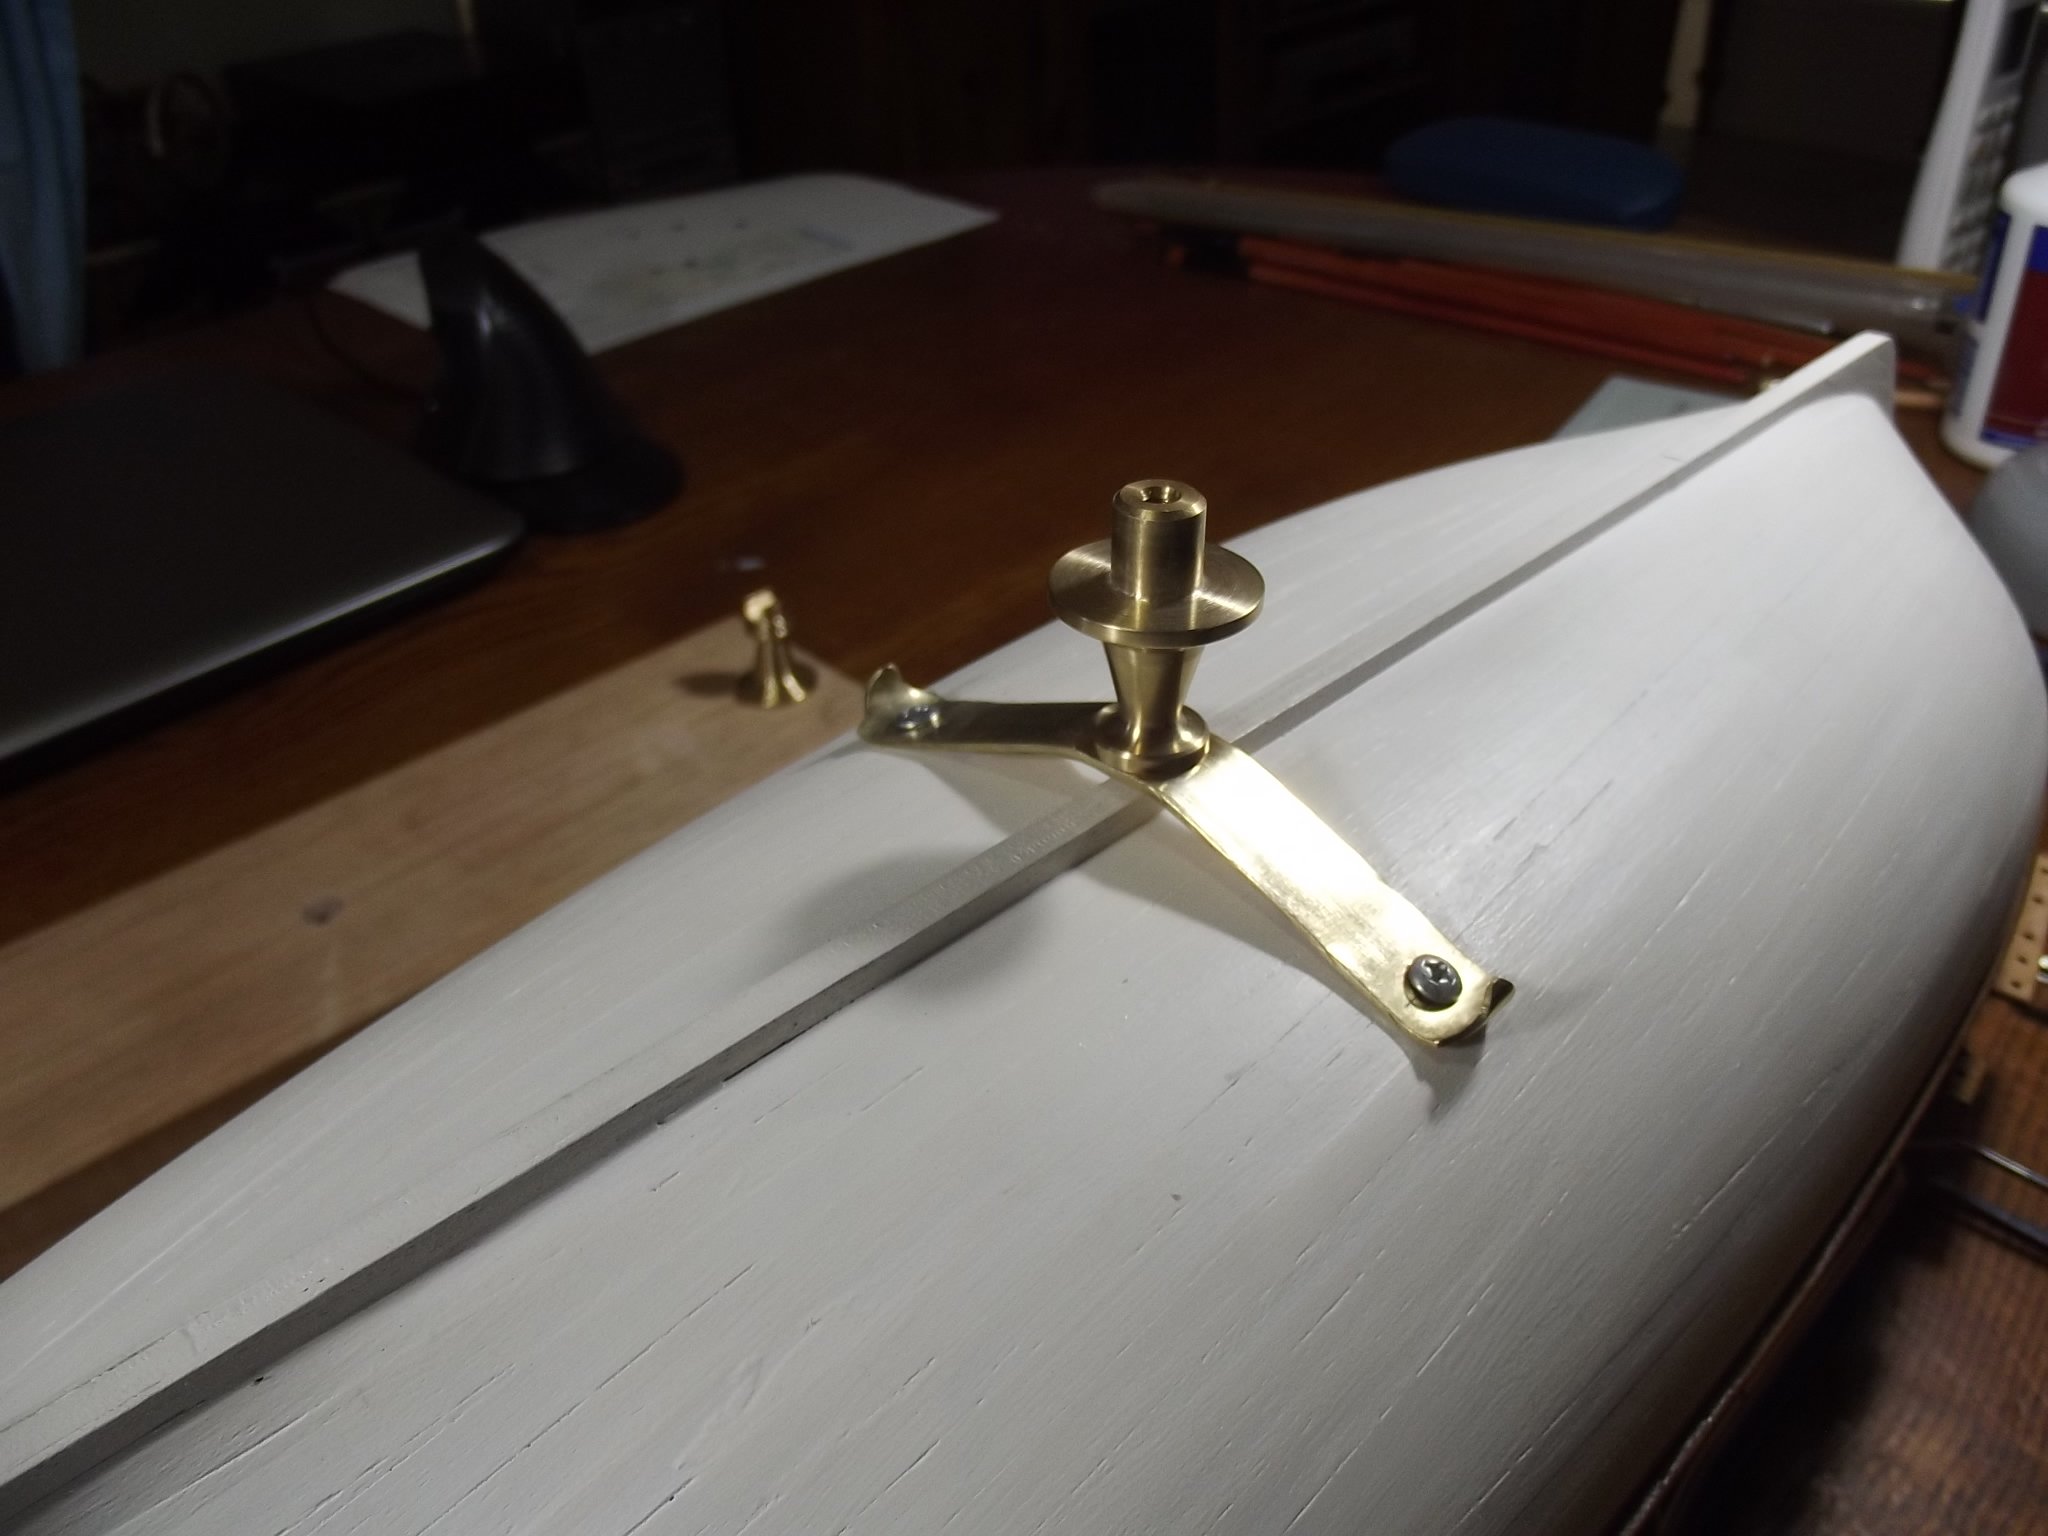
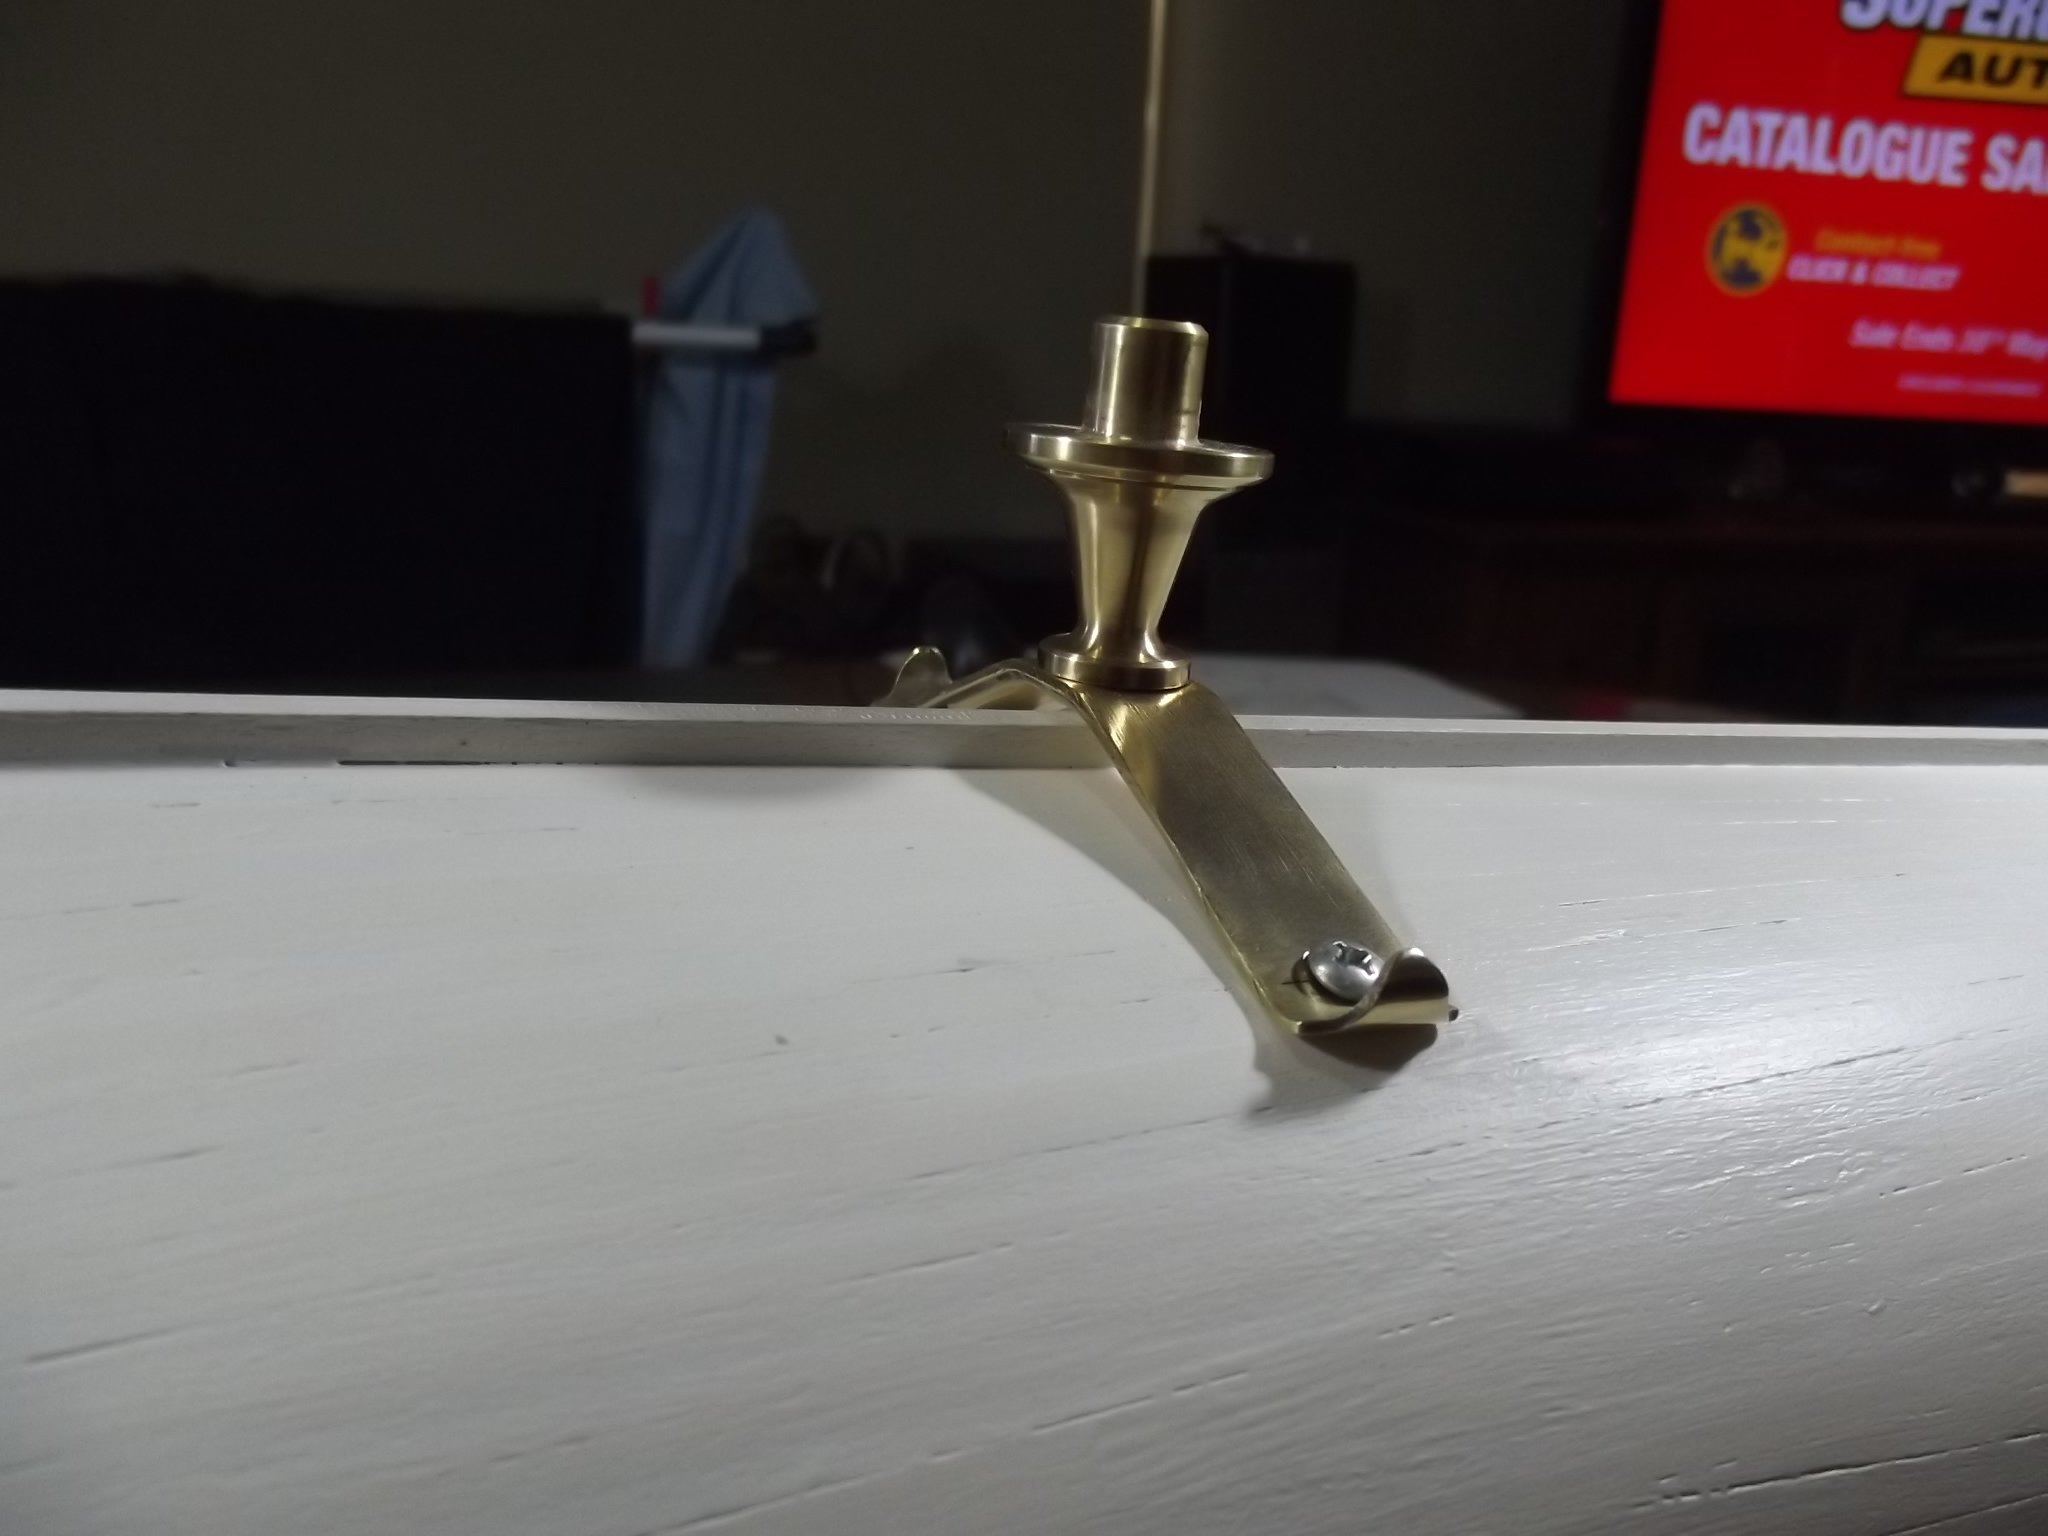
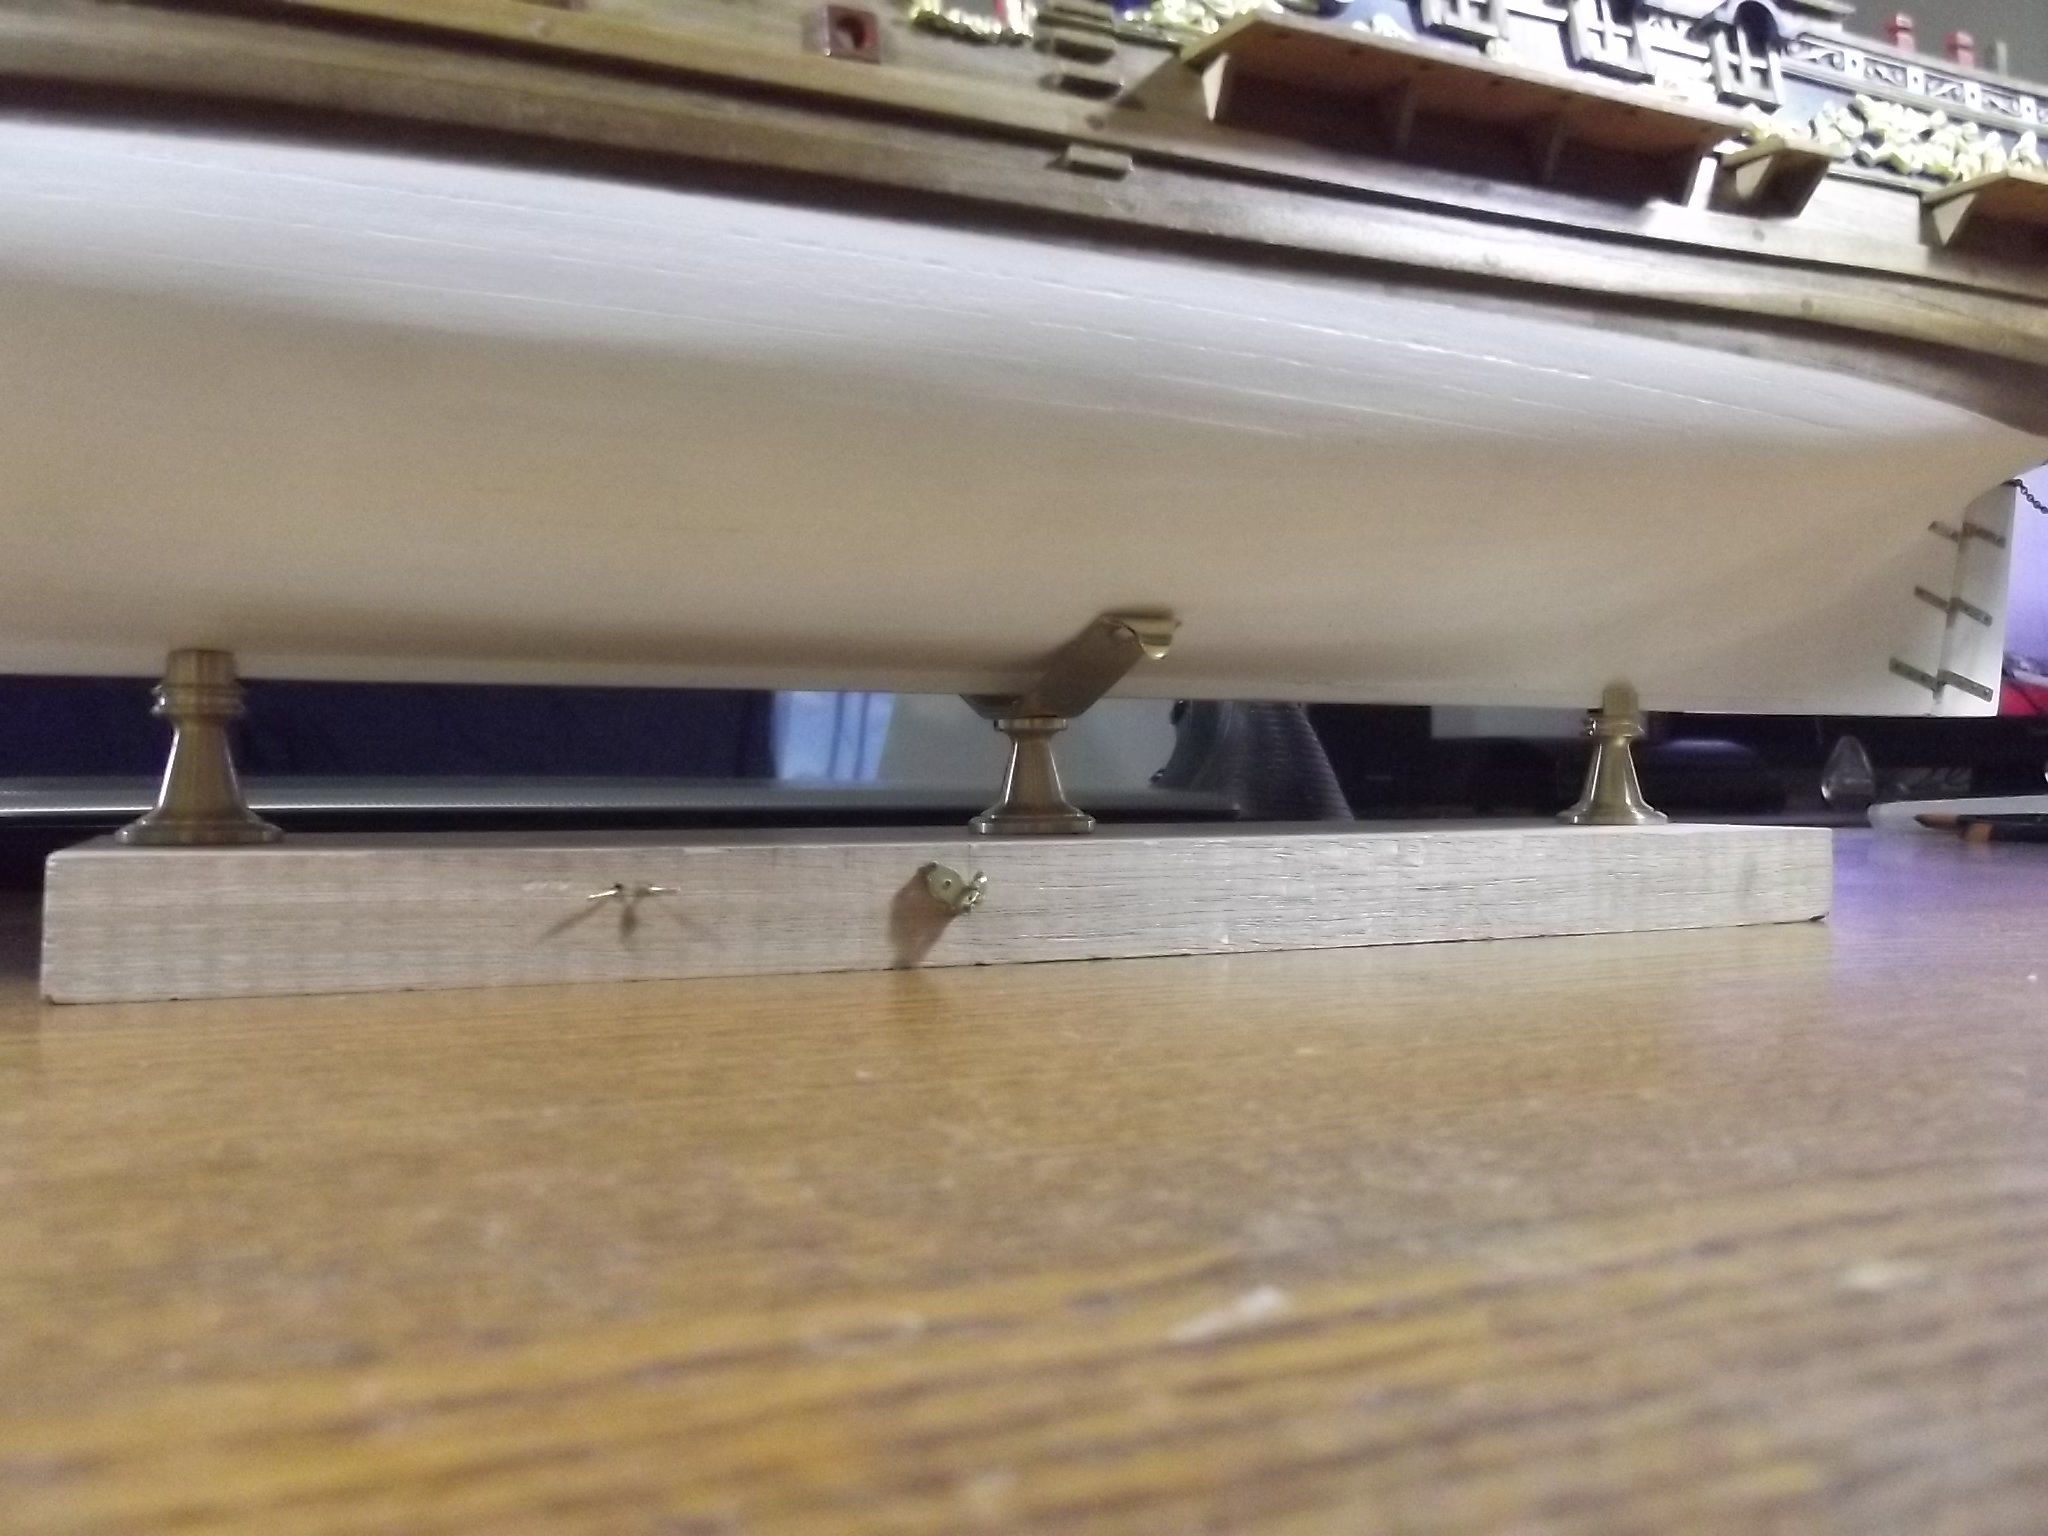
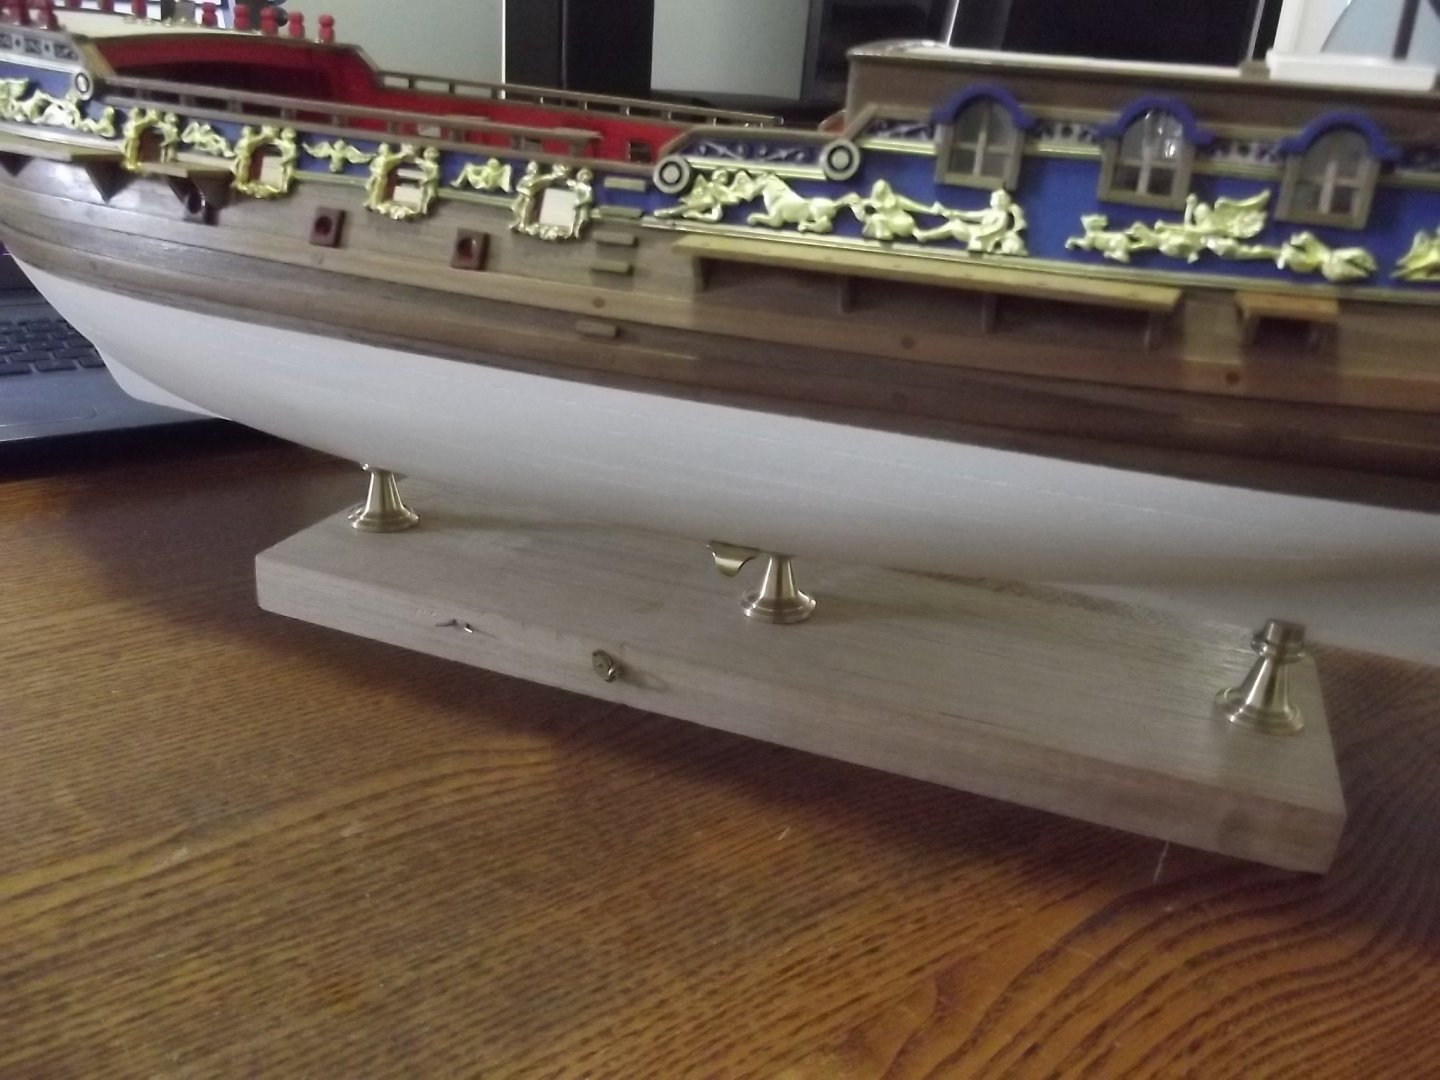
Thanks Mark, I've been stewing this over for weeks trying to come up with an elegant solution. Most involved very complex milling of the centre pedestal head from larger diameter brass which I wasn't keen on. I saw one model with the two pedestals as usual and a vertical strut from the display base to the far side of the hull which I even considered for a bit but thought a bit too rudimentary. This solution presented itself the other day and I'm very happy with it. Viewed from a normal angle there is very little to see which is what I wanted.

-
Well that depends entirely on the font size
-
I've been concerned for some time that the weight of this hull would be too great for the tiny keel ( 4x4.5mm ) to sustain any lateral movement so I've come up with a 3 pedestal system whereby the centre pedestal is parted off below the keel and a cross arm fashioned from two layers of 1.2mm brass plate soldered together after shaping them to fit the hull. The cross arm is screwed to the hull and will hopefully provide the anti roll protection I think it needs. The wooden base it is currently on is for setting up and continued building, when done the pedestals will fit straight into the display base. I had to get this sorted now while I can still tip the thing upside down.


-
Yeah Chris, don't beat yourself up about a less than glass like finish. My boat looks great to everyone that sees it but the fish and I know that it ain't perfect
- 299 replies
-
- 10
-

-
Beautiful planking job, can I book you in to help with my next full size build?
-
Like Mark Pearse I have just found this build and am enthralled. It will be a joy to follow along!
- 433 replies
-
- 4
-
-
- open boat
- small boat
- (and 1 more)
-
15' Dinghy by Bedford - FINISHED - 1:1 scale
Bedford replied to Bedford's topic in Non-ship/categorised builds
Gary, "elegant and utilitarian" is what makes the craftsmanship of old so very beautiful that even a 119 year old tug boat is a thing of beauty (see S.T. Waratah) and something I strive to achieve. I let the function dictate to basic form then fine tuned it to please they eye. -
I'm reminded of making the spars for my boat and the realisation that I could have three near round spars or three perfectly round tooth picks.
- 299 replies
-
- 12
-
-

-
Ah yes the old boat build three step. One step forward and two steps backwards! Never mind Chris, you'll get there and more importantly you'll be happy with it. I had an old town plastic canoe which I had to sell to make way for my dinghy build but it had a hand hold in the breast hook / deck at each end so I just made an eye splice in three strand rope around the hand grip and left the line long enough to almost reach the forward roof rack and attached a dog clip by way of another eye splice. I then had a short webbed strap with an eye in each end that went around the roof rack for the dog clip to attach to. This had the effect of creating a fixed length lanyard with which to set the longitudinal position of the canoe on the car while providing the required mechanical restriction against it sliding forward in an accident. I used a ratchet strap to do the same thing aft, this allowed me to pull the canoe against the forward strap. Then just two straps over the hull. Why have I told you this? Well if you went this way you wouldn't need cleats but I'd recommend two screw pad eyes such as the last one pictured in your previous post and I'd probably through bolt them.
-
15' Dinghy by Bedford - FINISHED - 1:1 scale
Bedford replied to Bedford's topic in Non-ship/categorised builds
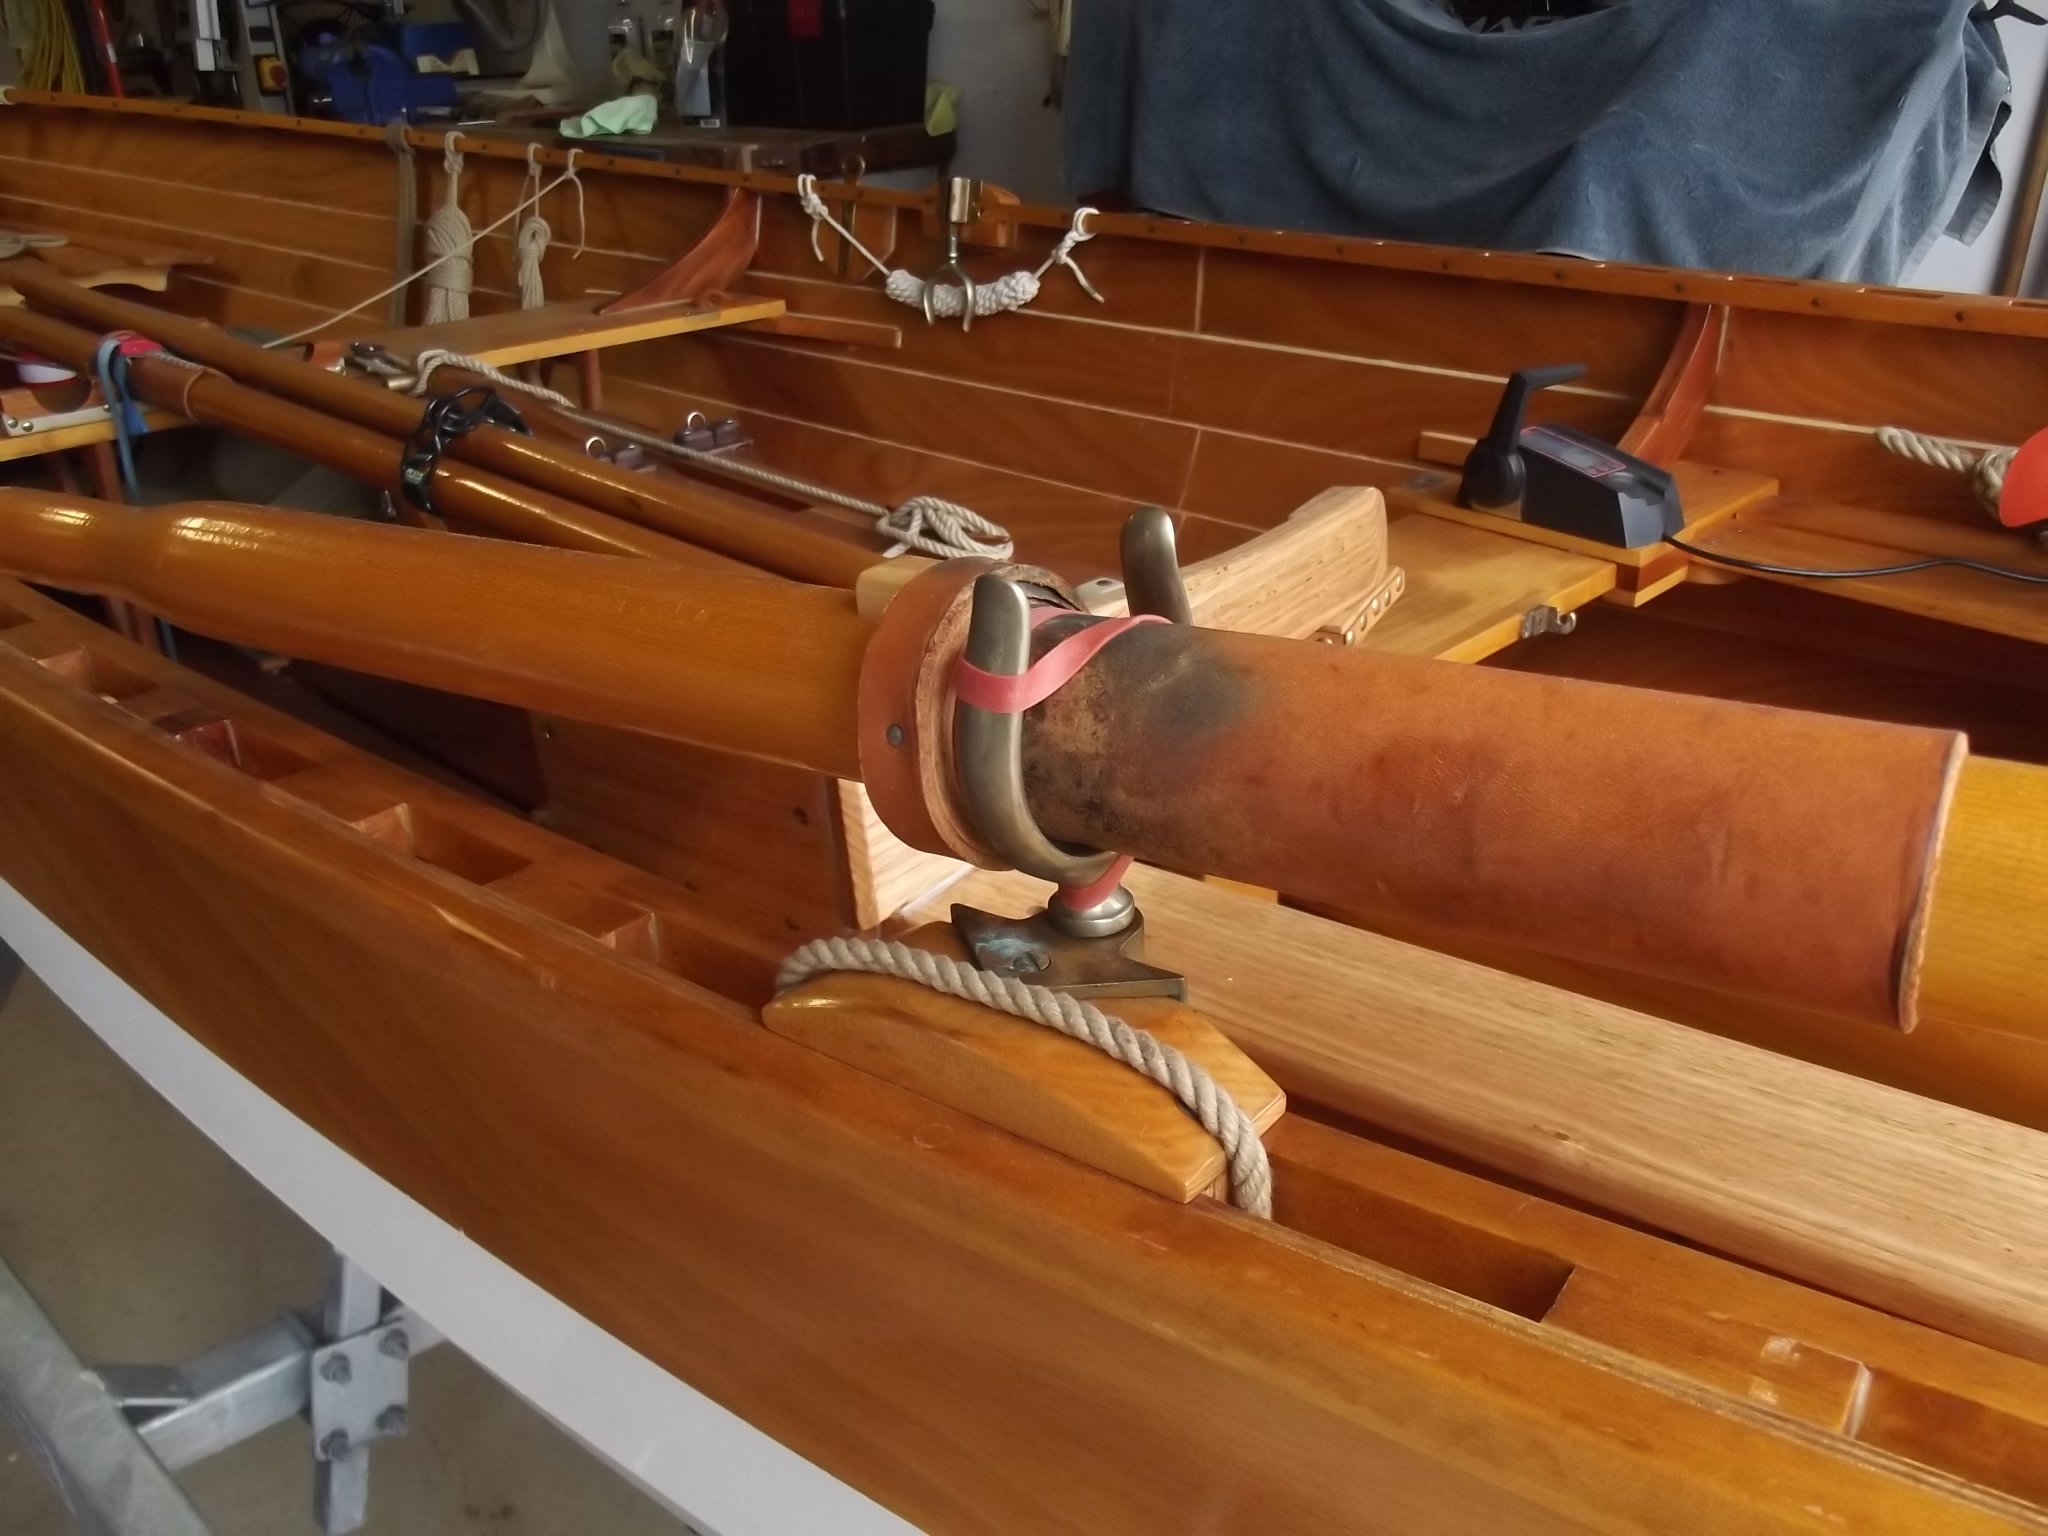
Mark, I bought the #2 but decided it looked so nice with just the #1 that it didn't need the #2 and the #1 is a lot easier to re-finish because it's just a case of wash down and reapply. Having said that, if I did another one I might do #2 on the thwarts etc. Here is an oar rest in place and I found that a simple "postie" rubber band should hold the oar easily and effectively.

- 109 replies
-
- 10
-
-
15' Dinghy by Bedford - FINISHED - 1:1 scale
Bedford replied to Bedford's topic in Non-ship/categorised builds
Thanks Mark, I let the job guide the shape and I'm happy with the result. I use Deks Olje #1 for the interior, all that hoop pine was almost white when I built it but now has a beautiful warm honey colour to it.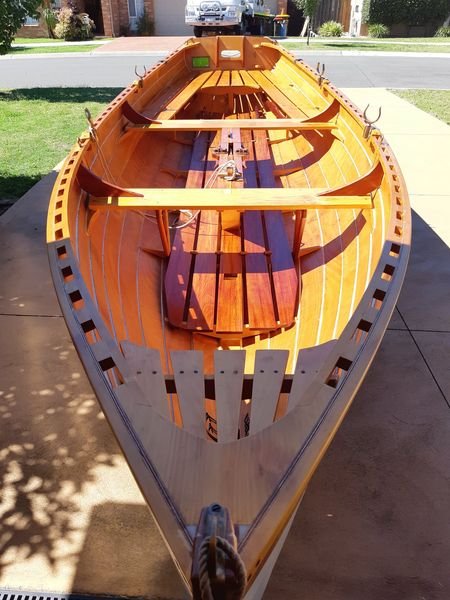
-
15' Dinghy by Bedford - FINISHED - 1:1 scale
Bedford replied to Bedford's topic in Non-ship/categorised builds
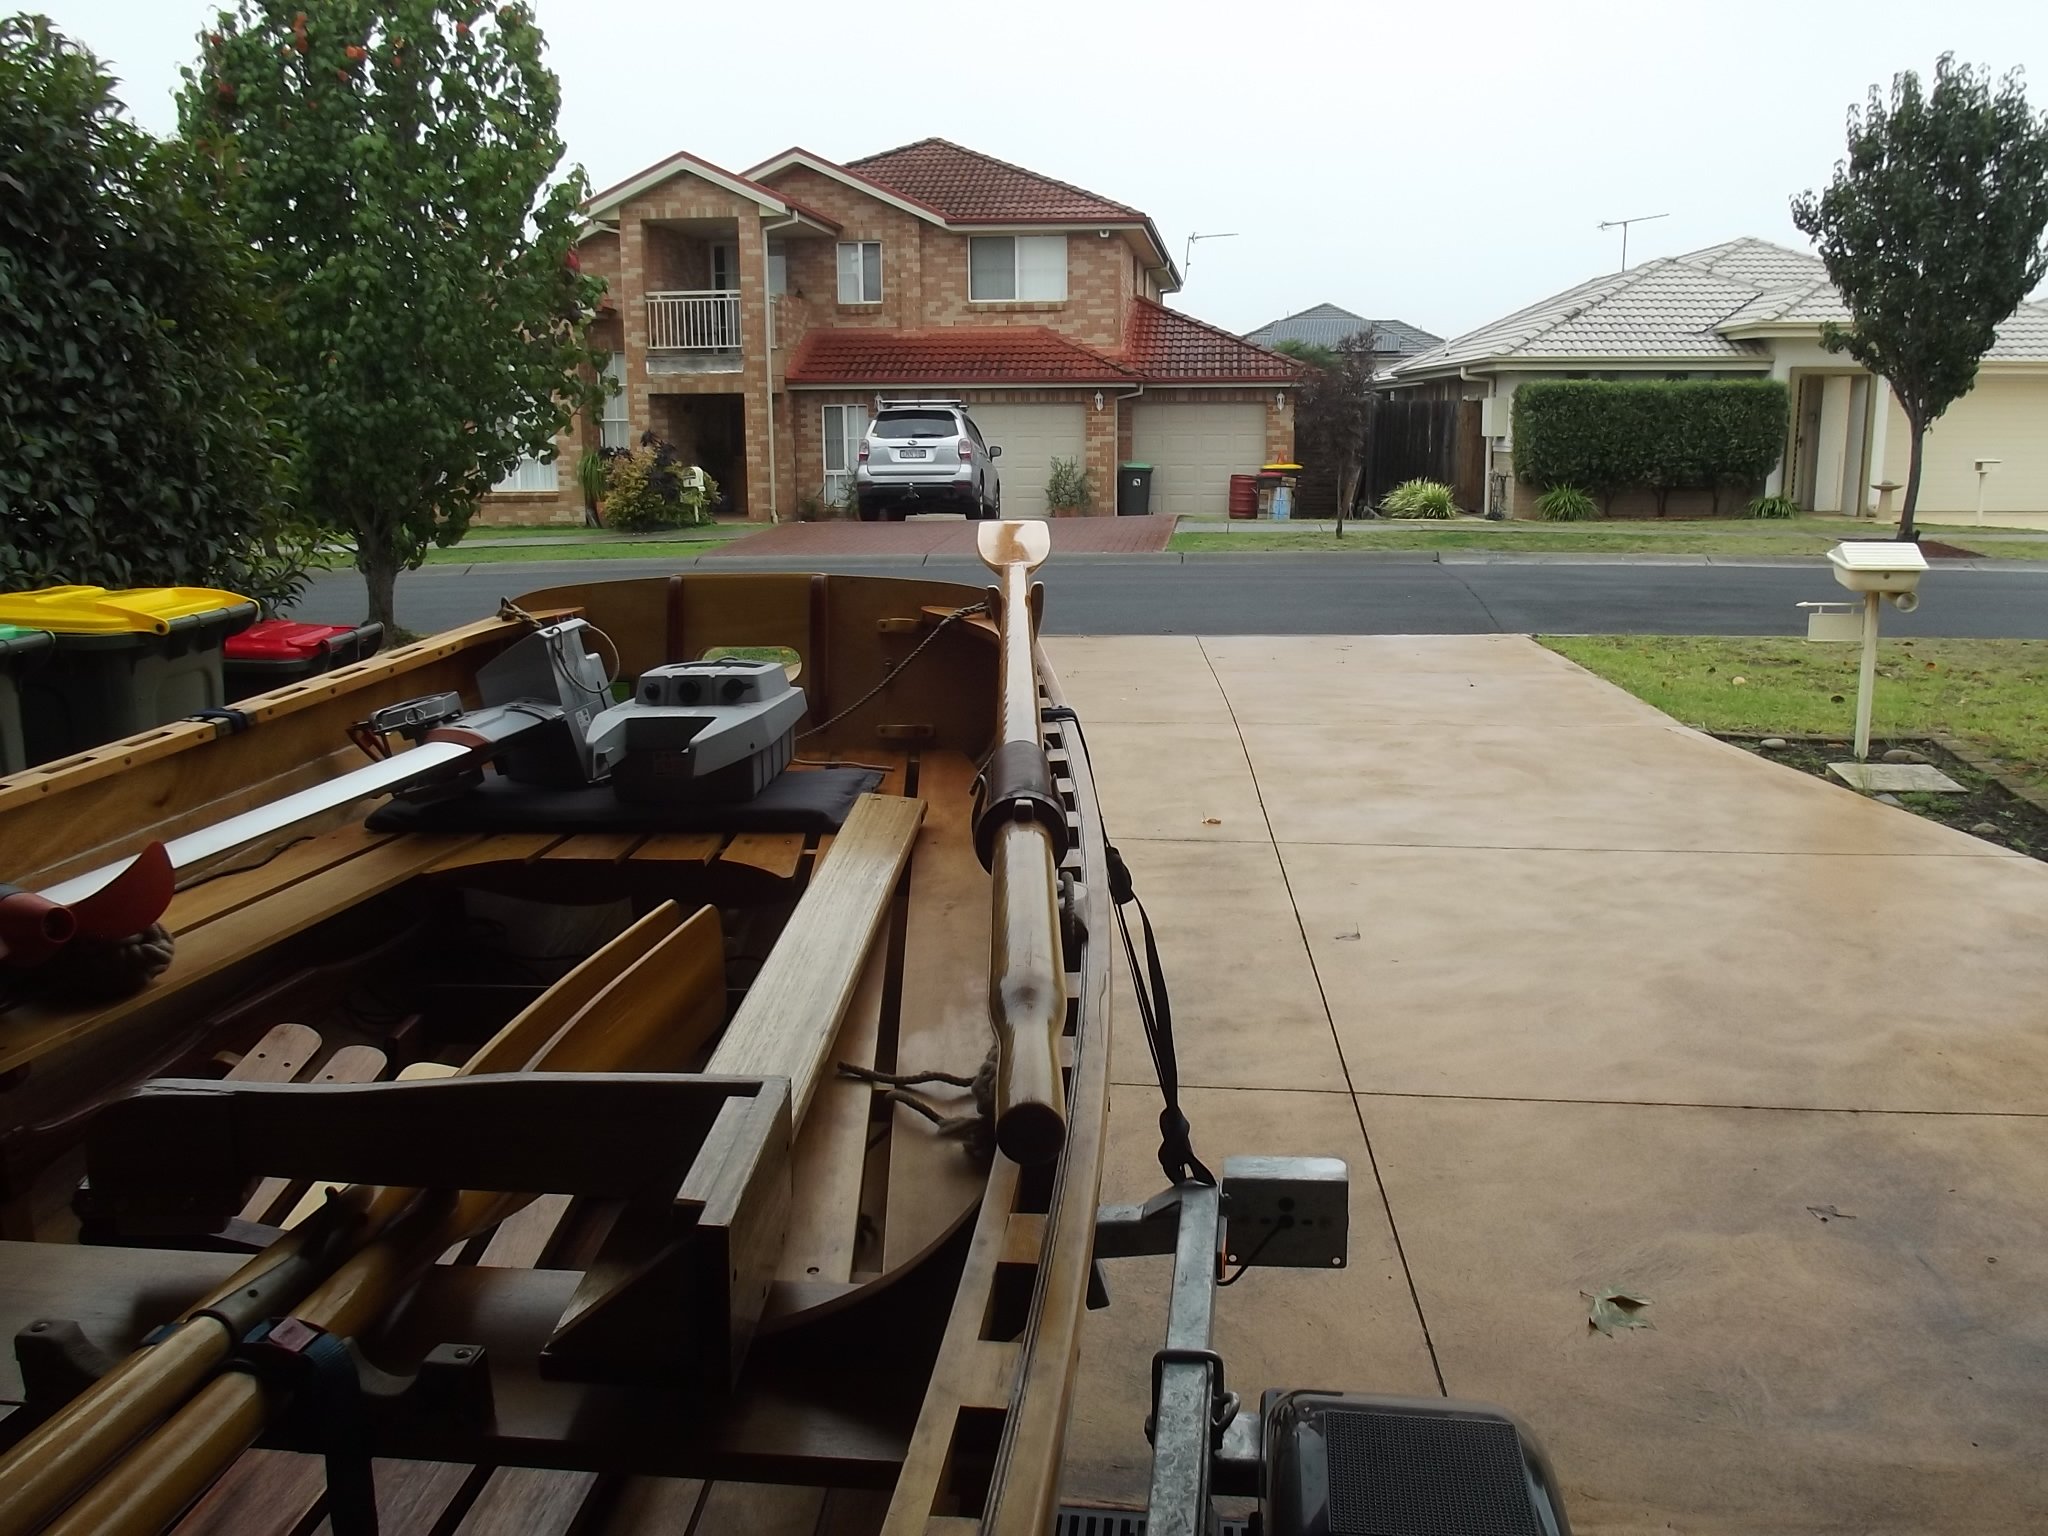
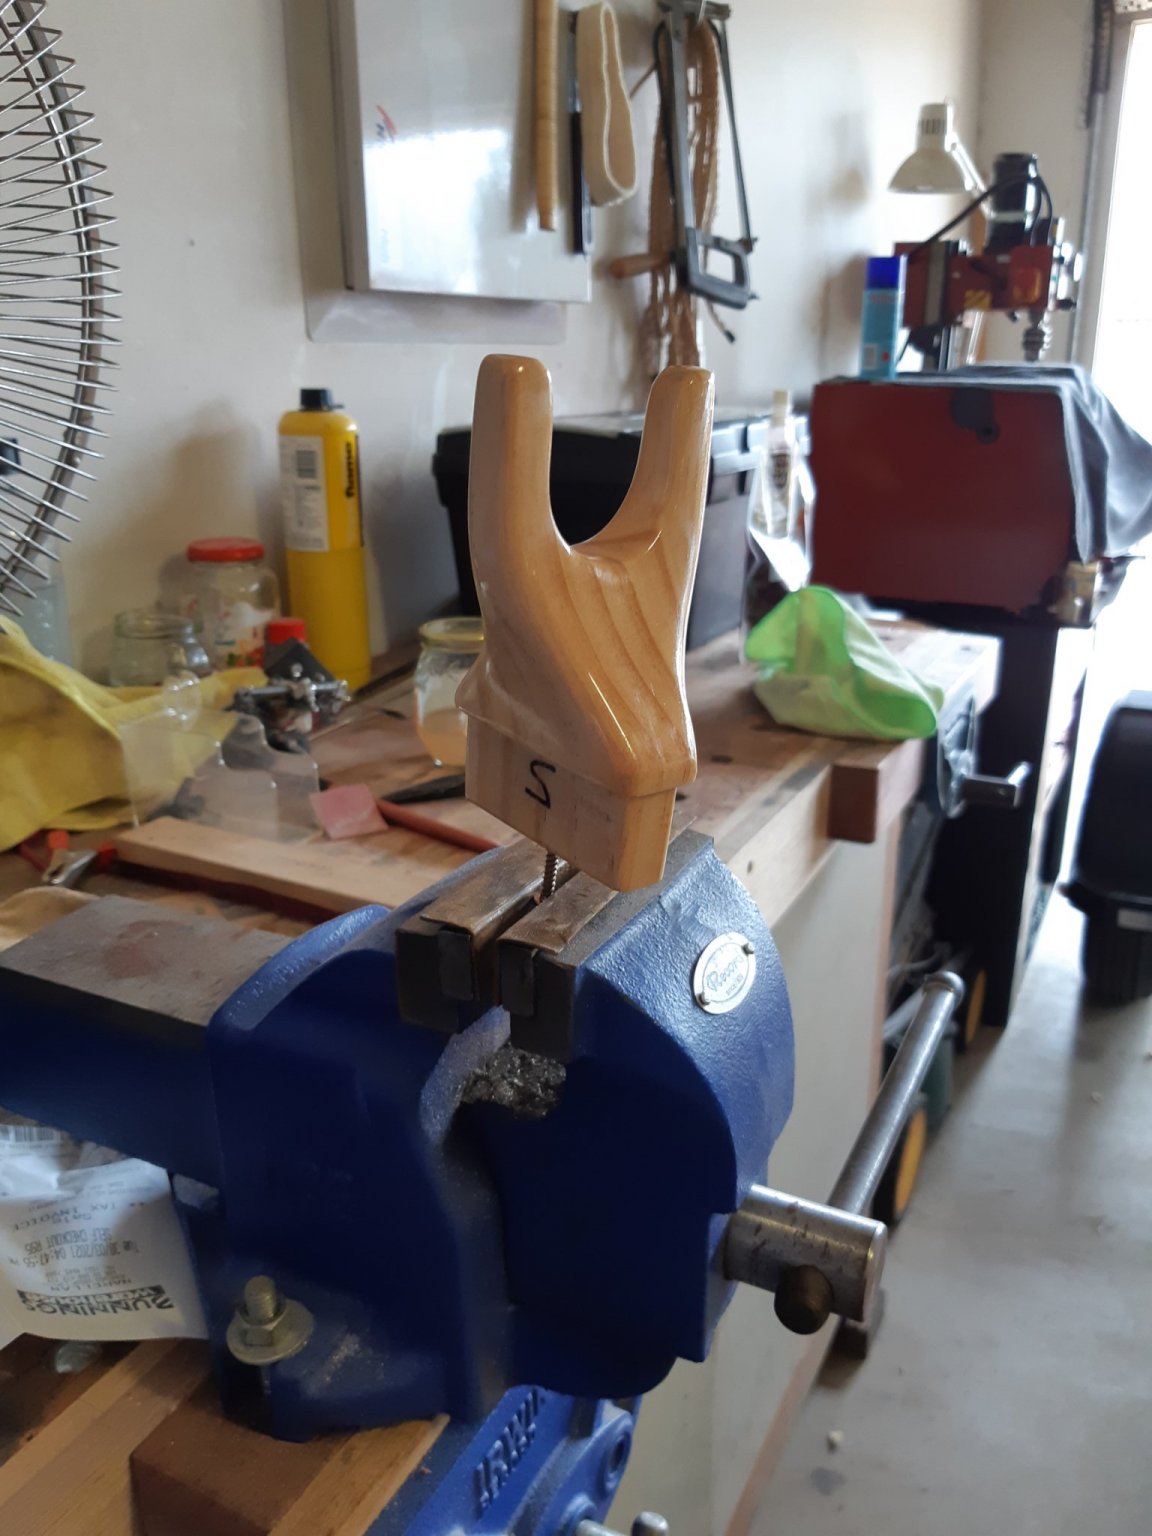
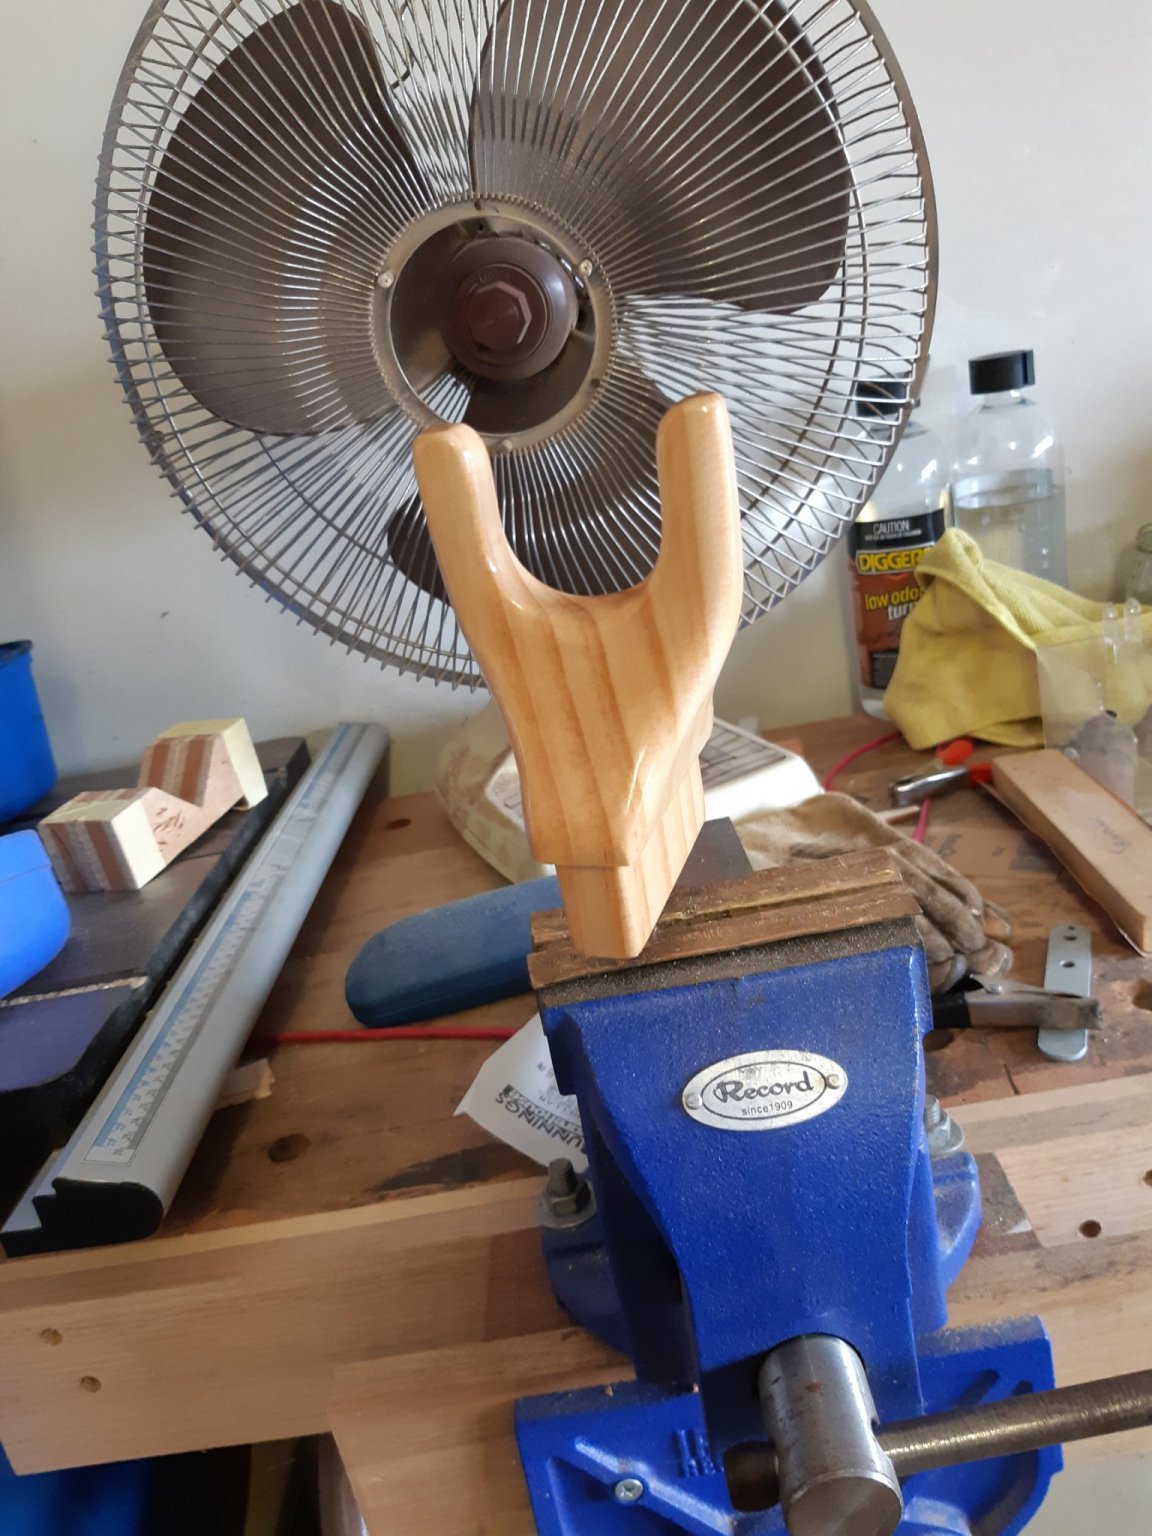
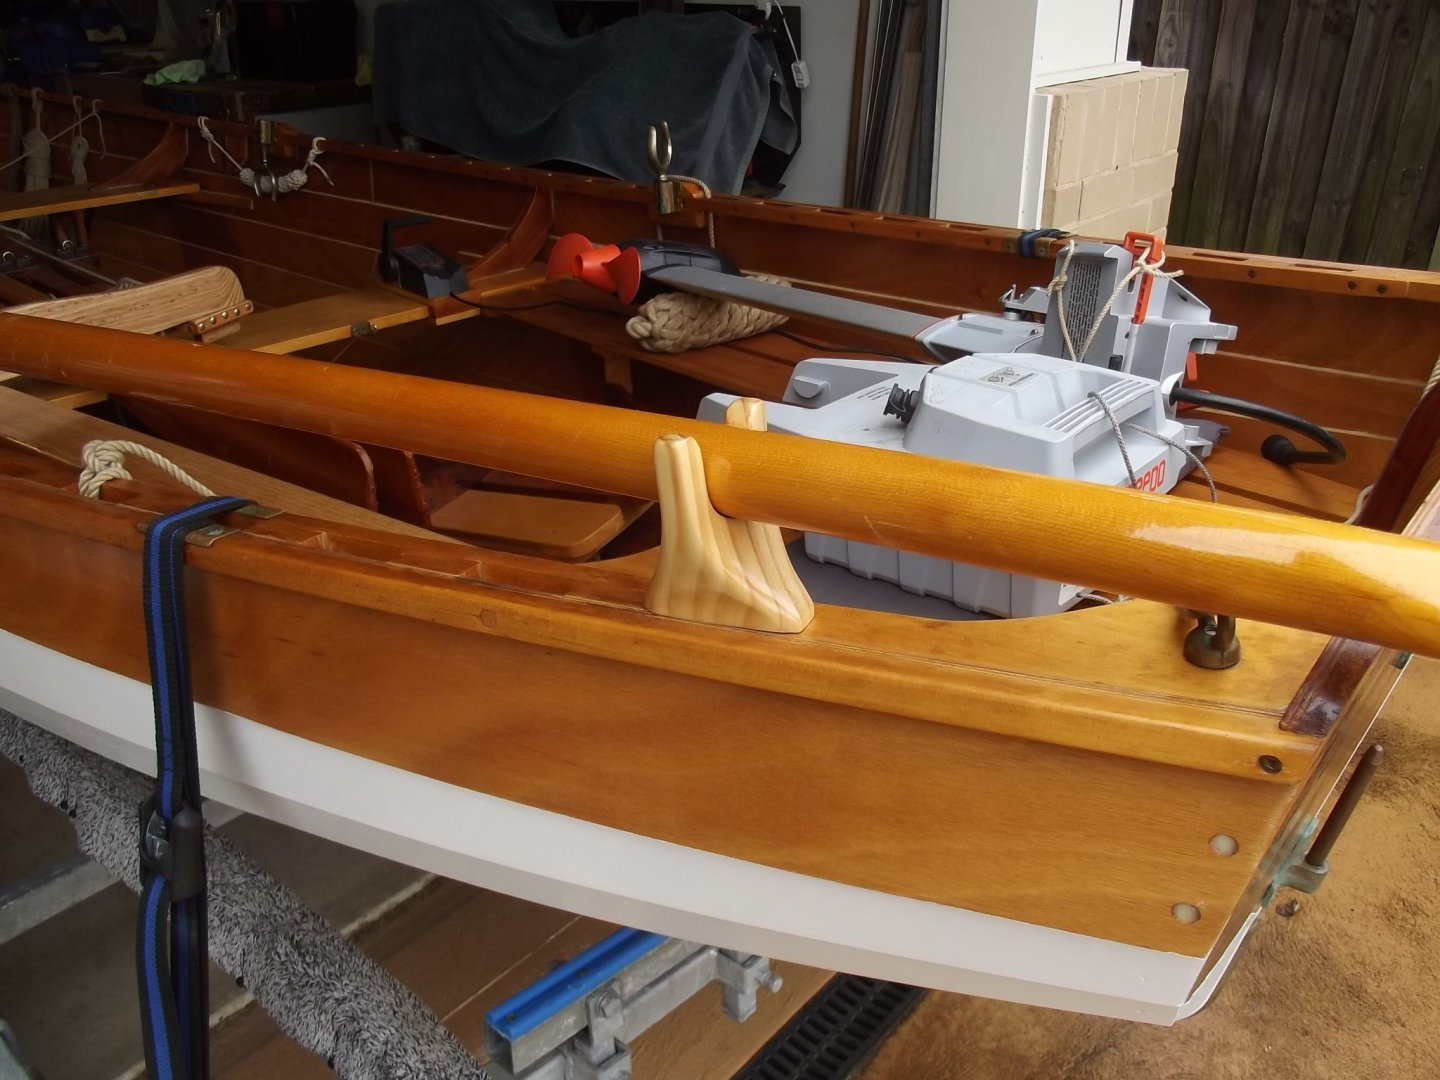
It is truly written that a wooden boat will always have work to be done. In my case not a lot although I did recently wash the interior and re-oil it, a very easy task which proves my decision to oil the interior was valid. I always have trouble stowing the oars when I decide to motor or sail and they generally end up in the way but the other day I came up with a solution. I've made rests for the oars that will slip into the aft most inwale space so I just have to swing the oars astern and drop them into the rest. I'm now just trying to find an easy way to strap them down.

- 109 replies
-
- 12
-
-
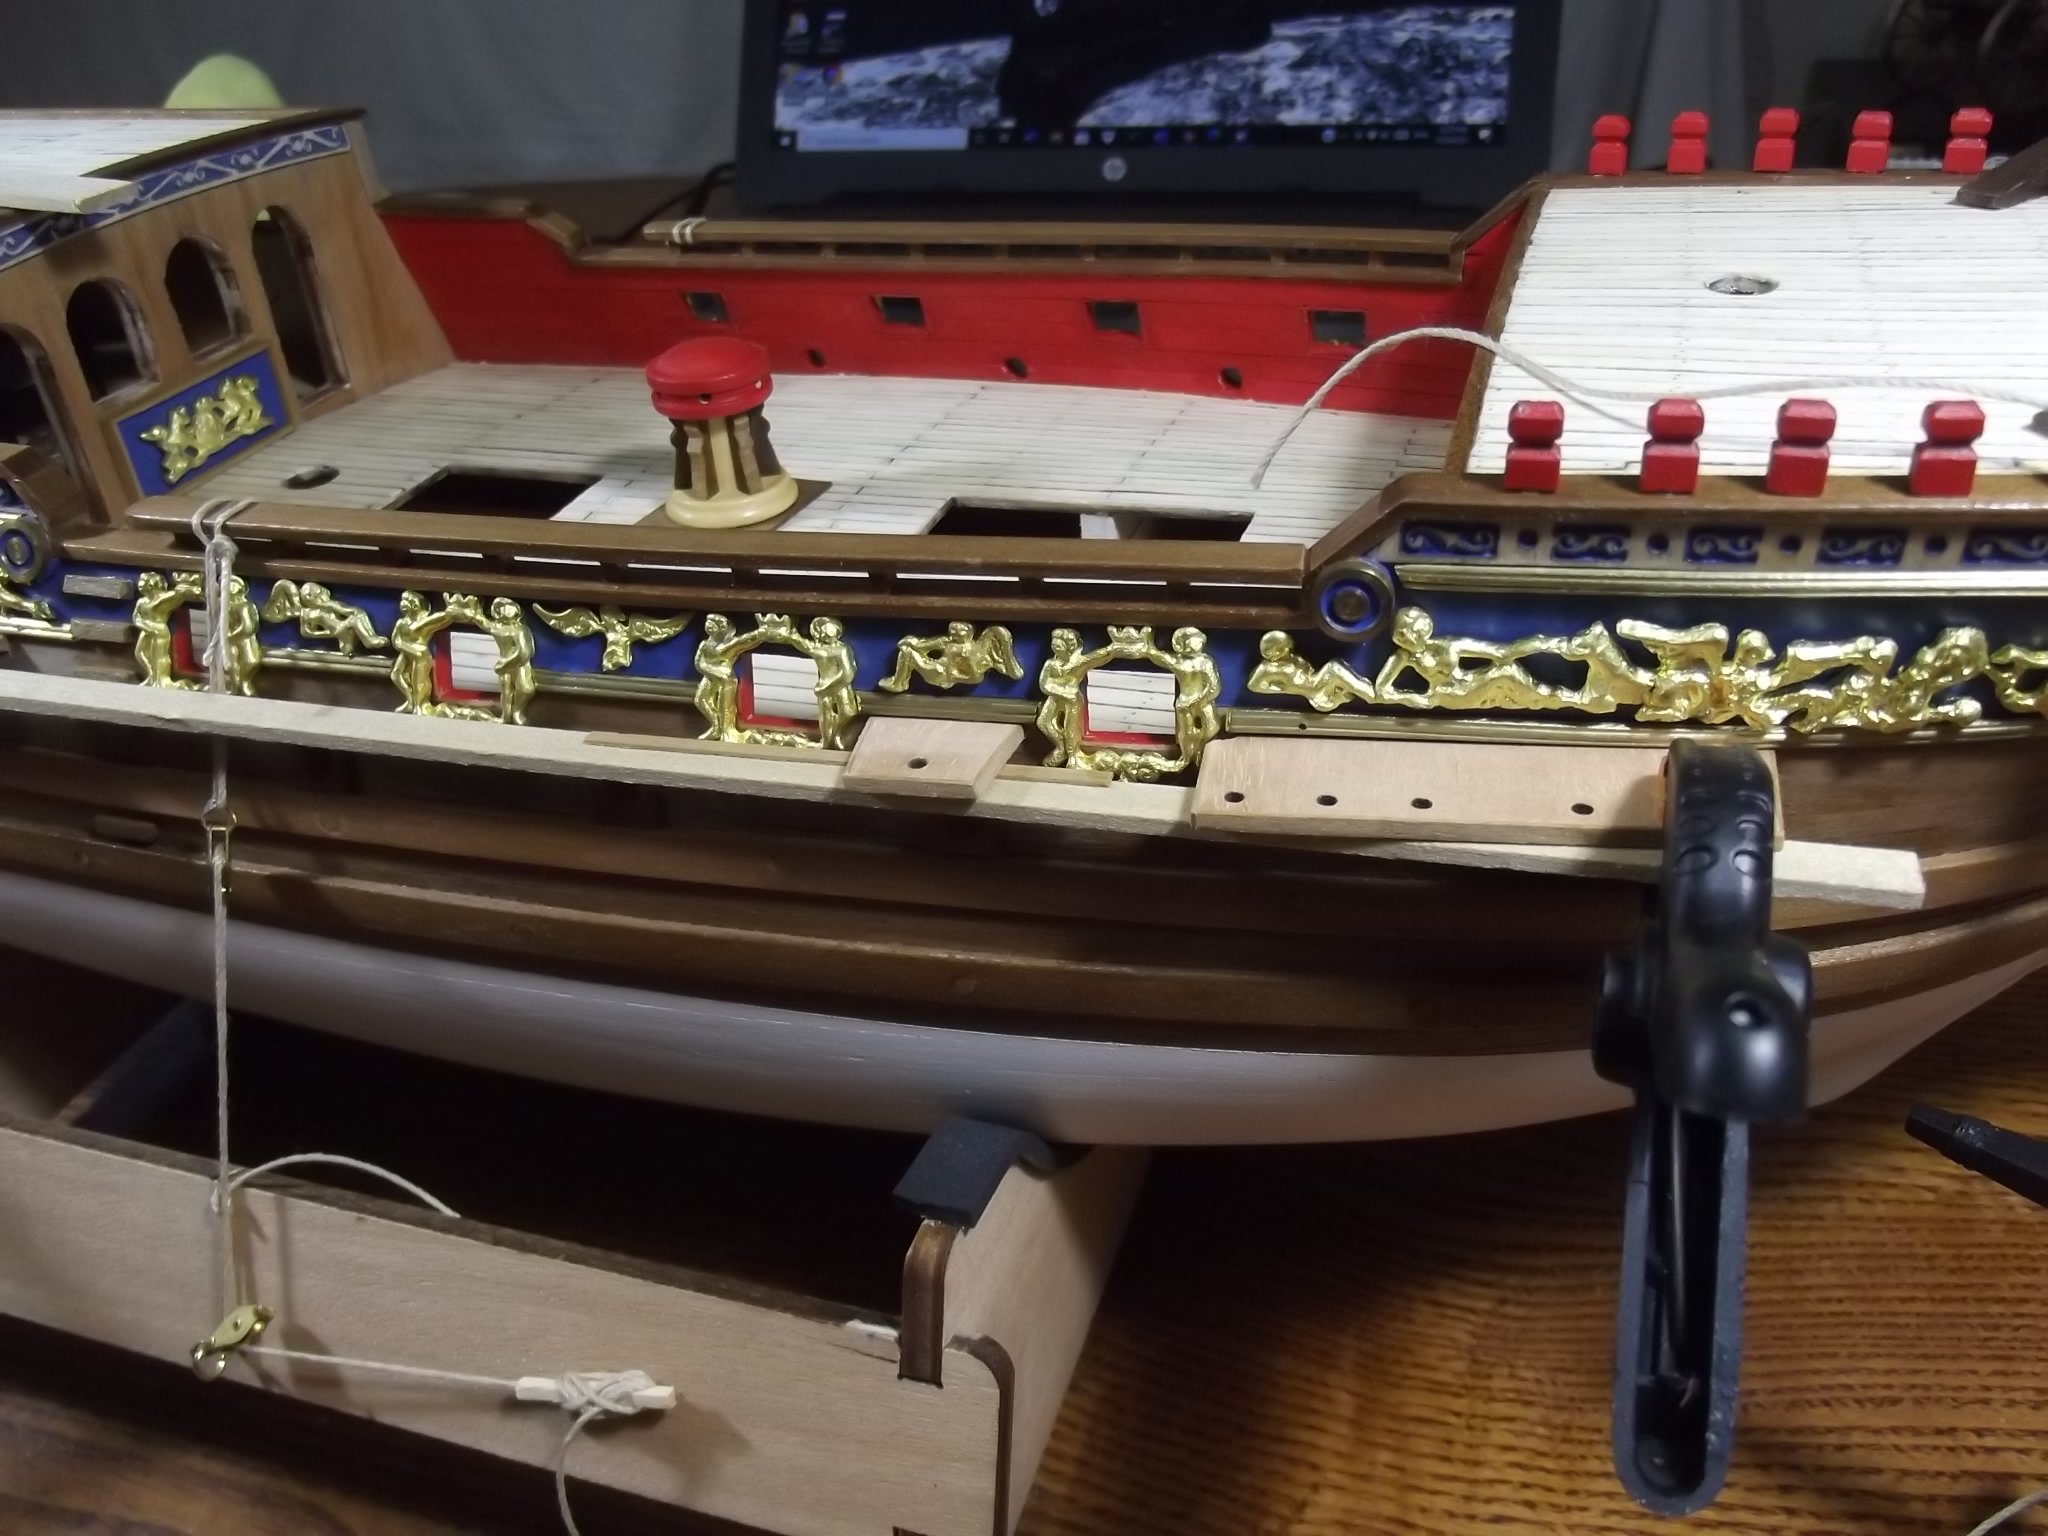
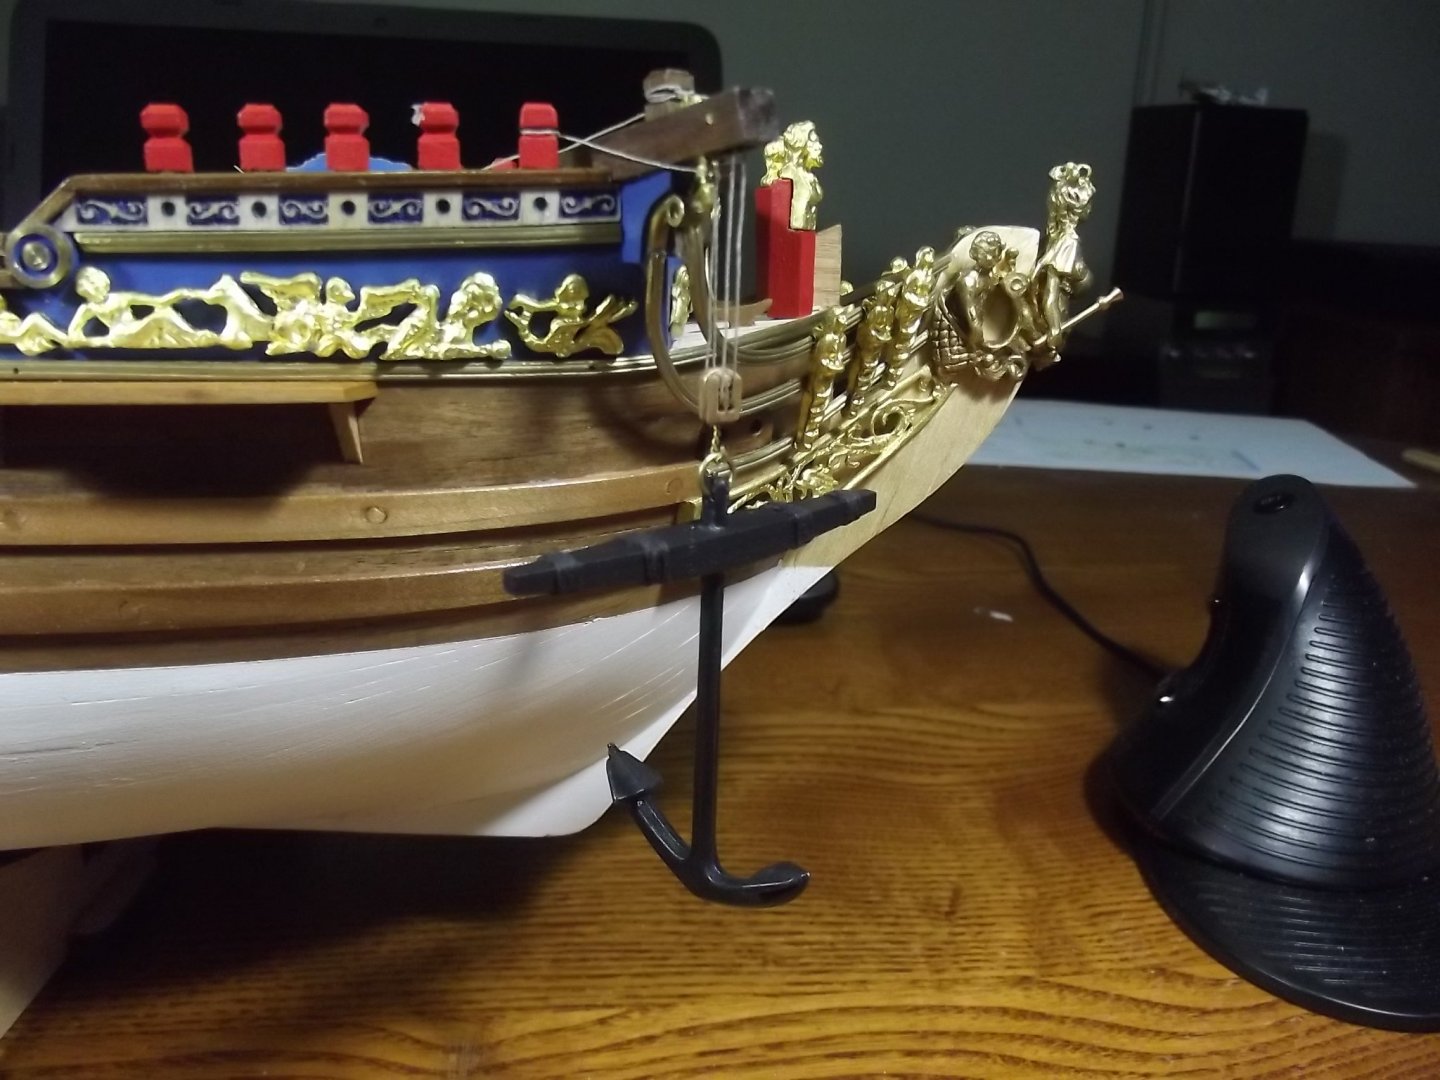
I've mentioned before that in the kit the cat davits only had a single line 1:1 pull which is wrong, I'd imagine maybe 6:1 but 4:1 at least. So I turned double sheaves to go in the cat davits a while back and today I made two double blocks to complete the set. They look a bit furry in the pics but in the flesh they're good and I found that by "sawing" a piece of cord back and forth in line with the pull I was able to round down the dummy sheaves in the blocks so I'm well pleased with that. When the ship goes into the display case it will have one anchor fully stowed and one hanging from the davit.
-
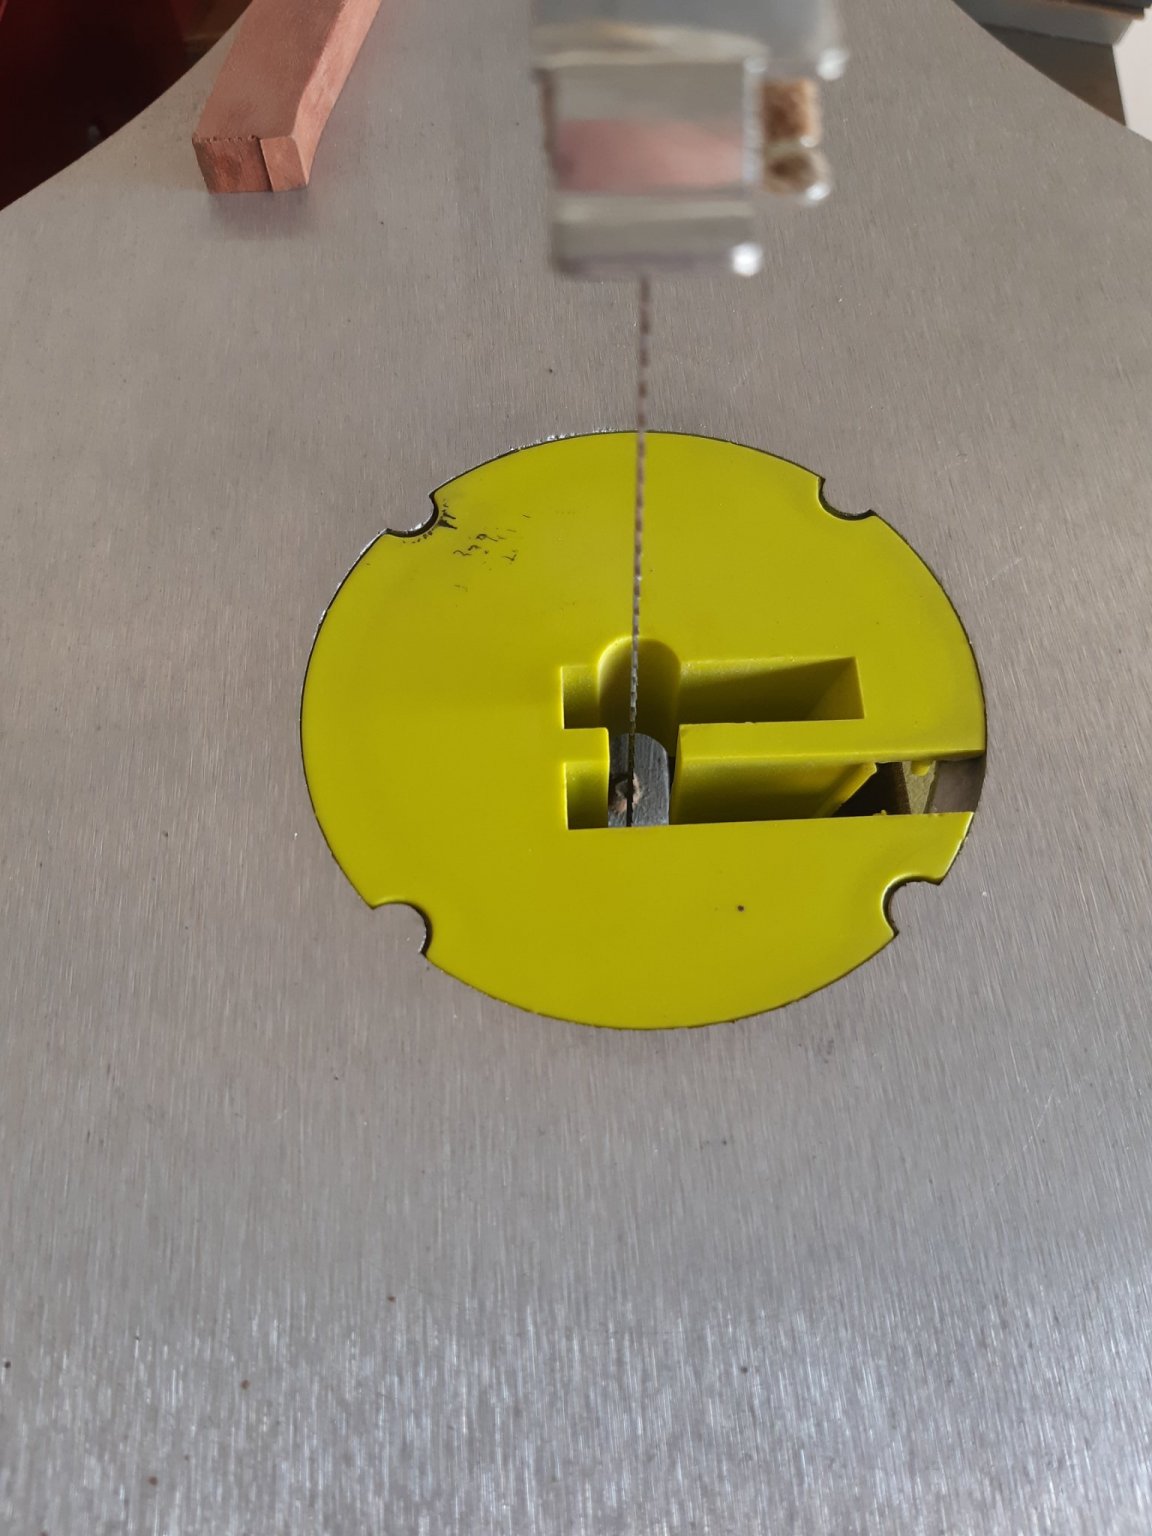
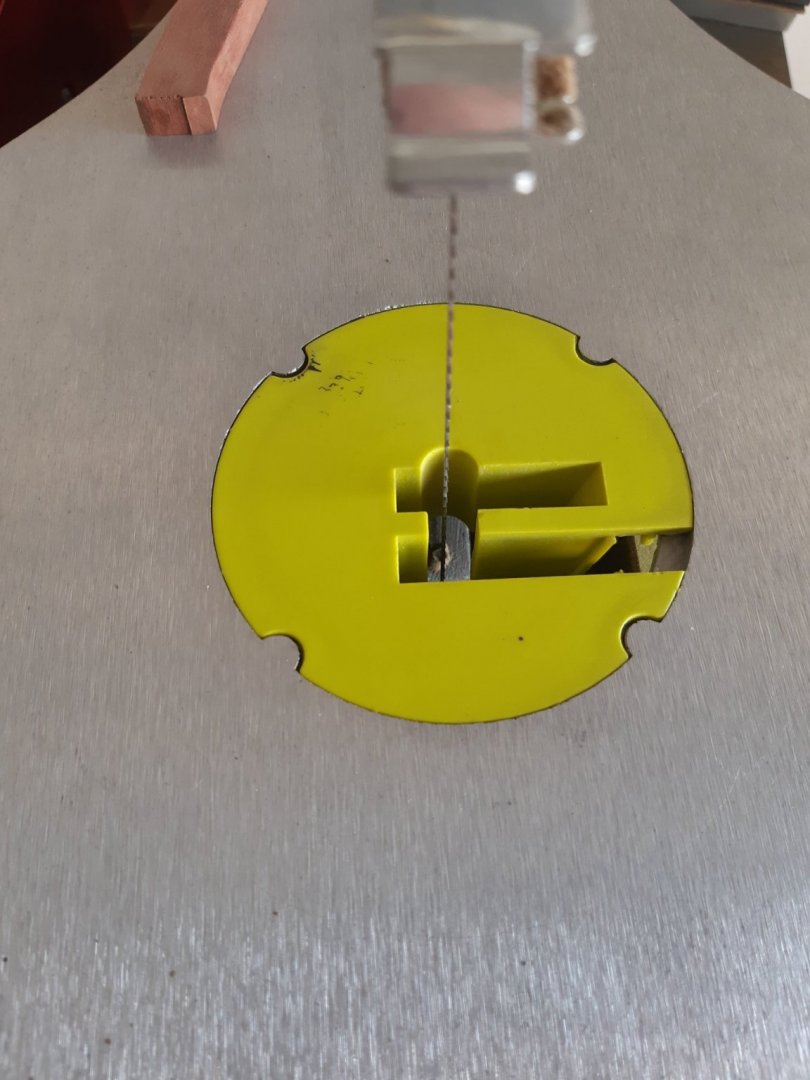
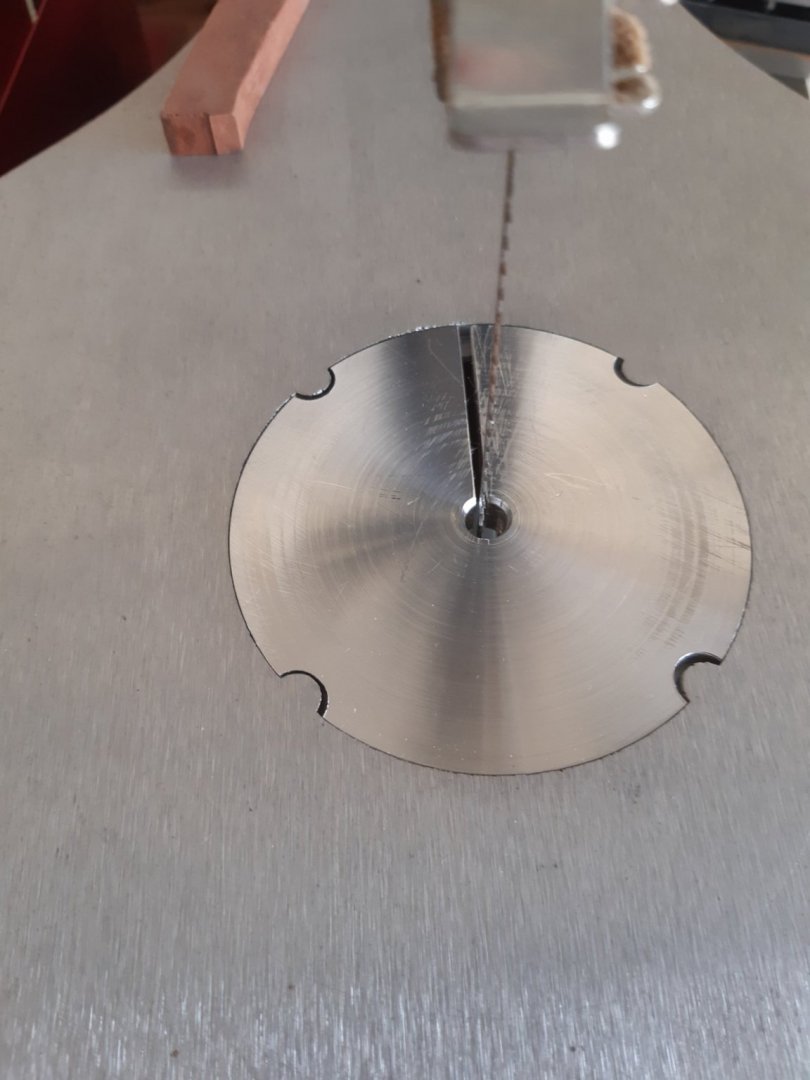
I've obviously slowed down a bit on this build, I went in flat out for weeks but that gets too much so I've been doing other things. Among those other things I've turned a new "plug" for the scroll saw I have. When I did the hand rail the huge gaps around the blade and the dreadfully made hold down foot made the job very difficult so I turned a new plug which supports small pieces much better and while trying that out I put an after market blade in and tried it without the foot and found I no longer need a foot so there's a fiddly part I don't have to make now. An advantage of the new plug is I can orientate the slot on any 90 degree increment I like which keeps it away from snagging small thin fiddly bits.
-
Nice, now get that paint on and show us what it looks like!
-
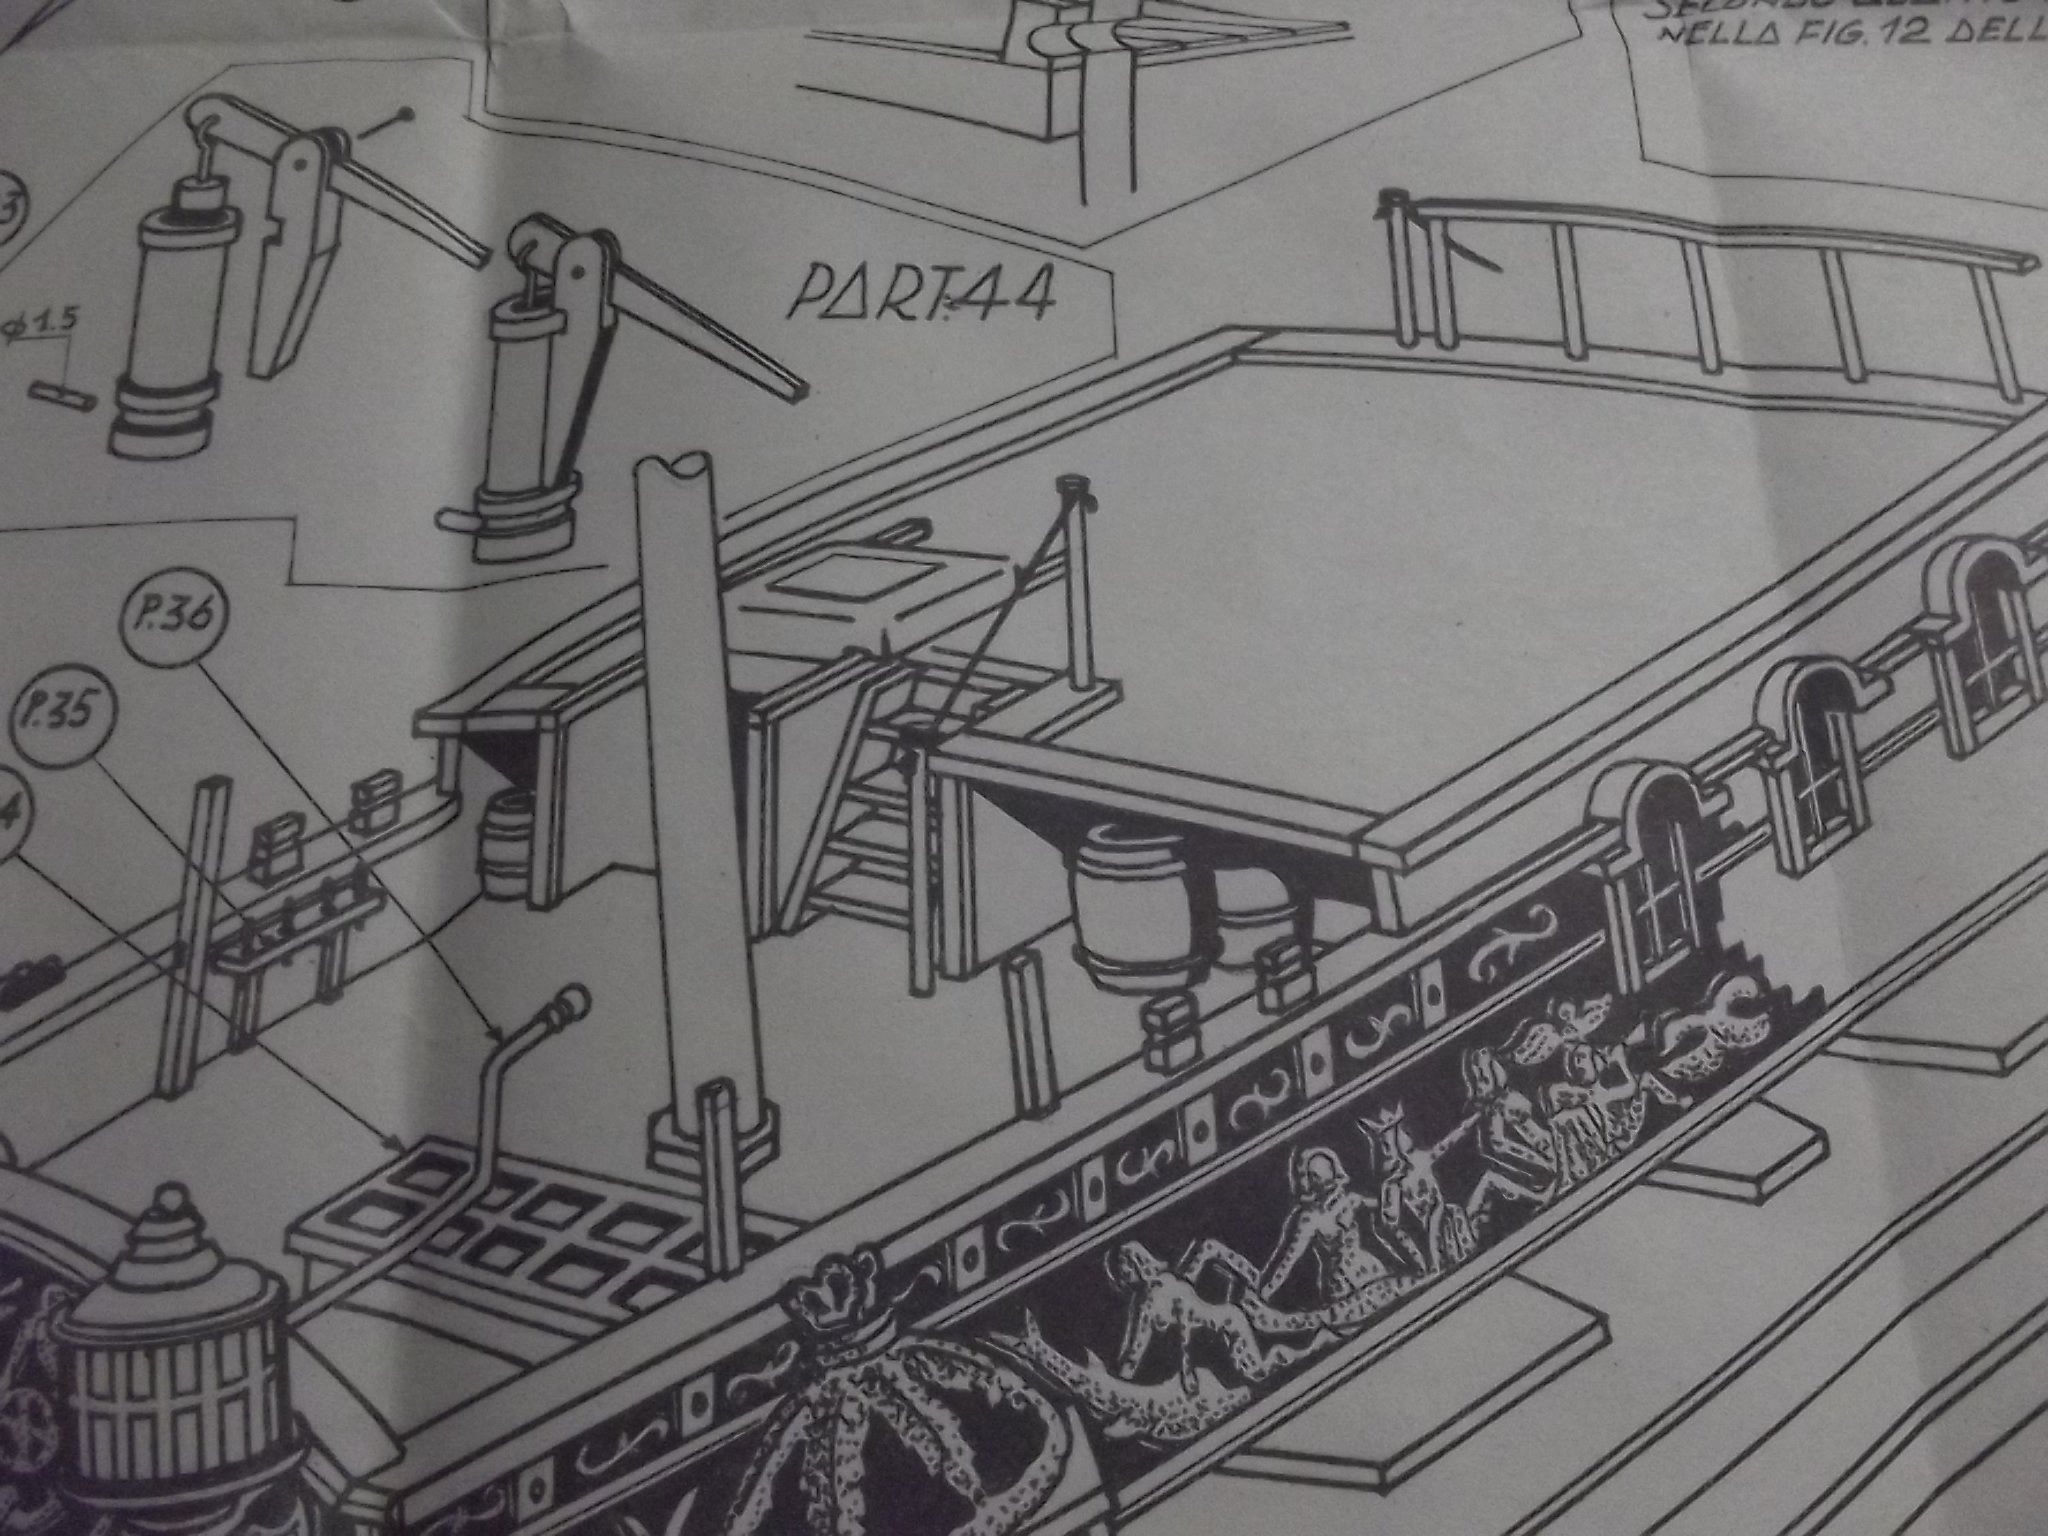
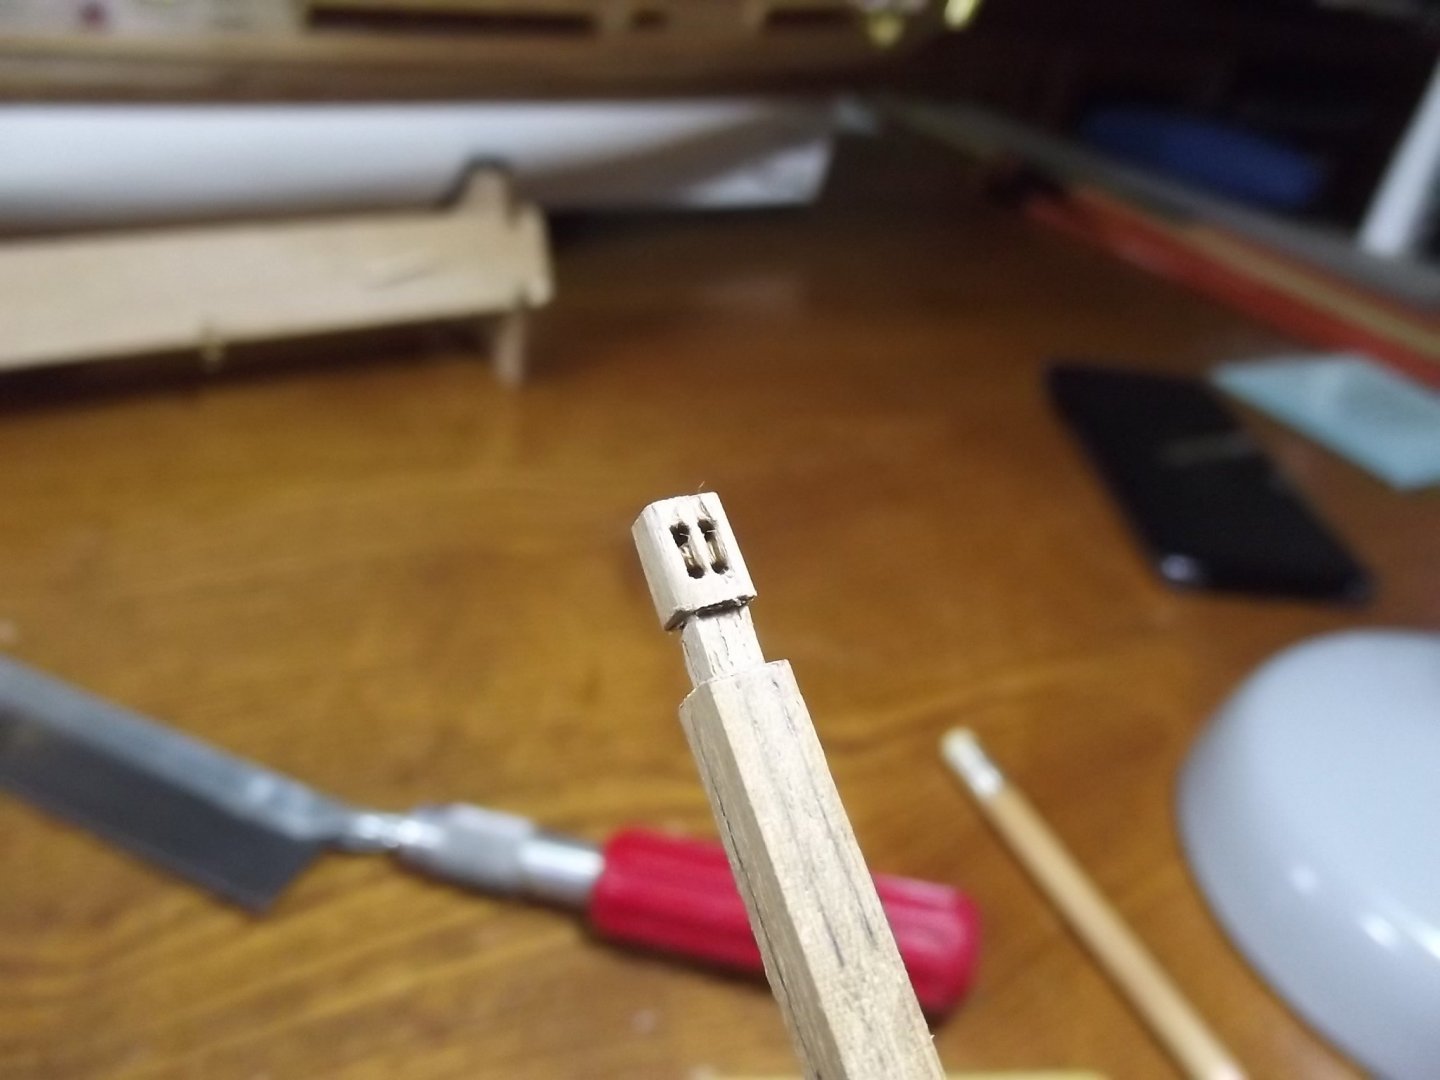
I have a question for the professor. I would have made the fairlead slots by drilling a hole at each end to allow swarf to fall out and then milled the stock in between. Is there a reason you opted for the drill and cut method that I'm missing?
-
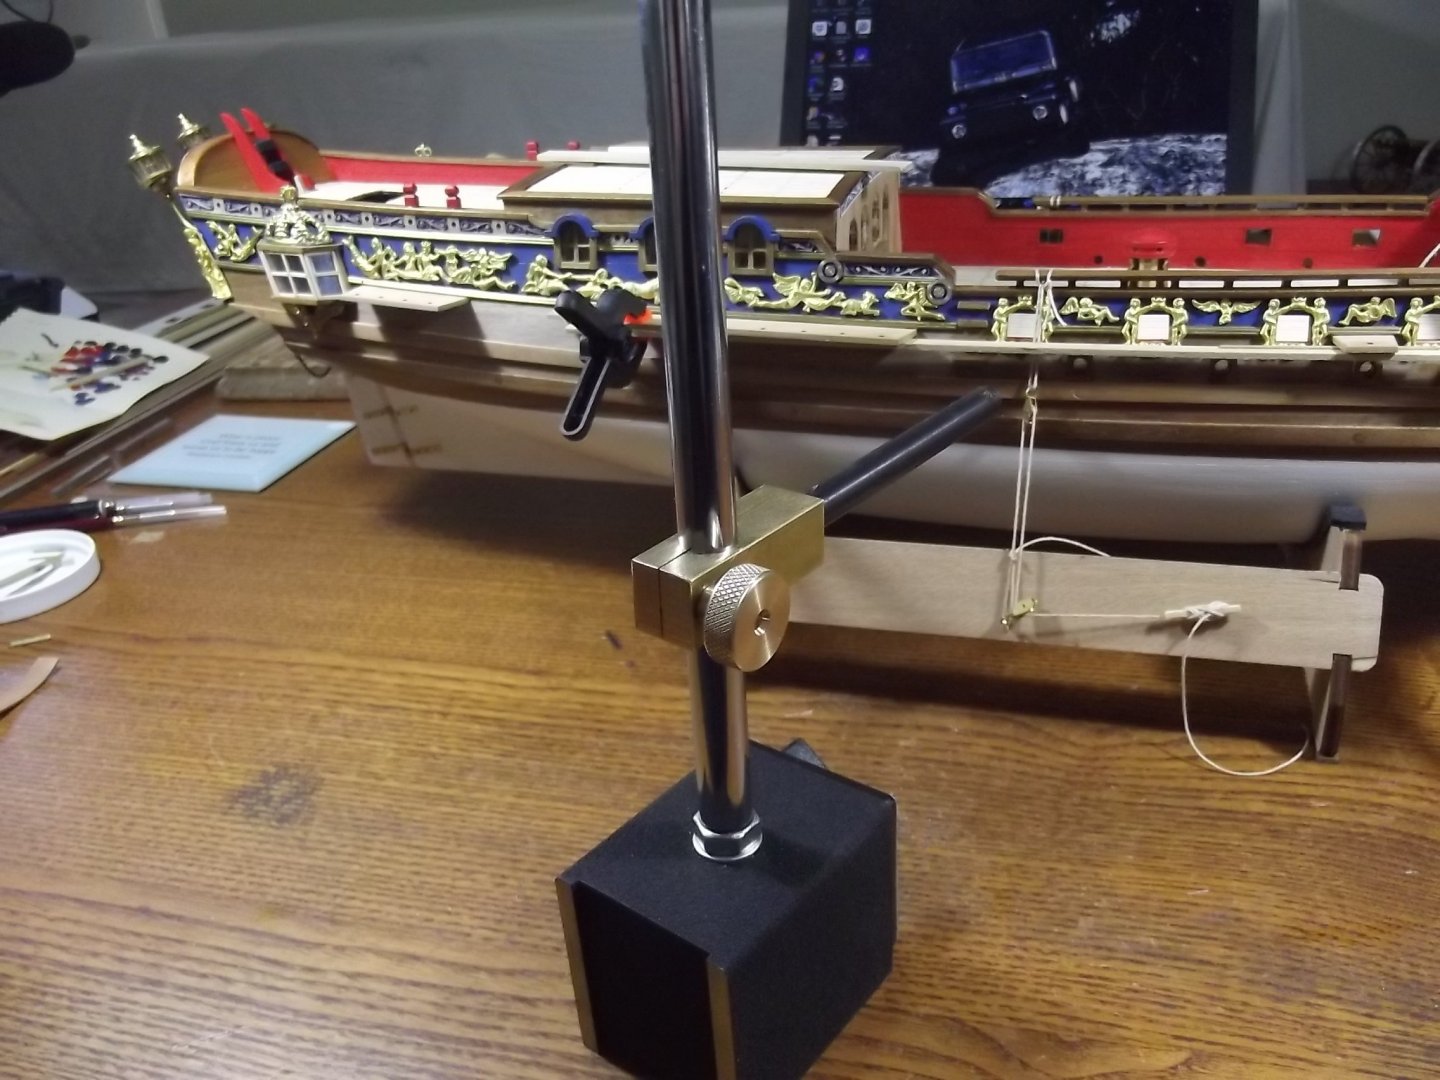
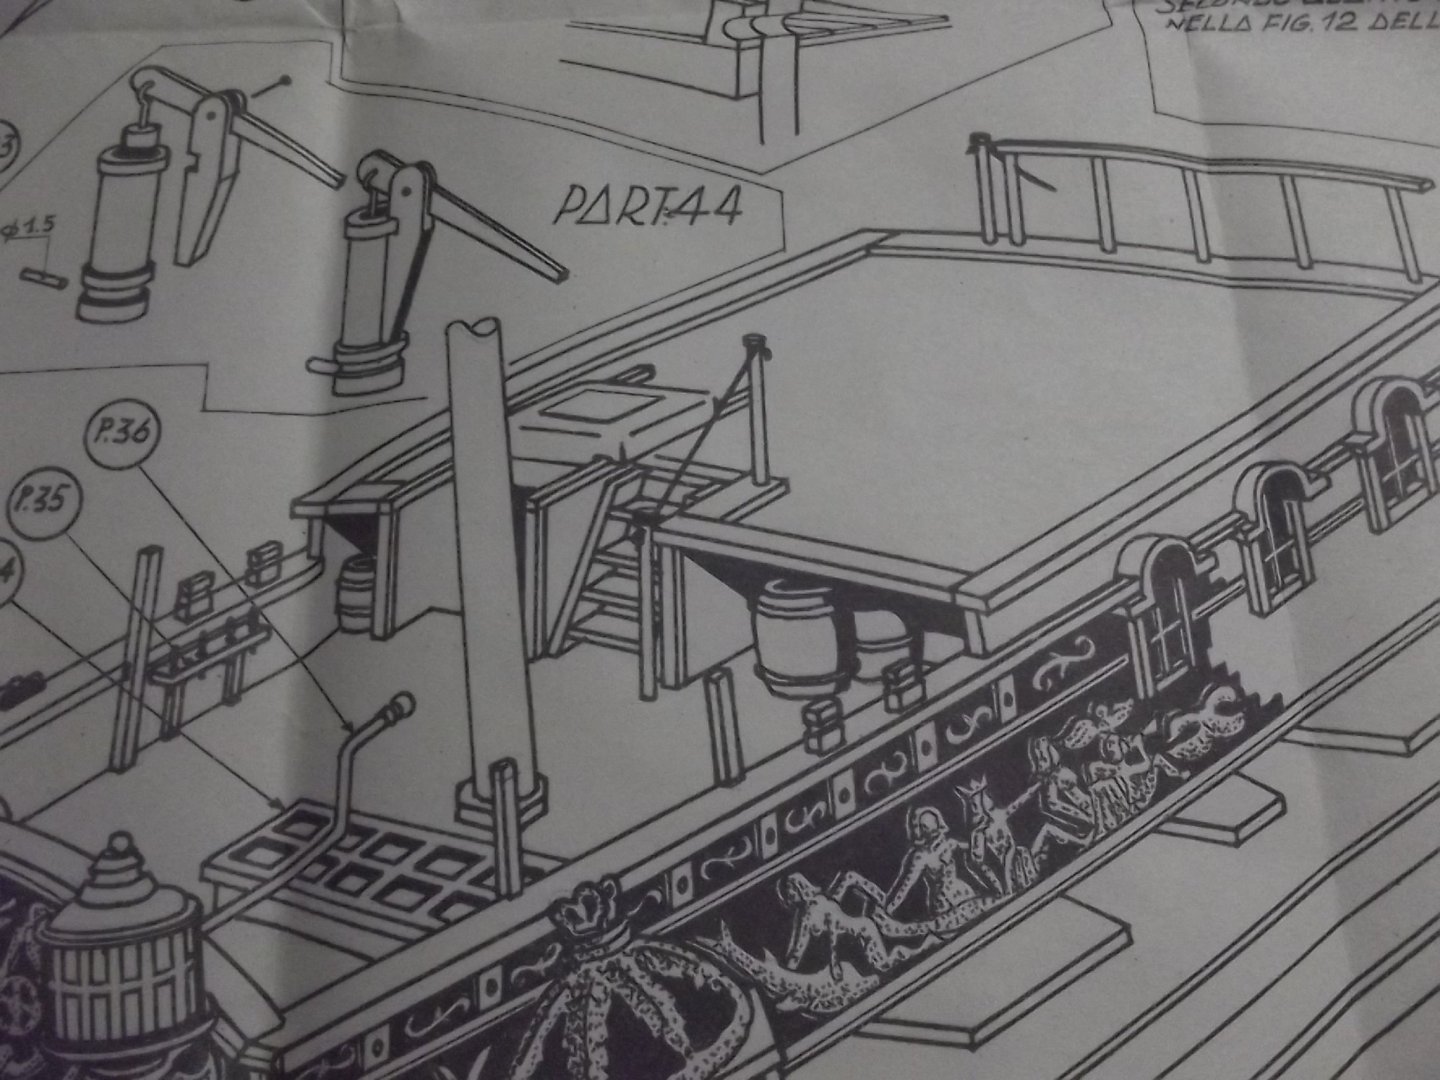
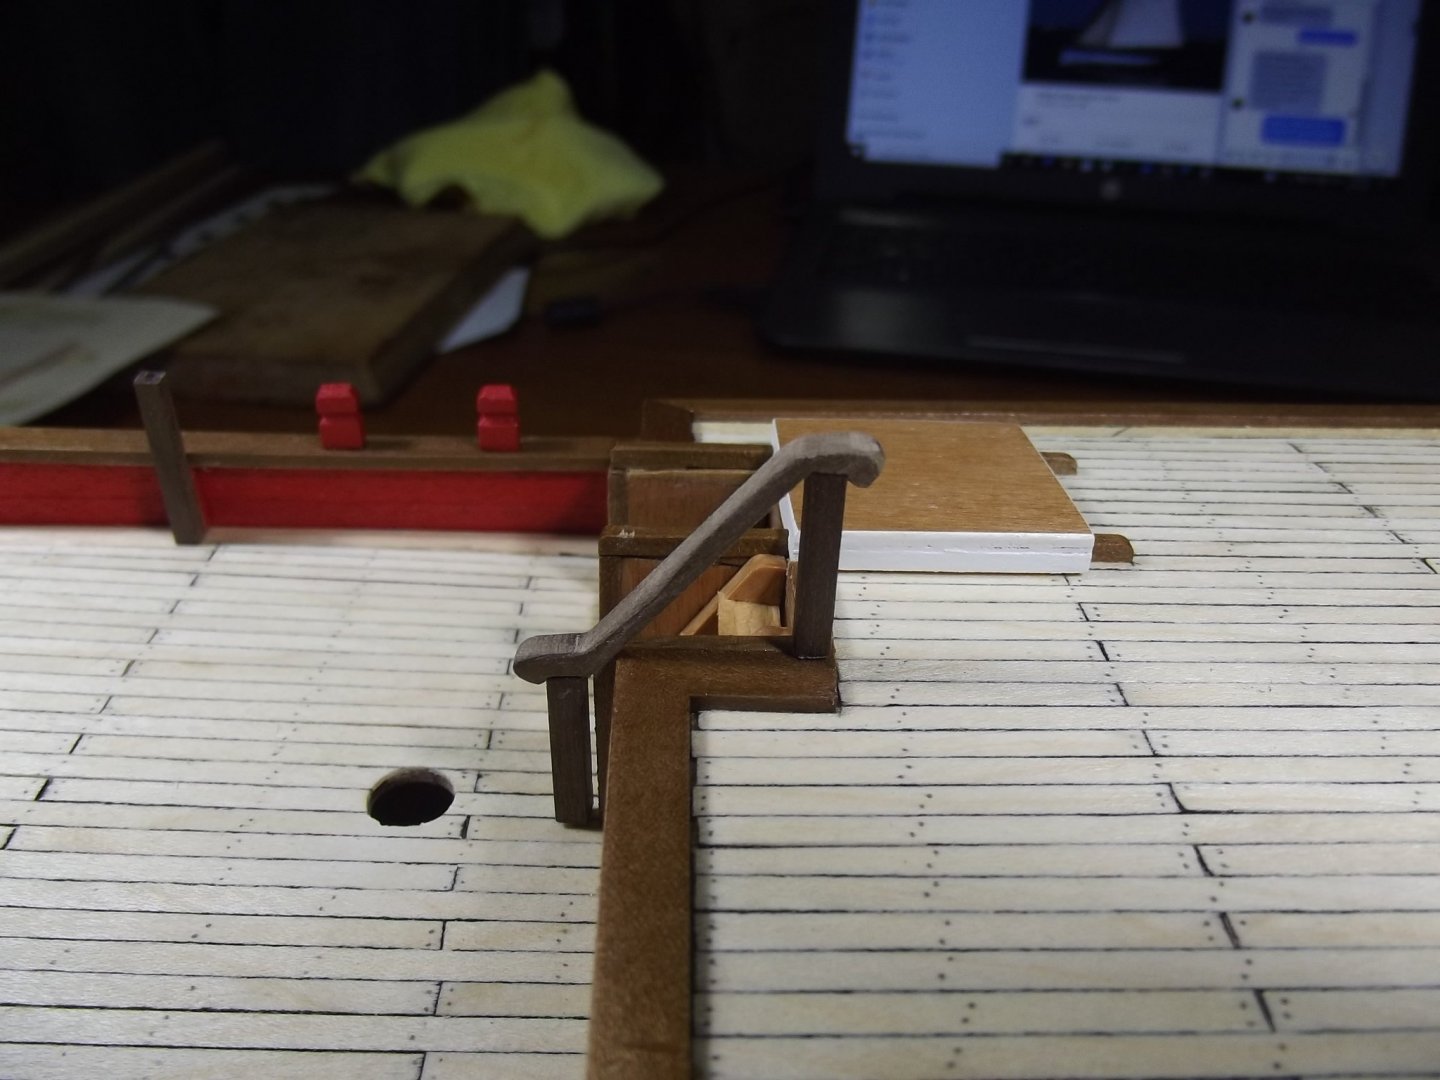
I made a block to mount on the dial gauge base so I had an adjustable level rest to get the shroud tables nice and level. For some I just clamped a plank between larger tables so it would follow the curve of the deck. The plans call for a bit of string between two dowels to act as hand rails on the stairways. I don't know about anyone else but if I was building a royal yacht for King George II I wouldn't be doing that so I made them out of walnut.

-
Time for shroud tables, first step lash down the ship to the build frame to keep the hull level to allow the tables to be attached level