Bedford
-
Posts
1,285 -
Joined
-
Last visited
Content Type
Profiles
Forums
Gallery
Events
Everything posted by Bedford
-
 Thanks Ilhan but I find the excellent pictorial record answers my questions pretty well. Steve
 -
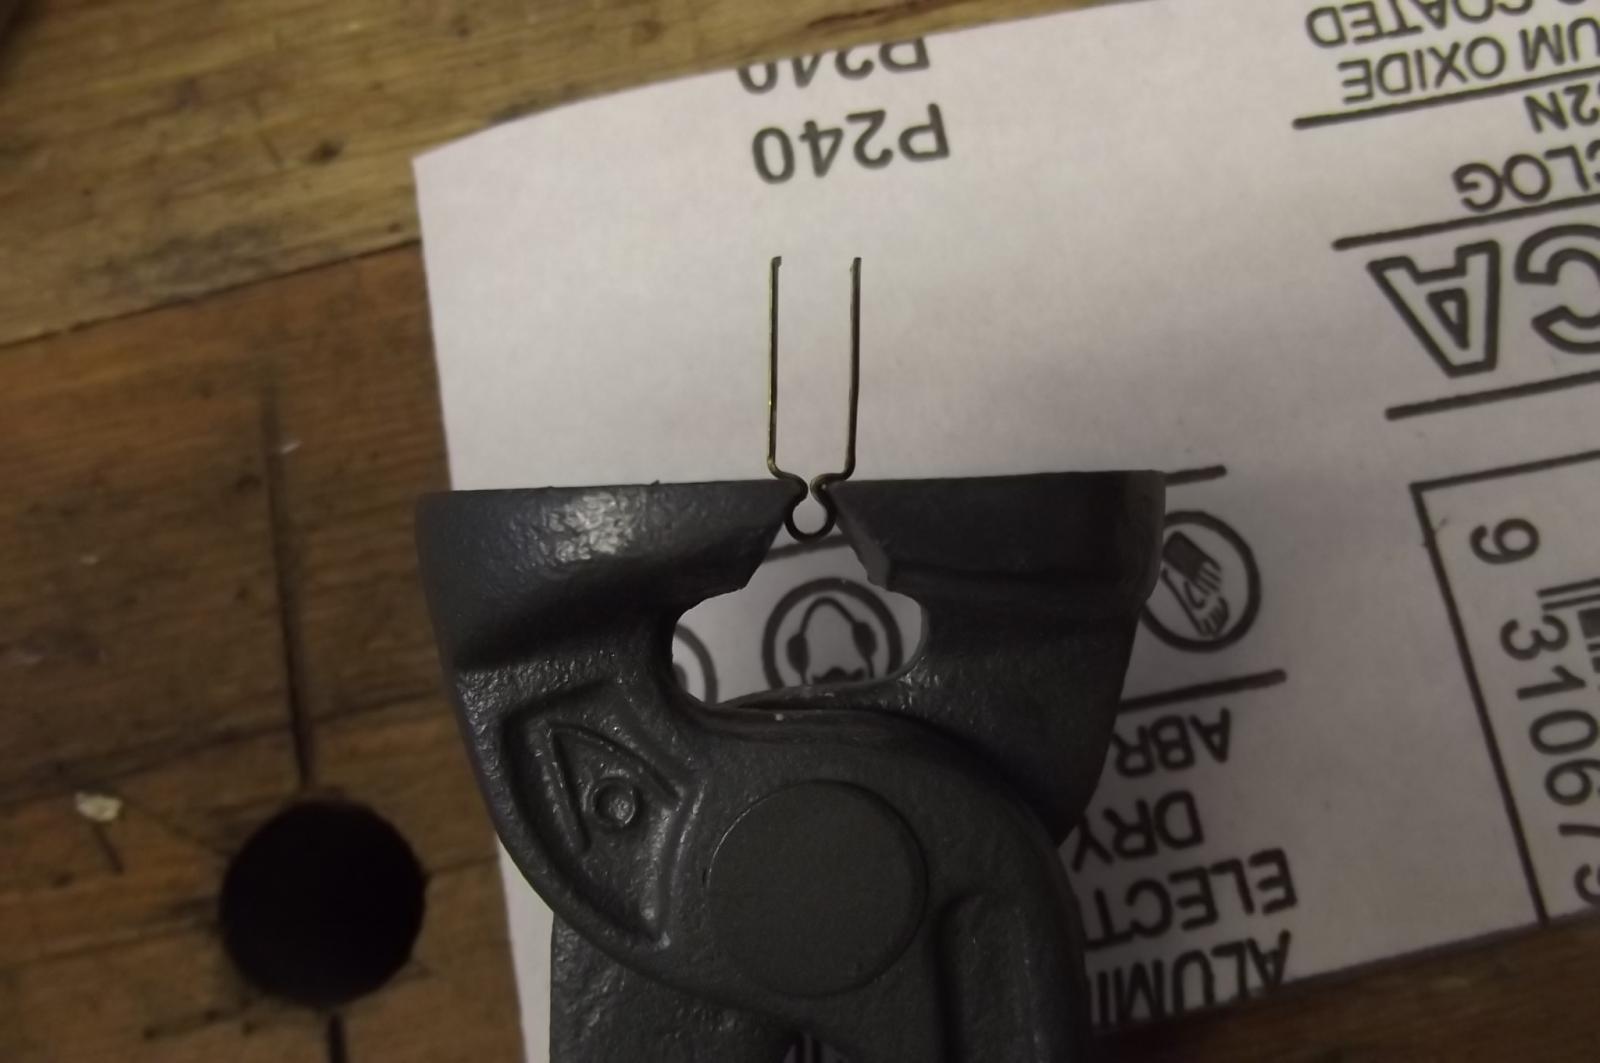
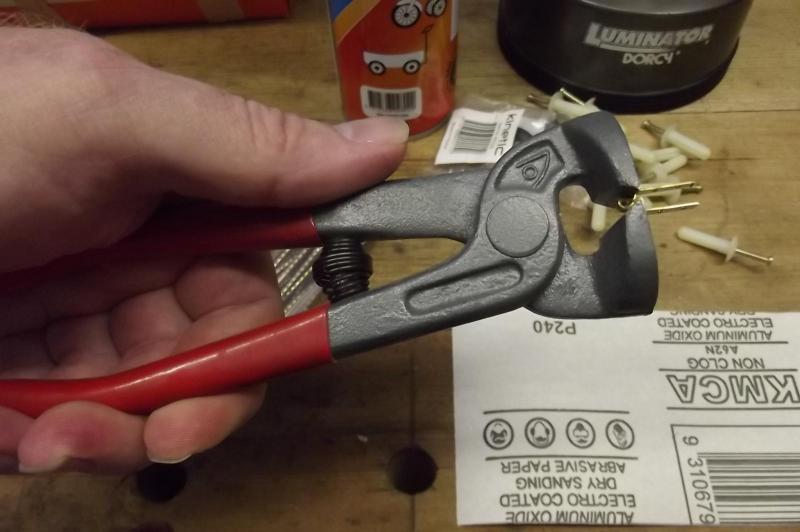
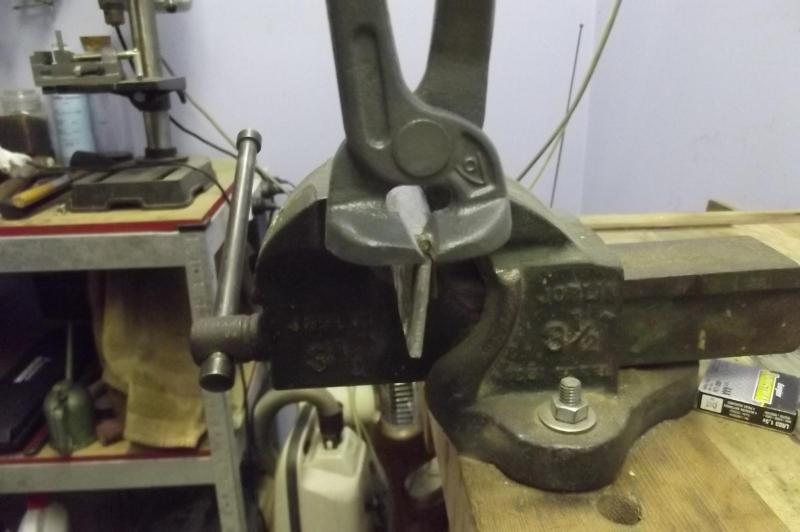
As a result of Shazmira posting about badly formed and ill fitting rudder hinges I thought I would post my answer to the problem. First get one of these, it is a tile nipping tool designed to help shape ceramic tiles. I don't use brass rod for the hinge pin opting instead for brass nails supplied with the kit, cut to length and put into the hinge with the head at the top like most domestic hinges to stop the pin falling through. Then holding the hinge pin section of the hinge with the tool, note, I did not put the pin in for the pic. Push the tool and hinge down onto a hard edge wide enough to fill the throat of the hinge and while pushing against this crimp the hinge in around the pin. The pin should not get jammed because the brass will normally spring back just a bit. When the pin pocket is crimped in nicely you can rebend the throat of the hinge tightly around a metal or hard wood edge that is the same thickness as the stern post or rudder using a hard straight edge to bend with to get a clean fold. Note: if the brass is hard you can heat it until it is going red and leave to cool. This will soften it nicely but leave it discoloured, a touch of emery or steel wool will fix that easily.

-
One more trick with the hinges to get them to fit better against the keel and rudder. The bend will always be rounded to some degree and it is hard to get perfect form on the hinge. File a bevel on the keel and rudder in the right place to correspond to the hinge, so the hinge will be able to sit in closer and it will cover the bevel so no-one will see it.
-
You will find all kinds of handy tools in the most unexpected places. The trick is to be able to think outside the square and see the potential. As for your hinges, it is not for me to say they are good or not, that is entirely up to you. If you decide to try again - now you know how to soften the brass so do that first so you don't break it, not sure about the quenching, when I relaoded bullets that was the method for keeping the brass neck soft. Try it without quenching and see what happens. By the way, heating them will burn off the ca and let the old pin come out. Your use of wire cutters shows you are thinking outside the square, that is probably the way I did my first one.
-
This is the tool I would recommend, you can file or grind the outside of the jaws to get the pin groove closer to the keel/rudder if you want. This is how the hinge is crimped, I don't have a pin in it, it will release a bit when you let go so the pin should not end up too tight Then rest it over a steel or hard edge the right thickness and using something flat and square ended like a steel rule bend the sides down against the steel


- 773 replies
-
- 3
-

-
- san francisco ii
- artesania latina
- (and 1 more)
-
Hi Robbyn. Ok, this is a common problem and you will find most models have it. The hinges are mass produced and not model specific. I don't use brass rod as they suggest, I use some of the brass nails supplied with the kit instead and cut them to length. the head of the nail sits at the top and prevents the pin dropping out. This is probably quite accurate too, look at your household door hinges. Yes, cut the hinges to length as best you can so the nail holes seem sensible. I re-form the hinges by putting the nail in the hinge pin part and using different pliers I have which are a bit specialised. You could get a nipping tile cutter and file or grind it down till it creases the hinge around the pin better and then while still holding it with them you force the brass down on a hard piece of timber or metel that is as thick as the keel and reshape the bends to fit better. Do the same with the other side of the hinge for the rudder. I will try and get some pics to explain better. Note, you may not need to do this but to soften the brass and make it easy to bend heat it til it is going a pinky red colour then quench it in water. Now you will appreciate the coals in your wood fire!
-
I appreciate what you are saying Robbyn, beauty is in the eye of the beholder. As stated before, my next build will be the Royal Caroline which is an incredibly ornate ship from 1749, I also want to build the Victory but neither of these ships are for the novice, you need a few down the slipway before taking these on. Steve
-
You go girl !! Of course the first will have many mistakes but to be honest, you will be the only one who sees most of them. People who come to your wood heated house in between snow storms will see the overall model and be amazed. I tend to recommend anyone building their first model goes for something late 19th century like a clipper ship because of the modern bow design, the bullnose bows are harder to do. I also tell them to just look at one step at a time and it will come together as you suggest. Didn't work though. Steve
-
I agree with Russ, bare timber should always be the best to glue to but as someone mentioned before, sample pieces. Stain an offcut and see how well you can glue something to it. Further to the shellack topic, I didn't know cooking oil would emulate the finish, nice bit of info, thanks. Shellack is a golden hue, just for reference. To emulate a clear finish dampen the wood with methylated spirits, you can do this on the job itself as metho is alcohol and will do no harm to the wood or glue and dries off very quickly. Robbyn, glad I helped even if unintentionally I have a female friend who saw my "Schooner for Port Jackson" and wanted to build a tall ship herself so she bought the "Bluenose II" she took one look at the instructions and put it back in the box never to open it again inspite of my offers to help and guide. She eventually gave it to me one Christmas. I built it and gave it back to her, she had done something truly selfless and I am sure extremely difficult for us when our world was completely destroyed. The model was a very small token of my appreciation. It's nice to see a few female builders on here, perhaps I can use your example to get her to try again.
-
What finish did you use on the hull, the timber looks perfect. Steve
-
My two bob's worth, stain should not preclude wood glue adhesion because it works by getting into the grain so as long as the stain is not one that seals and finishes then it should be alright. Having said that, I have never stained a hull as I work on bringing out the natural beauty of the timbers involved. Robbyn, I am not a woman but I like what I like too If not, what I have done in the past where I have applied the finishing coat out of necessity before all parts are attached is the sparing use of araldite epoxy and if it is a structural joint then cross hatch the surface with a craft knife first. I know the moment has passed but when I do second layer planking I simply apply PVA aquadhere sparingly to the plank then run my finger gently over the plank to spread it thinly and offer the plank to the hull and rub the plank along it's length from centre to end several times which creates what is known as a "rub joint". the rubbing pushes all air out of the joint so the fluid glue holds the plank almost by vacuum. It only takes a few minutes of checking and pushing and re-rubbing to get the bond to a sufficient strength to hold the plank. Then run a knife edge along the exposed edge of the plank to remove excess glue that would interfere with the next plank and continue. I find second layer planking quite enjoyable and fast except for the obvious need to cut the planks to taper and have never had to use anything to secure the planks in place. Steve
- 773 replies
-
- 1
-
-
- san francisco ii
- artesania latina
- (and 1 more)
-
What a coincidence, I have that same model in a stalled state. I "Laid the keel" in March 2000 but found the lack of clear instructions on how to shape the stern a stumbling block and it has sat since although I now have seen pics on the net of the real thing and have the knowledge I need to make progress it is not a high priority. The Royal Caroline comes first. Not sure how old my kit is as I bought it at a clearance price from my supplier but I have everything, including the box. So if I can help just ask! I found this thread by searching for the Charles W Morgan and this is the only one on here at the moment, I would hope there are other completed models that will be re-posted in due course. Steve
-
I looked at this because the name suggested it would be something different. The lines of the hull are beautiful and got my continued attention. The build itself is inspiring! Pity there is no dialogue but the pictures do speak for themselves and the tell a very interesting story. I am familiar with the "strong back" concept for building real boats but have never seen it used for a model and I love the idea, espacially useful for any open boat build. I have a few long boats and whale boats in my future and was wondering how I was going to build them to a standard I would be happy with which kits rarely live up to with these acilliary boats. So many lessons learned, the heat sink on the soldering iron is another good one. Thanks so much. Steve
-
I think I shall watch this with interest. I like the idea of a long boat. Steve
-
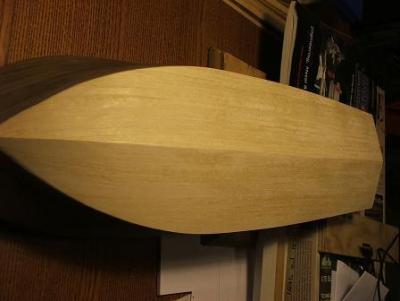
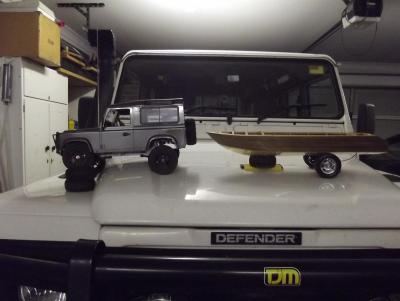
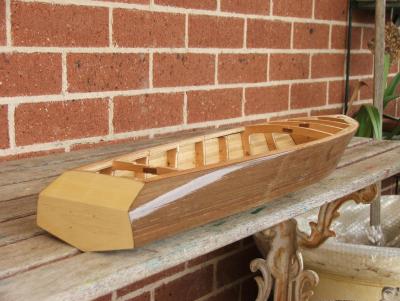
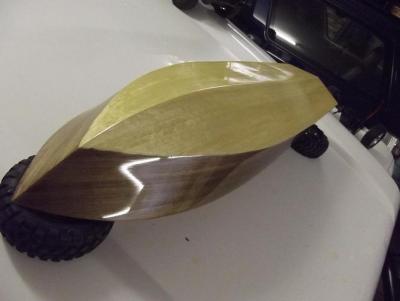
Wow, I wish I had seen this before I started my scratch built Mahogany runabout.
-
I don't know so much about talent, a bit of education and a lot of perseverance and patience are more what gets that finish. I am still not entirely happy with it though and I think I need a dust free room to do final coats because I always end up with small fine hair like dust in the finish but I will find somewhere suitable to do a final coat soon or maybe just use 1200 grit wet&dry to get rid of the dust. Steve
-
Ah, you don't miss a trick do you? The foredeck is mahogany except for the two centre planks which are walnut, just for a highlight. I found the mahogany planks weren't too bad and since there was a lot of sanding and spraying there and still more to do and the fact that the deck is fairly consistant in its shape and easy to sand evenly it is coming up pretty well without the grain filling sanding sealer but the sheets I was going to use for the sides had massive grain irregularities, combine that with the complex curves of the hull and it would have been impossible to get a decent finish without the sanding sealer.
-
Thanks so much for all the pics. I have one of these to build and it has to be as good as I can make it. I have a lathe and mill and would never have thought to use them the way you have, I especially like the spiral staircase and rudder. I will be keeping a link to this build. Steve
-
Good questions. The deck planks are only 0.6mm thick and the limewood was similar. I was sparing with the glue as I didn't want it getting onto the deck timbers and staining them so I suppose I used less glue that I should have and when it came to trimming the limewood strip back I found that it just kept pulling out below the deck surface. The finish is Cabots Urethane high gloss spray. I went with walnut for the sides for reasons stated earlier and the very fine grain really helps get a very smooth finish, if I had stuck with mahogany I would have needed to sand heaps and use a grain filler before spraying which would not have looked so good. I sand with open coat 400 grit between each coat paying attention to the surface defects it shows up, ie shiny bits need more sanding around till they get dull as well. I sand more and more lightly with each coat while still using the 400 grit. There are about 8 or 10 moderate coats on it. If you have an open grained timber then you need the grain filling sanding sealer which is like a thicker varnish and sands easily, so I am told. Steve
-
Thanks Michael, it really is a brain teaser at times but that is half the reason for building it. Steve
-
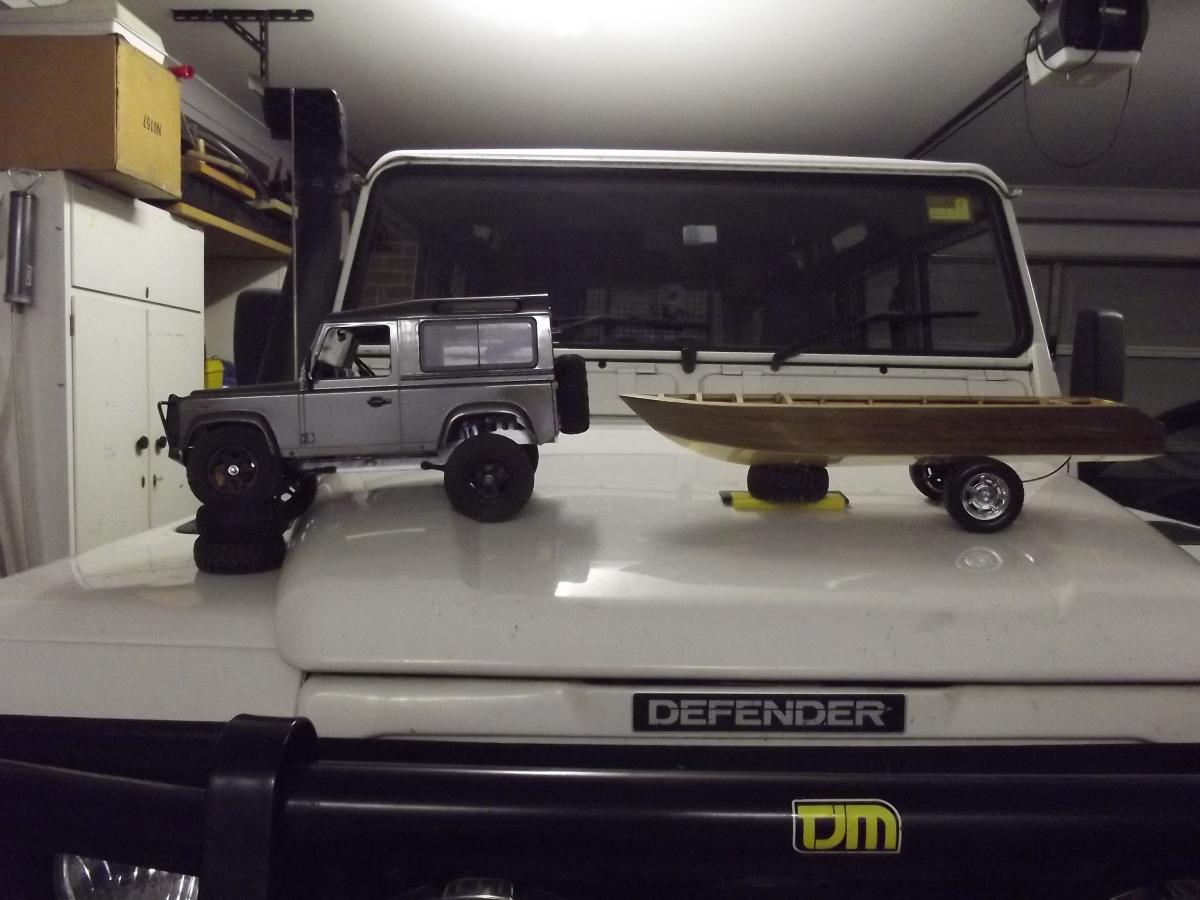
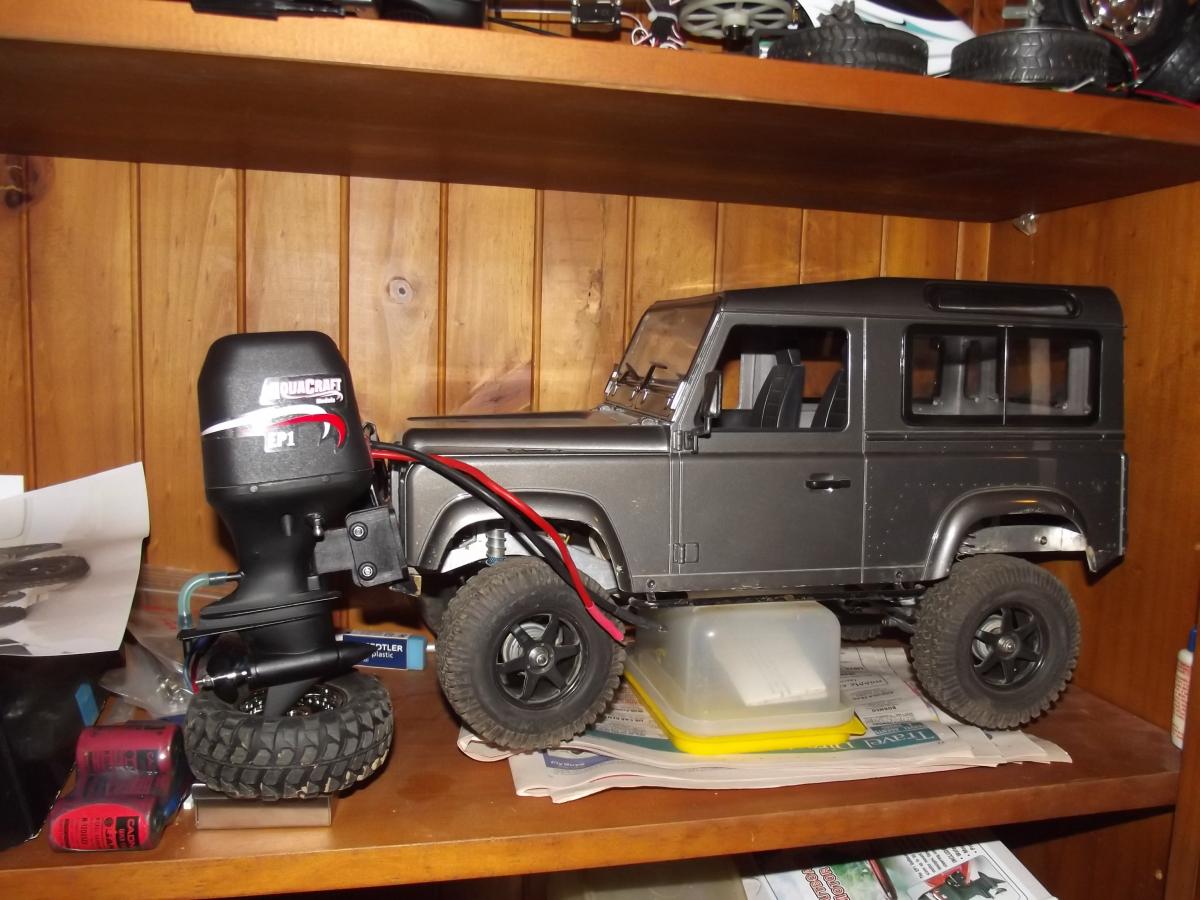
Mate, it's been an interesting experience. Learning new ways of doing everything but it seems to be good. I have been sitting here most of the day putting my builds back on the forum, a real shame all was lost but as they say "worse things happen at sea" It is an interesting if troublesome build. I am still not sure how I will line the interior but that will come as will a trailer. Lots of other stuff going on at the moment though so it will take shape slowly. Steve
-
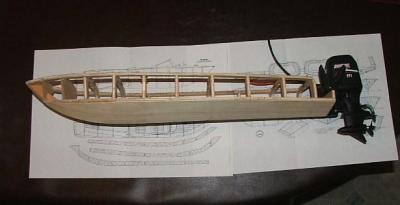
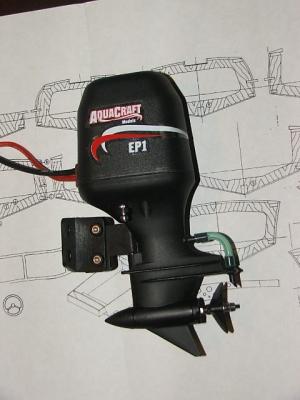
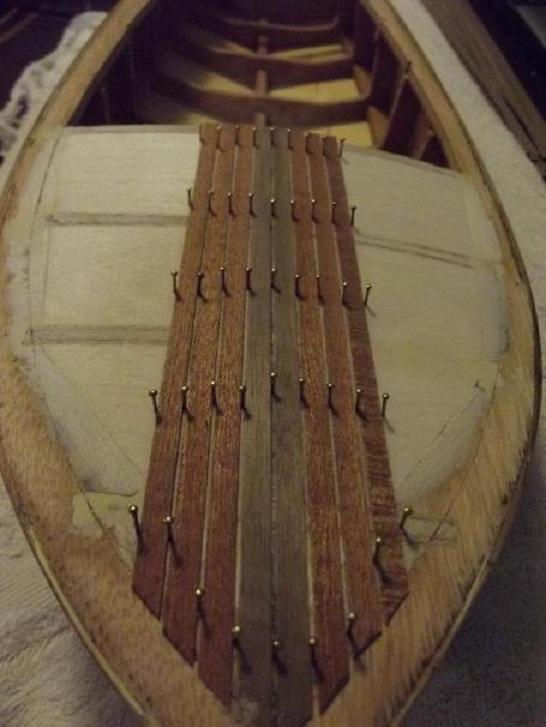
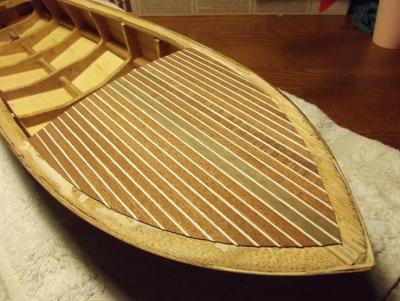
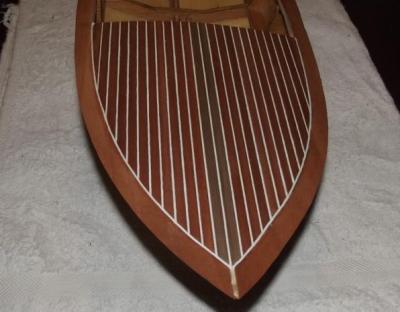
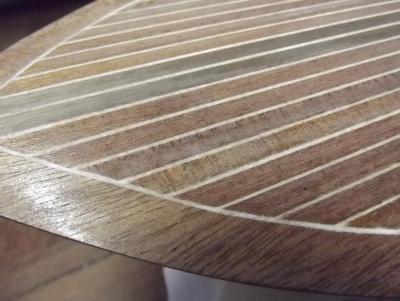
Next came the deck. I am making this up as I go to a degree so it all takes a lot of thinking and a certain amount of trial and error. I want the classic plank with white caulking between so I laid two mahogany planks with a limewood plank on edge between them then tried to trim the limewood back flush with the other planks. This was a dismal failure so I opted for the tried and true cord between deck planks as used on tall ships but with a white cord. It took a while to find a suitable cord but it worked pretty well.


-
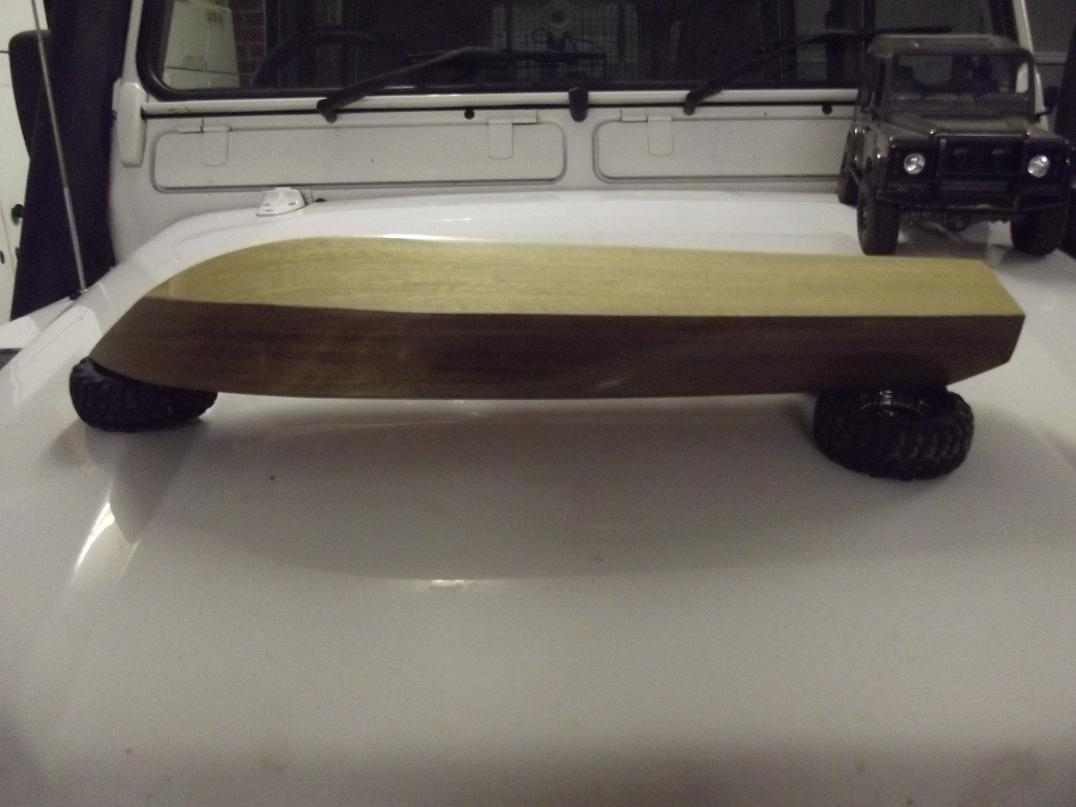
Then began the long drawn out task of spraying and sanding and spraying.....you get the idea. It has come up rather well though.


-
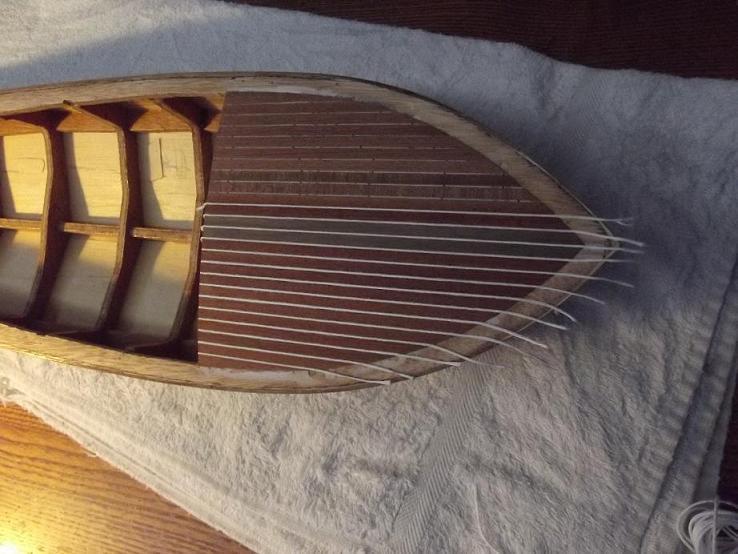
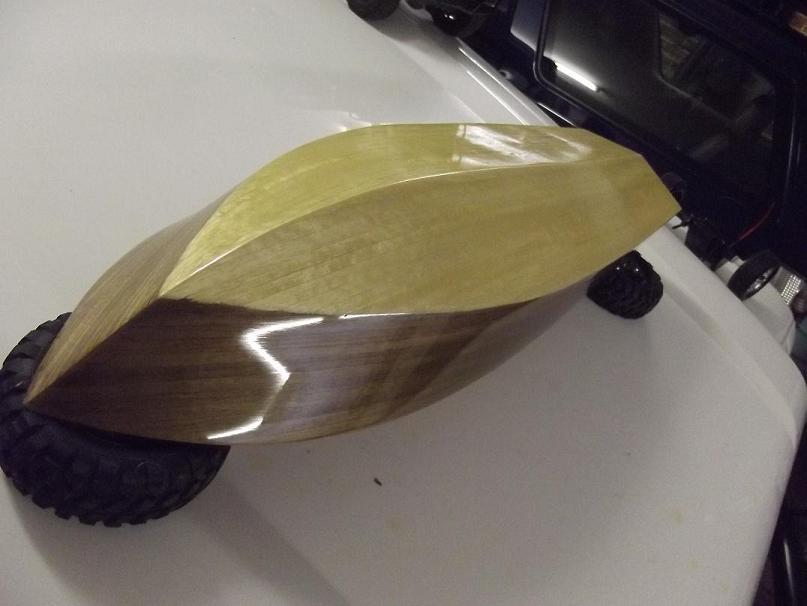
All seemed to go well until well into the sanding and finishing of the lower hull when I noticed that the third layer was delaminating! I peeled it off and resanded the second layer and tried again being very mindful of the instructions on the spray contact adhesive, the same happened again so I removed the new third layer and then sanded the second in preparation for a more conventional wood glue but when I attached the third layer piece by piece it buckled up because of the moisture in the glue. At this point I decided that double planking is a tried and true method of cunstruction so I removed all the offending layers from the bottom of the hull and bought planks to lay, so much for using up excess timbers. I did the sides in the double plank format from the word go because of the dramas I had with the bottom but I decided to opt for walnut outer planks because they have a finer grain thereby having finer edges which fit together much more neatly and the finer grain looks more scale.