HOLIDAY DONATION DRIVE - SUPPORT MSW - DO YOUR PART TO KEEP THIS GREAT FORUM GOING! (Only 20 donations so far - C'mon guys!)
×


maggsl_01
-
Posts
767 -
Joined
-
Last visited
Content Type
Profiles
Forums
Gallery
Events
Everything posted by maggsl_01
-
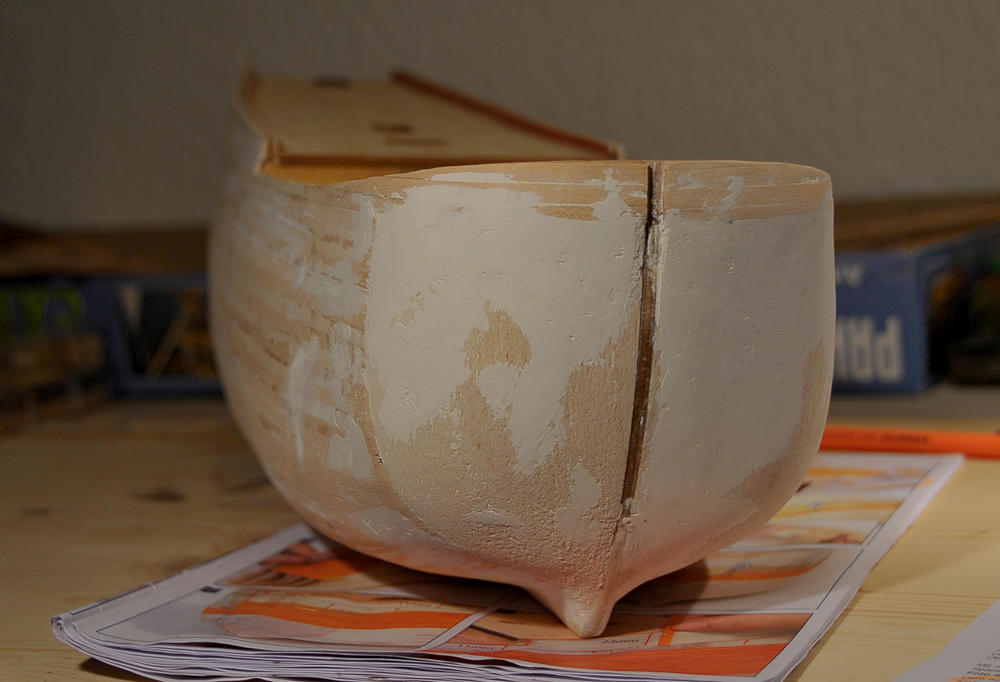
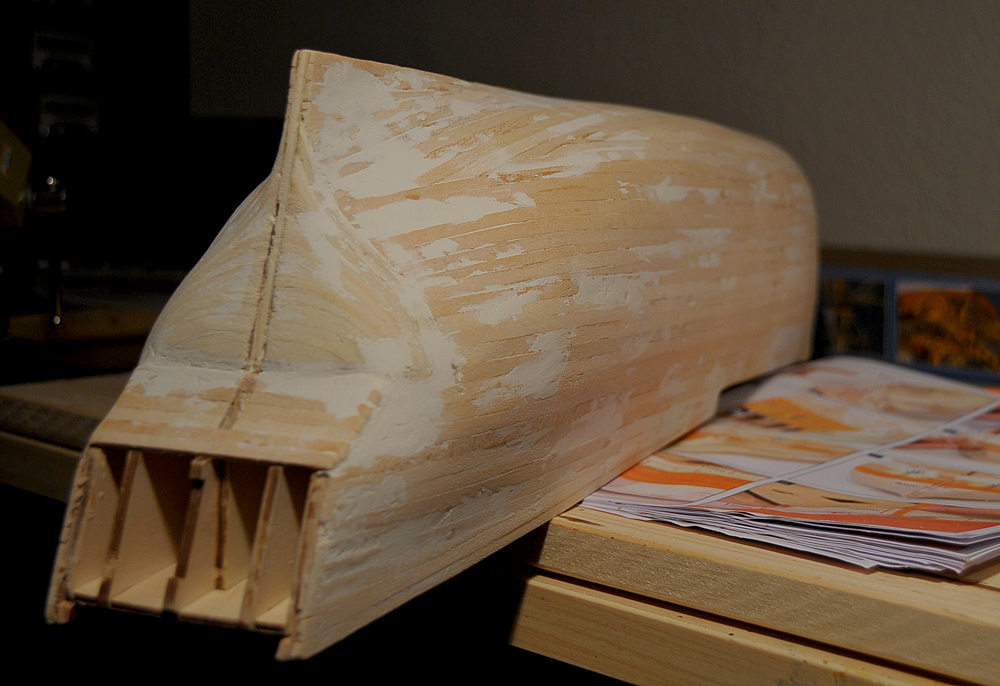
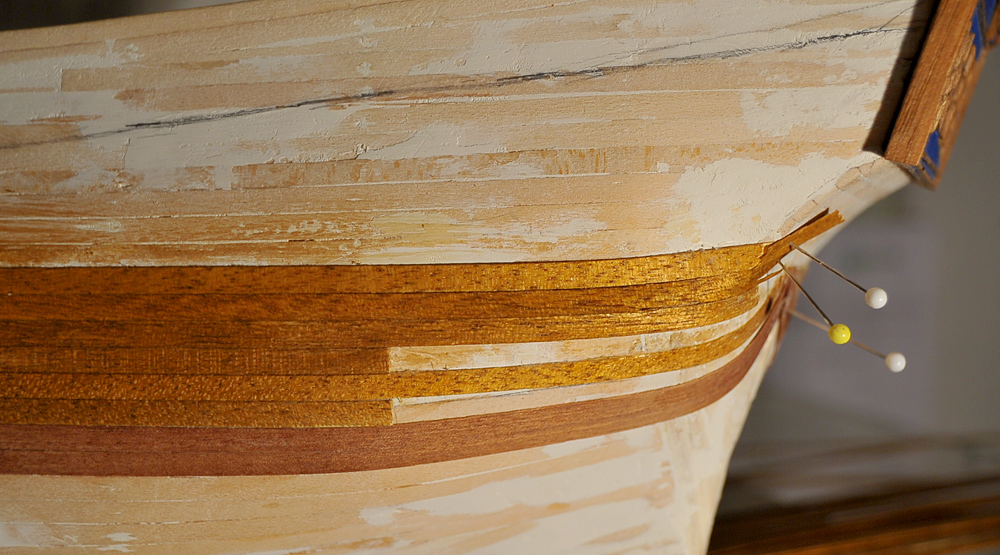
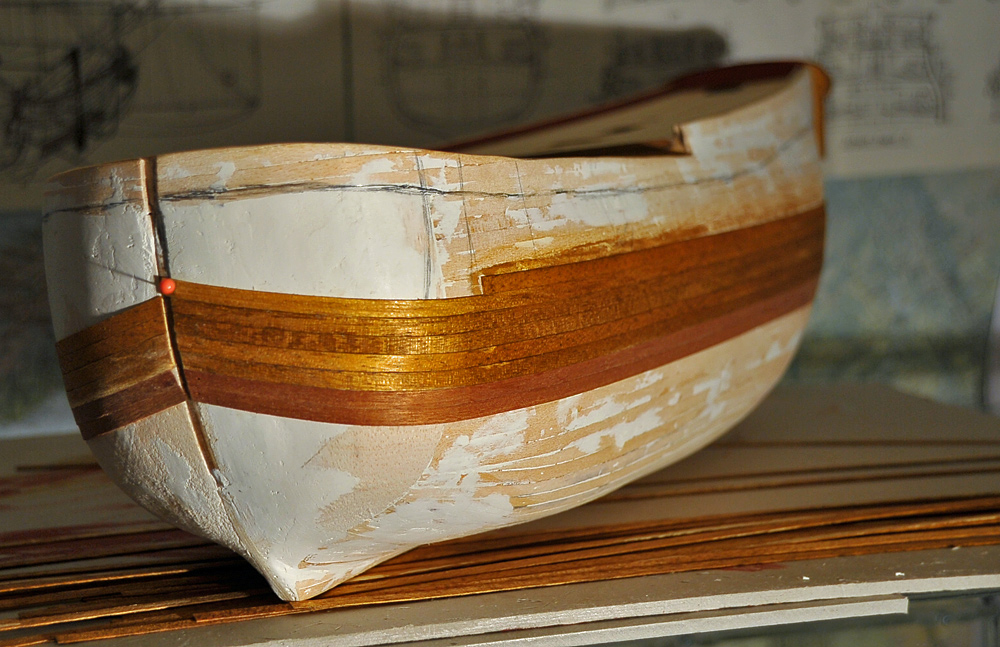
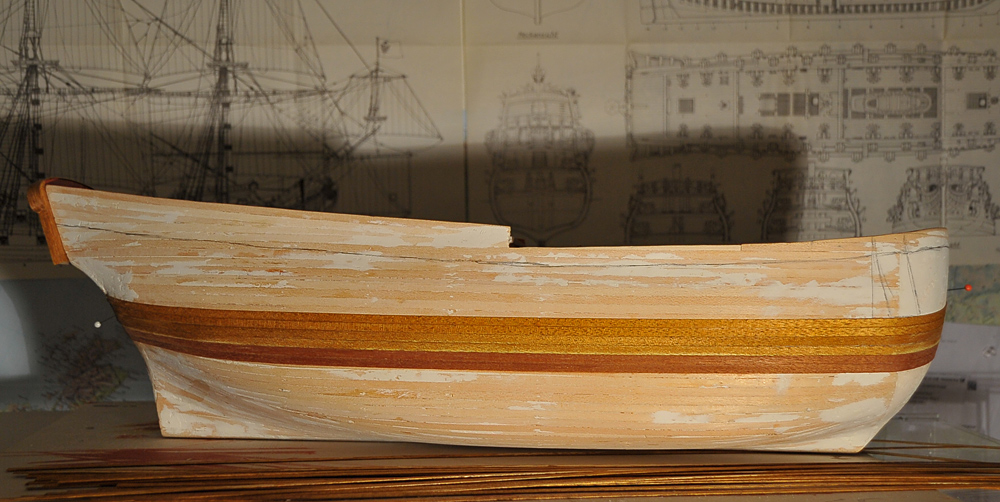
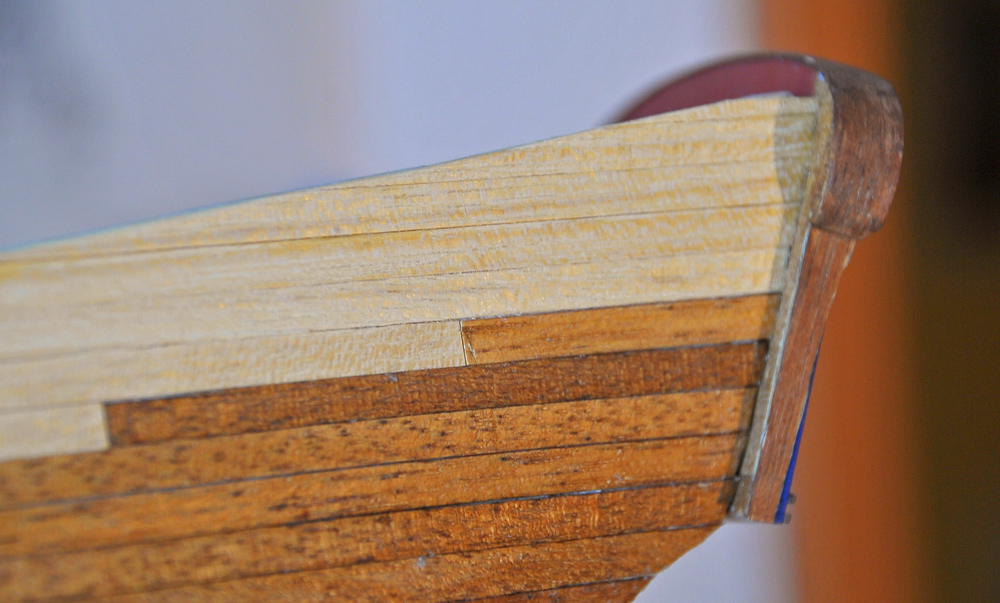
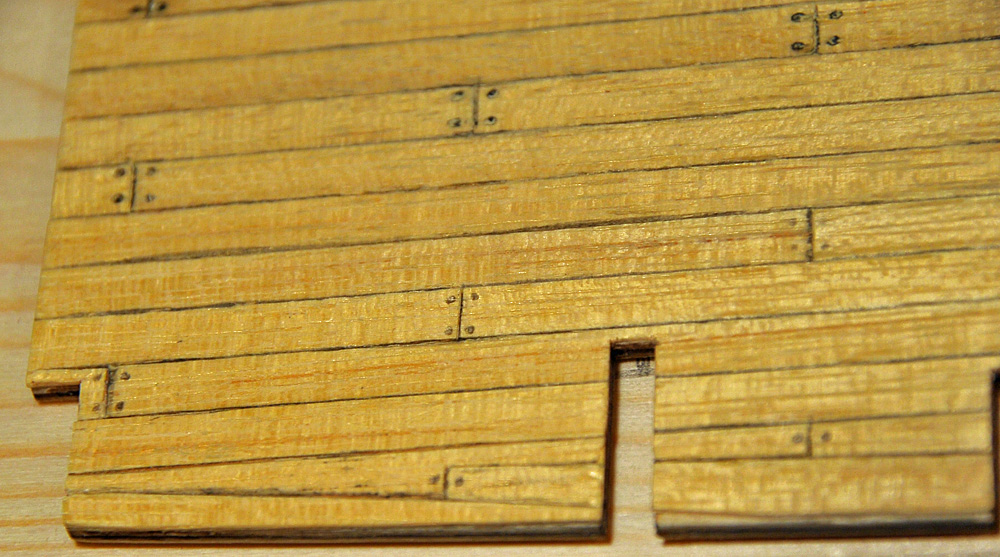
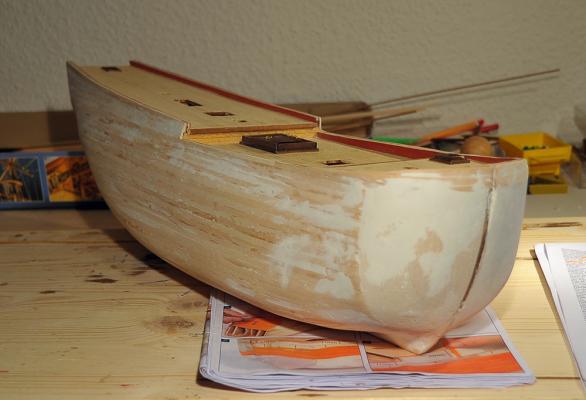
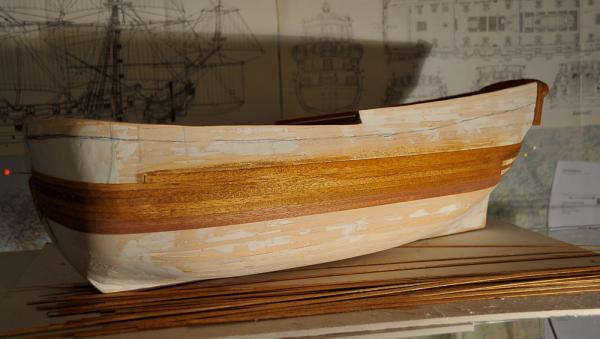
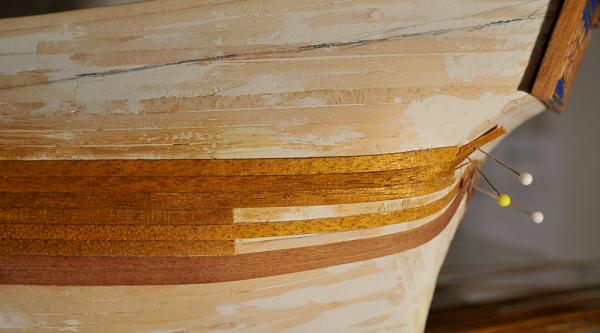
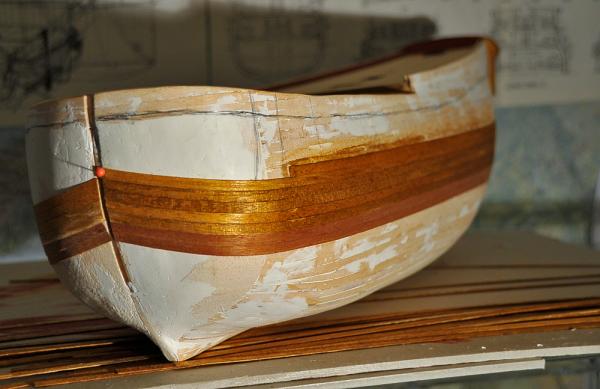
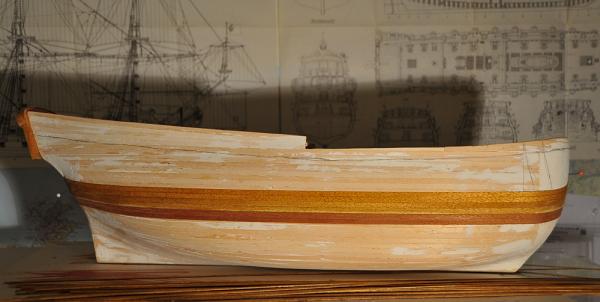
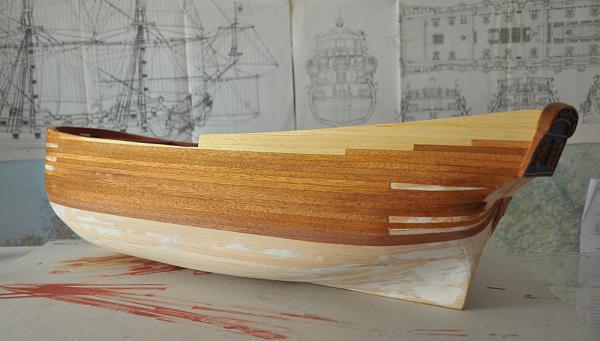
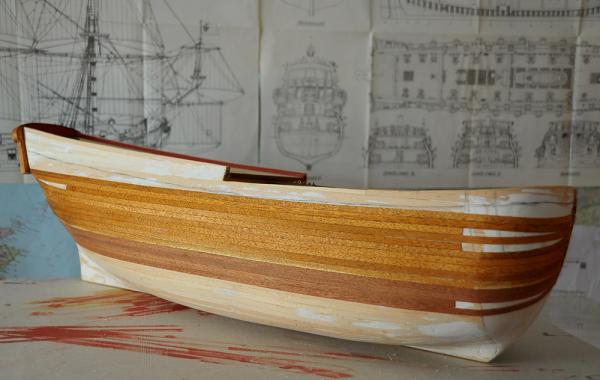
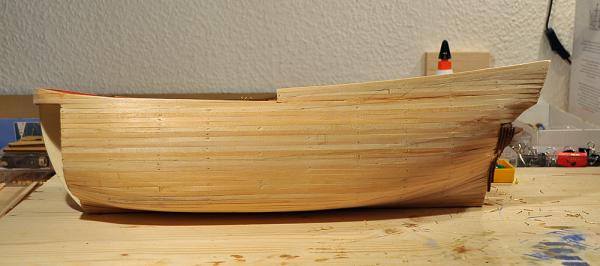
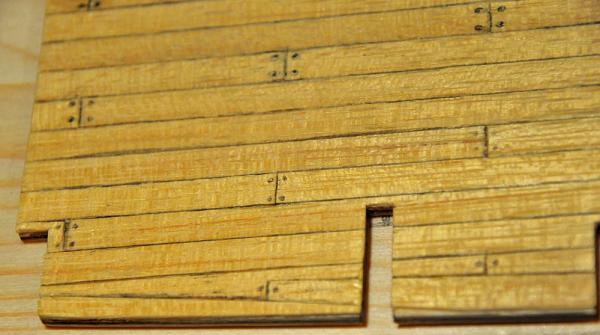
 Hello my friends, time has come to update my log a little bit. In the past three weeks I had a lot of family business to do... my dad became very sick (now he is getting better day by day), the car broke down (we ordered a new one) ... all that usual stuff that prevents you from having fun But nevertheless I found the time I needed to get some distance to the life's stress. I could continue with my Endeavour a little bit. I sanded the surface, filled the gaps, sanded again, filled up again... You sure know that game Occre provides some very tiny, thin strips for the second planking - not more than veneer. At first I was in doubt if that could work proper... but now I am positive about it. It works better than I thought. The white glue I use only needs to dry a moment an then I press the strip on the hull. It is in the correct place and shape and there is nothing more to do. I stained the strips for the upper part of the hull with a mixture of oak and teak as I did not want to paint the ship in a kind of yellow/orange as the instructions say. So it is a little difficult to sand the strips if necessary and to varnish them again after glueing. The varnish will not go into the wood where glue has closed the pores. It's tricky but with some patience and pressure it works. But as mentioned before: the strips do not need very much retouching. The upper part of the hull will be painted in blue as the instructions say. This is ok. I will also paint some of the decks furniture in red ochre (close to the replica) and the railing in black.(But this is future ) The lower part of the hull will stay in dark brown as the strips are that are provides with the kit. After the final varnishing they will have a very intense and warm colour. Well - thats the status quo at the moment. Some pics will show the work (that is really satisfying) Cheerio Max


-
hi vince I am sure: every serious modeller is some kind of engineer Your build comes great... compliments Cheerio Max
- 593 replies
-
- 3
-

-
- royal william
- euromodels
- (and 1 more)
-
Hi all thx for your words @Ed - sorry Ed, I havent been to Como yet, so I could not visit Euro-Model. But this will follow (I hope soon, but who knows what may come - one of my Dogs is serious sick... we will see how it goes on with him who is a real friend ) @Dimitris - you are welcome, have a Retsina and a Ouzo :) and be my guest whenever you have time to stop over
-
Hi Cristi you do a very marvellous job--- very very nice to see the progress best wishes Max
-
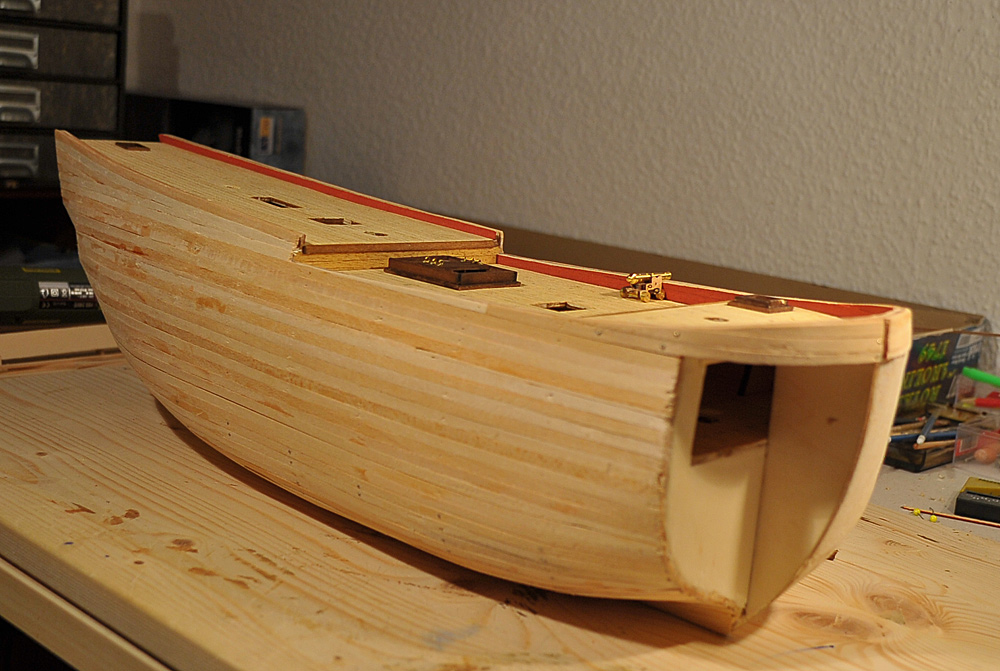
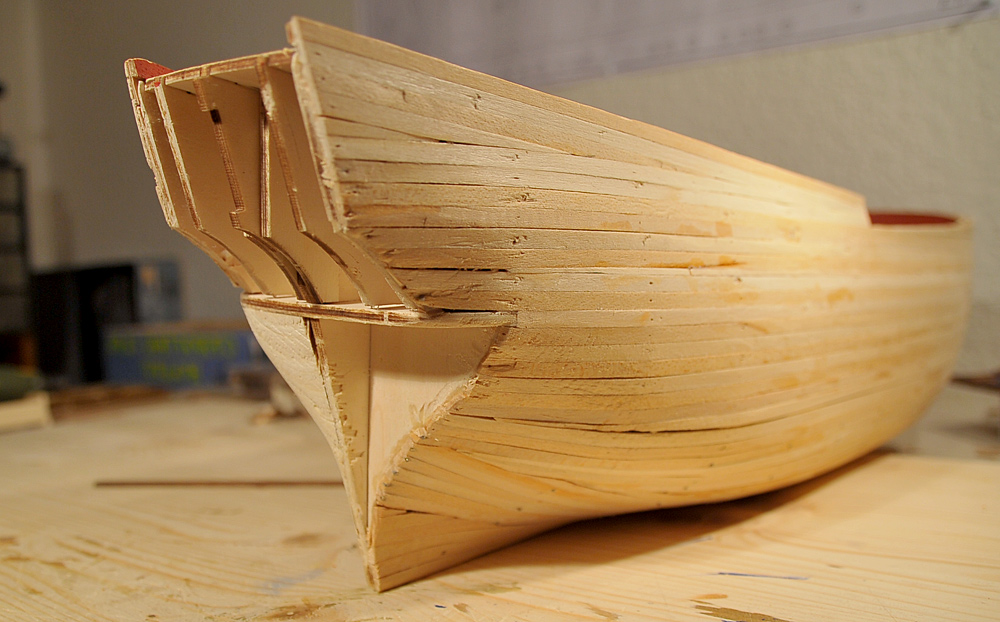
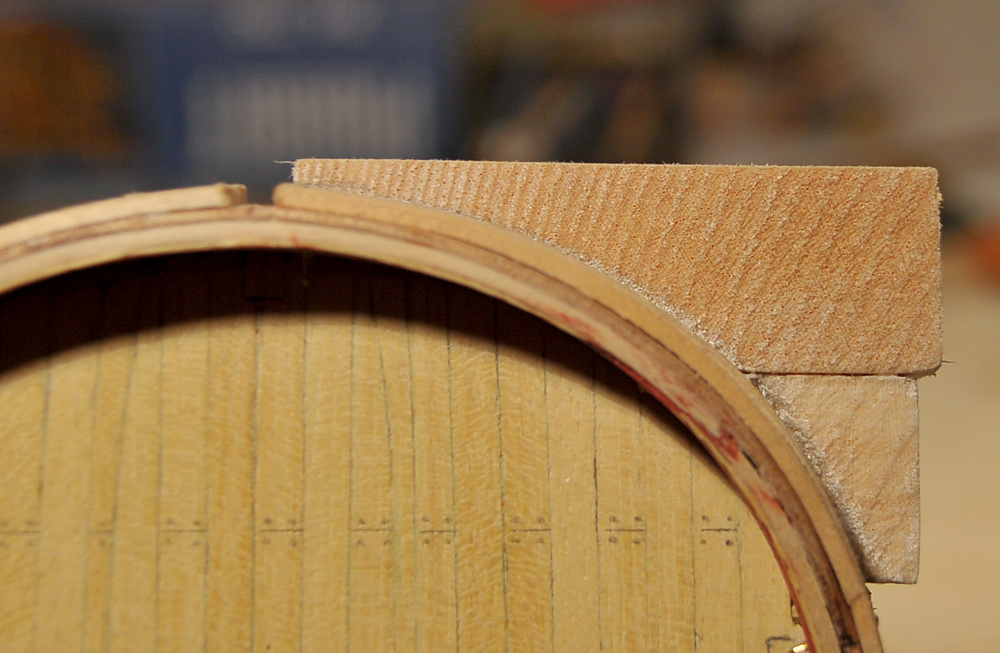
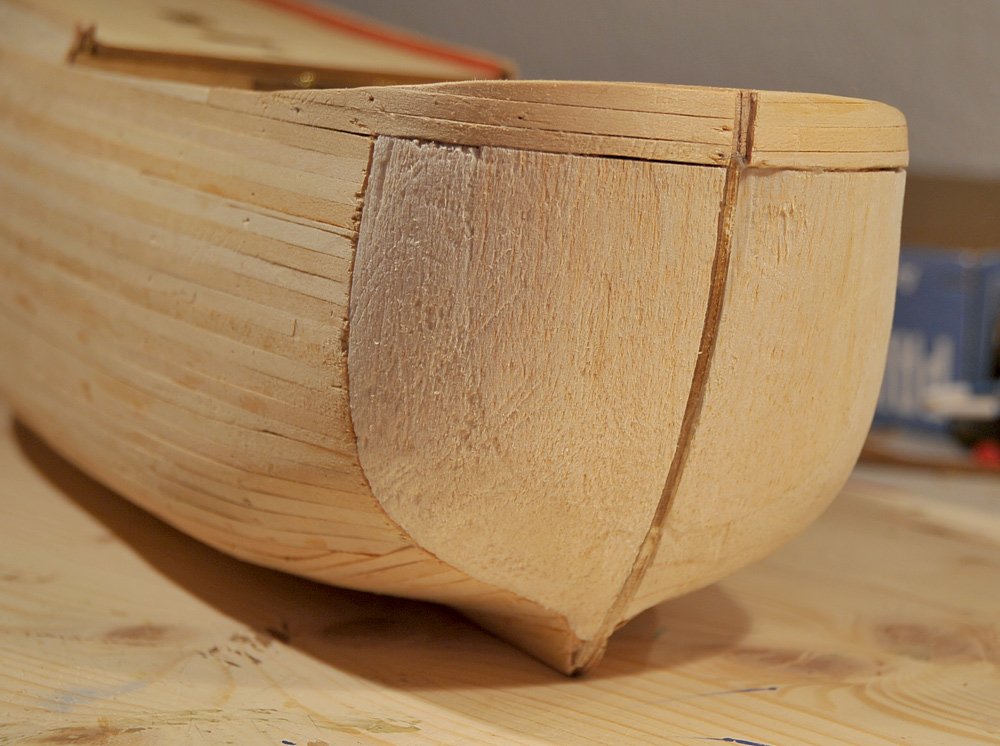
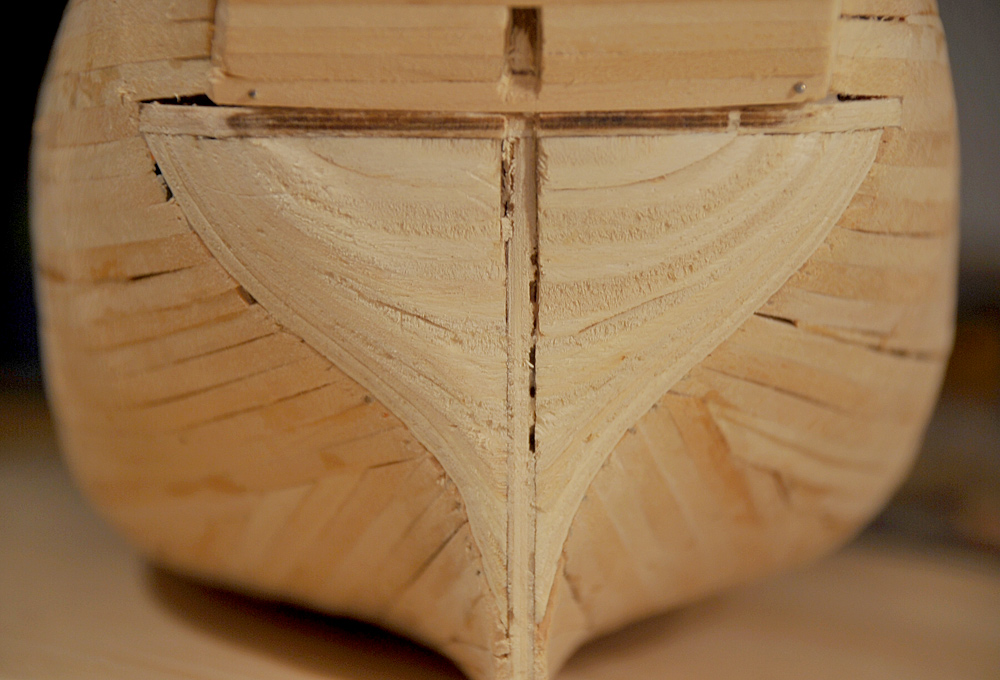
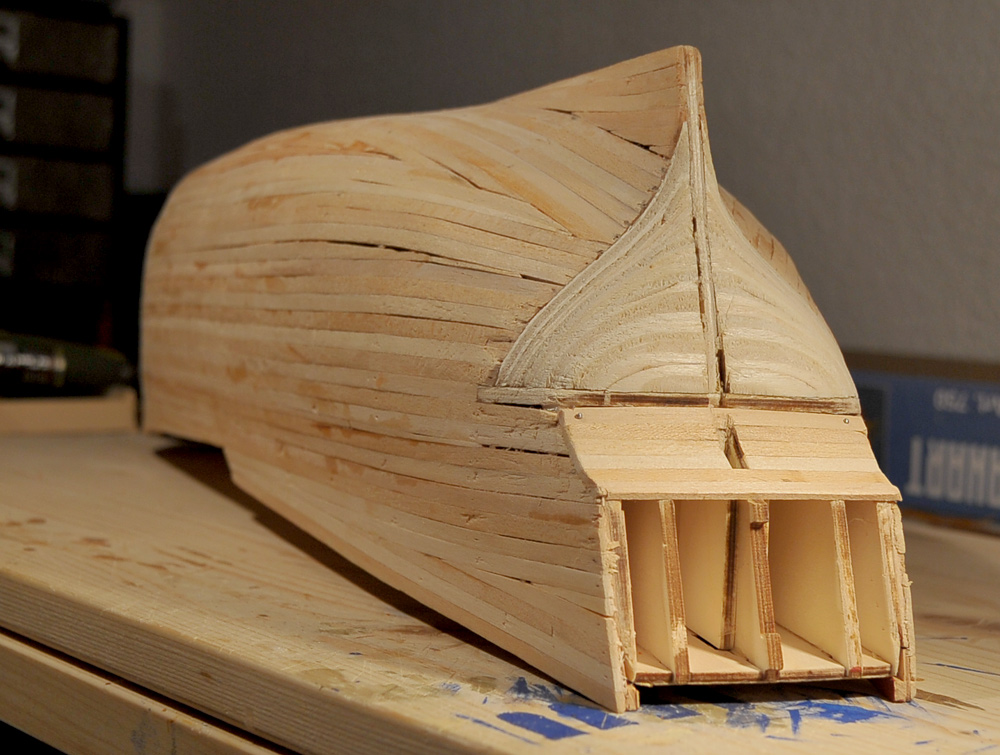
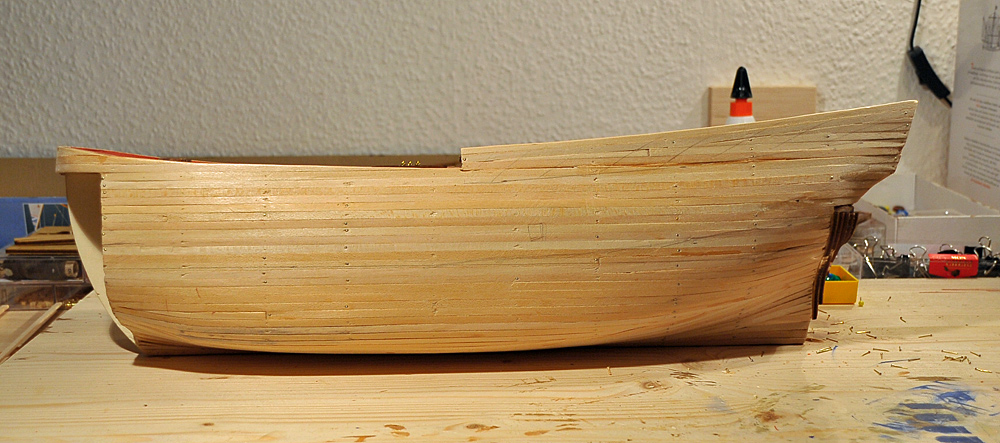
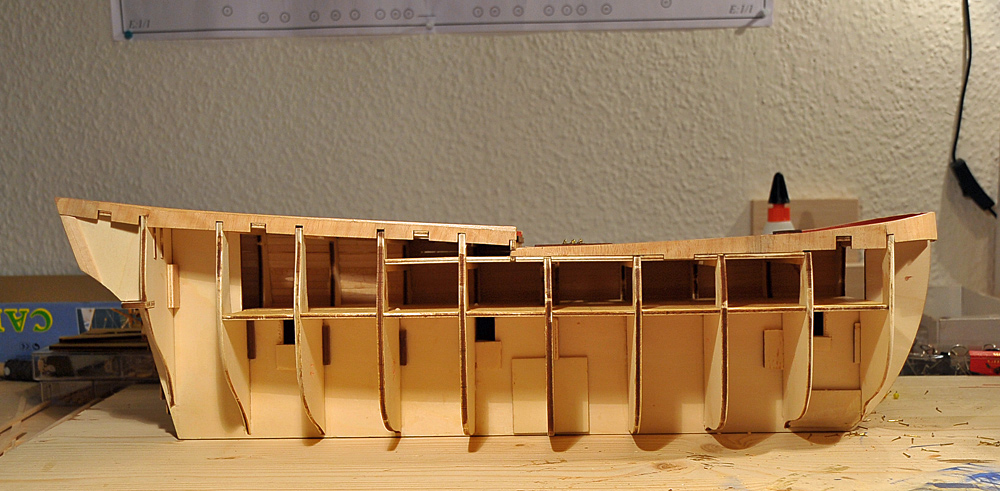
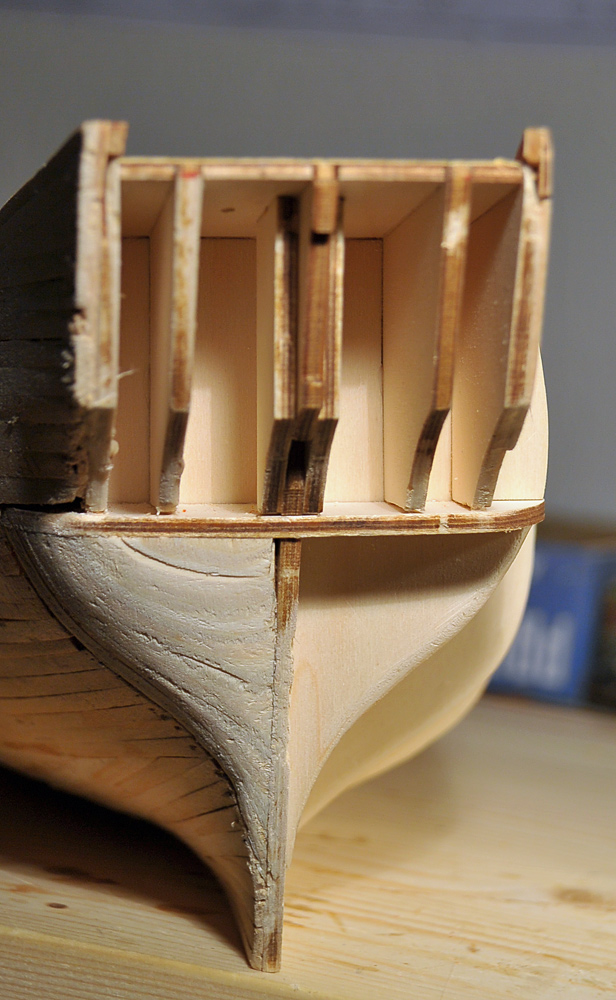
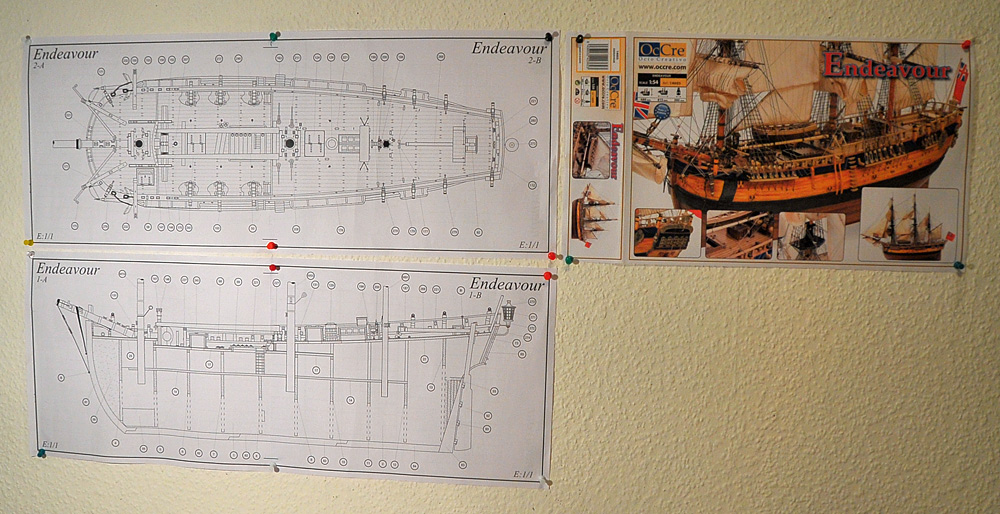
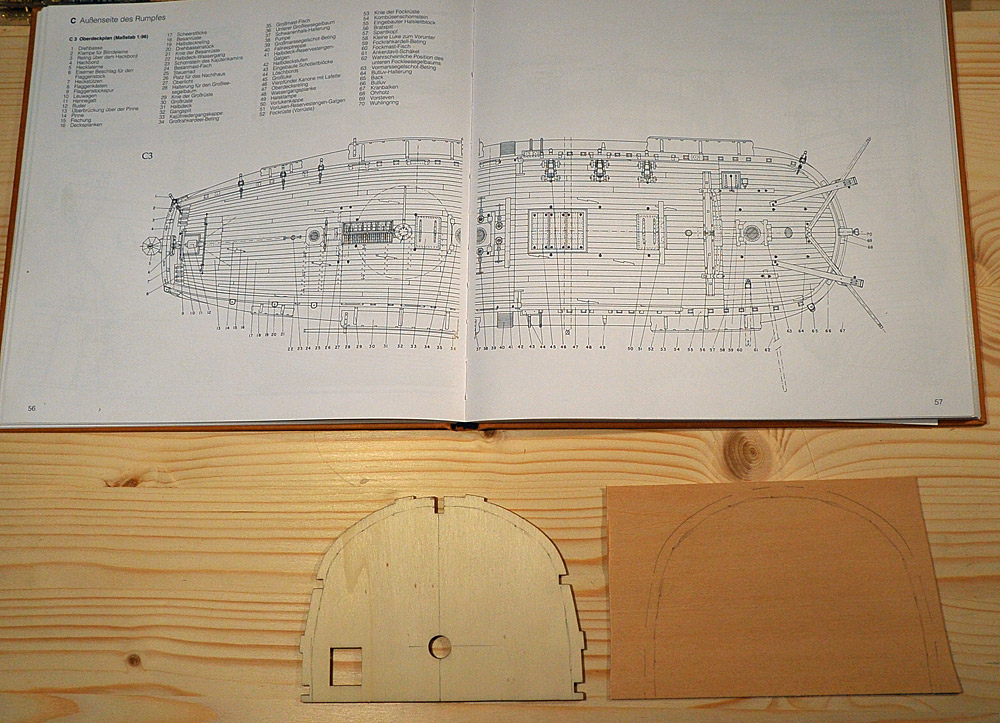
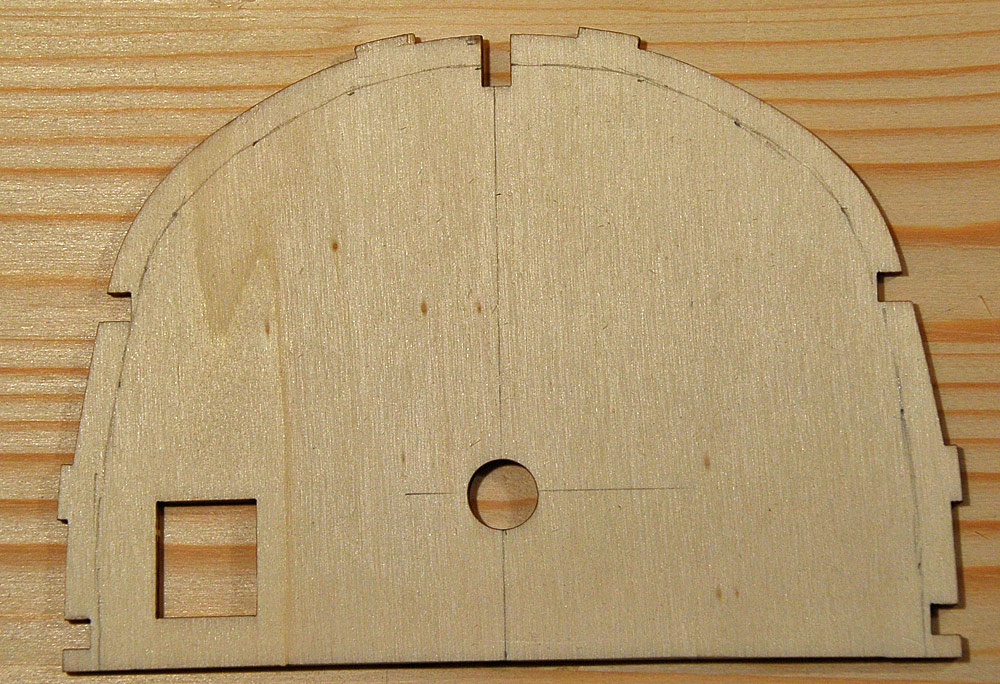
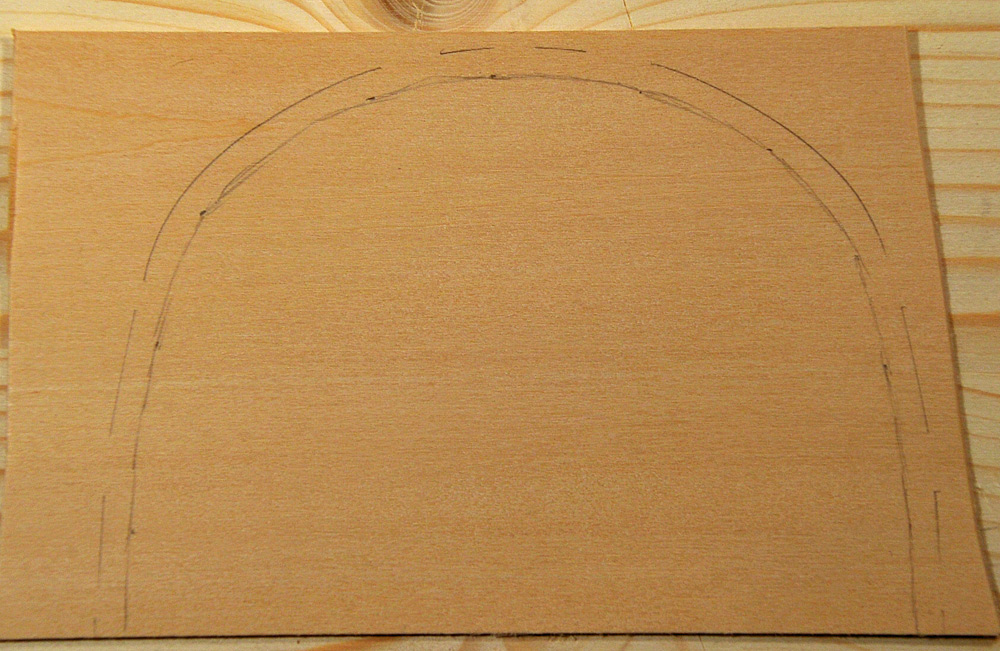
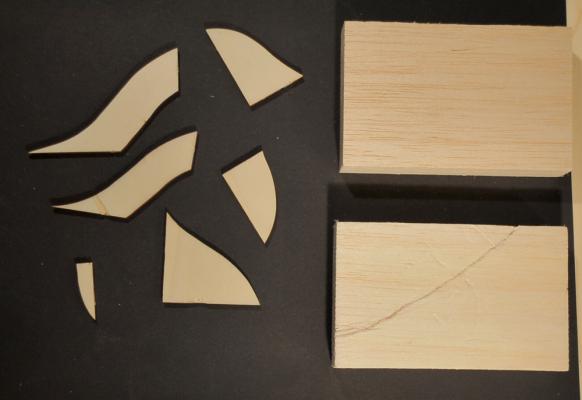
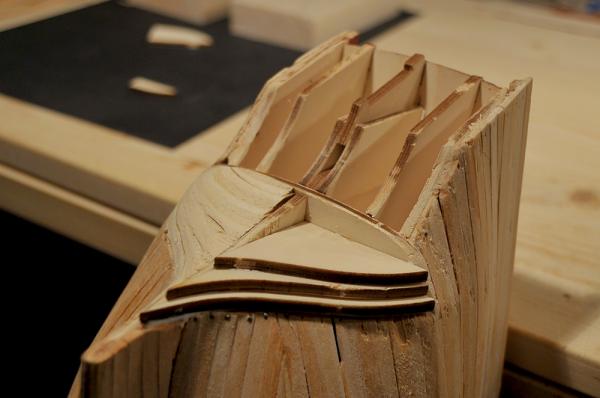
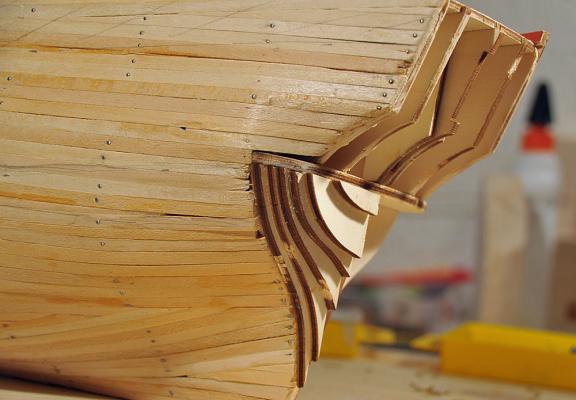
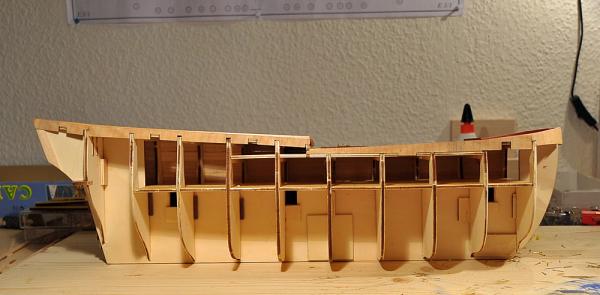
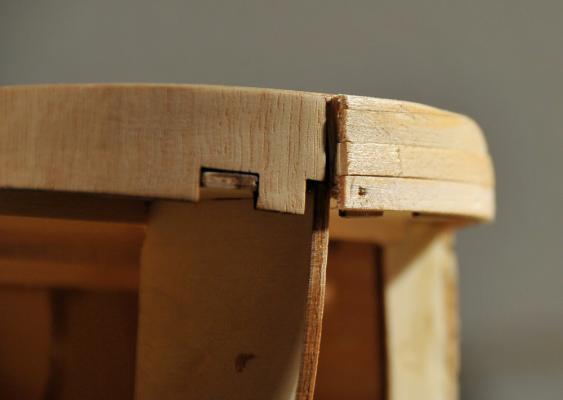
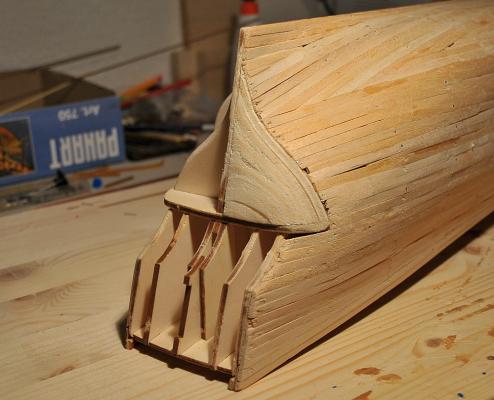
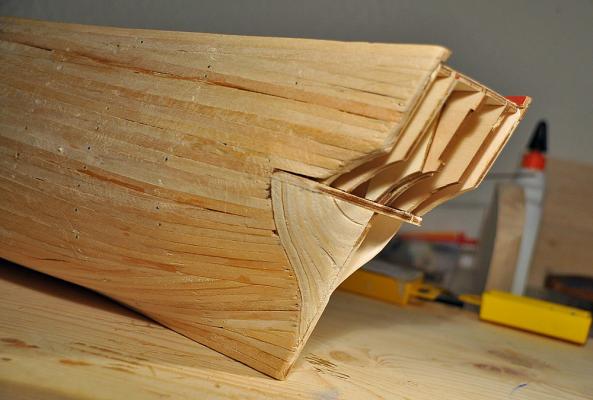
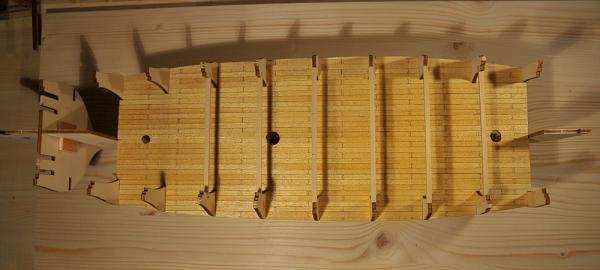
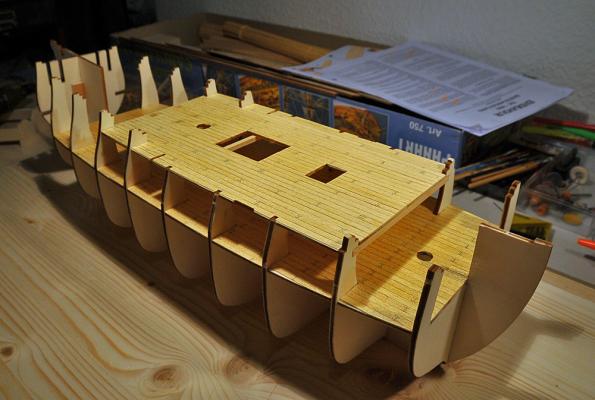
Hi my friends it is time for a little update now. I had some busy days in the office and not so much time to build. And on the other side I did the first planking. You all know that this is not so exciting. I admit that the work on the Occre kit gets very very good. The first planking is very exact to do and not one problem was to solve. The bow filler from balsawood is good to work on, the filler parts for the stern are from plywood and also good to handle. I used a grater (thats what Google said) to rasp down the filler parts. After this I sanded the wood smooth. Next will be to fill the few gaps and get the surface perfect for the second planking. The problem with the second planking is that it is just a very thin plank, about 0.5 mm, just like veneer. So it is absolute necessary to have a fully accurate surface on the hull. You cannot compensate any fault after. I am thinking about to cut the holes off for the ports before the second planbking. I do not want to glue the port onto the planking... I want to fit them in without any sticking out. If anyone is doing that kit or wants to: Be cautious with the rudder. It will be best to prepare anything before planking as it is a little fiddly to fit in the parts. All in all: I work on the Endeavour by Occre for about ten week now - and I am quite good on my way. It is really a fun to build this model as far as I have done yet. But of course it is not as challenging as a Corel or Mantua or at least Euro Model - kit will be. I look forward for the next steps to do. Some pics will show the Progress - and as always: Comments are very welcome Cheerio Max


-
Hi I've never done this coppering... but it Looks very good. Perhaps I will dare some day to build a model with a coppered hull... Go on this way - its very nice Cheerio Max
-
Hi Cristi thank you for your compliment... yes: i like her very much. and of course she is already under a acrylic Hood as i dont want to get her dusty and: the Gallery is already online Cheerio Max
-
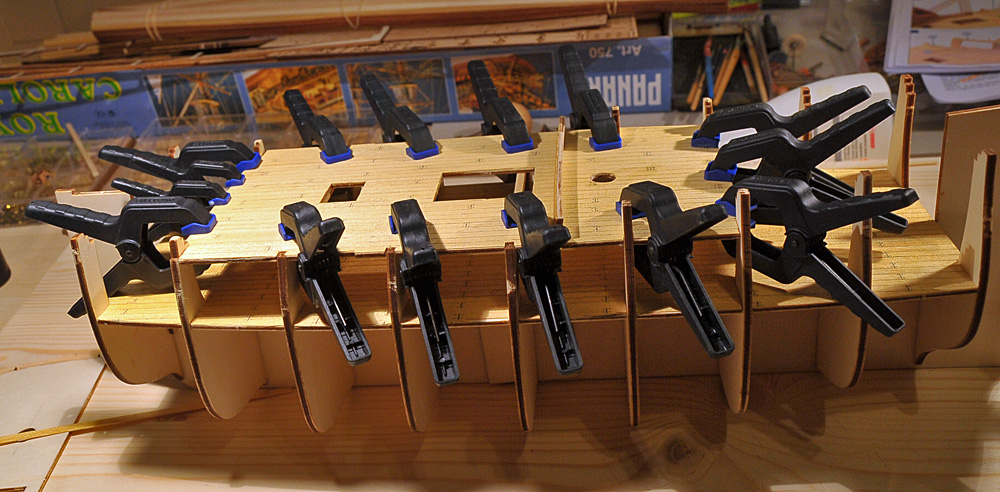
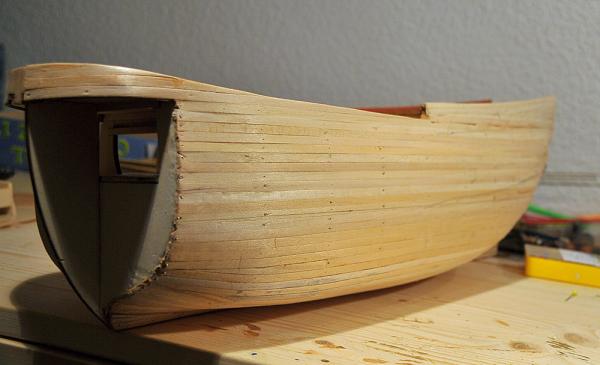
Hello my friends its been a Long Long time since my last update. I am doing the first planking of my Endeavour at the Moment. I think you all know what this means... most of the time sanding... and sanding and sanding The kit is good, the instructions are even better - so nothing is wrong with the result.It is fun to do this Occre kit. I have almost finished the portside. Enjoy what you see :D Cheerio Max

-
Oh Denis, you know for sure: Life is pain ... Cheerio Max
-
Hi Denis, it's an amazing Job that you do on the windows. It's such a small detail compared to the hole size of the ship - but you spend so much time and effort to do it perfect. Thats modelling on a high level... Cheerio Max
-
Hello Nigel thx for your kind words. At least just this was my intention: To create a kind of 3-D on the deco. I did not like the "flat" look of the PE-parts. Cheerio Max
-
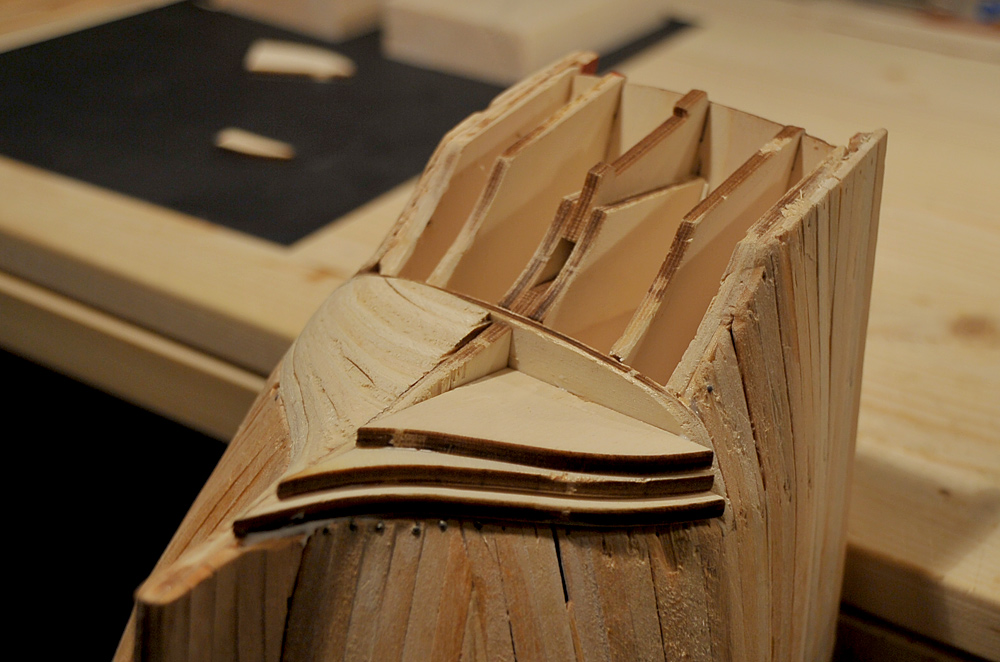
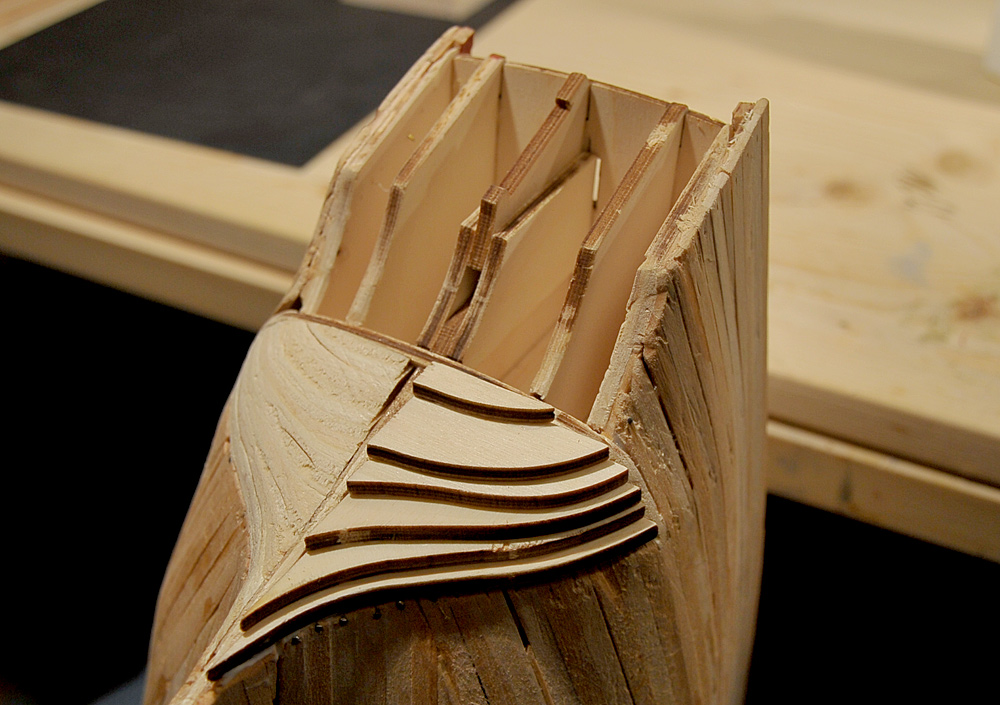
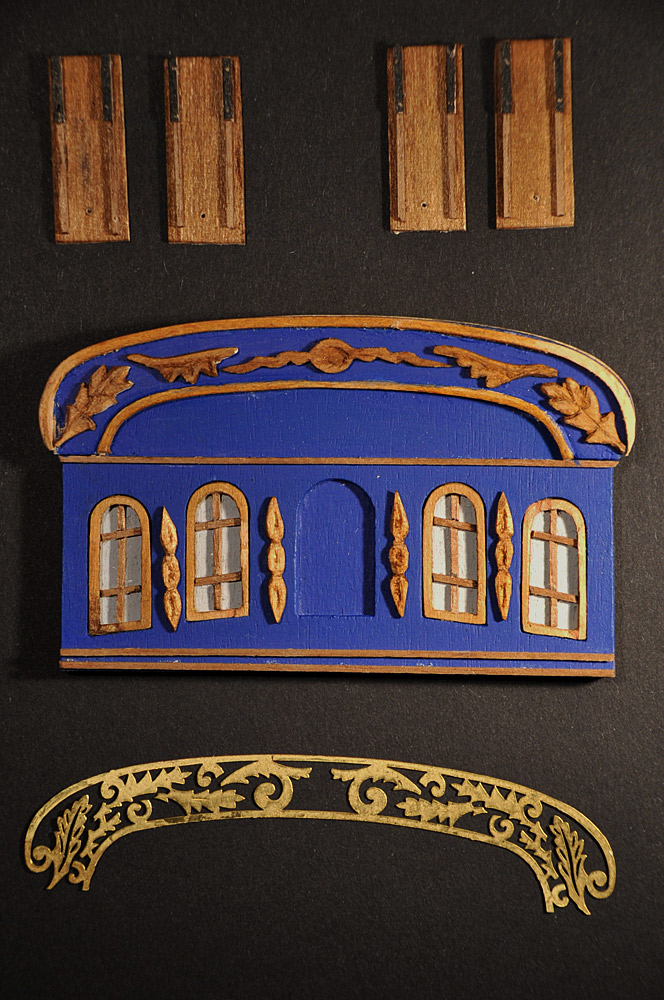
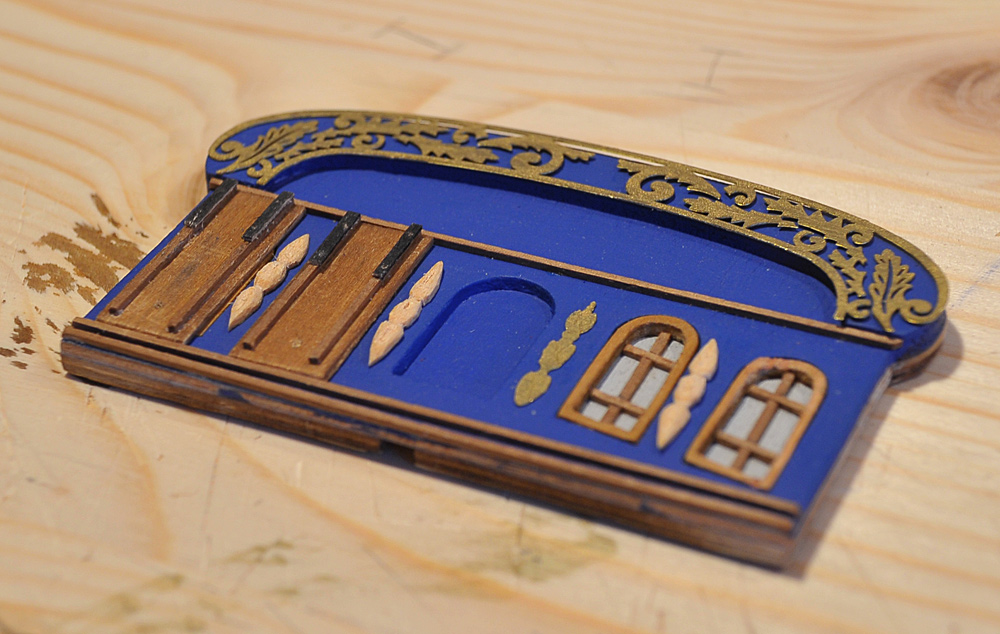
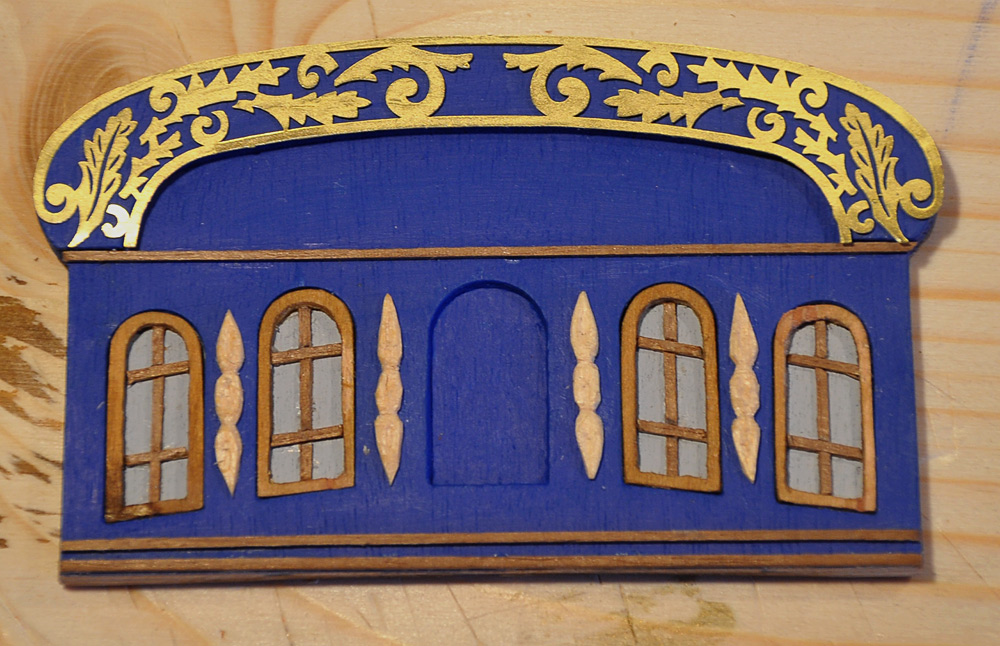
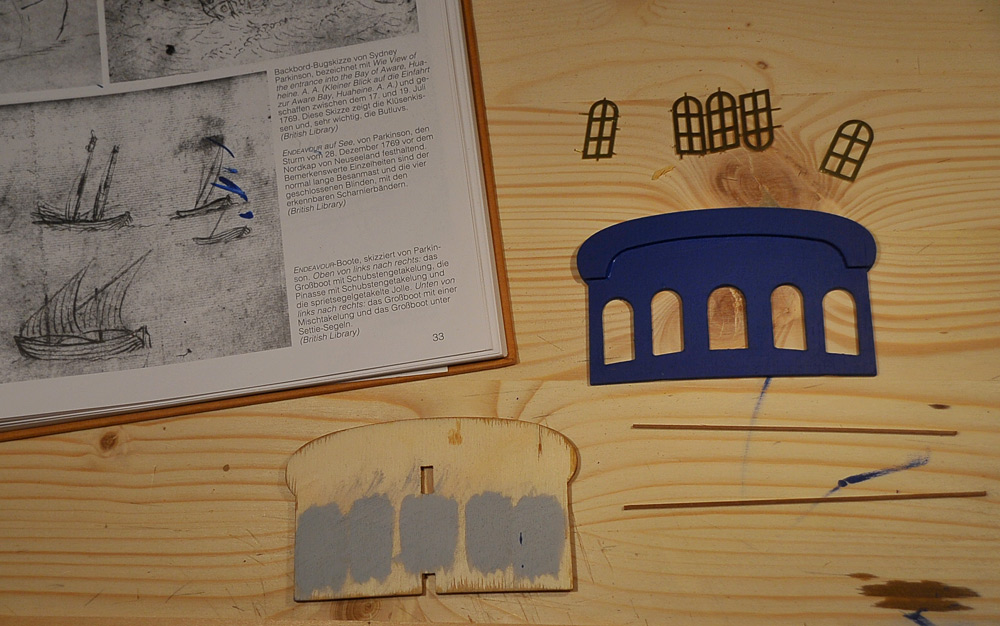
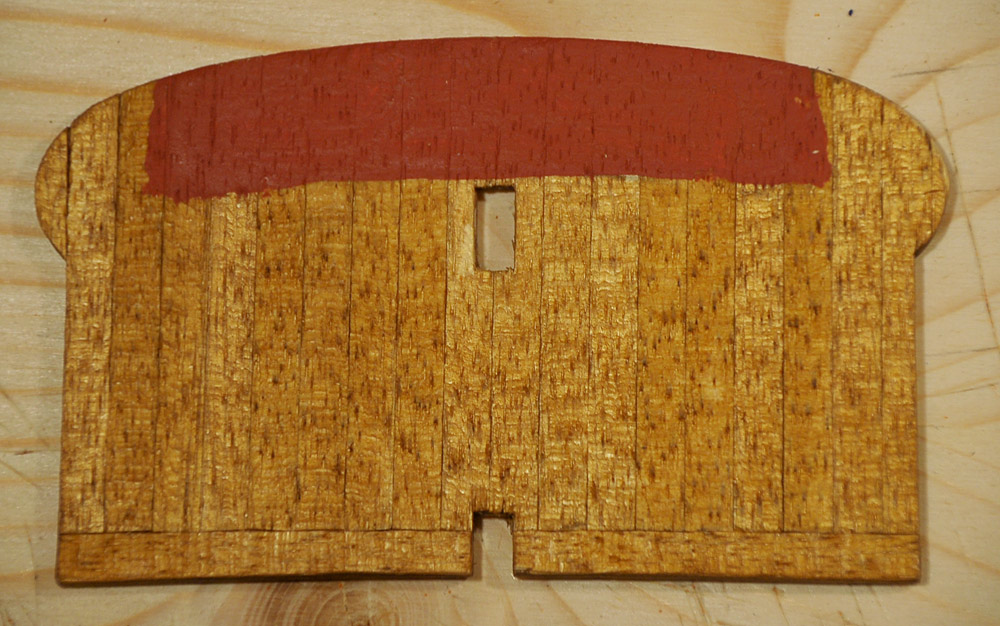
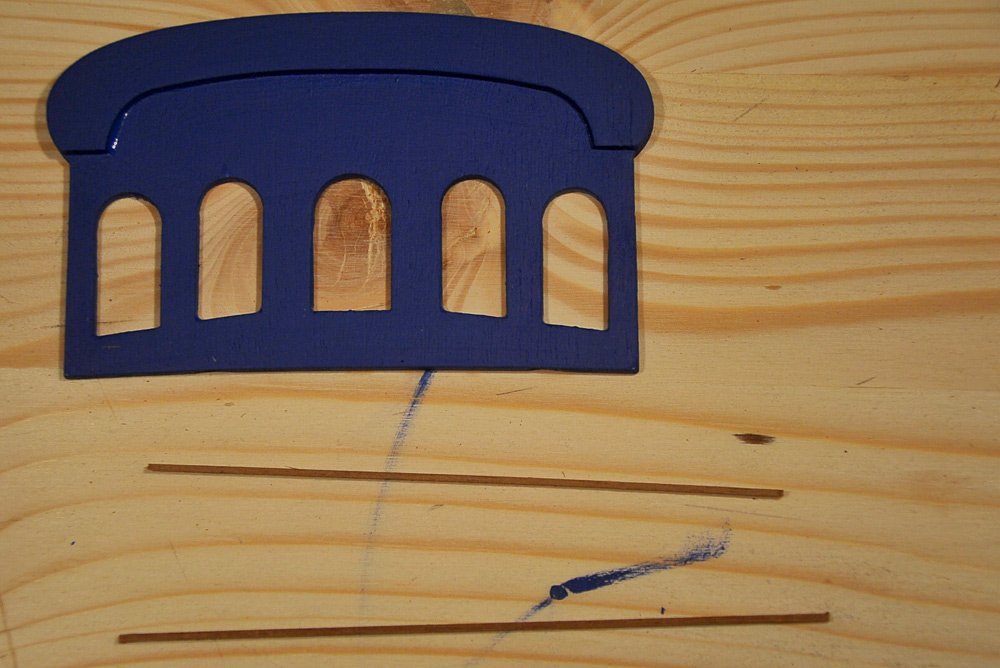
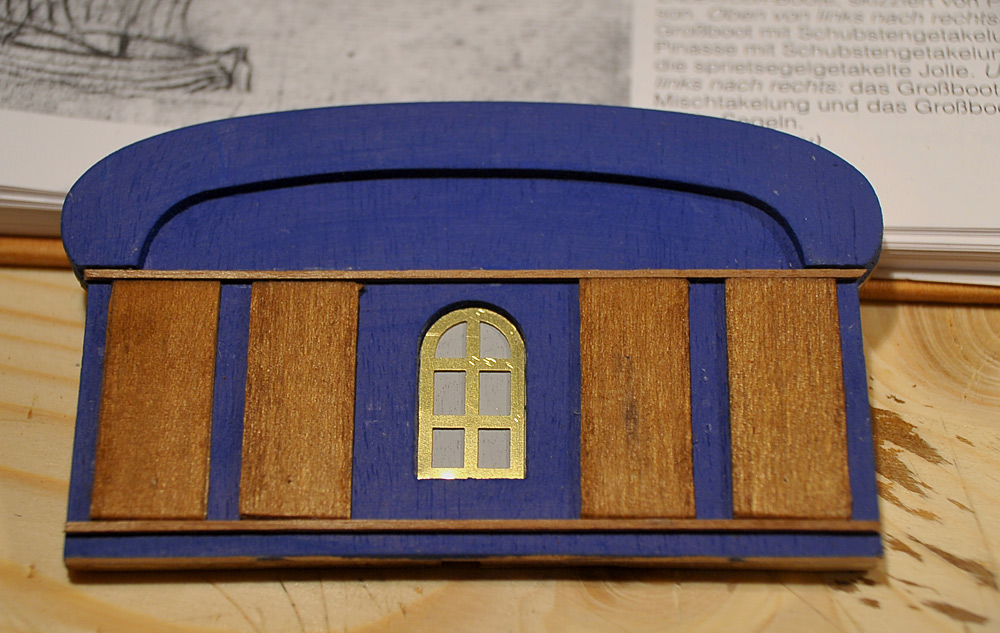
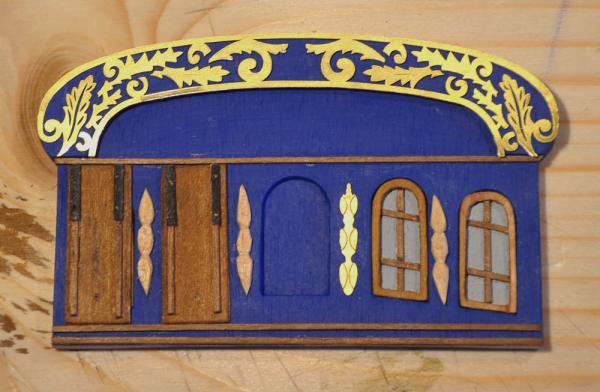
Hello again just one pic and a short update: I tried some variations for selfmade decorations and at least found a solution that I like. It is my first attempt in carving so pls dont be too critical with the result :D Above the transom you can see the four covers for the windows. I will keep them opened as it is to see on the sketch by Parkinson. The decorations are designed very free and represent an own interpretation. I tried to get them more detailled and according to the decorations shown at the Australian replica... well, I failed terribly... But at the end for me my solution looks better than the photoetched part in the kit. I have to touch up some small things with Color, then I will glue the decorations on to the transom. I will not paint the decos but keep them in this natural wooden look. I will go to Norway for a week now and have a trip on the Hurtigruten ship up to Kirkenes. During this trip I will at least visit the North Cape - the northernmost visitable point of the European continent. I will be back after Easter. Wish you all the very best... Cheerio Max

-
Hi Cristi, you do a wonderful Job on this kit. I am looking Forward to every Progress you make (did I mention that the SOS is one of my favorites? ) Cheerio Max
-
Hi Josh I am glad to read about a build log for the Wappen von Hamburhg - it is one of my favorite models beside the Friedrich Wilhlem zu Pferde and the Berlin. All of them are on my wishlist - and every log I cxan find I will follow. So I get my comfortable armchair, a good (bavarian) beer and some potato Chips... Have a good start and show us your beauty growing up from day to day Cheerio Max
-
Hi Schnu - sorry for the delay... The dust is kept out by a big hood... It is 90/75/28 cm big and from acrylic glass, made by a German Company called Sora (http://www.sora-shop.de). It is worth every Cent (the costs are about 165 Euro) as it prevents the model from the bad bad dust. Cheerio Max
- 153 replies
-
- 1
-
-
- royal caroline
- panart
- (and 1 more)
-
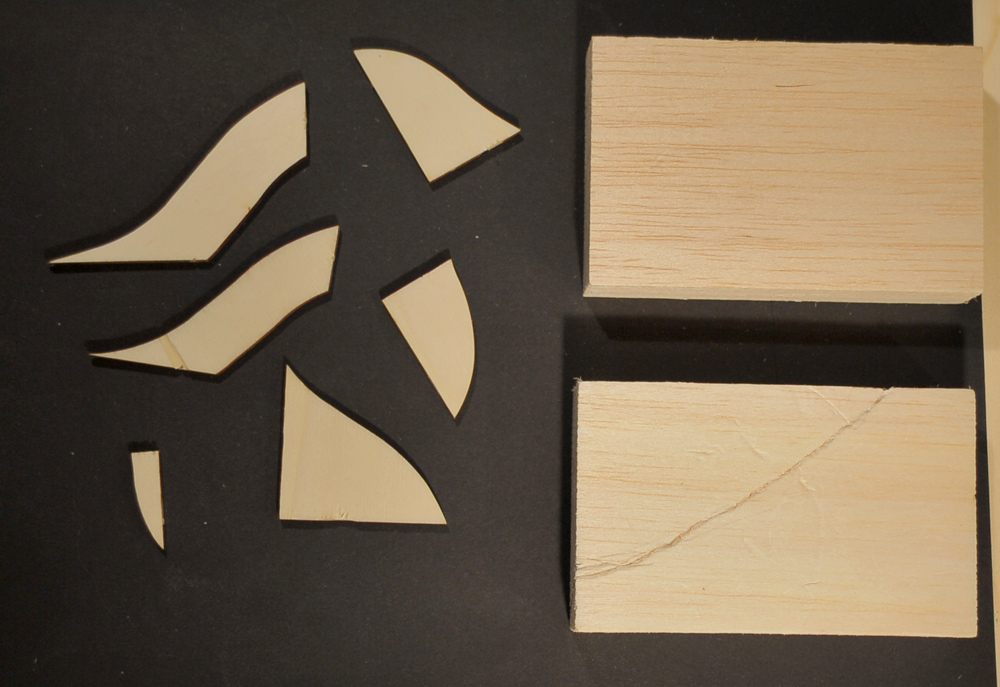
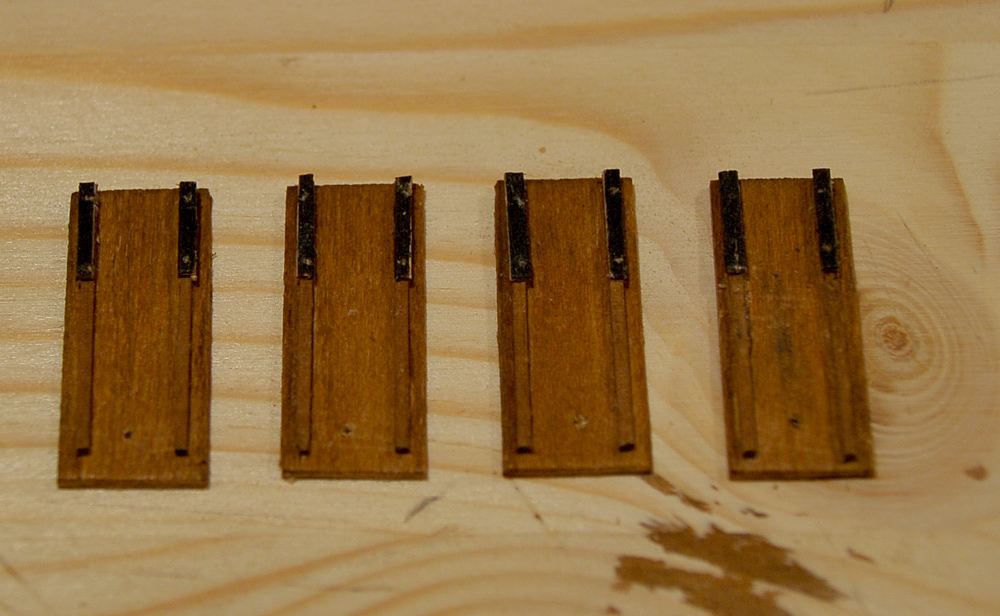
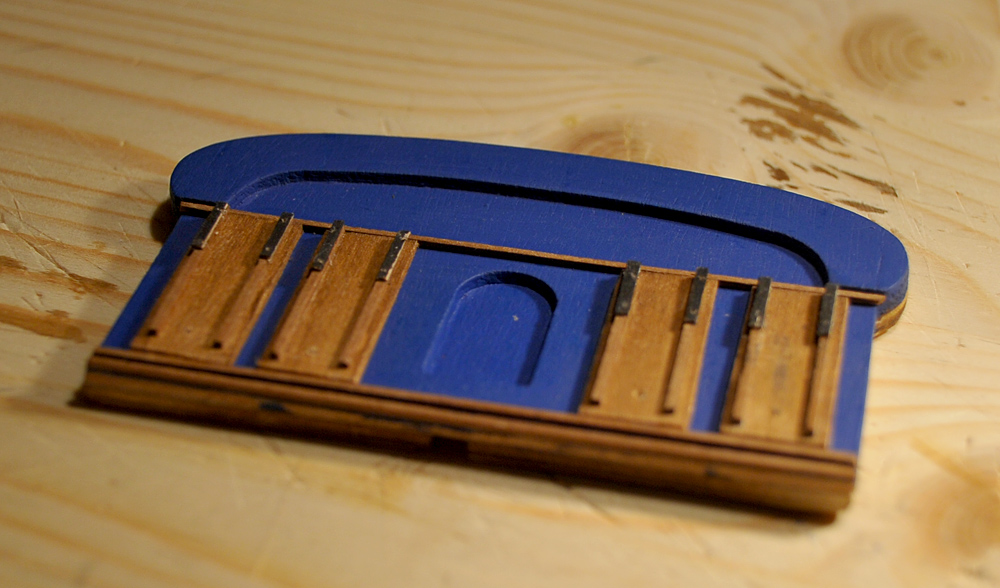
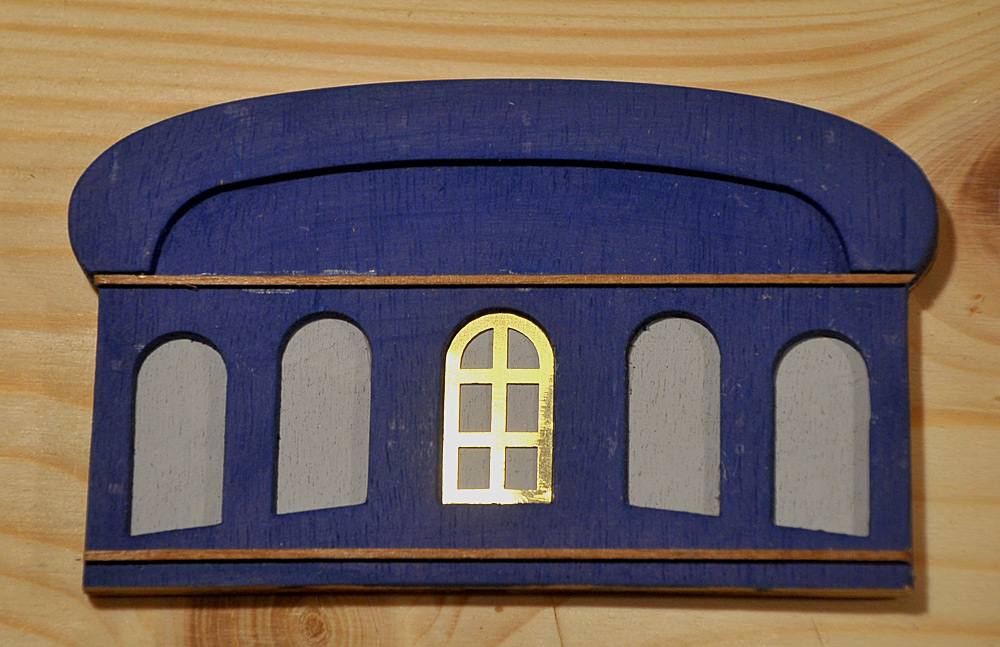
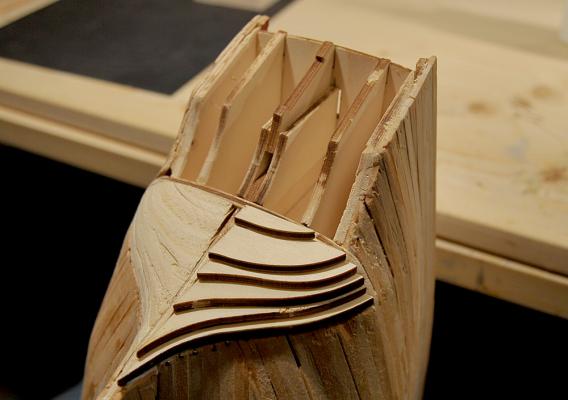
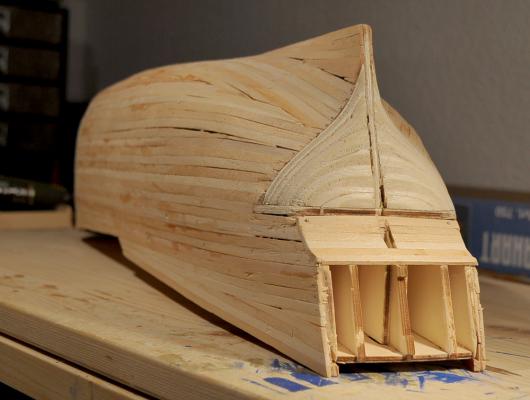
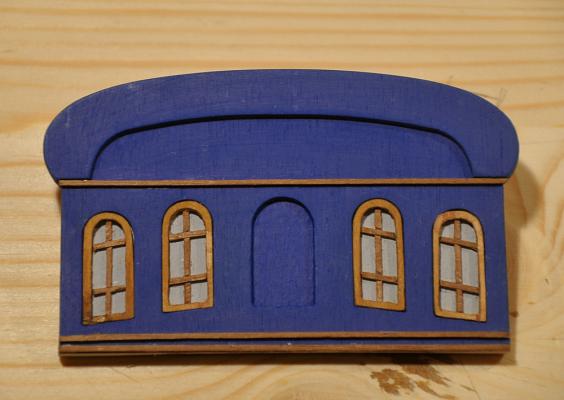
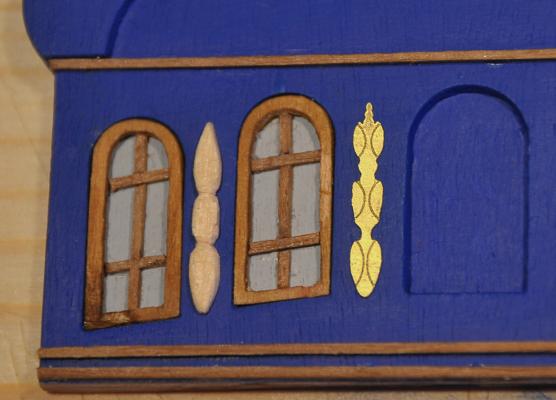
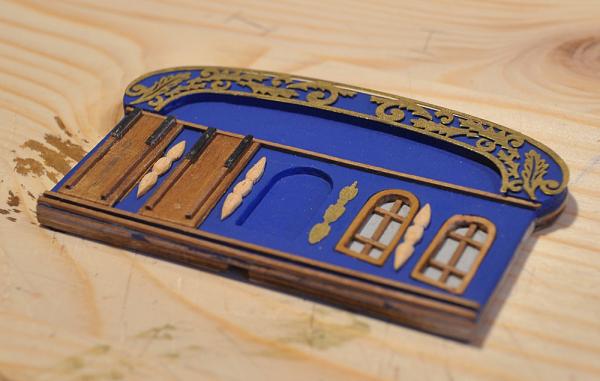
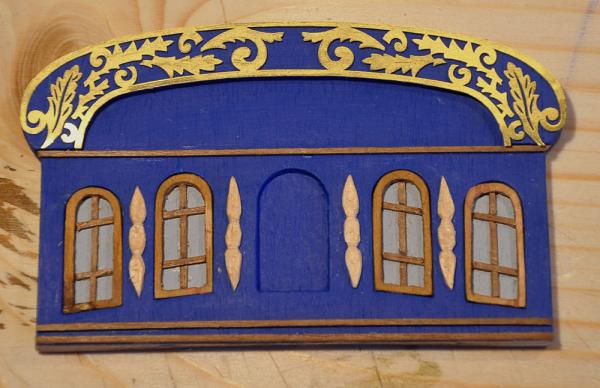
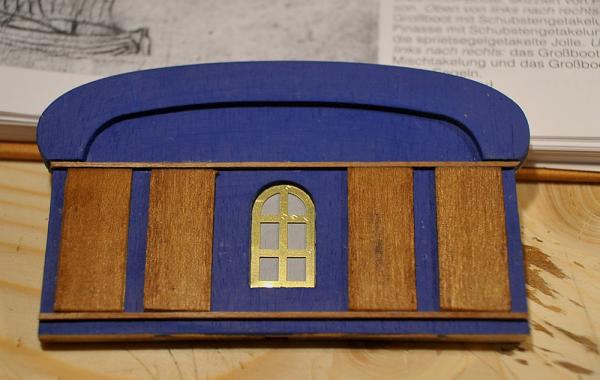
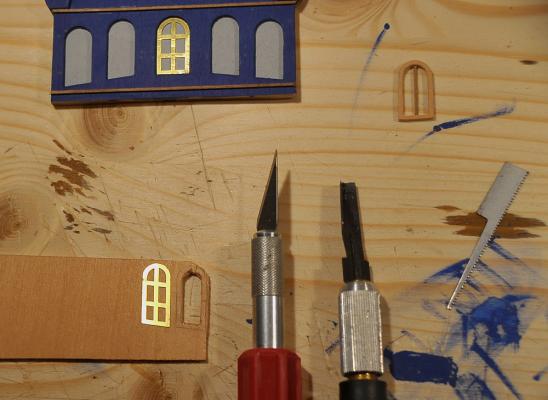
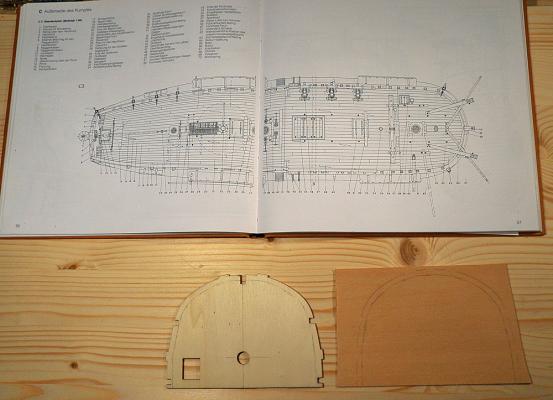
Hello all... I am still working on the stern. I made all windows by myself, stained the wood and fixed the frames. I decided to paint the "glass" in a light grey. Now the next "problem" came out: Should I use the decorations between the windows from photo-etched parts? It the same as with the windows... it looks not so "real". So I carved some deco from limewood. Now I need your help: Pls tell me what looks better? I will stain the decos in a kind of medium oak, probably I will paint the decos in a soft Gold... I have not decided this yet. Using the carved decos will lead to another problem. I should also try to carve the upper decorations which I show in the pics. I just laid down the photoetched part to show the difference... But I am not sure that I am ready to carve this kind of deco... At least I will combine the brass and the wood... The covers are ready but will not be built-in closed but opened. So please tell me your opinion about the decos and the way I should go best... Thx all Cheerio Max

- 147 replies
-
- 10
-
-
Hi.. I will only cover the four real Windows according to Parkinson - which sketch is printed in the AOTS. Thinking about the middle "window" too - it is a good idea to omit the "false" window Frame...I will test it Cheerio Max
-
Hi Mark, I just used a common pencil with very sharp tip - and I did not push too strong. So a light little dot is left. I like it although it is not as perfect as other modellers do it... Still learning Cheerio Max
-
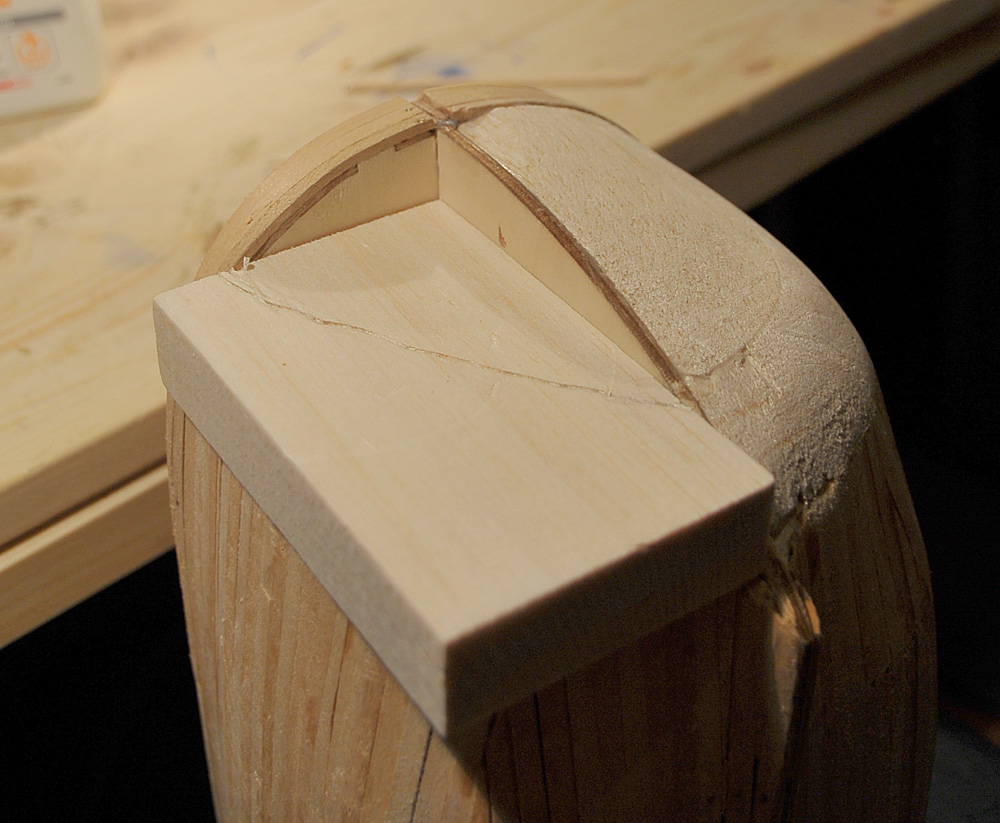
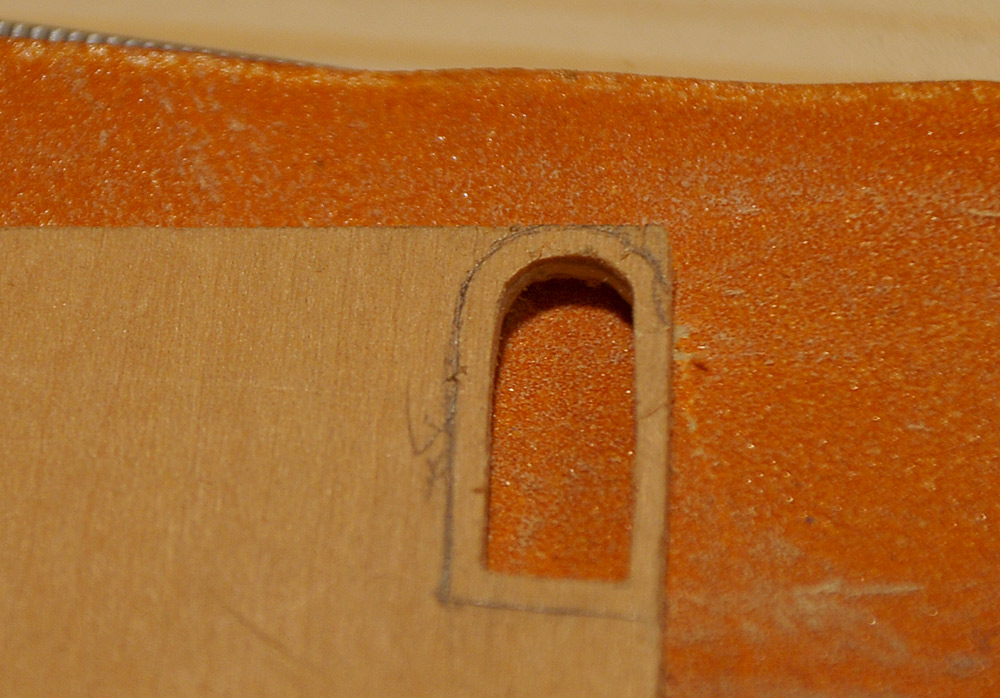
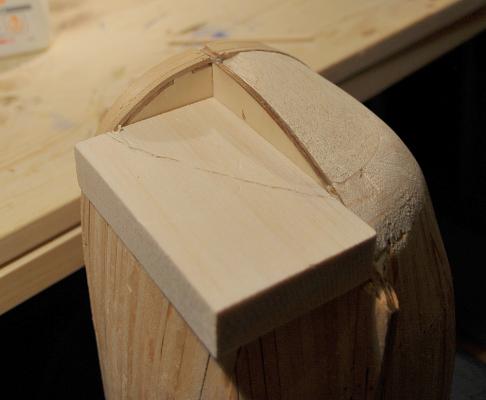
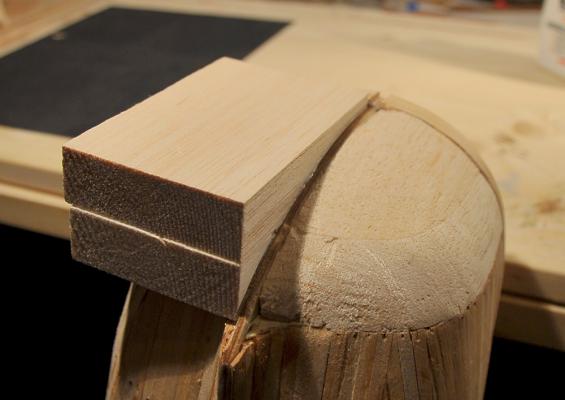
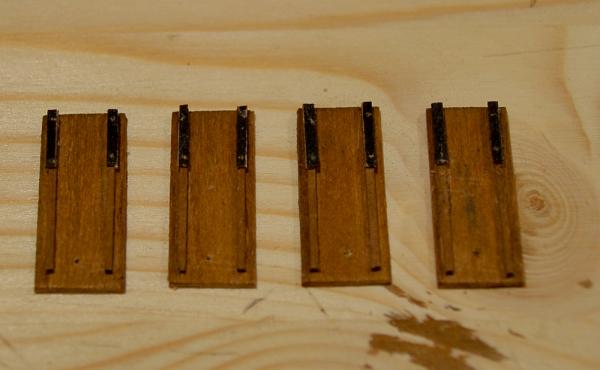
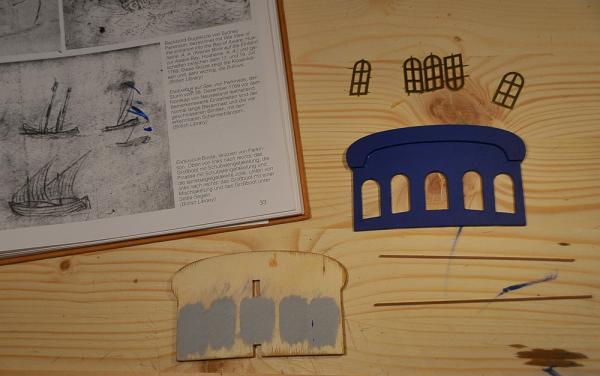
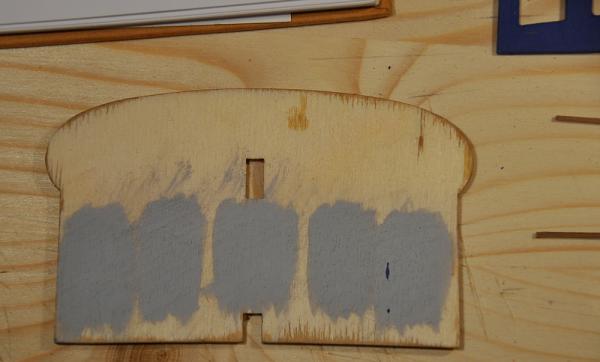
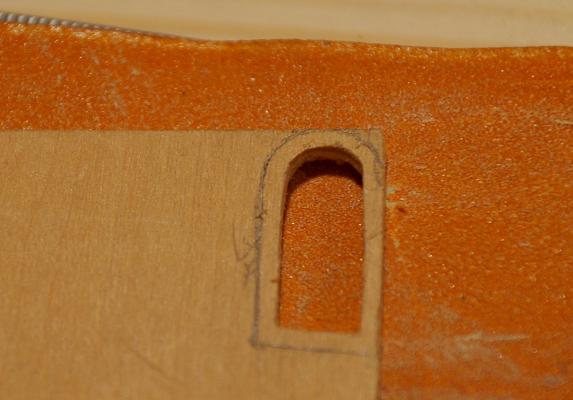
Hello everyone out there... It's time for another update. First let me tell you theat I have changed the row a little bit. According to the instructions I should now sand the Frames and prepare the hull for becoming planked. I will do so soon - but going through the instruction booklet I stopped by ath the construction of the stern. As I had no motivation to sand I started to prepare the stern section. So I tried to fit the windows into the stern - and finally decided NOT to use the photoetched parts. They DO NOT look good, even not when they are painted. I started to make my own windows from some plywood. I cut the frames with a knife using the PE parts as a pattern. It worked out quite good as you can see at the pics. It is a good Feeling to see that improvements to the instruction not only work but also give a really good result I am sure you all know what I mean... Still some work has to be done - like filling some gaps. But I will do this after staining the frames. The window bars are not cut yet - I will use 1/1mm nut, and I will construct the covers for the windows used for the Endeavour - as Mr Marquardt says in the AOTS. Enjoy what you see... and as always: Comments are welcome Cheerio my friends Max


-
Hello Mike, I already got the FWZP deliverewd - a 14 Kilogramm heavy box full of joy, fun and adventure. 11 Sheets of plans, every one good enough to make a man busy for almost a week or so to understand the drawings :) It will be a great pleasure... but also a even greater challenge to build this masterpiece... I hope I can follow your log soon. I will start with my FWZP not before next year as I will build the Endeavour before ... and perhaps the frigate Berlin by corel. best wishes - Cheerio Max
-
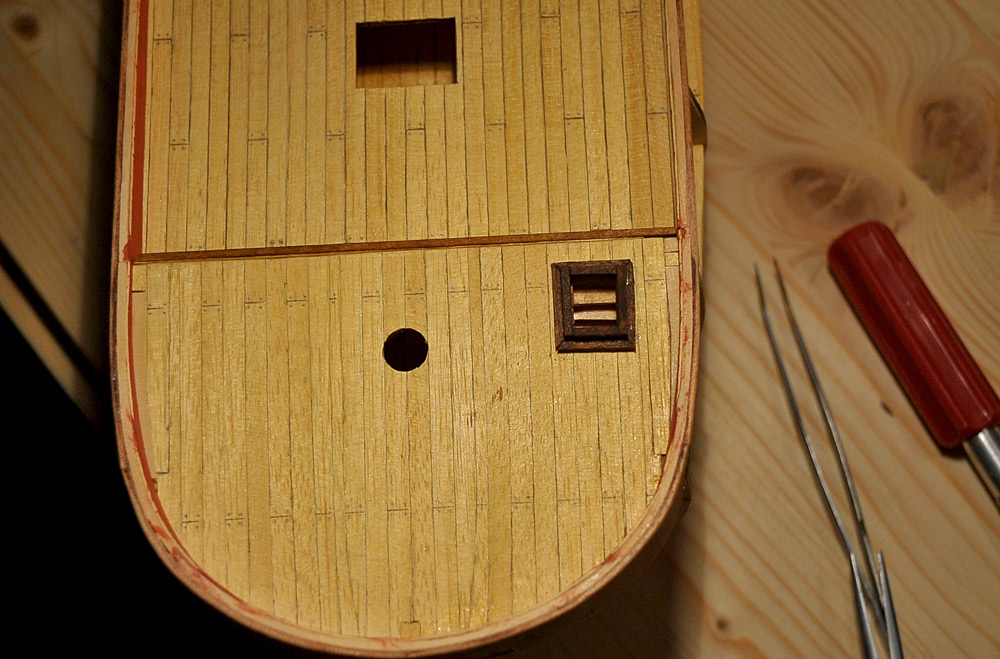
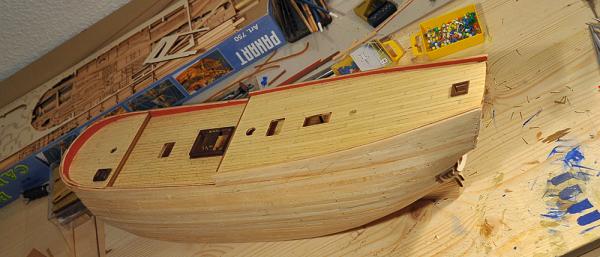
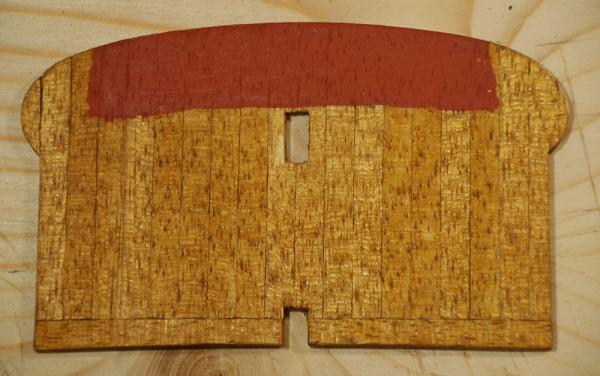
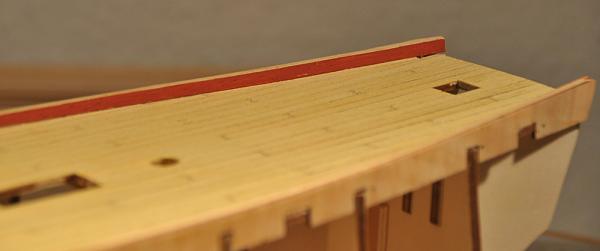
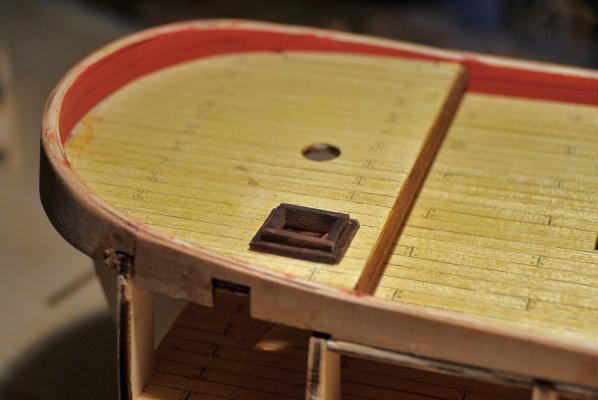
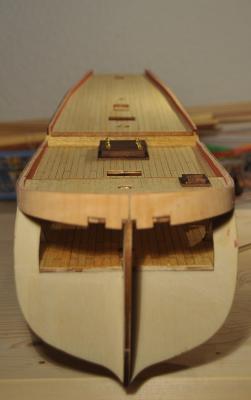
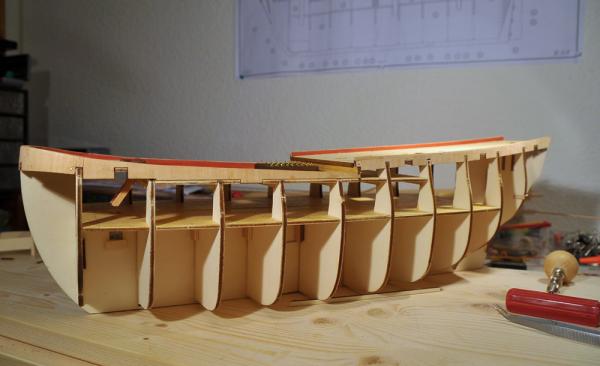
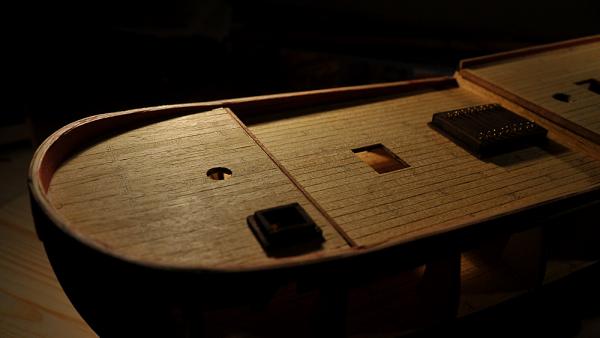
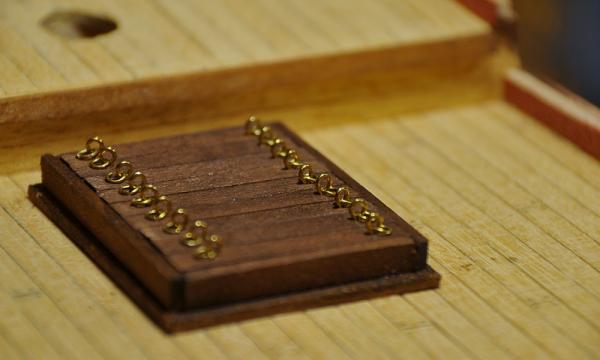
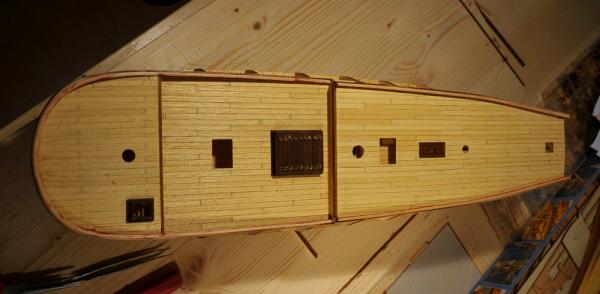
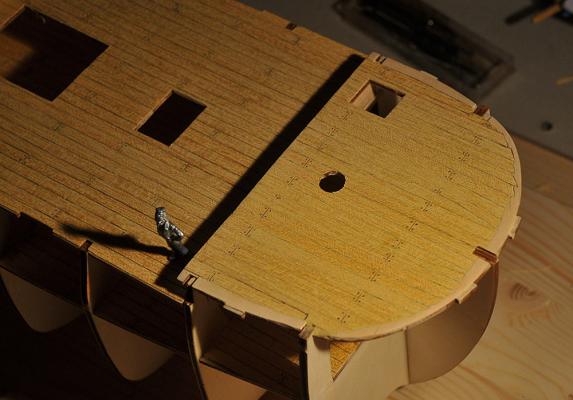
Hi all time for a little update. I finished the bulwarks so far, second planking with red ochre-painted strips. The great hatch is done, also the deck planking. As Ron said it is better to measure the correct size on the model and not on the plans. Everything works good so far. I noticed that some planks are not provided with the kit, the 2x8 mm planks are missing. I will buy some as I will have some chain plates and deadeyes from the aftersales market. I dont think that the idea to bind some brass wire has anything to do with the original... I will also buy some turned brass gun barrels and swivel guns. The parts in the kit look some kind of ... ehem... plastic... ... Enjoy the pics and... as always... comments are very welcome Cheerio Max


-
Hi Ron, great Job on your ship... I really love your log as it gives some really really good hints for my own build. Got the decks ready so far... ist a joy to build the Occre kit Cheerio Max
-
Hi Chris Perfect start - I will follow your build as I am interested in this model too. Perhaps some day I will get it and try to create an impressing model, so as you will do now. Many greets from Germany Cheerio Max
-
Hi David, nice and great progress for your RC. Wish you much fun. Cheerio max
-
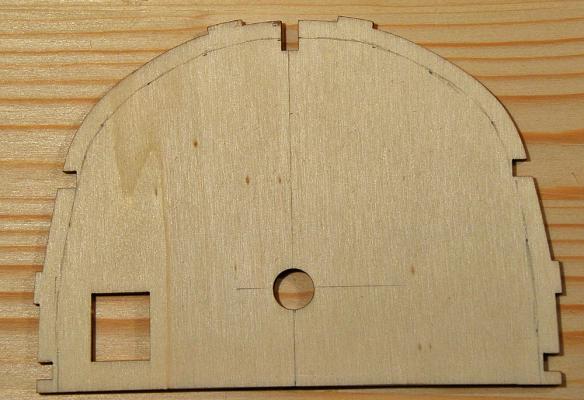
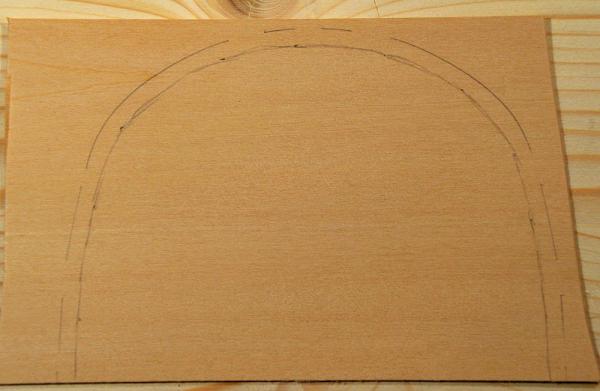
Hello my friends... it's time for an update. They were some really busy days in the office so I had almost no time and even no motivation to go on with my Endeavour. Only some small jobs like planking the deck etc. It goes on as I thought it would be: very exact precut parts, very good materials and a almost perfect booklet of photographic instructions. Would it be bad to say... too perfect? I took my AOTS by Mr Marquardt and compared the plans to the books descriptions again and again. So I decided to leave the instructions a little bit and to come closer to the book with the planking of the forecastle. I am not 100 % satisfied with the results so far but it is better than just the straight-on planks. Still I am learning and I think that every single effort to improve my knowledge is a good step to become a real modeller... Please enjoy the pics and you are welcome to comment... Cheerio Max


- 147 replies
-
- 10
-