md1400cs
-
Posts
2,864 -
Joined
-
Last visited
Content Type
Profiles
Forums
Gallery
Events
Everything posted by md1400cs
-
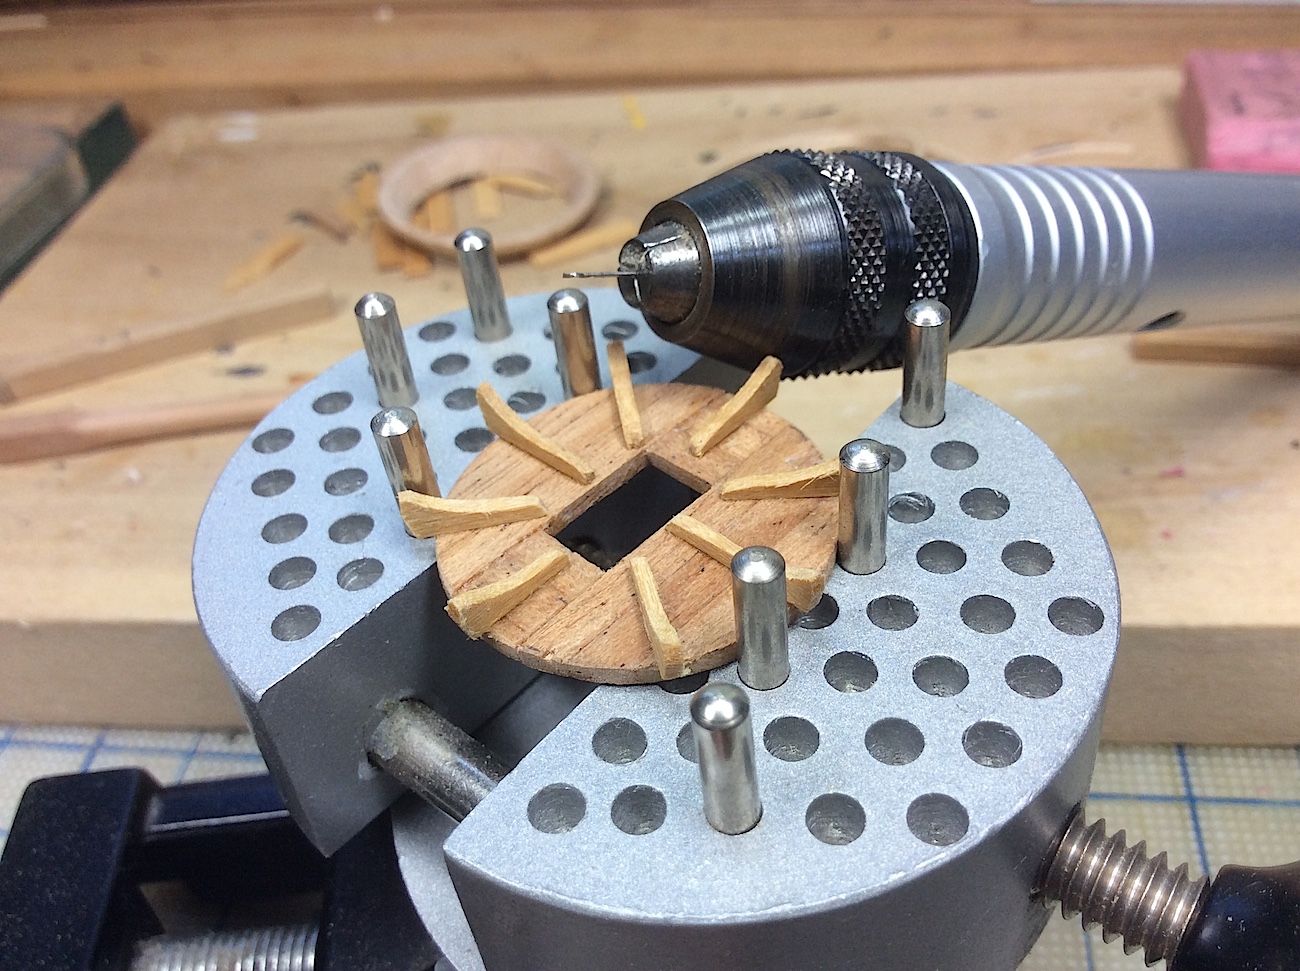
 George, Yes MM. but then went to Ebay so much cheaper. Called a Universal vice if link below does not load. http://www.ebay.com/itm/UNIVERSAL-WORK-HOLDER-PEG-CLAMP-JEWELERS-HAND-TOOL-HAND-HELD-VISE-ENGRAVERS-TOOL/190576041404?_trksid=p2047675.c100005.m1851&_trkparms=aid%3D222007%26algo%3DSIC.MBE%26ao%3D1%26asc%3D33421%26meid%3D46035cbe1bf14707b52a04500d97d26e%26pid%3D100005%26rk%3D2%26rkt%3D6%26mehot%3Dpp%26sd%3D151806811362
 -
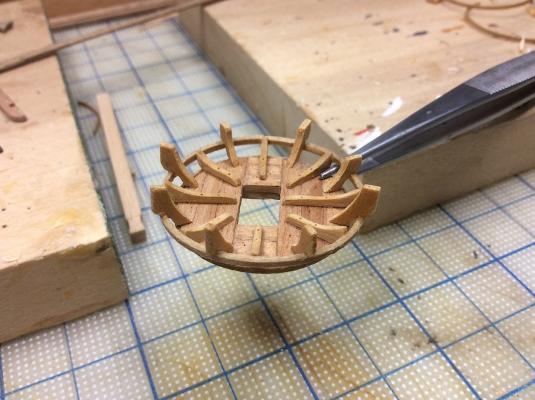
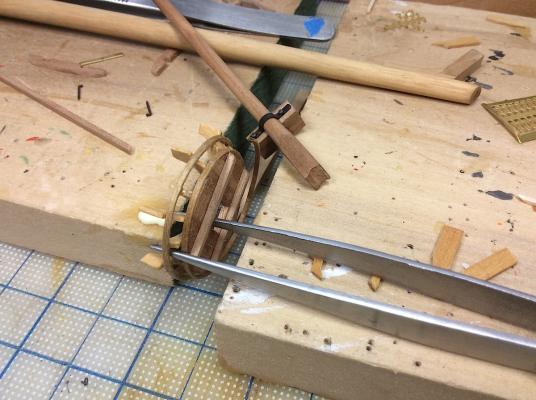
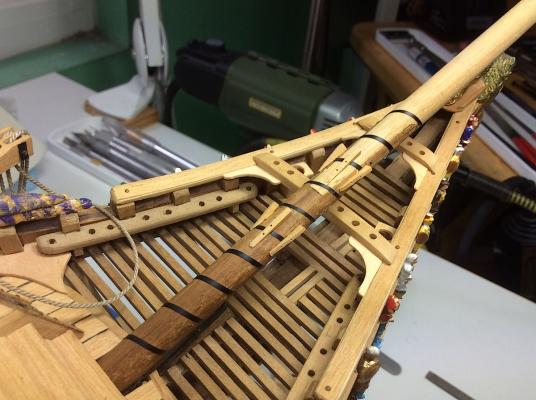
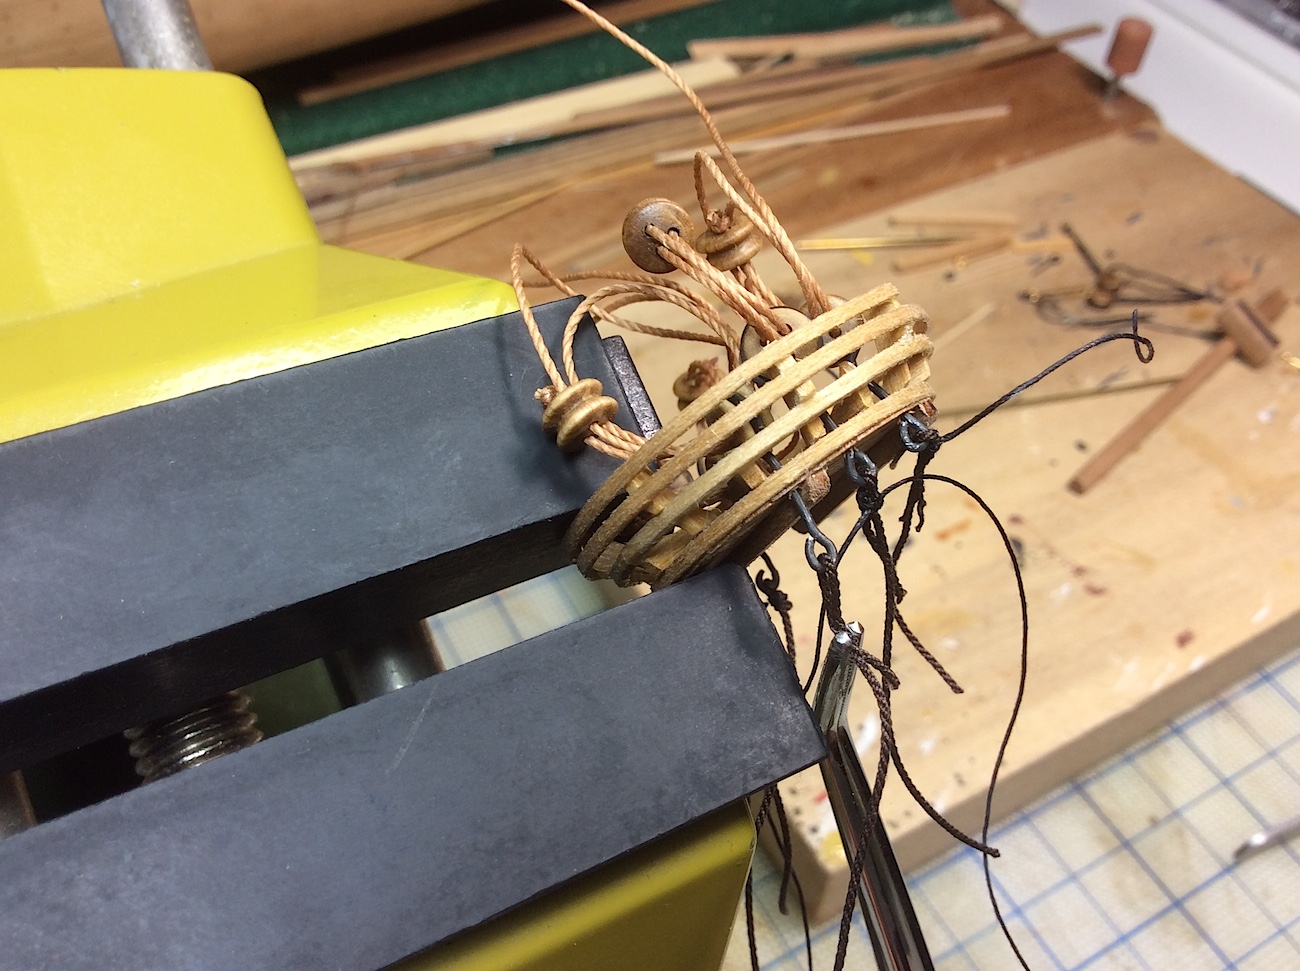
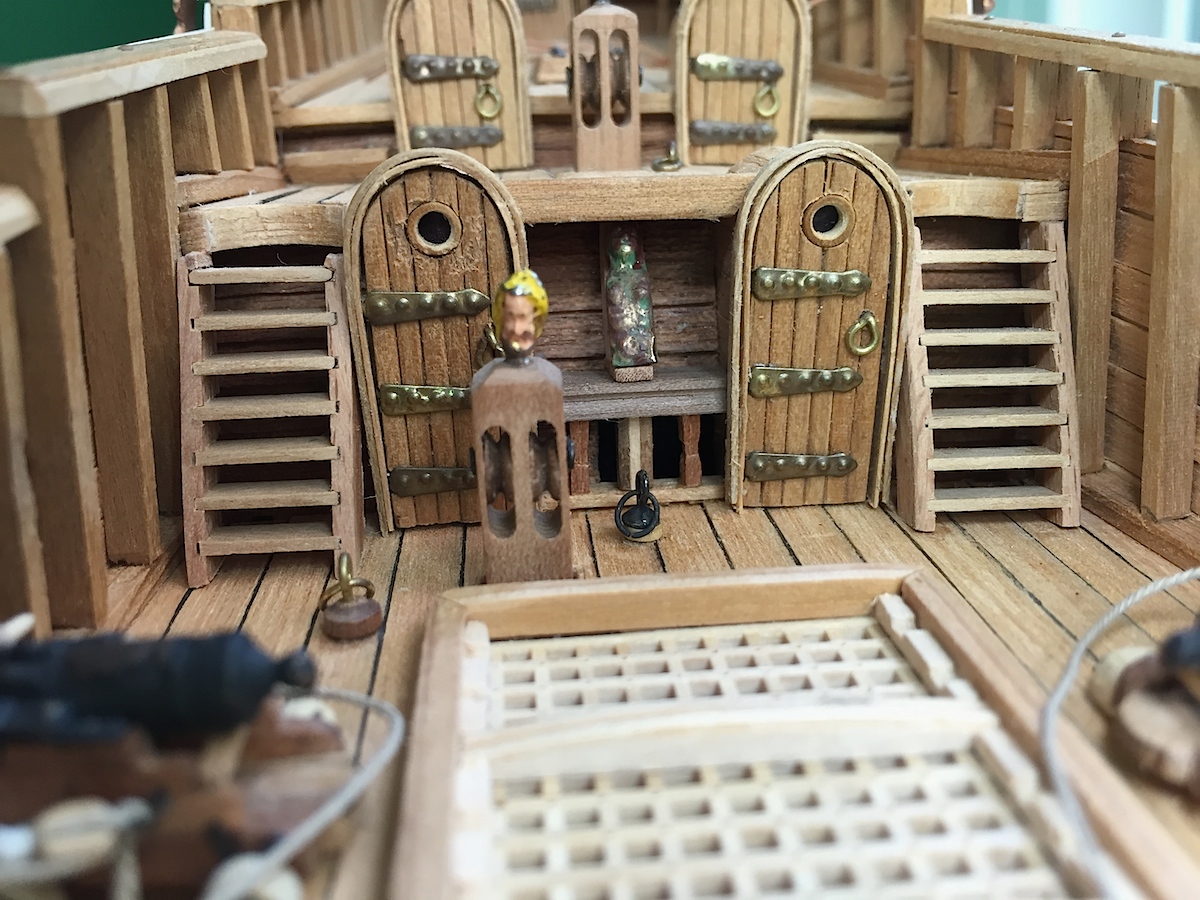
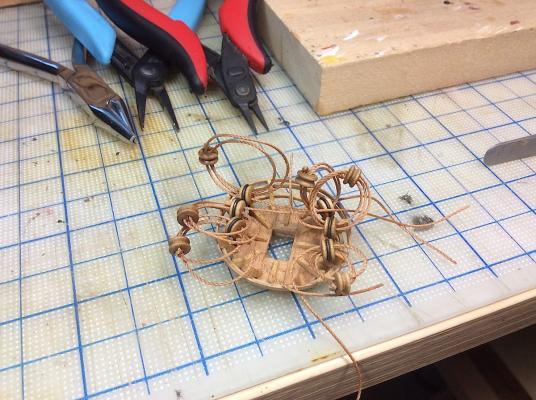
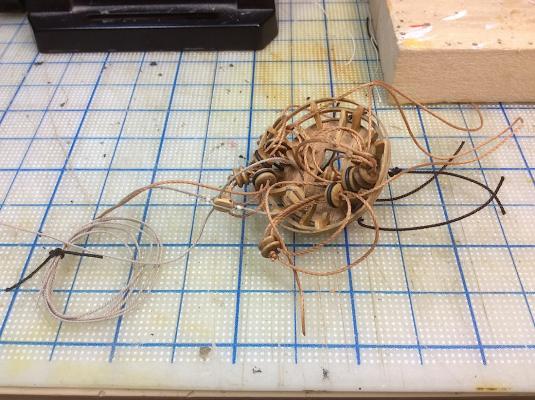
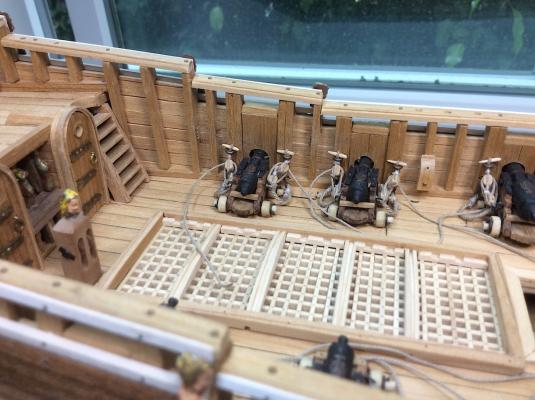
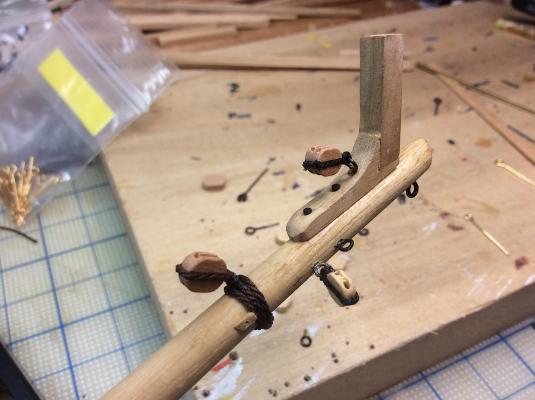
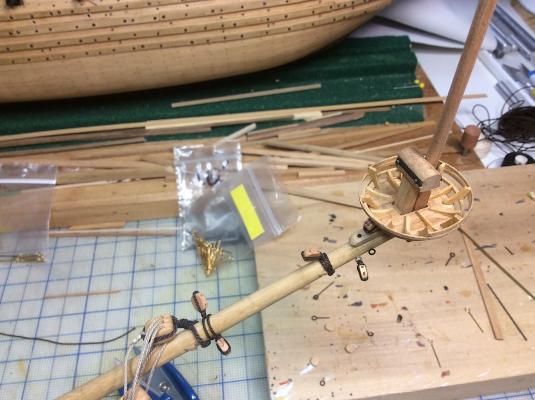
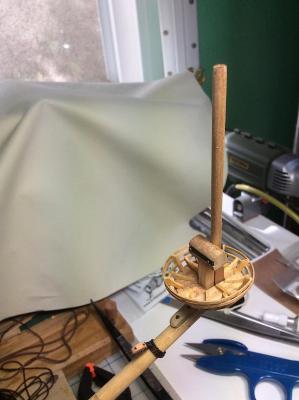
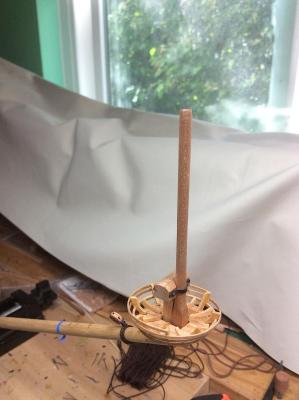
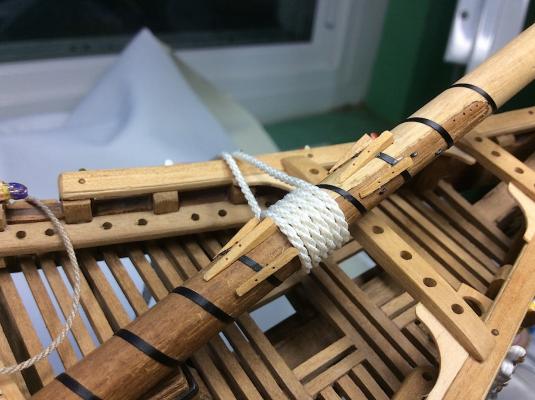
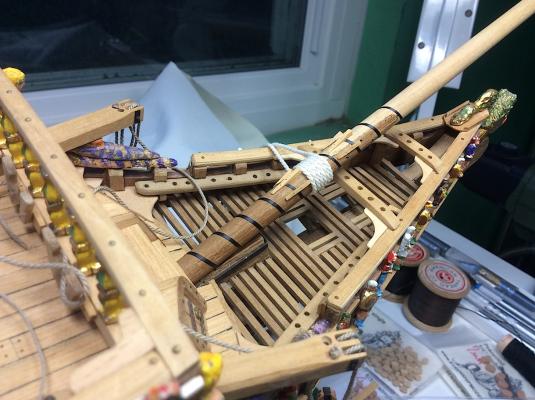
Hi Mates, Small update, but time consuming, as I was also working on the mast blocks; with the platform and the mast I thought it best to pre-rig some of the blocks, as well as the deadeyes before mounting. This (rigging) is new territory for me, so I hope that it makes sense later. I did not feel comfortable assembling the platform without the rigging. Also referring to three dif. plan sets had its issues, and settled on what you see here (mostly from Vasa Museum and Billings). Pics are self-explanatory so keeping it brief. Onto the flag mast, cap, and framing structure. Again thanks everyone for dropping by. Cheers, Michael


-
Alexandru, This set of updated photos, is beyond my working vocabulary to properly express the astonishing beauty of your project. Regards, Michael
-
Bruce, Yea a real beautiful build. Your attention to details is amazing ( I may have already posted that Hmmmm?) Cheers, Michael
-
Nils, Happily I found your latest project as I was visiting Karl's (Jeronimo) newest project 74-gun ship and then I linked from your comments. Looks, as all of your projects do, awesome so far. Cheers, Michael
- 2,625 replies
-
- 2
-

-
- kaiser wilhelm der grosse
- passenger steamer
- (and 1 more)
-
THE 74-GUN SHIP by Jeronimo
md1400cs replied to Jeronimo's topic in - Build logs for subjects built 1751 - 1800
Karl, Yes, as always, a beautiful start. Your skills as a builder of plank by plank miniatures of the 1/1s is well - remarkable. I will also enjoy following this newest build. As a suggestion, so that others whom may not be unaware of your other amazing builds might become so; you might want to add "footers" of your other builds. Just a thought. Your STUNNING Le Bonhomme Richard quickly came to mind PS: http://modelshipworld.com/index.php/topic/760-how-to-add-a-build-log-link-to-your-signature/ Cheers, Michael -
John, Hmmm that sure is some great level of detailing for those tiny boats - 5 Stars for sure Michael
- 2,250 replies
-
- 2
-
-
- model shipways
- Charles W Morgan
- (and 1 more)
-
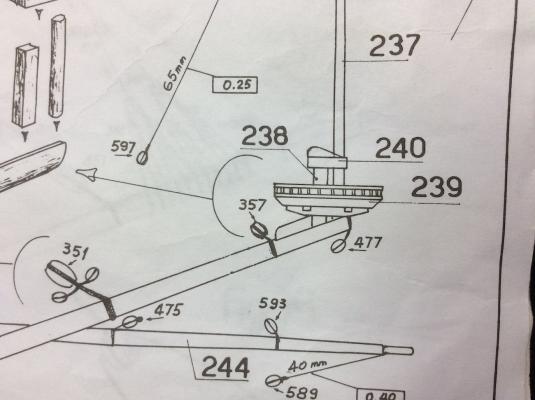
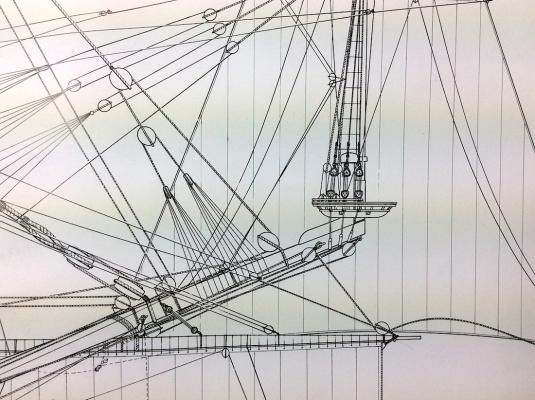
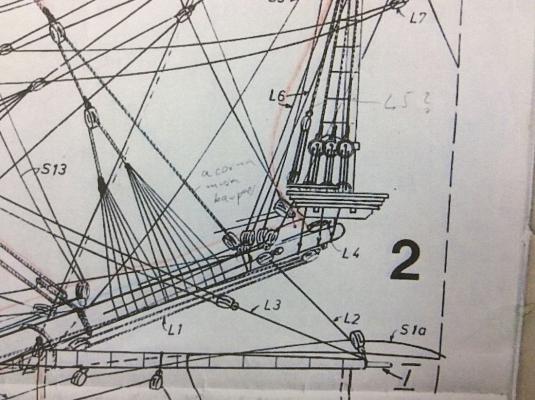
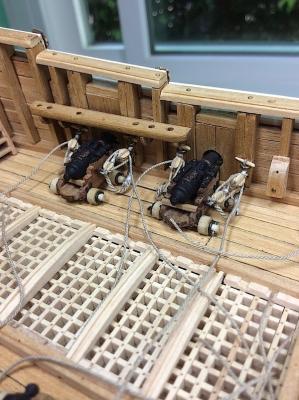
Hi Mates, As a continuation of my (one last time) venting (;-) This is what we Wasa builders are dealing with regarding rigging/block sheet inconsistencies. Pic 1- Corel plan sheet (no sails, just mostly standing rigging) Pic 2- Vasa museum plan sheet with sails Pic 3- Billings plan sheet with sails Pic 4- Billings with sails from building instructions (downloaded this online from the Billings website And Mark just posted that his Mantua rigging instructions were weak as well. “Hat off” to Karl and Frank, who struggled through to also, add their beautifully detailed sails. So it’s a “crap shoot” with this part of the kit’s accurate detailing. --------------------------- Pics 5 & 6 Oh, and then sometime back, I got a post from Fred Hocker. Loved the compliment of course! But backtracking it still is. I have not built the kevels as of yet. And this was in regards to rigging no less. Michael, The guns look very good, especially the hardware on the carriages, right on the money. If you are removing things, you could also remove the pinrail above the gun in the last picture and replace it with a big cleat for the mainsheet. We have this feature wrong on the ship in the museum - our bad! Fred So removed the pinrails but they left some glue scars OK onwards Michael

-
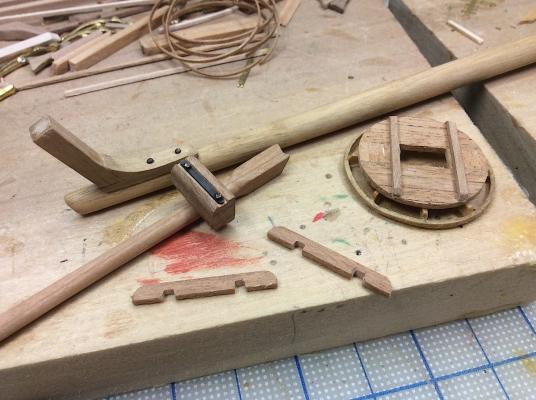
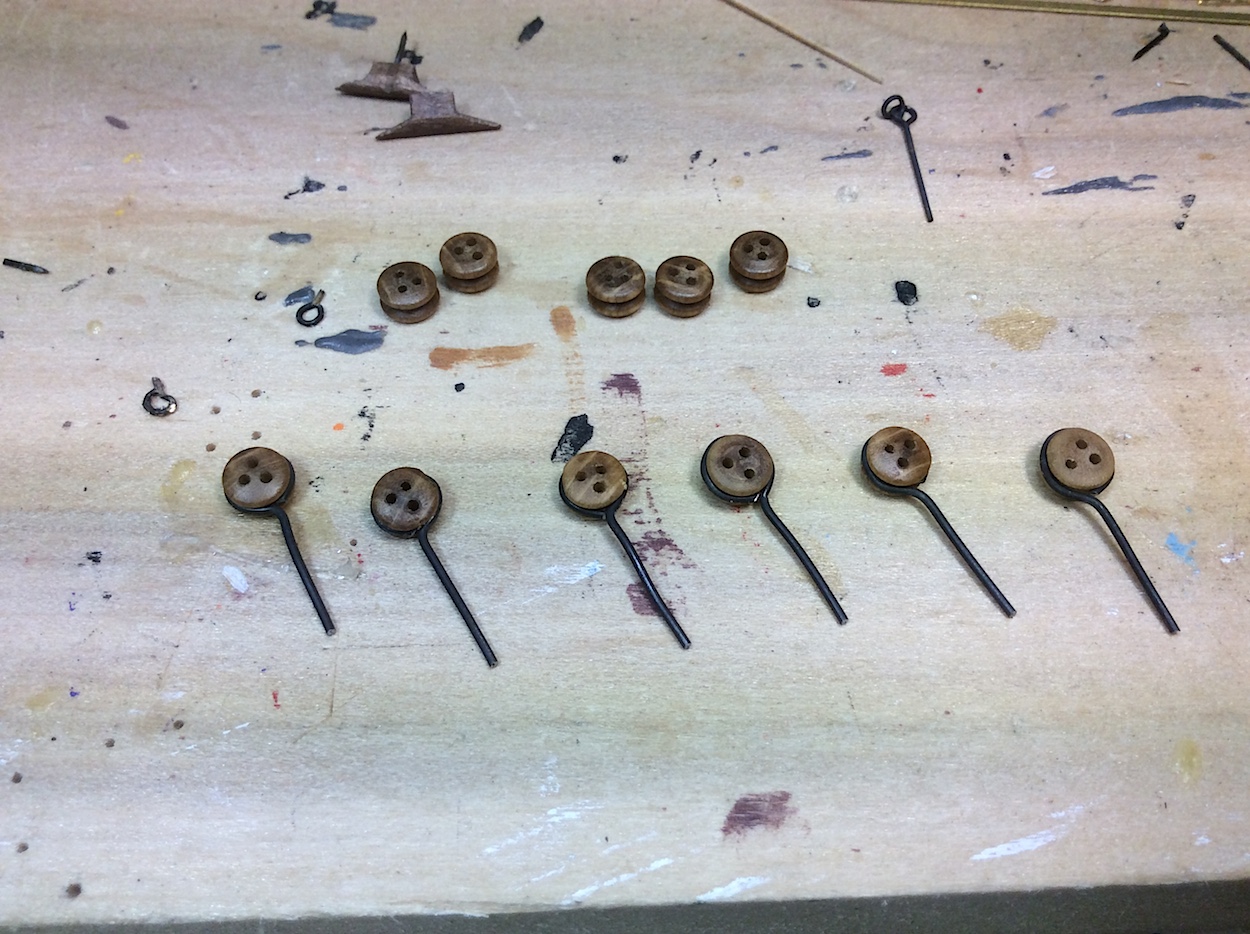
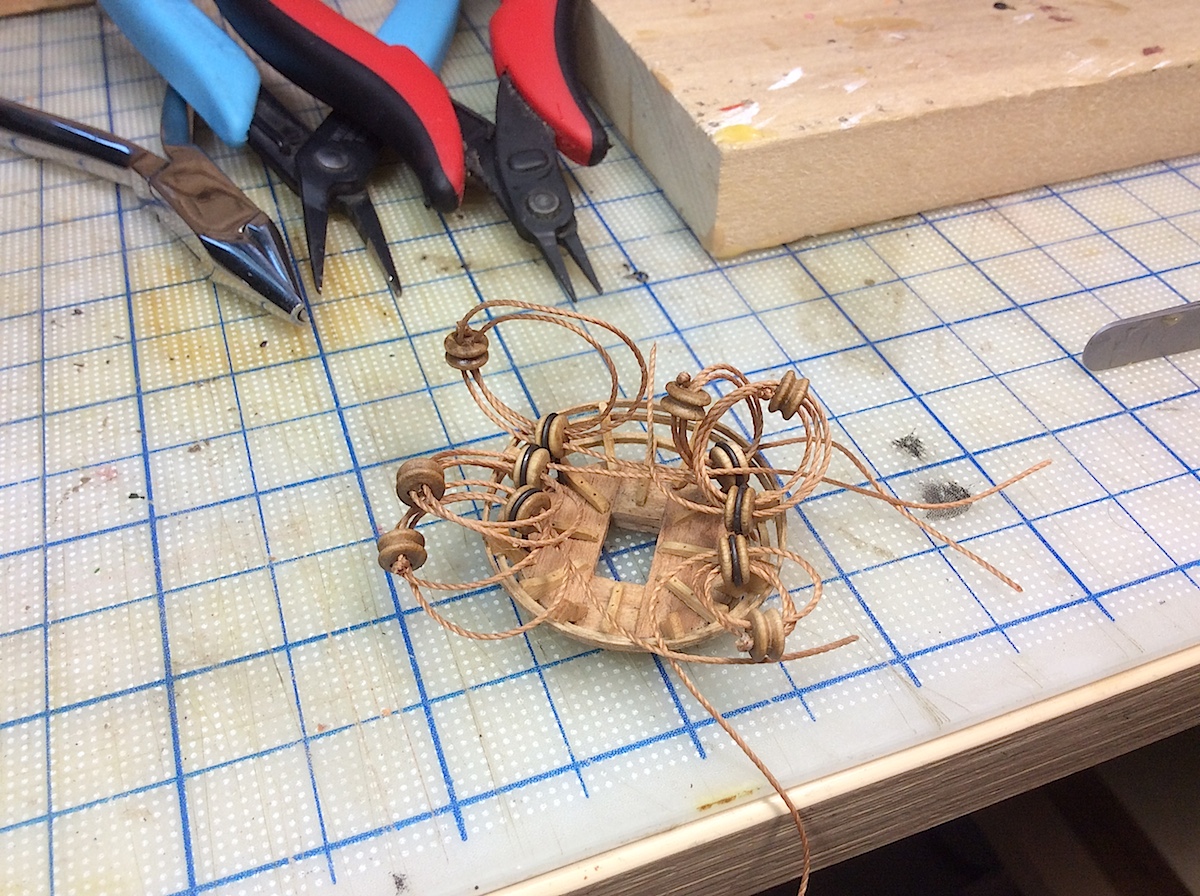
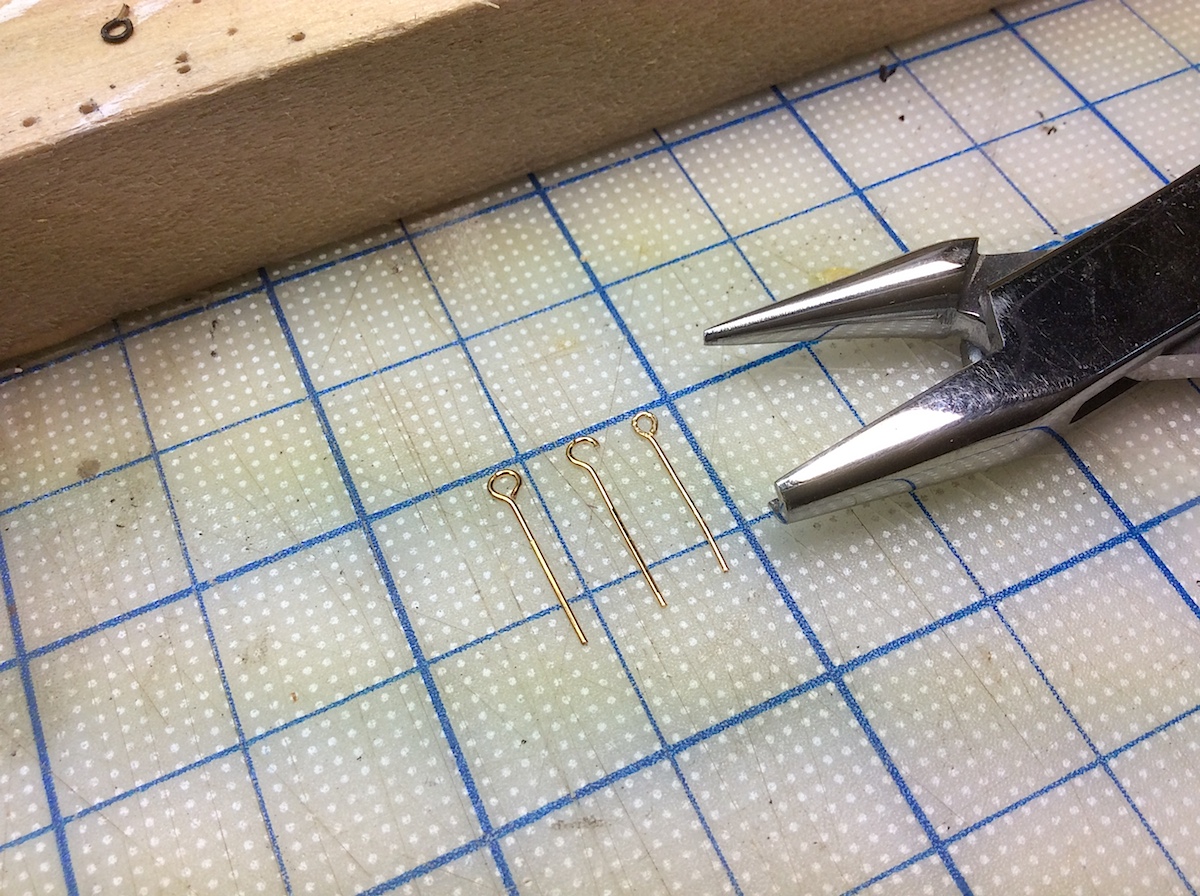
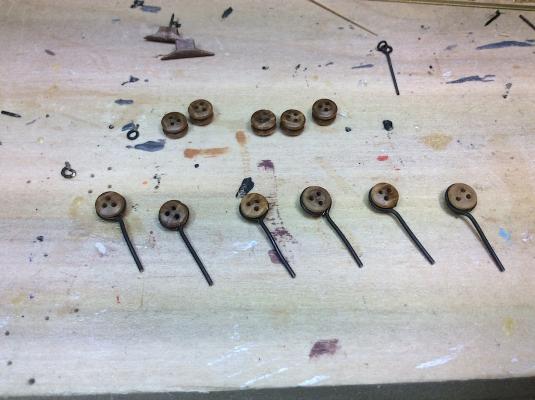
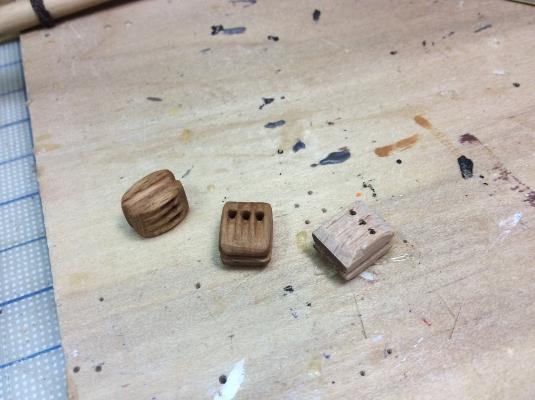
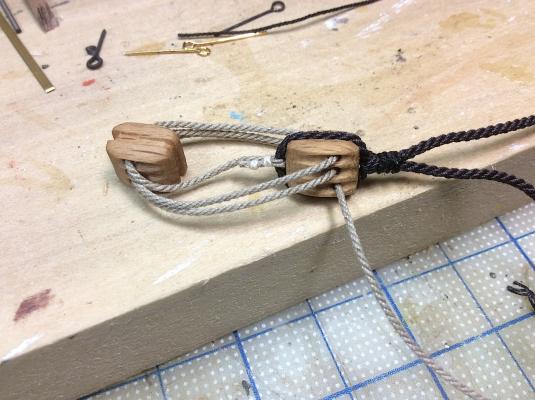
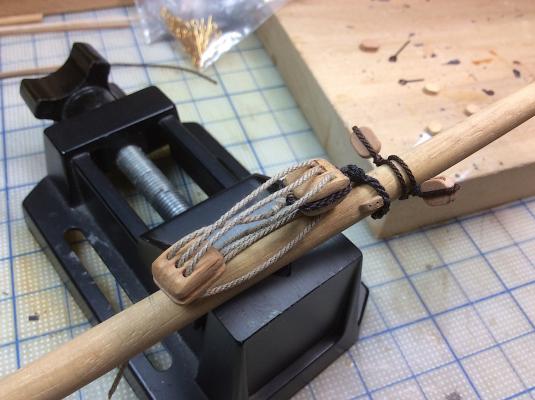
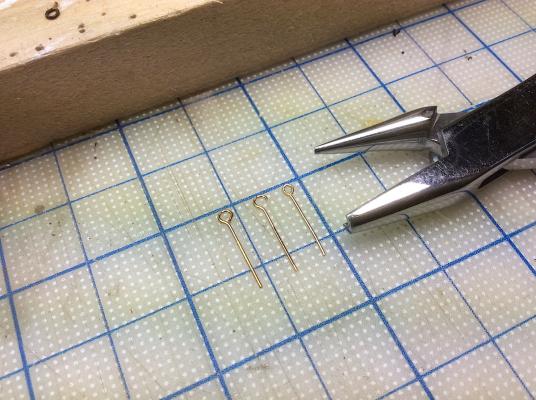
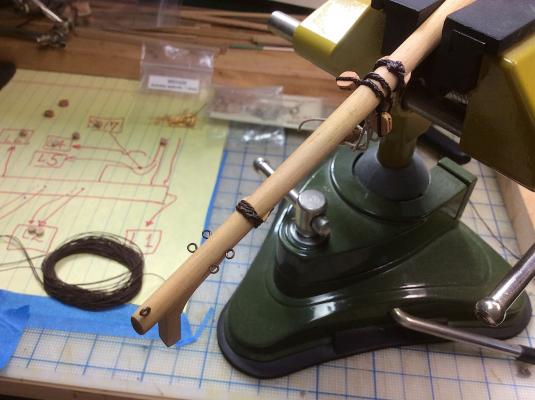
Hi Mates, Slowly moving forward actually, surprising indeed. At this stage I am discovering, as all other Vasa builders at MSW have noted, are the rigging issues with this ship. It appears as if the three main kits all have variations for positioning lines, and also where they should attach. So even adding a few eyelets to the lower bowsprit mast has its issues. Karl (karlop) was kind in sending me photos of his Billings rigging plans. I am also following Frank’s rigging ideas [fmodajar] (I plan to add sails so need to add blocks, not shown on the Corel rigging sheets), lastly I do have the Museum plan sheets. What’s still MIA is the Vasa II book, which was due late last year. Regarding the photos; Decided to use the Corel included triple blocks. They needed a full facelift, but I’m happy with how they came out. Using Chuck’s ropes, and blocks (Syren) and I am very happy sourcing from his company. Decided to “shrink” the eyelets, I found them to be out of the box, a bit too out of scale based on photos I have seen of the 1/10th and Clayton’s as well. I initially had used the Brass Black to darken the pieces, but too messy. So will just paint them as I go along. The flat black paint is also great as it removes any shine from the rope’s glue dabs. Platform in place but not attached, need to add lower platform braces and, of course the chainplate bits. As always thanks for dropping by. Cheers, Michael
-
Mark, That must be very hard to find (;-) Your build is "way up there" cheers ! MIchael
-
Sherry, Beautiful work. Your weather deck is also a work of detailed art. Cheers, Michael
-
Vince, I have been following along silently (now actively). Beautiful craftsmanship [should it be craftspersonship? (:-)]. Love all the details, text, and especially the very large jpg's that allow us to really see your quality of work, It was time for me to acknowledge your build log. I hope to one day reach your level of skill to build such a beautiful model of such a gorgeous ship. Cheers, Michael
- 593 replies
-
- 3
-
-
- royal william
- euromodels
- (and 1 more)
-
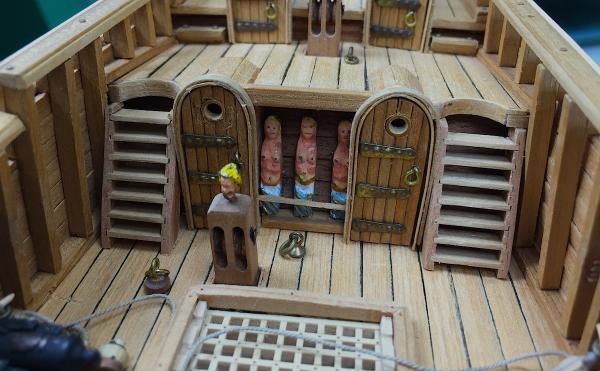
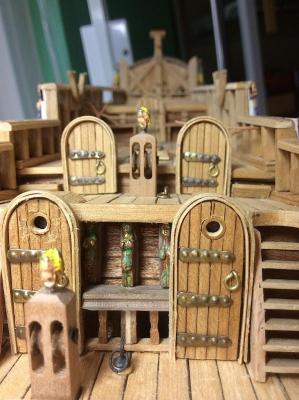
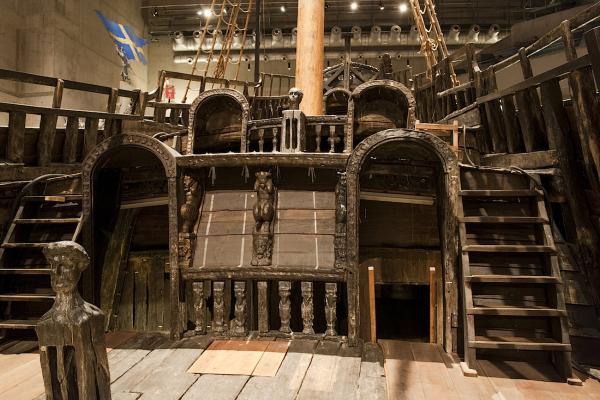
Peter, Thanks for your very nice compliments, very much appreciated. Yes Murphy’s Law is certainly a ghost for millions of people, many know his name, but many more are visited by him not knowing who he is, but nonetheless he seem's to be a constant annoyance in their lives J ---------------------------- As a follow up to your last suggestion (the semi-nudes), I wasn’t comfortable with the results; though better than before. These pics, chronologically, go through the history of my obsession with looking backwards at this build. This bit has finally been put to rest. As has been stated by other builders as well, this part also highlights how the Corel deck is too narrow. Cheers, Michael


-
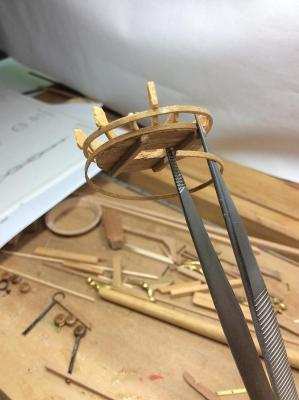
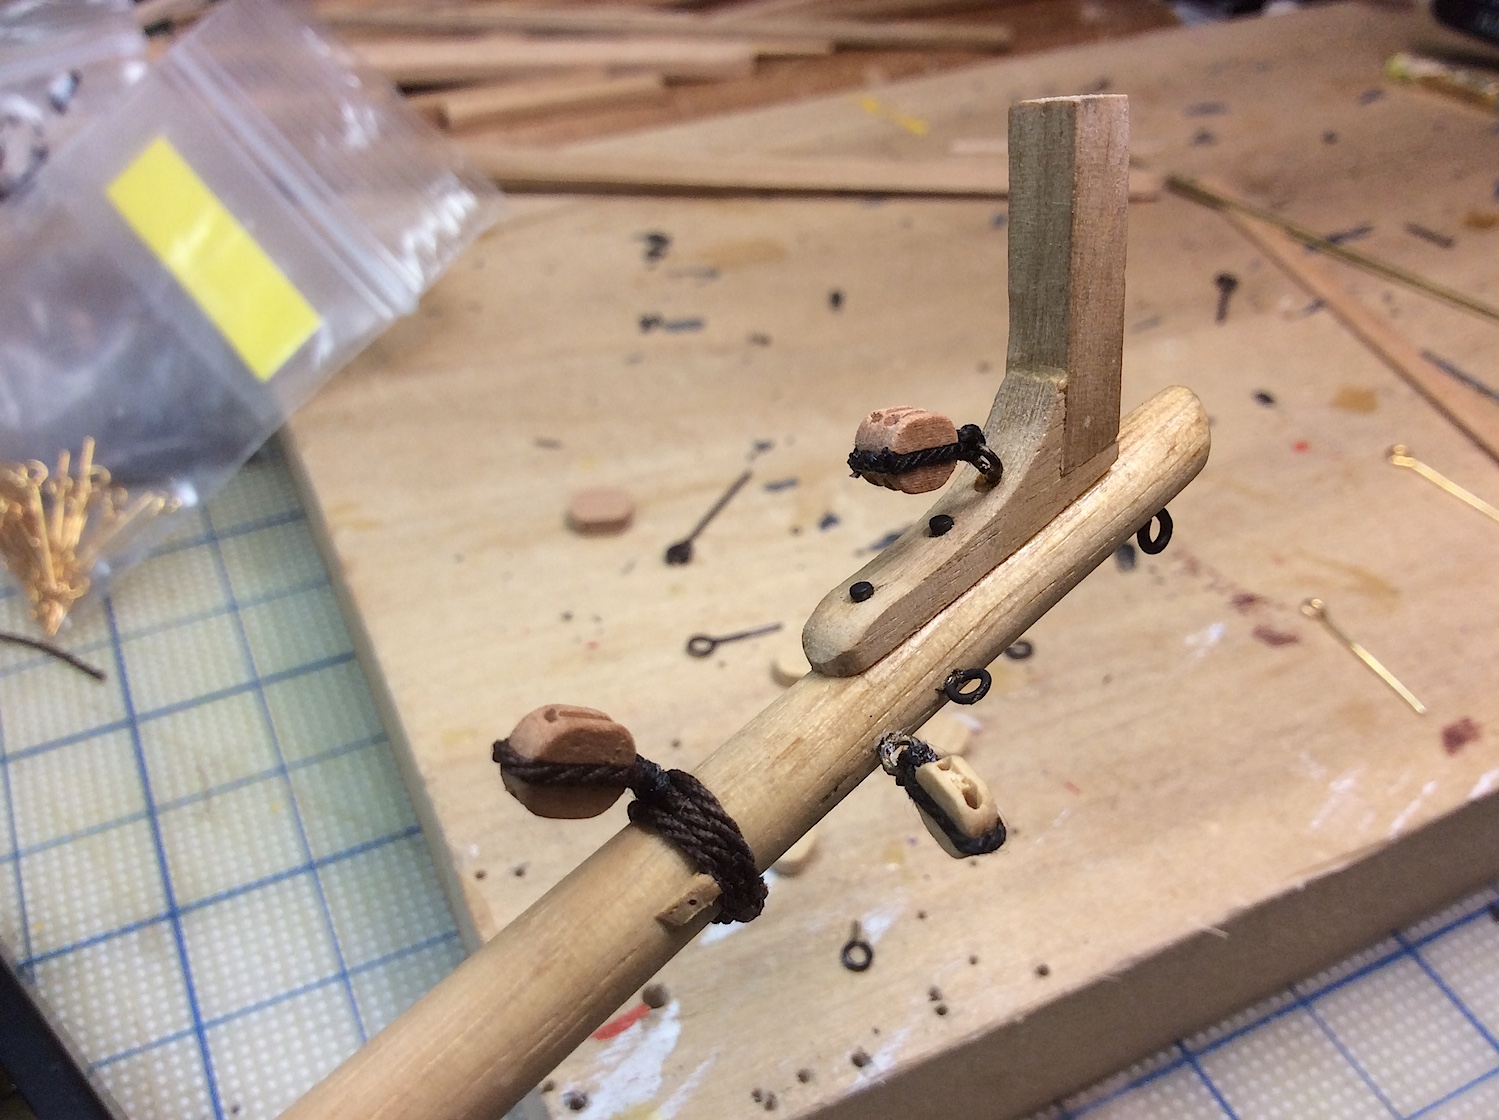
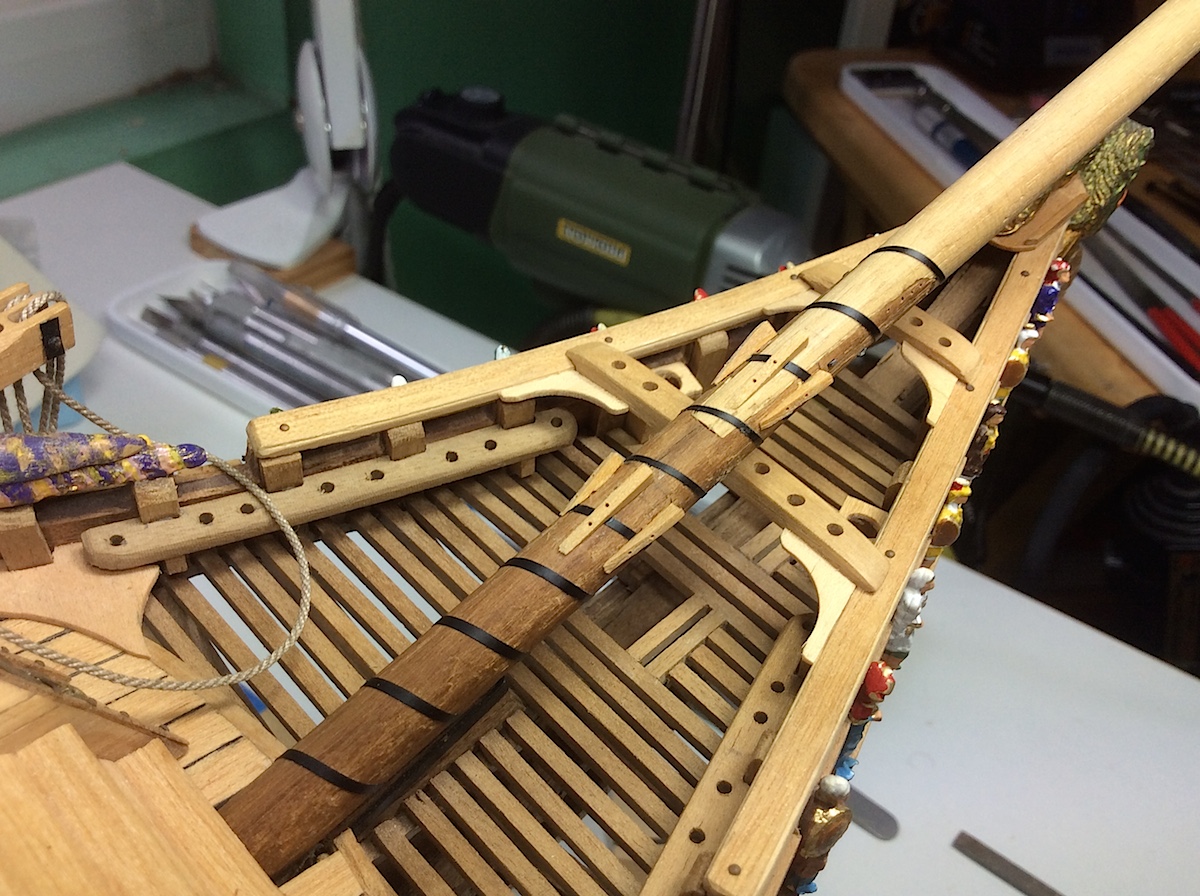
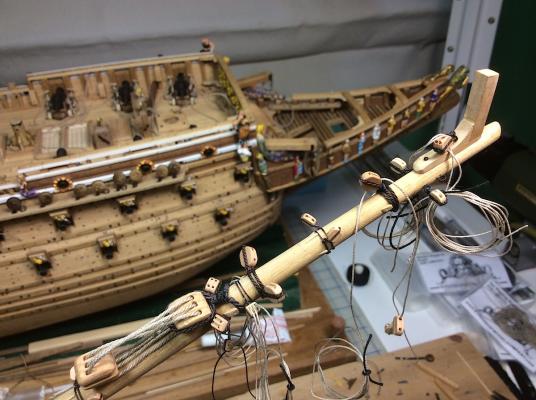
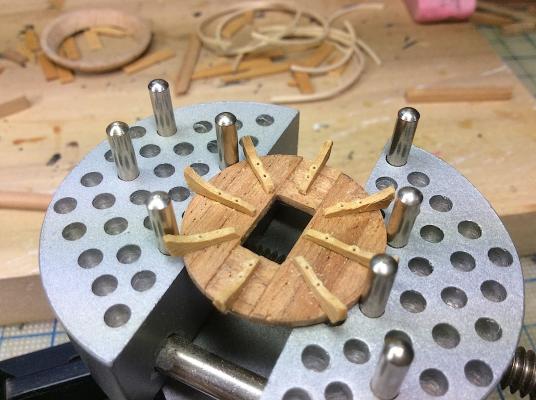
Frank, Yes noted. Thanks, I did take that into consideration for this platform. The others will need much wider openings for the ratline ropes. this one is the easy one. The ropes, as you know wrap above at the next cap. Yours, BTW looks excellent. Here are a couple of pics of where I am so far (nothing has been glued into place yet. I hope that I'm not missing something that I don't yet see?? Michael
-
Nigel, Hmmmm your carving skills are so excellent. Did you first start with turkeys at Thanksgiving? Yes I know that you folks ignore that one, but It just crossed my mind enough to make a joke, as we use that term here across the pond. Cheers, Michael
-
John, Really enjoyed going through your build log. Beautiful details. PS: Loved the oven (:-) Regards, Michael
-
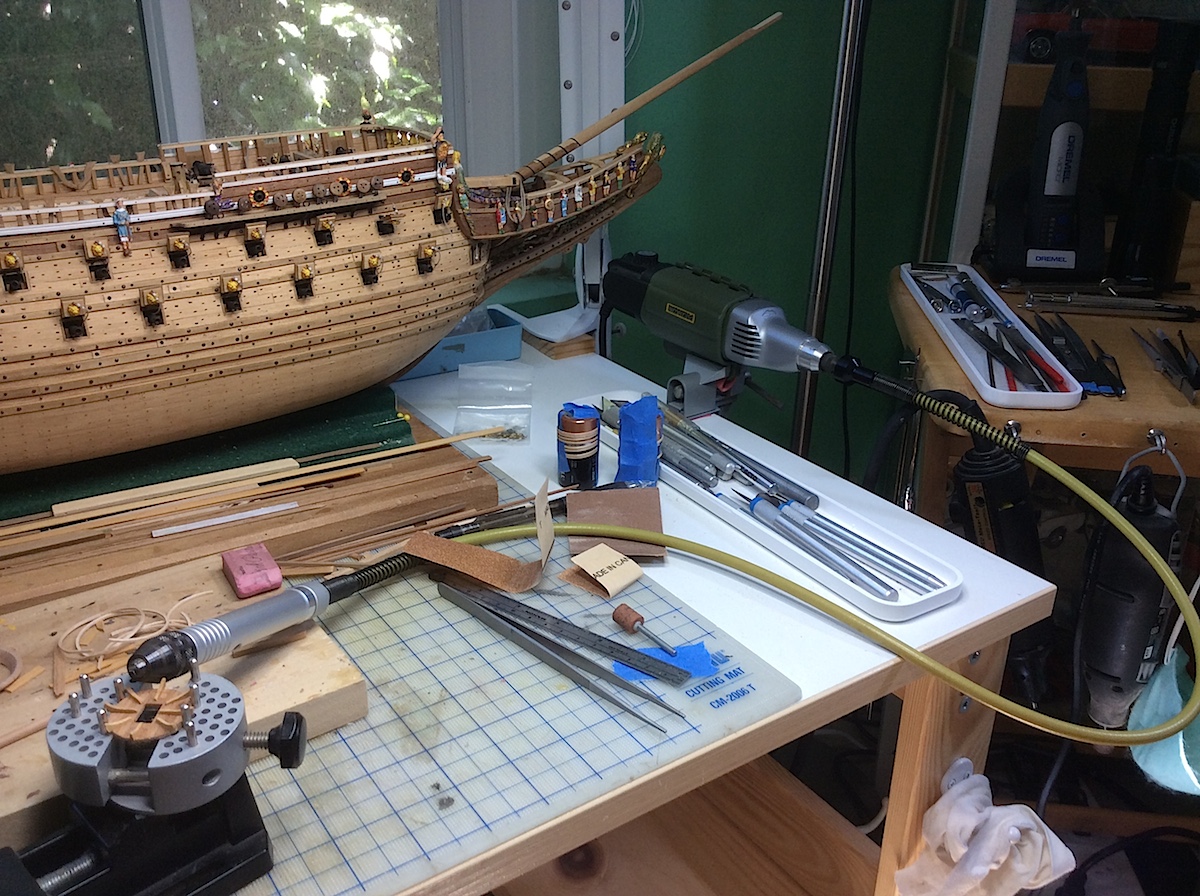
Lawrence thanks for dropping by, as well as your always very nice comments. Marc, thanks for your post as well Buck, also thanks for dropping by, regarding those tiny holes, well they are just that - holes. I was going to straighten out those very small RR spikes, but they were too big. Turns out that just drilling tiny holes gave the perfect “tromp l'oeil” illusion that you noticed. I also did the same for the weather deck gratings. Looking from a “normal distance” works for me. I also thought of inserting black fishing line, tried a couple and "saw" no difference, so holes it was. Same for the mast rope stays. PS: The Proxxon Micromot Flexishaft is an awesome accessory. It will accept super small drill bits and keep true smooth rotation, a wonderfully useful tool. Cheers, MIchael


-
Frank (riverboat) thanks for always dropping in and your very nice words Edwin, my pleasure glad that you found some helpful ideas. B.E. thanks so much, your work is so well known. I very much appreciate the acknowledgment. Very touching indeed. Michael, thanks for visiting my log, very nice of you to post some comments. ------------- Thanks Mates, your visits are always a motivator to improve my efforts. Cheers, Michael
-
Alexandru, She only gets more beautiful with each visit. You are one of those artists who are beyond description. Michael
-
Frank, Thanks for dropping in, and for you nice words - always appreciated. I have also learned a lot following your build log. Regards, Michael
-
Nigel, Thanks for your comments. You have been one of my teachers so always appreciate your thoughts. Yes, I do believe that she will be fully fitted with running lines as well as sails. Now those will be other learning curves that will need to be mastered. Though several awesome Vasa builds logs here will allow me to follow in their footsteps. The only variables are for accuracy with running rigging lines, Mark and Frank have debated these issues on their build logs. And, of course, we are still waiting for the Hocker Vasa II book !! (supposedly the rigging bible of this ship). For the sails my son's wife has one of those "computer" type sewing machines, and she promised that she would do the stitching. Karl (Karleop) and Frank (FrankM) both have great photos of their sails for the ship on their logs--(:-) Both look superb. ------------------------ Mark, No I did not use the milling machine It did not occur to me actually, not having seen how to use it for those details. May think about this for the next four. Hmmm, PKD123 Thanks for dropping by, first time I see you in the yard, sweet! Again thanks for the LIKES and just dropping by. Michael
-
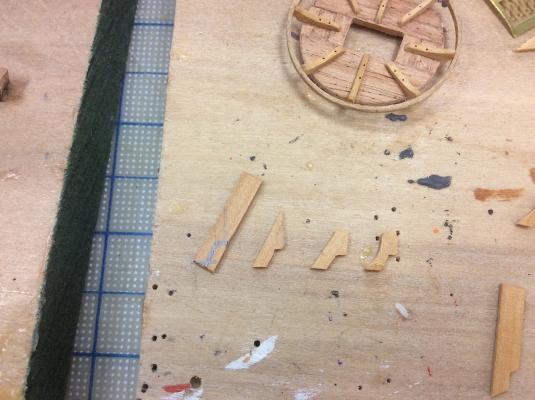
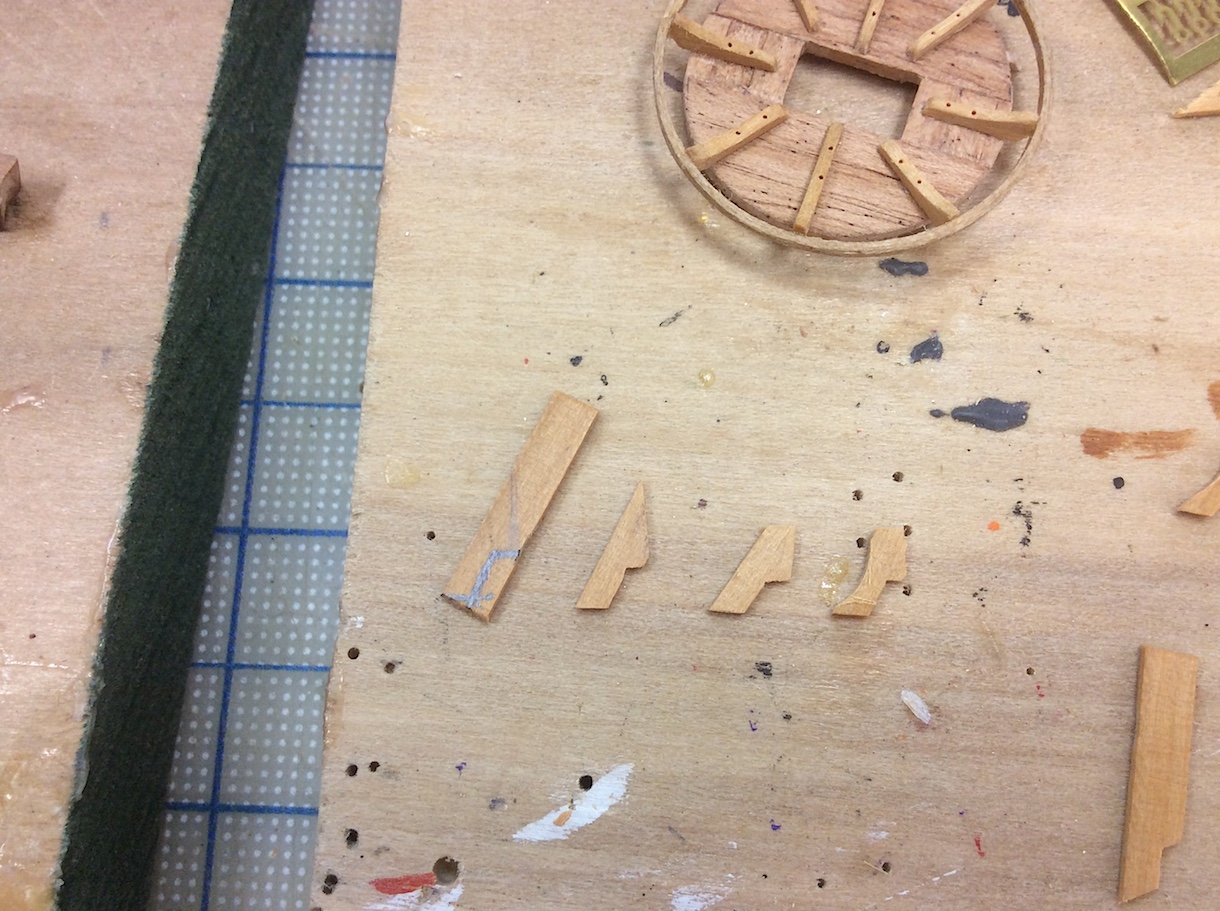
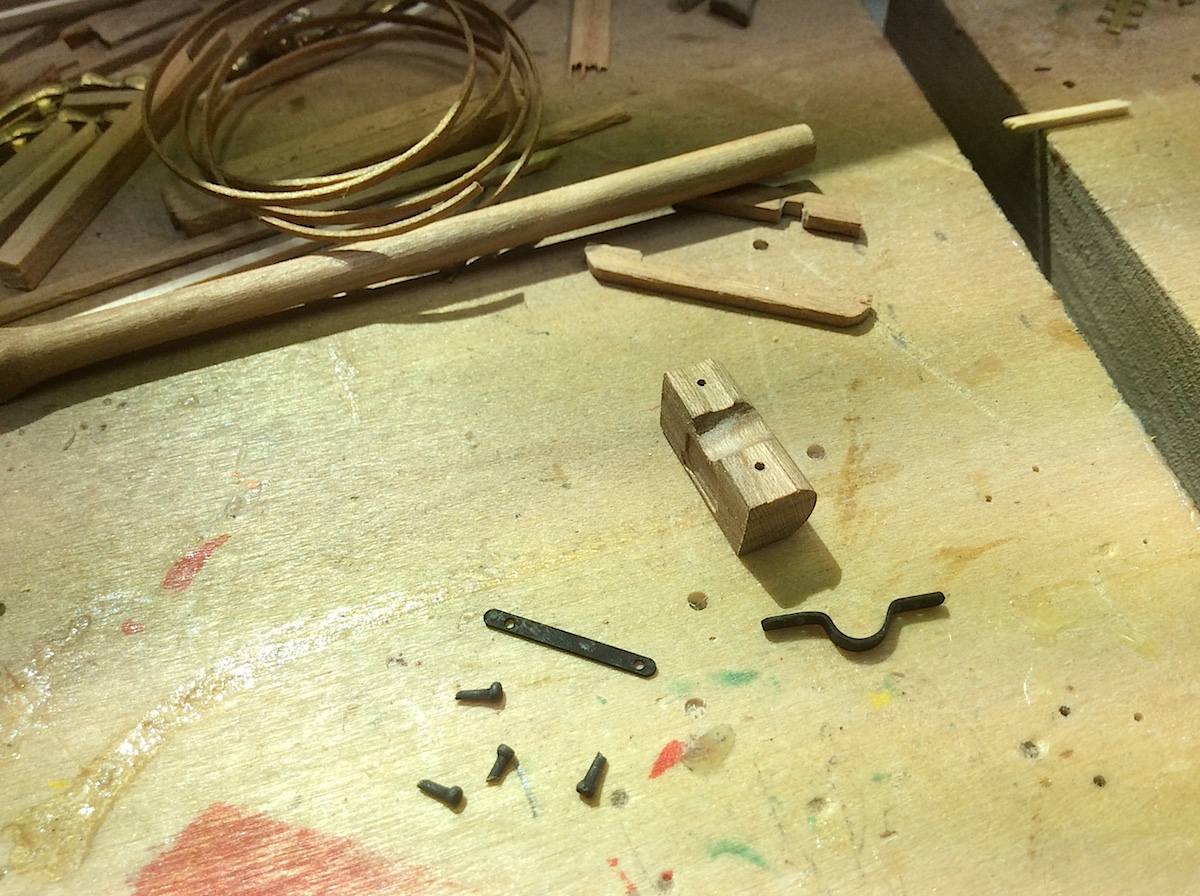
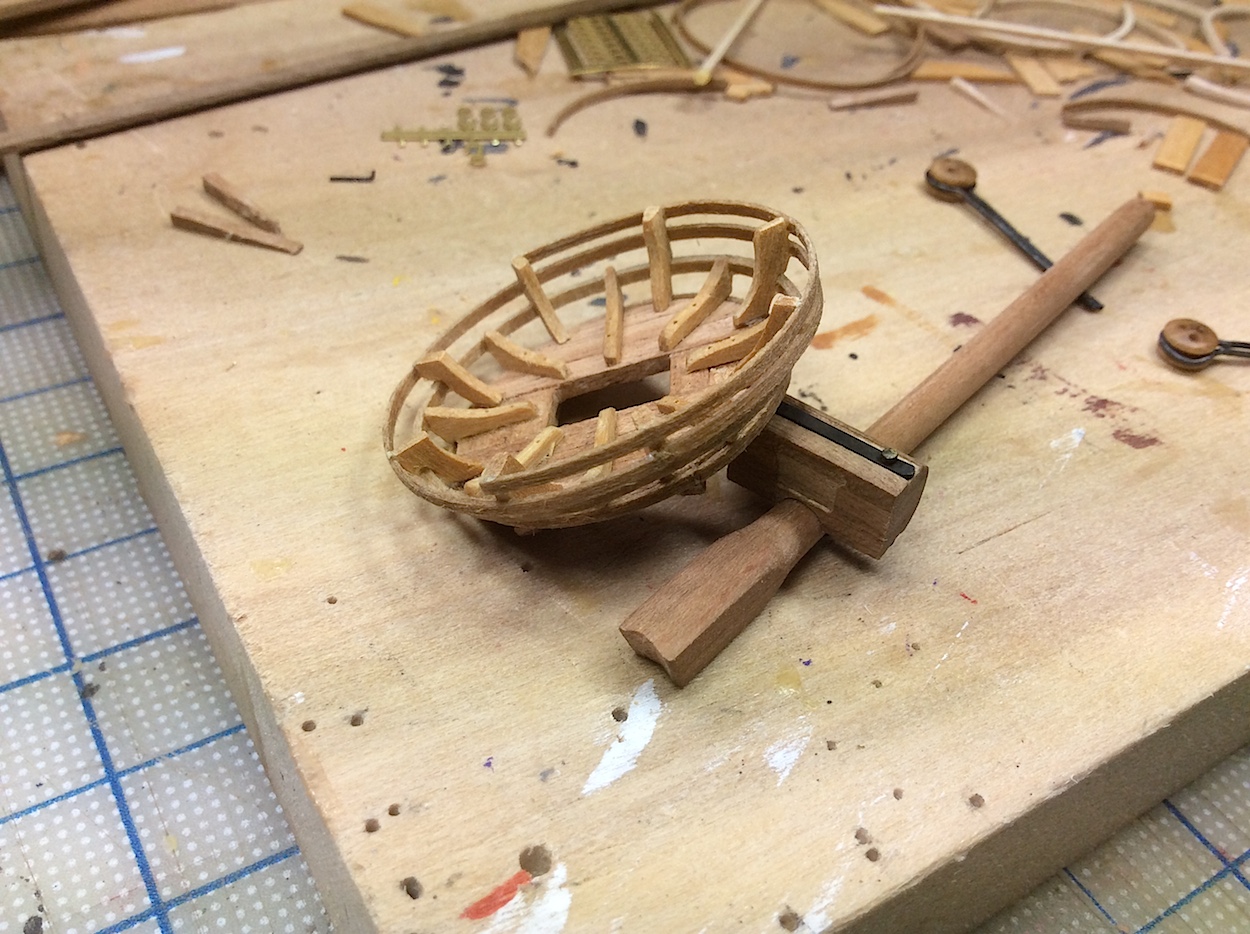
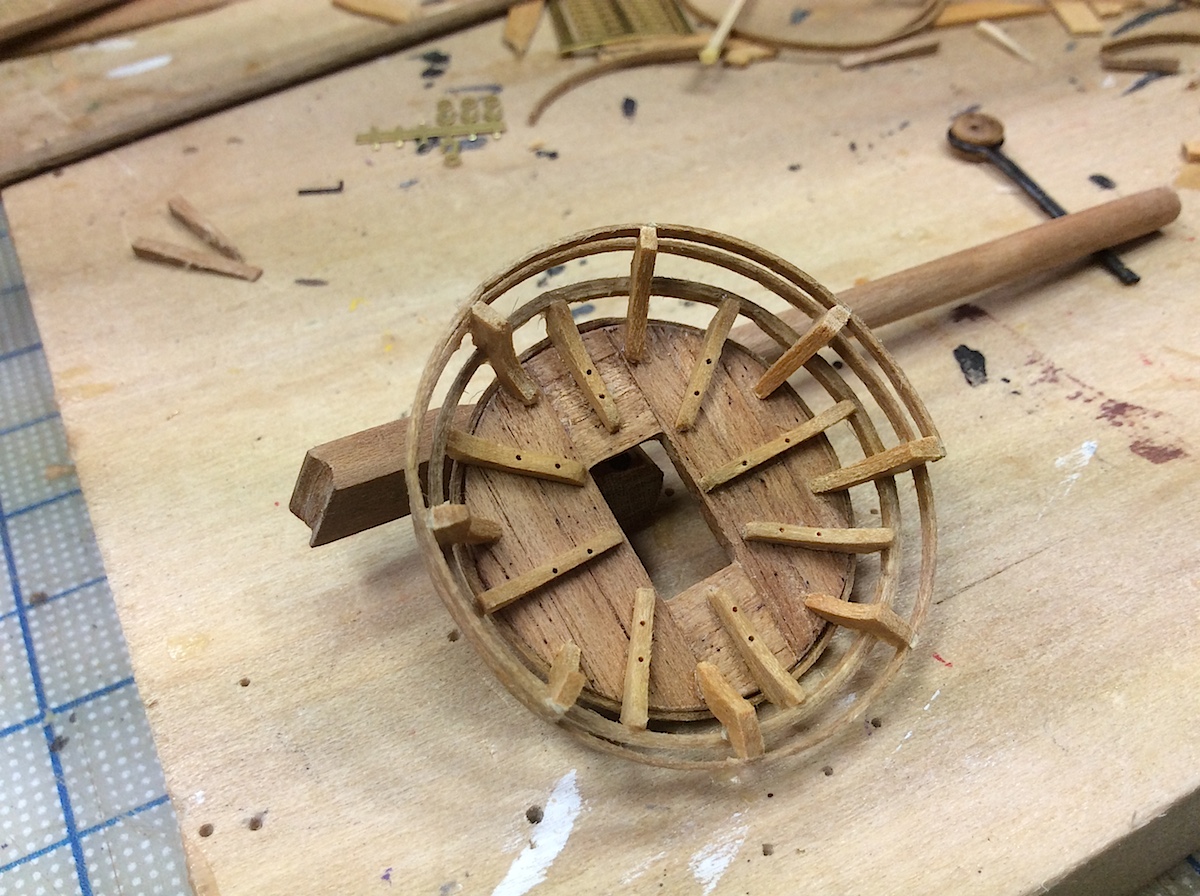
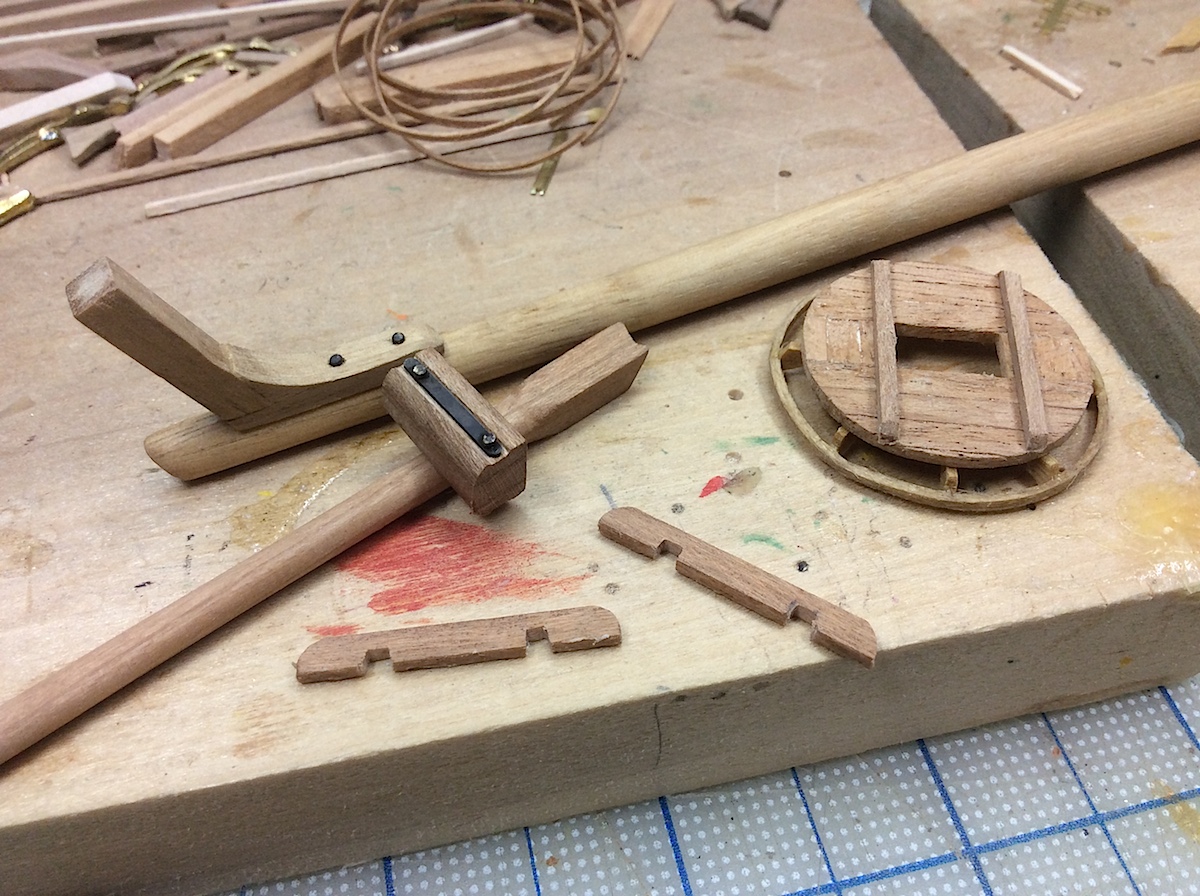
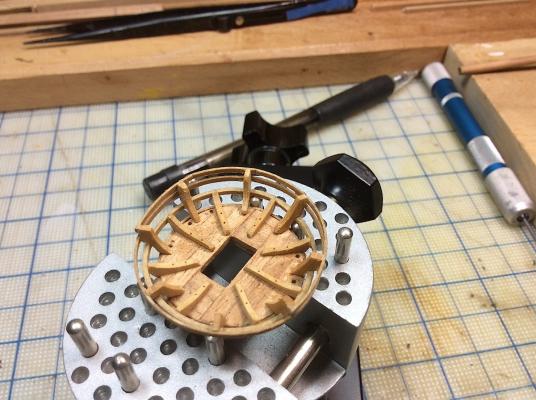
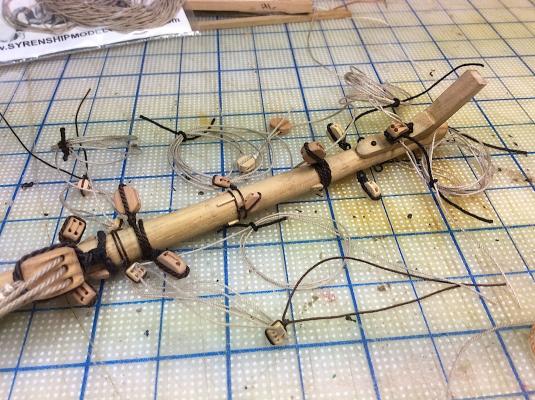
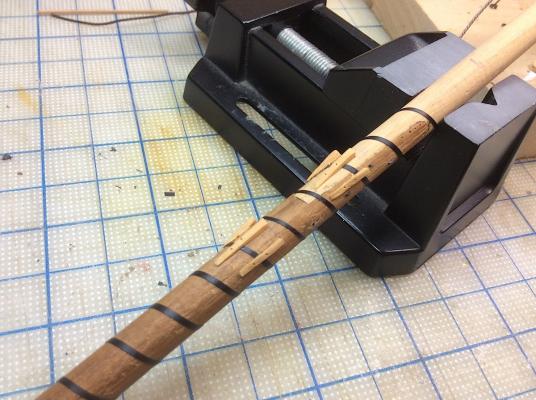
Hi Mates, Minor bowsprit mast platform photo update, self-explanatory. So I will keep text thin. This platform is a huge improvement from what Corel offers in its kit. Mark (marktiedens) has a nice comparison photo in his excellent build log, but as he also stated now I also need to spend a lot of time building four more (;-) Also working on detailing the mast as well. As always, thanks so much for your nice comments, likes, and just dropping by. Cheers, Michael