Supplies of the Ship Modeler's Handbook are running out. Get your copy NOW before they are gone! Click on photo to order.
×

md1400cs
-
Posts
2,836 -
Joined
-
Last visited
Content Type
Profiles
Forums
Gallery
Events
Everything posted by md1400cs
-
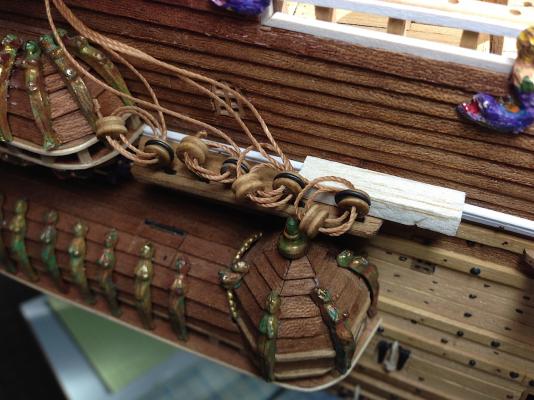
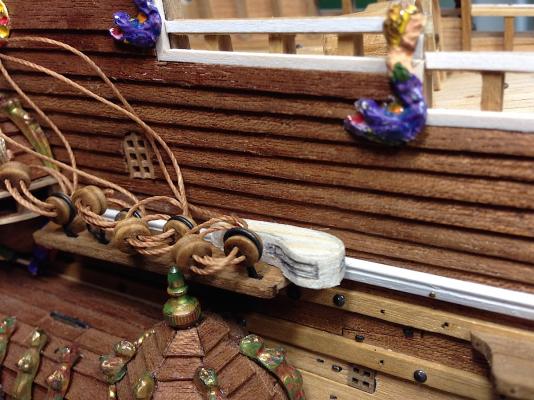
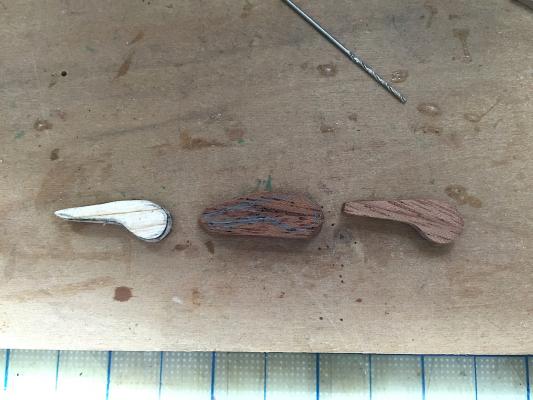
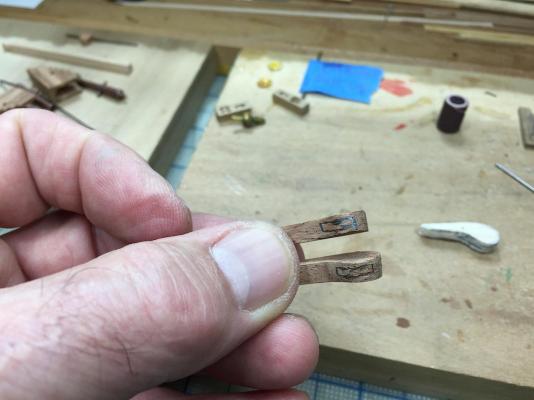
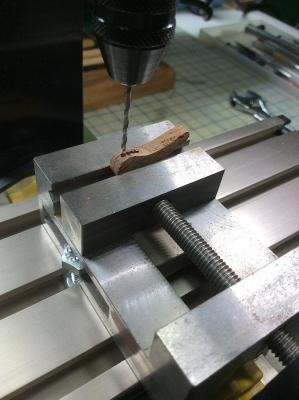
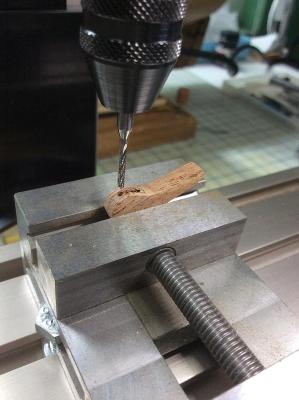
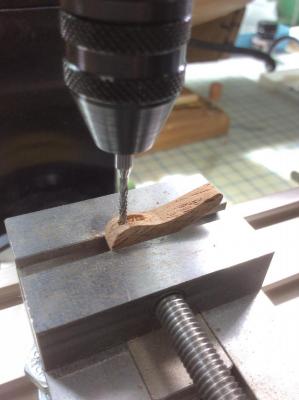
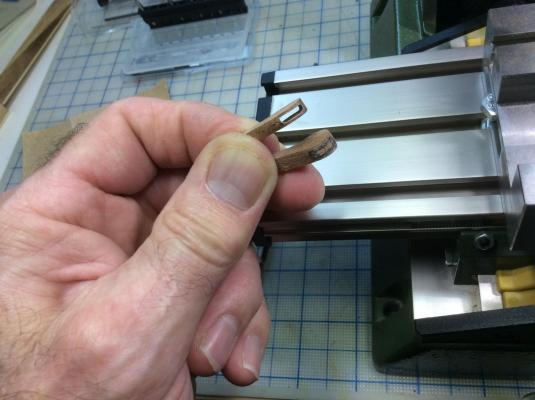
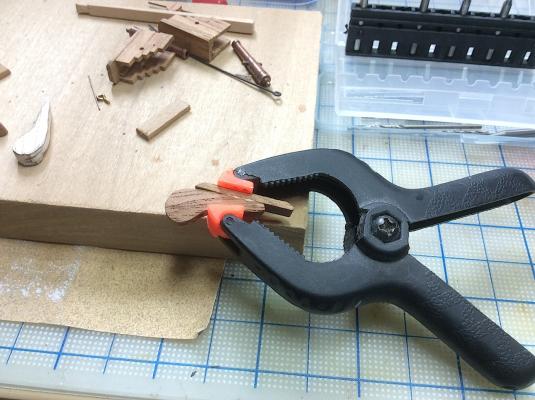
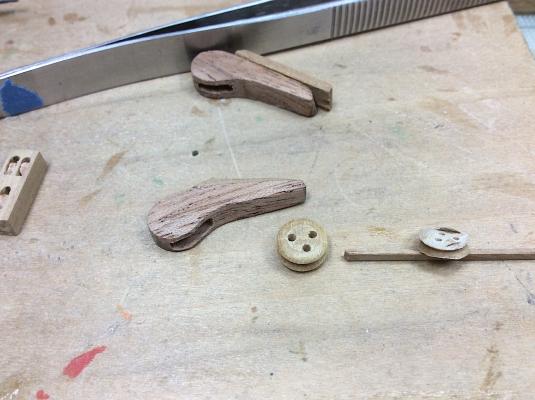
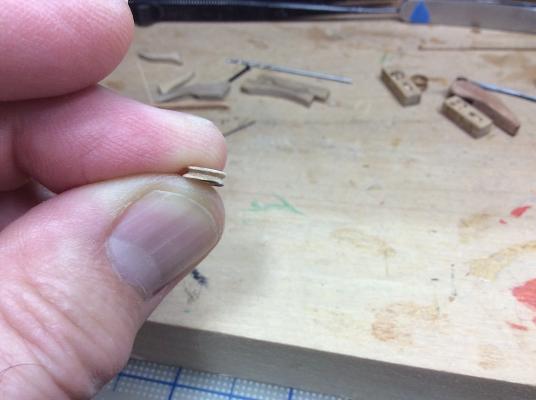
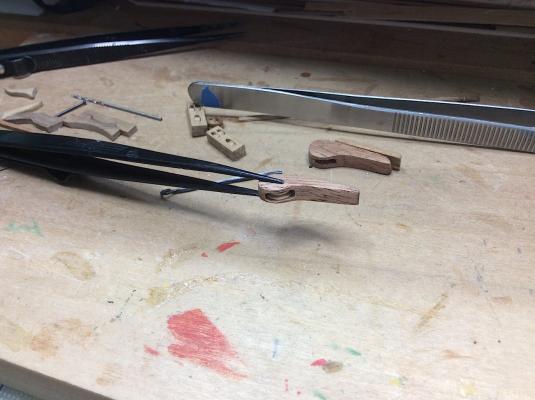
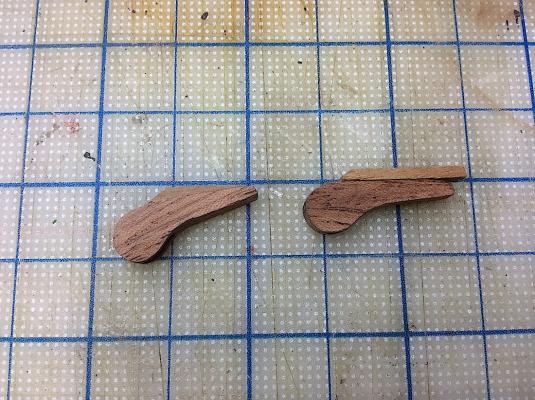
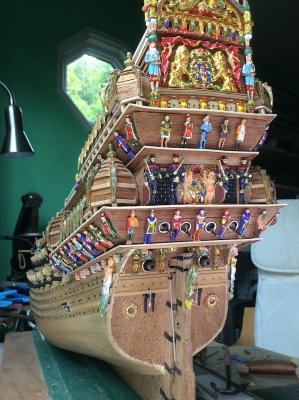
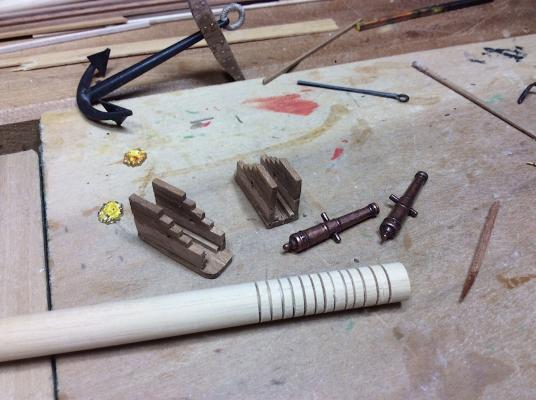
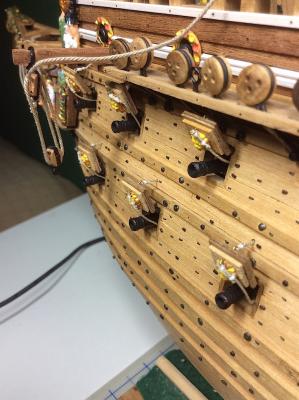
 Hi Mates, Started, again, working on the mizzen chainplate pulley sheaves. These pulleys were apparently used for the lower foremast sail. Here are some preliminary pics. The photos are self-explanatory. This is the first time (novice) that I “really” use the Proxxon MX70 (including X & Y attachment) for a task for which it was better intended. Nice tool-super accurate, great addition to my shipyard. Using the routing drill bits for the first time as well. PS: Nigel - thanks for you previous advice on how to correctly use these bits, I know that you have been very busy of late..good luck =============== Oops, just noticed, after again looking at the 1/1 photo that the housings have an outward overhang from the chainplates by a fair amount. (I used the 1:10th as a guide, hmmm wrong, no overhang on that model) So the two that I made would attach to the without any overhang. Fix: added a strip of wood to the rear of each one and re-shaped the back edge so as to gain that overhang. Bit of a diff. wood, but that will visually disappear once installed. The overhang is not as pronounced as in the 1/1, but I’m satisfied. At least this time I caught the error before installing. Hmmm is that a good sign?? Ha ah… Then made pulleys, as some of you know this is where I cheat. I’ve tried making real pulleys with my Proxxon Lathe, but just can’t seem to get that task right. So deadeyes to the rescue, a bit of sanding using a rotary tool, results in a “pulley”. Then a bit of sanding on the resulting sharp edges and Voila a pulley. I now need to add proper looking mounting nails, as well as the pulley shaft, then glue both into place. I’ll post a couple of pics when it’s all done. Again, thanks for looking in, and thank you so much to the kind mates that follow along, give advice, click like, and post way too nice of messages J Cheers Michael
-
Frank, Boy did I fall behind on your log. Oh my, with apologies. Your sails, stitching, furling, rigging are all first class works of art. Congrats your Vasa looks so excellent. I will follow your lead and log advice when I get to where you're at. Yes as George noted, partial furling the sails is a great idea, allowing for a lot of weather deck details to remain more visible. I also very much like the partial furling because it then allows one to see the purposes of specific rigging lines, especially for non-ship hobbyists . Nice touch Again such great scale detailing !! Cheers, MIchael
-
THE 74-GUN SHIP by Jeronimo
md1400cs replied to Jeronimo's topic in - Build logs for subjects built 1751 - 1800
Karl, Excellent choice!! This project is also bound to be spectacular. I will also enjoy following along. PS: These books are also so excellent. I have two of them, not the equipage one (in French [my original language]) excellent drawings as well as superb text. Regards, Michael -
Alexandru, You continue to amaze !!!! Your build log updates are always a pleasure to see. Michael
-
Peter, Thanks for your kind remarks. Yes those most forward hull guns were a big compromise. The odd overworked bit is that I also built false carriages, and then realised that I needed to pull out both cannons/carriages, and just close the doors gee wizz... In regard to your last notations you are certainly very talented if you also intend on sculpting some of those needed bits at the stern. Way beyond my skills, nor anything that I would want to add work to in this already overly customised kit. Had I been more knowledgeable when I bought this Corel years ago, I would have purchased the Billings and have a lot of extra fun adding details. Kit bashing can be fun, I have seen some amazing ones here at MSW, though the Corel Vasa would not be my choice for this kind of a project. The only negative with the Billings IMO is that all the sculptures are plastic, though very accurate. PS: It would be nice if you considered joining us and posting a build log for your ship. Regards, Michael
-
This is the only word that I understood -- fantastisk.-- I agree Cheers, MIchael
-
Andre, Nice bit of foresight on your part. Nice work, as you know I have been following your build, always a pleasure seeing your progress. You have really resurrected a once very damaged kit. I did not think of any of this until I started to realize that I wanted to improve on the weaknesses of this kit, by then several of the needed changes were too late to fix. The bowsprit spacing is one of these areas. I had already built and installed all details, only recently when I added the cannon doors did "the light" come on grrrrr...Still having fun however. Michael
-
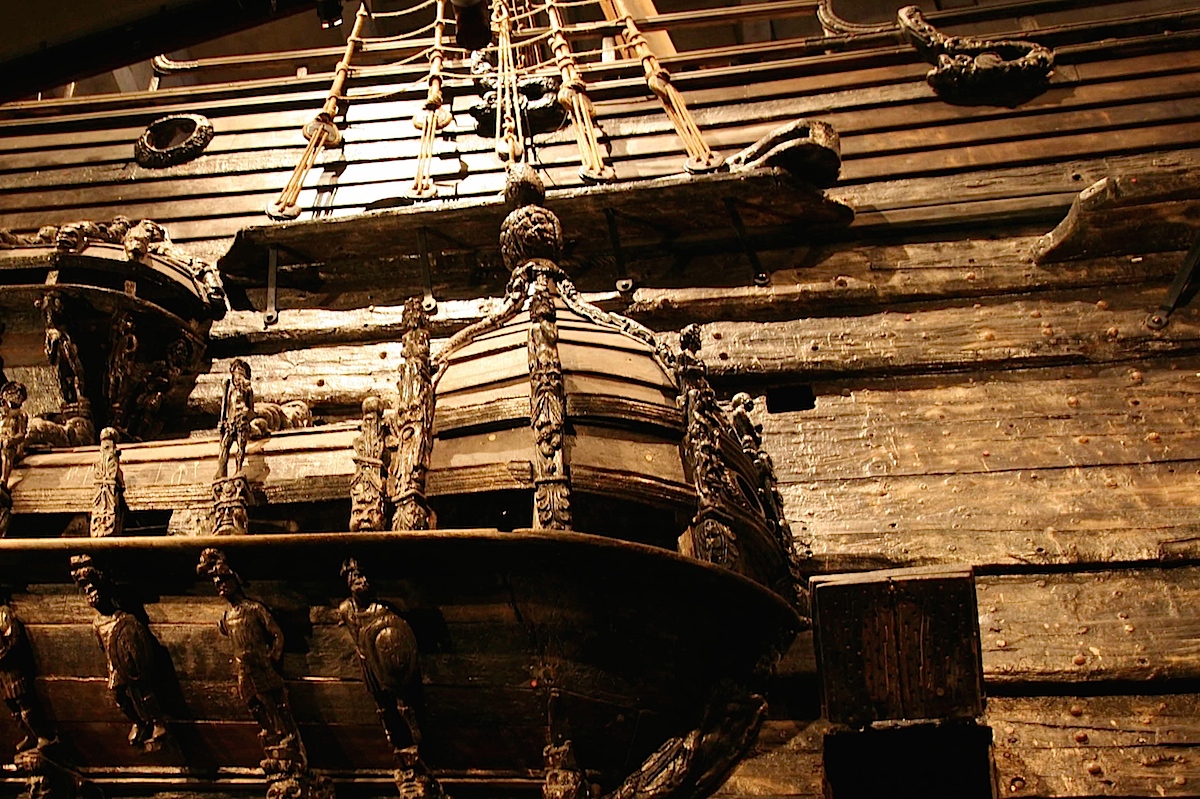
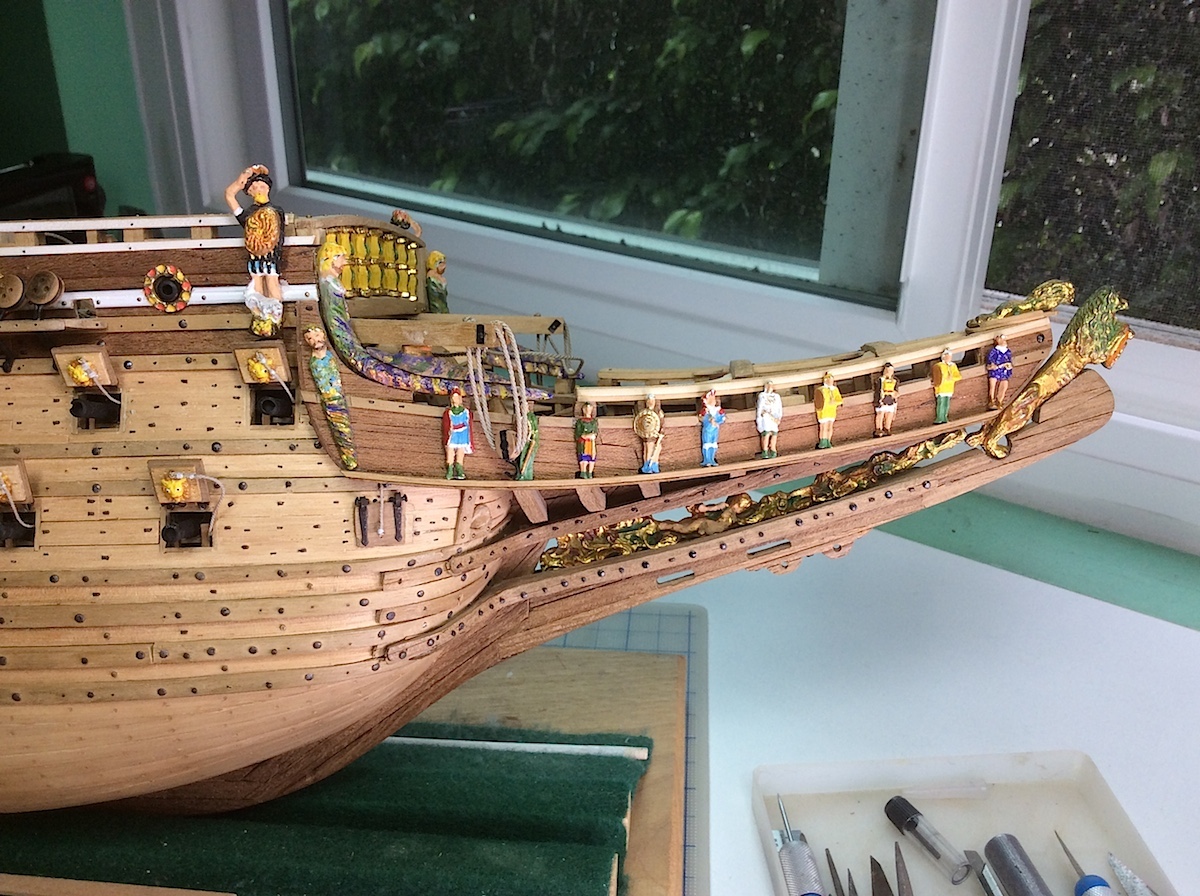
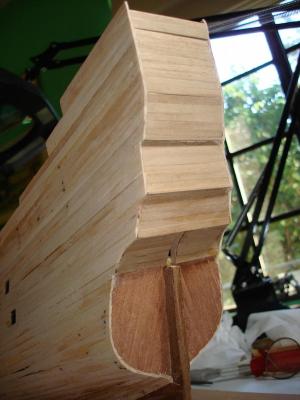
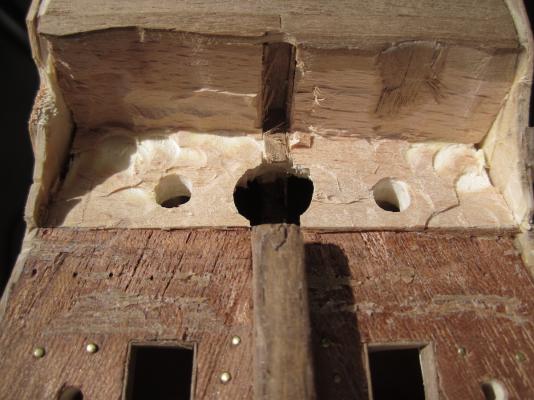
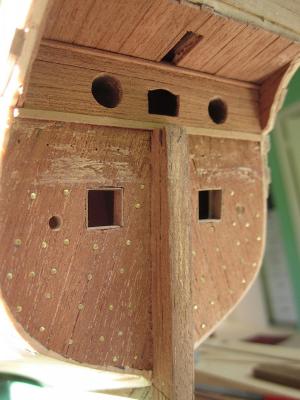
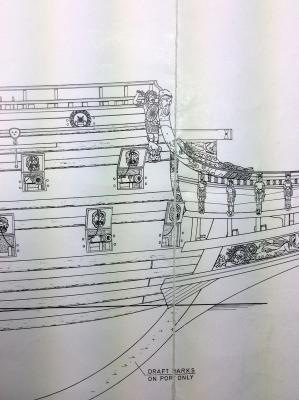
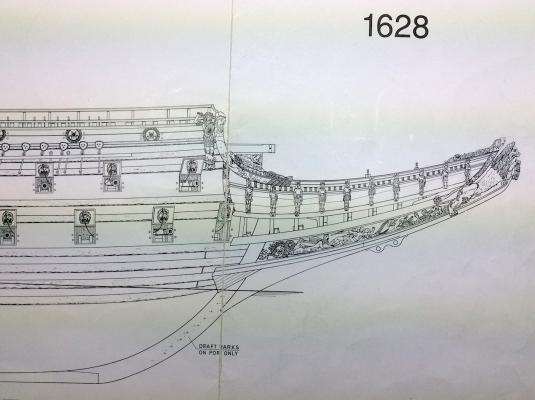
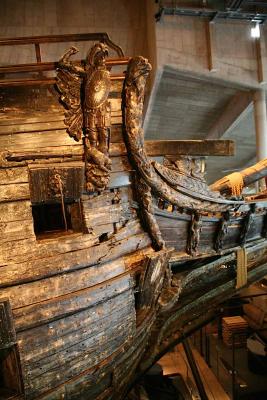
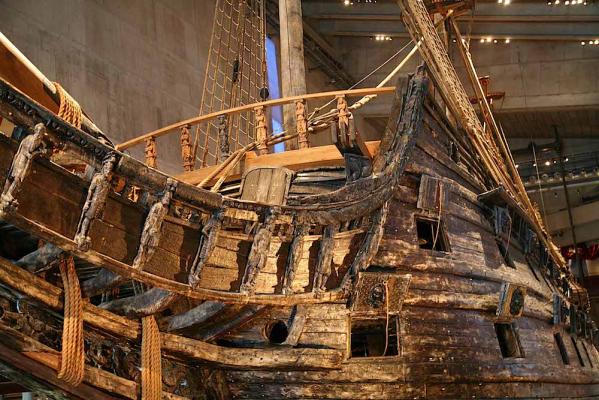
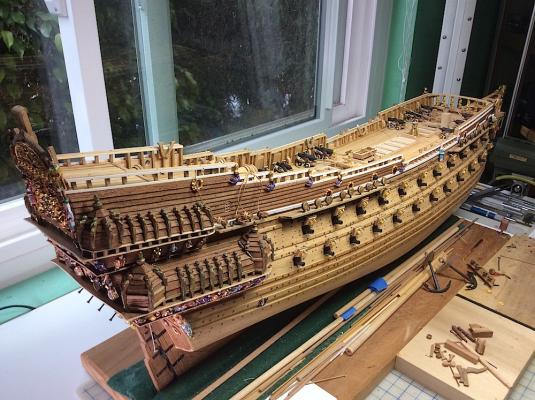
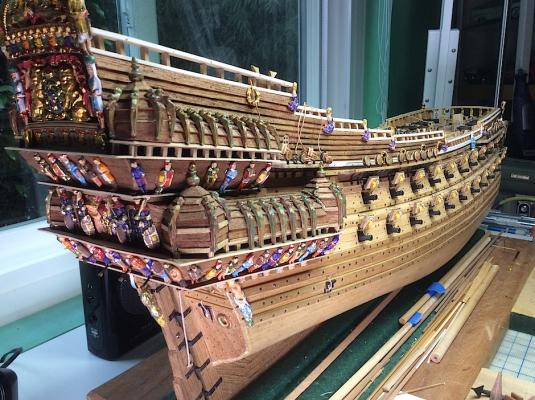
Peter, Very nice work reshaping the hull, as well as the bowsprit area, and the weather deck; thanks for sharing. The stern, of course, had to remain too narrow in order to accommodate the gilded pieces? For my part I stuck an extra set of required soldiers near the stern windows in order to have the correct number. Corel only supplies two instead of four. I also tore out and rebuilt the entire stern section, as noted in previous log postings because the Corel was so inaccurate. Here are a few pics from the original kit shape, my repair, and my completed effort. This kit, for those who are interested in better accuracy is sadly a "looser". Many of us certainly did not know of so many inaccuracies until we started reading all of the rants from builders, and looking at museum plans and pics, as was the case for me. Ferit, you are correct, one would think that after 30 years of sales Corel would update it. I do understand, according to Fred Hocker, the curator of the Vasa Museum, that several companies have approached him with interest in producing a very accurate kit. On the plus side, now with so many fixes available, it could be one of those fun kits to "bash". AND not a single visitor to my home has ever seen Any Flaws (:-) ha ha Cheers, Michael
-
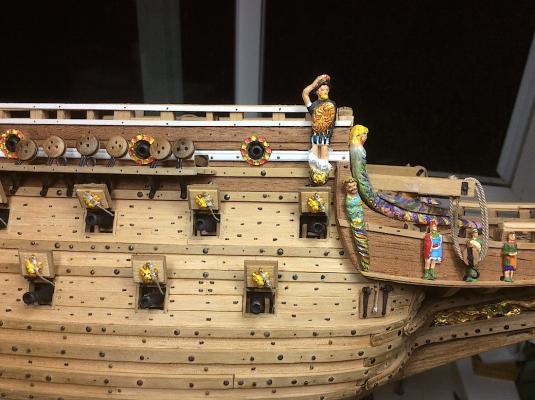
FYI-Another ongoing issue with the Corel kit, for those of you whom might read this, and are considering, which of the two kits to purchase, Billings being the other one, I noticed the following; ---------------------------------------------- After installing the most forward upper gun deck cannon lids that the two most forward warriors would have to be mounted much higher than they should be. This is because Corel’s kit does not allow enough space between the cannon opening and the bowsprit side railing structures. Even with foresight of this issue, if the two side structures were moved forward then they would not line up correctly at the beam with the lower central keel-framing bit. The Lion would have to hang on by its fore-paw claws (:-) And the weather deck would extend out too far forward adding an overhang lip. Also the most forward lower gun deck cannon port is an addition that I included for this build. These two are not part of the Corel kit instructions. Having added them, the lids had to remain closed as well. I include comparison pics FYI. Cheers, Michael


-
Frank, Excellent progress. Looking very excellent. Adding sails was a "grand slam" idea (:-) Michael
-
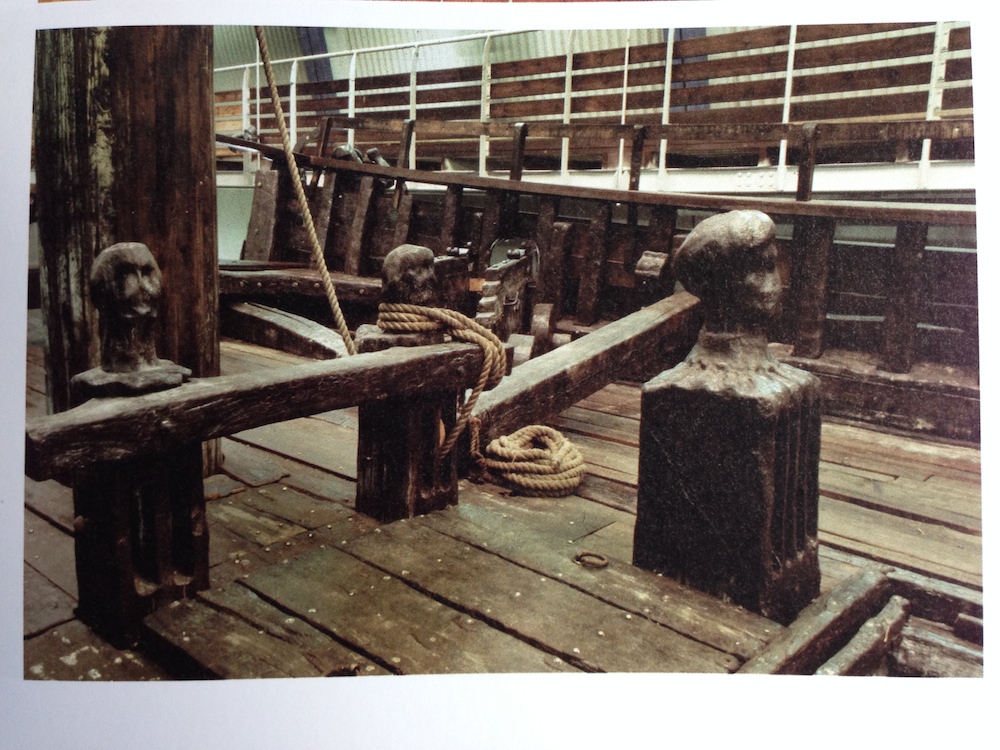
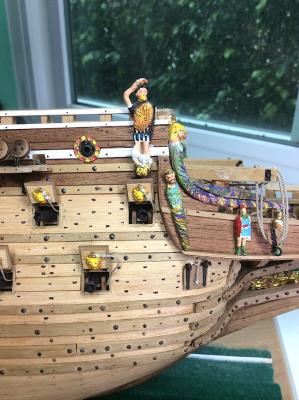
The noblewoman ready to be painted. Took some searching to find something suitable on the internet - Yes nice upgrade! do you have a supplier link? I'm tempted to follow your lead. I'm rebuilding my knightheads. What I had installed was weak these noble heads look very good, much closer to 1/1s Nice work Cheers Michael

-
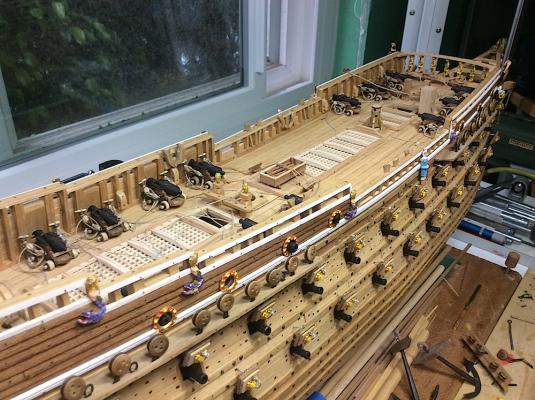
Mates Oh My - thanks for all of those such kind and supportive comments as well as the likes-very nice, and much indeed appreciated. Frank M, I will now move onto the weather deck and rebuild all the knightheads and add pulleys, clean up the 14 cannon carriage ropes, build the last two poop deck cannon carriages. Then onto the masts (:-) I think? Cheers, MIchael


-
Karl, Absolutely superlative work-beautiful, congrats on another excellent build. Michael
- 662 replies
-
- 1
-

-
- bonhomme richard
- frigate
- (and 1 more)
-
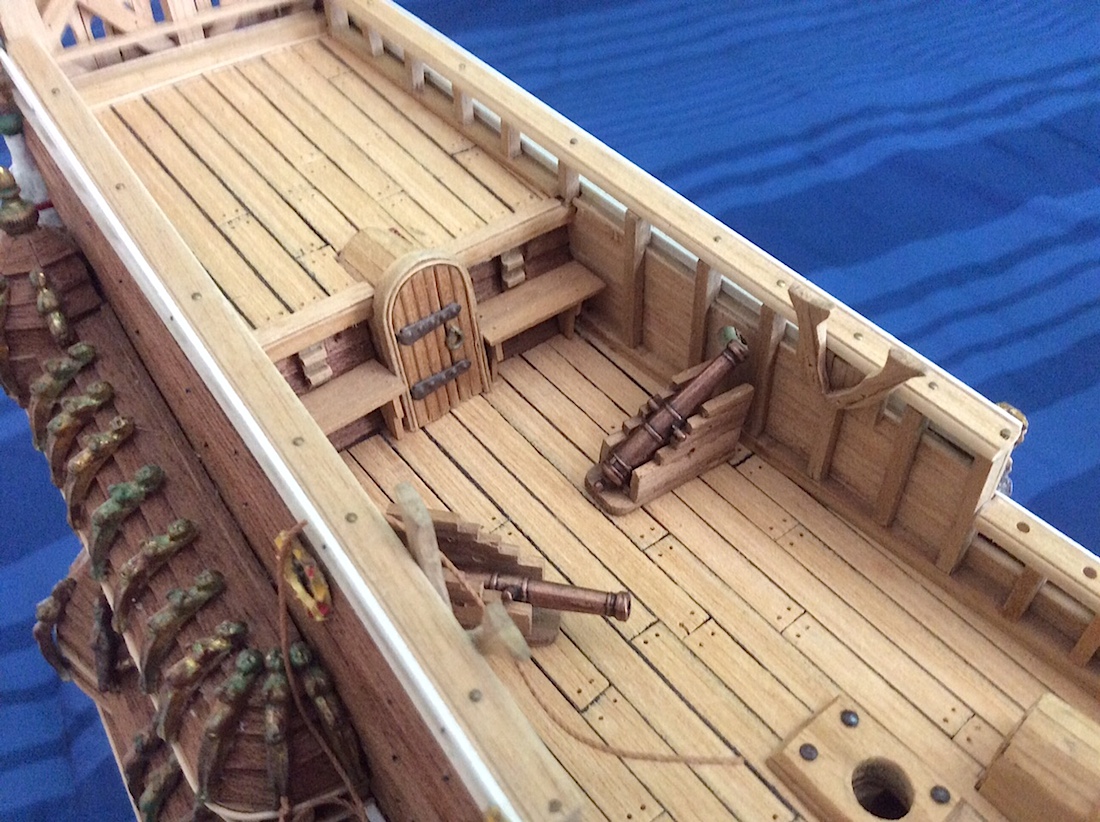
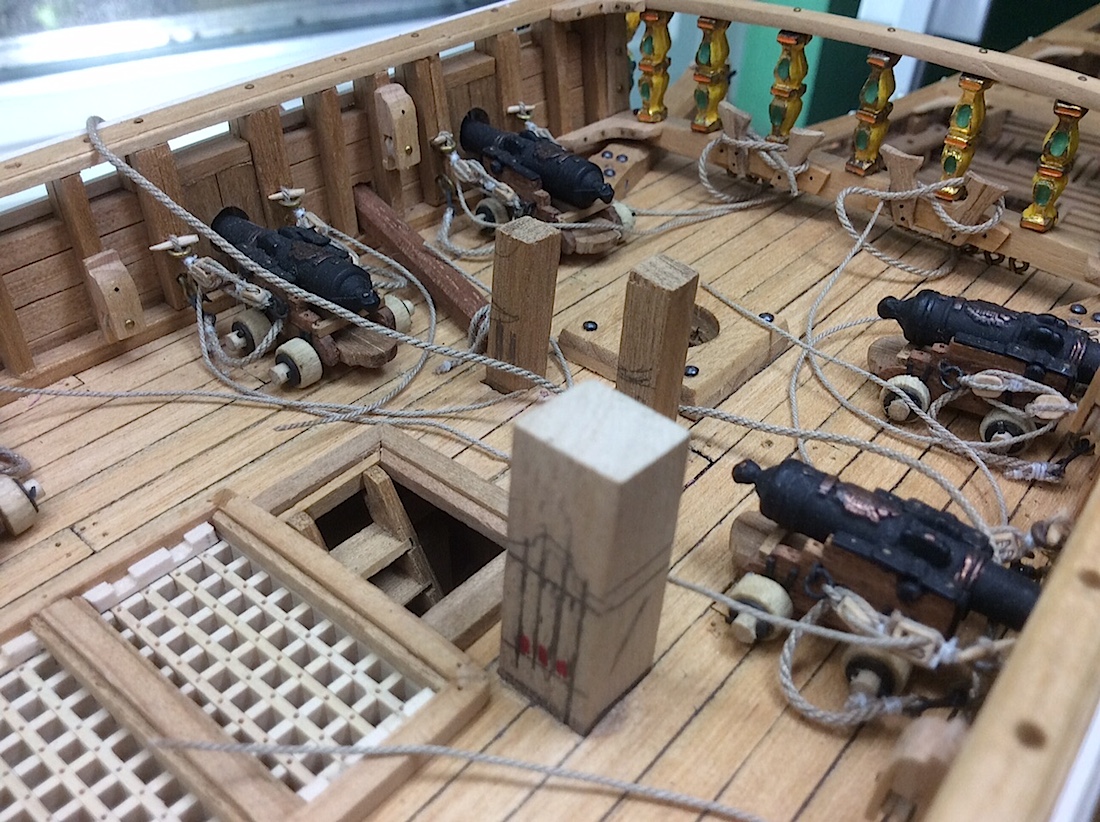
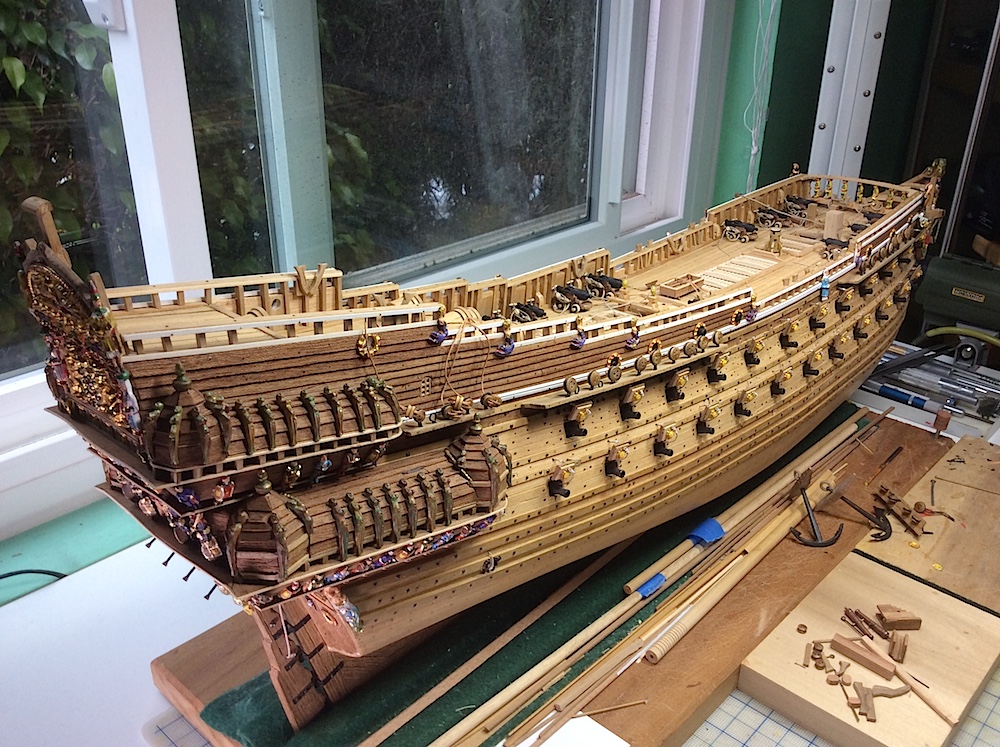
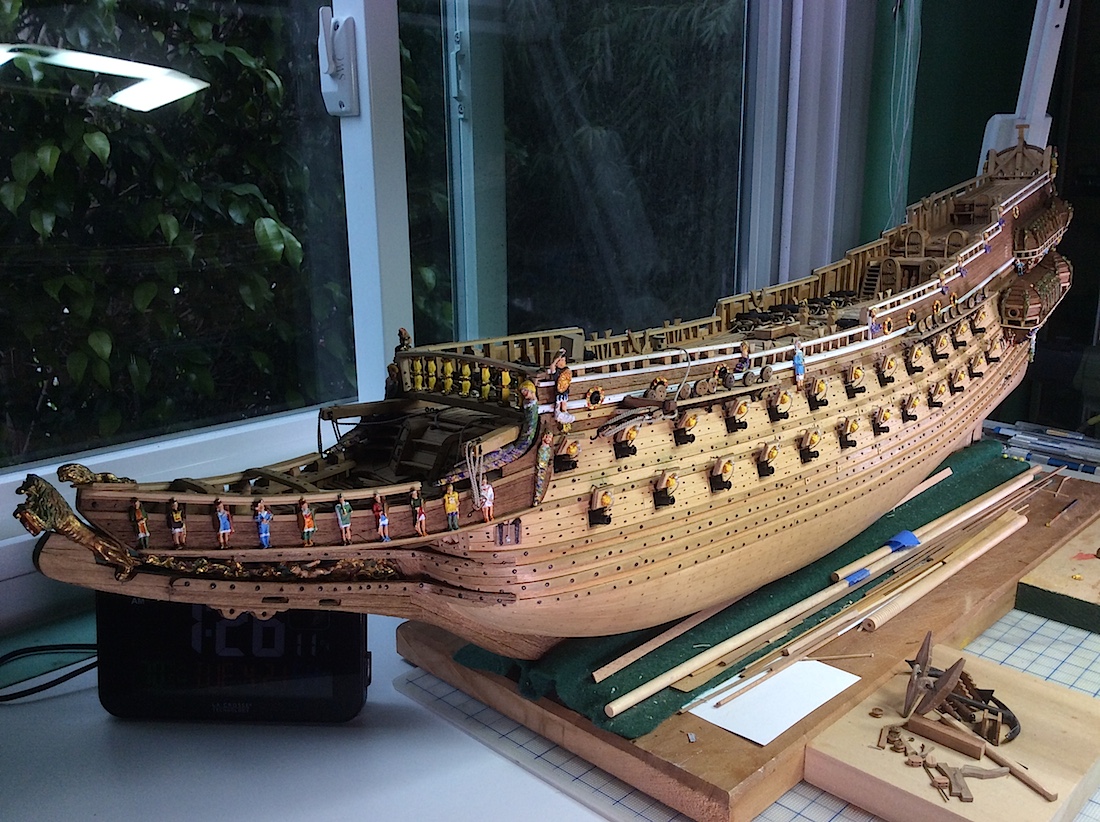
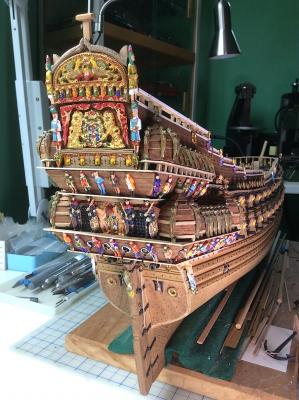
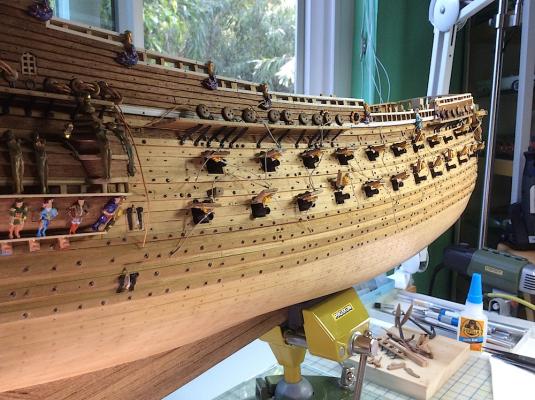
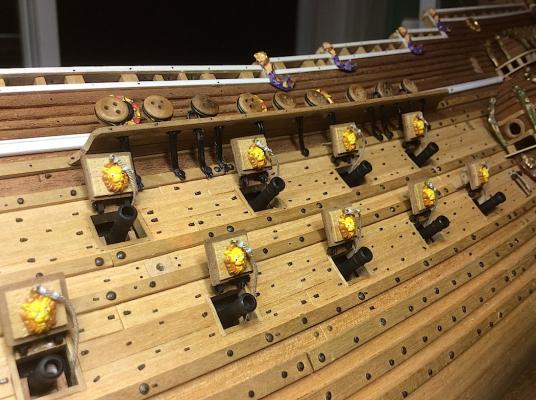
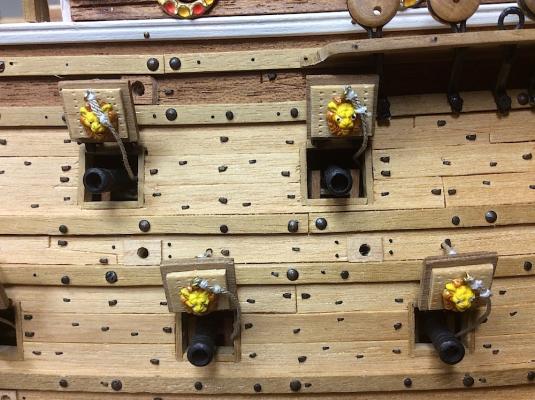
Hi Mates, Finished up the hull cannon doors and installed them. Here are some updated pics. Regards, MIchael


-
Vince, My only reservation would be if this kit looks SO awesome because Chris Watton added his "magic" though the Amati link does seem to indicate that the kit also includes patterns for the wonderfully colorful upper hull artwork. I'll wait for reviews here at MSW. Yes, It certainly is super tempting. Michael
-
Beautiful !!! http://www.amatimodel.com/en/new-entries/revenge be sure to click the 3D animation, and wait for the image to stabilize as you rotate it around. Clicked on Search Reseller, appears to only be available from sellers in Italy at this point. No idea on pricing that I could determine. (I know that link was posted previously) They do list USA resellers of Amati but not for this issue, as of yet. Check my last sentence, Just checked with Age of Sail in California, they are expecting this kit next month. Michael
-
Hi Mark, Just catching up with your build, looking excellent. Thanks for the kudos, yes your deadeye strops came out excellent. You also nailed them to the correct locations. The Corel instructions are so "out to lunch" on this bit. I'm also glad that I researched that before nailing them to the hull. Keep up the great work. PS: Great job painting all of the details in your stern and bow figures. Regards, Michael
-
Hornet, Thanks for that link. I was disappointed in MicroMark's shoddy business practices, I will avoid them from now on. Michael
-
Frank, Awesome work on your sails they look so good. They will certainly add a huge "bling" to your gorgeous ship. The bolt ropes work is excellent! Did you use ropes from Chuck as well, and what size? Cheers, Michael
-
John, I posted a link on General Nautical Discussion. I thought of you when I saw it. It has to do with the C W Morgan. Cheers,
- 2,250 replies
-
- 2
-
-
- model shipways
- Charles W Morgan
- (and 1 more)
-
Vince, Beautiful work ! Yes she needed a protective bubble. My dream is to one day have the talent/ability to build the SOS, still a dream (;-) Michael
- 264 replies
-
- 2
-
-
- sovereign of the seas
- mantua
- (and 1 more)
-
Lawrence, Thanks for all of the latest Like clicks very nice of you to spend some time with my build. Cheers MIchael
-
Frank, Nice update on how your doing the sails, great help for later. They are looking very good at this early point. Michael