HOLIDAY DONATION DRIVE - SUPPORT MSW - DO YOUR PART TO KEEP THIS GREAT FORUM GOING! (Only 72 donations so far out of 49,000 members - Can we at least get 100? C'mon guys!)
×

md1400cs
-
Posts
2,839 -
Joined
-
Last visited
Content Type
Profiles
Forums
Gallery
Events
Everything posted by md1400cs
-
 Frank, As you know..I have a folder of all of your sails work. Hoping to emulate your work, as well a Karl's, and (Ulises wonderful rigging). Not sure I can get to all of your levels of work. Wood is my friend, and I so enjoy those parts of the build, but cloth, and rigging, Hmmm? I will see about that next new challenge. Though I do have great builder's whom I am following (:-) and BTW my build is going soo slow (;-( Your ship is so beautiful,Thanks for following mine as well. Michael
 -
Frank, As you know..I have a folder of all of your sails work. Hoping to emulate your work, as well a Karl's, and (Ulises wonderful rigging). Not sure I can get to all of your levels of work. Wood is my friend, and I so enjoy those parts of the build, but cloth, and rigging, Hmmm? I will see about that next new challenge. Though I do have great sages whom I am following (:-) and BTW my build is going soo slow (;-( Your ship is so beautiful,Thanks for following mine as well. Michael
-
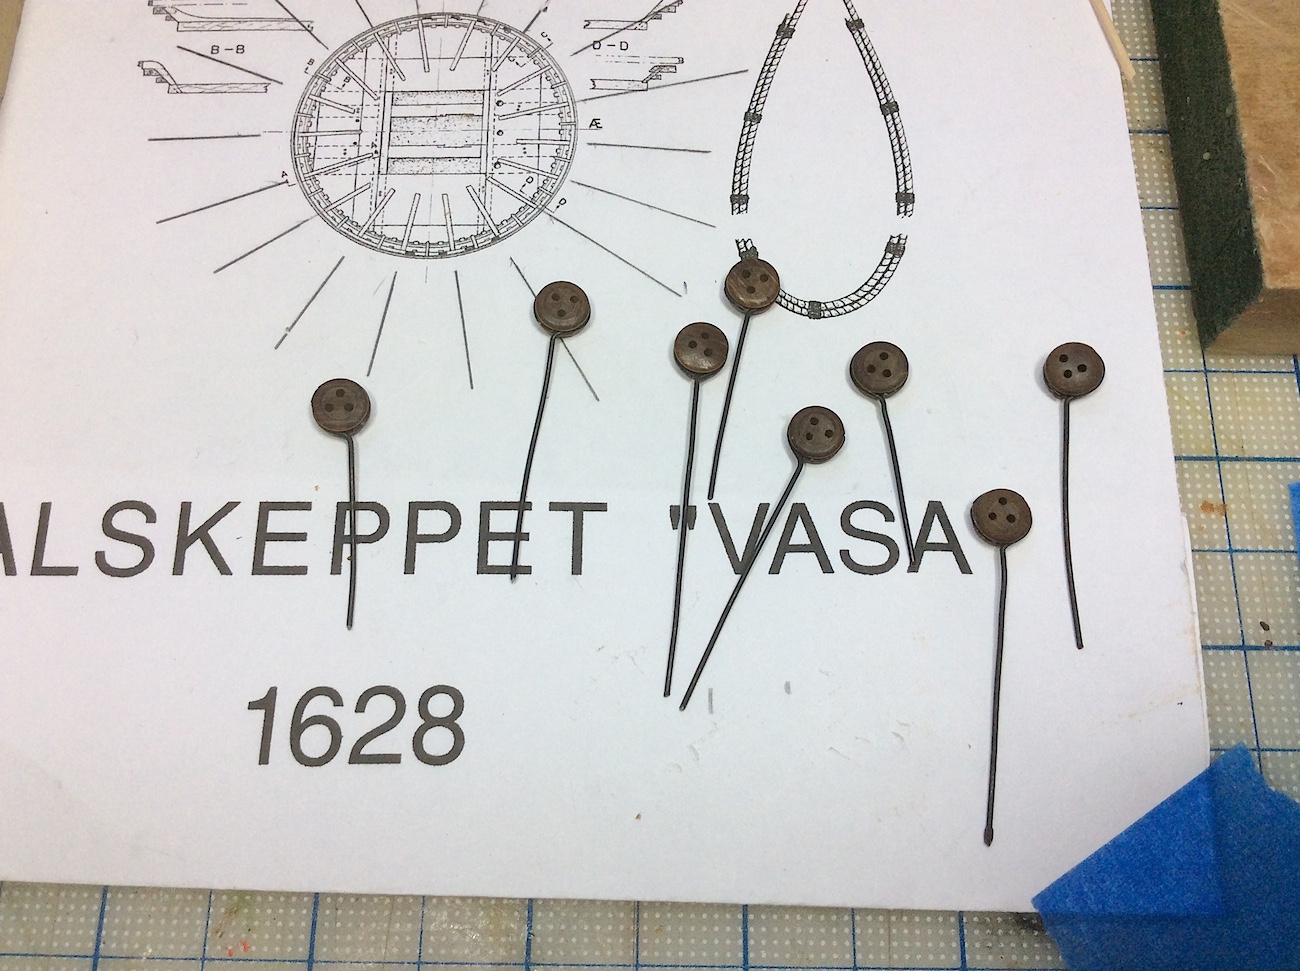
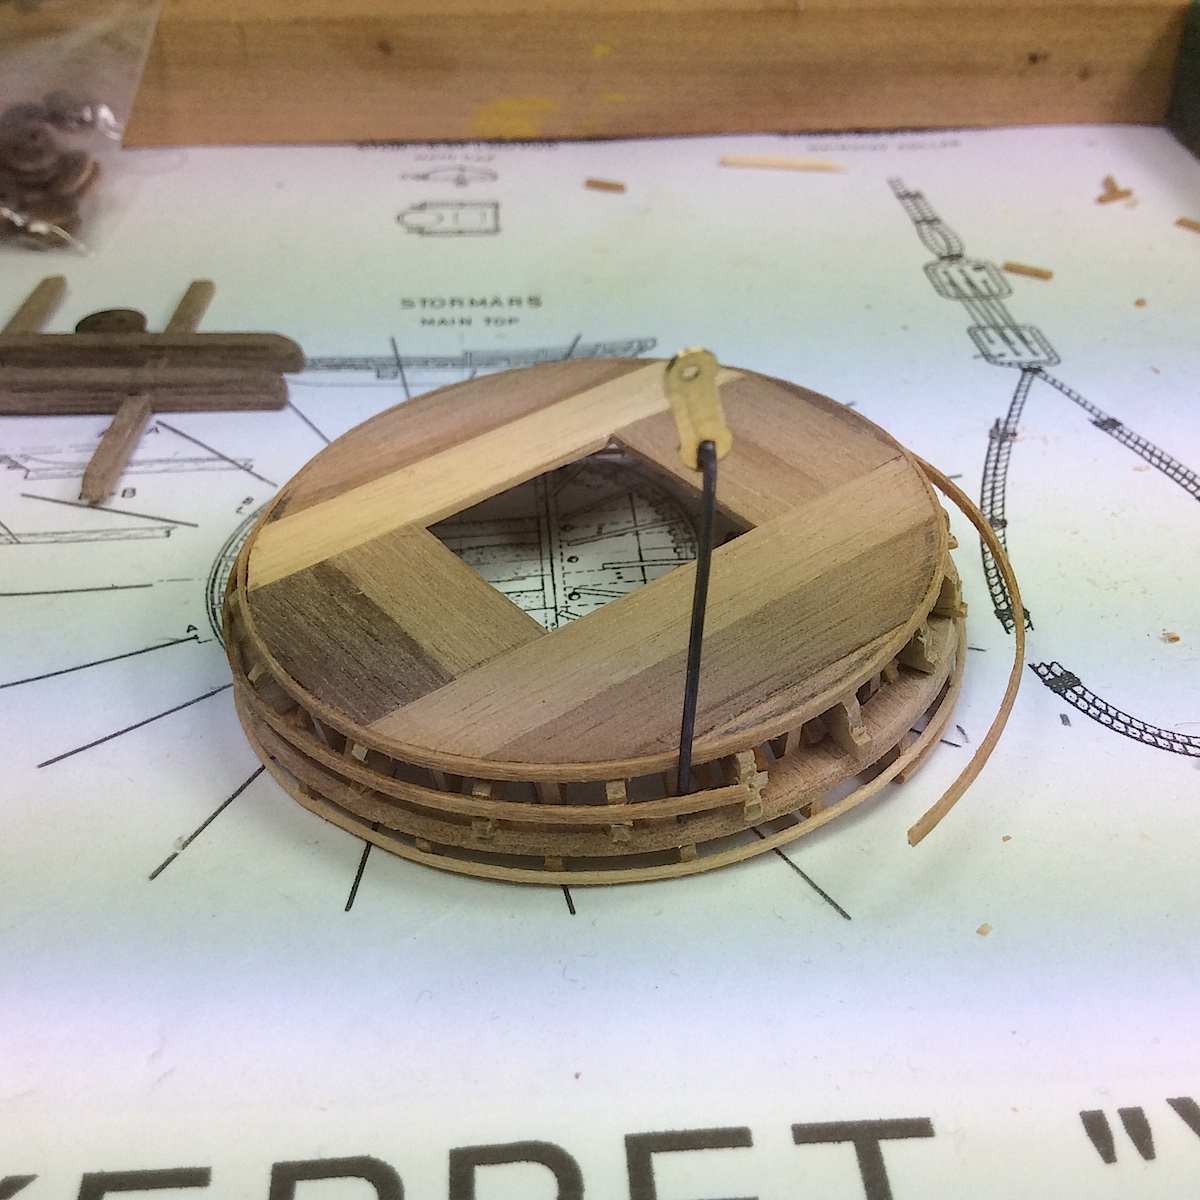
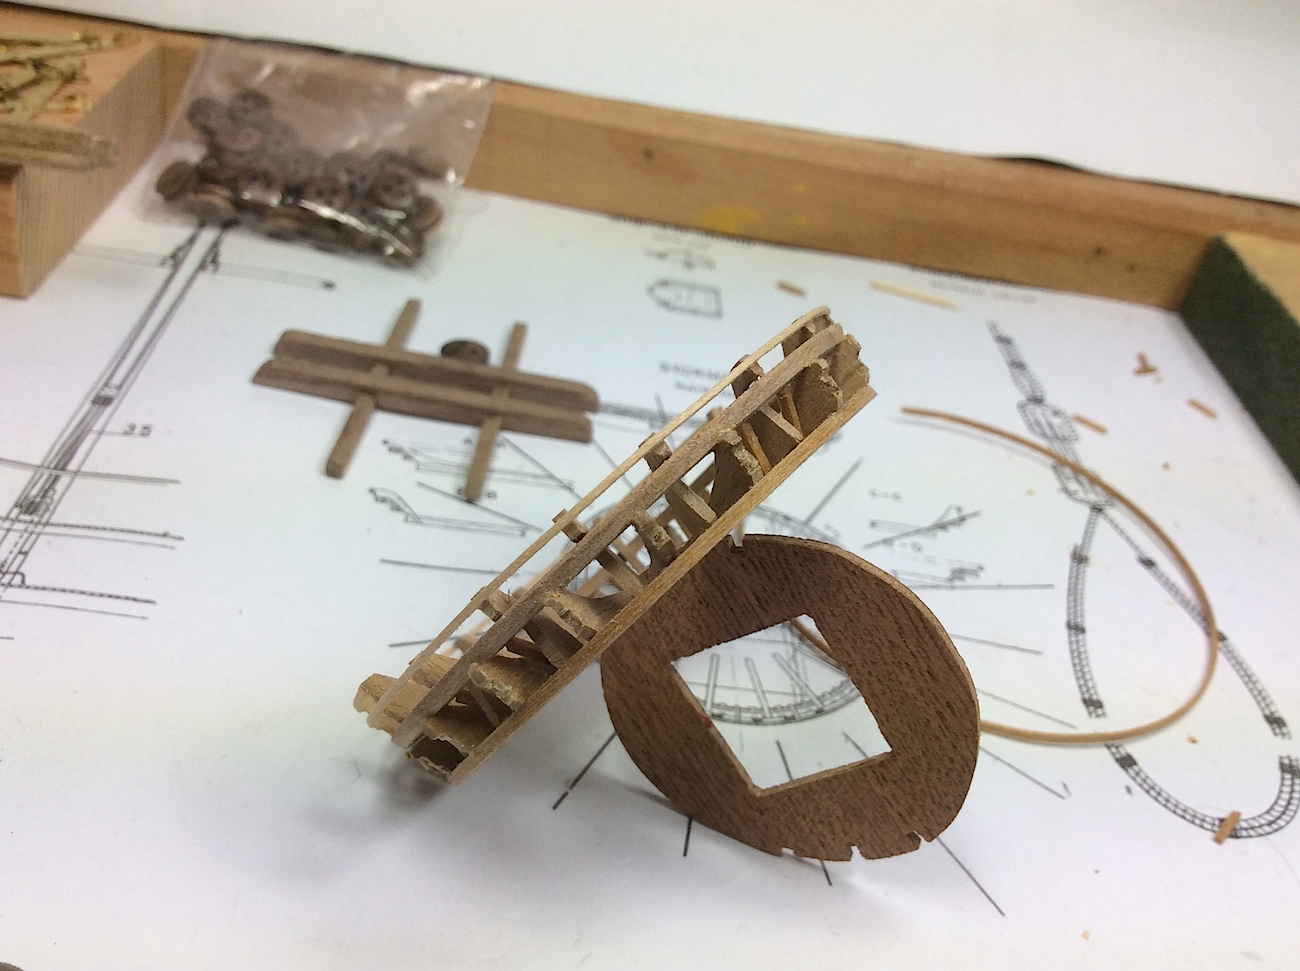
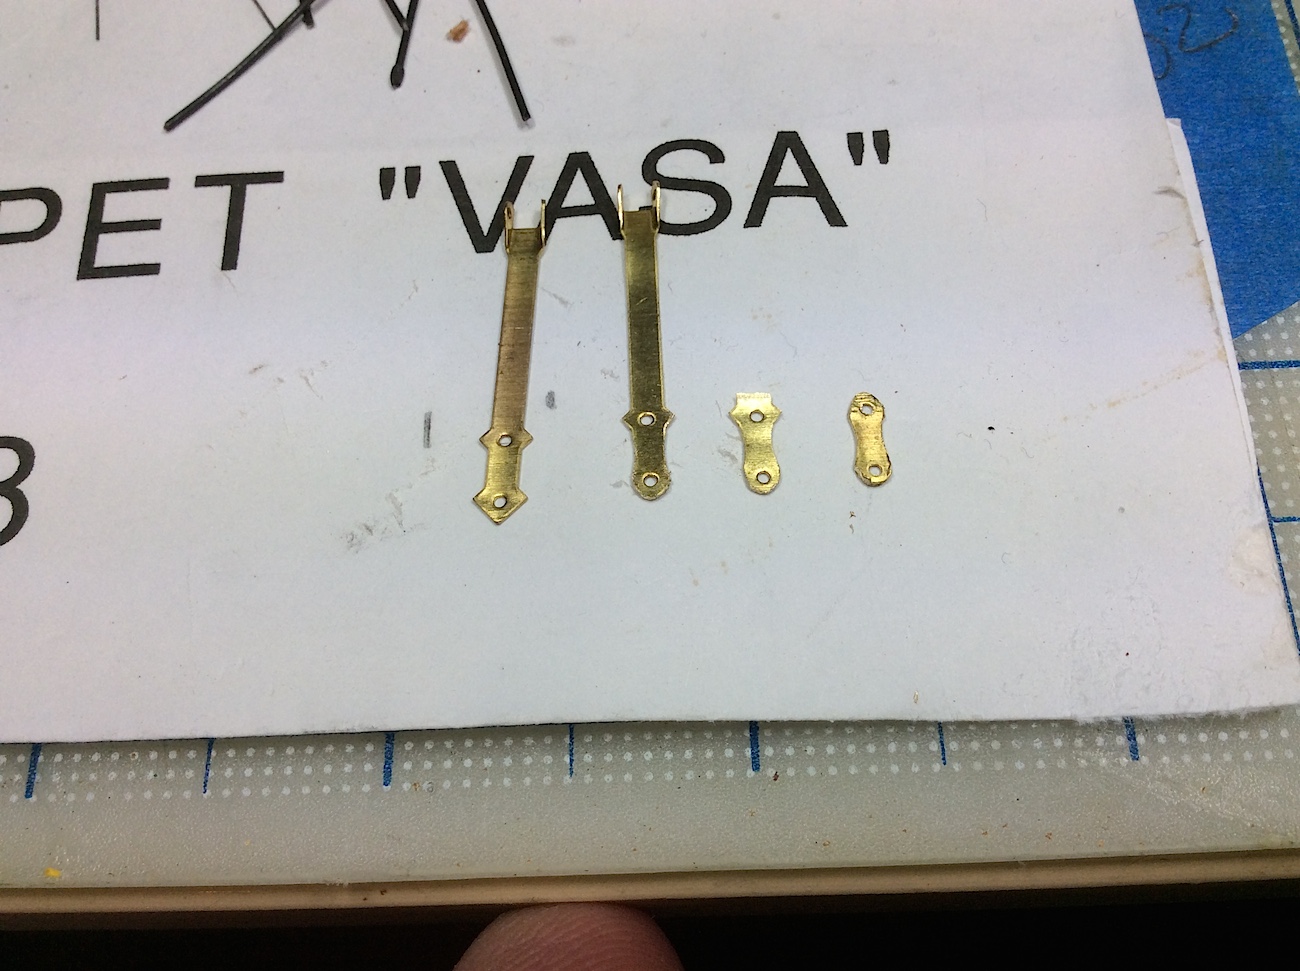
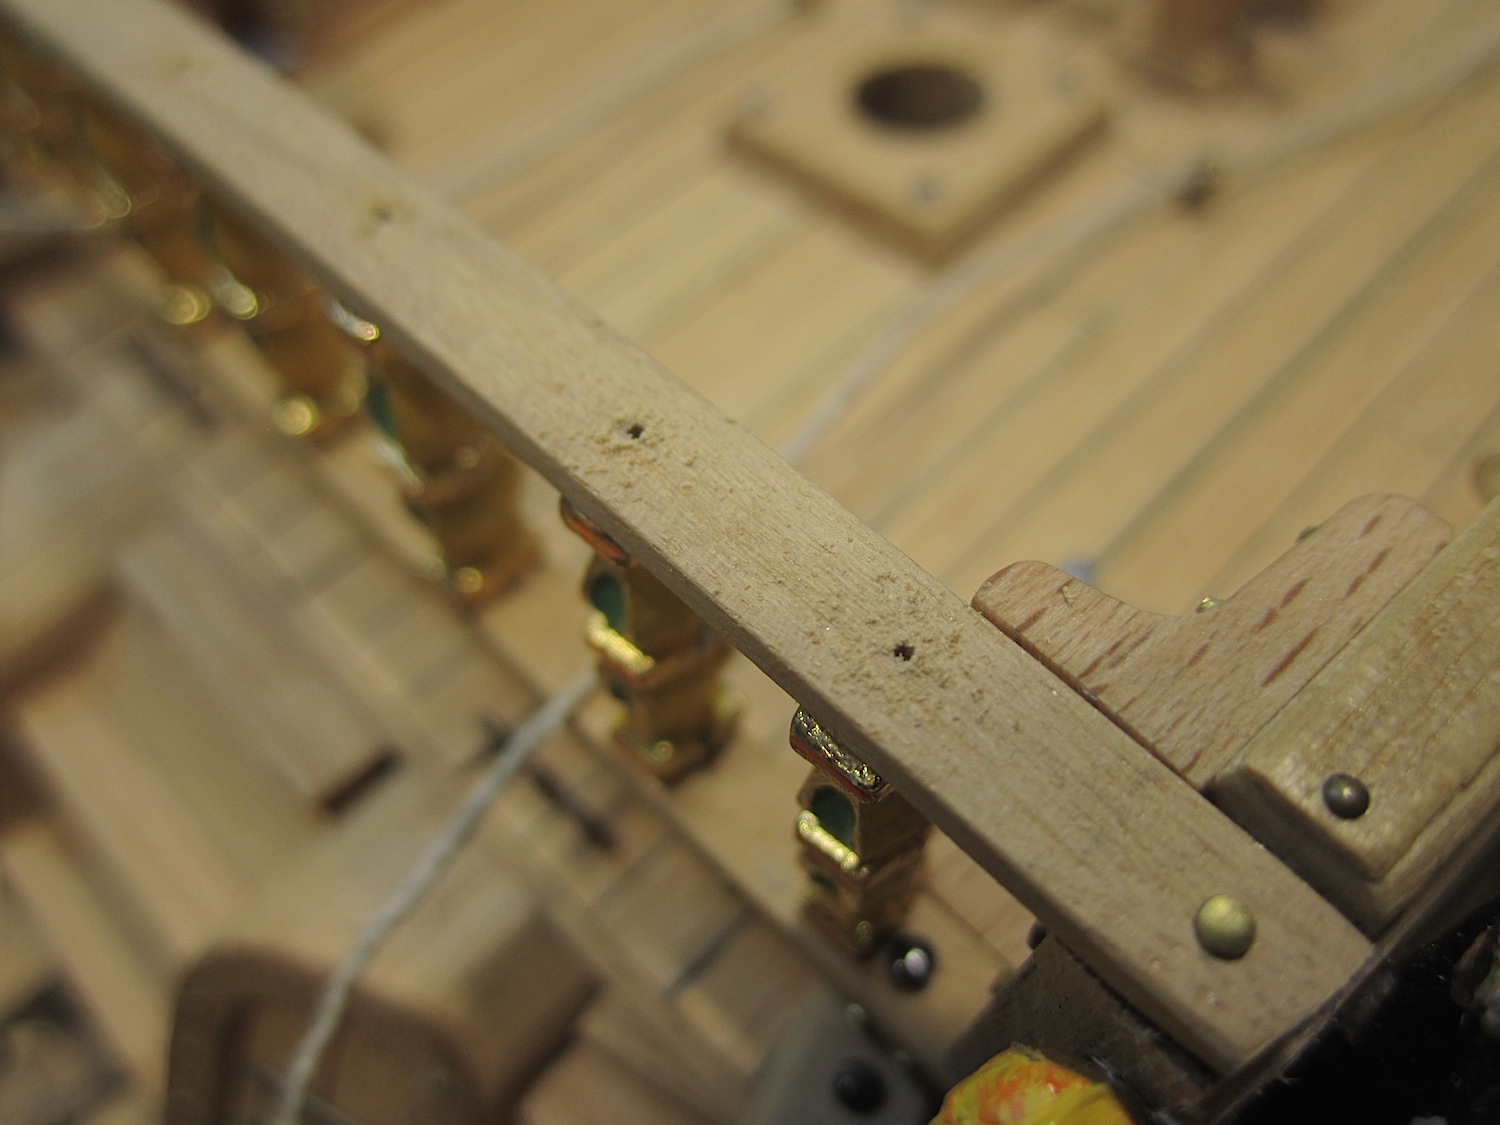
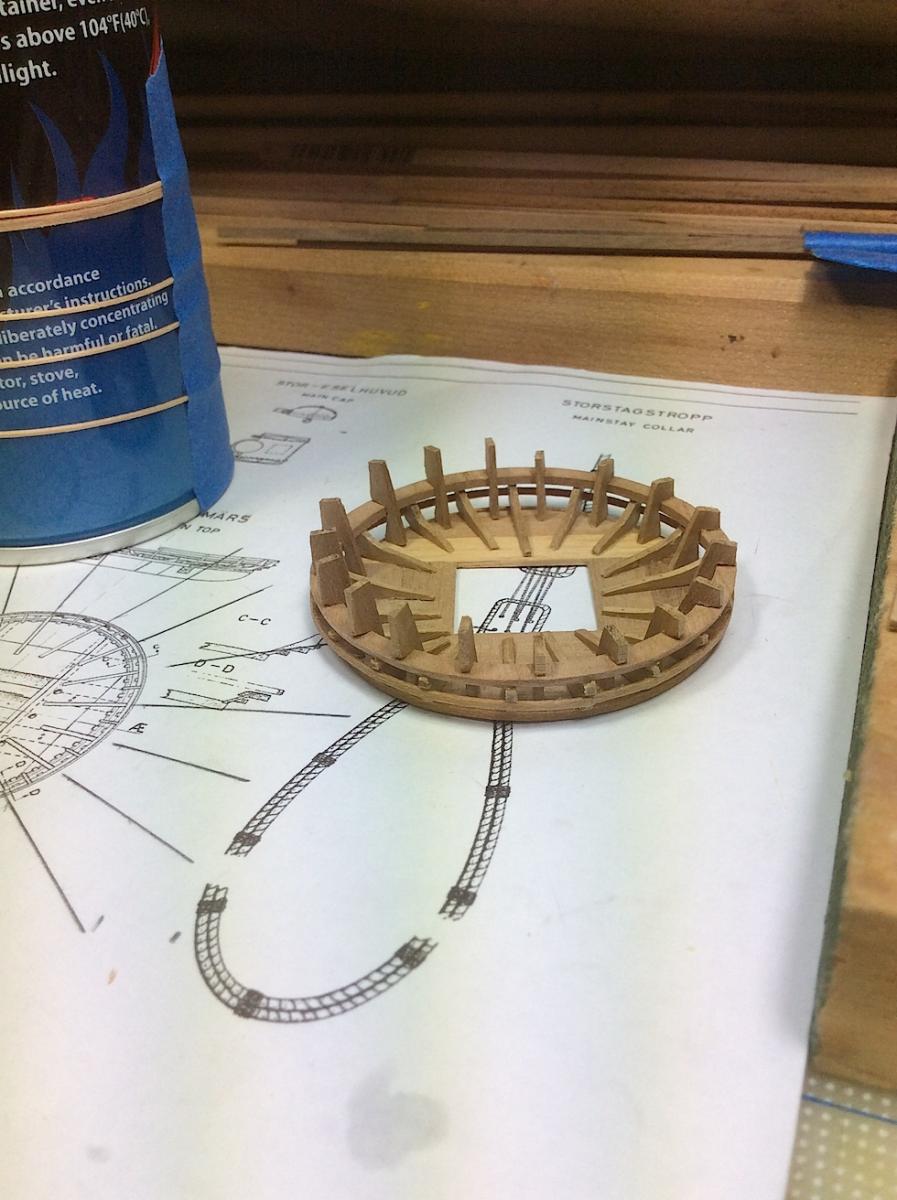
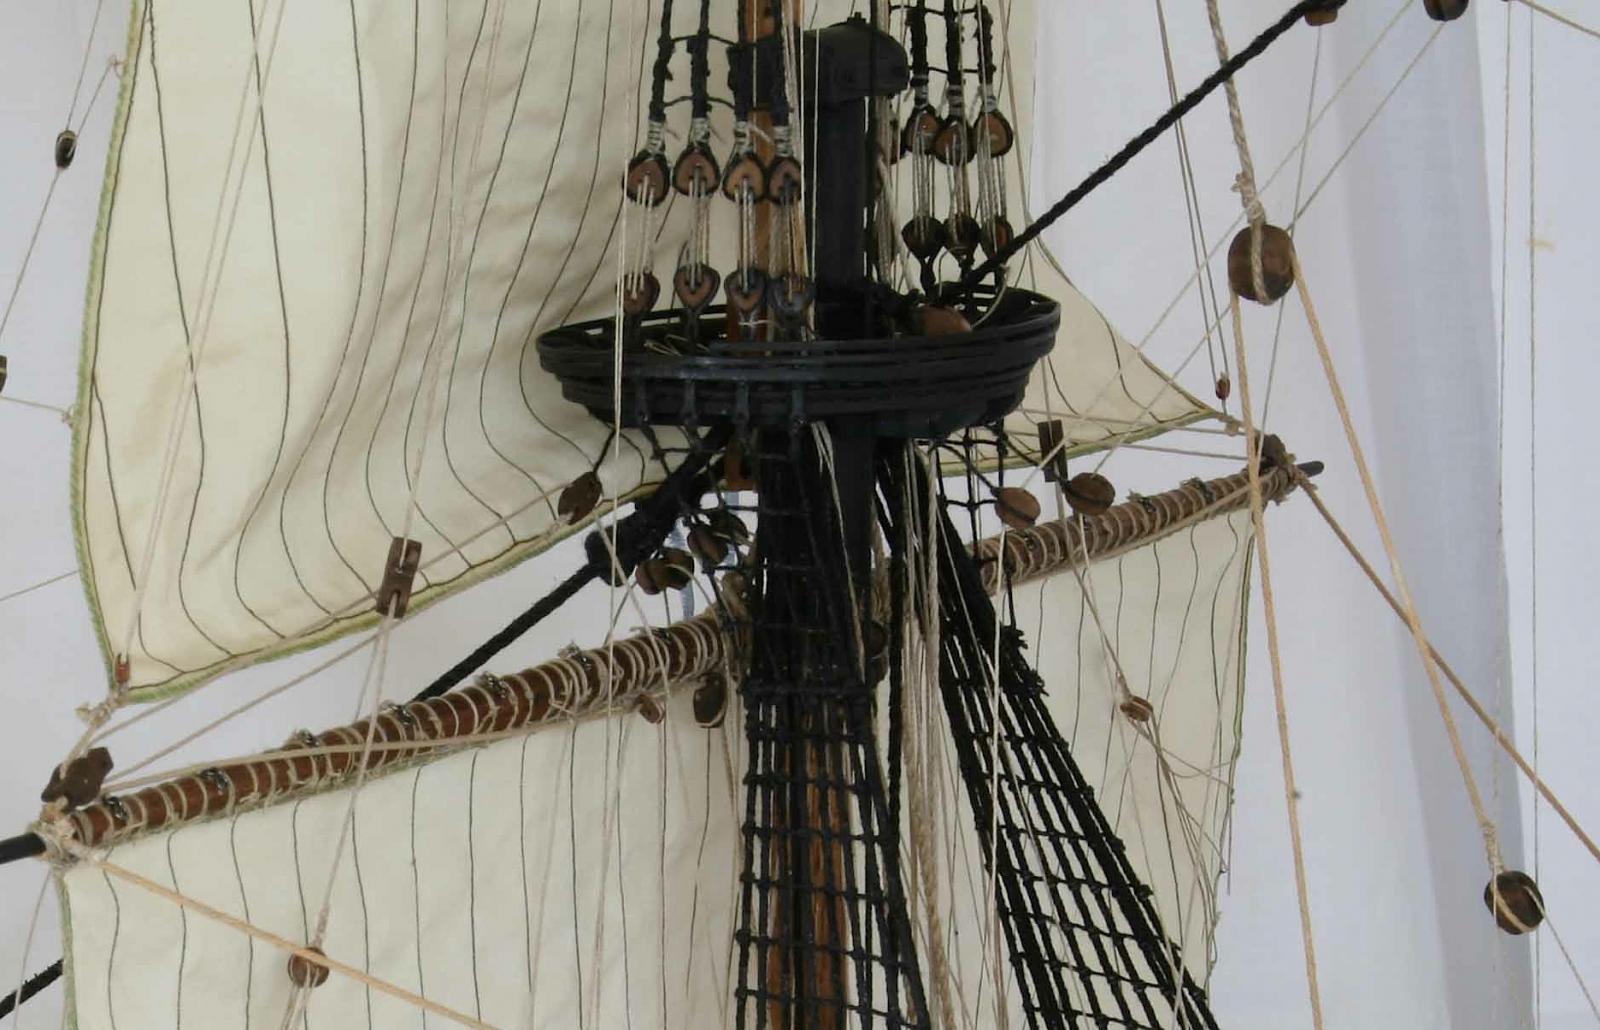
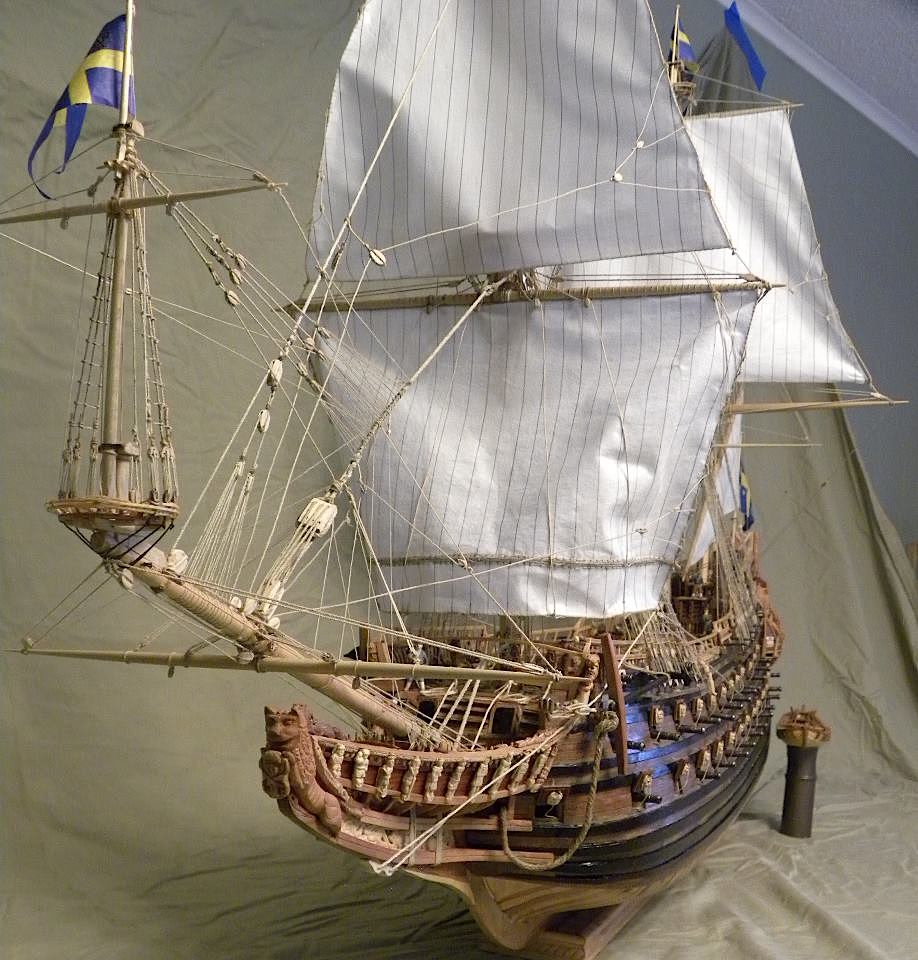
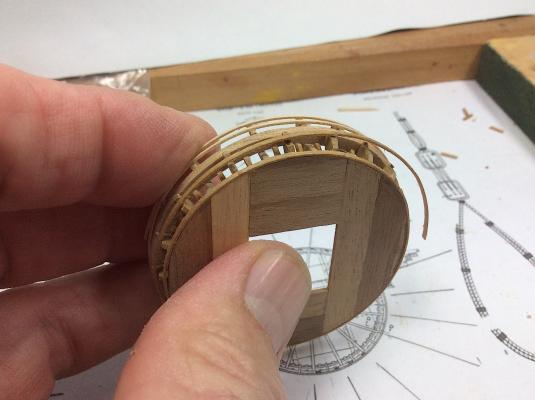
Hi mates, Thanks for dropping in. Mark thanks as well for your supper compliment SO appreciated. Yes four more (bowsprit done) Hmmm Though the next ones should be easier. Learned a few things with this lower foremast plate, as well as having a grasp on how to fashion the needed parts. ------------------------- Continuing, I started to fashion the deadeye “chains” using 20 gauge black wire (pic 1) not correct, but such a small almost hidden detail once the plate gets busy with ropes everywhere. I then realized that the lower ring braces were extending outward too far (see pic 2, 3, 4) and the chain would not hang properly outside of the lower already attached ring So removed the ring and Dremeled down the braces (see pic 5) -------------------------- I then took some leftover bits that I had purchased to use as chains for the hull, but then decided against it. So those bits will now become (after blackening them) the way to attach deadeye/chains to the ropes below the mast cap. See pic 6. The last three pics show the “fix” my favorite word with this very very slow build. (:-) So, the next caps will have a bit larger flat ring and or cap floor will be a bit smaller. Thanks for still following along at this snails pace, Regards, Michael


-
Mark, I don't know how I missed this one? Hmmm now following along SO nice.. Will go back in a.m. with 2 no 3 coffees and catch up to page 1 (:-) Michael
-
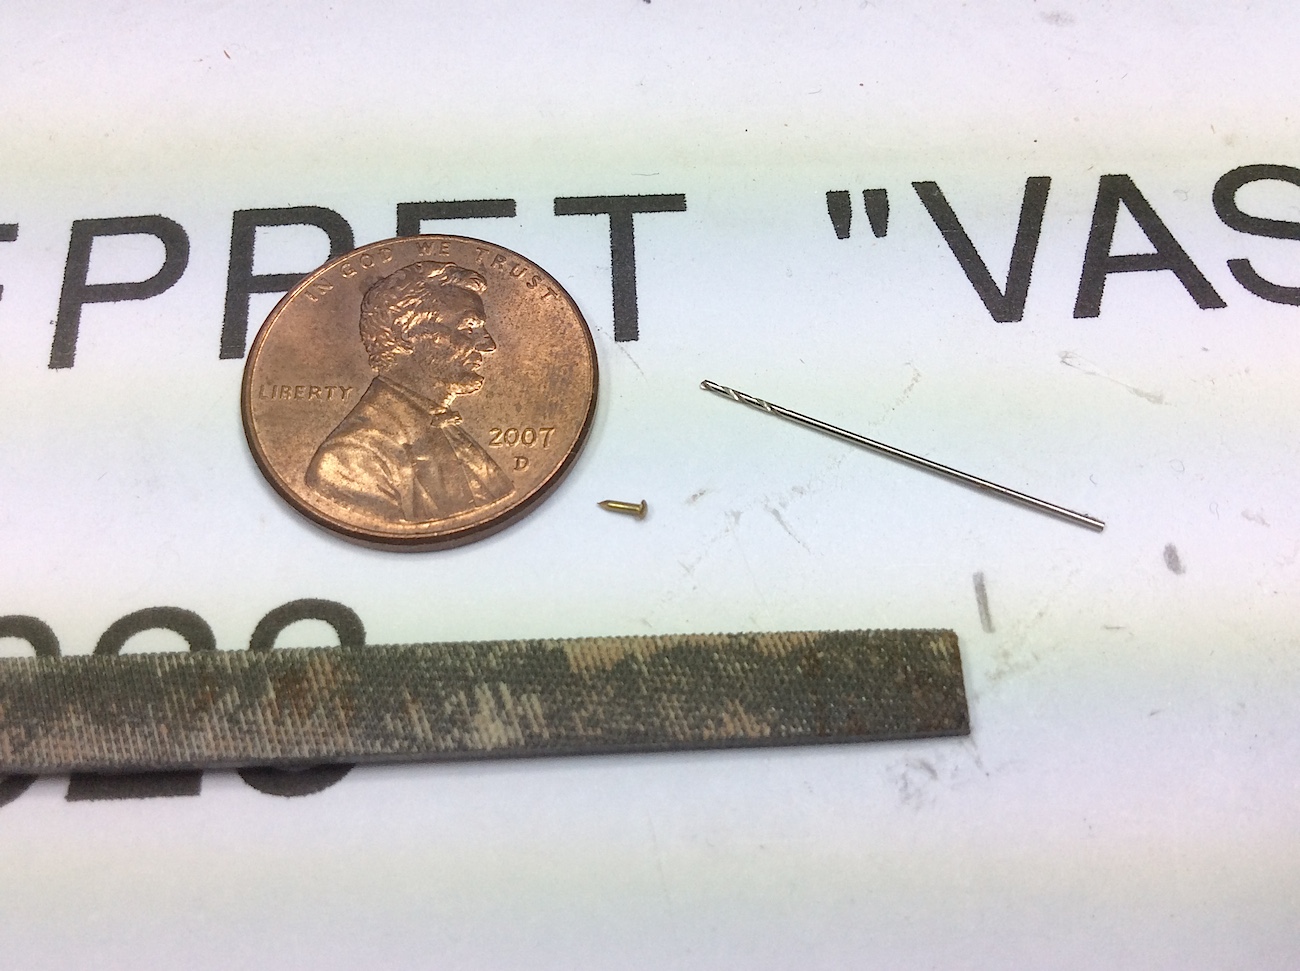
Julie, SpyGlass is right-on. I have always had great success by pre-drilling the holes. Try a couple of bits first. Find one that allows the nail to be inserted with some resistance. Push it in with a micro flat file so that he head won't shift as you push it in. In fact I pre-almost all of my nails except for first plankings. I hope that this works for you. Michael


-
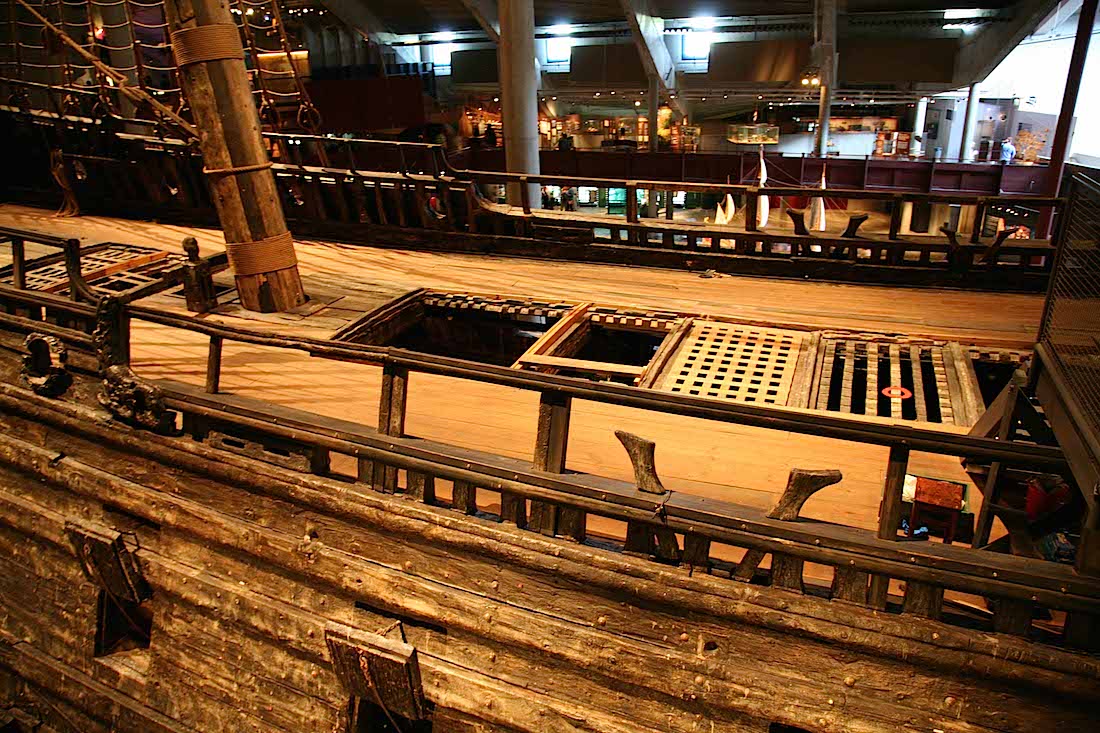
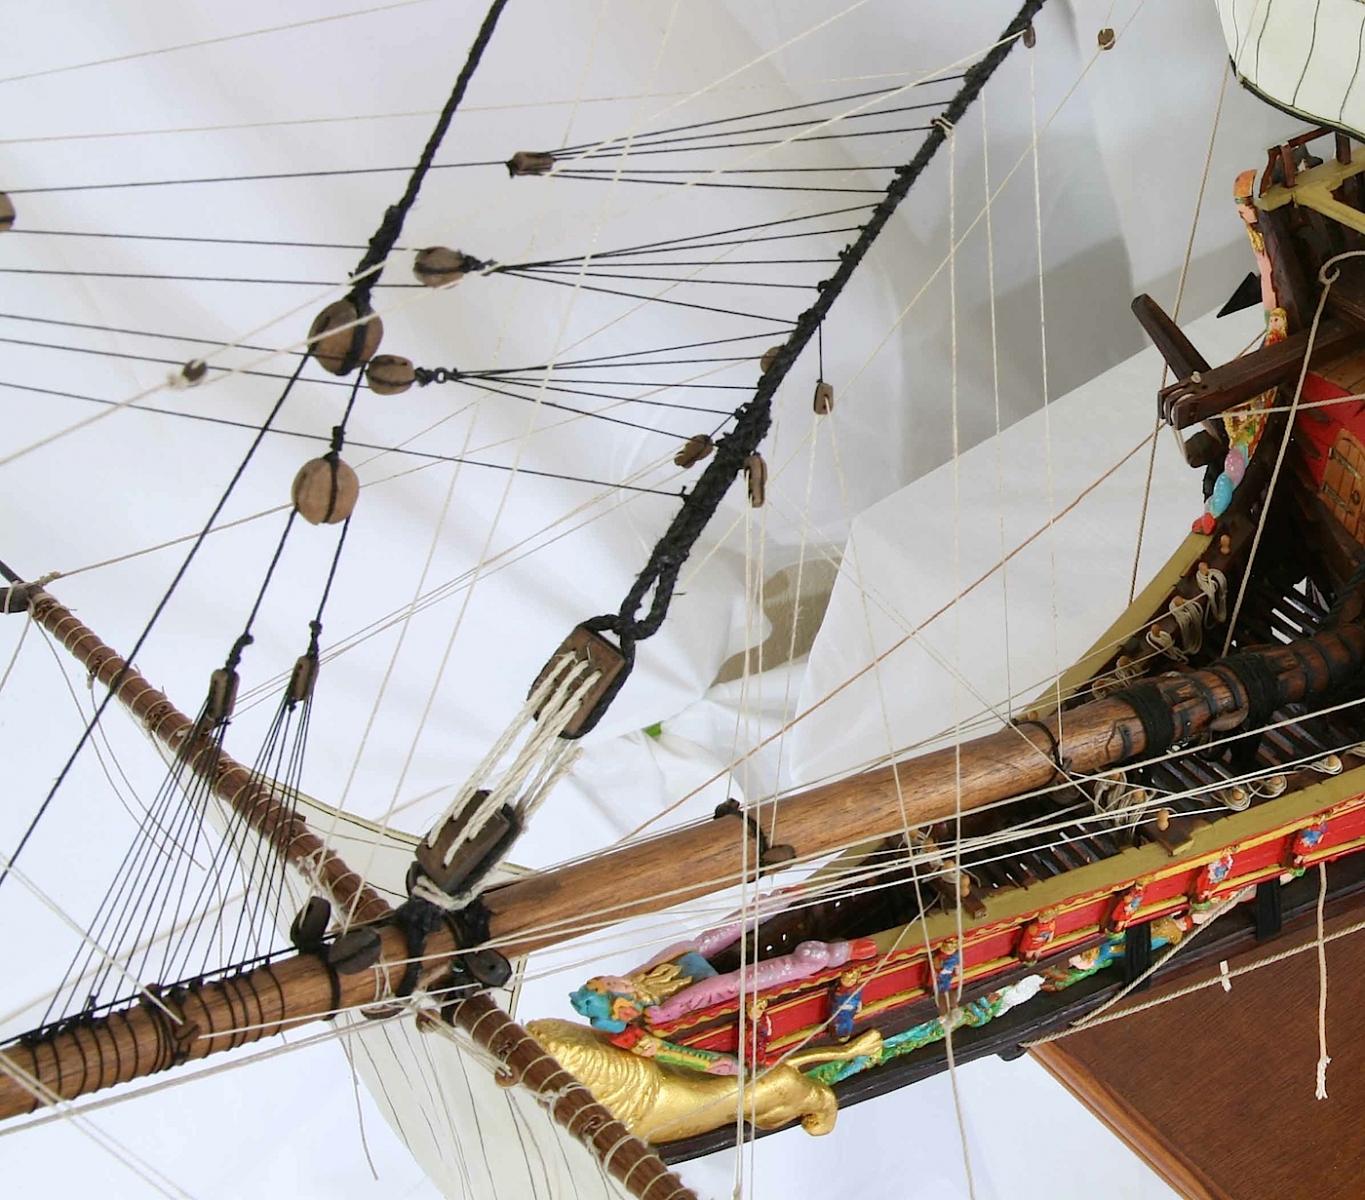
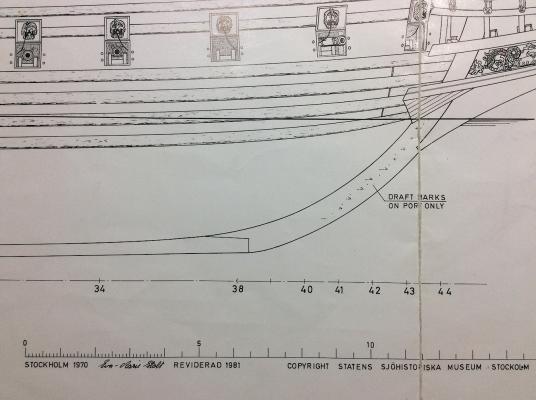
Rob/Mark There has been a revision to the 70s drawings. Still dated and probably with very minor changes. Oops I just noticed that two cannons are missing from the lower gun deck! Should I pull mine out ha ha. FYI: Second photo note the deck drain hole just below the kevel. and you can see a small hole on the other side as well from the deck. Michael

- 86 replies
-
- 2
-

-
- billing boats
- wasa
- (and 1 more)
-
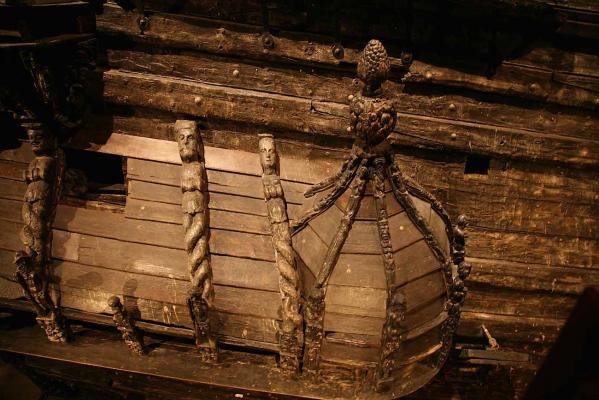
Tadeusz is correct. Nice pics as well Rob there are also deck drain holes for all three decks along each side of the hull. Look at your longitudinal museum sheet. (weather, upper and lower decks) they appear as squares with a black circle inside each square. The one you were asking about is also in the museum drawing right where it should be. Took me a while to even see that small detail. Your eyes are way ahead of mine (:-) Michael
- 86 replies
-
- 2
-
-
- billing boats
- wasa
- (and 1 more)
-
Peter is correct. I needed to research this as well. As you know Corel puts a door there. Wrong.

- 86 replies
-
- 2
-
-
- billing boats
- wasa
- (and 1 more)
-
Rob, Nice update. PS: Looking at photos of the 1/10th always makes me feel so insecure (:-) Michael
- 86 replies
-
- 2
-
-
- billing boats
- wasa
- (and 1 more)
-
Frank, Yes !!! looking super excellent. I also love how you weathered the name on the stern. Looks SO real. Cheers, Michael
-
John, Yes indeed looking excellent. PS: Looking forward to In the Heart of the Sea
- 2,250 replies
-
- 2
-
-
- model shipways
- Charles W Morgan
- (and 1 more)
-
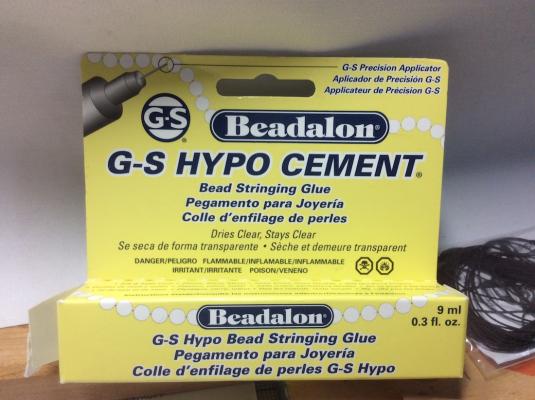
Mark, Thanks for the info regarding shroud diameters. I will follow your lead. I also agree Syren ropes are so excellent. Chuck's ropes will be used 100% to rig my ship. Your Fore-stay with the deadeyes at the bowsprit mast are so so nice. Looks perfect. I have also decided to keep the six hole deadeyes (already mounted) ==================== PS: regarding rope glue. Have you tried G-S Hypo cement? I have been using this glew for all rope applications including running a small bead at the tips ( thumb and fore-finger won't seize together as with CA as you twist and straighten the end) The dried glue disappears once dry on tan rope, and on black rope a tiny brush stroke of clear flat (model paint) also make any visible glue disappear. Available at Amazon and Michael's craft stores + others I'm sure Michael
-
Hi Mates, Thanks for the really nice words, "likes" or for just dropping by. Rob-Happy that you find my technique useful. BUT, if you decide to do the platforms this way, I will need to post a fix. I need to remove the lower ring and re-set the braces. I'll explain when I post an update. Peter-(:-) Joachim-Thanks, as always for your visits, as well as your always such encouraging thoughts. So sorry to read your post. Yes so lucky that you were all OK! Still this kind of an event is very sobering indeed. Many of us will be happy to see your updates with your stunning AV, one of the very best builds here at MSW. and with such a complicated ship. Regards Michael
-
Mark, Excellent work. Your shroud detailing at the mast tops is so nice. PS: what size Syren did you use for those shrouds .025? Michael
-
Just catching up. NICE update, excellent work, enjoyed your granddaughter's effort. A future MSW builder (:-) MIchael
-
John, YES just found your build log, indeed - BEAUTIFUL work. Congrats !! Michael
- 745 replies
-
- 4
-
-
- francis pritt
- mission ship
- (and 1 more)
-
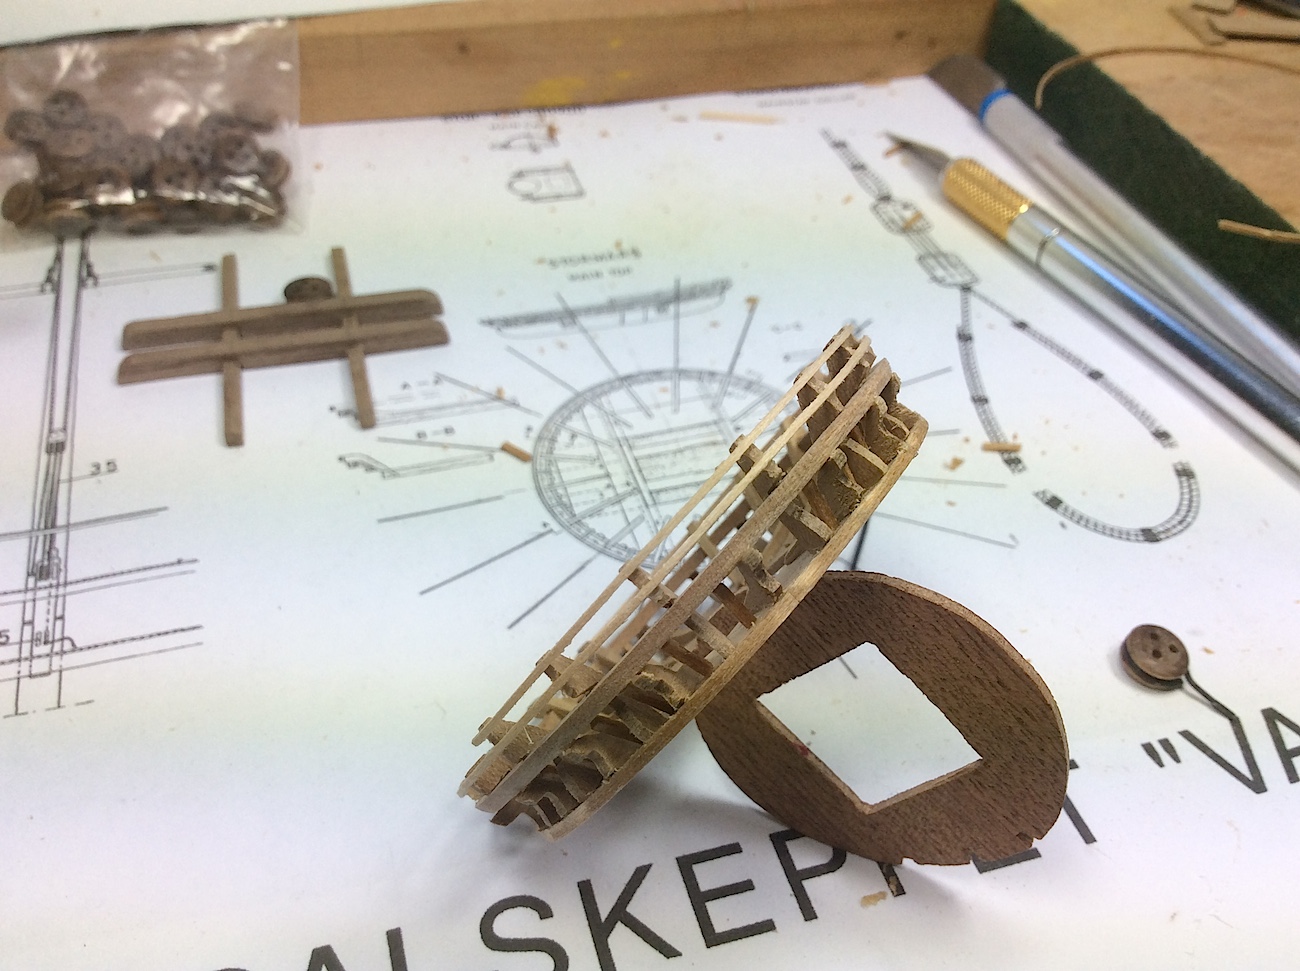
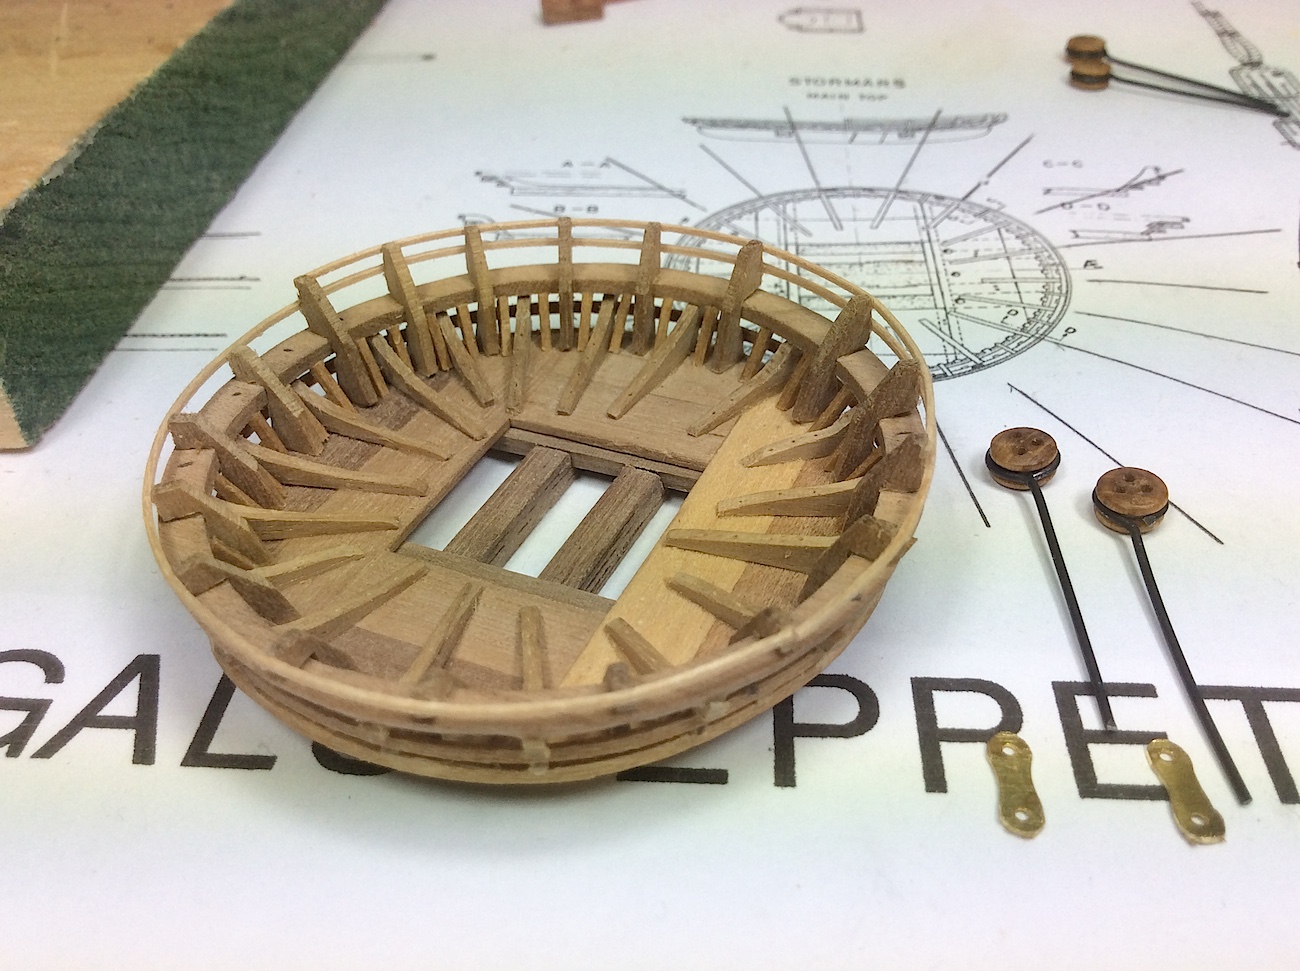
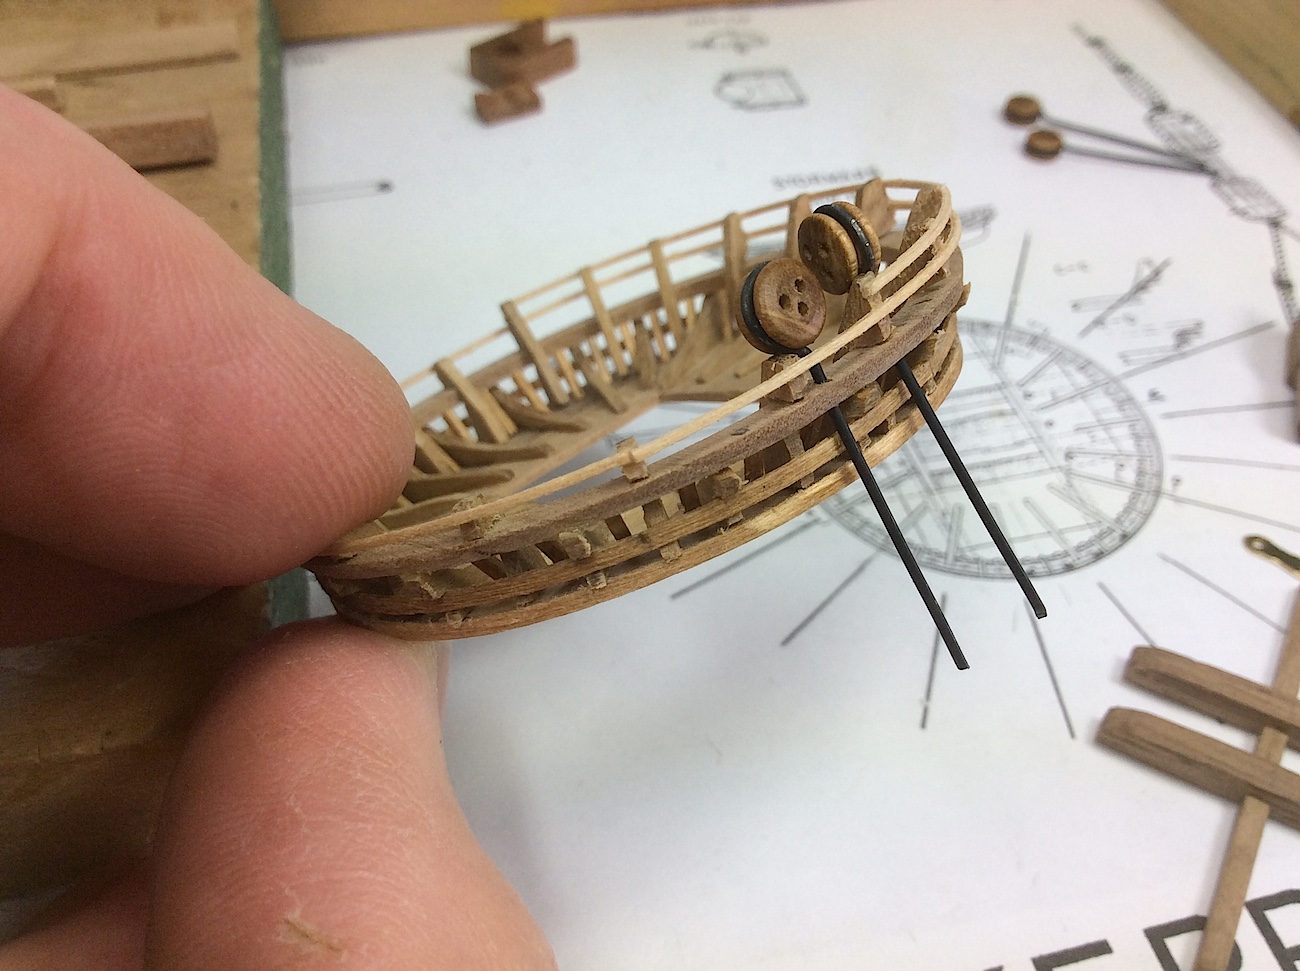
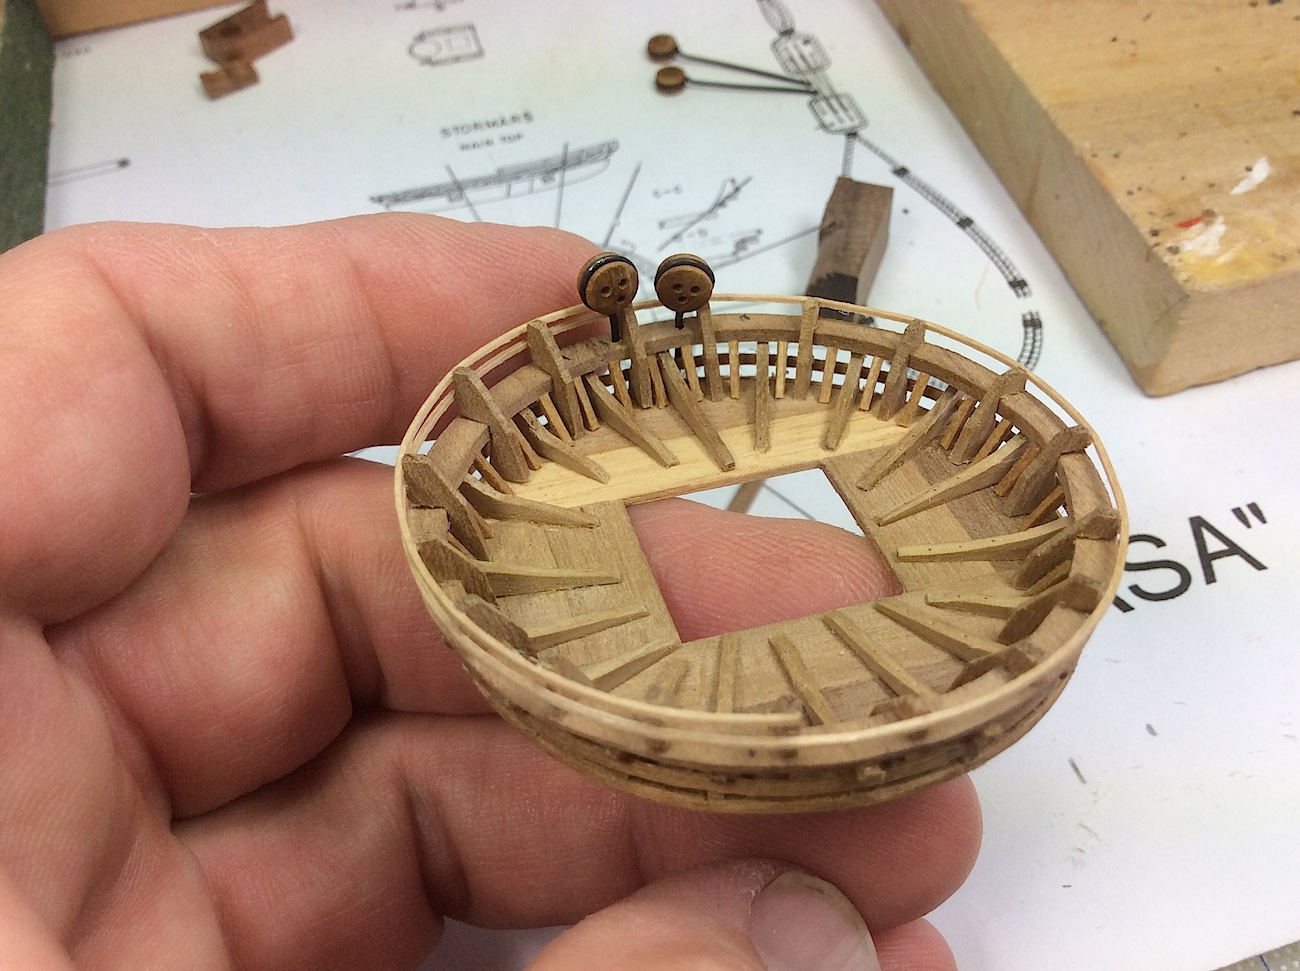
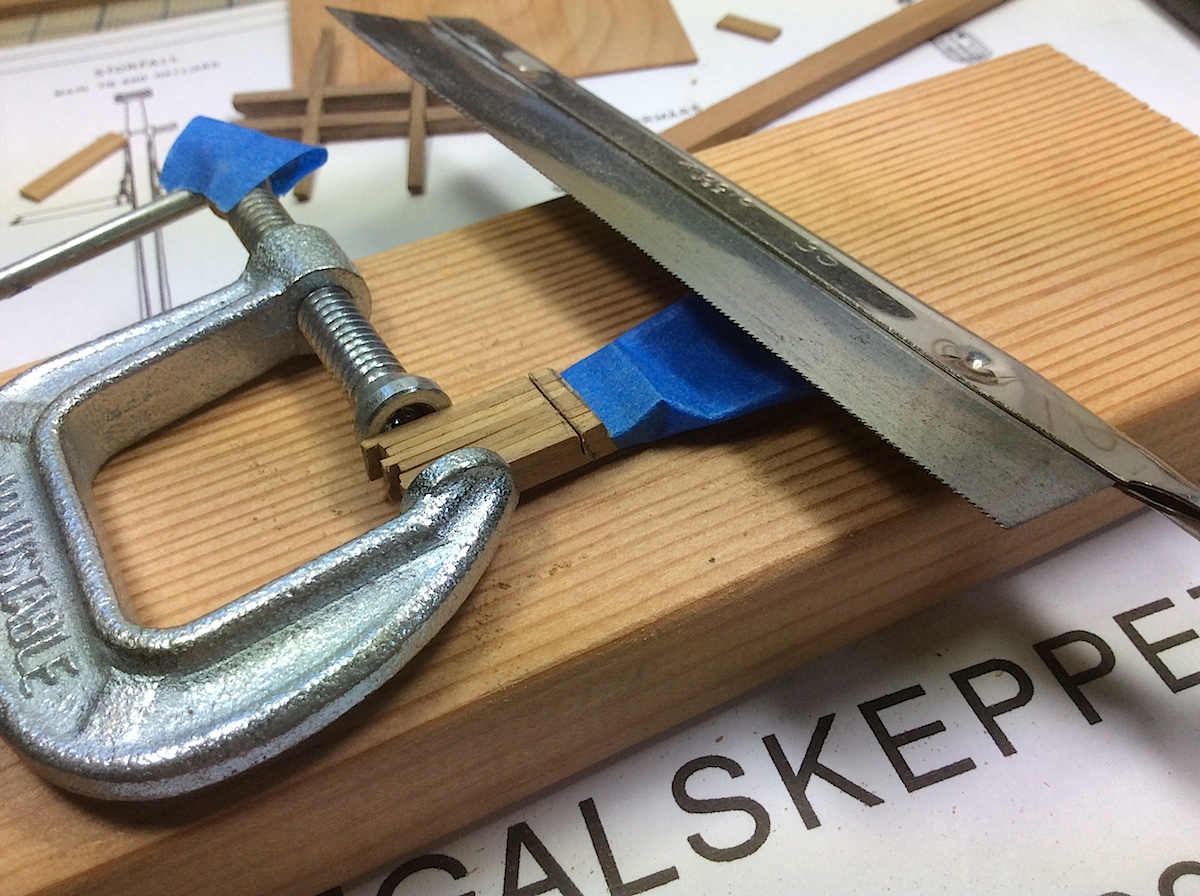
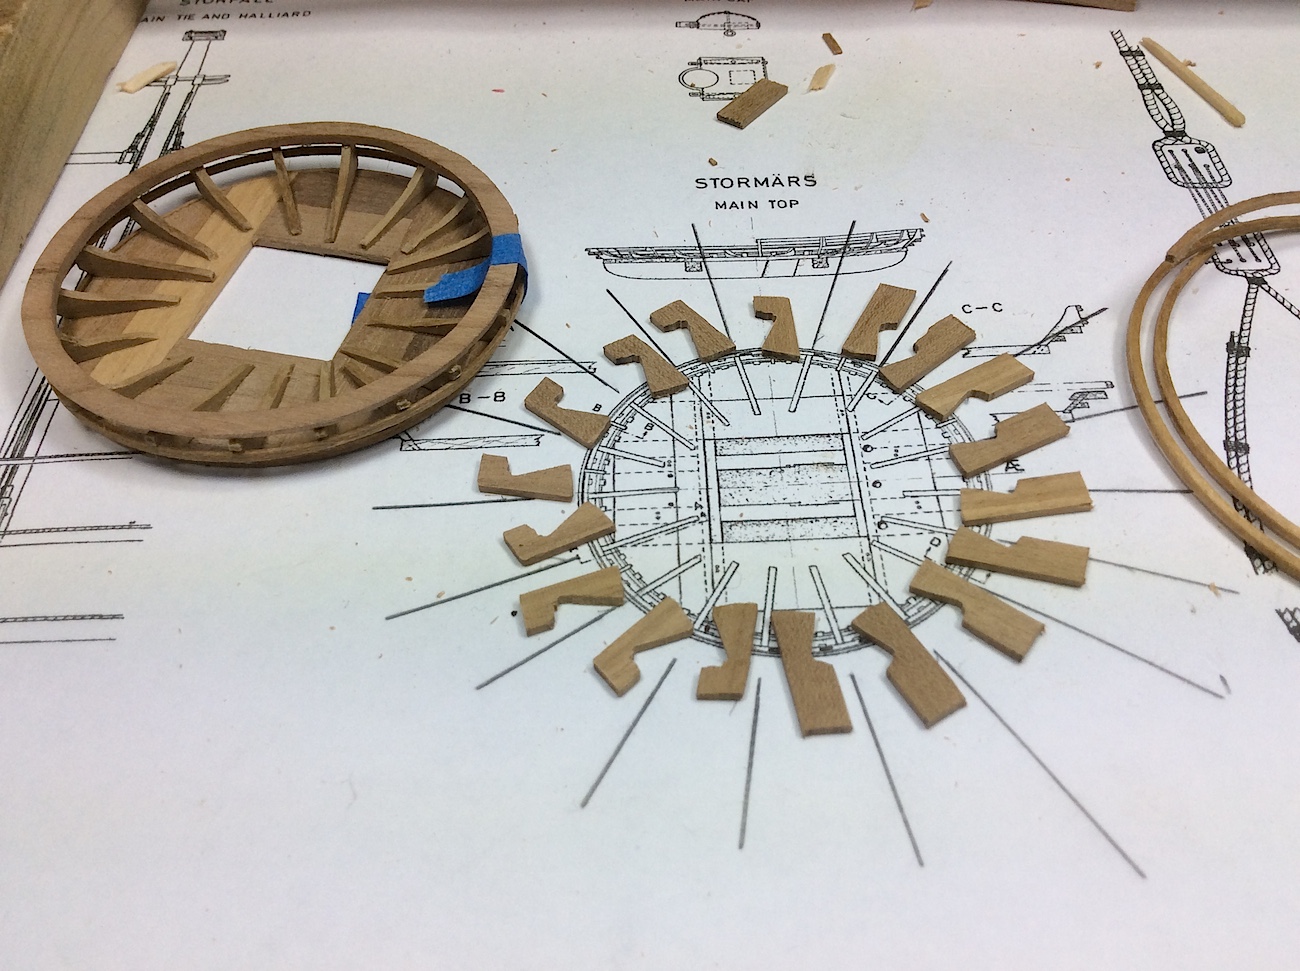
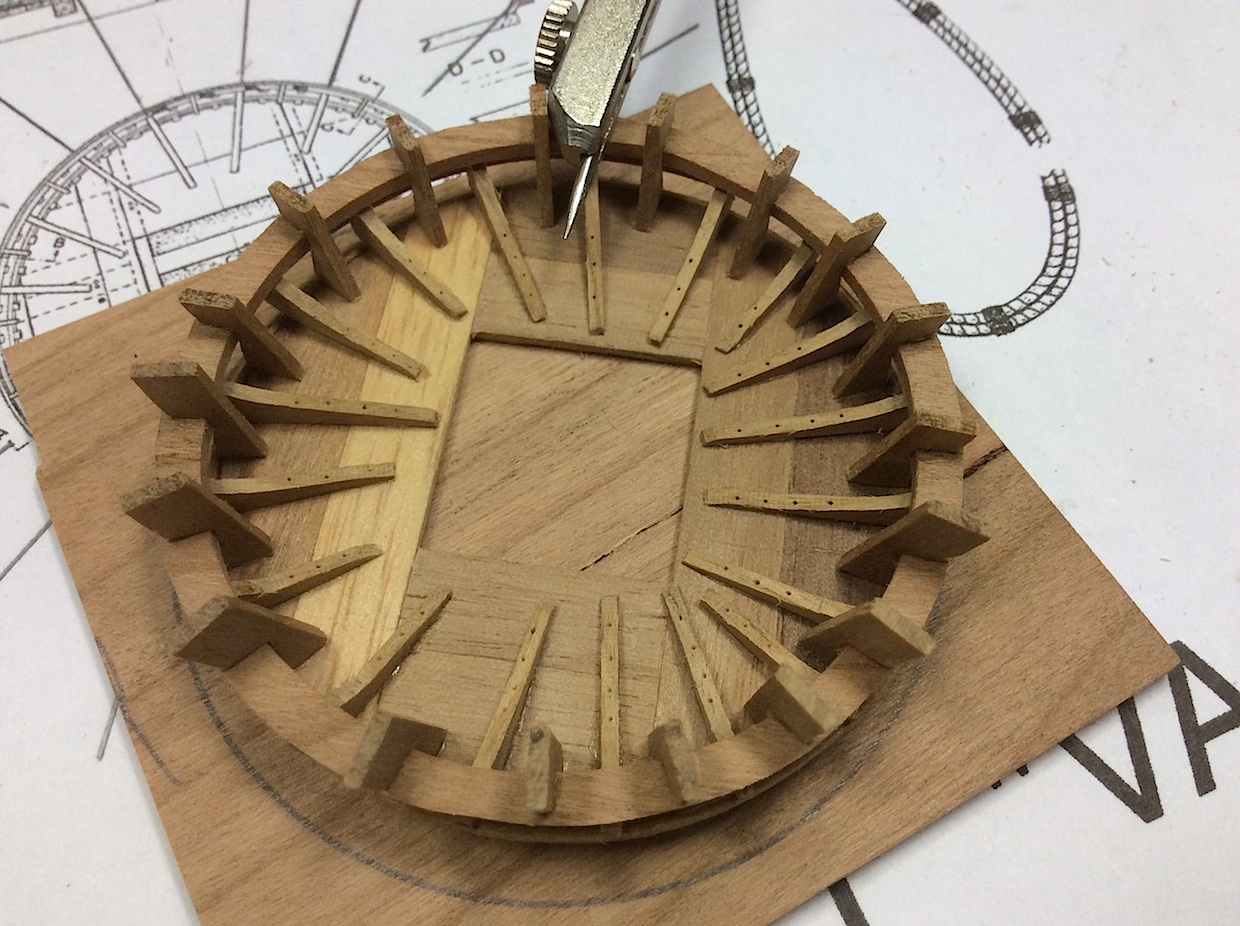
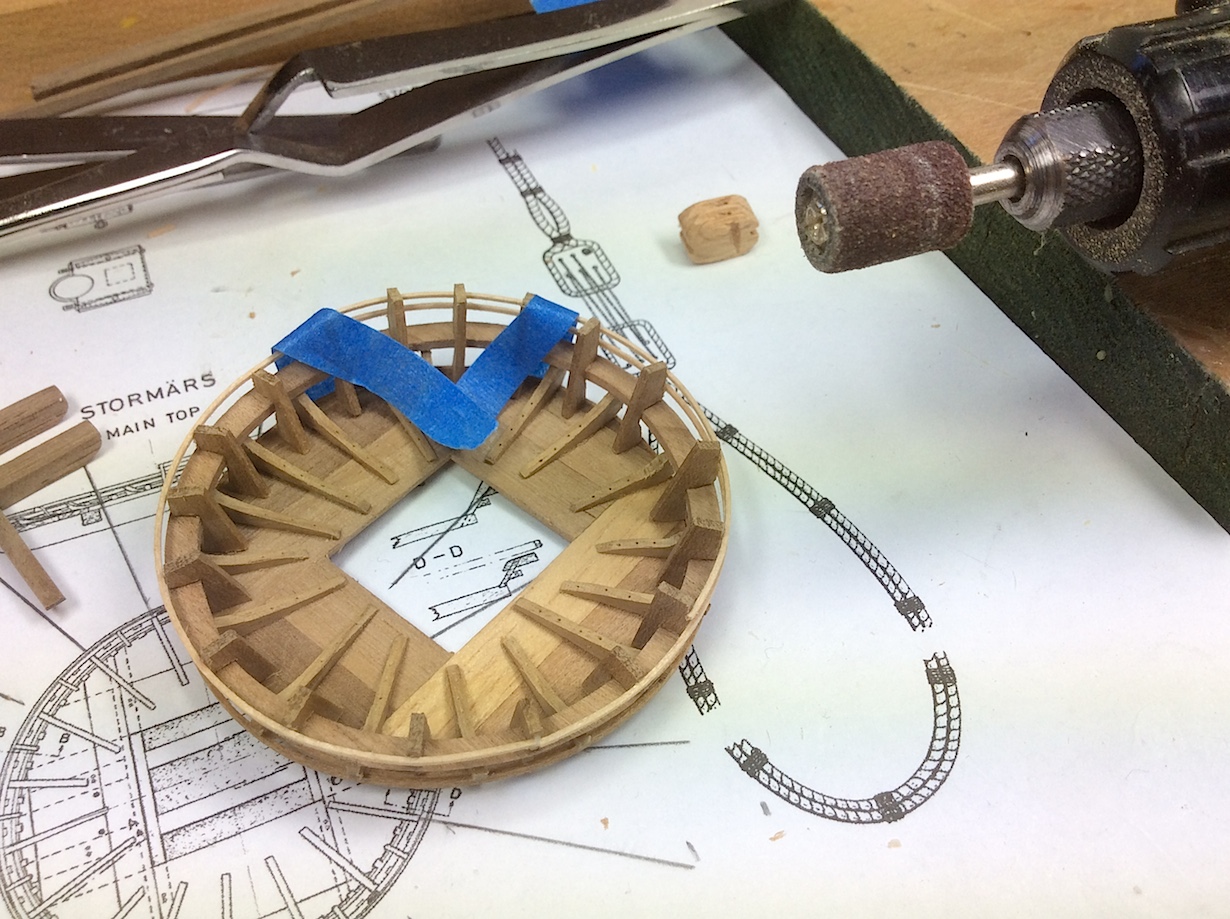
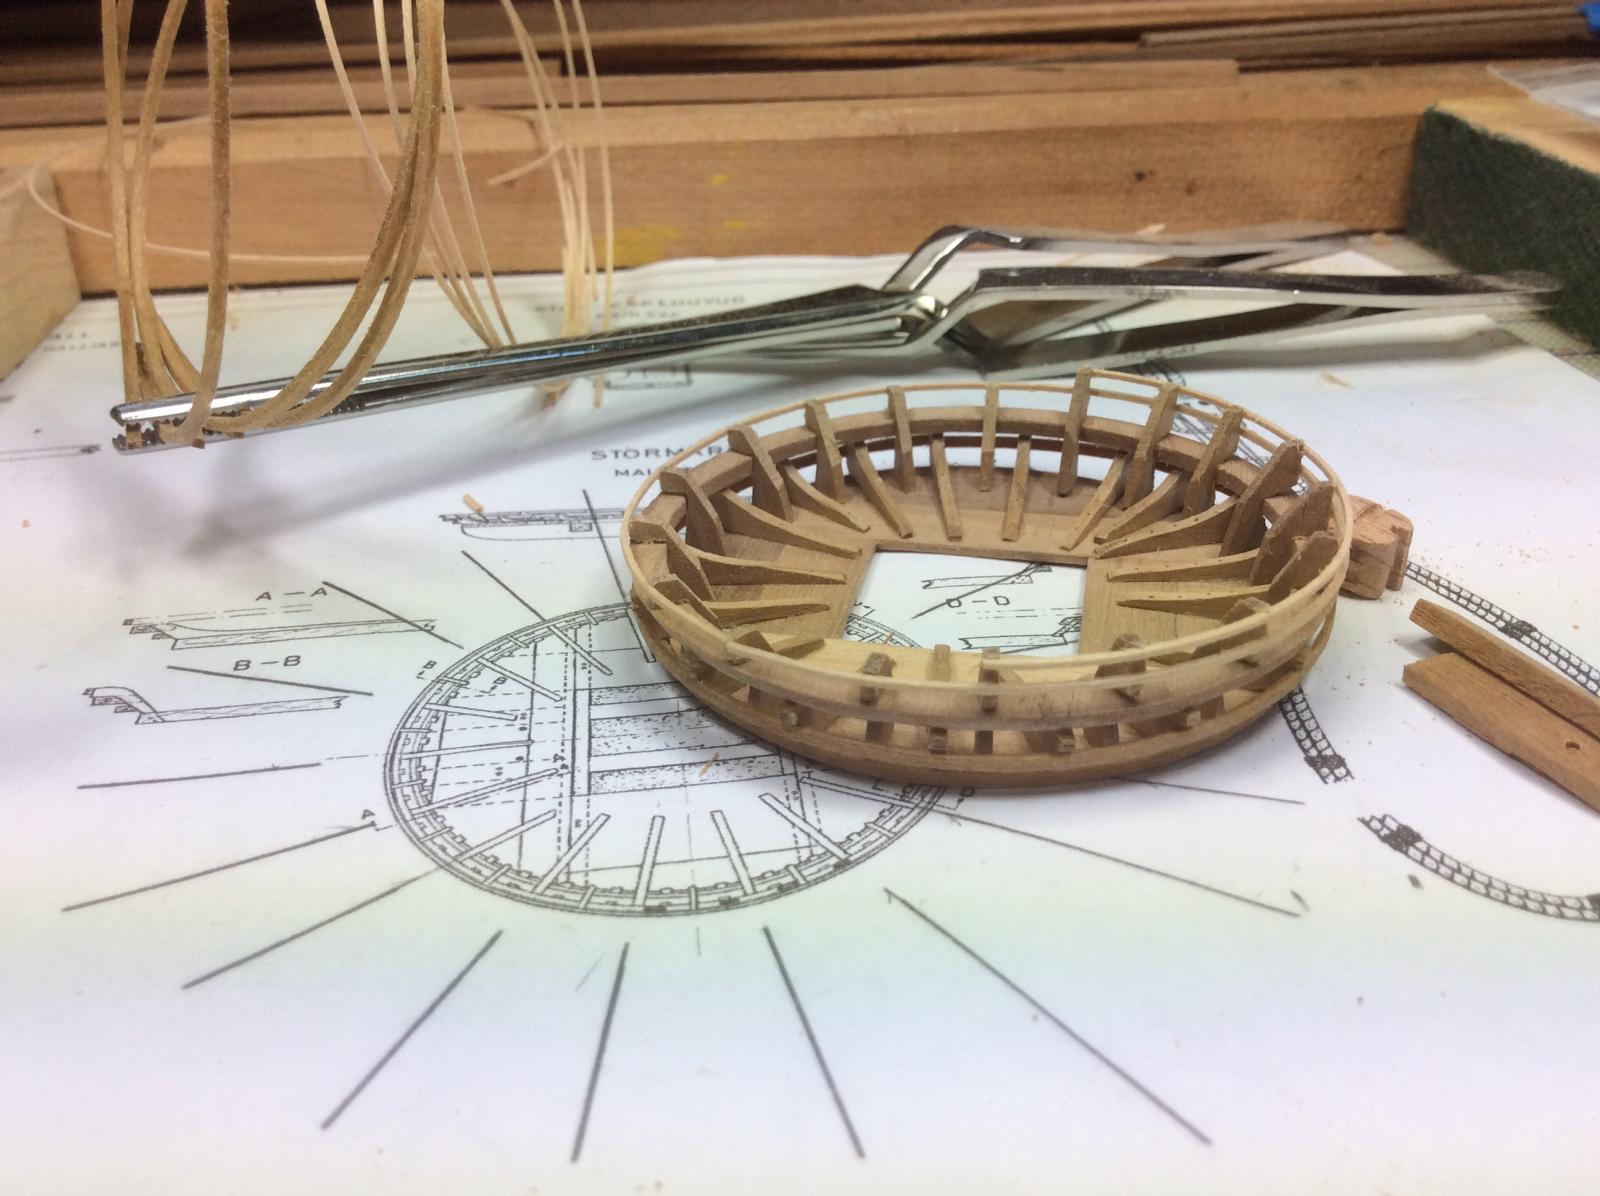
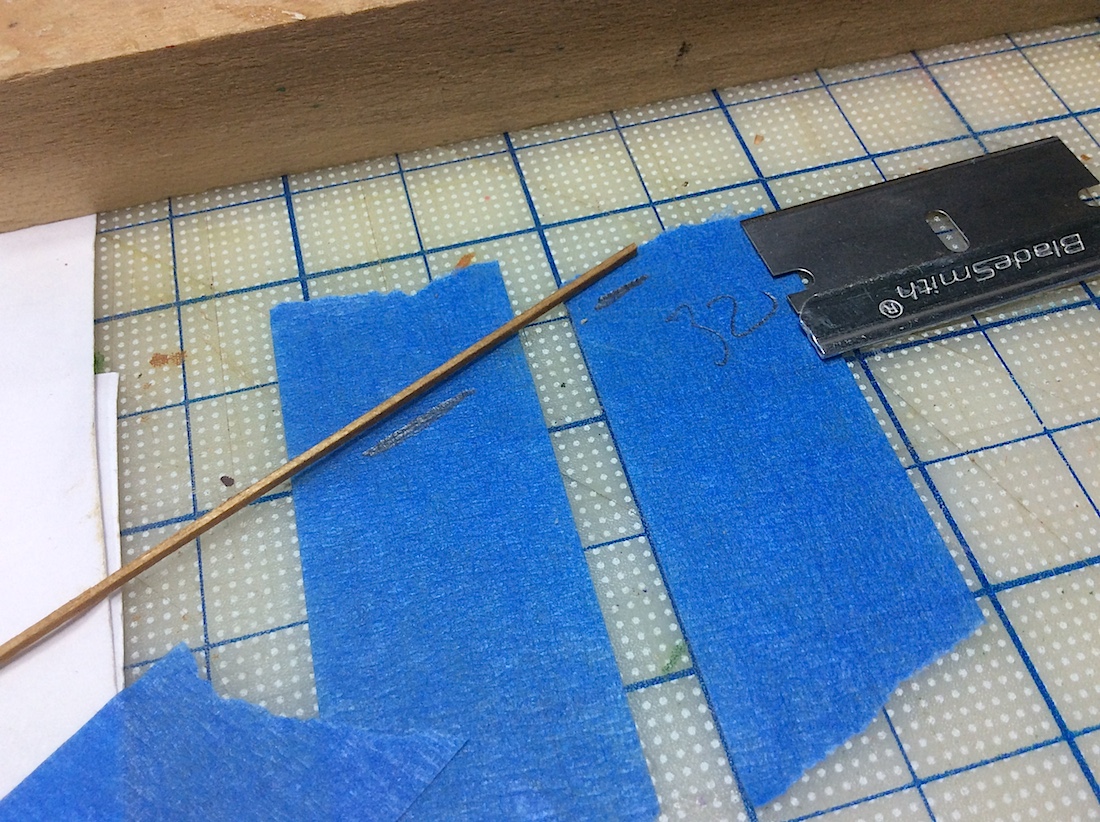
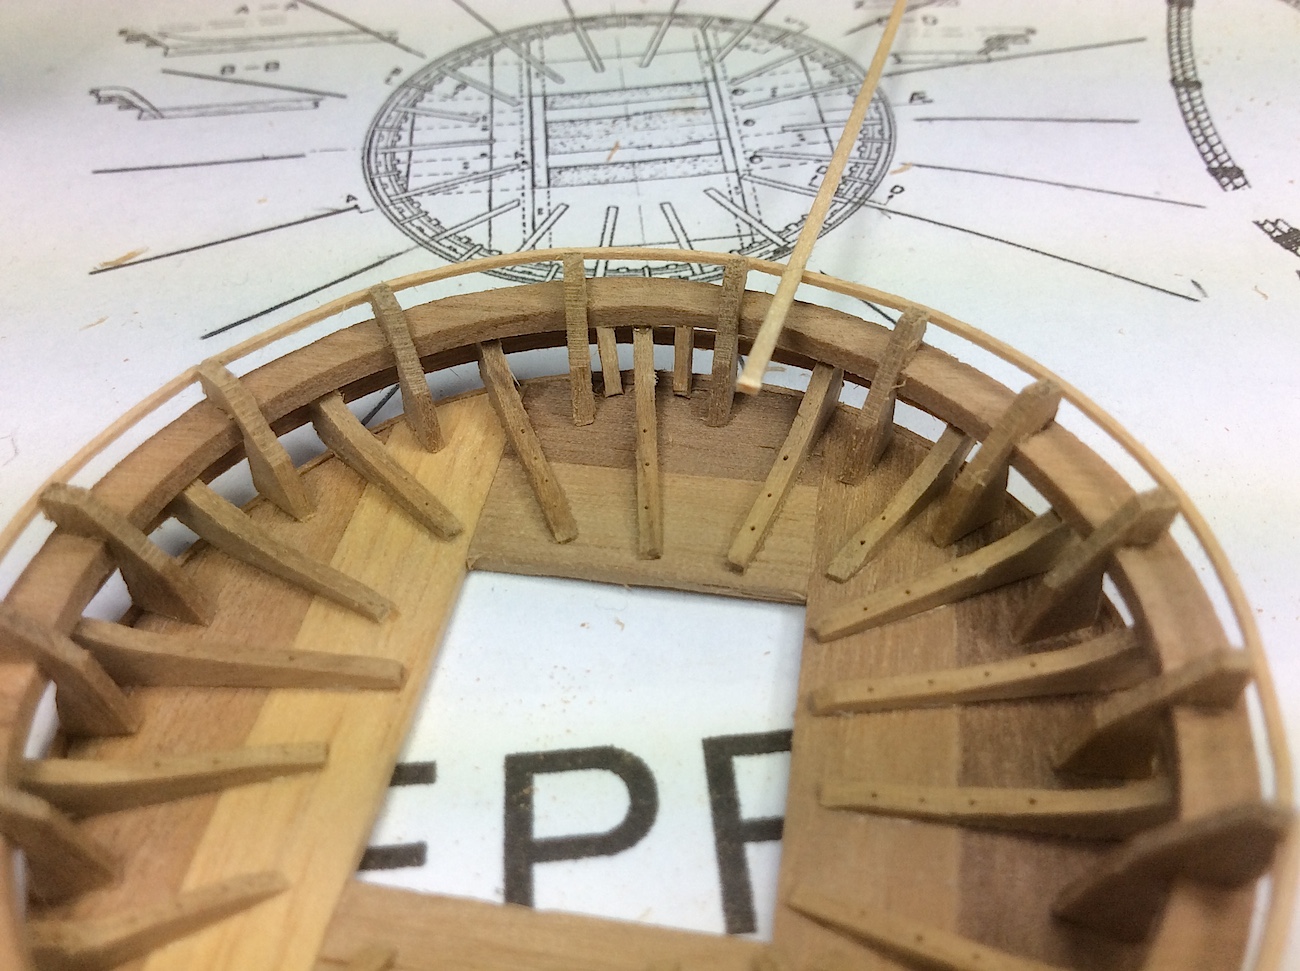
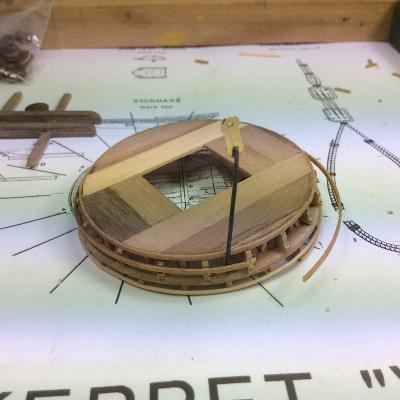
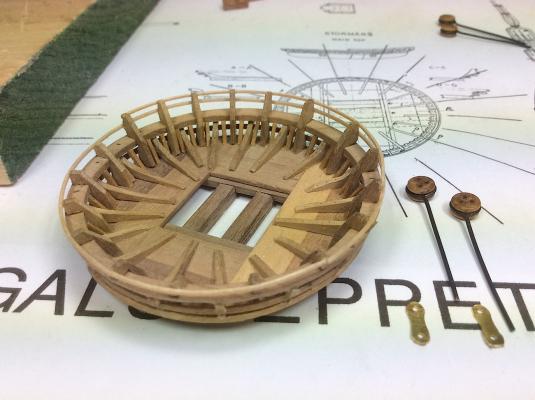
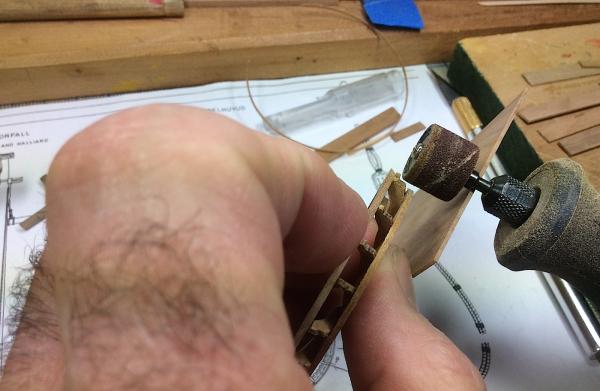
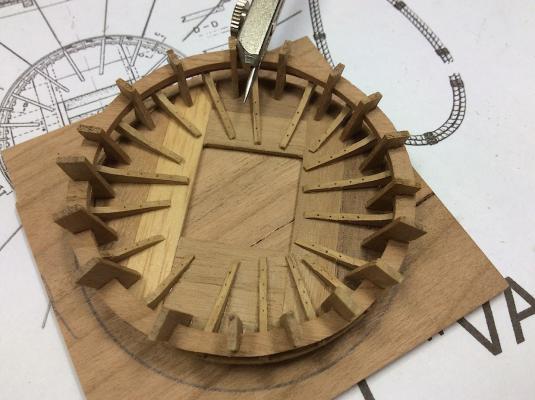
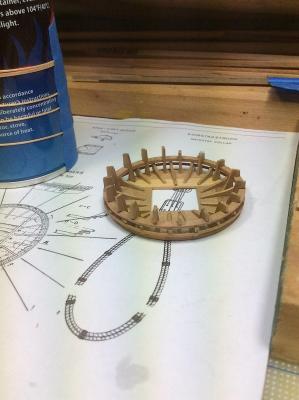
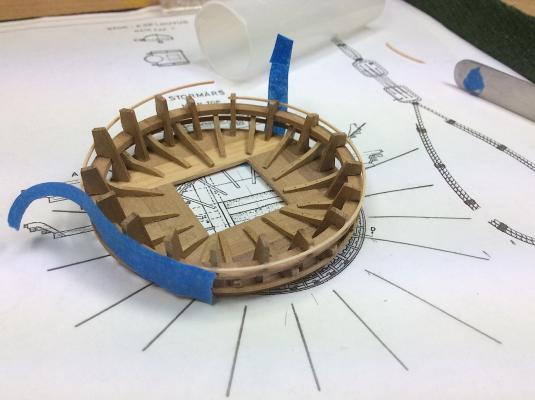
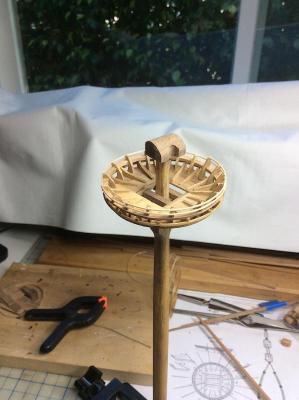
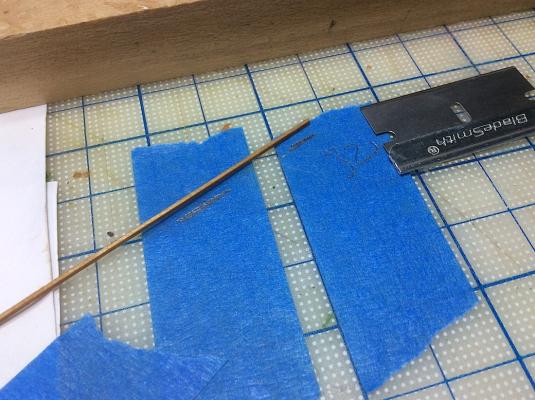
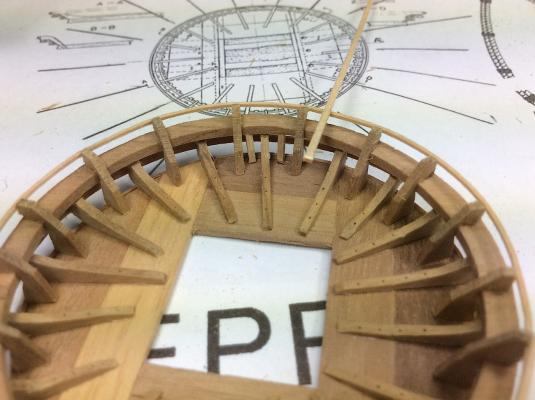
Thanks for the likes and thanks for dropping by and posting encouraging notes. (;-) Finishing up the fabrication of the foremast platform. •Trimmed down the lower braces before mounting the first ring •Then made the bits for the upper ring braces •Used a divider point to simulate the small nails for the lower braces •Installed the 18 vertical bits •Added the rings •Then with a rotary tool sanded down the protruding edges and tops +++++++++++++++++++++++ Next up, need to cut the 32 small bits to insert around periphery of the platform. Used the blue tape as a measure guide for all the cuts. This second platform was easier than the first (bowsprit) I learned through experimenting with the first one. The upper fore, and the three mains should be a smooth build section. Still mentally thinking of how to insert the shroud deadeyes and keeping the chainplate rope attachments within scale. Still a “?” I wonder if just wrapping lower the deadeyes in tarred rope and running those eight ropes through the large flat ring would be “OK” ?? However I believe that the last pic IS how it should be Hmmmm Again, thanks for dropping by. Michael


-
Rob, Thanks for sharing. Yes (:-) I do have this photo, but without the cute kids having fun. Michael
-
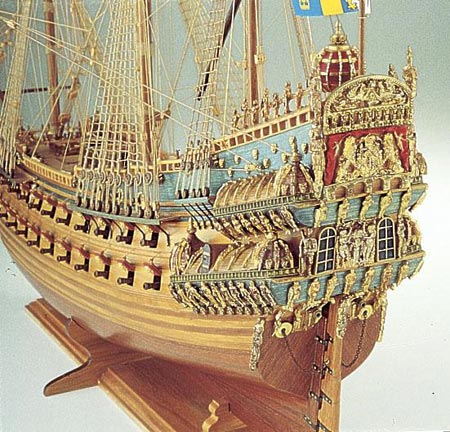
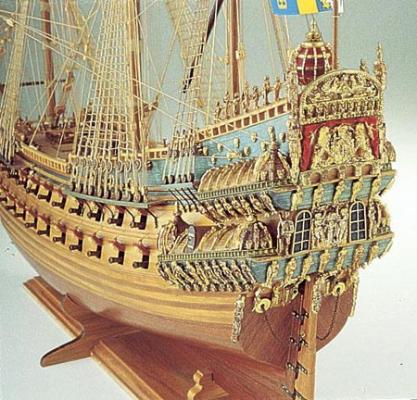
Rob, Learning is so much fun (;-) Again the Billings get's it right. Also the bobinette tips align correctly just below and adjacent to the lower part of the upper galleries. Almost an impossibility with the Corel. This photo is one of their promo pictures.
- 86 replies
-
- 2
-
-
- billing boats
- wasa
- (and 1 more)
-
John, Yes drawplates are a "pain" but necessary it seems. PS: Don't be eating too much "honeydo" I'm on that diet as well - ha ha MIchael
- 2,250 replies
-
- 3
-
-
- model shipways
- Charles W Morgan
- (and 1 more)
-
Mark, I posted some pics in your build log. Here is a pic from Clayton's - a good one. And one other from a Euro commercial builder. The four hole seems to be "the proper" way to go.


-
Mark, I found this from Calyton's. Also the Billings rigging sheets show what you have done. Hmmm OK time for dinner or after all this stress I may first need a cocktail (:-) )

- 249 replies
-
- 2
-
-
- billing boats
- vasa
- (and 1 more)