md1400cs
-
Posts
2,862 -
Joined
-
Last visited
Content Type
Profiles
Forums
Gallery
Events
Everything posted by md1400cs
-
 Thanks Mates, George you are always, also, so kind with your likes. (;-) So I finally, today, got around to putting together Syren's "Servo-Matic". So I will re-visit my first attempt at an eyelet, and a mouse. I plan to follow up, properly, with Chuck's tool and properly serve the rope as well. Still learning, I am....Sorry for the very minor post (:-) Regards, Michael
 -
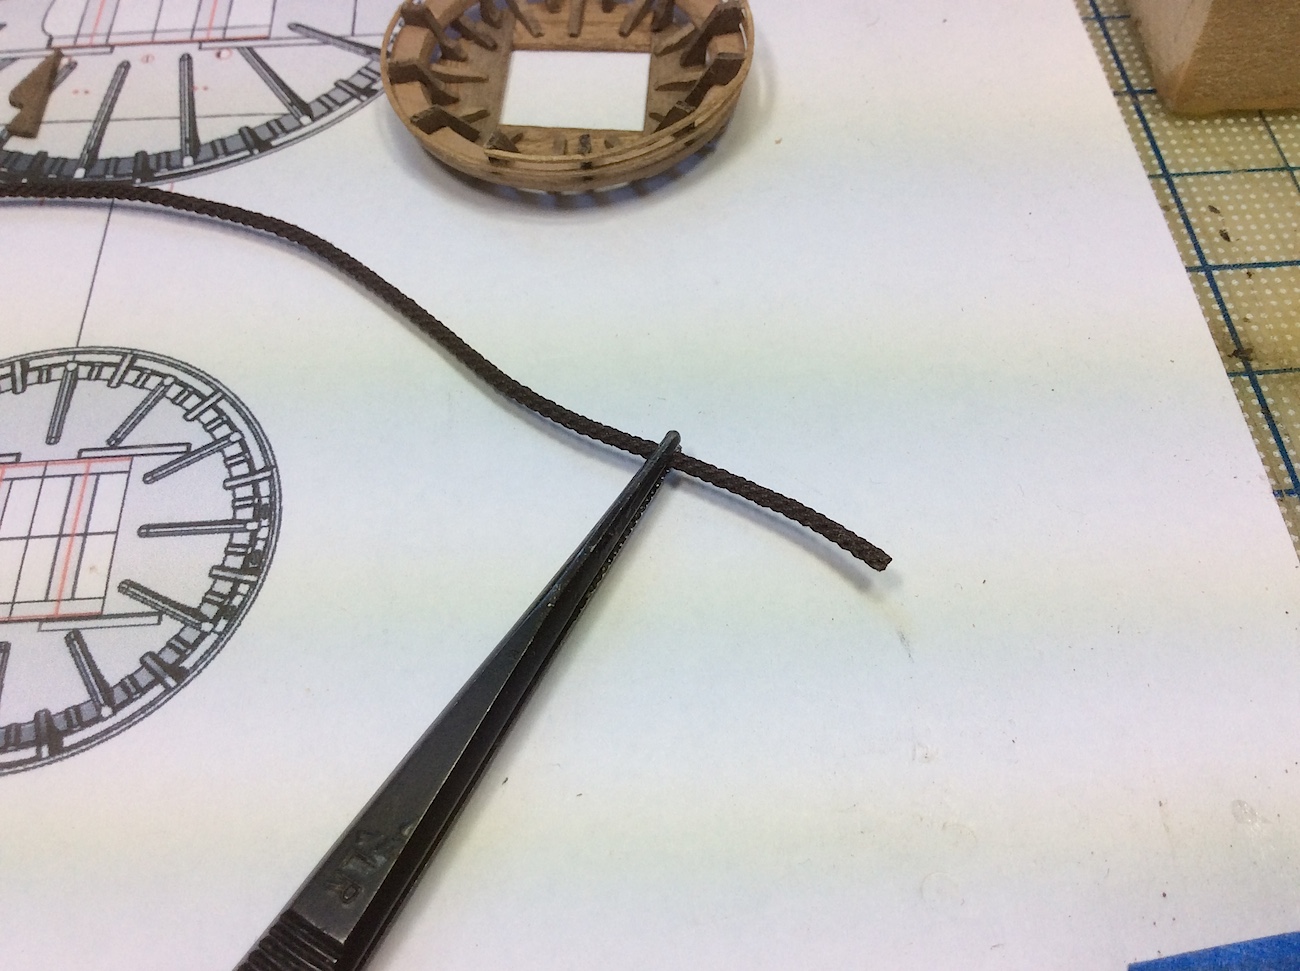
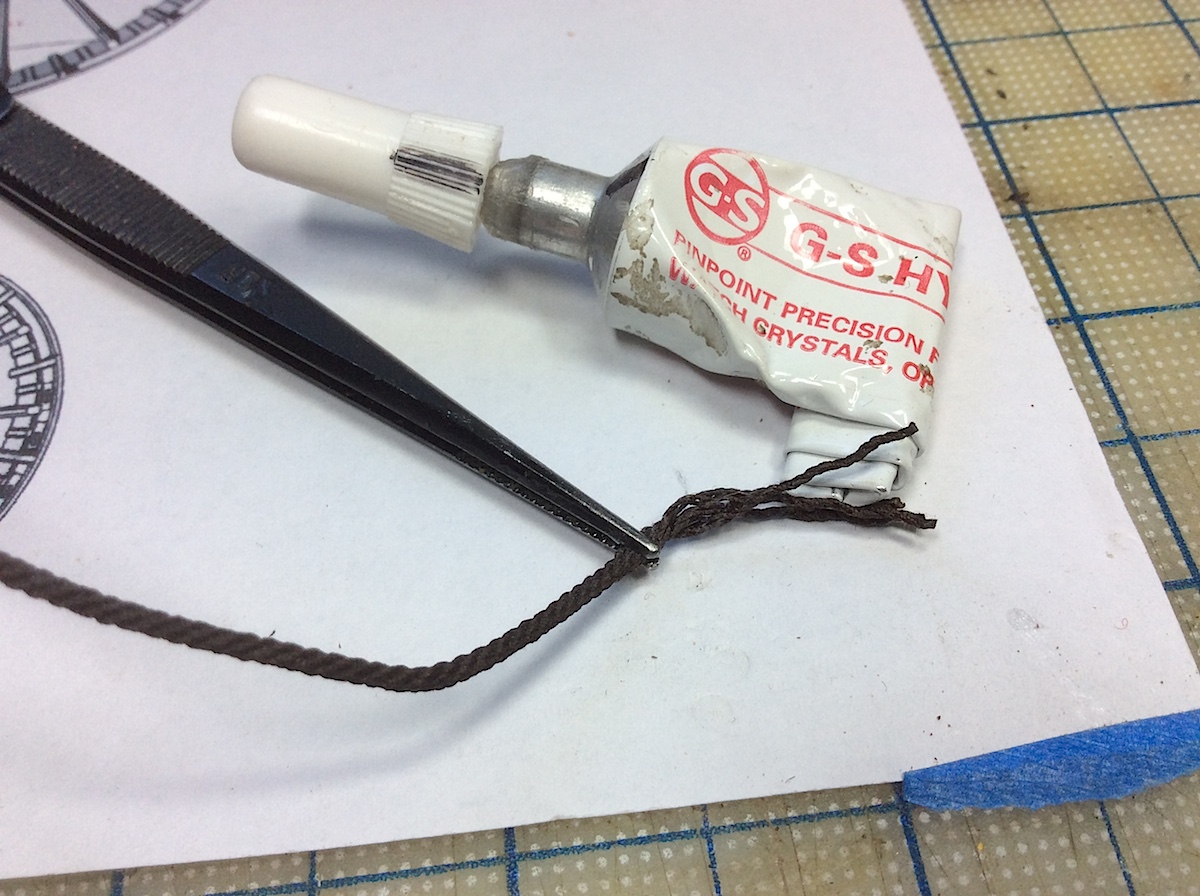
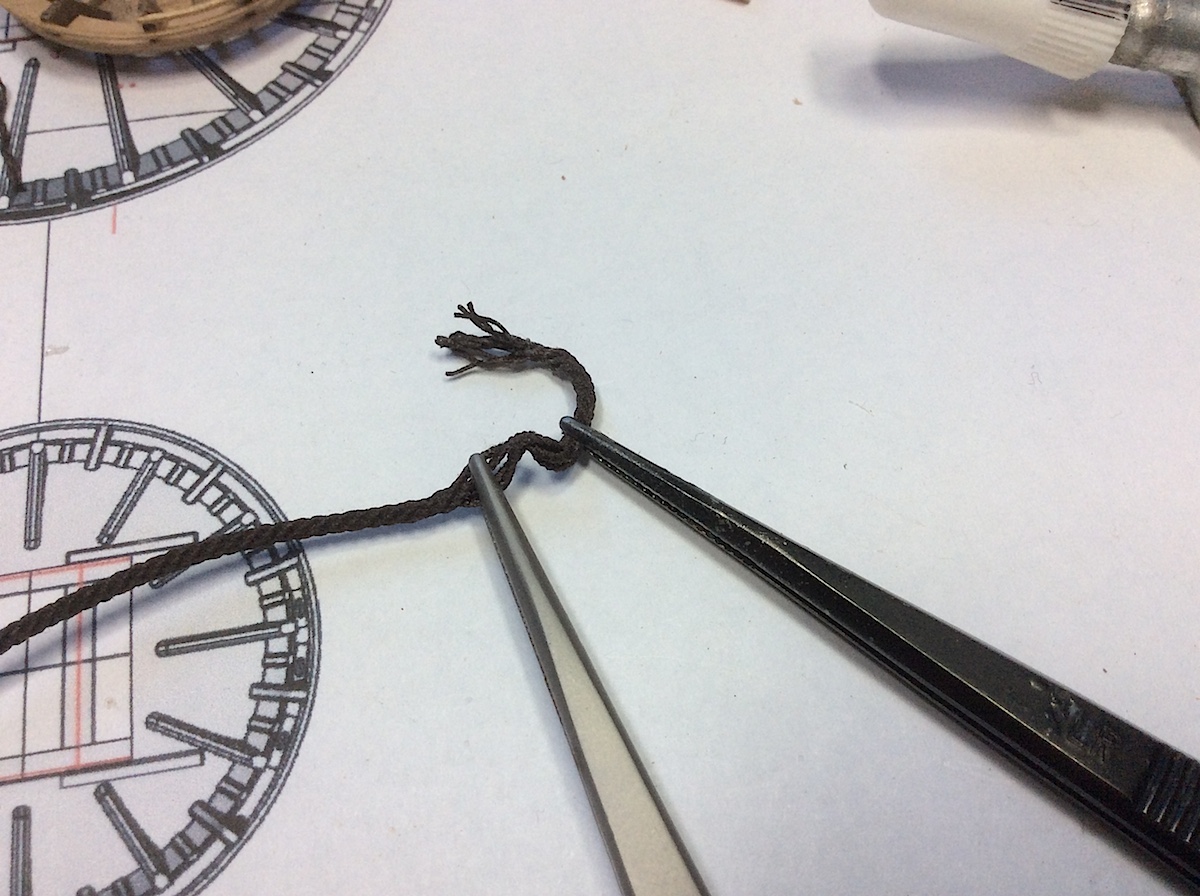
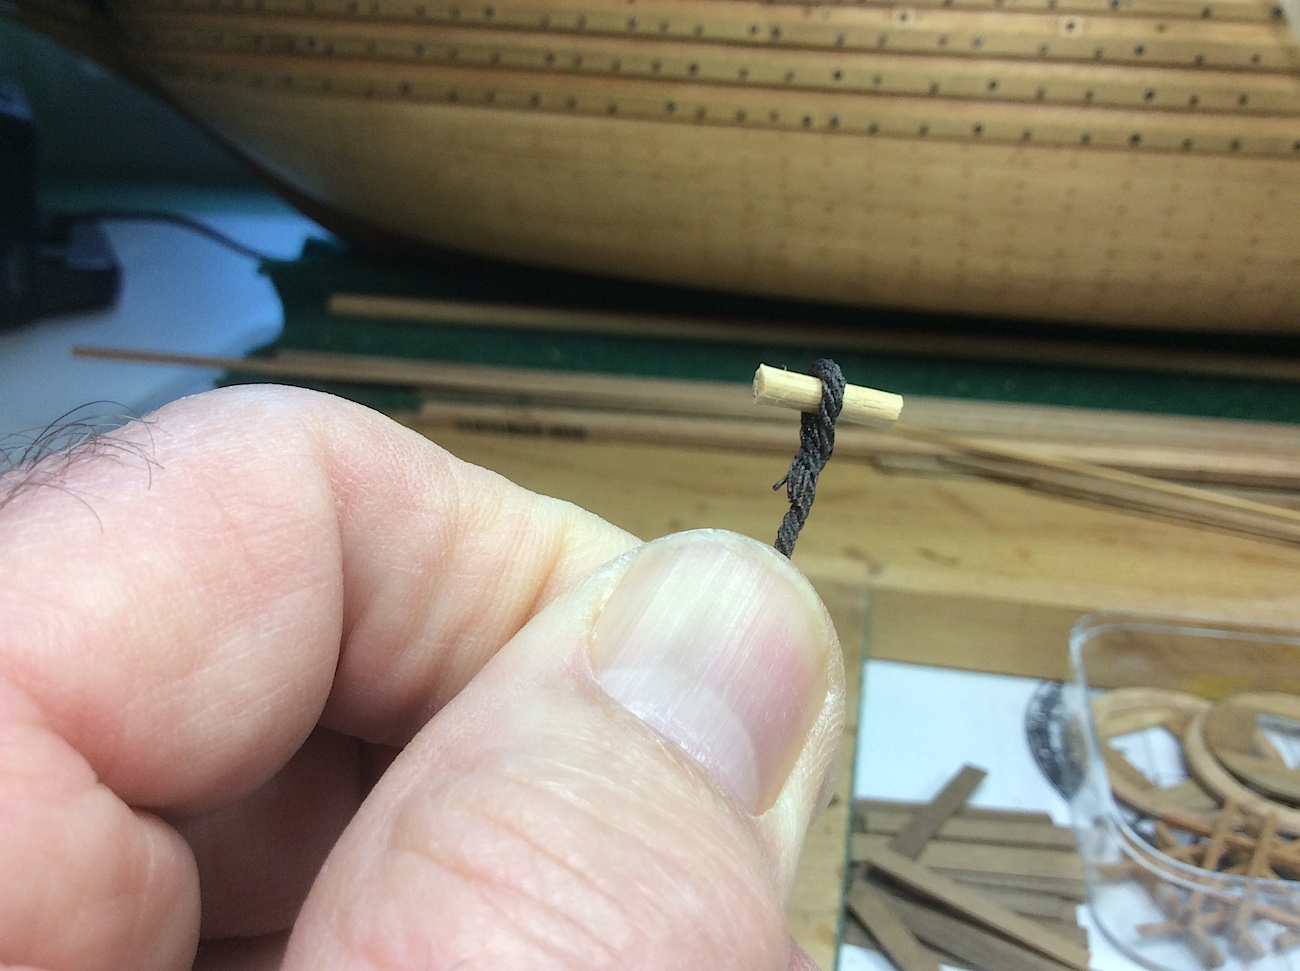
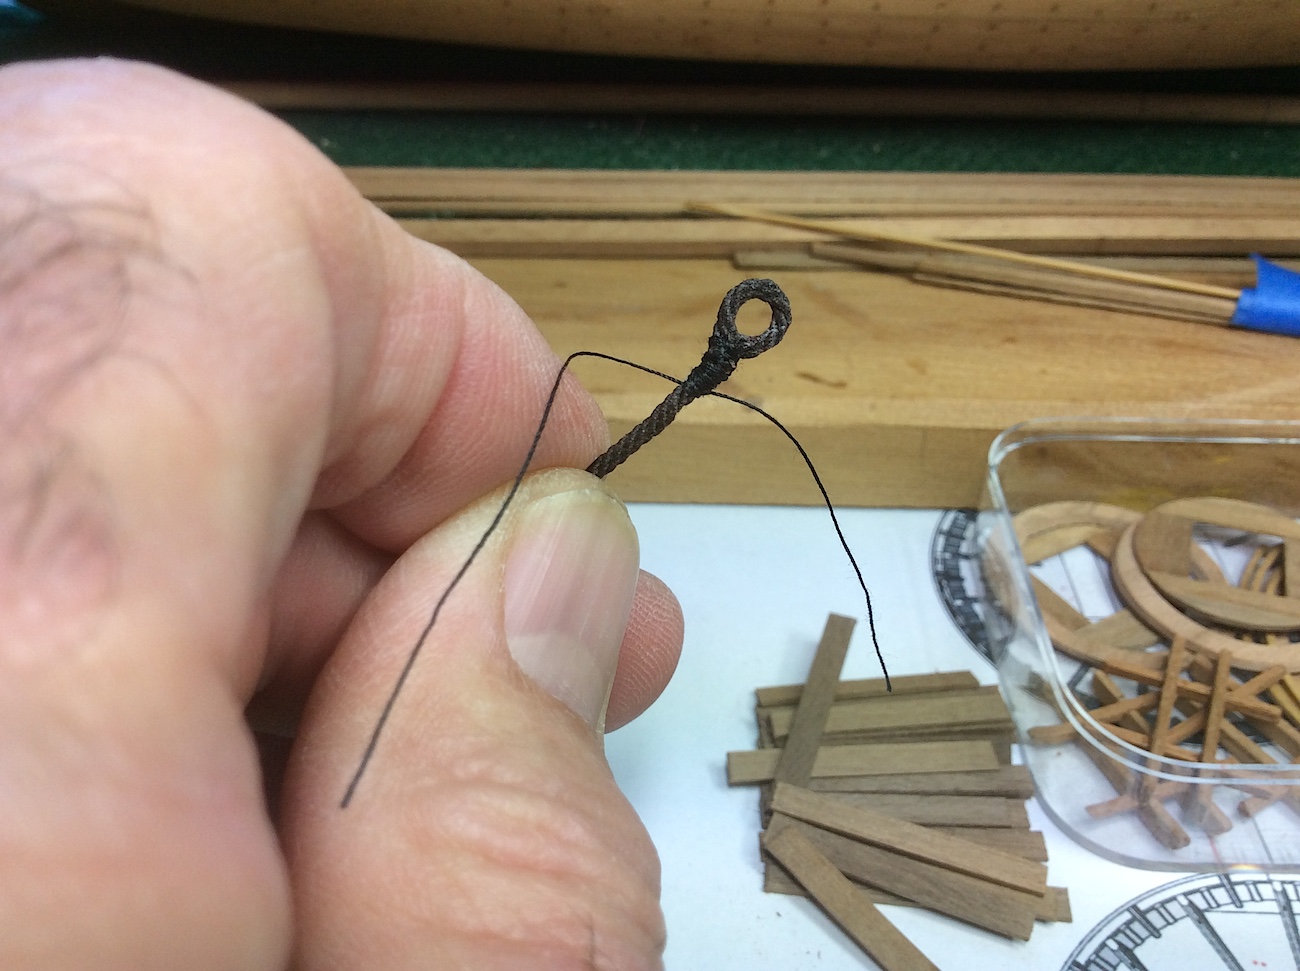
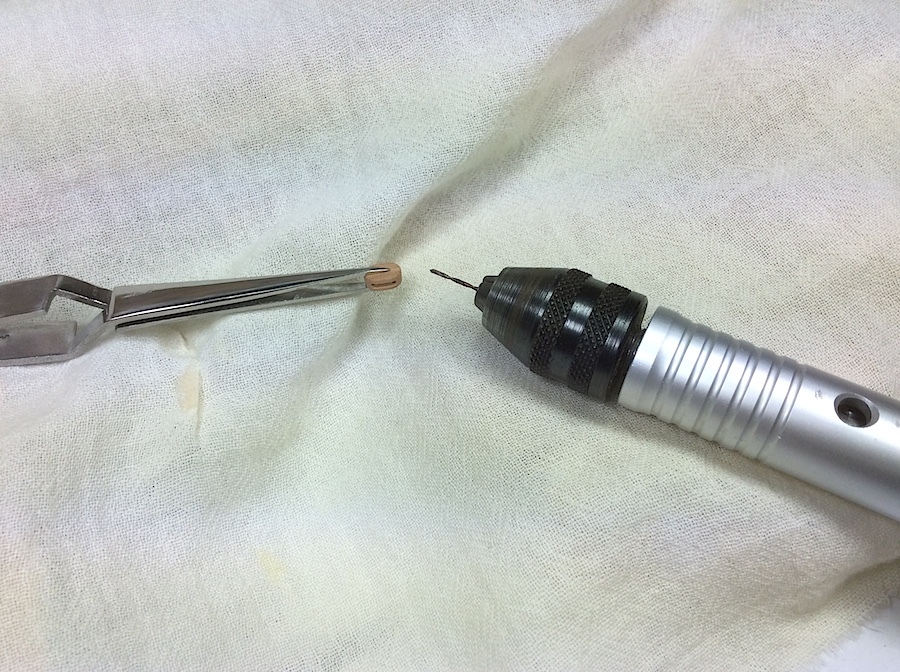
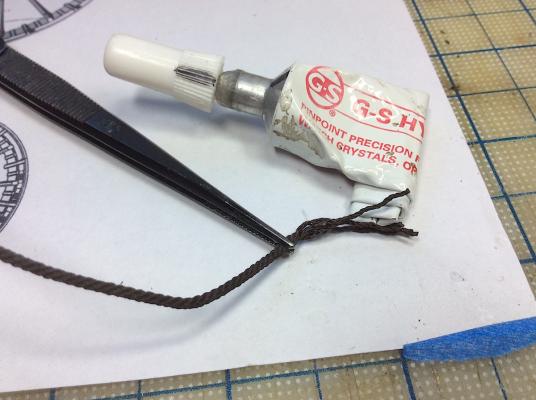
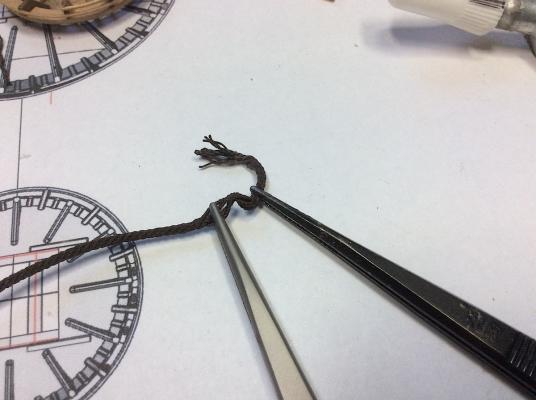
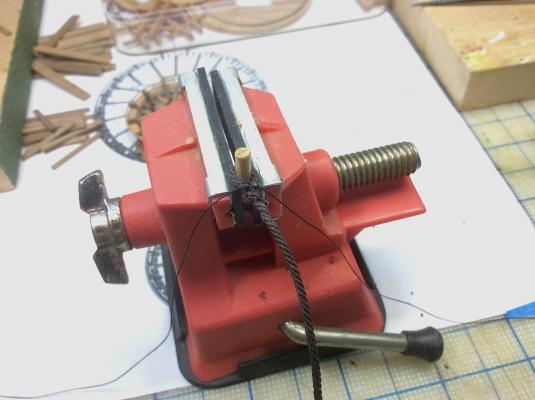
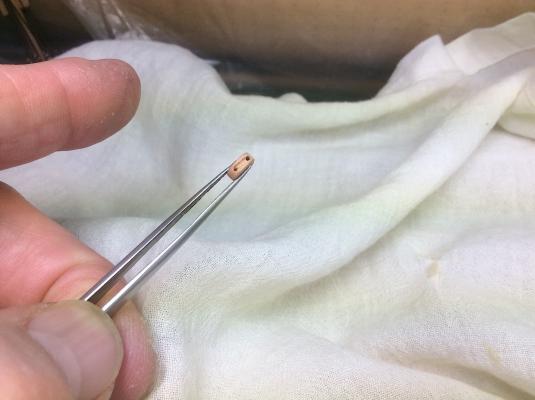
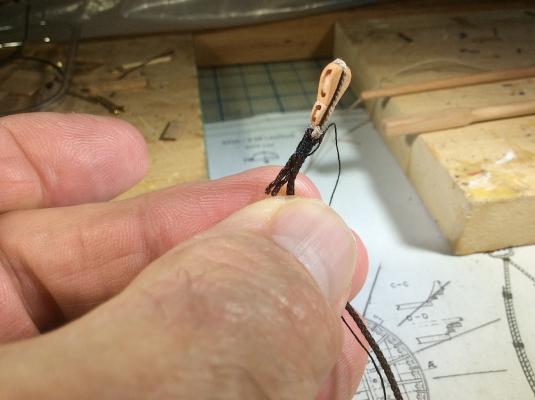
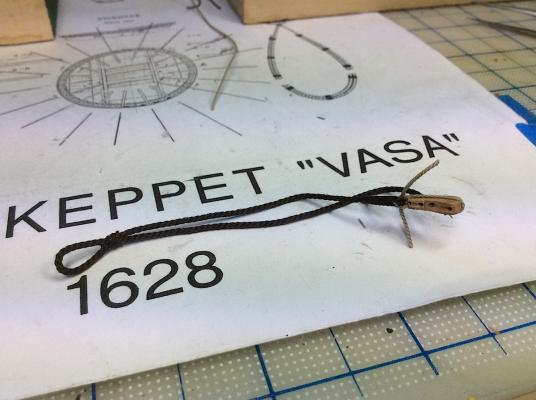
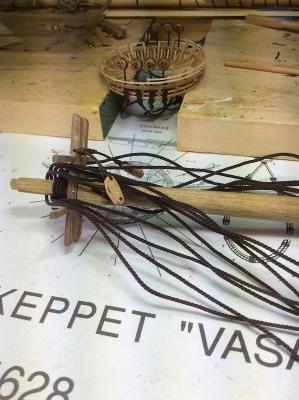
Hi Mates, Doing some work finishing up the three foremasts timbers as well as the upper platform. Took a detour and tried to make the mouse for the foremast stay that attaches to the bowsprit mast. Well did the first bit. I wanted to try (first effort) not to just bend the rope tip over forming the ring, but instead trying to lace the end back into the rope itself. The 1/1 details look so perfect, but Hmmm… ---------------------------- Using closing tweezers unlaced a tip of the 9-ply rope Added a bit of glue so as to not allow the pope unfurl any further. Added some space from the glued bit and re-attached another set of closing tweezers after reversing the rope wrap Used a dowel as a “ring” and after pushing the loose rope ends through the un-stranded gap, again used glue to set the rope twisting it all back into an appropriate looking weave. Let the glue dry, cut off the protruding stands and then wrapped it all with thread. OK now I need to actually make the “mouse bit” And as always, thanks so much for dropping by and taking a look - Always so appreciated. Cheers, Michael


-
Mark, Super rigging job. So you decided not to install with tarred standing rigging. I know that this has been discussed a lot among we Vasa builders. Clayton did not. Nor are they installed at the museum in either ship. I'm almost the "Lone Ranger" here. Though from what I have read, tar had not yet been added to the ropes at its first "sailing". Stockholm tarred looking ropes were available at Syren ( a very dark brown [as opposed to black]), so that's how I decided to proceed. I really, actually also, like the look of the non-tarred ropes Cheers. PS: beautiful work on your crowsfeet !! That has to be a real area of "I'll get through this" bit... Michael
- 249 replies
-
- 3
-

-
- billing boats
- vasa
- (and 1 more)
-
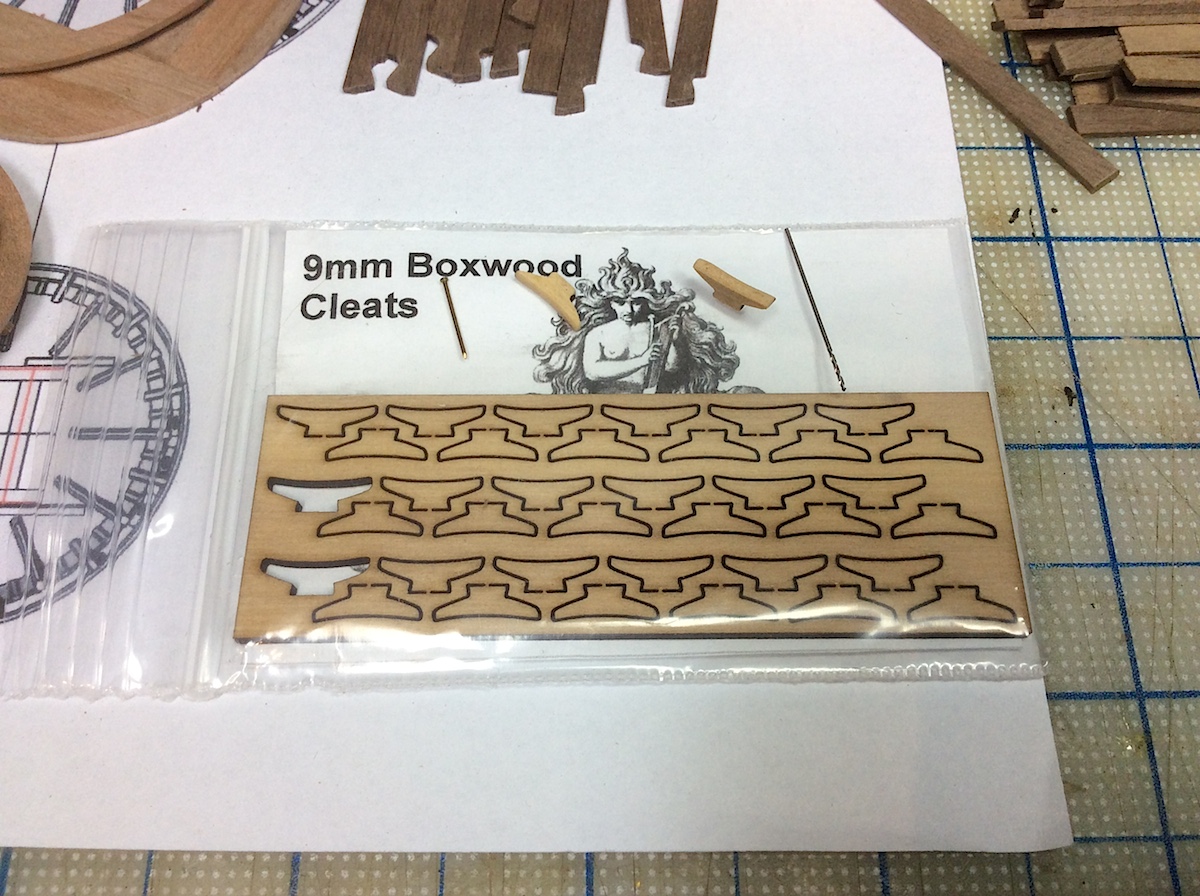
Hi Mates, just a quick FYI - post. I needed some more blocks and rope so went to Syren's site. Chuck has added several size cleats. Look really nice. Cheers,

-
Ed, Your capstan is a work of art. I seems as though with each new posting your art gets better and better. But that can't be (:-) Also a big thanks for all of your text. SO informative as well. Your build log is just as good as your ship (:-))))) Michael
- 3,618 replies
-
- 5
-
-
- young america
- clipper
- (and 1 more)
-
Greg and John, Thanks for your kind comments. Also appreciate the Like This clicks, and also mates just looking in. Frank, yes those are Chuck's blocks at Syren (along with 100% of all rigging) John, yup a bit of frustration here and there - certainly par for the course, but the learning is really encouraging. Cheers Michael
-
Henry, Thank you for your very knowledgeable assistance. So appreciated. I very much enjoy learning about this "at their time" amazing state of the art technology. It always always reminds me of, when I was working in the UK, (though my home is in the US), traveling across the Atlantic (back and forth) at 37,000 feet drinking champagne in a flying machine listening to music from my portable CD player (antique) looking down at the choppy Atlantic Ocean thinking, "omg they could never imagine today's amazing transportation". But today We can easily think of "Beam me up Scotty" And that idea is, today, half a century ago (;-) Yes I droned on, but love today (;-)..... Again thanks !! Michael
-
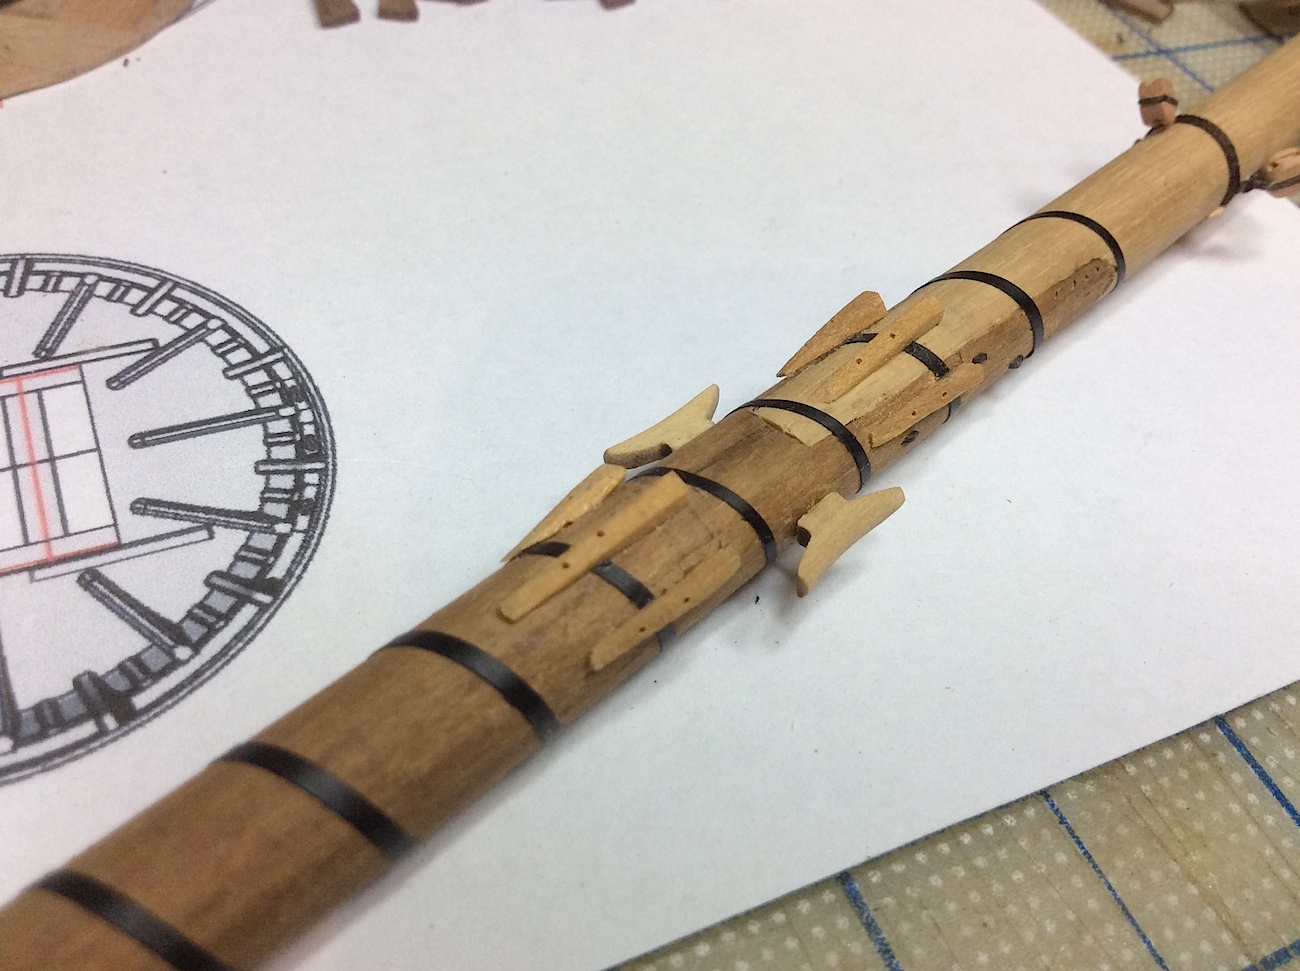
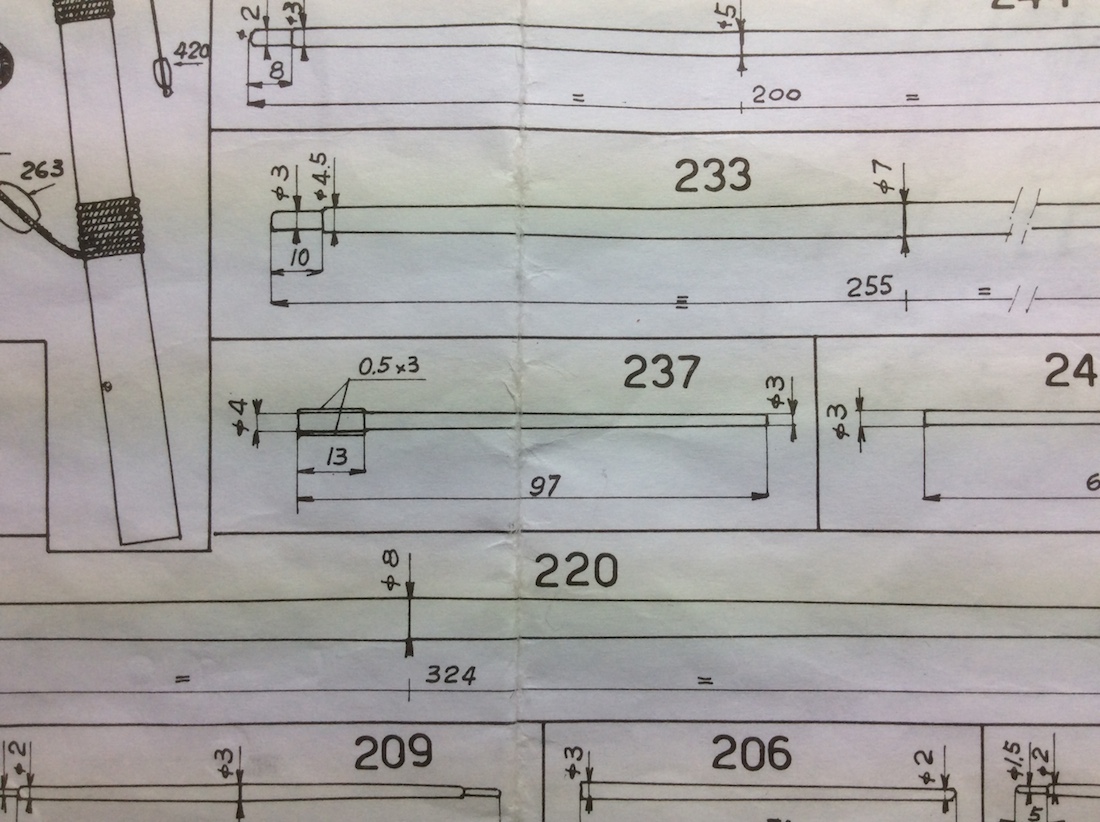
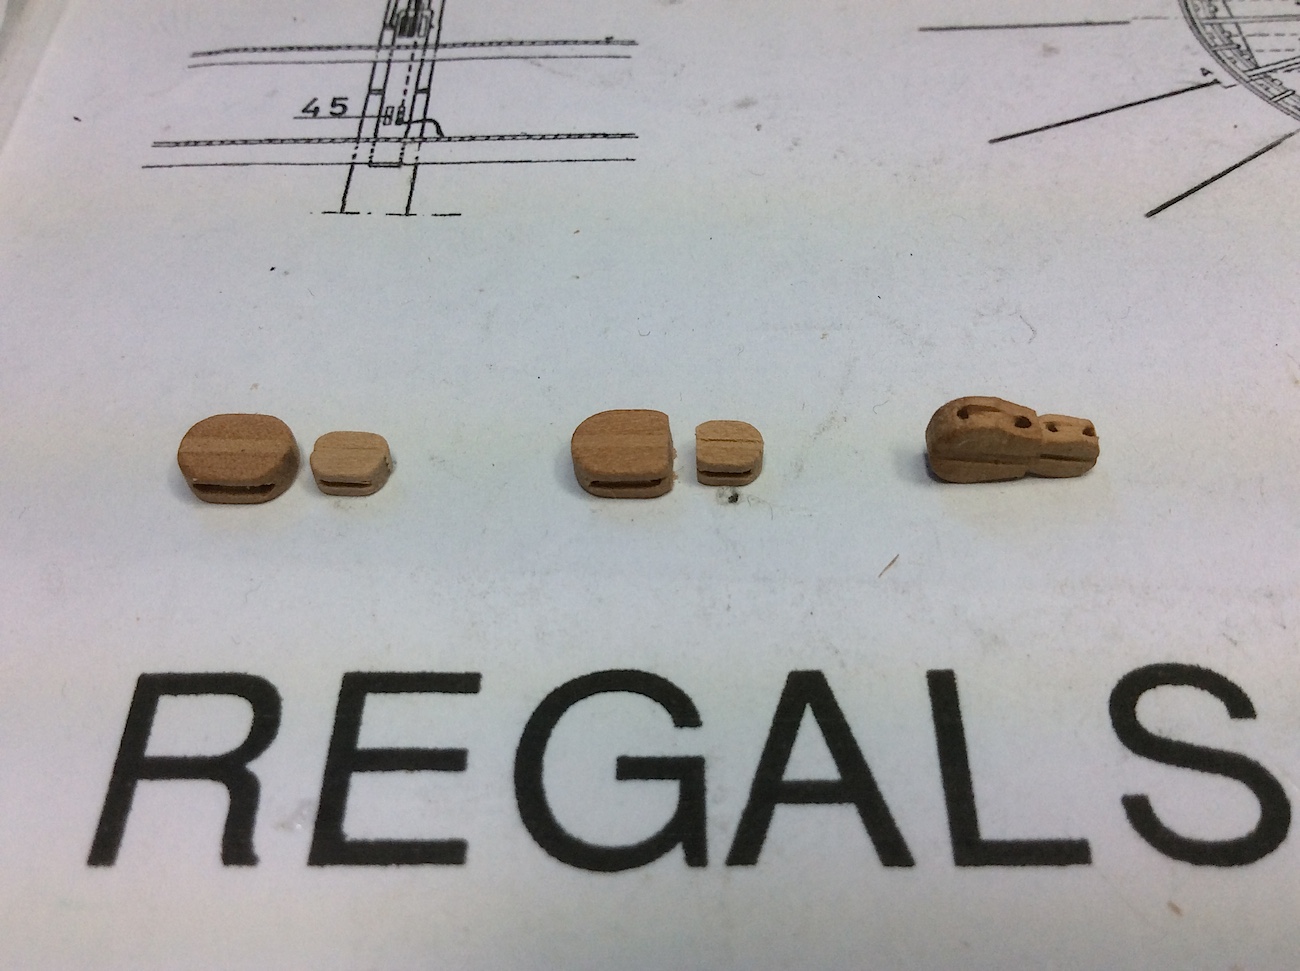
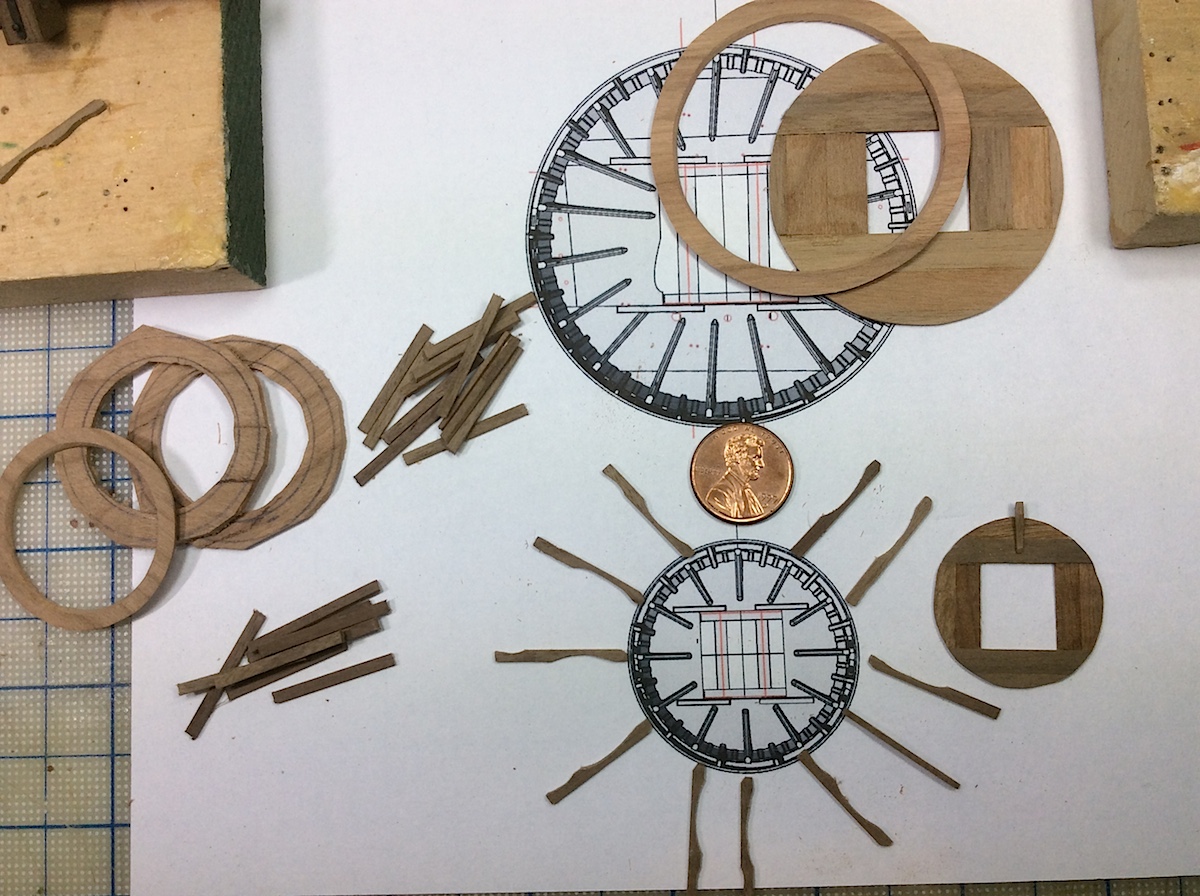
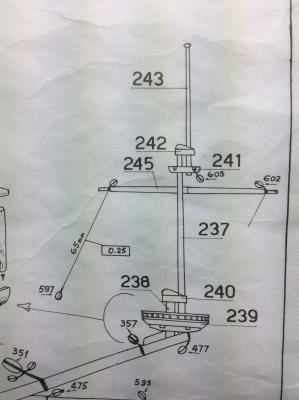
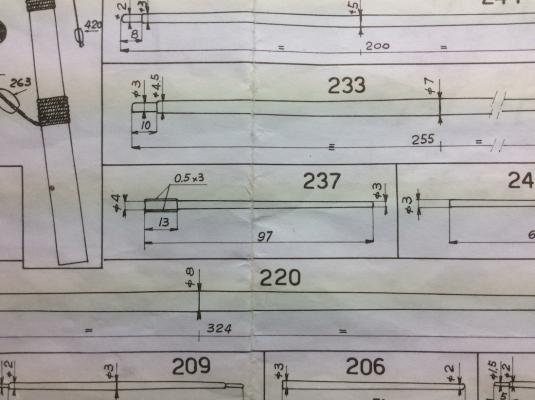
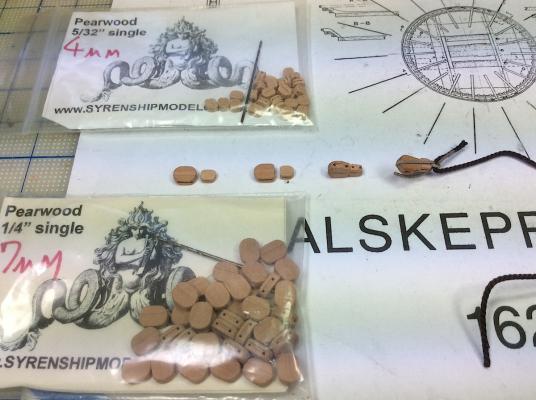
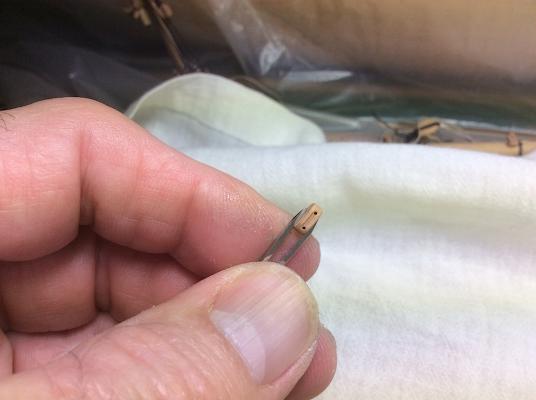
So I did some frustrating research regarding deadeye size related to mast diameter (post just above) Pic #1 Corel part number for that mast Pic # 2 Corel measurements for that part Pic # 3 Smallest kit included deadeye Pic # 4 Smallest deadeye next to installed mast part number 237 So in order to stay within scale I would need to double the diameter of mast part 237 or source a deadeye of apprx. 1 1/2 mm diameters. Looked at several retail sites. The smallest deadeyes seem to be 3mm, which is what I installed. SO I'm leaving this bit as-is. This new knowledge will be useful as I continue. Though for sure the smaller deadeyes would have been a better fit. Cheers,

-
Lovely indeed. So Frank you're in for another Winter blast from hell this weekend. Stay warm and off the roads with that sweet car of yours. Michael
-
Jack, Just found your new build log. Great project I will follow along. Michael
- 170 replies
-
- 2
-
-
- gokstad
- dusek ship kits
- (and 1 more)
-
Peter, (Henry, George) Thanks for your constructive, and helpful post. Very much appreciated. I am fairly comfortable with my building skills that have imprroved, BUT I am an unsophisticated novice otherwise. These blocks are a good example of my lack of knowledge. For all-intents-and purposes this is my first build that requires rigging knowledge, especially for three masts. Mates, please don't refrain from helpful postings of "fixes" for my errors. I enjoy learning about all of these important aspects of this hobby. These fiddle blocks will be easily reversed. Thanks! I also received a very kind PM from another excellent builder who suggested, rightfully so (I've since learned as well), that the deadeyes attached to the bowsprit mast cap are, in fact, too big. They should be about half of the diameter of the mast for a given location (again very much appreciated constructive information) THANKS "J"...... BUT- Hmmm, That would be too much work to fix. The Corel kit included deadeyes in three sizes. I, ignorantly, used the middle size, leaving the small ones for the upper platforms. Hmmm--again. Though now this obvious error will grate at me. I may eventually need to dis-assemble the cap and replace the deadeyes with after market purchased pieces. Sorry--got a bit wordy here, Again thanks for following along AND thanks for the help. OH and one more thing. Regarding shroud and line sizes and diameter I'm fishing in the dark (:-) Sincerely, Michael
-
Frank, Capt. Steve & the "likes" click, thank you for dropping in and posting. Always very much appreciated. Moving forward at a snail's pace (:-). Though we are finally expecting "El Niño" storms, so I may be in-house a bit more. Frank!! I'm sure that you are already, this weekend, buried in snow? Michael
-
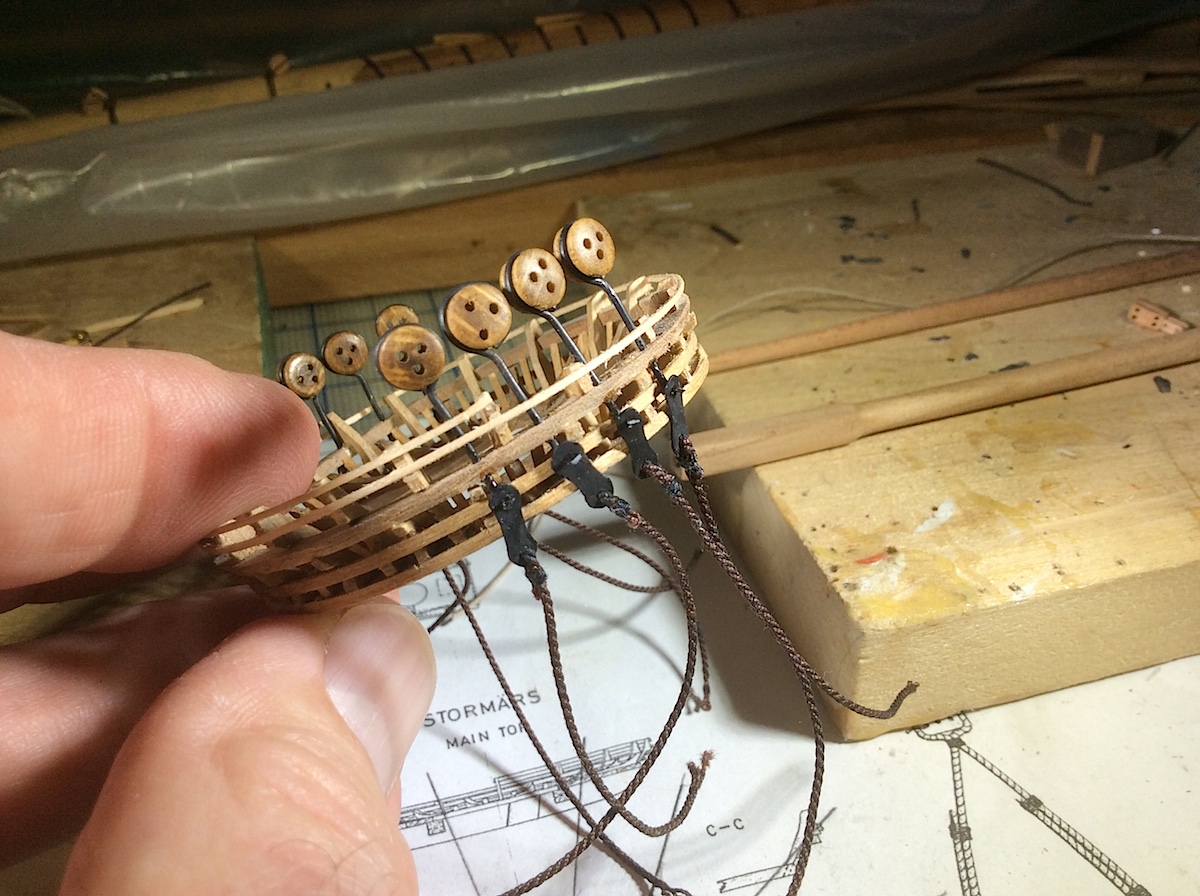
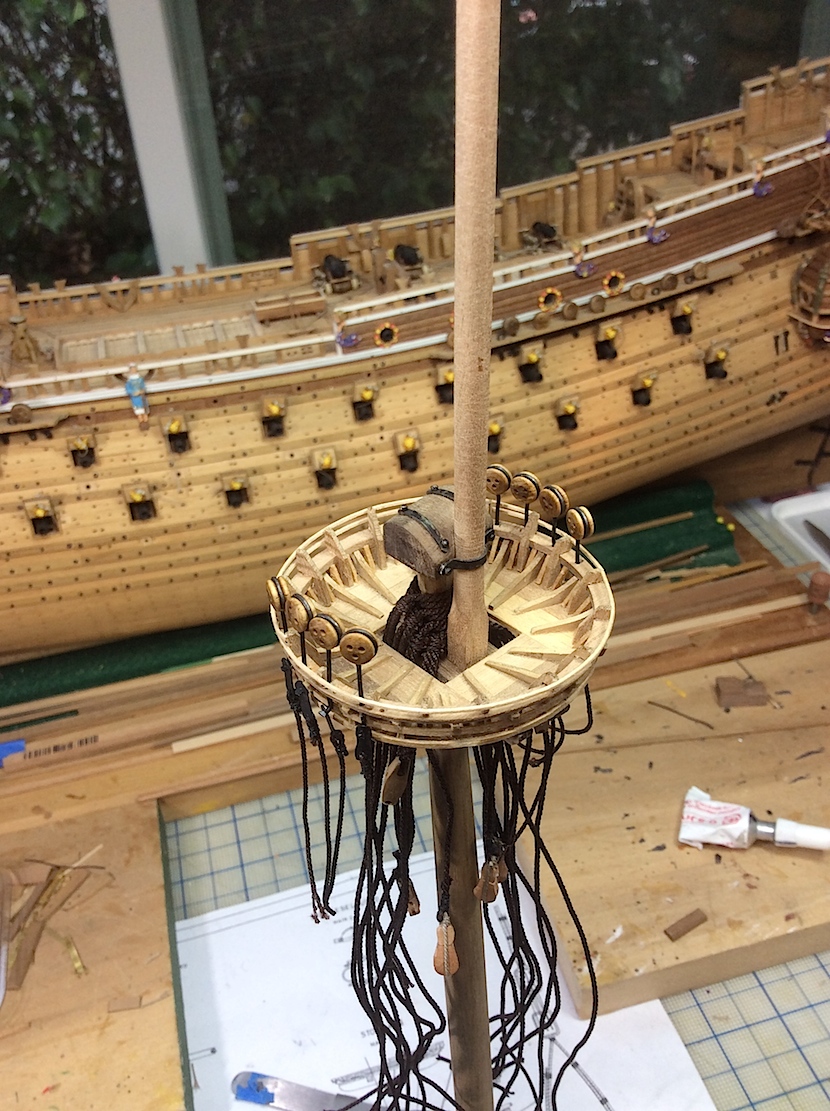
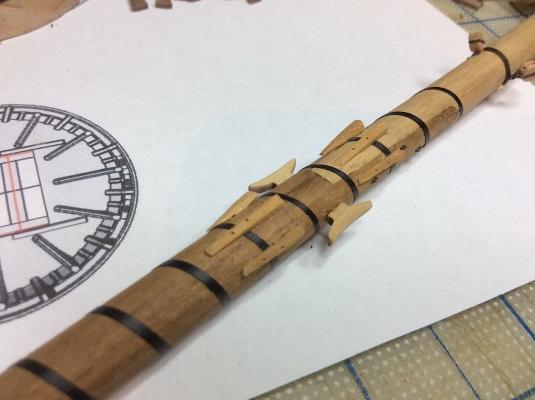
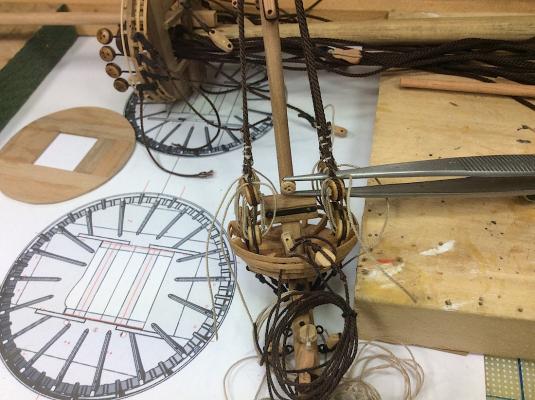
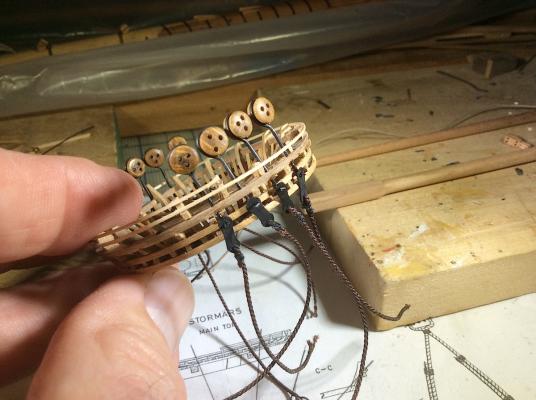
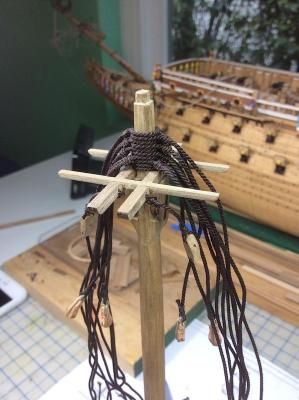
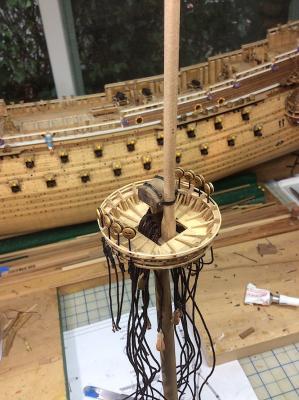
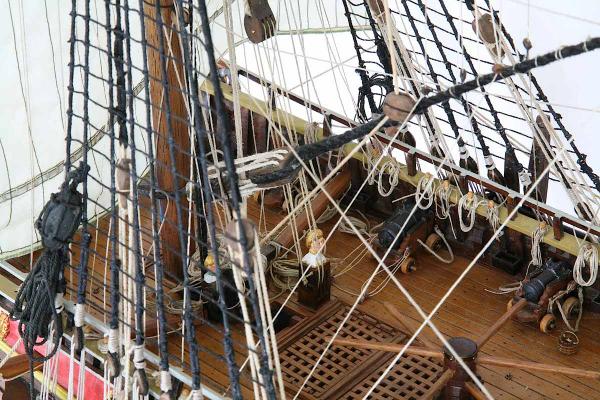
Hi Mates, So after getting Fred Hocker’s confirmation regarding the Vasa having mast tackles with fiddle blocks I used some single blocks to “make” four blocks. These four blocks will remain static attached to shrouds (without lines inserted) so wanted to add a bit of detail to the “pulleys” within. Will need four more for the main mast as well. I used a drill bit and sort of honed within the blocks to make the pulleys appear more circular. The diff. is somewhat noticeable. Had lines been strung through these blocks I would not have done this extra bit of work. Finished up the lower foremast cap and deadeyes. Added the shrouds as well as the middle foremast staff. Now working on the four other needed platforms. Doing them all at once. Thanks for dropping by as well as your advice. Cheers,


-
Bob, Such a delight for the eyes.!! Beautiful model. It looks like a "simple" model to build, BUT I'm sure that it was much more involved than it would appear. Your level of, and attention to quality details are superlative. Congrats.... MIchael
- 196 replies
-
- 3
-
-
- higaki kaisen
- woody joe
- (and 1 more)
-
Vince, Just catching up. Brilliant work. Love the stern details as well. George is spot on, that black stripe is perfect. Michael
- 593 replies
-
- 2
-
-
- royal william
- euromodels
- (and 1 more)
-
Frank, Super nice flag mounting details !! Made a folder of your pics, when I get there (in ten years) I will follow you lead (:-) Your Vasa looks really spectacular. Great build (and it was a Corel ha ha). I'll have to follow your wagon train on another forum?? Michael
-
Mark, You are out-doing-yourself on this one (:-) Cheers Michael
- 652 replies
-
- 1
-
-
- royal william
- euromodel
- (and 1 more)
-
Dirk, Yes, as always your work is such a pleasure for the eyes (and brain-I'm learning a lot). Michael
-
Rob, Enjoying following along. Mostly silent or with a "like" here and there. That said great work. Love your carriage riggings !! Michael
-
Henry and Peter thanks to both of you for your so well detailed responses. I also very much appreciate the links. Very helpful indeed. It appears that the Vasa did infact have these as part of its standing rigging. Fred Hocker was also kind enough to respond to my question at the Vasa specific site. His response: We don't have any direct evidence for burton pendants one way or the other, but we do probably have mast tackles (a 17th-century item that served the same purpose as burtons). These consist of a fiddle block on a long pendant, usually rigged as a pair on each side on the fore and mainmasts. The pendant rope is the same size as the shrouds, and made up the same way. These are looped over the masthead before the shrouds, and so form the first two tiers on the bolster. Most of the early 17th-century rigging inventories I have read list mast tackles rather than burtons, but some list both! Fred Hocker Vasa Museum So I can now start these shrouds and also first add mast tackles without the eyelet but with the blocks as both of you had suggested. Again thanks Peter and Henry (Mark - good idea as well) Thanks to everyone for also stopping by. Cheers, Michael
-
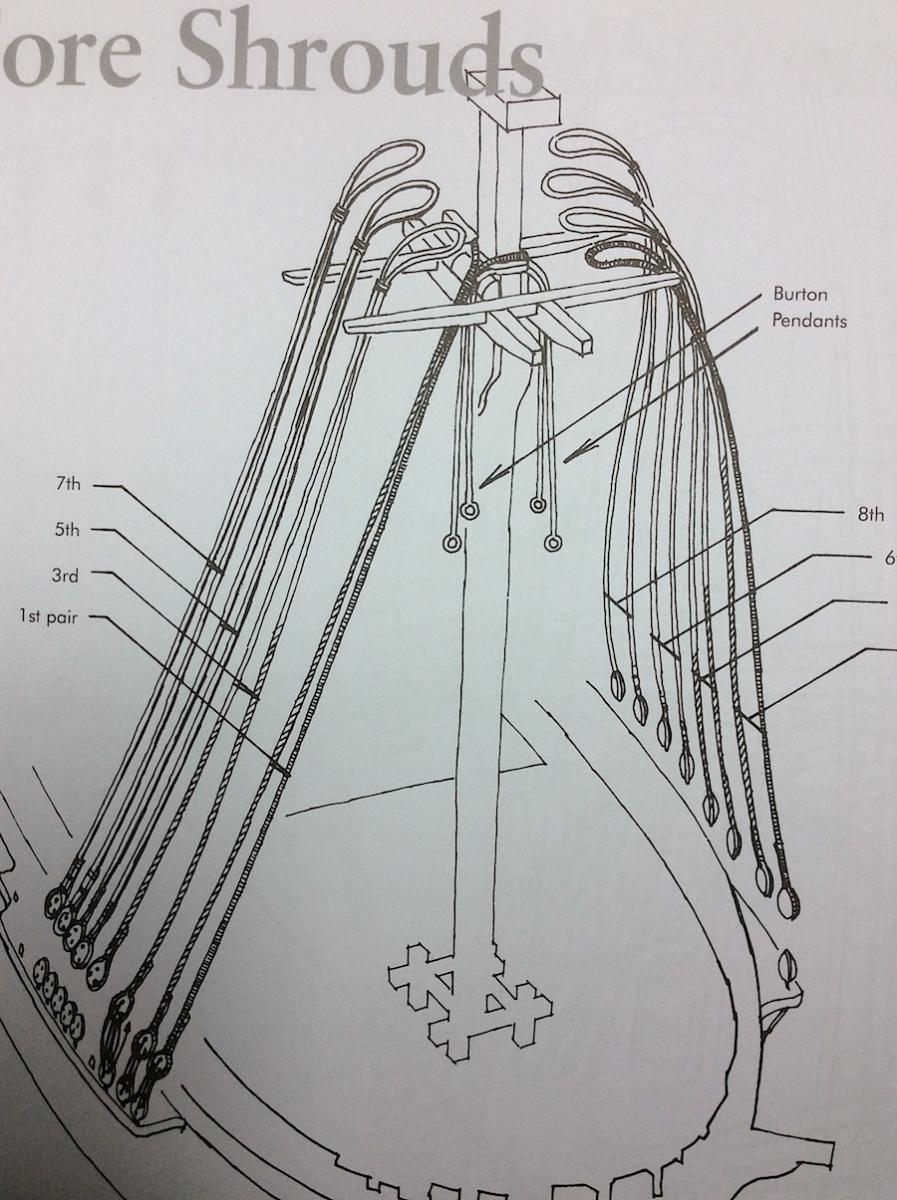
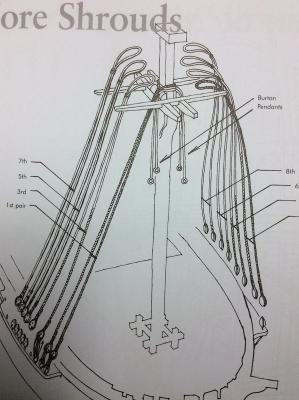
Hi Mates, Need some advice. Starting to attach the foremast shrouds before locating the lower platform. But looking at a rigging book I noticed these Burton Pendants. Did a Google search and it seems that they were also on some 16th century. ships. Any help would be appreciated regarding adding these to this build. All of the rigging plans that I have for the Vasa don't seem to include any of these linee. Thanks in advance. I will post an update soon. Regards...
-
Frank, This is the only one that I have seen with buoys. Its scale is 1/35th. You should have all of his pics in your files from previously (:-) If not, here is the link to his excellent scratch built. http://www.modelships.de/Vasa_II_Janssen/VASA_II_ship-model.htm PS: Tripple clicking on each jpg makes them super large and super detailed, very easy to adjust detailed views. I looked in the Landström book and found no reference, Clayton's nor the 1/10th include these either?? I am also planning to add some to mine. Hmmm
-
Frank, NOW! I remember, yes we had in fact spoken about this in the past (:-) Yes nice diversion indeed Speaking of "off topic" I have been binging (Netflix) through "Hell on Wheels" an amazing drama series on the building of the US Transcontinental railroad. One of the best series that I have ever watched.Just finished season four. MIchael
-
Frank, Nice couple of updates. Flag and upper railings look excellent. Nice work. So what's up next under your table at position No.1? Michael