HOLIDAY DONATION DRIVE - SUPPORT MSW - DO YOUR PART TO KEEP THIS GREAT FORUM GOING! (Only 44 donations so far out of 49,000 members - C'mon guys!)
×

md1400cs
-
Posts
2,839 -
Joined
-
Last visited
Content Type
Profiles
Forums
Gallery
Events
Everything posted by md1400cs
-
 Frank, You are also always SO kind. Thank You so very much for your posts. Michael
 -
Mark, Yes I've now just joined that choir (:-) It's now much more "peaceful" Thanks for posting, much appreciated. You are right this ship will constantly evolve. Michael
-
Mark, Good points. I'm now in that camp as well. Done with the "what ifs".....It's now time just for the forward moving building part, research for its own sake (on this ship) , and the growing skills part. PS: Oh and we would have had to also cast several diff, size cannons (:-) MIchael
-
Nigel, I appreciate your thoughts, yes the research bit certainly makes things more interesting. Even along with all of those inherent resulting frustrations it creates The learning bit is inspiring I enjoy this very much. Translating it into a kit build is the conundrum. (:-) Though the research part sort of allows me to share in the thoughts from past lives, and how those people created to the best of their abilities. A nice facet of this hobby. Scratch-building is a huge leap up (for me) . And certainly makes research the leading edge of a project, one that becomes very absorbing as well. Thanks for your confidence in my potential abilities. Presently I don't have that level of comfort. Your RW, for example is breathtaking---I'm not even on the same planet as you (:-) Though my next project will, just after opening the box, benefit from all that I have learned here at MSW from so many artists. Nigel you have always been so kind with your thoughtful comments, a heartfelt THANKS... I am putting my current frustrations on the back burner and will continue with this Vasa, a build that, accuracy frustrations aside, am really enjoying. Again thank so much for being a kind follower, your esteemed mate.... Michael Michael
-
Buck, Hmmm thanks so much, blush blush your comments are sooooo inspiring. Thank you so much for taking the time to follow this build, as well as sharing your super kind remarks. PS: Love your avatar.. Regards, Michael
-
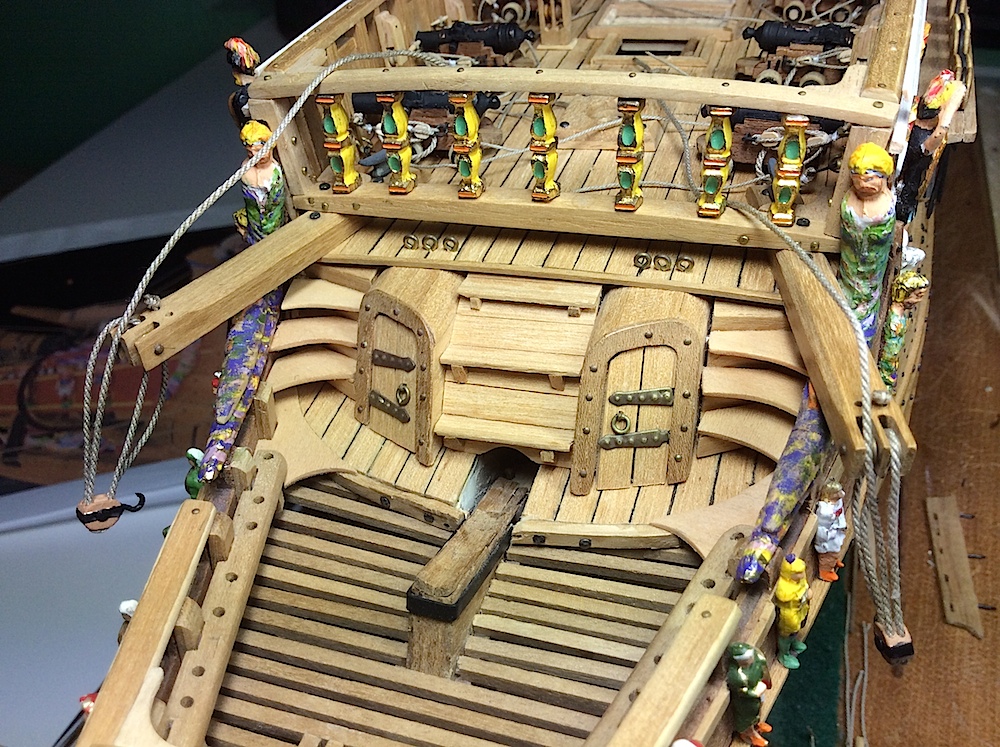
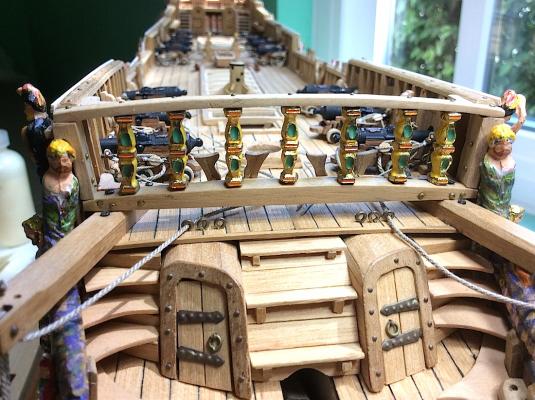
Mark, Thanks for the info. That, it seems to me, will make it even harder for the smaller rear towers to rise up enough to overlap the lower parts of the upper galleries as we have been discussing. It will be interesting to see how you figure that one out, allowing enough room for the standing stern guards. PS: Fred has also just sent me a post indicating that the quarterdeck pinrails should not be there. “The museum got it wrong”, he said. You can check that out at the Vasa specific site, at my build postings. So, I just removed mine, and it left scars grrrrrrrrrr. He also discusses what should be there instead. PS: No I am not rebuilding my towers. This will be an ongoing problem with this ship as new data are turned up and subsequent changes to our builds are needed. Enough already (:-) I'm just going to move forward from now on. My log is already SO filled with "going backwards” tearing out and making fixes. I'm now done with that. And as you said maybe six members here out of the more than ten thousand would even know the differences, and errors........ As Fred had mentioned last year there is some interest for a new kit that may be in its development stages. One that is 100% based on Vasa’s 1/1 current info inclusive of 3D/cad computer renderings. I say current info because the way this ship is "changing" I can just imagine after this kit "is released???" the museum will find more areas where they got it wrong. Just going to have fun moving forward, not sideways, and definitely not backwards anymore. Pulling out those two pinrails that left scars is the last change for me. I will however absolutely highly regard member’s suggestions for how to get this right in regard to nautical accuracy. Nigel, B.E, Ferit as well as some kind other members have been so gracious in offering their guidance as I move along. Big thanks to the nice people, who click, or post comments. I need this project to be fun, not an exercise in frustration J Sorry for the long post, but I needed to vent as well PS: I do very much believe, however, that seeking the most accurate build possible is a wonderful goal that I wholeheartedly support. I'm only writing for myself here, certainly out of frustration. And Corel's is the furthest from what should be Oh well.. Regards, Michael


-
Adam, You have made what is marketed as an intermediate "build look absolutely "Advanced". This build of yours is super exceptional. Gorgeous work. Very much enjoying following along. PS: Bigger Pics ??? (:-) were certainly missing some great details Michael
-
Frank M and Frank (riverboat), Thanks for your nice comments, helps to keep the energy flowing (:-) Michael
-
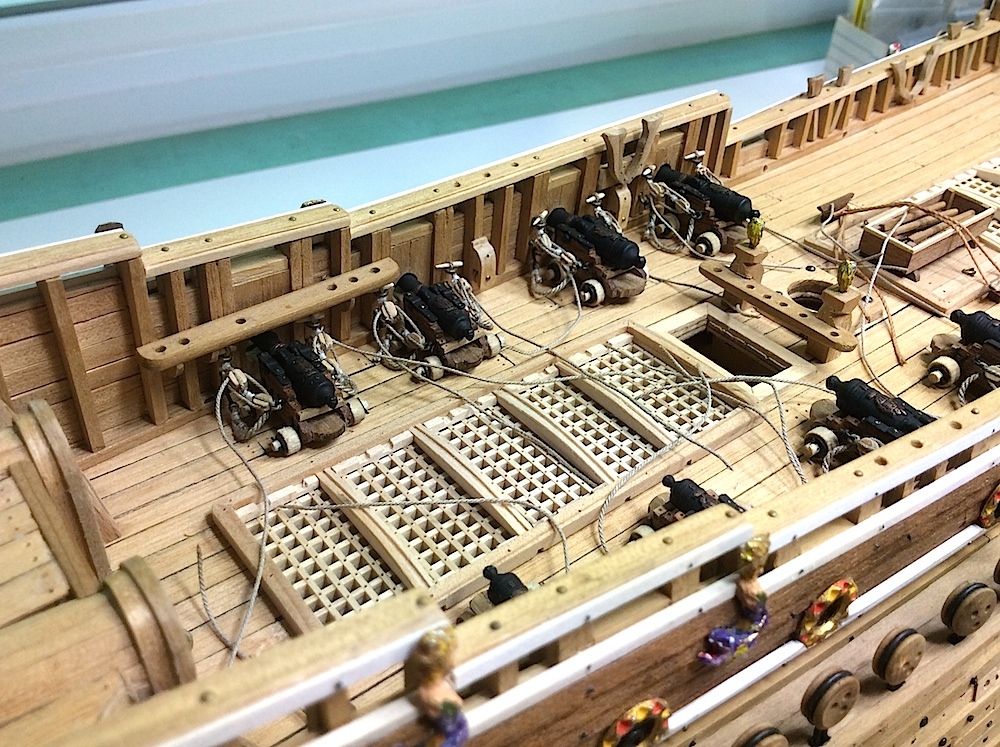
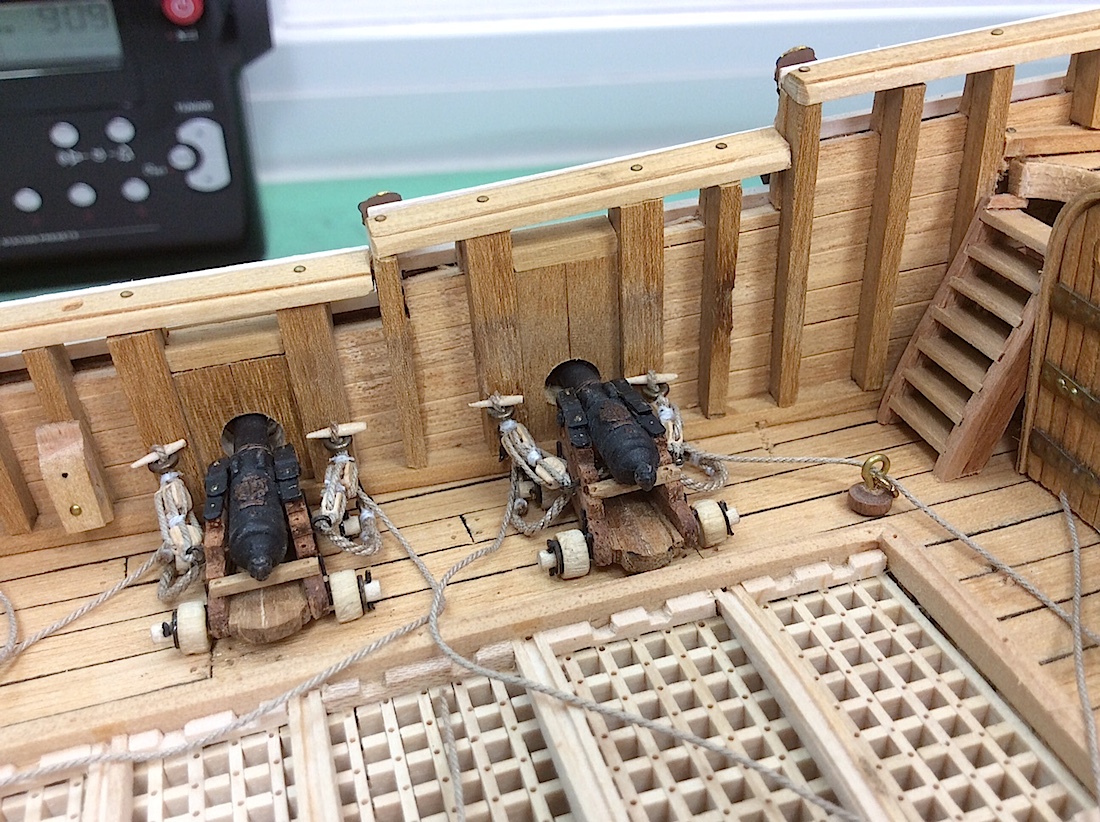
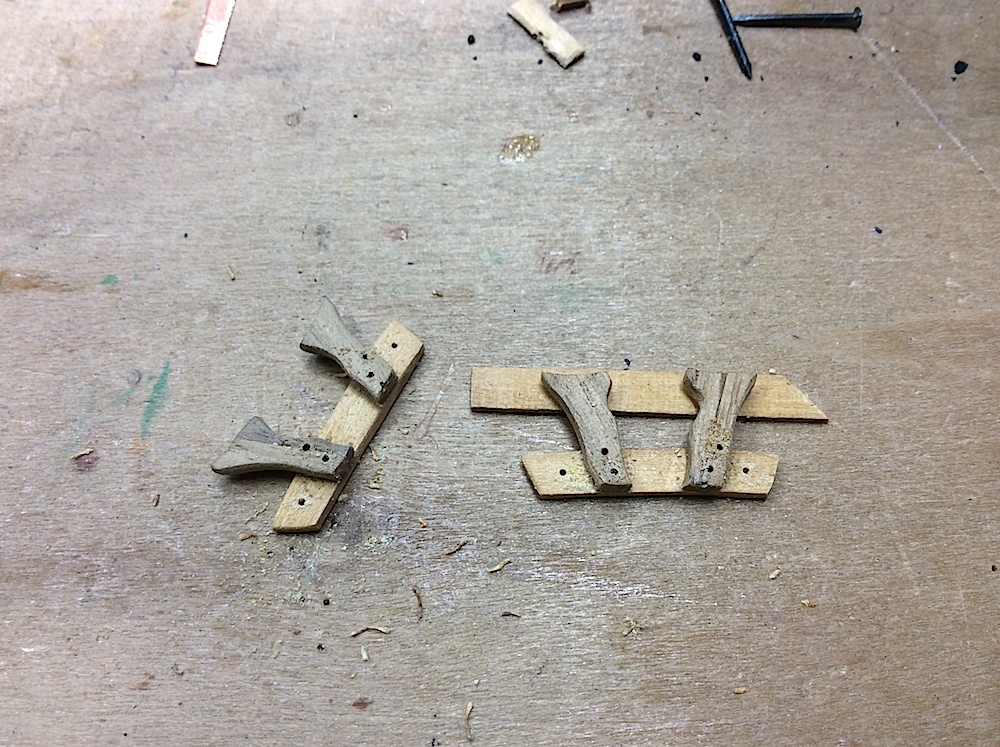
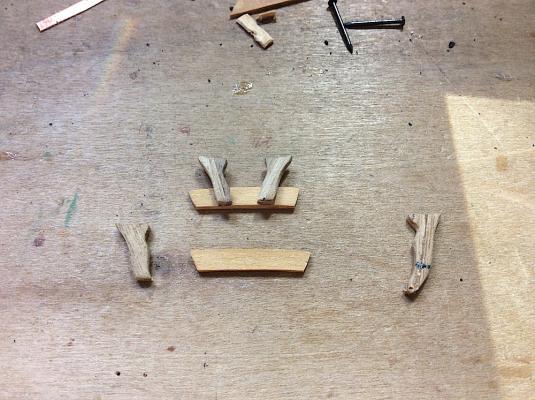
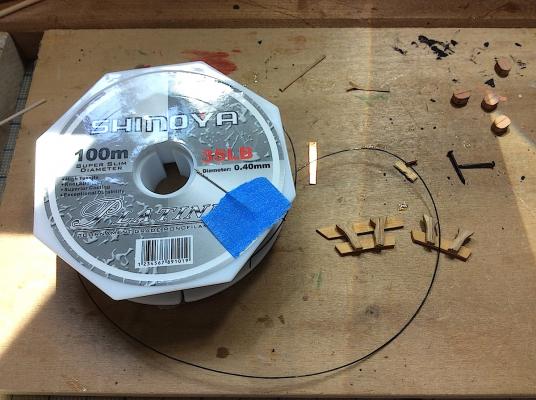
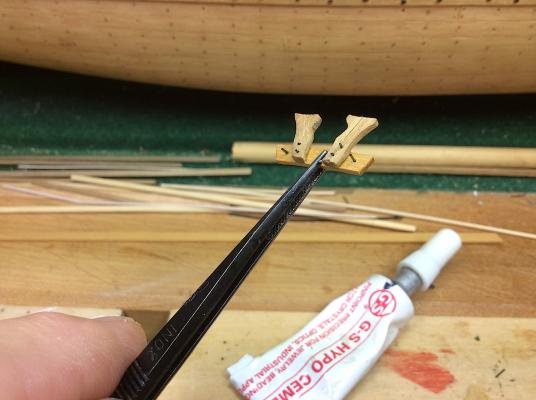
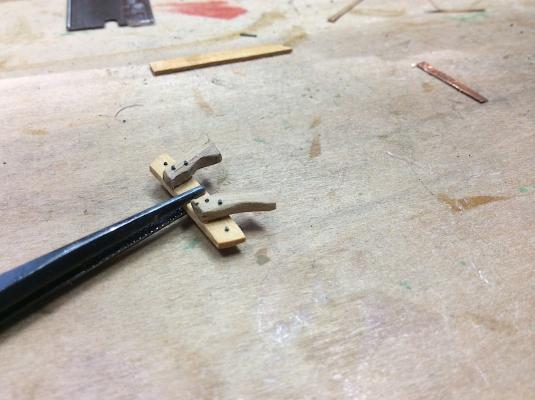
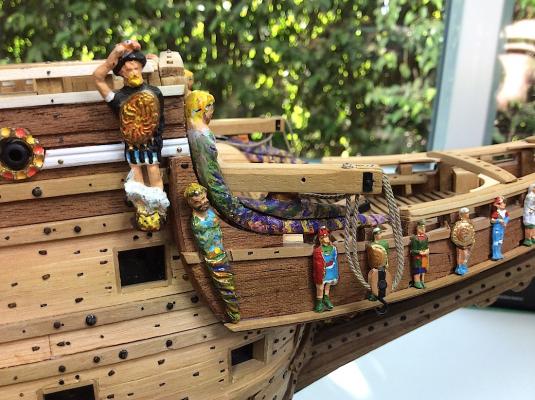
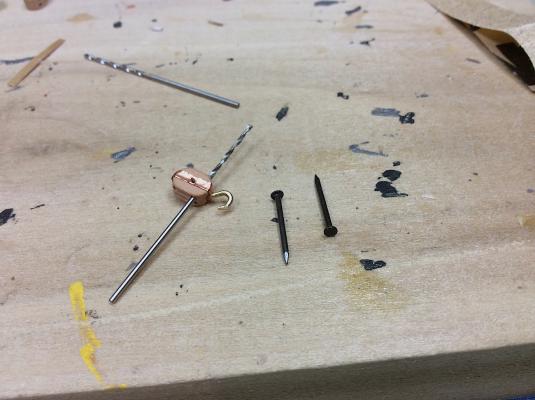
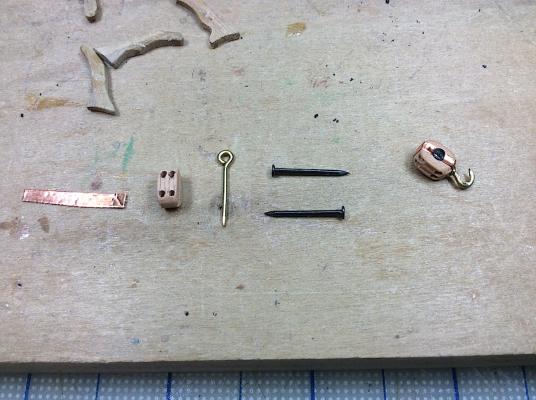
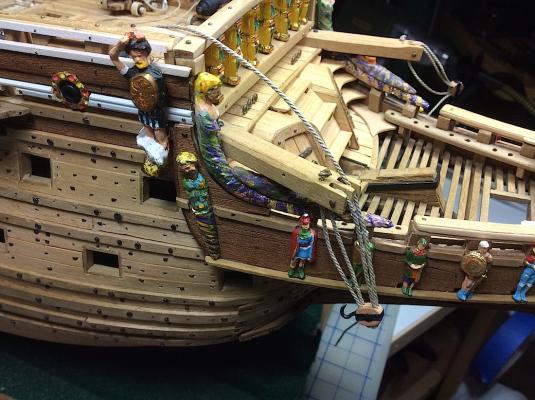
Hi Mates, Continuing with the bow anchor cathead details, now turning to their needed kevels. It turns out that I had built and installed a second pair that was at one time attached to the quarter-deck, turns out that this was incorrect (see first two pics). An early Vasa museum plans set (1980) showed two sets per side at that location, as did Landsröm. A second plan set dated 1981 had one set removed. I communicated with Fred Hocker, who indicated that the ’81 set had been corrected. So the two kevels were just lying around, how convenient; shortened them for use at the bow railing, and just added a framing bit for attaching. After gluing, then drilled small holes and inserted black fishing filament to simulate the needed nails. The brilliant fishing line idea is not mine but belongs to one of our MSW members; apologetically I don’t remember whom (I did post a notation on his build log at the time of seeing his very clever idea) Inserted the lines from the rear and left the front ends just a tad proud to simulate nail heads-sort of J G-S cement is perfect for this task. If there were a bit of glue that travelled through the hole to the front end, after a few moments it can be removed with your thumb nail or tweezers, pulls completely off as would rubber cement. LOVE this glue! It has proved to be so versatile. Ferit thank you Again!! You found this. Hint: I attempted to just “hack of" the front tips of the black filament to adjust them, but the blade snagged them and some resulted in angled cuts. Solution was to actually use the razor blade as a slicer moving the blade as I cut. Worked very nicely allowing for a nice clean flat cut. PS: Exacto type blade not up to the task. -------------------- Thanks for your “likes”, dropping in for a look, as well as the very welcome supportive suggestions and comments J Regards, as always Michael


-
Nigel, Your post got me very interested and I found this, a comprehensive look at the kit in development. Looks to be awesome. I'm sure that some of you may have already seen this pdf......but in case not, here is the link. http://www.shipmodelersassociation.org/misc/VictoryKitResearchWatton.pdf Michael
-
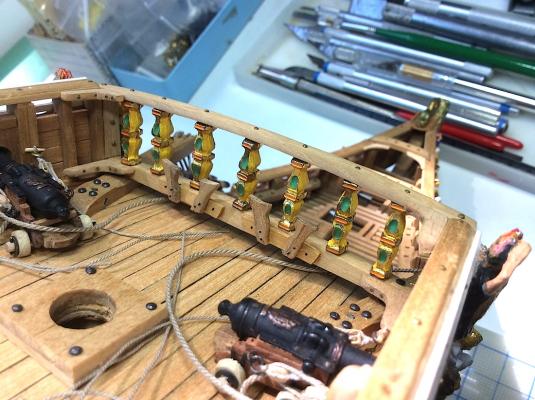
Nigel and Ferit, Thanks so very much for your advice. I have made the subtle, but very noticeable change to the knots by counter-sinking the holes. I have also changed how the blocks were laced. Lastly I added the small details of the metal bracings at the sides of the cathead pulley rods. Cheers guys and (:-) for you Michael

-
Mark, Hello Michael I see my kit comes with 4 small turrets & 2 large ones.The plans show the large ones placed at the front of the lower gallery.Wouldn`t you think they would go at the rear? /Mark Noted. Yes another Corel error to add to their list. I realized this as I was building the turrets. The lower galleries should have two same size large turrets. The only small ones are on the upper galleries. I sent Corel an email requesting two large turrets. Their CS is very nice. They have sent me several parts to date. You will need, of course, to make your request “legit” I did note from where I had purchased the kit, and that they would not supply missing parts. Be sure to add a jpg of the part(s) you need from their build sheet, along with the part, and their kit “S” number. Note the museum pic and my "fix”. Their email is info@corel-srl.it Please feel free to post or PM any questions that you have as you go along (:-) At least your Corel is in its early stages. Armed with your excellent level of knowledge about this ship your alterations will fall into place nicely. Mine was quite a way along before I learned of my many mistakes (:-) Again, I'm very happy to help PS: I think that I also asked for a few extra large size decorative figures. Cheers, Michael
-
B.E, Thanks so much for your post, coming from someone with your skills its a royal compliment. I'm very thankful (:-) Michael
-
JanV, Nice update, your masts are looking very correct. Nice blocks ! Michael
-
Mark, Just an other (last) thought, but looking at the 1/10th it appears as though the turret rises up a bit more with a narrower spire. If you were to add one thinner upper row of circumference planking then the turret decorative piece might reach up to where it should be. But then your decorative pieces might be too short hmmmm Michael
-
Ferit, Thanks so much. This was a big error, and you are so kind to allow me to know of this. I so appreciate your post and pic. I have fixed this, as well as following Nigel's suggestion regarding the knots. I will post some updated pics along with the new kevels that I have just installed for the anchor catheads. Again thanks so much for your help (:-) PS: Your Berlin ???? So many of us so love your work. Regards, Michael
-
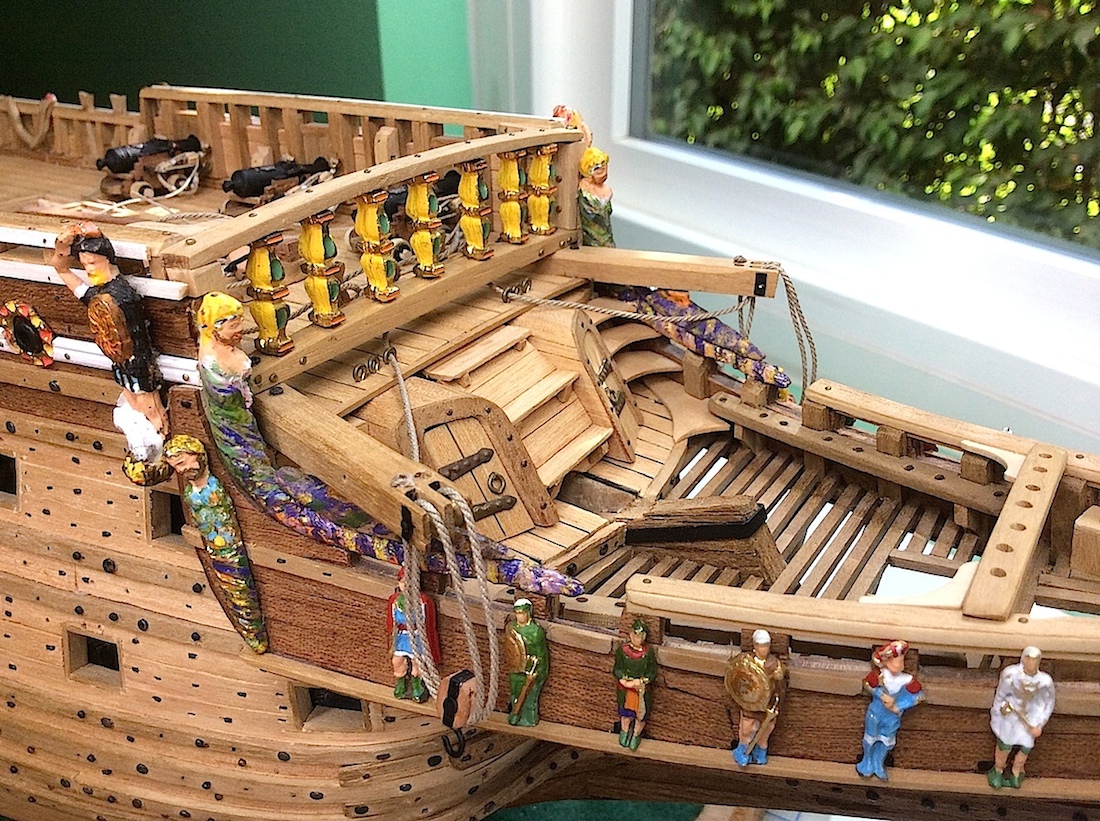
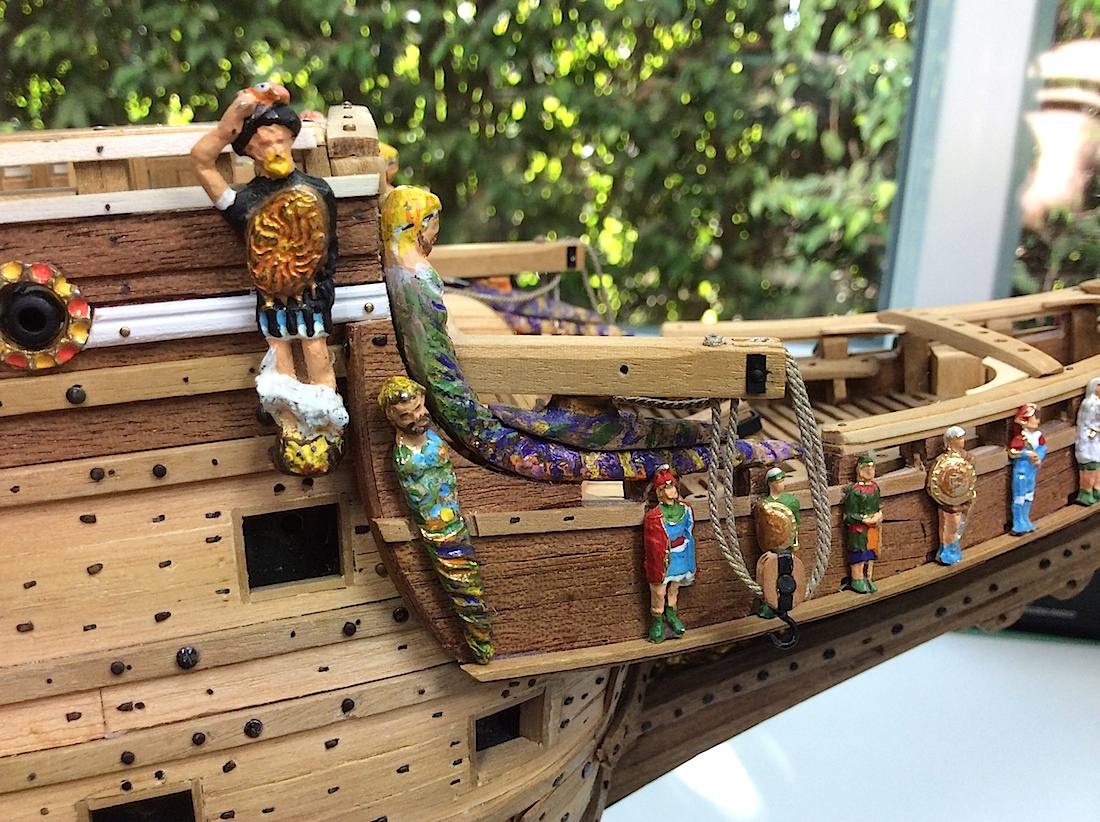
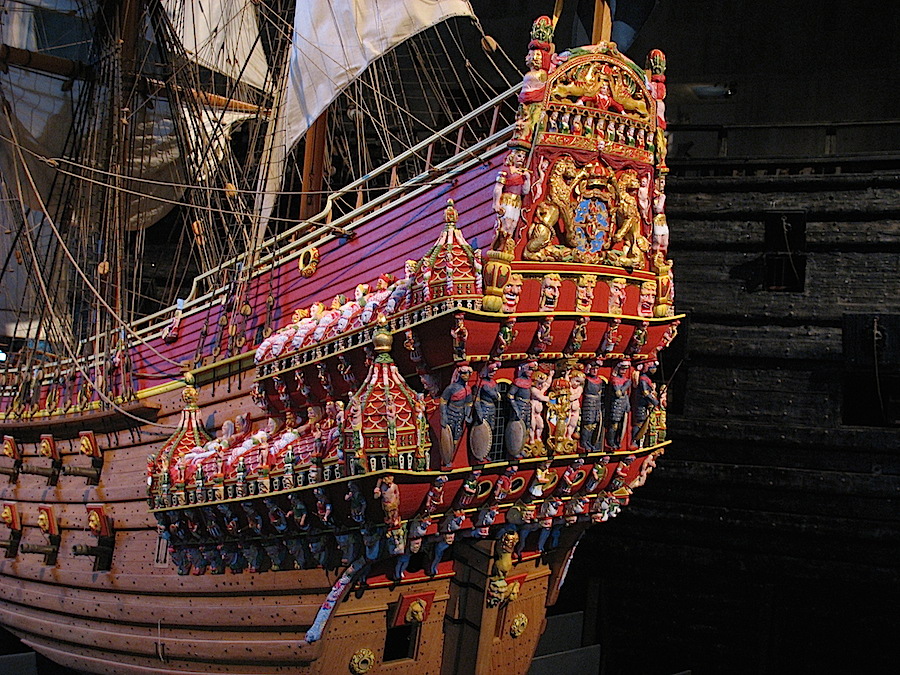
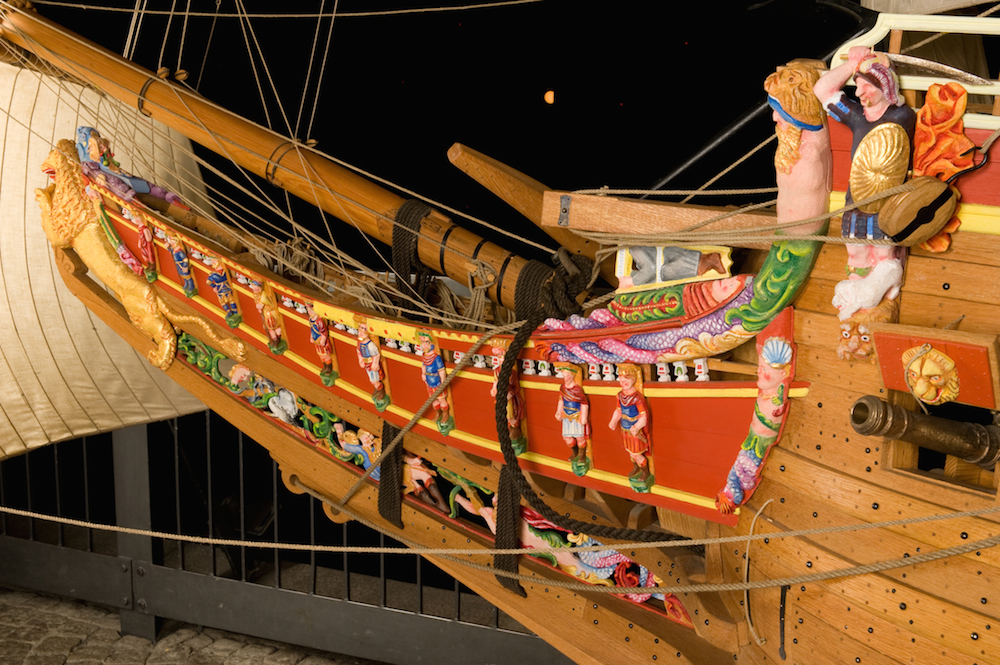
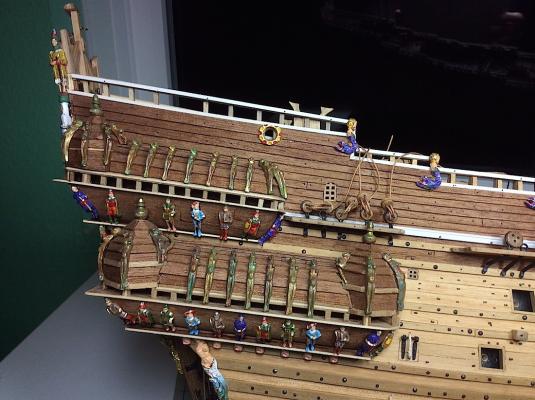
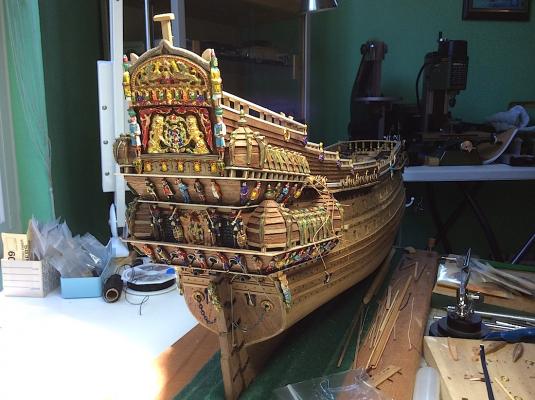
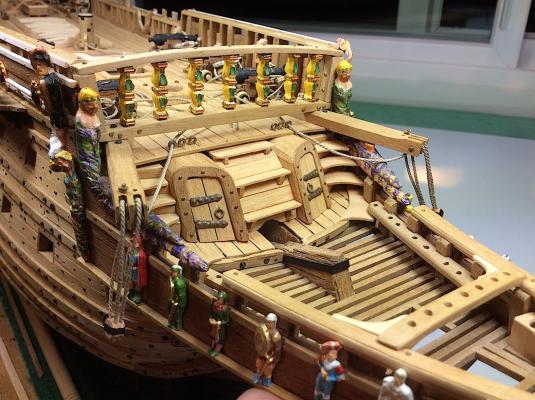
Mark, I was thinking about your Corel resurrection, along with all of the errors that are built into this otherwise nice kit. And then I thought of this big error. The lower galleries are not properly scaled so that the lower, most rearward, bobbinet turret tops slightly overlap the lower portion of the upper galleries. See my pic as well as the 1/10th for comparisons. Based on the size of the stern soldiers as well as the stern windows it would, it seems to me, impossible to scale this area correctly. I have not seen a Corel Vasa build that has gotten it “figured out”, food for thought on your current build J PS: I did not mean to add one of my pics on your build log, but only using this single pic as an example of this issue J Your work is so excellent; it will be fun to follow along… PS: as has been posted your first planking is - well so perfect.. Cheers, Michael

-
Alexandru, Your art is SO brilliant as to be almost, well too amazing. Such a work of love on your part. Thanks SO much for sharing your brilliant build of such a complicated ship-plank-by-plank. An astonishing build. Michael
-
Nigel, Thanks so much, again, for suggesting an idea for improving the look of my build. Your advice is always SO welcome. You are so kind to post your thoughts. I will, of course, follow through. Brilliant idea. (:-) I so appreciated. Your earlier advice regarding the carriage wheels, as you may have noted I "re-did" all of the axles. Much improved (:-) (:-) Regards, Michael
-
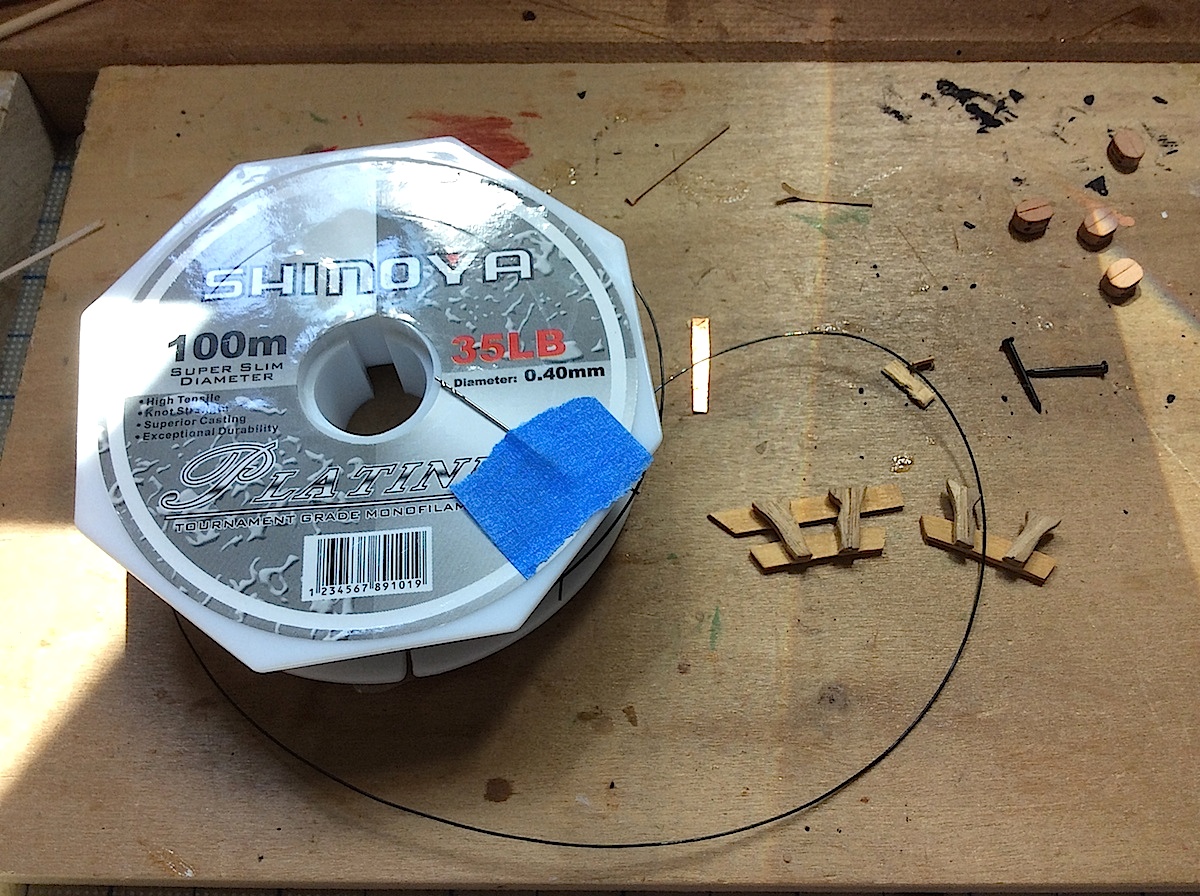
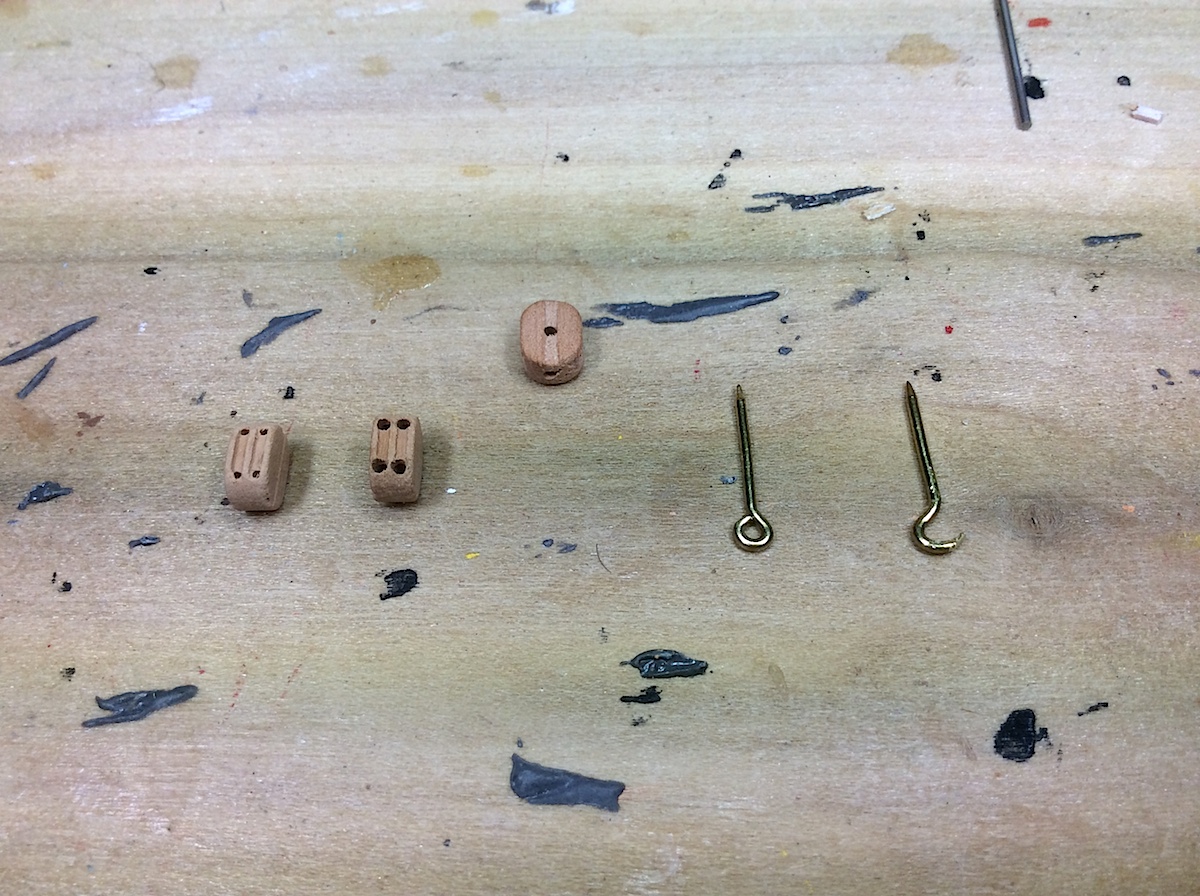
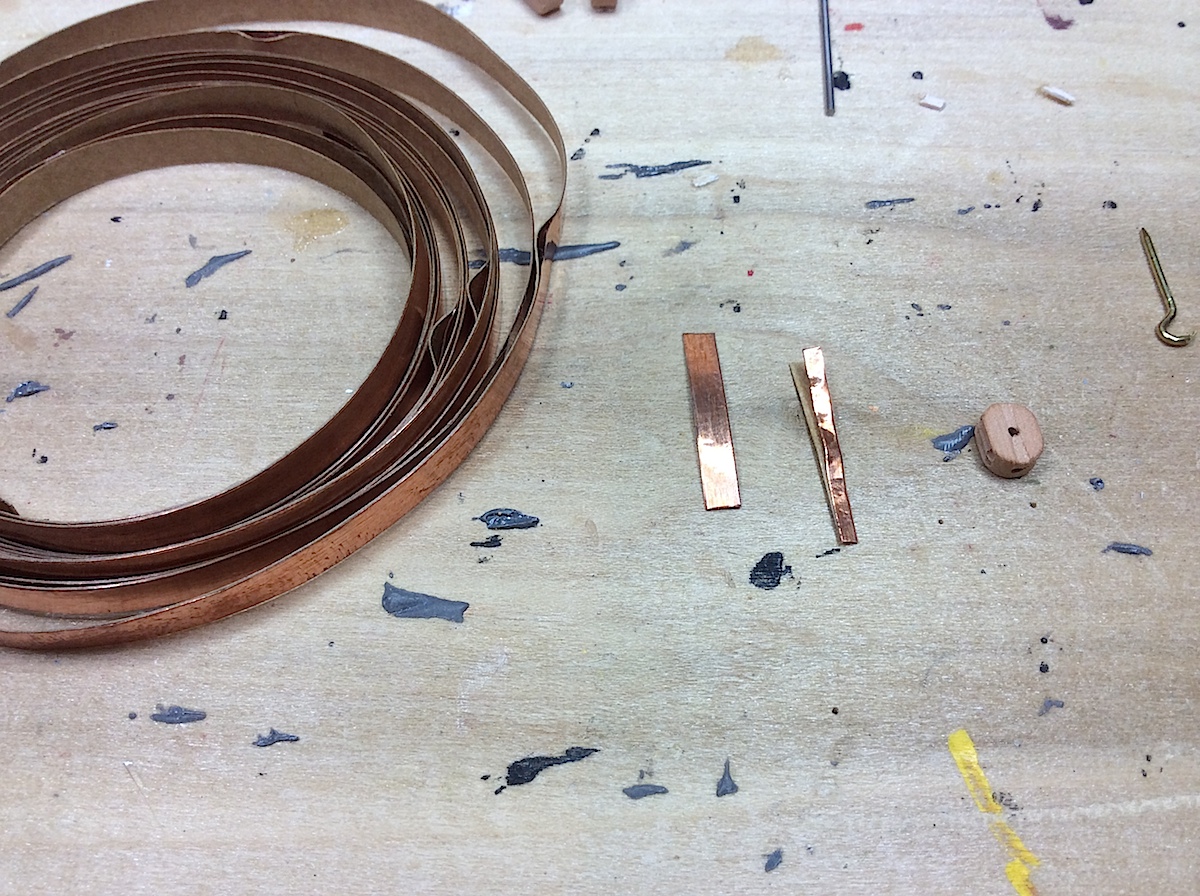
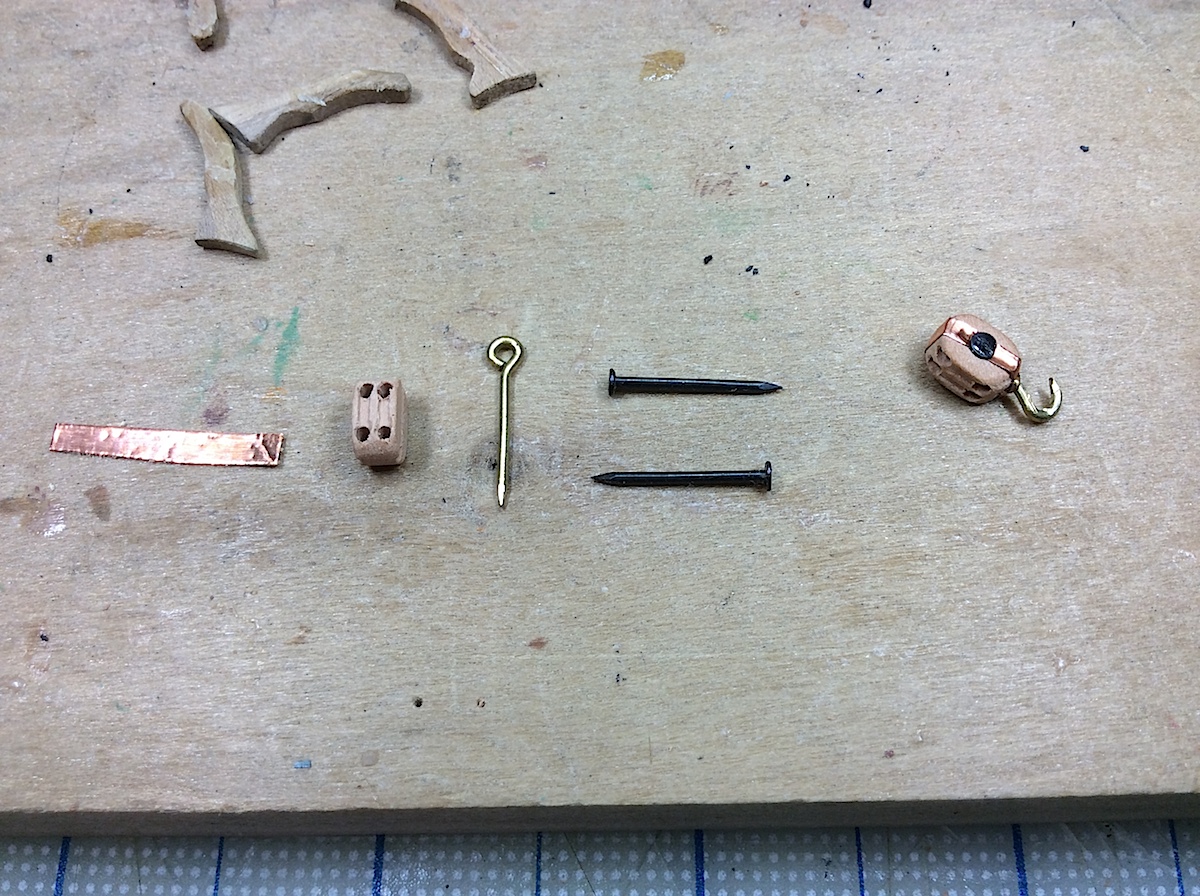
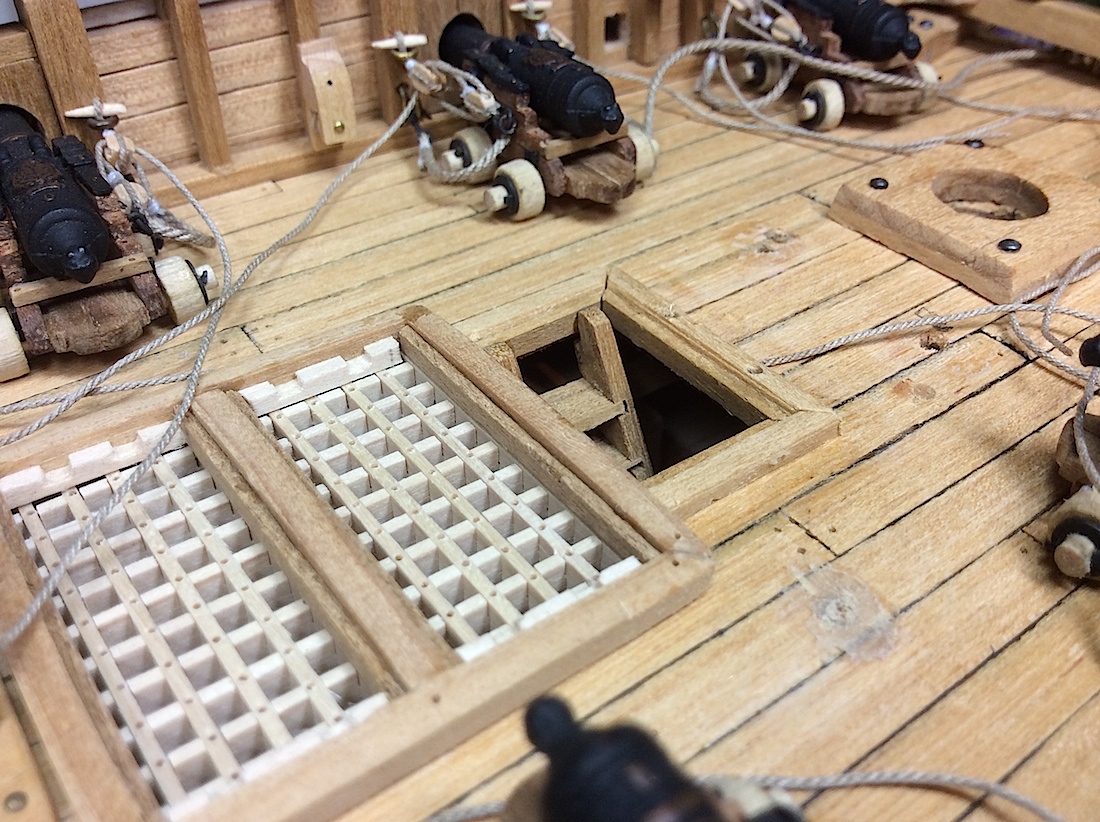
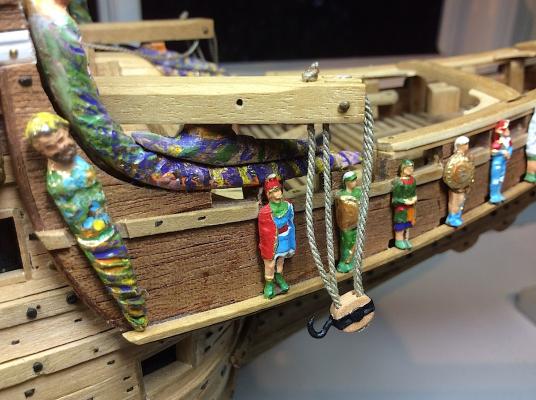
Hi Mates, Thanks for the comments and the likes very kind of you. Started working on the ropes for the anchor catheads. I wasn’t sure about how to detail the blocks. On the 1/10th the blocks were capsuled with metal bracings, not rope. This created a bit of a scratch of the head. So I chose this solution; 1) re-drilled the block holes increasing their size. 2) drilled two more holes in each block, one for the hook and the other two for the pulley rods. Looking through my boxes of “stuff” I found a copper tape strip that had adhesive backing. Hmmmm, that might work? Cut the tape into a narrow strip and wrapped it around the block. Glued the hook with CA, and pulled a drill bit through making sure that the hook was not blocking a rope hole. Cut some flat head nails and glued them to the sides of the block. Painted the added bits with flat black paint. Lastly added the ropes attaching the blocks. Next up will be the single side anchor cathead and its block. In the last two pics; I removed the knightheads that had been built such a long time ago, as well as removing the railing leading out of the upper gun deck, both of which are incorrect for Vasa. I will rebuild the knightheads to correctly reflect the Vasa’s. Tossed the railing (it was so nice (L)


-
Frank, Beautiful gold leaf work. Whoa !! Michael
-
Lawrence, thanks for your post, haven't checked lately and missed it. I appreciate your thoughts. Regards, Michael
-
Mark, NICE re-start. Well you can certainly remove the Corel kit errors by following those of us whom have dealt with these as we have gone along. Excellent - you have already altered the stern, adjusted companion way roof lines, etc..this will be a very nice build. Enjoy Michael
-
Ray, Found your build while surfing through Kit Builds. Oh my, your work, and your ship are Beautiful. Well done..... Michael