md1400cs
-
Posts
2,875 -
Joined
-
Last visited
Content Type
Profiles
Forums
Gallery
Events
Everything posted by md1400cs
-
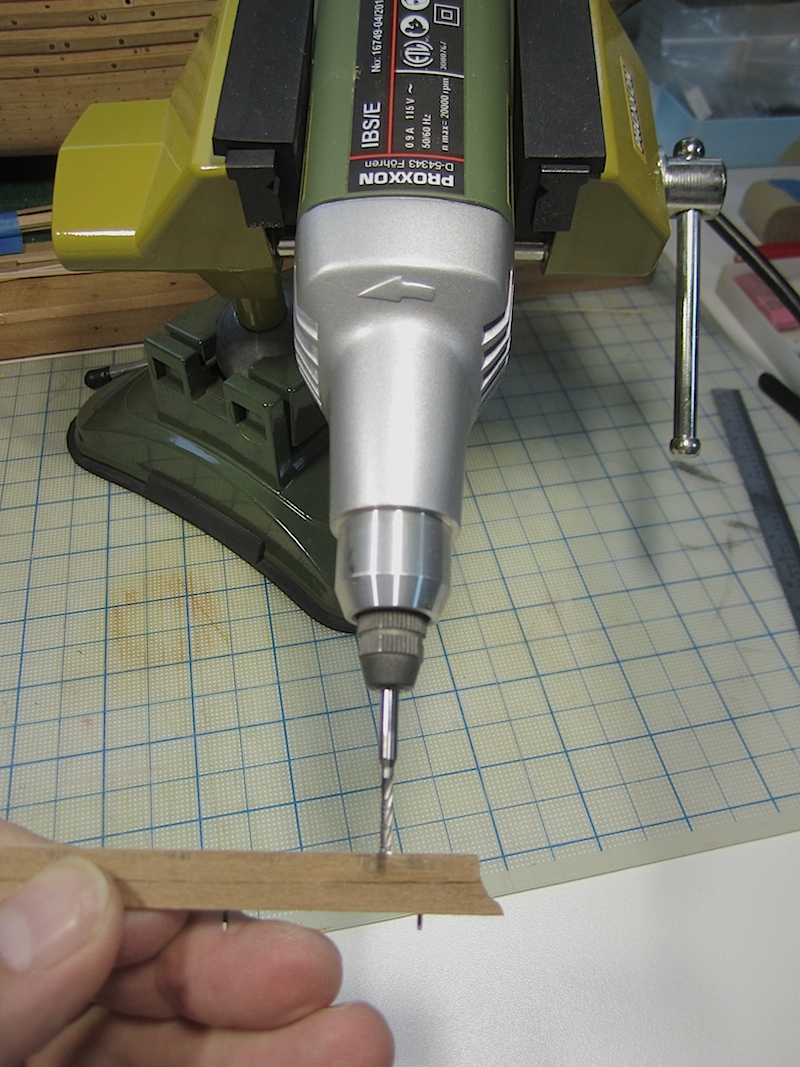
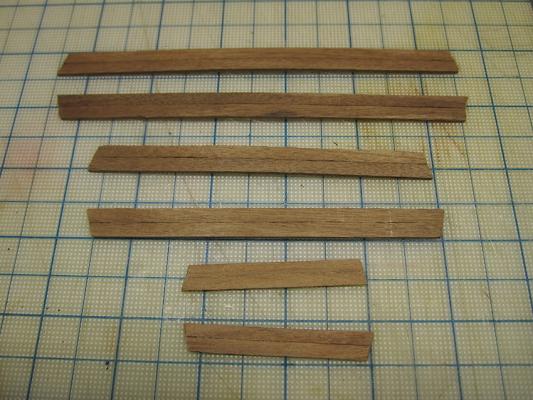
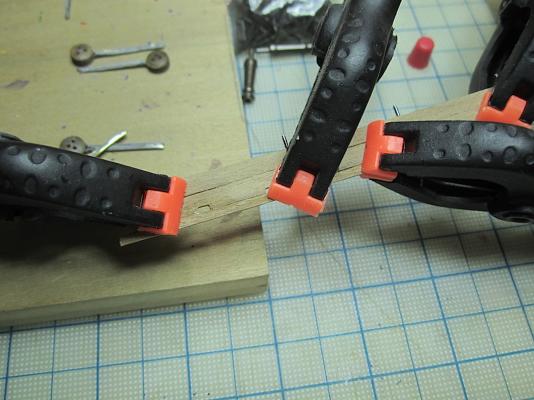
 Mark. I have a question, if you don't mind. I think that you mentioned that you added a ridge on your deck railings using your Proxxon milling machine? What did you use to attach the long strips as you were rotating the lateral wheel to get that perfect looking ridge? PS: Your railings look so excellent. Regards, Michael
 -
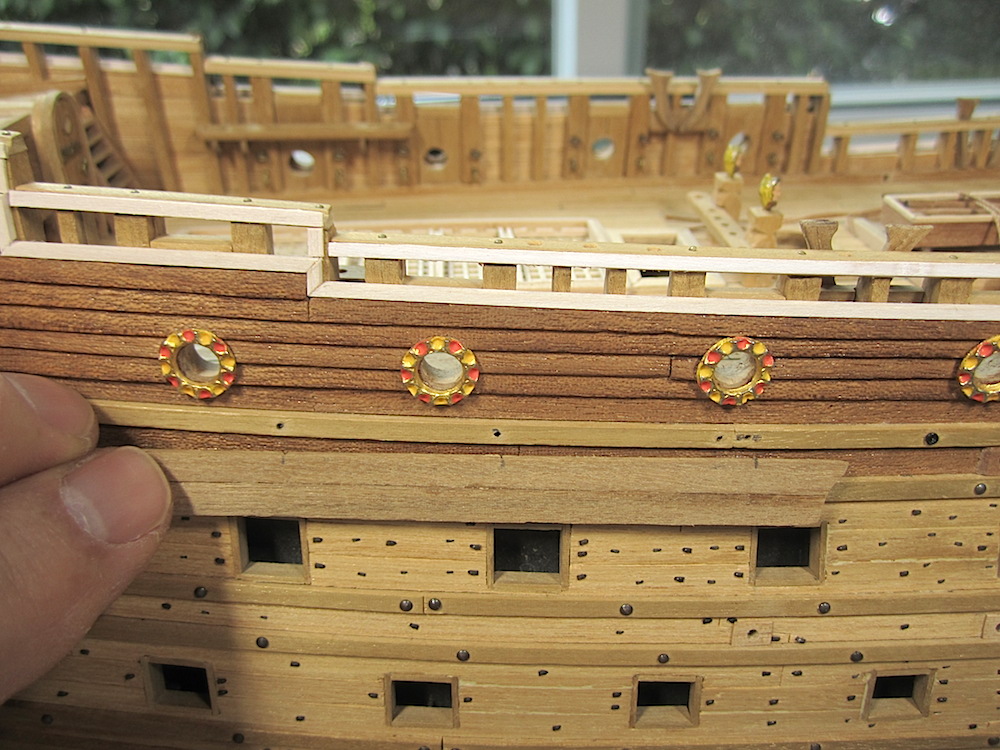
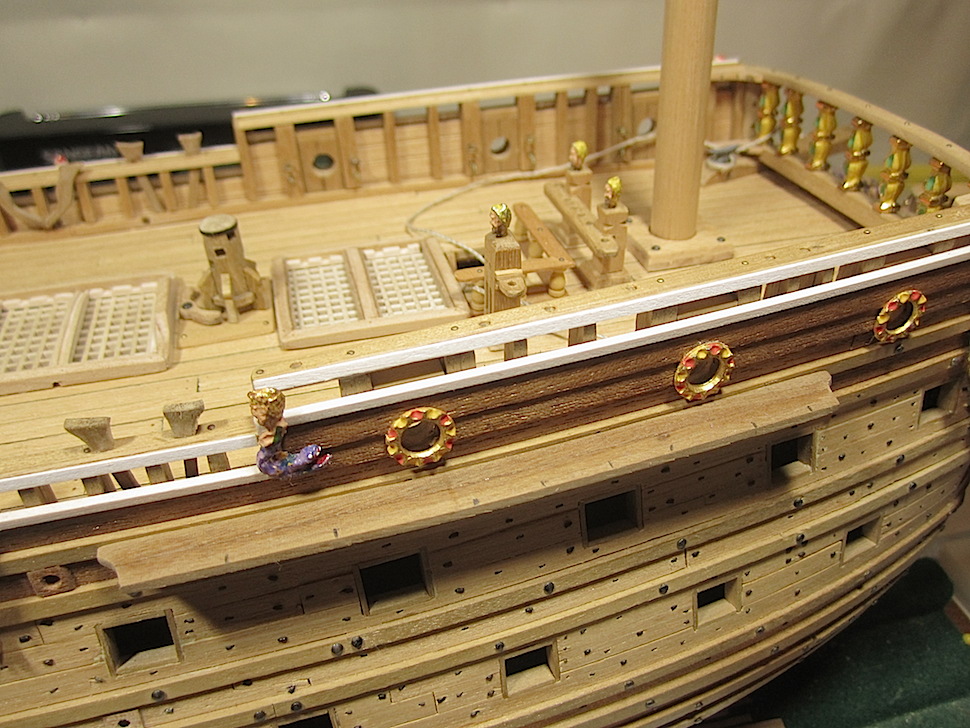
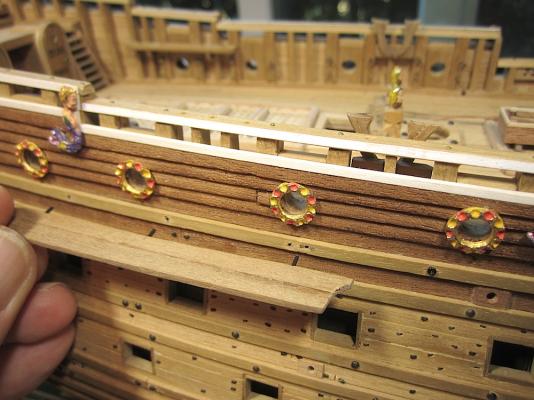
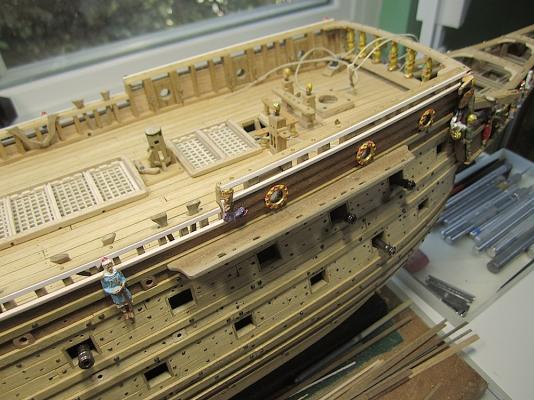
Hi Everyone, revised posting from yesterday's Part 1 of 2; chain-plate installations. Nothing new here, I've mirrored how most of you install these when there are no bracing timbers above or below the plates. In regard to this build there is, of course, an other error. The chain-plates, above the galleries, are to be attached to the hull upon, or just below large longitudinal timbers that run the length of the upper outer hull. I did not install these on each side. In deference to Corel their instructions were correct, I just missed it. I have an idea for a fix. Again, thanks to all of you for spending time here. Regards, Michael


-
Nigel, No need to waffle, as you might have assumed I'm looking forward to visiting your new build log. Michael
-
Ulises, I keep repeating myself.your rigging details and work are outstanding. Your rope making skills are excellent. congrats! Do you have rigging plans for the running rigging, as well as what Corel provides for standing rigging.? Regards, Michael
-
Nigel, Thanks Oh my it's 2:20 a.m. where you are in the UK as you responded. Must be that black tea keeping you up, or is it your SOS (:-) Michael
-
John, Nice update. I note that you really get around and have visited several ships, very nice. Good for you. One day I need to get to the East coast, several ships that must be great to board. Michael
- 2,250 replies
-
- 1
-

-
- model shipways
- Charles W Morgan
- (and 1 more)
-
Hi Lawrence, Thanks, yes it is a great gift one that I will use for a long time. Certainly a "must have" kind of tool for detailed work. I'm looking forward to learning how to use it. In regards to your question, My son noticed that I was getting much more "serious" with this hobby as this build progressed. He also noted that I had been purchasing some tools here and there. So he asked me what else I had on my shopping list. The MF 70 was the last on the list. As they say how your structure a list could come back to haunt you (:-) His mom told me that he actually intended to surprise me an iPad Air, but I had gotten one a few weeks ago (I was still tugging along with a first generation antique). So he needed to fill the gap. Perfect! Funnily enough he has absolutely no interest in this hobby, but he appreciates the effort and time involved. Thanks for asking, very kind. Regards, Michael
-
Dave, Made a second pot of coffee and went through you log. Very nice, the amount of details that you have added through your excellent research is paying of handsomely. Beautiful build. Glad I found your log after you dropped in on mine. Kudos to your work Regards, Michael PS: As many have, I also built the Revell Constitution so many years ago. Interestingly enough the revel kit still stands up today as a plastic kit.
- 601 replies
-
- 1
-
-
- constitution
- revell
- (and 1 more)
-
Dave, Funny thank. I then linked on your Constitution log. WHOA beautiful work. I will now follow your build. Very creative work. I'm happy that you dropped by and posted. Michael
-
B.E. Thanks, no I did not get the Proxxon bits. I do, however have four end bits that range from .8 mm to 2.mm. I got these through an Amazon vendor in Israel. They seem to be of very good quality. I will look for the larger ones through Proxxon thanks for the tip. PS: Do you have this as well? I'm tempted. I know that you are very happy with your MF70 from Proxxon. http://www.amazon.com/gp/product/B0029VQO58/ref=ox_sc_act_title_1?ie=UTF8&psc=1&smid=ATVPDKIKX0DER Michael
-
Not an update, but my favorite son (we only have one child) got his dad an early Christmas present. It showed up yesterday. Hmmmm so happy. I think that my need for tools is over, now just more ships (:-) Presently working on the Vasa chain plates. Regards, Michael

-
Matti, NIce. YOUR Billings is so close to the 1/10th. Good work. Nice build. Michael
-
Andre, Your milling machine work is very accurate. Nice work. Thanks for mentioning me in your idea. Nice of you. Very nice paint work on your lions looking very good. You now gave me inspiration for how to paint mine. I will follow your example. Thanks Michael
-
ancre Le Fleuron by cabrapente - FINISHED
md1400cs replied to cabrapente's topic in - Build logs for subjects built 1501 - 1750
Cabrapente, Your latest updates are so excellent. Even at extreme camera lens close-ups (something that I fear) your work becomes intoxicatingly even more beautiful. You are a great artist Con gran respeto Michael -
Gil, YES thanks for all of the above. So nice of you to share in great detail. I'm sure many of us have learned "a bunch" just from just your last two posts. Regards, Michael
-
Thanks much appreciated. It is amazing. Its restoration/resurrection opens such a great window into the 1600s for us modelers and the public in general The Vasa is soo up your alley. Your build would be so excellent. PS: if you go for that sunken treasure, Corel is the weakest in regard to accuracy, as you probably noted being a fan of that ship. MJD
-
AJ, Hi. Just discovered your build log. Very very nice, your attention to small details is very excellent. I will enjoy following along. Regards, Michael
- 304 replies
-
- 1
-
-
- niagra
- model shipways
- (and 1 more)
-
Mark, yes very clear follow up. Much appreciated. Excellent solution. Very creative on your part. This never even occurred to me whoa (:-) These will look very close to the original on the 1/10th as well as the 1:1 I think that when you add the ropes to your deadeyes the off center holes will mostly visually disappear. Thanks for the extra pics. Michael
-
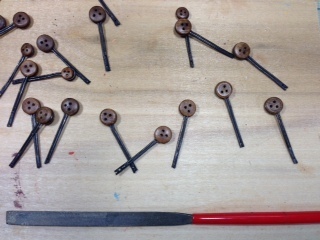
Mark, EXCELLENT..I am also struggling with the chainplates. Age of Sail also sent me those Amanti plates, but with round blocks. I found that trying to assemble them was futile. So now I'm working with those included in the kit, but they are not correct either. I would like to get better looks at what you did, it really looks excellent. I would like to revisit those Amanti pieces and follow your excellent design. I also like those triangle shaped blocks. Would you be so kind as to post a close-up of how you adapted those pieces, especially at the block end? It looks as though you also shortened the plate and bent it over the brass rings which you inverted to loop towards the inside. The pic is What Corel supplies for several of its kits. Not even a single, but a trike out. Also way too long. Thanks in advance Michael
-
JP, Thanks the admiration is certainly mutual (:-) Your log has also been such a pleasure to follow. I've learned a lot from your very copious and well illustrated postings. Your Rattlesnake is super. PS: Good luck with your Victory as well. That ship separates the adults from the children (I'm just a "teen" so far) Michael
-
Lawrence, Hi, those double laminated blocks are NOT mine. They are from Andre's very beautiful Wasa also a Corel kit. I was just using HIS pic as a reference from his build log. If you have not dropped in on his build, you are missing a really beautiful project. I do not (yet) have the Proxxon 37110 milling machine. I will order that very soon That should complete my need for tools. When the milling machine with the XY table arrive, I will try to slot those double deck vertical pulley blocks. I do thank you for you your nice comments about the triple blocks, I did those "by hand" so they are a bit sloppy, but came out better than I hoped for. Regards, Michael
-
Andre, I'm happy that my build is also of benefit to yours. I have learned so so much by visiting other builders' logs here at MSW. My skills have so improved as well. Yes that Proxxon milling machine will be mine after the new year. I went back and looked at your upper railings again, they do look so good. I was also going to follow your idea on how you designed the deck rope vertical pulleys (I don't know their specific name) The pic below is from your build. Very nice. Question?? where did you obtain those brass pulleys? Again, I appreciate your nice comments. Michael
-
Hi JP, Yes to all of the above comments. I also really like your hull treenails Whoa. beautiful. Nice to see your updates again. Regards, Michael
-
Joachim, So nice to see an update on your build. Wacko is SO correct. The amount of superlative extra details, at every step of your build, that you are incorporating is so beautiful to see. Your quality of work is superlative. Your ship is already certainly light years ahead of the basic kit. Whoa Nice, very nice indeed. Regards, Michael
-
Lawrence, Thanks for your confidence, Yes it will be a challenge, especially the masts and spars, much more detailed that the century earlier Vasa. I also plan to copper the lower hull. I'm gathering much info and numerous photos, placing those into files so that when I start it won't be a total mystery. Though it seems that very little original information is available regarding the details of this ship. Michael