Glenn-UK
-
Posts
2,639 -
Joined
-
Last visited
Content Type
Profiles
Forums
Gallery
Events
Everything posted by Glenn-UK
-
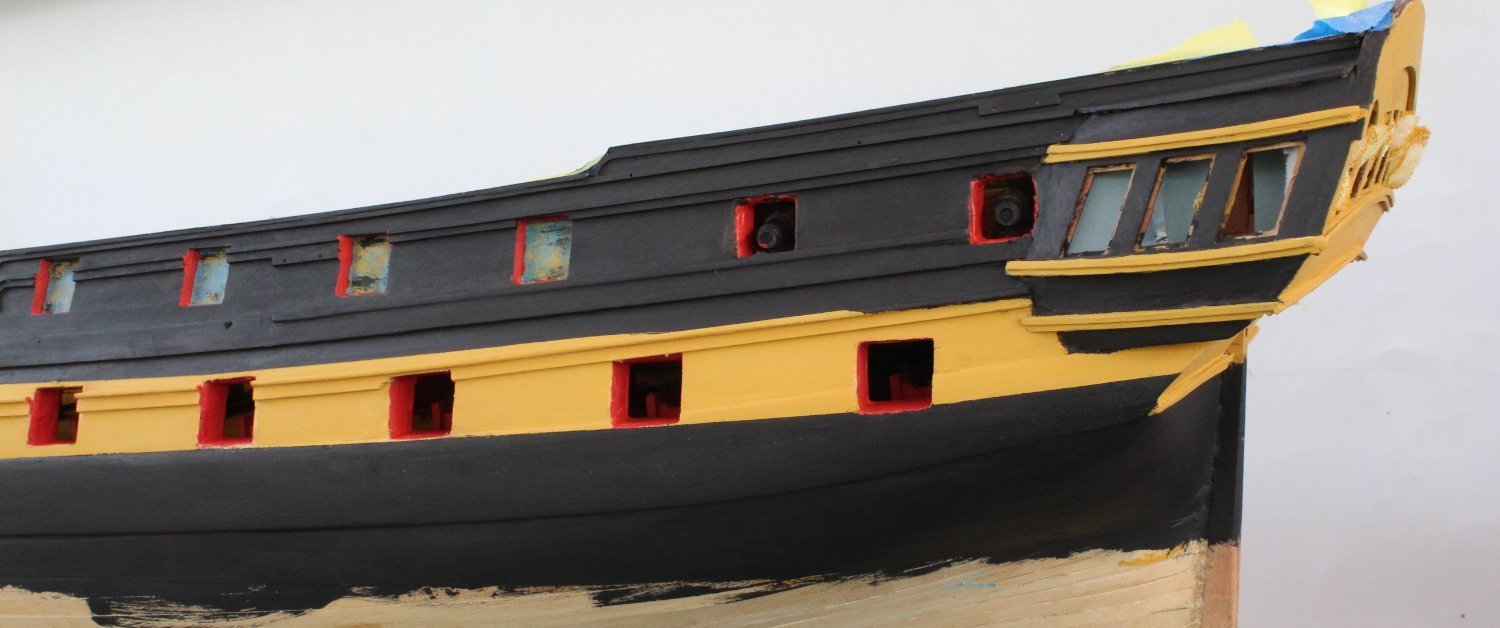
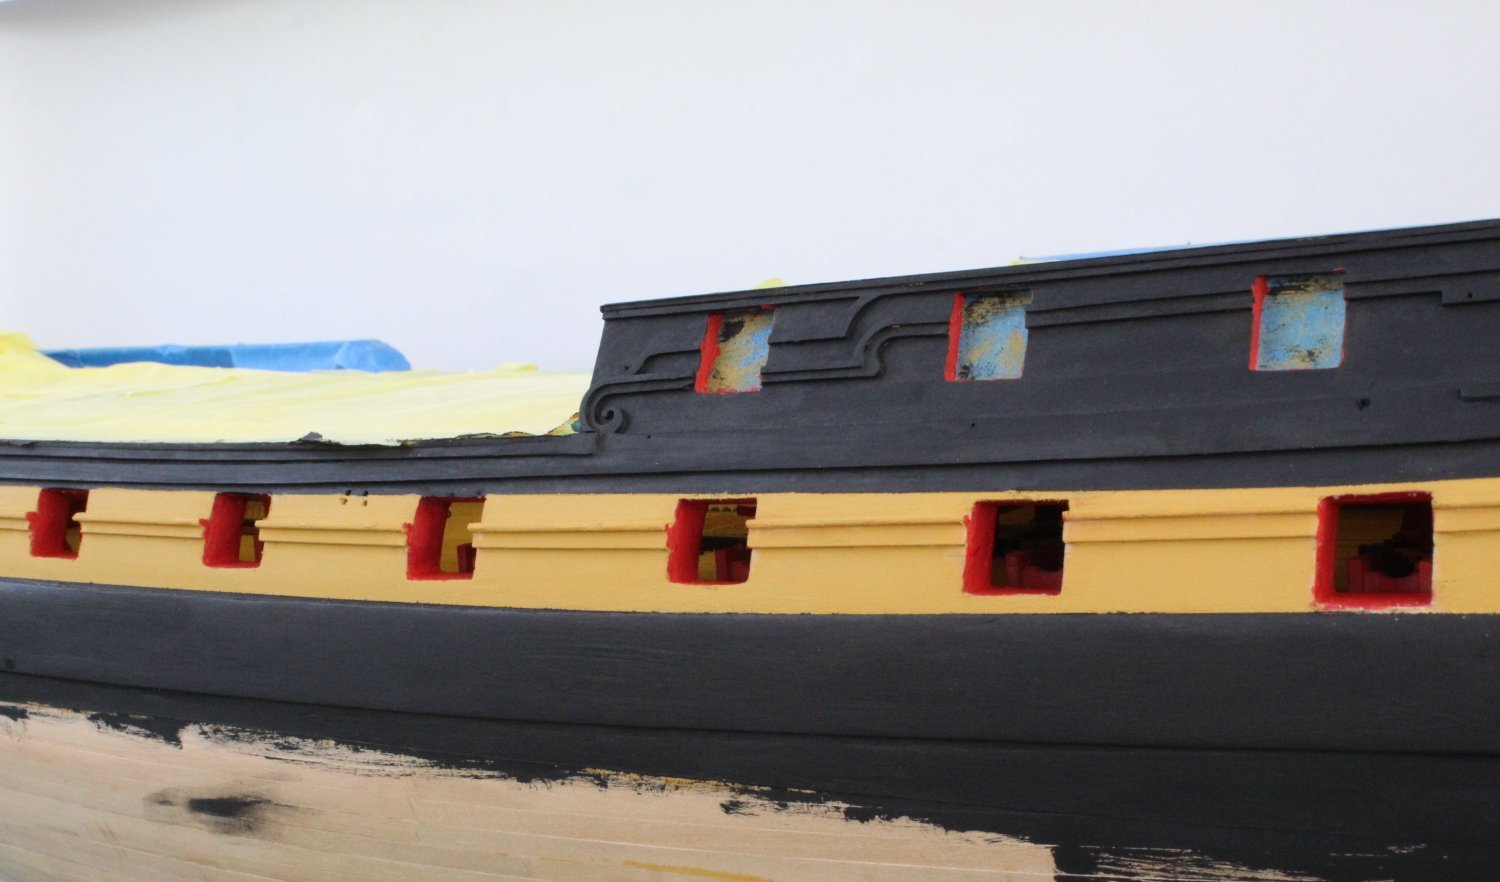
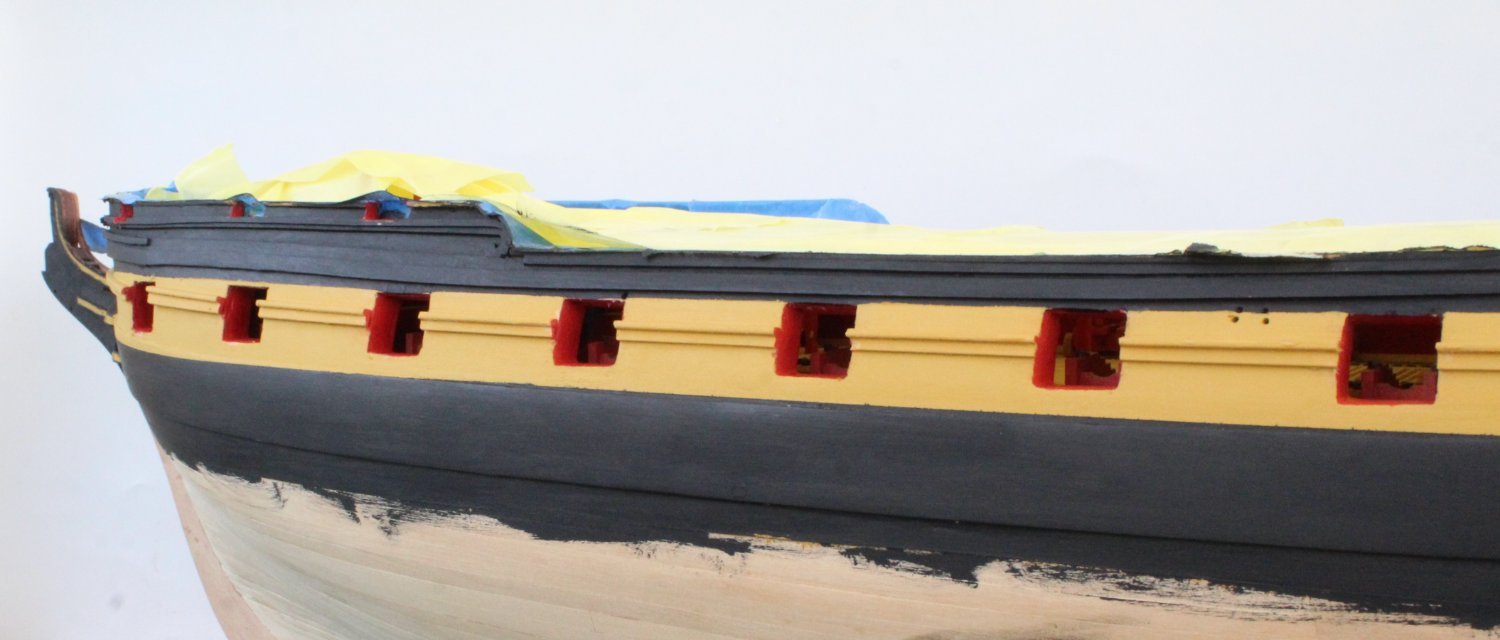
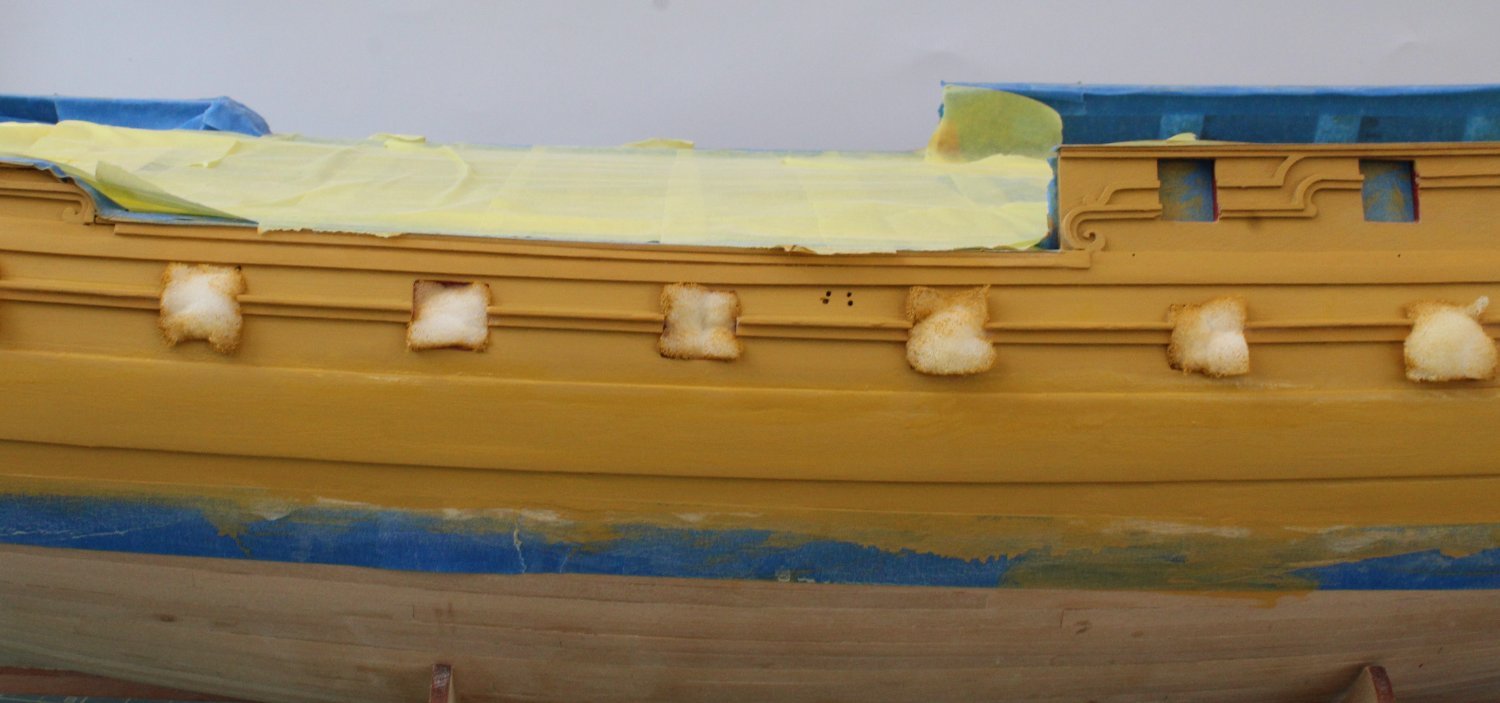
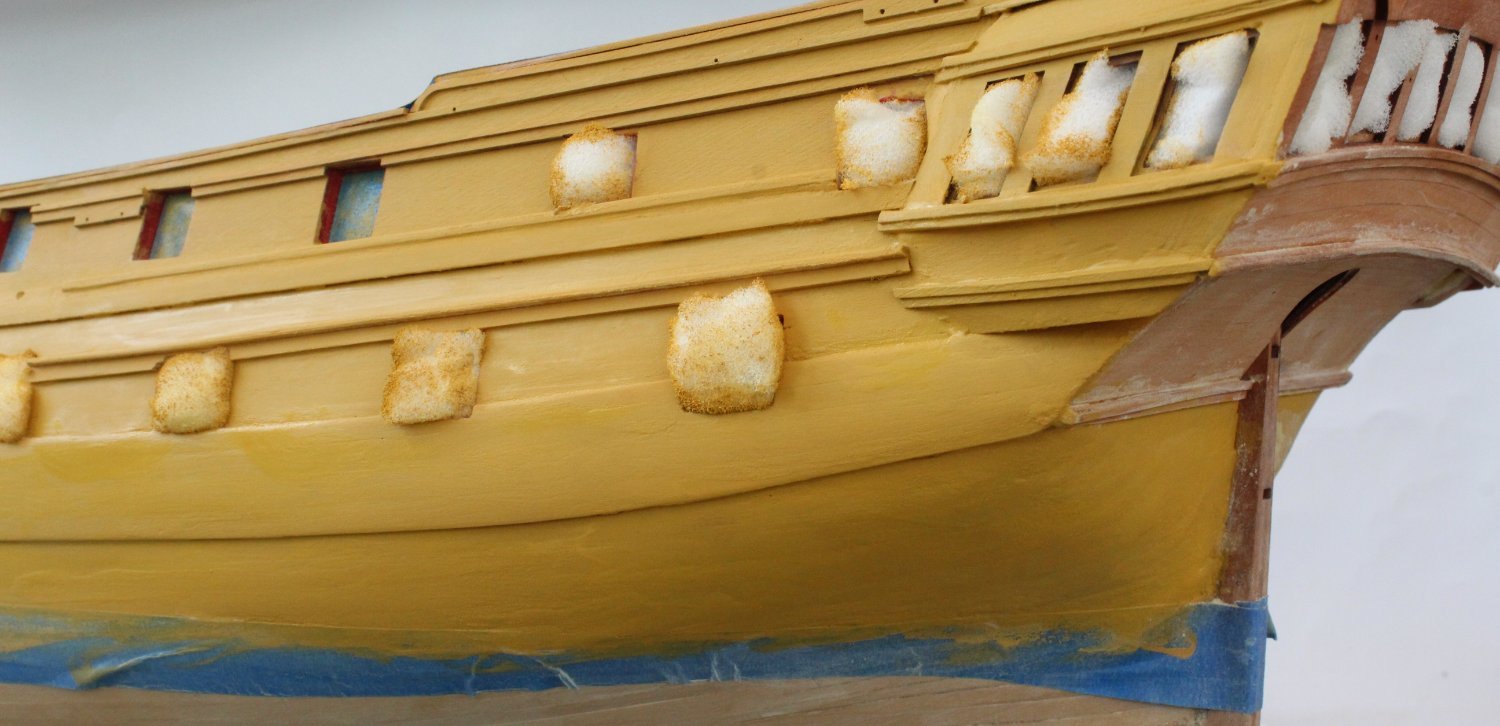
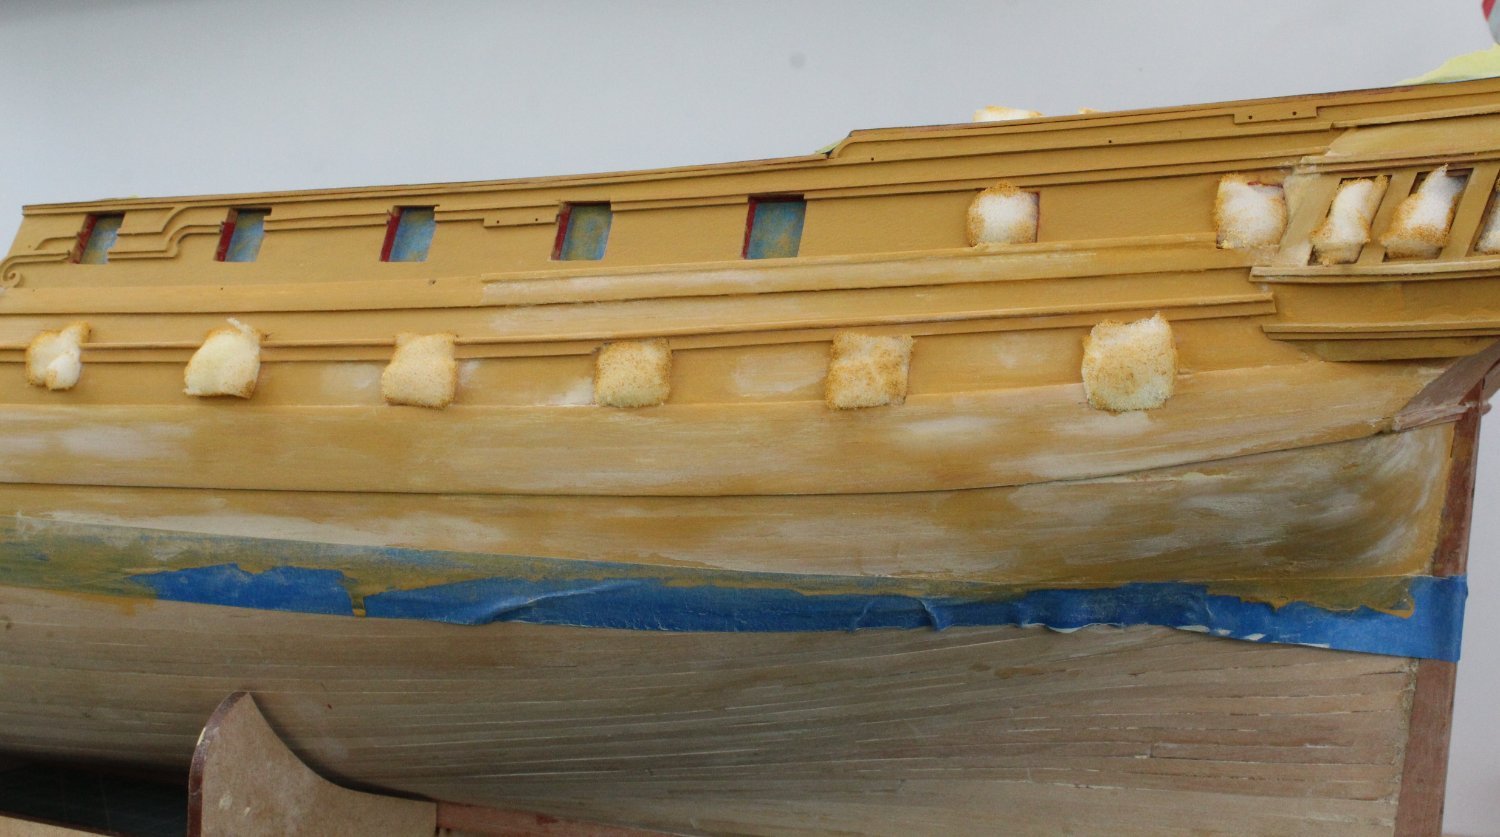
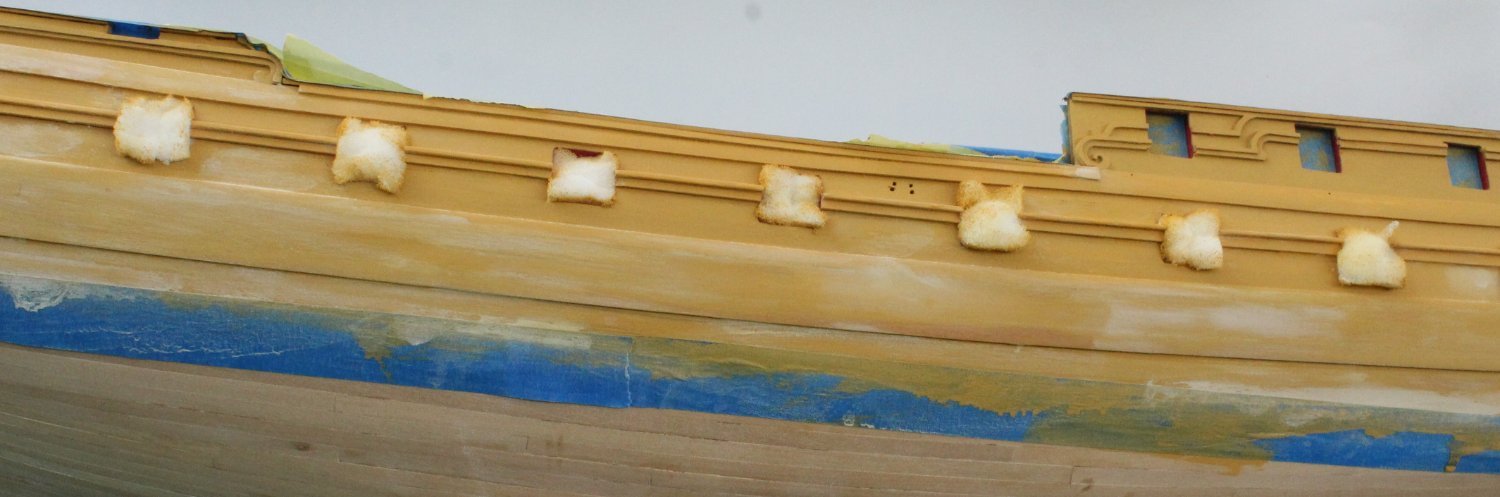
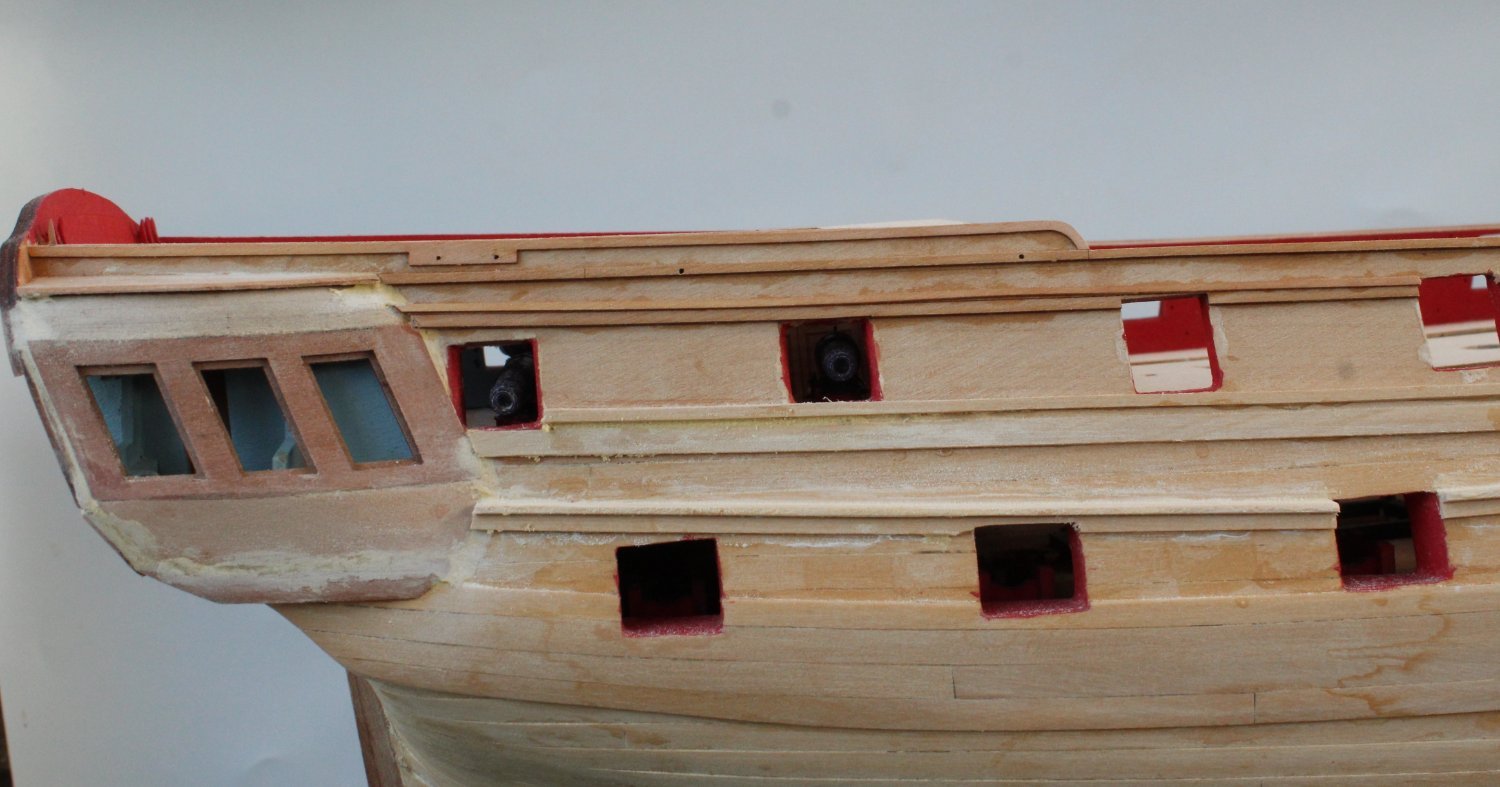
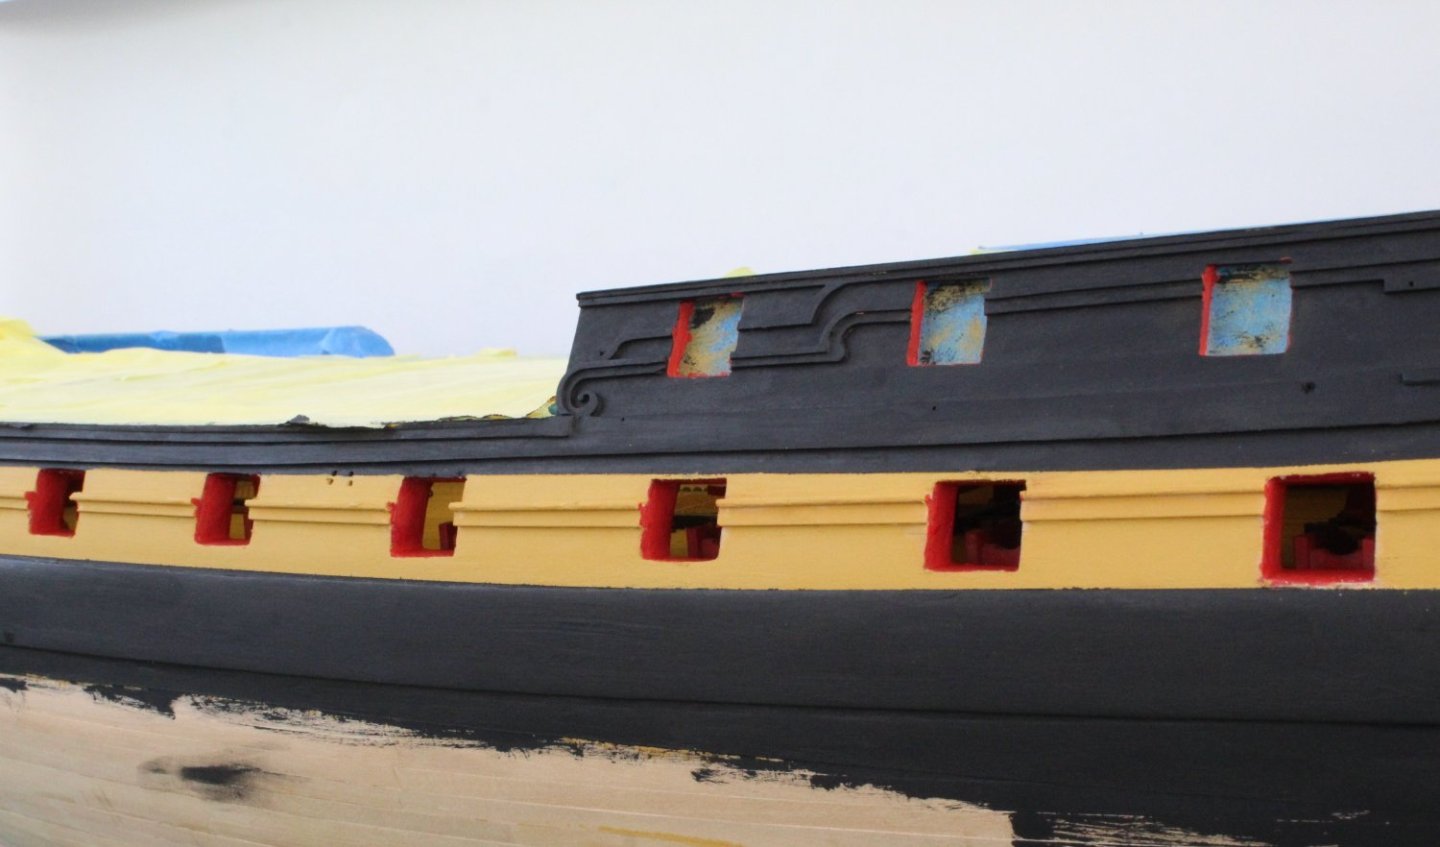
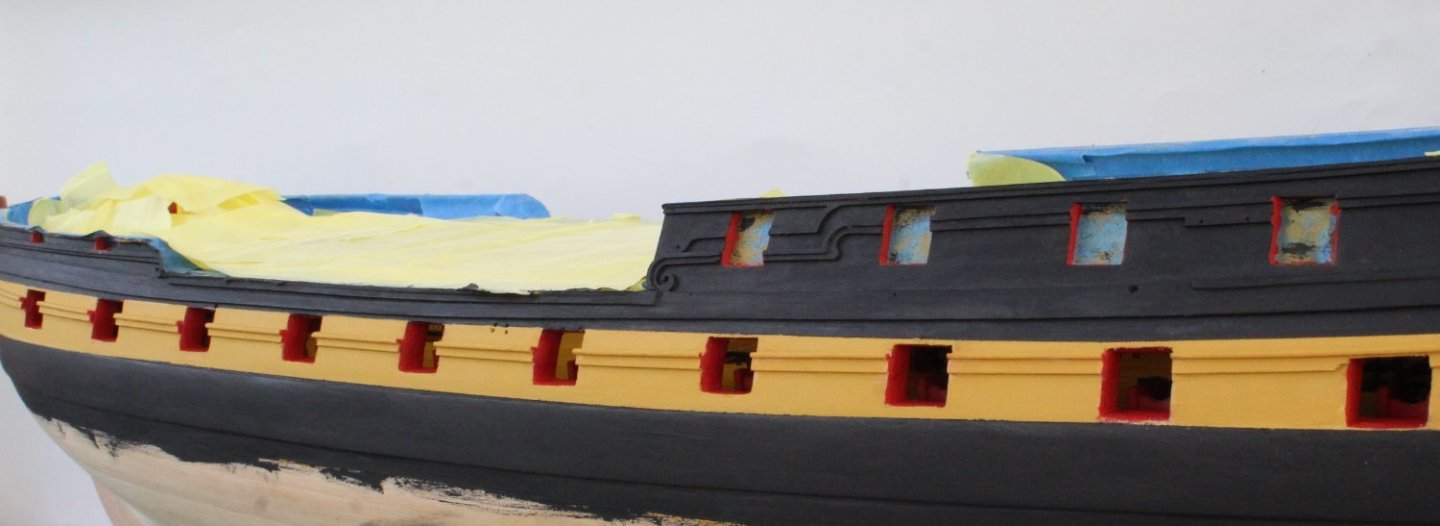
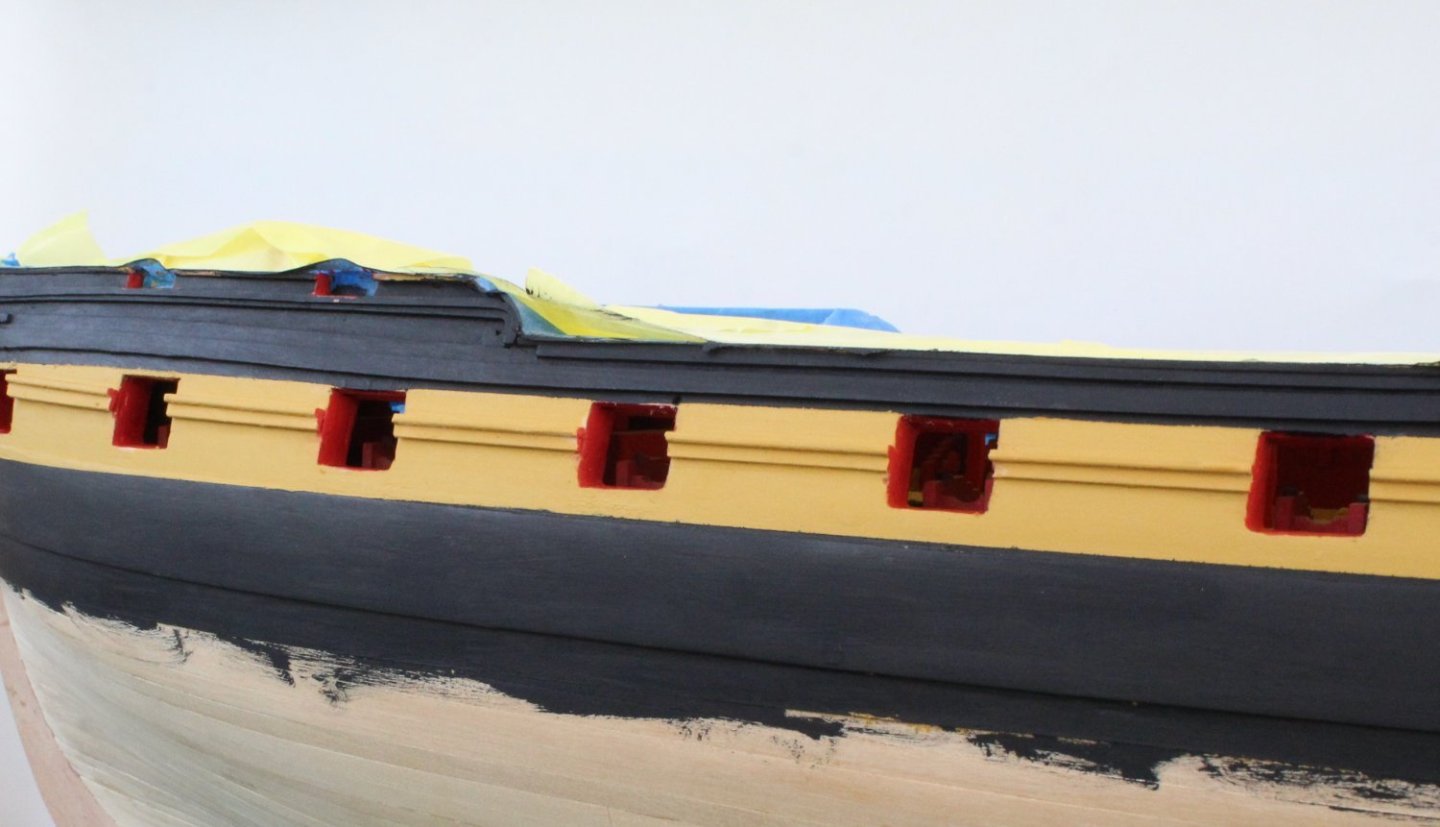
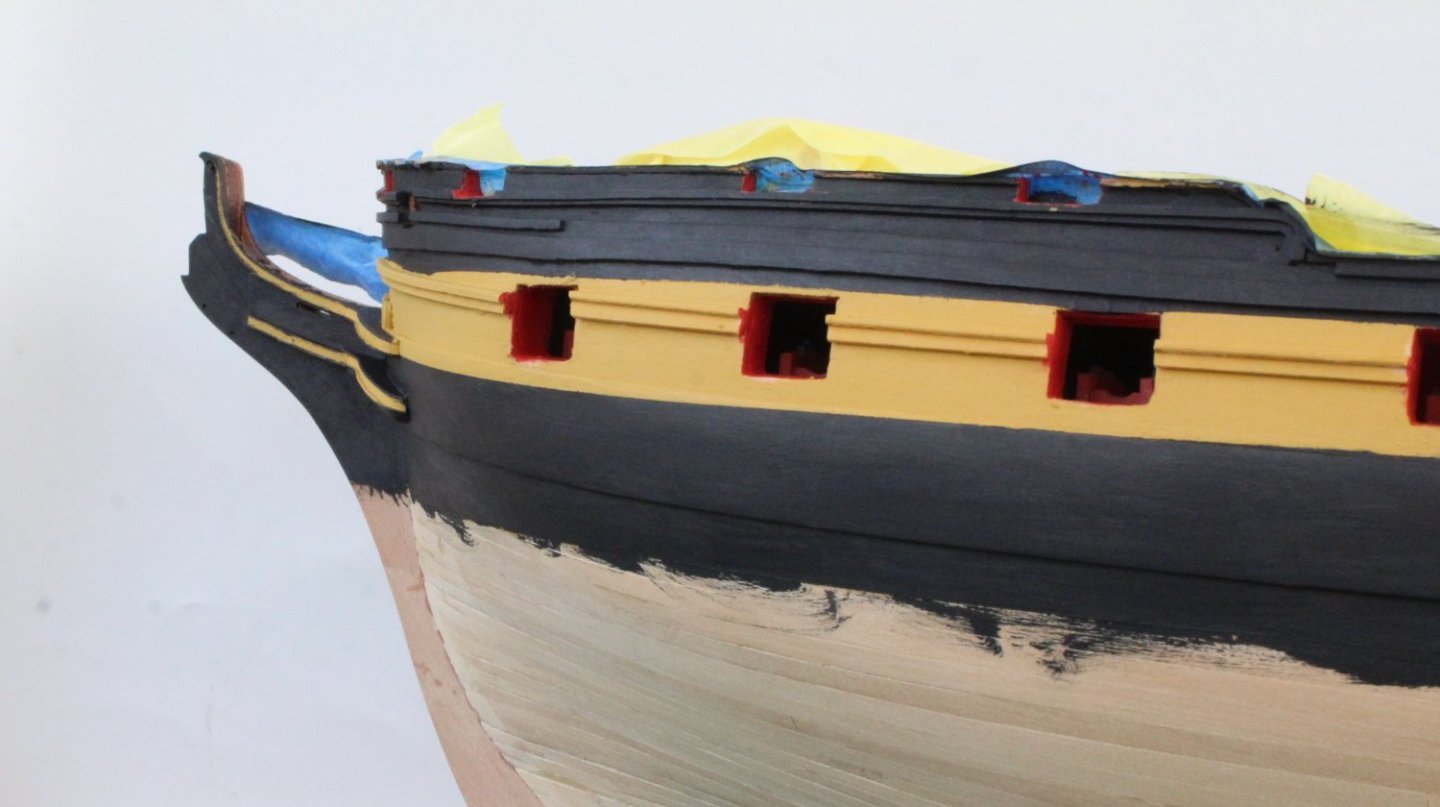
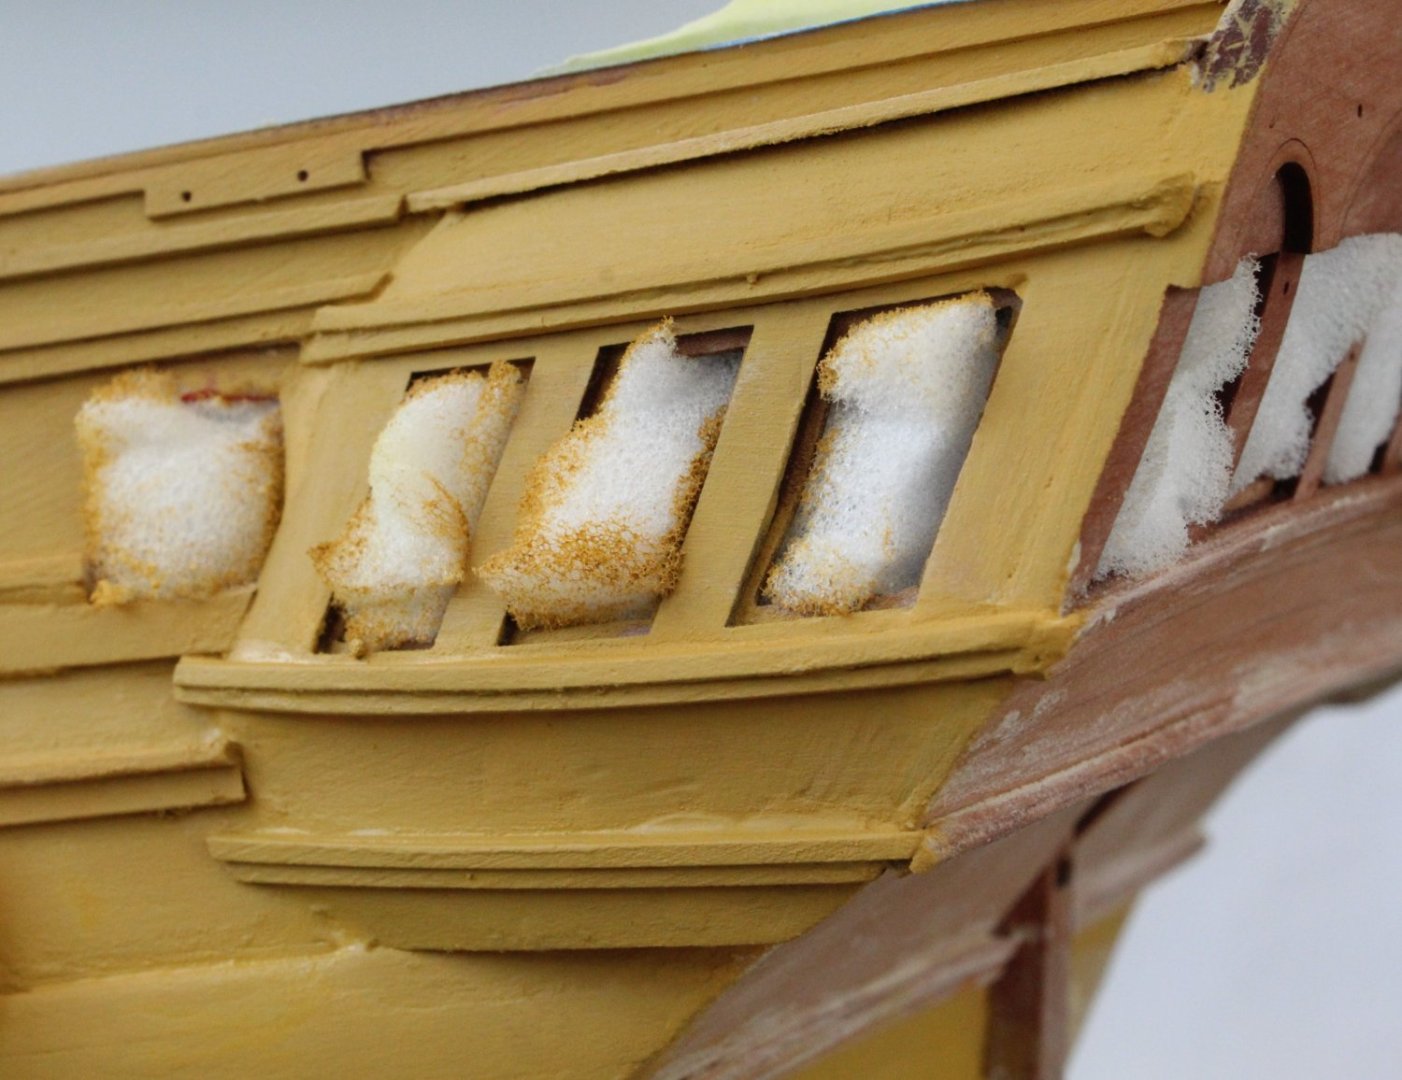
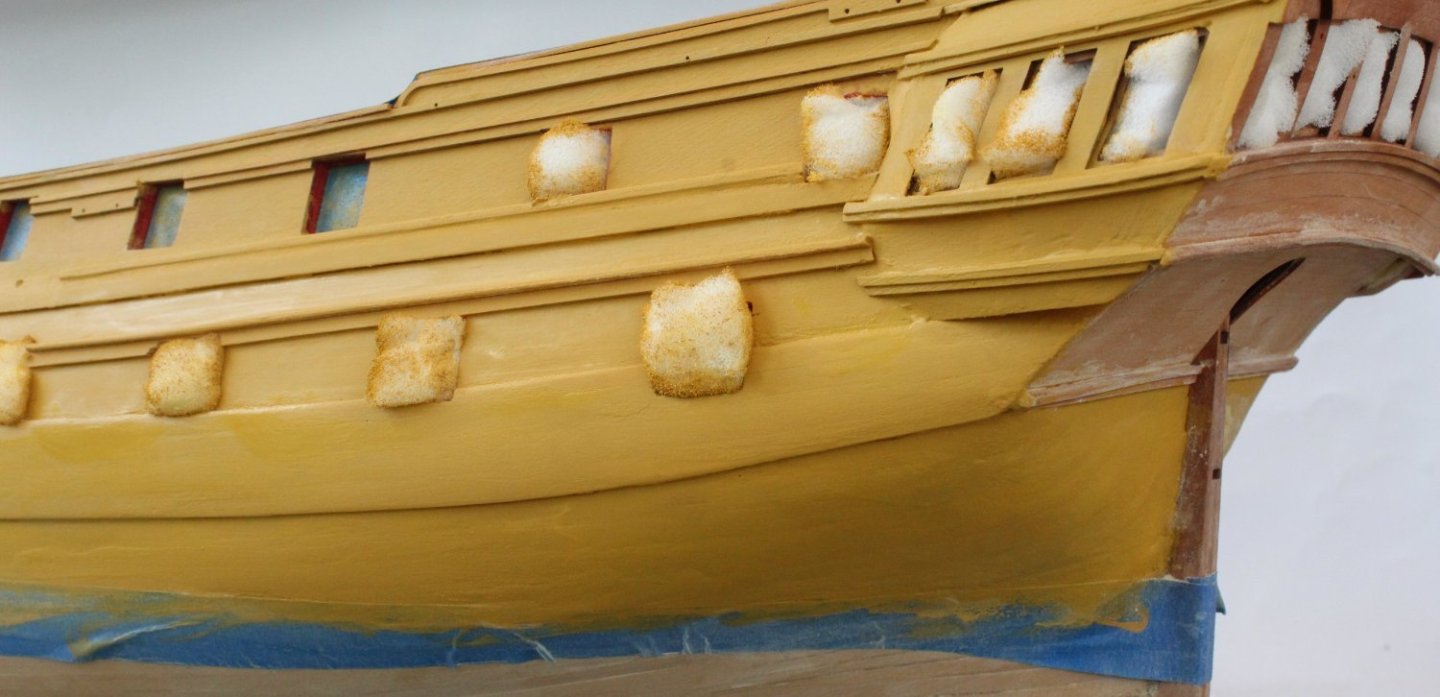
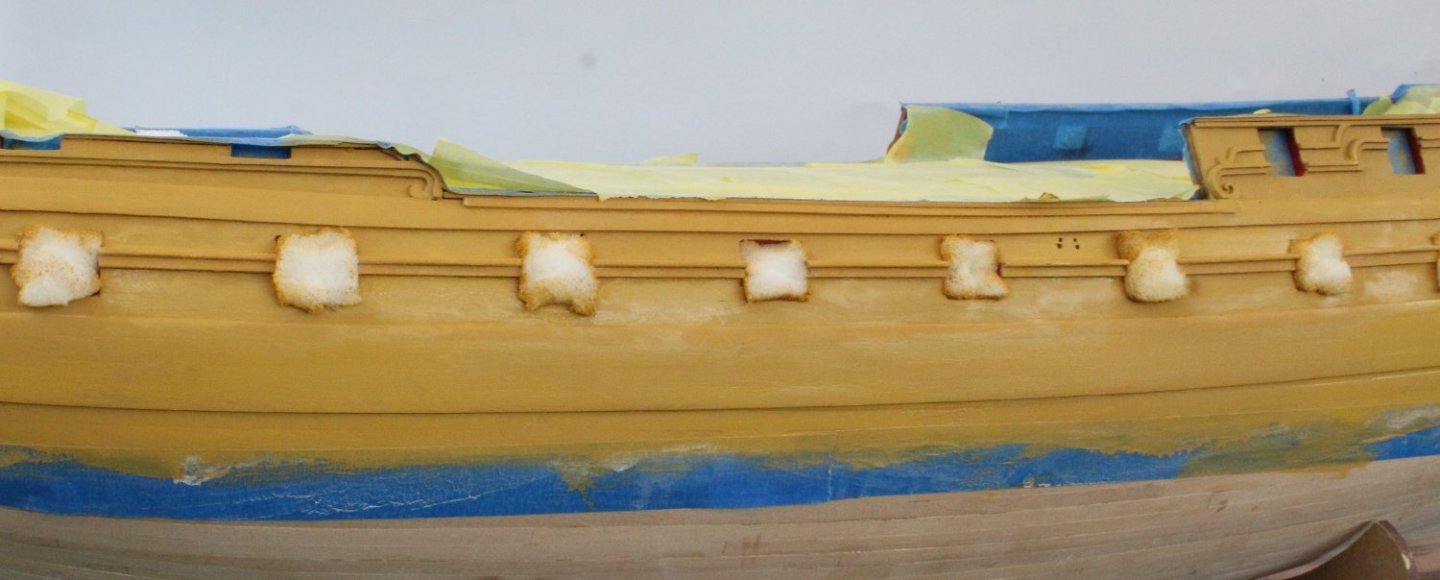
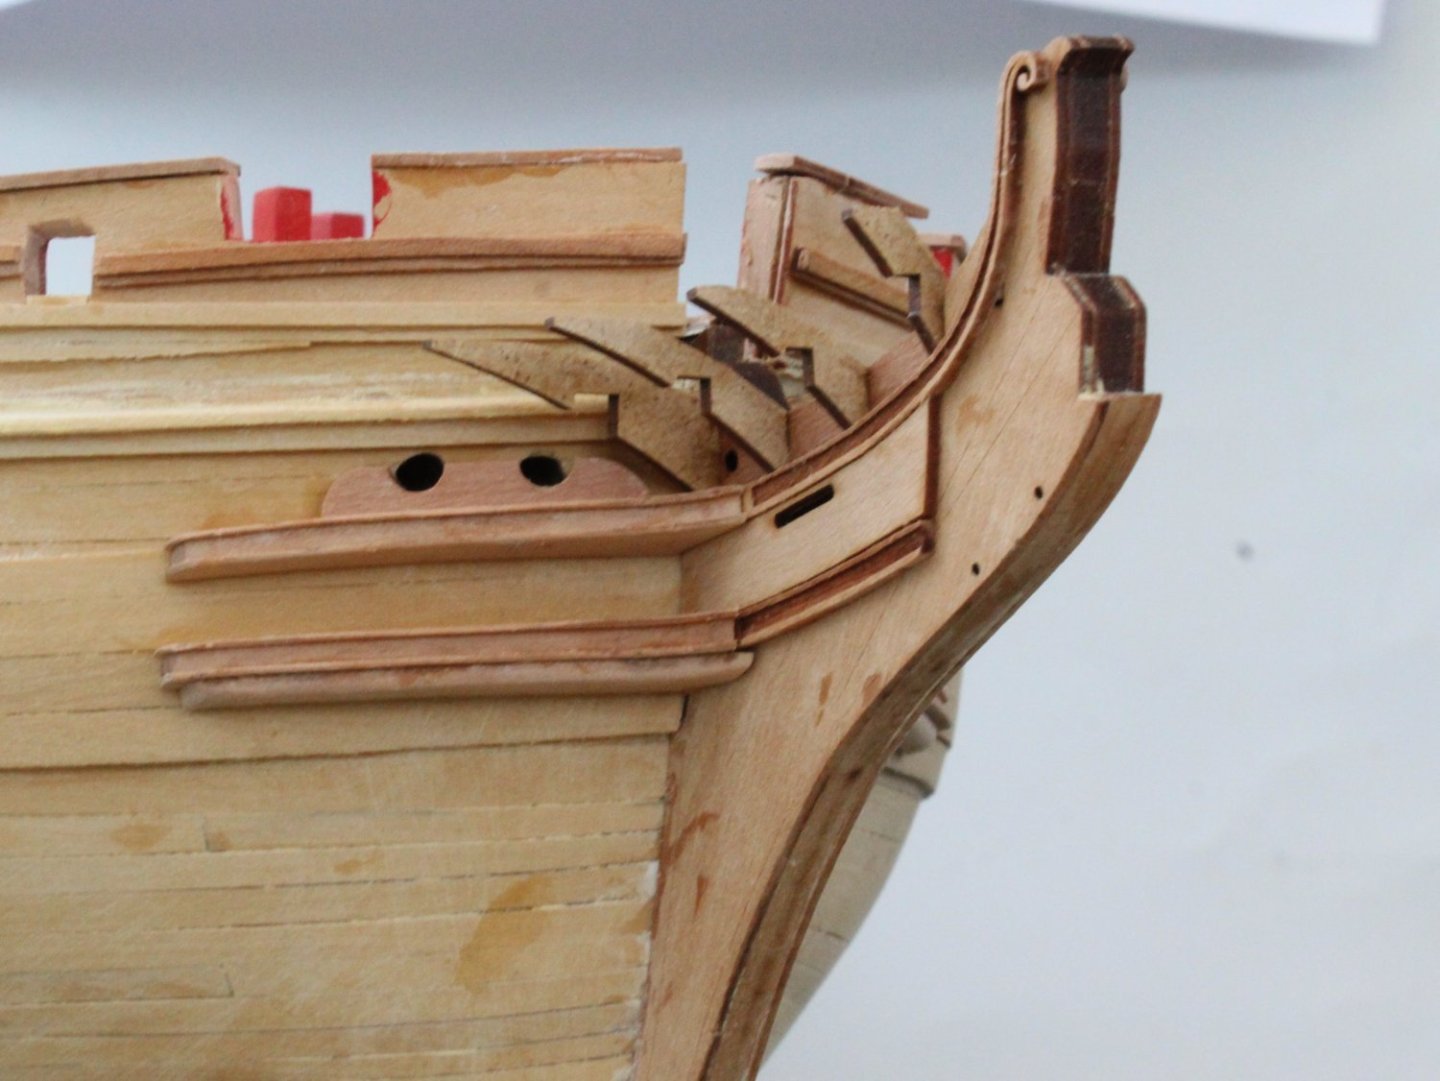
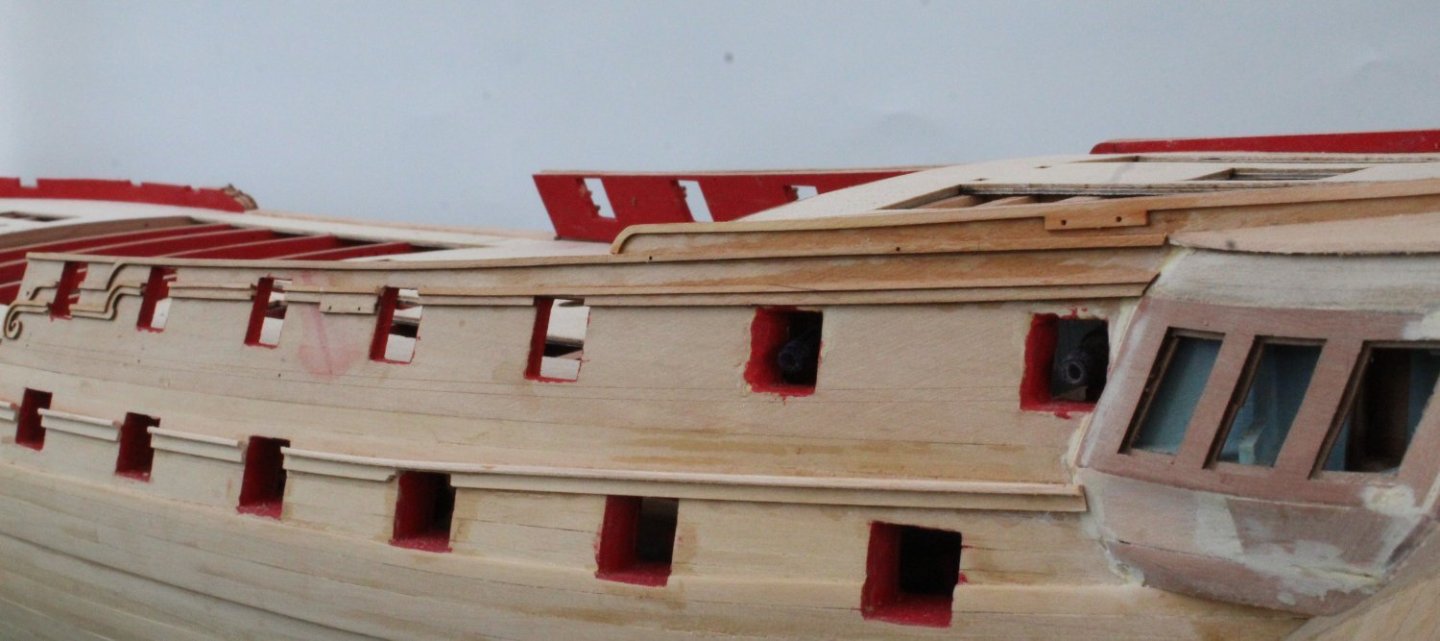
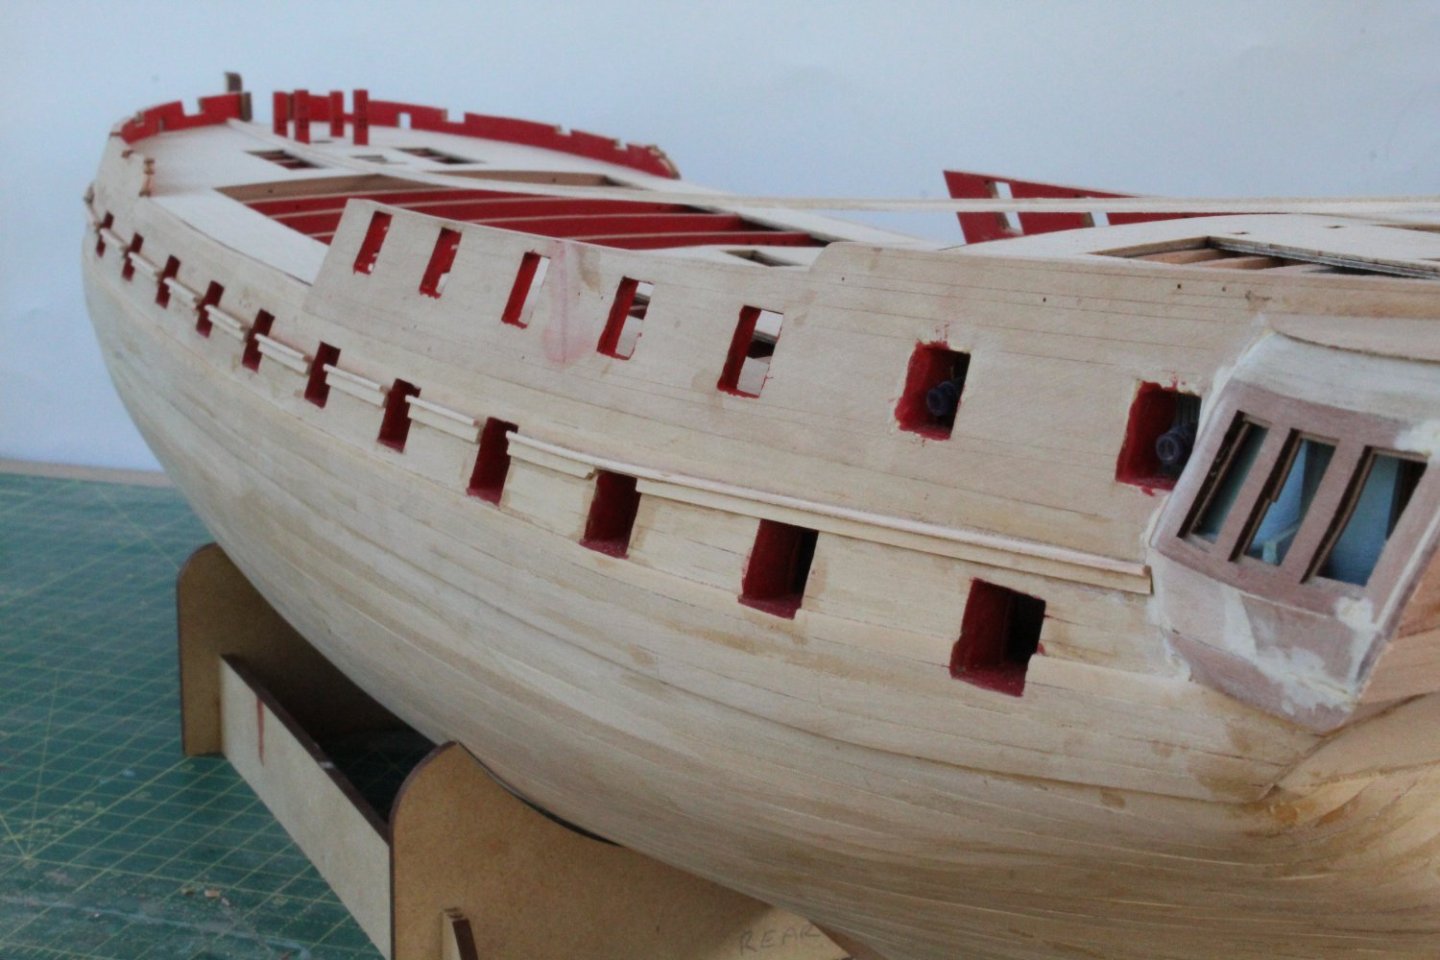
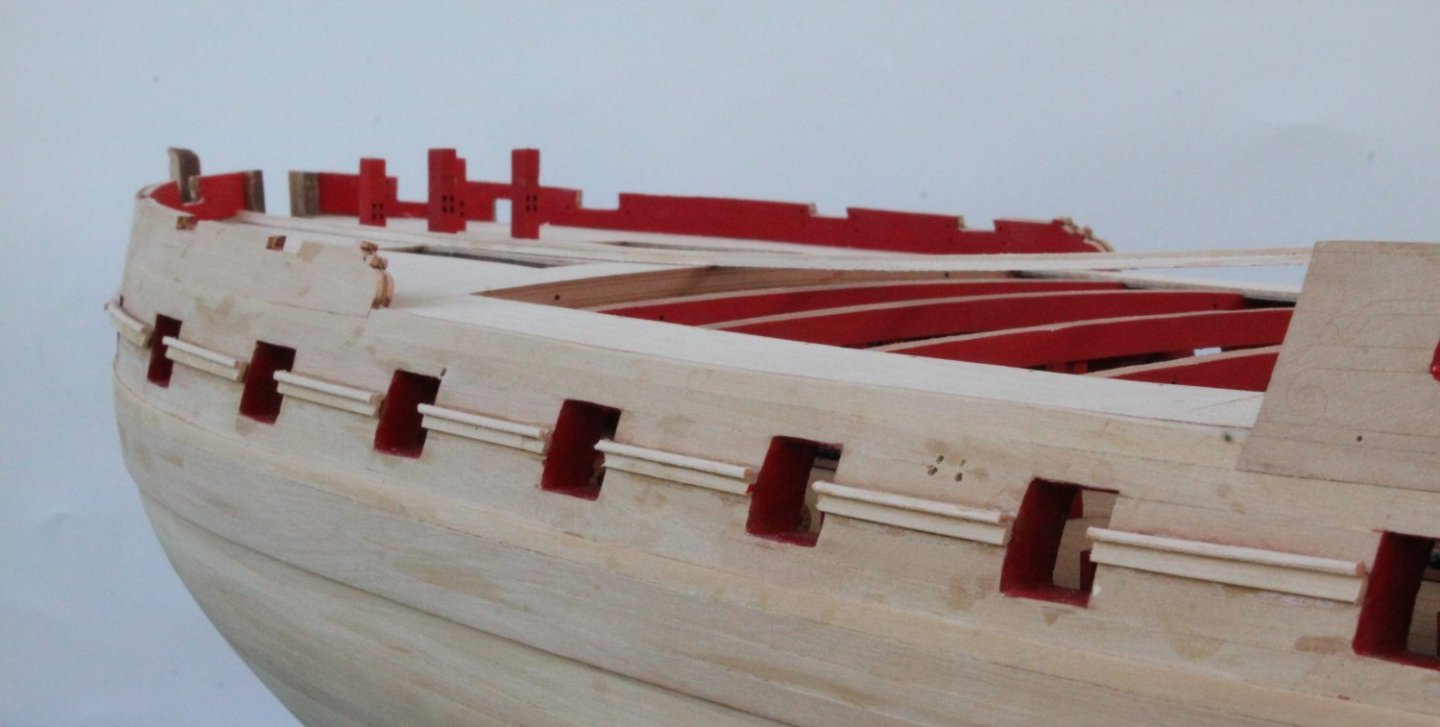
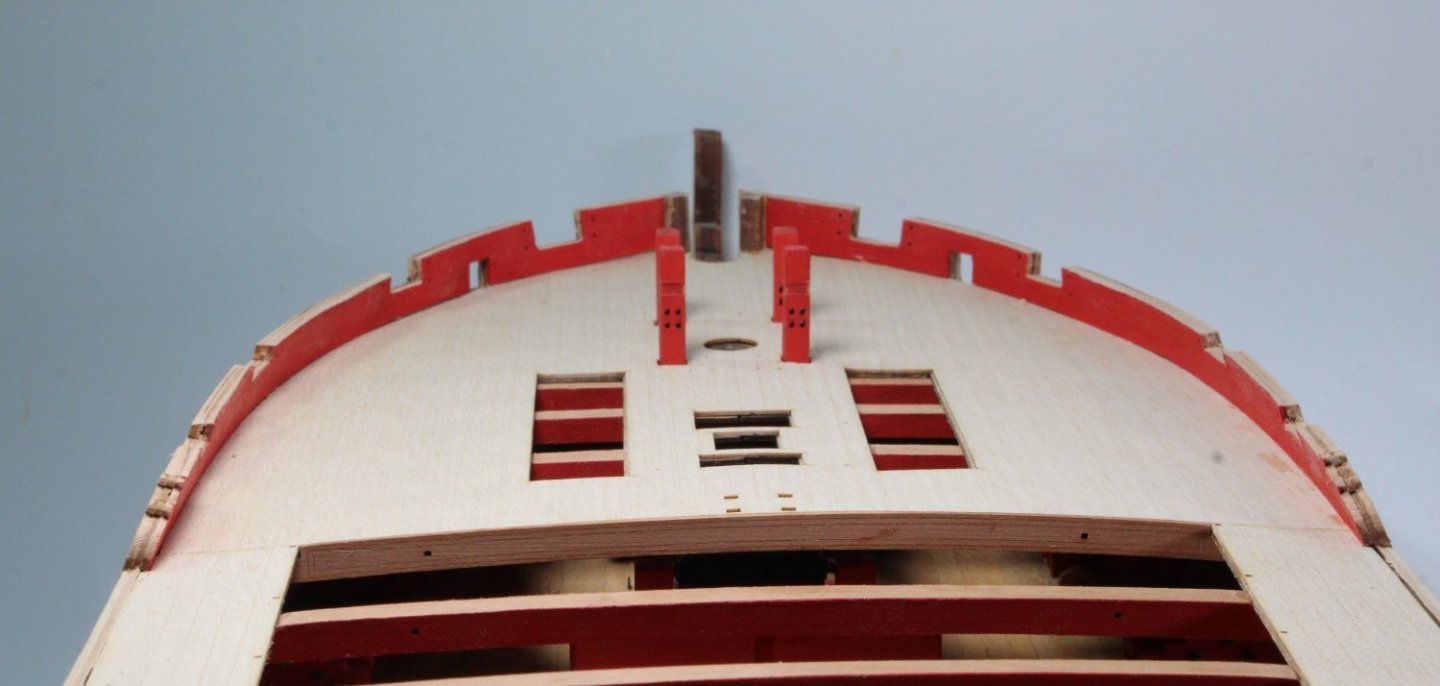
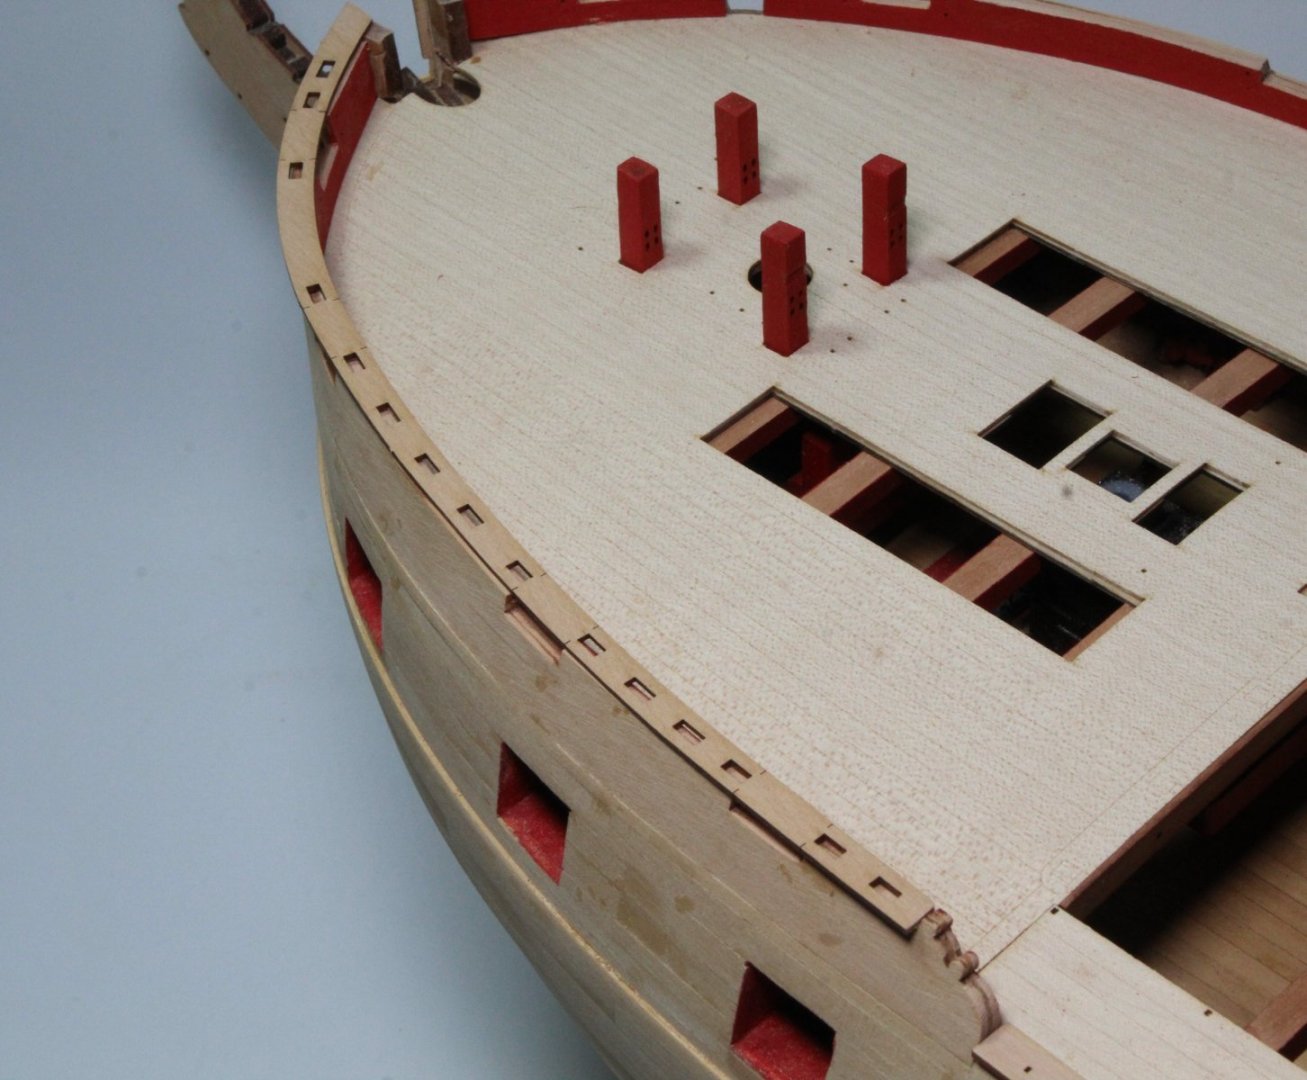
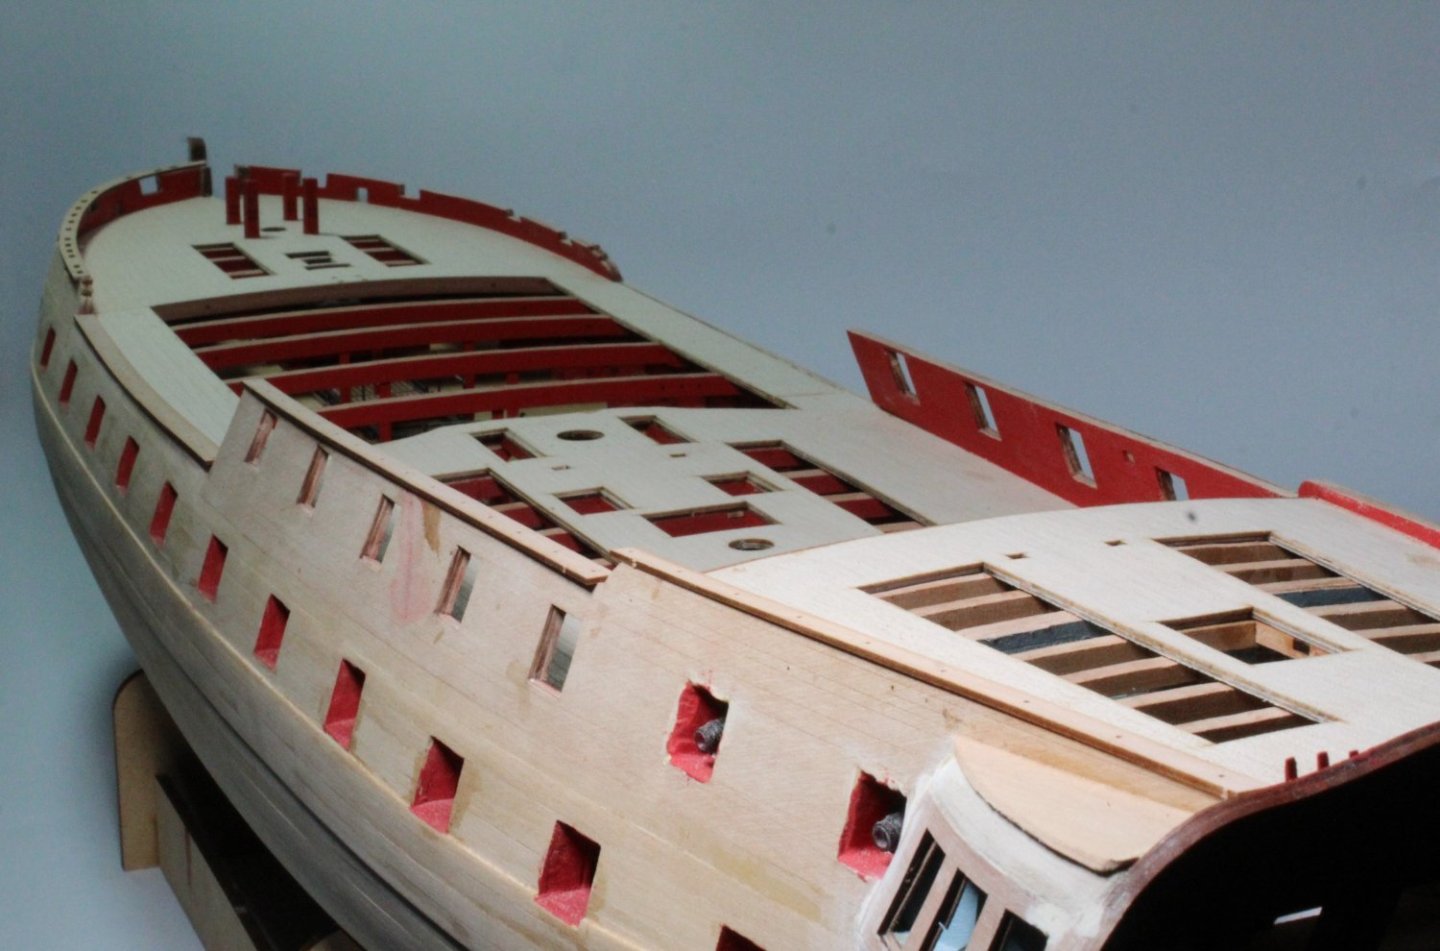
 Hull Painting - Left Hand Side The painting of the hull (left hand side) continues at a slow pace. The black painting was added after the yellow central section taped. I did not end with perfect clean cut lines once the tape was removed but it now looks much better after some rework. The gunport openings were then retouched with red paint. I don't think I can get it too much better unless I strip back and start again. I will now be moving on to painting the stern area and after that the right-hand side of the hull. Midship Photos Bow Area Photos
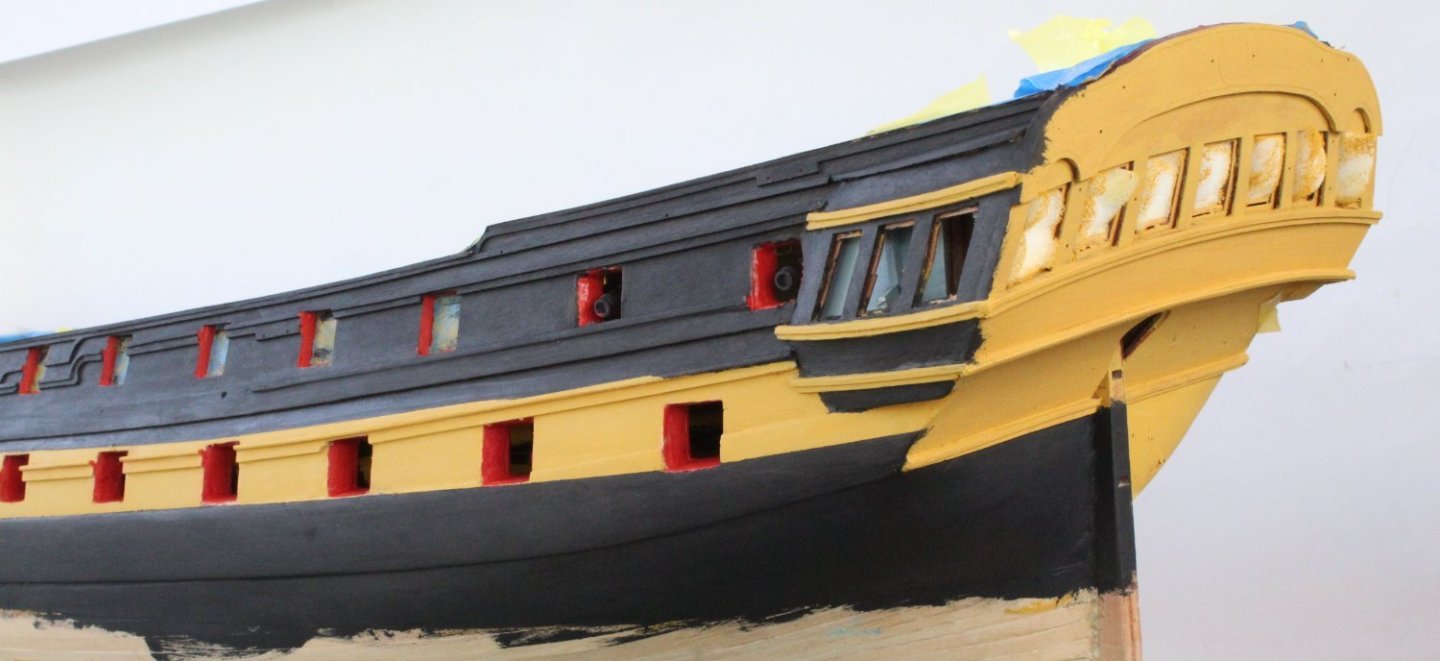


-
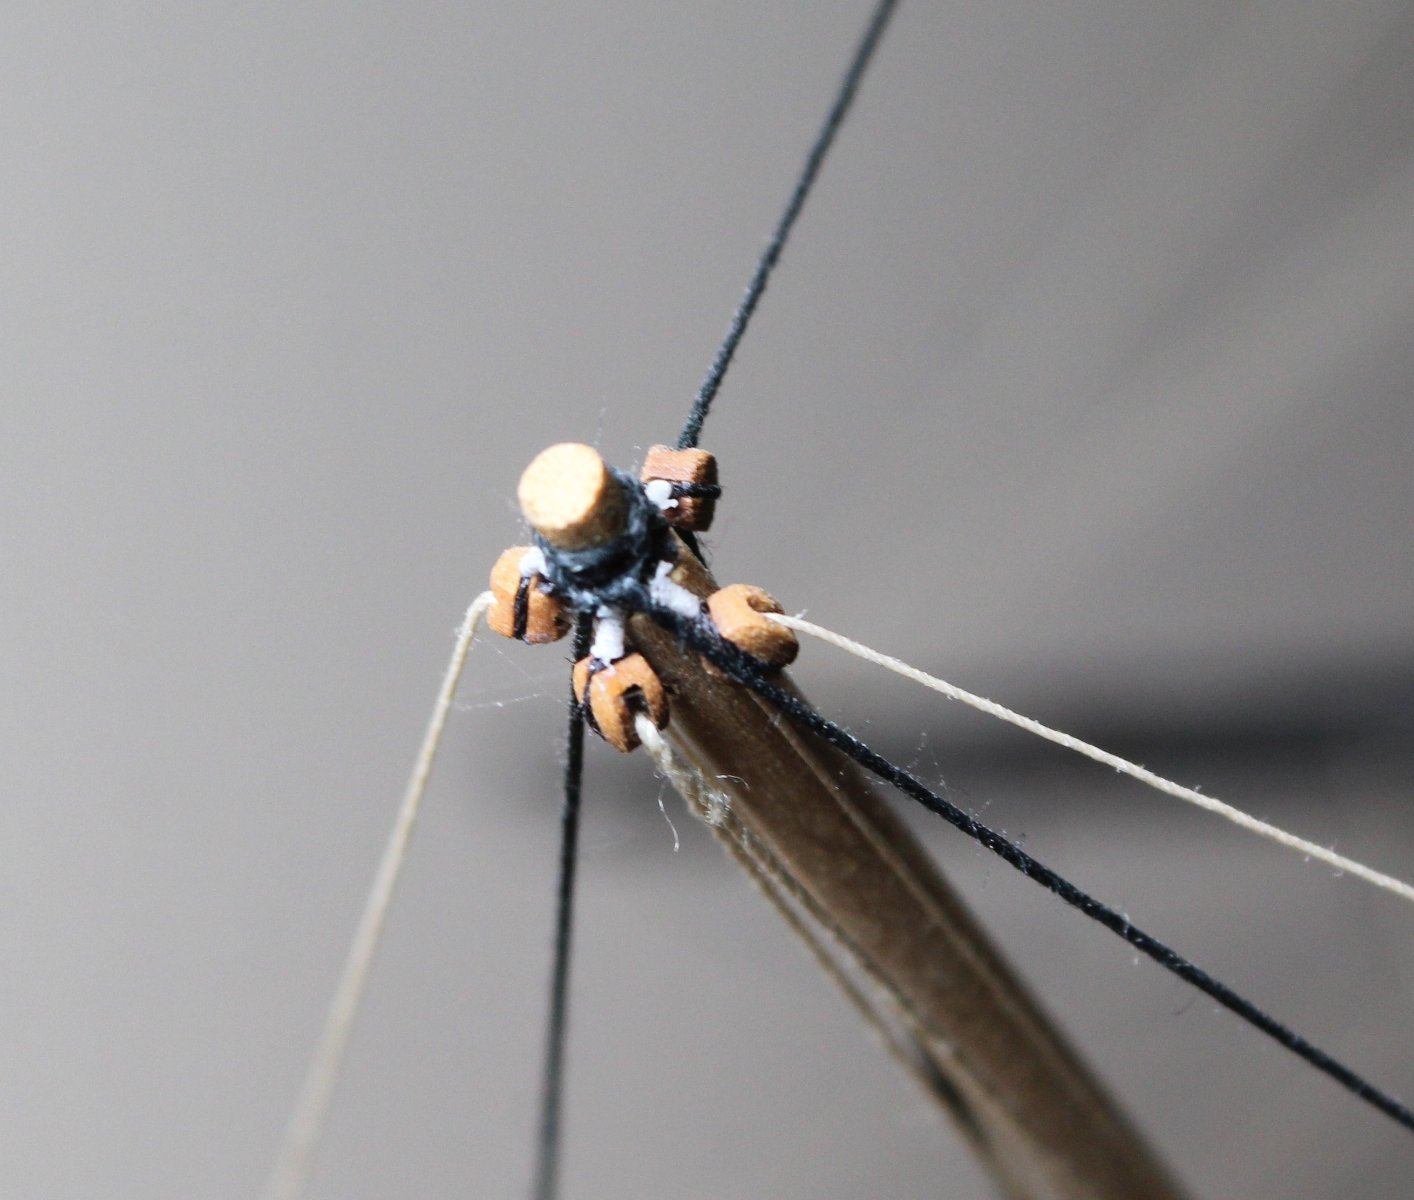
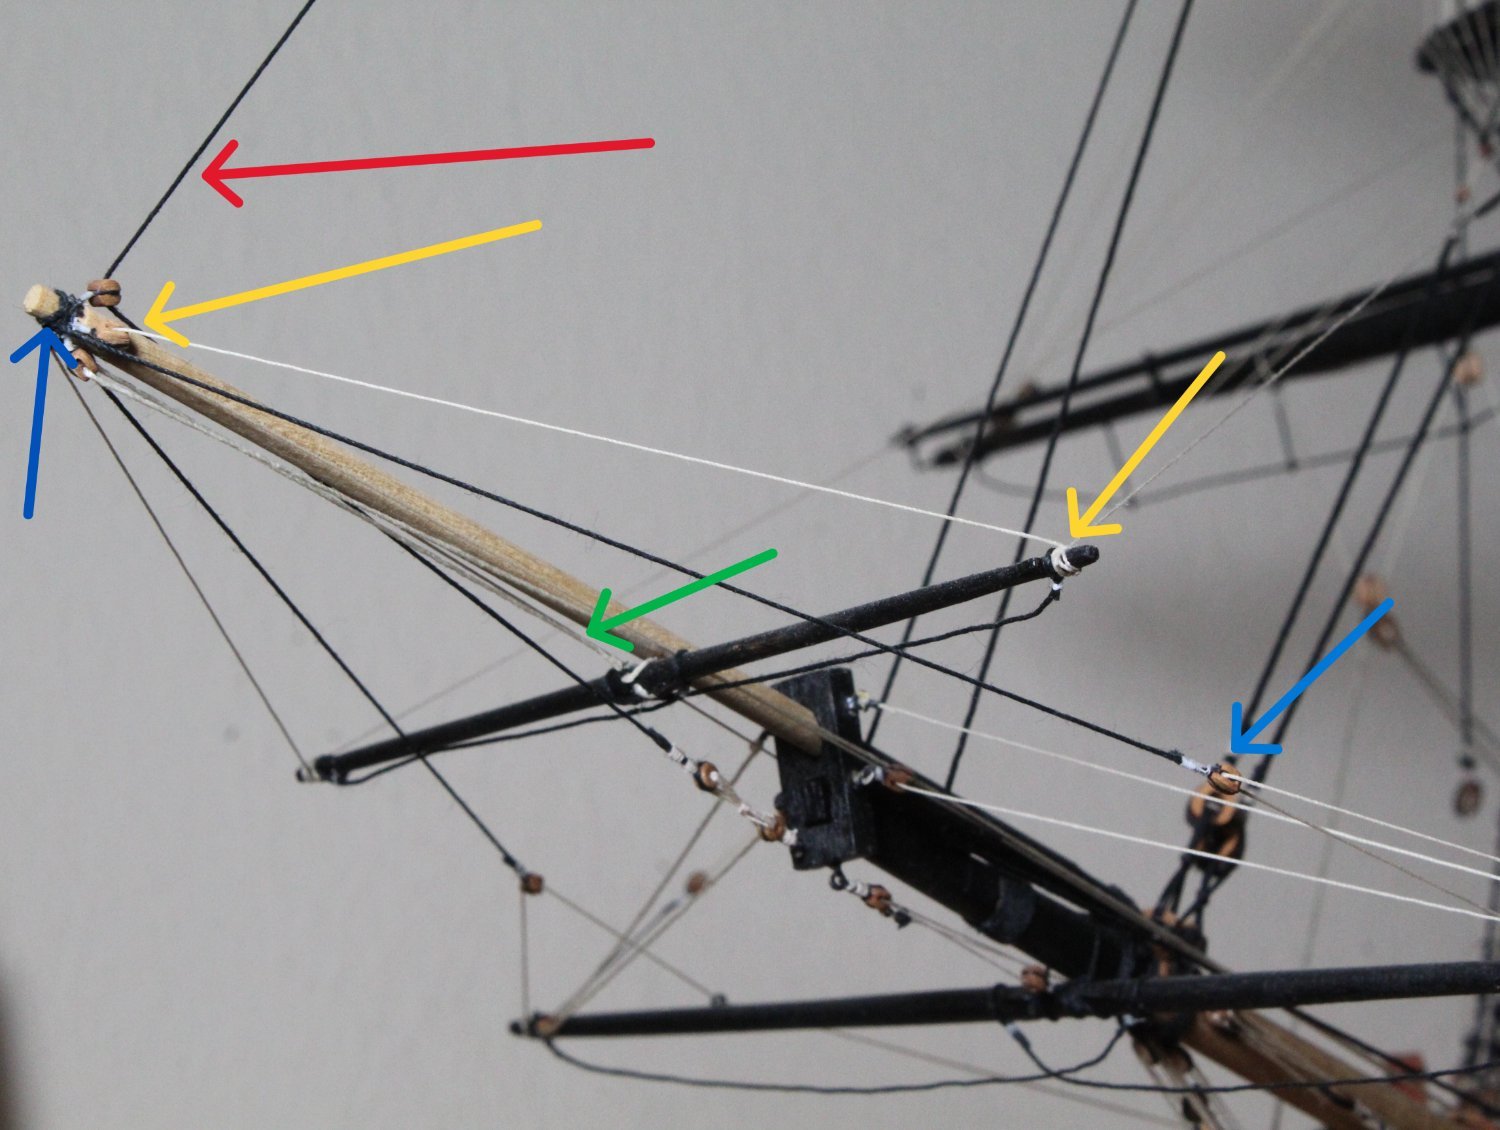
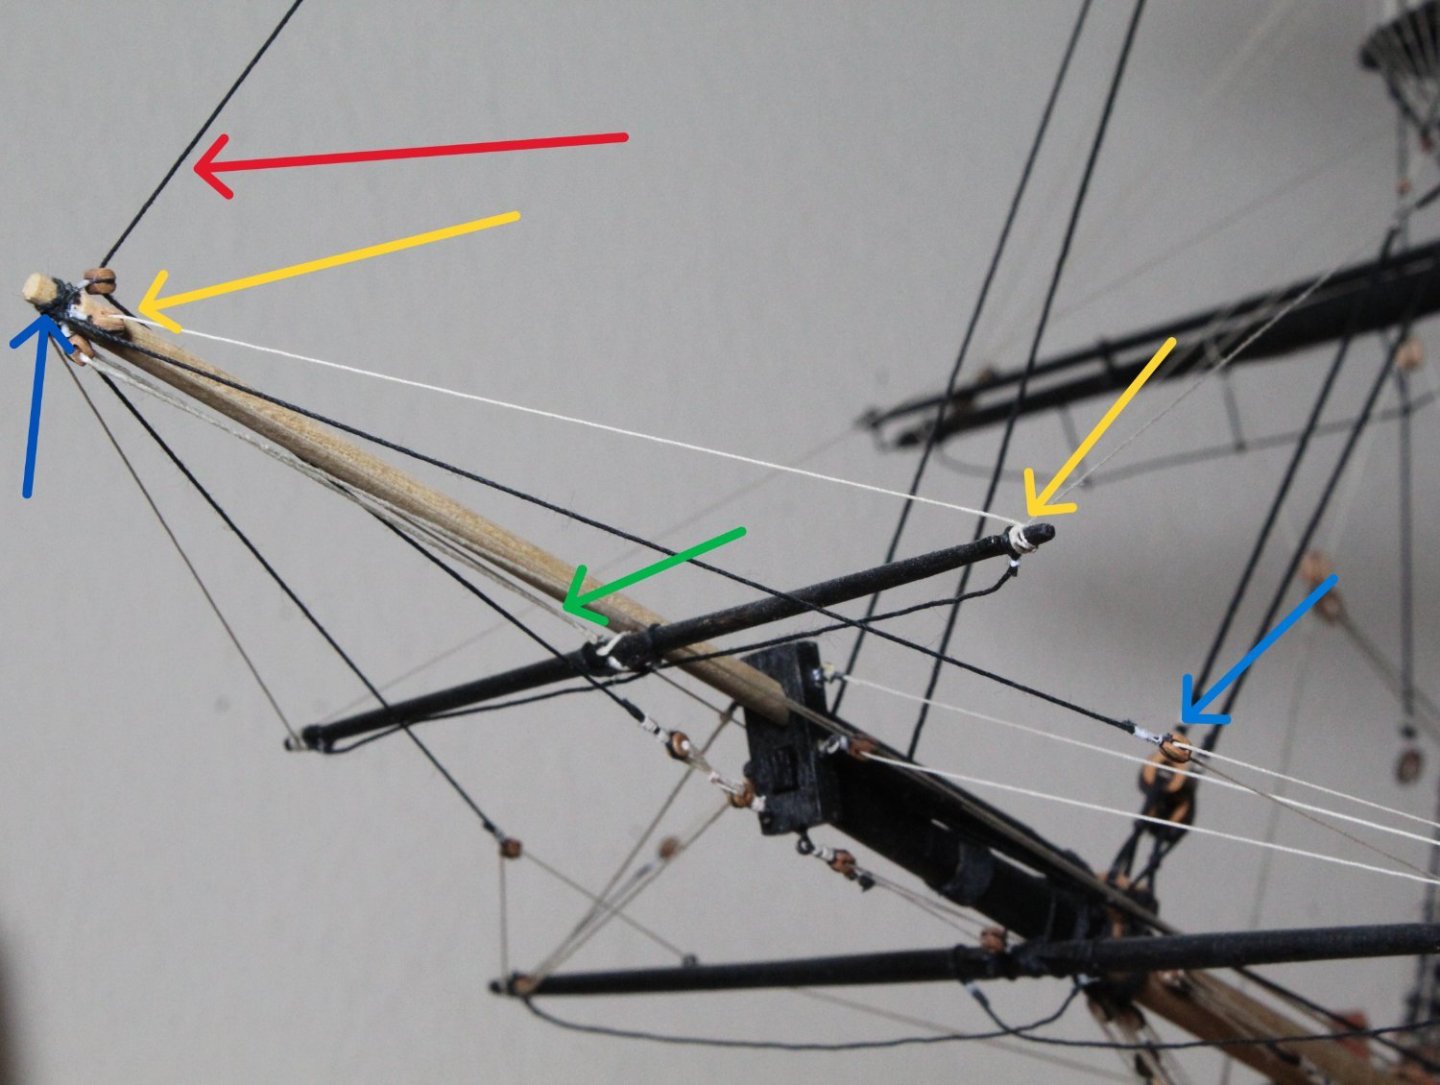
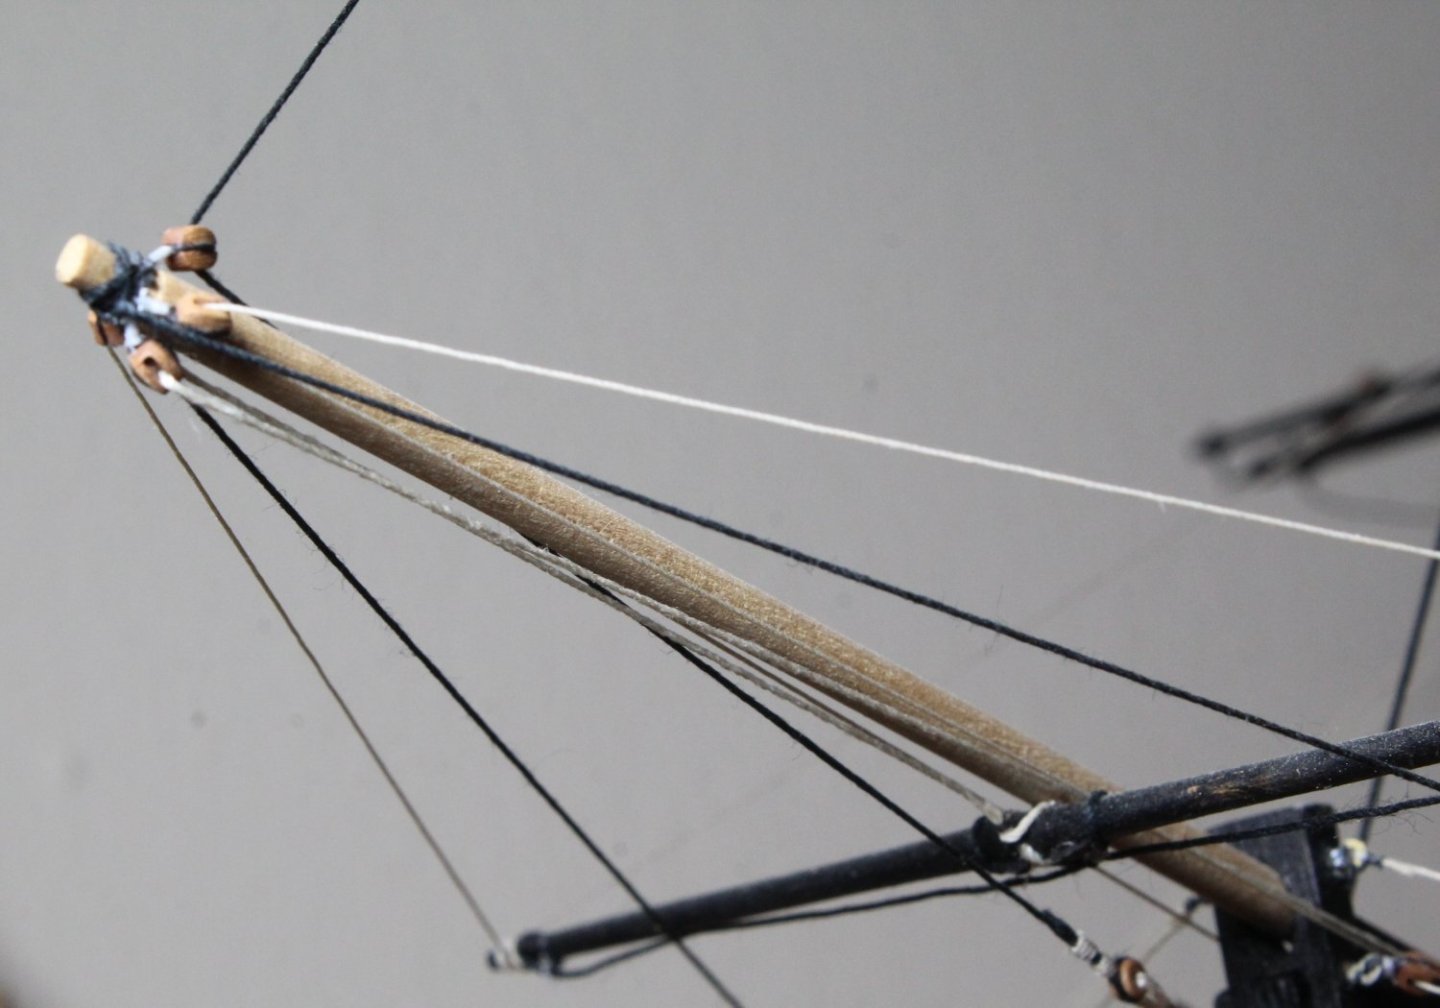
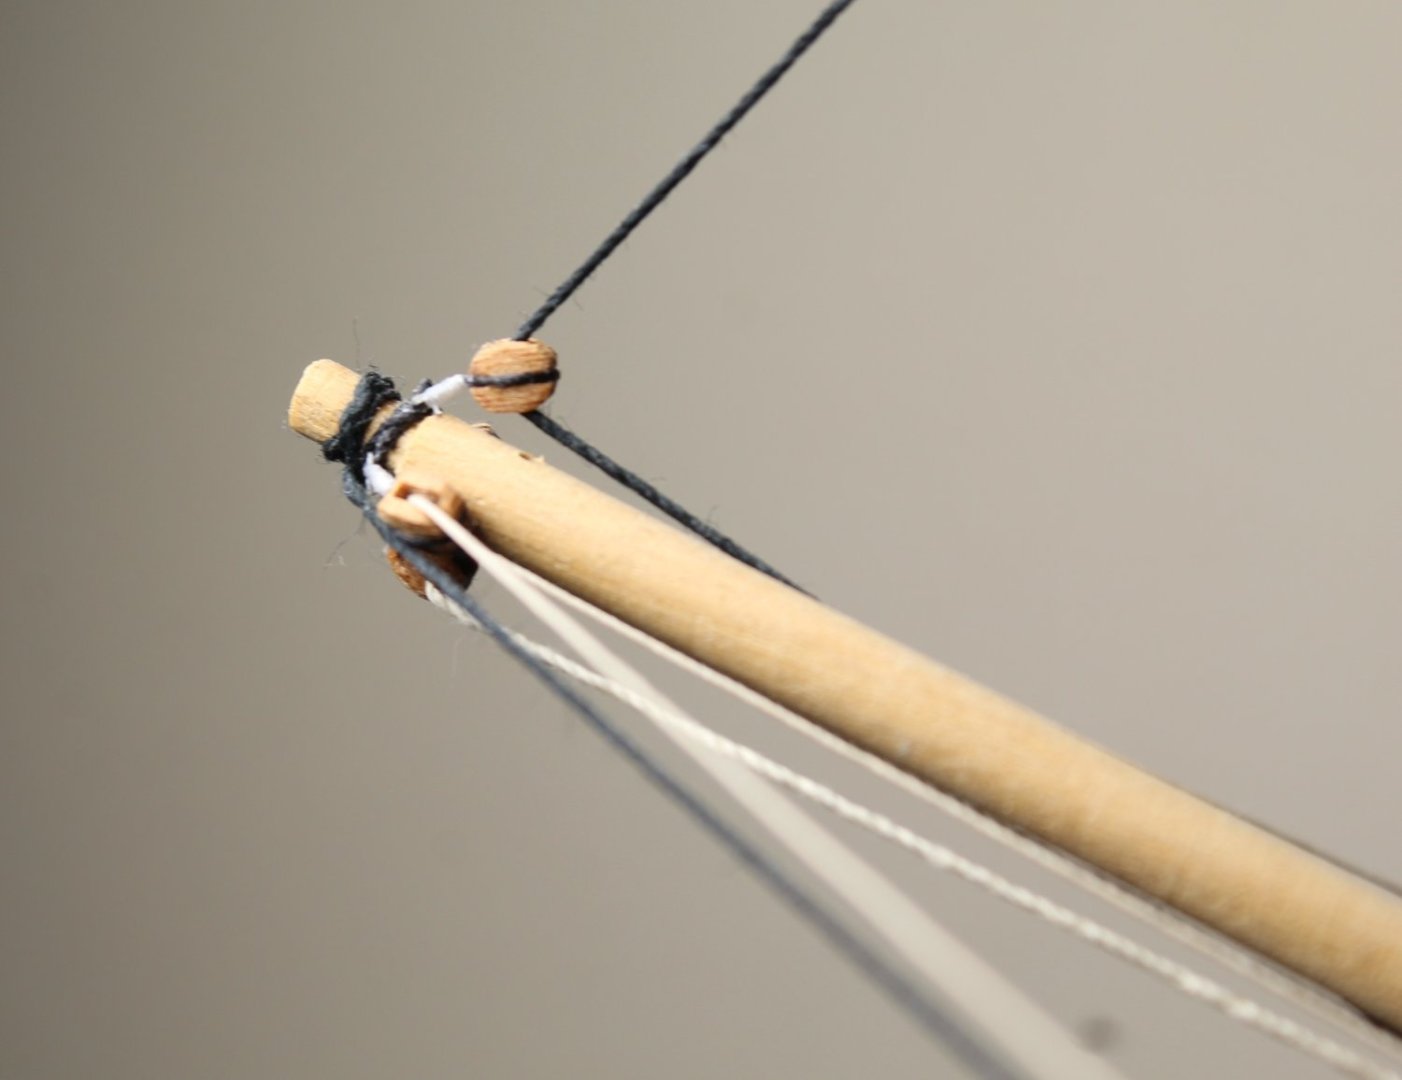
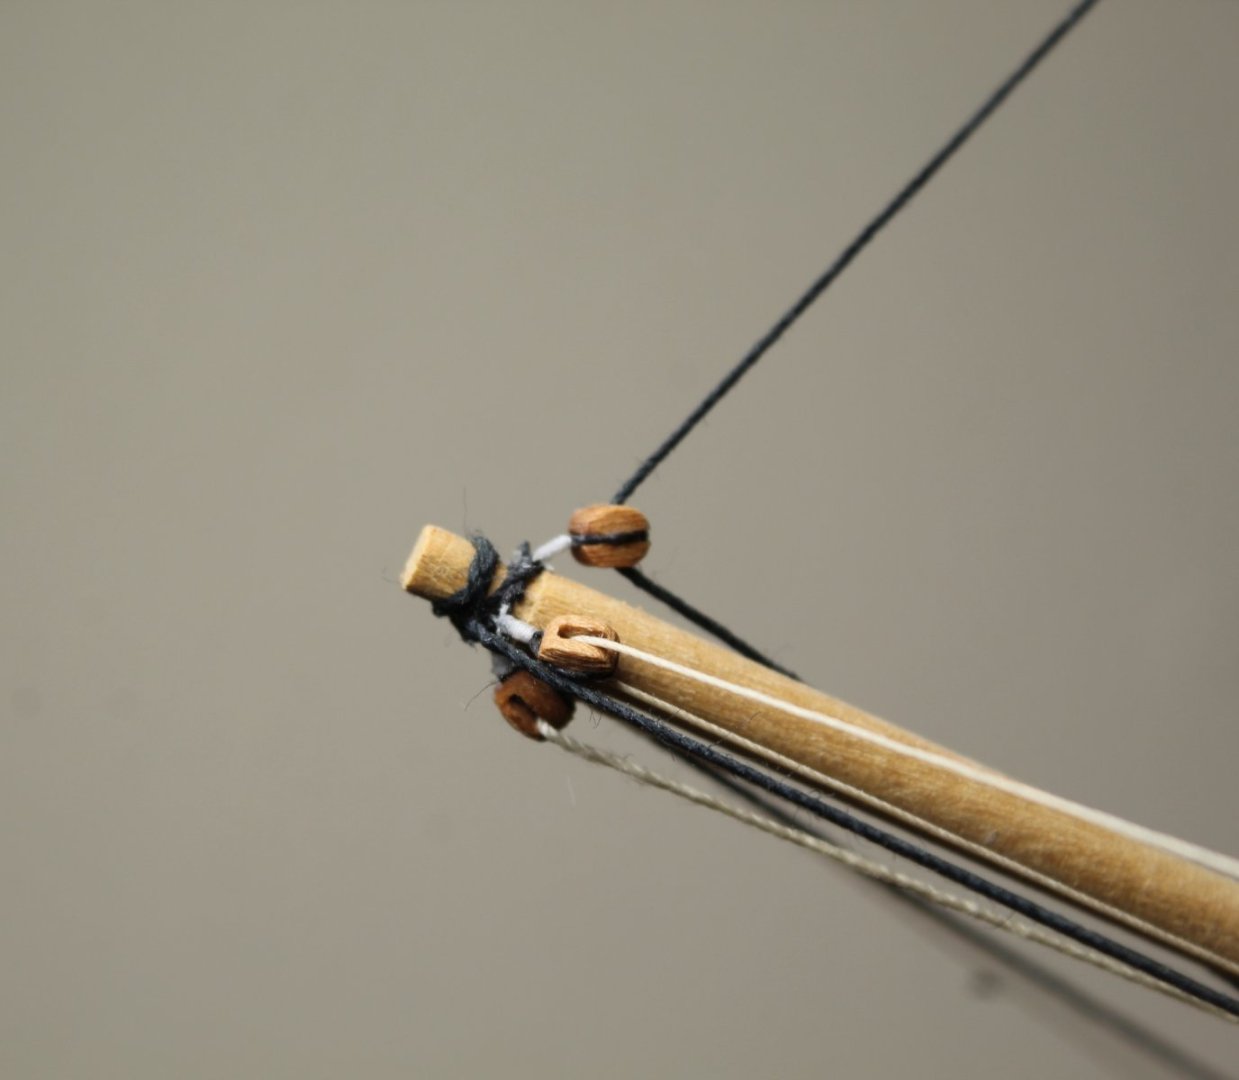
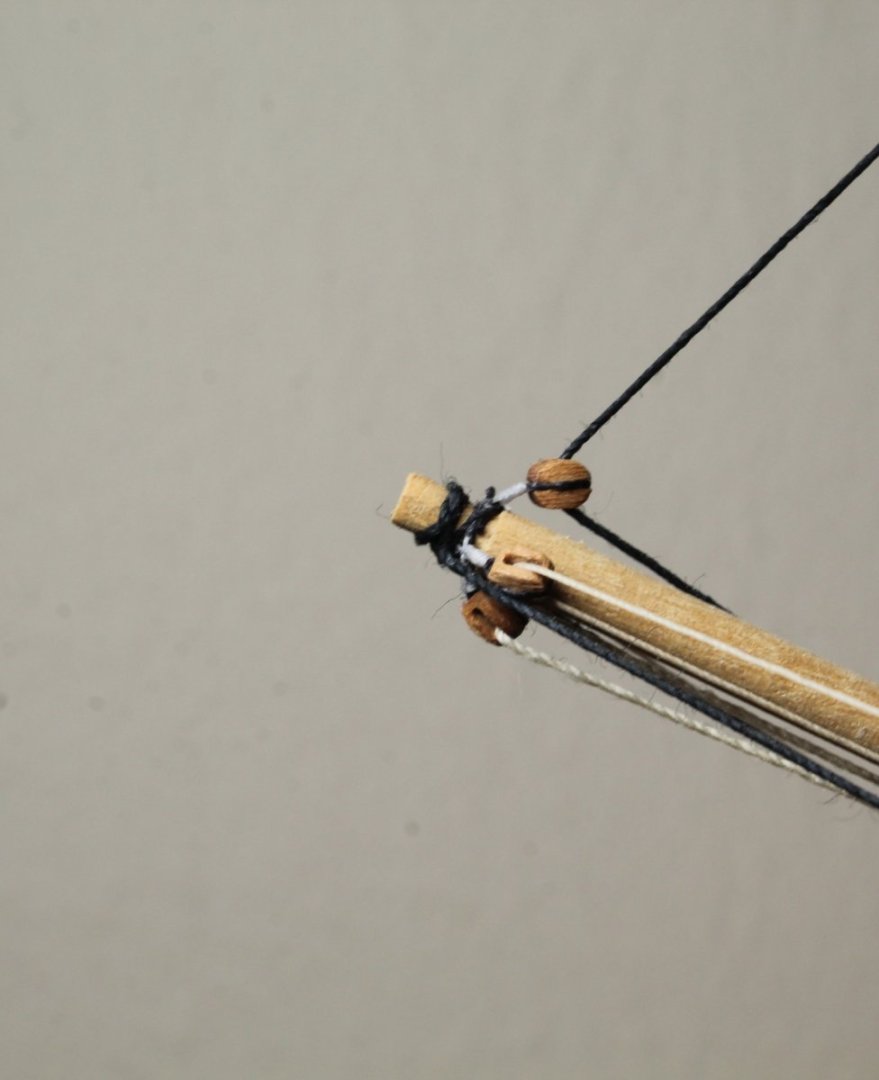
I added 4 blocks to the end of the bowsprit. All the other rigging was looped with a hitch type knot. The first photo shows the 4 blocks and other rigging at the end of the bowsprit The next two photos shows the block rigging. The top block was used for the red arrow (stay). The left and right blocks (yellow arrow) were for the braces. The bottom block (green arrow) took the rigging line that sets the position of the yard along the bowsprit. Hope that helps

-
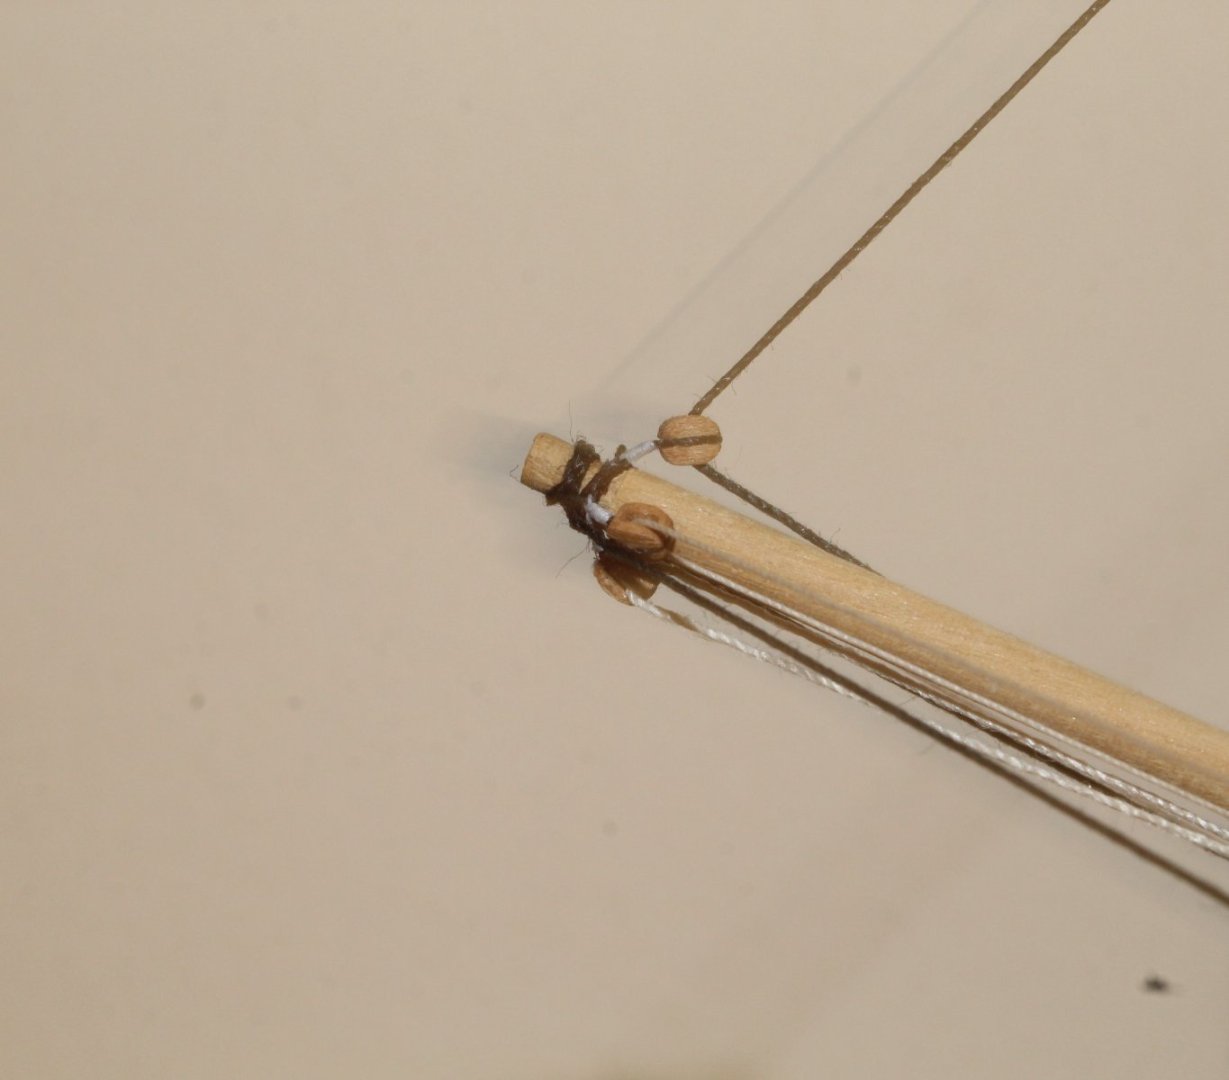
I have taken some pictures of what I did, hope they help. I think they were looped with a half hitch (or maybe a clove hitch)
-
Hello You need to look at plan sheet 18 (Mizzen and Bowsprit) as these show the rigging threads for the spritsail yard braces. Hope this helps Glenn(UK)
-
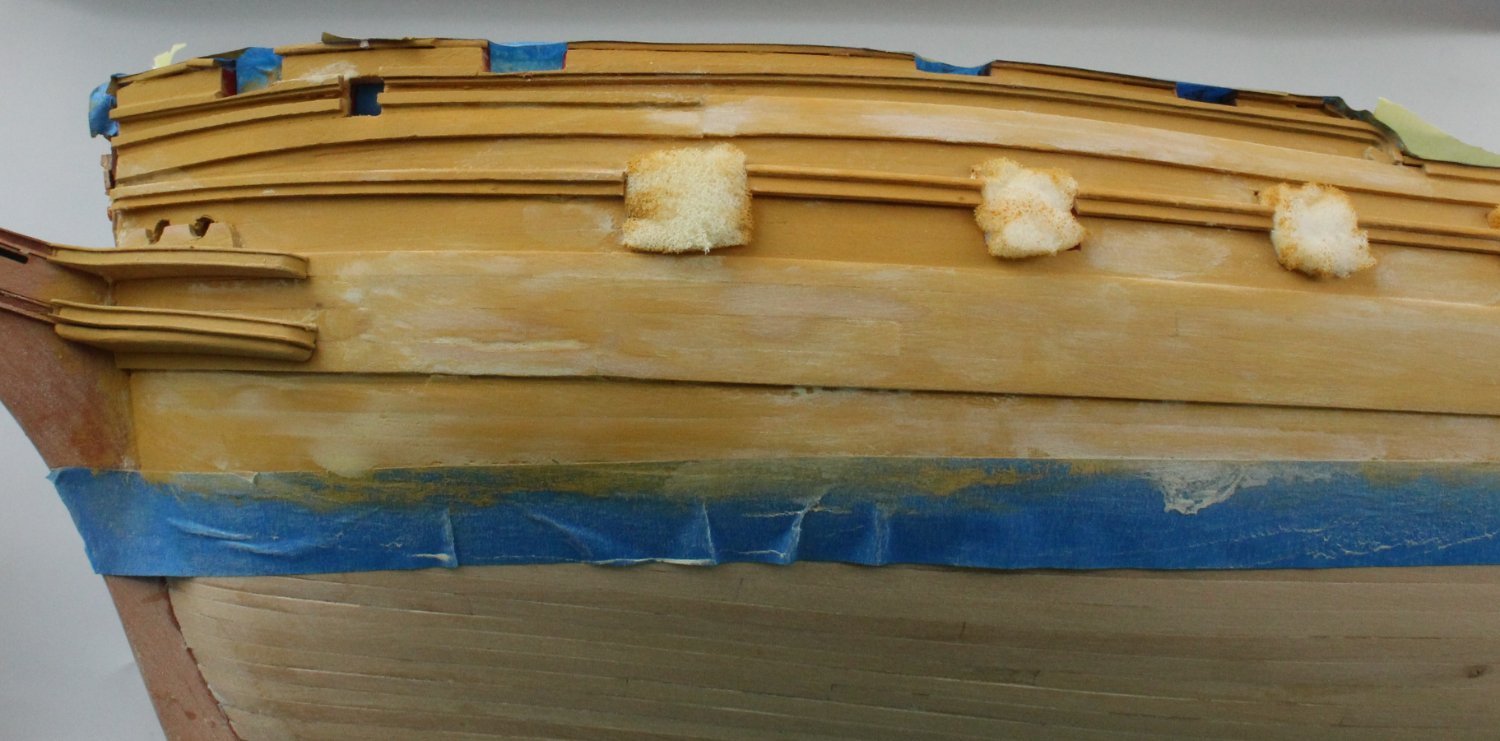
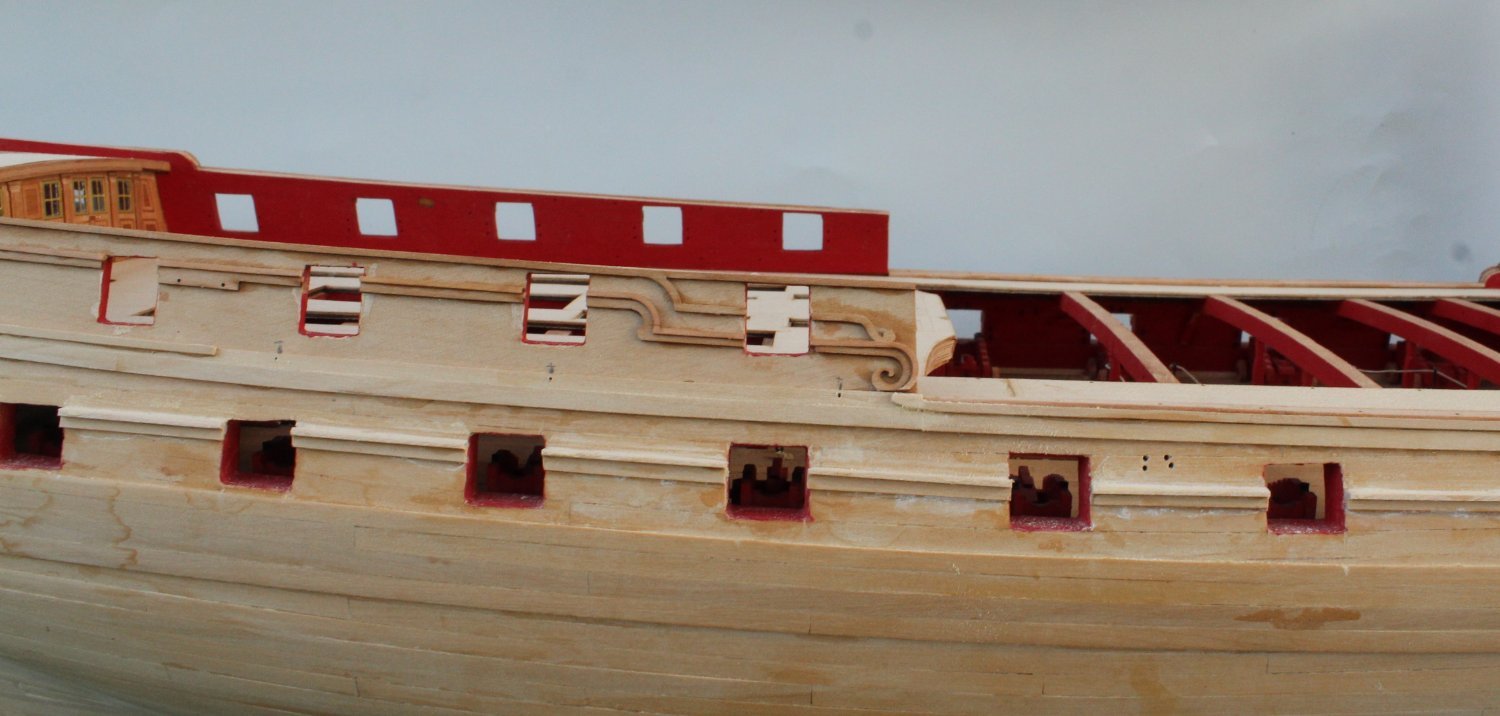
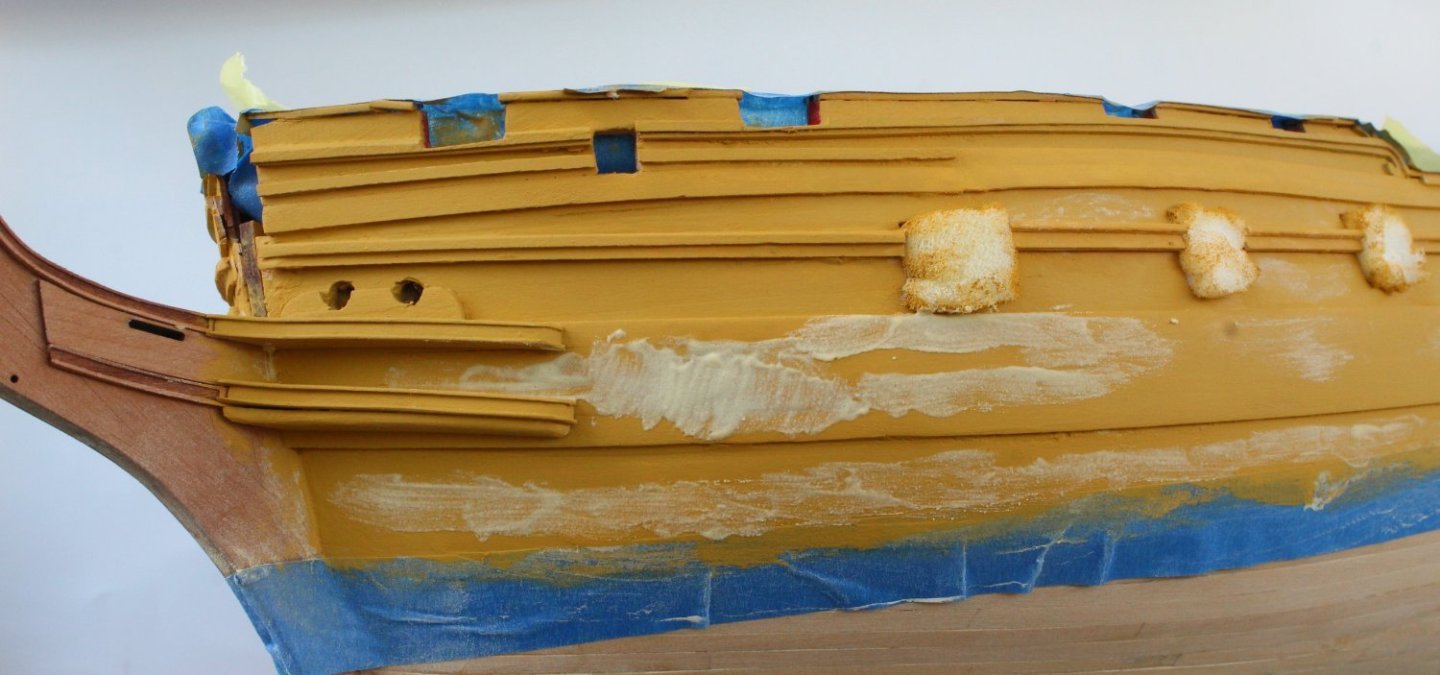
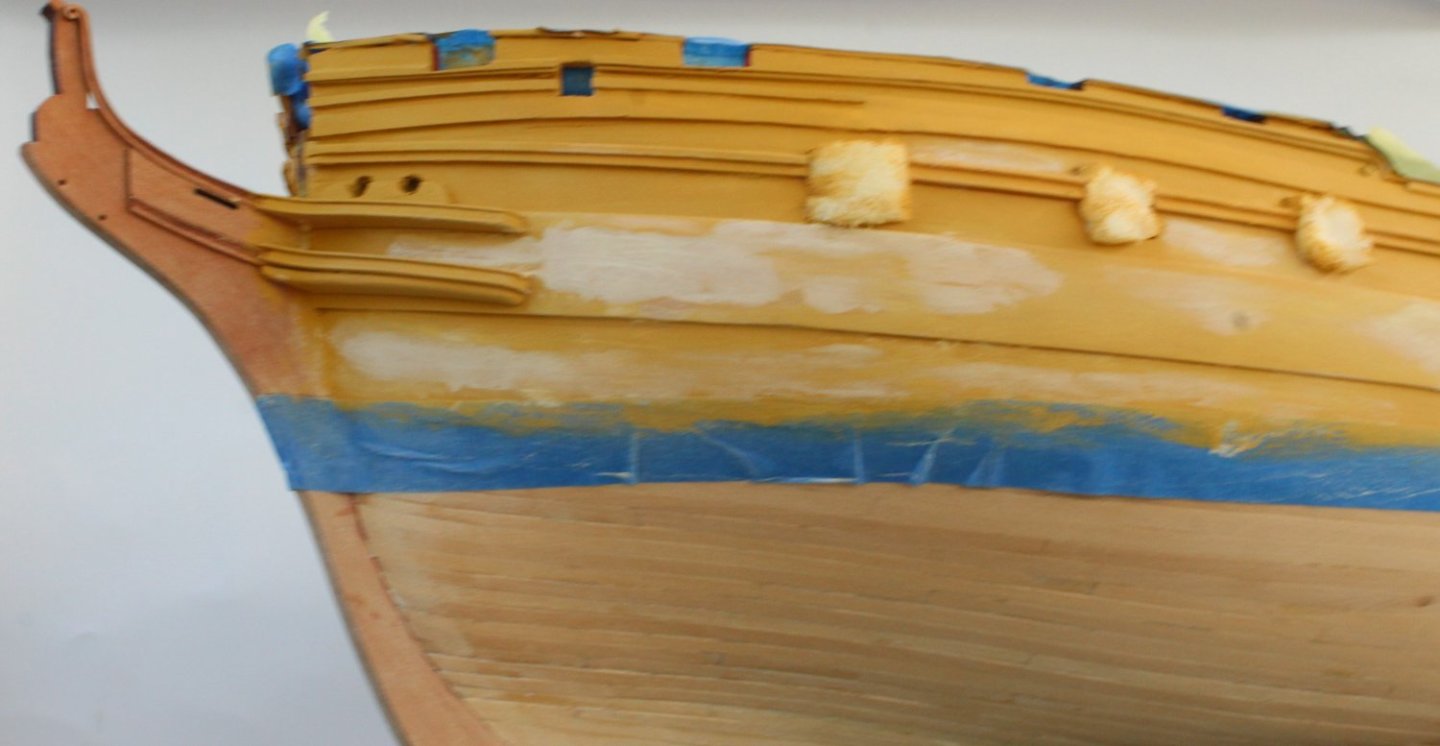
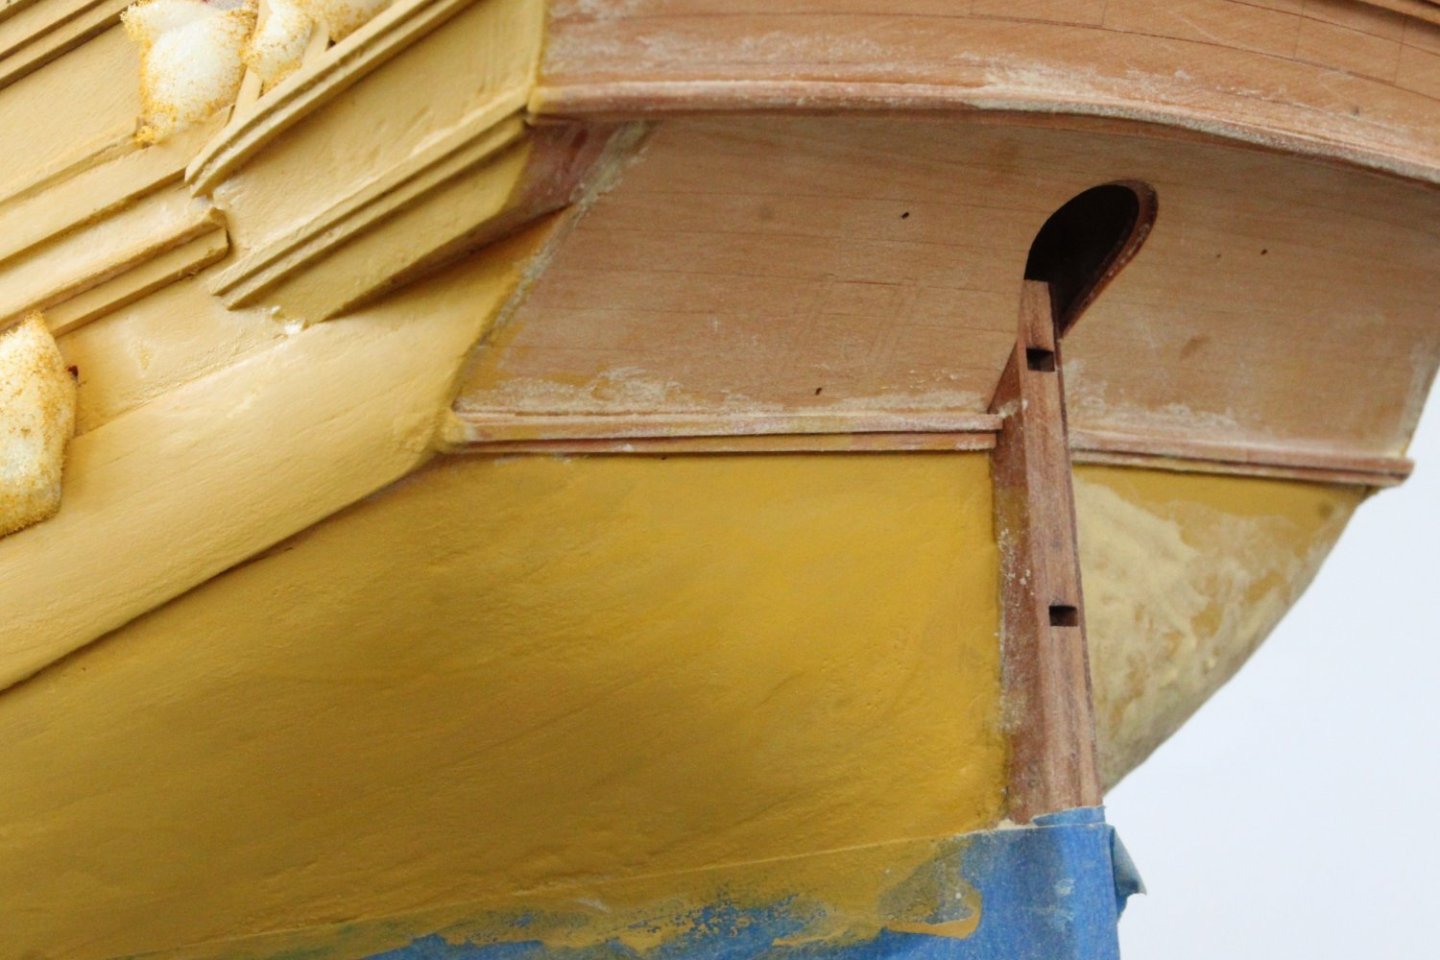
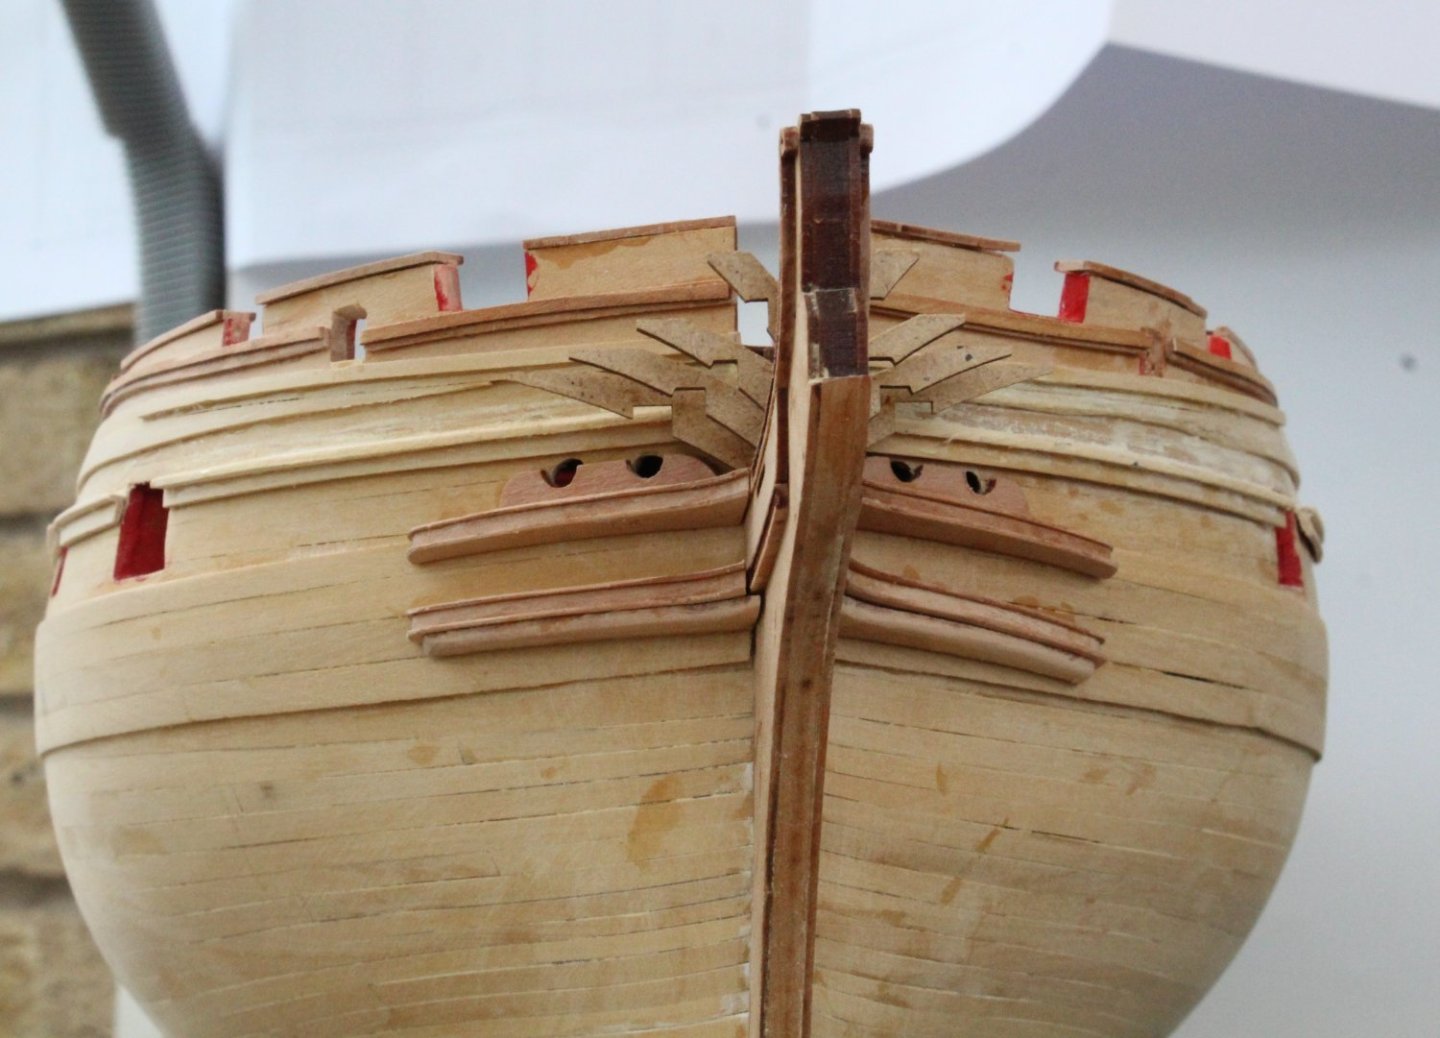
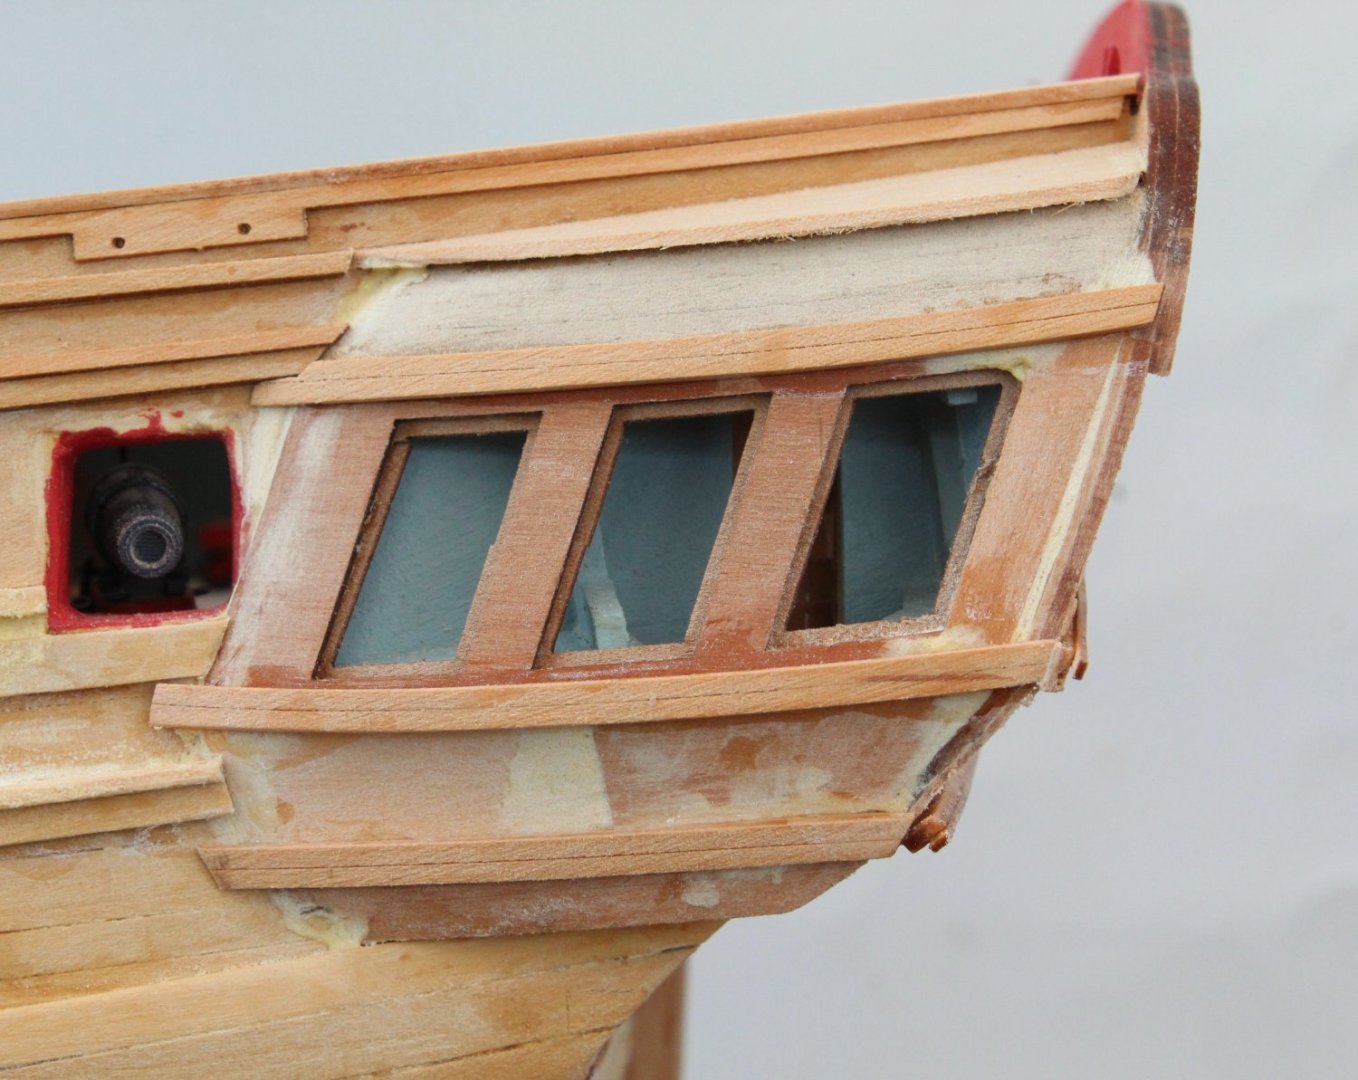
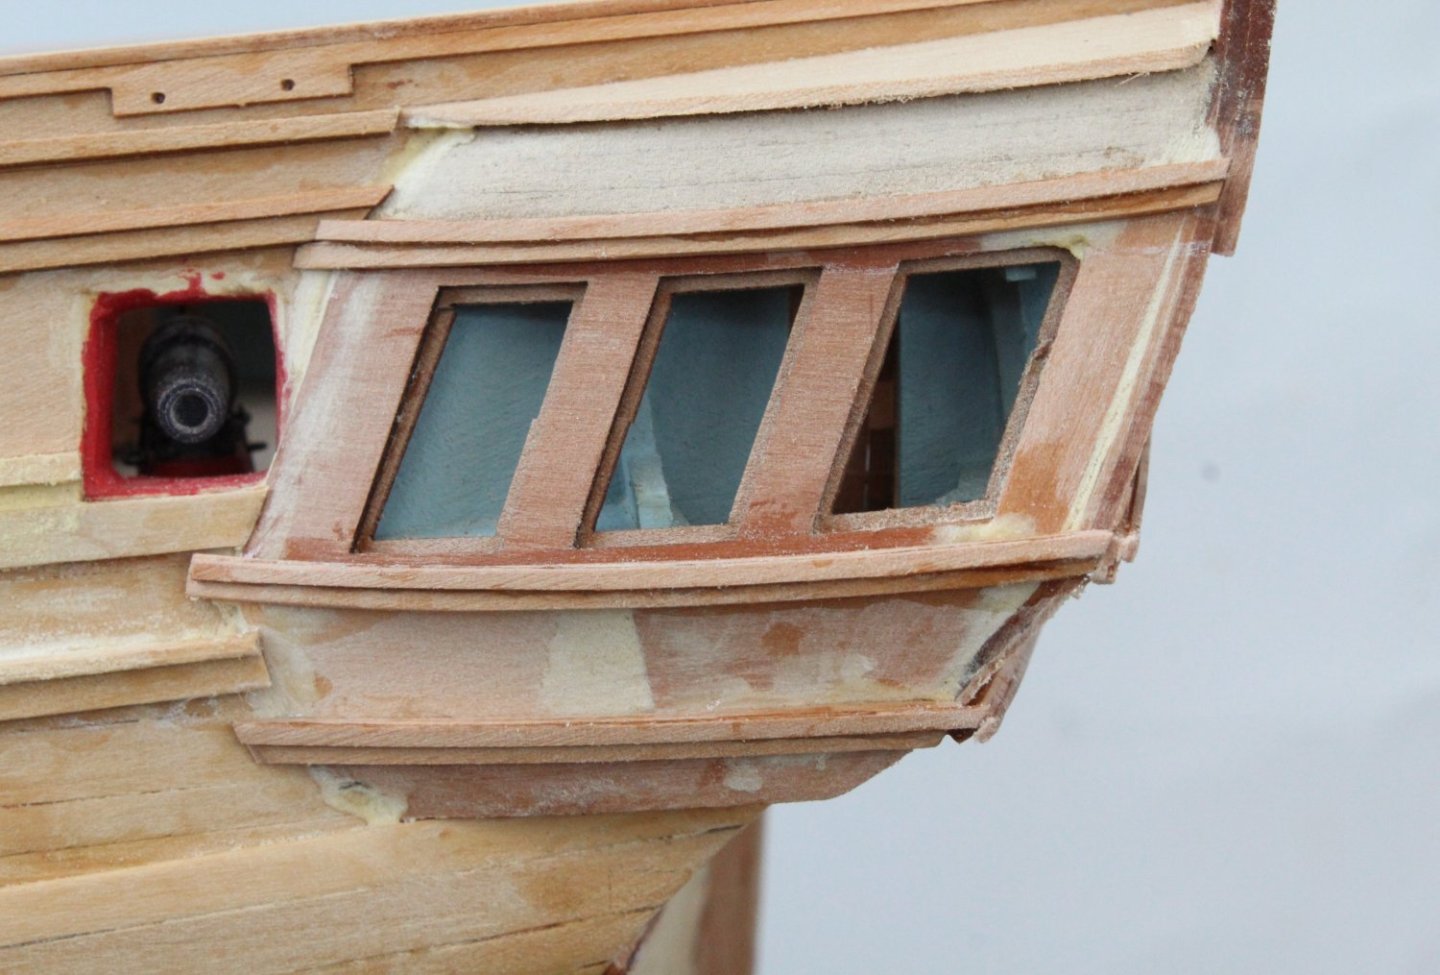
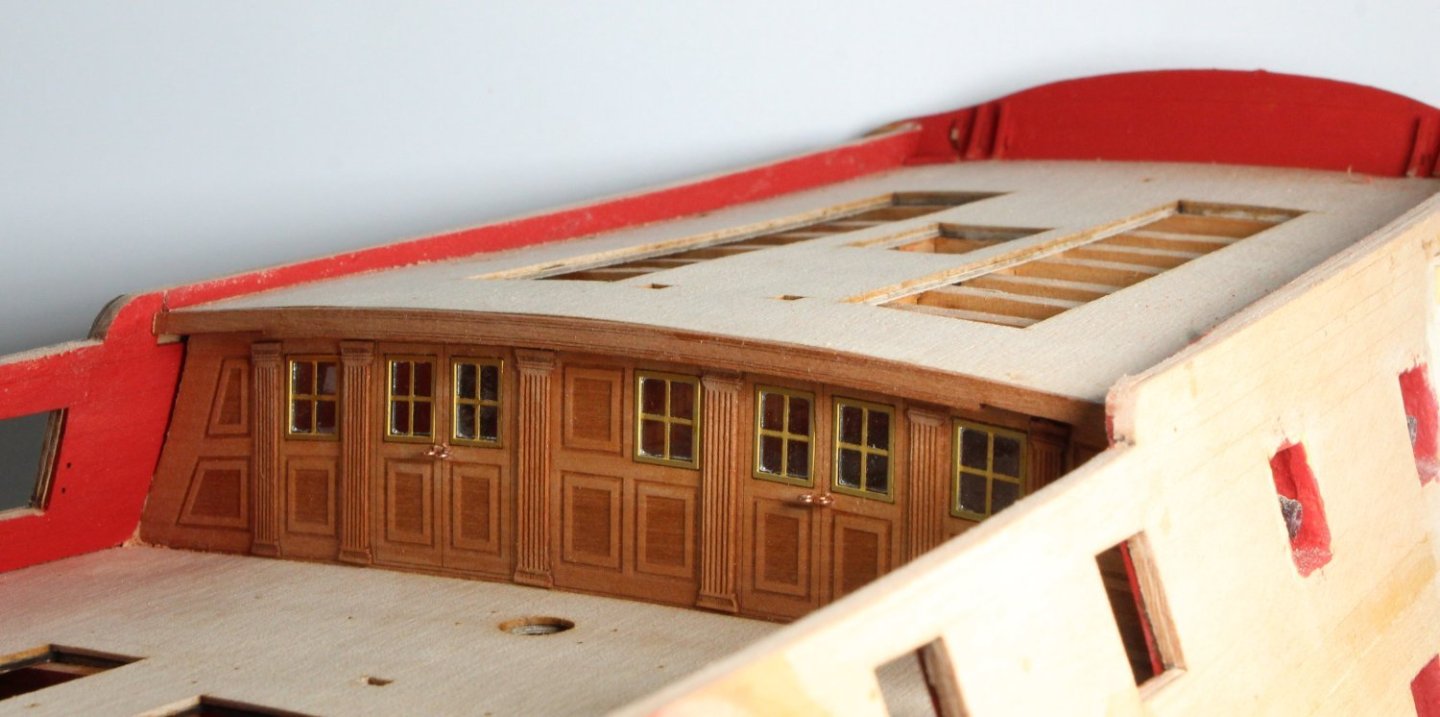
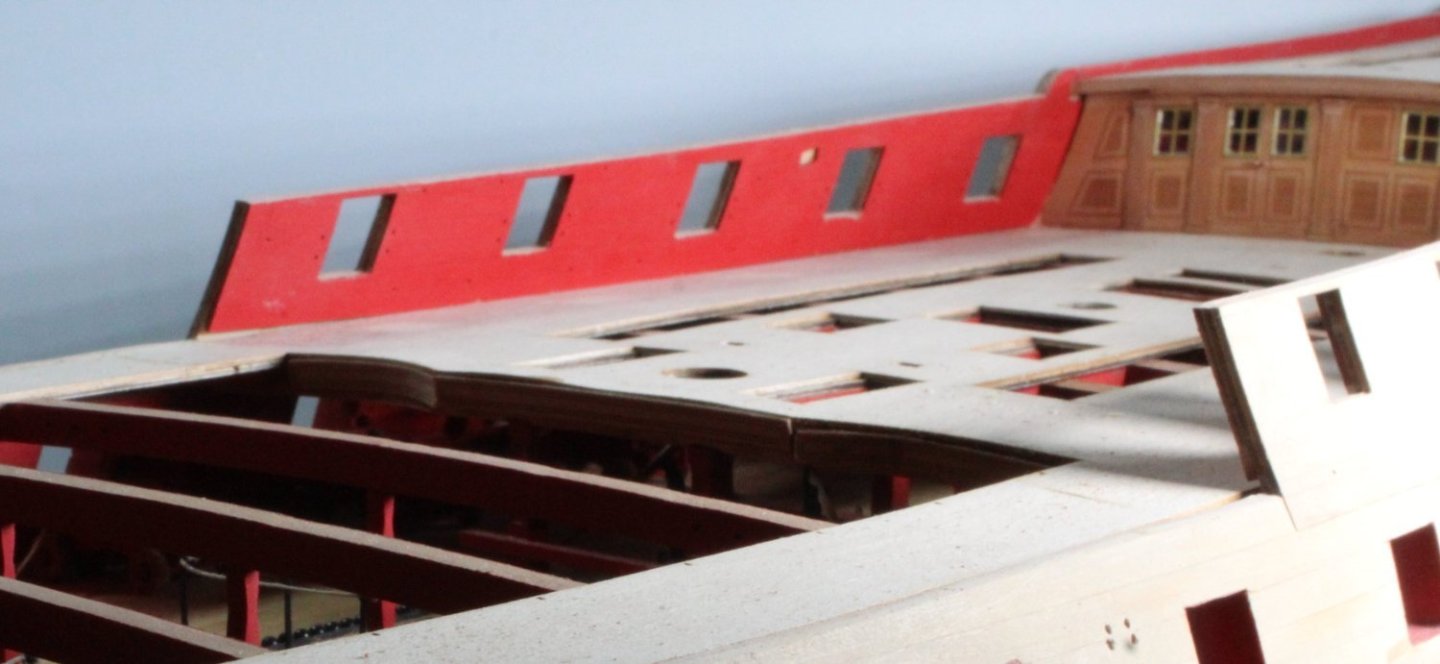
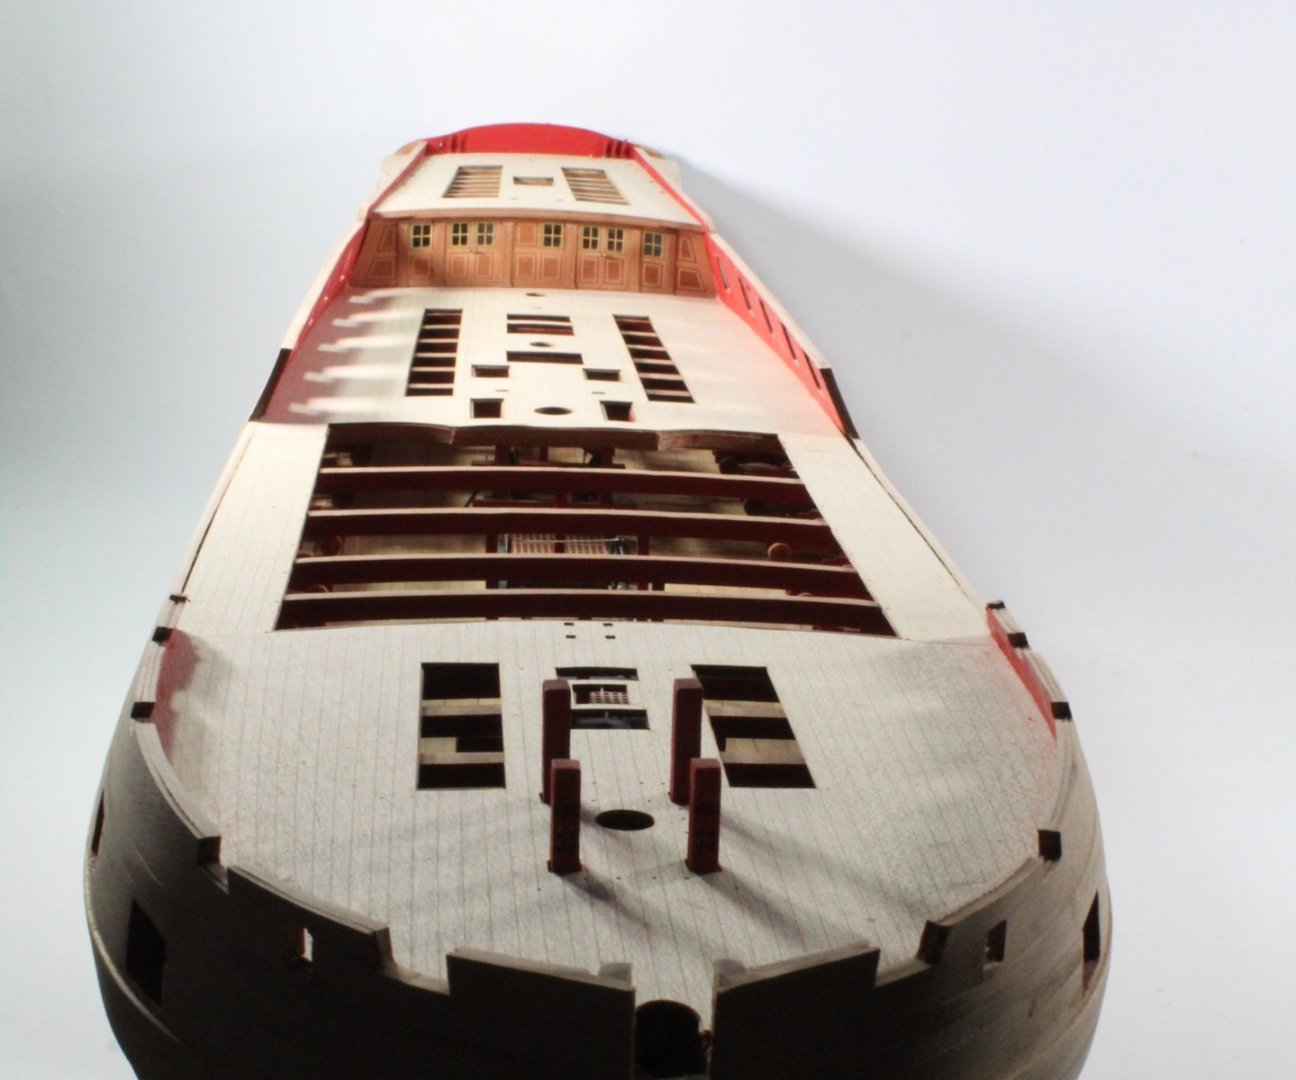
Hull Painting Continues The left hand side of the hull has had another fill, sand and paint process and is looking much smoother but there is still a little bit more work required as can be noted from the attached photo's. Bow Area With reference to my last post it could be seen that the bow area required more work, especially on the wales near the hawse bolster area. I mixed some filler with water and Titebond to get a smooth paste. In the photo below I have brushed some of the filler mix around the bow area. Once the filler had been given time to harden the area was sanded, using a mix of sandpaper and sanding sticks (120 to 600 grit). The next photo was taken partway through the sanding process. Once the bow area looked smooth another coat of yellow ochre was applied. For the most part this area is now looking smooth but still requires a little bit more work. For example there is an area at the top of the lower hawse bolster which need a bit more filling and sanding. Midships This area did not require a great deal of filler and once I had sanded it and then added a new coat of paint it is now looking smooth. I think it will require one more fill and sand as there is still a bit with the upper section of the upper wale (below the 4 holes) which needs to be sorted. Quarter Gallery I am reasonably happy with this section. There is one area which will need filling and sanding before the black paint is added, which is quite evident from the attached photo. I also need to remove the unwanted debris from the upper rail. Stern Area This is the section which requires the most work to get a nice smooth finish. I am slowly getting there but I think it will require a couple more sessions of filling and sanding before I can move on.


-
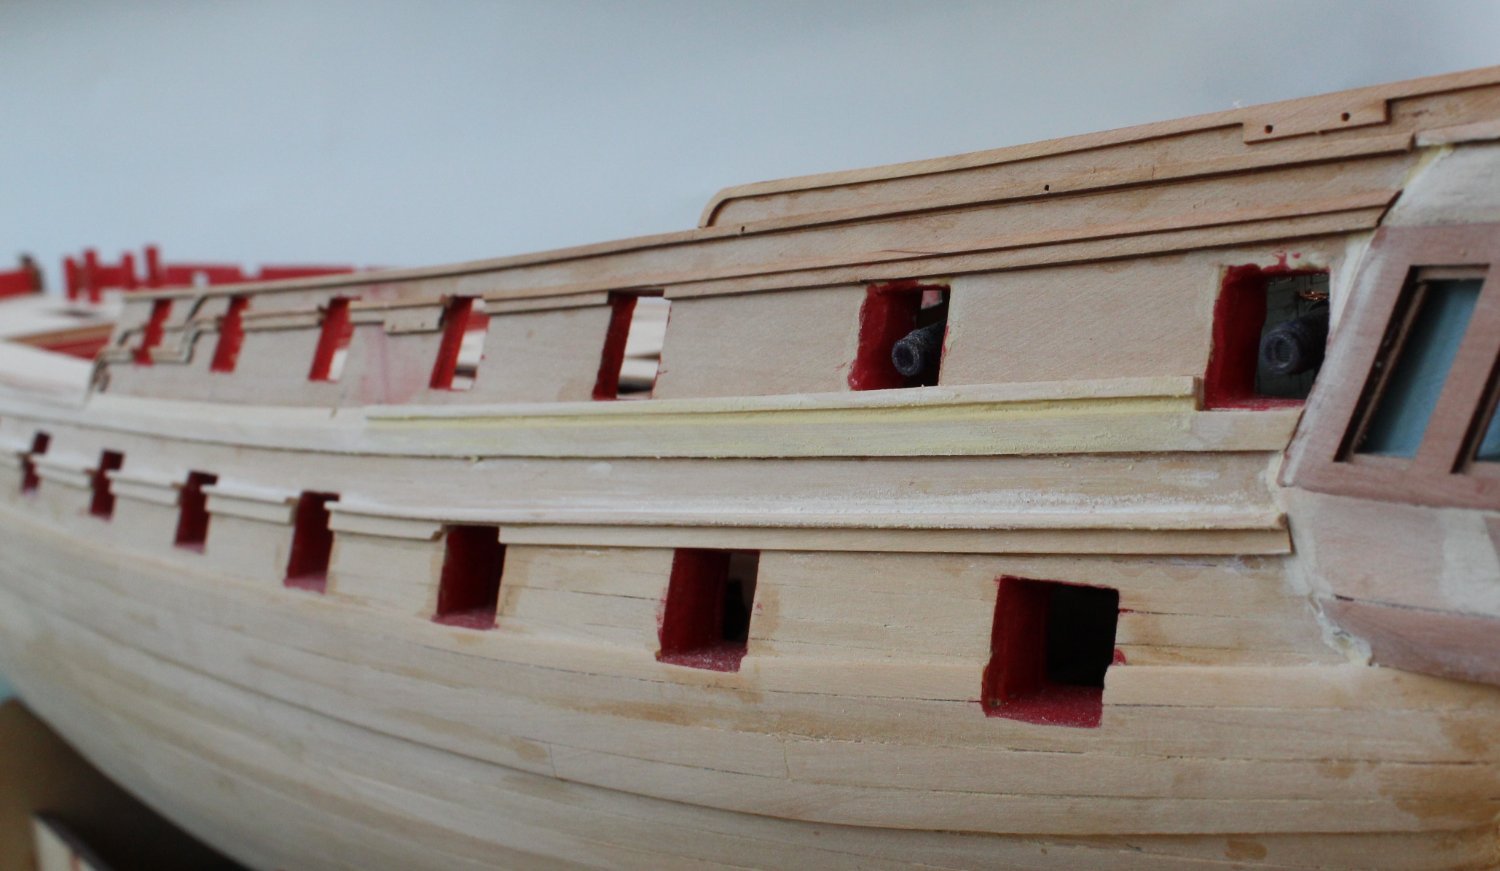
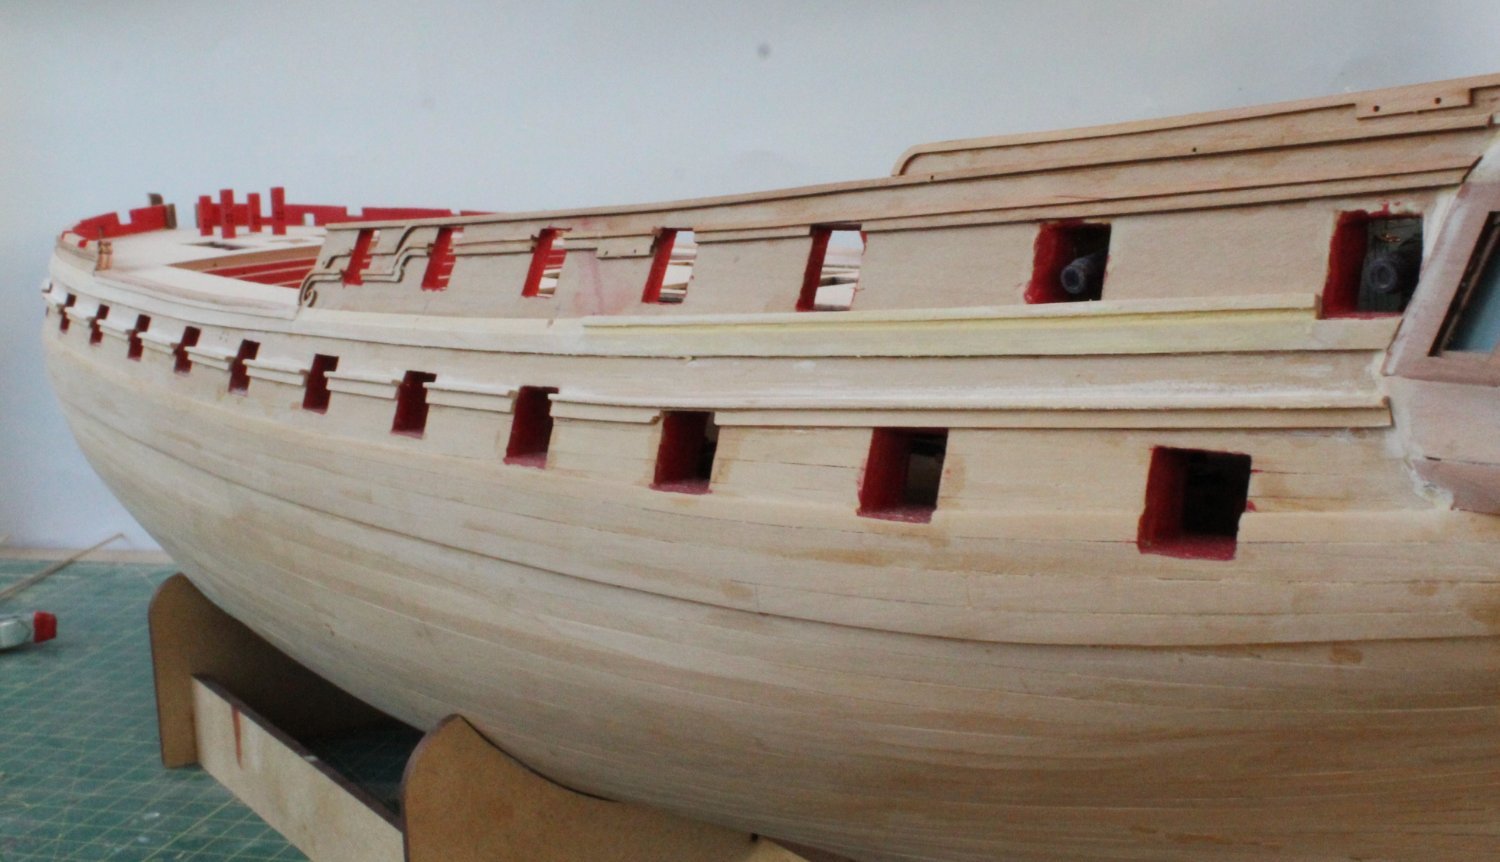
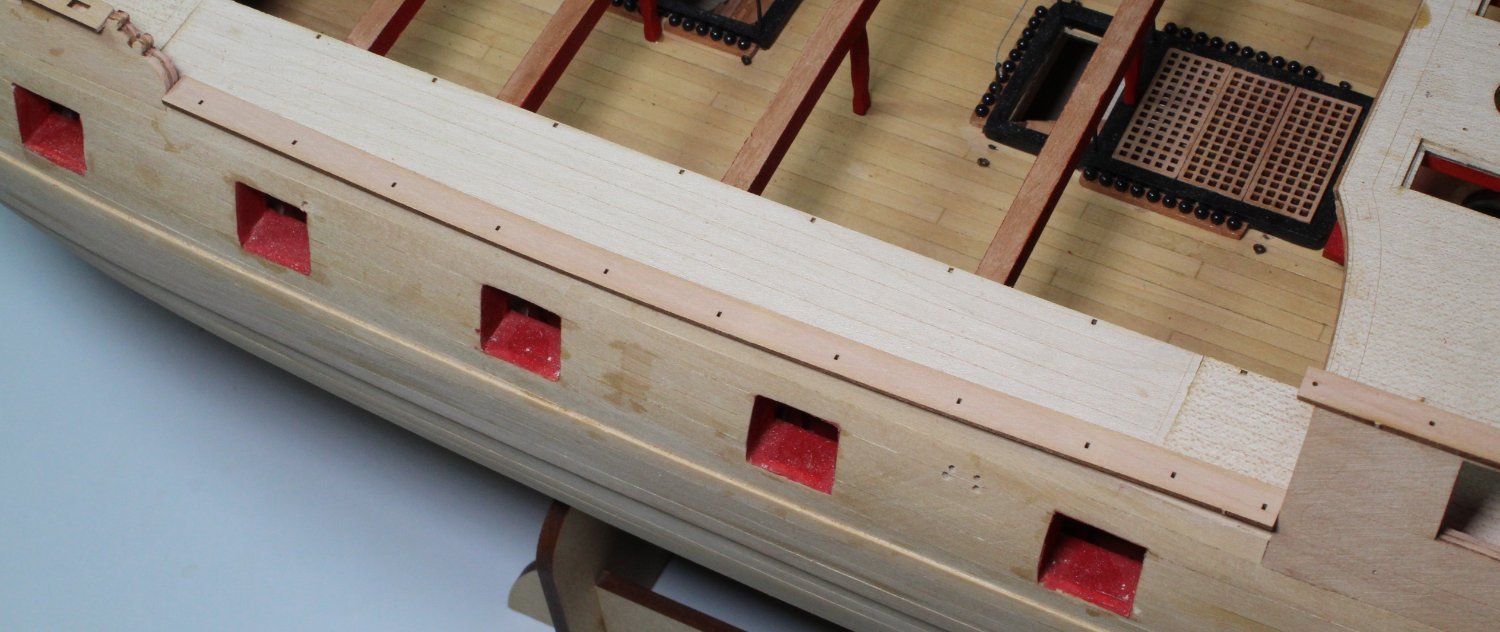
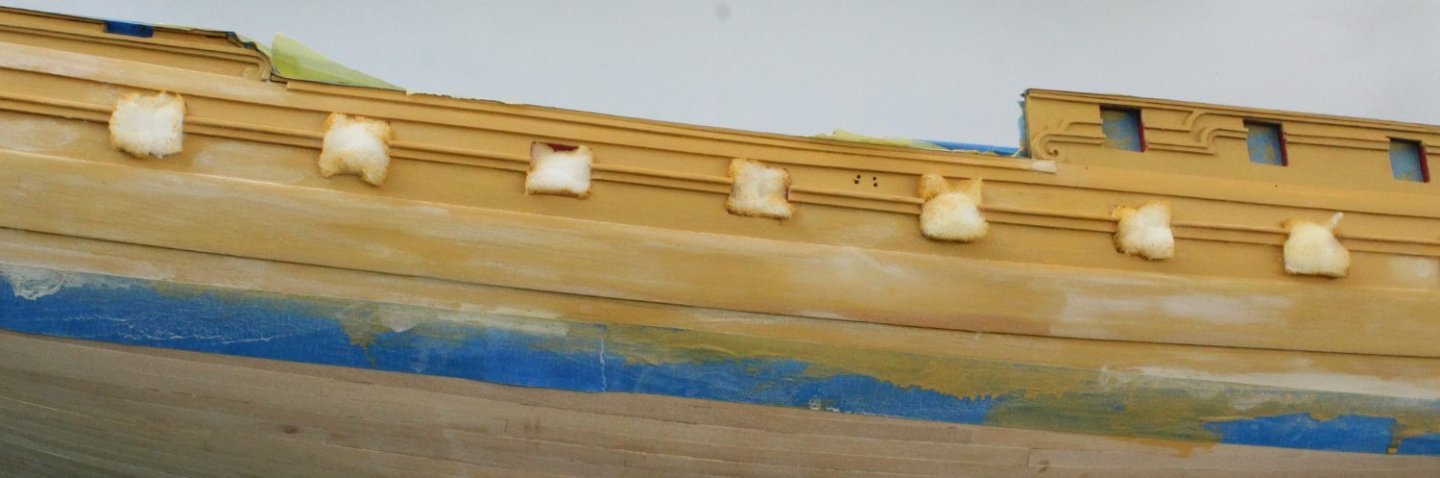
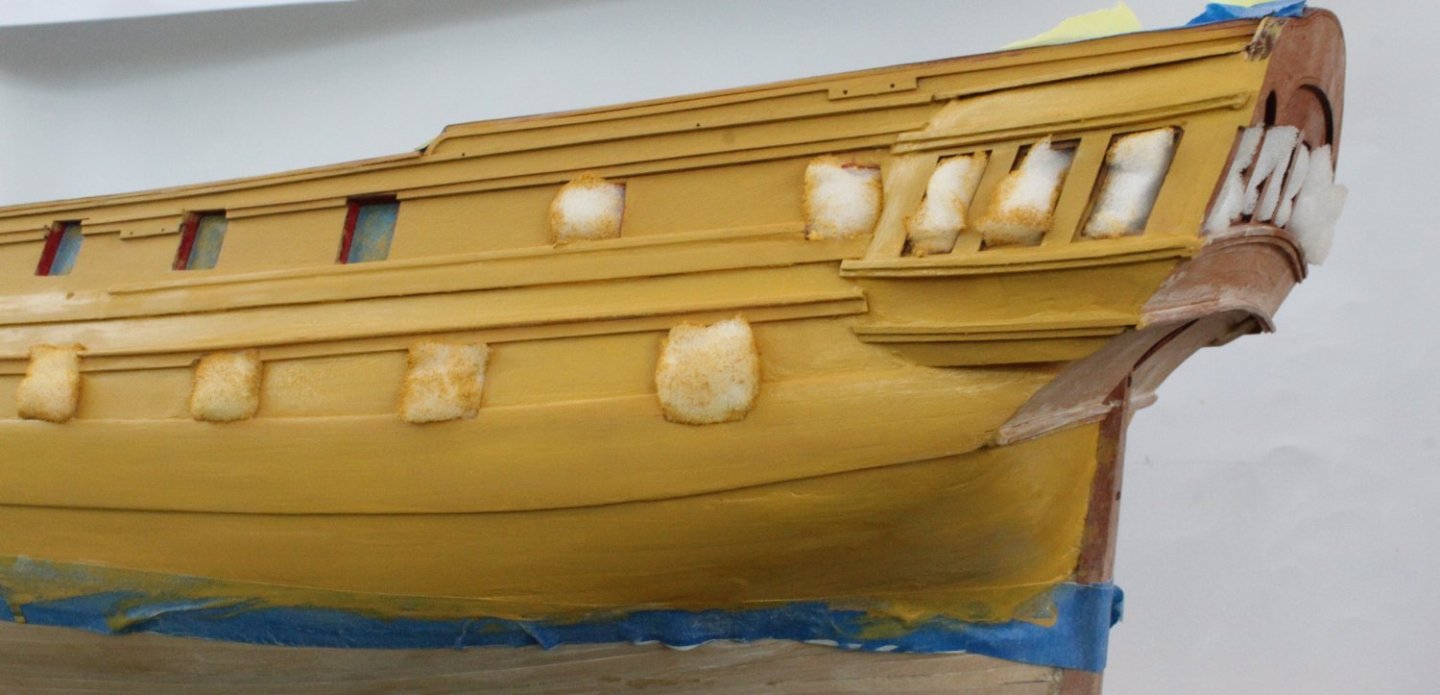
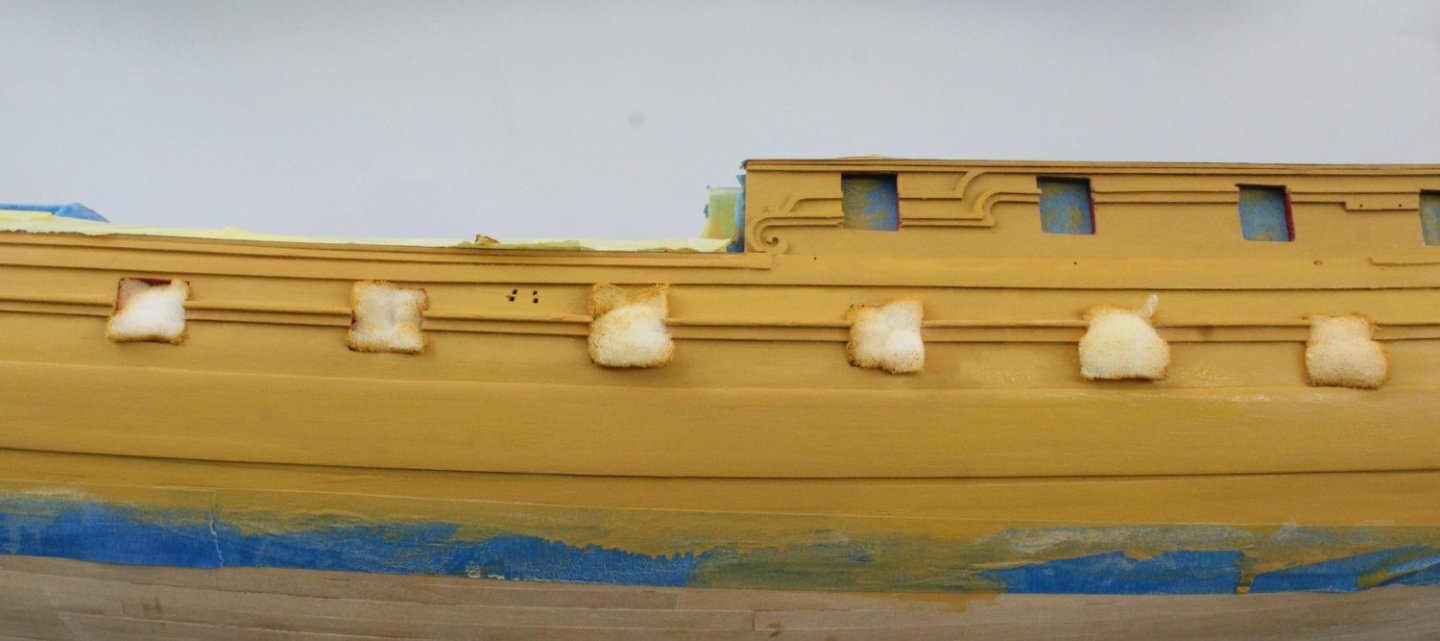
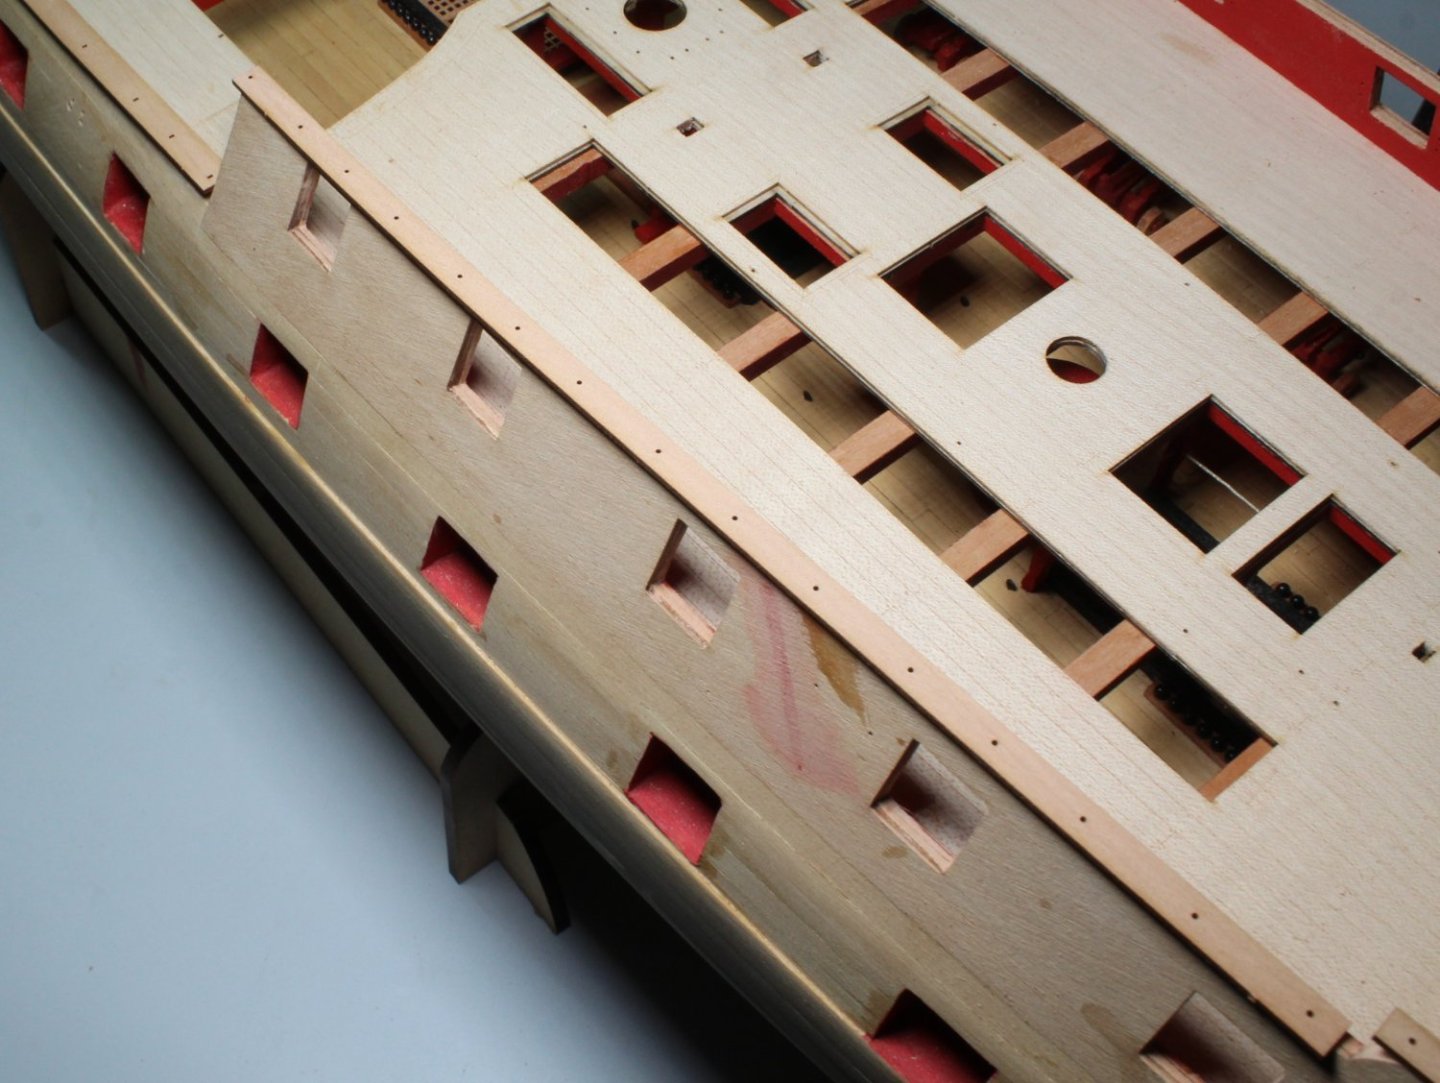
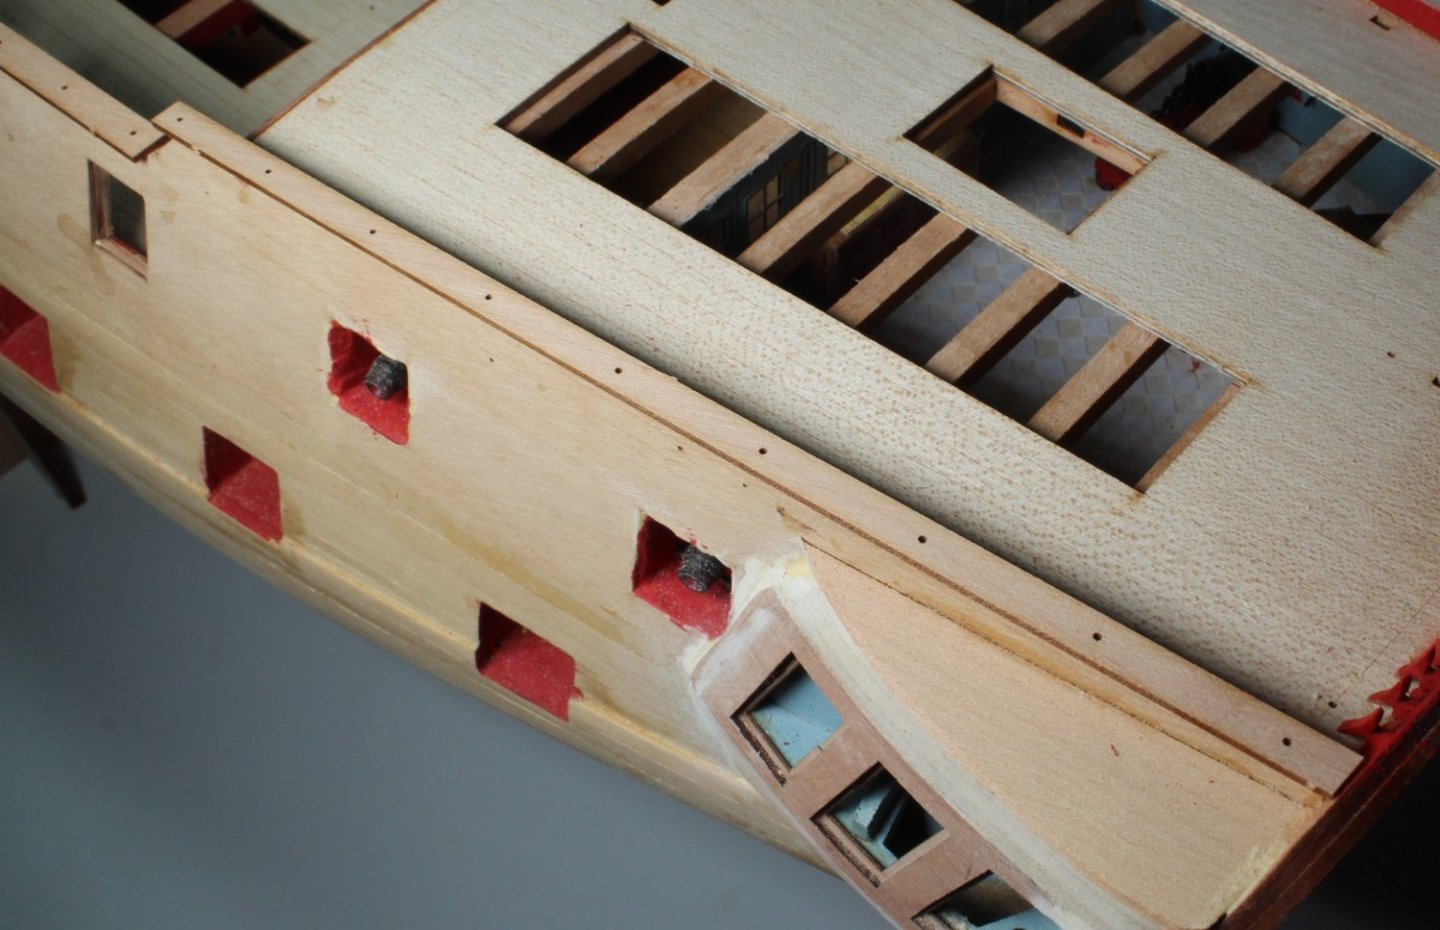
Start of Painting The Hull Yesterday I was able to return to the boat yard after returning home from a short holiday. The next task to undertake is to paint the hull. This is not a task that can be rushed and will take a few days to complete. I have to allow time for the wood filler to set before it can be sanded smooth. I then, after a new coat of paint has been added, I have to allow time for the paint to dry before it can be inspected and new filler applied to any remaining defects. Task 1 - Tape the hull. This took quite a bit of time. Foam padding was added to the gun ports. Once the hull painting is complete I will have to touch up the gun gun ports. Task 2 - Add a coat of WOP to the areas to be painted and allow it to fully dry overnight. Task 3 - Apply a coat of yellow ochre to the area to be painted. As explained by Jim in the build manual the lighter colour helps to show the defects. Task 4 - Inspect the painted hull and applied wood filler as required. Task 5 - After sanding the wood filler take a few photo's Task 6 - After the dust removal apply a second coat of yellow ochre paint. Task 7 - Take some more photo's Stern Area Photo As can be seen there is much more filling and sanding required around the stern area. I think this area will take the most effort to get the desired smooth finish and will no doubt end being a real labour of love. Midship Photo's The midships area does not look too bad, but it still requires a little bit more work to get the required smooth finish. Please note the paint is still wet the photos below. Bow Photos Still a bit more work required to get the bow area looking smooth, especially on the wales. As you will also note the hull rail workmanship above the hawse area is not my best work. Waterline The top edge of the lower blue tape is set along the waterline. Once I am happy with the how the hull looks, and before the black paint is applied I will remove the tape. Time to go for a run.


-
I always fully insert, the internal framework is designed for this.
-
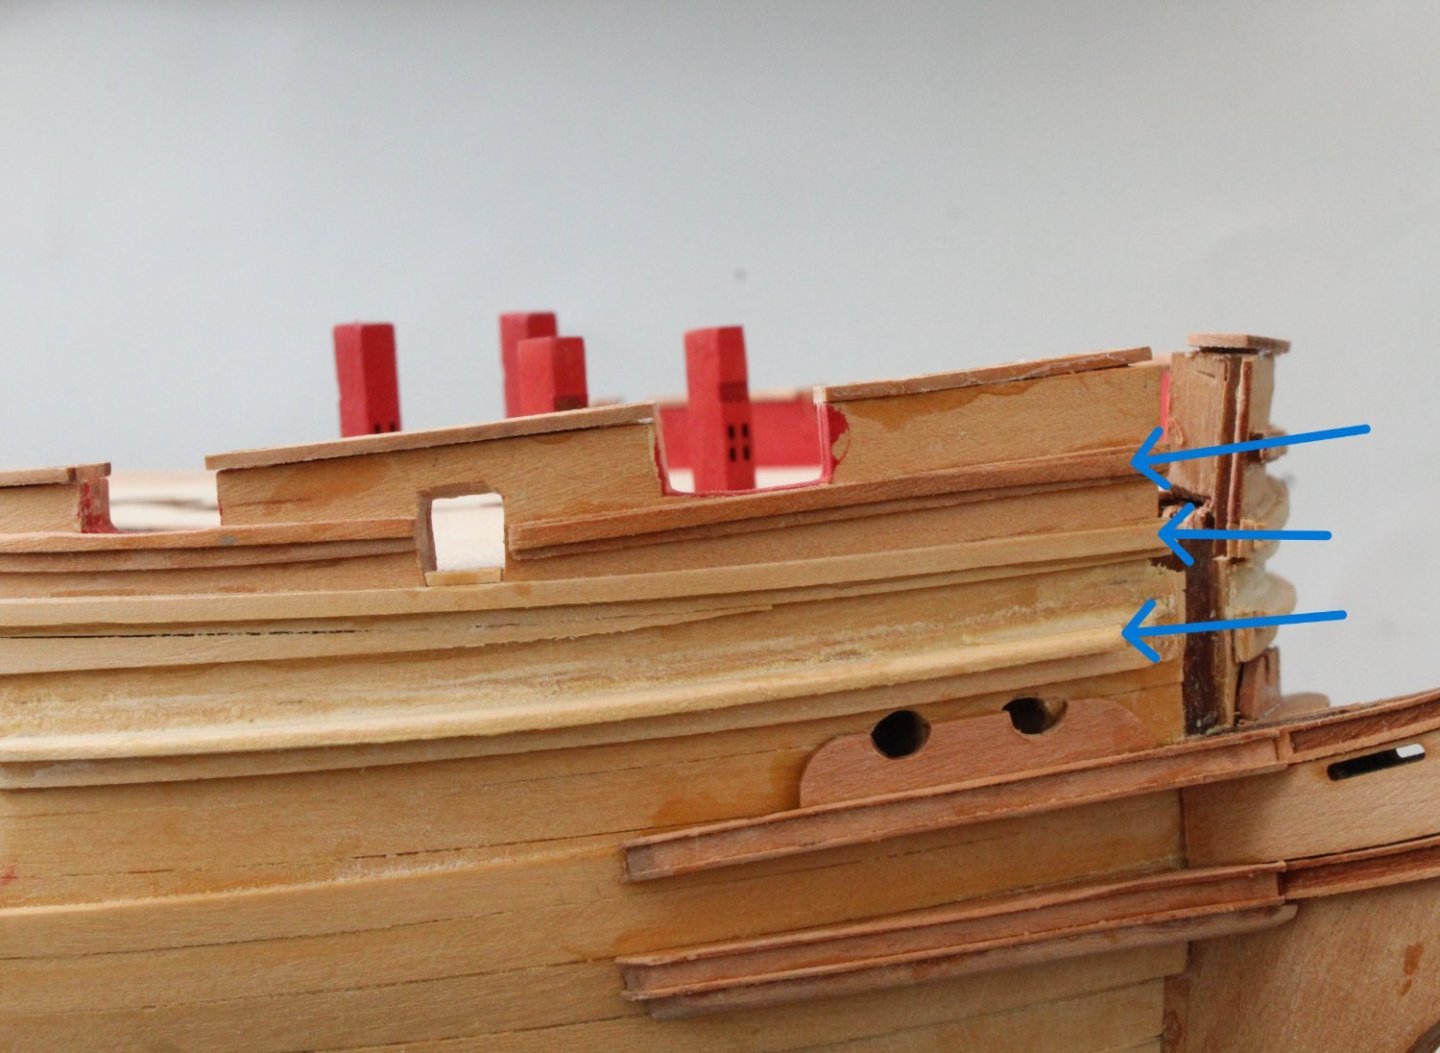
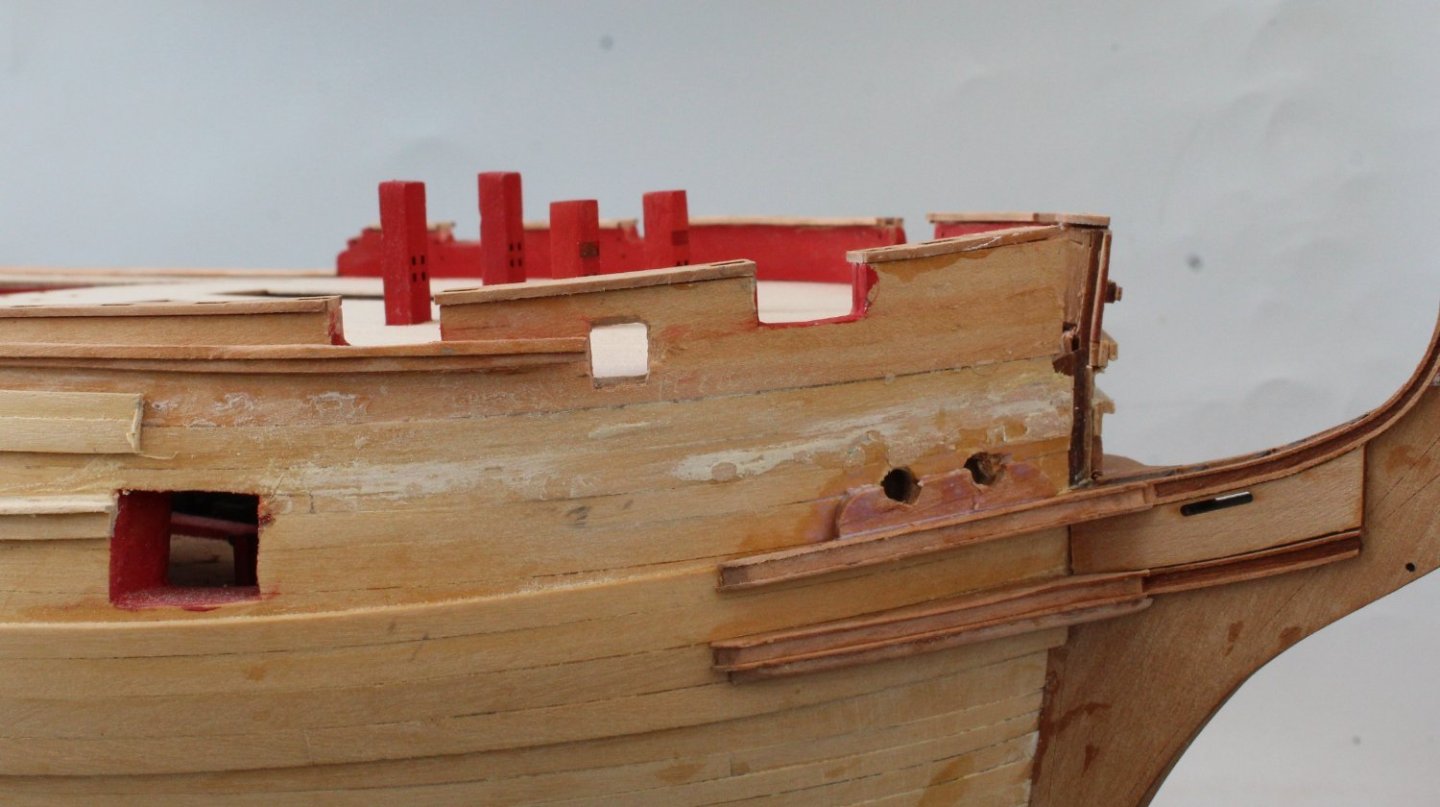
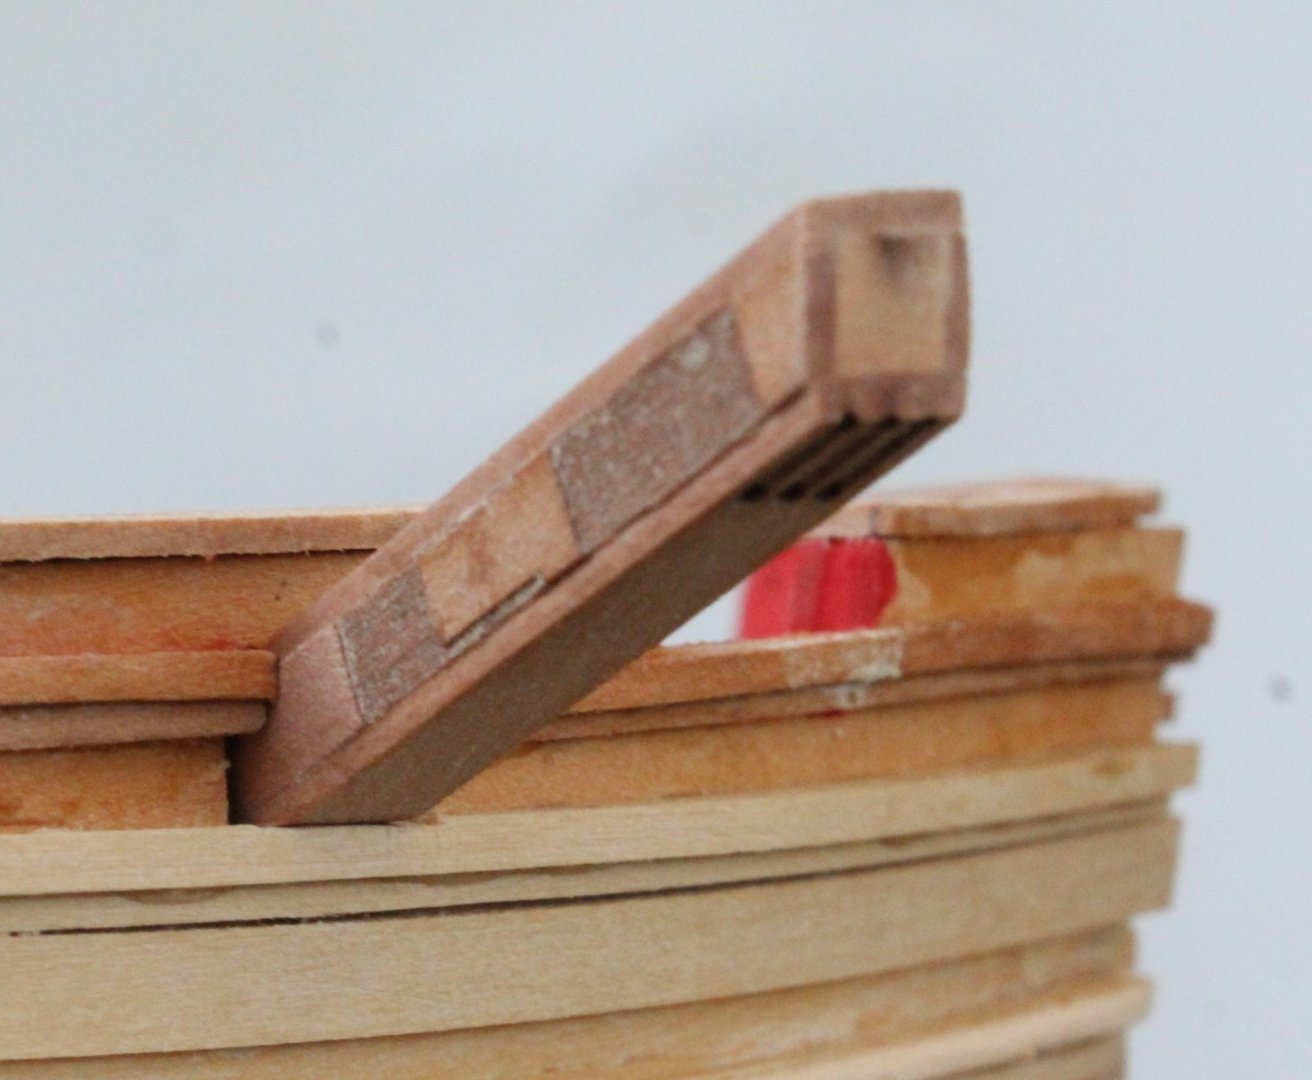
Hull Rails Rework As I highlighted in a previous post I misaligned the hull rails around the bow area (both sides). Initially I was going to accept my error so I could move forward with the build. However on reflection I decided I should try to rectify the error. The rails (blue arrows in photo below) are set too low. I ended up trimming the bottom edge of the middle plank so the low rail could be added. Not my best idea but it was a workable solution. It was not very pleasant to look at however. With a dish of acetone and a sharp craft knife blade I removed the right-hand side rails. I decided to remove all the middle rail from the front edge of where the fore channel will be positioned. Thankfully the rails came away and the hull just needs a bit of cleaning up. Using wood glue the top rail was clamped in its new position. I also reworked the hawse holes and adding a bit of filler to hide some of the gaps. I am much happier with the top rail position. I used some tape to get an idea where the remaining two rails should be positioned. The new middle and lower rails were then added and overall I think it looks better. Given how I was able to rework the right-hand side I am confident I will be able to readjust the left-hand side rails. My final check of the new rails was to see if the cathead would still fit. Once the rail section sitting over the cathead opening was trimmed the cathead seems to be a good fit.


-
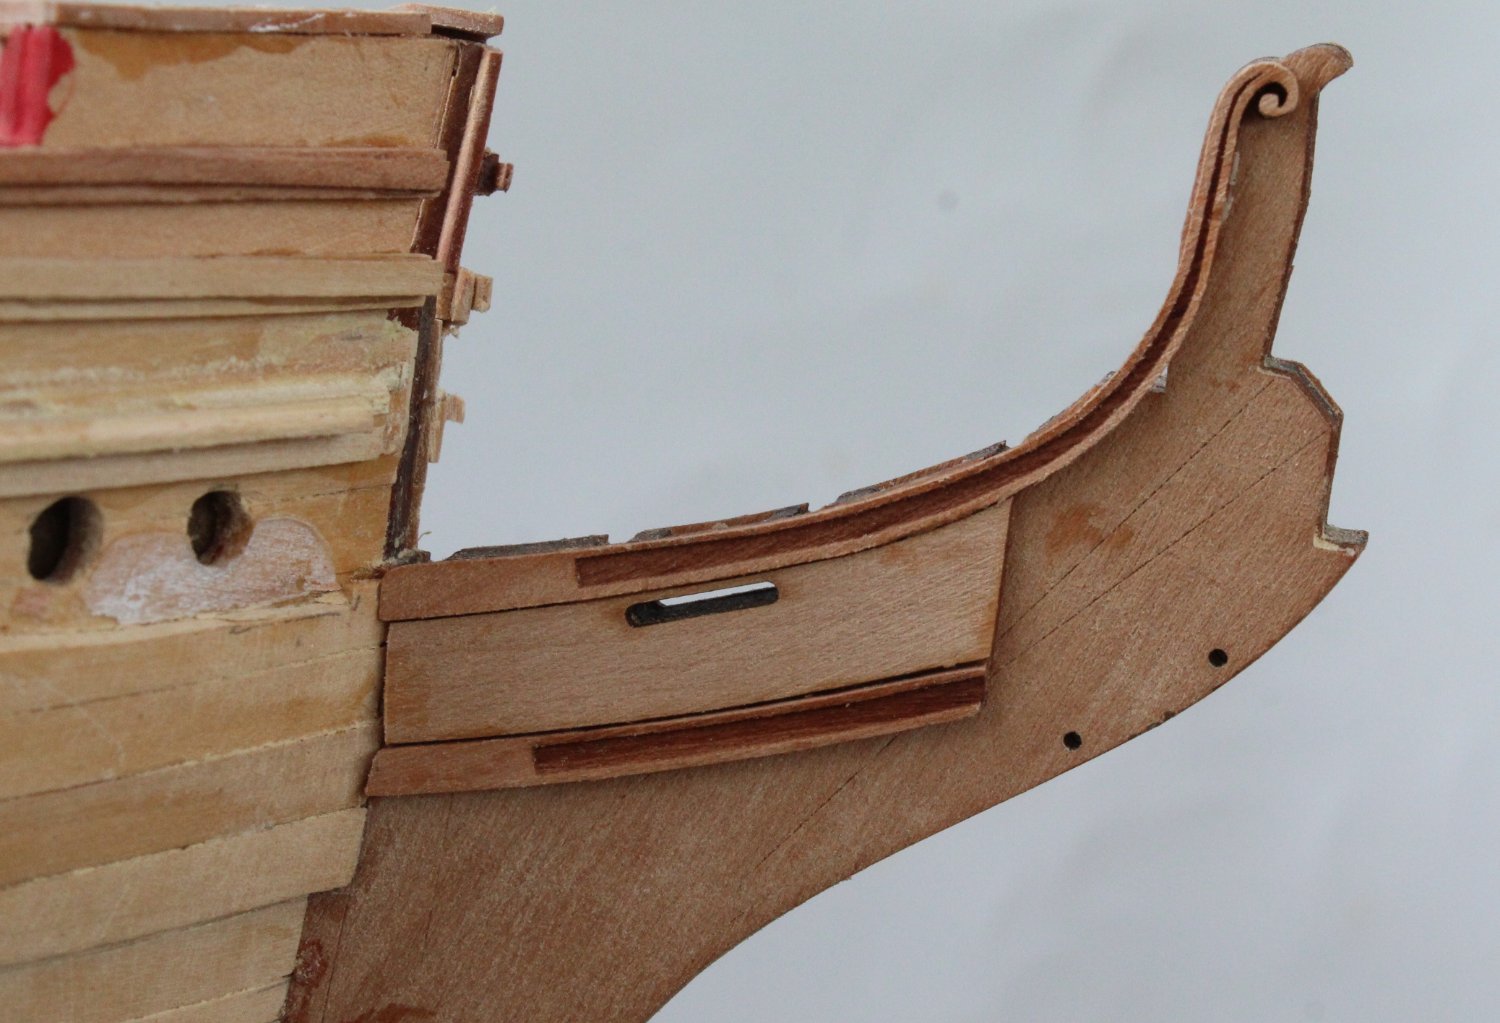
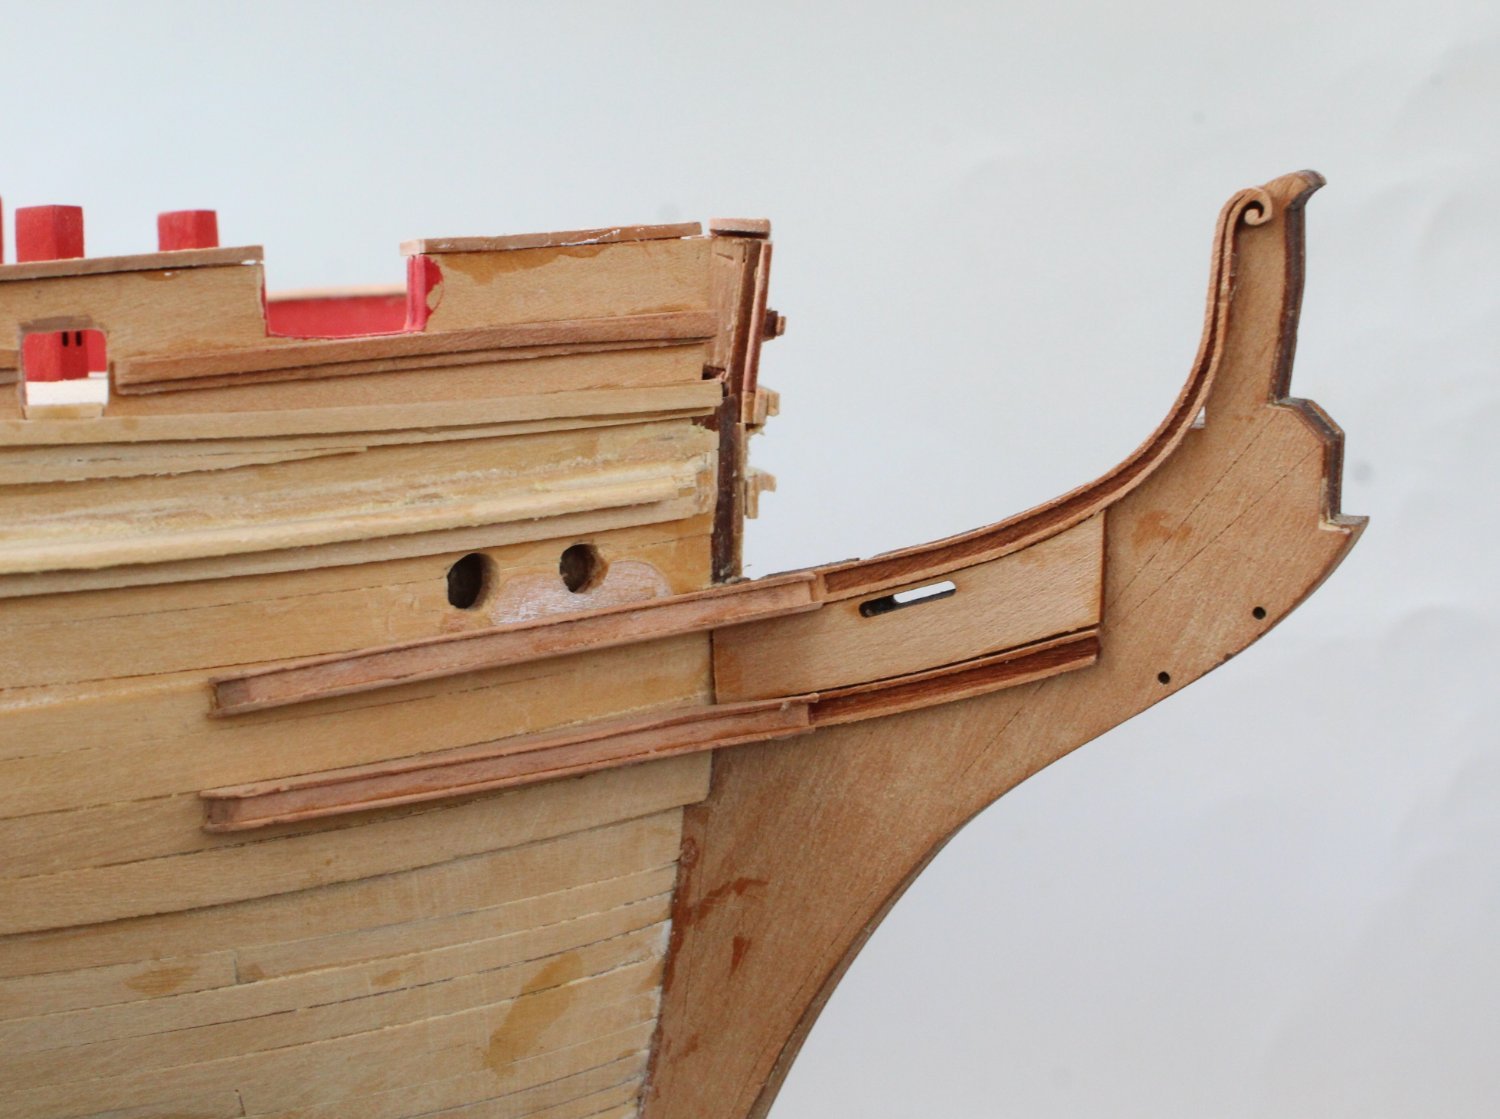
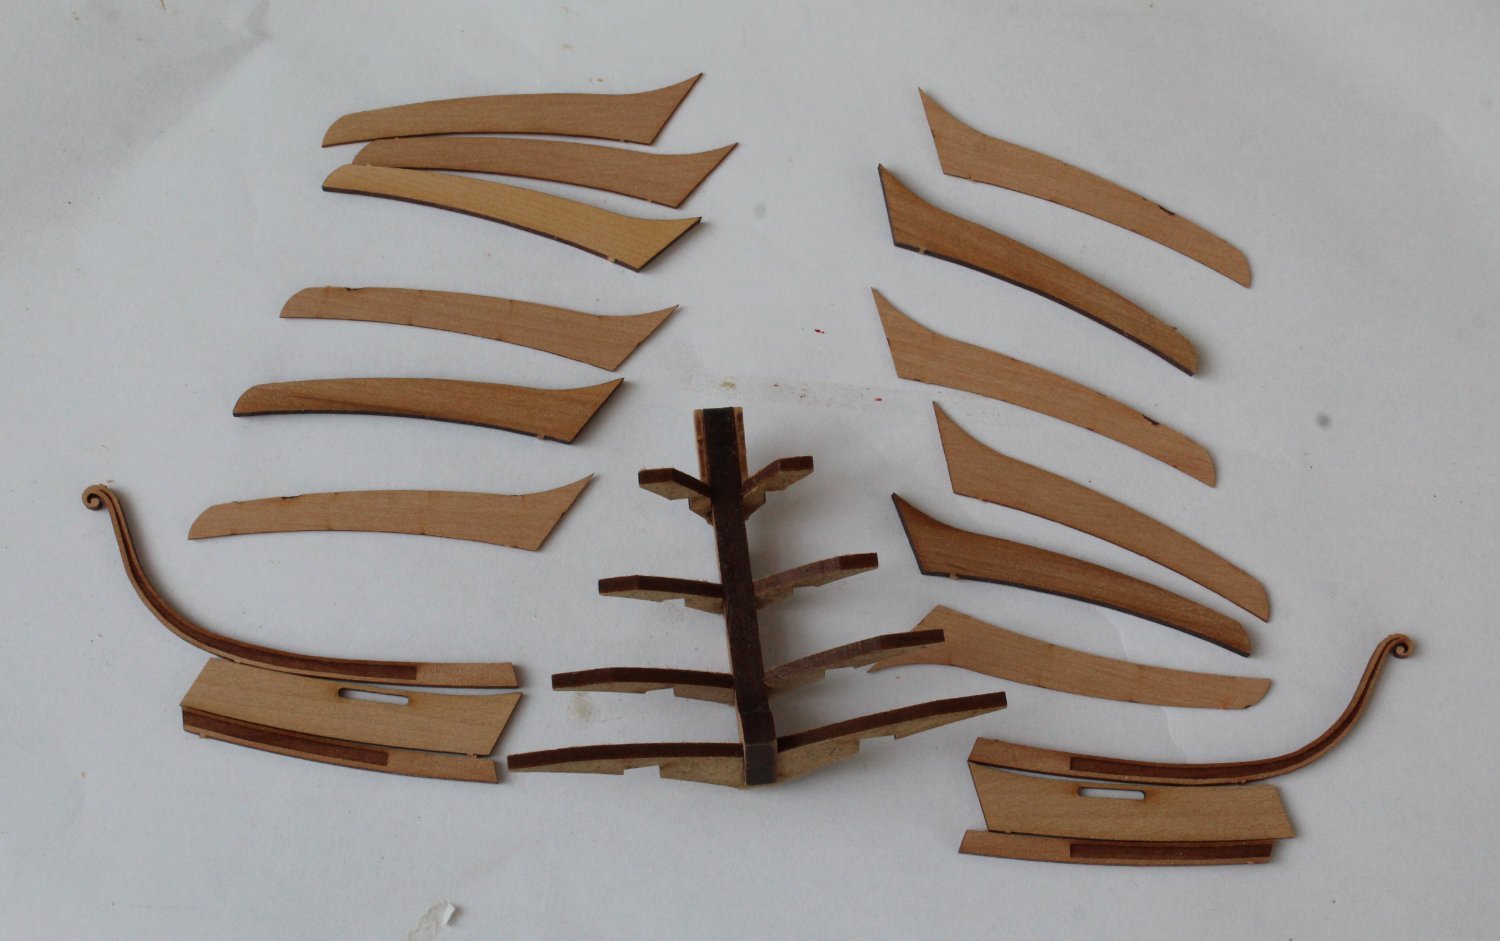
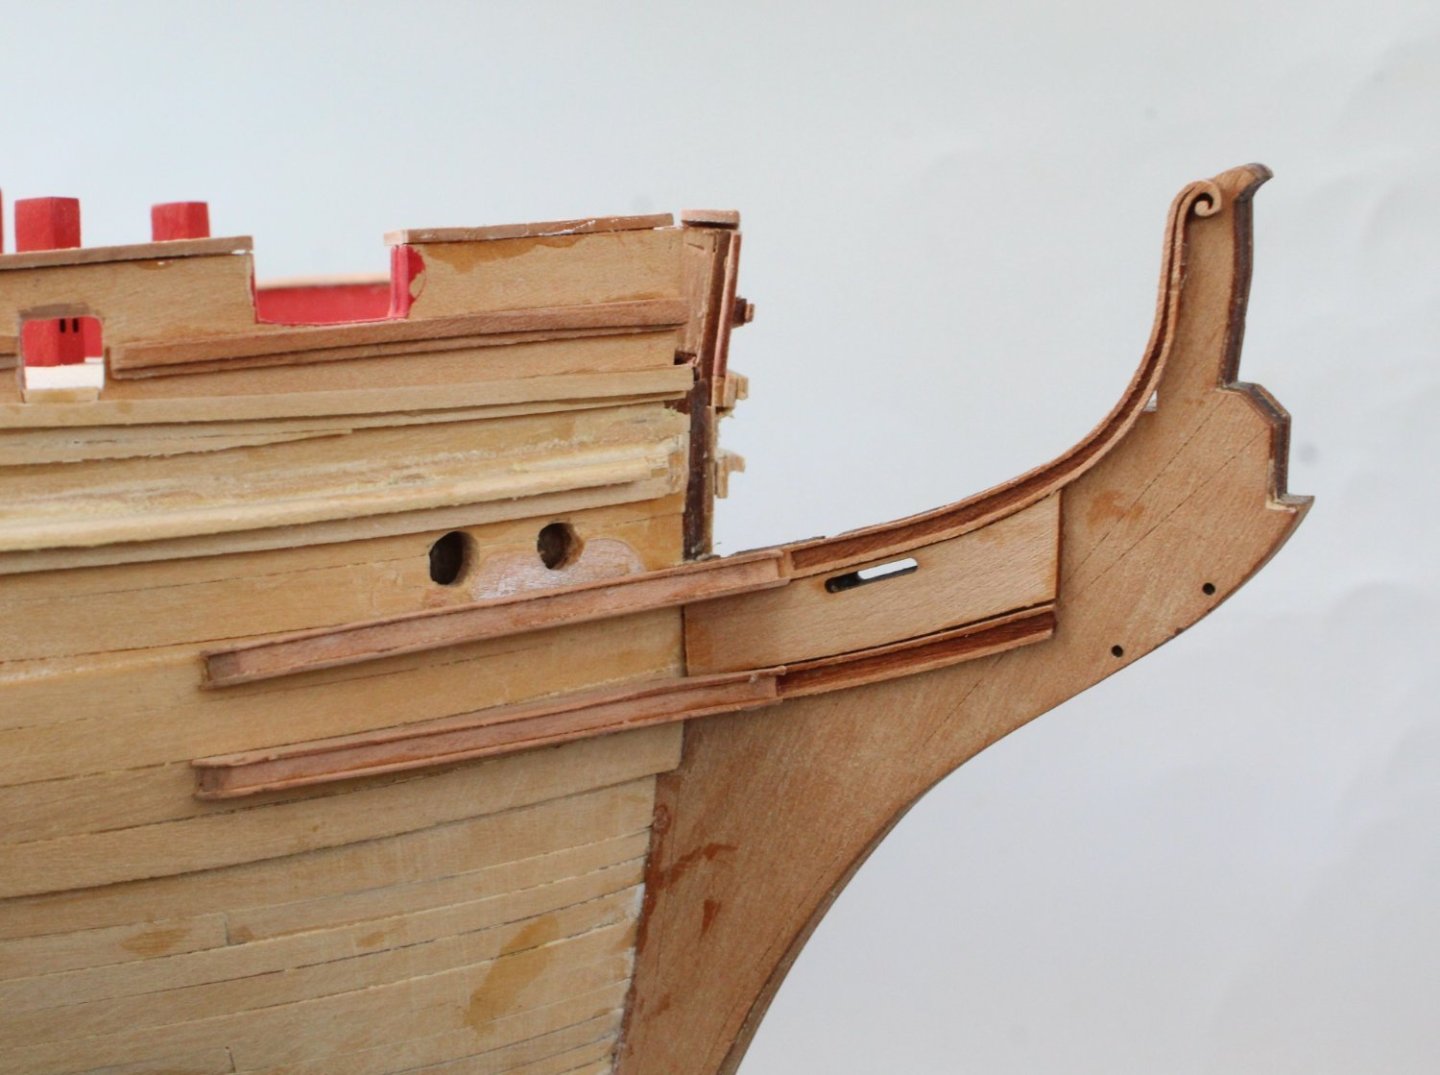
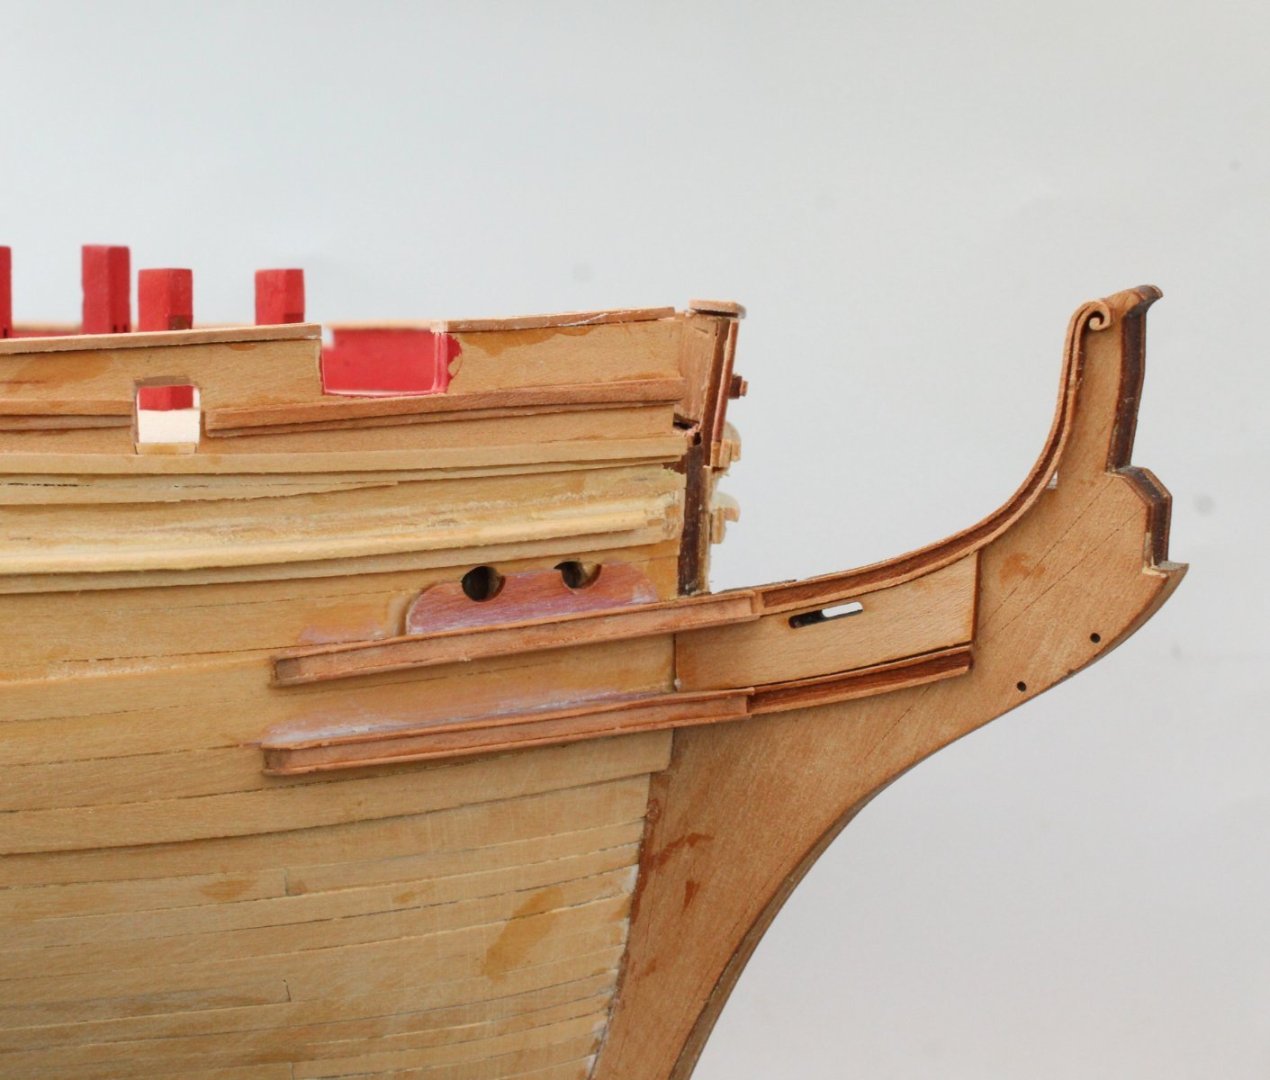
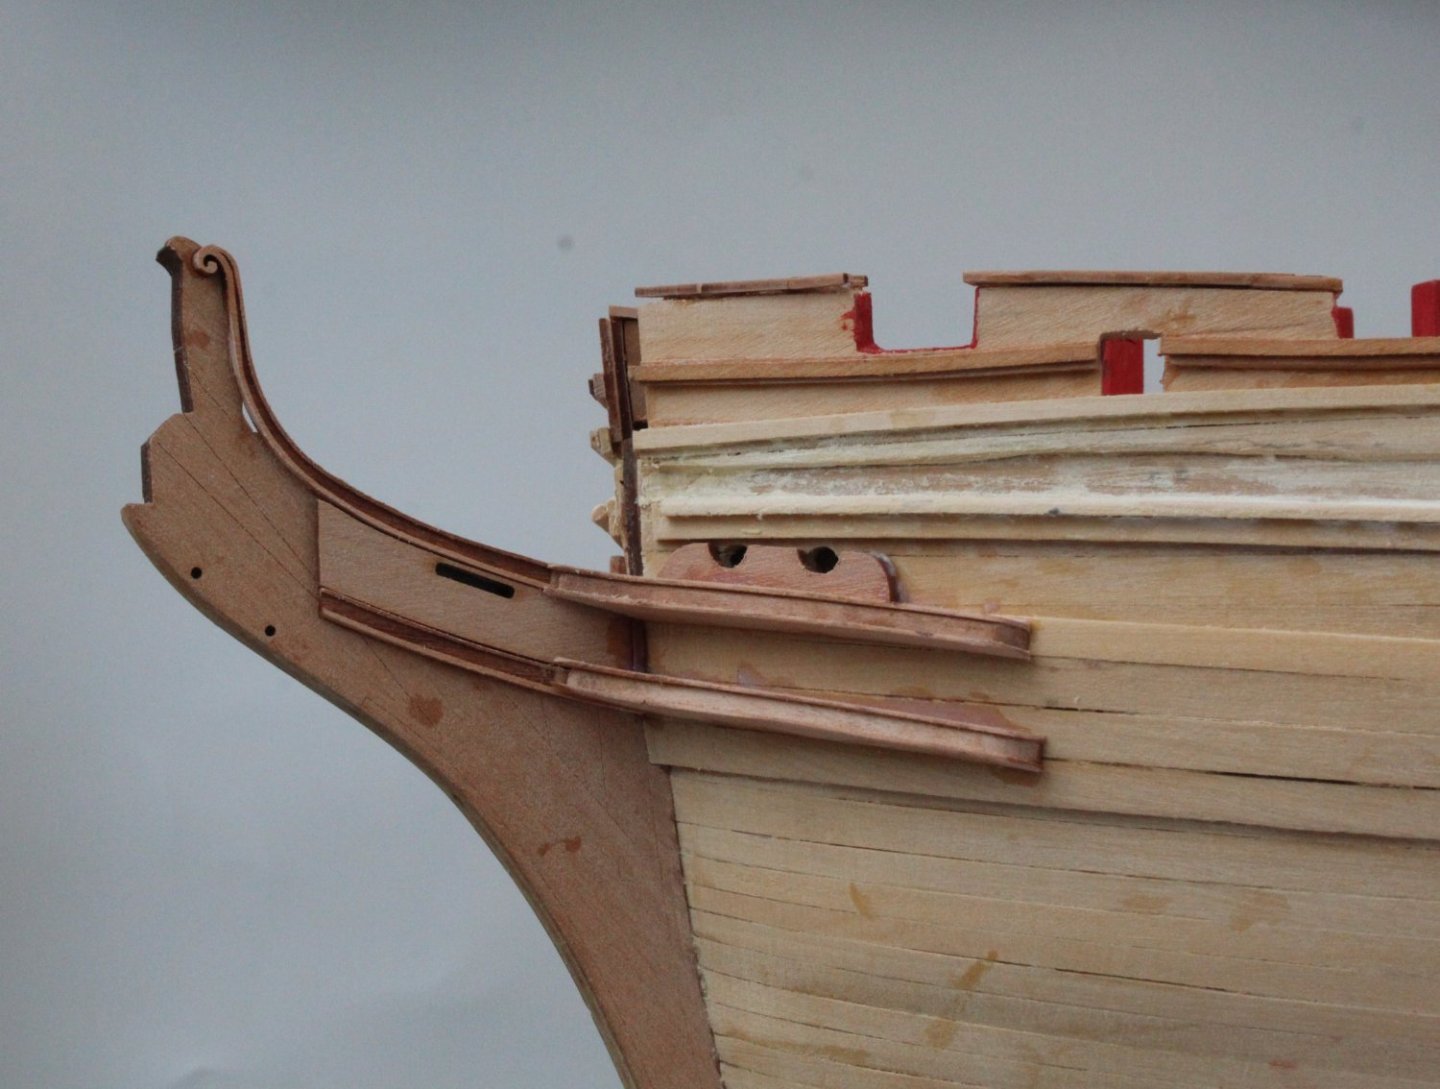
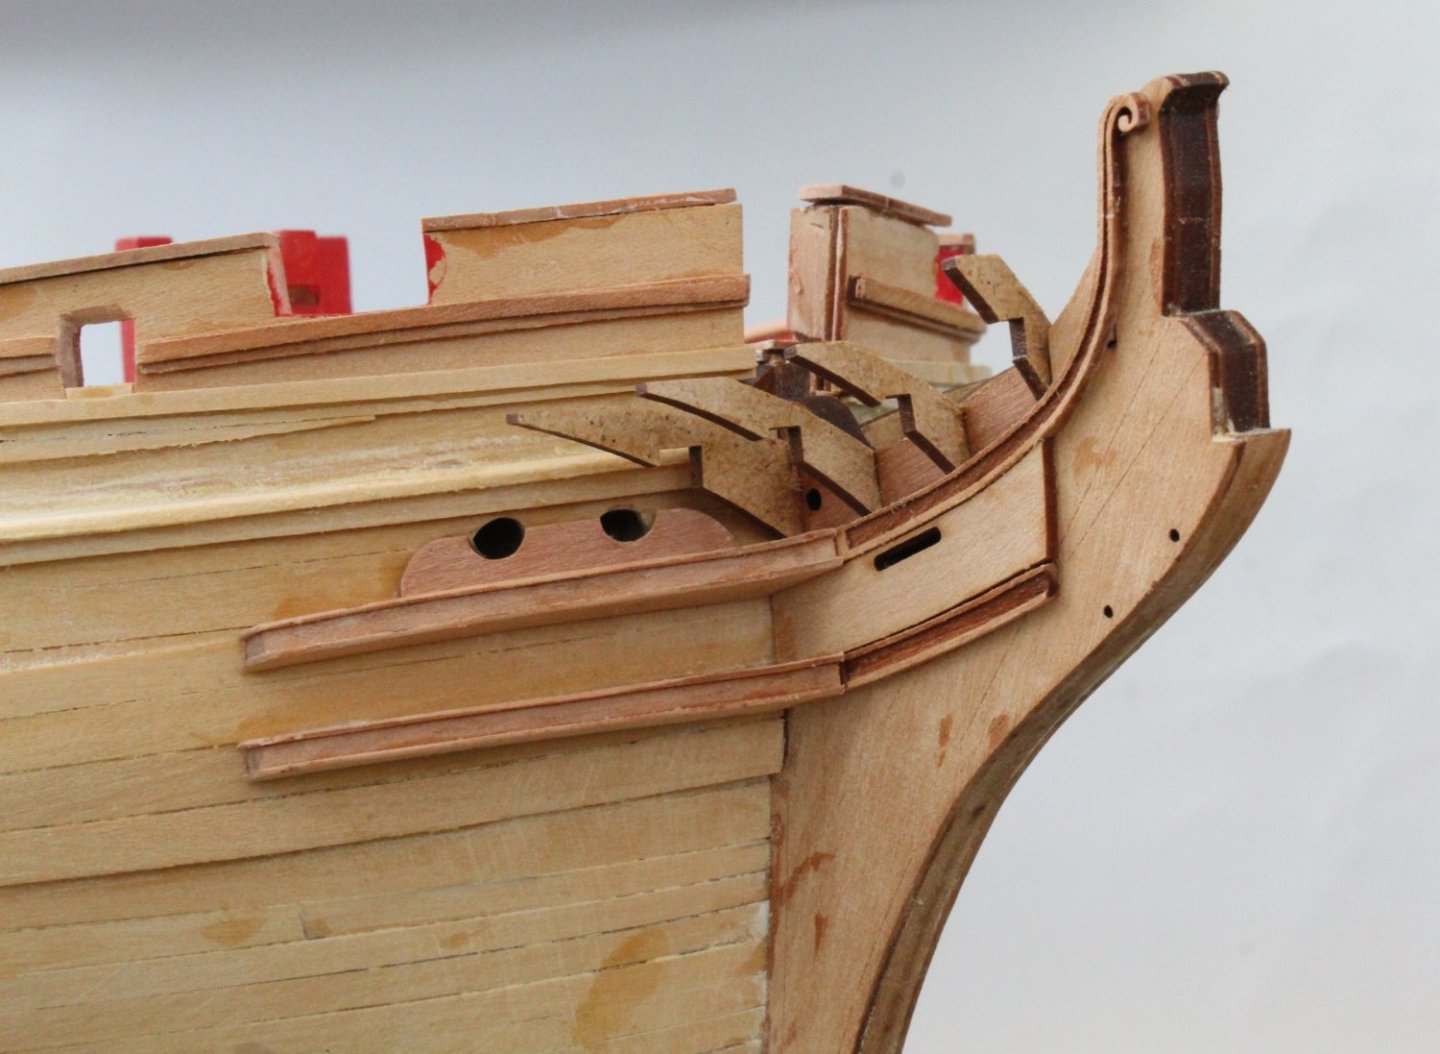
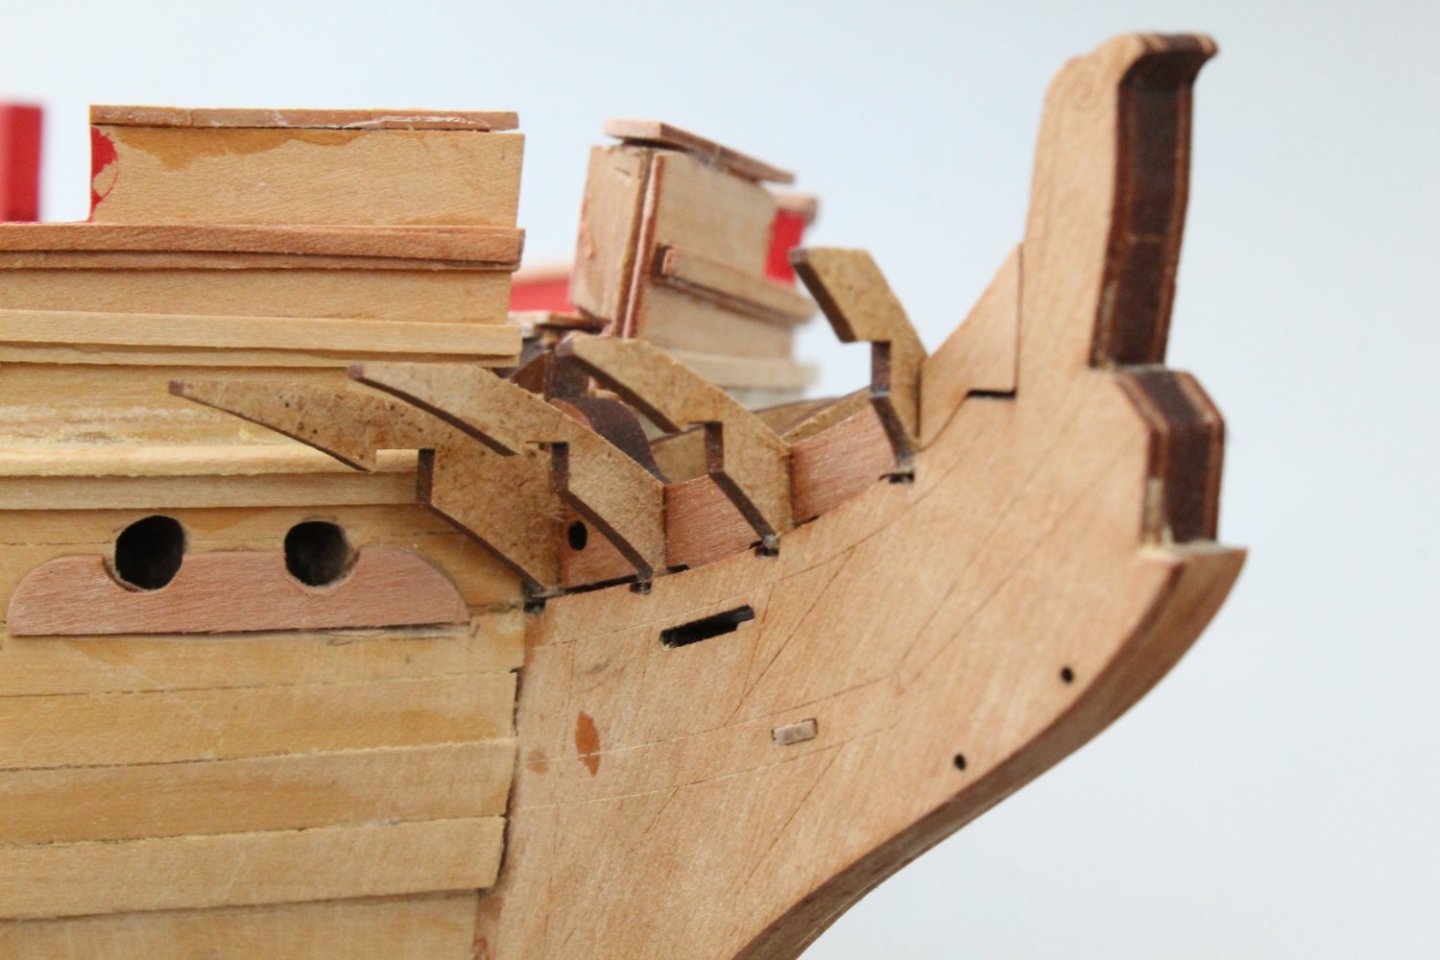
Bow Area Work Adding the various items around the bow went much quicker than I was expecting and only took me an hour this morning to complete. Once I had carefully removed the laser char from the various patterns a test fit was carried out of the bow gammoning bolster and the bow cheek rails. The patterns did require a little bit of trimming before I was happy with the test fit, as shown below. These patterns were then coated with wood glue and affixed to the bow stem. You will notice in the next photo that I also had to remove the right-hand side hawse bolster pattern. When I tried a test fit with the upper bow cheek assembly the hawse bolster pattern needed to be positioned a tad higher. Once I was happy with the fit of the upper bow cheek it was glued to the hull using wood glue. This was swiftly following by adding the lower bow cheek pattern. Finally the hawse bolster pattern was refitted, noting I might need to adjust the hawse holes in the hull. I might also see if I can readjust the position of the two upper hull rails. The gammon knee assembly was also retested. The final task was to shape and fit the bottom bow cheeks. With the work completed it was time for a cup of green tea followed by an easy paced 50 min stamina building run to celebrate. Yesterday I came first in my age category (65-70) at a local parkrun. For those of you who do not know a parkrun is a free community event where you can walk, jog or run a 5km course and takes place every Saturday morning. There are currently 1,215 weekly events in the UK but there are only 64 events in the USA. I also need to source some foam packing so I can block off the gun ports prior to the painting phase. Also should I invest in a air brush system, as I think this will be much better for painting the hull. I'm now heading back to the shipyard to see if I can do something with repositioning the two upper hull rail assemblies.


-
Nicely done, looks great.
-
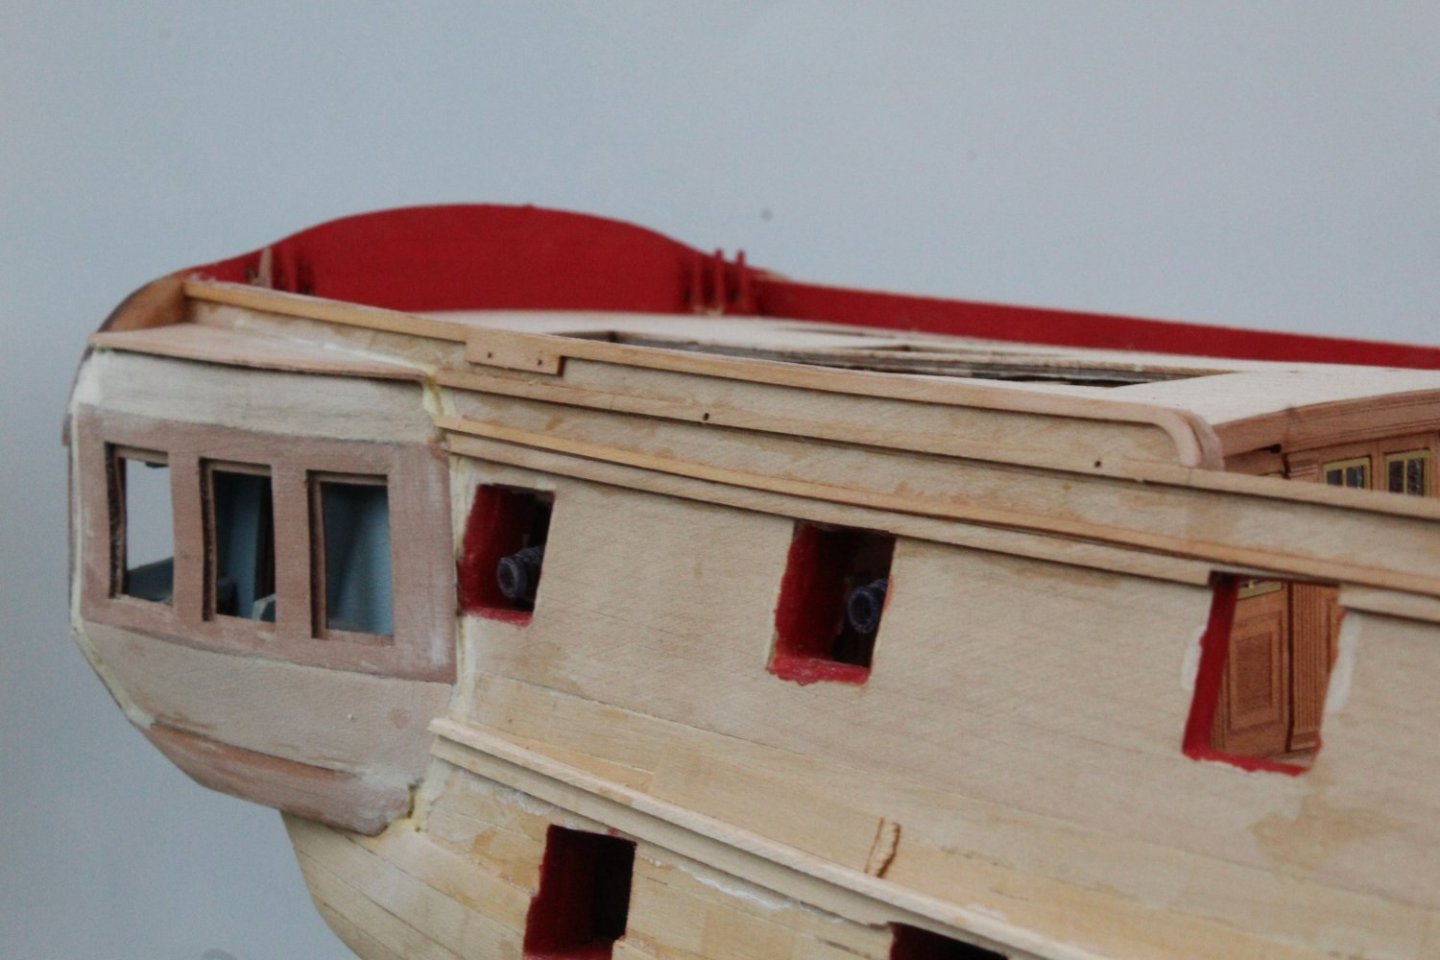
Quarter Galleries and Bow Work I have now added the 3D rails to the quarter galleries. I started with adding the wider 1mm patterns. I am pleased with how these patterns have lined up with both the stern counter and hull rails. There will be a bit of tiding up required however. The next picture shows the 0.6mm patterns added to the top of the 1mm rails. It looks much better now. It will look even better when the paint has been applied, as the imperfection will be hidden (hopefully). With the bow cheeks added to the gammoning knee, the assembly was test fitted. The prow outer patterns were then added. The completed assembly is dry fitted in the next photo as it need to be removed for the next build phase and will be fitted after the painting phase is complete. I did notice that the left-hand hawse bolster pattern was set too low and would a problem when fitting the 2 bow cheeks to the bow. As can be seen in the next photo I have been able to remove the hawse bolster pattern and this will be repositioned when fitting the bow cheeks. The rest of the bow parts have been assembled and I am hoping to be able to get these parts fitted before my trip to Norfolk. Once these parts have been fitted the hull painting activities will commence.


-
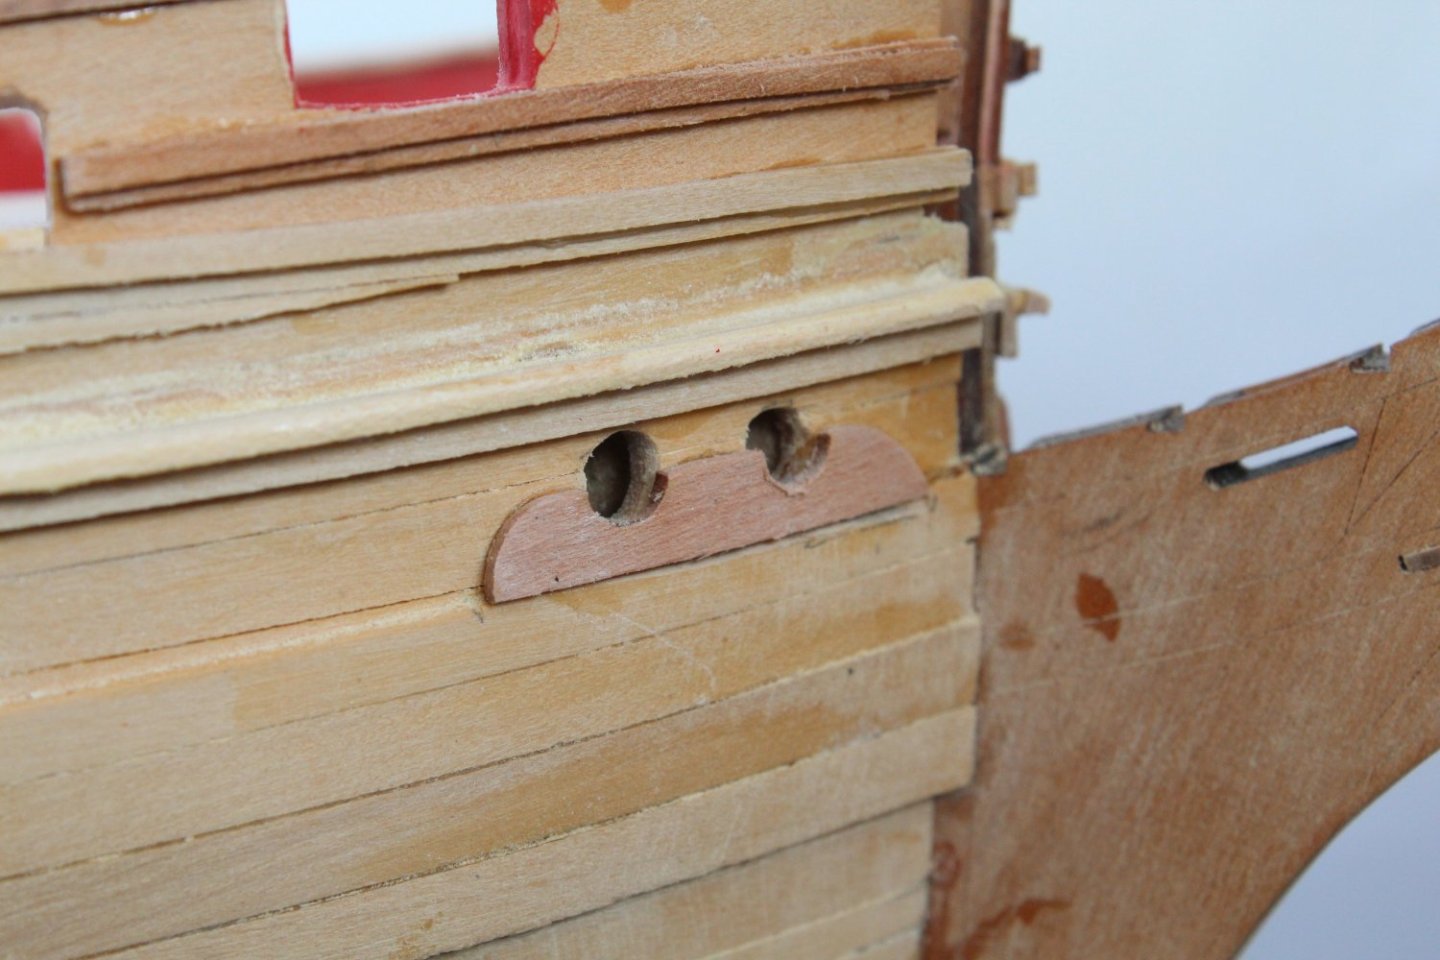
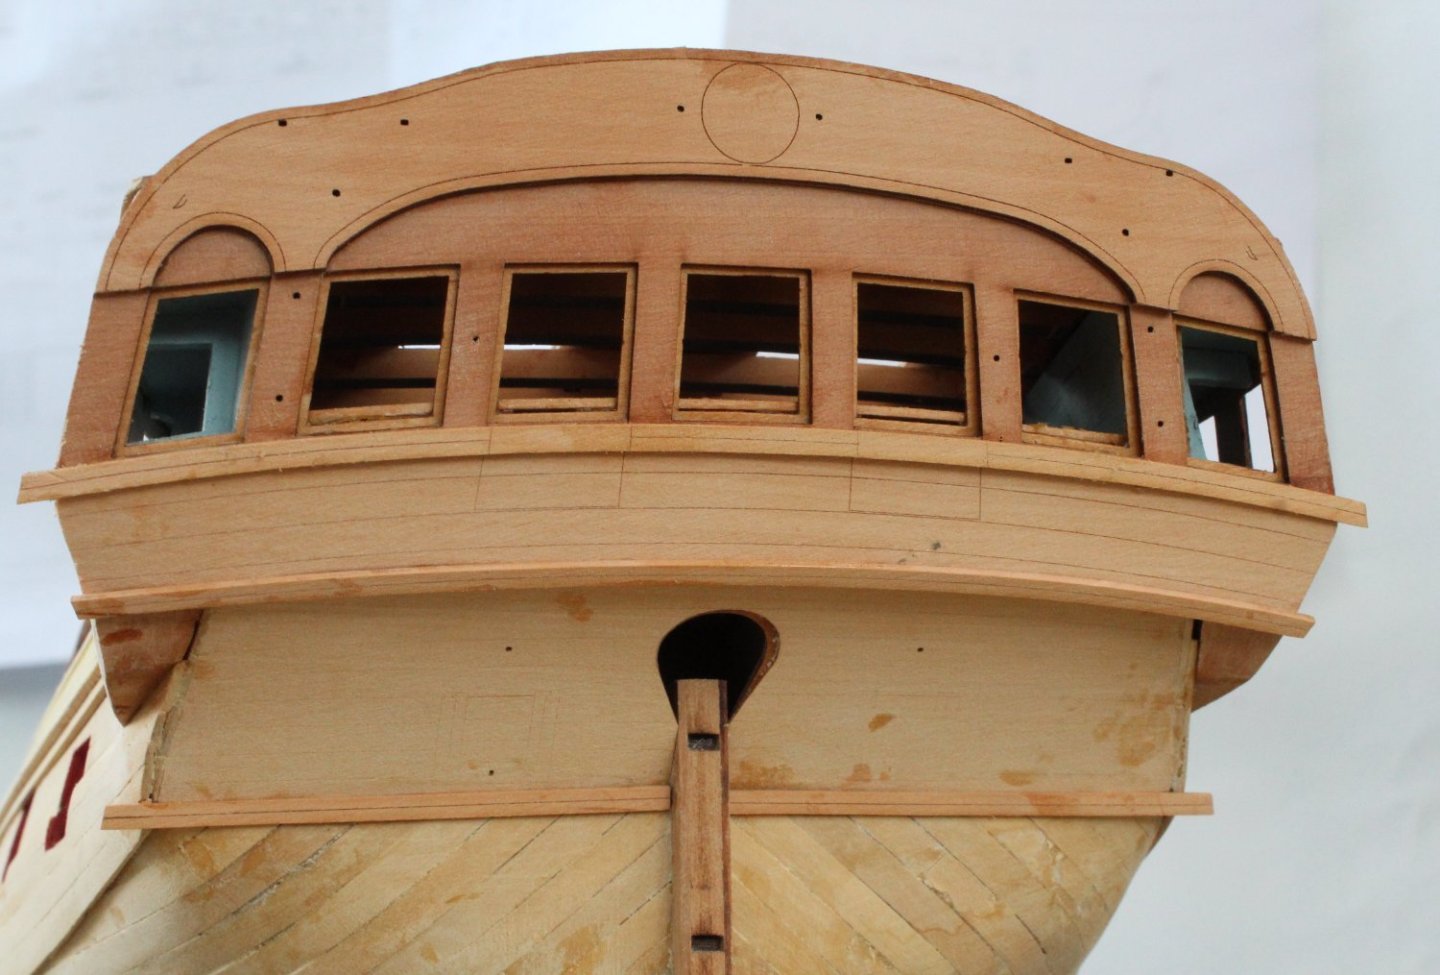
Hawse Bolster, Gunwales and Stern Counter Rails Some more progress today. The hawse bolster patterns were fitted. As advised in the build manual the patterns did require trimming to match my build. Once I was happy with the general fit the patterns were wetted and then clamped to suitable bowl to get a nice bend for ease installation around the curved bow area. Using ca glue the hawse bolsters were glued in position. The more eagled eyed will note the error of my ways with the installation of the hull rails around the bow area. The top rail is set low and should be across the gun port rather than below. I know I can remove and try to align the rails correctly but after much consideration I decided that, once built, the model will not be on pubic display so I can live with the how it looks. It will also be less noticeable when painted Next I added the gunwales to the forecastle, quarterdeck and poop deck. The forecastle gun ports will need a retouch paint job. I was happy that the poop deck gunwales aligned perfectly with the top of the upper stern counter pattern. I did mention in a previous post that the rudder housing needed to be reglued at some point and it was a simple job to add the wood glue and clamp in place. All looked good when the clamps were removed. Final task of the day was to add the stern counter 1mm rail patterns. There are some 0.6mm patterns to that will sit on top of these rails to create the 3D effect. When adding these rails I was checking the position of the quarter gallery rails and as far as I can tell then line up perfectly with the stern counter rails.
-
A great spot, and I am OK with how it looks. Thanks for your comments and support.
-
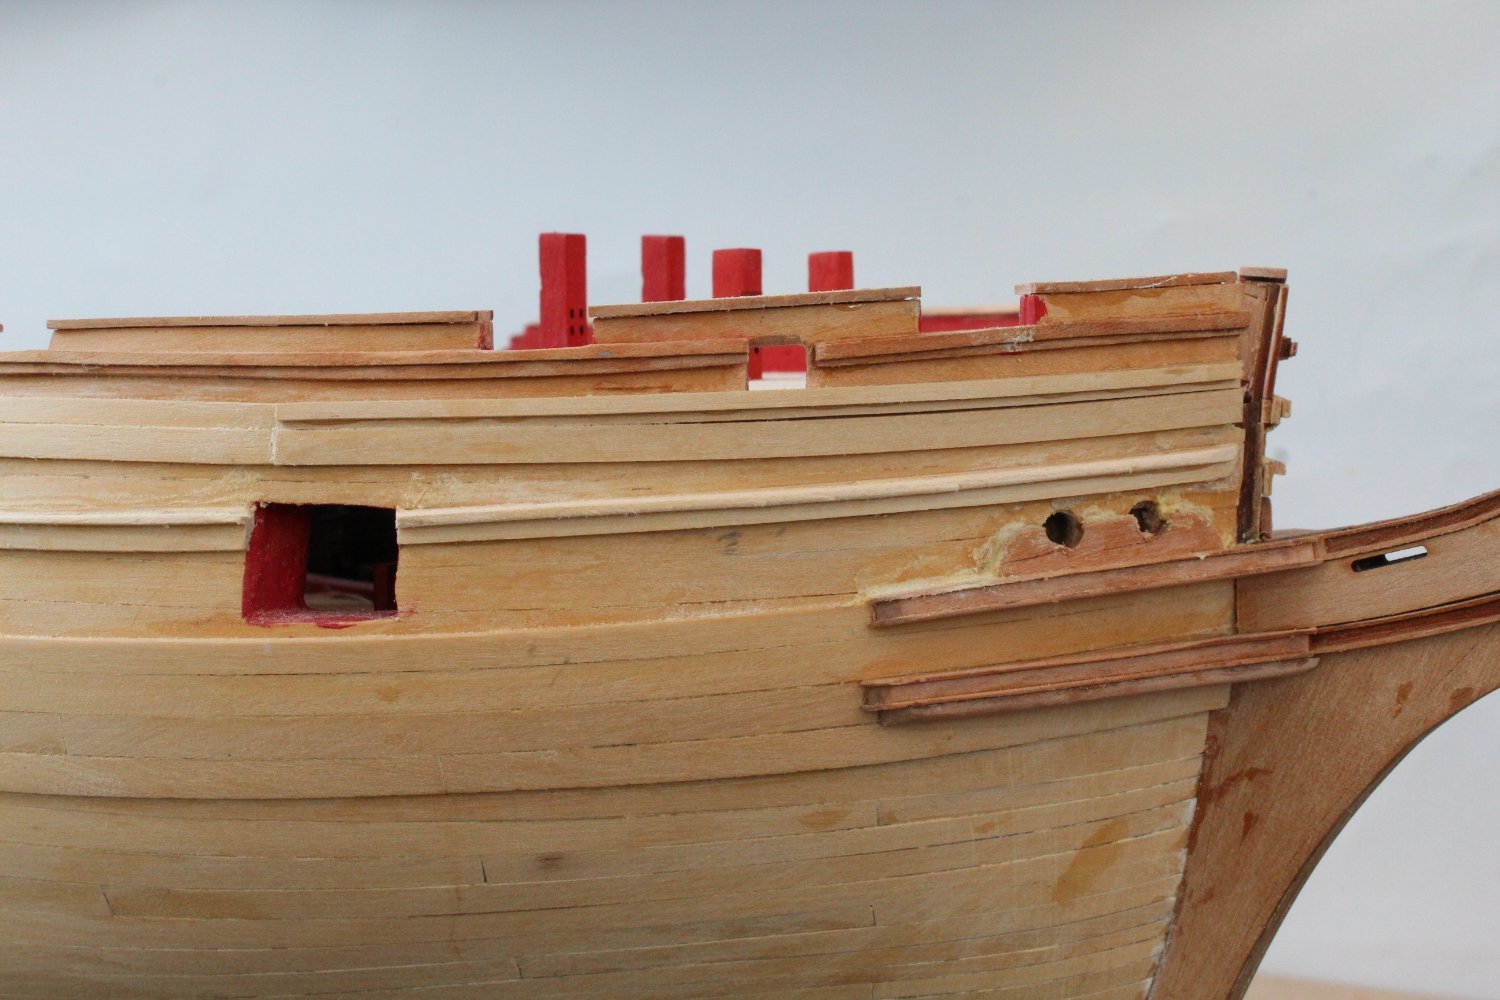
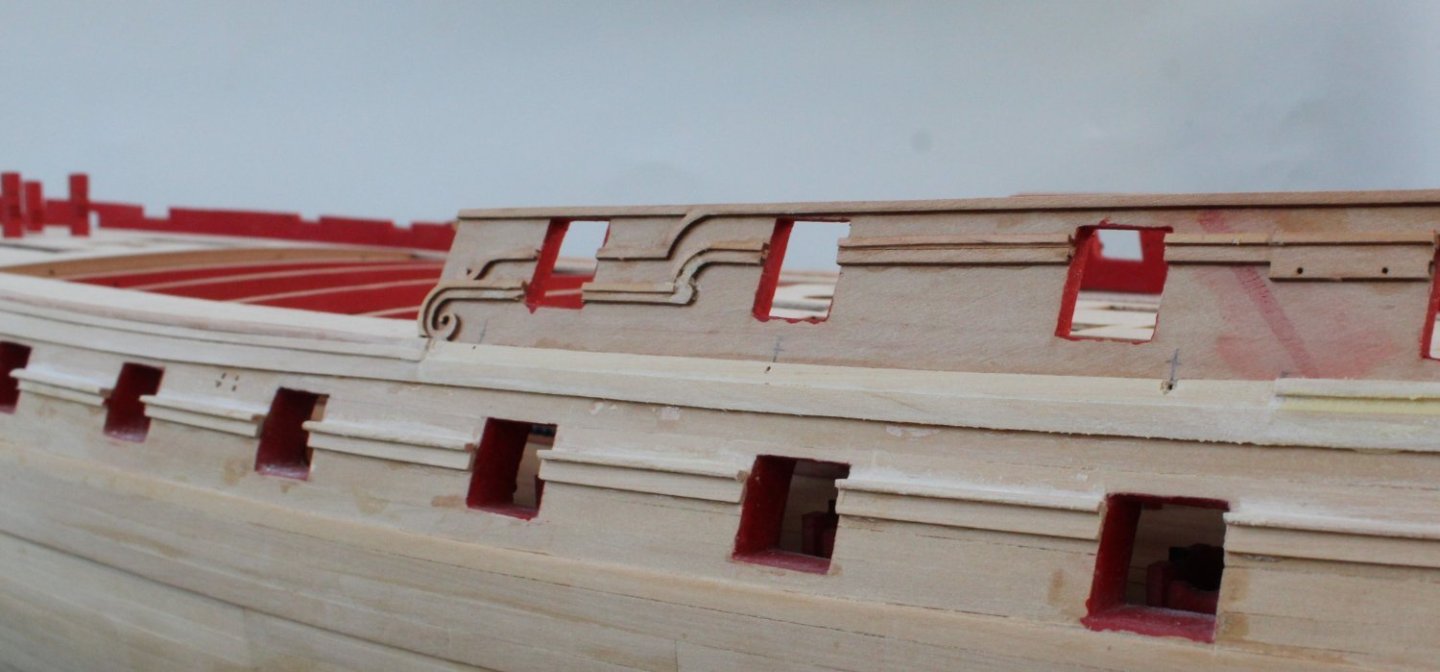
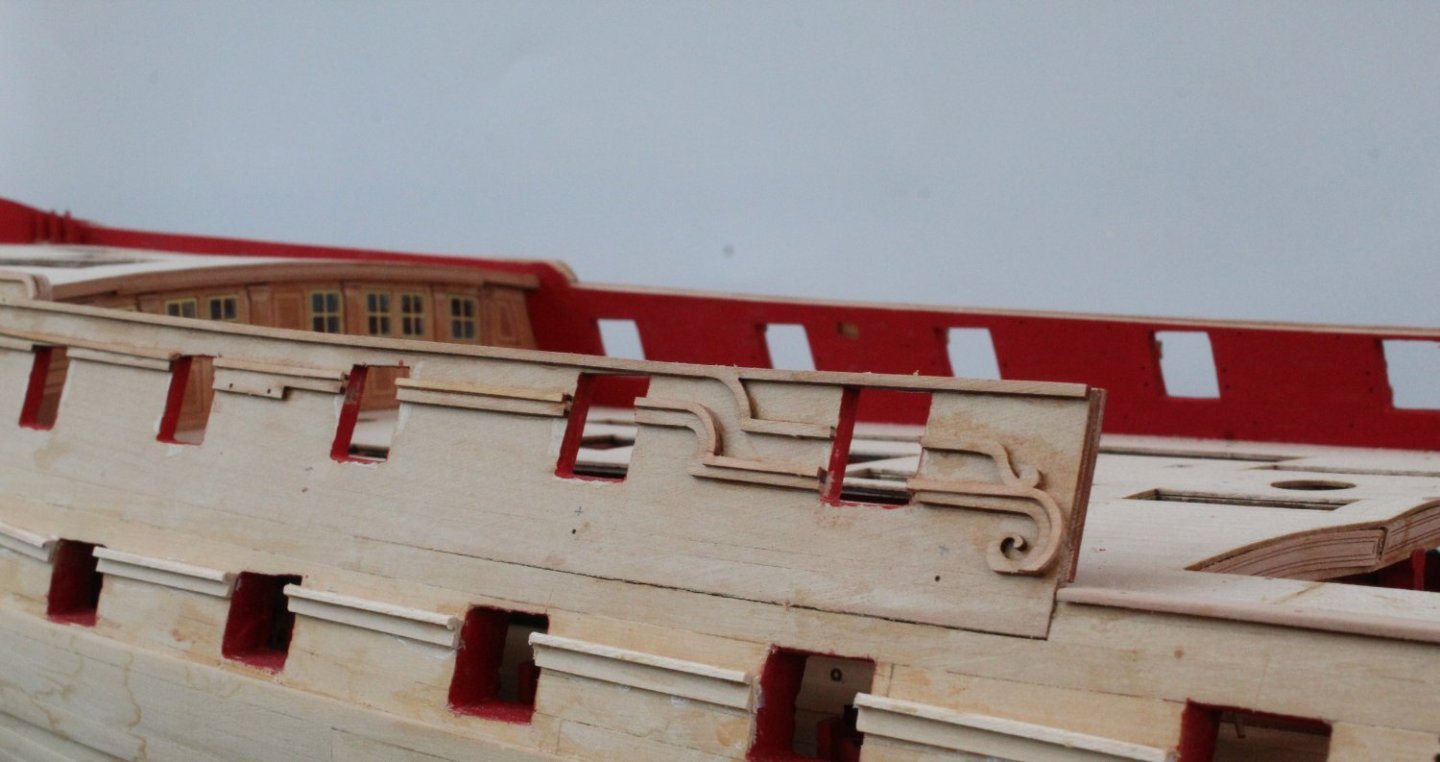
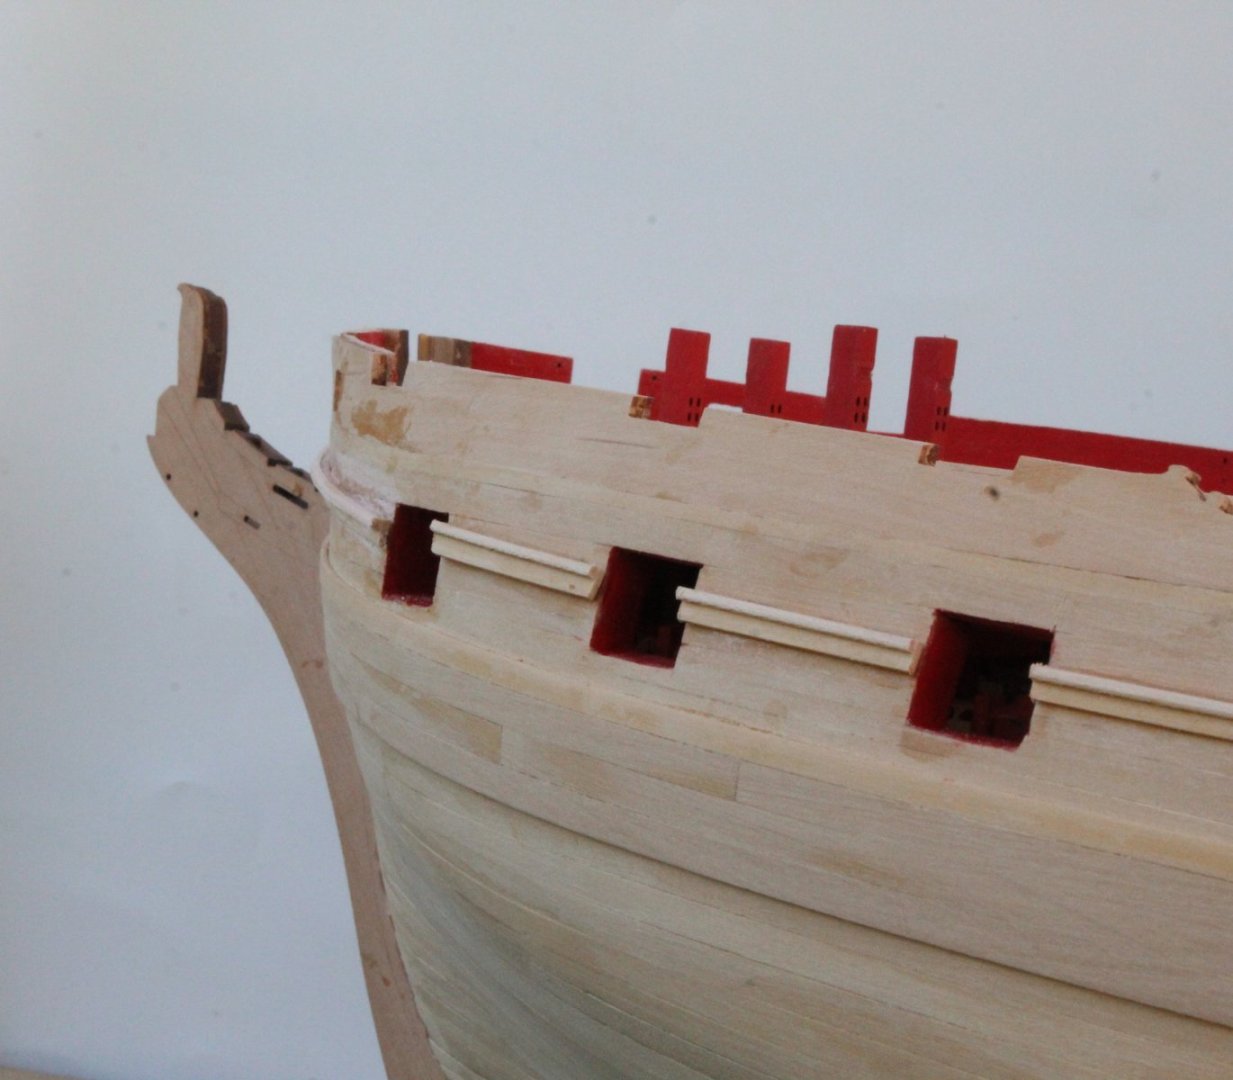
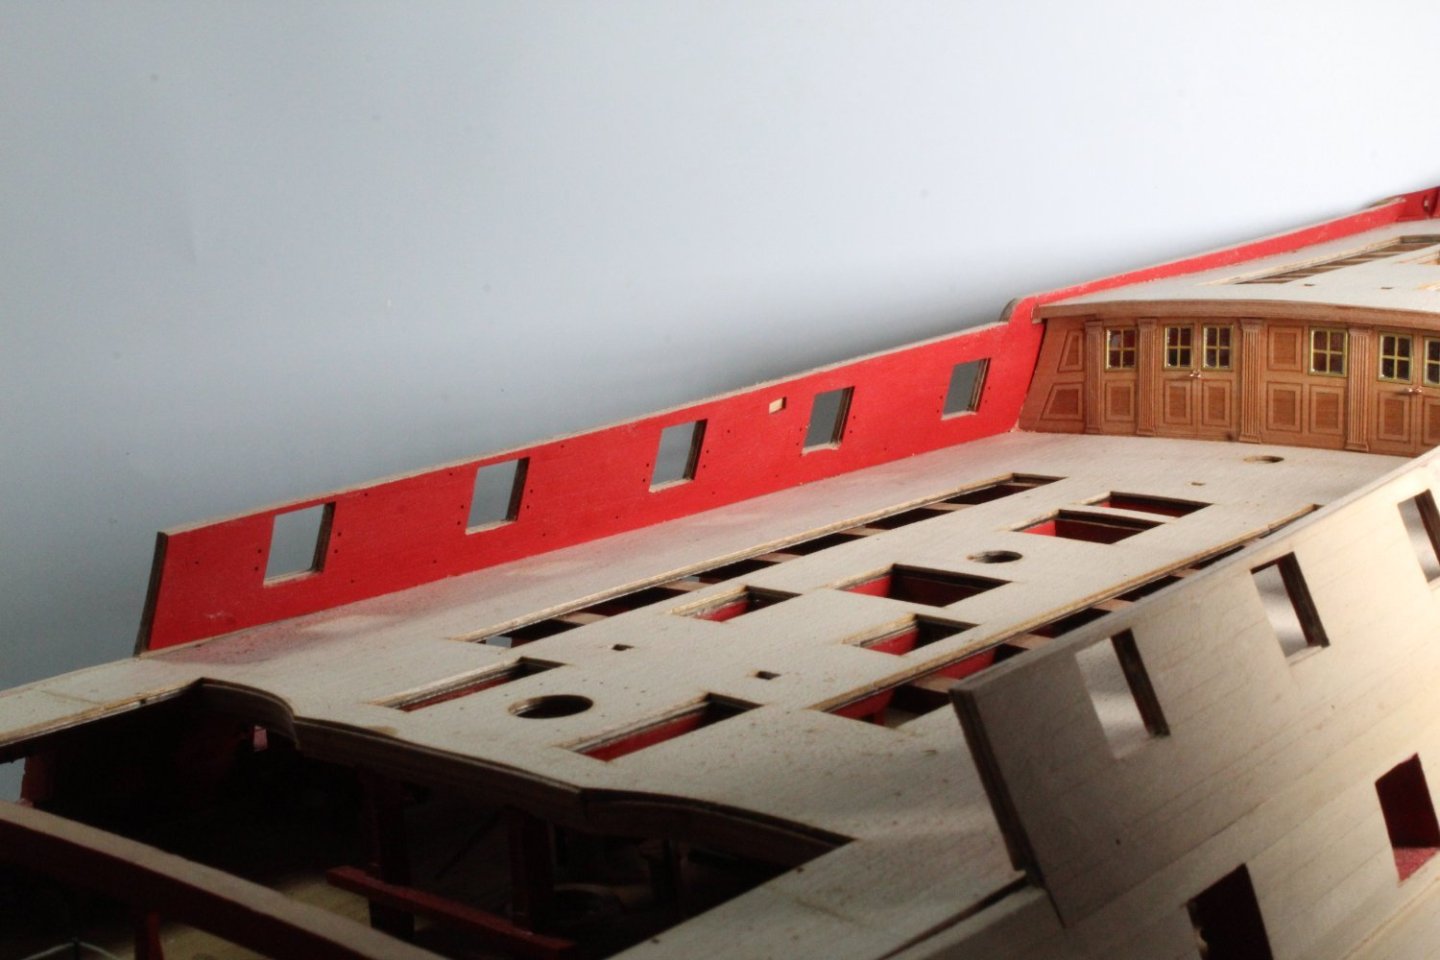
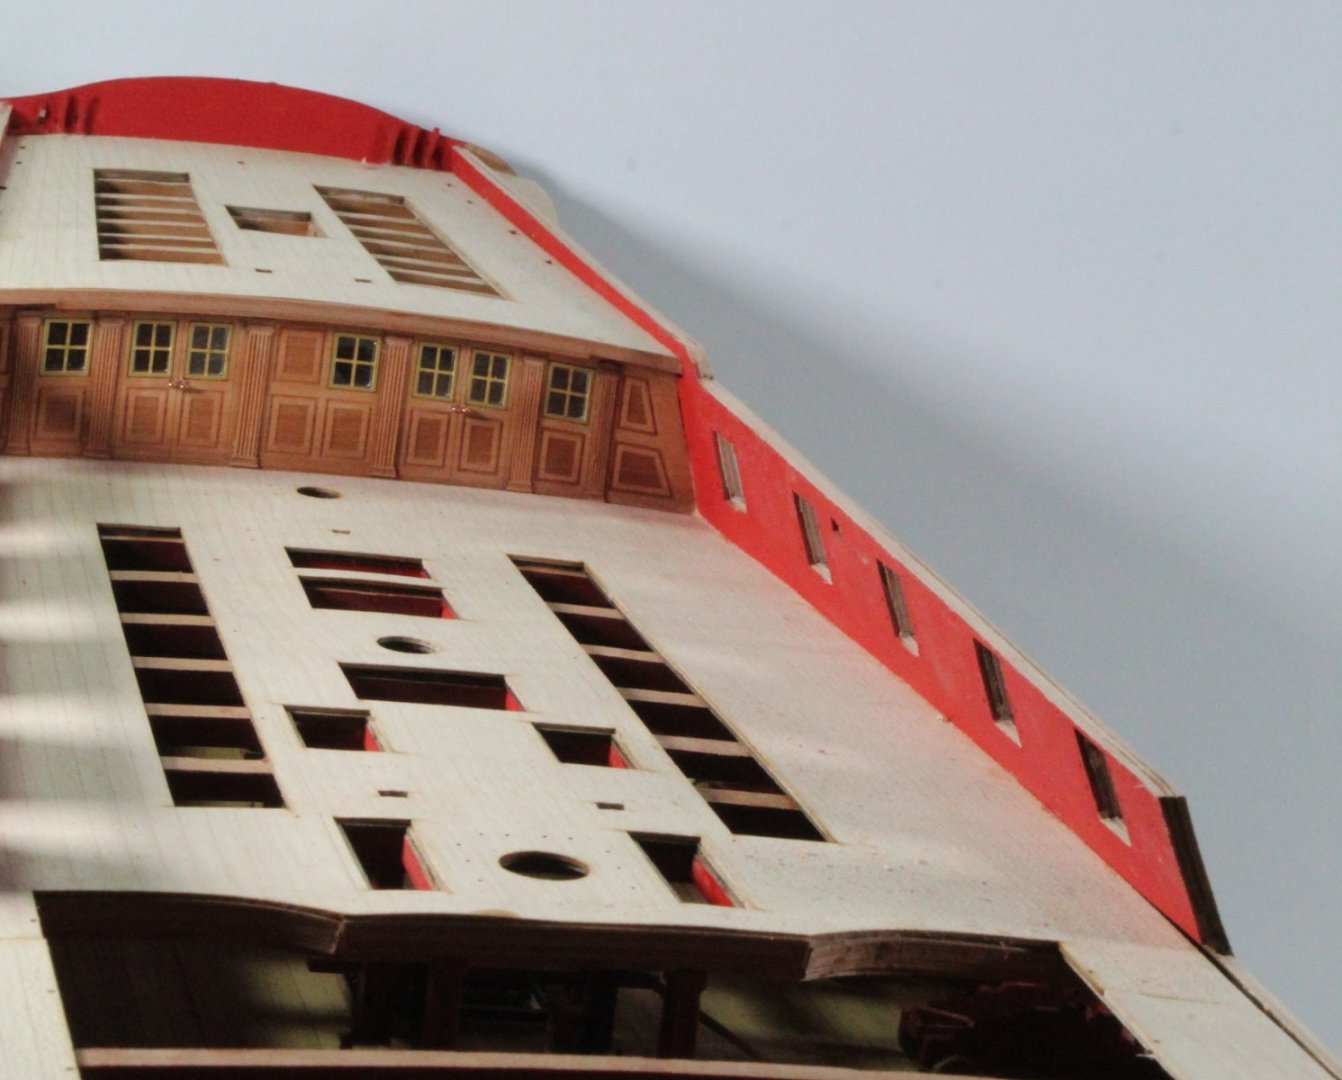
Hull Decorations I have only been able to make progress in small steps this week with other household commitments, such as gardening, grandparent duties, etc. Next week my wife and I are off to Norfolk for a few days so progress will continue to be slow. My dad was in the RAF for several years I lived in so many different places as a child as my dad was posted to different RAF bases. I was born in Kings Lynn but I have no memory of living before we moved to Calne when I was 1 year old. We lived in a couple of RAF married quarters in and around Kings Lynn whilst my Dad was posted to RAF Marham so thought it would be interesting to locate them. I have competed adding the outer hull rail patterns. I think they will look OK once the hull is painted. I have attached a few photo's of the rails. There were some alignment issues but, for the most part I have been able to be creative and hide my shoddy workmanship.


-
I like rigging bow to stern also
-
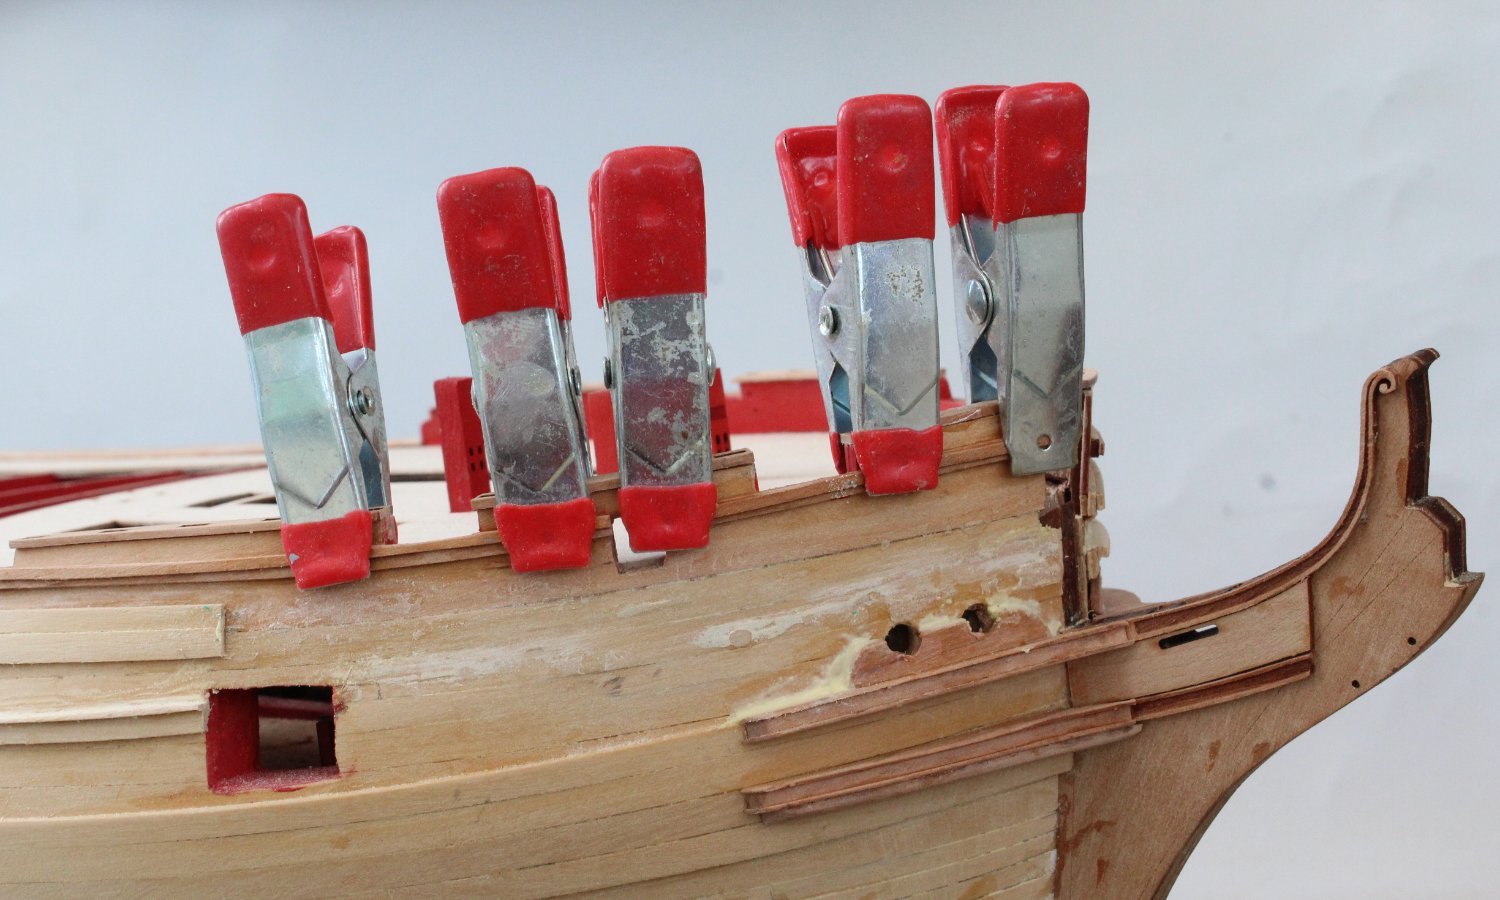
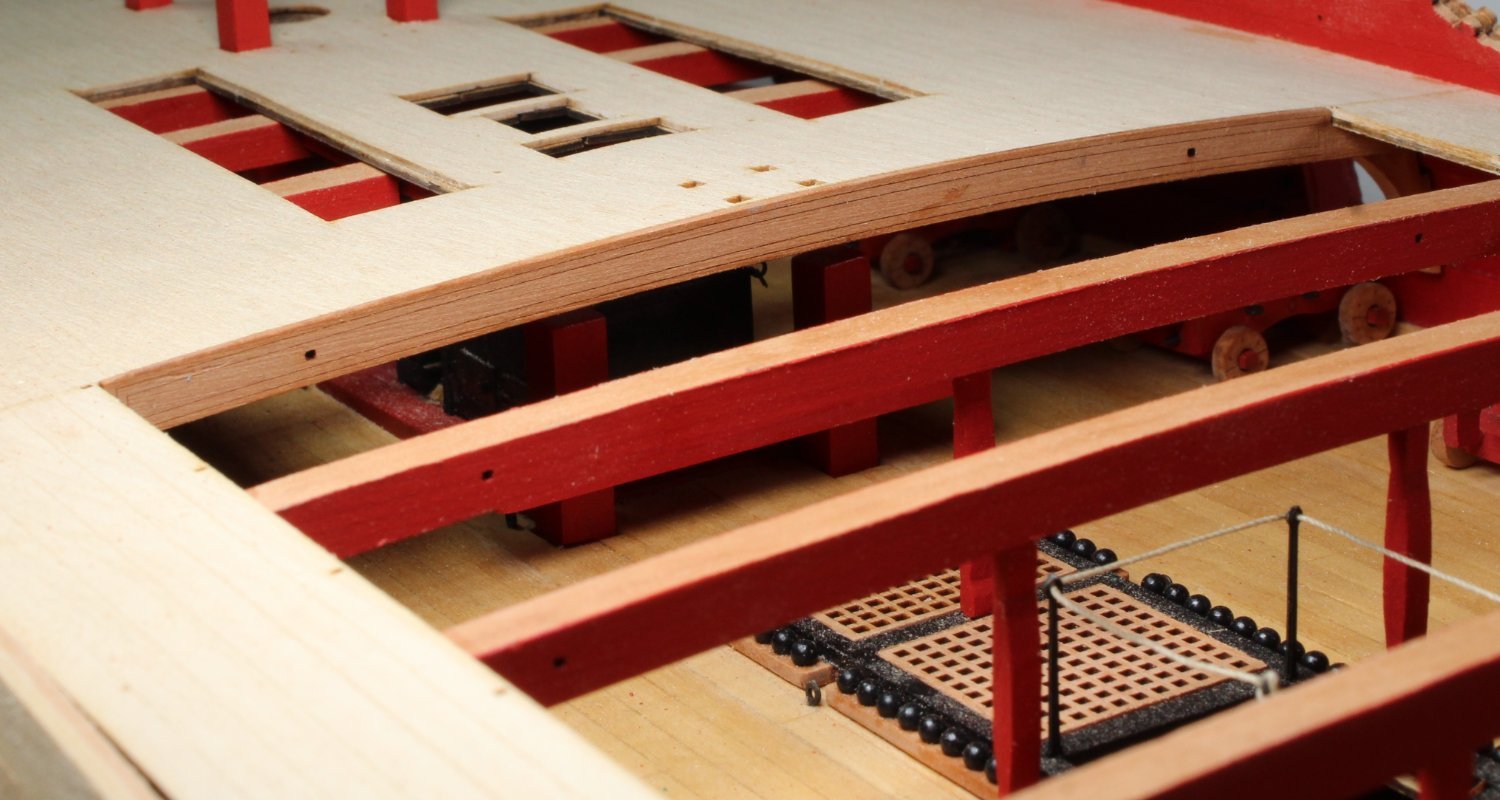
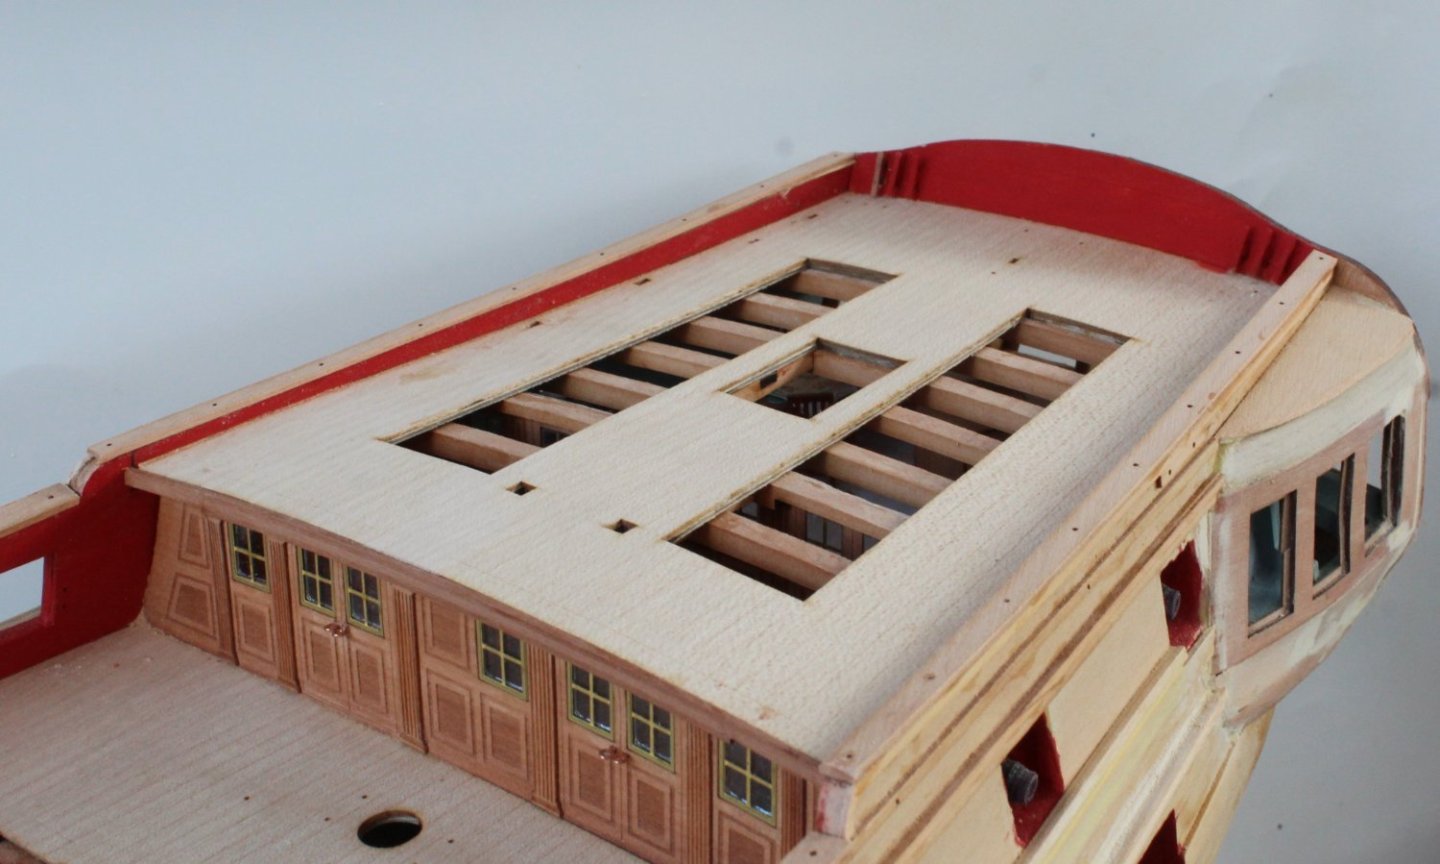
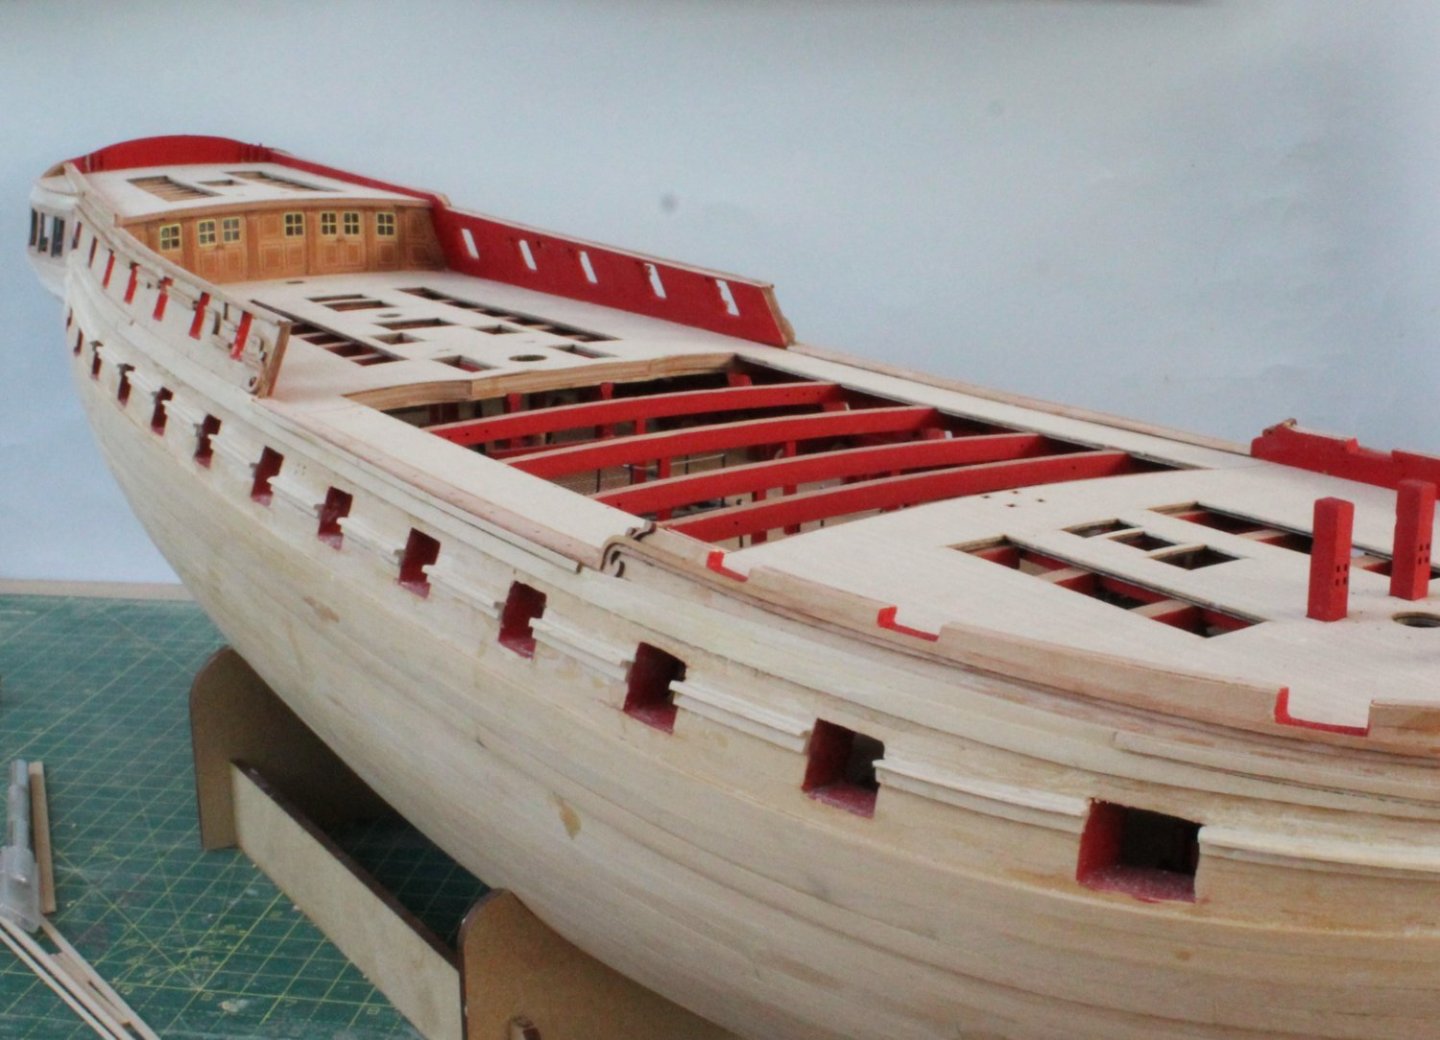
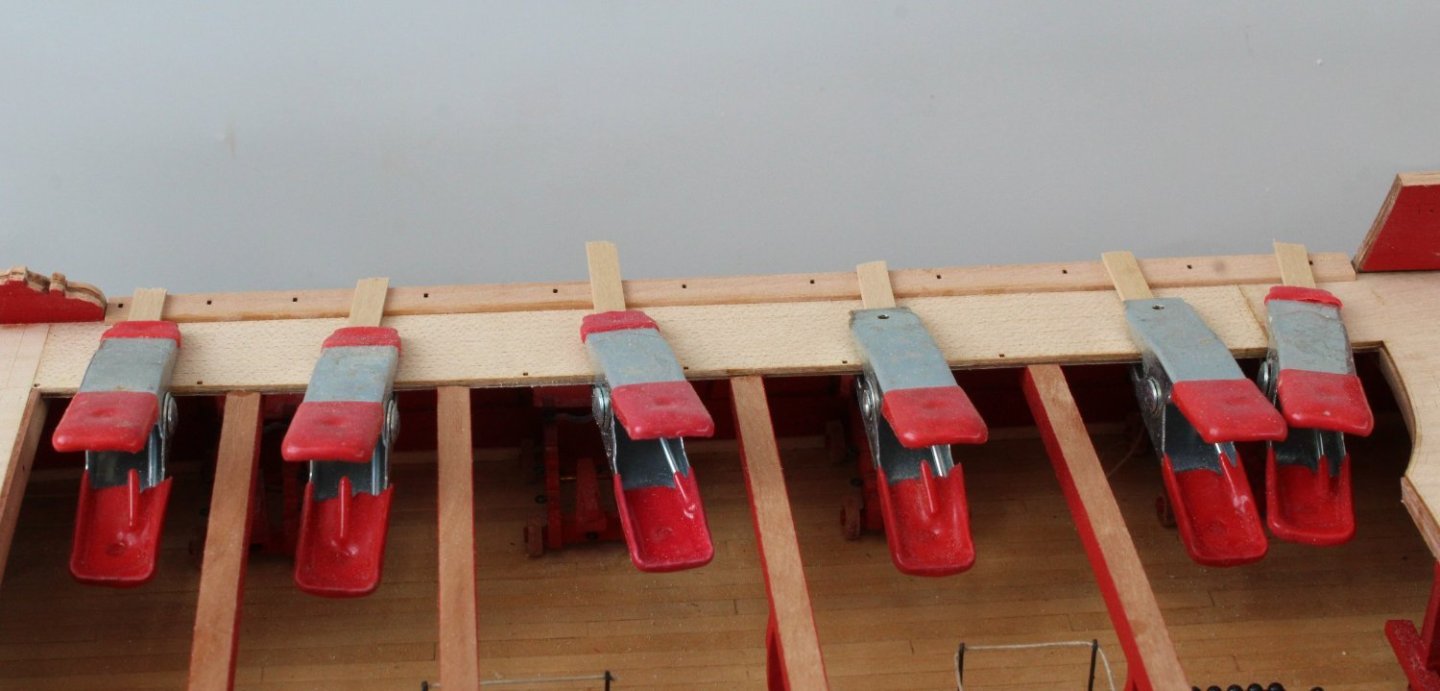
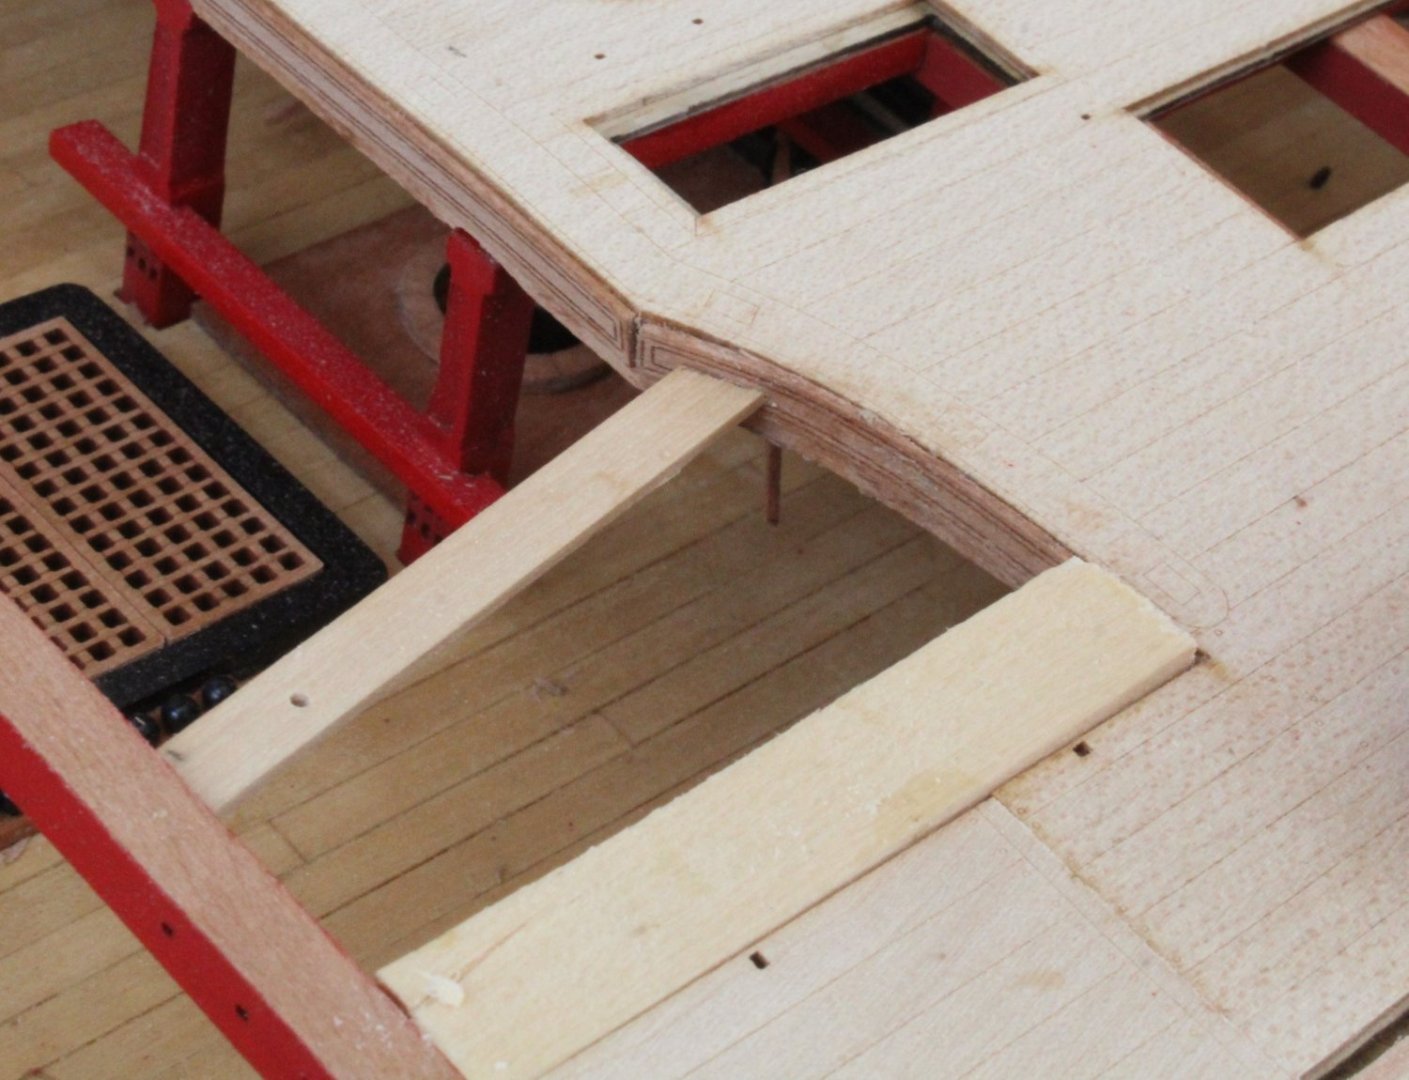
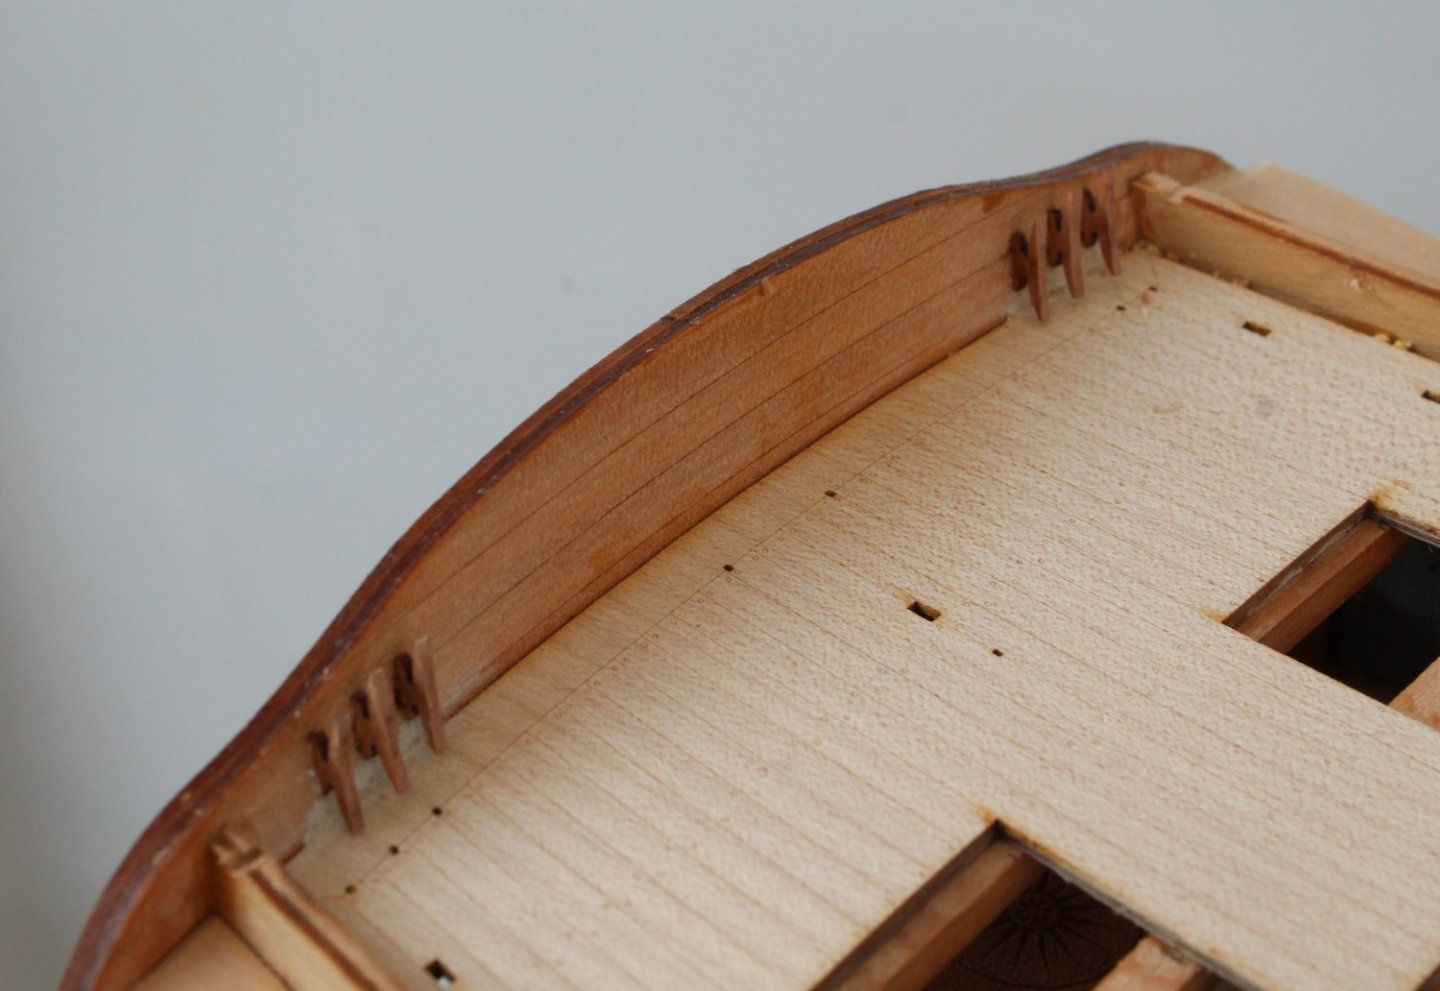
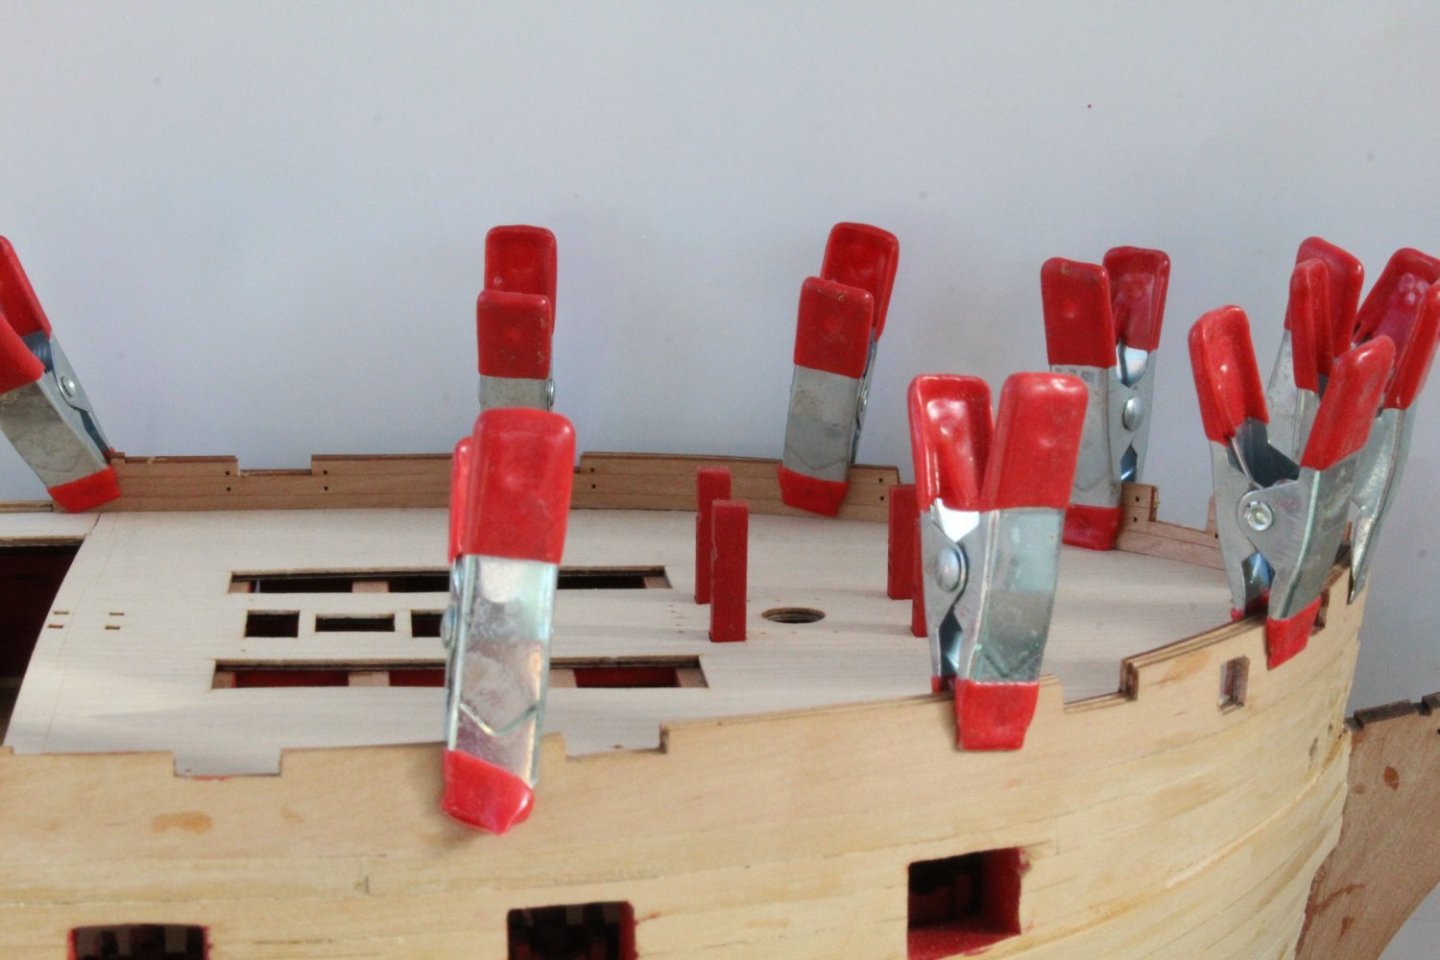
Gangway Gunwales The next task, according to the build manual, was to add the gunwales to the gangway section of the deck. The sides of the hull had already been sanded flush to the deck level. The gunwales were glued in place and to ensure they were held in place as the glue cured I found a simple way to clamp them using some short plank lengths. This can be seen in the photo's below. 3D Hull Patterns The next task was to add the various 3D hull patterns. These consist of a set of 1mm pear wood patterns and a set of 0.6mm pear wood patterns which will sit on top of the 1mm patterns. There are guide lines on the bulwarks to ensure these patterns are correctly positioned. I have added a section of photo's of these patterns in situ.


-
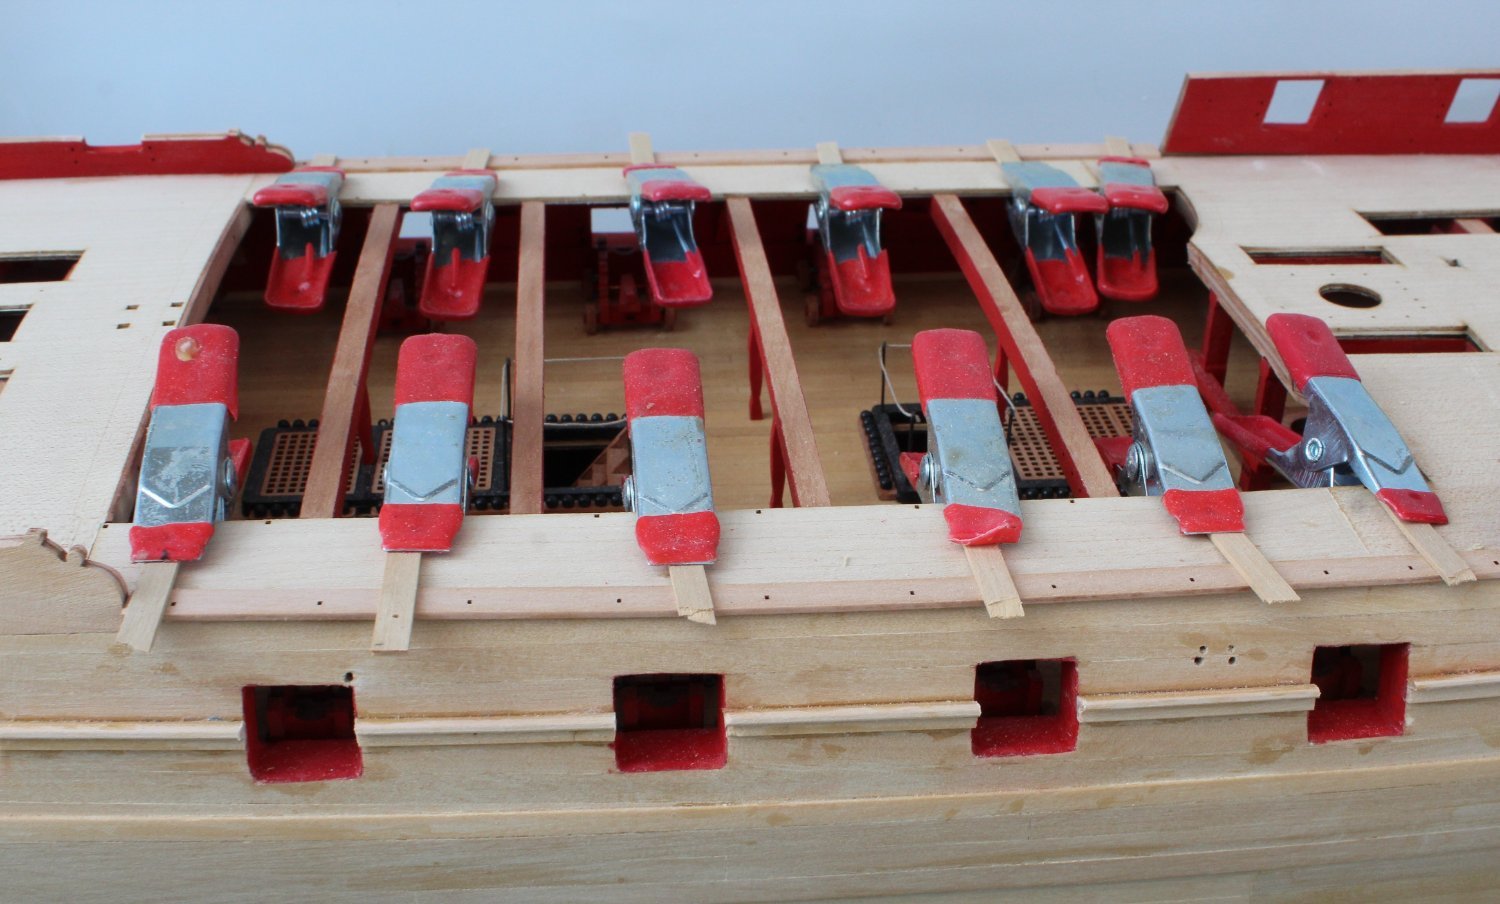
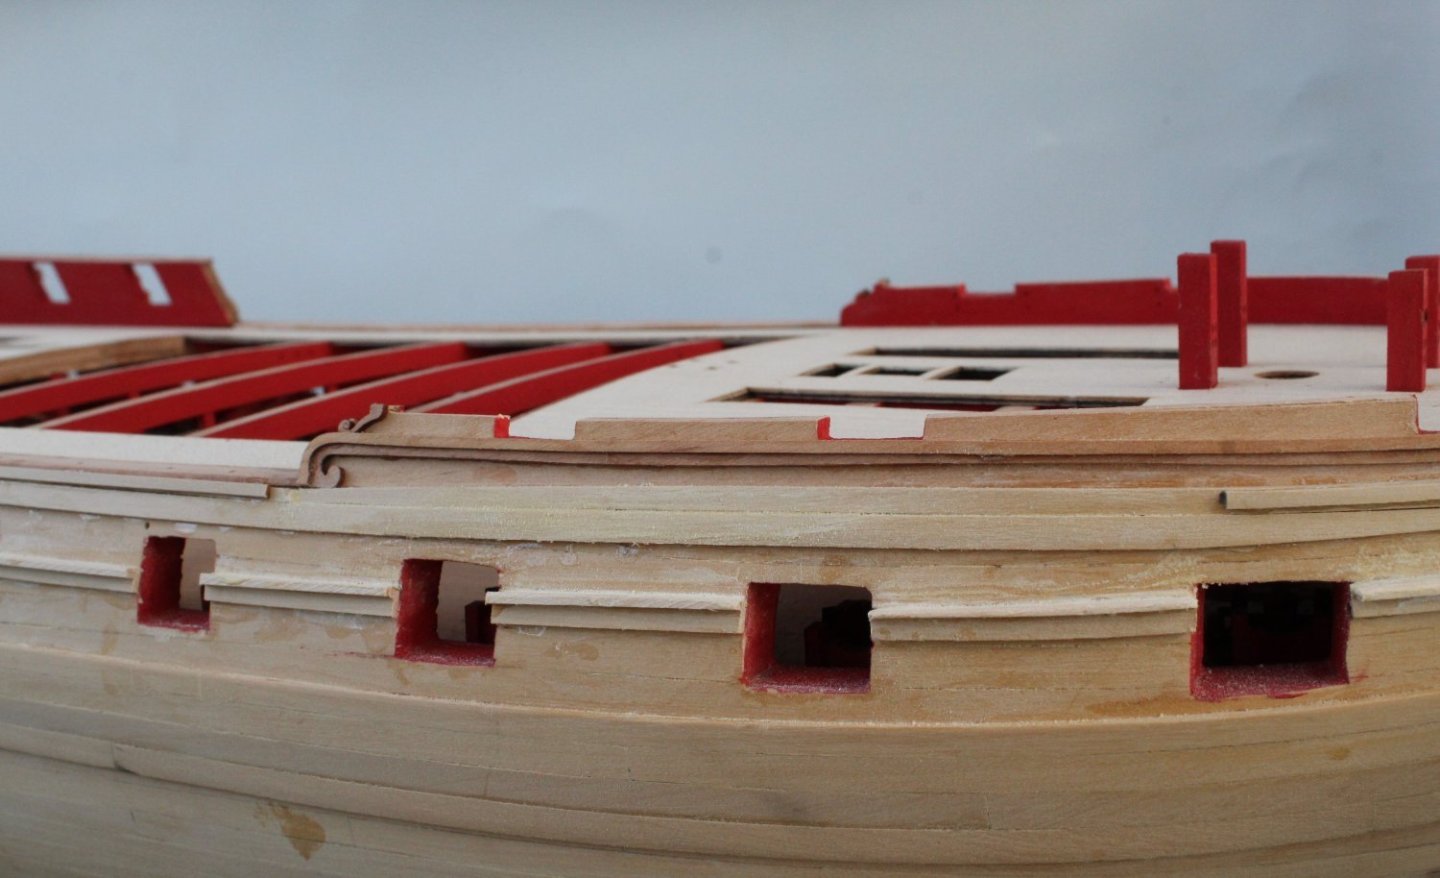
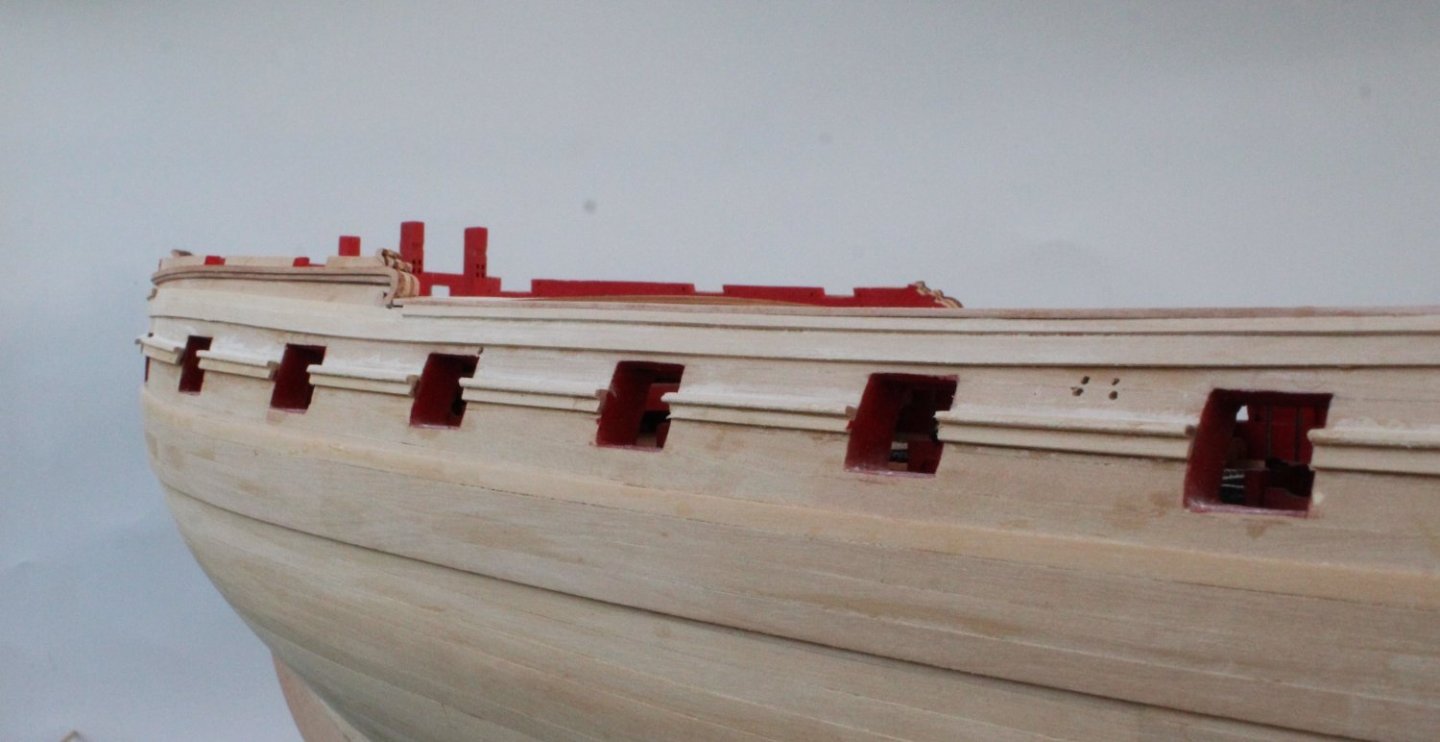
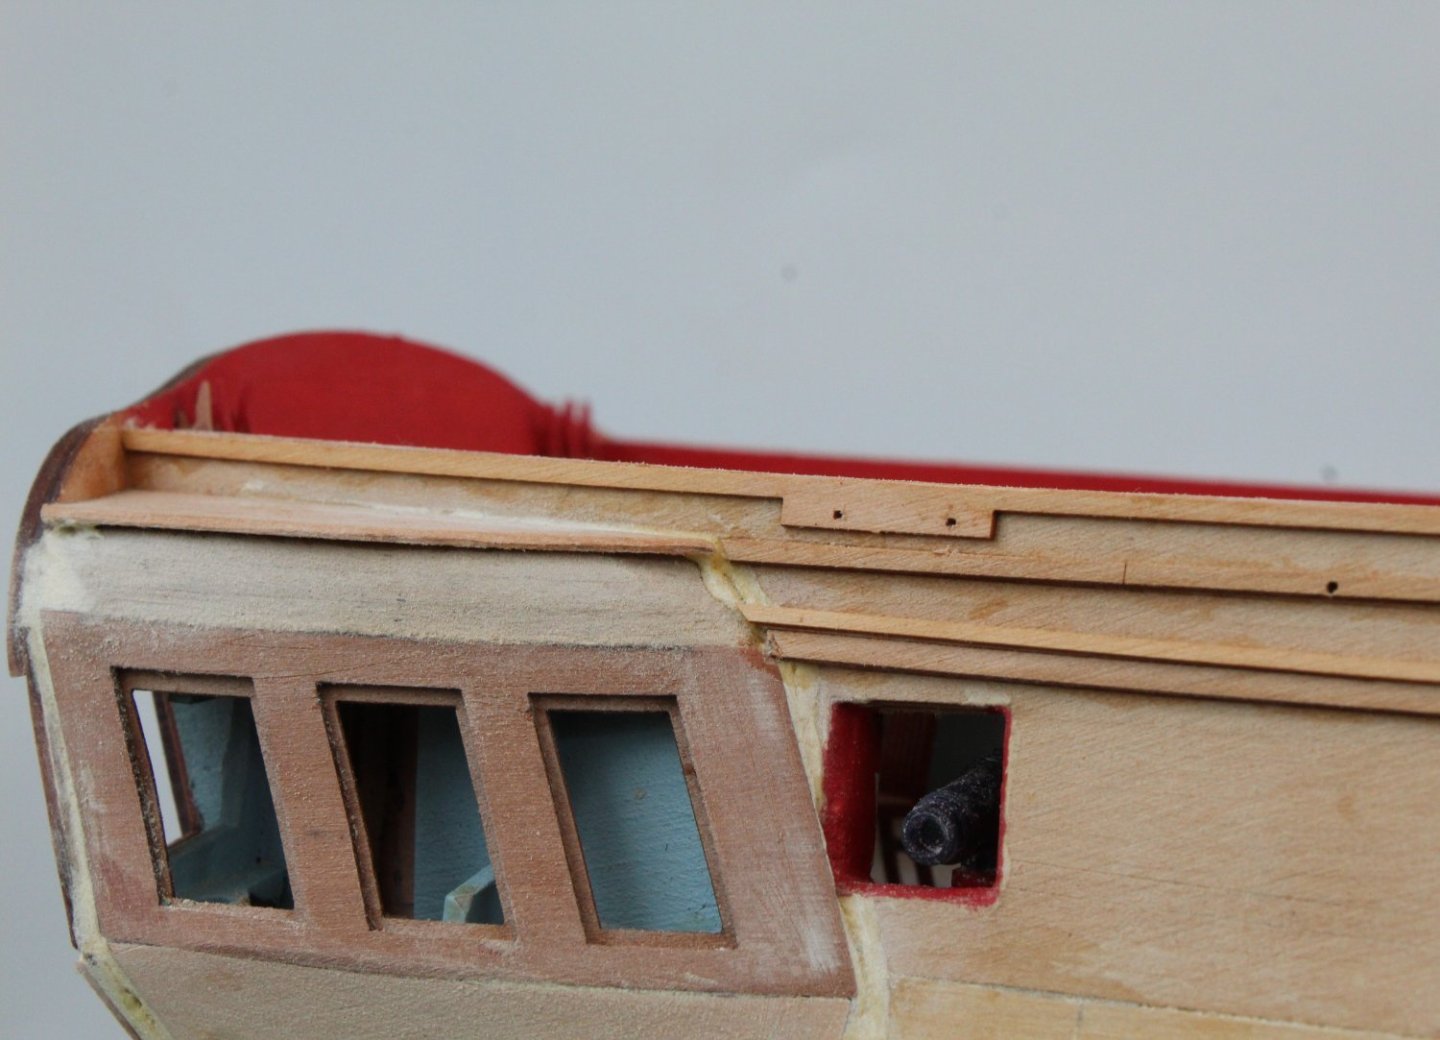
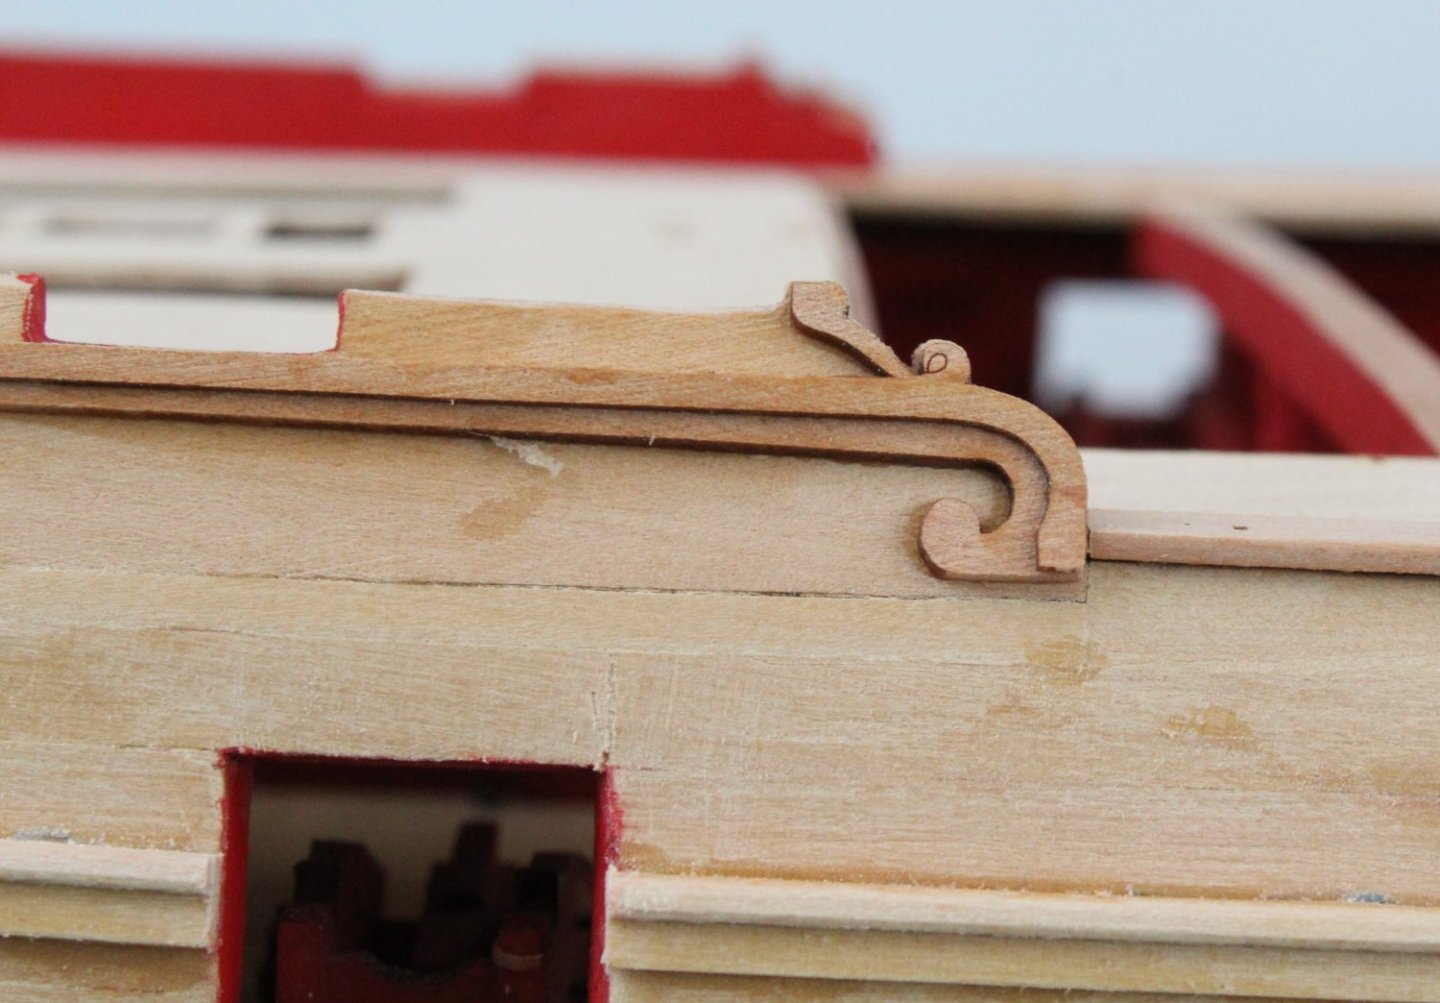
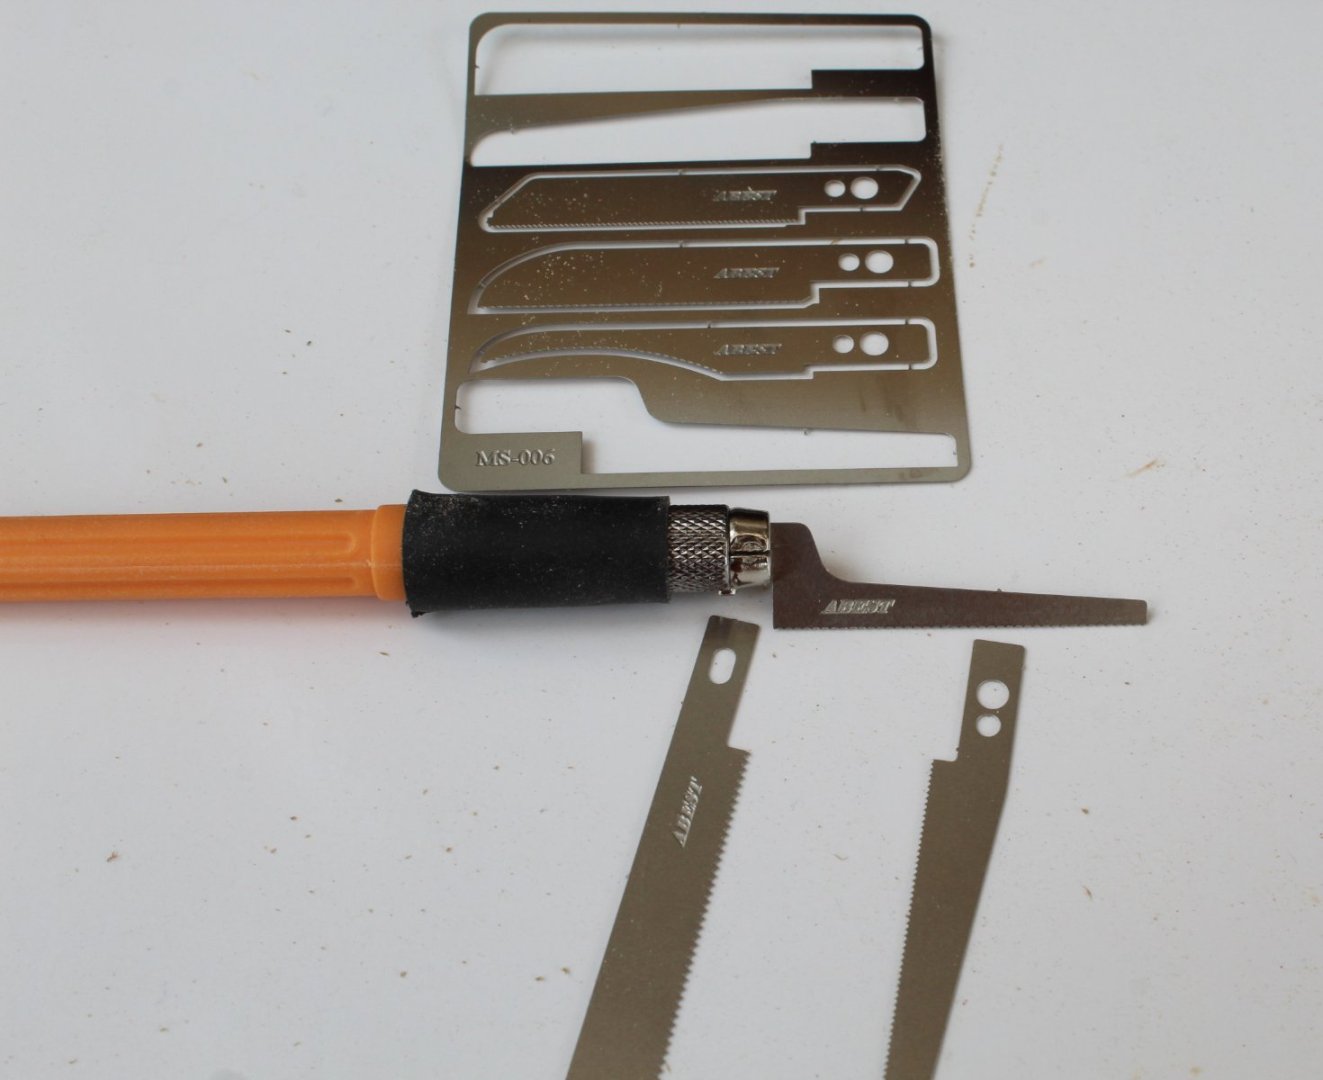
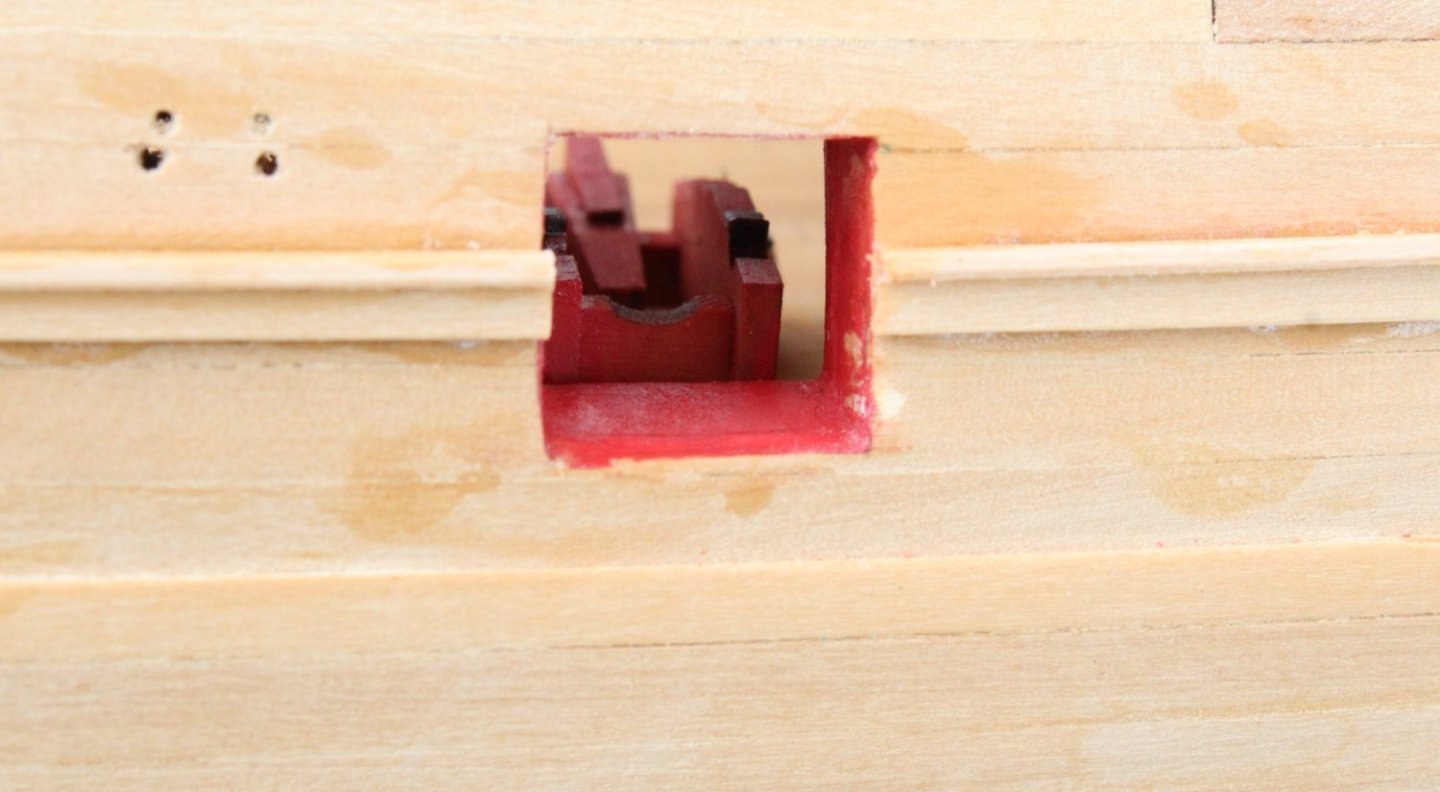
A New Tool I thought it may be an idea to get a small mini saw for trimming the hull rails between the gun ports. I ended up buying the Magicrose mini hand saw (from Amazon), which arrived with a selection of different sized saw blades. With a suitable saw blade fitted I used the hand saw to trim the material over the first gunport. The tool turned out to be a winner, noting the rail edges will require a light sand and the gunport sides will require a paint touch up. Taking my time each gun port was cleared in turn, using the mini hand saw. You will note that I have also painted the upper quarterdeck gunports.
-
Enjoy your well earned holiday, you deserve a break
-
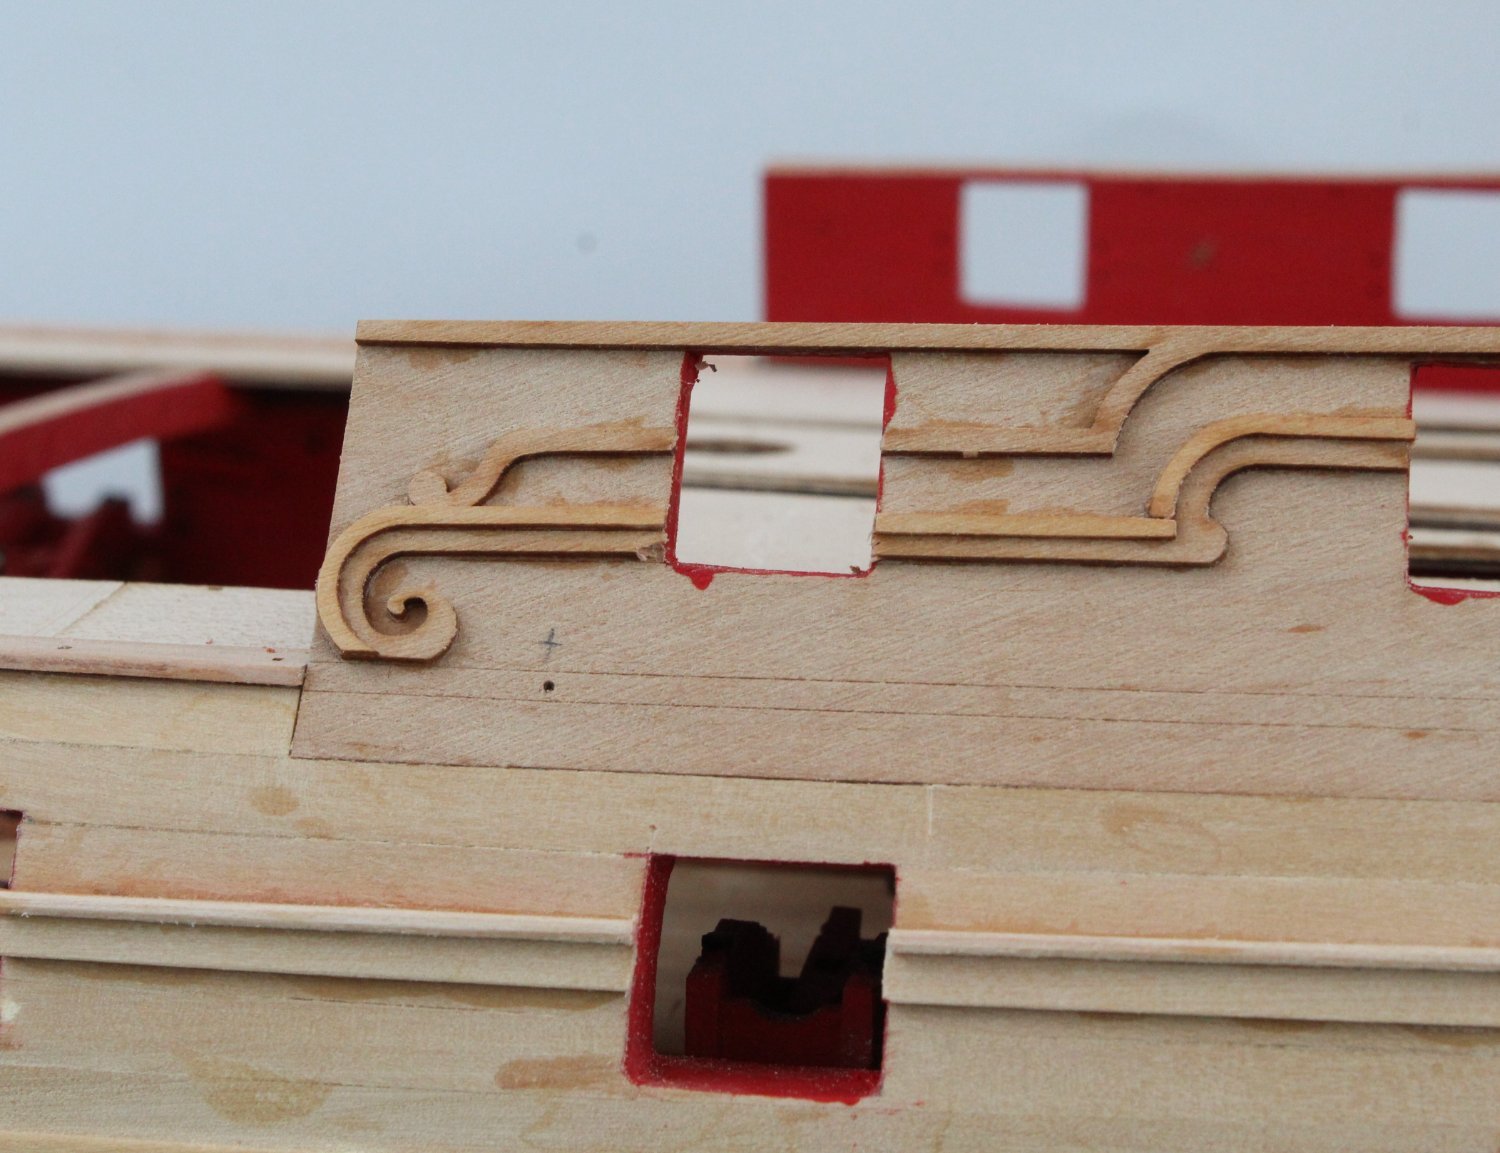
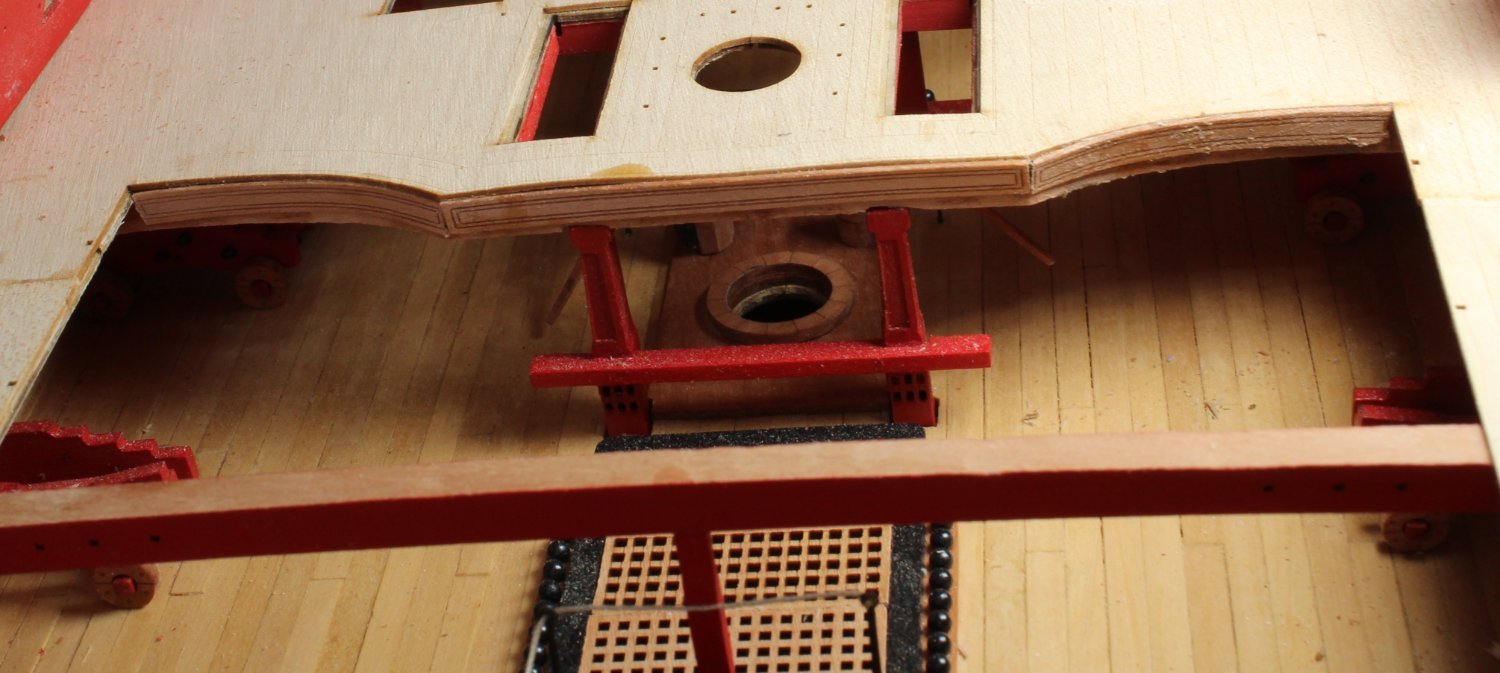
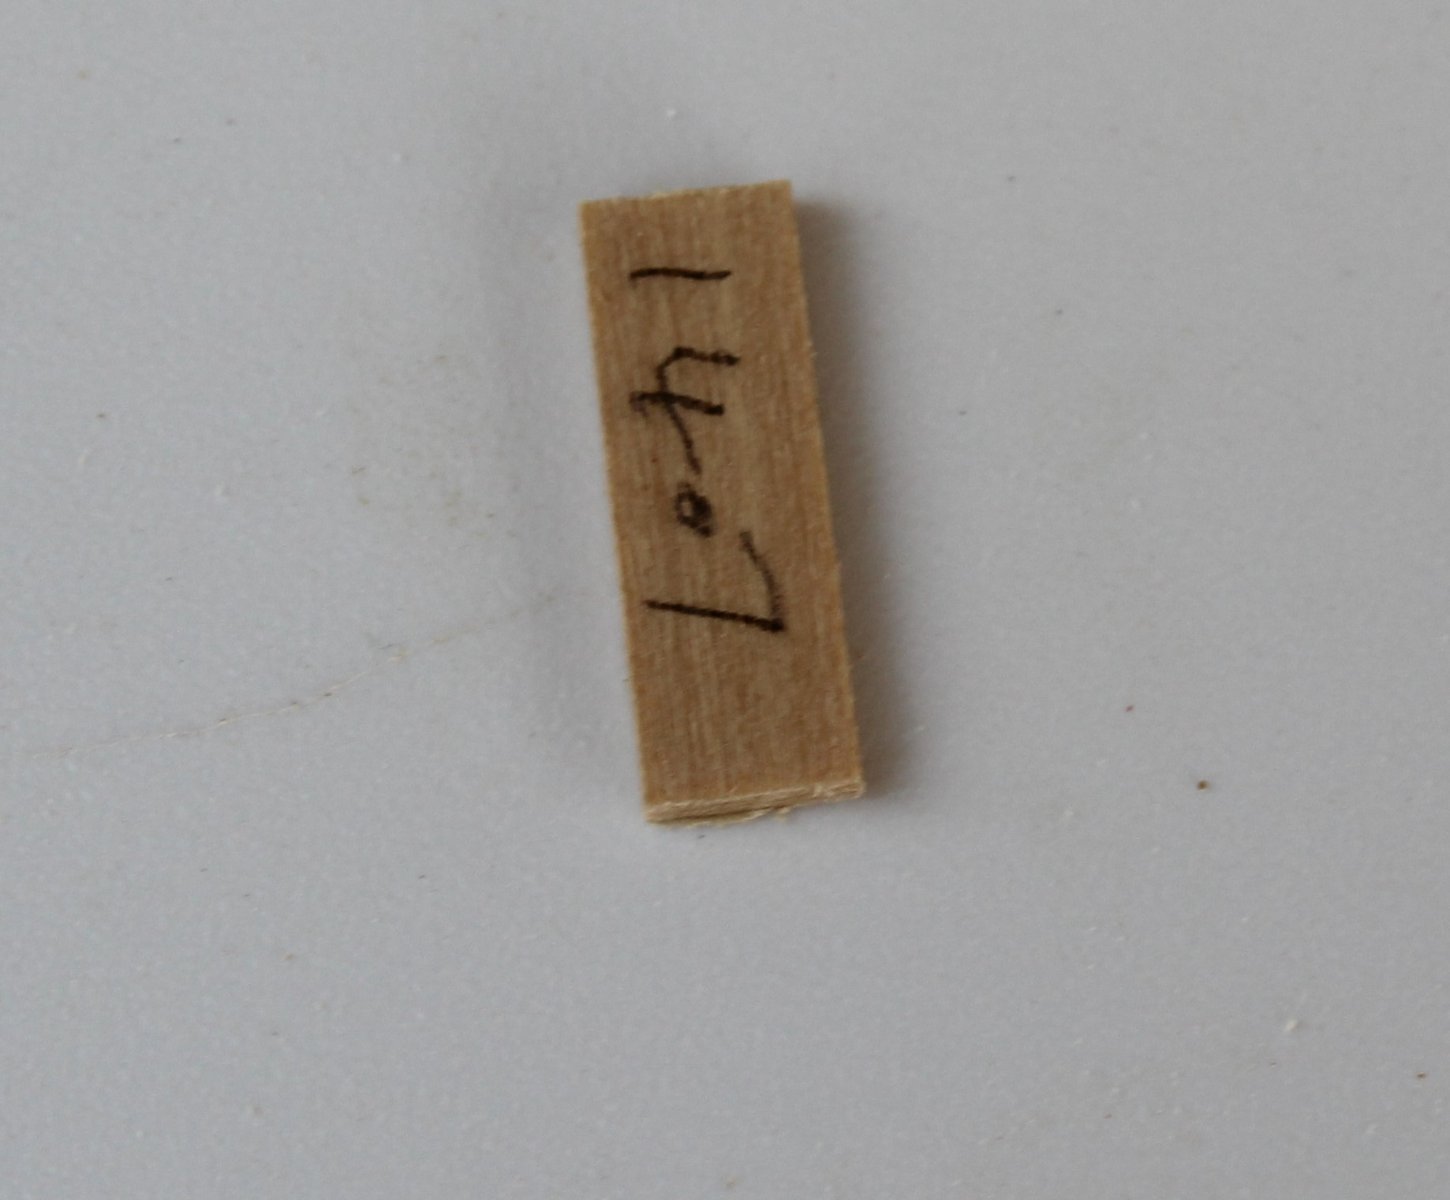
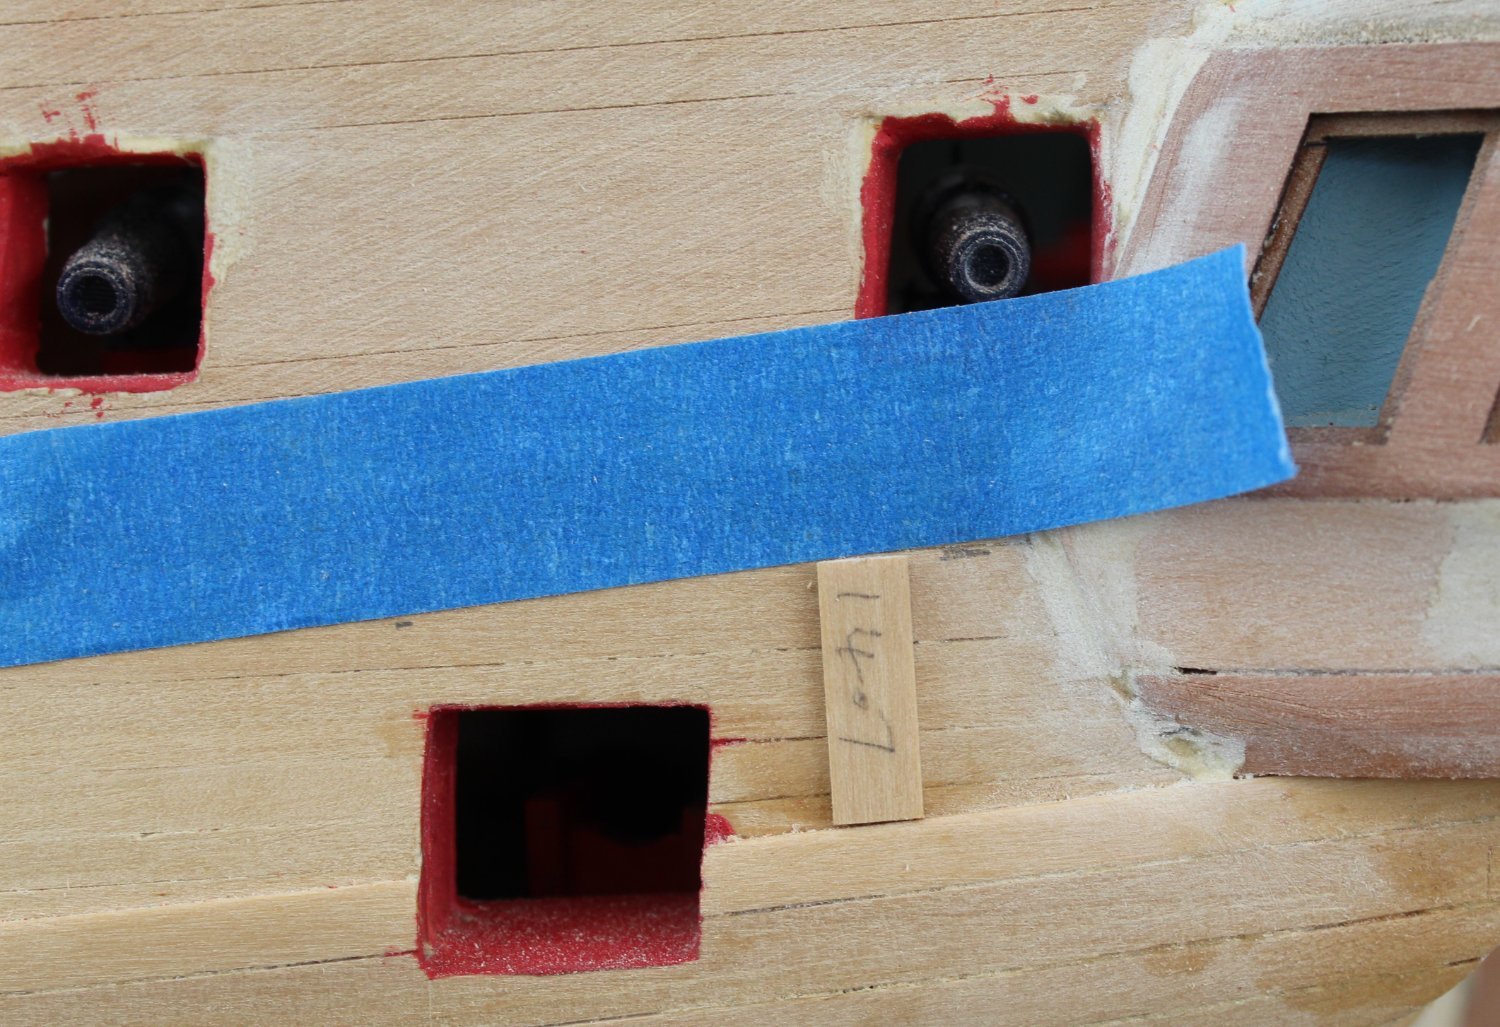
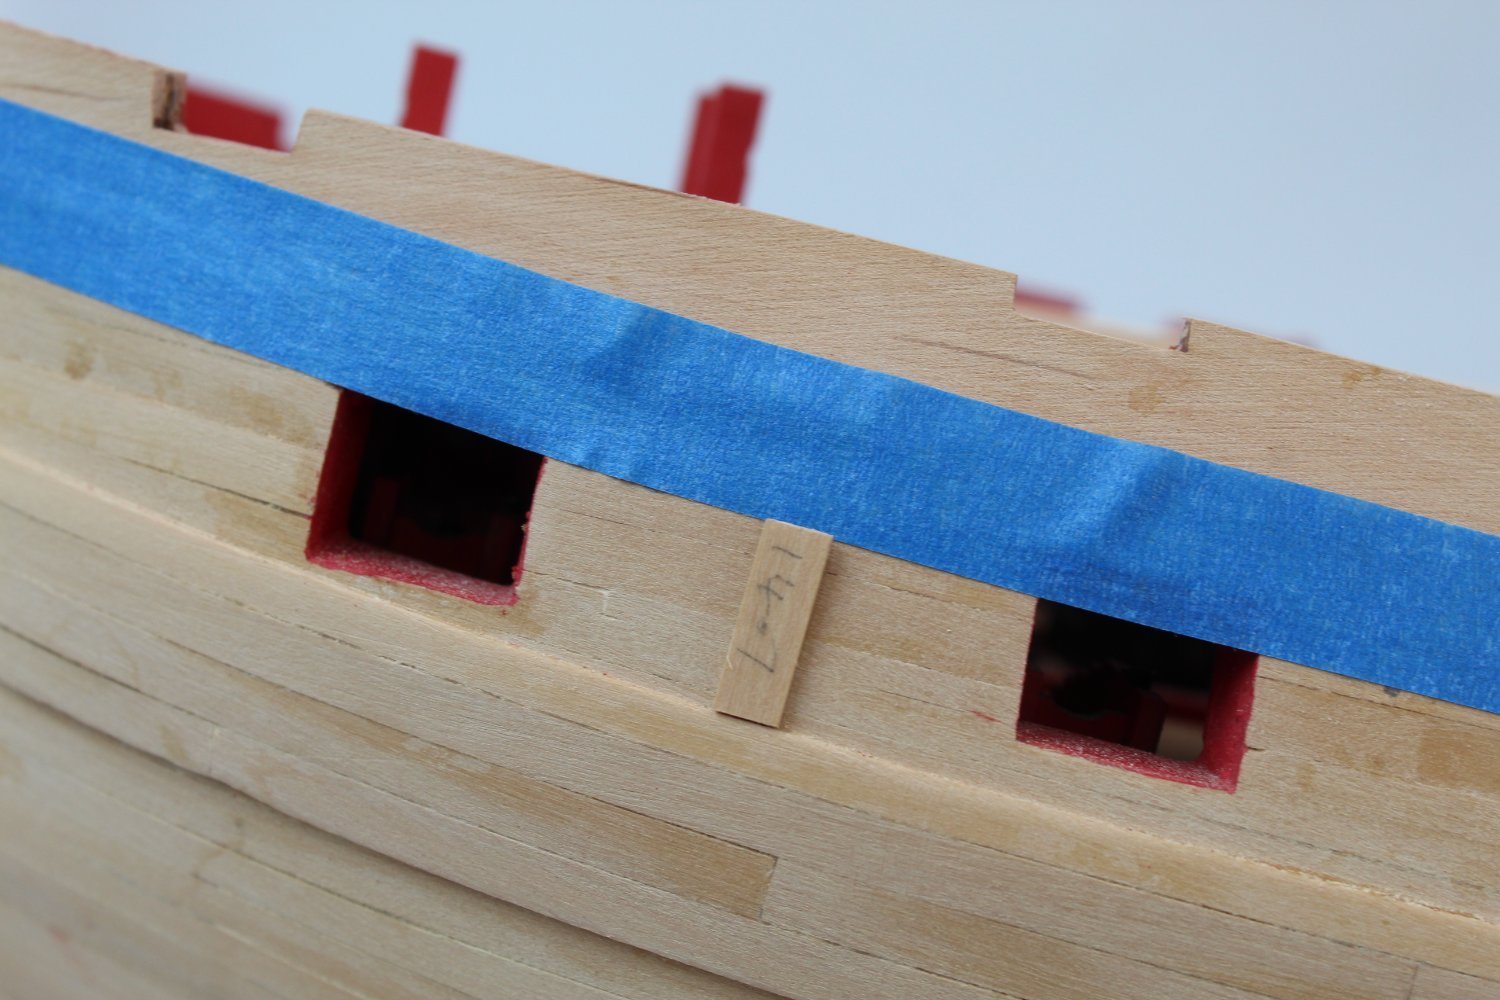
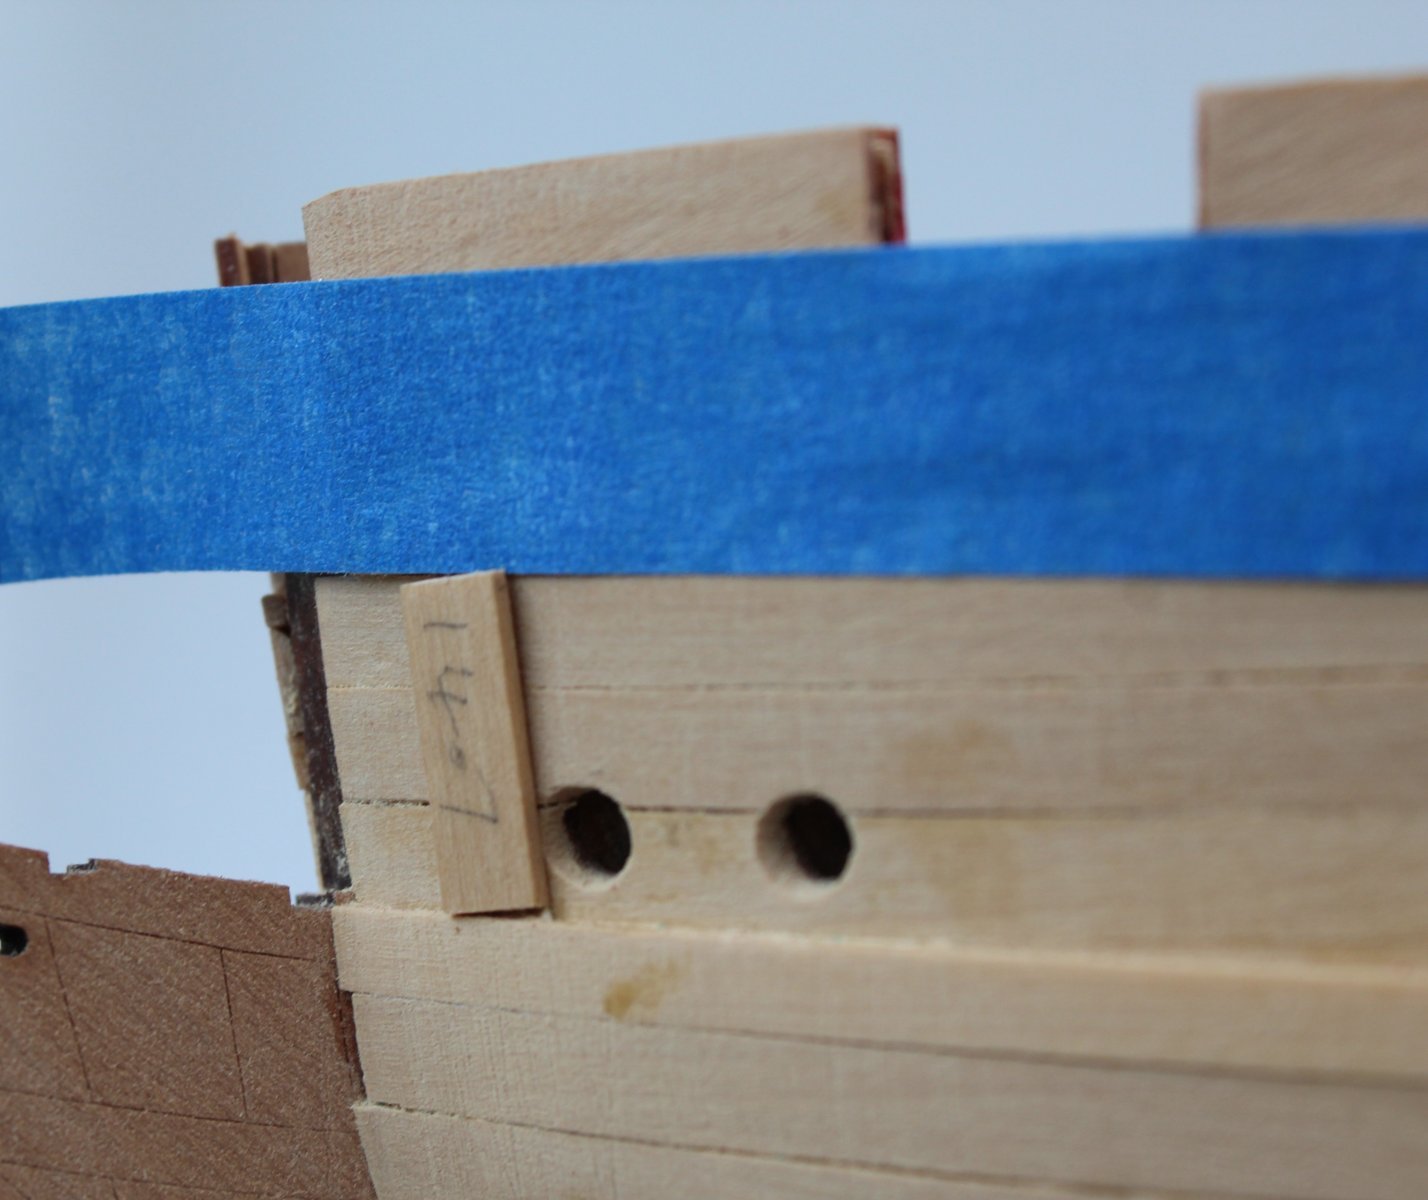
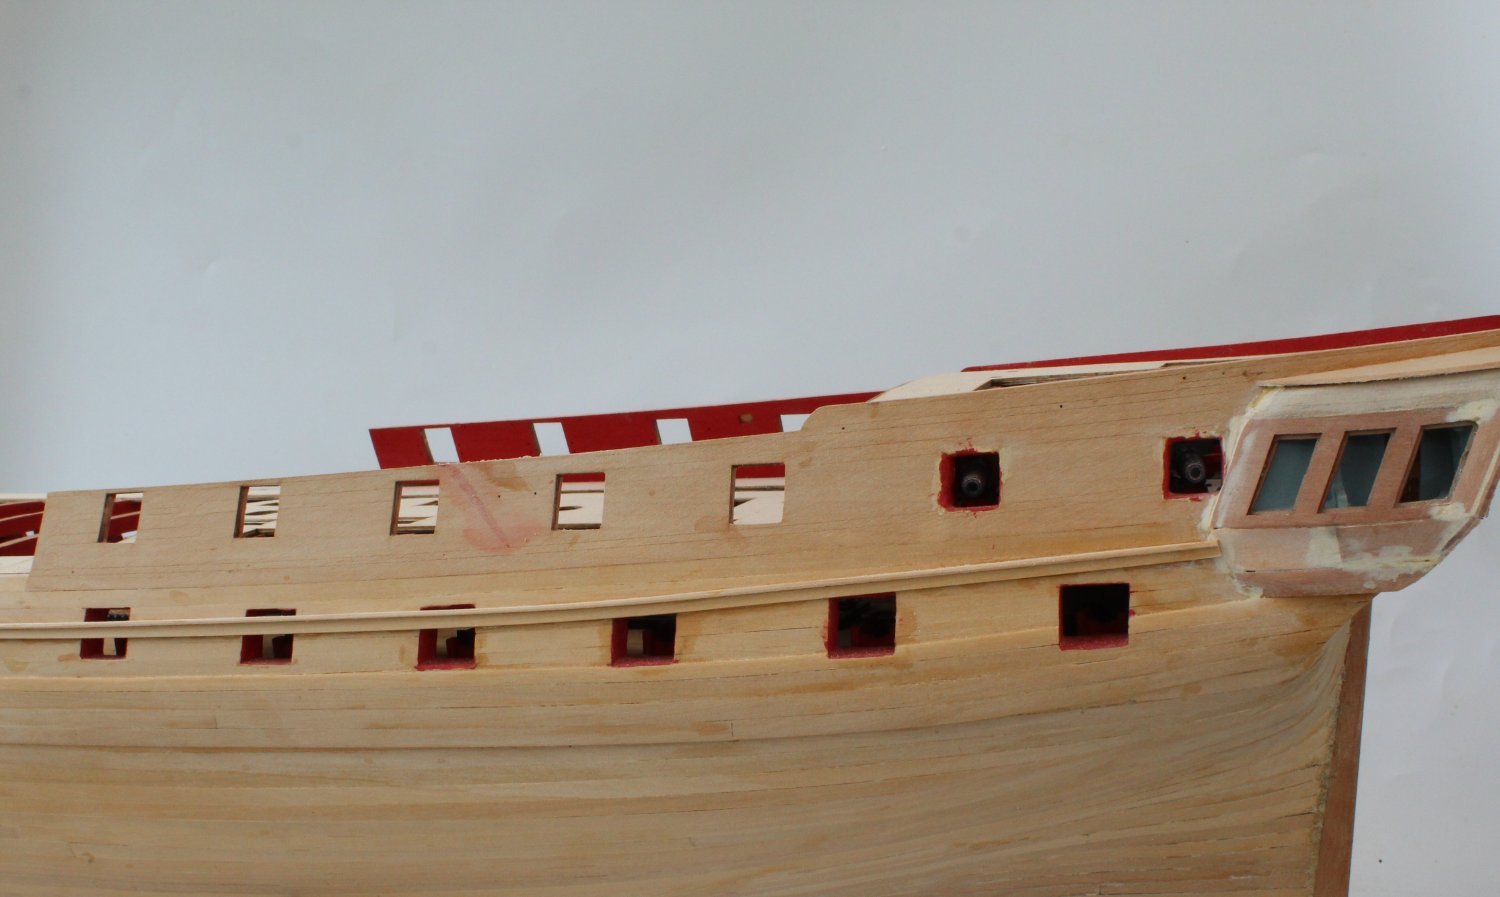
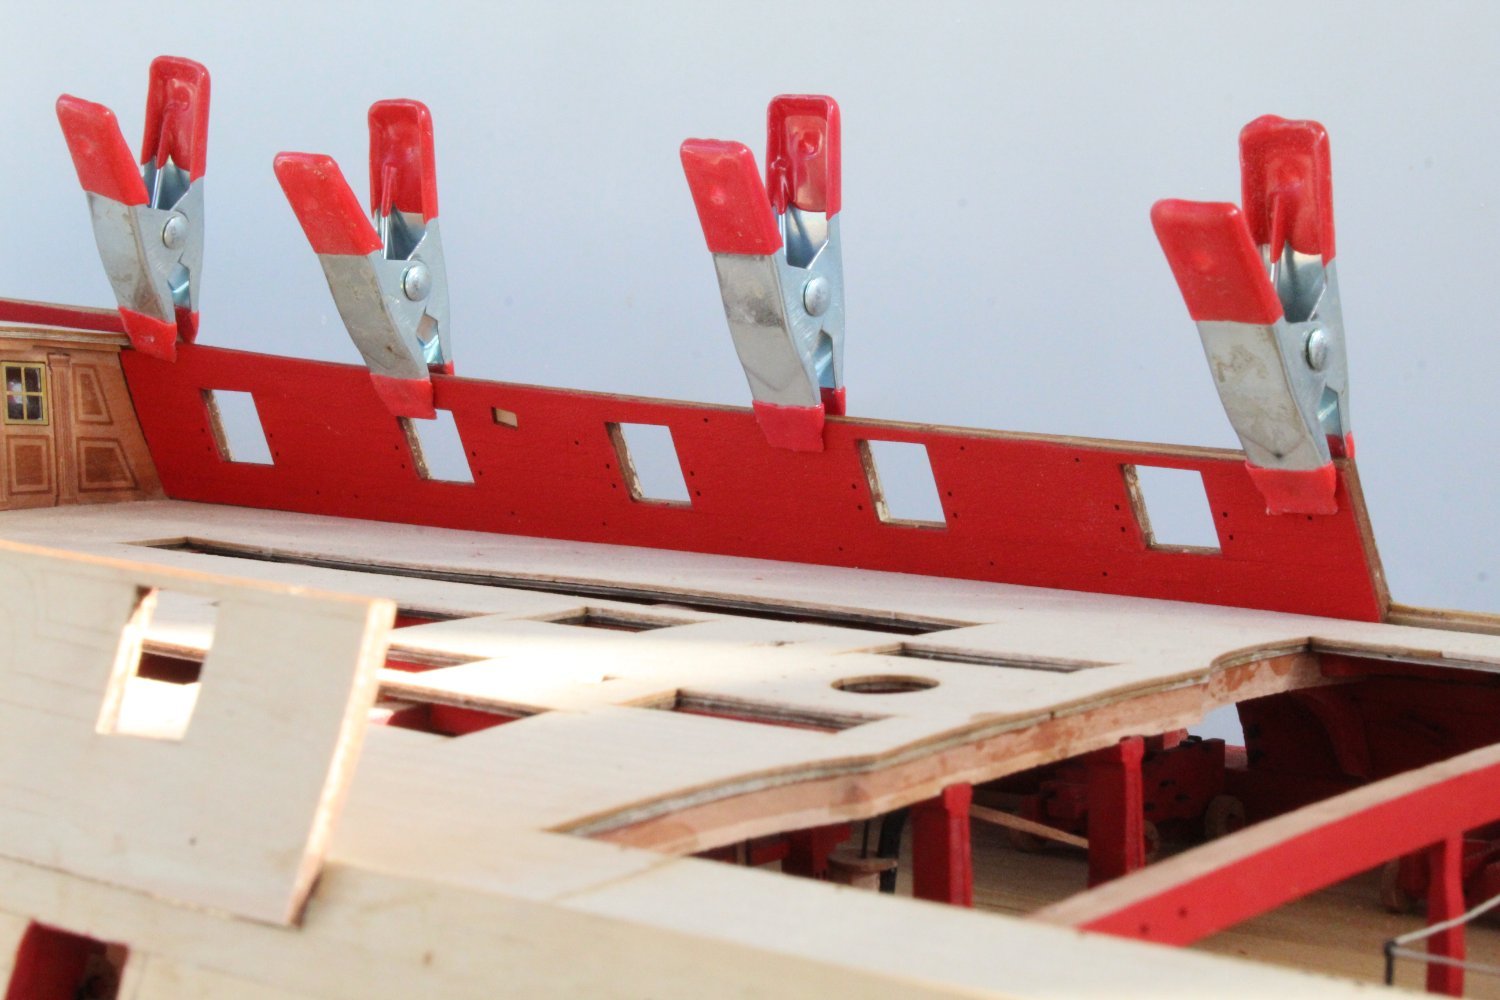
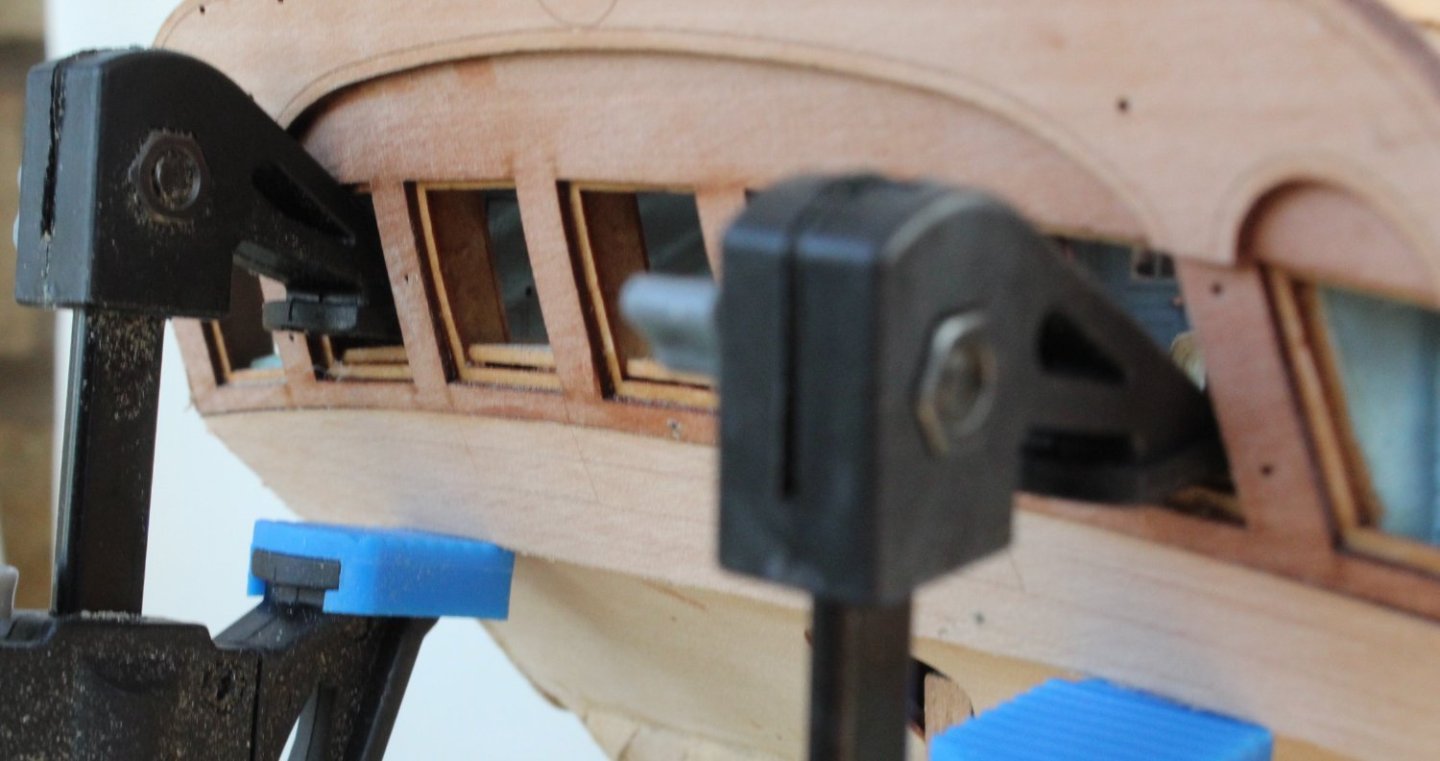
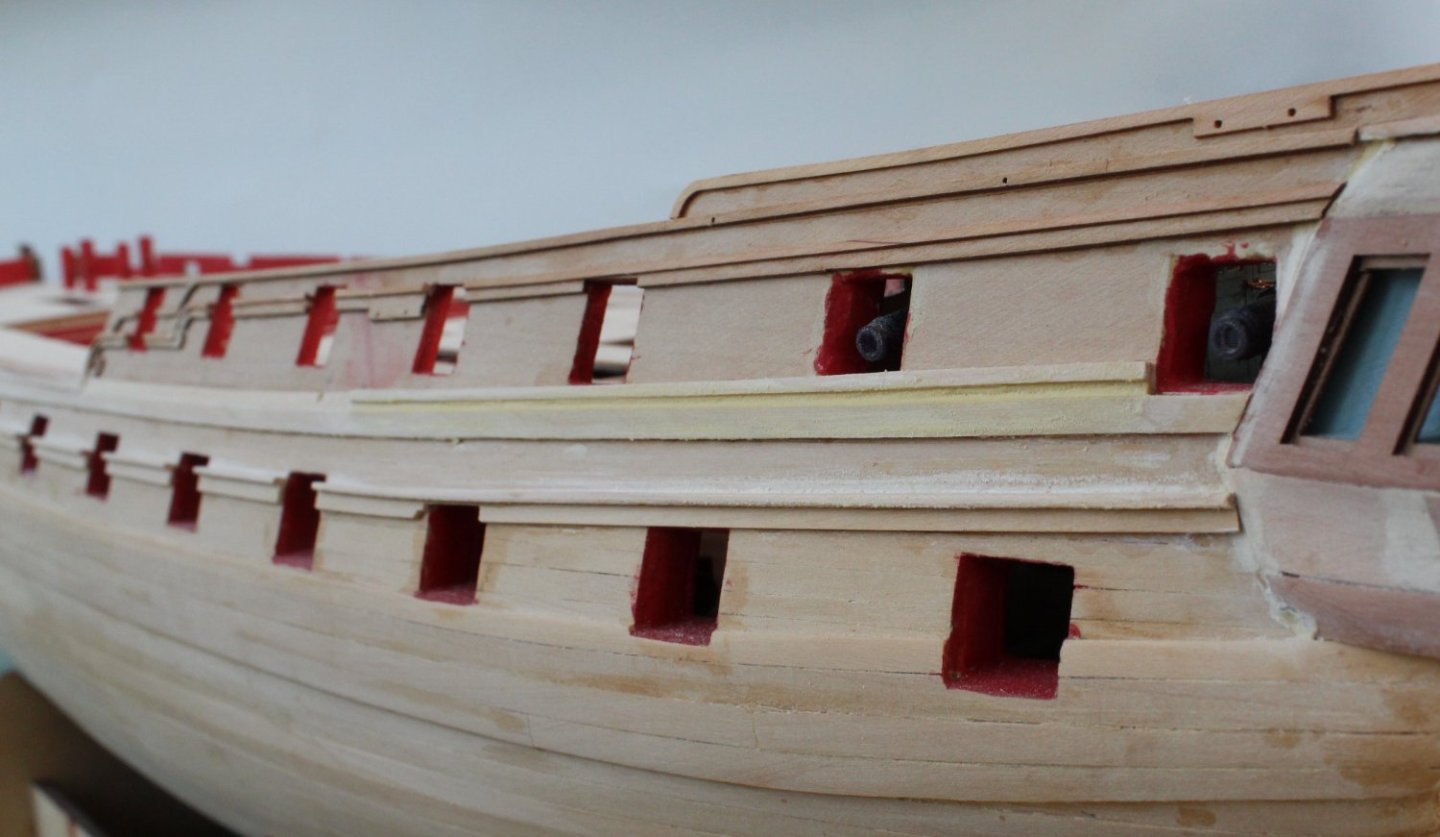
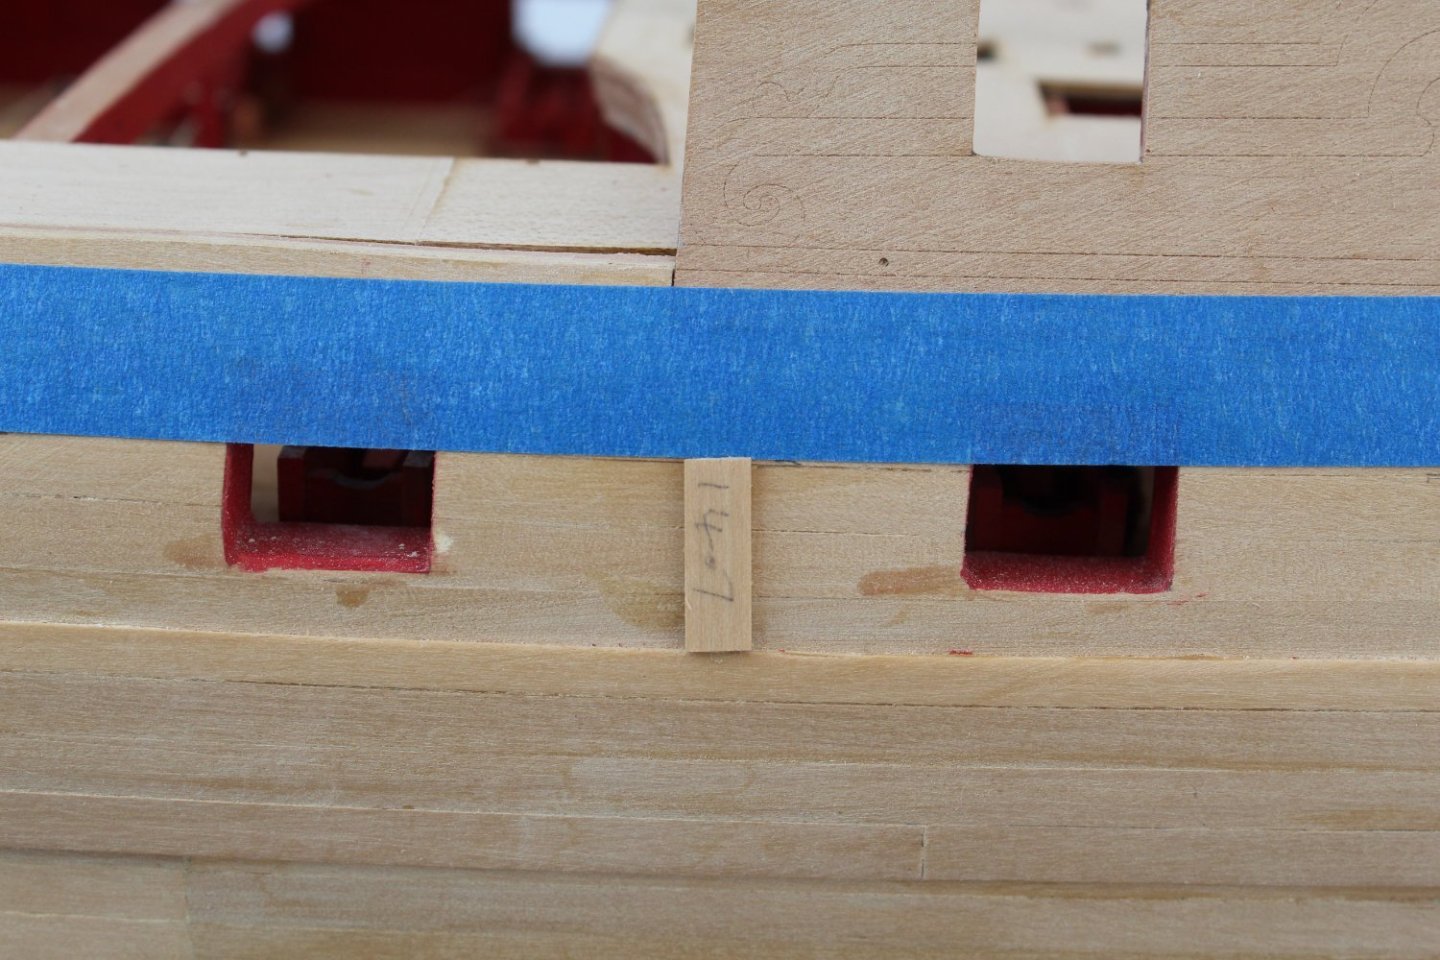
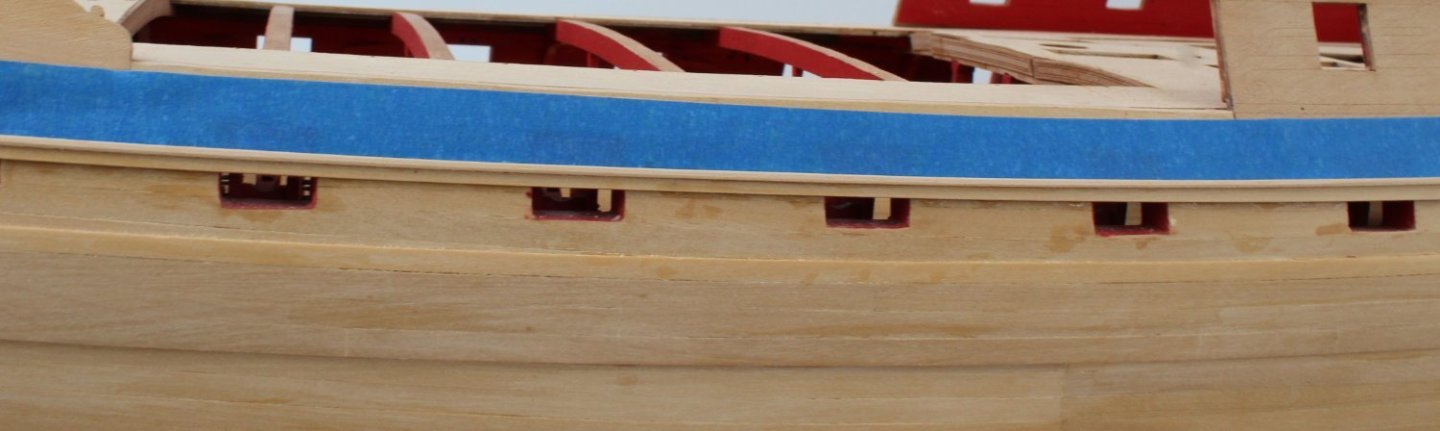
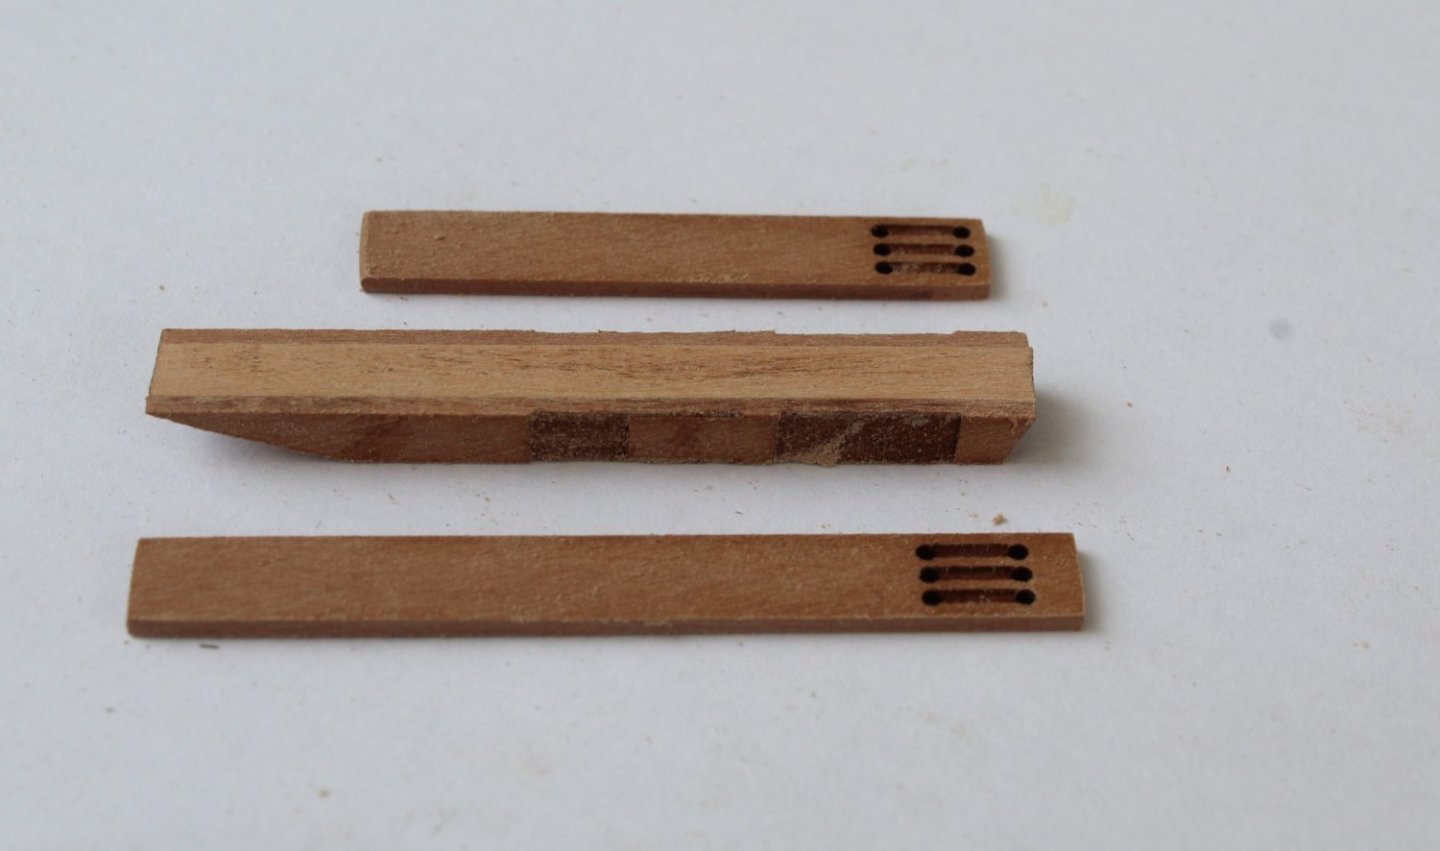
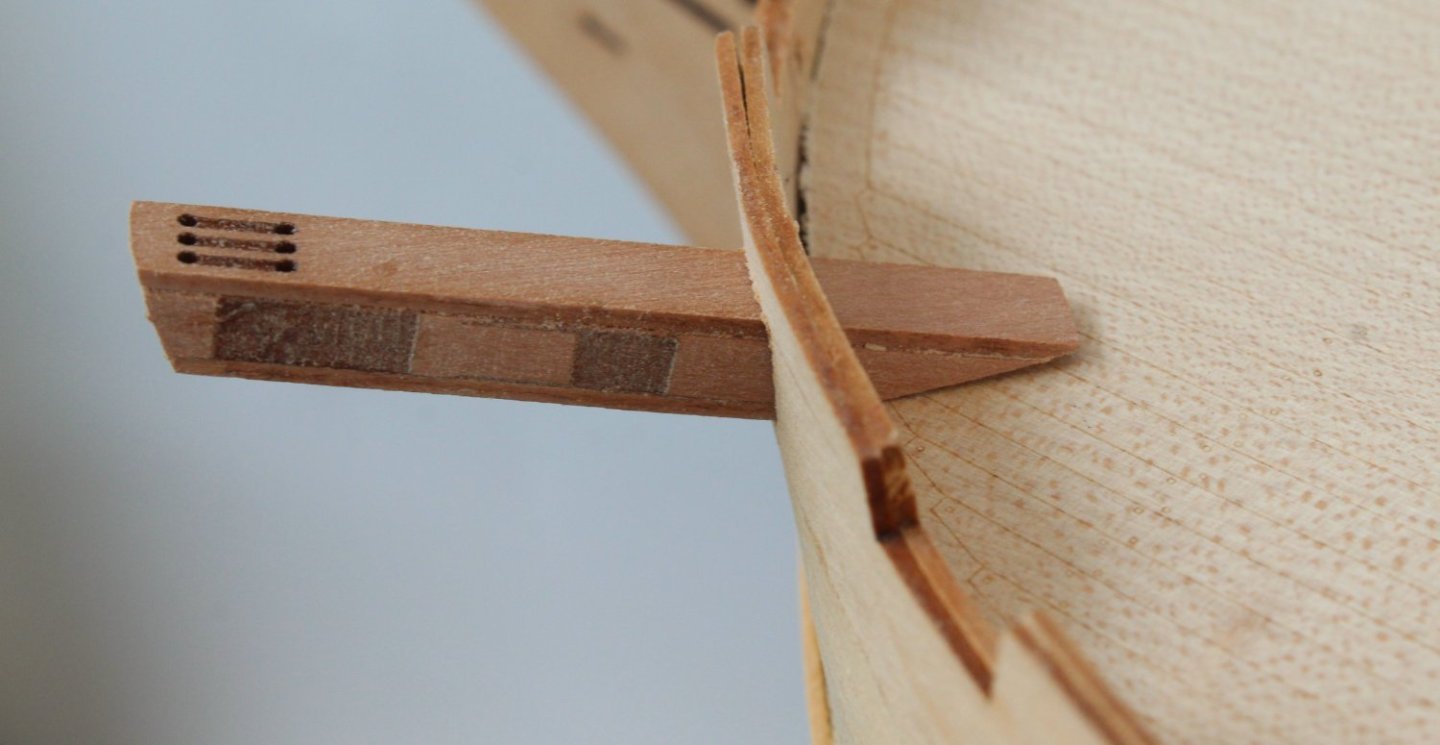
Quarterdeck Front Fascia Pattern As reported in my last post I was not very happy with how the left hand side fascia pattern was fitted. I brushed some warm water in the joint area and taking great care I was able to gently release the pattern without causing any damage. On the first attempt to refit the pattern I noticed it was not sitting as I wanted when the clamps were added. After a little bit of thought I came up with a different clamping method, as shown in photo below, the part was refitted. With the clamps removed I was much happier with how the quarterdeck fascia patterns looked. Hull Rail Decorations The next job was to start adding the hull rail decorations. In order to make the first rail a length of 1mm square material had to be added to a length of 3mm wide plank. Once this was done the leading edges were rounded. I am reasonably happy with how the profile looks, as shown below. The top edge of this rail is to be positioned approx. 14.7mm above the top edge of the wales. I made a simple measurement piece that measured 14.7mm Using the measurement piece as a guide I made a few pencil marks. A length of tape was then added to the hull. After a few tweaks, using the measurement piece as a double check I was happy with the run of the tape. The rail was then glued in place, using ca. I took my time to ensure the rail followed the path of the tape. With the tape removed the rail looks good. I will now have to repeat the above process for the other side.


-
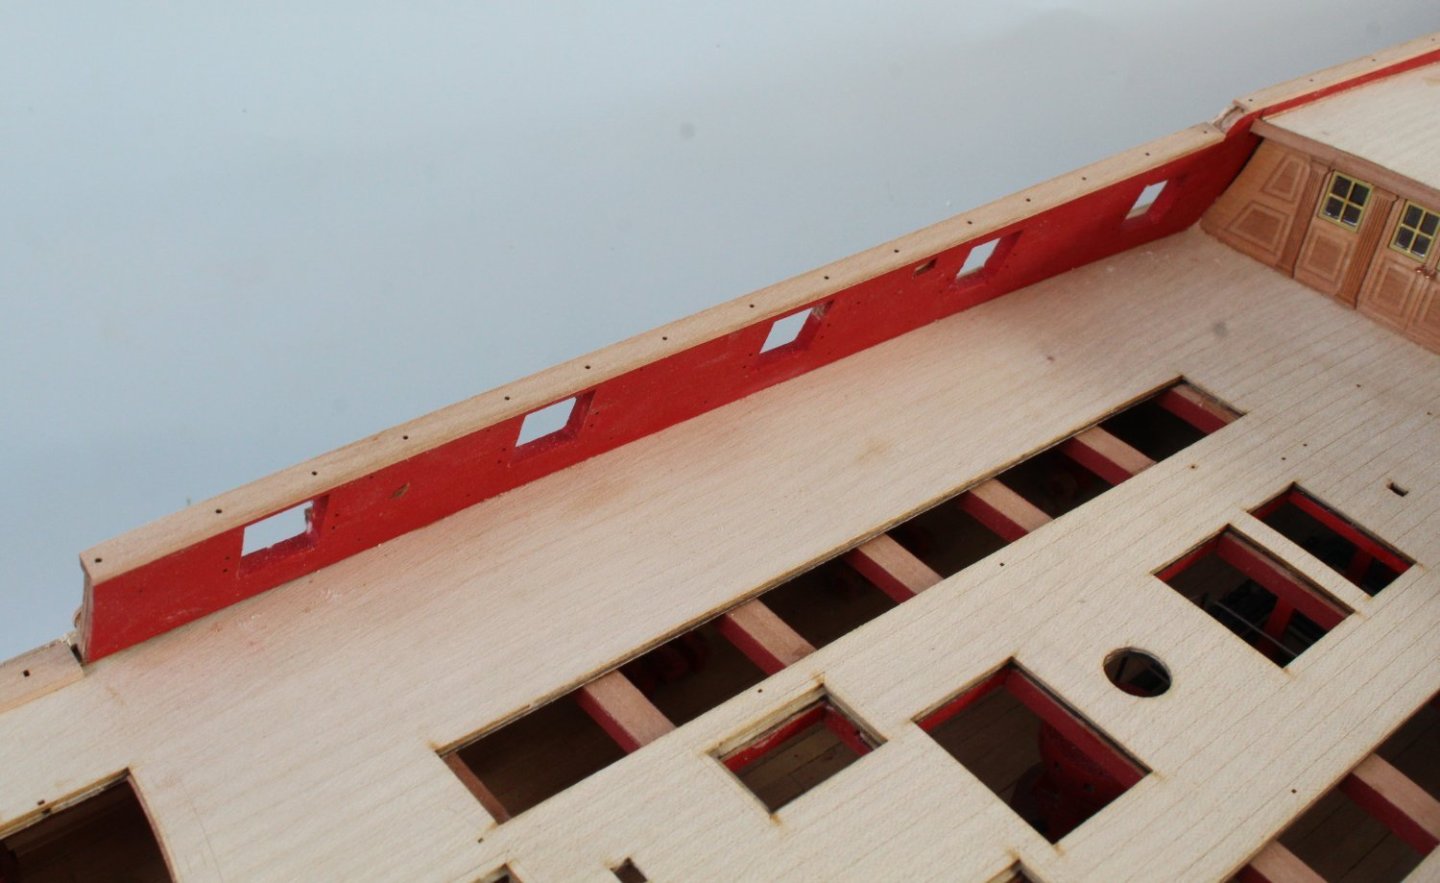
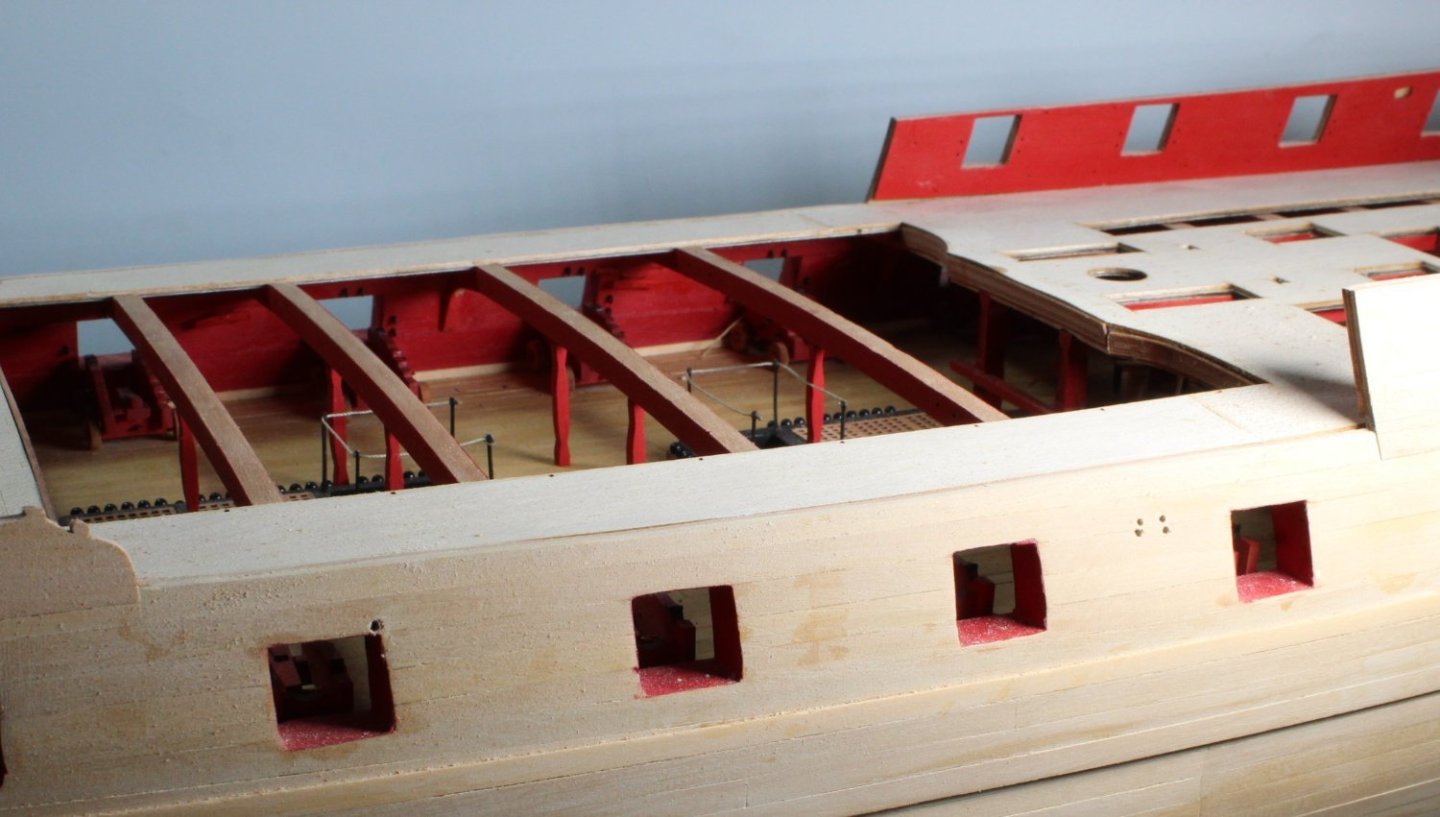
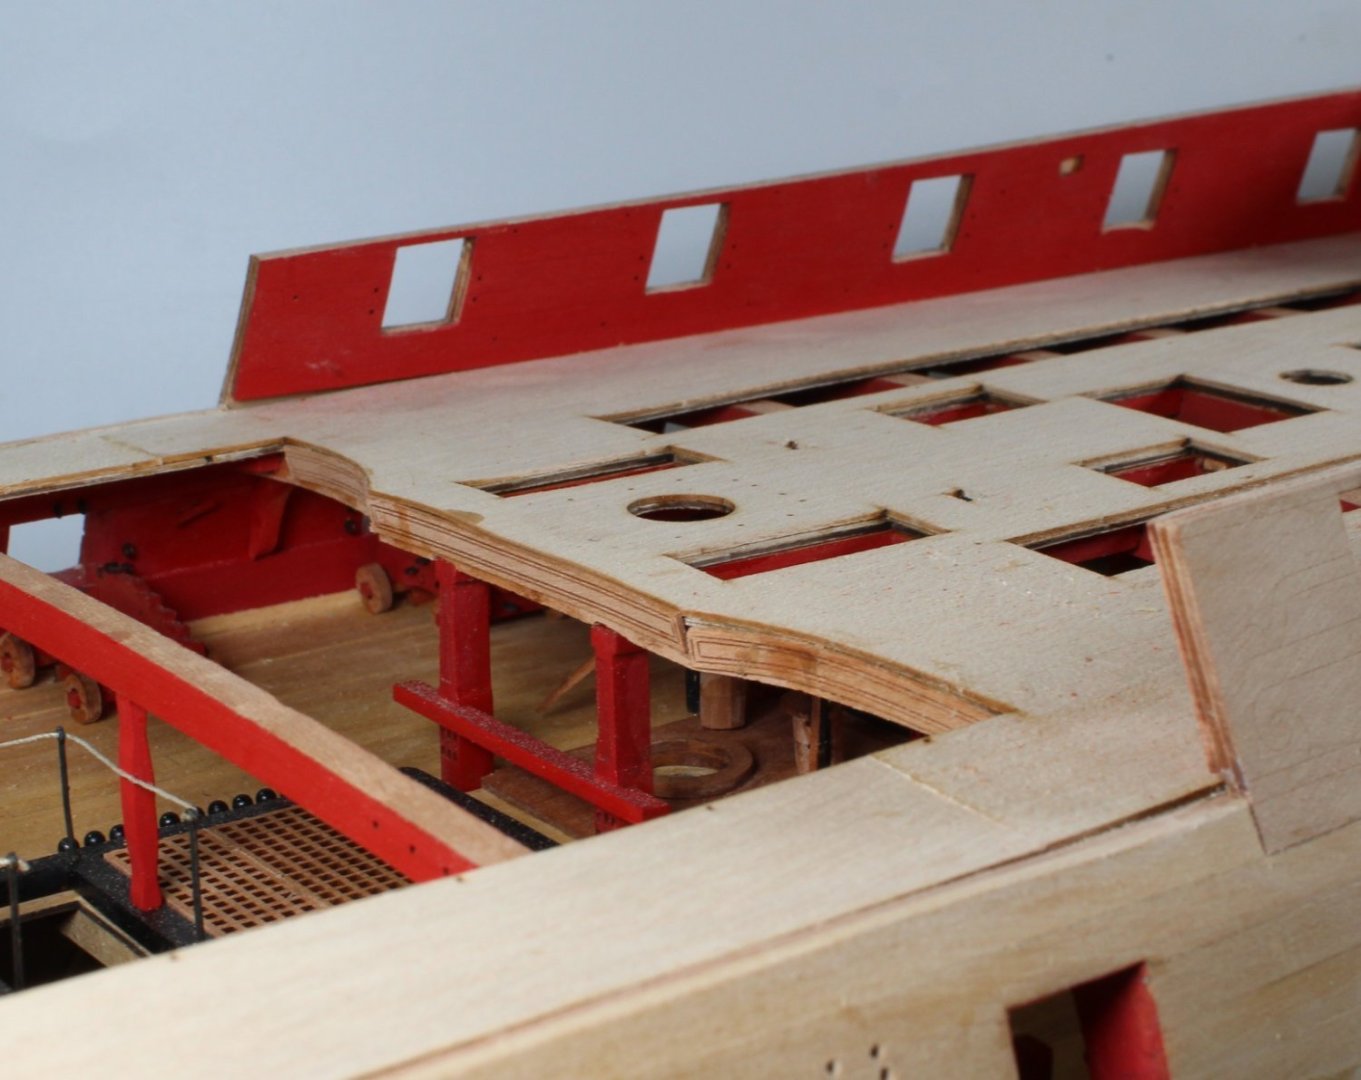
Inner Bulwarks and Gunwales I have now completed the work related to fitting the inner bulwarks. The deck front fascia patterns have also been glued in place. Poop Deck Quarterdeck Bulwarks Quarterdeck and Poop Deck I have also sanded the central hull section down to the gangway level. I have not made a great job of fitting the quarterdeck front fascia's patterns. I will try to release the left hand side pattern and reglue in the correct position. Forecastle deck complete with front fascia pattern fitted I spent a bit of time tiding up the gun ports and sanding the tops of the bulwarks level. The various gunwales were then test fitted and I am very happy with how they are laying. The forecastle gunwales may be a bit of tweaking to match the hulls bend. Forecastle gunwales Gangway gunwale Quarterdeck gunwales Poop deck gunwales All the gunwales on left hand side I liked the following photo so I decided to add it to this post


-
Hope you were able to elongate the slots. I found it was not as bad a job as I first feared.
-
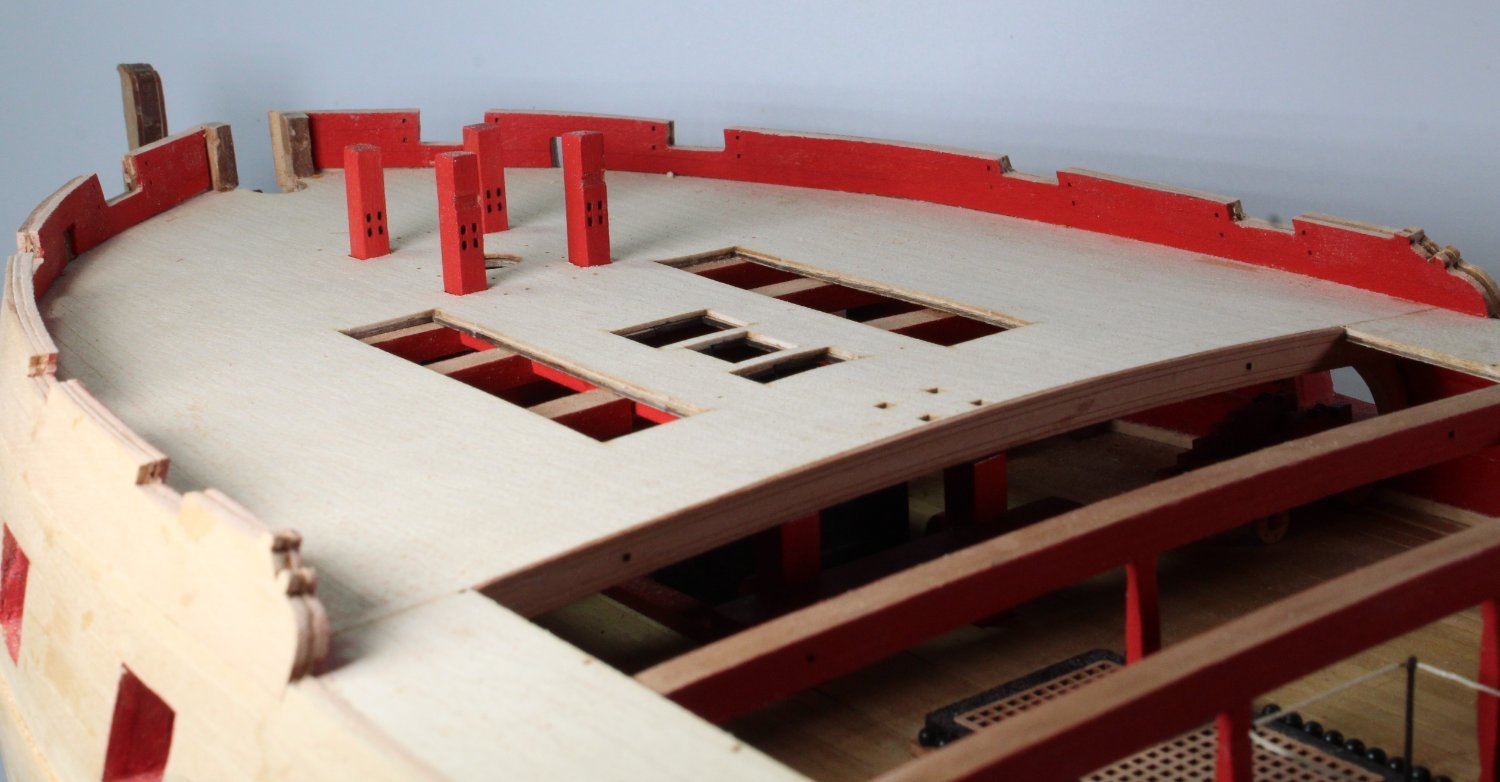
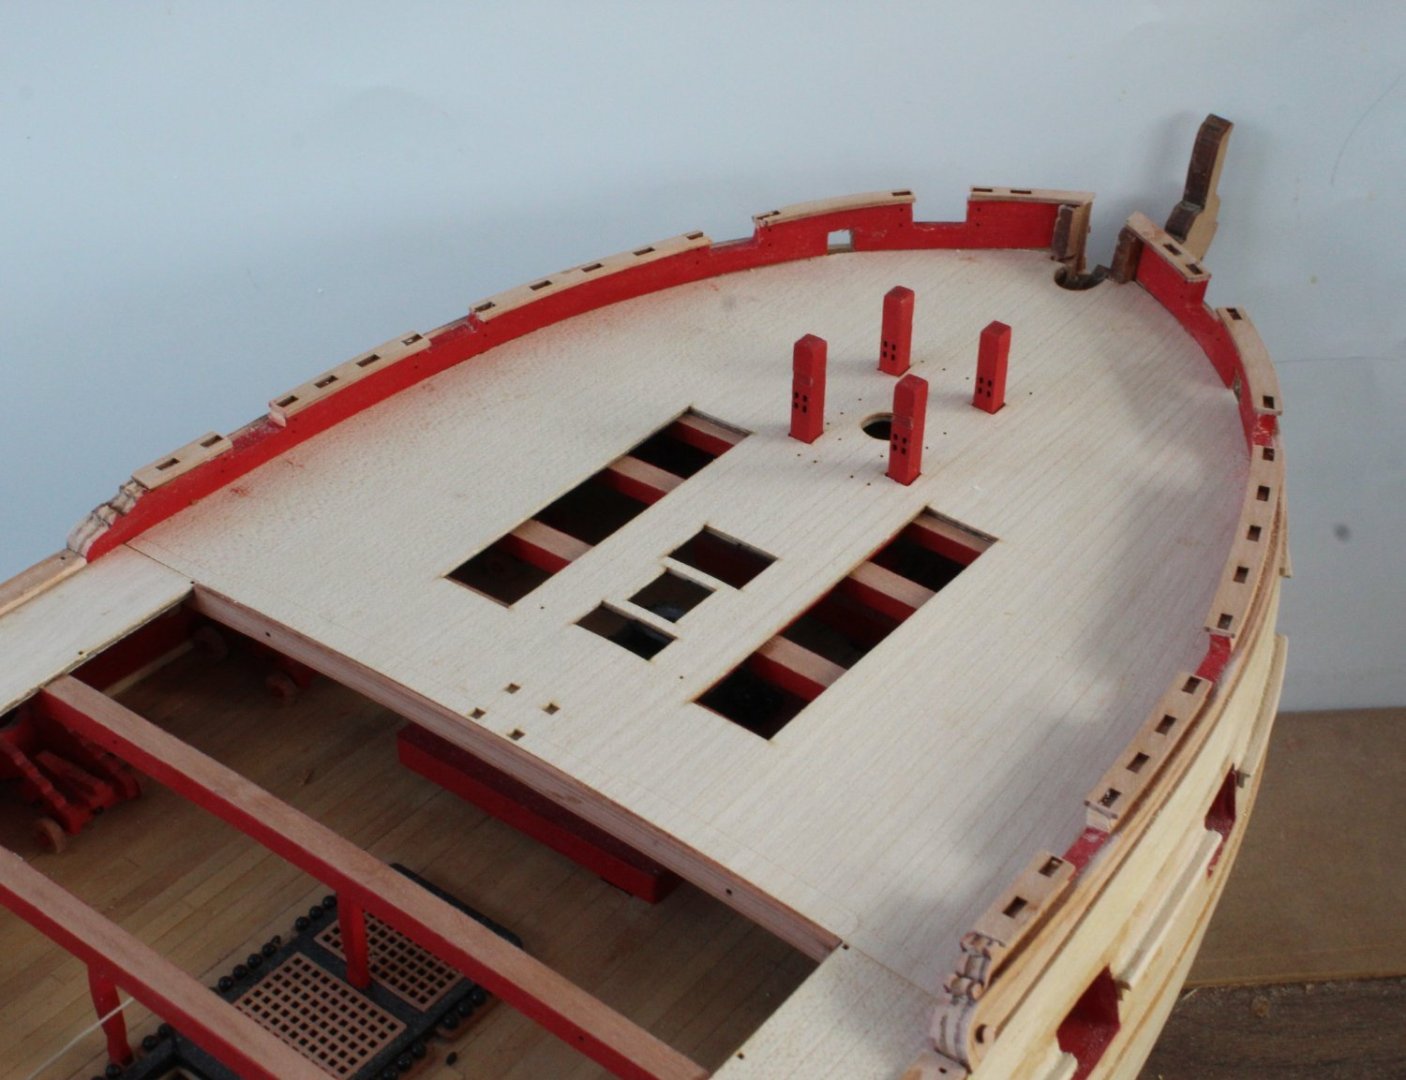
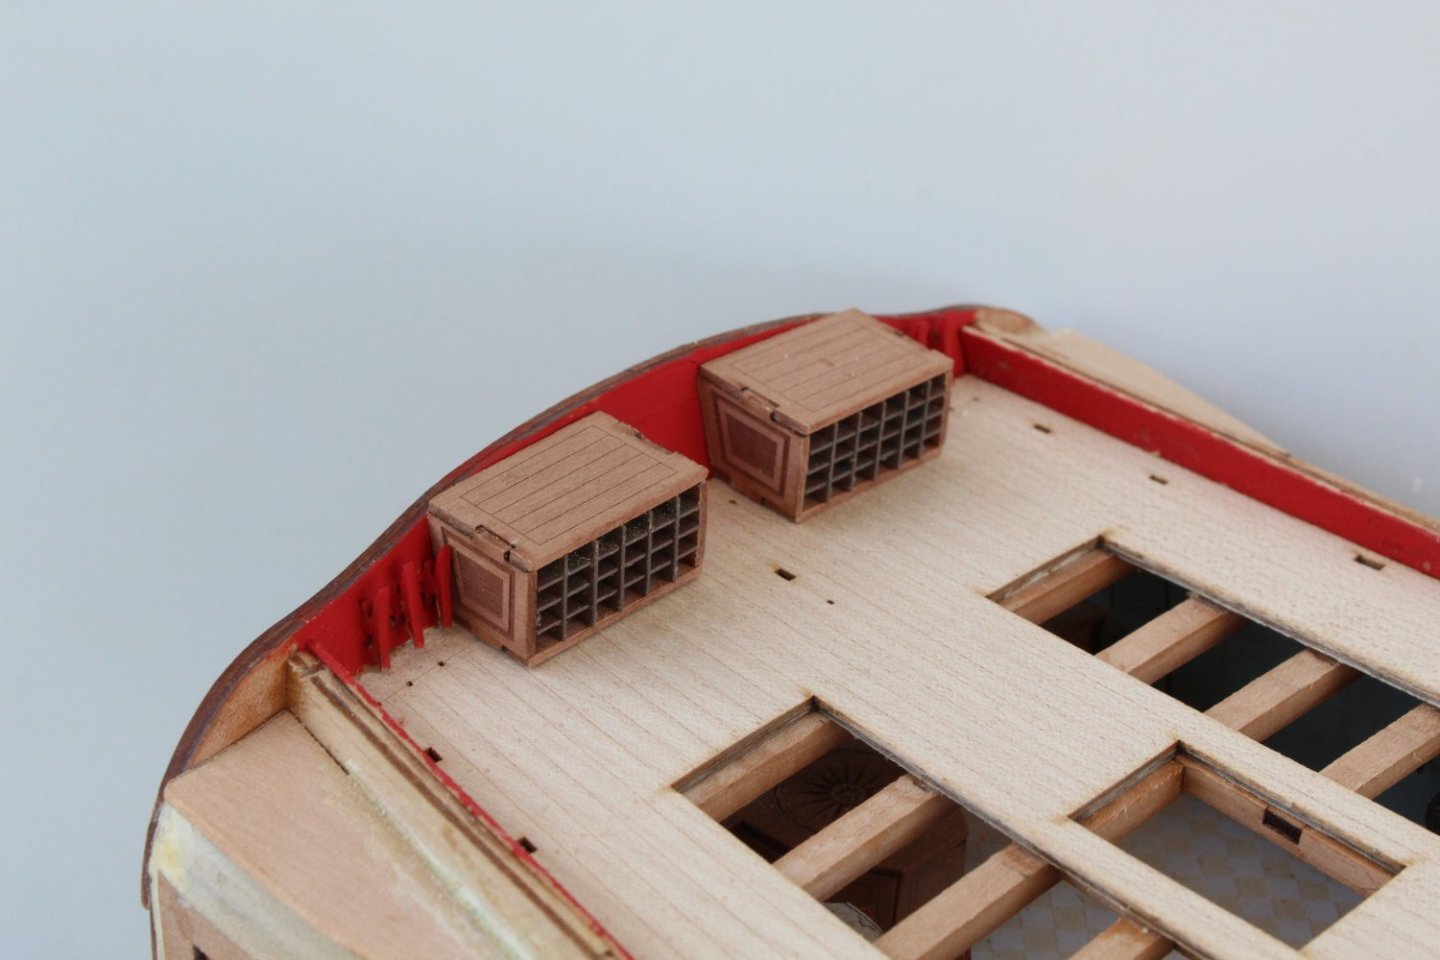
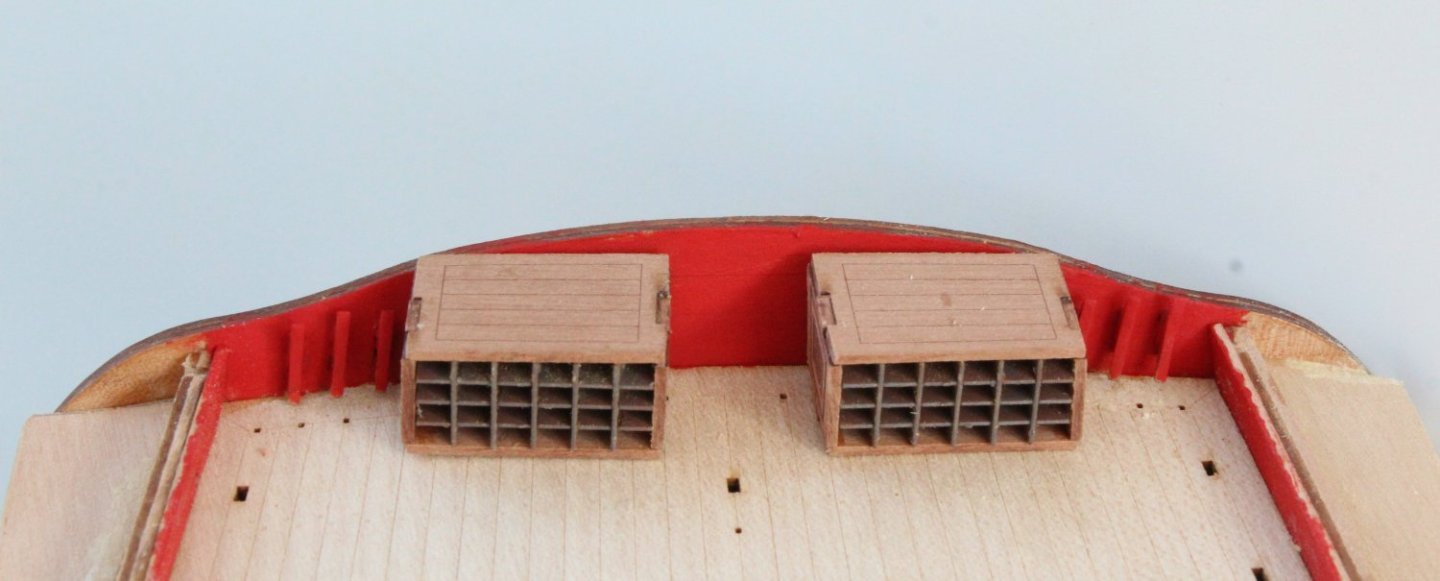
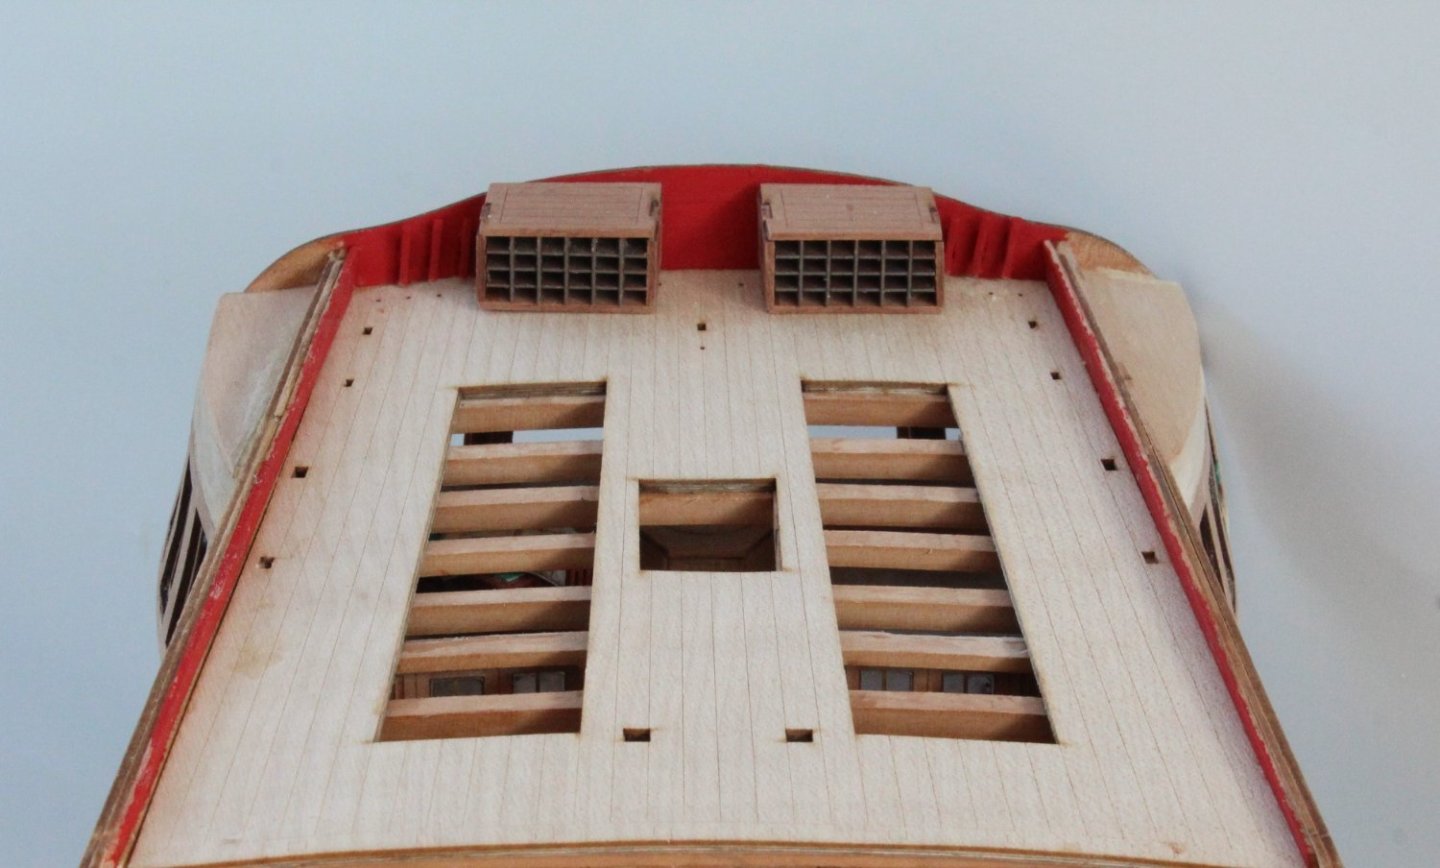
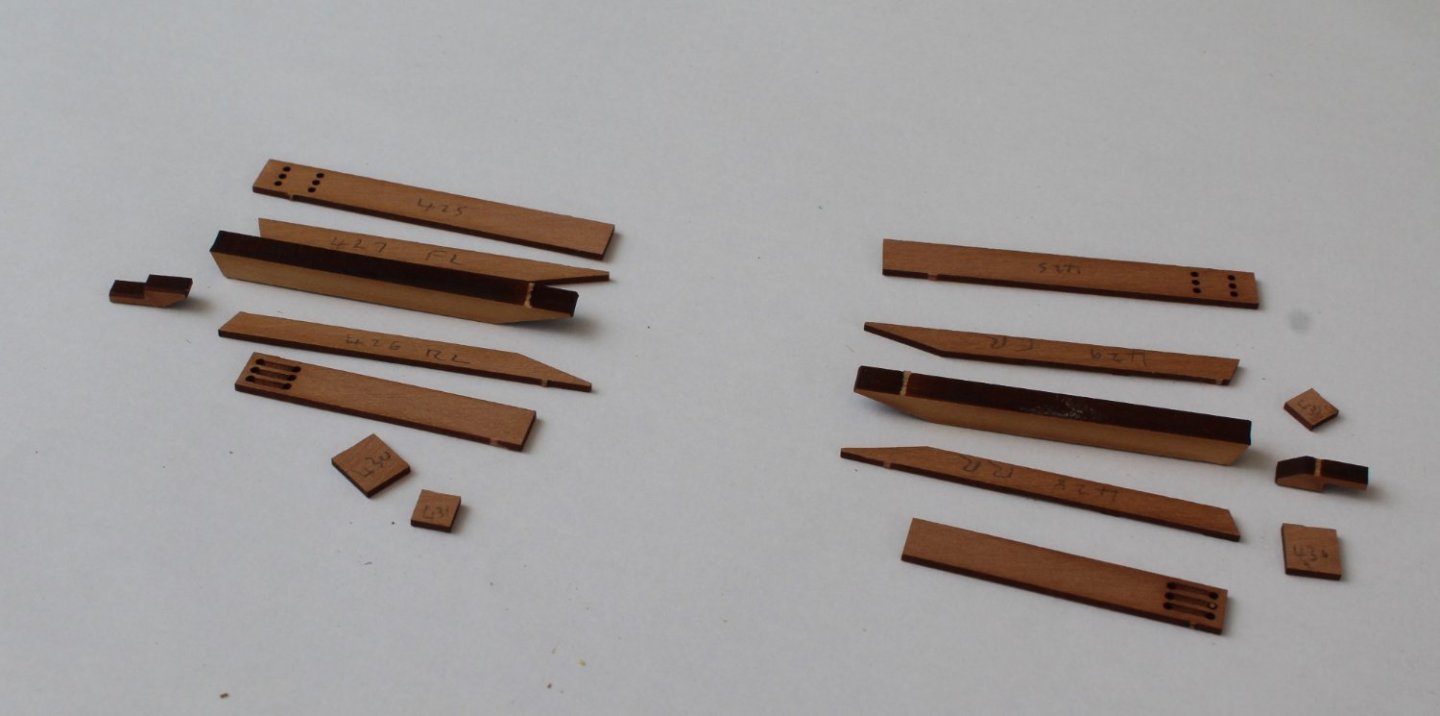
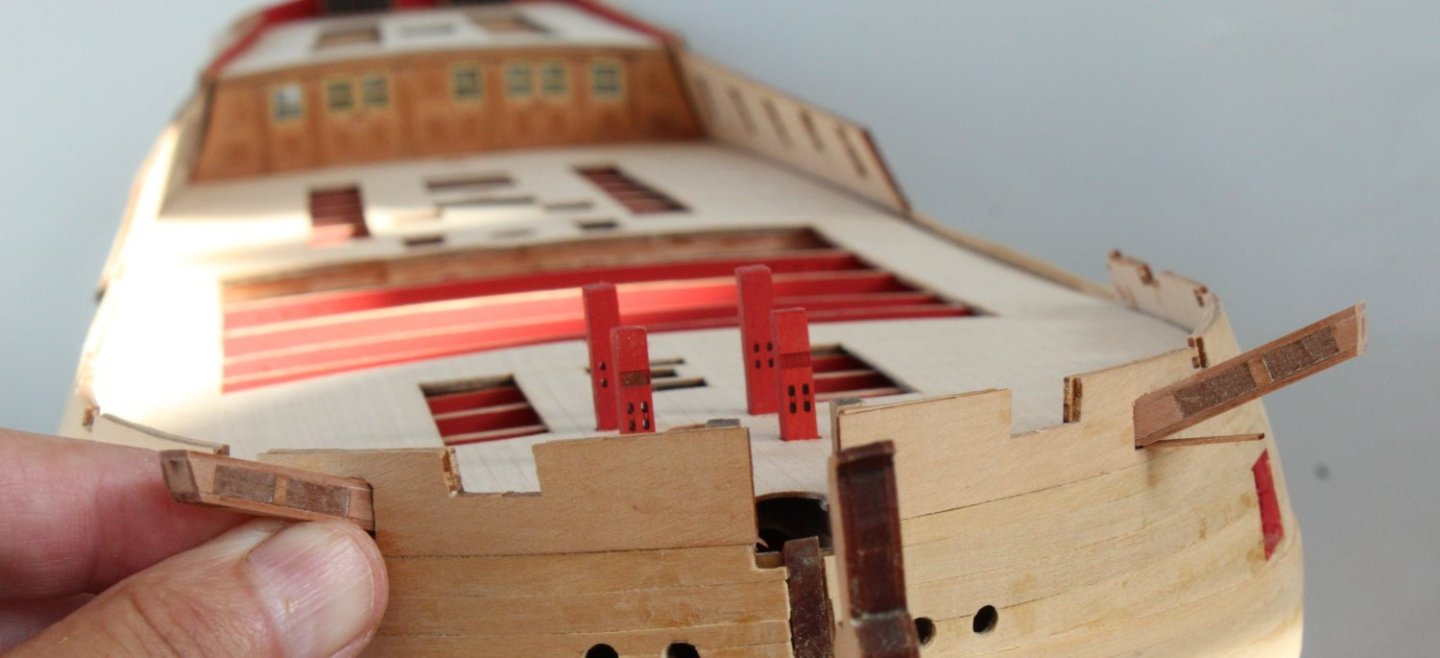
Poop Deck and Inner Bulwarks In my last post I reported the stern fascia cleats would not fit in the slots as the cleats were fouling on the poop deck. As advised by Jim I elongated the slots. I then added some wood filler to the bottom end of the slots. Once this work was completed the cleats were installed as can be seen below. With the inner poop deck bulwarks added the fascia and bulwarks were painted red and everything looks good. The quarterdeck inner bulwarks have been painted red and test fitted. They appear to be a good fit and once I have double checked the eyebolt hole alignments they can be glued in place. The forecastle inner bulwarks have also been test fitted and are now ready to be painted red. I then thought it would be a good idea to build and test fit the catheads before the inner bulwarks are added. The various catheads parts were removed from the pear wood material. I did mark the left and right hand side patterns (426 -429), as can be seen on the photo below. The side parts were glued and clamped in place. Once the glue had cured the catheads were ready to have the top and bottom patterns added. The slots in the forecastle bulwarks did require a little bit of work before the catheads would fit. Although not shown in the two photos below the catheads were also test fitted with the inner bulwark clamped in place.


-
Thanks Jim The slots have now been elongated upward and I have started the infill. No-one will ever know once the inner stern fascia pattern has been painted and the cleats installed.