
HOLIDAY DONATION DRIVE - SUPPORT MSW - DO YOUR PART TO KEEP THIS GREAT FORUM GOING! (Only 51 donations so far out of 49,000 members - C'mon guys!)
×


mtaylor
-
Posts
26,273 -
Joined
-
Last visited
Content Type
Profiles
Forums
Gallery
Events
Everything posted by mtaylor
-
RM, You might want to have a look at Model Expo's Shipwright models. There's 3 and they will give you a firm base on model shipbuilding. Here's the link: https://modelexpo-online.com/Model-Shipways-Shipwright-Series_c_815.html
-
Welcome to MSW, Mateusz. Good looking models.
-
Looks good, Denis. Very well done. I vaguely remember hearing or reading back in the day that many kits with engine compartments wouldn't let the hood close as most builders (kids we were) left the hood open to show the engine and the detailing like spark plug wires, fuel lines, etc. Yeah... I went down that rabbit hole myself.
-
-
Welcome to MSW, RMillet. When you're ready to start building, do open a log as it's the best way to meet others and also get help.
-
AL has some also, but I'm not sure of the exact scale but some are pre-painted. Also there's the various places selling figures and other items using the 3D printing tech. You might do a search here on MSW and see what you get. There's been more than few posts on these... including in build logs. Worse case, make one or two. They don't take much time and there's the satisfaction part. I've made one and as I recall, took about an hour or less.
-
-
Nothing wrong with Navy Board style, IMHO. I'm headed there myself as display space is at a premium in my place.
-
The infantry square was pretty common and goes back to Roman times,,, here's the article from that fount of all knowledge (and misinformation but not in this case) Wikipedia.... https://en.wikipedia.org/wiki/Infantry_square
-
True. We can't waste gas on multiple trips so if we see something that "might" be useful, we grab it.
- 331 replies
-
- 10
-

-

-
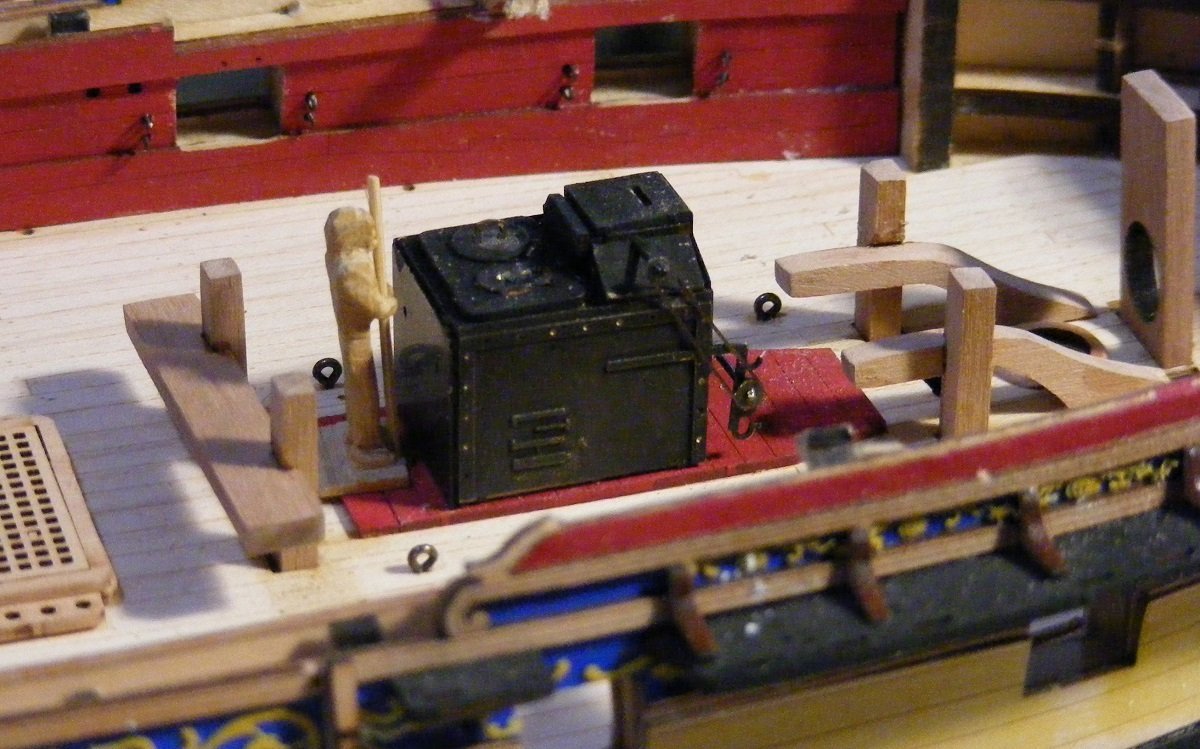
Thanks Tom, The instruction manual and drawings show it oriented with the spits forward. The riding bitts knees also go forward and seem to block access to the stern side of the stove even more. Speaking of the riding bitts knees, the instructions do call them out in Instruction 478 for removing from the parts stock, but do not have an "installation". The drawings do show them though. Edit: I found where they get installed. My bad for not reading and remembering that far ahead. BTW, you can download the manual for free here: https://vanguardmodels.co.uk/product/hms-sphinx-1775/
- 505 replies
-
- 7
-
-
- vanguard models
- Sphinx
- (and 1 more)
-
There's been more than few topics on this... here's just one. There's lot of ways of doing this and most methods seem to buried on build logs. https://modelshipworld.com/topic/23725-hand-planing-fixture/
-
Welcome to MSW, Todd. I go along with the others on suggesting you do a build log. They're a great way to meet other modelers and also get help when needed.
-
The manikin is a brilliant idea. Many of use "fixed" figures for scale but have one articulate for rowing is a better plan.
-
A long time ago I did some work with aluminum and welding it. Not for the faint of heart. Usually needs a inert gas to be present around it and extreme temperature control. Not worth the hassle unless you're doing something an aircraft or auto body. Also, dissimilar metals create other headaches. Go with the all brass. Your castings are probably so-called "pot metal" or "britannia metal" and isn't suitable for soldering.
-
Thanks Tom, The Marines did teach me this and throughout the decades, it's served me well... "Improvise, adapt and overcome" which is the unofficial slogan of the Marine Corps. I
- 505 replies
-
- 10
-
-
- vanguard models
- Sphinx
- (and 1 more)
-
If I remember right, the model department did buy a lot of battleships and other kits they thought they could use parts for the Death Star. Rack 'em, pack 'em, and stack 'em. Going to the shore they all sat nicely. Coming back... different story.
-
It's great to see you back on this build, OC. I'm sorry to hear about the issues with the other builds.
-
Thanks. I've been sweating blood on this build to get it right and overcome my personal issues. So far, I'm feeling pretty good at this point. I admit to coming close to packing it in
- 505 replies
-
- 7
-
-
- vanguard models
- Sphinx
- (and 1 more)
-
Thanks for the likes and comments. Still making progress. The bow area of the gundeck. I did have to do some serious thinking here. I dug out my little yard master and did some eyeball work and more thinking. I finally decided, Captain's prerogative needed to be applied. With the wall/door section added there just didn't seem to be enough room for the cooks to work. So didn't use it but did add a very small bit of "brick" to cover the hole. Now to go onto more of the gundeck work.
- 505 replies
-
- 28
-
-

-
- vanguard models
- Sphinx
- (and 1 more)
-
Be careful with that one. My second wife got a bunch of these.... And I note they now come in all sorts of designs and colors.

-
For sanding, EZ method works well. I've also found that some of the long fingernail files from a beauty supply shop that basically sandpaper on both side of a stiff piece of foam work well. They bend, they're relatively cheap and come in many grits from very course to very fine. If they get clogged, a quick pass with the shop vac cleans them up. They do wear out like sandpaper so keep some extras on hand.
-
I use as long a plank as I can manage. Checking in sections is fine but try to make the check at least 3 bulkheads and overlap The longer the test plank, I find the better. Depends on the hull length. I use a soft wood like basswood for checking it easy to twist and bend to the shape needed.
-
Welcome to MSW, Skip. Looks to be a fascinating project.