
HOLIDAY DONATION DRIVE - SUPPORT MSW - DO YOUR PART TO KEEP THIS GREAT FORUM GOING! (Only 51 donations so far out of 49,000 members - C'mon guys!)
×


mtaylor
-
Posts
26,273 -
Joined
-
Last visited
Content Type
Profiles
Forums
Gallery
Events
Everything posted by mtaylor
-
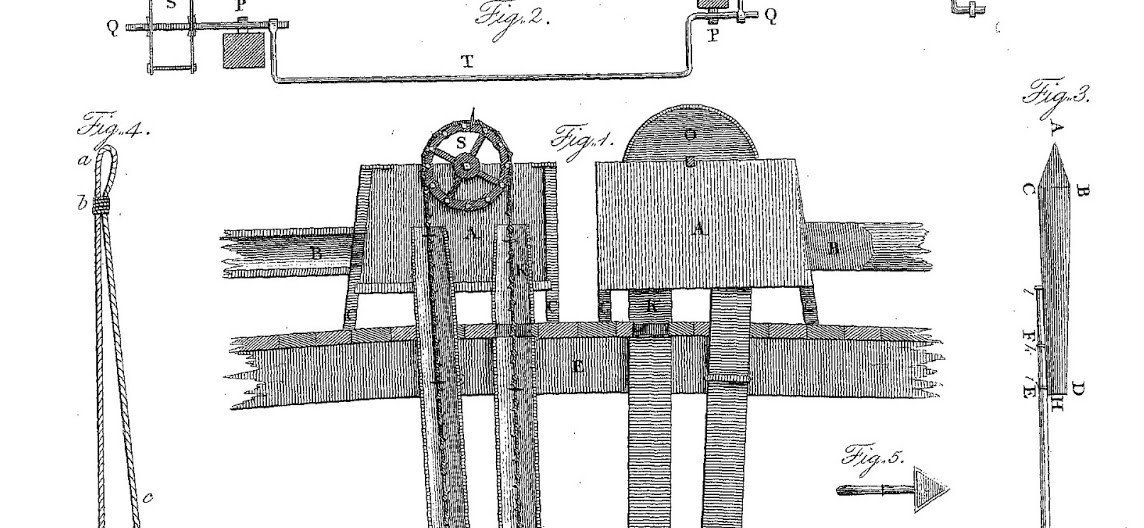
Keith, I hope it goes well for you also. I really believe I just had a bad prescription for the eye doc... it was a second bad one from him, so I'm changing docs. Thanks Glen. Those are the chain pumps to pump water out of the bilge. See pic attached. If you've seen Master and Commander there's a couple of scenes where they're using it.
- 505 replies
-
- 8
-

-
- vanguard models
- Sphinx
- (and 1 more)
-
Thanks Keith. Vision is still up in the air. Appointment later this month <sigh>. I've found the best I can do is work for maybe 30 minutes tops and then go do something else for an hour or so.
- 505 replies
-
- 6
-

-
-
- vanguard models
- Sphinx
- (and 1 more)
-
Looking very good, Ras. For the flags, take an old soda can, cut it open and get it flat. Then bend it to the shape you want the flag to be. Then brush a good coat of water/white glue on it. You may have to tape a bit hold in place until it drys. Spray starch also works well. I very strongly suggest you test any method before applying to your final flag. You'll probably need to make a test flag or two.
-
I realize that scale is pretty tiny but I'm gobsmacked at how great the rigging looks.
-
So far, so good. You are on your way. One question though, what are you using to get the frames square to the keel both fore and aft and vertically?
-
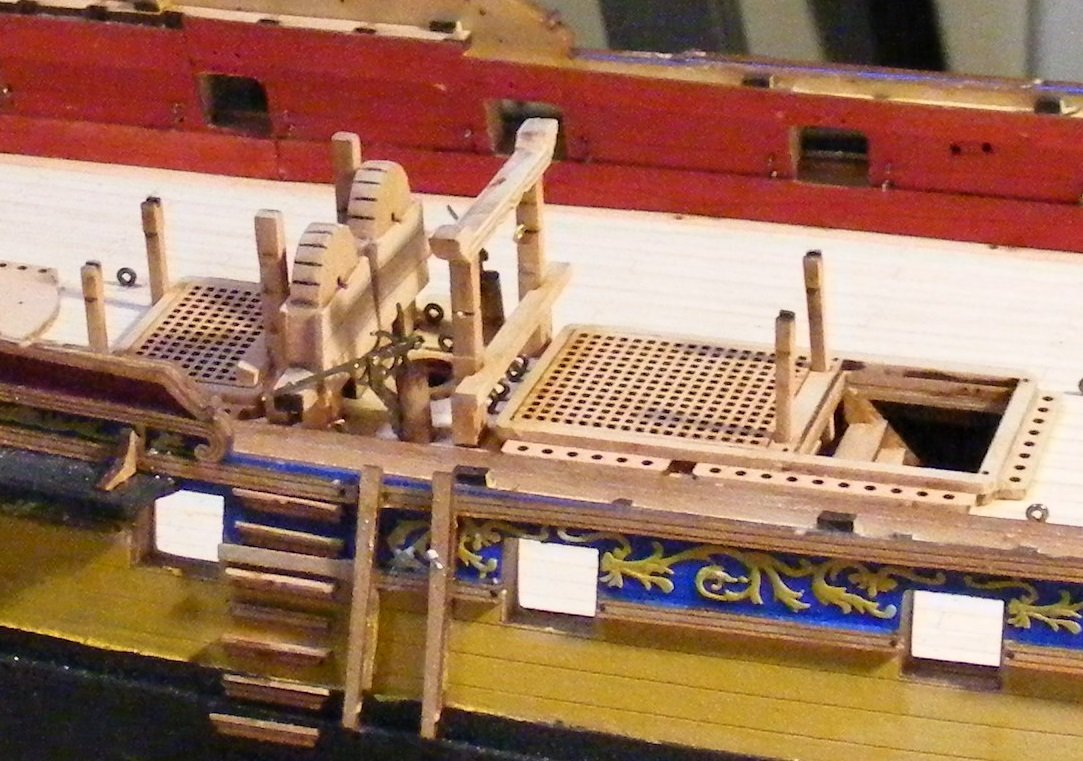
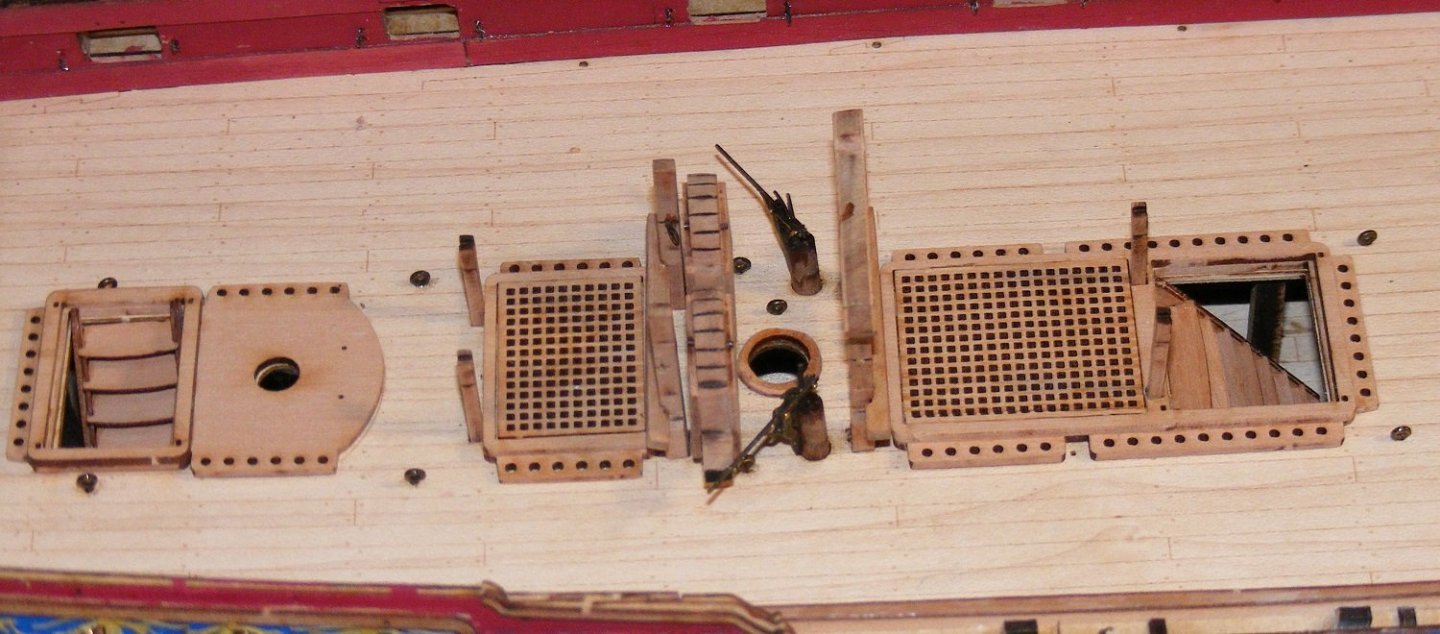
Still working... slow but steady. Seems once I start working, the "how to" part comes back. Weird the way the mind works. I've been focused gundeck, aft and middle. And forget to take a photo of the two cabin areas. But in the main area, I've added eyebolts, coamings, grates and the furniture around the main mast. For those who noticed, the pump stanchion iron work missing, I'll CA it on after doing the cranks. I think it'll be less fiddly trying to get the cranks in position without the iron work being in the way. I still need to clue the stanchions for the pump hands in place. Here's photos... more coming as I've moved forward to the area around the foremast.
- 505 replies
-
- 20
-
-
- vanguard models
- Sphinx
- (and 1 more)
-
Planking glues
mtaylor replied to ChiefCarr's topic in Building, Framing, Planking and plating a ships hull and deck
I'm not sure there's any coating you can put on the outside to keep the second layer on. It might be a better option to add treenails to the planks. I know others will answer so wait and see what they say. -
There is a build log of the Granado in the scratch area. You might do a search using "Cross Section" and "Title Only" selected in the Search function as there might be others. Do this at top of the Scratch Build area and also select "Forums"
-
Martini Porsche 935 by kpnuts - FINISHED - Tamiya - 1/12
mtaylor replied to kpnuts's topic in Non-ship/categorised builds
Thanks for the info. I wasn't aware of that. -
Welcome to MSW, Nate. You've received some great advice already but I'll add, when you've decided, start a build log. You'll get help and meet other builders. And yes, an intro in the New Member area is a good idea also.
-
Martini Porsche 935 by kpnuts - FINISHED - Tamiya - 1/12
mtaylor replied to kpnuts's topic in Non-ship/categorised builds
I must confess I'm surprised that the tank is clear plastic. I'm assuming the real ones were that way also and there was no fuel bladder? -
Welcome to MSW, Alex. Seems like you have a good basis for continuing your journey. And yes, the log will help you as well as being a great way to meet others.
-
I'll give it my best shot in order.... `1), I've never had a problem not stripping off the blackening using CA. Once mounted, there's no tension or stress and thus, no need to solder. 2) Not sure myself as I haven't done any of those... yet. 3) It should. Flat clear coat of anytype should work. I've used flat varnish from Vallejo. 4) Yes, a spot of CA. 5) Depends. Usually just a spot of glue on each wheel does it. Some do put a toothpick or maybe some thin brass rod through the carriage into a hole in the deck. Again, secure with either CA or epoxy.
-
1:54 HMB Endeavour
mtaylor replied to Tony_Brooks's topic in Building, Framing, Planking and plating a ships hull and deck
Easy way to do treenails at this size would be drill holes (not very deep) of the appropriate size (Allens' size seems right). The fill the holes with either a bit of glue and very fine sawdust or Plastic Wood which comes in colors. -
We do have a cross-section scratch build in the Trition Group Build. See the link in the "Group Projects" at top of any page. There is also a Topic area "Group Projects on MSW" on the main page which also shows the Download Area.
-
Oh the sacrifices we make in pursuit of our hobby. On the serious side, seems everyone comes up with "offbeat" ideas at times for parts.
-
More than anyone else here at MSW I suspect. What you're pointing out seems reasonable.
-
kit review 1:65 HMS Endeavour - Artesania Latina
mtaylor replied to James H's topic in REVIEWS: Model kits
That looks impressive and it's great see how far AL has come compared to about 15 years or so when I built my first one. -
Welcome to MSW, Jim. Building a model you are really drawn to is important, especially for a first build. I hope you have some fun and enjoy it and the future journeys into model ships.
-
The French, it seemed, had a different philosophy on building than the English. They had basically a formal training program for the designers of ships and that included an apprenticeship. They were not afraid to experiment. They also had different methods of building ships and wood supplies. However, the Revolution in France changed many things.
-
This build literally boggles my brain both in size and detail. Carry on, Kevin, I salute you.

- 201 replies
-
- 6
-
-
- SD 14
- Marcle Models
- (and 1 more)
-
Scratch area has tons of ships with quarter galleries but I don't recall any SIB's. You might do a search with just the key word "Bottle" and then drill down from there. Probably the easiest way would be just to carve it to shape and paint. I suspect any stern "artwork" would have be a just a "suggestion" of what's there.
- 177 replies
-
- 3
-
-

-
- Independence
- bottle
- (and 1 more)
-
It's just a reinforcement to the connection at the stem and keel. There's also another reinforcement, but not a horseshoe at the stern.
-
F-86F-30 Sabre by Egilman - Kinetic - 1/32nd scale
mtaylor replied to Egilman's topic in Non-ship/categorised builds
Looking at the photos you posted, you probably could have got away using a very dark gray.. almost but not quite black. Hopefully what you're planing will help a bit on the interior. -
I missed that on the first photo. I agree... order new parts as Model Shipways has a very good parts replacement policy.

