bear
-
Posts
362 -
Joined
-
Last visited
Content Type
Profiles
Forums
Gallery
Events
Everything posted by bear
-
ahoy Mates I use a clove hitch for the ratlines except for the two ends. I have used an overhand knot,but should I just use the clovehitch on the ends also? And how do you trim off the ends fluch with the shrouds on the outside? Keith
-
Ahoy JBSHAN What you said is what I am thinking as to how they were used,I just want to know if anyone has some solid information on how they were rigged. Keith
-
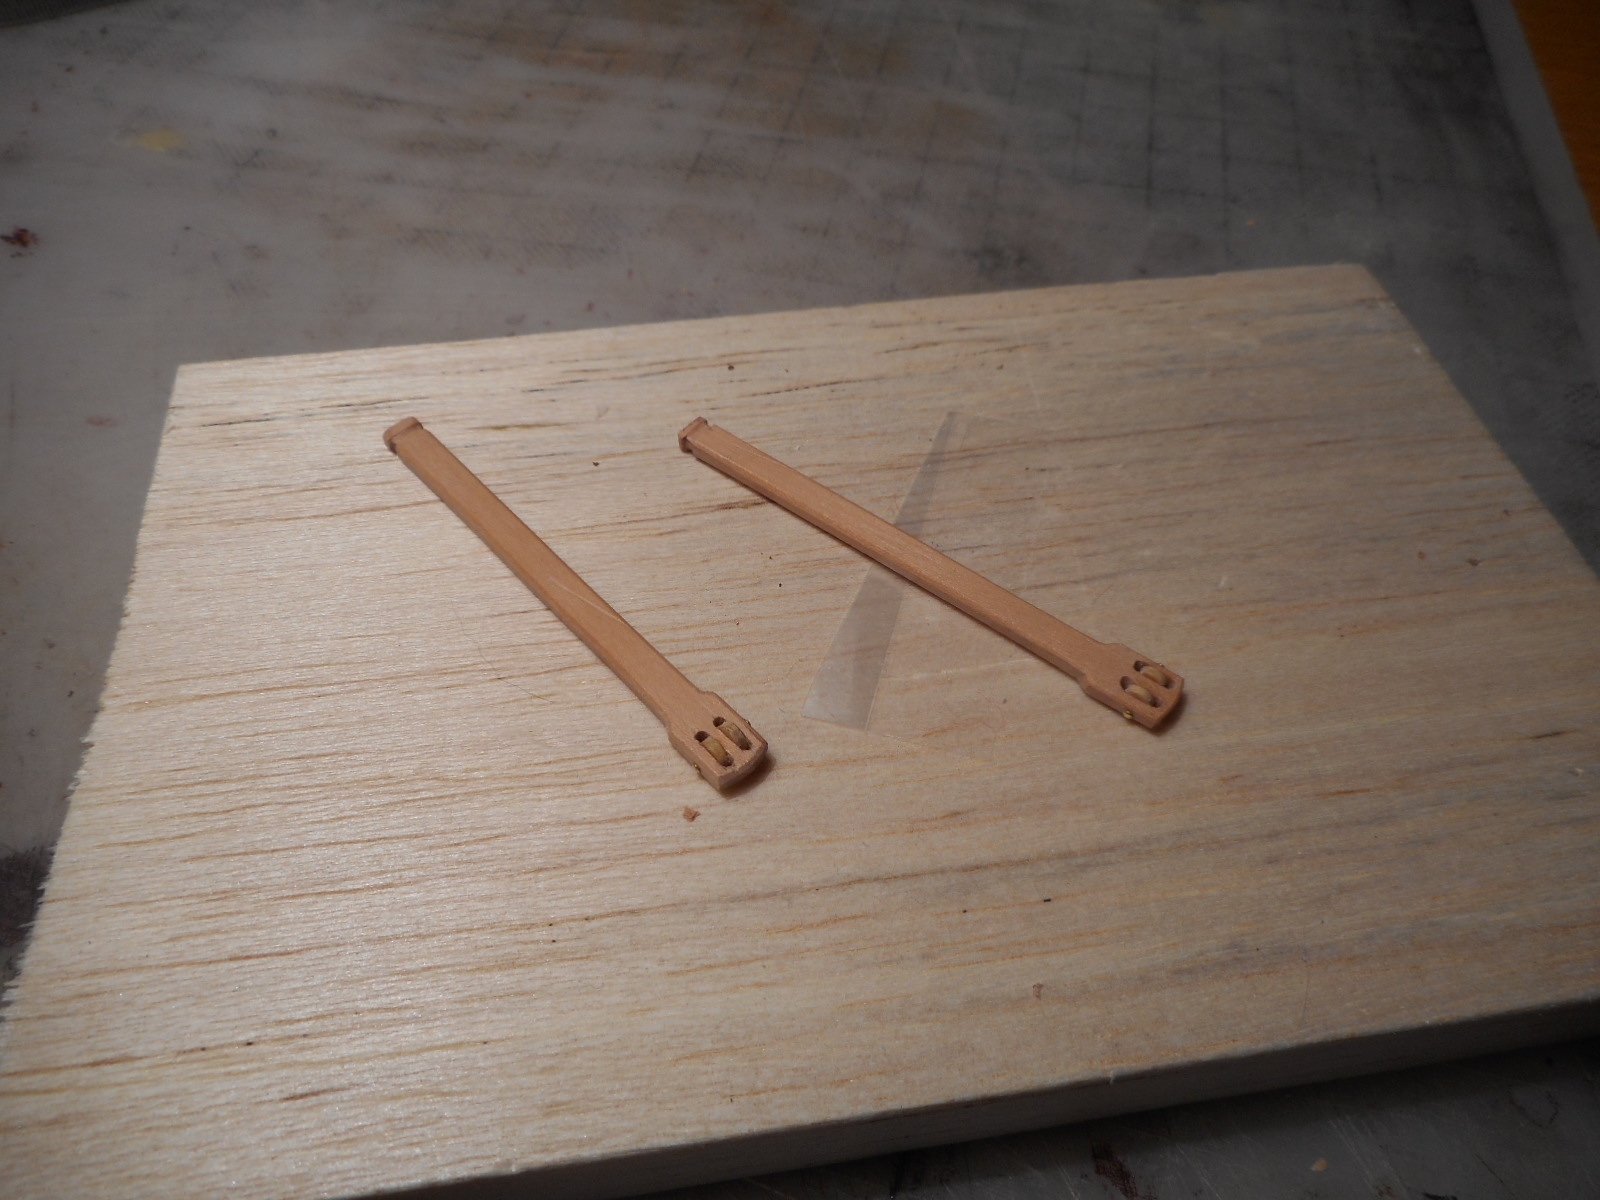
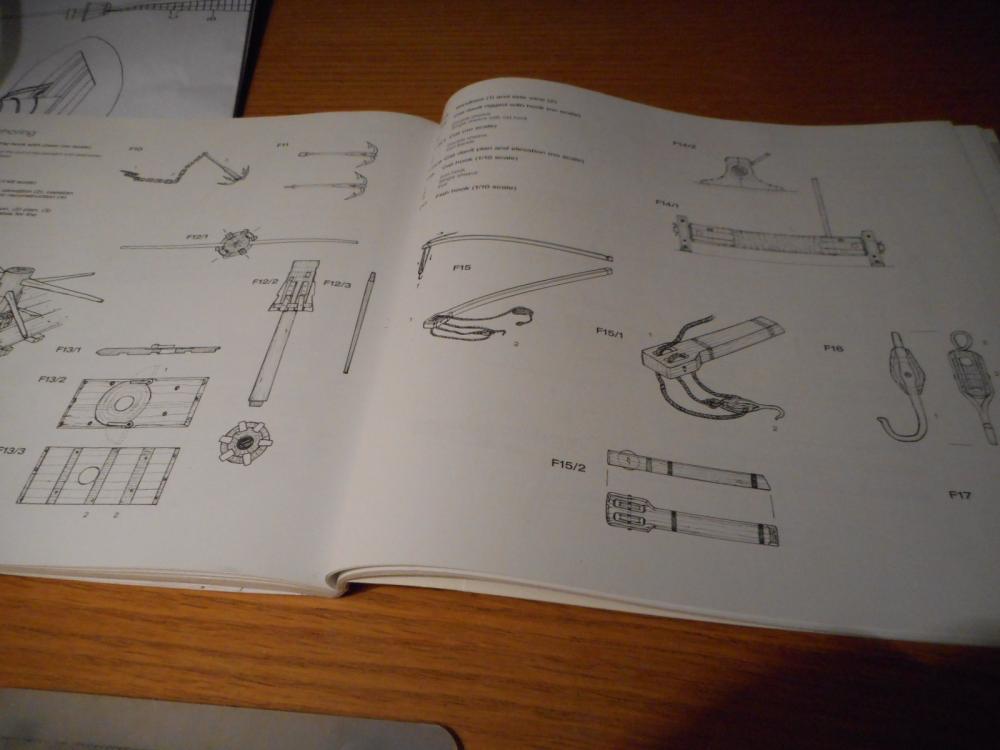
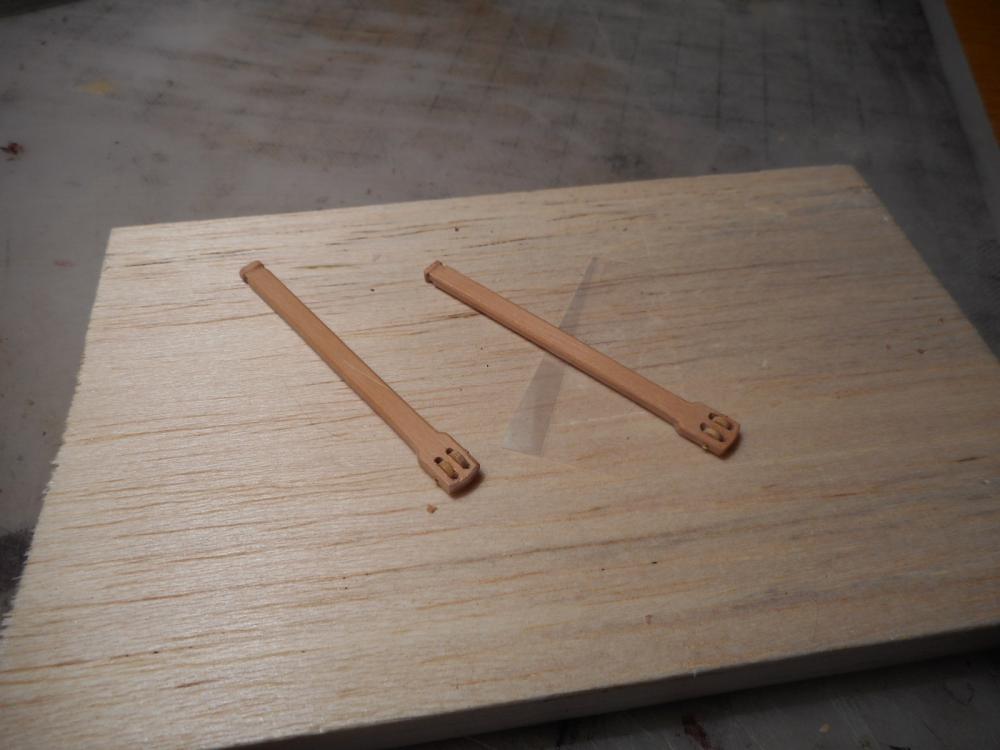
Ahoy Mates Trying to find out how cat davits were set up on the bow of ships in the time period of around 1535 on English warships? It's for my Mary Rose build. The new Anatomy Of the Ship Mary Rose has sketches showing cat davits that were used,but do not show where or how they were set and rigged for use and storage on the Mary Rose. I have made the two of them up and need to find out this information. Have looked thru all my books and have searched for "cat davit" with no answers being found. Would they have been lashed to the deadeye's on the bow when not in use? I would like to have my model with one of them raising the anchor into place. Thanks Keith
-
Ahoy Mates Subject: Civil War Blockade Runner Scale: 1/48 Build Type: POB or POF doesn't mater And a Short Kit. Fittings fine in kit,but planking is up to buyer-keeps price down,and buyer can go with either economical wood or other more expensive wood choices. Price Range: $150-$300 Quality- Must have bulkheads and frames that line UP! That are fair and not being 1/8-1/4" off being fair,or shapes not the same frame to frame. Maker should have a outside builder build and show that they are right.And do it before the kit is being produced and on shelves for sale! After buying kits from 6 manufacturers over the last 4 years,not one has a kit without this problem. From 2 that have had just a couple problem frames to a majority where 75% of the kits frames-bulkheads were wrong shapes,and had to be corrected. There are other types of kits using laser cut frames and bulkheads that have tapered and other shapes like the ships we build,but they do not have the same problem with their kit's. I have been in production for all my adult life and quality control processes. There just needs to be a raising of standards of all in the kit making community. Some just need to be made aware and have very little to work on. Others will not care or even listen or try. Just think of it this way,if you have a terrible first build and not the skills to deal with uneven shaped bulkheads to start with. Do you expect that person to want to build another kit-or even finish the first kit with problems? It will only help all of us if the standards are raised up to a level that they should be with CAD and laser cut parts. We are not talking of old school steel rule cut kits of the past. Build Time: I like short time builds and long. I lke to vary it. 6 month's to 2 years I frankly think that raising the quality question and problems that we all are subject to is correct if you are talking about new kits and what we want. I want it to be taken in a positive way not just a ranting way. Keith
-
Opinions on Sherline DRO for Lathe
bear replied to rtropp's topic in Modeling tools and Workshop Equipment
Ahoy Mates Just to start being 63 when I started out in a machine shop bak when I was only 12 there was only the lead screw dial that was on it and the next step was mounting a direct reading indicator to show the movement of either the carriage or tool rest. You had to deal with lead screw backlash and it took a lot of skill and use to use them correctly and get things right. Next was when I was 17 and the shop had travel dials on the Bridgeport mill table and cross feed. They were better than the dial on the lead screws,they showed the table travel. But they could slip and if you had to be very accurate,you still had to set up direct indicators on the X and Y axis to also show any crabing of the machines tables when moved,or to show movement when they had to stay still. Still al lot depended on the skill of the toolmaker or machinist . Then DRO's first generation came out. they were better than what had been used before,but the resolution was only .001 total because they used a glass scale with lines etched into the glass. The reader owuld detect the bar and the counters would add up the total number of lines crossed. At this stage they used frequency counters that had been around since the 1940's and Nixe tubes for the numbered lights to show how far you had traveled. You could have a total of .001 error since you could be just up to the next line going both ways without the numbers changing-thus the error of distance. I still had to use a direct reading indicator to know where I was really at. Then they went solid state and now use magnetic encoded bars. They have come a long way,and those of you hwo have only used their mills for hobby work,you really can not know the preasure that we went thru before the DRO's came about to know where your mill table was in relation to you mill cutter of boring head. I have not said anything about the spinel that your tool is in. These also deflect and move around either from being lose in the quill of machine head from use,and the bearings in your spindle also make up a large part of being accurate in holding the cutting tool on center and not deflecting when cutting forces are applied. Just gong down memory lane here. Less and less guys around who had to machine before DRO's were around. I also used tooling buttons,which you set suing height gauges and indicators. You would set these round cylinders on the part you wanted to drill or bore a hole in the exact center of the hole. Then set up the part in the mill or lathe. Indicate the button until it was in the center of the spindle where your toll was. Set up direct reading indicators on all moving parts of the table if you were in a mill. Then remove the tooling button and drill and bore your hole in this place. And hope that it did not move,and if so that your indicators would allow you to move it back on the center you wanted. Are there any guys out there who know what I am talking about with tooling buttons? I still have about 100 of them in different sizes-home made ones and also Starrette made ones.And one's over 100 years old that I got from my Dad. Keith -
Ahoy Mates I am just about to start on the main rigging of my Mary Rose and am excited about doing the rigging. Not only because I have been building the ship for over two years now and it's a welcome change,but that now after rigging 3 ship models in 3 years I really love to work on the rigging. From searching thru my books for how to rig different time periods and ship types to seeing how tight and consistent I can get my seizing.And seeing what everyone here is working on,and getting answers to questions here. And most important how even all the deadeye's lashing to each other. And with most builds there's another area and skill to learn and master. Like in diemaking after a while there's little that is really new,just different situations doing the same things. And trying to master what you are doing. So back to my question-do you like rigging? What do you like and what do you not. Keith
-
Ahoy Mates In what era did catheads start being used on ships? I have not been able to find out what time period they were put into use. Thanks Keith

-
Treenail detail option?
bear replied to S.Coleman's topic in Building, Framing, Planking and plating a ships hull and deck
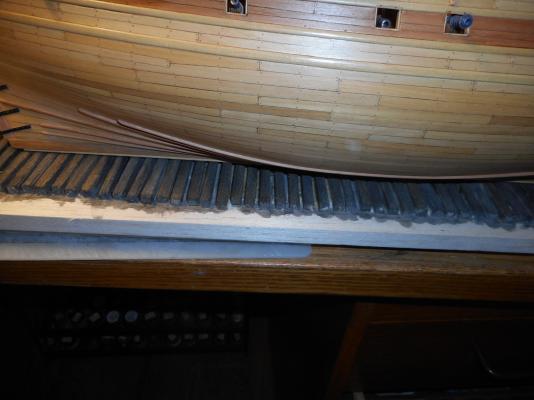
Ahoy Mates I drill out the hole then fill it with colored Titebond. I use a modified Chuck Passaro way. I color the Titebond with enamel paint-Modelmaster's and have no problems. I drill out the holes after the planking has been Dullcoted first. That seals the wood surface,which makes it easy to remove the excess glue-paint off the surface. I use the end of a xacto blade to force the mixture into the drilled hole leaving a small amount above the surface. You let it harden up for about ten minutes-NO LONGER,then file off the surface flush with the planks. Then repeat if the glue mix has shrunk into the hole. Try it out and see if you like it. I tried using water based paint to color the glue with,but it had a chemical reaction with the Titebond and gelled up the mix. I have used it on my Mary Rose build as the photo shows. I had to try out the color mix,after I sanded them down smooth I coated over with Dullcote,and it darkens them up a little. You just have to find out the right combination. If you let the glue mix dry more than a couple of hours or overnight,it's very hard to sand off the planks,even with the planks having been Dullcoted. The Dullcoted planks also allow the hole edges to be sharp edged without any burrs like uncoated wood does. The planking is boxwood and swiss pear. Try it out and see if you like it. Just another way of doing things. Keith

- 23 replies
-
- 12
-

-
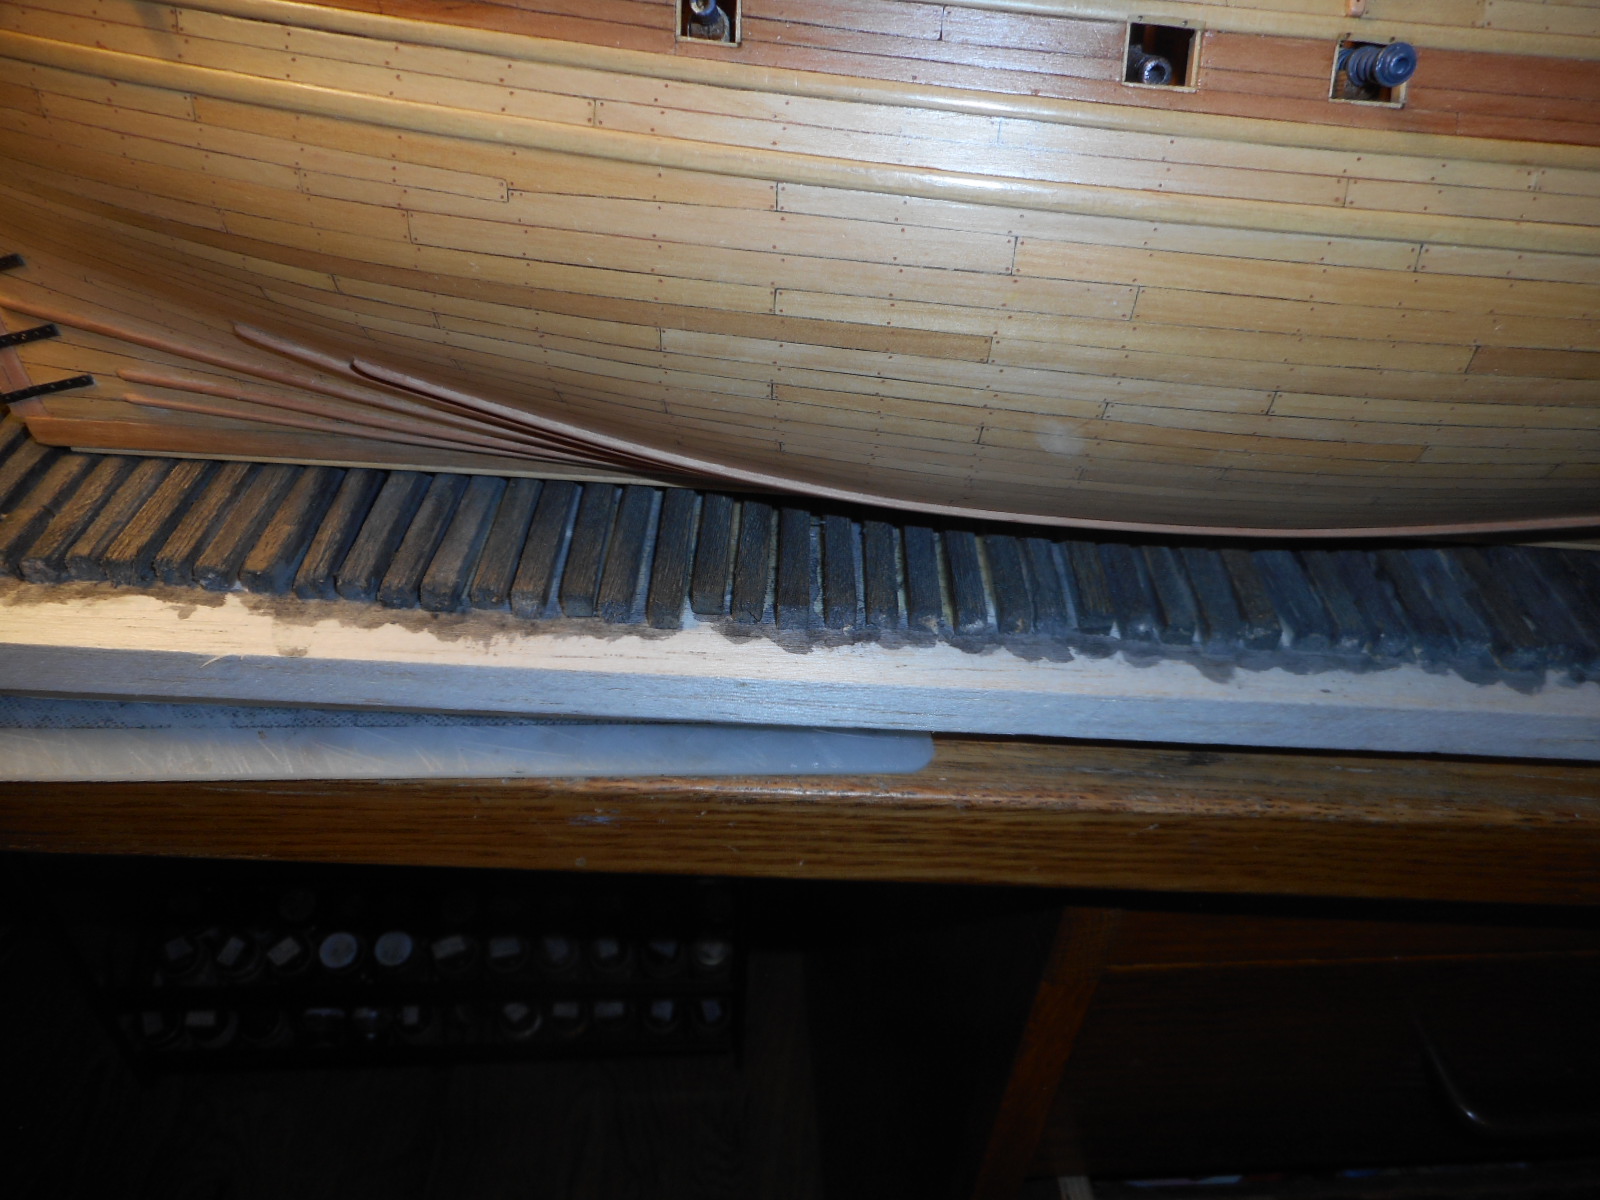
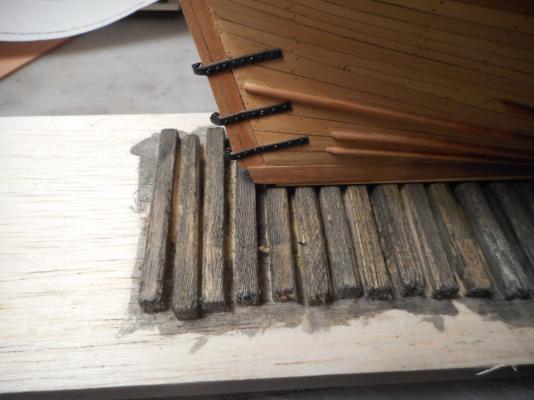
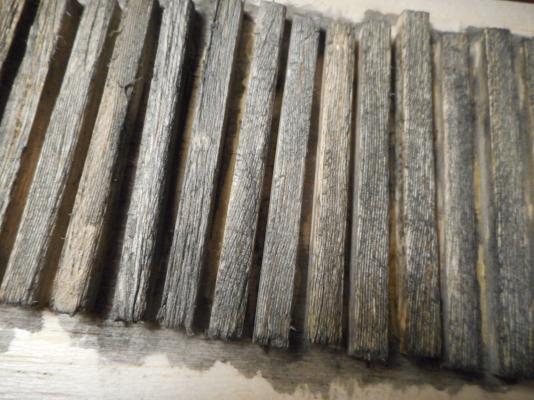
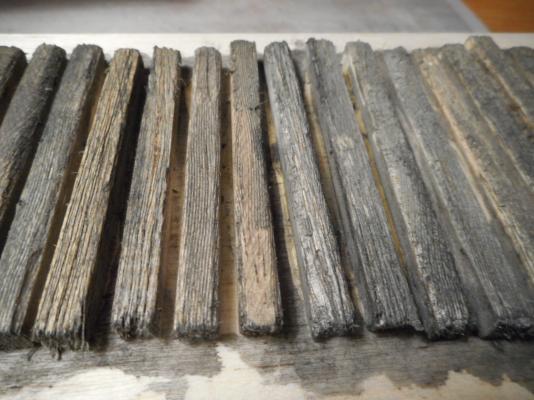
Thanks Mark for setting me straight on the types listed. Keel blocks it will be. Here's what I have made up today for the dry dock. Ties will be set with rock around them up to within 1/16" of the top of the tie's. They are 1/4" square balsa strips that I cut to random lenghts and then I added the wood grain and stressed areas to them. I painted them with a grey wash. The rocks-model railroad ballast will be brown and grey mixed. With the keel blocks and then the props will be added on outside the width of the base now for added width at a later date. I added the wood grain and distress to the ties with an xacto knife and wire brush. I had different harness of balsa strips,so they made the wash look different in color without having to change the wash color itself. Keith
-
Ahoy Mates It's the time when I need to decide how to display my Mary Rose model. I want to display it with the hull resting on cradles in a dry dock . Need to know where to look for examples of the type of cradles used in that era or near to it. Thanks for your help in advance. Keith
-
Hi Dave Get as wide of sheets that you can. I use manila file card stock to get the shape of the splied plank. Then I can transfer it to the sheet . Like has been said above you can nest them together. I start with the top box planks and then work my way down to the keel. That way the curve of the planks are each larger than the last one. And they nest very nice. Using the file holder material works great,and is cheaper than wasting wood trying to match the curves. Keith
-
Crew
bear replied to CalSmurf's topic in Discussion for a Ship's Deck Furniture, Guns, boats and other Fittings
Ahoy Mate Check out Red Box figure sets. Hobbyterra.com has them and also Hobbylink has some of their sets. I just ordered 1/72 sets of English Sailors 16th-17th Century. Check them out. I have ordered from Hobbyterra for over 5 years now. They are in the Ukraine. They always have great service,and send emails when they ship your order. Hobbylink in eastern USA is also a great place to purchase from. I will send you a message when I get my orders and let you know what the figures are like. I will be using them on my Mary Rose build in progress now. Keith -
Ahoy John My only concern is the MDF. It looks like it will be weak where the frames thin out on the tops. I have a hard time thinking that they will be strong eniugh when you start planking,but I guess that with the flat sides up high that it might not be a factor-hope it's not for you. I would hate to spend that much on a kit and have MDF for the bulkheads and frames. They are getting cheaper all the time,and where they should not.Just my opinion. Even tho it's hard to work with,I would prefer the hard plywood that Caldercraft has used. MDF is for Ikea and basswood bulkheads is for the birds. Too weak for my liking. Keith
-
Work station clutter
bear replied to Senior ole salt's topic in Modeling tools and Workshop Equipment
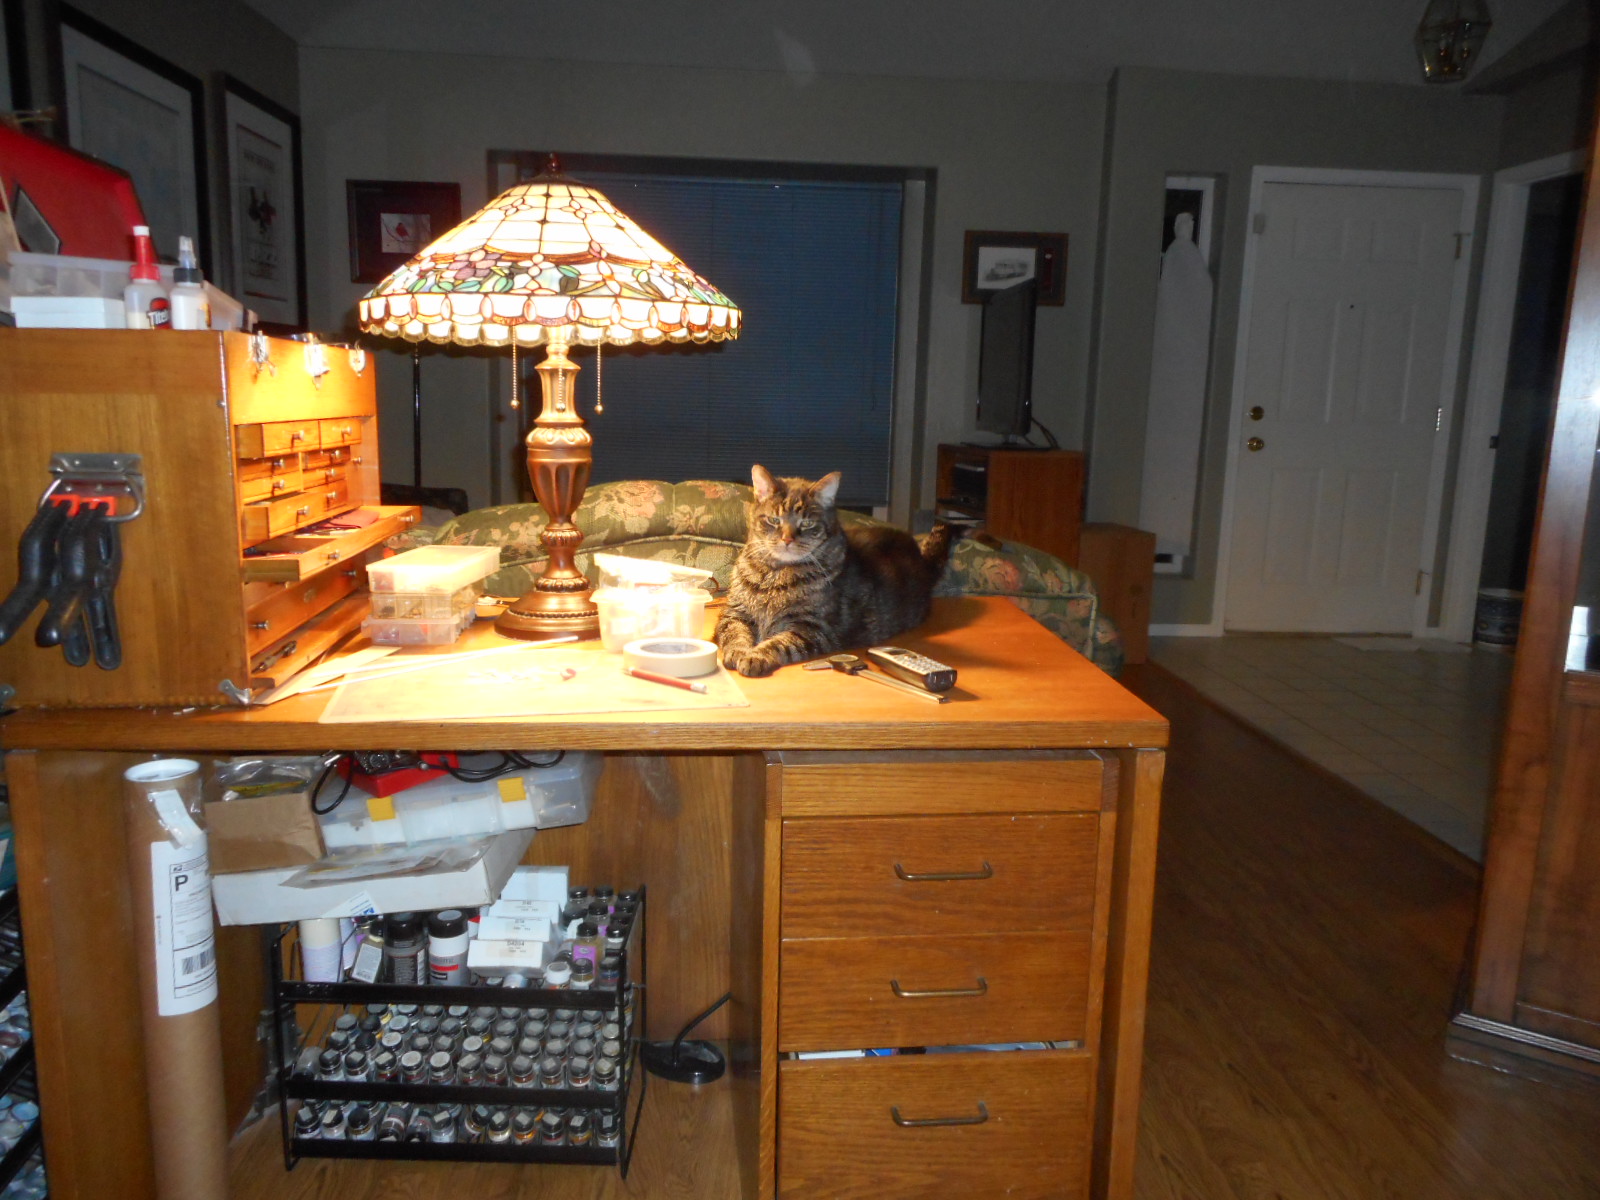
Ahoy Mates Here's my clutter that moves around and does just what it wants to do. It's called Sweet Pickels who is the shipyard Supervisor and Inspector of anything that looks or moves like loose wires or strip material,which becomes his prey. Keith
- 39 replies
-
- 10
-
-
Rivet decals
bear replied to MartinOwen's topic in Painting, finishing and weathering products and techniques
Hello Martin Try looking at the resin rivet decals for Rail roads from Micro Mark. They have the best value for what you get. They have two scales "O" gauge 1/48 and HO which is 1/87 scale. You get straight lines and round patterns and multi rivet line patterns. I have used them on my Accurate Armour's Flak LVCT in 1/76 scale.And my Revell 1/72 Flower Class Corvette along with the Little Ships PE and white metal cast detail sets. Keith -
Work station clutter
bear replied to Senior ole salt's topic in Modeling tools and Workshop Equipment
Ahoy Mates Here's what I have to fight for working room. Sweet Pickels. Just as soon as he hears me,he's right there getting as close as he can,laying on top of tools,stepping into Titebond,and stealing plastic strips if they are lose to play with or even better for him-my sanding sticks. He loves to grab one in his teeth and run away with it. But most of the time he just lays down and takes a cat nap under the warm light. He then snores when he falls asleep. He doesn't bother what I work on other than to rub against the ship now and then except for a rare time when he does grab something. Pickels is now 12 years old. I adopted him when he was 8. He's a great cat. Keith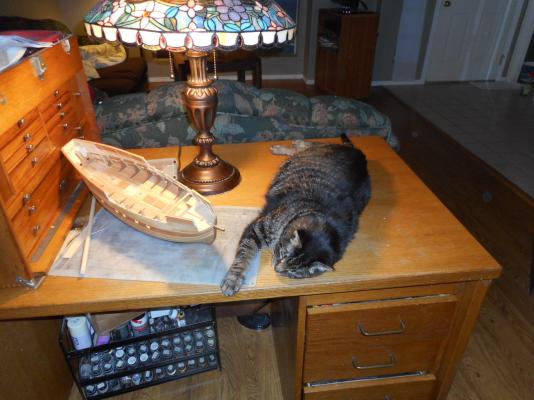
- 39 replies
-
- 11
-
-
finish
bear replied to Barbara's topic in Painting, finishing and weathering products and techniques
Ahoy Barbra Try Testors Dullcote on a sample and see how you like it. Keith -
Matt clear coat
bear replied to robbe33's topic in Painting, finishing and weathering products and techniques
Ahoy Mates Try Testors Dullcote Lacquer 1160 1 1/4 oz bottle. You can brush it on with a soft 1/4" wide brush. It dries flat and doesn't show any brush marks if you make sure that you put a wet coat on. Try it out,it works great. You can then polish it with just a paper towel and get a sheen to it to a gloss if you want. It shrinks down very flat-"I mean thin". You can put 4 coats on a surface and it doesn't show a thick build up like varnish does. It dries fast to the touch. I let it dry overnight before working with it. But you can apply another coat after it dires to the touch with no problems. I like it because I do not have to spray it to get a good finish and surface. Keith -
To spile or not to spile...
bear replied to fish's topic in Building, Framing, Planking and plating a ships hull and deck
It's like" to be or not to be,that is the question" Well I have done all of the methods of plank bending. I prefer to use a combination on mt building. Spliing is an art that you have to practice,and yes it does take wider material than is what is supplied in a kit. But as one who doesn't use the kit wood for other than first planking if at all,it's not what dictates how I build or plank. 99% of kit supplied planking wood is crap IMHO. I have spent more time trying to get a great fit by bending in the different ways listed than by spiling a plank. As to wasted wood,a lot of times I make up a pattern out of folder paper to begin with,and that way I reduce my waste by 90%. I can layout and trace the paper plank onto the sheet and then cut it out leaving enough to fit it into place. The next spilied plank is about the same shape, so it nests into place next to where the last one was. Just how many planks do you break using the heat and bend and other methods? And if it's short,what do you grab onto when bending? Keith -
The sad thing about the recovery of the Cairo is that it was complete when they discovered it back in the early 1960's but idiots tried to raise it out of the river without getting all of the silt and mud out of the hull and casemate before lifting it with a crane.The cables that they had around it tore it apart and it fell back into the river. Reading the book about how they mishandled it's recovery still makes me sick.Then what they recovered wasted away while they tried to find money to take care of what they had. All the wood rotted and warped beyond repair. Just like the crime that's happening now with all of the naval ships on display like the USS Olympia. So much for taking care of our history. ISIS would be proud of what we are not doing to save it right now. It's too bad that Zukkerburg and Gates do not put a small amount of their money into saving some of what made it possible for them to be able to have done later in time. At least the Cairo has been displayed in it's present form for all of us. Its great to walk inside and around it in person. I did back 20 years ago. And measured deatils to latter build a model of it. I measured all the armor plates and rail road rails that were used for armor. Keith
-
If you want to see another set of boilers from the 1860's try the Vicksburg display of the Ironclad Cairo that is now on display. They have the boilers in the City Class Ironclad on display with the other recovered parts set up . Keith
-
Ahoy Mates I use Testors Dullcote Lacquer 1160 and brush it on. Dries fast and shrinks down to nothing. Seals the wood and can be lightly sanded to remove any fuzz. Doesn't raise the grain. Try it out on some sample wood sections to see how your other paint will stick to it. Great points are it's clear,flat and doesn't add any thickness like pigmented primers do. So if you want the planking lines and wood grain or other details showing threw the primmer,this is great to use. You can brush it on without any brush marks showing when dry. Like I said try it out as for combinations of paints over it and what wood you use it over. Keith
-
Ahoy Mates Have a question concerning ships ladders. Was there any use of a rope next to the ladder used as a handrail ? And if there was,what time period's were they used in? Thank Keith
-
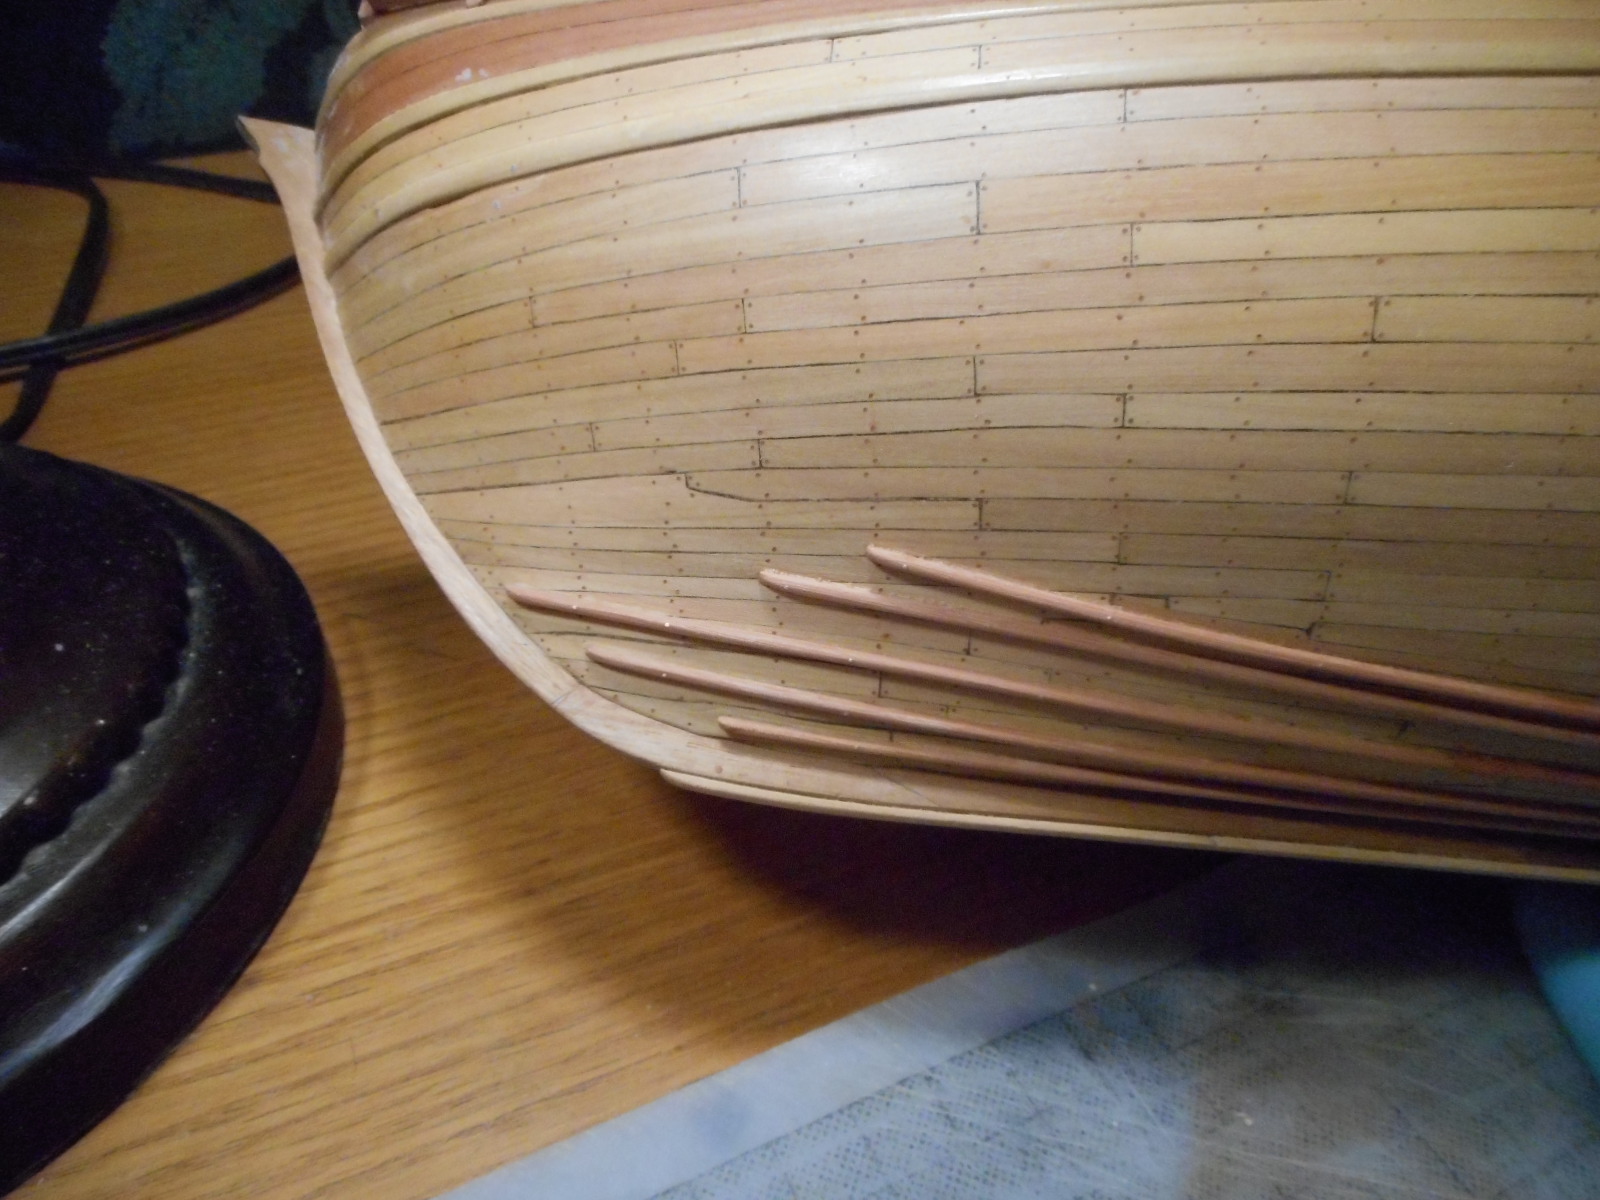
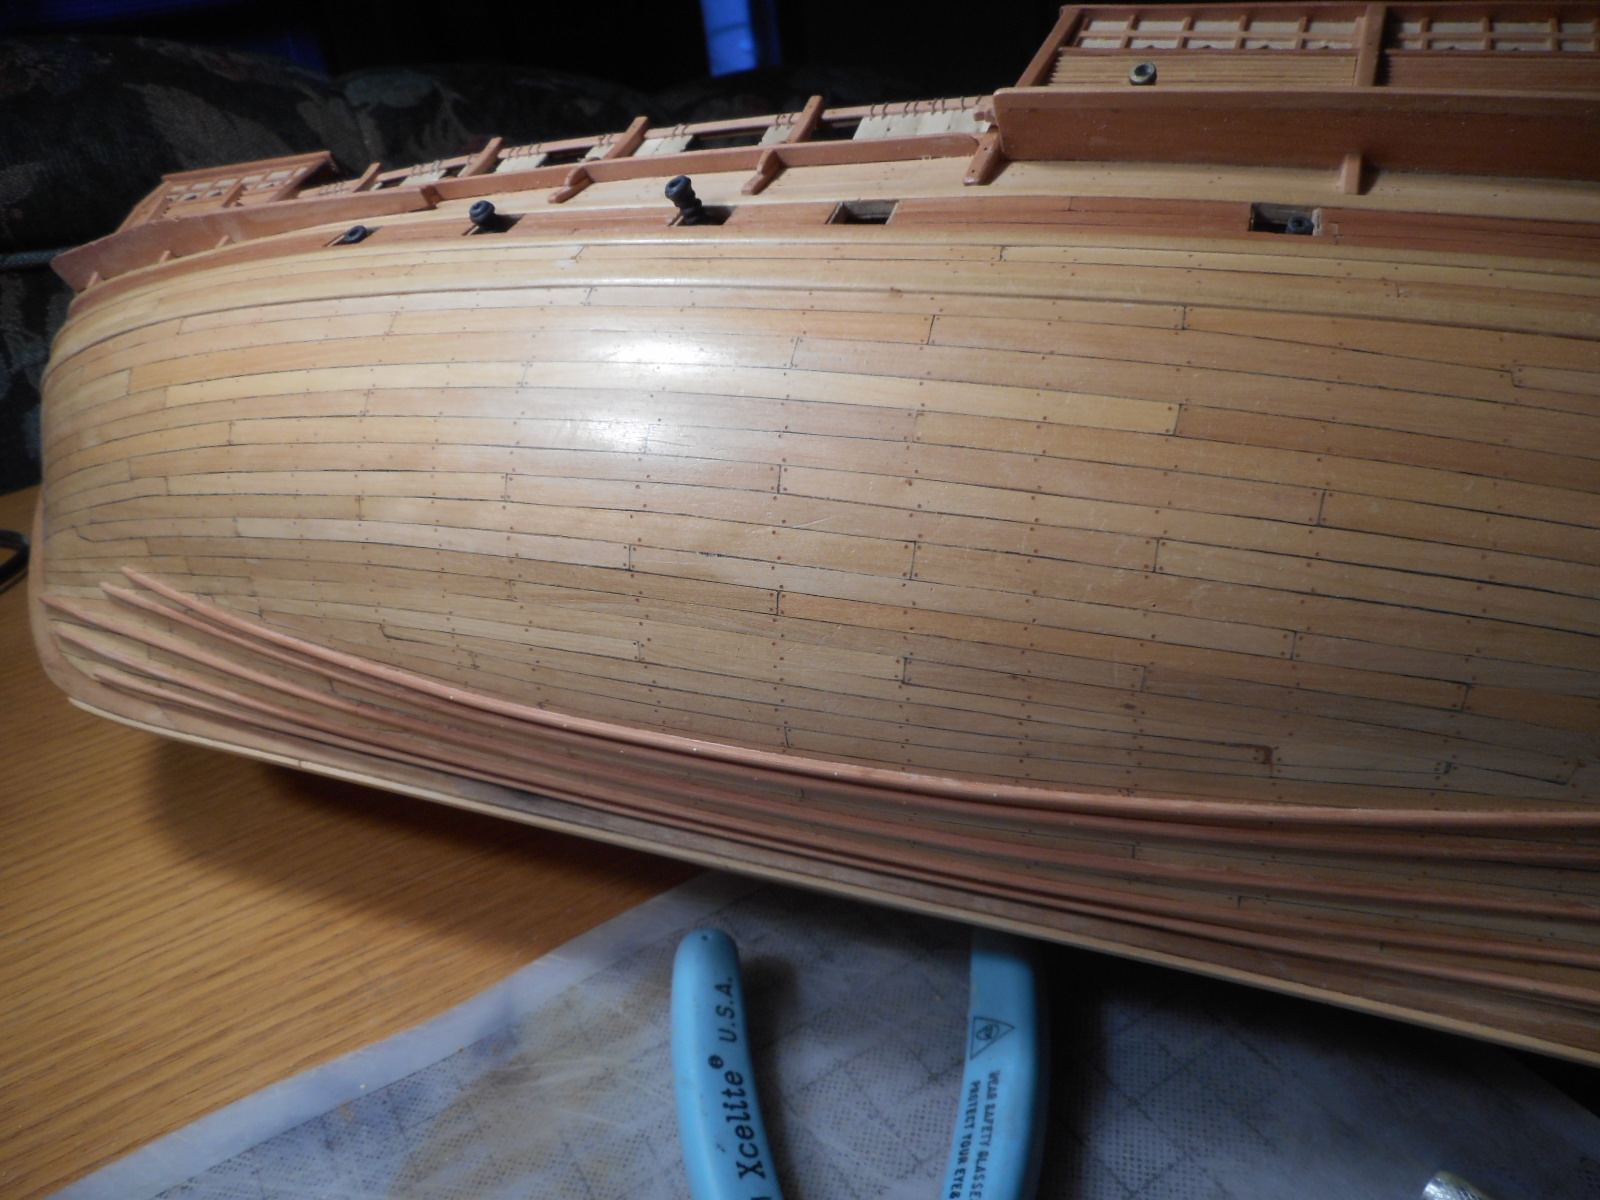
Ahoy Arthur First you need to do some samples on a test section with the same wood and finish on the hull,then take some sample copper plastes. On the back side of the plates,rough them up,with either the side of a small file or diamond file. That will give the glue something to hold onto. On the hull ,I would rough it up also. I use either the edge of a file,which I scrape across the wood at an angle to leave at groved surface-just like what you would see when a tile setter spreads the glue with a notched trowel. This gives the glue a place to hold onto the wood. Try this out on a couple of samples and then do a "pull" test on how well the glue holds the copper onto the wood hull. See how well they hold onto the hull by prying them off. You might have to spend some time getting the right combination,but it's well worth the time. The main thing is-two smooth surfaces do not leave anything for the glue to hold onto. And since the copper is smooth to begin with,it needs some roughing up- not enough to distort the plate,but something to hold the glue. I ran into this when I was making some plywood from oak veneer and basswood . The veneer had a cloth backing and the basswood was smooth. I used Titebond the glue them first without doing anything to the surfaces. When the glue dried,I found out that it did not take much to peal them apart. And since I was planking with this combination,when I bent the plank to fit the hull,almost 80% of the planks that I had made pulled apart. So I then roughed up the mating sides that would be the glued surfaces. I roughed up the basswood with the edge of a razor saw,by pulling it across the plank surface.Which left the groves of the saw teeth. On the cloth backing of the oak veneer I scratched up its surface wuith the piont of an exacto knife blade. After that I had O problems with the tow different materials pealing apart. I now do this roughing up when I am planking a hull . Let me know if you try this,and if it works for you. Keith
-
Ahoy Mates What type of joint should be used or types for 90 deg. corners of top railings along the hull . Would it be a butt joint or should you have a tongue or other type of interlocking shape? Time period would be 1600-1750 English warships. Thanks Keith