HOLIDAY DONATION DRIVE - SUPPORT MSW - DO YOUR PART TO KEEP THIS GREAT FORUM GOING! (Only 64 donations so far out of 49,000 members - C'mon guys!)
×


Kevin
-
Posts
7,009 -
Joined
-
Last visited
Content Type
Profiles
Forums
Gallery
Events
Everything posted by Kevin
-
 wonderful work and congratulations on her completion, i will follow you into the dark side with many returns to the kit side as i bring the Victory towards a finish
- 1,279 replies
-
- 1
-

-
- agamemnon
- caldercraft
- (and 1 more)
-
£359.00 thats a lot of money but the reviews seam ok, in fact i dont see a bad one, but thats would be the HMS Druid money used up - lol oh the dilema
-
wife has suggested a hegner muticut 1
-
i think i have found the problem, i was just out playing with it, and it well, packed up on me, pre empted by some smoke and a bang
-
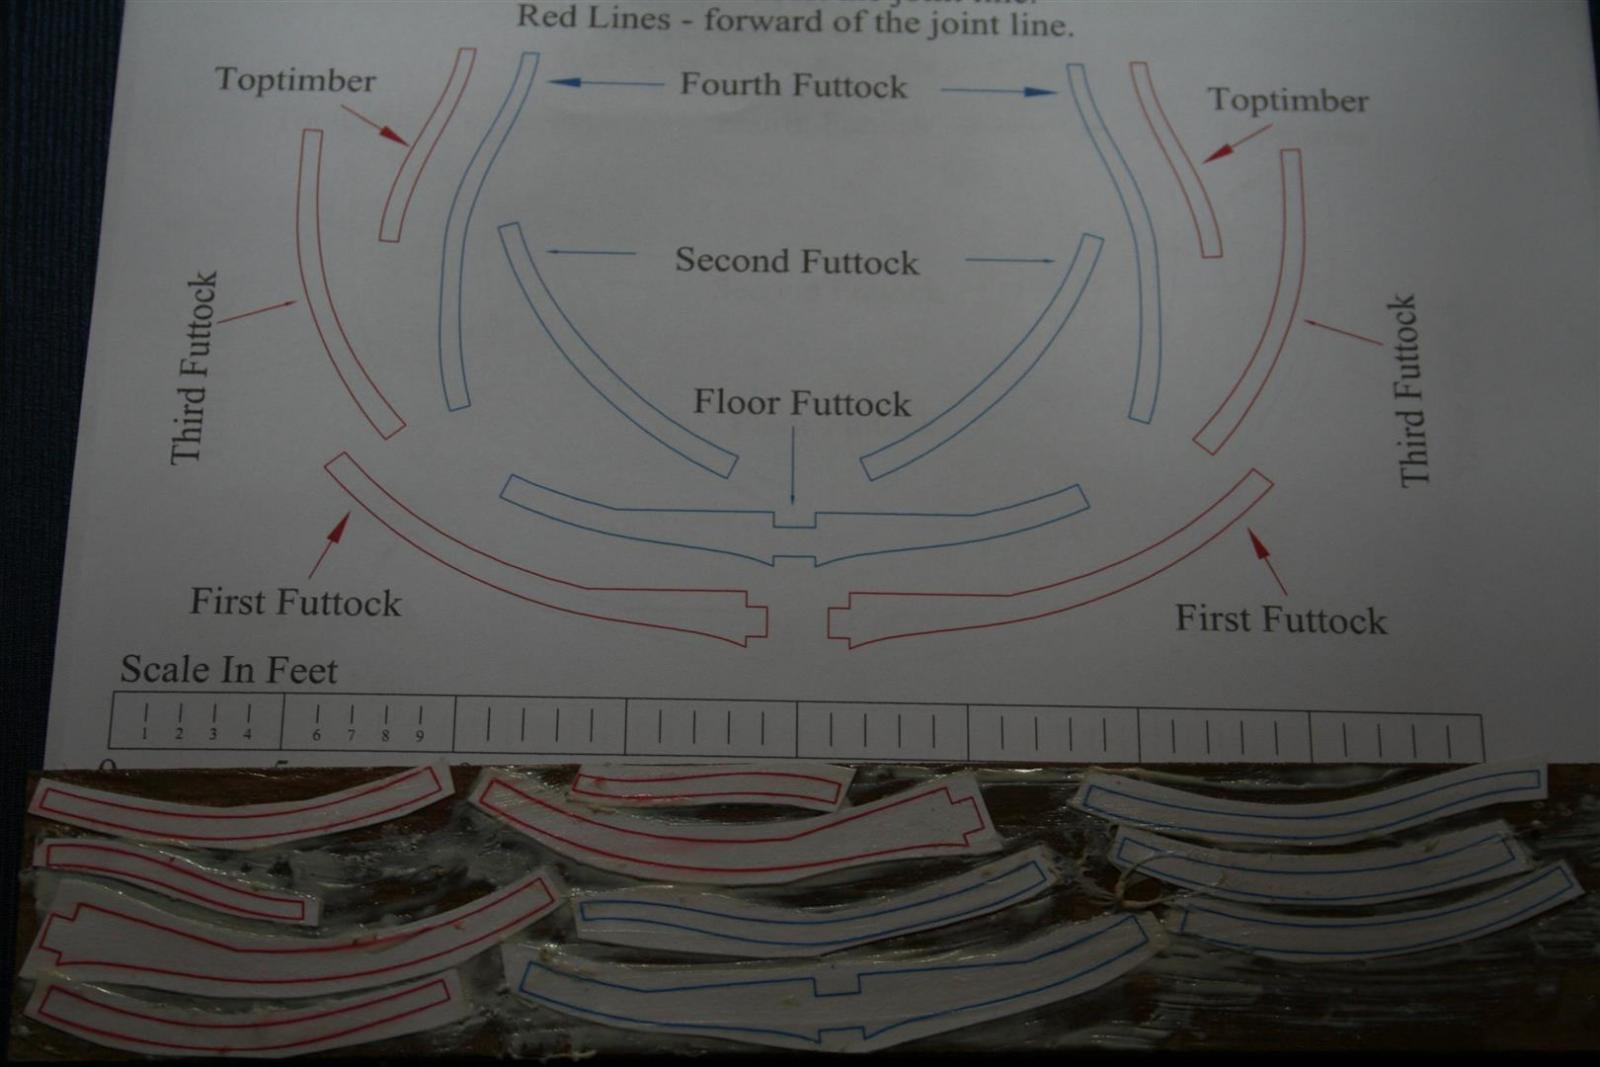
Nigel i have no confidence in the scroll saw, new blades in it and adjusted to be taught- it still keeps snagging the wood i did the initial seperation of all the parts and then went around them again leaving a lot to sand, which i did the same way as you, Next weekend i will try and cut along the blue/red lines and see if in the mean time get hold of an alternative scroll saw
-
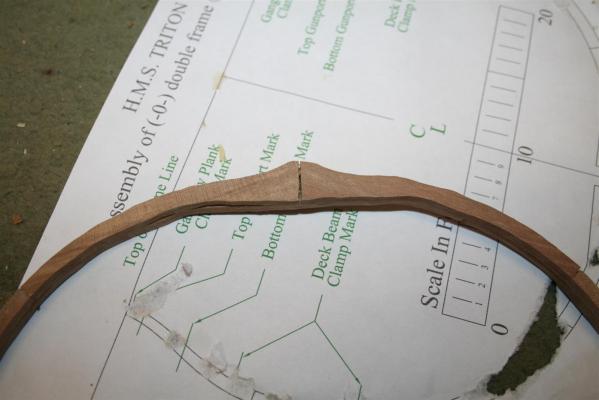
well i give my self 2/10, one of them for being a sunday too many big gaps,i need to improve a sanding technique, what a great day, and looking forward to Lewis winning the F1 race will make it just perfect

-
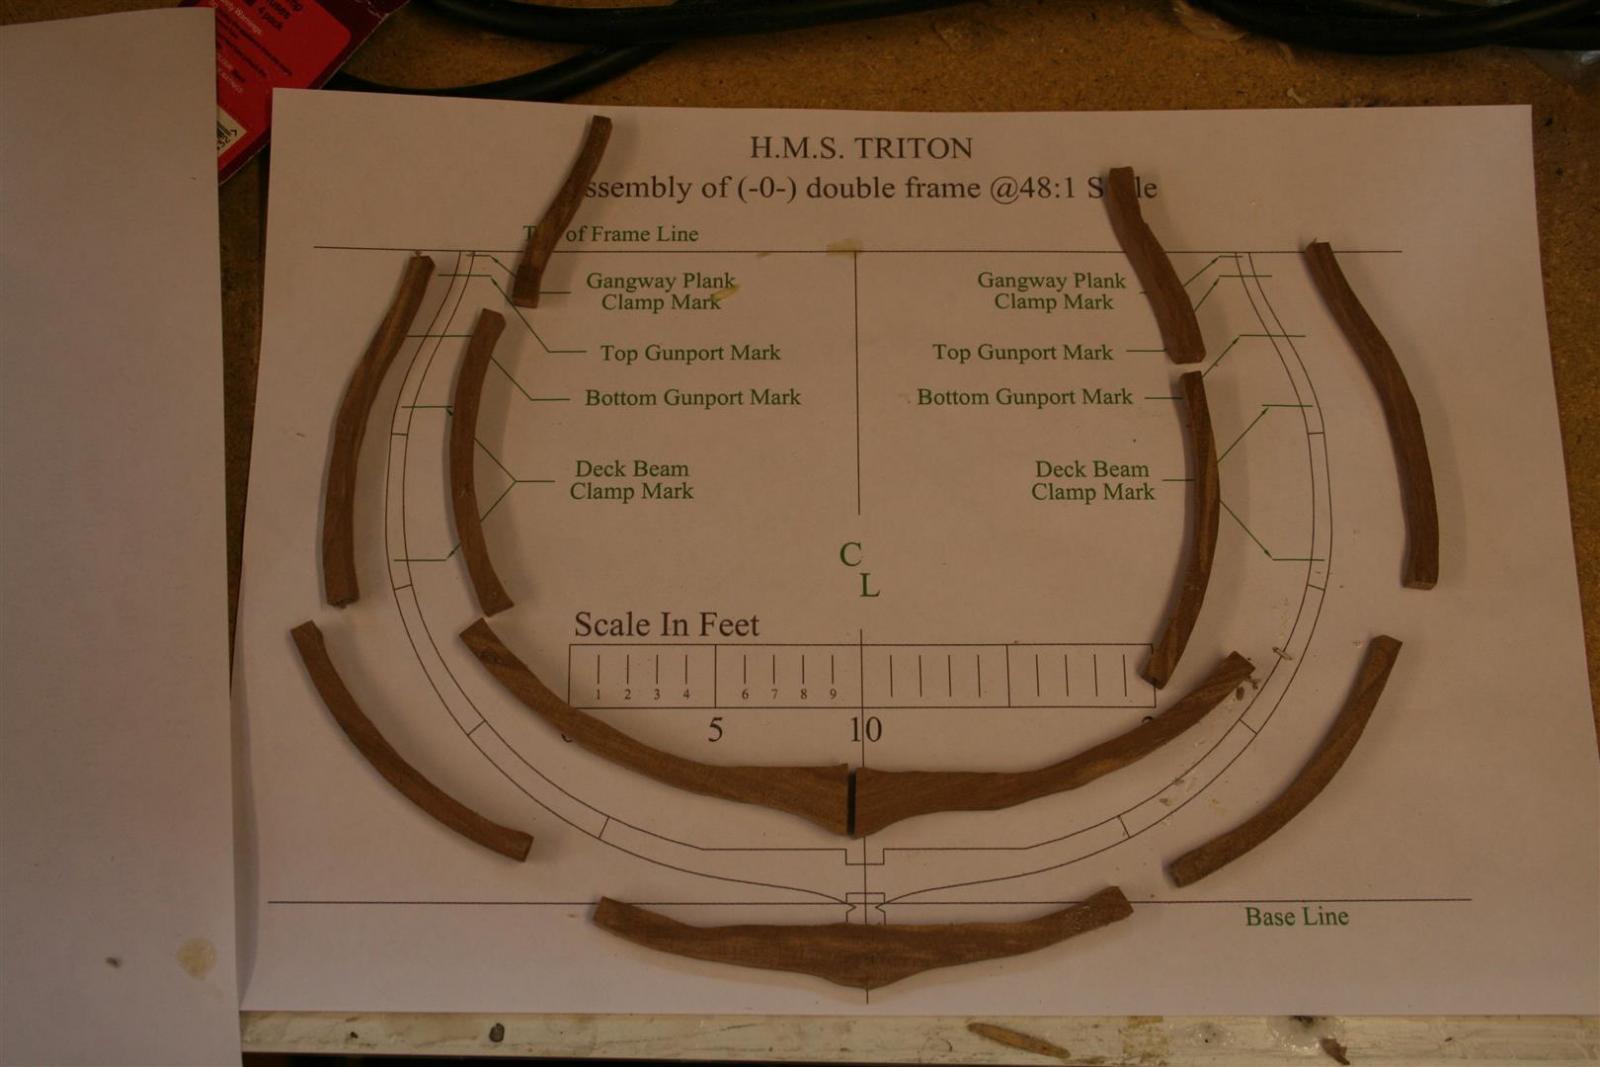
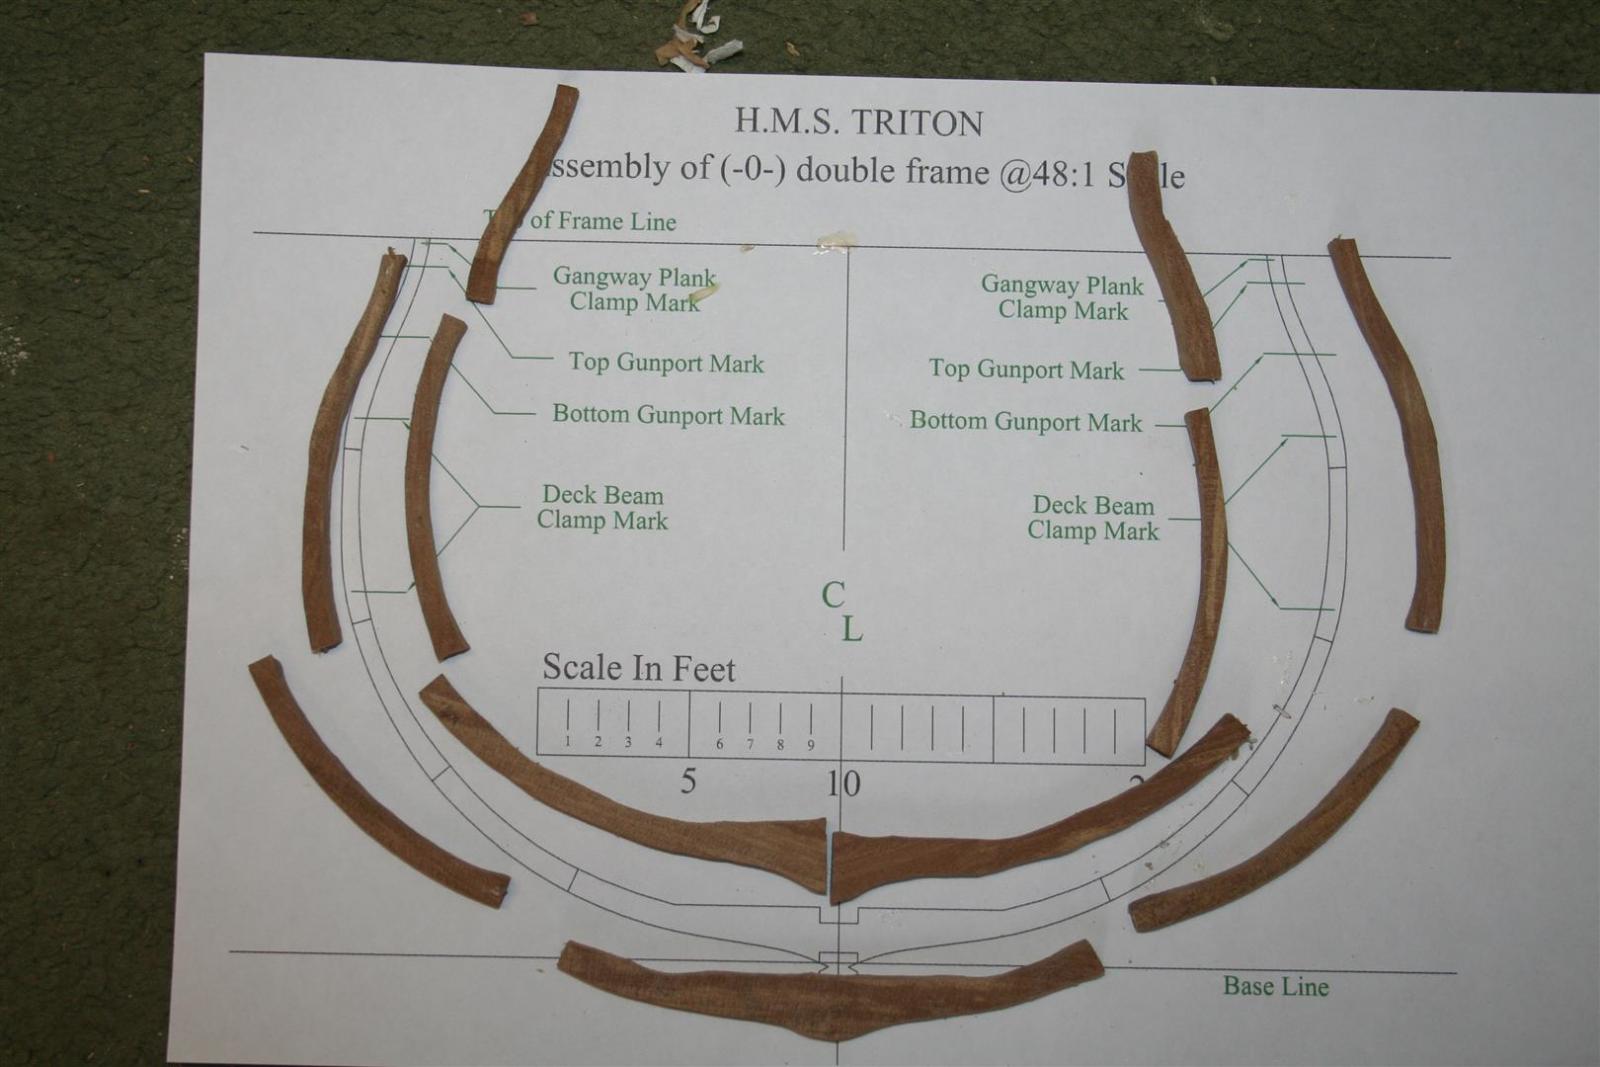
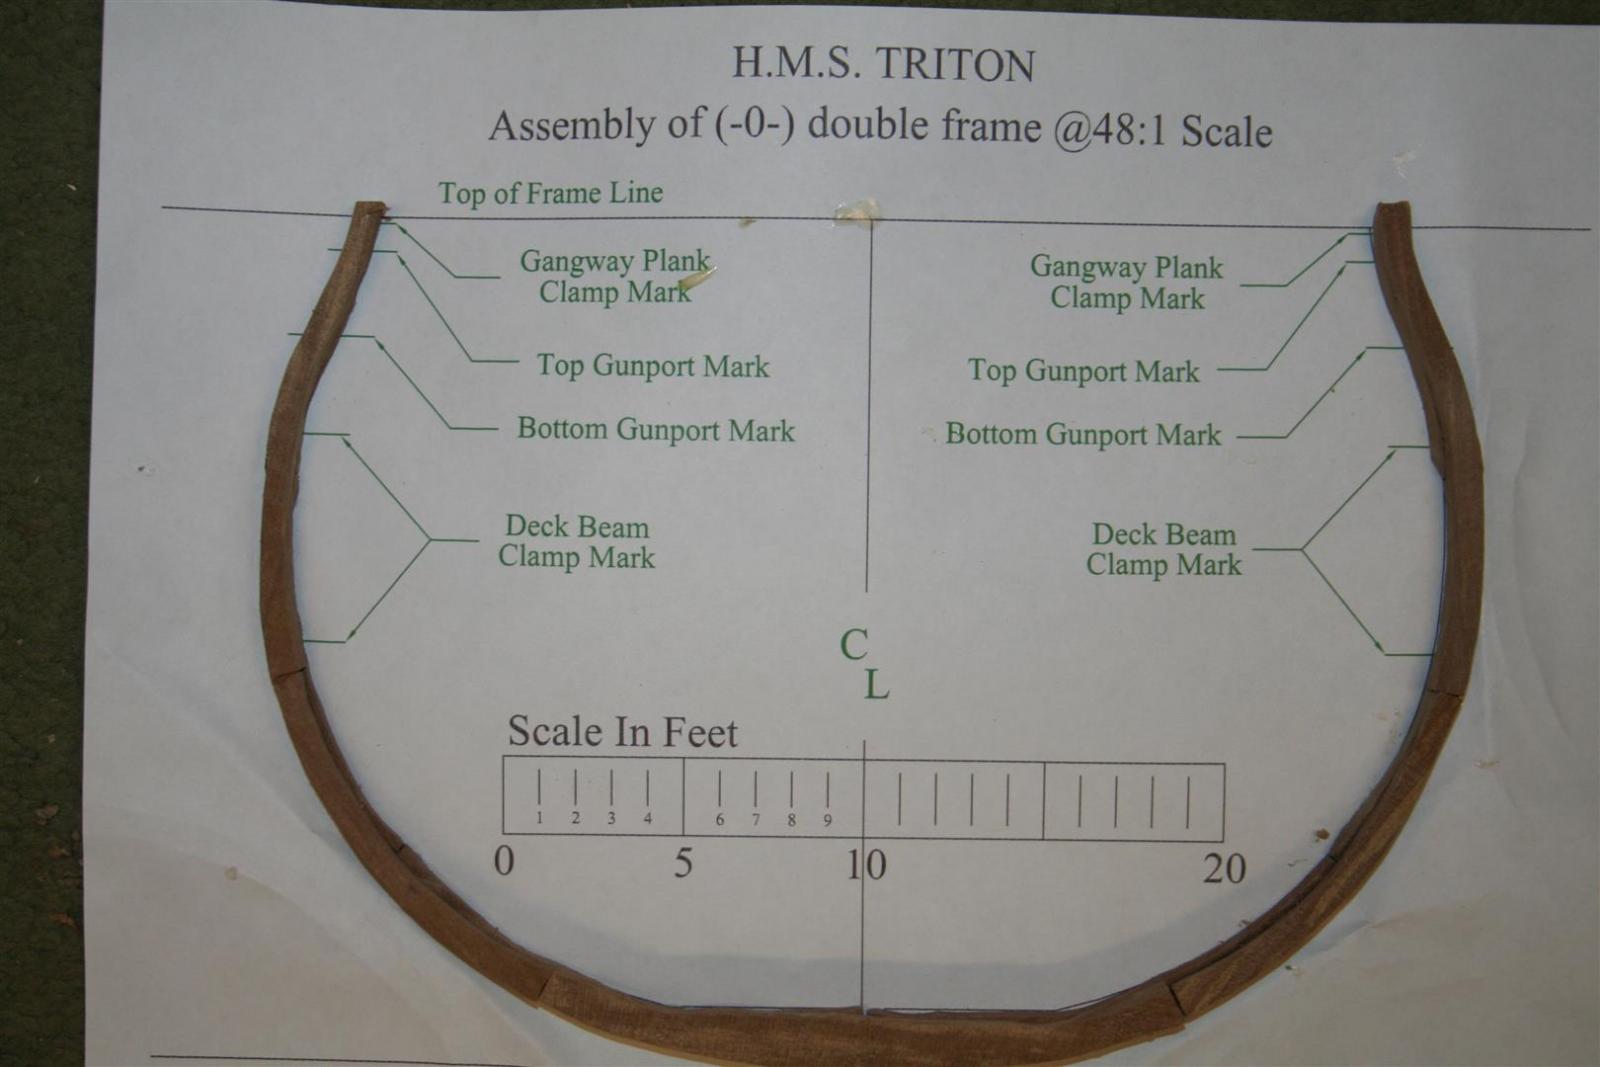
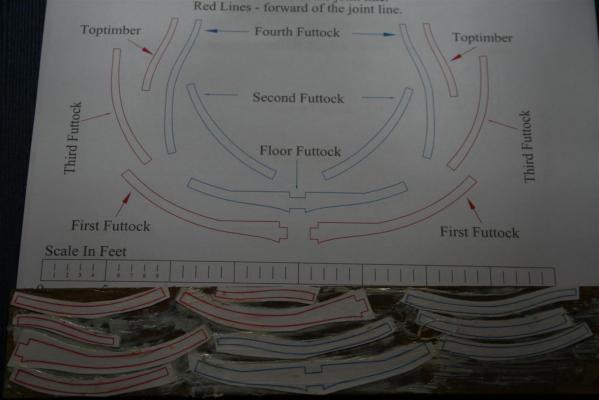
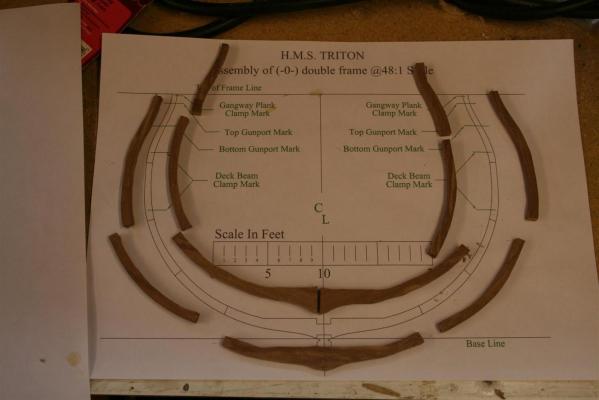
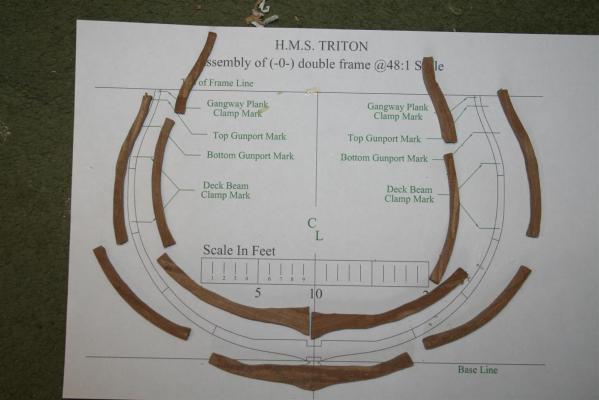
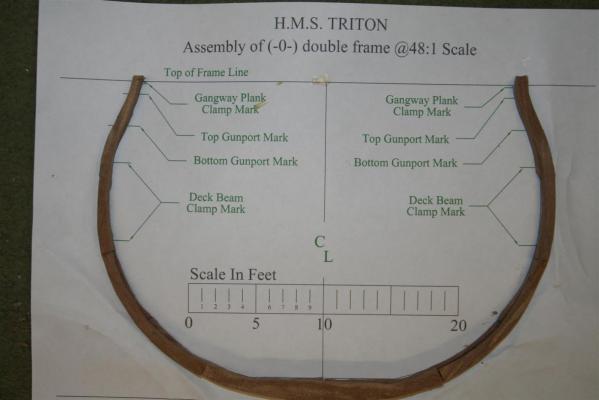
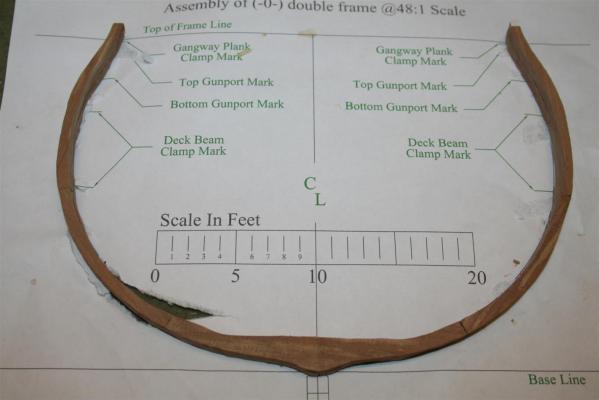
Nigel Thankyou its a steep learning curve for me, kits have everything i want, (lol apart from not wanting a kit) so far today i have printed the plans of frame 0 and then cut out the 11 individual bits cut my Pear down to planks of 50mm x 5mm used copydex to secure plans to the pear learnt how to tune the scroll saw and had an attempt at shaping all the bits - been my biggest headache so far within a few hours i will have made frame zero (not very well) but as stated before i am teaching myself how to do this, next weekend i will do it again and hopefully be better
-
im having fun, but not doing so well, i will post some photo in a few hours
-
Fantastic work and I am here feeling very intimidated about starting the section build
-
its ok Mark i have a couple reserved on the front row, room for one more (who wants to be my friend)
- 456 replies
-
- 2
-
-
- finished
- bomb ketch
- (and 2 more)
-
thank you very much
-
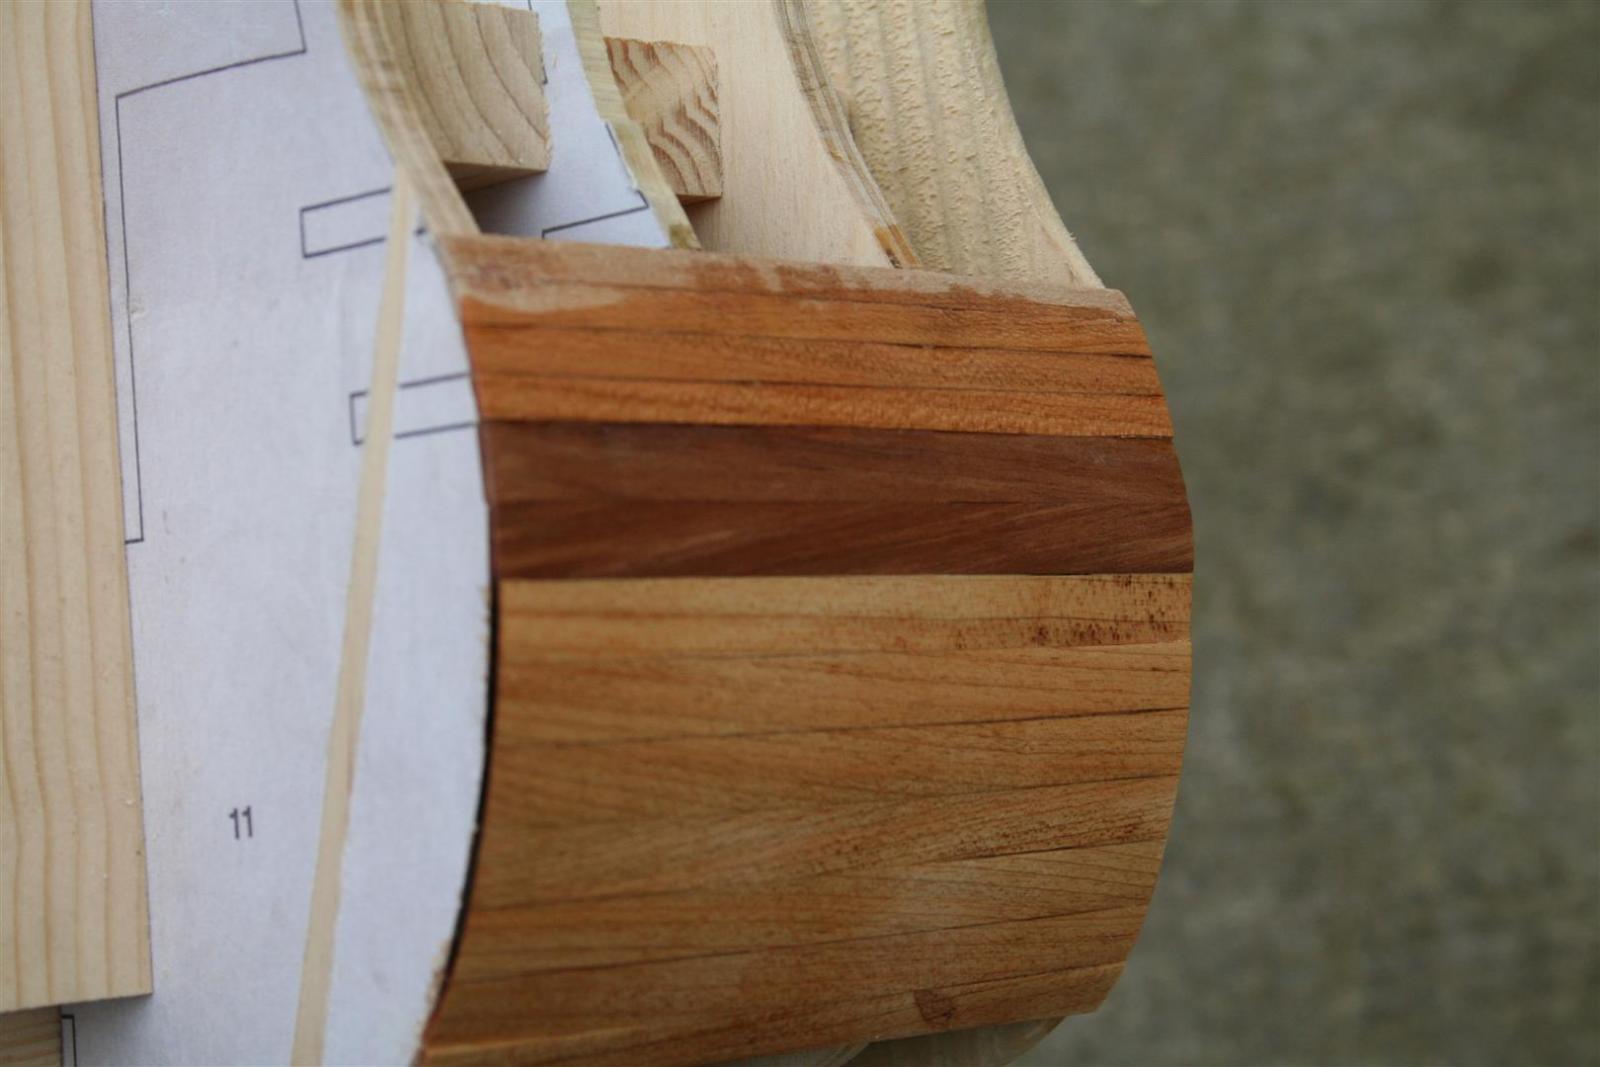
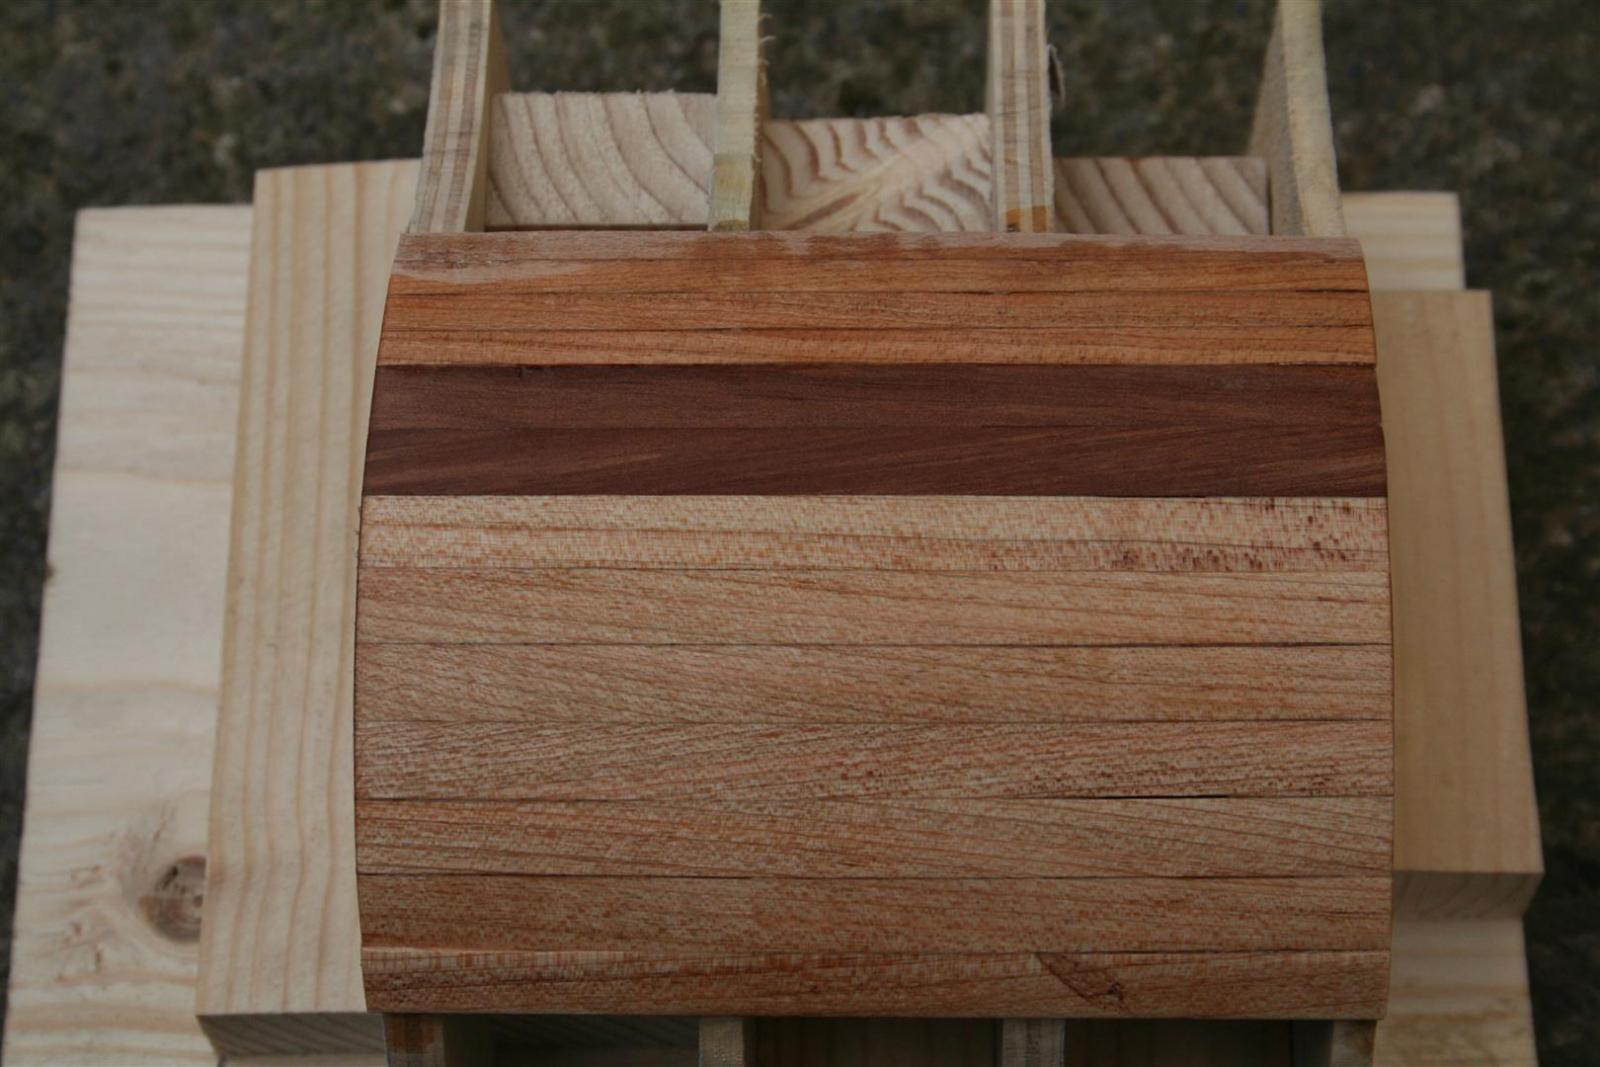
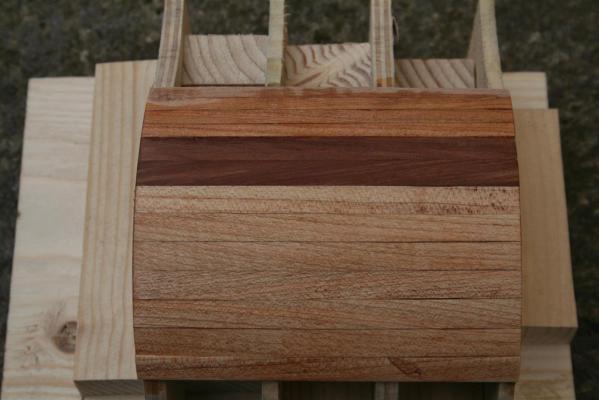
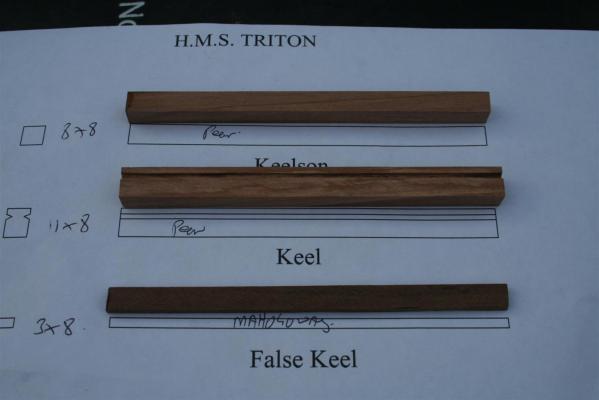
Top Pear Middle Cherry Bottom Maple at this stage it was dampened down - post sanding, i dont know what varnish to use, or if to try tree nailing it before
-
NO not yet
-
Well a lot more learnt today regardless as to weather the wales are in the correct place or not i did 3 sections of planking in 3 different woods to see any colours i preferred the thicknesser i am using is completely of calibration, when putting through one side is continually 1mm thinner than the other so the planking is not working very well my chamfering need to improve, to many gaps stop using c/a glue but considering no plans or anything to go by - i am well happy

-
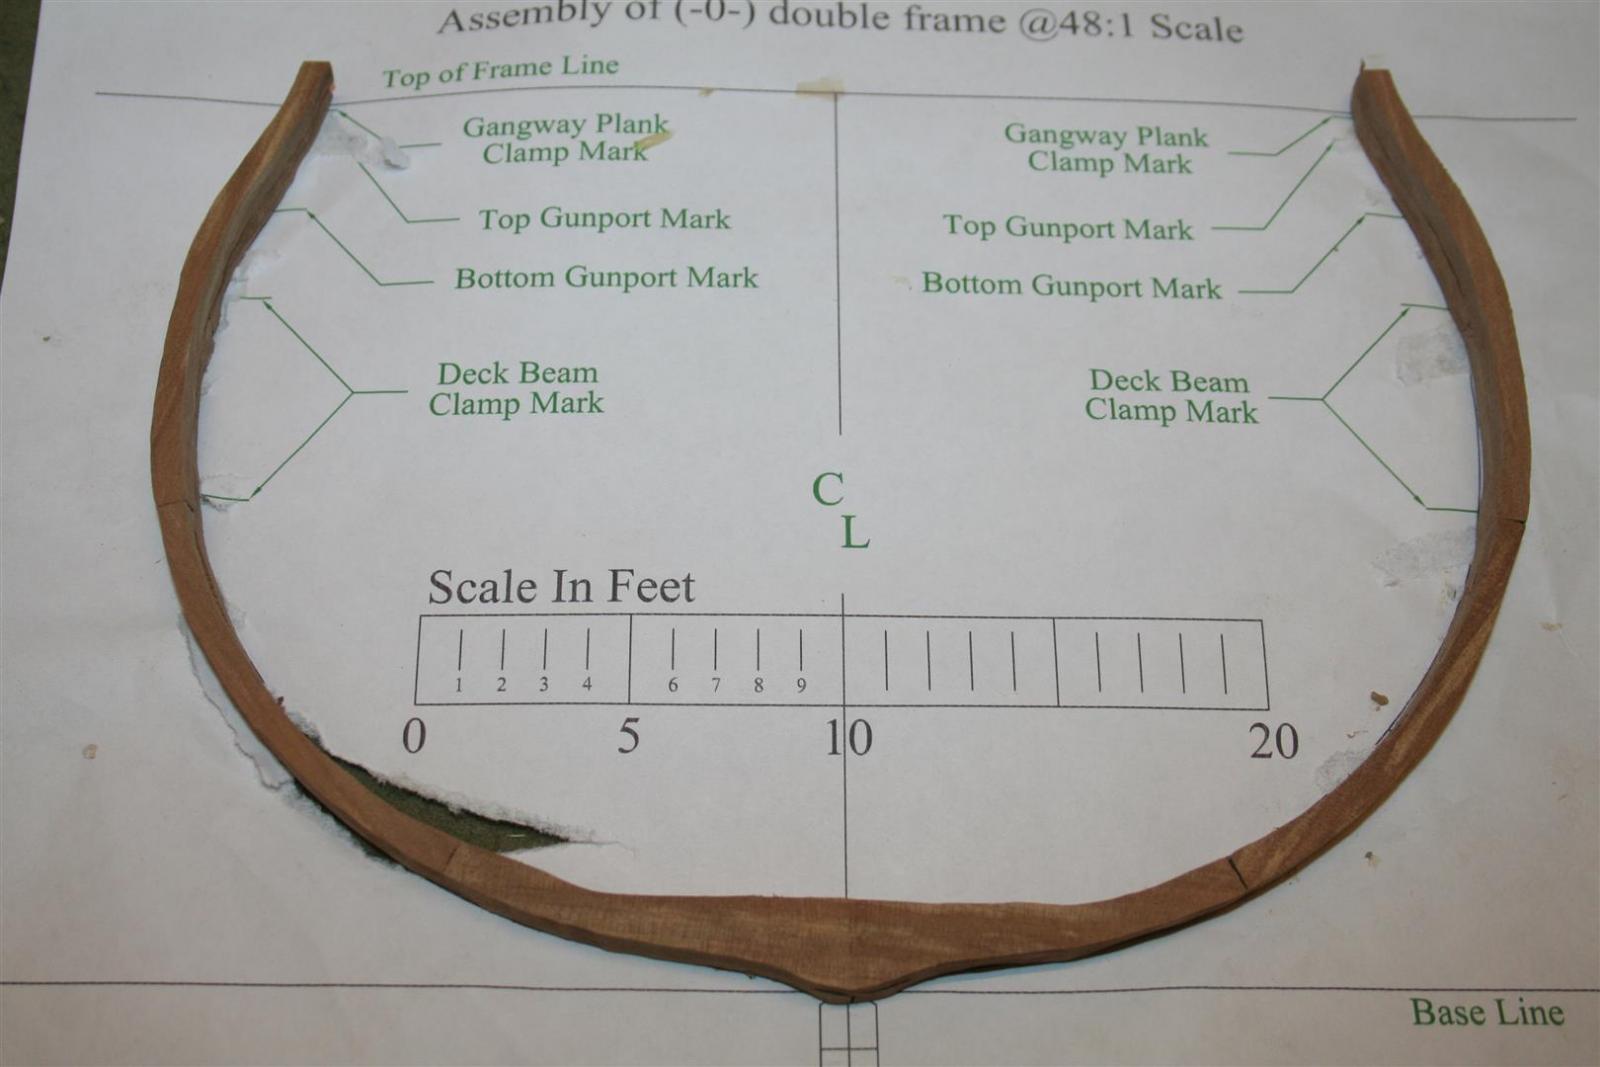
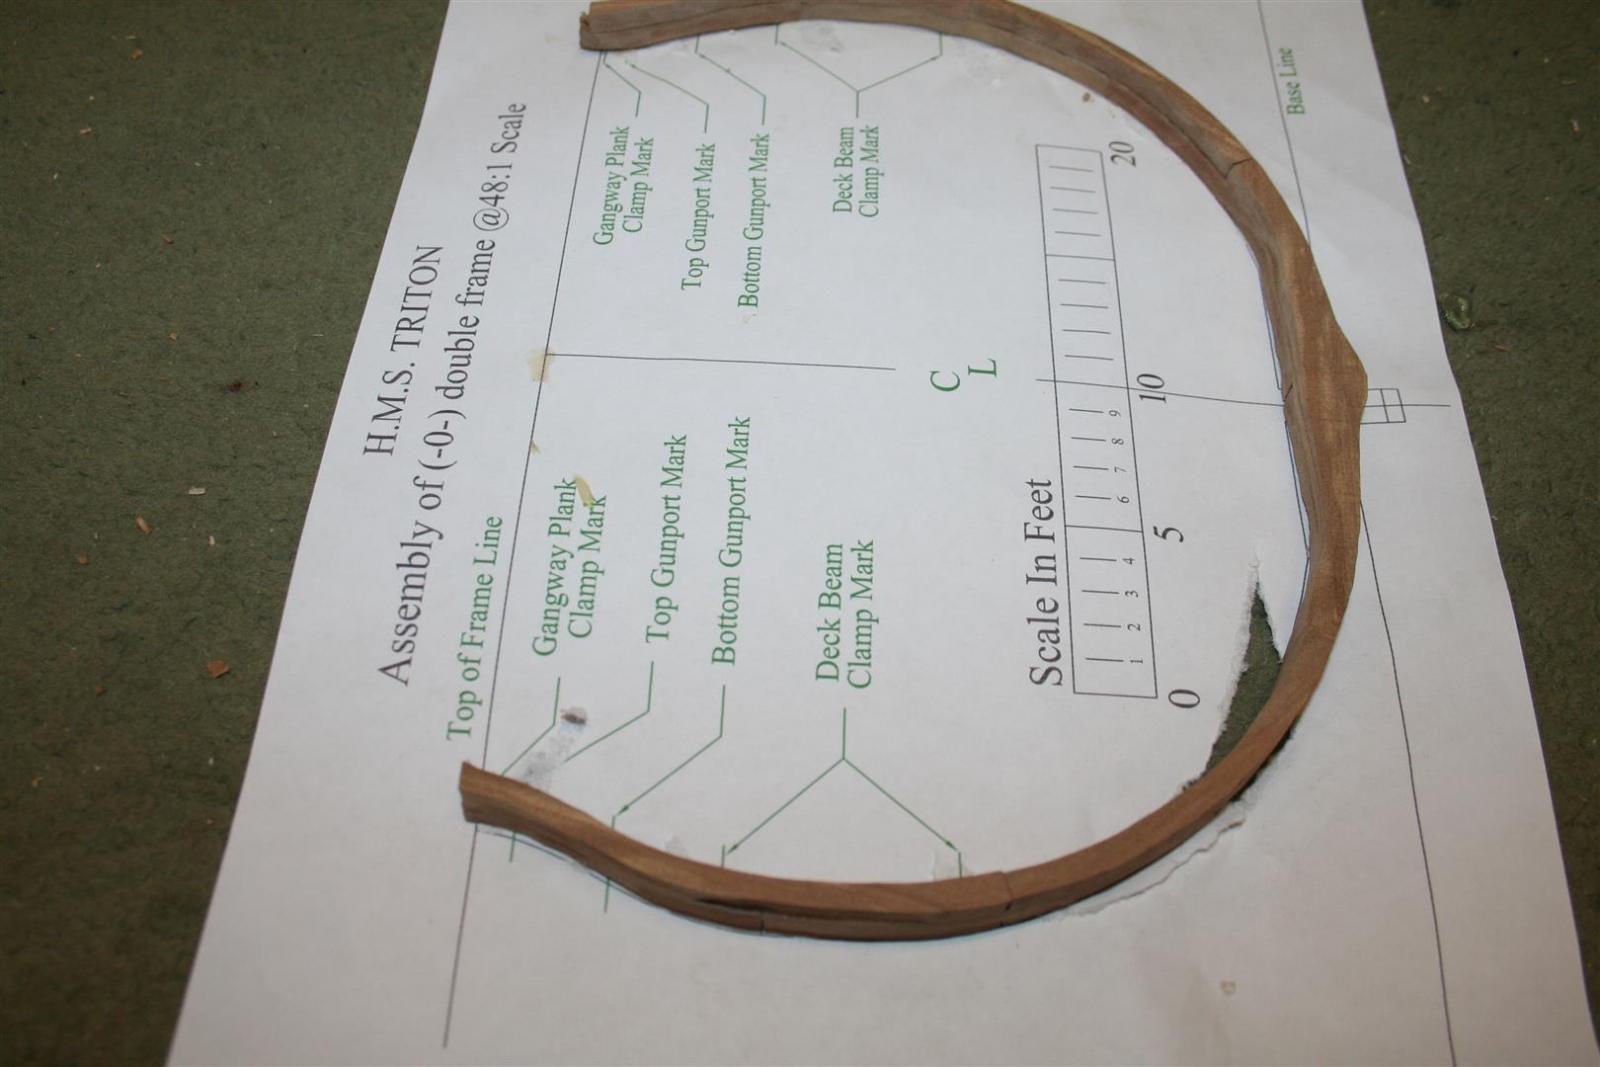
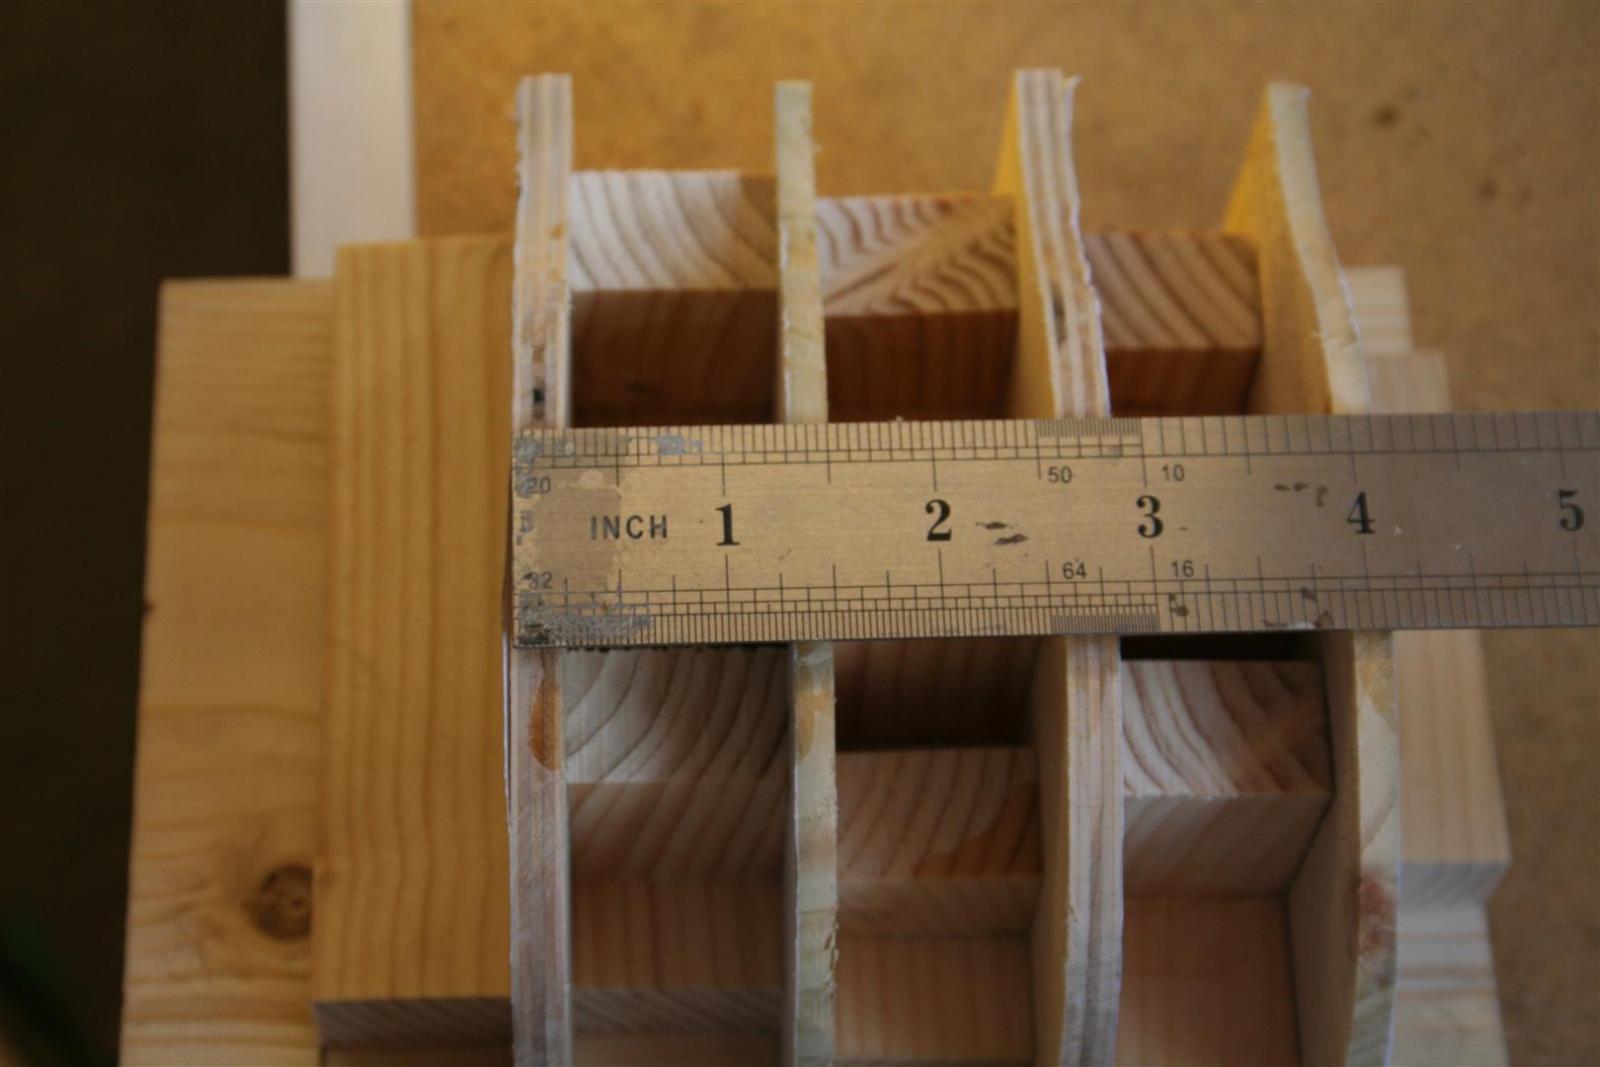
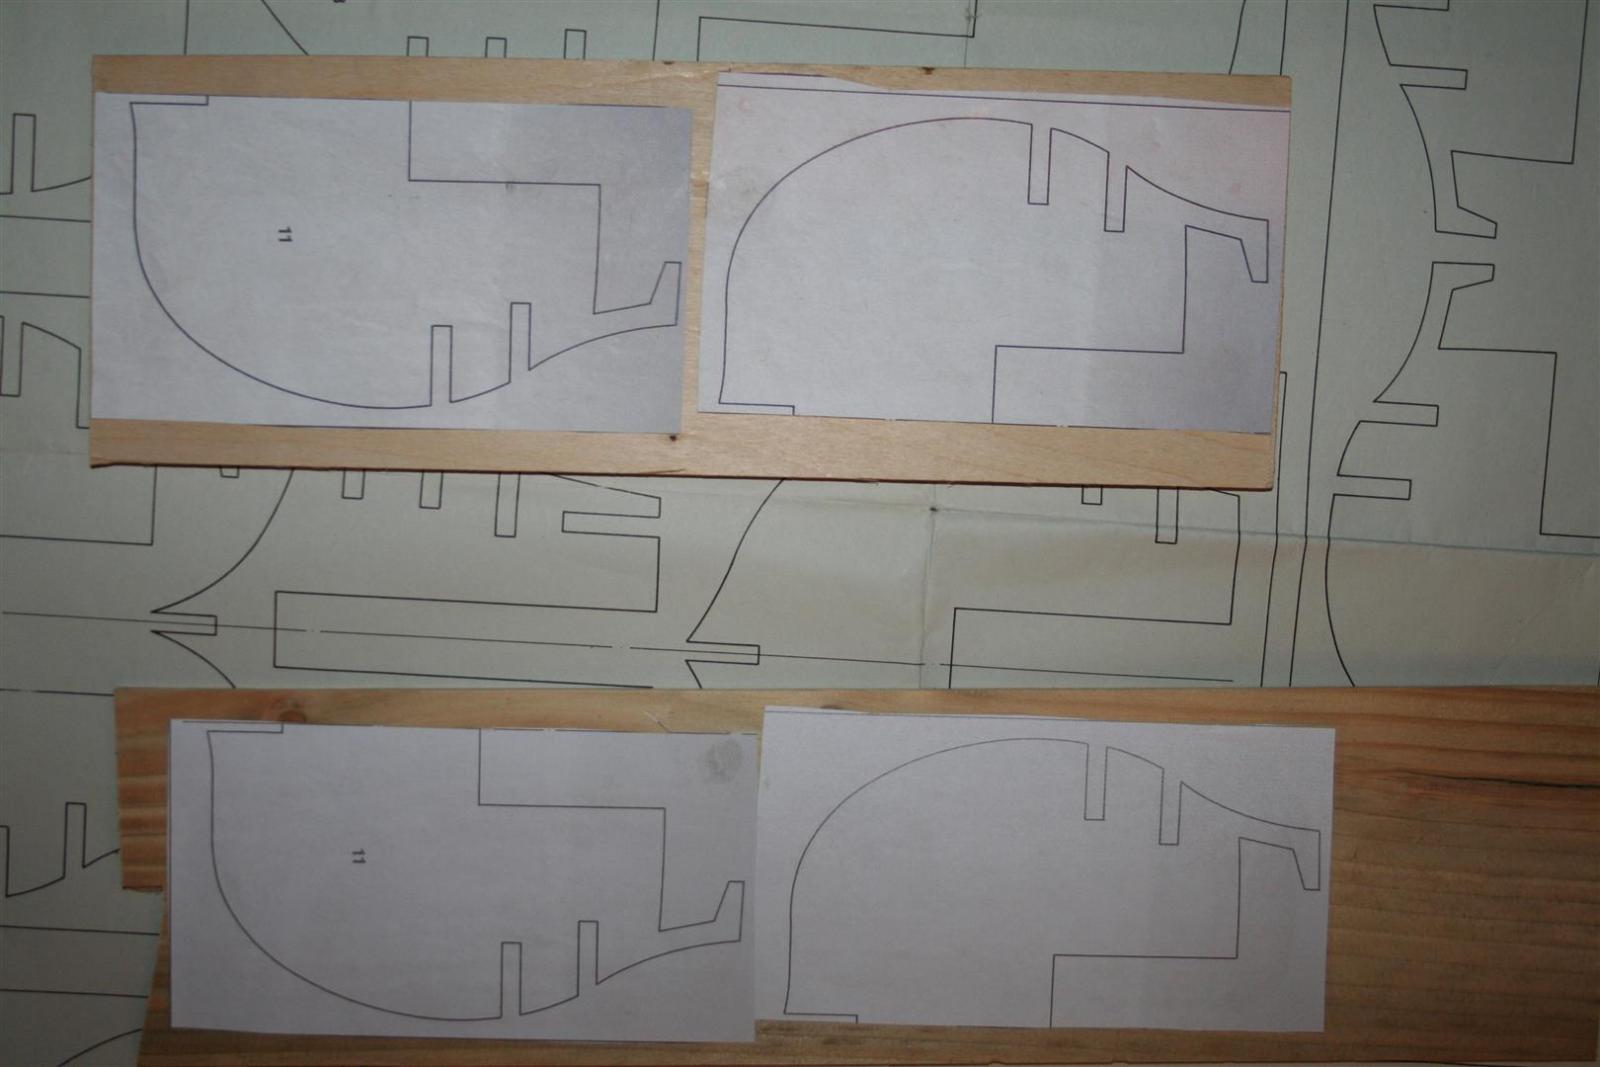
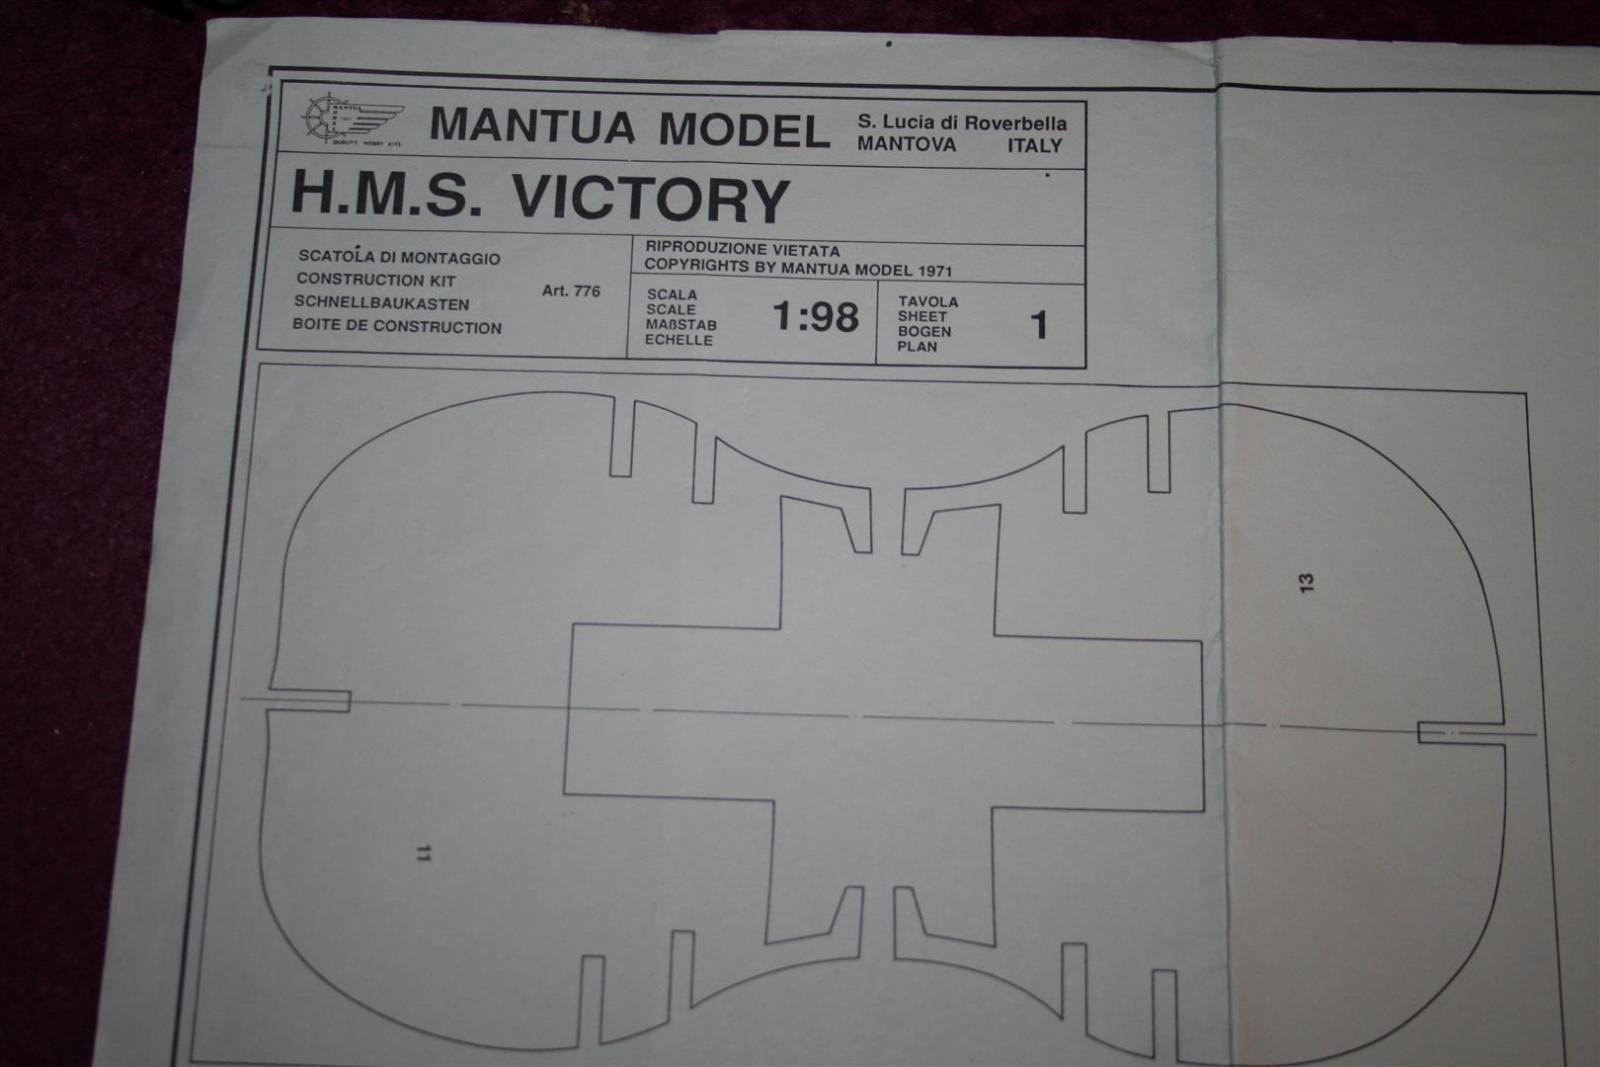
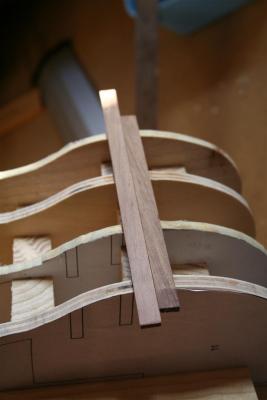
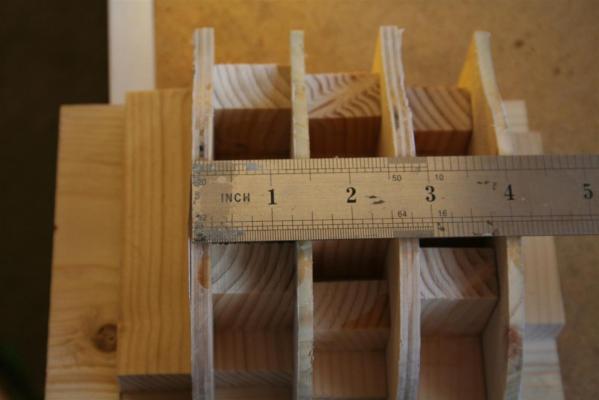
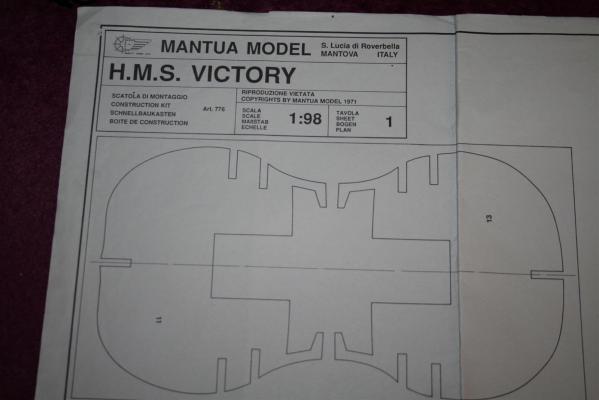
whilst I wait for access to the Plans, i decided to have a look at external planking and get away from glue sand and hide by painting attitude So i copied a frame from the Mantua HMS Victory in 1:98 scale plans, and cut 4 halves "the same Frame number) and glued to a piece of timber, trying to ensure they are all vevel as i have no keel They have no scale representation in the format they are in but as all four are the same i get a even hull shape even the wales are not in the right place, but i have no better way of doing this at present lol i am eve chamfering the edges - never done that before

-
fantastic work I need to re read your log
-
I am itching to move forward, lol (i must wait for admin) what did I learn on Day 1 Well all my tools don't cut straight, which i was aware off, but in real life it didnt matter, since dinner time yesterday all the cutting guides are checked with set squares, wow what a difference Also - it may look right on the first attempt, but would it look better on a second one - in my case yes Don't be frightened of the tools, treat them with care, and remember they will bite, but they were bought for the purpose just have to learn what that purpose is. Do wear eye and ear protection
-
Gil Good evening Im quite close to the sea if you want to pop over and share a wee dram
- 755 replies
-
- 1
-
-
- finished
- caldercraft
- (and 1 more)
-
Thank you Juergen not much to show but that was a big fence for me to jump hopefully as I gain more confidence with my tools I will get better
-
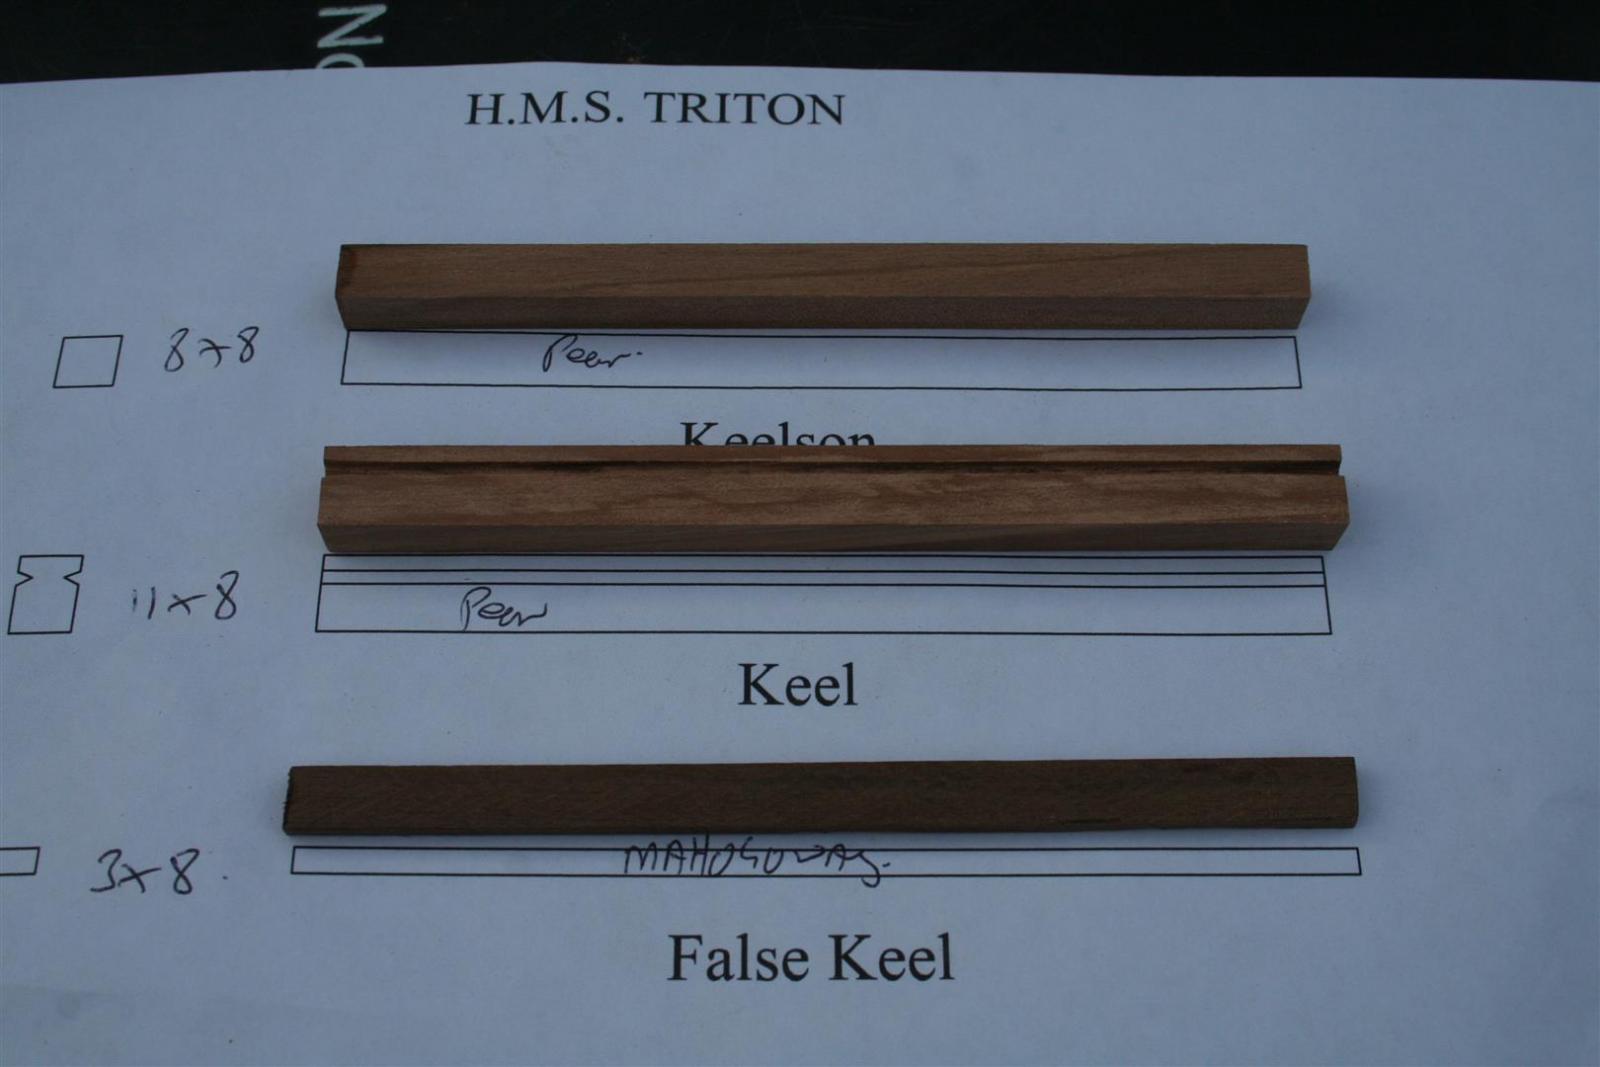
good evening everyone well after the 4th attempt i got it right, well i did on the 3rd as well but cut the 3 length the wrong size i wanted a darker wood for the false keel so used some from my scrap wood pile

-
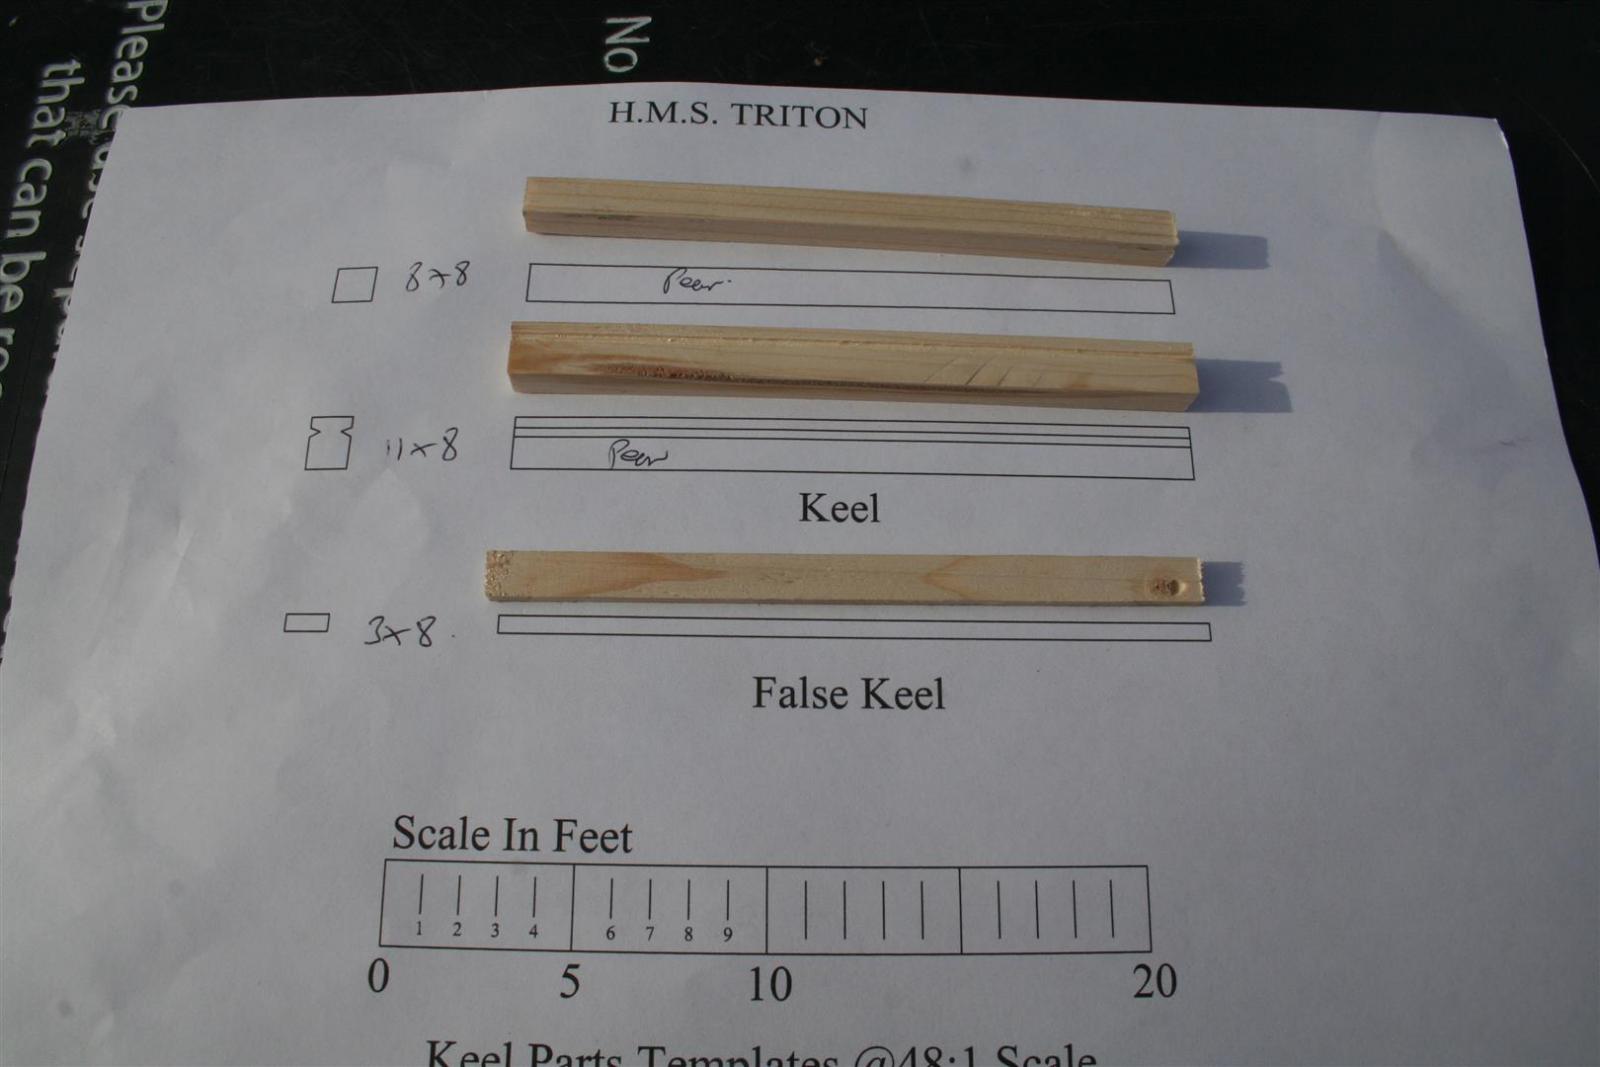
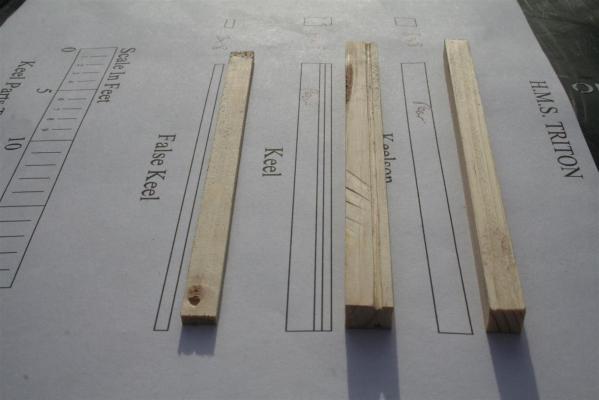
Well i have had a go, used some crappy white wood from under the work bench, measurement wise it is spot on, so im happy now to try with my purpose bought wood, is this enough to be granted access to the next set of drawings, please?

-
i received the quote (p&p) from Jim Brynes for the thicknesser - paid , so hopefully it will be here before the big guy in red arrives
-
just deleted a load of stuff