


Maury S
-
Posts
1,490 -
Joined
-
Last visited
Content Type
Profiles
Forums
Gallery
Events
Posts posted by Maury S
-
-
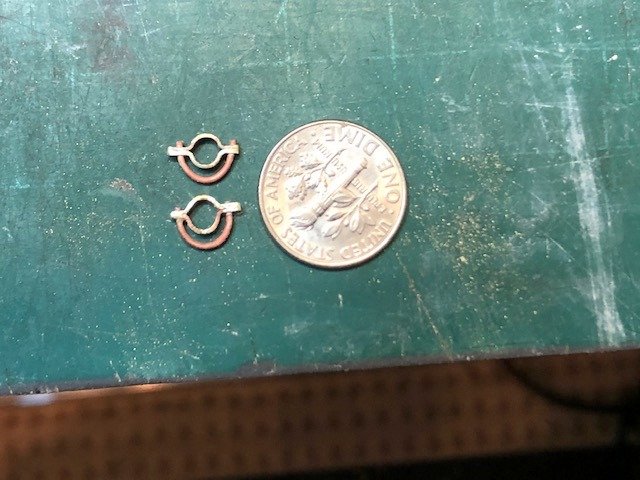
The fore and main sheet wyes are made. They fit on to the booms and the sheet tackles hook on to the loop part. I've not blackened them yet so they photograph better.
Maury
- mtaylor, FriedClams, davec and 4 others
-
 7
7
-
-
I can't believe it's been a week since the last post... not much done. Bowsprit guys seizing redone and tightened up a bit. Booms and gaffs tapered, rounded and sized. Jaws Cut out and glued in place. Clappers installed.
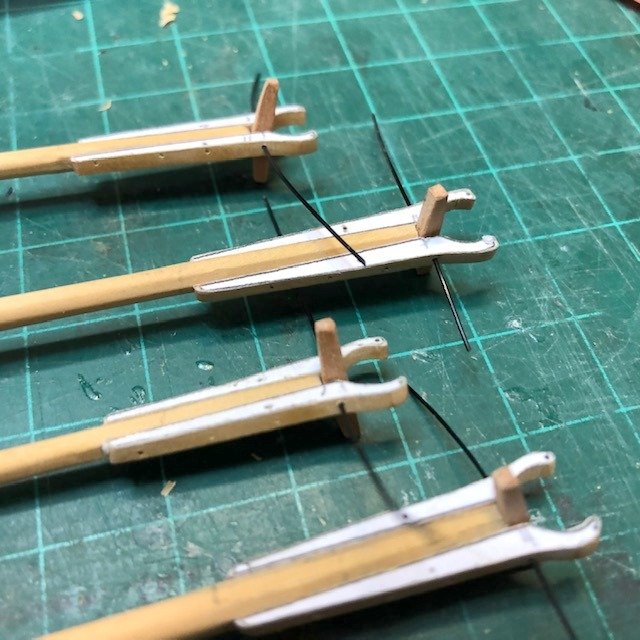
I use various sized (15, 20, 25 and 30 pound test) monofilament line as simulated bolts. A little heat at the end simulates a nut or bolt head. These have not been trimmed yet.
Maury
-
I have a PROXXON FKS/E table saw for sale. Hardly ever used since I bought my Byrnes saw. Great condition. On a mounting board.
Includes a carbide rip blade and regular crosscut blade. Accuriser fence ($70 accessory) included.

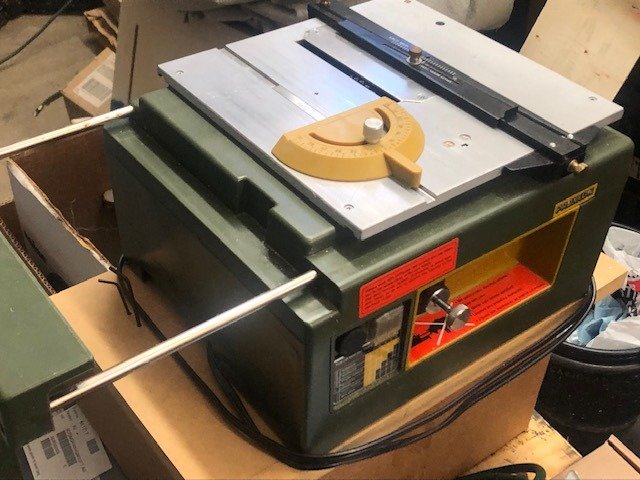
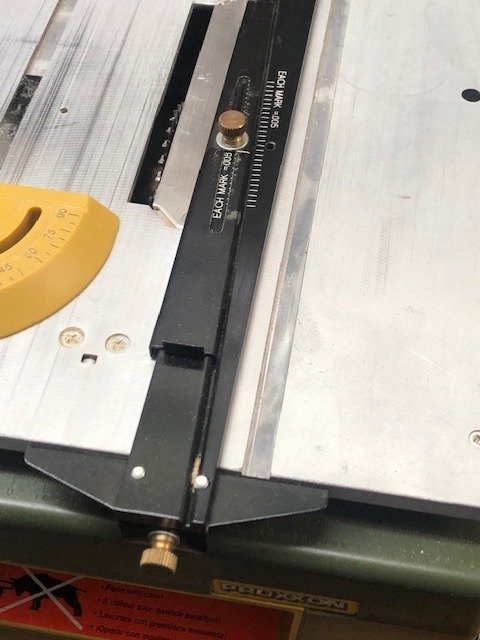
$250 including FedEx shipping anywhere in continental US. PM me with any interest.
Maury
-
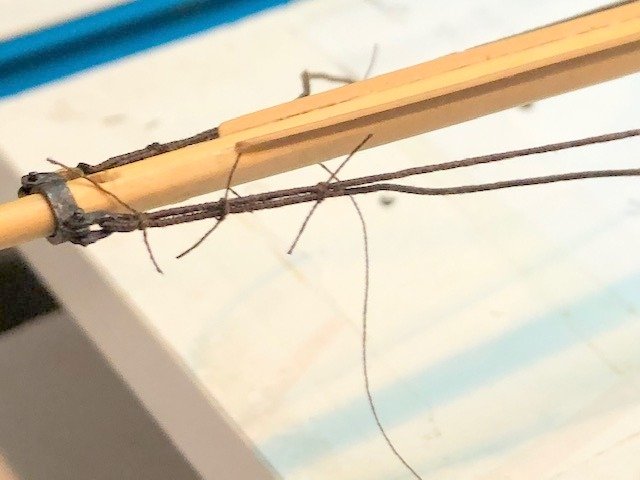
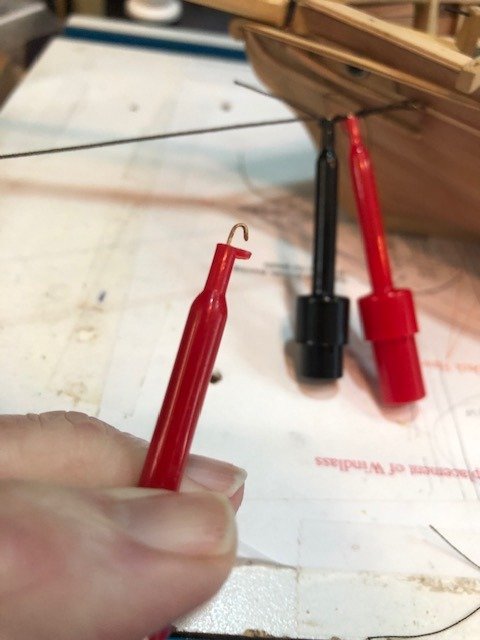
Bow Sprit guys installed. I'm glad I waited for those Radio Shack Test Clips. https://modelshipworld.com/topic/23876-rigging-clips/ They made it so much easier getting my fingers in there. Ends are not cut off yet. I'm waiting to see if any adjustment is necessary. Seizings are coated with matte medium. I think they will hold OK.

Getting the split thimble onto the shackle was tough.
Maury
-
Hat tip to Randy Biddle (Windship Studios) for this one. Radio Shack "Test Clips". Spring loaded, small enough to fit in tiny places and real inexpensive. Radio Shack may be out of stock, but check around on Amazon...$2 - 3 for a package. They hold the two lines together for seizing. I'm hoping a dab of matte medium holds well.

Maury
-
-
-
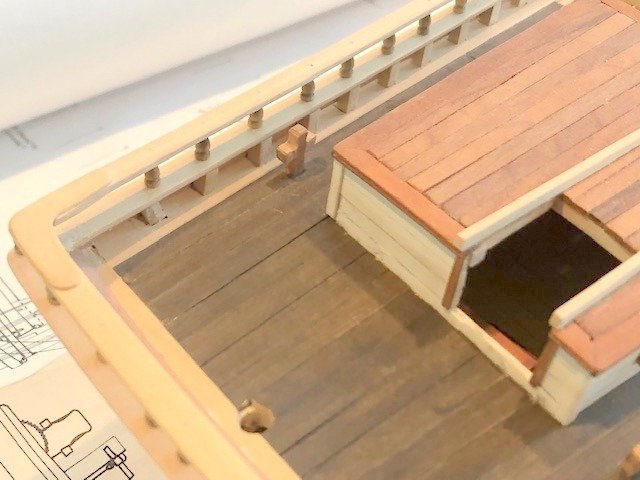
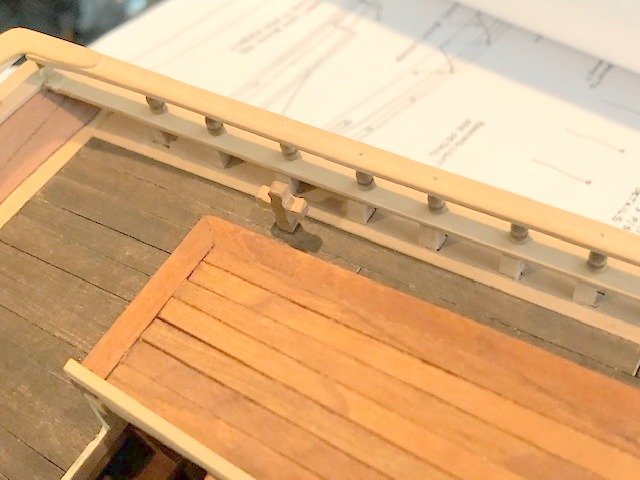
I removed the rail and thinned it about 1/3. At scale it's now about 2-1/2" thick. Much better now.

Maury
- GrandpaPhil, druxey, FriedClams and 1 other
-
4
-
-
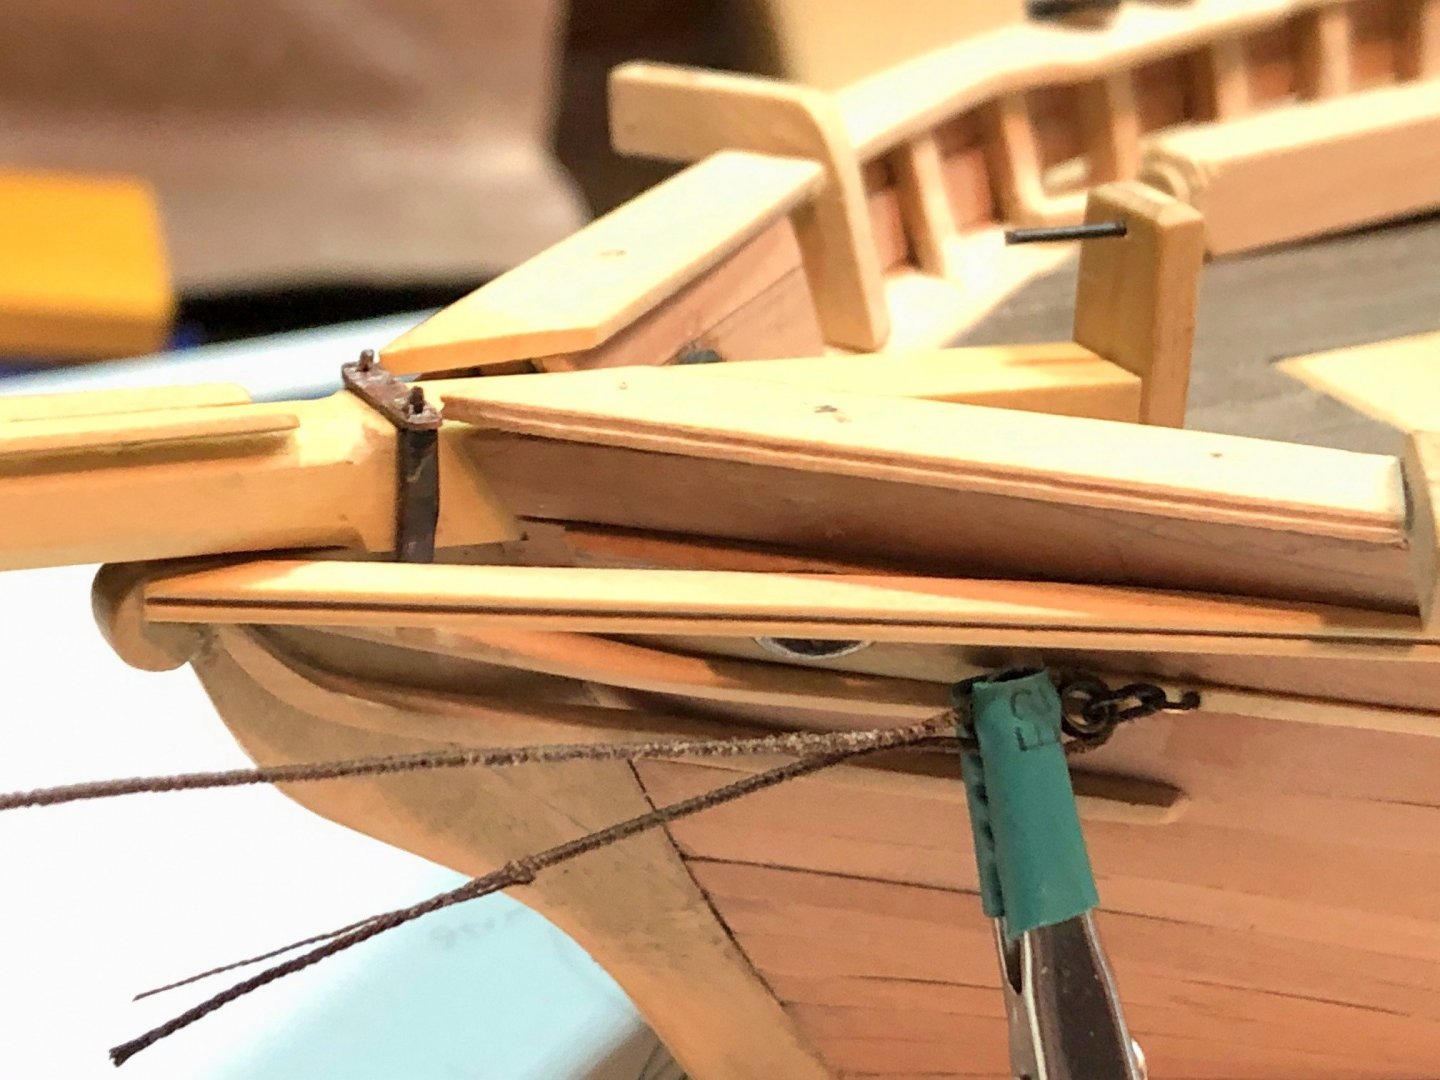
The gammon iron is in place (needs blackening), the staples and thimbles for the bowsprit guys are in. The guys are .018" (.865" at scale) rope from Syren, served the whole length using Chuck's handy "Serv-o-matic" device. They are temporarily held in place with alligator clips. I think there is some bees wax residue visible that has to be removed.
Maury
- FriedClams, druxey, mtaylor and 3 others
-
6
-
Getting ready for the final county building dept. inspection and of course, the tax assessor.
🙂
Maury
- thibaultron and mtaylor
-
2
-
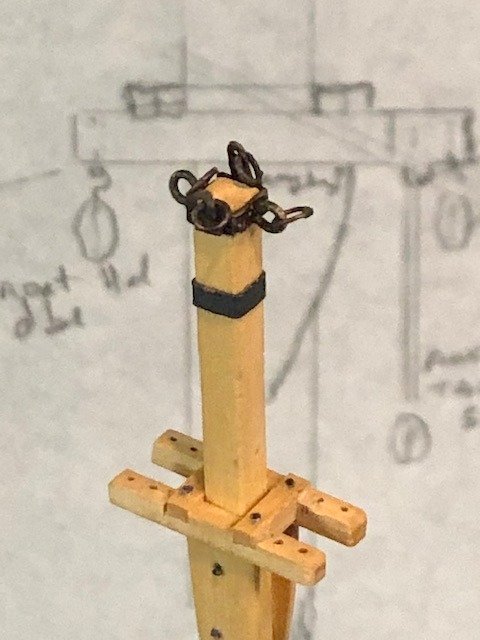
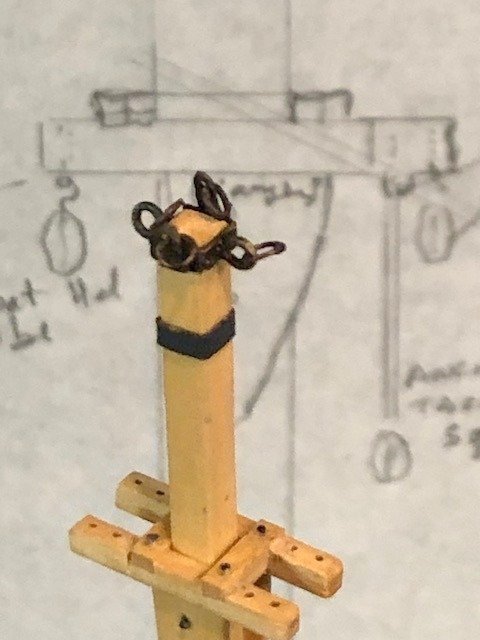
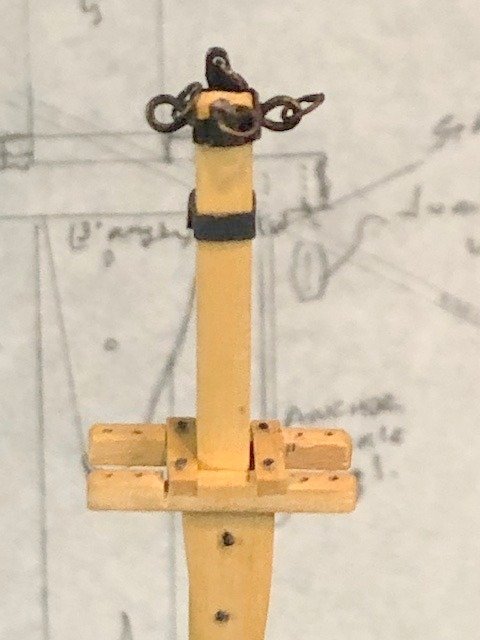
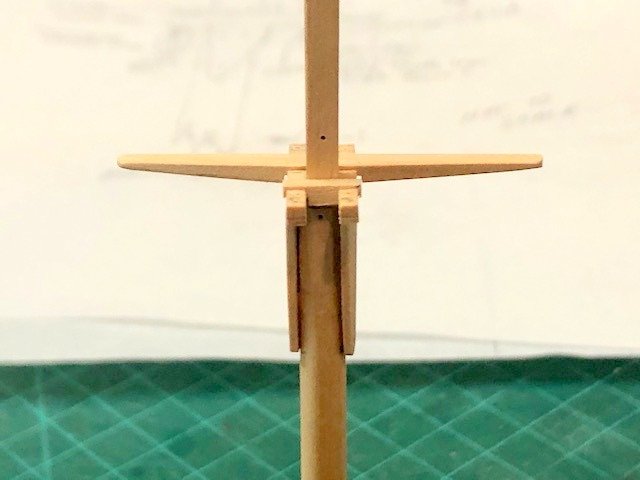
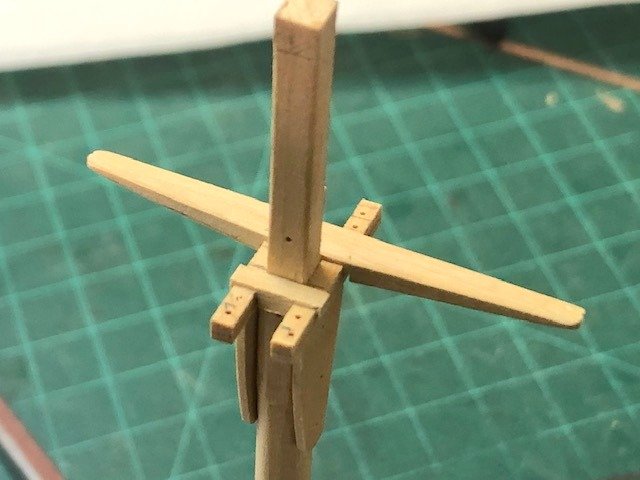
I've re-done the iron work on the mast tops. They were out of scale. Instead of using eyebolts, I've gone to staples. They are much cleaner (and smaller).
The upper one is fit with a thimble for the main boom topping lift.
Maury
- tlevine, FriedClams, druxey and 3 others
-
6
-
The eyes and rings are too large. ID works out to about 4.5". New ones in progress are about 2" ID. Copper wire stretched to harden comes to about .96" dia. (all at scale). This should look better.
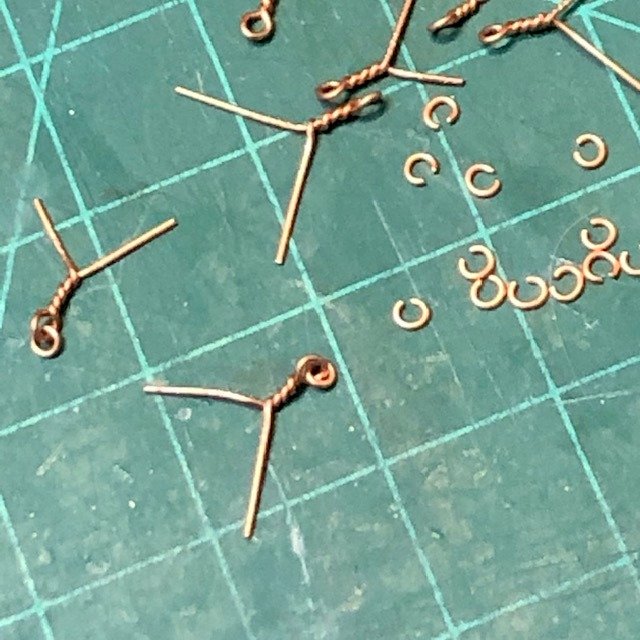
Using a 1.2mm drill bit to wrap around.
Maury
- druxey, FriedClams, JpR62 and 3 others
-
6
-
Fore mast head iron. This was one of the toughest soldering jobs I've done using two different temp. solders, but I don't think it mattered. I'm not good enough with the benzene torch to vary the temp between 1450 and 1325 degrees and not melt my project piece. There are tabs on each side. One for a line to the Main top mast shoulder and one for a line to the Main Top mast head. The fore ring is for the jib stay and aft goes to the main mast bail.
I started with a piece of rectangular brass tube that just fit over the mast, drilled a hole for a ring in the narrow edge then proceeded to cut and solder the two tabs on the sides with the rings attached. I then cut off one end to the tube to make a "U" shaped piece that just fit aft to fore. The open end of the piece was finished by using black paper similar to the intermediate band shown.
Maury
- FriedClams, druxey, GrandpaPhil and 2 others
-
5
-
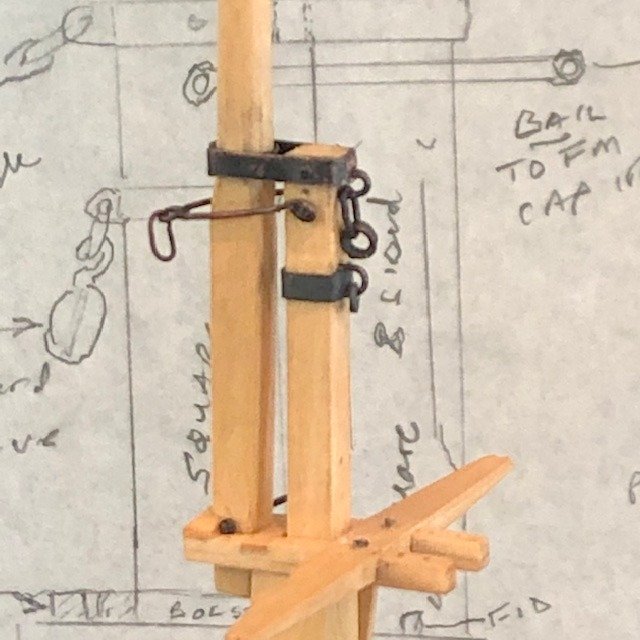
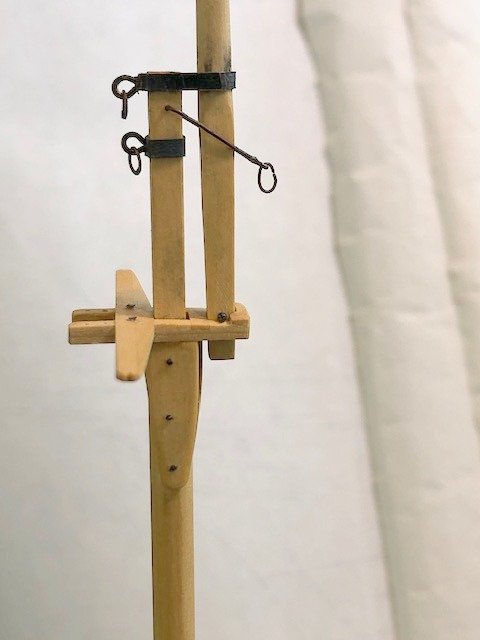
More time on the masts... All the spars were wiped with a 50% diluted wipe-on-poly. The trestle tree is installed, staples on the bottom are not installed yet. They will be attachments for several blocks (main throat halyard, fore boom topping lift, and centerboard lift). Mast band for the Peak Halyard block is paper. The bail (iron piece that attaches to the mast, goes around the top mast (and is currently just hanging there) connects via a line or chain to the fore mast cap iron) is next up. The mast cap is copper strip soldered to a piece of tubing that accepts the top mast. The ring at the back of the cap is for the Main Boom topping lift.
Maury
- druxey, paulsutcliffe, Tigersteve and 2 others
-
5
-
I built jigs to hold the masts. The base is as wide as the boat at the level of the mast. The block is as high as the bottom of the mast step to the deck.
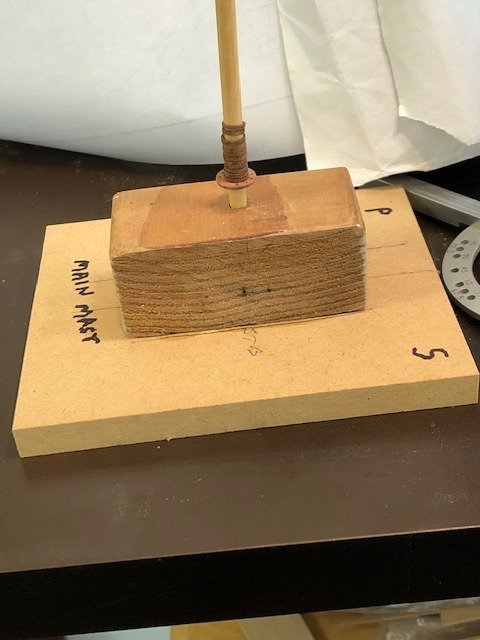
Since the main mast is off-center, this arrangement matches the plan. The one for the fore mast is centered on the base. It will help getting all the attachments, shrouds, etc. set up properly (hat tip Ed Tosti again).
Maury
- GrandpaPhil, Mark Pearse, druxey and 1 other
-
4
-
-
More on the trestle trees.
The main has a spreader, the fore does not. Dry assembly...
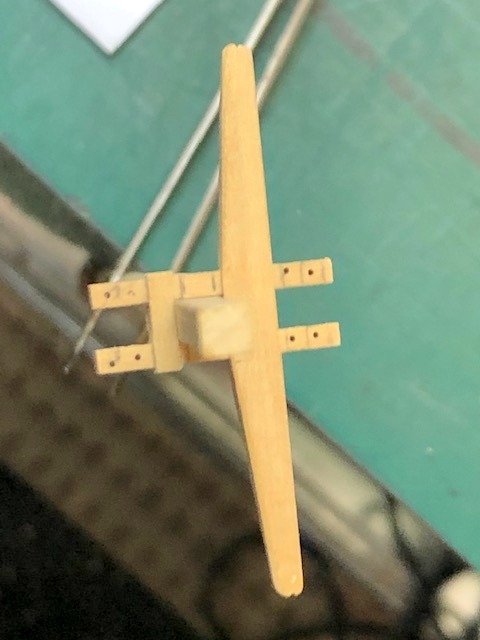
The pieces were all pre-drilled for the stables. Finish sanding to come. All interlocking pieces done on the Byrnes saw and my homemade sled. I checked with Jim Byrnes; he's open and shipping so my new sliding top will be here soon.
Maury
-
Working on the masts...Hoops made earlier from 1/16" curls using the mini plane.
Cheeks and trestle trees next. I stacked 4 pieces, lightly glued them together then shaped the cheeks. The tops have a 4 degree forward slope to account for the rake of the masts.
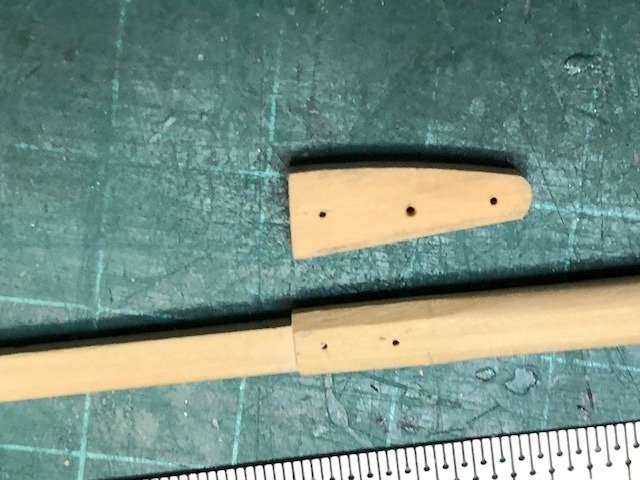
Once shaped, I soaked the piece in iso. and separated the parts.
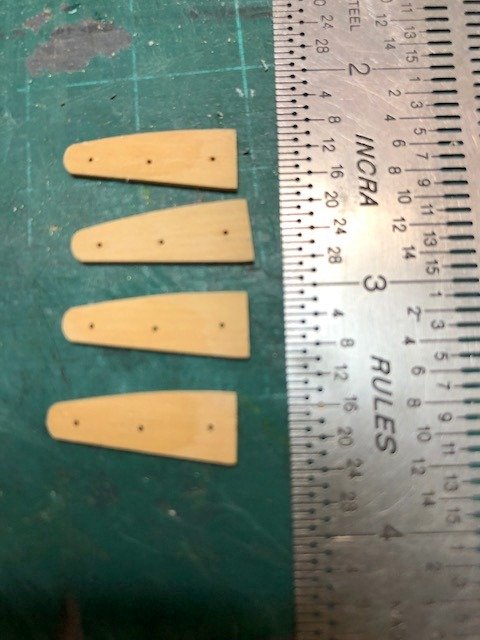
Once glued to the masts, I'll work on the trestle trees. WASH YOUR HANDS!
Maury
- mtaylor, druxey and GrandpaPhil
-
3
-
Bollards made and installed.
Maury
- FriedClams, mtaylor, GrandpaPhil and 3 others
-
6
-
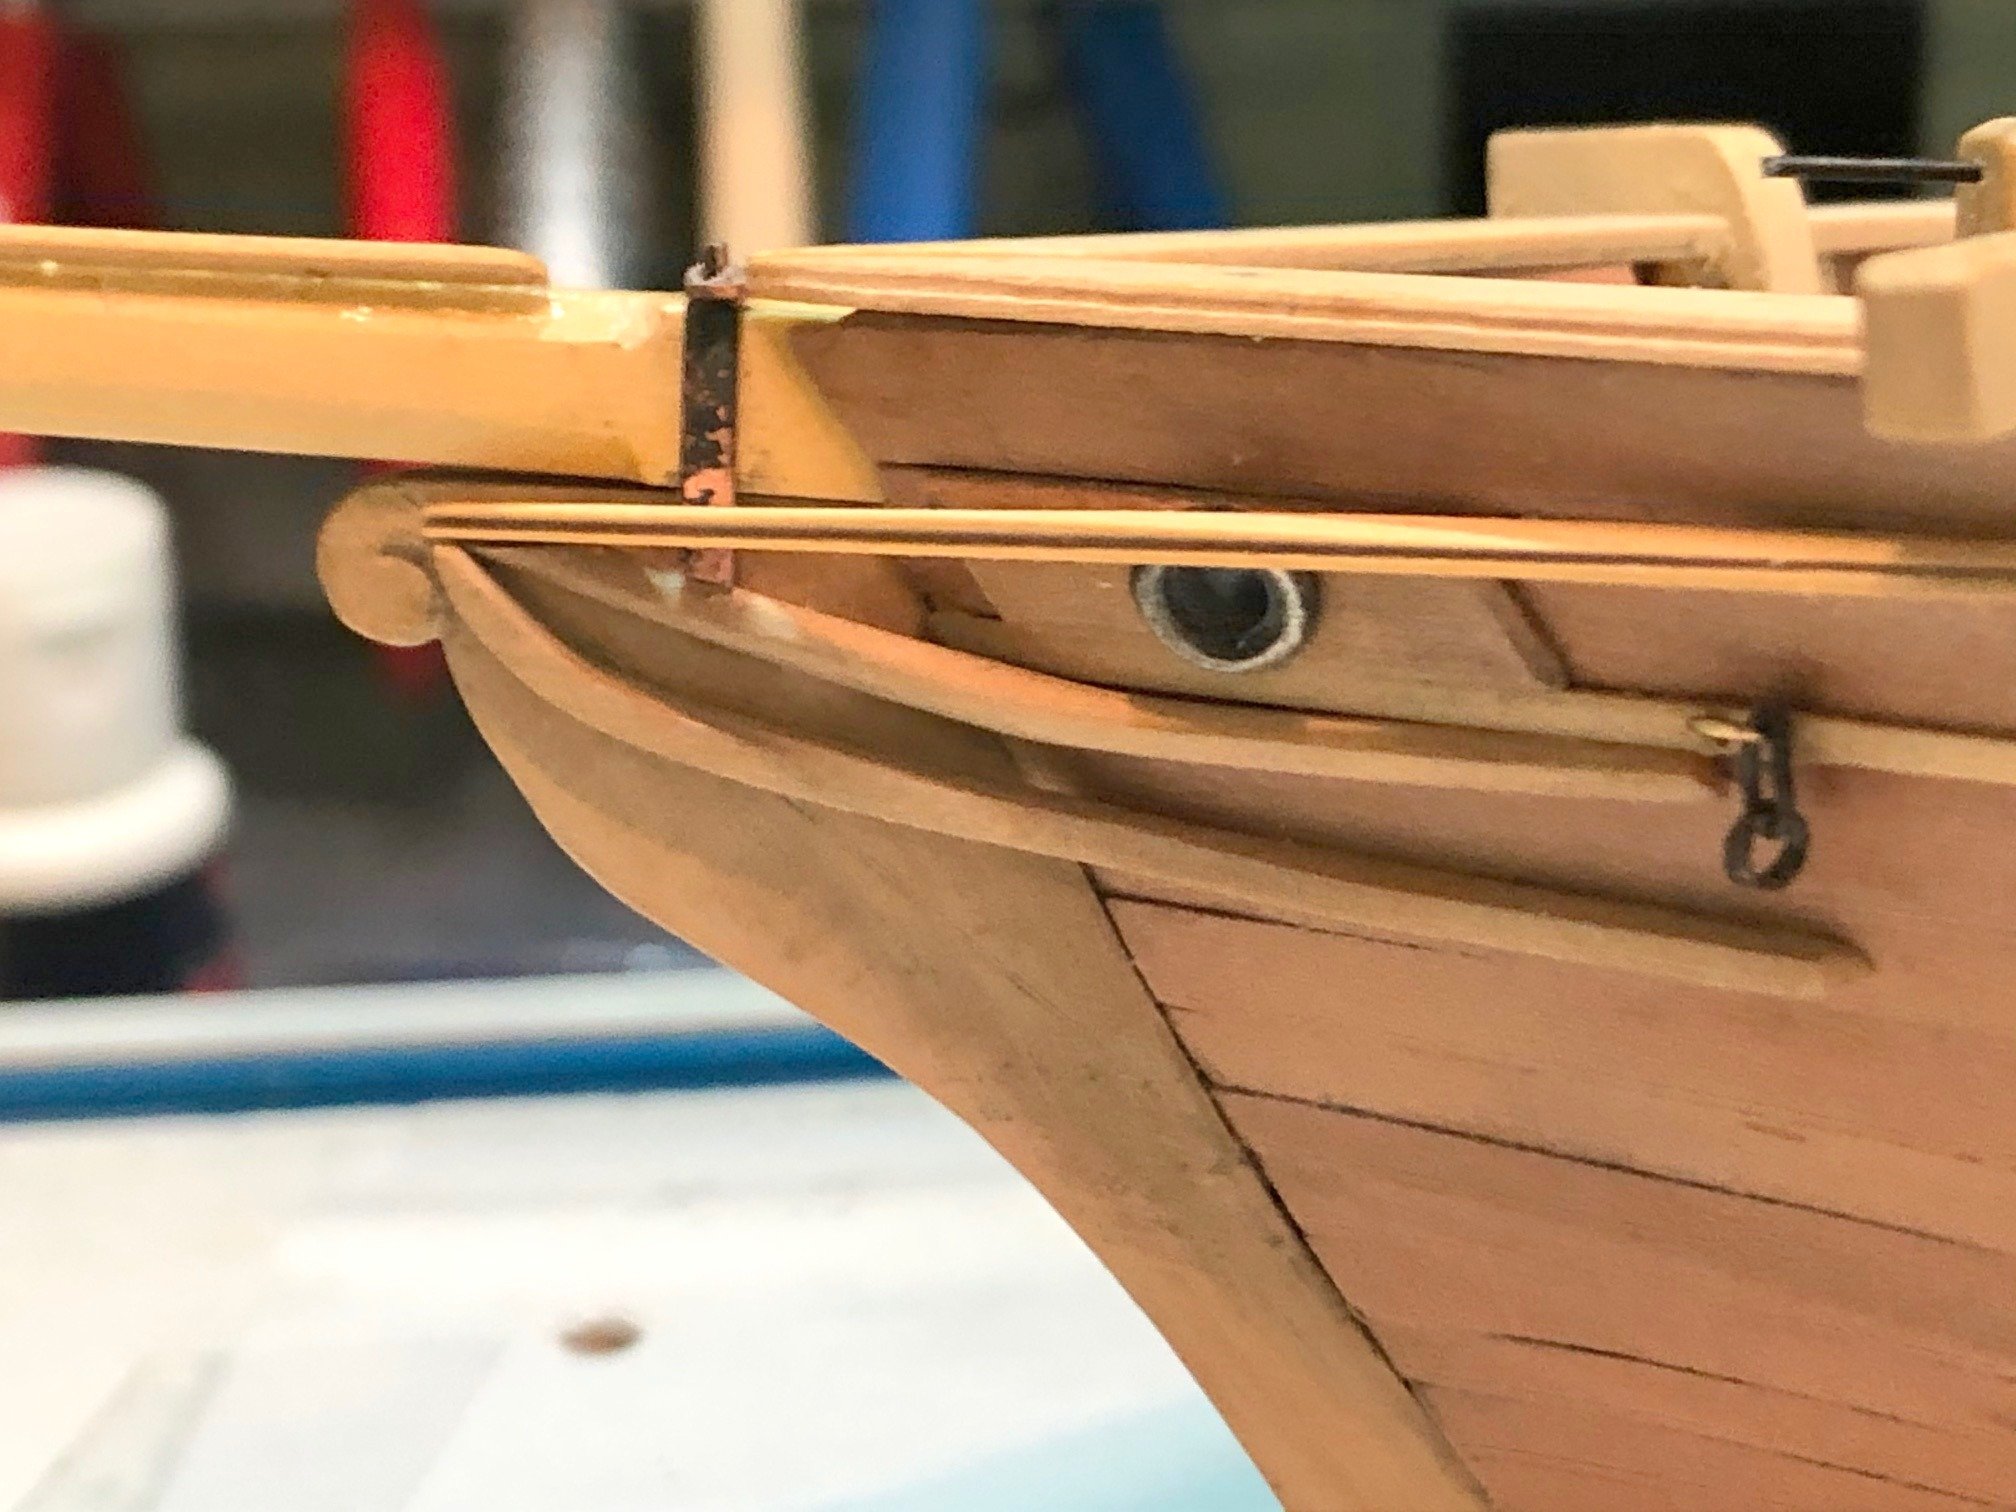
I assembled the stemplate / shackle / bobstay.
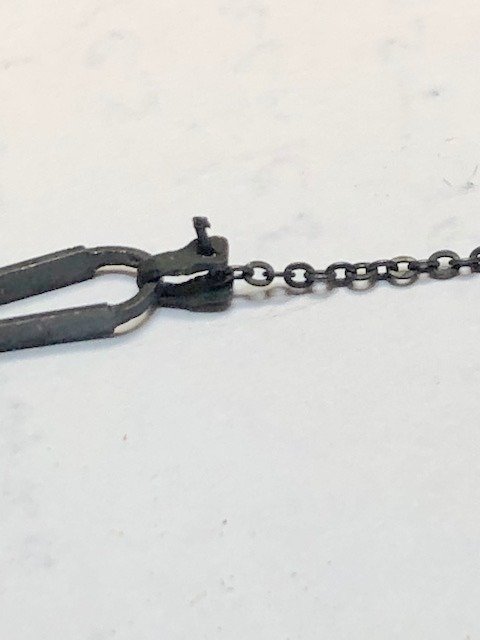
Getting the pin through the shackle and chain was tough. I lightened up the photo. It's darker so very difficult to see.
I have no first source on this so any help would be appreciated. The plans for my Emma C. Berry (c 1866) show the bottom third of the bobstay chain was parceled and served. Would this have been standard practice? [am I going to have to serve this chain?]
Maury
- mtaylor, FriedClams, GrandpaPhil and 1 other
-
4
-
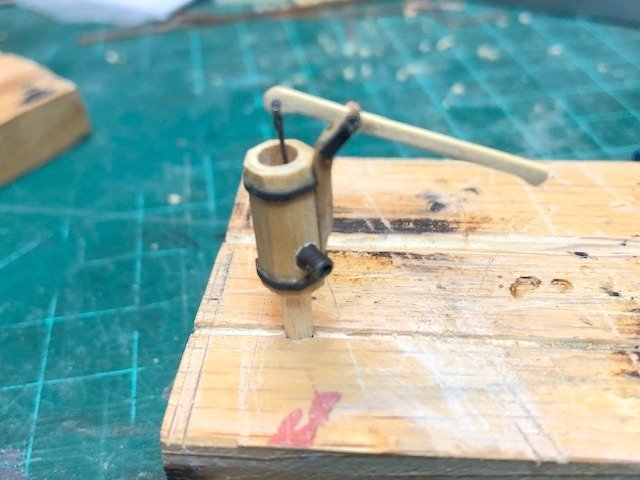
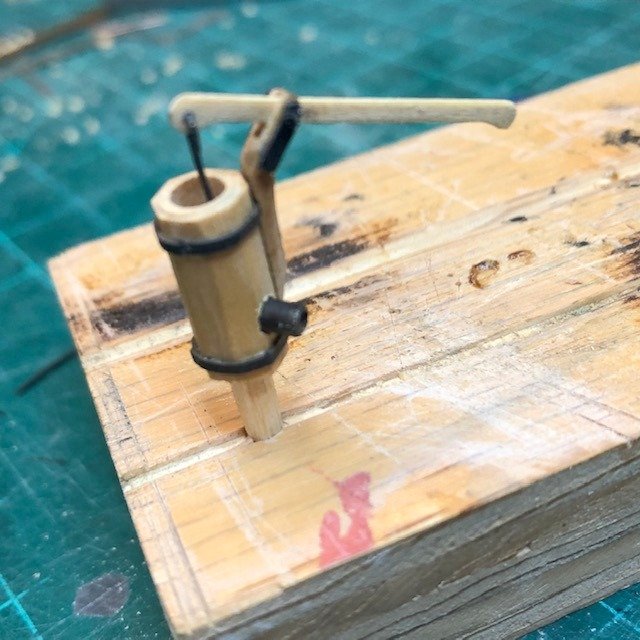
The elm tree pump is finished. Eric Ronenberg and Randy Biddle assured me they would have used such a pump on a schooner at that time... Not one of the more modern metal pumps like the Edsons.
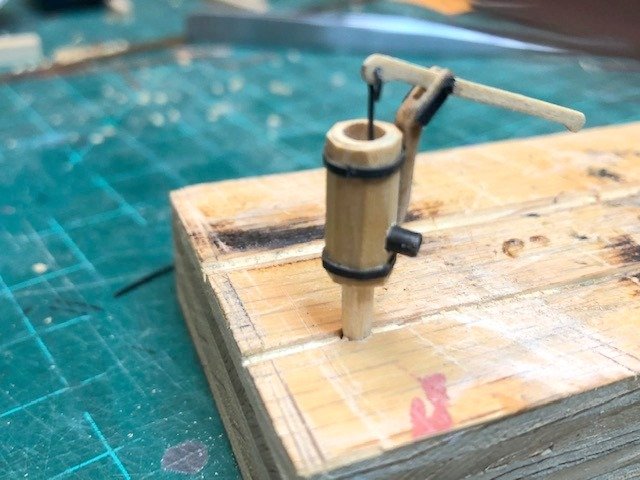
I started with a longer 1/4" square piece of boxwood, bored out the center on the lathe then finished it to 8-sided and cut it to proper length. The bands are paper. The cheek that supports the brake (handle) is reinforced with small brass plates. The pin in the brake is black monofilament line. The drain pipe is blackened brass tubing.
Maury
- GrandpaPhil, FriedClams, Dowmer and 3 others
-
6
-
Make sure you dip the parts in a bath of baking soda + water to neutralize the reaction.
Maury
- thibaultron and mtaylor
-
2

Blackening Britannia Metal
in Metal Work, Soldering and Metal Fittings
Posted
BlueJacket sells a pewter blackener (for Britania metal) See link on Forum page for sponsors.
Maury