


Maury S
-
Posts
1,490 -
Joined
-
Last visited
Content Type
Profiles
Forums
Gallery
Events
Posts posted by Maury S
-
-
This is NOT a full review of the book, hence not in the Book Review Section...just some comments:
The Evolution of the Wooden Ship by Basil Greenhill with illustrations by Sam Manning has been extremely helpful. Sam Manning's drawings are tremendous and answer so many detail questions that arise in the course of a model construction.
Maury
-
Museums used to require linen lines. Has that changed over the years? Chuck is probably the biggest supplier of scale rope. What are his thoughts?
Maury
- mtaylor and thibaultron
-
 2
2
-
Very interesting deck weathering. I LIKE IT. Chuck Doan's work is amazing and an inspiration to us all.
Maury
- Keith Black, FriedClams and mtaylor
-
3
-
Druxey,
All the info I've garnered about off-center masts indicate they were plumb (head does NOT lean to the center). This countered the sailing impact of the centerboard being off center (on the other side of center-line). I've seen quite a few examples in my journey with this build. Re: glue, I learned of this at Modelshipworld link: https://modelshipworld.com/topic/943-gluing-techniques-and-associated-information/page/4/?tab=comments#comment-628081 post #93 (Thank you Vossiewulf). The dye really stands out under the black light so you can clean up smudges and spills before it sets.
Maury
-
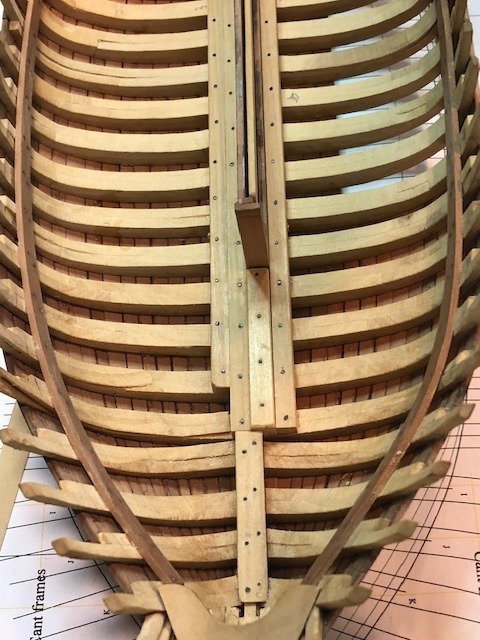
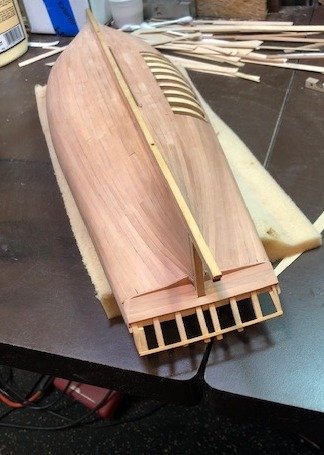
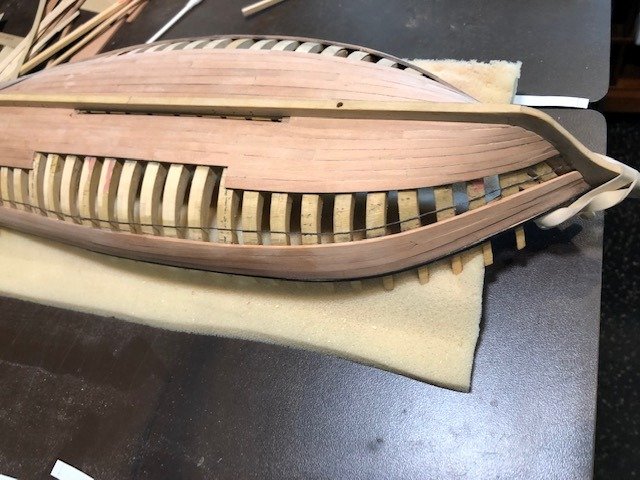
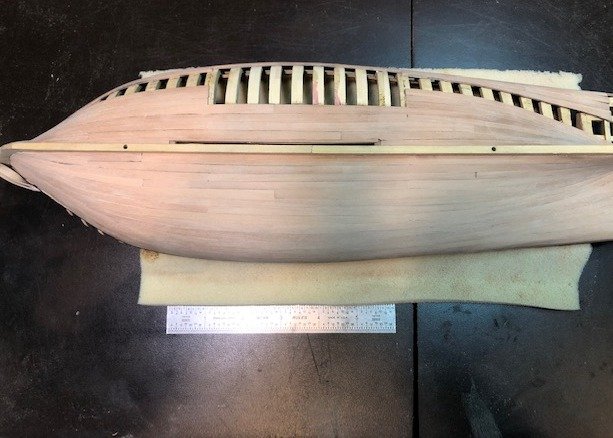
While waiting for glue to dry, I knocked out the blanks for the two mast steps. Notches around the several keelson timbers cut on the Byrnes saw using a sled. Mortises will be cut once the masts are ready to be set.

The fore mast is on center-line and the main is off-center to right of the centerboard well.
At this stage, the starboard side has one more strake than the port. BTW, I've started using Yellow Instrument Glue from Luthiers Merchantle Int'l. Seems to hold every bit as well as Titebond, and has a fluorescent dye that shows up under black light for better cleanup. About the same cost.
Maury
- mtaylor, FriedClams, yvesvidal and 3 others
-
6
-
-
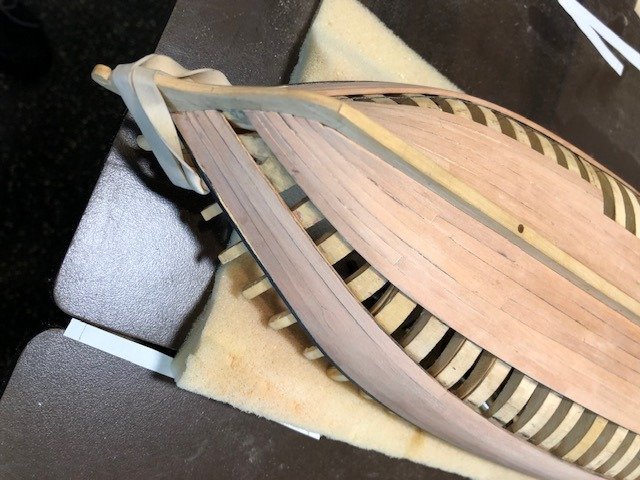
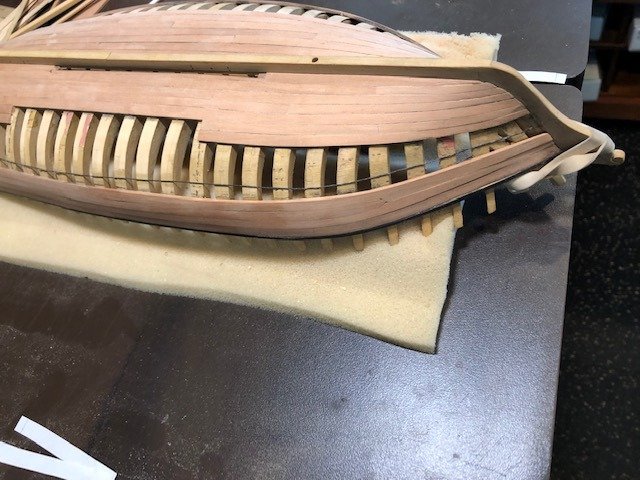
More ceiling strakes. Long-nosed clamps where they fit, Pressure from gantry above deeper into the hull.
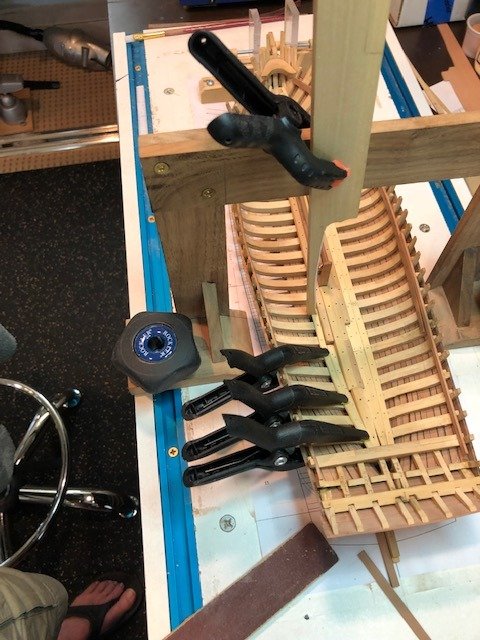
Butt pattern is the same as the outer planking, but not on the same frames.
Maury
- yvesvidal, paulsutcliffe, bruce d and 7 others
-
10
-
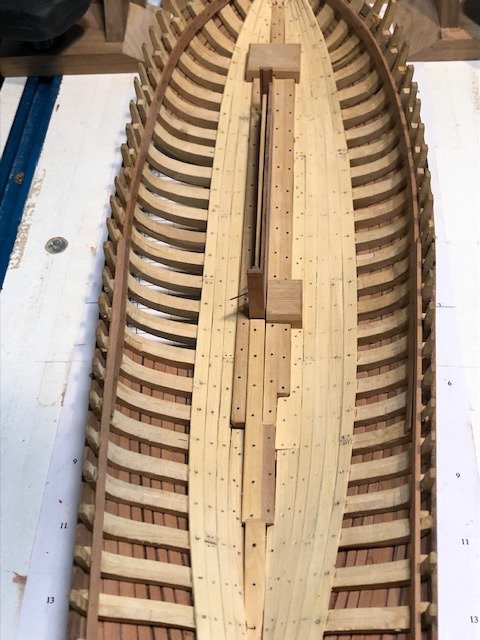
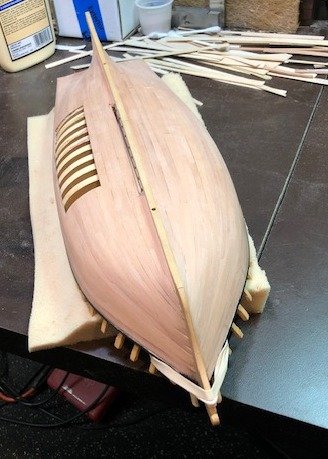
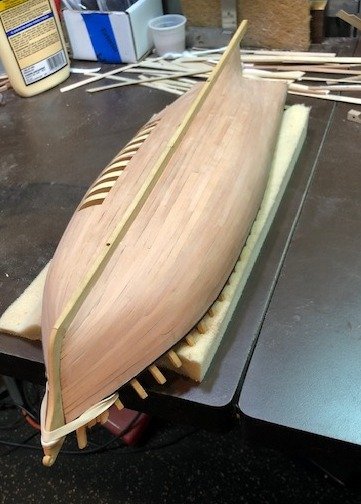
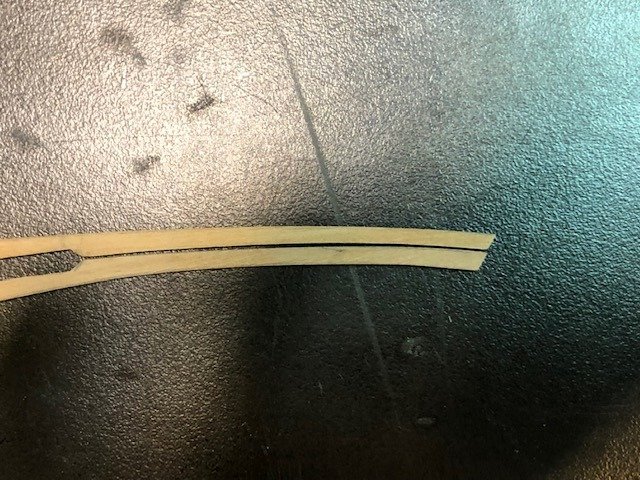
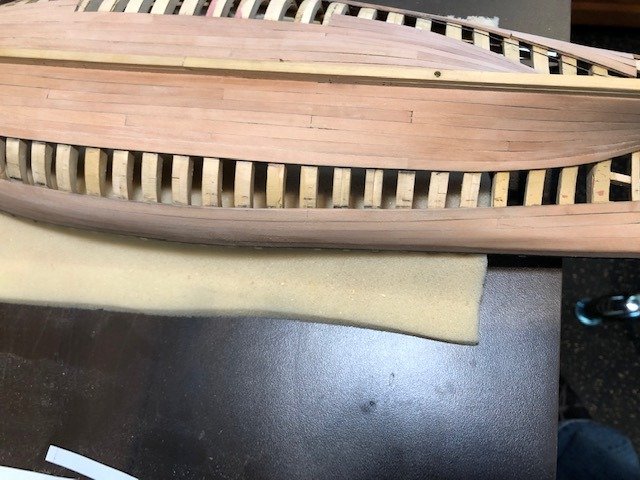
She's back on the building board and ready for planking the ceilings.
Since the centerboard is off-center, the keelsons are not equal port and starboard.
The first course of ceiling planks will line up for the subsequent strakes.
The first pieces are just spiled, bent and laid in place. Some more tweaking to be done.
By the way, since Chuck has been praising Alaskan Yellow Cedar, I thought I'd give it a try on the interior. It's certainly a lot softer than box. When I sand the edges, there is some fiber left hanging so I'll have to be careful about that. There is an obvious cedar aroma, so I won't be getting any moths (or shipworms).
Maury
-
Druxey, That's what I'm thinking. It exposes the frames to wear but I expect the bulwark frames were abutted to the top futtocks and were replaceable. Dowmer, there is no other info. about the boat than the Chapelle drawing and commentary in the National Watercraft Collection.
Maury
- mtaylor and FriedClams
-
2
-
Back to the shipyard after a vacation.
Attached is a photo of a portion of Chapelle's original drawing showing a "Scupper Strake" just above the wale.
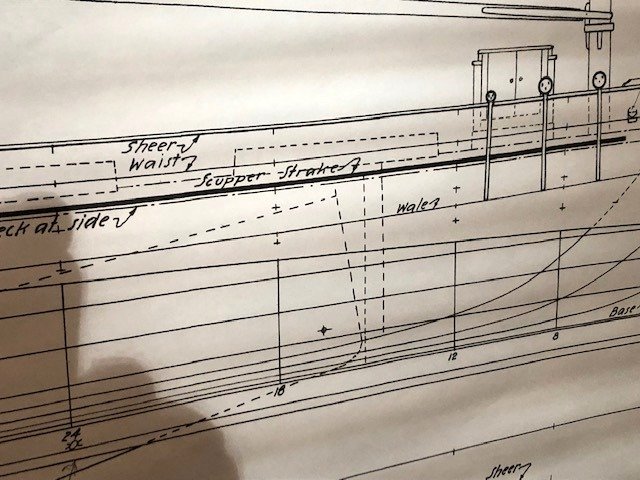
Does this mean that there is a continuous opening in the bulwarks or that scupper holes were placed as needed in that strake? All evidence I've gathered indicates these were "wet boats". Getting water off the deck would have been important.
Appreciate any comments.
Maury
- mtaylor, GrandpaPhil, bruce d and 1 other
-
4
-
What else can be said? Thanks for the journey.
Maury
- CaptainSteve and druxey
-
2
-
-
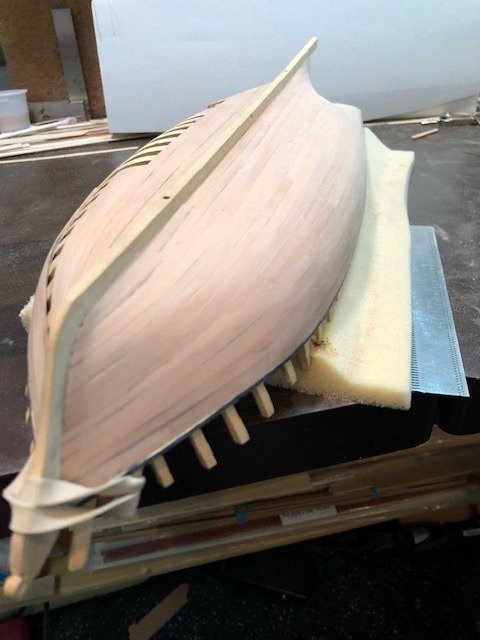
Whiskey strake is in. Counter is planked. I'll finish the transom before reattaching to the building board for the interior.
Rubber band is to protect the stem.
Maury
- ccoyle, Mike Y, paulsutcliffe and 10 others
-
13
-
And such a clean shop. OK, OK, OK, I'll clean up mine this weekend.
Maury
- mtaylor, FriedClams, Obormotov and 1 other
-
4
-
-
Ed,
So where is it going to be displayed when finished? A new room added to the house?
Maury
- EdT, Piet and CaptainSteve
-
3
-
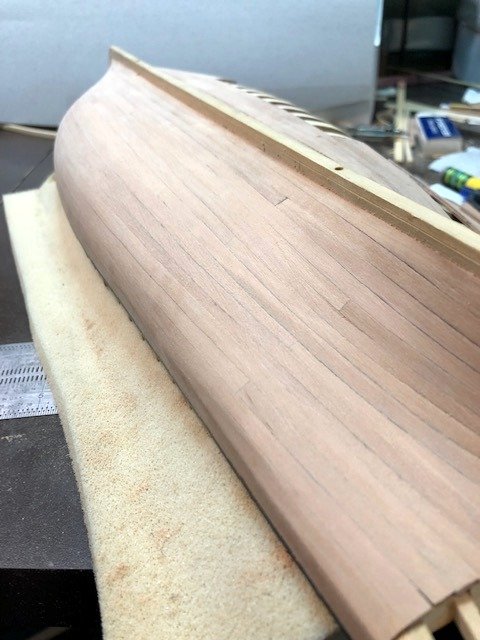
Getting near the end of the outer planking...The remaining starboard drop plank(s) have been spiled but not yet bent.
They were shaped and fit but not glued in place 'til everything lines up properly.
Maury
- oneslim, FriedClams, druxey and 4 others
-
7
-
Anyone have one for sale? contact me via PM. Any comments on the independent vs the self-centering model?
Maury
-
Love those chisels!
Maury
- FrankWouts, mtaylor, Canute and 2 others
-
5
-
-
-
Planking continues. Using the sacrificial bass wood for spiling patterns has really simplified the process. It's really nothing like using card for patterns. Being able to sand to a tight tolerance on the pattern makes a huge difference.
You can see the un-planked window on the port side developing.
Maury
- bruce d, paulsutcliffe, Mike Y and 7 others
-
10
-
Heads up! For all you Bench bashers...Current Harbor Freight catalog has the 60" work bench on sale for $119.99. (I think you need the coupon).
(I have no connection to HF)
Maury
- mtaylor, Jim Rogers, thibaultron and 1 other
-
4
-
Centerboard Schooner C. Chase 1846 by Maury S - FINISHED - Scale 1:48
in - Build logs for subjects built 1801 - 1850
Posted
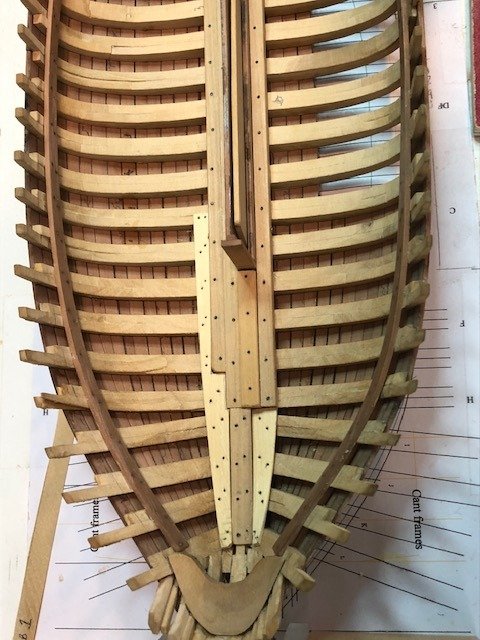
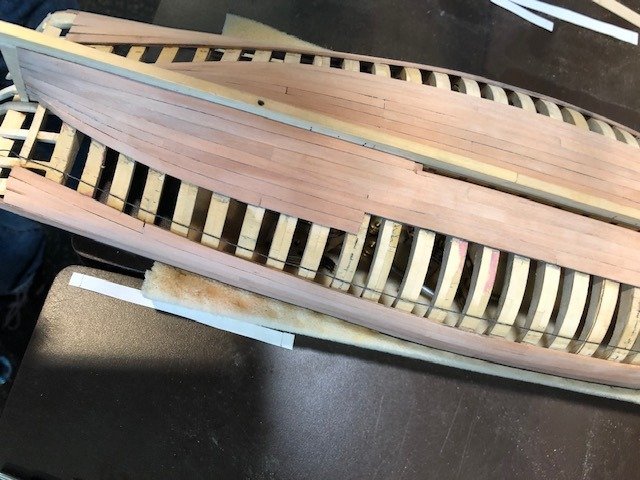
More planking of the interior (ceiling). Almost done...
Maury