


vossiewulf
-
Posts
1,477 -
Joined
-
Last visited
Content Type
Profiles
Forums
Gallery
Events
Posts posted by vossiewulf
-
-
Rick, that sounds correct, it wouldn't surprise me at all if stern names were reserved for 6th rates and up. But this might be one case where I intentionally deviate from reality, as a display object for the average viewer having the name on the counter seems right. But I haven't decided for certain.
Sailor, that's actually an interesting idea, I'll keep that in mind
")
Popeye, pretty sure I have some extra cooling jackets, they'd be a tad big though, and thanks for the well wishes. I actually pinged PPD and told them they should advertise here, really surprised they don't already, this forum is chock full of likely customers.
- mtaylor, Canute and popeye the sailor
-
 3
3
-
BTW, I'm thinking of making this something other than Lady Nelson. I need to go look on Threedecks.org for a cutter of the right time period and size.
There's a company called PPD Limited in Scotland that will do one-off custom photoetch for about $50 delivered to me, and the sheet is large enough that I could do the artwork and get the brass for a number of ship names that would fit the kit part. I would then be open to sending the unused ones to people building. I had them make me 1/12th scale Spandau cooling jackets a couple years ago, was very easy, I made the artwork, emailed it to them, had brass in my hands in a couple weeks, I think I fit like 12 on the smallest sheet they do. Barrel is just a rod, front piece was cast resin.
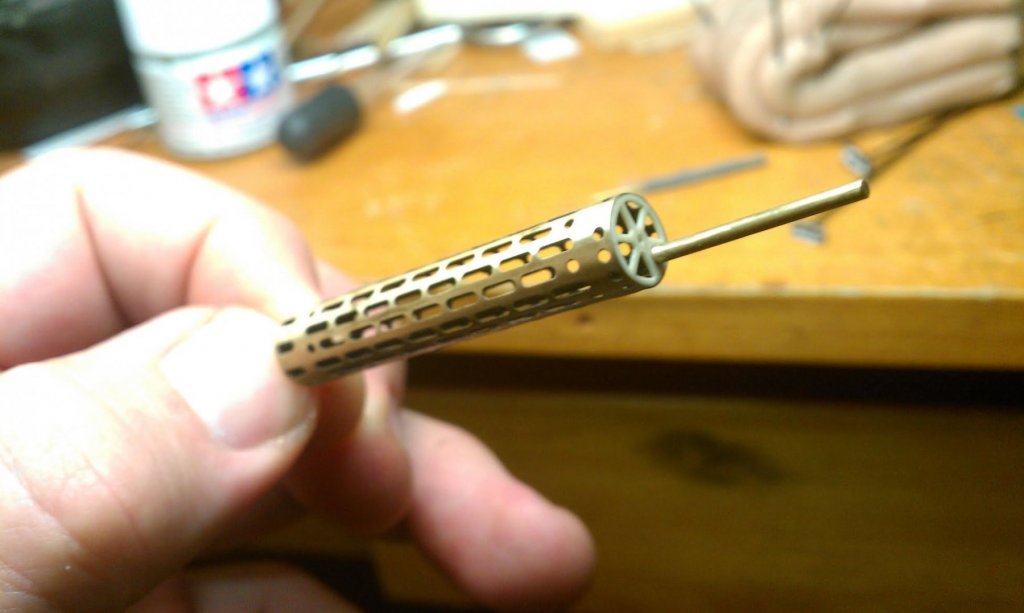
And if folks here don't know about this company, they should. If you don't have Photoshop skills, not too hard to learn what's needed for this, it's actually pretty simple. Or talk/bribe someone like me into doing something, it doesn't take me terribly long unless you want to do something to simulate super-complex carving. I think I did the artwork for the cooling jackets in about an hour.
-
-
Back up on the laptop at least, and installing the basics. I'll take my desktop parts to a shop this weekend, not going to be able to do it during the day this week. And then depending on the answers I'll have some level of shopping to do, and earliest I could start the rebuild is probably the following weekend. So I should be able to get back into the ship workshop and make some progress.
That's assuming, of course, that like my leg doesn't arbitrarily fall off while I'm cooking an omelet or something. I intend to remain fully in a combat stance for the time being, other shoes keep dropping and I'm not sure it's over. That's going to be my new phrase for this kind of thing, it's been raining shoes
-
The encoding from MSW may be causing an issue. However that's hardly a mainstream file type regularly used, so I'd be happy I was getting it to work at all.
- EJ_L, Hubac's Historian and mtaylor
-
3
-
Hey Tom can you come over and do the rigging for my LN? I think you could knock it out in an afternoon. I'll totally pay for the soda and chips
-
Another one, make sure the bearding lines established by the lower parts of your filler blocks are exactly symmetric and the bulkheads on both sides end the exact same distance from the keel. When I went to cut the rabbet for the first planking I found my two bearding lines looked good but didn't agree in places up to 1/32" and that would have been replicated to the planking and the finished model.
I didn't do this, but if you want to be sure of hull symmetry you can use paper strips, cut one and make it follow one of the bulkhead sides and cut it to the exact length of one side, then lay it on the other side of the bulkhead; if they match you're good.
-
Everything important is either on Google drive or my CloudForge repository, I learned a long time ago to keep data in one place and applications in another and backup the crap out of said data, with cloud being the best option these days. And it makes rebuilds much easier, they just require app installation while your data drive gets dropped into the new build.
And these days google drive is nice. I take ship photos with phone, save to Google drive from the phone and by the time I walk across the house to the computer room my (RIP) desktop has already synced and I can open them in Photoshop for cropping.
I ordered a new laptop about 30 minutes ago and this being San Francisco it will be delivered before 10PM. About 50% of what Amazon carries is available here from Amazon Prime Now, which offers two hour delivery for a single $5 tip for the driver. I even got them to deliver a new mouse to my hotel room in Seattle last year when I was visiting my team in Bellevue. So I'll have a machine I can install some basic things on this evening, and I can't complain about that part at all.
-
Oh I'm not recommending you follow all my steps, just see the places where I found things out of alignment or otherwise problematic, like the bulwark strips and their crazy top line and confusing gunports.
In this case you should see where I eventually added filler/reinforcement to all of the inter-bulkhead gaps because in every case if you don't, the first planks will not follow a fair line but have flats between bulkheads that are at best hard to totally remove, and they will flex under sanding leading to dips that need filler. But at the same time to make it right, those filler block outlines need to follow the correct curves, you can't just sand them flat or you have the same problem.
If I did it over, I'd use filler blocks everywhere.
That said, what you have looks good. One thing you should do now also is ensure perfect symmetry on the last transom frame - make a template from one side and flip it over and make the other side match. I didn't do that and had some annoying work to get it right later.
-
It was a similar chore for the wings of aircraft with external bracing wires, with the time required multiplied by the number of bays in the wings. This was another reason ground crews liked the later Fokker aircraft as there were no external bracing wires, with both the Dr.I and the D.VII the wings were fully cantilever (some of the first); early prototypes of the Dr.I had no interplane struts. But that made pilots nervous and there was a bit of resonance so they added the very thin struts of the production version. Those struts should be very thin on your model, they only really had meaningful strength in the tension direction. With the D.VII they skipped over the pilot complaints by adding minor N struts to the wing cellule, but again they were there just to prevent vibration.
The Pfalz D.XII came out not long after the D.VII and was a reasonably good fighter aircraft but ground crews disliked it in comparison to the D.VII because it not only had external bracing wires, it had two bay's worth to get straight.
The fuselage got out of straight by being (except for AEG and Fokker that were steel tubing) wood covered in fabric that was exposed to the elements daily plus a wide temperature range (it get very cold upstairs remember) plus any loads they put on it. For the same reason ships have adjustment methods for almost all of the standing rigging, WWI aircraft wings and fuselages moved and changed and needed regular adjustment.
Fuselage fabric could generally be removed, most had "stitching" somewhere (usually on the bottom) that today would be called lacing, and could be unlaced and replaced. I'm not entirely sure about all aircraft as some didn't have visible stitching, but it's hard to imagine how they could perform the required task with it on.
My knowledge of the actual process is somewhat limited, but I know they would set the tail up on something so that the reference lines, usually the top longeron, were level; the reference lines varied from type to type. They'd then use squares and plumb bobs and sighting tools to measure, and iirc they worked from engine backward. Each plane type had a specific documented process for these steps and I know there was generally a few phases where they'd get one or two axes right and then the rest.
More detail than that and you need to go to the Aerodrome forum, in particular the builders' forum where there are people who know orders of magnitude more than I do and who likely can tell you the exact steps for the Dr.I.
-
Go read my build log Mark, I recommend filler blocks the whole way if you can stand it, also will show you a whole series of issues to avoid and how to handle double planking on a keel plate that is a smaller width than four layers of planking is.
-
-
Tried a new power supply, looks like everything is fried. Good thing I paid for top of the line PSU and motherboard that are supposed to be thoroughly protected from this kind of thing. Will have to disassemble it and have a shop test to see if anything still works.
Meanwhile I guess I am going to order a new laptop as well, it's four years old, will just yank out the HD to save a few files. Going to be an expensive week and rebuilding the desktop is about 1/10 getting new hardware and putting it together and 90% and a couple of weeks of reinstalling and configuring the CC suite and MAX and several code IDEs and about 20 other applications.
-
And my laptop that I have been using daily for YouTube TV in my work area that I had gotten hooked up to my desktop monitor and keyboard just started failing, the fan isn't coming on so it shuts itself down with overheating two minutes after you start it. I am sitting here repeatedly counting to 10 to prevent myself from taking a hammer to both of them.
-
-
Yes, the two top stringers end one... I thought two frames short but there should be a piece that goes from a couple inches below the top stringer from that frame to the rudder post at the end of the fuselage, that forms a recess on top where the tailplane goes, and it should have a distinctly positive angle of incidence to offset the inherent tail-heaviness. But yes, you can see how assembling an aircraft out of steel tubes required a fancy alignment jig.
However, they also didn't have to get it quite as right as you do, very few WWI aircraft had fuselages that were fully cantilever and self-aligning, almost all had internal rigging wires with turnbuckles of some kind, and ground crews had to regularly go through an annoying process of realigning the fuselage through use of those rigging wires because once you got it straight, it immediately started to go out of straight again.
- Nirvana, CaptainSteve, WackoWolf and 5 others
-
8
-
-
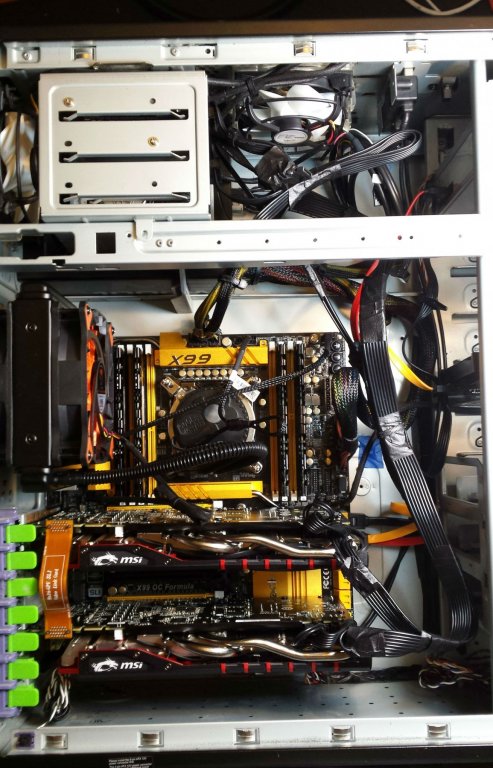
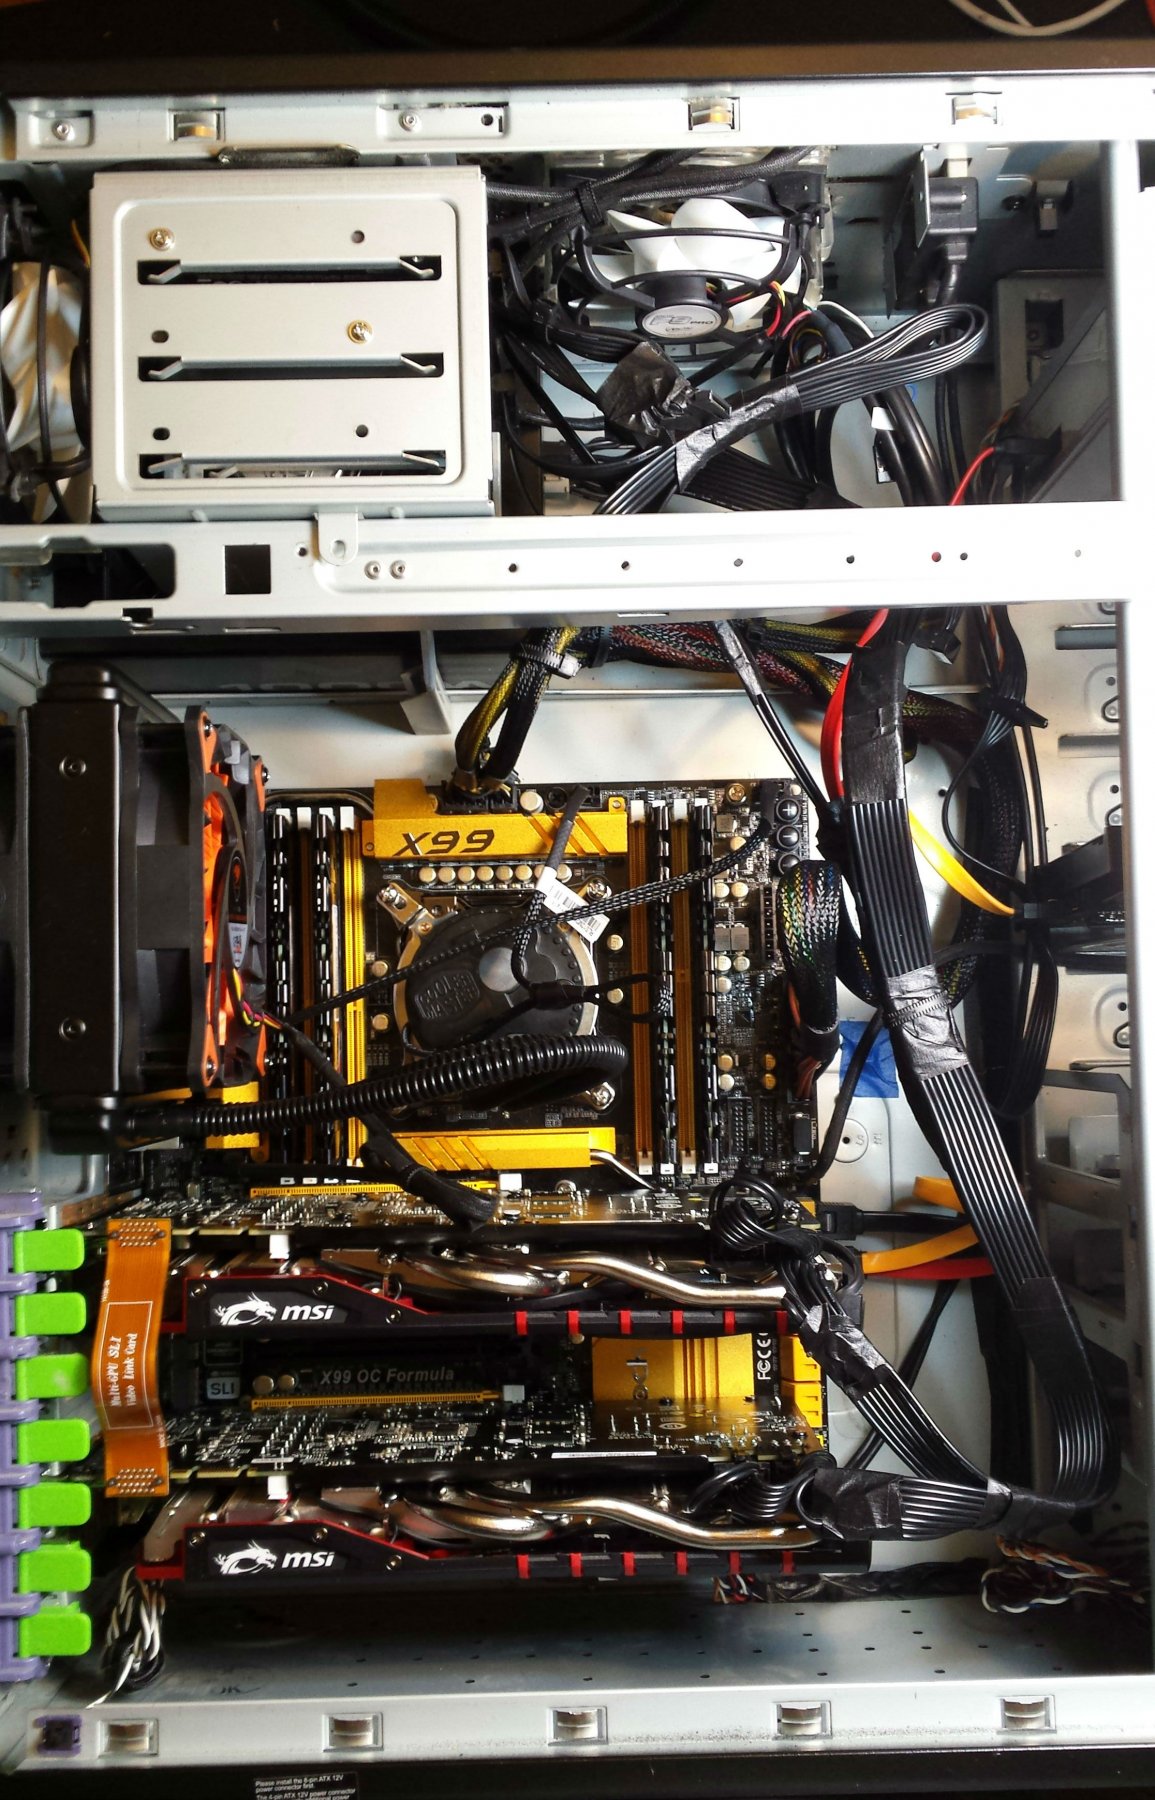
Haven't even gotten it out of the machine yet, was too disgusted to deal with it this evening. Getting the PSU out that always goes in first is never fun.
This is the innards, I have always built my own machines. PSU is behind the drive bays top left, water cooler radiator to the left of the CPU. It's i7/5930 overclocked from 3.7 to 4.2Ghz and the video cards at Nvidia GTX 970s.
-
Webarchive is an archive type exclusive to Safari, won't be able to read them without installing and using it.
- Hubac's Historian, mtaylor and EJ_L
-
3
-
Another one folks may not be aware of are universal tints, as the name implies they can be used to tint lacquer and water based finishes and fillers. However since they're pigment-based they are most commonly used to tint fillers and you can often get a closer match tinting a neutral filler than you can with the glue/sawdust method which (in my experience) tends to come out a bit dark.

-
-
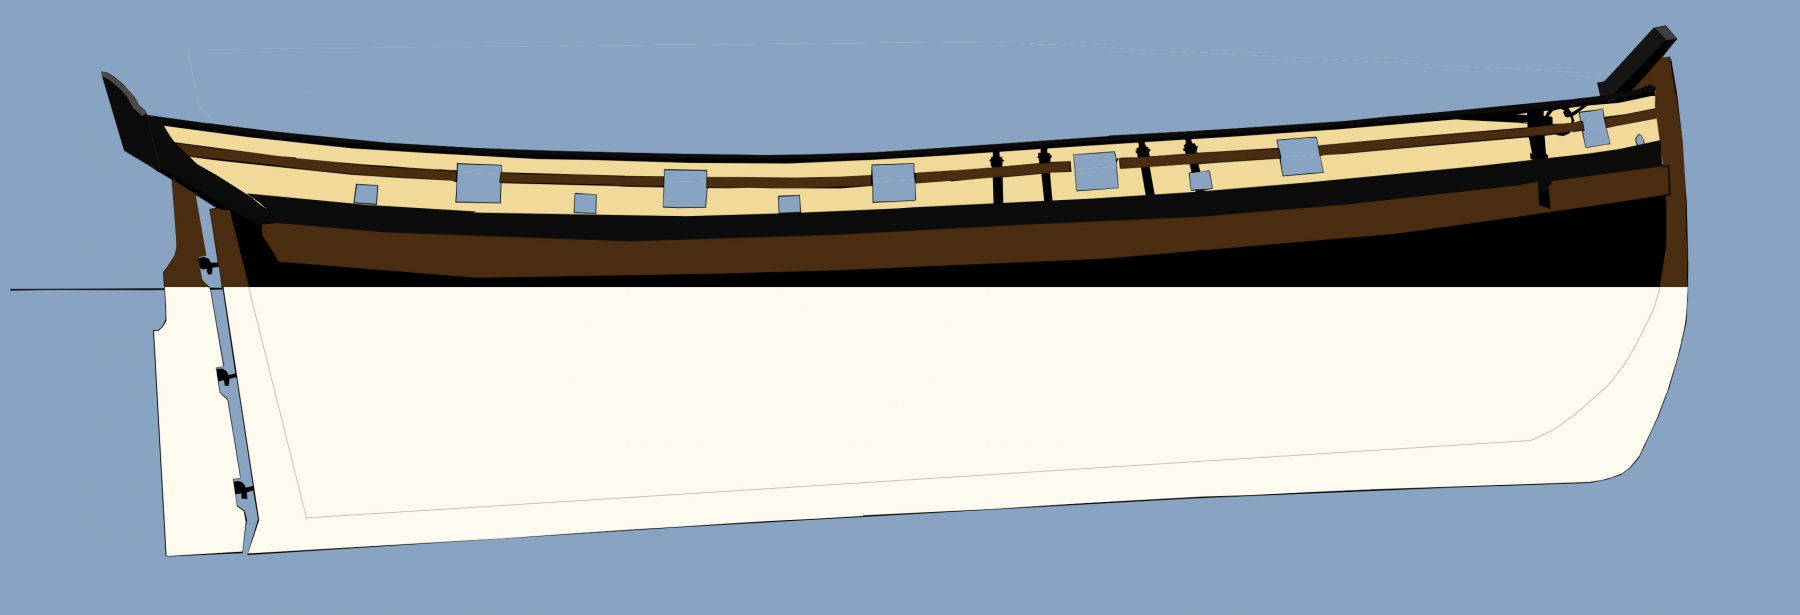
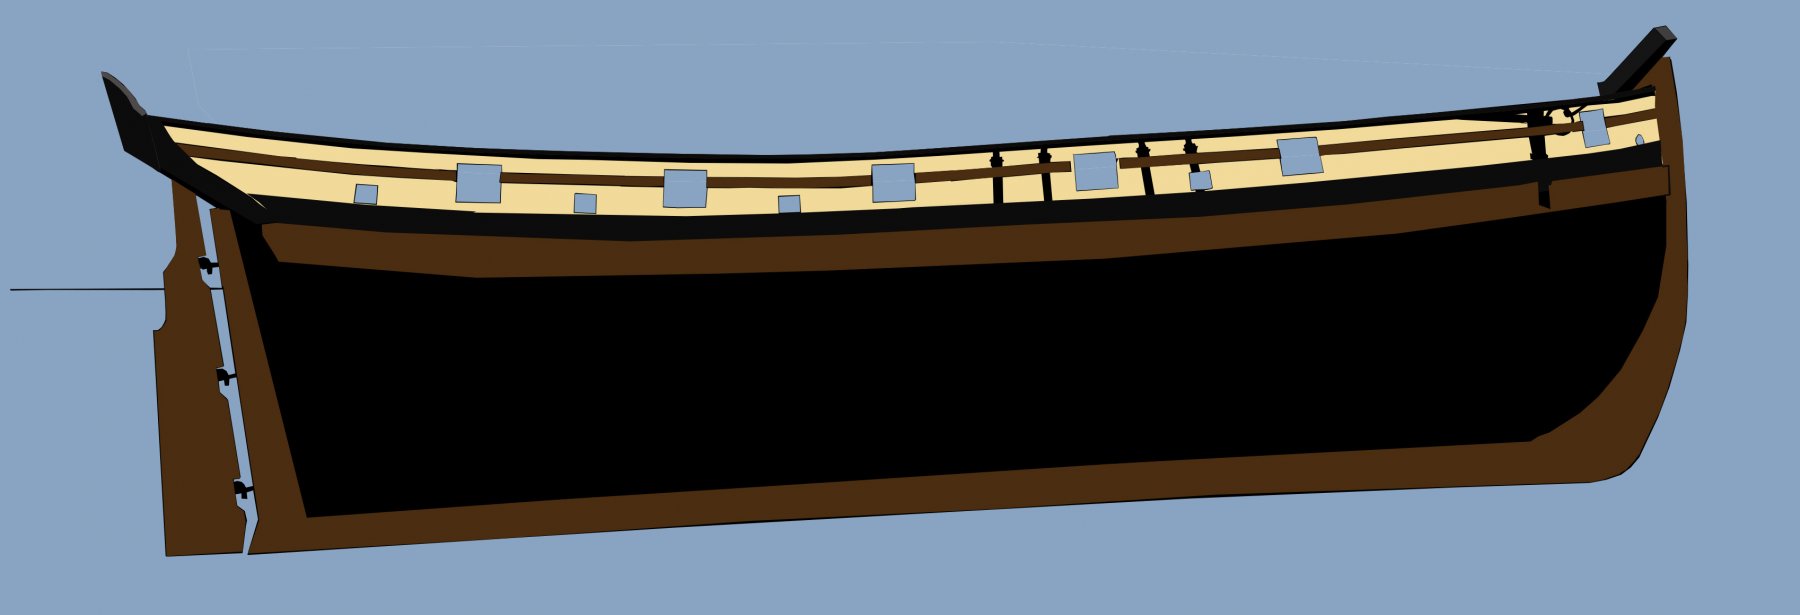
That's the waterline on the plans.
And now I have a new problem, I was on my desktop when the very expensive 1100w power supply suicided, boom computer goes down and we get a nice electrical burning smell. My only hope is that it didn't take the also very expensive motherboard with liquid cooling and the dual video cards and the 32gb DDR5 and the SSDs with it.
-
On 3/10/2017 at 7:01 AM, Hubac'sHistorian said:
I know you guys are 110% right about this. When I was experimenting with my week-long trial of Illustrstor CC, it took a few nights, but I started getting the hang of fairing a curved line. It's just that there are so many tiny curved lines that have to be traced over😱!
Anyway, at this point, the build won't progress until I digitize. I just needed to see that the whole thing was actually feasible.
Thanks for the support guys - it is very much appreciated!
You can do everything you need to do with paths/splines in Photoshop CC plus have a much more logical workflow for the graphics, Illustrator is really for folks specializing in vector graphics for advertising or other graphic design.
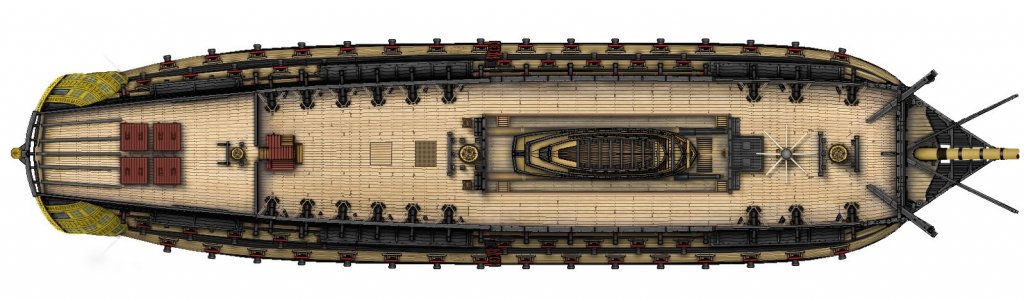
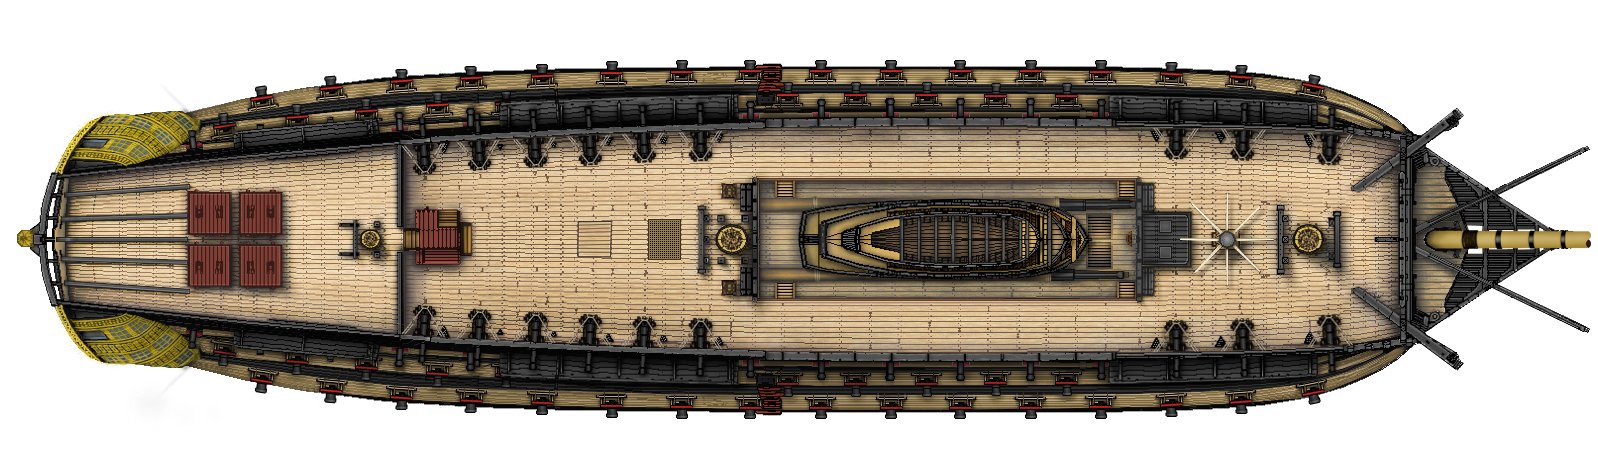
I recently took Gerard Delacroix's Commerce de Marseille deck plan (with his permission) and did the below in Photoshop. I'm pretty sure this kind of detail is enough for what you need and as you can see you can generate depth without much difficulty - almost all of the shadows here are just painting very low strength black (like 95% translucent) with a soft-edged brush and building up those those strokes where it should be dark and not so much where it shouldn't be, and limiting where they go by working inside selected areas.
If 2D isn't good enough you need to go to 3D, CAD programs are the obvious choice there but I prefer 3d modeling programs, I think the workflows are much easier to use for creation of complex 3D objects, you can always export a DXF/DWG/OBJ and import into a CAD program if you need the plan/drawing generation features. However, the learning curve is both steep and long and it takes real commitment to learn enough to be reasonably productive. I've been using 3DS MAX since it was 3DSr4 for DOS in 1994 including off and on professionally, and there are still big sections of it that I have no clue about. So strongly suggest you go as far as you can 2D.
-


USS Constitution by usedtosail - FINISHED - Model Shipways - scale 1/76
in - Kit build logs for subjects built from 1751 - 1800
Posted
There ya go, win-win for everyone! And it was about 80 outside yesterday")
Back in reality, very nice progress and she looks great.