HOLIDAY DONATION DRIVE - SUPPORT MSW - DO YOUR PART TO KEEP THIS GREAT FORUM GOING! (Only 13 donations so far - C'mon guys!)
×


JerryTodd
-
Posts
875 -
Joined
-
Last visited
Content Type
Profiles
Forums
Gallery
Events
Everything posted by JerryTodd
-
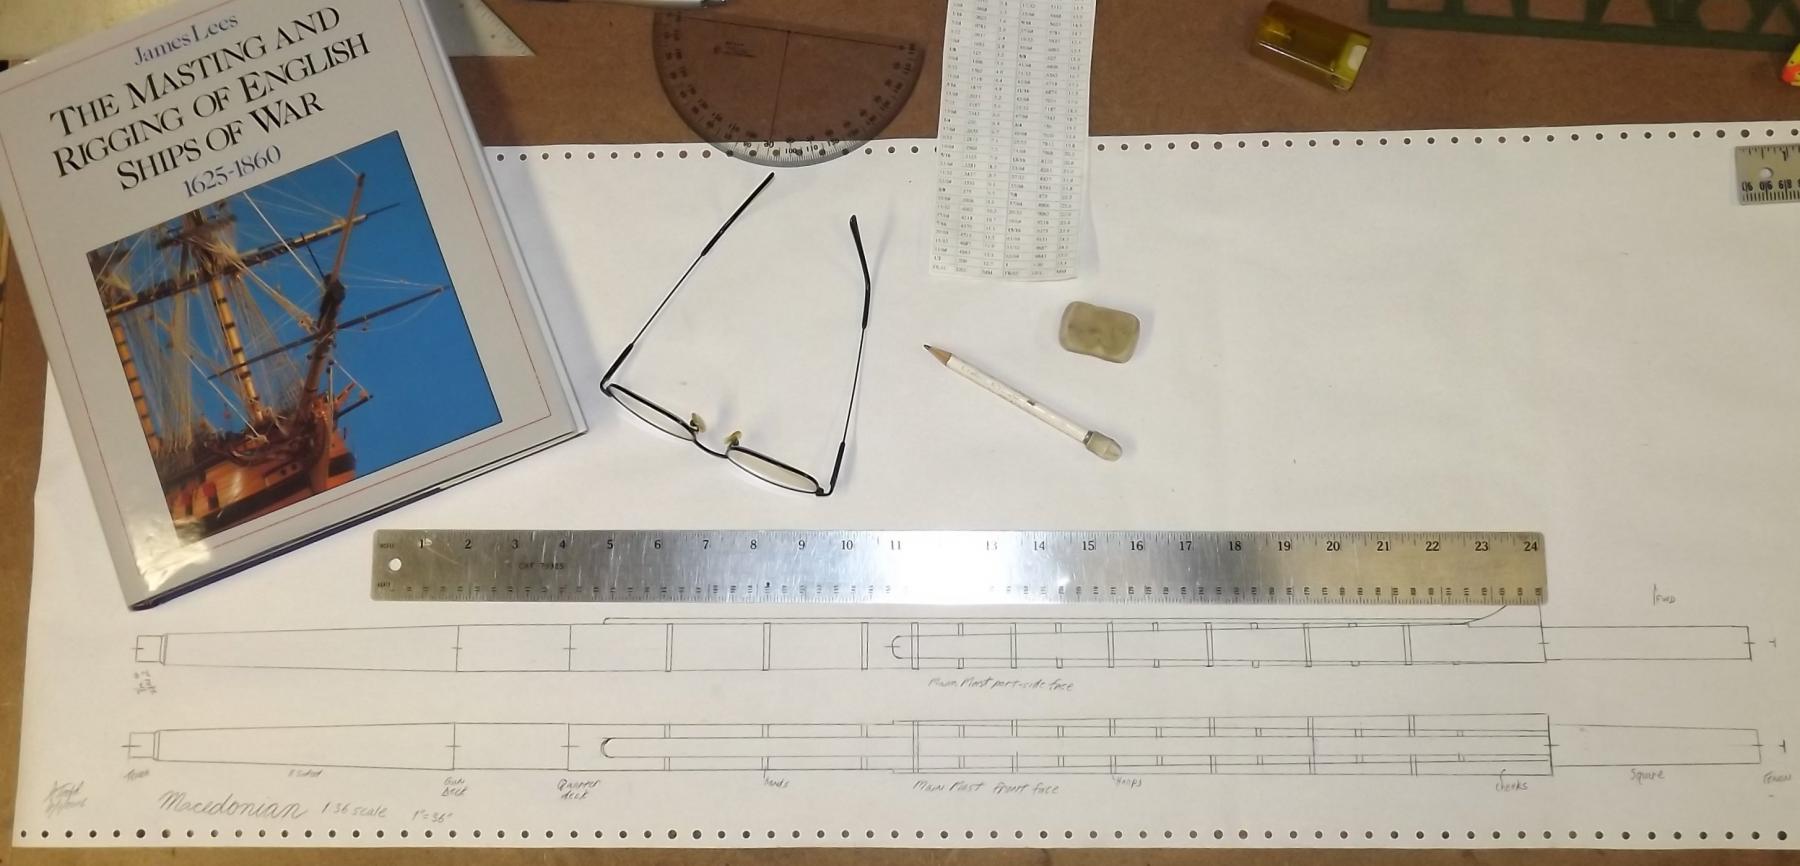
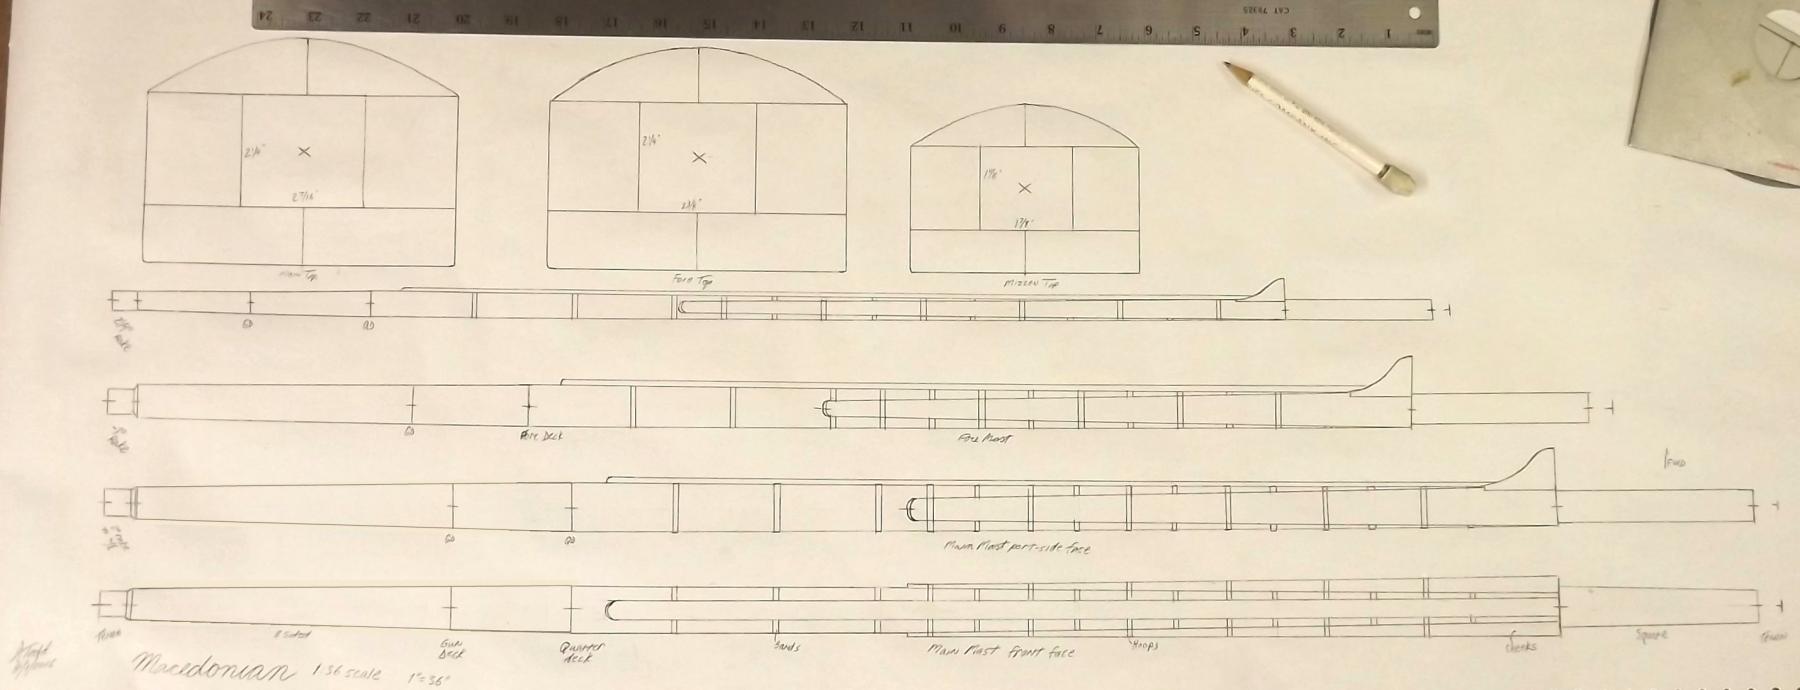
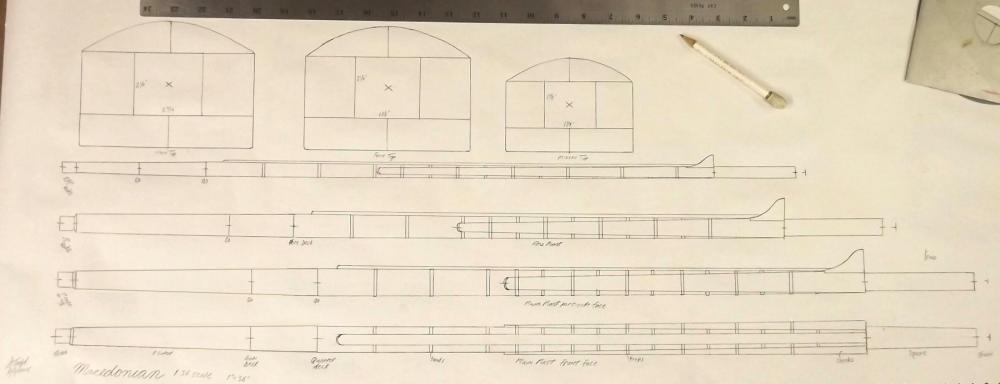
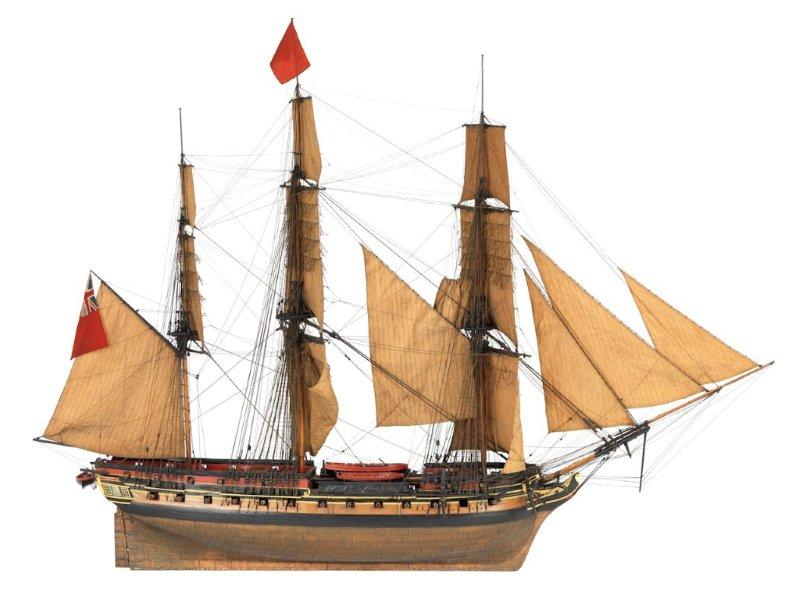
 Looking through Lee's for something else and got to thinking about Macedonian's sticks, so I started drawing them full-size (for the model that is). As many British friigates I've seen get built on this forum, I was surprised at how complicated figuring out Macedonian's rig has turned out to be. I knew I didn't want the spar dimensions taken off in 1819, as she was completely re-rigged to American standards at that point. I wanted British dimensions, but the standard spar dimensions for a 38 gun frigate turned out to be not all that standard. after checking various sources within Lee's, as well as a couple of iterations of Steels, and a couple of other places - even trying to get an idea of proportion from the lovely in this NMM photo; I eventually just opted to go with the proportions given in Appendix I of Lee's which is based on the main mast being the length of the gundeck plus the beam, divided by two (then divided by 36 to get my scale). I built an Excel spreadsheet that figures it all out by plugging in those two numbers and the scale (the forum wouldn't let me attach it). Again, using Lee's as a guide, to figure out the proportions for the period Macedonian was built (1810), I started drawing... This is the front face and port profile of the main mast which is about 33.5" overall. Ignore the tops, the size is right, but the front curve is not. I just scanned the top shown in Lee's and scaled it to each mast.
- 97 replies
-
- 8
-

-
- macedonian
- frigate
- (and 2 more)
-
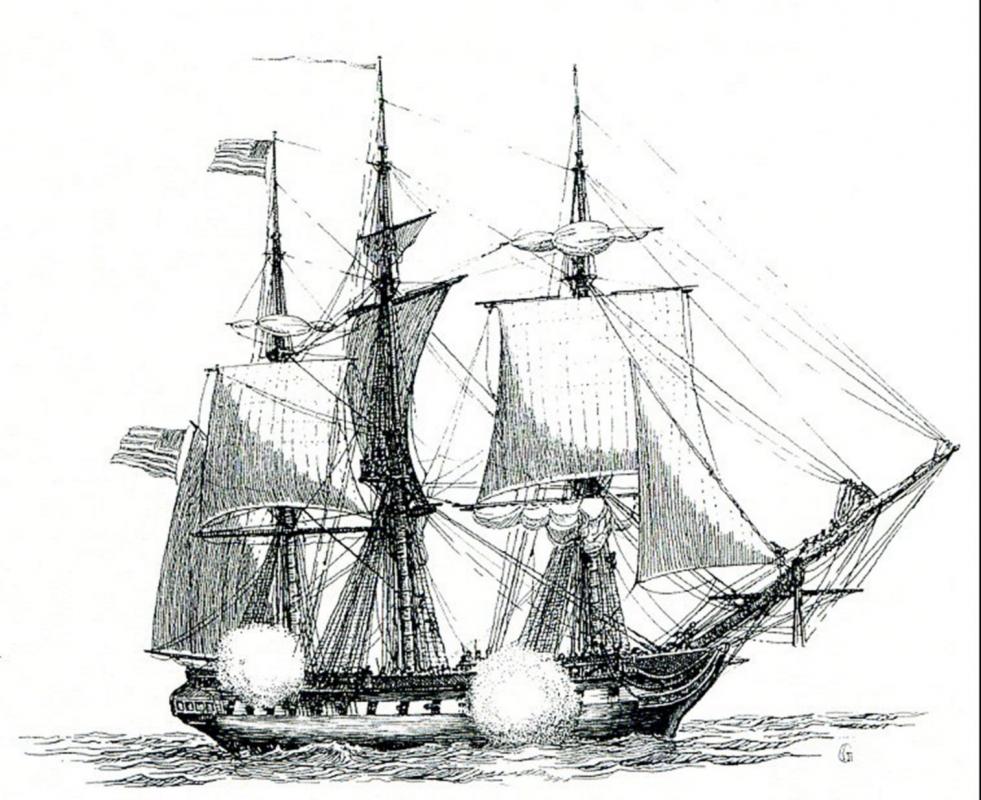
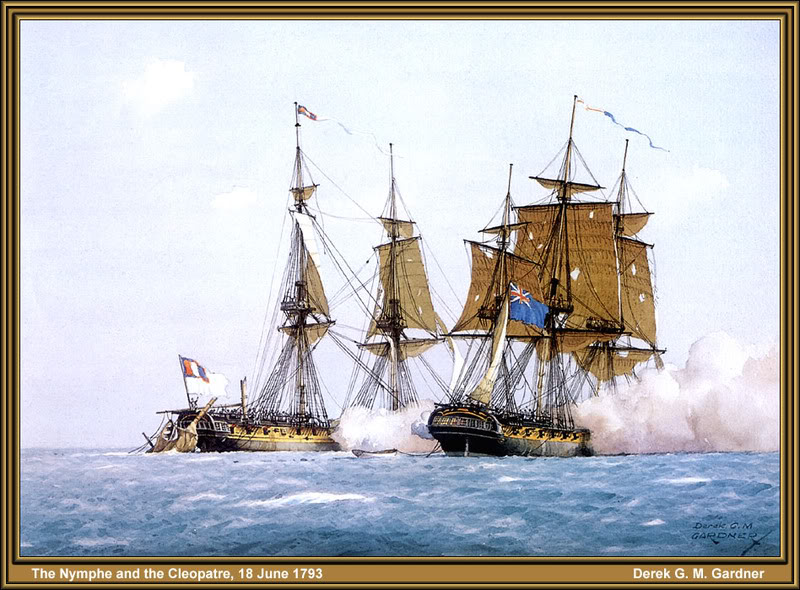
Here's a couple showing vessels under "battle sails" with the corses and t'gallants in bunts and clews
-
They could be "hanging in their bunts" as if they were just loosed or about to be furled proper.
-
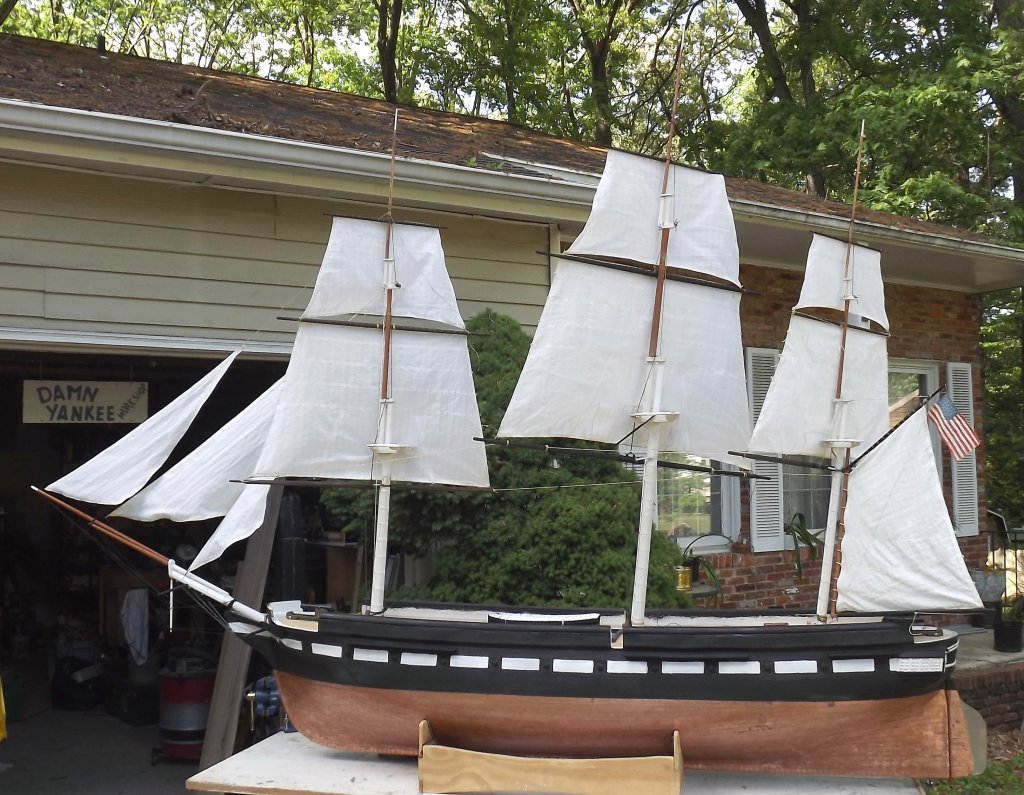
Constellation's been coppered since 2010. She's been in fresh water and brackish water. The tape sticking hasn't been an issue, but sliding the model on something like auto-carpeting the wrong way will catch and lift corners, like scaling a fish; and edges, protrusions, etc, rubbing along the bottom should be avoided - all of these are transport issues. If you have to transport her off the cradle, put a pad of some sort under her so she can be slid without rubbing her scales the wrong way. As for the patina... Being a working model, I could let her take on her own patina naturally, then clear-coat it when it was where I wanted it. I clear-coated her bottom in September 2014 using a matt finish spray. When I paint Macedonian I'll give it some brown washes a little at a time till I get her bottom to look like Constellation's copper. The paint I used has copper in it, or so says the can, but being in a paint suspension it won't brown or dull on it's own.
-
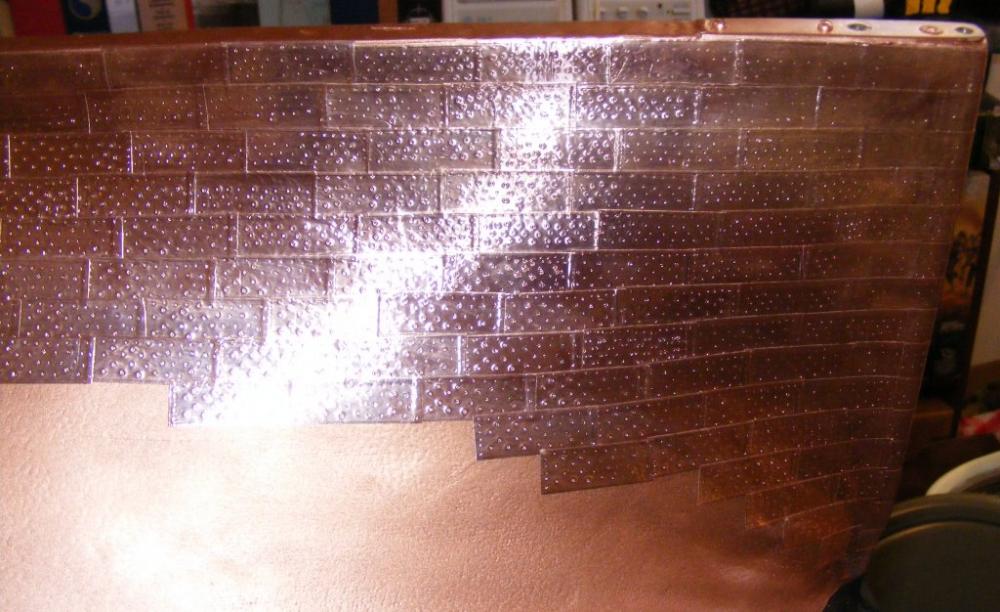
I coppered Constellation with copper tape from a place that sells it for electrical applications. They sell a coated version (non-conductive), you don't want, and an uncoated version (conductive) you do want if you want a "patina." It was cheaper than the model suppliers, and the large size is harder to find at model suppliers anyway since they cater to 1/48 scale and smaller kits. You can see my coppering job, including the nail patterning on my thread Very soon after getting coppered, while is was still bright and shiny. Very pretty, but not what I wanted. A couple of dips in the water later, the copper is much more dulled and browner, but still looks good. This is when I clear coated it and hopefully it'll stay this way. Notice, it's not green! Copper tape is expensive. It took slightly over two rolls to cover Constellation and cost over $50 US. The copper paint I pre-painted her bottom with looked good though, and I could get 4 inch wide aluminum peel and stick duct-tape for $20 a 100 foot roll! I tested the idea on Constellation's launch and plan to use it on Macedonian instead of actual copper.

-
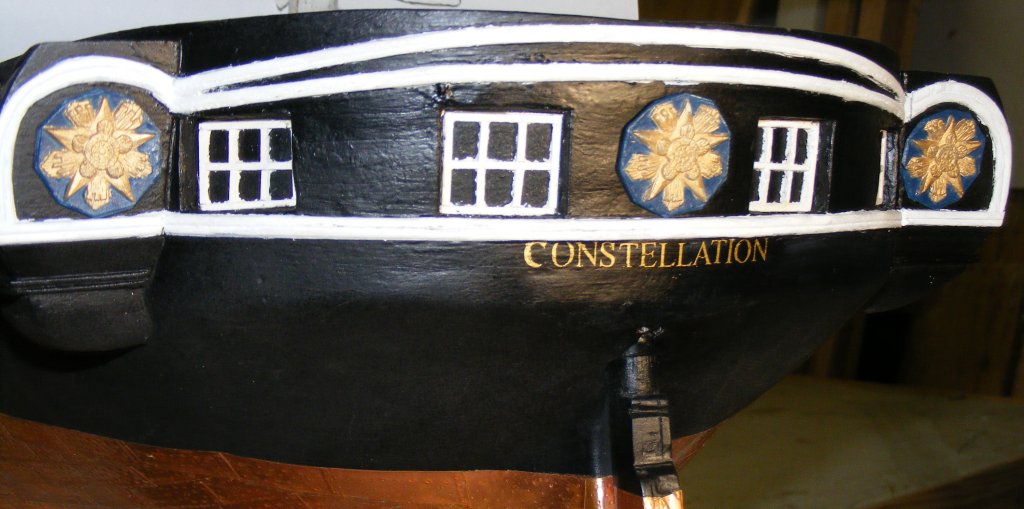
Ship lettering
JerryTodd replied to piperck's topic in Building, Framing, Planking and plating a ships hull and deck
Mine were a little larger than you might want, but I got gold dry-transfer lettering from Letraset in the UK. http://www.letraset.com/products/90-Letraset-Transfers/
-
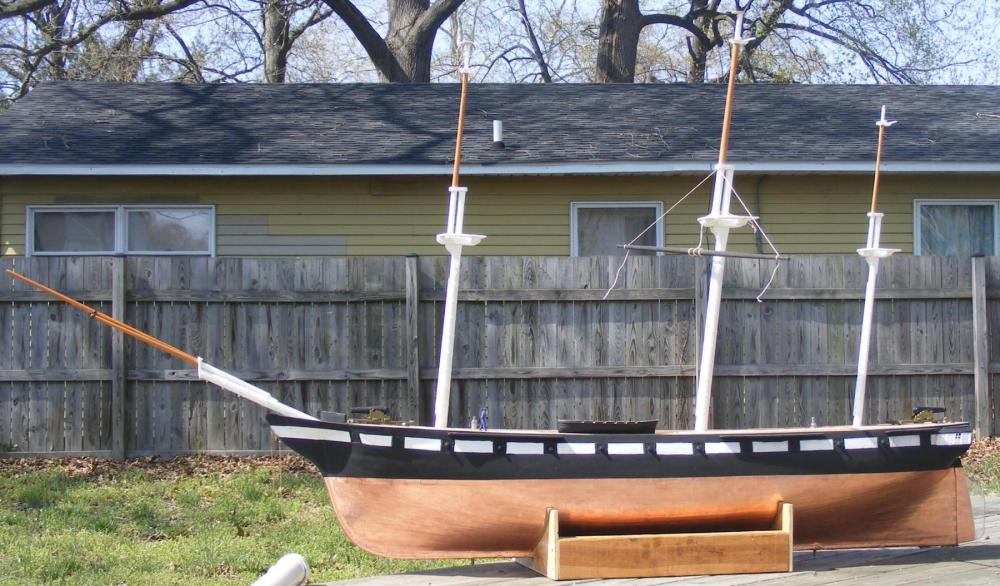
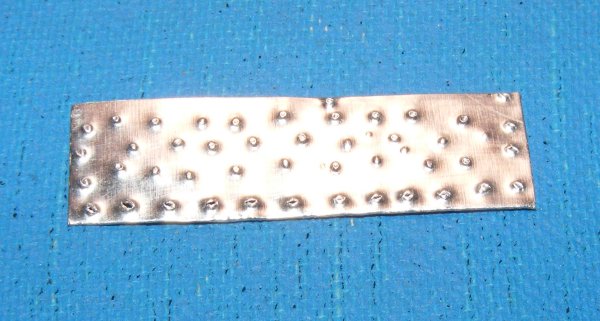
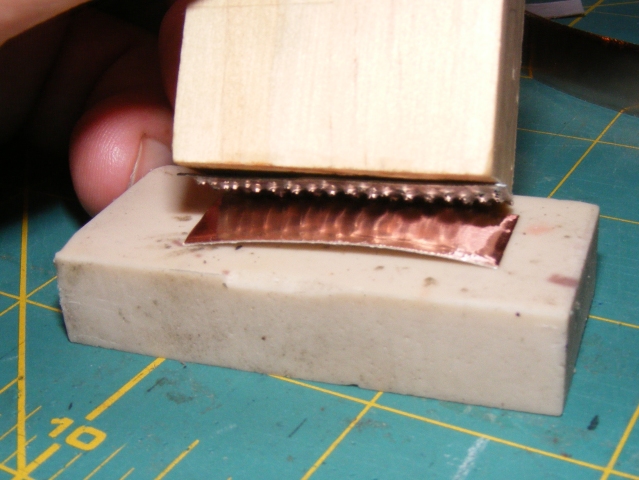
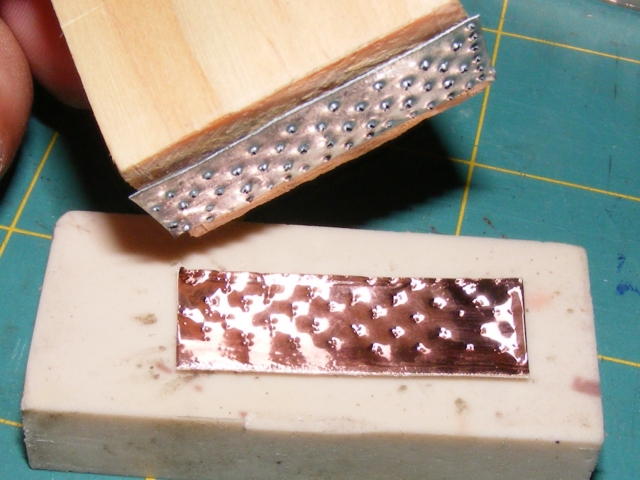
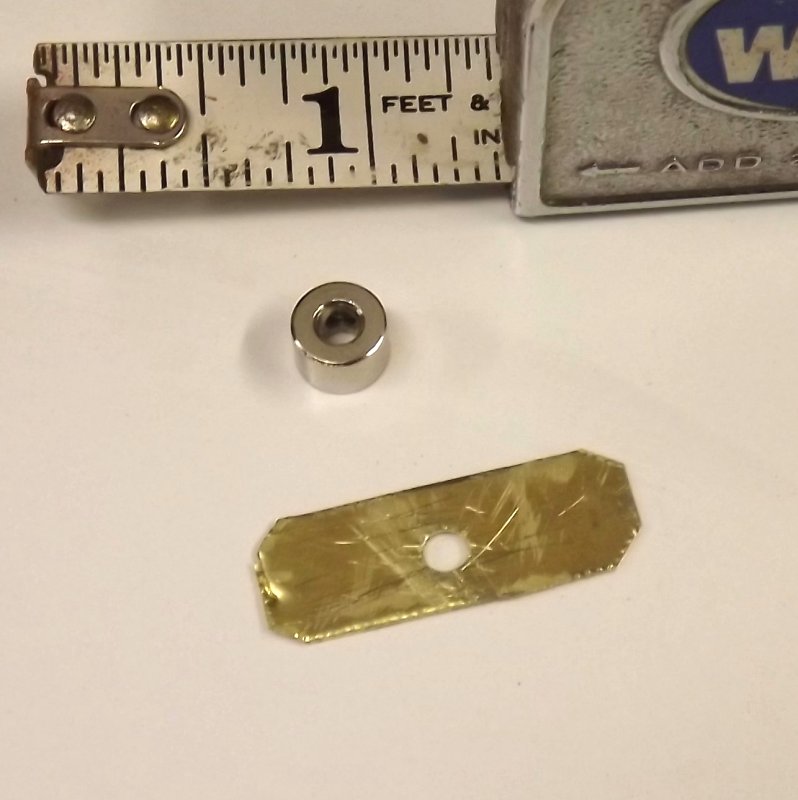
Copper sheets were held on with counter-sunk, flat headed, copper nails - not rivets. If you're using peel-n-stick copper tape, get some thin brass or aluminum and make dents in it for the nail pattern, You can fold an edge down to imprint the seam. Mount the plate on a block or handle, and press it into the tape on a firm backer, like hard rubber. The above model is 1:36 scale and 62" on deck, and the tape is 1/2" wide. The dents are made from the outside, and get pushed back out when the plate's pressed onto the hull, giving a counter-sunk nail appearance. The process works as well at smaller scales.
-
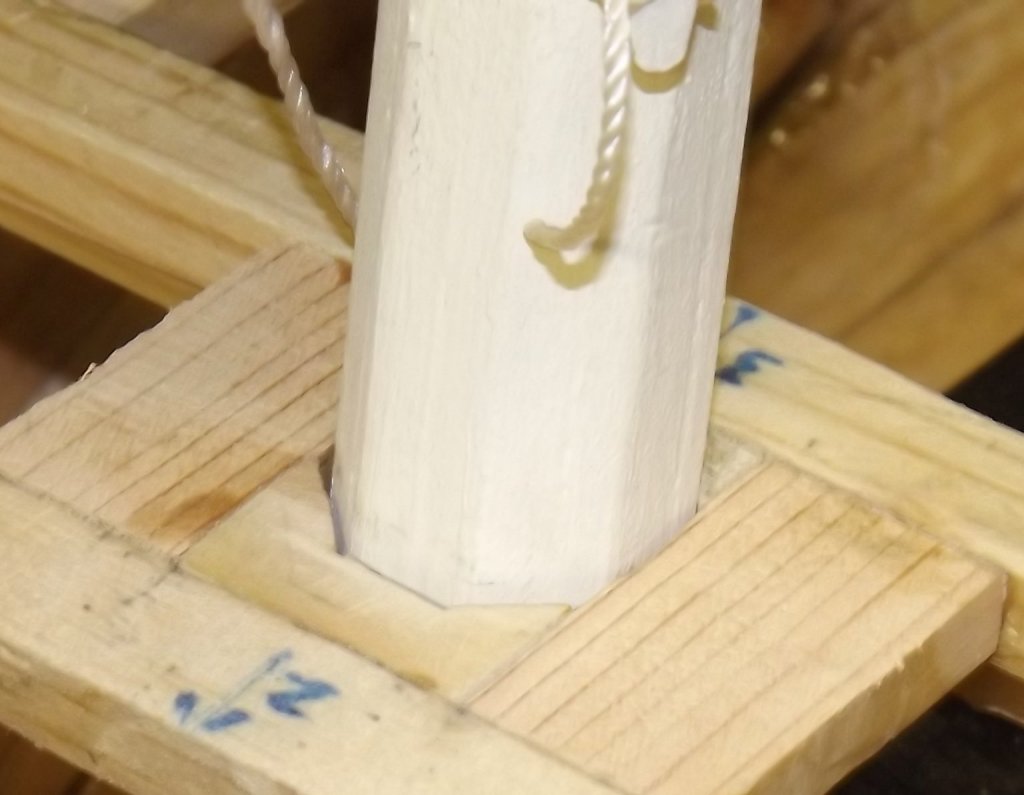
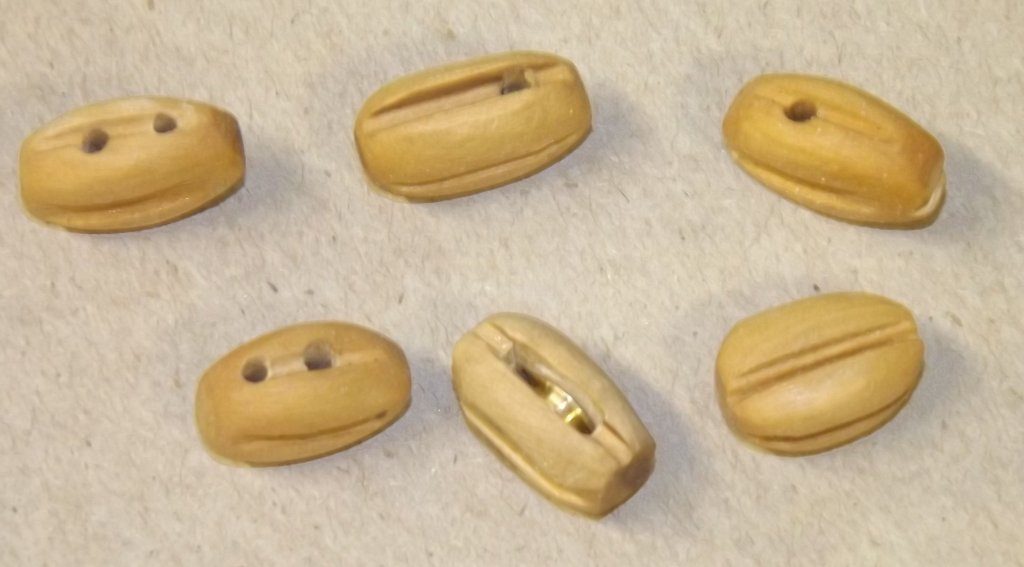
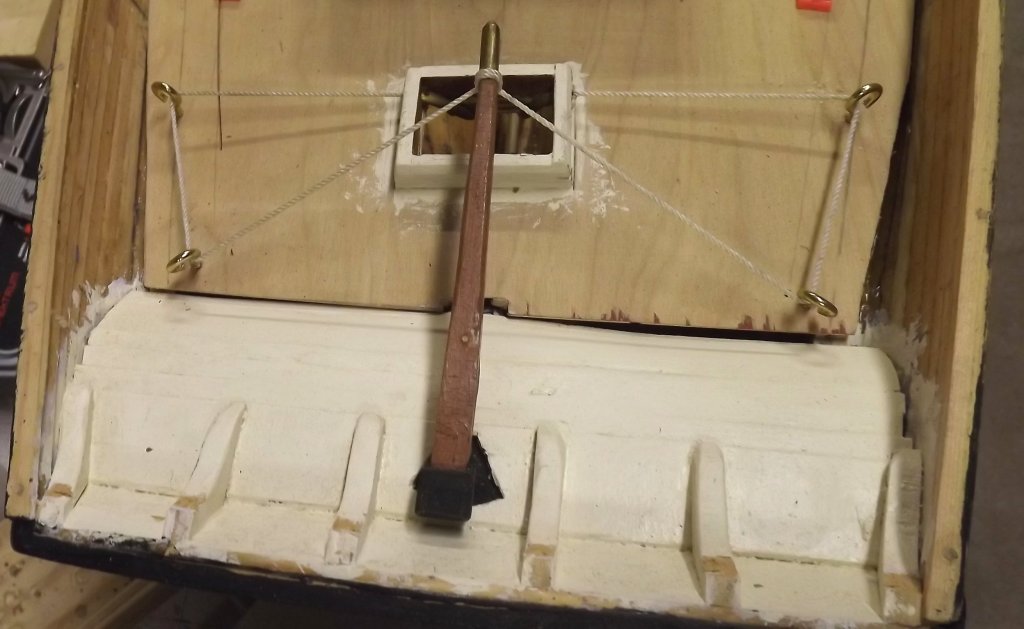
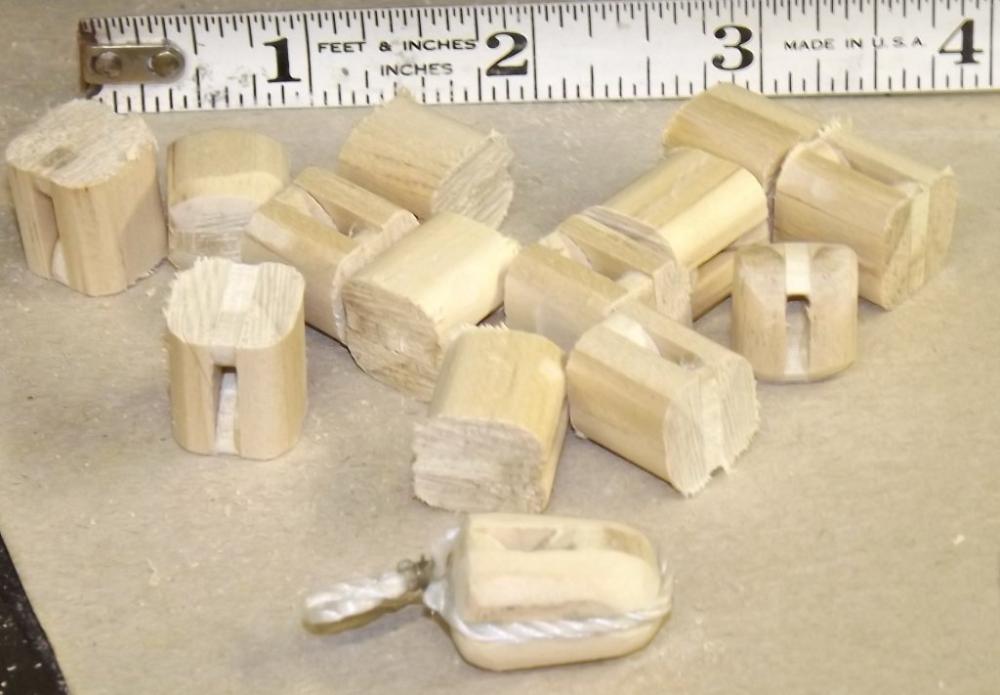
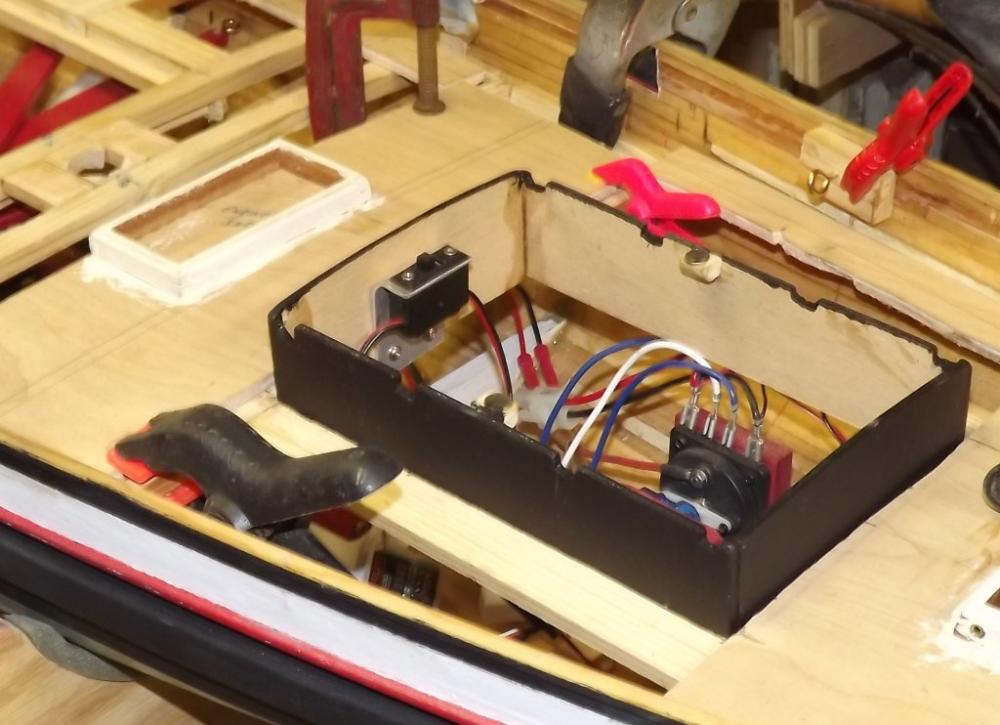
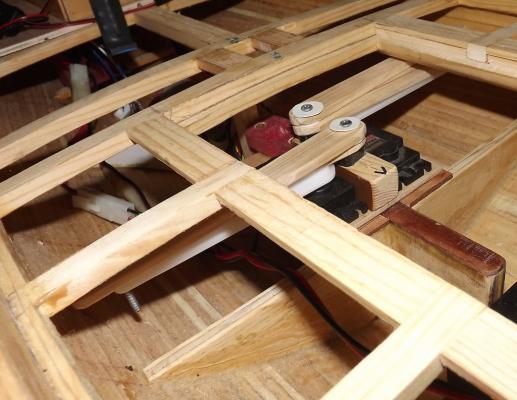
Still working on the fores'l sheeting. My problem is too much friction - it binds too much for the arm to pull the sail across. With a single fair-lead I can pull the sail over with the sheet just laid over my finger, but the port sheet has to be routed across to the starboard side, and both are doubled onto the arms to increase the arm's pull length. But for now, it's time to procrastinate... I mounted the master switch in the front of the cabin trunk... ...installed blocking in the mast partners that hold the masts at the correct rake angle and help against twisting... Installed a "beam" aft to catch the end of the sub-deck there... ...and got to making some quickie blocks to use on the fair-leads down below decks. They don't have working sheaves, but the line glides through the wider hardwood dowel than it does around narrow screw-eyes. Some of these will no-doubt get replaced with ones that have working sheaves (probably from some Delrin rod I have), but these help me get the system in order. On the subject of working sheaves; these lovely blocks, sent to me some time ago by Victor Yancovitch, will be modified (like the one front-center) with working sheaves for use on the tiller ropes above deck. Another bit of procrastination was framing up the new "engine room hatch" between the main mast and the cabin trunk. I thinking I may need to widen the main hatch from 5.5" to maybe 8". The last fair-lead for the sheeting arms are mounted near their tips, inside the hull, up under the deck, and will be a real pain to access. That's down the road. Once I get the sheets working, then I'll revisit the idea and determine if it's really necessary to get into that level of surgery. I went ahead and painted the inner cabin trunk black. The lid has slit windows on the sides and I colored the inner part with black marker where you could see through them. It just seemed cleaner to paint the whole thing.


- 79 replies
-
- 7
-
-
- pride of baltimore
- privateer
- (and 3 more)
-
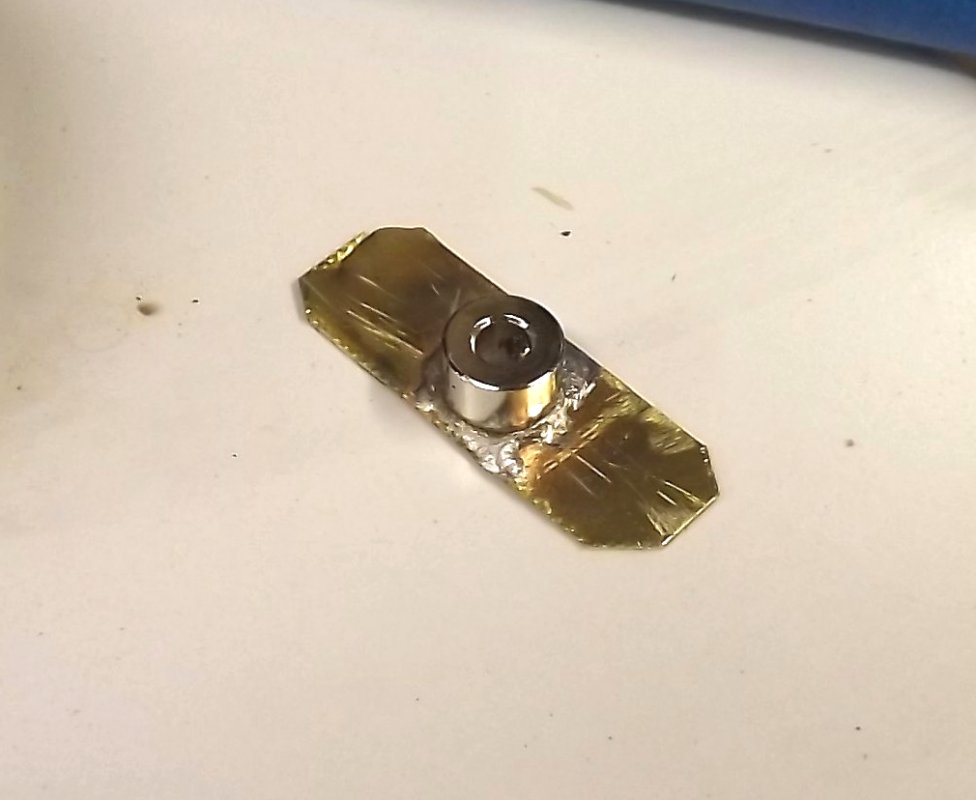
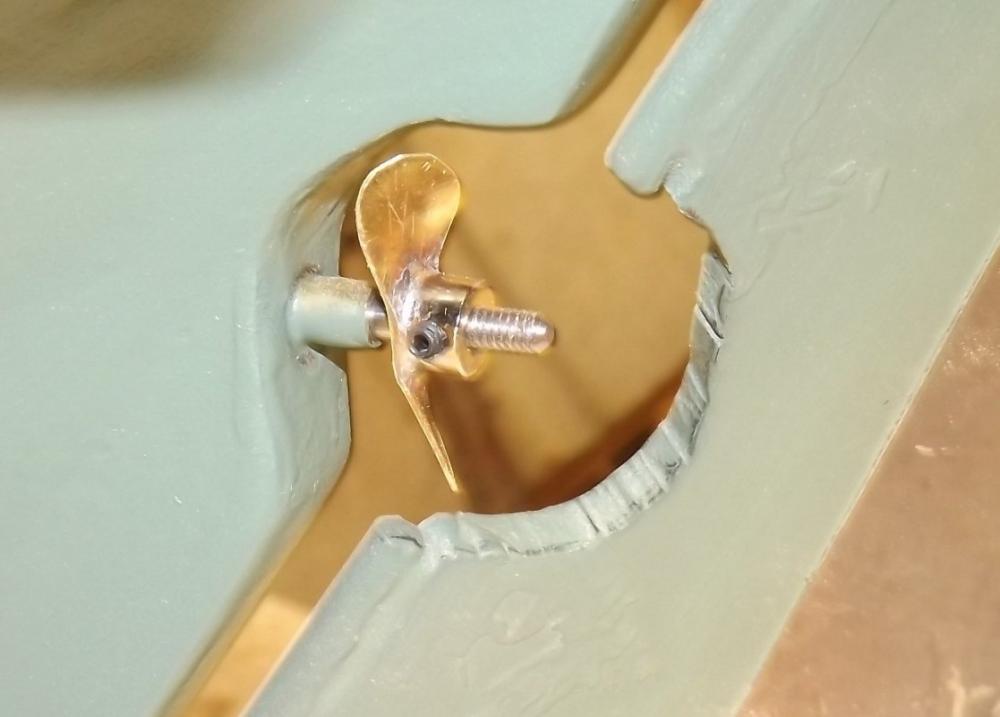
I've been pecking at the sheeting for the fores'l and not having much luck. In the mean-time I ordered some cable extensions for the rudder servo and some shaft collars which came in yesterday. The shaft collars are for making a 1-1/8" propeller since I couldn't find a metal 2-blade prop that size online. I just gave it a little pitch until I can test it in water.
- 79 replies
-
- 5
-
-
- pride of baltimore
- privateer
- (and 3 more)
-
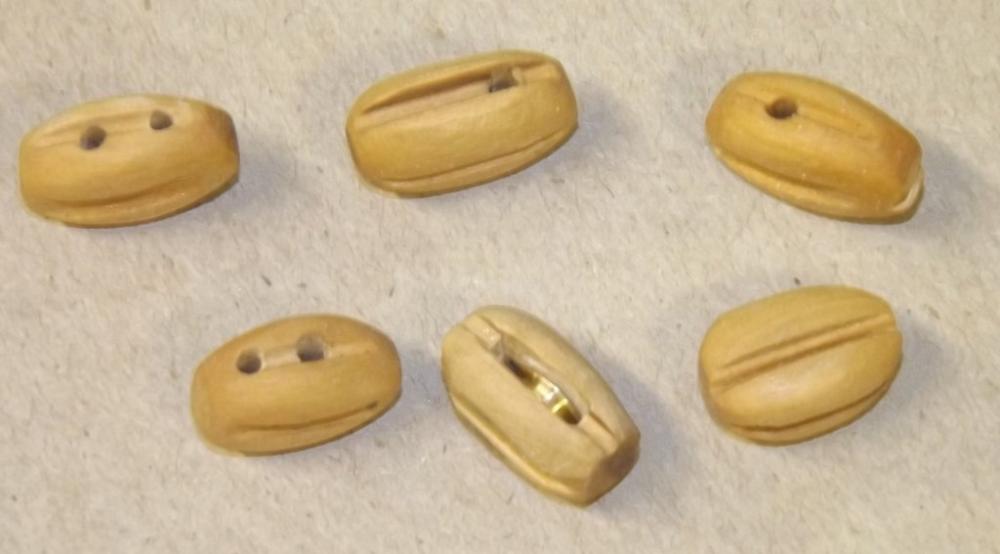
Actually rigging the vessel's great, but making things like chain-plates and bullseyes for a working model is not my favorite thing. Making blocks is ok, even with working sheaves (since I buy brass sheaves and don't typically have to make them). I'm not a fan of walking rope either, but in the diameters and lengths I usually need I don't have much to choose from; I've yet to find a source of 1/8" or 3/16" diameter line made from Dacron polyester which is what the standing rigging on my models typically is. Glad that's off my chest - I feel better
-
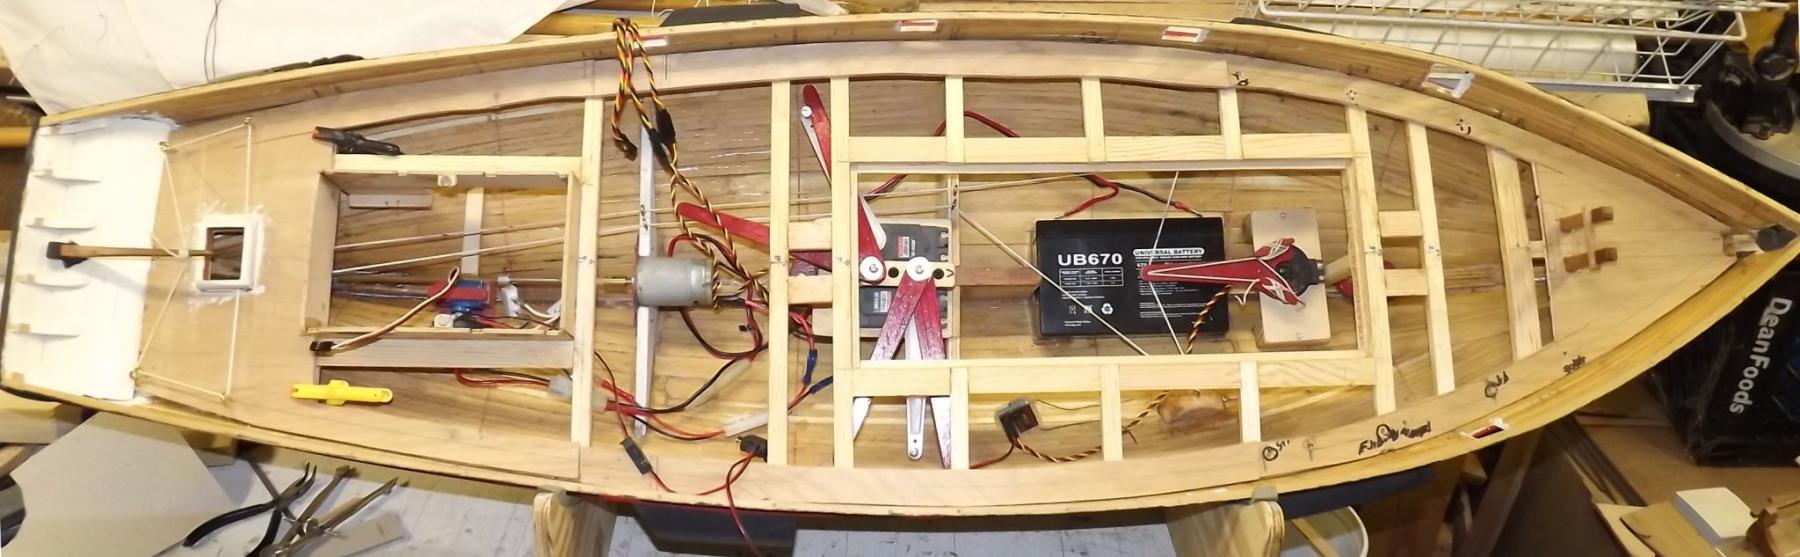
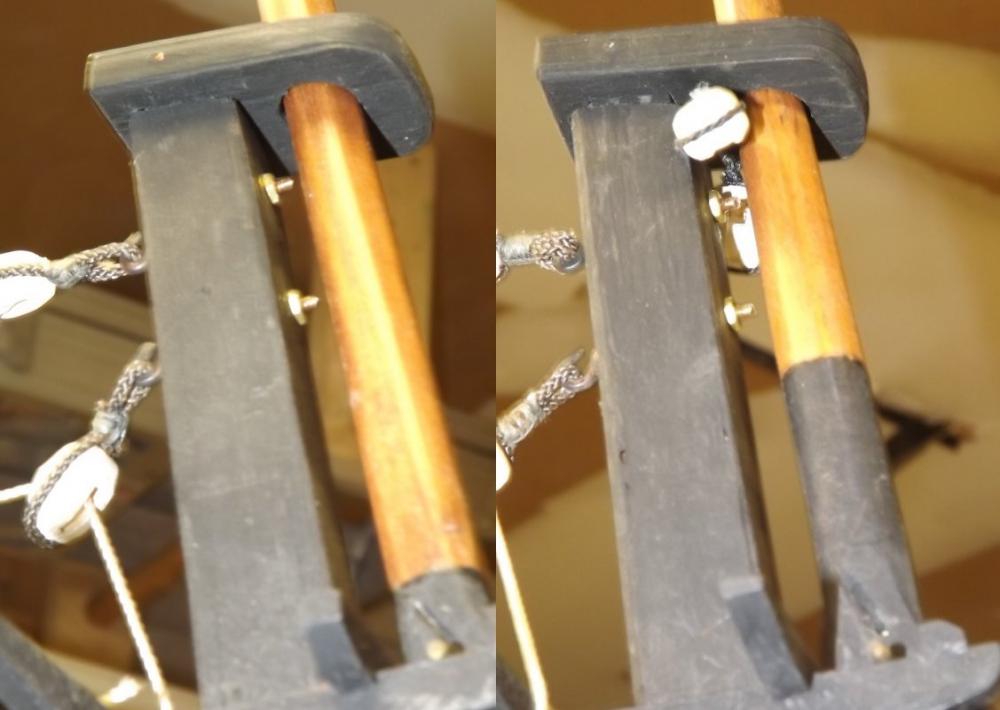
A little paint... A look at everything... Threaded the gaff haliard hooks on the masts and put nuts on them.... And a little video of the steering in operation. Once the working blocks are installed on deck and on the pillow blocks P&S of the rudder servo - it'll be smoother - it's rubbing in a lot of places at the moment.


- 79 replies
-
- 5
-
-
- pride of baltimore
- privateer
- (and 3 more)
-
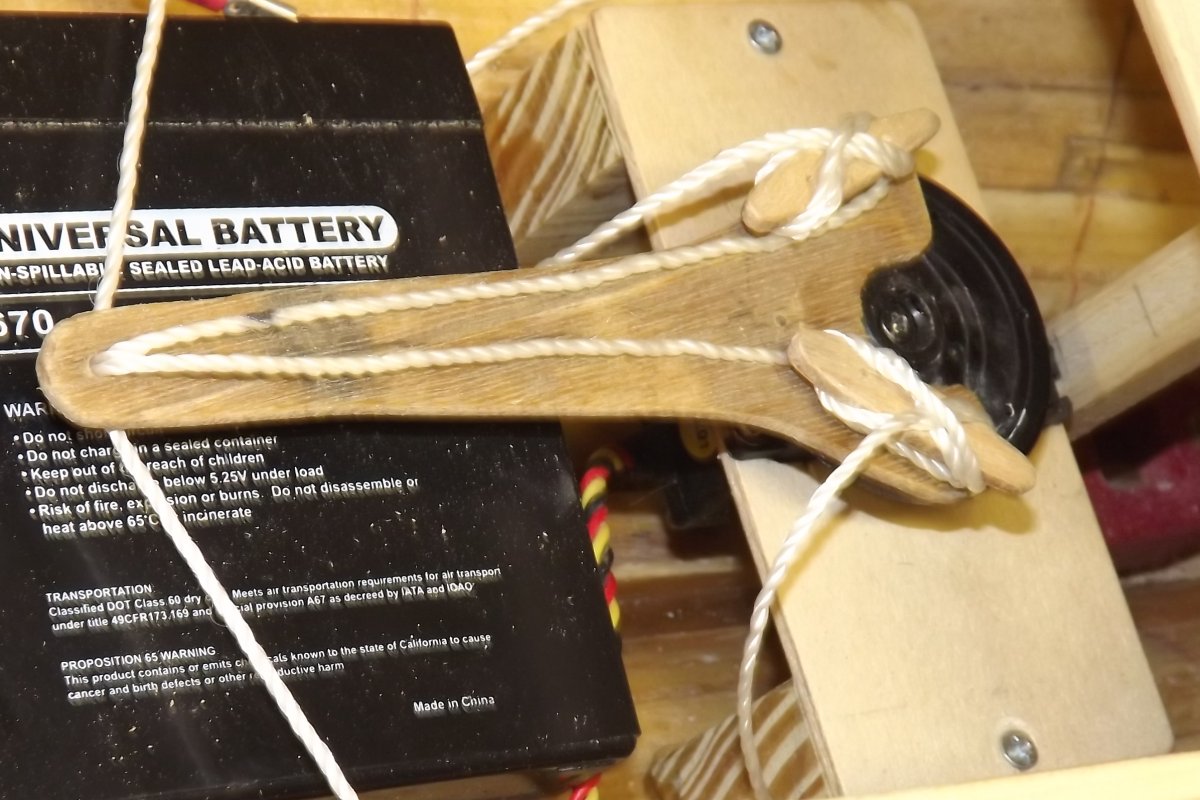
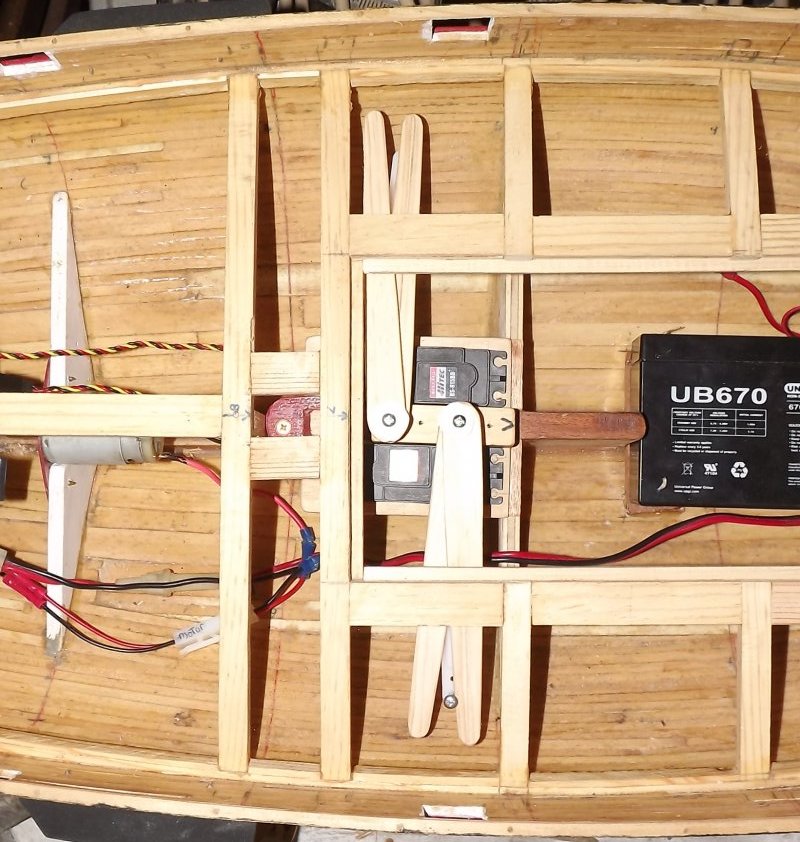
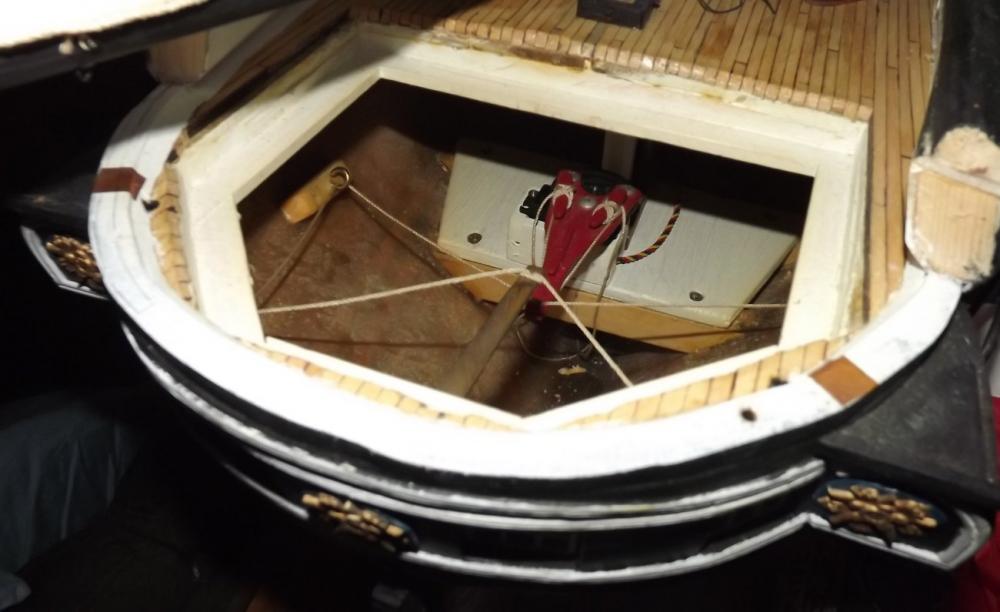
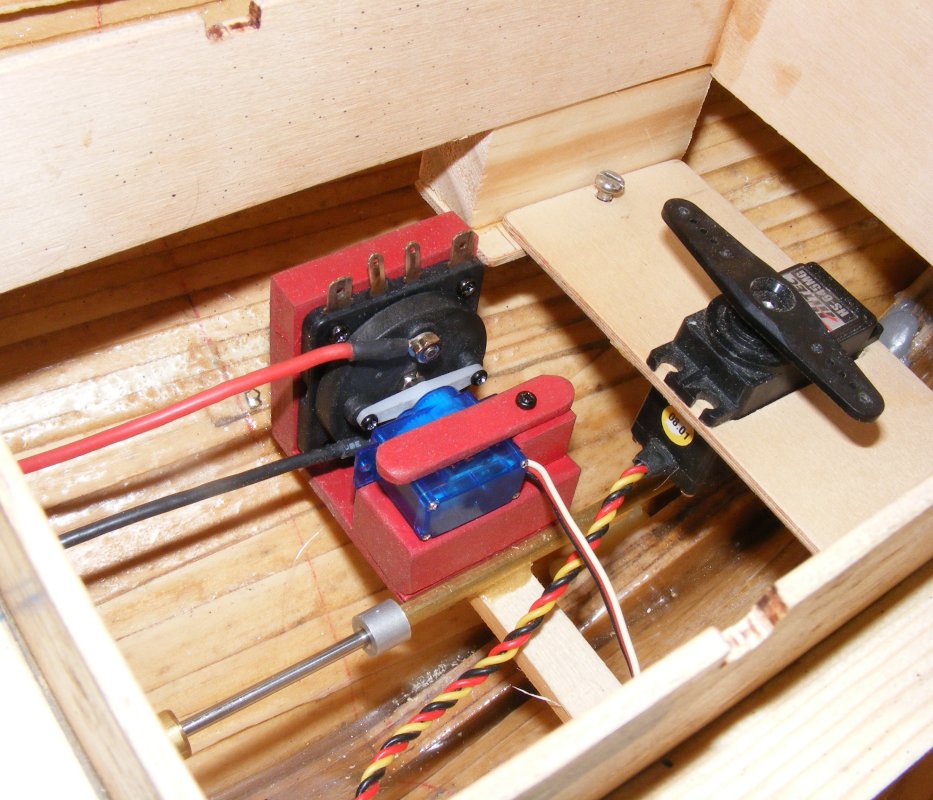
I settled on a way to handle the steering that's pretty much the same way I did it on Constellation. The arm on the rudder servo has cleats so I can adjust the lines if needed. I mounted oak blocks in the hull to lead the steering cables to either side of the servo. The arm and the cleats are made of very thin luan plywood called doorskin which is literally what they sheath interior doors with. I'll paint it red eventually because I have a can of red spray paint I have no use for otherwise.


- 79 replies
-
- 3
-
-
- pride of baltimore
- privateer
- (and 3 more)
-
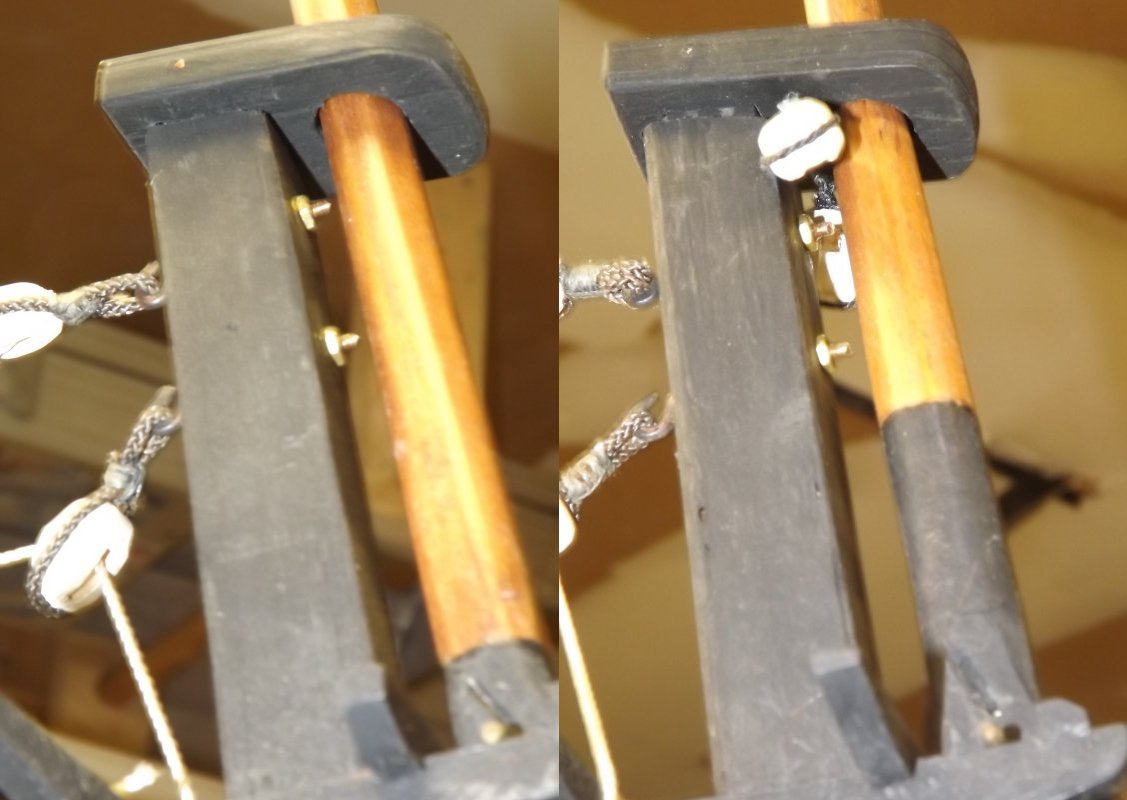
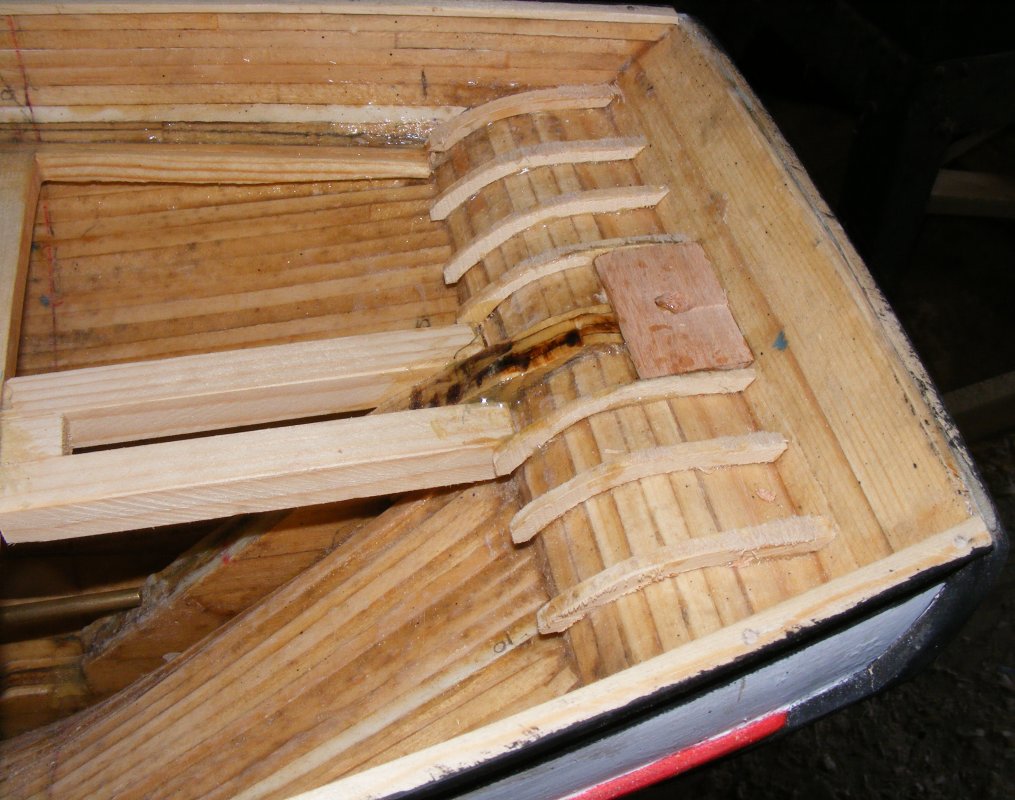
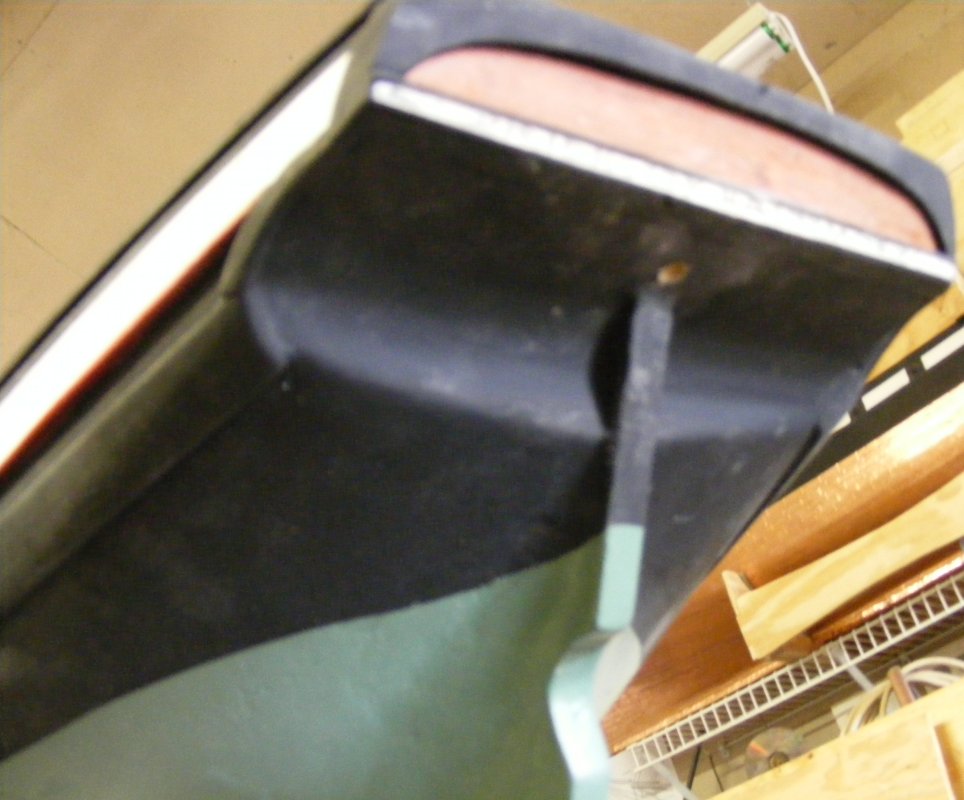
There is no "under deck" back there, at least none that I'll be able to access or run gear through. I originally though to run the steering lines to the waterways and then into the cabin sides to the servo, but then the idea of routing it through the lazerette hatch struck me as doing the job more subtlety and actually using otherwise unusable space. The main hatch forward is 13" x 5-1/2" - a lot easier for me to get into and the main reason I move the rudder servo forward. I have a different idea at that end I'm working on which I'll post when I get it set-up. Counter's frames installed, these are maybe 1/8" thick. Under the counter. Counter decked with 1/16" bass. The prop shaft tube installed, showing the tight space behind the cabin that will be inaccessible once the deck is on. (those twin beams are gone, unneeded.)

- 79 replies
-
- 4
-
-
- pride of baltimore
- privateer
- (and 3 more)
-
The rudder head comes through the counter and there's no place to run linkage through that wouldn't be obvious and clunky looking. Pride had relieving tackle rigged most of the time and rigging the steering this way approximates that somewhat.
- 79 replies
-
- 4
-
-
- pride of baltimore
- privateer
- (and 3 more)
-
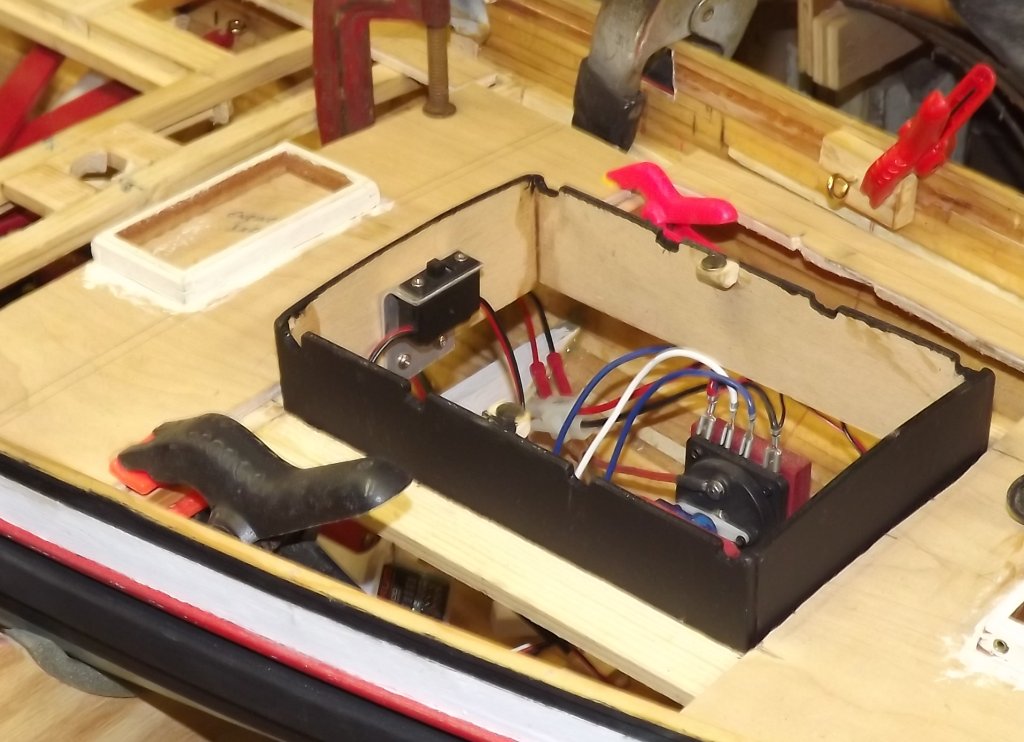
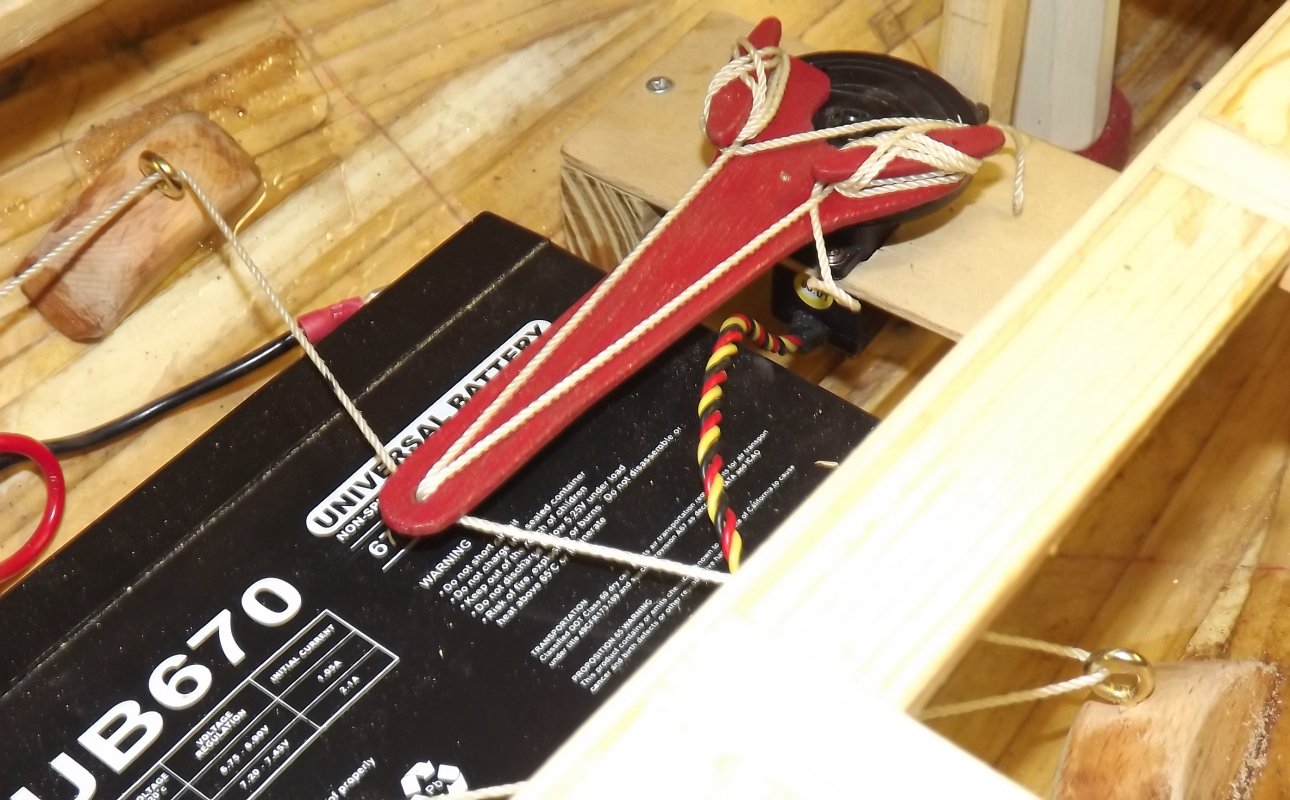
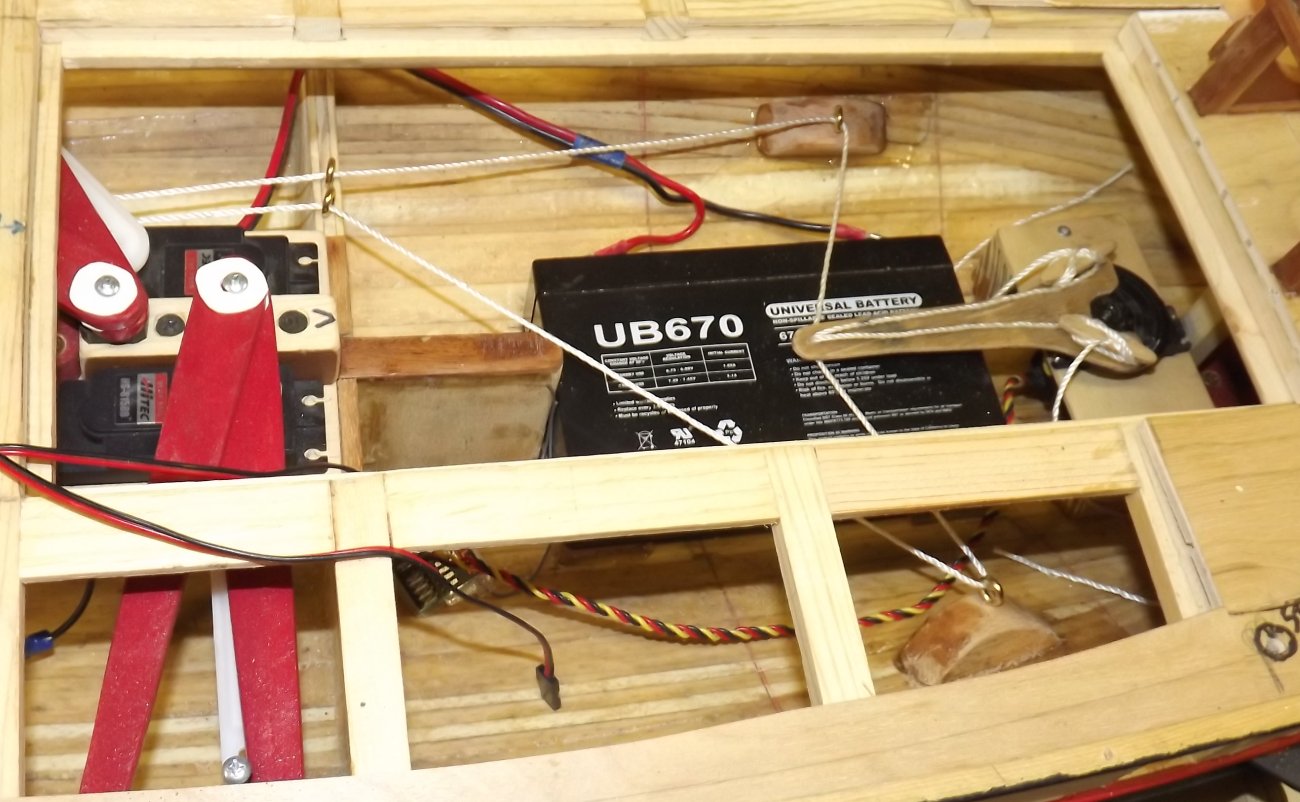
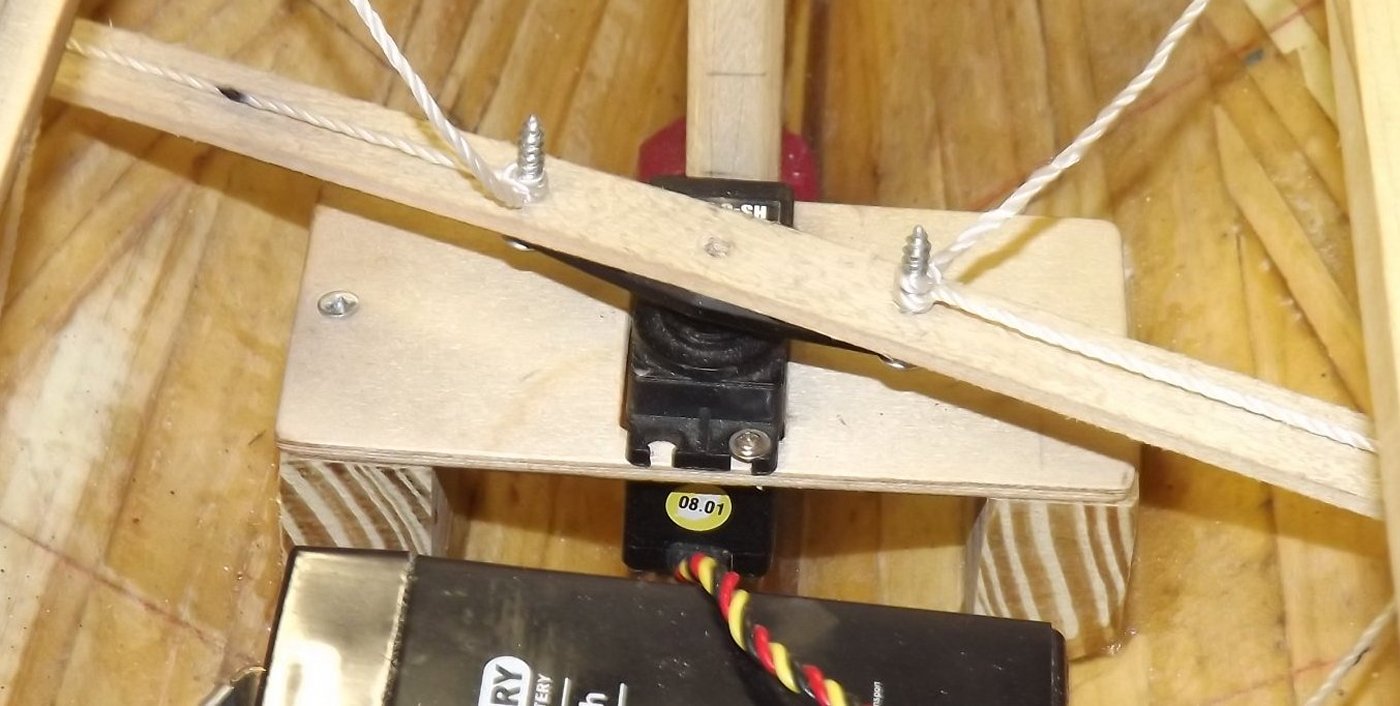
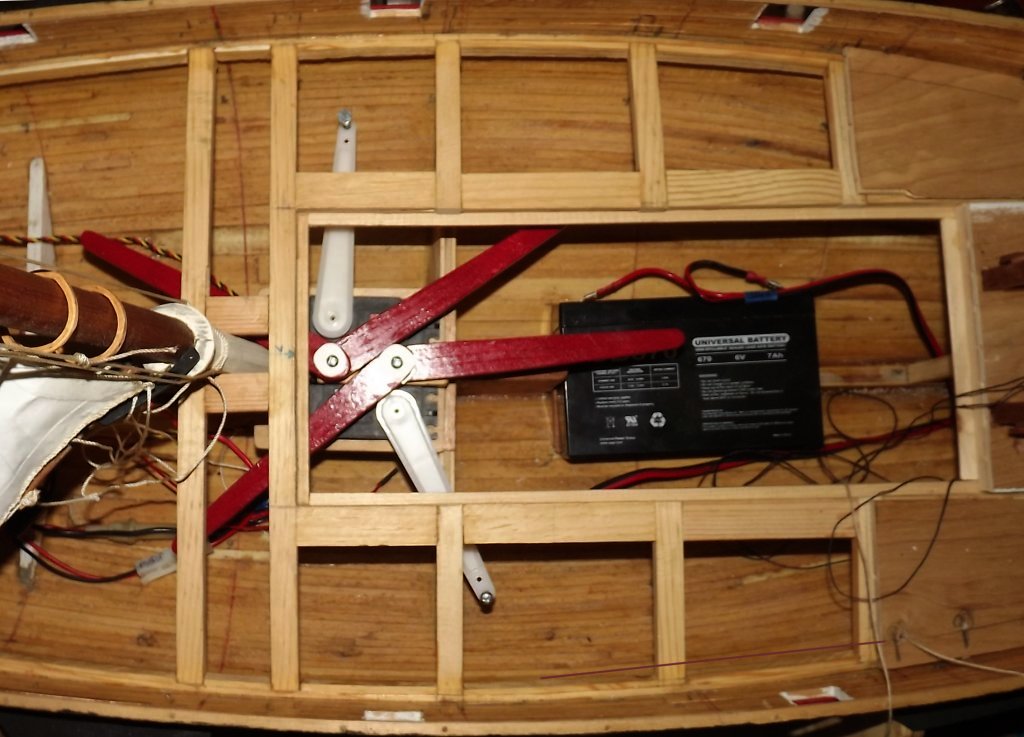
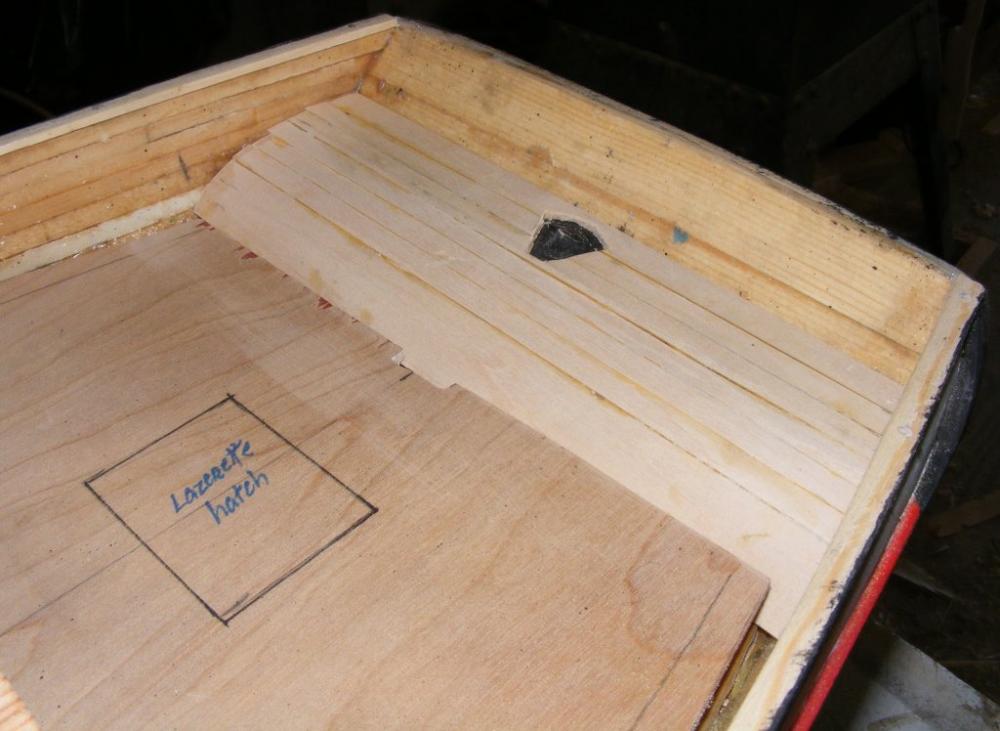
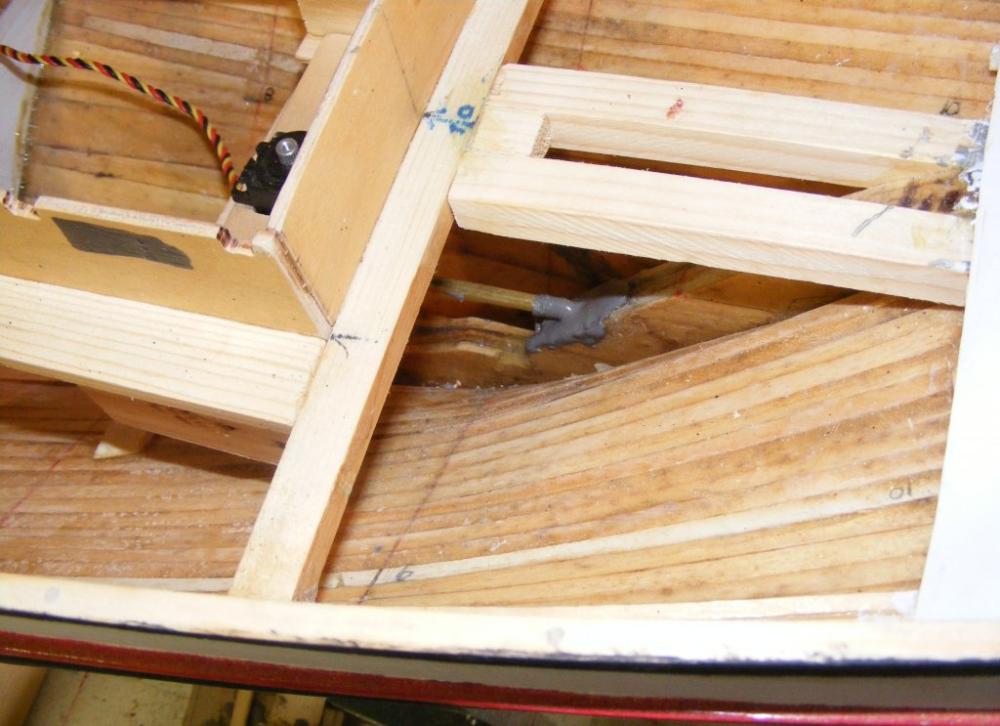
I've been trying to figure out the steering so I can get this one in the water. I thought I had a plan; the tiller lines would run through blocks in the waterways into tubes in the lazerette hatch coaming and then on to a servo mounted in the main cabin. but that part of the plan wasn't going to work out. The problem is, there isn't enough room below decks for the servo to move a large enough arm to get the tiller to move as far as I need it to go. A quadrant or drum set-up wasn't getting it, and there's no way to set-up a direct linkage with push-rods and such. So, I placed the servo for the steering forward of the battery and routed the tiller lines up to it. I epoxied in a couple of blocks just forward of the battery to mount the rudder servo deck on, and jury-rigged an arm on the servo to try to nail down this rudder control thing.


- 79 replies
-
- 6
-
-
- pride of baltimore
- privateer
- (and 3 more)
-
Using a server with dead eyes, standing rigging
JerryTodd replied to achuck49's topic in Masting, rigging and sails
On the prototypes, shrouds are precut to length, wormed, parceled, and served fully or partially, and mounted on the boat. Model's shrouds are typically cut long, the dead-eyes and lanyards are pre-set to length, and the shroud is pulled around the upper deadeye, seized, and made fast, and then cut to length, so all the deadeyes line up nice and neat. You would need to serve the shroud to it's end and when you go to cut it to length, glue it at the cut so the serving doesn't unlay. You might also use fabric glue on the ends of the shroud as you're serving it, as it's flexible and shouldn't interfere with bending it around the dead-eye. -
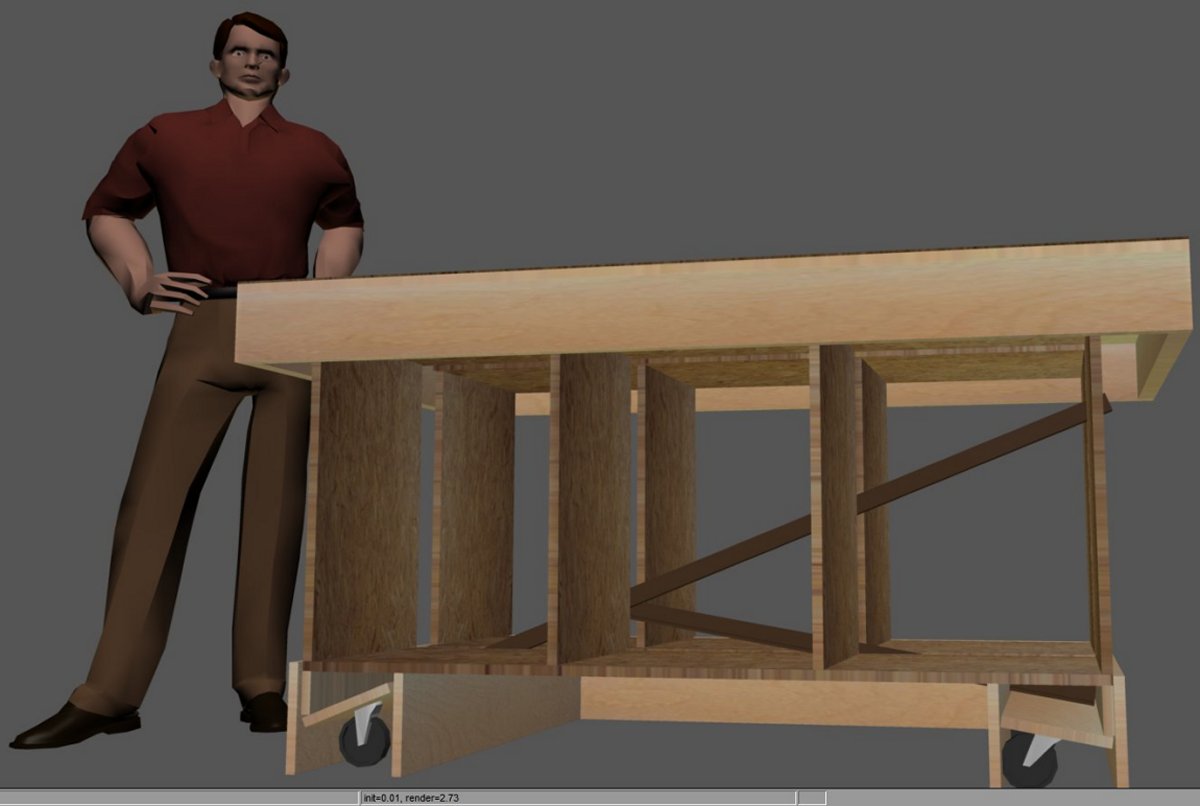
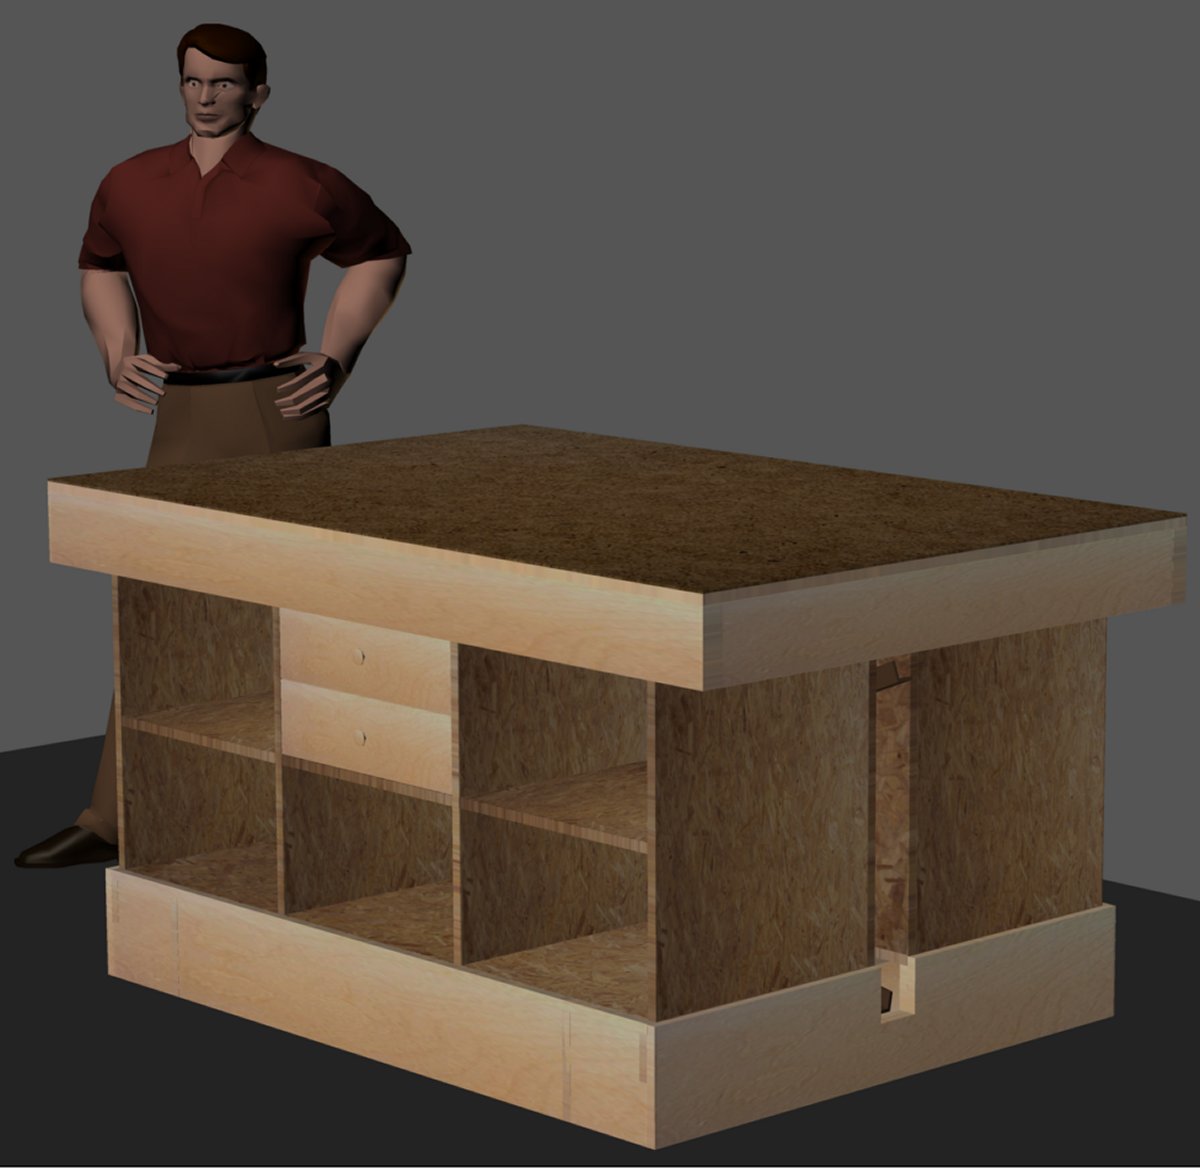
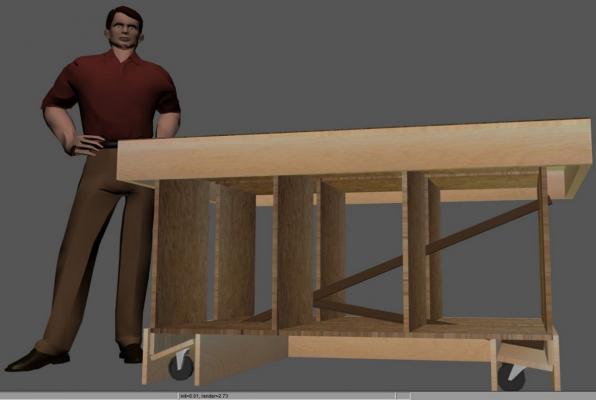
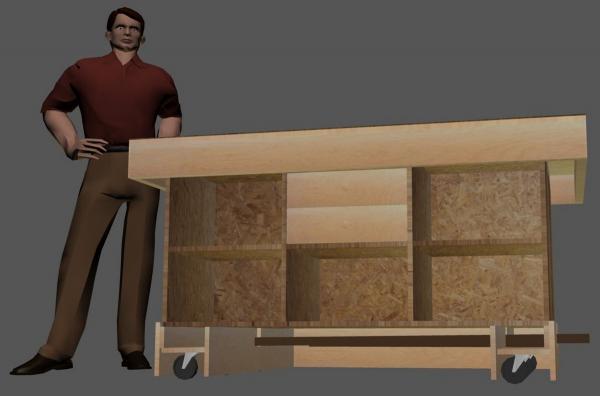
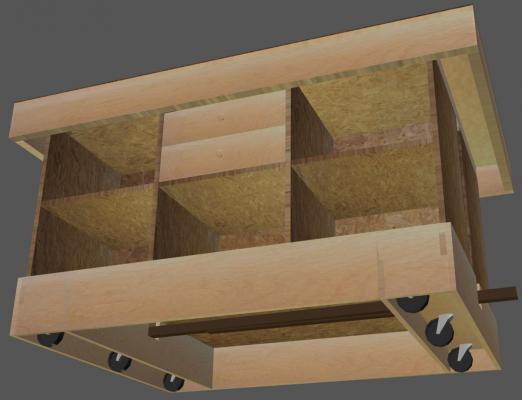
There's no heat or AC in my shop/garage, so over the winter nothing of substance got done and the garage served more as an extension to the refrigerator. With warmer weather here the focus is on getting the garage cleared up and usable as a shop. The bandsaw got casters, the tablesaw's casters got repaired, and small cabinet with a bunch of shallow drawers found at a thrift store was added for all my little tools. It requires moving a lot of stuff out onto the driveway to work on the shop and then it started to rain - a lot. During the monsoon I was playing around in my old 3D drawing program with an old idea for a 4 foot by 6 foot work-table on casters and I think I finally nailed a mechanism that will work. There's a lot of folks here that suffer from work-area space issues and a need tools and tables to be mobile - so I thought I'd share this with you. A lot of it was inspired by a fellow on YouTube and this video: Here's some images of the 3D model (drawn in free software called Anim8or) Please pardon Posin' Paul, he's just there for scale. With some internal bits removed so you can see; the brown arms are L iron from a bed frame. The 6 casters are mounted on a 3/4" thick white pine board and levered against a strip of wood. Lowering the end of the bed-frame sticking out of the right of the table, levers the wheels down and lifts the table an inch off the floor. No hinges are used saving $20 at least. The whole caster set-up will slide right out if you want to remove them for some reason. The top is 4' x 6' with hardboard (Masonite) work surface that can be replaced if it gets too gnarly. The body is basically two 5 foot by 21.5" boxes built of OSB (Oriented Strand Board) which is running about $12 for a 3/4" x 4' x 8' sheet. The caster levers operate in a 2" gap between the boxes making the body 45" wide and 60" long. A pair of drawers will go into one of the pigeon holes; a vice get mounted in one end, and electrical outlets will be installed on all four sides There will probably be hooks and such on the ends to hang things. The skirting around the base will have relief cut in (not show in pics) so the table will essentially have four feet to sit on; and the lever will have a latching system to hold it down in the deployed position. The height of the table is designed for it to also act as an out-feed table for my table-saw. Obviously a 4 x 6 table may be a bit much for some of you, but it's the caster set-up I'm mainly showing you here - which can be adapted to nearly any size bench or table, as shown in Carl's video above. When I get to building this beast, I'll add it to this thread.

-
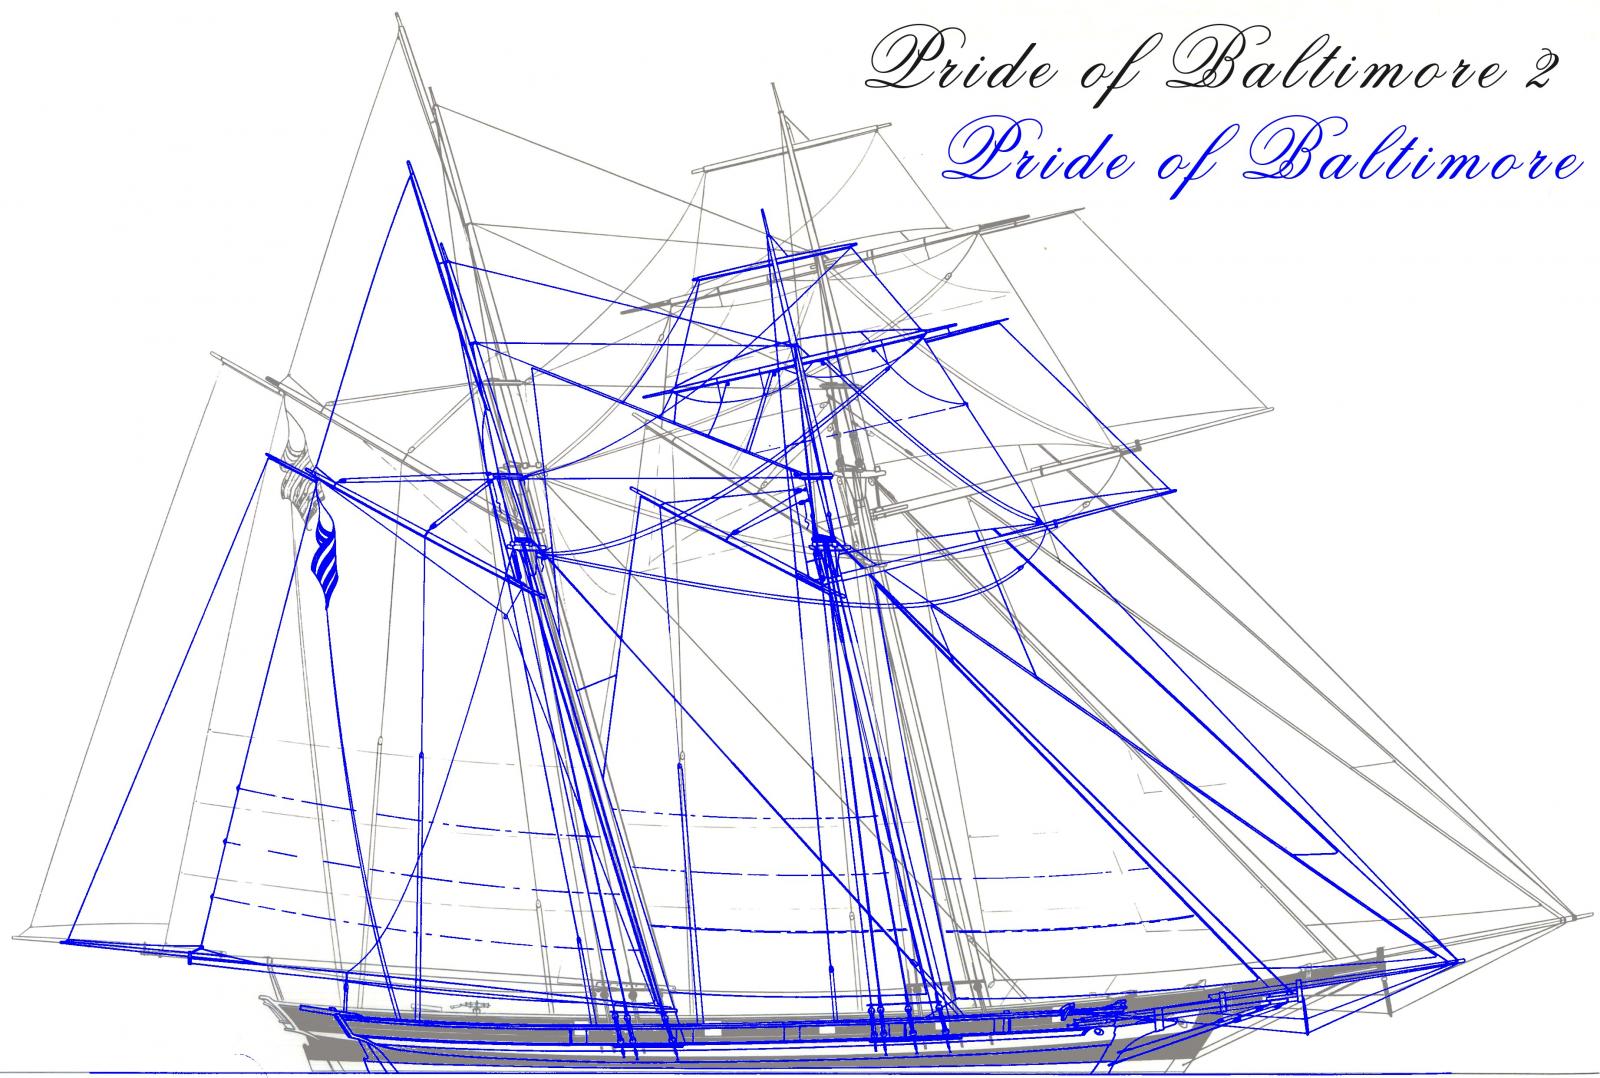
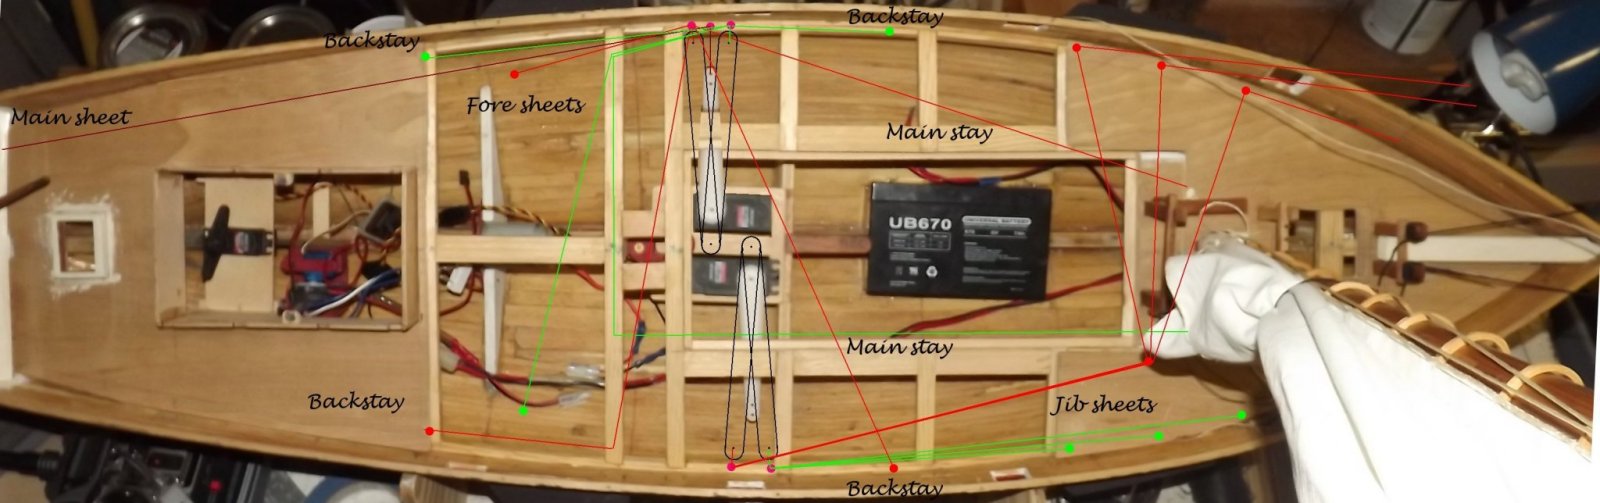
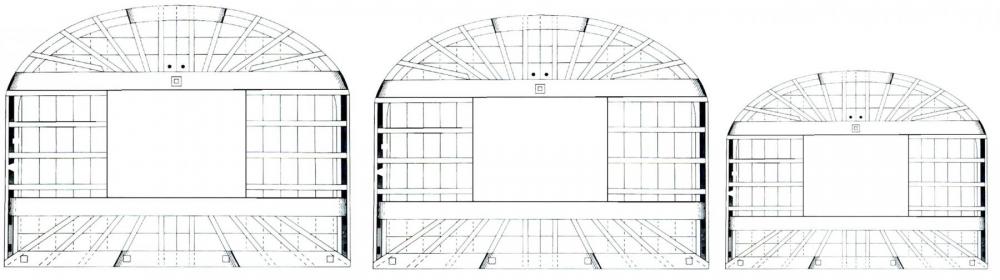
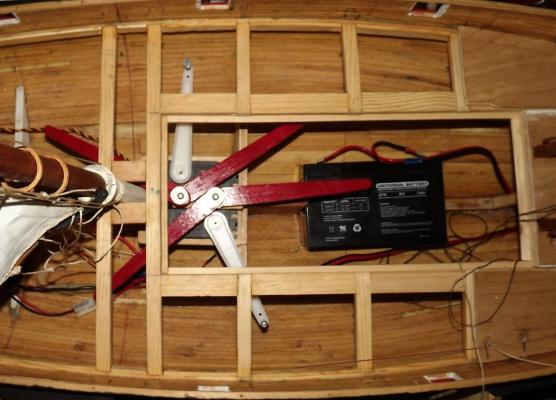
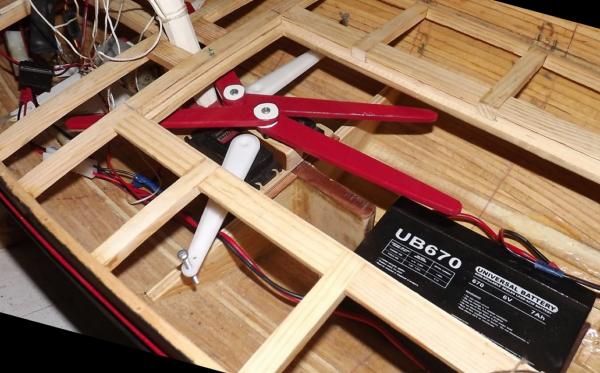
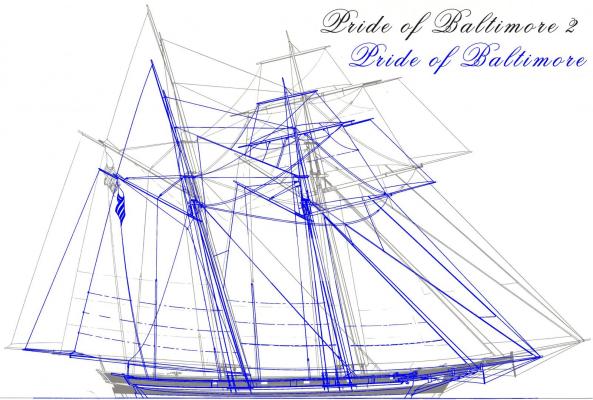
I painted the sheeter arms red, 'cause I still have a can of red spray paint and not much else to do with it. The set-up is mounted between the servos This shows the arms at their full extent with the servo arms centered. The amount of sheet the arms have to haul on either side for each sail is: Starboard servo: Fore sheet: 17.5" / 44cm Main sheet: not measured yet Port servo: Fore stays'l: 4" / 10cm Flying jib: 11" / 28cm Jib sheet: 13.5" / 34cm Tops'l yard brace: 15.5" / 39cm For those of you only familiar with Pride II, here's the sail plan of both Prides at the same scale to show the difference in size between the two.
- 79 replies
-
- 6
-
-
- pride of baltimore
- privateer
- (and 3 more)
-
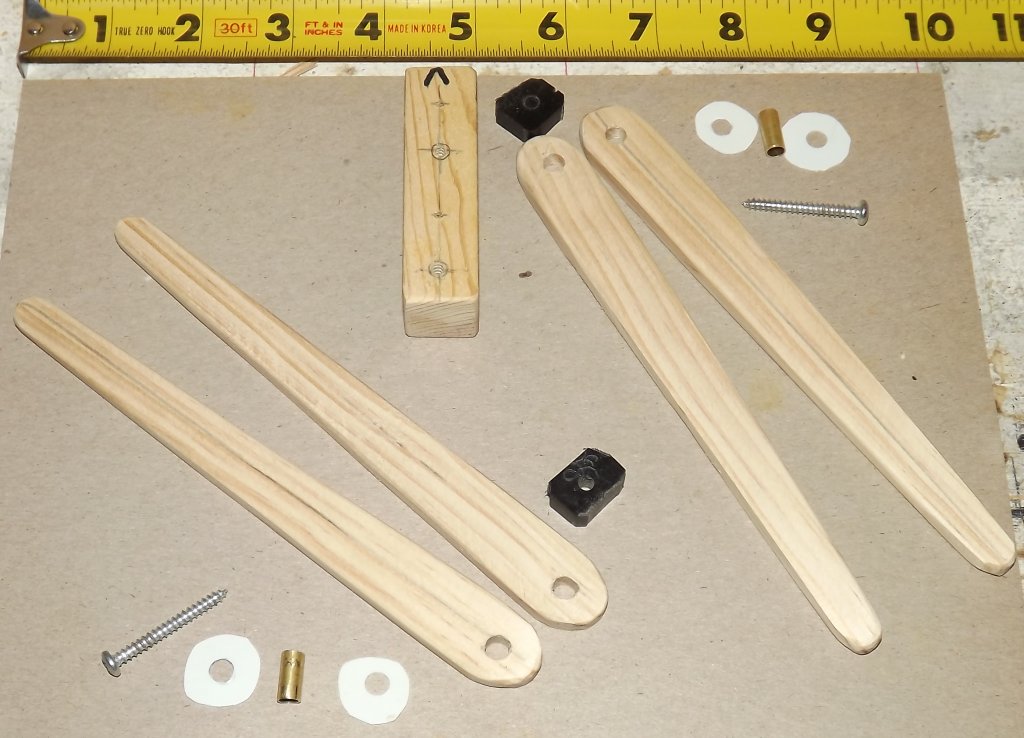
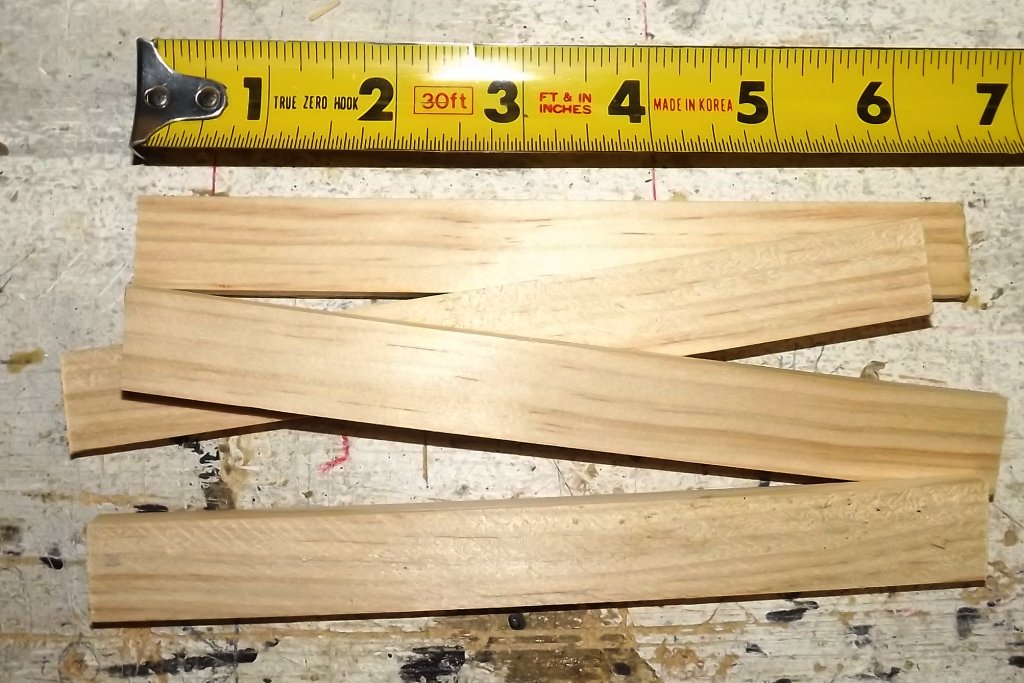
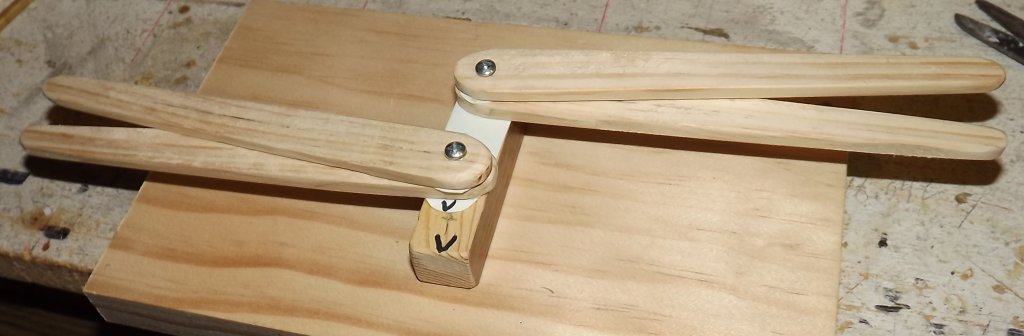
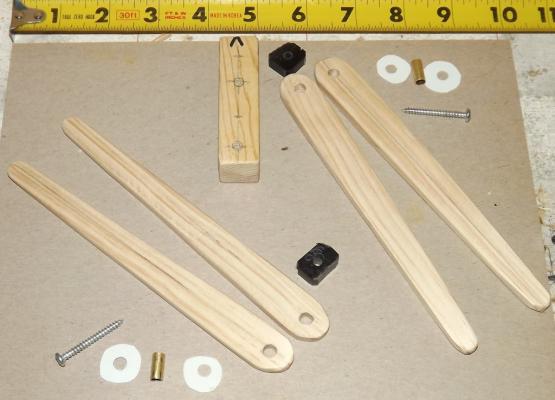
Let's hope this works.... I cut 4 sticks 6-1/2" long, 3/4" wide, and 3/16" thick from pine. I tapered and sanded them. They stacked, two each, on a bit of brass tubing as a bushing to keep the pivot holes from wearing larger. A pan-head screw serves as a pivot pin and holds them to a common block so it's all one assembly. There's a thin styrene "washer" between them and on top, and they sit on a 1/4" Delrin block to lift them over the servo arm. The block will be screwed to the servo-tray between the two sail-arm servos, one pair facing port, the other starboard.


- 79 replies
-
- 5
-
-
- pride of baltimore
- privateer
- (and 3 more)
-
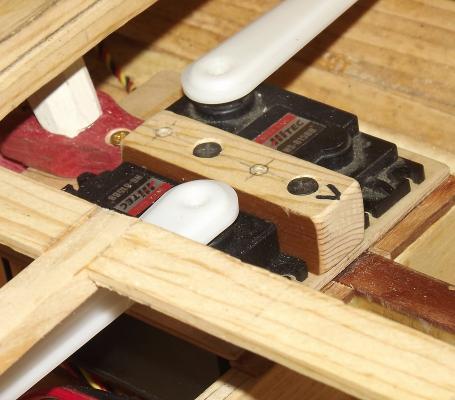
So here's a rough idea of how the sails will be controlled. Two "Mega-sail-arm" servos will be used with the Semaphore Sheeter as described above to control the sheets of the heads'ls, fores'l, mains'l, the running stays, and the tops'l yard braces.

- 79 replies
-
- 6
-
-
- pride of baltimore
- privateer
- (and 3 more)
-
Well, busting my bottom the get Constellation rigged for sailing in open water at the Chesapeake Bay Maritime Museum Model Expo this weekend and the event's been cancelled because of a tropical storm coming up the coast. I think I'll continue on prepping her and maybe take her down to Annapolis in a couple of weeks and sail her on the Severn.
- 553 replies
-
- 8
-
-
- sloop of war
- constellation
- (and 3 more)
-
If was made from Legos you wouldn't have to worry about sawdust and you'd be a feature in the international news.
-
Brig USS Enterprise 1799 info gathering
JerryTodd replied to CharlieZardoz's topic in Nautical/Naval History
It was never U.S.S. Niagara - the designation USS didn't come into common usage until the 1860's or official usage until the 1900's. -
Why sew them? If you managed to maintain 1mm stitches - how long would each stitch be in your model's scale? How wide would the thread be in scale? There's seam lines already printed on the sail, leave it at that.
-
It's supposed to be "as launched." He's doing something about 15 years later.
- 446 replies
-
- 1
-
-
- Revell
- Constitution
- (and 1 more)