


Nirvana
-
Posts
5,452 -
Joined
-
Last visited
Content Type
Profiles
Forums
Gallery
Events
Everything posted by Nirvana
-
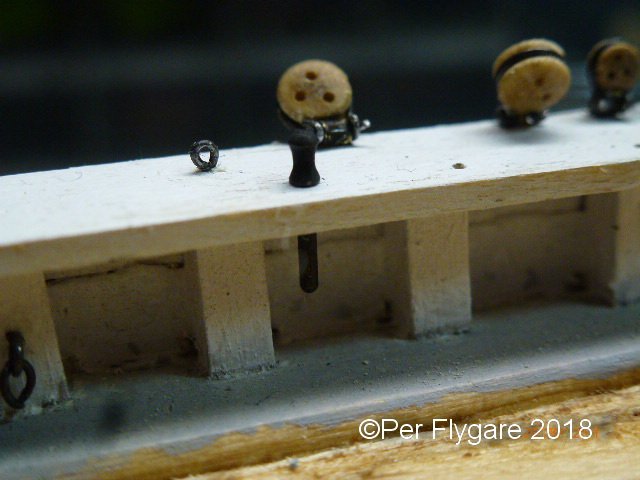
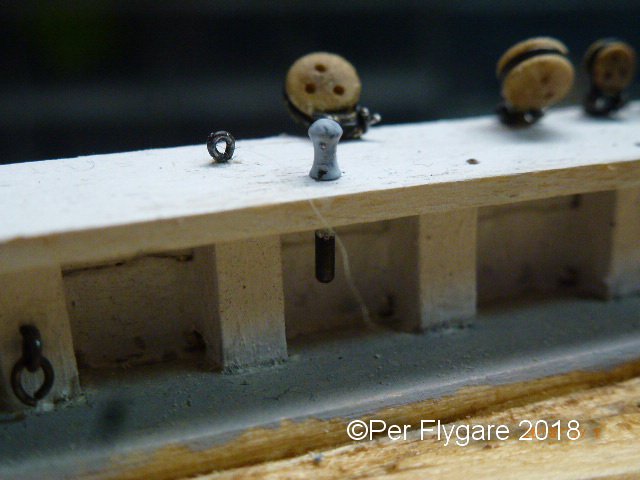
 After a long time I am back at the ship yard, pondering the belaying pin situation. I can't decide whether using wood or blackened brass or grey painted brass. So please any feedback will be gratefully appreciated.
-
Just finished reading through this cross section Pegasus creation. I am blown away, beautiful work Chuck. Also we are all so blessed having you providing us with great accessories and kits. Someone just want five blocks? Your price of a 25 pack or 20 are so great anyway.
-
Michael, Done! I have been watching another D'Agustino build of Vasa. Fascinating with a subscription build. Maybe it's a good build motivator too.
- 91 replies
-
- 4
-

-
- deagostini
- vasa
- (and 1 more)
-
Castos, look up Lars Christensen on YouTube. He has hours and hours of tutorials for F360. I am an old CAD fox so F360 was new for me as well.
-
Rob, a warm Welcome to MSW
-
Are you going to build her as static or RC?
-
This will be interesting, I am waiting for the day when I have a Bluejacket kit in my stash.
- 64 replies
-
- 1
-
-
- laughing whale
- trawler
- (and 2 more)
-
Hi cpddet, you are off to a very good start with Bluenose, I have really enjoyed my journey with Bluenose so far. And yes, there are several good sources to access as for building her. Happy Thanksgiving
-
Kenny, the last non-modell pictures shouldn't be allowed in here …… lol, just kidding. I guess I am not lonely when I say " I am jealous, of where you are located" Still waiting for that lottery win, so I can move.
- 163 replies
-
- 1
-
-
- america
- constructo
- (and 1 more)
-
Ah, now there they are. Very nice!
-
Kevin, the uploads of pictures didn't work. Try again.
-
It's always a pleasure to read the build logs at the breakfast table. That's so beautiful 😀
-
Hmm, learning by doing .....oh well, it could had been worse, like knocking the Syren to the floor....😎
- 242 replies
-
- 2
-
-
- syren
- model shipways
- (and 1 more)
-
Tools, supplies and workstation......
Nirvana replied to CPDDET's topic in Modeling tools and Workshop Equipment
While we are on the cheap...… has any of fellow American friends bought this 9" Benchtop Bandsaw from Grizzly? Priced at USD 200.00 it is cheap, then when it comes to quality is another question. However, having a 5 star rating based on 170 reviews you never know. I like to get one. -
I am considering the ropewalk machine from Chuck, even thou' it's not powered.
-
How could I? Nick, I am sorry ..... I forgot to mention how nice your Le Mirage is coming together. Beautiful done.
-
As Jim replied, Proxxon basically the same as Micro-Mark. It should read the other way around as Micro-Mark is a Chinese copy of Proxxon. I have an older Proxxon that does a decent job, but after working with Byrnes table saw, there is nothing better than Byrnes! Saving up for that table.
-
I am honored! Thank you. That transom is really tricky. Took me some trials before getting what I wanted.
-
Glad to hear you are safe and still have power. It's an excellent time for ship building.
- 1,306 replies
-
- 7
-
-
- syren
- model shipways
- (and 1 more)
-
Building Acrylic cases technique video
Nirvana replied to Jim Rogers's topic in Modeling tools and Workshop Equipment
Jim, I like that informative video. Can I order a case from you, for my Bluenose? -
Great idea!😀 I will remember that when it's time for me to do the cannon rigging.
- 1,135 replies
-
- 4
-
-
- model shipways
- syren
- (and 2 more)
-
Kevin, I didn't copper plated the hull of Constructo America either. I found a good paint resembling copper.
- 162 replies
-
- 2
-
-
- america
- BlueJacket Shipcrafters
- (and 1 more)
-
Maybe it's time to renew my EAA membership. SolidWork is part of the French Dassault Systemes. EAA annual membership is 40 dollars according to their website.
-
So crisp and clean!