


Nirvana
-
Posts
5,464 -
Joined
-
Last visited
Content Type
Profiles
Forums
Gallery
Events
Everything posted by Nirvana
-
 Carl, I am fully aware about that.
 -
Messis, beautiful build you have going there. I truly hope the picture in post #13 is messing with me. But the waterline doesn't seem to be straight to me. If I put a ruler on top of the picture between stern and stem, you have a drop in the middle
-
Mr. Watton, I am glad to see you are going outside the manufacturer line, and creating your own choice of "kits". Just like Mr. Passaro. I can see a line of potential customers for your products.
-
Oh my, now I need a bigger wallet for all the items!
-
Lou, I just looked into this guys ebay sales...... beautiful items, high price but I do have the Revell Connie that I want to modify. Maybe further down the road after the move to the coast and the economy has stabilized. Yes, me and The Admiral is moving this year to the Shelton area.
-
John, you can't go wrong with kits from BlueJacket Inc or a kit from Chuck Passaro. Both of them are sponsors. Use the search feature in the build logs for the name of ship you like to build. Take it from there. Good luck in your search.
-
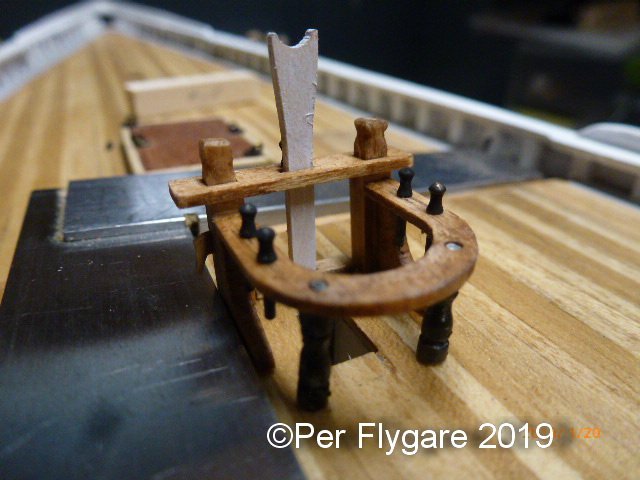
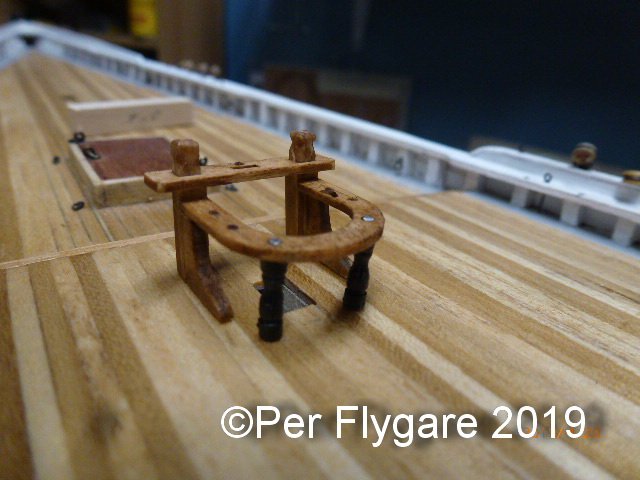
I am using Chuck's cleats in the building of the Bluenose, see the latest picture in my build log where I had to alter them according to the plans. Take a look at this picture of the fife rail, and where you have the base legs.
-
From PNW
-
I have done a couple "hulls" using F360. One thing I figured out was to center the canvas origin on the 00 bulkhead location where the waterline meets. This way I found it easier to work forth and aft in right sequence, naming each plane accordingly to the bulkhead. However, the only issue I have had is to line up the imported sketch to 0/90 angle towards the planes. Looking good though. I am to work the F360 tonight after work.
-
Time to glue down the fife rail, the boom support is not completely finished. Somehow I like the contrast in-between the rail/boom support/belaying pins. This instead of having it all white.

-
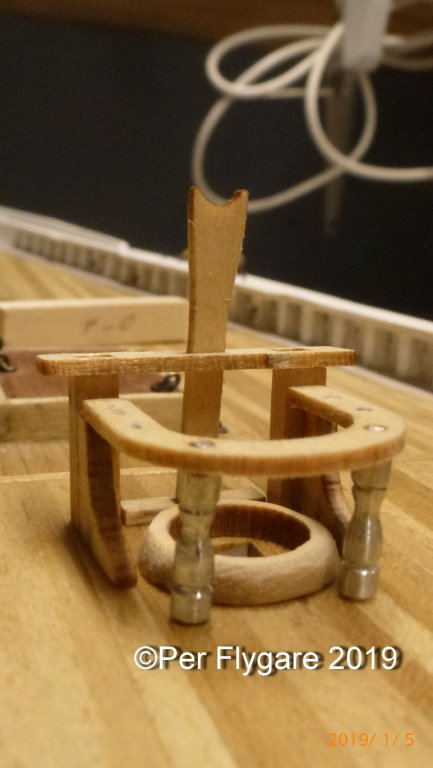
So I got the fife rail together, for awhile I didn't know whether to go with painted or varnished version, I went for the a latter. Somehow it got a more weathered appearance. At this stage, the "rail" is not glued into place, cleats are to be added to the base legs. This has to happen before the final glue down.

-
Can i live without a BYRNES TABLE SAW
Nirvana replied to shihawk's topic in Modeling tools and Workshop Equipment
I am running an older Proxxon. It's not being used much so I can't justify a Byrnes........ yet! However the tips link is useful for me as well. -
That planking looks great! What kind of tool did you come up with?
- 91 replies
-
- 3
-

-
- deagostini
- vasa
- (and 1 more)
-
Popeye, thank you for the kind words.
-
Maybe just to hard on myself.....the height is perfect.
-
Dave, looking good But you have put yourself in a difficult situation since you removed the stanchions from the bulkheads. You need them for guidance when planking "above deck". A friend did just like you and ran into issues. You need the strength to get the planking right.
-
Thinking about making a jig to get the assembly aligned properly.
-
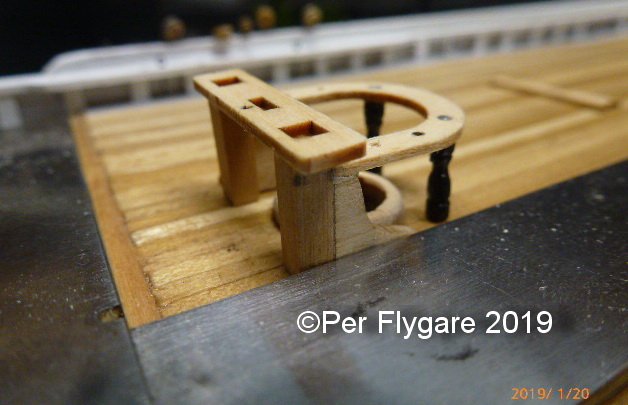
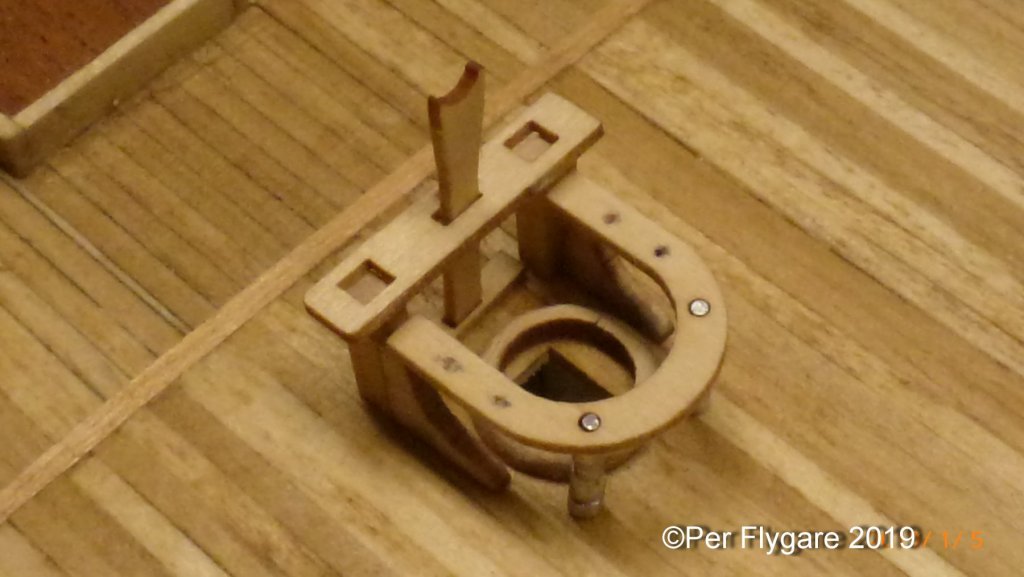
The fife-rail is a challenge. Here I made sure all parts had been treated with poly-wipe-on, The lower square leg are slightly larger than the plans, but with the "plank" on top and additional parts I think it will turn out fine. Here 3/4 of the assembly is dry mounted for check up. Since the parts are all going to be white I am not to worried for slight marginal error.
-
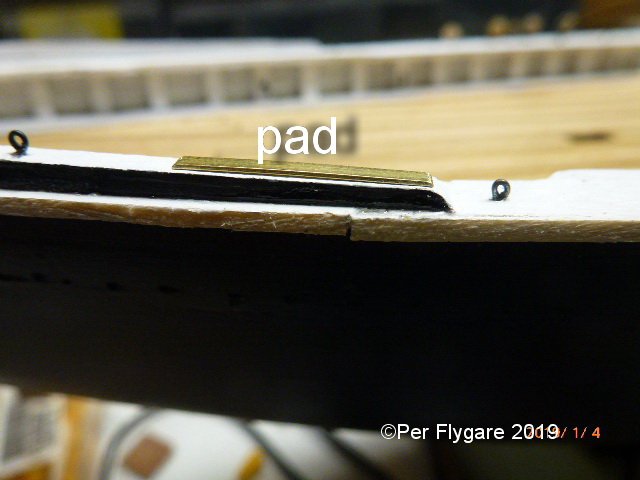
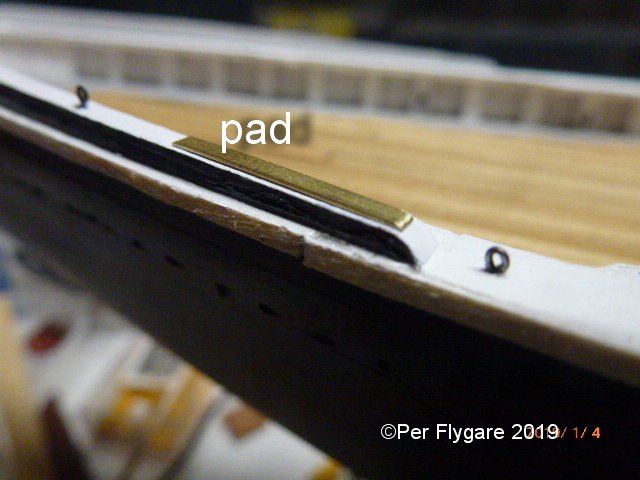
The anchor pads doesn't have any material description, and when looking at the has been provided in the box I found that the brass piece was just right size in thickness and width. After having this painted black or blackened I think it will be just perfect. I will make indication of nails to hold the pads down. Like they can replaced after wear. I have no idea if Bluenose in real world had a wood or metal pad. My mind says metal, but I could be wrong. But considering the wear at this area, metal make sense to me. If anyone else know more, please let me know.
-
I have the Bluenose practicum, but barely used it. Worked majorly from the plans.
-
Leonard, use that money to buy extra parts from Syren Ship Model Company. Use this forum for information and guidance. That's why we are all here.
-
Olivier, I bought a 8050 long time ago, found it at Walmart at a heck of a deal, pricetag was misprinted and it rang up at 50 dollars. So far mine has been running without any problem nor overheating. Running time has varied depending on speed but I would say I am getting about 8 hours before I need to charge it. At the time when this model came out on the market, there were a recall of some serial numbers because they overheated and could catch fire. Today I don't think there is any issues at all.
-
Montanes, Happy New Modeling Year!
-
Chuck, that is just amazing. Crisp and clean. Beautiful!
- 421 replies
-
- 3
-
-
- medway longboat
- Syren Ship Model Company
- (and 1 more)
-
Titebond II is what used.


