


Ulises Victoria
-
Posts
1,790 -
Joined
-
Last visited
Content Type
Profiles
Forums
Gallery
Events
Posts posted by Ulises Victoria
-
-
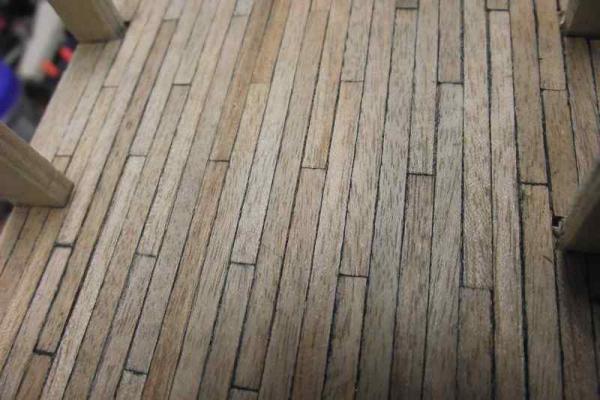
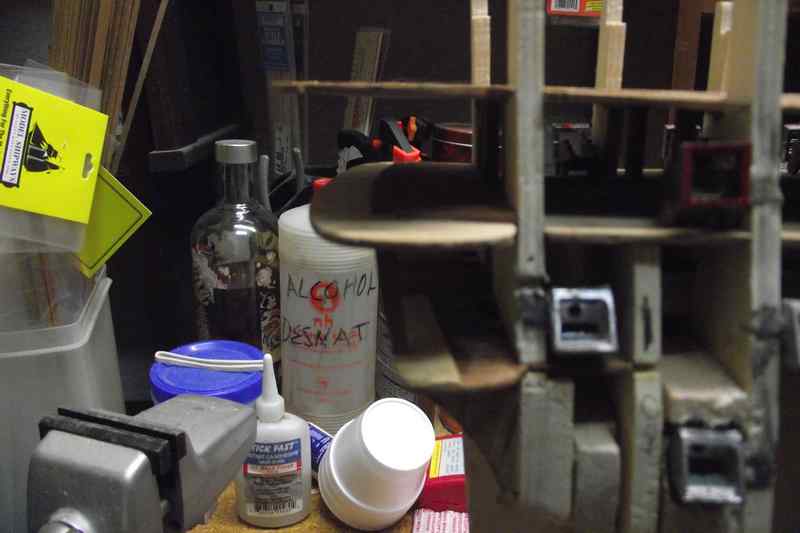
Good question. I made a board with several pieces of wood planking to do some tests (page 7 post 92). I'm still undecided.
I want to give this ship a slightly weathered look, so I think I will use a liquid named "weather it", that makes wood look old and used.The problem is in my testing that applying any other finish afterwards, erases that look. I may use that weather it liquid and nothing else. After all, real decks weren't covered in tung oil or shellac finishings. (Comments on this,anyone?)
Will see.
-
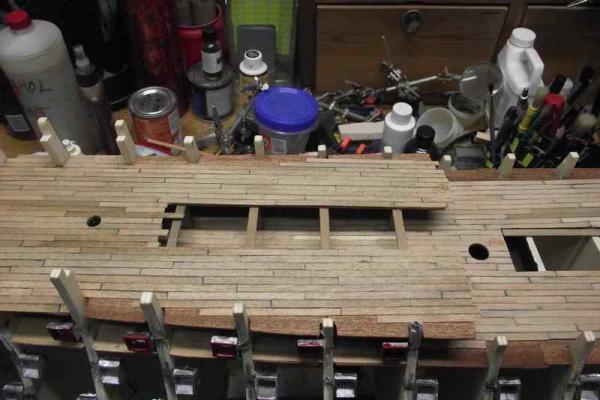
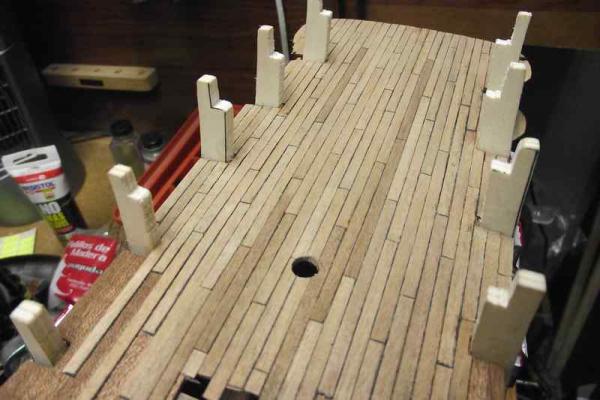
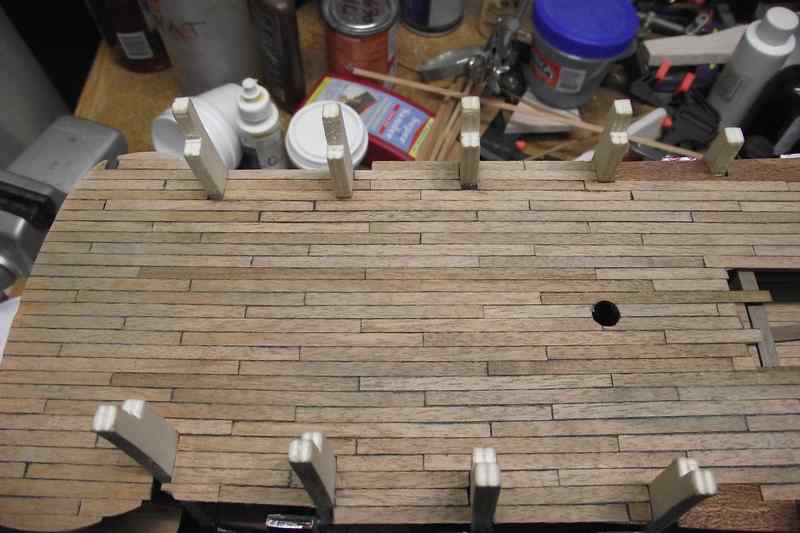
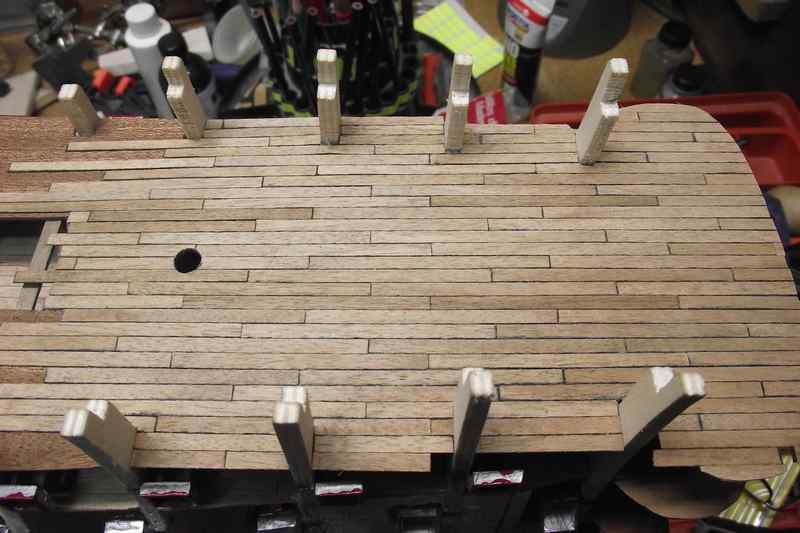
Hi all. Another small update. I decided to keep planking the remaining of this deck leaving unplanked only the edges where the bulwarks will be built.
No finish has been applied to the wood yet. You see plain raw untreated wood.
Also some trimming still to do.
Thanks for visiting.

- marktiedens, mtaylor, Bindy and 7 others
-
 10
10
-
Hi David
Gorilla now make several different glues but the packaging nearly all looks the same
 I have some of the 'foaming' stuff,but they do make a regular PVA type wood glue as well now.
Kind Regards
Nigel
I have used the wood Gorilla glue with excellent results. Choosing between Gorilla and Titebond is really a very close call.
-
Ditto what everyone has said. For raw wood to raw wood nothing beats .... ahem...wood glue.
 Titebond also being my favorite.
 -
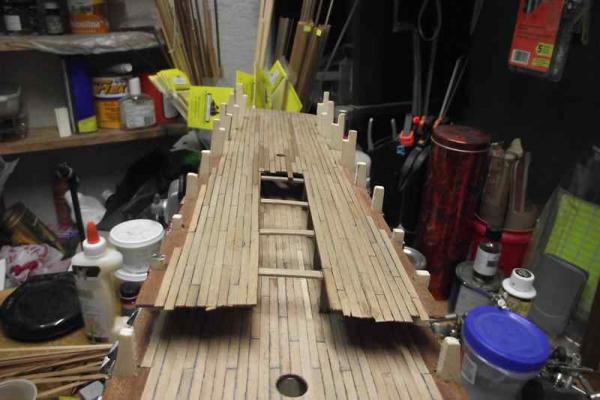
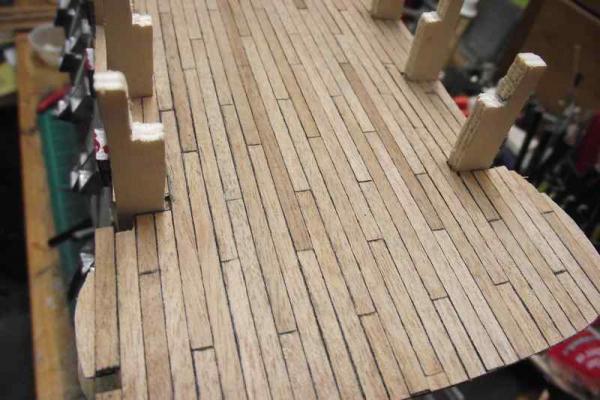
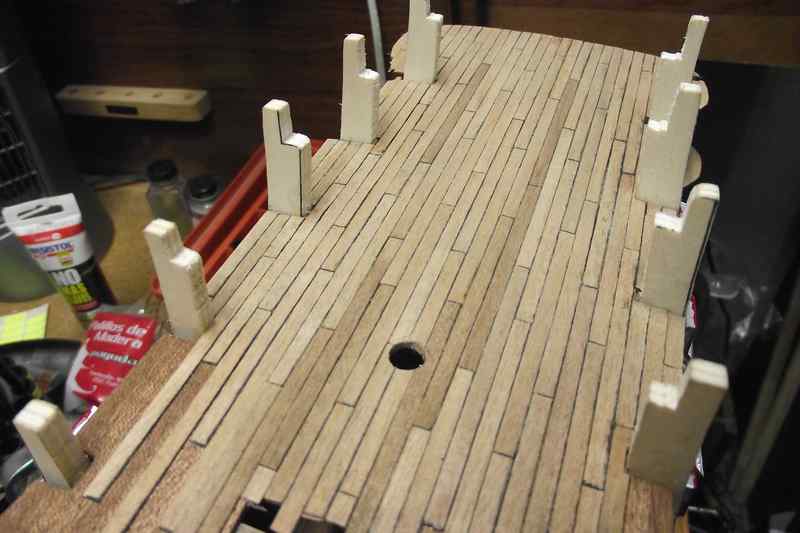
Small update. July 25 - 14
I finished planking the first portion of the second stern false deck. The remaining will be planked once the bulwarks are built and the tip of the bulkheads removed.
No finishing applied yet.
Next step is to place the beams that will support the last false deck above this one, as well as fitting of the fore castle deck.
Cheers
- Sjors, dgbot, marktiedens and 6 others
-
9
-
Aha! I tried using tissue paper to do the planking in my Royal Louis decks, but that didn't work for me because I tried the "mass gluing" method. I see now that planks should be laid separately. That is a whole new animal. I may try that on the upper deck of my ship later.
Thanks for the info.
-
-
Excellent work, Mark!!! Will keep an eye on your progress.
Cheers!
-
One more thing about Mamoli - be sure and inventory the kit. Every Mamoli kit I have done was short either wood or metal parts.
/Mark
Mark: Were you the one who said you did not get enough wood strips to finish the first planking of your Royal Louis?
I measured the widest bulkhead in my Royal Louis top to keel, and it is about 240 mm. Divided by 5mm width of the planks I'd need 48 strips of wood per side or 96 strips for both sides. I have 130 strips in my kit, so it's safe to assume I will get enough strips to finish the first planking. Maybe they are changing the amount of material in newer versions of the kit? My kit, however, came short of 2 sets of large wheels for gun carriages. No biggie as these will be hidden under another deck, but still...
-
Thanks Arthur.
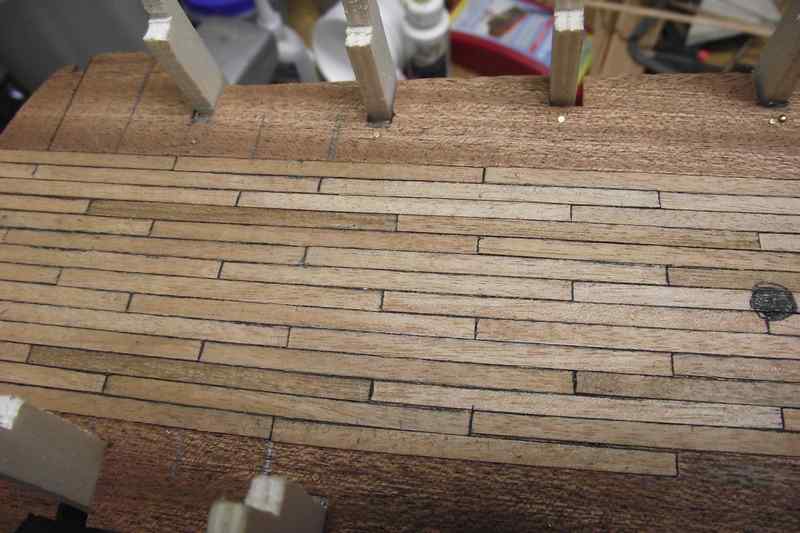
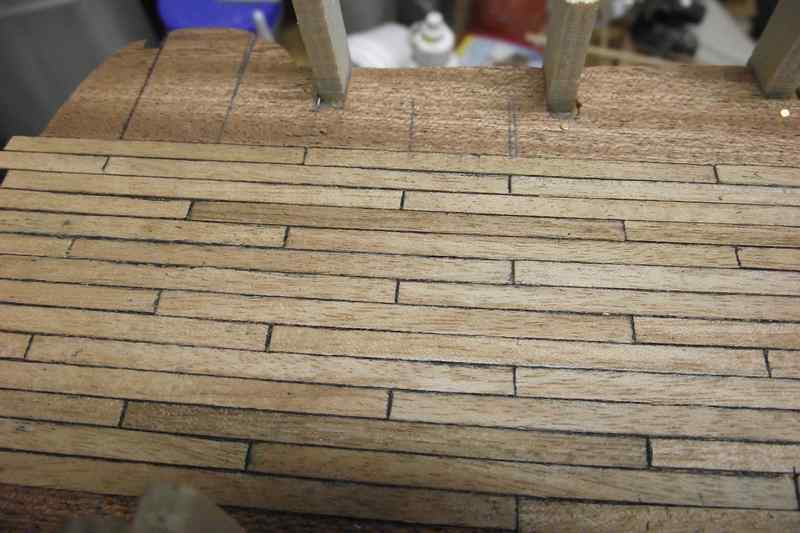
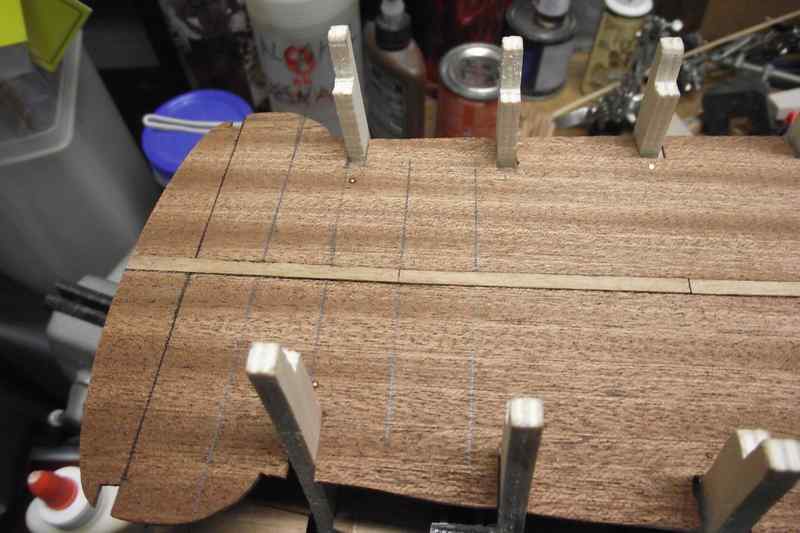
I tried the method of gluing black tissue paper to the sides of the planks, but that just didn't work for me. So what I'm doing here is painting the side of the planks with a black pencil. Not a gray graphite pencil, but a black color pencil. Another thing to note is I don't paint the "side" of the plank. Think more like painting "the upper edge" of the side of the plank. (hope this makes sense, or is clear) After the glue is dry, I "erase" the joints with a white pencil eraser. This gets rid of any excess of the black stuff and leaves just what's necessary between planks. So far I am happy with the result.
Edit: I only paint the right and lower sides of each plank.
-
-
If there is someone I consider an expert in these matters, is Kester.

- CaptainSteve, mtaylor and geoff
-
3
-
I bought it, assembled it and never used it.
-
Roger. There was a glitch a few months ago that affected several pictures throughout the site. The only way to fix that is that the poster post them again.
If it happens in your log, then you should be the one able to fix it.
Hope this helps.
-
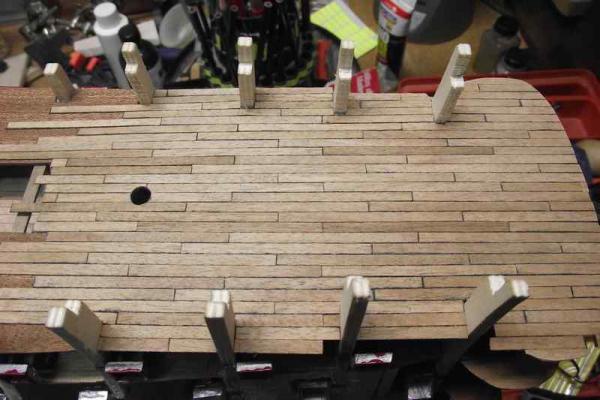
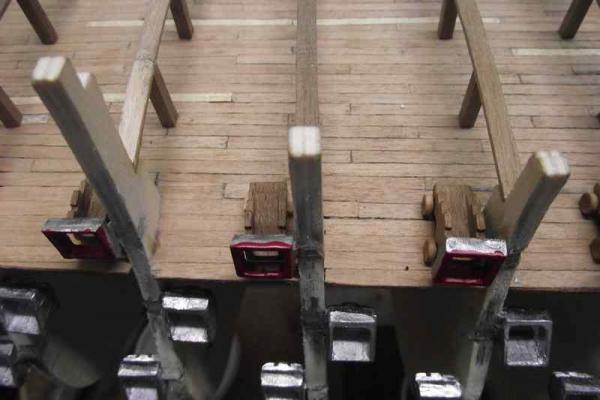
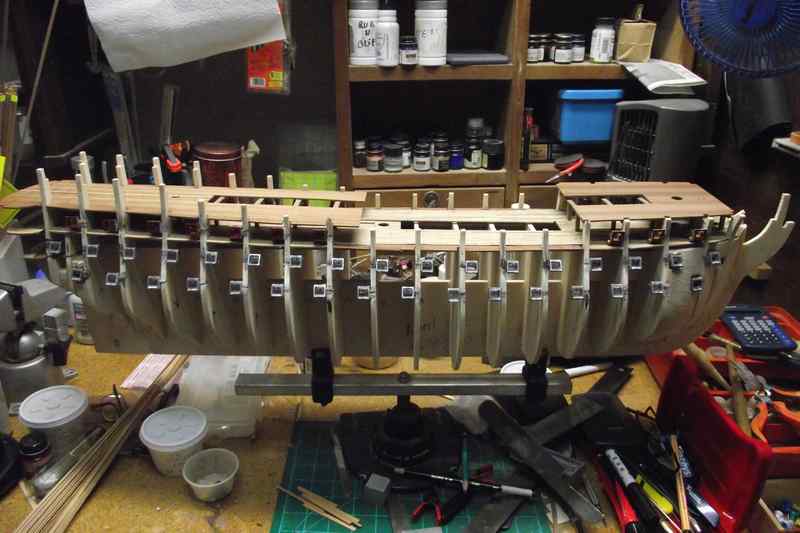
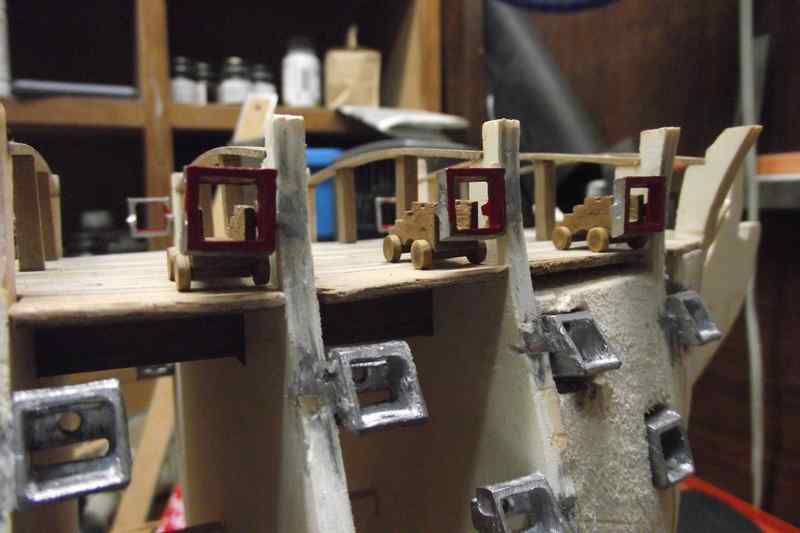
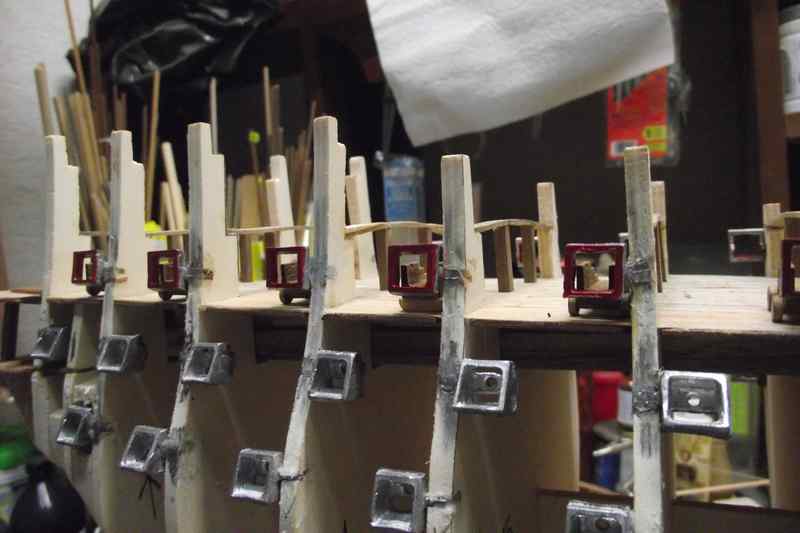
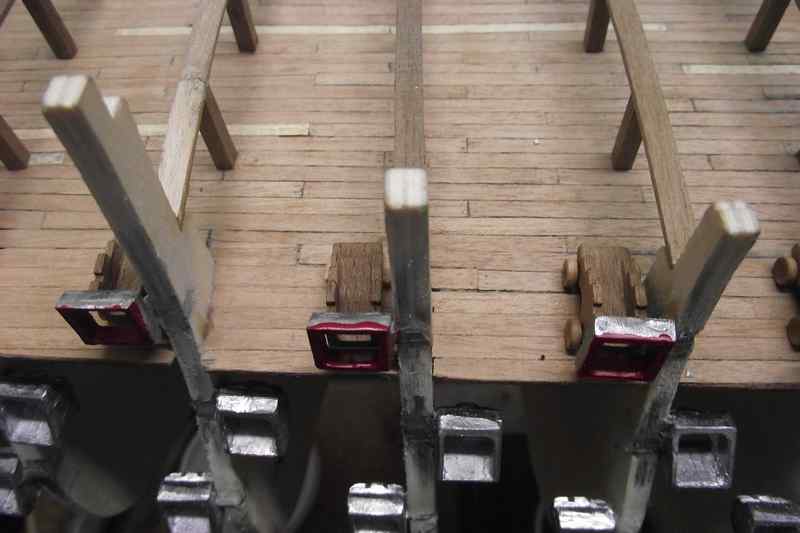
Another small update.
The cannon carriages are permanently (I hope!
 ) fixed.
The second false deck has been adjusted and glued/nailed in place.
Starting of planking job on this deck.
Cheers! Thanks for visiting.


General view. Fore false deck is just placed there. Not yet adjusted or fixed.
- mtaylor, Sjors, CaptainSteve and 4 others
-
7
-
Thank you all for your encouragement words, and advice!!!!
-
Seems like you are approaching the end. Good job. "Me cae que" (Spanish slang
 ) you are doing a terrific job with this restoration.
 Any idea what will be next?
Saludos
Ulises
-
What is your approximate budget?
-
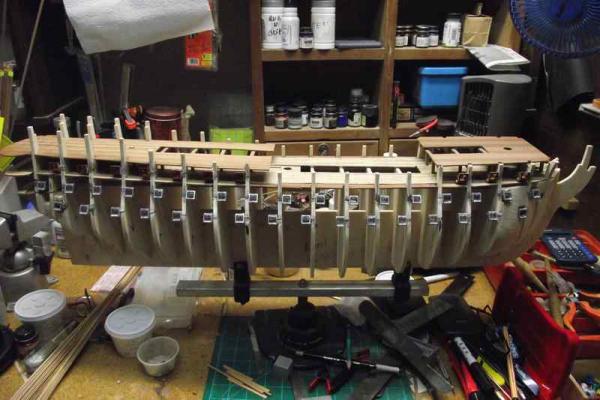
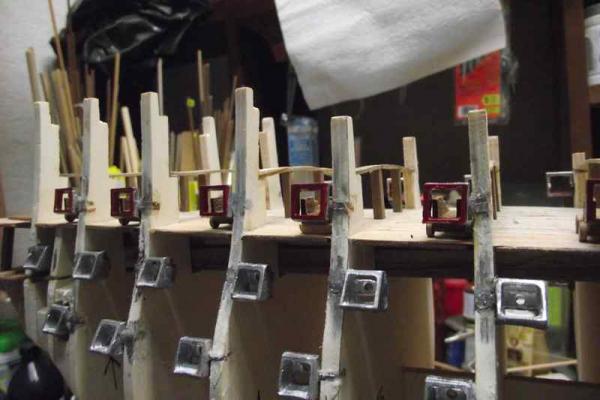
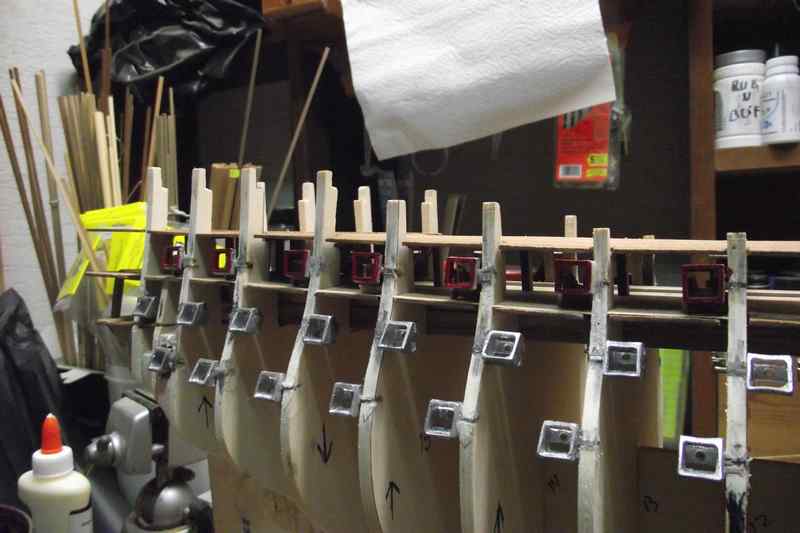
Small update July 16-14
Cleaned all the cannon metal frames joints, and painted red the upper frames where gun carriages will be installed.
Carriages are only dry fitted in these photos.
Line up of 32 deck gun carriages.My kit came short of 2 sets of wheels, so I had to improvise with a small strip of wood to raise one of them. Fortunately most of these will be under deck, so they will not be visible. Only 12 of these will be fully visible in the middle of the deck.

Thanks for visiting!
Cheers
Ulises
- Karleop, CaptainSteve, Bindy and 3 others
-
6
-
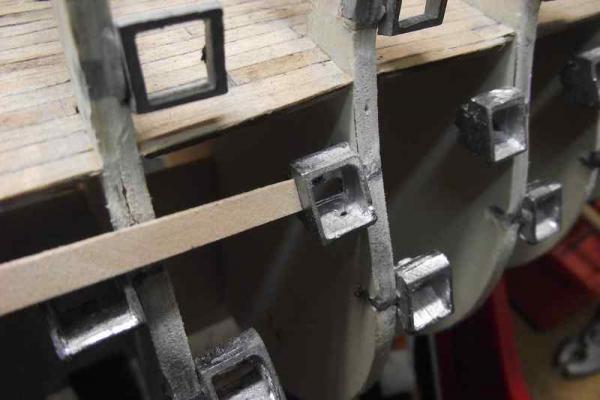
Hello all.
Posting here to hear some expert's opinion on this matter.
After finishing placing the metal cannon frames, instructions say to glue now the gun carriages in the upper deck without the barrel. (Underlined in the instructions.)
And then fix the upper decks, so these cannons will be covered by the decks.
At first I didn't see why without the barrel, but then I saw that with the cannon barrels sticking out, sanding the metal frames flat to the planking is going to be more difficult, and you run the risk of hitting a cannon and pop it out of its place. I was planning to fix a small strip of wood over the carriage where the gun rests on the slots, to make sure those cannons will never be off their place.
However, gluing the barrels after the planking is done, will make it more difficult to properly glue the barrels on the carriages, leaving them in a very vulnerable state, in my opinion.
So: fix the barrels at the beginning, making the gun barrels more secure but making sanding more difficult and risky? or gluing the barrels last making them more vulnerable?
At the moment I'm inclined to the first option. (Hope this whole thread makes sense.)
Thank you all.
Ulises
-
find the mistake...
Thanks. I guess you will find plenty of that here

-
Thanks Mark. Remember this is a fake plank which I'm holding in my hand. The actual amount of metal to be filed will be less. Anyway this is a very soft metal. It files down very easy.
About damaging the planking, this is done after the first planking stage, so it doesn't really matter.
Thanks for your input.
- FrankWouts and mtaylor
-
2
-
Thank you Pat.
James... not sure I understand your procedure, but in the case of this Mamoli kit, the frames protrude over the planking, so you lay the first plank making the ends of the planks fitting against the outer sides of the frames. When this is done, you file or sand down the frames to level with the planking. There is no chance of planking over the cannon frames.
I'm not sure if I understood your description or if you will understand mine
In this photo, I'm "faking" a plank held in my hand to illustrate my description.
I appreciate your comment, though!
- FrankWouts, Aussie048 and muratx
-
3
-
Thank you Banyan. I plan to put first planking, then file the frames to level with the planking and then paint red just before second planking.My guess is that this order will eliminate any chance of a bright metallic shiny spot after the second planking. Open to ideas, though.


Royal Louis 1780 by Ulises Victoria - FINISHED - Mamoli - Scale 1/90 - French 126-gun ship
in - Kit build logs for subjects built from 1751 - 1800
Posted
Thanks. I haven't try that.
I think I will scrape the decks. Seems to me that sanding leaves a way too smooth surface, not very realistic, IMO.