HOLIDAY DONATION DRIVE - SUPPORT MSW - DO YOUR PART TO KEEP THIS GREAT FORUM GOING!
×

alde
-
Posts
1,027 -
Joined
-
Last visited
Content Type
Profiles
Forums
Gallery
Events
Everything posted by alde
-
 Thanks for posting this Jim. I have a couple of these little kits in the desk drawer waiting to be built. I tried to build a MS boat kit too and only got so far before I tossed it in the trash. I hope the manufacturer continues to add different scales and sizes.
 -
Mark, ANCRE has a book called “French Frigates” The frigates in the French Navy 1650-1850 (available in English). l have not seen the book so don’t know if it would be of any help to you. Maybe ANCRE could help point you in the right direction for you carving details anyway.
-
Seeing the frames in relation to the exacto knife really brings home the size of the boat. I can’t wait to give it a go with a group build. It will make for a great learning experience with several different levels of modeler skill.
- 421 replies
-
- 2
-

-
- medway longboat
- Syren Ship Model Company
- (and 1 more)
-
Requesting feedback for future MSW Group Projects
alde replied to Chuck's topic in Group Projects on Model Ship World
I am not an engineer but do come from an engineering field. I was a draftsman and mechanical engineering technician for the US Navy for many years. I do tend to get caught up on details but my modeling skills have not reached the point where I can put most of it into a model. I confess to sometimes just buying ship drawings because I enjoy looking at them with no intention of building the ship. My point is that I don't mean to nit pick the finer details. However you do it is fine with me. I just appreciate the fact that you are doing it. -
Requesting feedback for future MSW Group Projects
alde replied to Chuck's topic in Group Projects on Model Ship World
Wouldn't it be better to correct errors on the contemporary models instead of carrying them on into the future? -
Mark, the CD set is on its way. Thanks for pointing it out.
-
Mark, you are da man. Where the heck did you find these pictures? This verifies everything for me and will work out with what I have done so far. Is there an NRG article?
-
Thanks for doing this Chuck. It's much appreciated.
- 421 replies
-
- 6
-
-
- medway longboat
- Syren Ship Model Company
- (and 1 more)
-
I love talking with old folks that were there. My father in law joined the Navy in 1935 and served until the late 1960's. He had some great stories. His father and grandfather were also US Navy as far back as at least the 1870's.
-
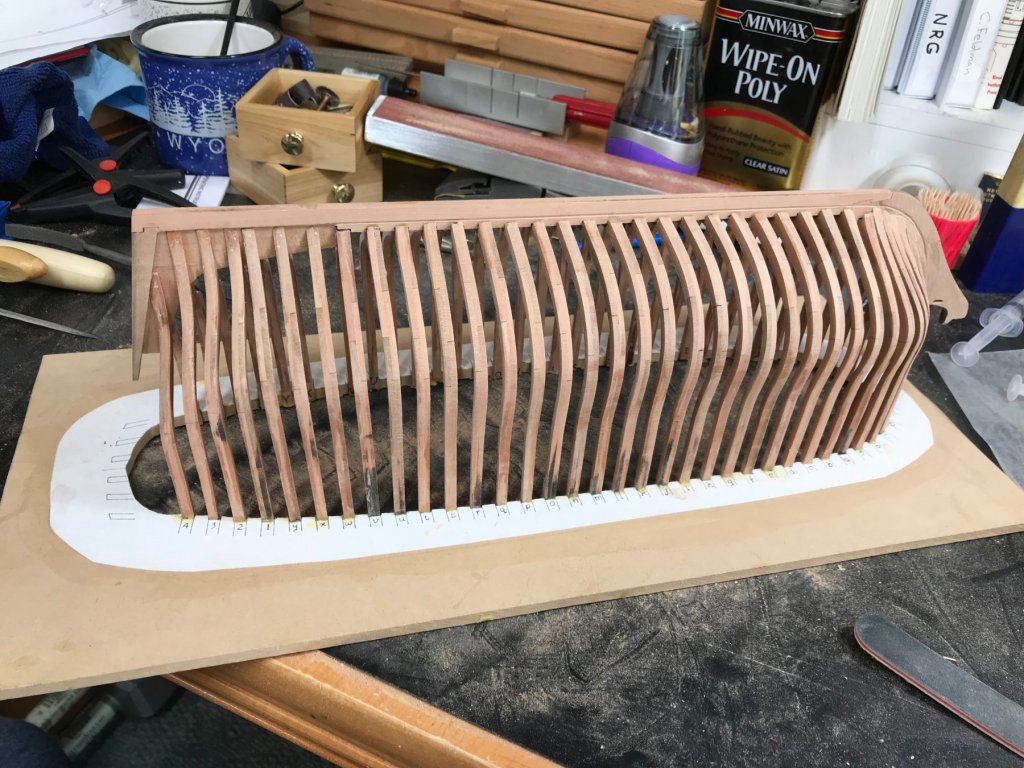
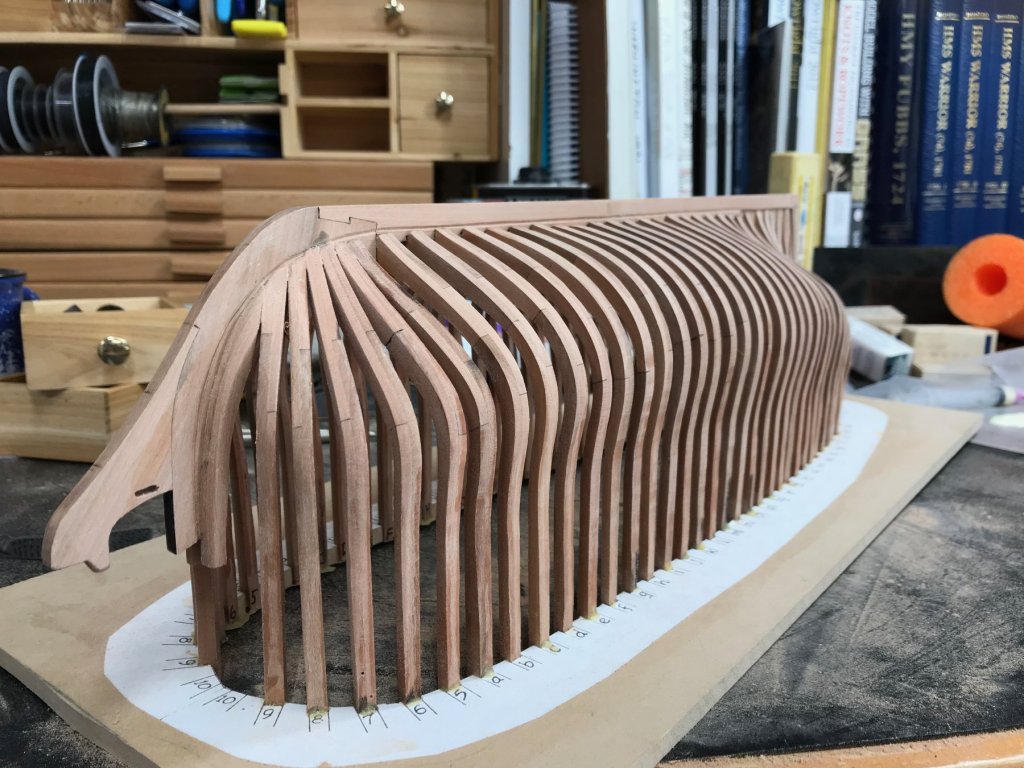
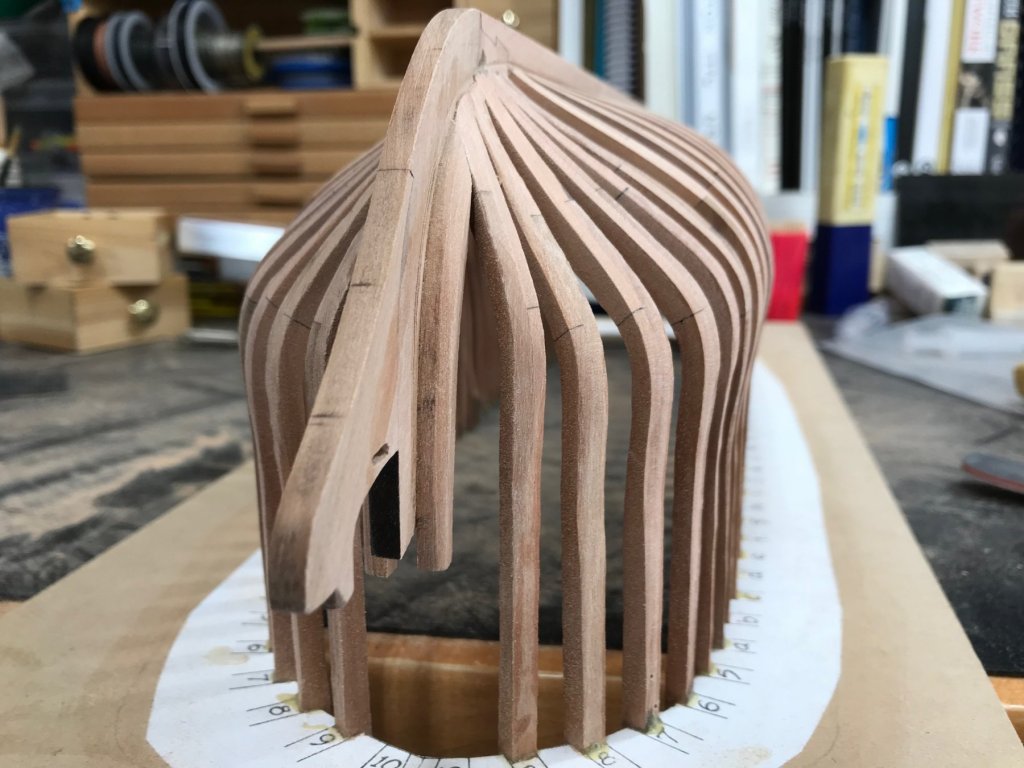
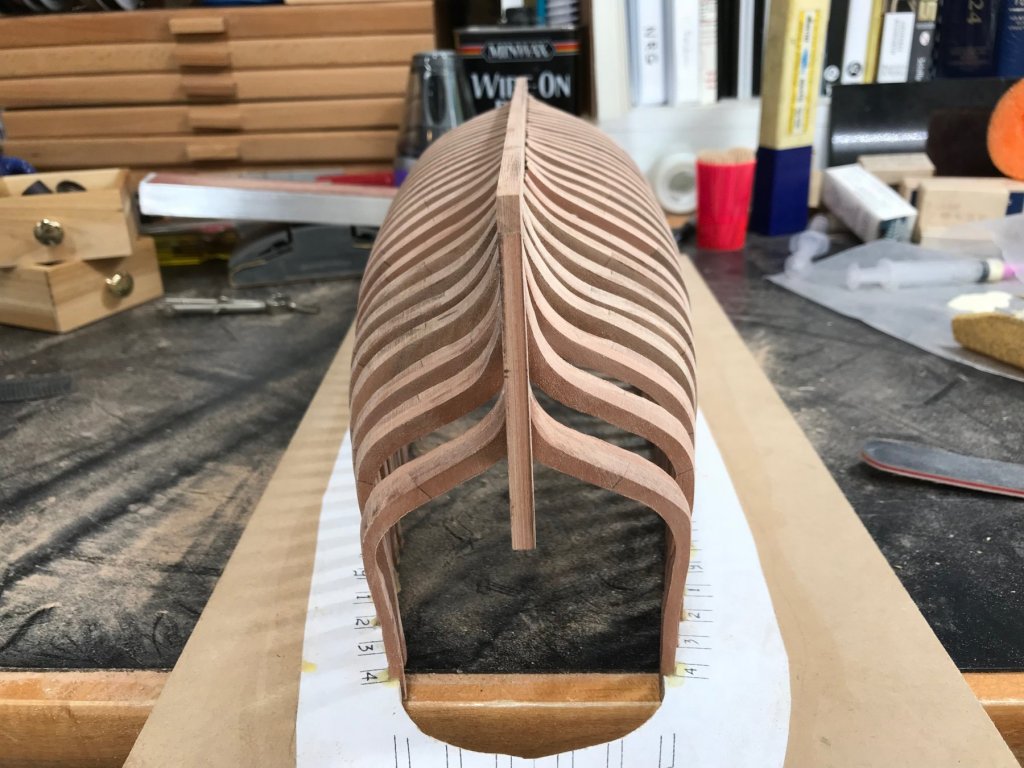
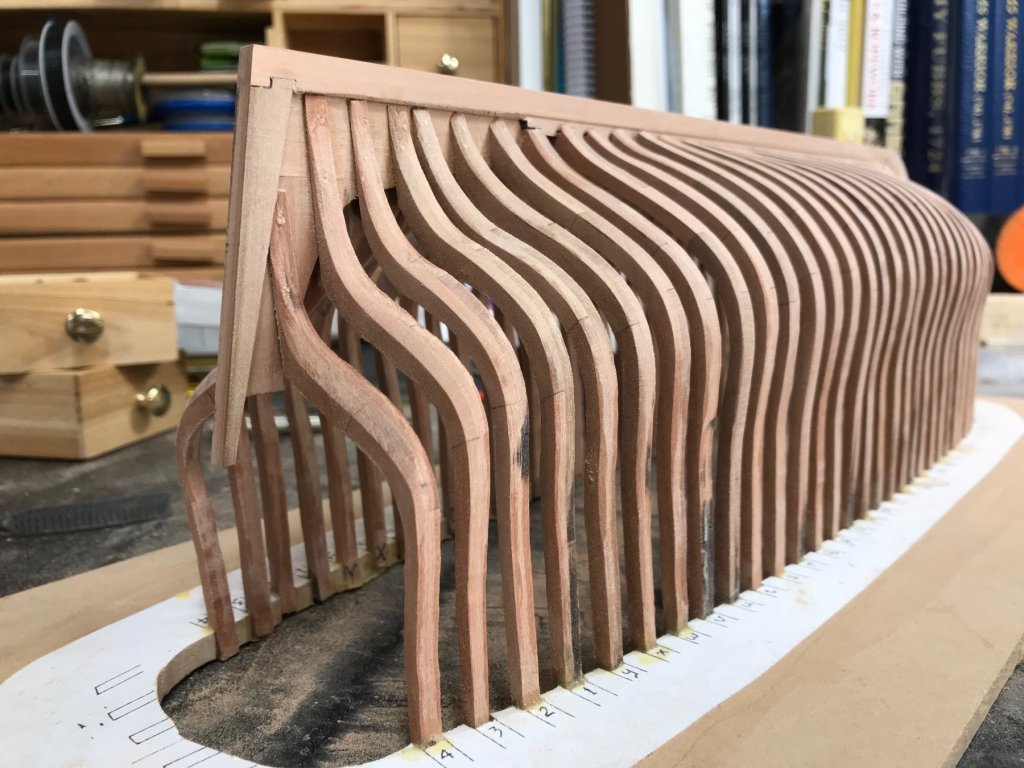
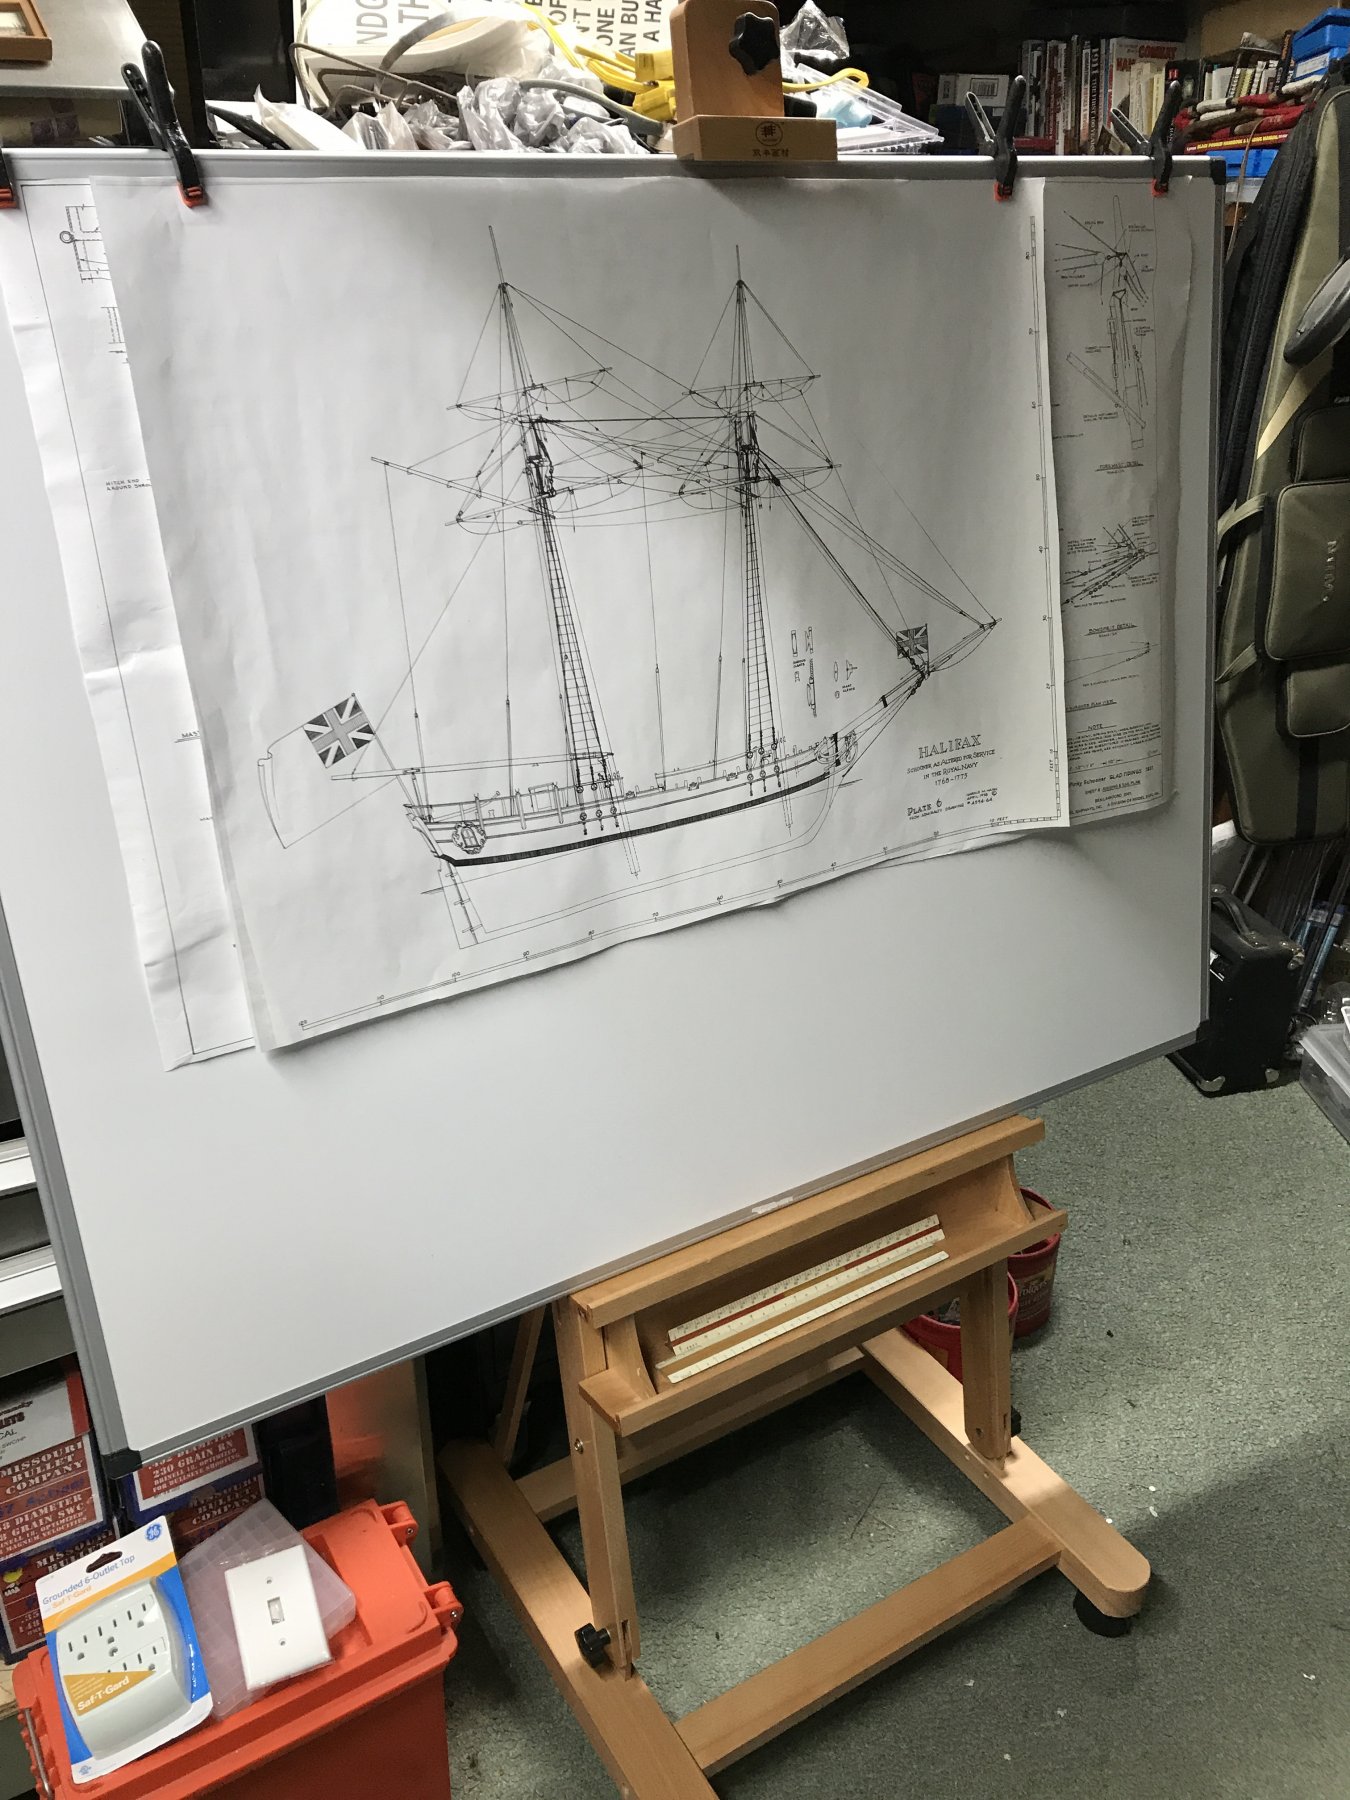
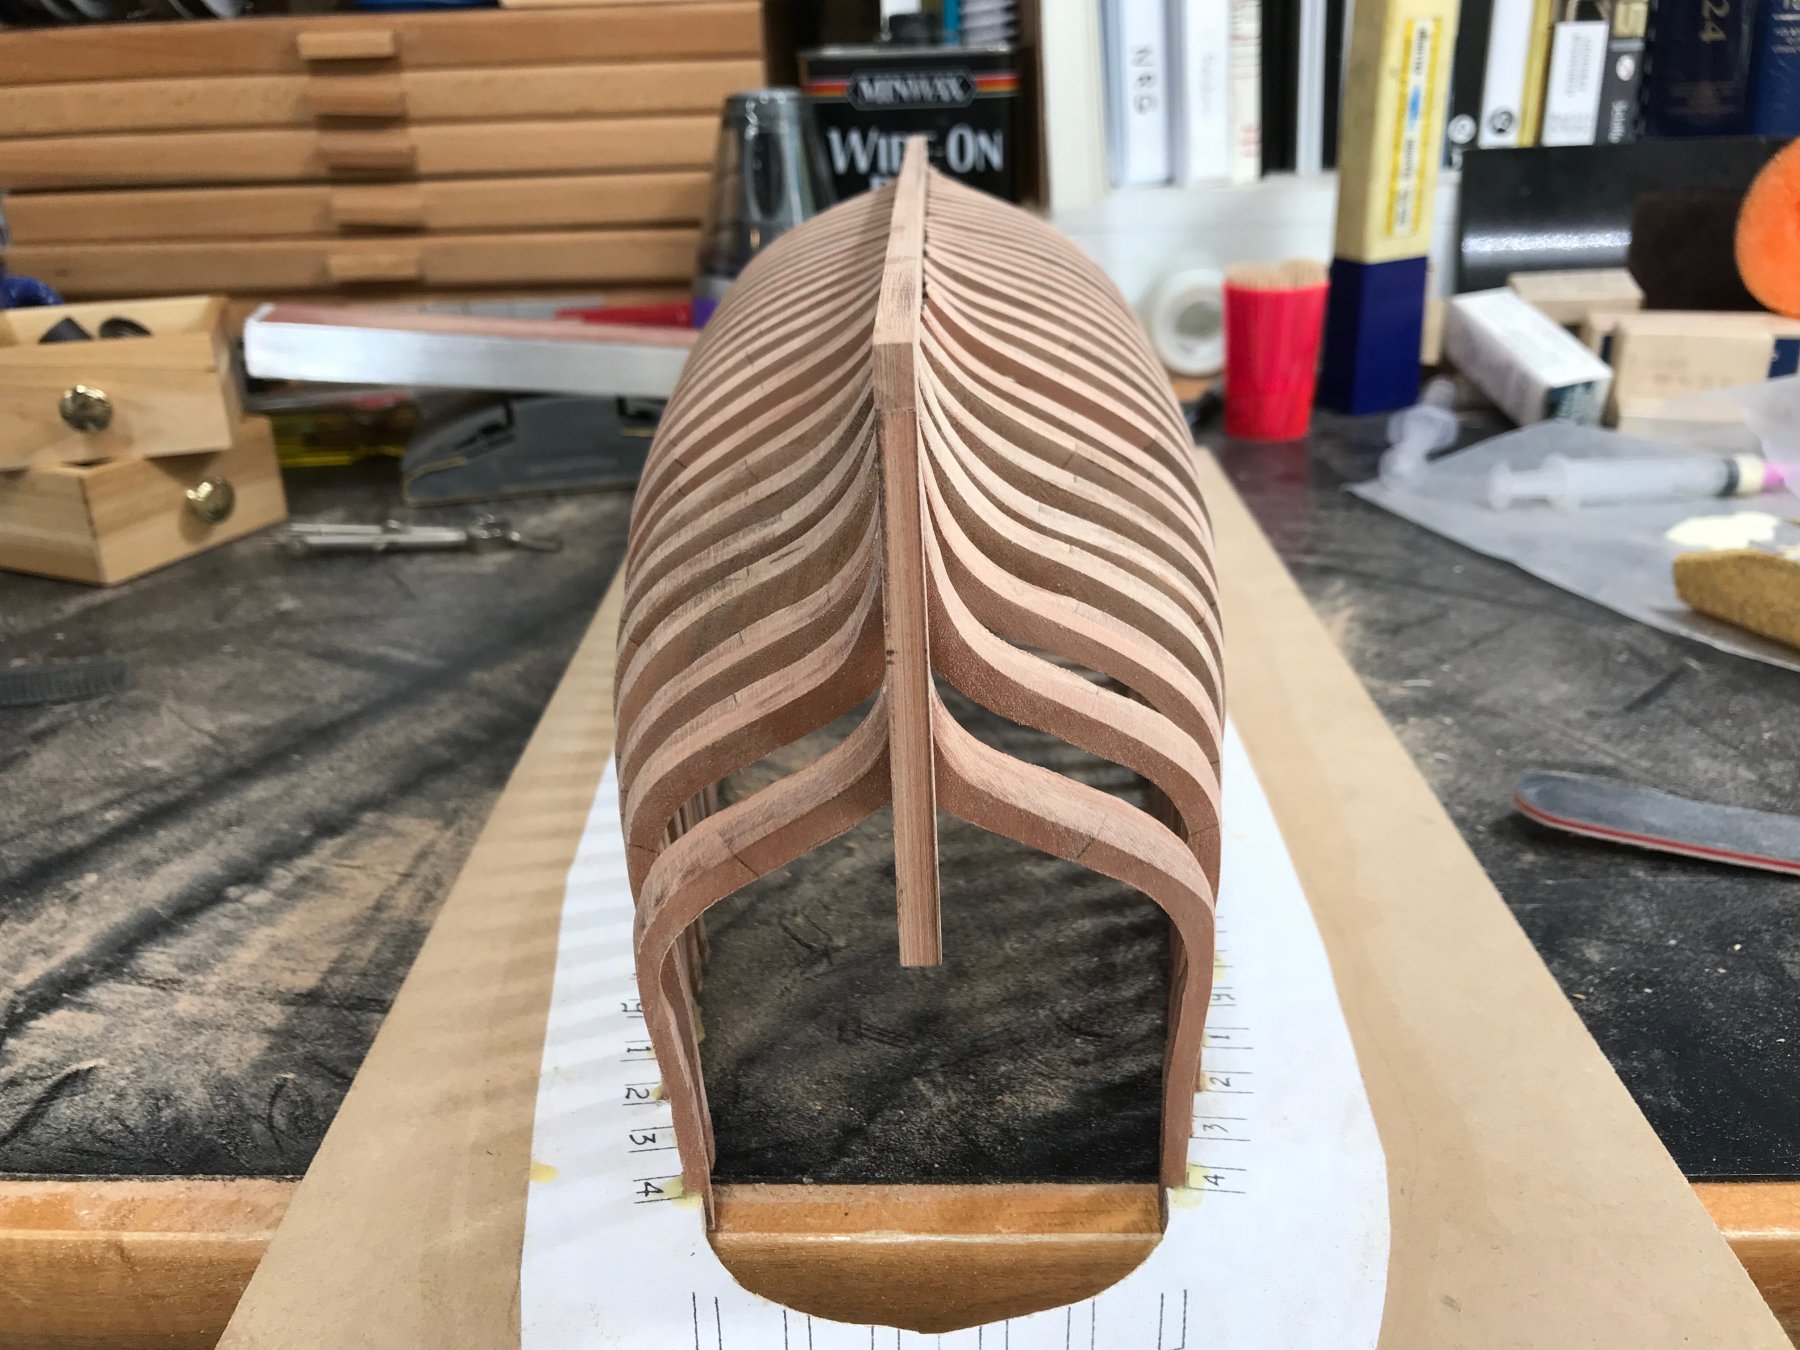
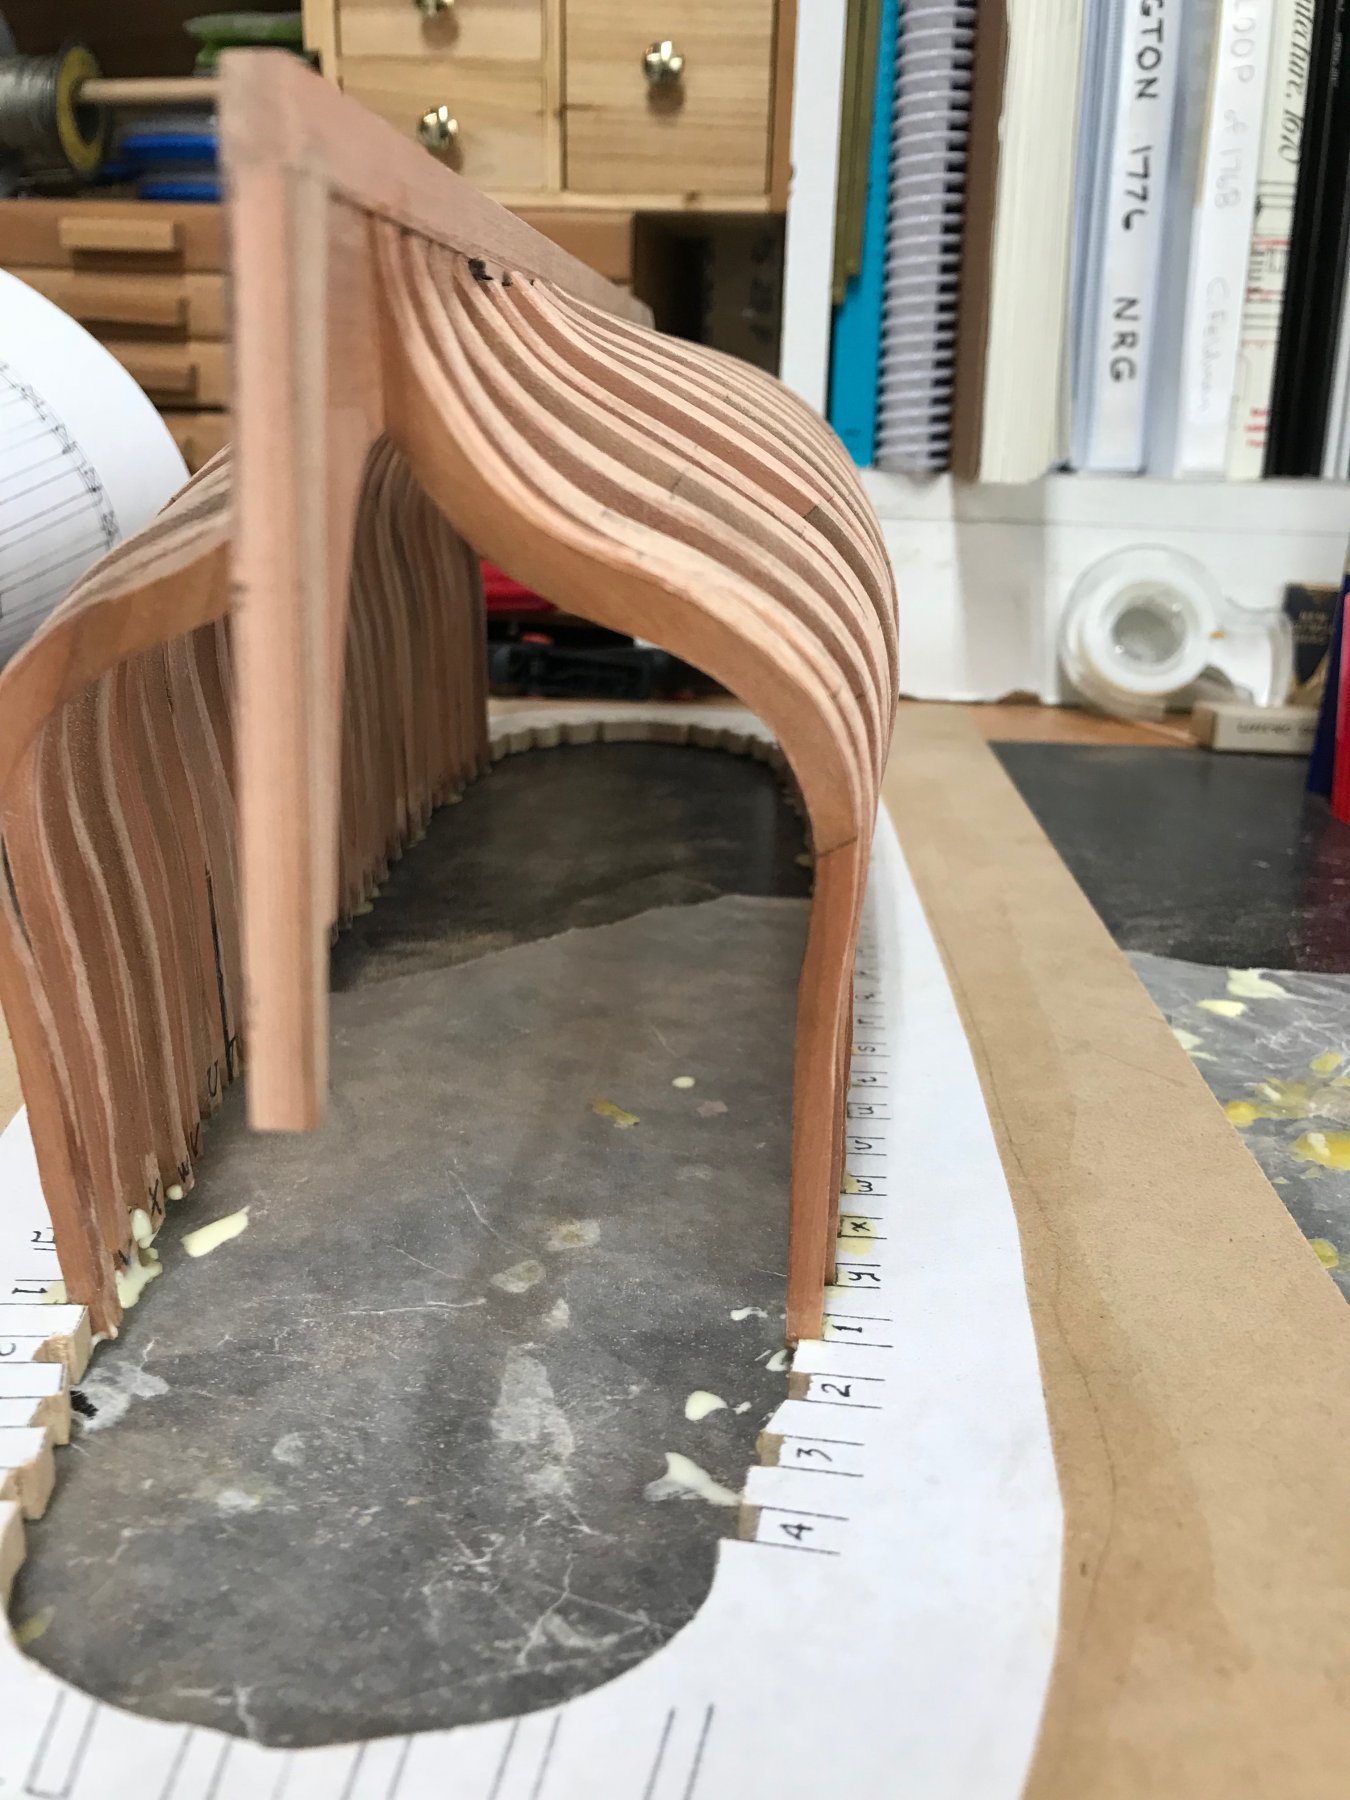
I spent 15 years of my professional life as a draftsman and more than 25 additional years heavily involved with drawings and ship design for the US Navy. That said these stern frames have been a real challenge for me to figure out. I kept referring to Bob's (rafine) build and the Hahn plans and think I came up with something that will work. Like Bob I had to make some parts including the stern frames because as Bob found out the legs are too short on the kit parts. It's all part of building and part of the fun for me is figuring this stuff out. I will take some pictures later. I still need to cut out a couple of frames and get it all together. The Hahn book has no good photos of the stern framing for the Halifax. It does for the Hannah but it's quite a bit different.
-
I saw your beautiful hull on Lou’s Providence build log. I can’t wait until I get to the point of freeing it from the building jig. It’s still a ways out though. I’m trying to figure out the stern frames right now. It looks simple enough but I want to only have to do it once.
-
Looking good Lou. Like John said once you get that first plank down and you start to see the lines of the hull take shape you want to keep it going.
-
Just as long as it's not the "demon" cat eating the keel.
-
You know we're just messing with ya. Ship modeling is a slow process. That said, we still want pictures.
-
Thanks for stopping by and giving me some encouragement. What ship did you build with this method. Im about done with the fairing and will work on improving the rabbit a bit then it's time to lay in the wale strakes. I'm still leaning toward using the ebony for them. I bought a nice dark guitar fingerboard blank and it's almost too nice to cut up. I'll have it all pre-bent and shaped before o commit glue to it.
-
I was thinking the same thing. It ain't so without pictures.
-
Ian, your workmanship is beautiful. I have this kit but don't want to start it until I can do it justice like you have. She has such great lines.
- 51 replies
-
- 1
-
-
- cheerful
- Syren Ship Model Company
- (and 1 more)
-
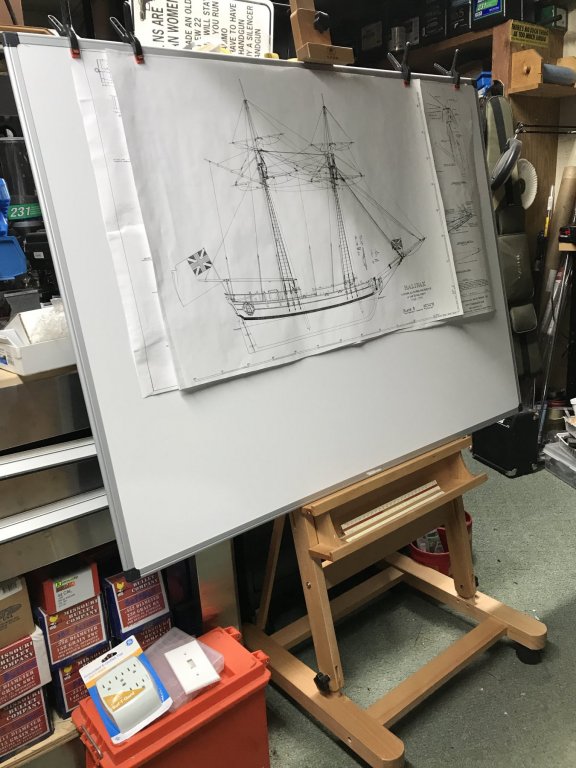
Laying out plans in a smaller workshop
alde replied to alde's topic in Modeling tools and Workshop Equipment
You guys sure have some good solutions. I opted for a painters easel on wheels with a white board on it. My only mistake was not getting a magnetic white board. I may end up replacing it with one.
-
Requesting feedback for future MSW Group Projects
alde replied to Chuck's topic in Group Projects on Model Ship World
Count me in Chuck. I would love to learn sailmaking. Maybe it can include furled and unfurled sails. -
Thanks Mark. It's going slow but I see progress every day. I'll try to work out the stern frames in the next couple of days. It looks pretty straight forward but I want to get it right the first time. I need to study the plans for a bit.
-
I'll look into it Lou. I want a nice black color but would like the wood grain to show if I can.
-
She's looking great Tom. Man that's a big model.
-
Thanks Lou, it finally feels like something is coming together and looking like a hull. Maybe by the end of next week I'll try fitting the shear strake. I have some nice dark ebony strips and I was thinking of using that for the shear but I understand it's not easy to work with. I may try cutting and bending it anyway. If I can fit it OK I'll use it. If not there is always paint for the black planks. I used ebony for my guitar fingerboard and it cut and glued just fine but I didn't have to bend it.
-
It's been slow going but it is going. I managed to get all the framing done and treenailed the half frames to the keel assembly. This is the first time I have made treenails and it took a bit of practice before I could get them down to a scale 1 inch without too much trouble. I also did some fairing and it seems to be going ok. It's going to be a slow job to fair the inside. It's going to take some thought and custom sanding pads to get it done. So far so good.