alde
-
Posts
1,028 -
Joined
-
Last visited
Content Type
Profiles
Forums
Gallery
Events
Everything posted by alde
-
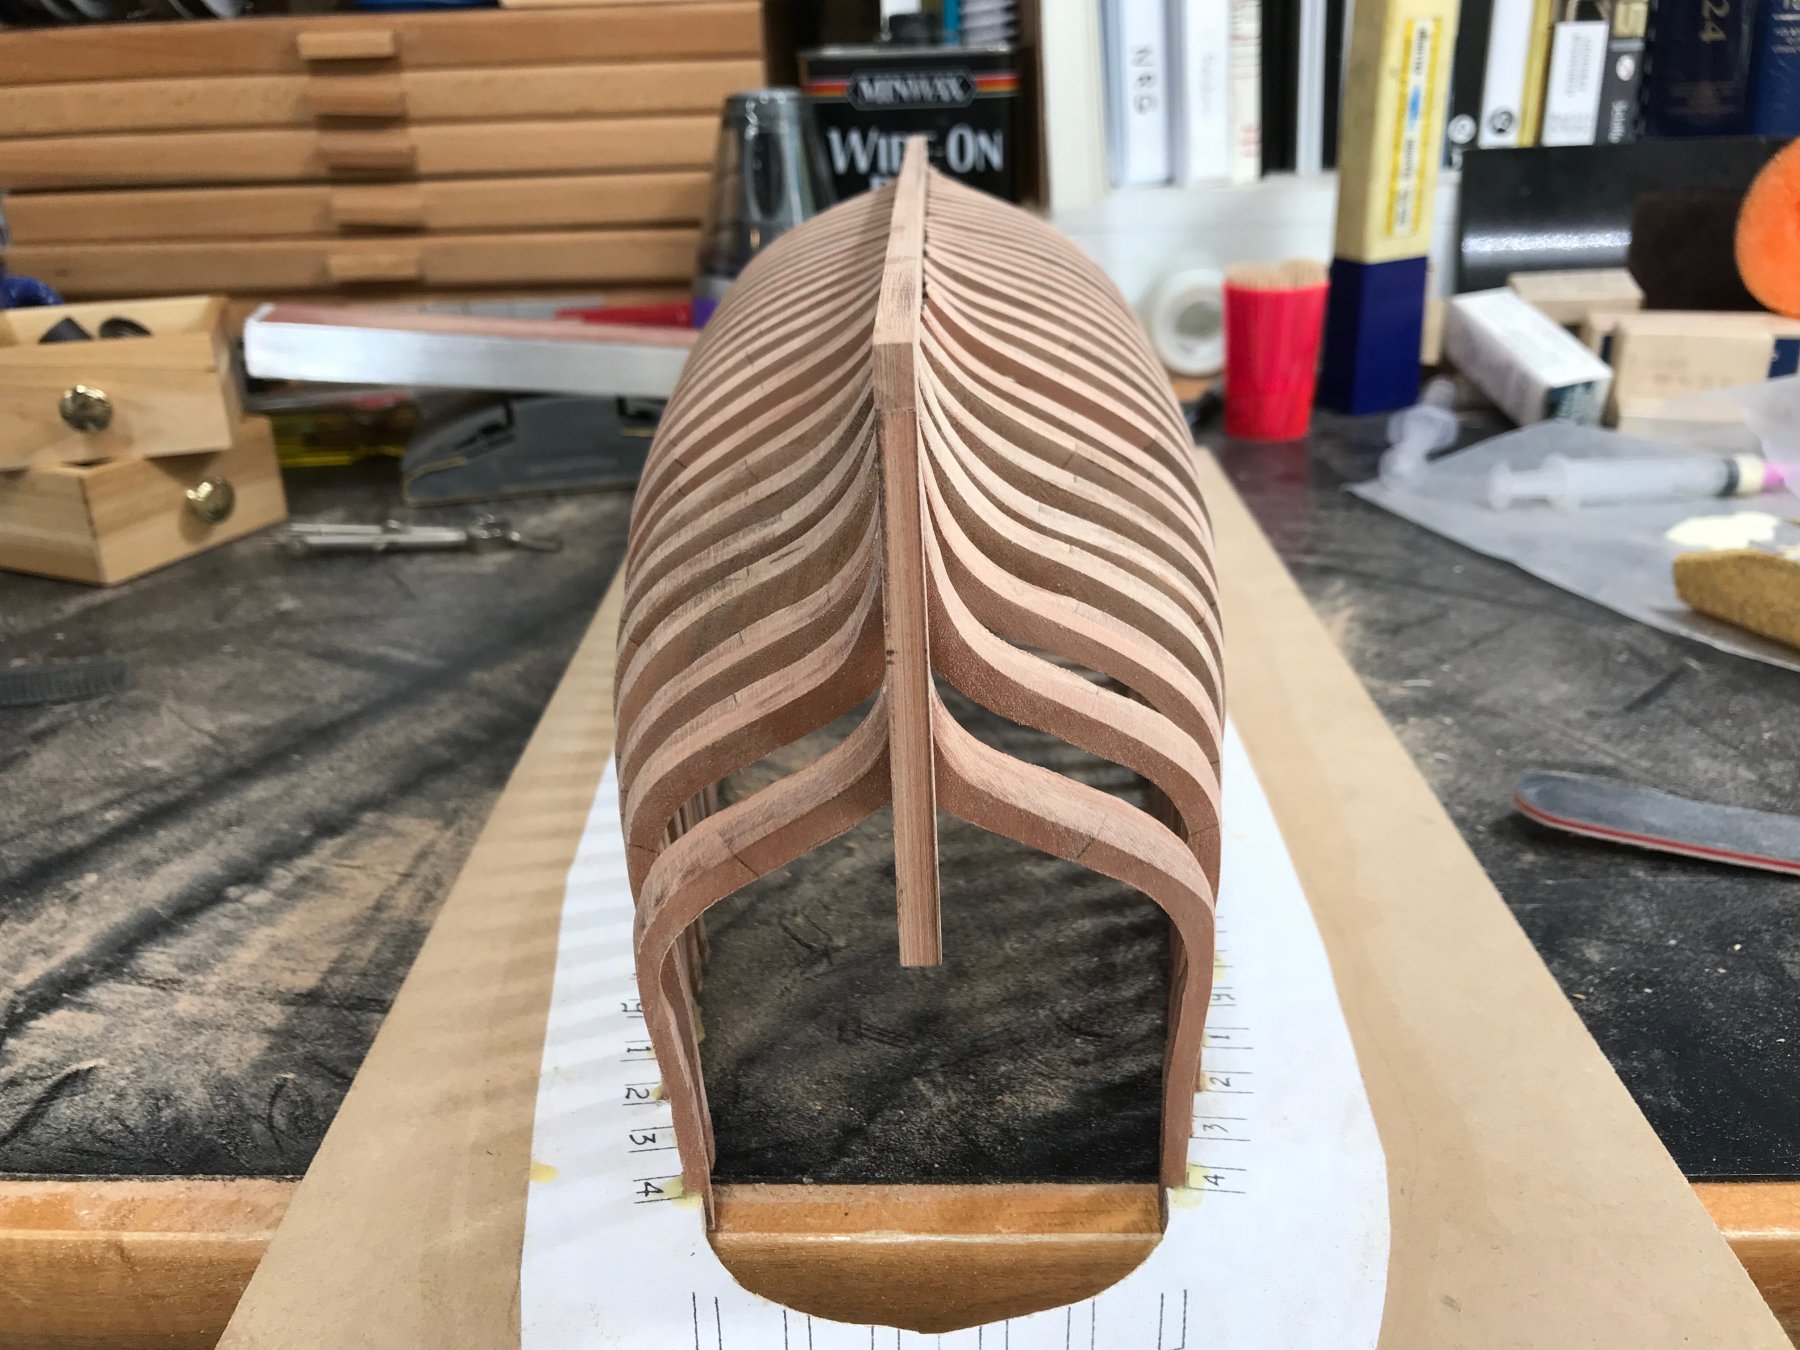
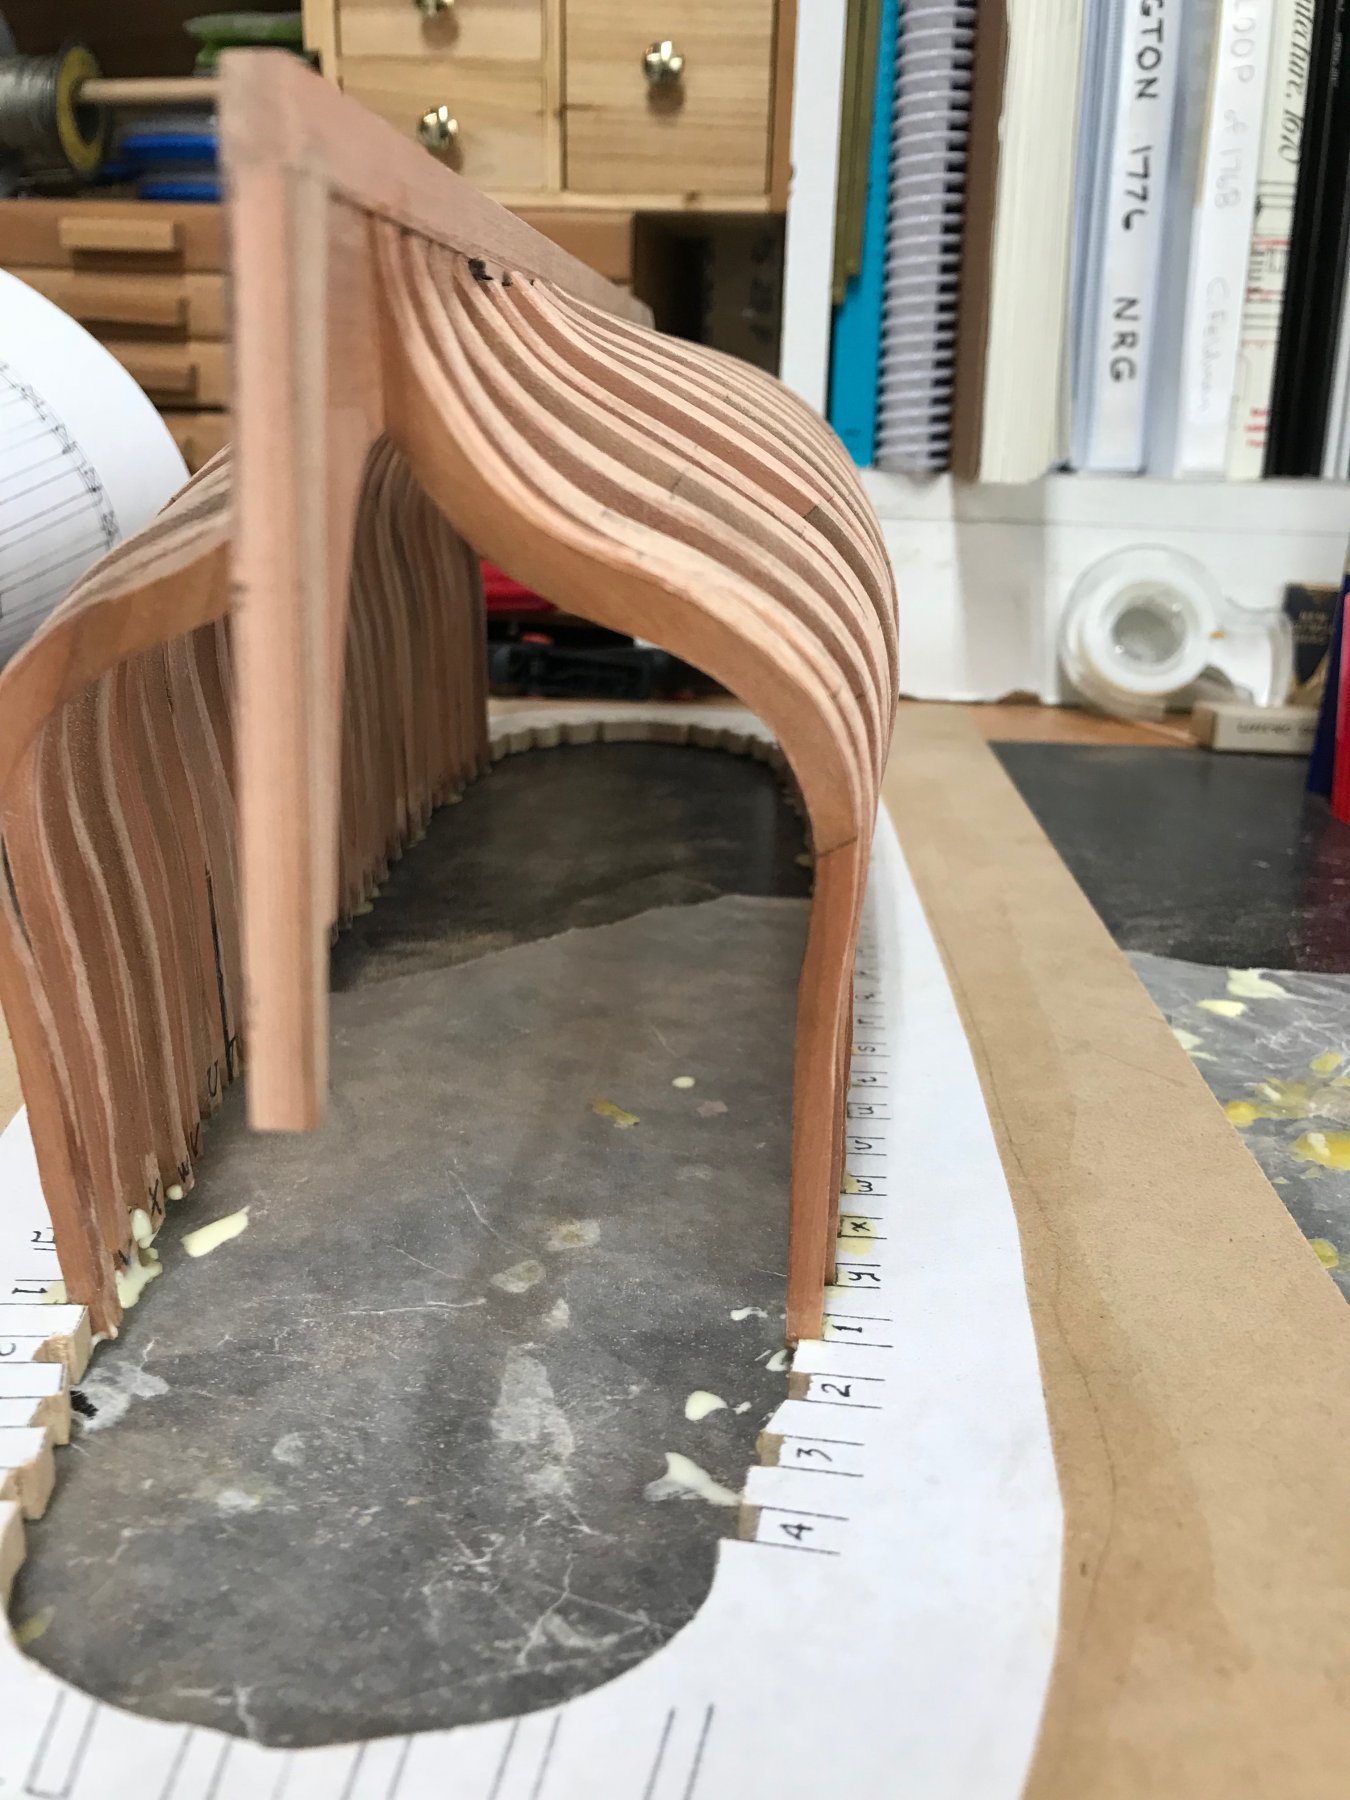
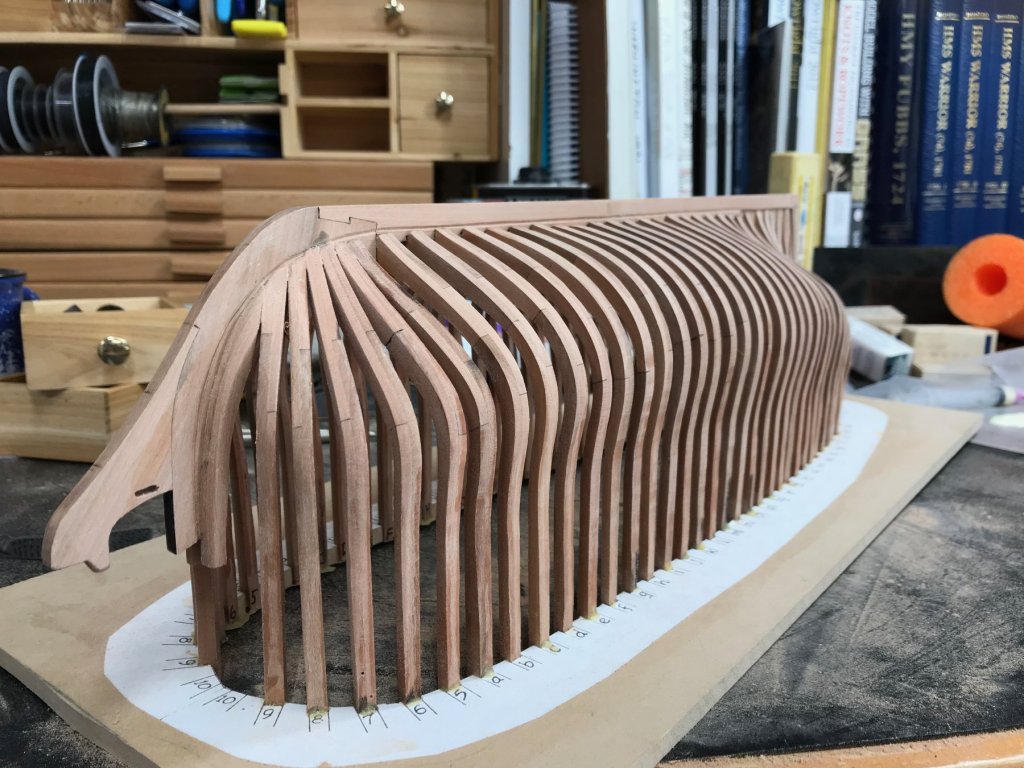
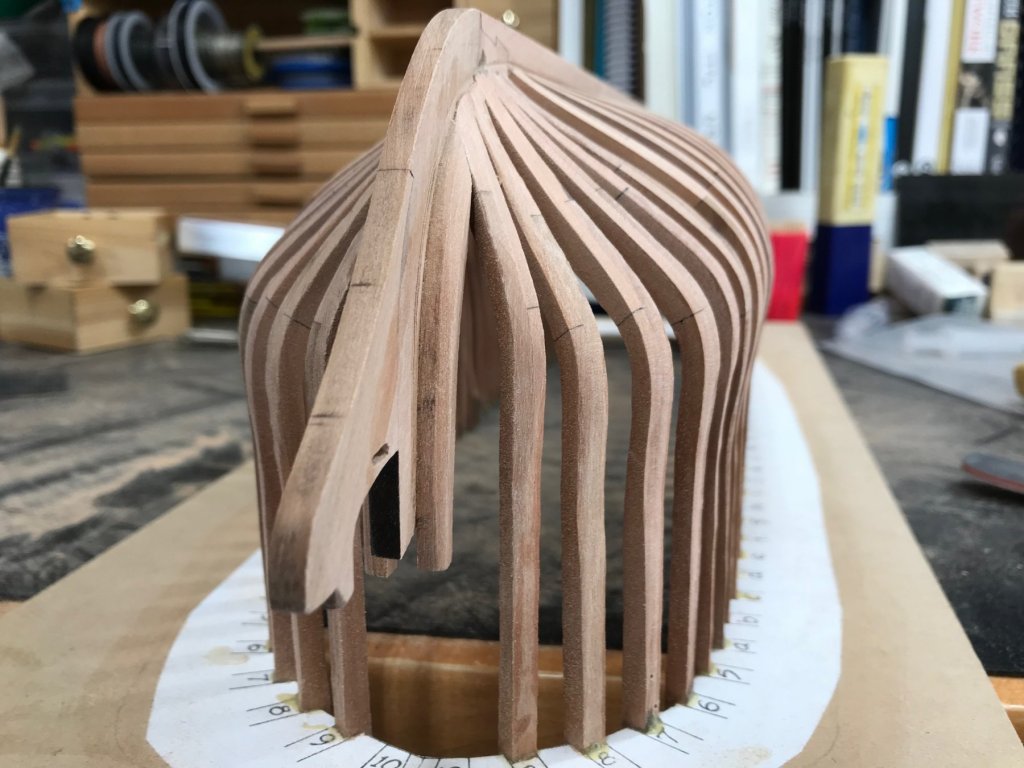
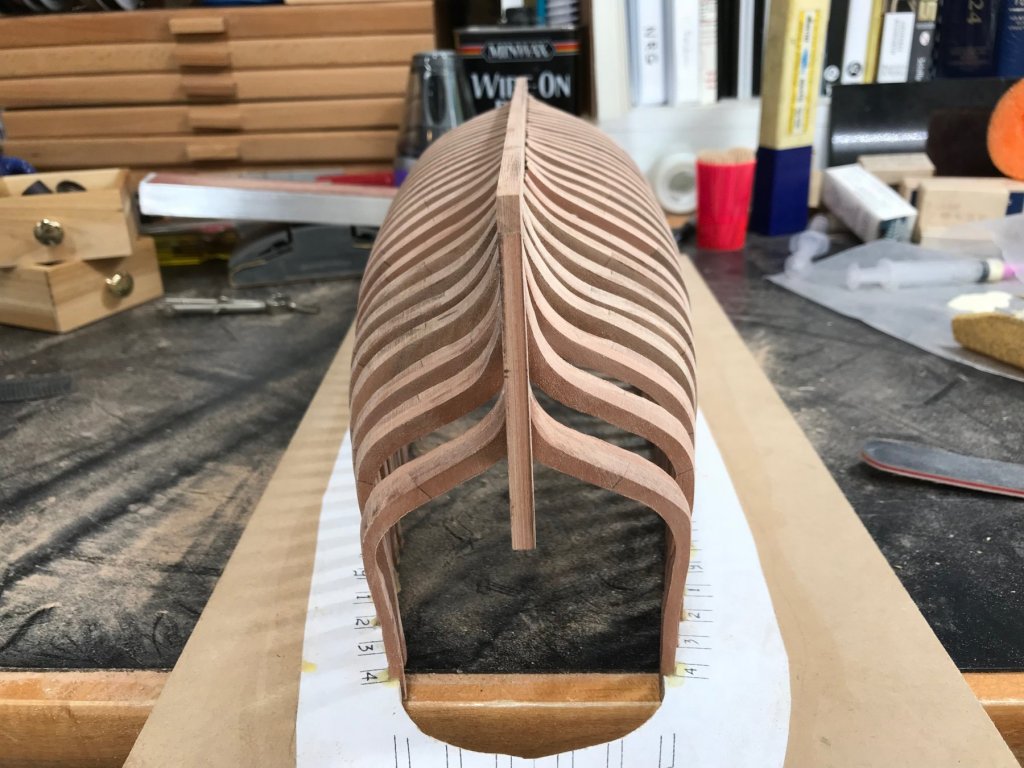
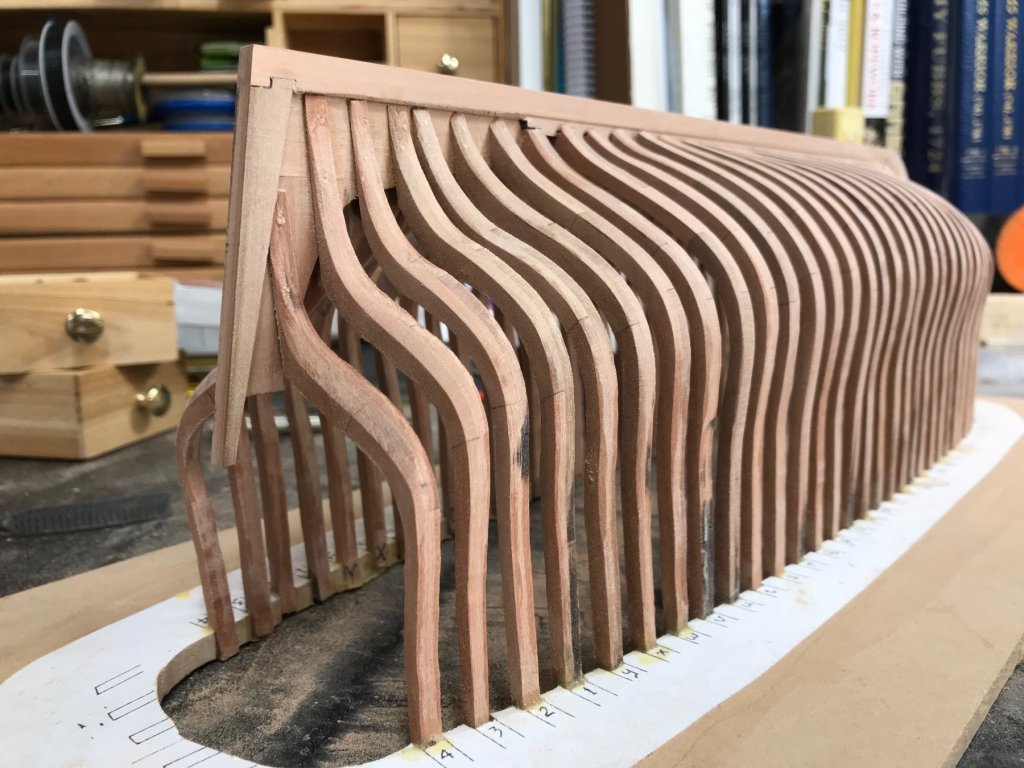
 It's been slow going but it is going. I managed to get all the framing done and treenailed the half frames to the keel assembly. This is the first time I have made treenails and it took a bit of practice before I could get them down to a scale 1 inch without too much trouble. I also did some fairing and it seems to be going ok. It's going to be a slow job to fair the inside. It's going to take some thought and custom sanding pads to get it done. So far so good.
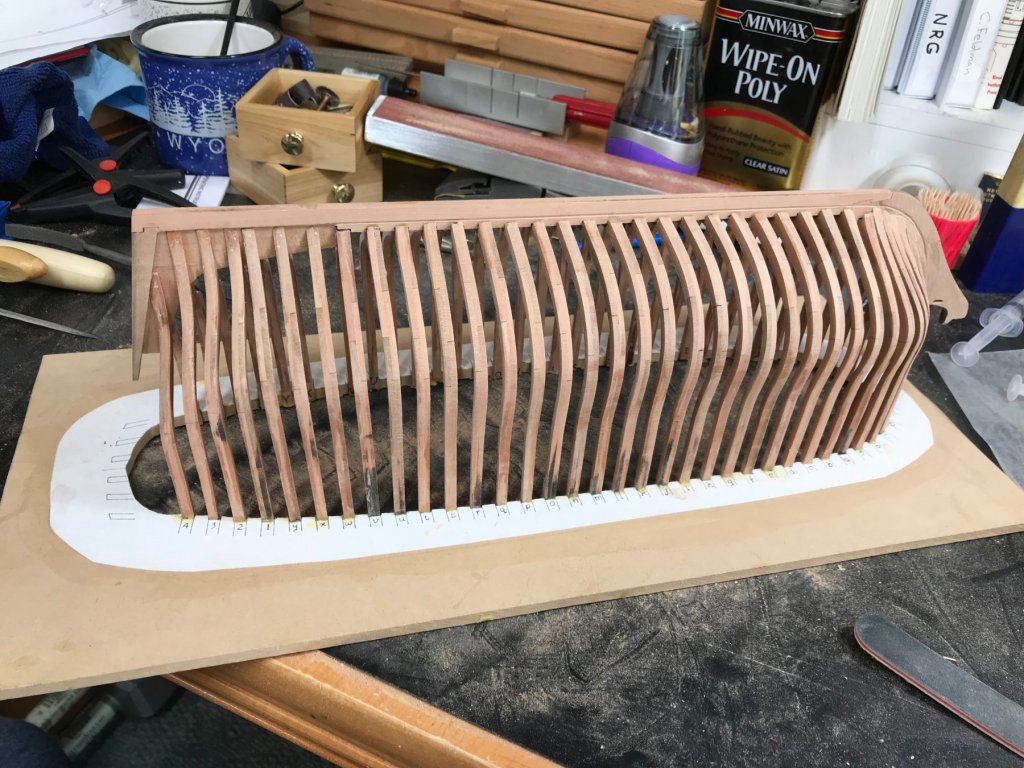

-
Requesting feedback for future MSW Group Projects
alde replied to Chuck's topic in Group Projects on Model Ship World
Thanks Chuck. I absolutely agree that a small project of a year or less is the better choice. It might me something that could be built while working on a larger project at the same time. -
Requesting feedback for future MSW Group Projects
alde replied to Chuck's topic in Group Projects on Model Ship World
Chuck, as far as the Whinnie as a group project how would it compare in difficulty as compared to say Model Shipways Constitution? -
That sure looks nice Rusty. I'm also interested on the use of the weathering powders. Can you give some details on the technique?
- 120 replies
-
- 3
-

-
- queen anne barge
- Syren Ship Model Company
- (and 1 more)
-
Requesting feedback for future MSW Group Projects
alde replied to Chuck's topic in Group Projects on Model Ship World
I had already planned to purchase the Whinnie when it's ready for sale but as a group build I don't know. For many of us a build like that would be at a minimum of a couple of years to build. With a project that large and involved and builders pace there would be people all over the place as far as progress goes. Would this work for a group build? On the other hand it would sure help a beginner like me to do it with a group. -
Requesting feedback for future MSW Group Projects
alde replied to Chuck's topic in Group Projects on Model Ship World
Chuck, A San Francisco Bay Felluca is a pretty little work boat that might make a good subject. Some of them were painted with bright colors and have a simple rig. Maybe a War or 1812 era gunboat would be a good subject too. -
Balsa filler may not be a bad idea. It will go easier.
-
You’ll be fine Lou. Just don’t glue until your happy with the way the plank lays on the frames and takes the bends. Once you start using the tick strips and fitting planks things will start feeling better. Can’t learn until you jump in.
-
Thank you. I think the 1/48 will be good sellers. I know I will buy at least 2 when they are available. I need one for my Halifax build and one for future use.
- 216 replies
-
- 7
-
-
- masterkorabel
- ships
- (and 3 more)
-
Kurt, is it possible to post the correction sheet on the NRG website with the instructions for those of us who already have a set of plans?
- 504 replies
-
- 2
-
-
- washington
- galley
- (and 1 more)
-
I found that out the hard way. That’s why I ended up pinning all the whole frames to the keel. It worked great but I’ll still take the sanding slow and easy.
-
They do tend to mellow as they get older but that could take a couple of years. Of course in the meantime there is always a squirt gun.
-
Thanks Mark. I was leaning that way but it sure helps to hear from someone with more experience. The half frames that I have installed seem pretty solid without pinning them but I think I'll go ahead and do the half frames like Hahn shows. I did drill and pin all the full frames to the keel and it's nice and solid now. It's fairing up pretty well too. It's starting to look like a hull. I hope to have the rest of the half frames in by maybe the end of next week.
-
I have a question for those with more experience with this type of build. I'm doing the half frames now and have 3 in place now. In Hahn's book he shows these frames being trunneled in place for added strength. I plan to do this but was wondering if I should drill all the way through both frames and pin them together or just drill into the deadwood? To me it makes sense to go all the way through. I was just re-reading some of the book and see that when he installed the keel he uses epoxy. I used yellow titebond for mine. When I was doing some preliminary fairing a couple of the frames popped loose. I wish I had paid more attention when I did this. I may drill and pin each one through the inside of the hull into the keel for extra strength.
-
She looks great Mike. I just noticed the new book for this ship on Seawatch Books and ordered it today.
-
Lawrence, I am having a great time with this build. It's really rewarding to see it come together and I'm learning a lot from it. I'm looking forward to your Oliver Cromwell coming together. Your making great progress. I really like the Hahn method and plan to do at least a couple more like this. The Cromwell is going to build into a beautiful ship and I may build it one day. I think maybe the Hannah may be next though. From there I don't know. I have a pretty good stash of kits I may end up finding new homes for so I can focus on scratch building but who knows.
-
Looking forward to it James. Thank you.
-
Looking really nice Mick. I really like the look of the treenails on the deck. The color and size look just right. They don't stand out too much and look like freckles. They are subtle. Very nice indeed.
- 504 replies
-
- 2
-
-
- washington
- galley
- (and 1 more)
-
Looking forward to your pictures Lou. Any progress is good progress. In a way your working on it when your just sitting back thinking about how to move forward and what your going to do next or doing your research. It all gets you to the goal.
-
Thanks Mark. By adjustment I guess you guys are talking about depth? I figured I would have to do that. I have a set of small, curved rifler files that should work great for that. I glued the keel to the whole frames today but haven't touched it since. I'll start on the rest of the frames Monday. I'm looking forward to that.
-
Tick strip
alde replied to Kurt Johnson's topic in Building, Framing, Planking and plating a ships hull and deck
I would think the bottom of the rabbit would most accurate. If you go from the surface of the keel you'll come up a bit short.