alde
-
Posts
1,028 -
Joined
-
Last visited
Content Type
Profiles
Forums
Gallery
Events
Everything posted by alde
-
 Thanks for the feedback Russ. I really appreciate it.
 -
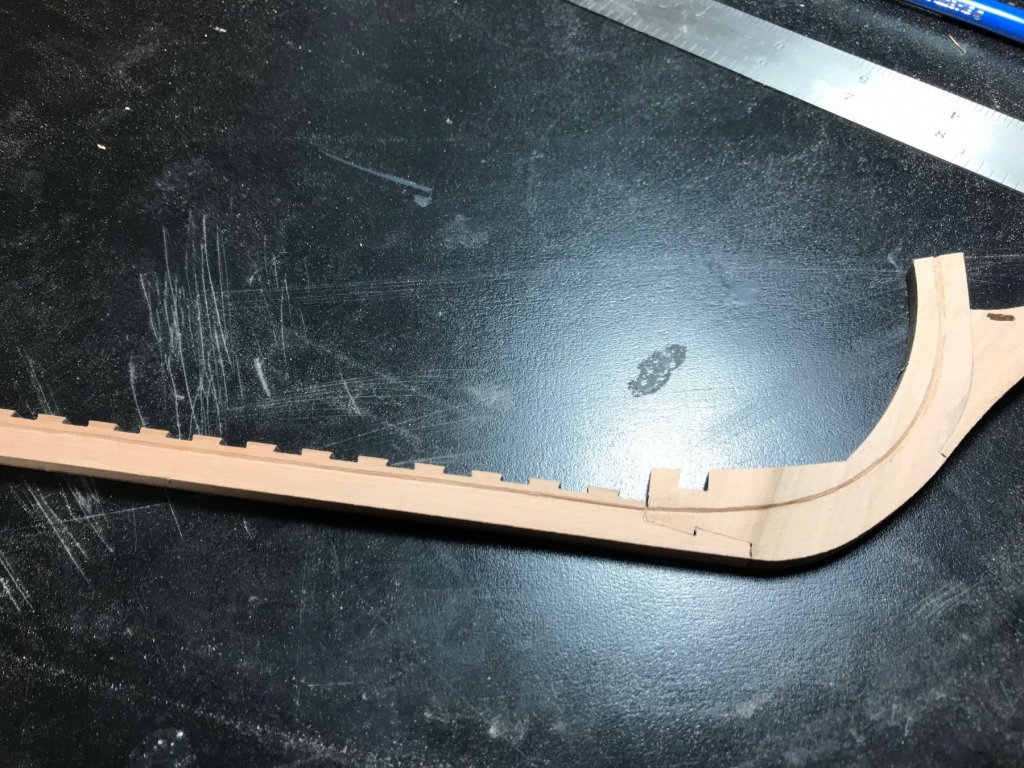
I know it's not much of an update on the build but it felt like a real milestone for me. I was really stressing about cutting the rabbit but I think it went pretty well. Using the framing plan as a guild I drew in the rabbit with a straight edge and ships curve. Once I was happy with the way it looked and adjusting it here and there I clamped the steel staight edge to the straight part of the keel and started making light cuts with a No.11 blade on an angle. I did all 4 straight lines then started carving out the V-groove. Then for the stem I did basically the same thing only free hand this time to make the curve. After most of the wood was removed I used the corner of my steel straight edge to scrape out the groove to clean it up. Both side look pretty decent if I must say so myself. Now that that is done I will make sure everything fits well and looks good then glue the keel assembly to the frames. Cutting the rabbit was about all I could do today.

-
Glad to hear your easing yourself back into it. I bet it gets easier when you start to make some real progress. As far as planking goes I don't have a lot of experience either but I've found that the most important thing to do is not glue anything until your absolutely happy with the fit. I have taken a good part of a day fitting a plank until I was happy with the way it fit without any stress on it. Then clamping is really easy because your just holding it in place and not trying to bend it into place. It can be frustrating at first but gets easier once you learn how the wood reacts.
-
I'm glad to hear it Lou. I can tell part of you is anxious to get back at it.
-
Mike, Welcome to the forum. It is a great bunch of folks. You will end up making some good friends even if you never meet face to face. I know I have. A build log is the best way to learn. You'll get great advice and learn the terminology as you go. Once you have the kit in hand and you study the plans many of your questions will be answered. You might consider a first ship being something there are several build logs for. The Model Shipways Armed Virginia Sloop is very popular with a bunch of great build logs that will guide you through your build along with asking questions in your own log. I'm sure the Friendship Sloop would be a good choice too. They are great looking vessels for sure. Just have fun and ask for help when needed.
-
Back when I was a draftsman in the old lead and vellum days I worked for an engineer would would tell me not to draw more in one day than you cold erase the next.
-
Lou, I’m getting ready to fire up the scanner and should have what I have to you fairly soon. I hope it helps fill any gaps in what you have. Of course it could end up causing you more headache.
-
I think what I’ll do is plank the upper part of the hull and see how she looks. If I like it I’ll leave it. I don’t have a driving need to get too fancy on this one.
-
Thanks guys. I will for sure cut it flat on the bench. What do you think about the plank or two at the keel? It will still leave frames exposed to show the structure but may help make it look more “finished”. I’m still going back and forth about it.
-
You'll get there Lou. Give it time. Maybe you could just concentrate on your research for now and the rest will come in time. I'll get what I have to you. I just need to figure out how to use my scanner. Its one of those combined with a printer and copier. I think I used the scanner 2 times since I got it. If all else fails I'll bring them with me next time we get together and you can just borrow them.
-
Lou, I've been waiting to see some progress on your Provedence. I found infomation on your ship you may not have including a decent profile drawing and some descriptions. Also a painting showing a boat on deck. You may already have it all but tomorrow I'll try to get it scanned and email it to you. If it's good stuff great. If not no loss. I hope I can get to planking in a couple of weeks. The fore and aft frames will be a challenge not to mention the rabbit.
-
Not me. I tend to be pretty patient when it comes to modeling. Once I get ready to build a boat I'll work at it until I can build a decent boat no matter how long it takes. I'll also try different methods until I find one that works for me. I think you work the same way from what I have seen of your model.
-
I'm almost done with all the full frames and am pretty happy with it so far. Once the full frames are all glued into the building jig it will be time to glue in the keel assembly. That leads me to a bit of a dilemma. I know for sure I'm going to plank at least one plank below the shear strake. I have also seen some models with one or two planks up from the keel. I'm thinking of doing this. From what I see from other models only planked one below the shear plank they don't bother cutting a rabbit. If I do a plank or two up from the keel I will definitely need a rabbit. Any thoughts?
-
I have a couple in my workbench drawer for a while too. I tried to build one a while back but ended up throwing the whole thing in the scrap box. I just couldn't get any of the wood to bend no matter what I did. Next time I'll follow your lead and use boxwood.
-
I think the weak link with those Model Shipways boat kits is the material. The wood is just too brittle and thick to work with using the tight bends on these little boat frames. I'm looking forward to seeing what you can do with boxwood. Some well built boats can be a nice focal point for a great ship model.
-
Brass Black
alde replied to Nirvana's topic in Painting, finishing and weathering products and techniques
Is it the Birchwood Casey Brass Black? If so I have used it and it worked well for me too. But like you point out it needs time to set before it's durable enough to handle. -
A beautiful Confederacy. She looks great rigged.
-
Mick, she's fitting out beautifully. I plan to go back a re-read your log from the start. I think your experience will be very helpful on my current build and especially when I eventually start my Galley Washington. I was just going over the plans and material list yesterday. I bought the wood package from Crown Timberyard a year ago.
- 504 replies
-
- 3
-

-
- washington
- galley
- (and 1 more)
-
It looks darn nice Bob. I haven’t tried coppering yet but it looks like a real challenge.
- 359 replies
-
- 4
-
-
- prince de neufchatel
- model shipways
- (and 1 more)
-
Pandora by marsalv - FINISHED - 1:52
alde replied to marsalv's topic in - Build logs for subjects built 1751 - 1800
I need to go back and read your whole build log but WOW. Amazing work. -
Sounds like it’s all coming together. Congratulations on your upcoming retirement too.
- 1,354 replies
-
- 2
-
-
- constitution
- model shipways
- (and 1 more)
-
Every time I try to use super glue for anything it turns into a disaster. I try to avoid the stuff all together. I'm learning there's no substitute for good fitting parts and. For knots diluted white glue works great.
-
I'm looking forward to watching this one come together. These little colonial era ships are beautiful.
-
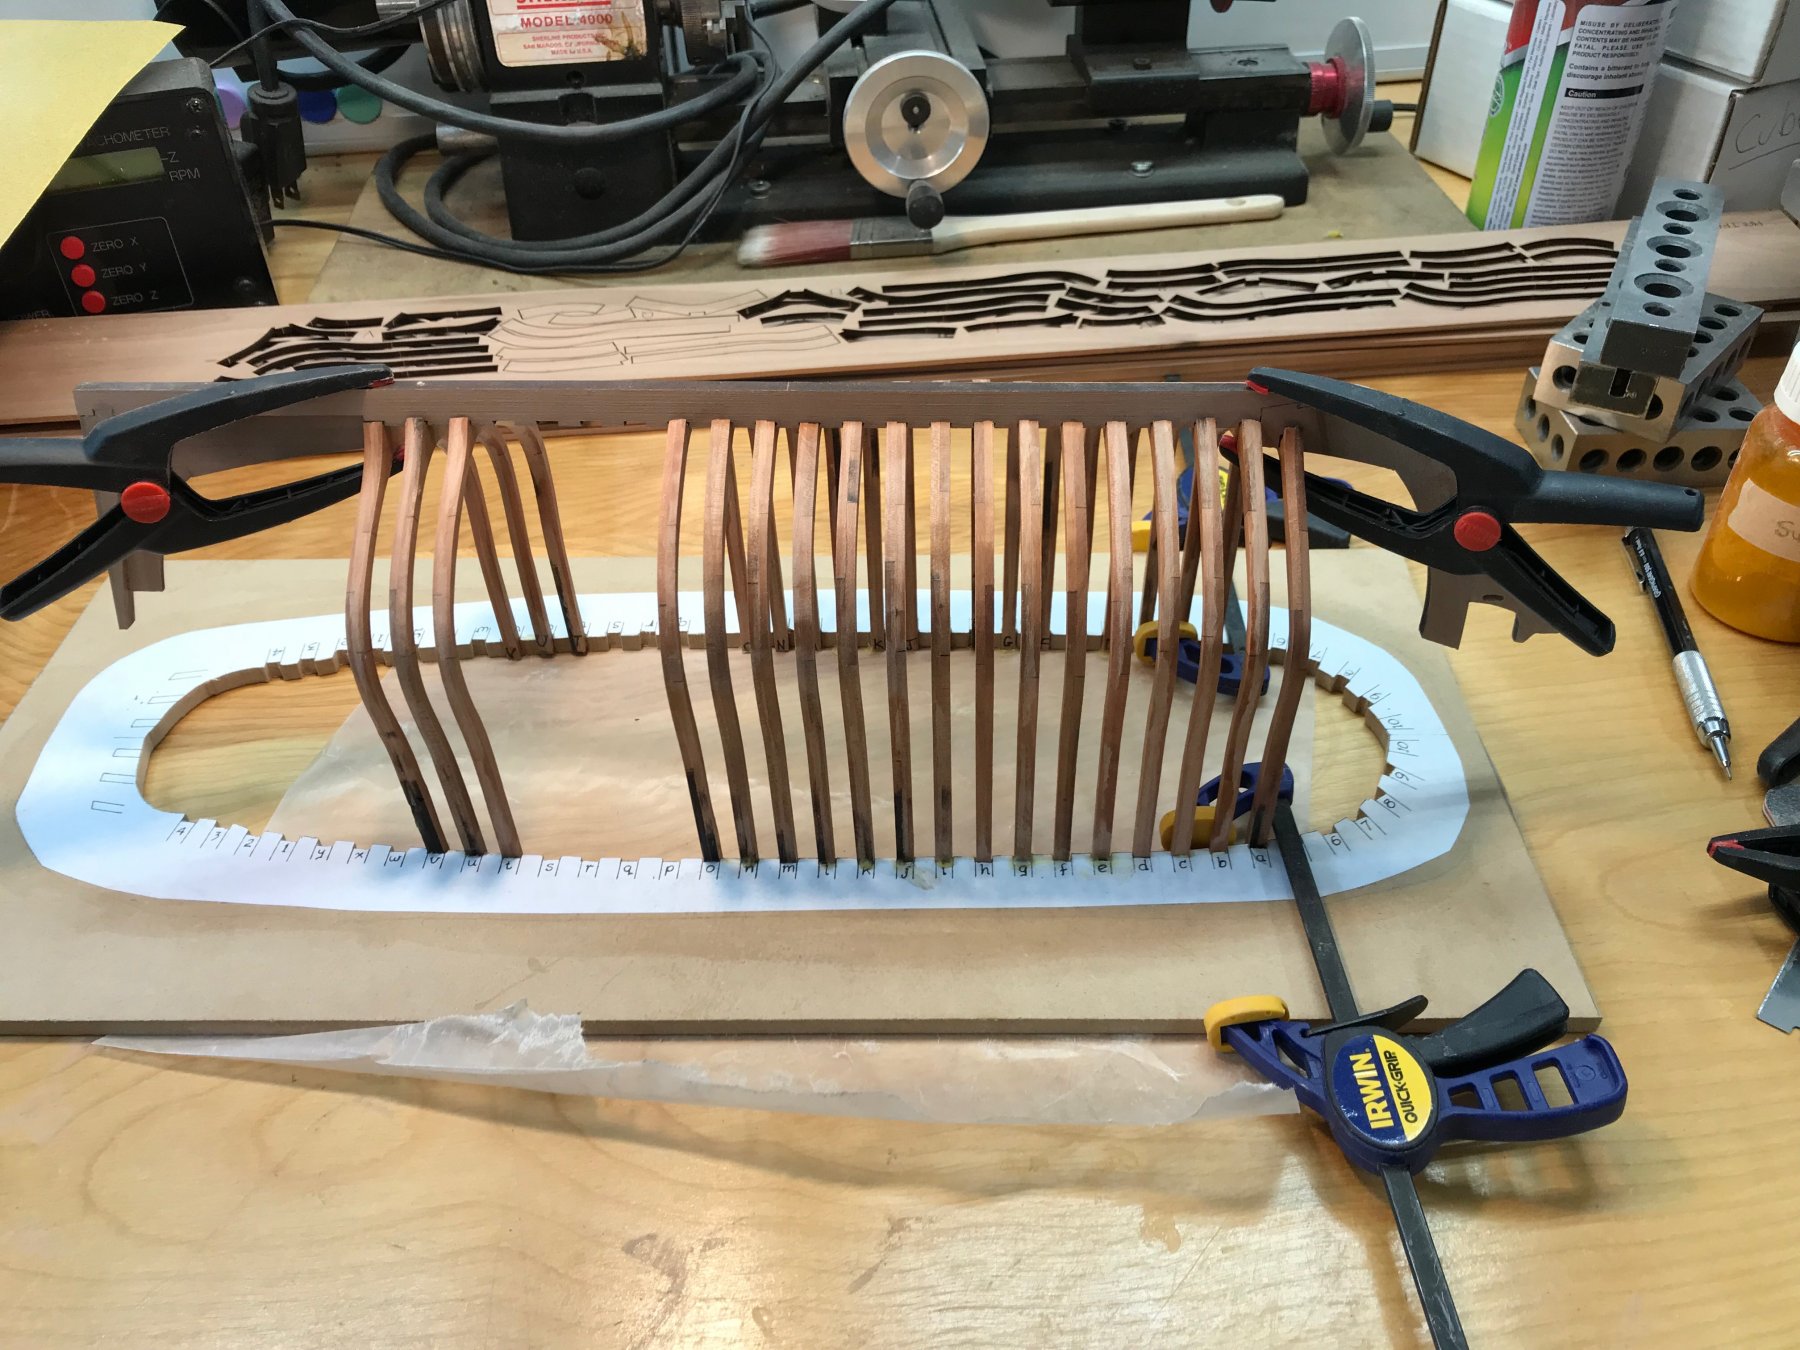
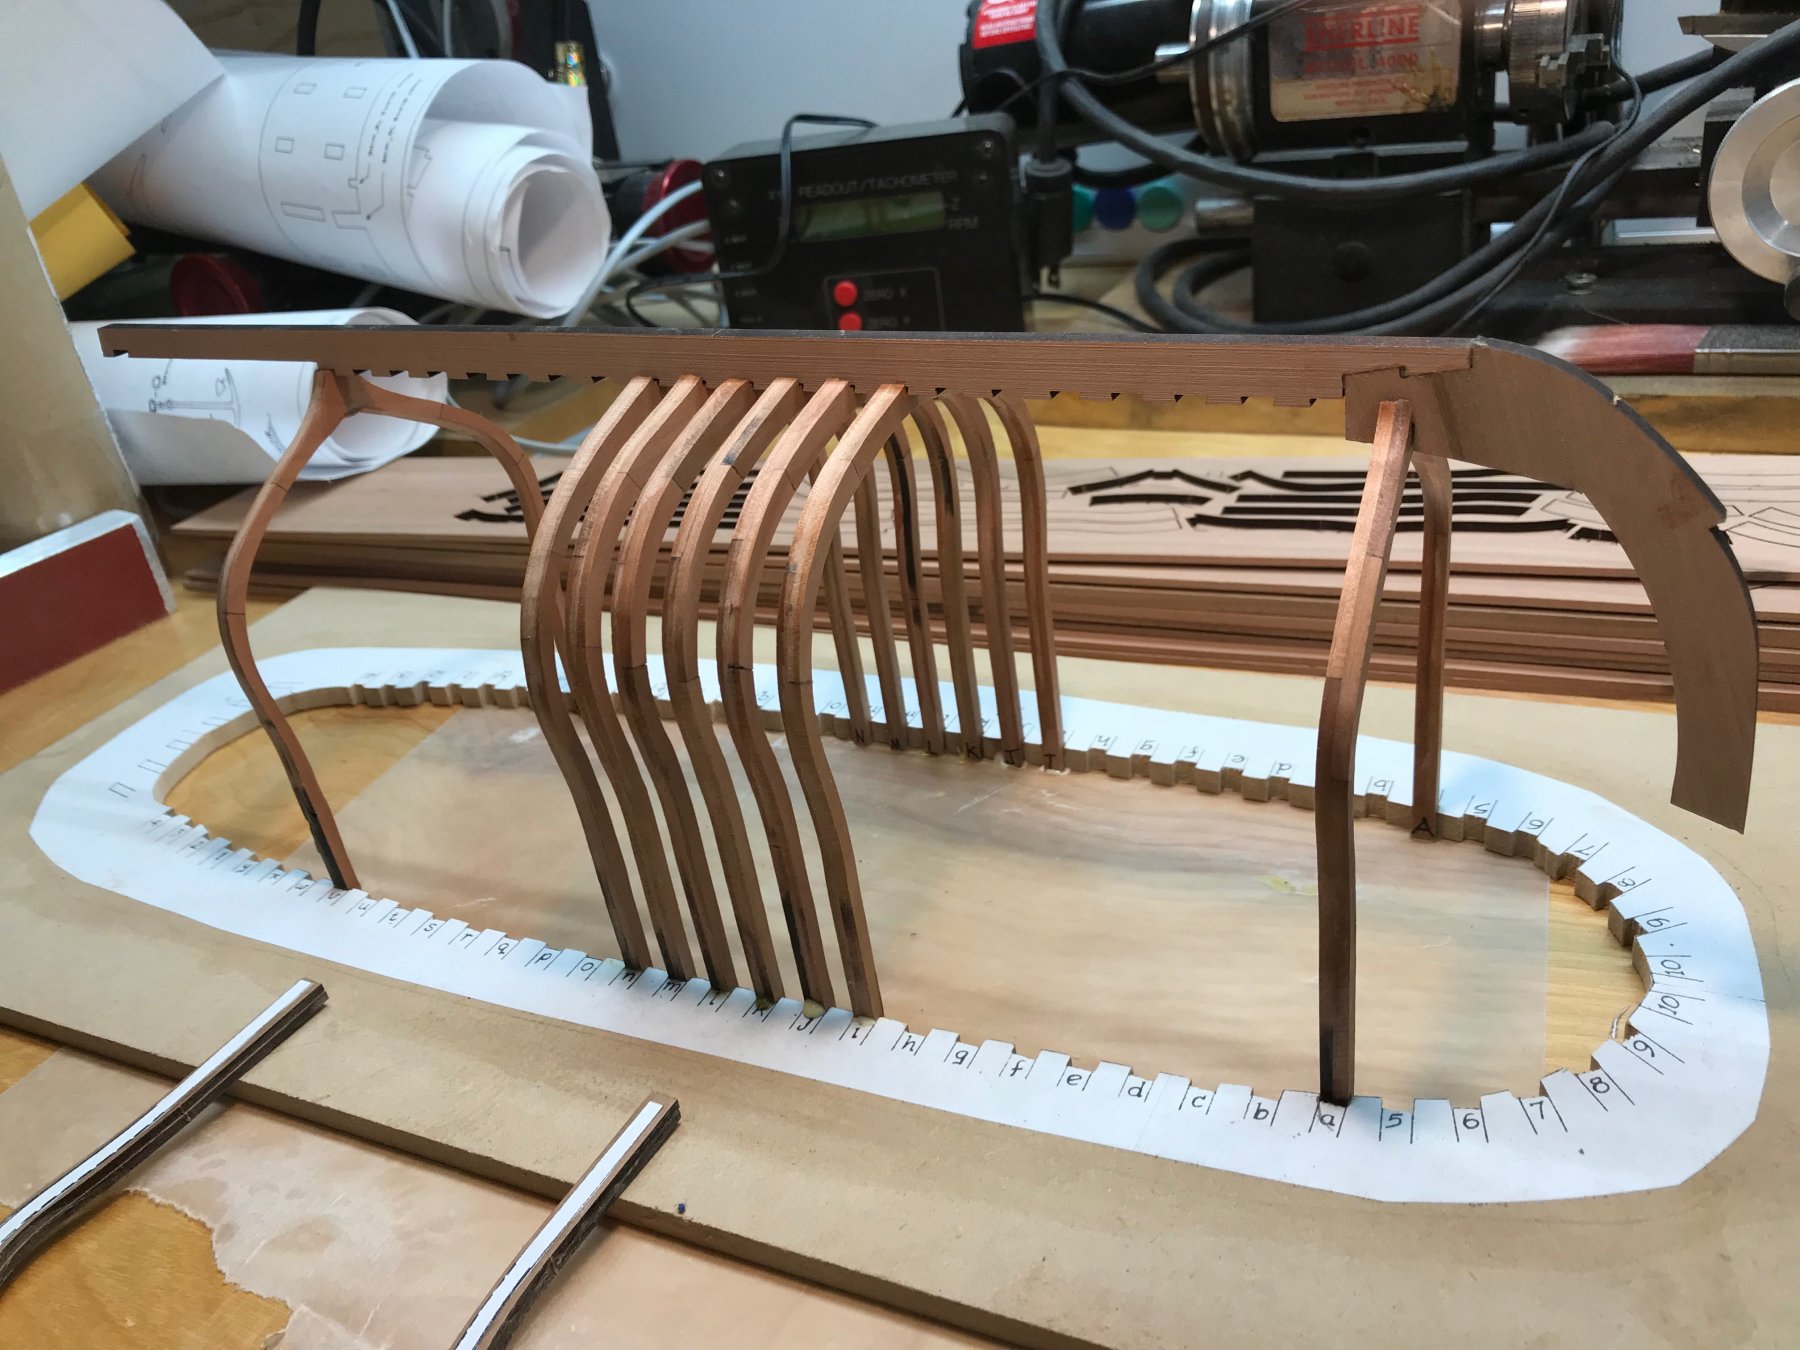
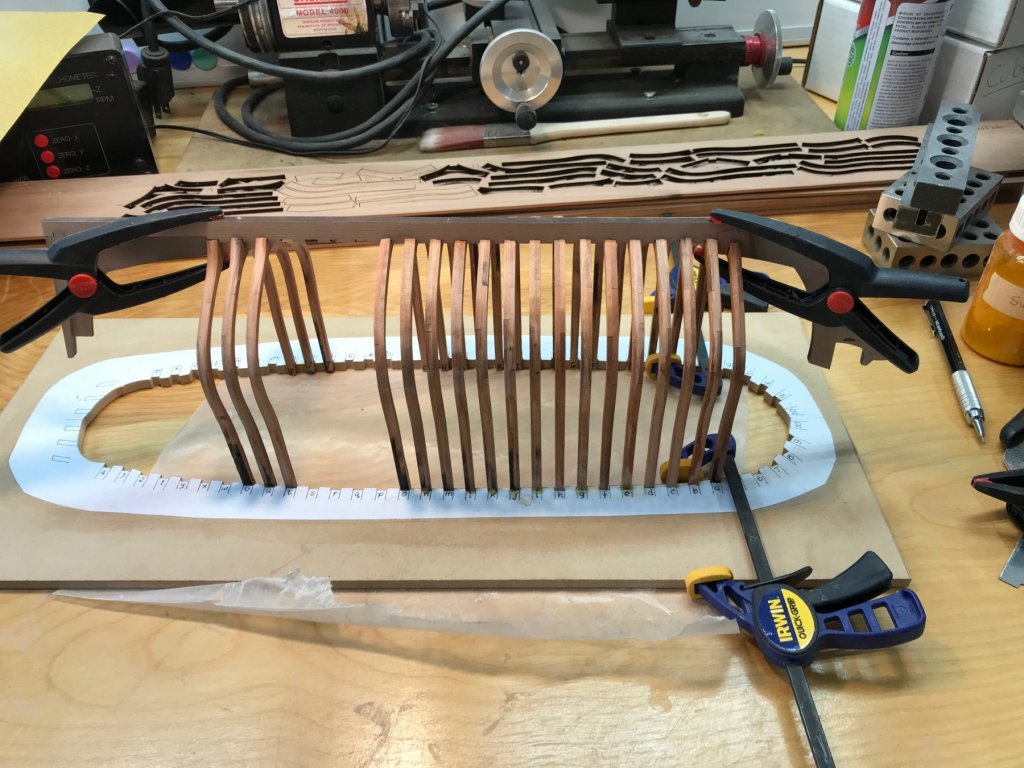
I've started glueing some frames to the building jig. What I've been doing is getting the distance from the top of the keel to the table top that the jig is sitting on by using the framing plan. The frame extensions that go into the slots on the jig are a tad long. After gluing in the first and last full frame's into the jig I just sand the frame extensions of each frame until the keel just seats in the slot without rocking. I just work slowly and check the fit often until it's just right. Then I clamp the frame to the keel (without glue) then glue the frame extensions to the jig. Each frame has a perfect fit to the keel. Once all the full frames are guled to the jig the keel can be glued to the frames. It's going very smoothly. I know purists don't consider this true POF building but it sure works well.


-
I'm really enjoying it Mark. It's a nice kit. In the Colonial Schooner book by Hahn he thins the assembled frames in the same way. It only takes a few minutes per frame and works great. I'm looking forward to starting a scratch built project. I think by the time I get through this I'll be about ready. The frames wouldn't really be that much more work. It will just take a bit of practice to get accurate cuts for the keel parts and such. I haveven the tools. I just need to learn to use them.