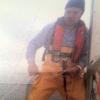
Jason Builder Posted February 19, 2022 Share #1 Posted February 19, 2022 Ahoy Modelers! It's been a couple years since I built a model boat or ship and I have never built a ship model from scratch and I feel that it is time for a new model ship project. I always have to be building something, and in the two years away from model boat building, I have scratch built a full size functional alphorn, 2 Viking Lurs, a wooden paddleboard, and have been making homemade brooms. In 2020 I assembled a Prusa i3 MK3S 3D printer and got Autodesk Fusion 360 CAD. The kids and I have had a great time designing and printing objects both fun and practical on the printer since we got it. Last week we took a family trip to Disney World in Florida, and I really liked the little "Motor Launches" that ply the waters of Bay Lake and Seven Seas Lagoon ferrying people between the resorts and Magic Kingdom. That is the boat that I have decided to build a model of, and I will document my attempt here. I spoke to the captain of one of these boats, who advised that the boat is approximately 41.5 feet long with a draft of 3.5 feet and is based on a Morgan 41 sailboat hull. Morgan built these in Clearwater FL, out of fiberglass with a modified keel and bowsprit. The boat has a fixed shaft and prop and traditional rudder. They were made in the style of a steam launch, but the stack is just for looks, these are not steam-powered vessels; they have a nice little motor in them, and the captains are very adept at docking them and casting off like pro's every time. I will do my best to draw this boat in Fusion 360 and to print the parts on my Prusa i3 MK3S printer. I do not have good experience with plastic models, but I plan to superglue the parts together and to enamel the model. Here is the printer and a picture I took last week of the boat. -Jason ccoyle, GrandpaPhil, thibaultron and 7 others 10 Quote -Jason Completed Model Links: Billing Boats Oseberg Viking Ship Optimist Sailboat model by BlueJacket 3D printed model of a Disney Motor Launch Billing Boats FD10 Arnanes Krick Alexandra Amati Golden Yacht Ship in a Bottle My hobby website: www.argobuilder.com Link to comment Share on other sites More sharing options...
Jason Builder Posted February 19, 2022 Author Share #2 Posted February 19, 2022 (edited) Hi! I found a basic drawing of the Morgan 41 hull, and I used that along with photos of the launch to create a 3D hull drawing. I graduated from Milwaukee School of Engineering in the '90s, but at the time 2D CAD was a very insignificant part of the engineering degree; I hadn't used CAD for 20 years and never used 3D CAD before, but I have really enjoyed learning Fusion 360 (I think it's been good for the brain), but I am no expert. I am learning as I go. I was able to get a decent roughed out shape of the hull, but I will need to file and sand it to finished shape. I will print this in PLA (Polylactide), and I am not sure if that material is sand-able or file-able, we will find out. If it is not, then I will need to go back to the drawing board and put more time into a perfect hull drawing. I have also completed the model of basic deck. I will print this in a very thin sheet and glue it onto the hull. I drew the planks into the surface of the deck and hopefully the printer has good enough resolution to print the little grooves between the planks. I plan to print the helm and the bollard posts right onto the deck when I print it. -Jason Edited February 20, 2022 by Jason Builder Ian_Grant, mtaylor, thibaultron and 2 others 5 Quote -Jason Completed Model Links: Billing Boats Oseberg Viking Ship Optimist Sailboat model by BlueJacket 3D printed model of a Disney Motor Launch Billing Boats FD10 Arnanes Krick Alexandra Amati Golden Yacht Ship in a Bottle My hobby website: www.argobuilder.com Link to comment Share on other sites More sharing options...
Jason Builder Posted February 19, 2022 Author Share #3 Posted February 19, 2022 Goede Dag! Well I printed the hull overnight and it turned out OK. I set the printer at .20 resolution with 10% infill and 6mm wall thickness, so the walls are pretty thick to allow for final sanding and shaping (which hopefully is possible with this material...) I printed upside down and it took about 9.5 hours to print. Much finer resolutions are possible, but would extend print time and I will be sanding this part anyway. I use Prusaslicer for my slicer software and I printed this hull upside down with the automatically generated support material to fill the void between the print plate and the model. Here are the photos of the printed hull and the support material that I removed with small pliers and snips. I am not a 3D printing expert, but if anyone is interested in a veeerrryyy basic intro to 3D printing, I typed up a page on how I got started, here : https://www.argobuilder.com/3d-print-workshop.html -Jason mtaylor, GrandpaPhil, Ryland Craze and 2 others 5 Quote -Jason Completed Model Links: Billing Boats Oseberg Viking Ship Optimist Sailboat model by BlueJacket 3D printed model of a Disney Motor Launch Billing Boats FD10 Arnanes Krick Alexandra Amati Golden Yacht Ship in a Bottle My hobby website: www.argobuilder.com Link to comment Share on other sites More sharing options...
Jason Builder Posted February 20, 2022 Author Share #4 Posted February 20, 2022 Bonjour, Yesterday I kept on drafting away on CAD. I printed the stand for the model so that I had somewhere to set the hull. Good news, my sharp file worked very well to put the finish shape to the hull in the spots I couldn't get just right on CAD. I still think a high speed sanding or grinding device would just melt the plastic rather than removing material, but so far so good using handwork for filing/sanding. I have enough pieces designed that I will be able to keep the printer busy while I continue to draw. The keel-holders on my model stand were printed with 50% infill and are quite sturdy. The base was printed with 10% infill (in-progress photo below). I am using up filament so the parts will be printed in somewhat random colors, but will be painted later. Have a great day, GrandpaPhil, Ian_Grant, mtaylor and 5 others 8 Quote -Jason Completed Model Links: Billing Boats Oseberg Viking Ship Optimist Sailboat model by BlueJacket 3D printed model of a Disney Motor Launch Billing Boats FD10 Arnanes Krick Alexandra Amati Golden Yacht Ship in a Bottle My hobby website: www.argobuilder.com Link to comment Share on other sites More sharing options...
Jason Builder Posted February 25, 2022 Author Share #5 Posted February 25, 2022 (edited) Hi Everyone, Not much work on the model this week but was able to get the deck printed, I designed it to be thin and it is very flexible to flex along the required curvature. Planking printed right onto the deck along with the helm stand and the cross-bollard posts. I am also pleased with the resolution of printing at the .05mm layer thickness with the very small parts. I'll post a picture of the rendered parts; all I have left to design is the prop , awning/roof trim, and the railing. Cheers! -Jason Edited February 25, 2022 by Jason Builder mtaylor, yvesvidal, Ryland Craze and 1 other 4 Quote -Jason Completed Model Links: Billing Boats Oseberg Viking Ship Optimist Sailboat model by BlueJacket 3D printed model of a Disney Motor Launch Billing Boats FD10 Arnanes Krick Alexandra Amati Golden Yacht Ship in a Bottle My hobby website: www.argobuilder.com Link to comment Share on other sites More sharing options...
Jason Builder Posted February 27, 2022 Author Share #6 Posted February 27, 2022 Hallo allir! Well the design work is done in CAD and now I need to keep printing away. I am going to print all the parts (and check fit as I go) before I begin final assembly. I have designed the model with 62 separate printed parts + 5 metal eyelets + 2 fabric flags + standing rigging. The fire extinguisher canister/handle and bracket are pretty small, but I am pleased with the as-printed parts.......the parts will be sanded/assembled/painted (not always in that order). -Jason mtaylor, GrandpaPhil, Ian_Grant and 3 others 6 Quote -Jason Completed Model Links: Billing Boats Oseberg Viking Ship Optimist Sailboat model by BlueJacket 3D printed model of a Disney Motor Launch Billing Boats FD10 Arnanes Krick Alexandra Amati Golden Yacht Ship in a Bottle My hobby website: www.argobuilder.com Link to comment Share on other sites More sharing options...
Jason Builder Posted March 8, 2022 Author Share #7 Posted March 8, 2022 (edited) Сайн уу, Mongolian spelling of "hello" there. Visited there multiple times for fun and work and it's a great place. So now I have printed all the part for the model. After working through the best print orientations for the parts, I wound up splitting the railings into multiple parts, so the model has 69 printed parts shown here, (edit: plus the 6 life vest hatches shown in the post further below) for a total of 75 printed parts, which I will now sand/paint/assemble. -Jason Edited March 12, 2022 by Jason Builder mtaylor, Ryland Craze, GrandpaPhil and 2 others 5 Quote -Jason Completed Model Links: Billing Boats Oseberg Viking Ship Optimist Sailboat model by BlueJacket 3D printed model of a Disney Motor Launch Billing Boats FD10 Arnanes Krick Alexandra Amati Golden Yacht Ship in a Bottle My hobby website: www.argobuilder.com Link to comment Share on other sites More sharing options...
Jason Builder Posted March 9, 2022 Author Share #8 Posted March 9, 2022 Merhaba, Model Boat Builders! Tonight I got around to some sanding and painting. Also, during design, I noticed that I had a square stern, but the boat should have a rounded stern. I had already printed my hull, so I printed a stern filler piece to round out the stern. I designed the roof as a laminated structure with a thin smooth sheet laminated on top of the thicker curved roof piece, saved me some sanding time. yvesvidal, mtaylor, Ian_Grant and 1 other 4 Quote -Jason Completed Model Links: Billing Boats Oseberg Viking Ship Optimist Sailboat model by BlueJacket 3D printed model of a Disney Motor Launch Billing Boats FD10 Arnanes Krick Alexandra Amati Golden Yacht Ship in a Bottle My hobby website: www.argobuilder.com Link to comment Share on other sites More sharing options...
Jason Builder Posted March 12, 2022 Author Share #9 Posted March 12, 2022 Hi Everyone, Painting, sanding, painting..... I also saw that there are life vest hatches that I had missed in my design so I designed/printed those and then printed the text on my paper printer and glued the text to the hatches. -Jason Ian_Grant, yvesvidal, mtaylor and 3 others 6 Quote -Jason Completed Model Links: Billing Boats Oseberg Viking Ship Optimist Sailboat model by BlueJacket 3D printed model of a Disney Motor Launch Billing Boats FD10 Arnanes Krick Alexandra Amati Golden Yacht Ship in a Bottle My hobby website: www.argobuilder.com Link to comment Share on other sites More sharing options...
Jason Builder Posted March 14, 2022 Author Share #10 Posted March 14, 2022 (edited) Guten Abend, So today with painting wrapping up, I got to assembly. Glued the life vest hatches onto the engine house sides, glued the deck on and the fore-hatch, and the fire extinguisher, ships wheel, coaming cap, railings, benches, and I set the roof poles in place. Have a great day! Jason Edited March 16, 2022 by Jason Builder mtaylor, GrandpaPhil, yvesvidal and 2 others 3 2 Quote -Jason Completed Model Links: Billing Boats Oseberg Viking Ship Optimist Sailboat model by BlueJacket 3D printed model of a Disney Motor Launch Billing Boats FD10 Arnanes Krick Alexandra Amati Golden Yacht Ship in a Bottle My hobby website: www.argobuilder.com Link to comment Share on other sites More sharing options...
Jason Builder Posted March 15, 2022 Author Share #11 Posted March 15, 2022 hi Everyone, Assembly is going well so far. I glued the awning around the roof and glued the roof to the roof poles. Installed the navigation lights and the spot light. Then glued on the rub rail. I changed the color of the base-plate to black, as it looked like too much brown earlier. I also installed the flag poles and life ring. Ryland Craze, yvesvidal, KeithAug and 3 others 6 Quote -Jason Completed Model Links: Billing Boats Oseberg Viking Ship Optimist Sailboat model by BlueJacket 3D printed model of a Disney Motor Launch Billing Boats FD10 Arnanes Krick Alexandra Amati Golden Yacht Ship in a Bottle My hobby website: www.argobuilder.com Link to comment Share on other sites More sharing options...
Jason Builder Posted March 15, 2022 Author Share #12 Posted March 15, 2022 (edited) What a fun little project this has been. My first plastic model and first scratch built model. To finish off the model, I added steel rod braces fore and at between the roof and deck to match the actual boat. I then attached the mast and standing rigging. Happy modelling to you all! -Jason Edited August 20, 2022 by Jason Builder Harvey Golden, Ryland Craze, Ian_Grant and 6 others 7 2 Quote -Jason Completed Model Links: Billing Boats Oseberg Viking Ship Optimist Sailboat model by BlueJacket 3D printed model of a Disney Motor Launch Billing Boats FD10 Arnanes Krick Alexandra Amati Golden Yacht Ship in a Bottle My hobby website: www.argobuilder.com Link to comment Share on other sites More sharing options...
mtaylor Posted March 16, 2022 Share #13 Posted March 16, 2022 What a neat looking boat, Jason. Very well done. Ian_Grant and Jason Builder 2 Quote Mark "The shipwright is slow, but the wood is patient." - me Current Build: Past Builds: La Belle Poule 1765 - French Frigate from ANCRE plans - ON HOLD Triton Cross-Section NRG Hallf Hull Planking Kit HMS Sphinx 1775 - Vanguard Models - 1:64 Non-Ship Model: On hold, maybe forever: CH-53 Sikorsky - 1:48 - Revell - Completed Licorne - 1755 from Hahn Plans (Scratch) Version 2.0 (Abandoned) Link to comment Share on other sites More sharing options...
GrandpaPhil Posted March 29, 2022 Share #14 Posted March 29, 2022 Congratulations! Nicely done! Jason Builder and mtaylor 2 Quote Building: 1:64 HMS Revenge (Victory Models plans) 1:64 Cat Esther (17th Century Dutch Merchant Ships) On the building slip: 1:72 French Ironclad Magenta (original shipyard plans) On hold: 1:98 Mantua HMS Victory (kit bash), 1:96 Shipyard HMS Mercury Favorite finished builds: 1:60 Sampang Good Fortune (Amati plans), 1:200 Orel Ironclad Solferino, 1:72 Schooner Hannah (Hahn plans), 1:72 Privateer Prince de Neufchatel (Chapelle plans), Model Shipways Sultana, Heller La Reale, Encore USS Olympia Goal: Become better than I was yesterday "The hardest part is deciding to try." - me Link to comment Share on other sites More sharing options...
ccoyle Posted March 29, 2022 Share #15 Posted March 29, 2022 Nicely done! A real bit of nostalgia for those of us who have ever ridden the Jungle Cruise. mtaylor, Ryland Craze and Jason Builder 3 Quote Chris Coyle Greer, South Carolina When you have to shoot, shoot. Don't talk. - Tuco Current builds: Brigantine Phoenix, Hawker Hurricane Link to comment Share on other sites More sharing options...
Murray03 Posted October 9, 2023 Share #16 Posted October 9, 2023 Hey there! Awesome, Awesome model. I drove these boats for two years and adored them greatly (even though they can be a massive pain to drive). The details are freaking amazing, so many little tiny details that register to my eye as something you would only see if you really studied the reference, or if you spent way too much time on them like I did. I’d love to own a model of one of them (Idealy my beloved Explorer) one of these days. Hopefully either I will get into the 3D print world or the company will finally produce a die cast or two. mtaylor and Jason Builder 2 Quote Link to comment Share on other sites More sharing options...
KeithAug Posted November 19, 2023 Share #17 Posted November 19, 2023 Nicely done - such a cute little boat. mtaylor 1 Quote Keith Current Build:- Cangarda (Steam Yacht) - Scale 1:24 Previous Builds:- Schooner Germania (Nova) - Scale 1:36 https://modelshipworld.com/topic/19848-schooner-germania-nova-by-keithaug-scale-136-1908-2011/ Schooner Altair by KeithAug - Scale 1:32 - 1931 http://modelshipworld.com/index.php/topic/12515-schooner-altair-by-keithaug-scale-132-1931/?p=378702 J Class Endeavour by KeithAug - Amati - Scale 1:35 - 1989 after restoration. http://modelshipworld.com/index.php/topic/10752-j-class-endeavour-by-keithaug-amati-scale-135-1989-after-restoration/?p=325029 Other Topics Nautical Adventures http://modelshipworld.com/index.php/topic/13727-nautical-adventures/?p=422846 Link to comment Share on other sites More sharing options...
Jason Builder Posted November 20, 2023 Author Share #18 Posted November 20, 2023 Hi Murray and Keith, thanks for your nice comments! Murray, if you captained one of these, hats of to ye! I've always been impressed by the consistency and skill of the captains of these little motor launches at Disney. Peace! Jason mtaylor 1 Quote -Jason Completed Model Links: Billing Boats Oseberg Viking Ship Optimist Sailboat model by BlueJacket 3D printed model of a Disney Motor Launch Billing Boats FD10 Arnanes Krick Alexandra Amati Golden Yacht Ship in a Bottle My hobby website: www.argobuilder.com Link to comment Share on other sites More sharing options...

Recommended Posts
Join the conversation
You can post now and register later. If you have an account, sign in now to post with your account.