All Activity
- Past hour
-
 Would have been cool, to find out about a family member through the kit. It seems to be a nice kit and will look terrific with you doing your magic. Cheers Rob
 -
 daHeld73 reacted to a post in a topic:
HMS Bellerophon 1786 by AON – scale 1:64 – 74-gun 3rd Rate Man of War - Arrogant-Class
daHeld73 reacted to a post in a topic:
HMS Bellerophon 1786 by AON – scale 1:64 – 74-gun 3rd Rate Man of War - Arrogant-Class
-
daHeld73 reacted to a post in a topic:
HMS Bellerophon 1786 by AON – scale 1:64 – 74-gun 3rd Rate Man of War - Arrogant-Class
-
yvesvidal reacted to a post in a topic:
1972 Ford Sport Custom Truck by Knocklouder--FINISHED-Moebius Models, 1/25 scale
-
 You might want to consider paper mache, using newsprint paper as well. It sounds like you will need more than one ream of copy paper for that area...
 -
yvesvidal reacted to a post in a topic:
1972 Ford Sport Custom Truck by Knocklouder--FINISHED-Moebius Models, 1/25 scale
-
Rick310 reacted to a post in a topic:
Thermopylae by My Fathers Son - or as near as I can get it
-
Thank you Mark, quirky as the AEG looks, it was a successful design, meaning, I saw stranger things flying, like pancakes (Chance Vought V-173) or the like. I can only admire the courage it must have taken to fly with these wood/tube/cloth/string crates with relatively unreliable engines in the dark of the night. Cheers Rob
-
Katsumoto reacted to a post in a topic:
Sloop Speedwell 1752 by Chuck - Ketch Rigged Sloop - POF - prototype build
-
Thukydides reacted to a post in a topic:
Sloop Speedwell 1752 by Chuck - Ketch Rigged Sloop - POF - prototype build
-
 Thanks for saying....
 -
Thank you Alan, glad you enjoyed the log. I benefitted so much of forum input myself, it´s a pleasure to give back a little. It´s not completely altruistic though, as it helps me to keep track of my builds and enhance learned techniques for myself as well. If you are about to enter the WWI plane building universe, I can tell you, it´s quite rewarding and not as complicated as it first looks. Kits of WNW quality help a lot due to thorough design. If you haven´t started exploring these kind of builds, it might be best to start with a German WWI fighter. Less rigging and colorful liveries do help. Cheers Rob
-
 What a lovely build so far!
 -
 Oh, yeah, you gotta start building this thing immediately. *Keith has a chair and a bowl of popcorn and ready for the show to start.
 -
I do think you can see the problem in post #74...the right ply gunport pattern looks a bit higher then the left. It's will be not symetrical when you place the stern window etc, but maybe you can shave off here and there some of the top right. You never see both sides at once, so maybe it wouldn't really be noticable
-
 The model is looking good Chris.
 -
Larger veneer pieces are looking nice and cool, but aren't the most easy pieces in a kit. That's what I discovered in my build of the Sphinx. There is a learning curve with these kind of woods...at least for me But love your progress! It looks nice
-
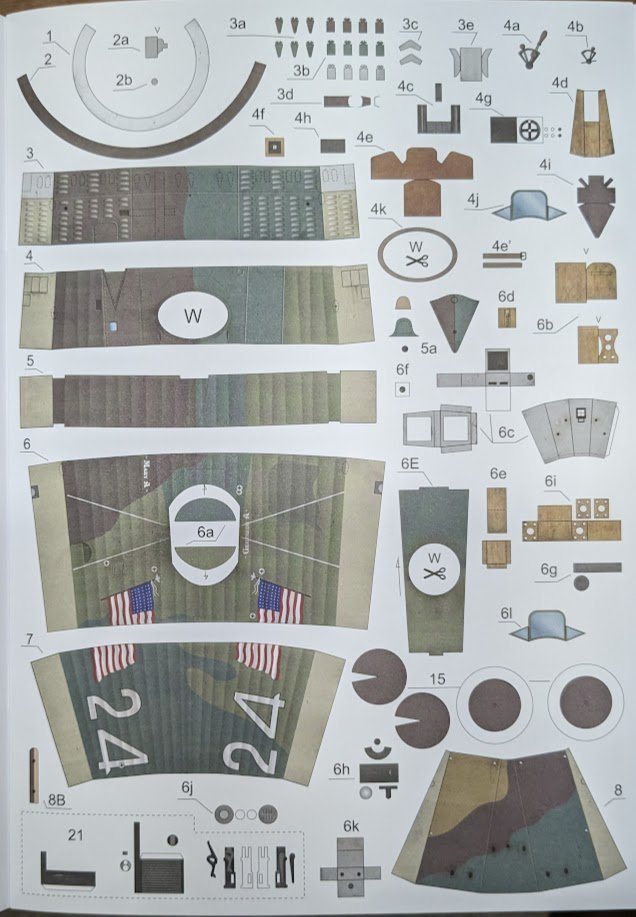
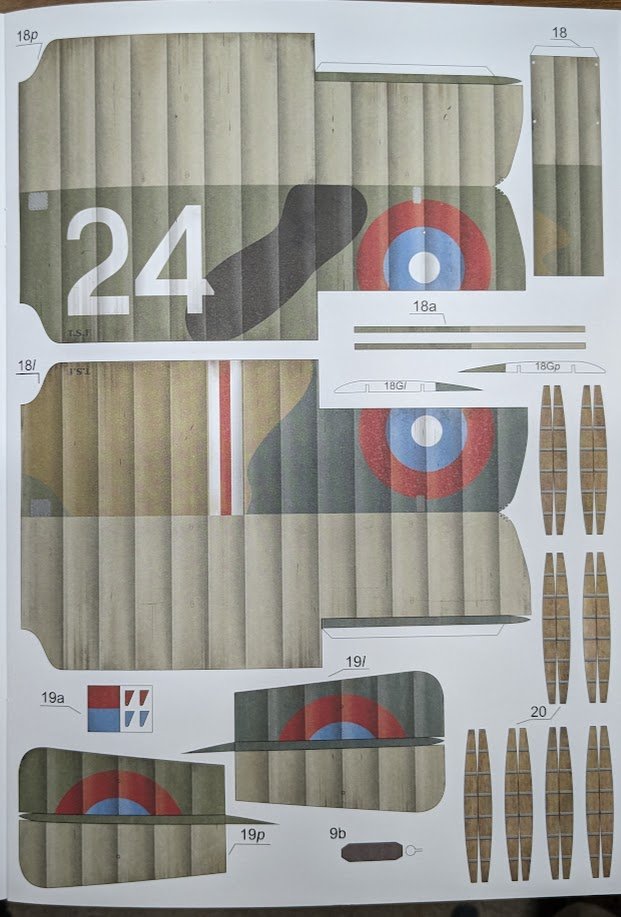
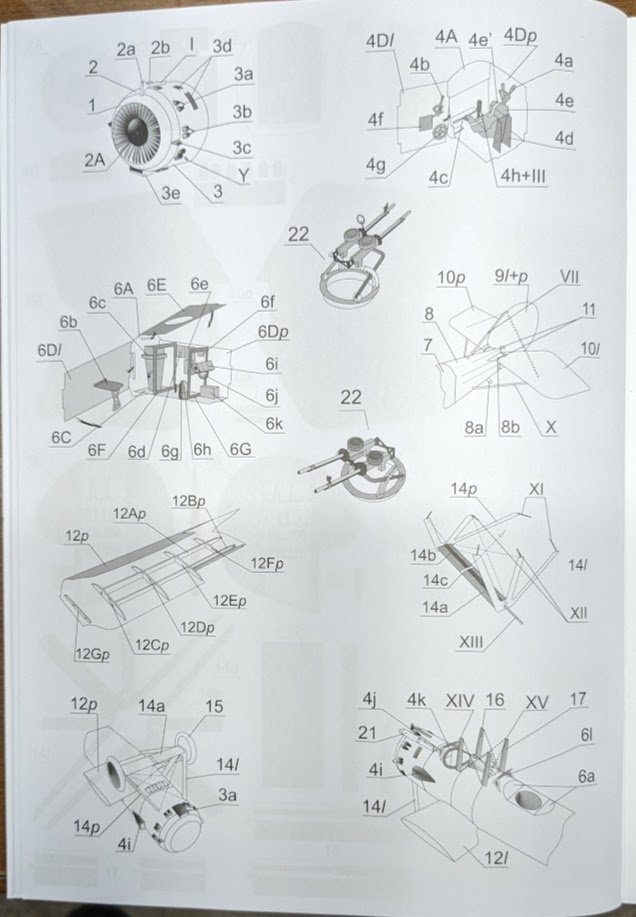
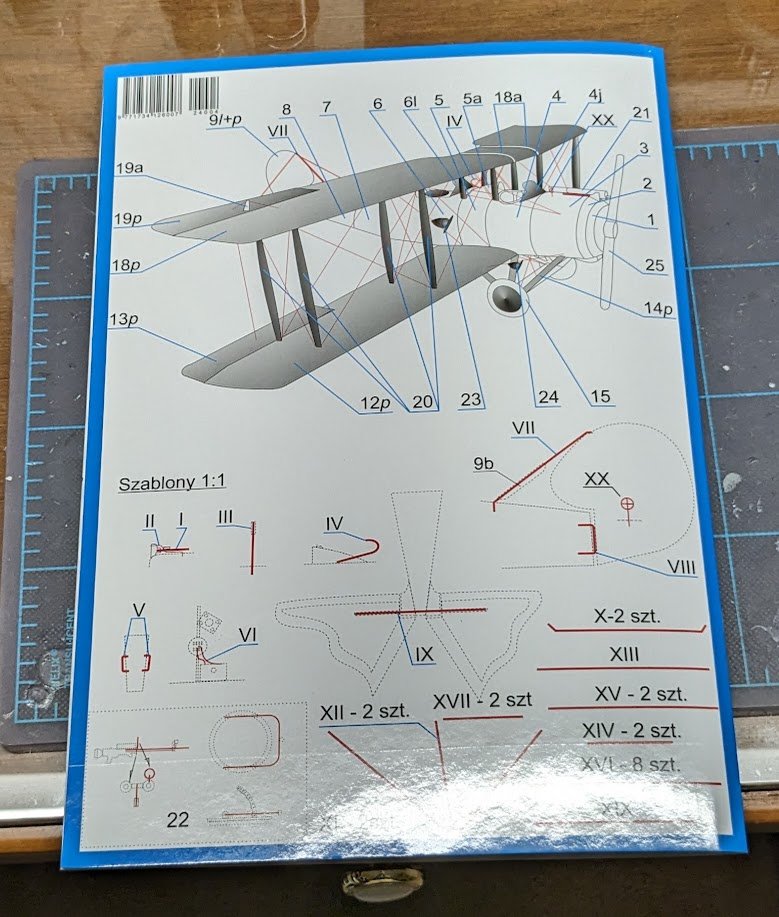
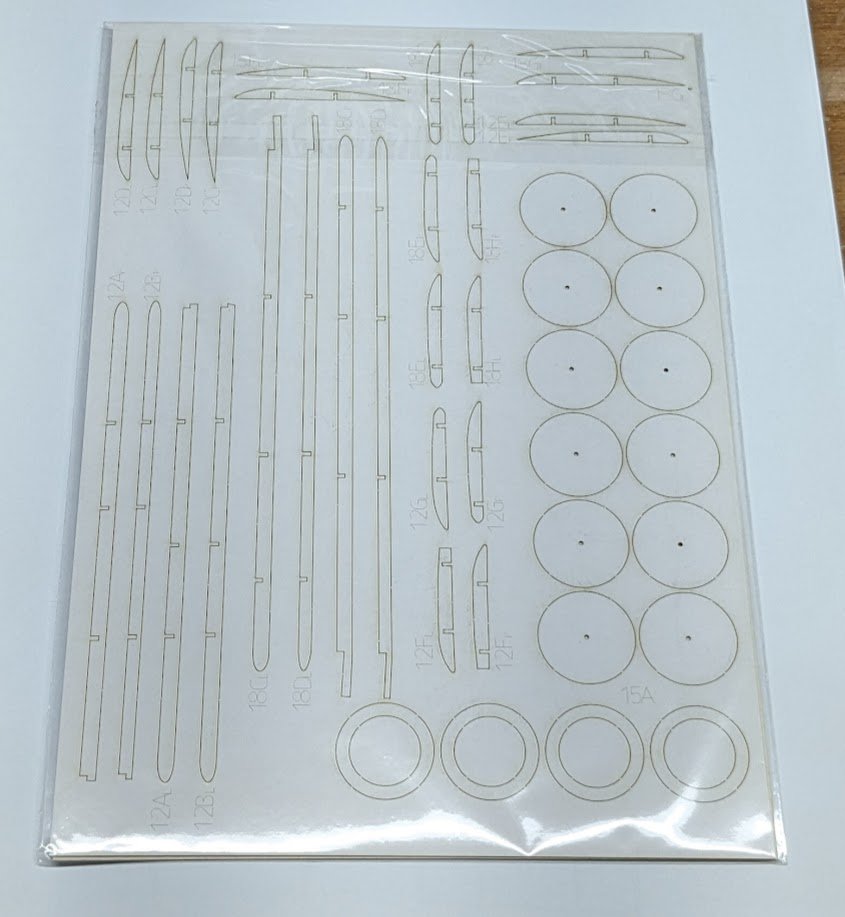
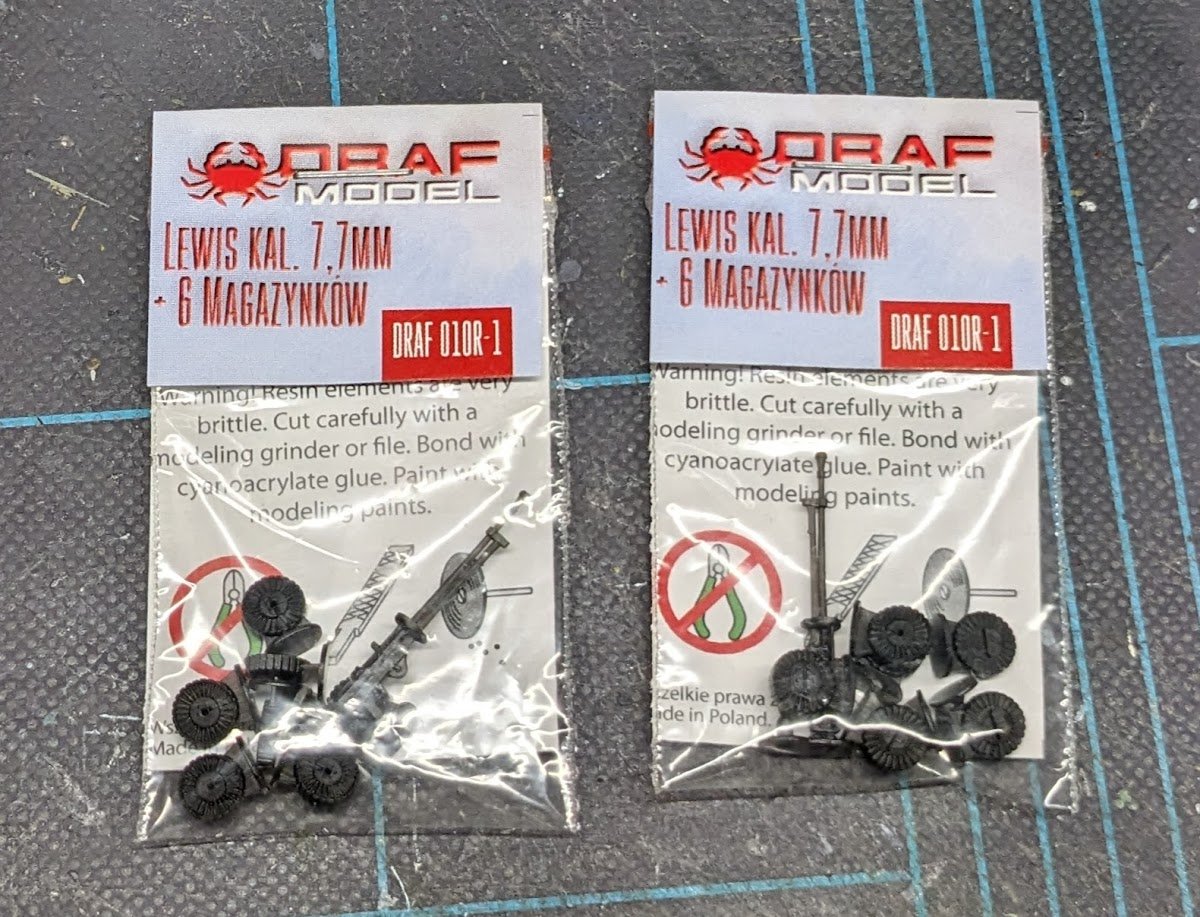
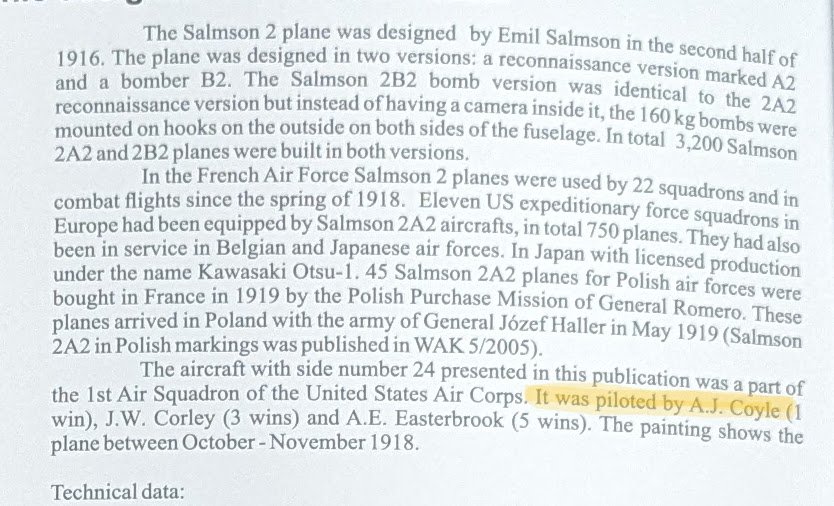
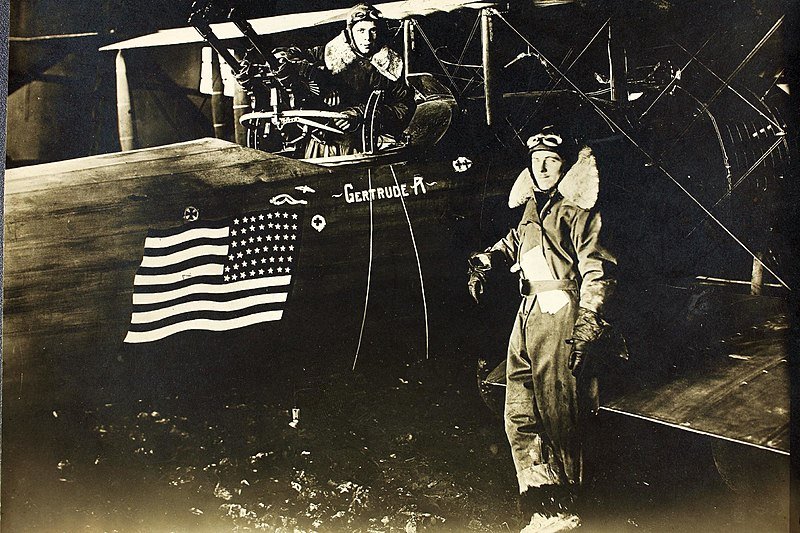
 Greetings! Whenever I order stuff from Poland, I like to max out the order that can be sent at a certain shipping price point. That means that for my last order from WAK, received just this week, I was able to slip WAK's latest release into my cart. It's a Salmson 2 A.2, a French two-seat observation plane used in the last year of the Great War. First Squadron of the US Air Service also operated the type. The kit is designed by Maciej Lewan and features very nice artwork done by Marcin Dworzecki. A little skimpy on the diagrams, but hopefully enough to get the job done. Of course I also ordered the requisite laser-cut frames . . . . . . as well as a pair of resin Lewis guns for the observer's twin mounting. Okay, so you might be wondering why I decided to start this build when I just finished the Hurricane and had started back on Phoenix. Well, I'll tell you why. I blame this wholly on WAK. I checked the inside front cover to see if there was any information about the aircraft depicted in the kit, and there I saw the following (in English, no less): Yup, the plane was "piloted by A.J. Coyle." That did it. Hot new release . . . chance to be one of the first to build it . . . pilot with the same surname as myself (and it's not a common one) . . . the kit fairly screamed "build me NOW!" So I caved. BTW, I have not yet been able to determine if Capt. Coyle and I are distant relatives, but I have an extensive family tree, and he's not in it, so I suspect we are not. Oh, well. Capt. Arthur John Coyle (standing), with Lt. A.E. Easterbrook. Anonymous unknown author, public domain, via Wikimedia Commons. I may try to build this concurrently with Phoenix, or I might not. I'll just have to see how it plays out. Plus, I have another project on my radar. 😬 So many projects, so little time!! Cheers!
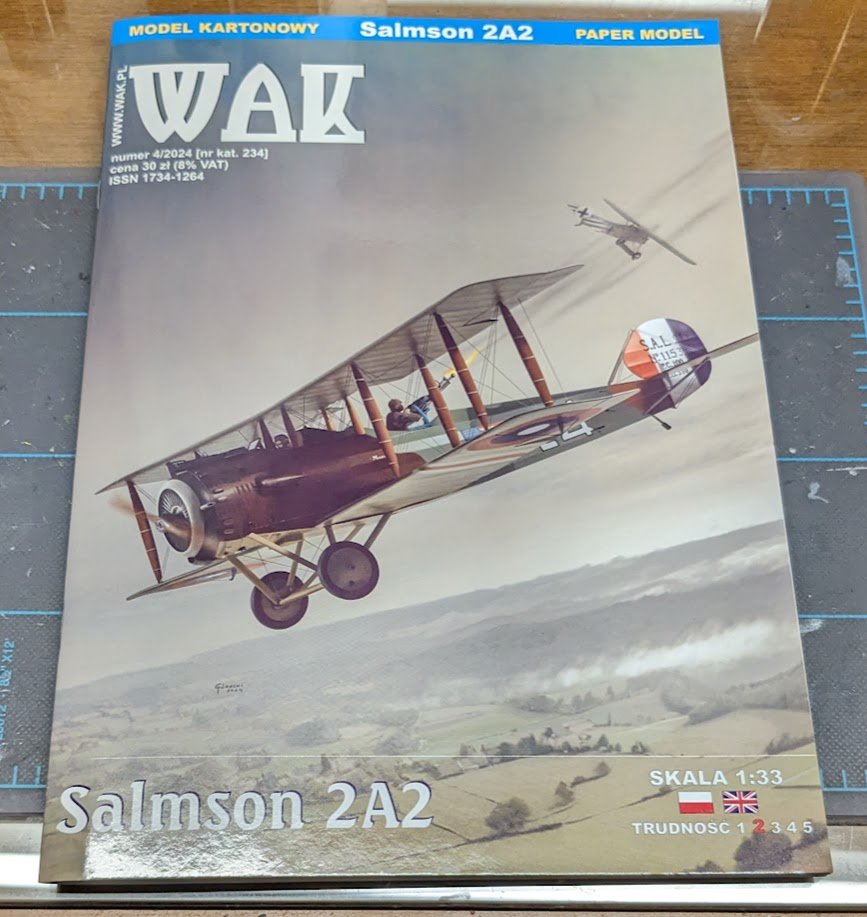
-
 I think you are doing more than an outstanding job with this kit beauty or for the ship modeling world. Everyone may know my opinion for that matter! 🙂
 - Today
-
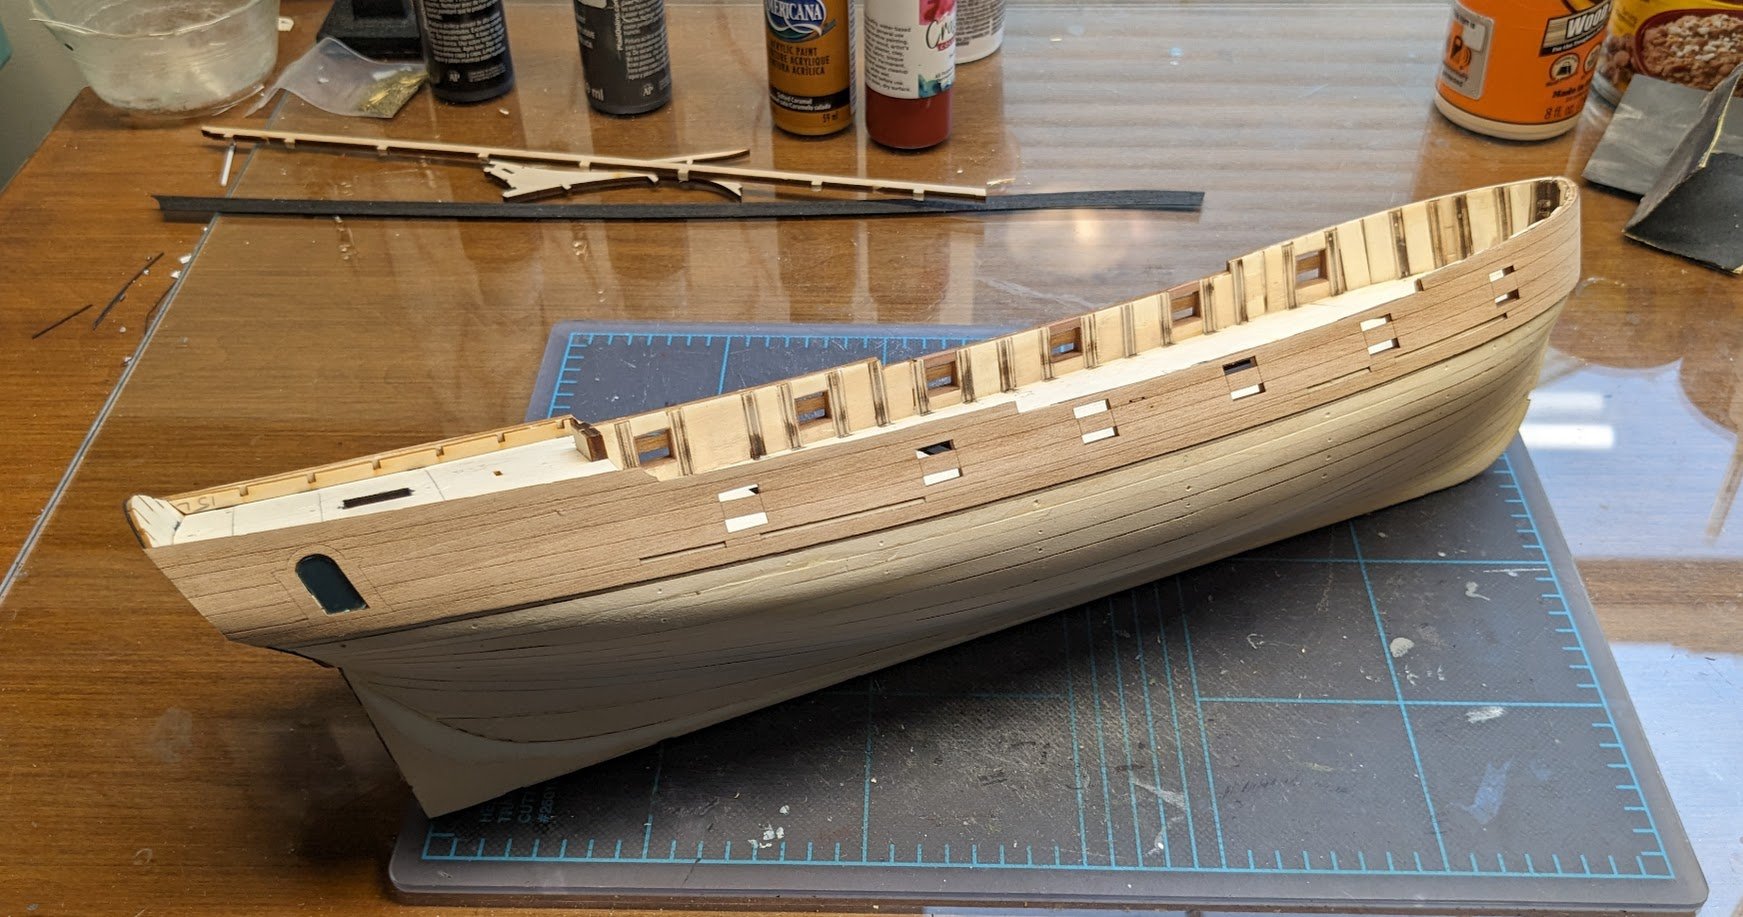
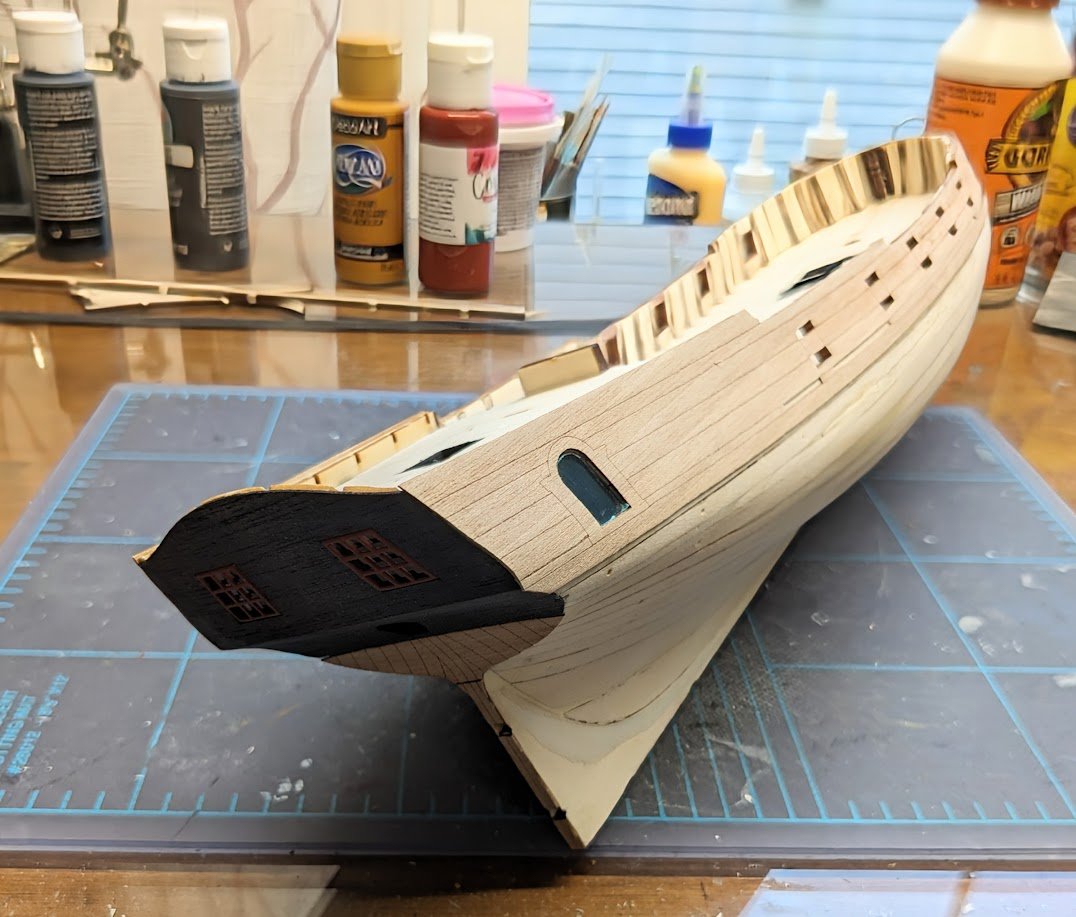
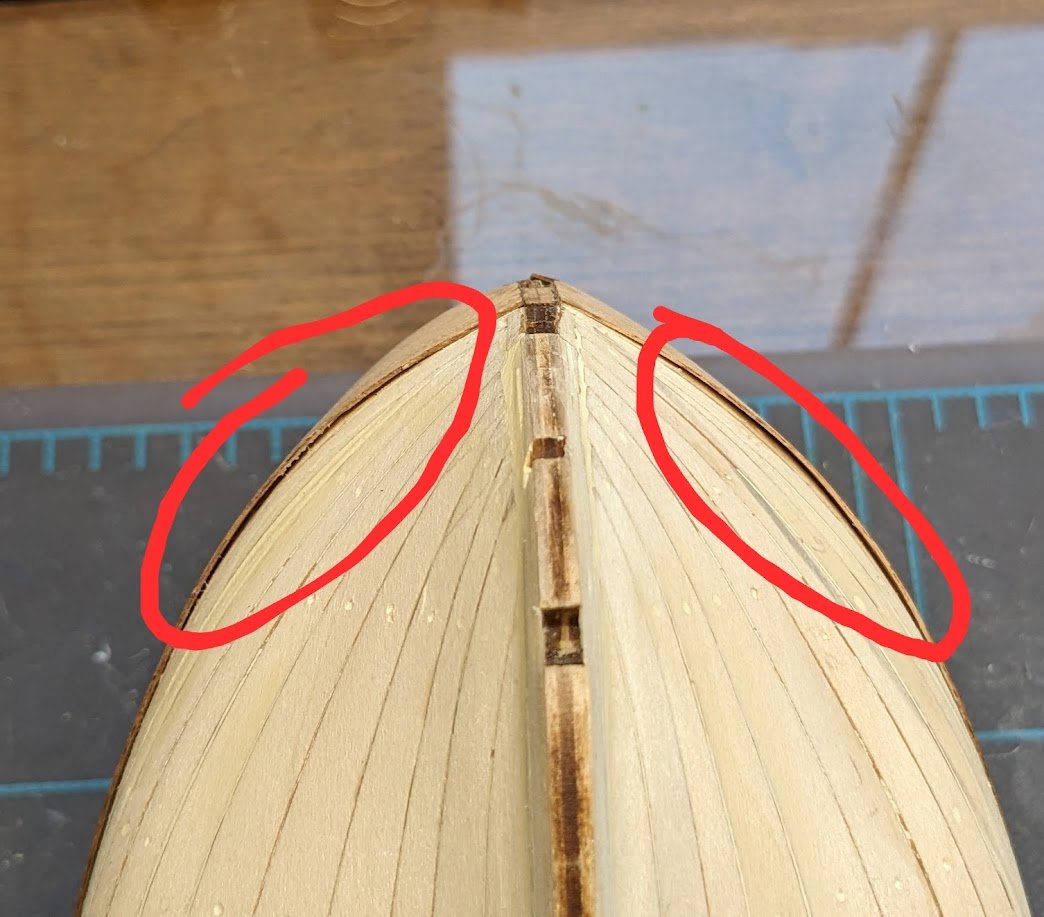
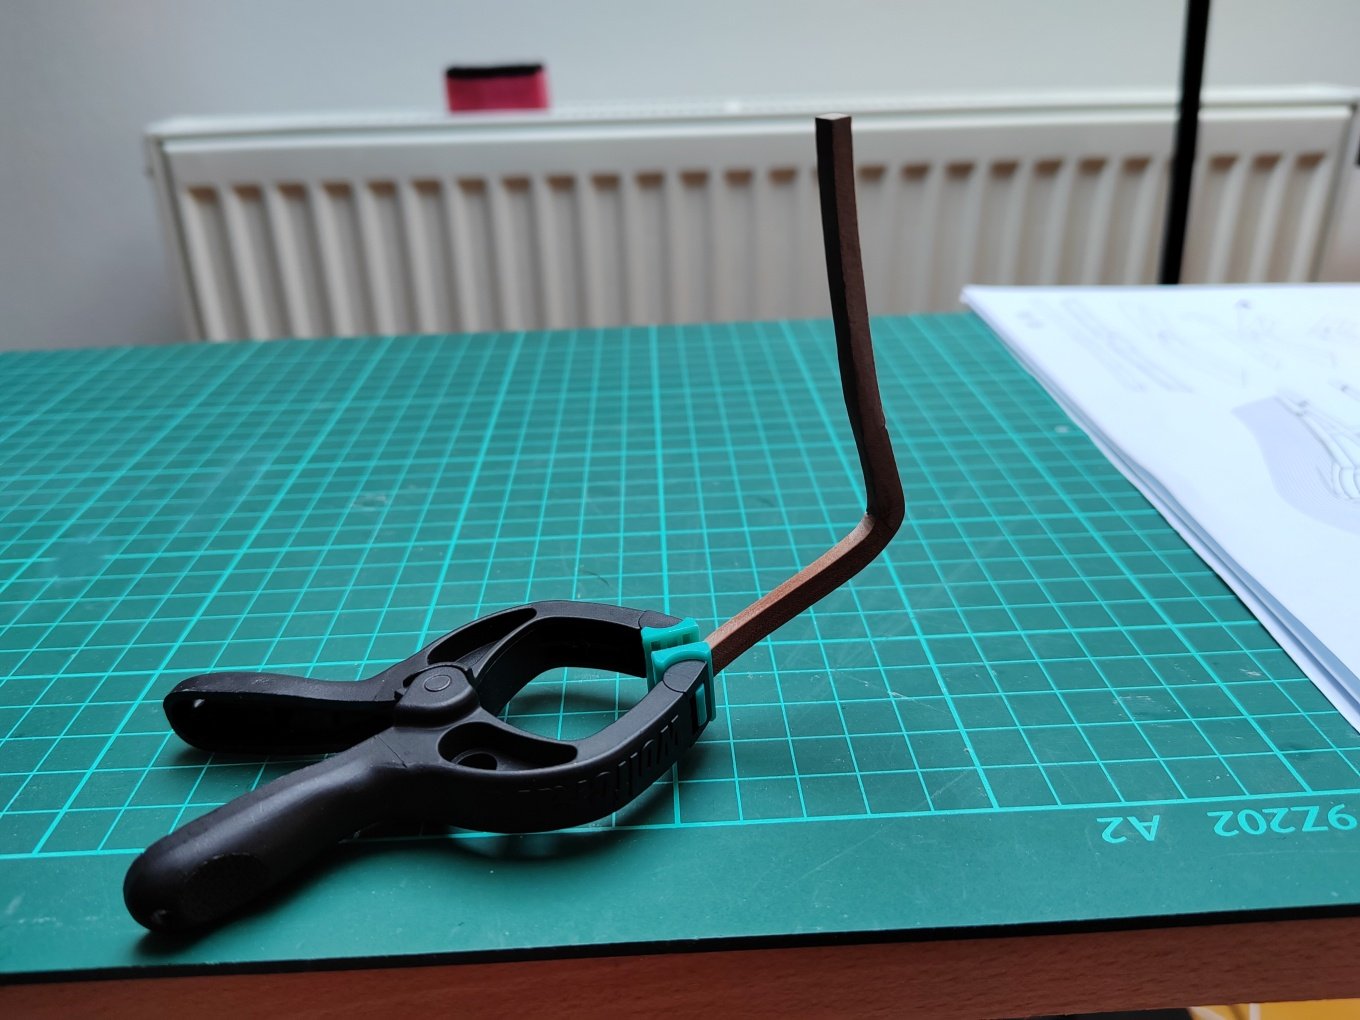
Got the two long pieces of veneer on the upper hull attached. Because these pieces are so wide, they are terribly unforgiving of any error in hull fairing, and that point is made apparent toward the bow. Here you can see that the natural curve of the veneer creates some small pockets where too much material was removed during the hull fairing process. You can't simply smash these down, because that will cause the veneers to buckle. Nor can you simply ignore them, because doing so will cause the wales (the next belt of planking) to sit too low relative to the upper veneers. Nope, I'm gonna have to add some material in those areas to raise the surface slightly and allow the wales to sit level with the upper hull veneers. An unwelcome task, but necessary. In the meantime, I may be hitting the pause button yet again on this build, for reasons I'll discuss in a separate topic. 😮 Don't worry -- nothing bad!

-
Frank, kinda, see the below. The way I understand the explanation, it depends on how the sails are rigged whether it's a yard or spar. https://en.wikipedia.org/wiki/Yard_(sailing)#:~:text=The spar at the head,the original square-rig yard.
-
The term spars includes both masts and yards.
-
Brig Le FAVORI 1806 by KORTES - 1:55
Keith Black replied to KORTES's topic in - Build logs for subjects built 1801 - 1850
Beautiful ship's boats, Alexander. -
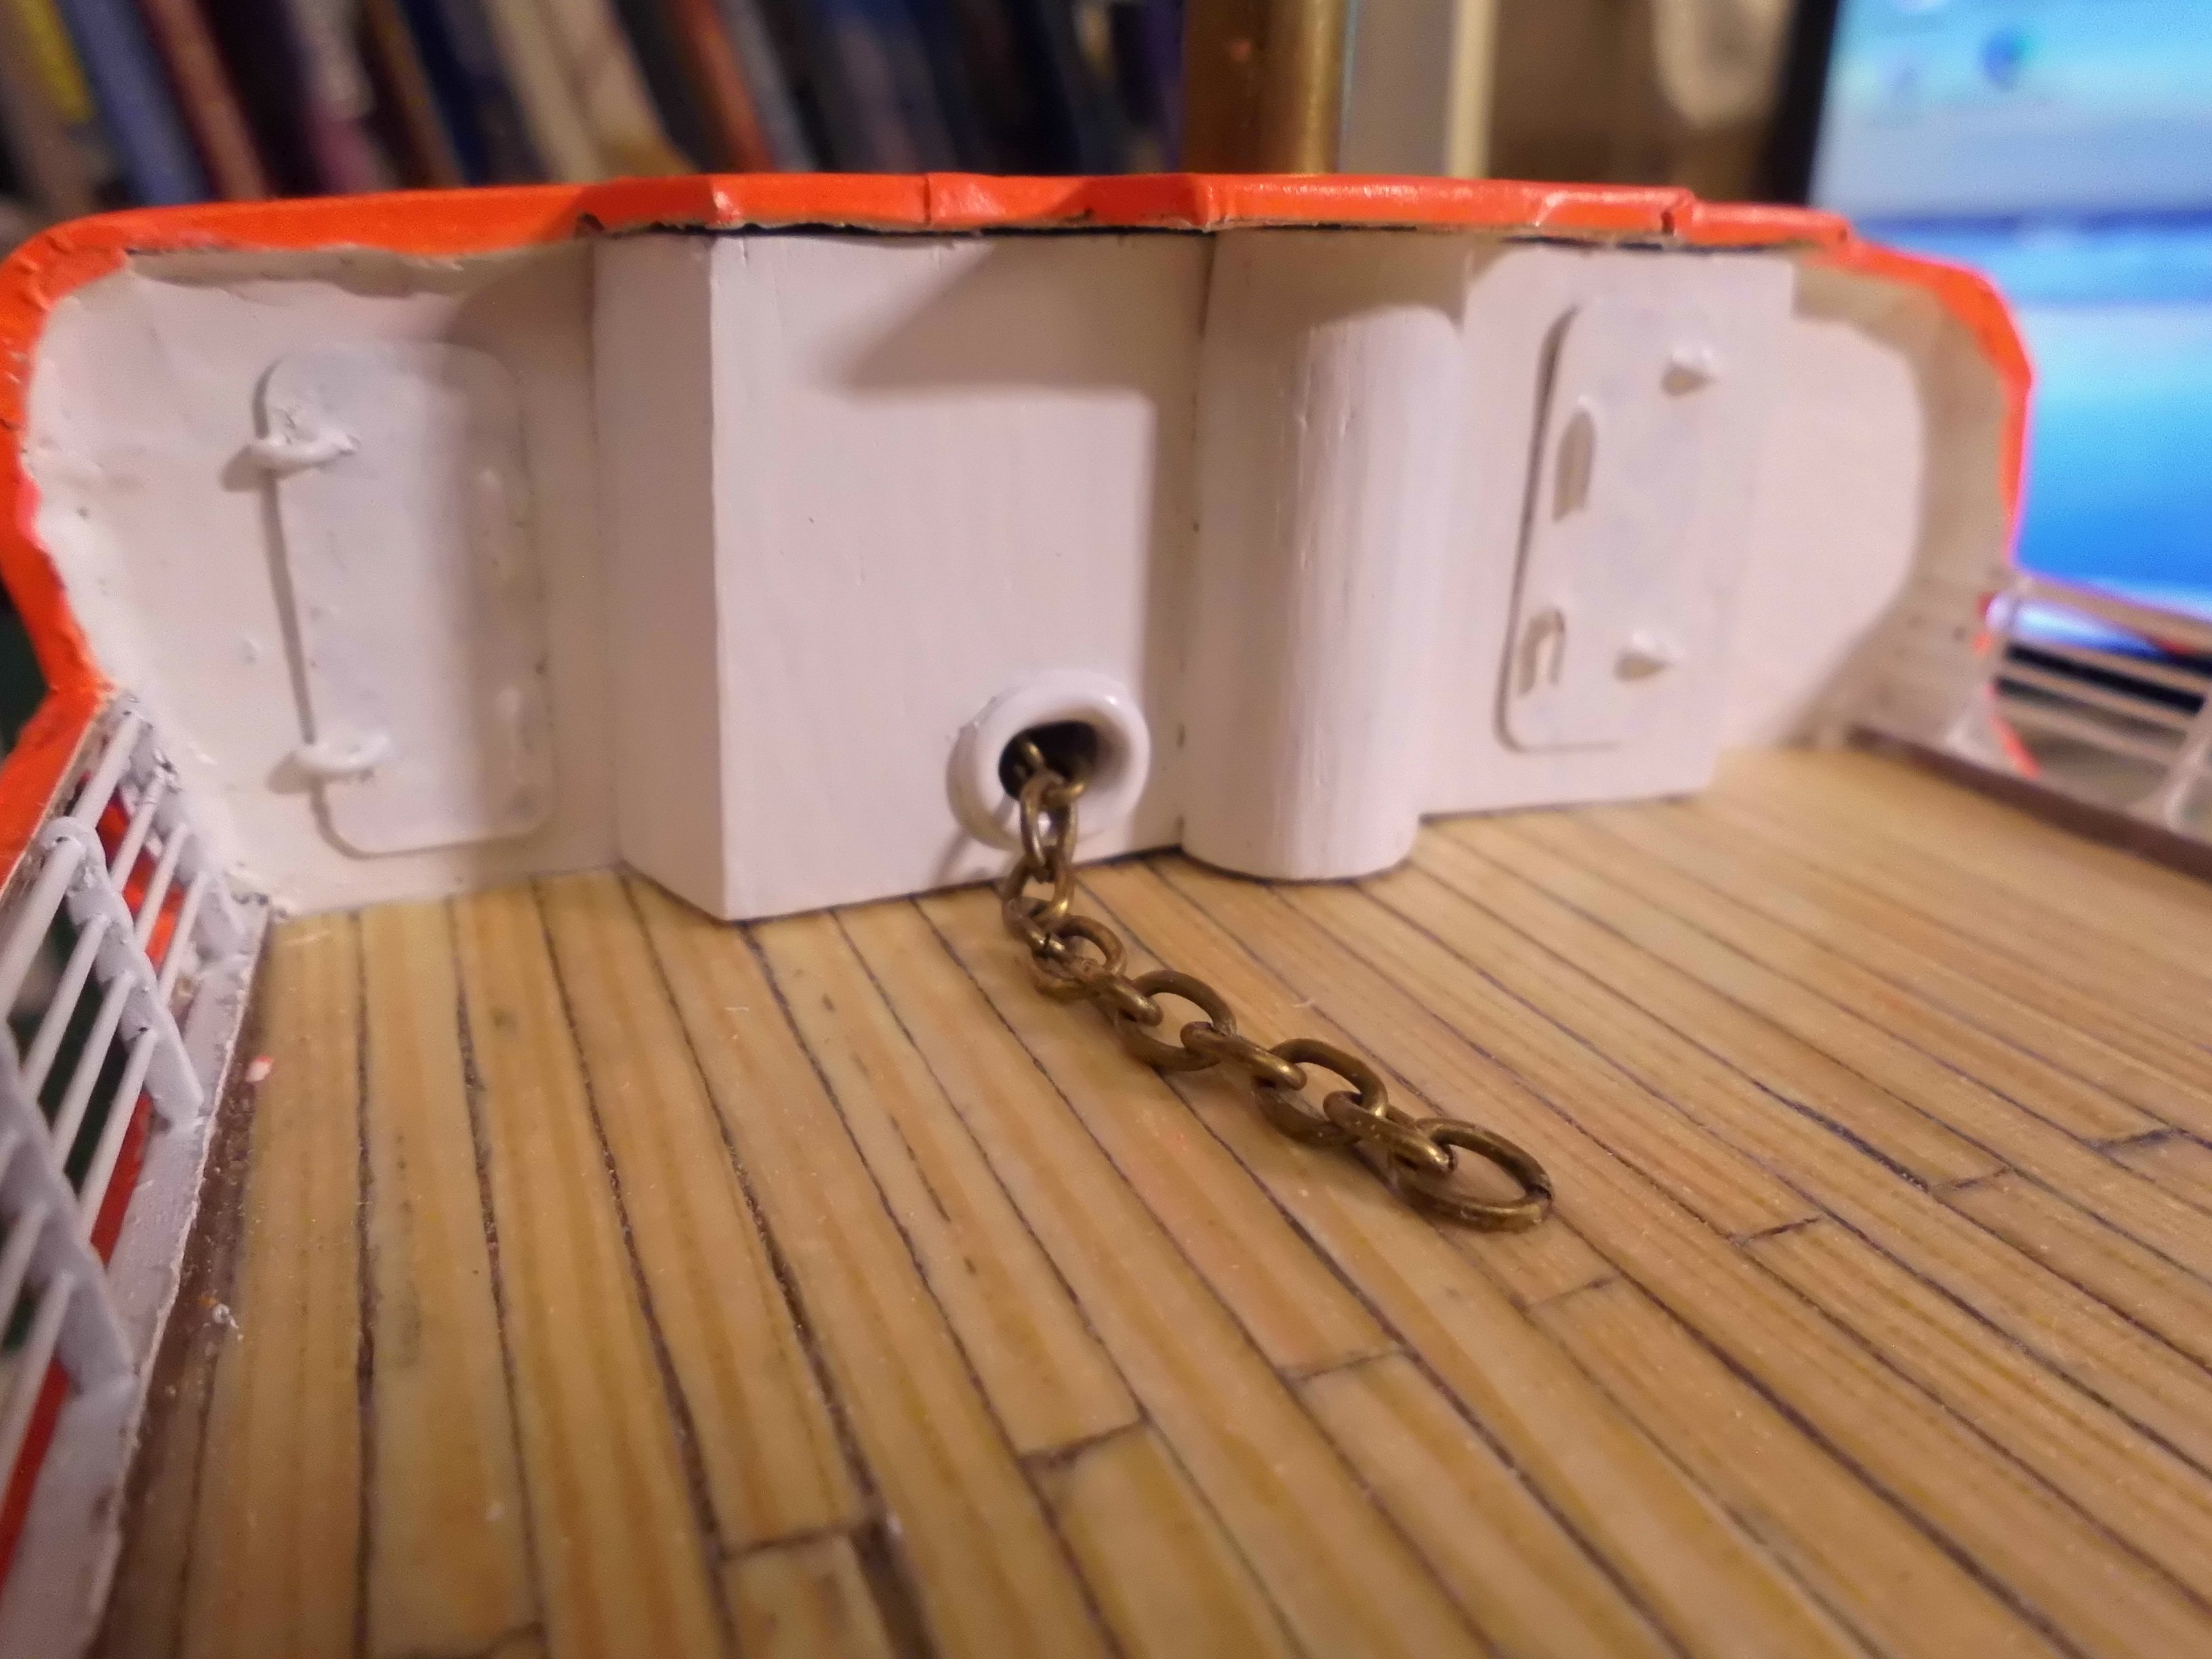
 Update made the updated forecastle bulkhead and support for the front mast, also the seawater tight access doors. The mushroom-anchor chain end will be connected to the ringspring buffer element on deck Nils
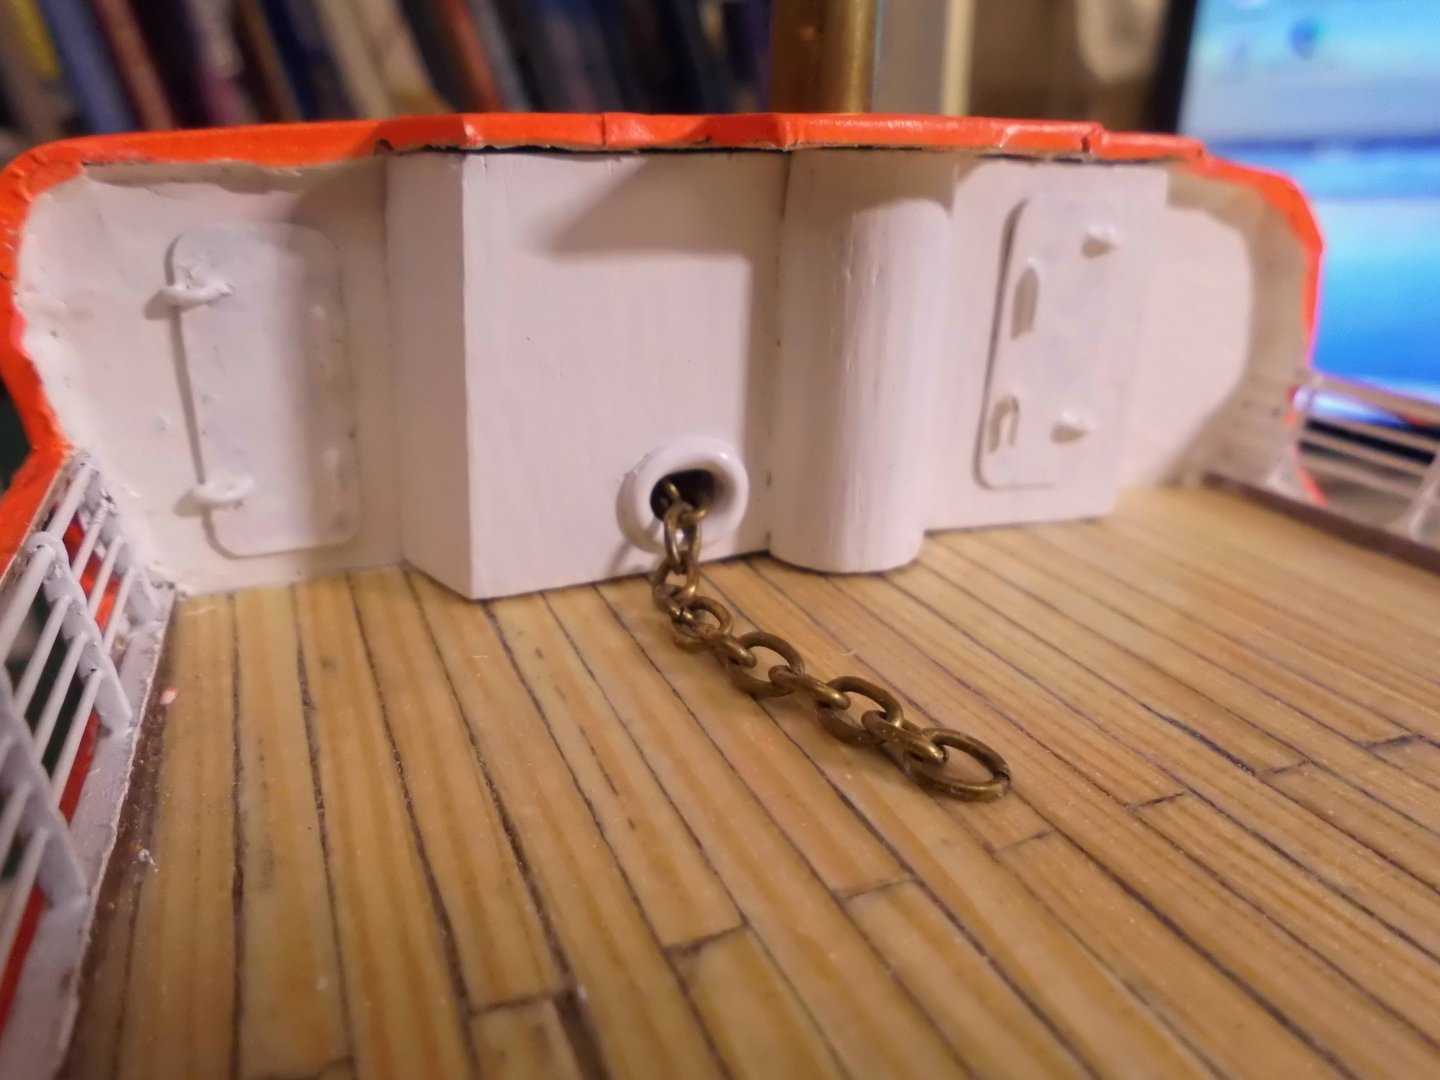
- 156 replies
-
- 2
-
-
- lightship
- Feuerschiff Elbe 1
- (and 1 more)
-
 Tom, I like Chuck's method because it incorporates the round up. That might be possible on the mill but it's above my pay grade.
 -

L'Amarante by marsalv - 1:36 - POF
marsalv replied to marsalv's topic in - Build logs for subjects built 1501 - 1750
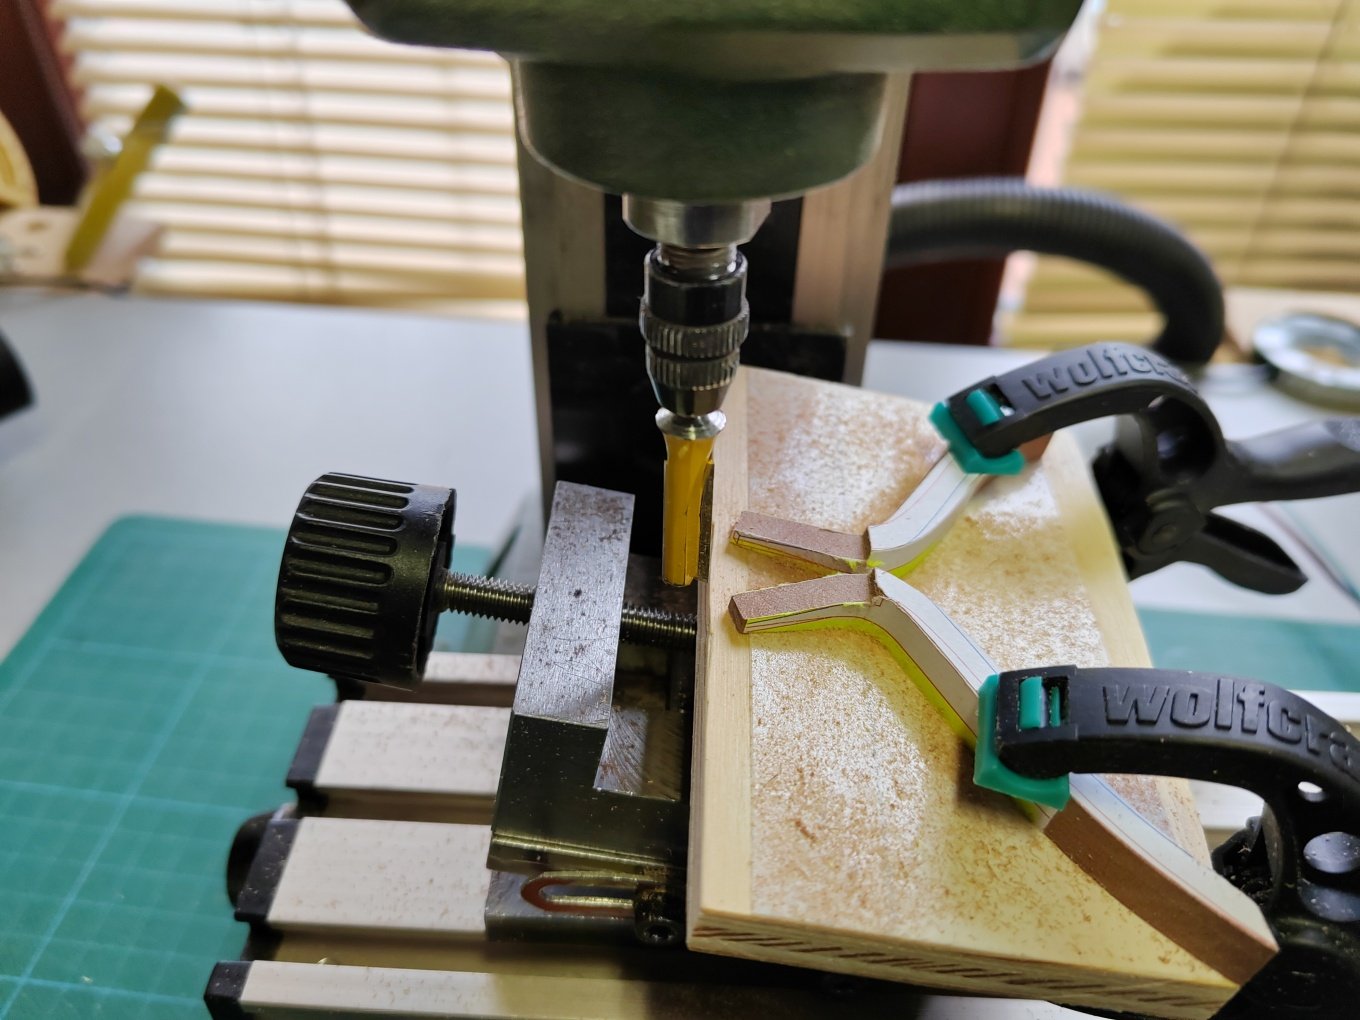
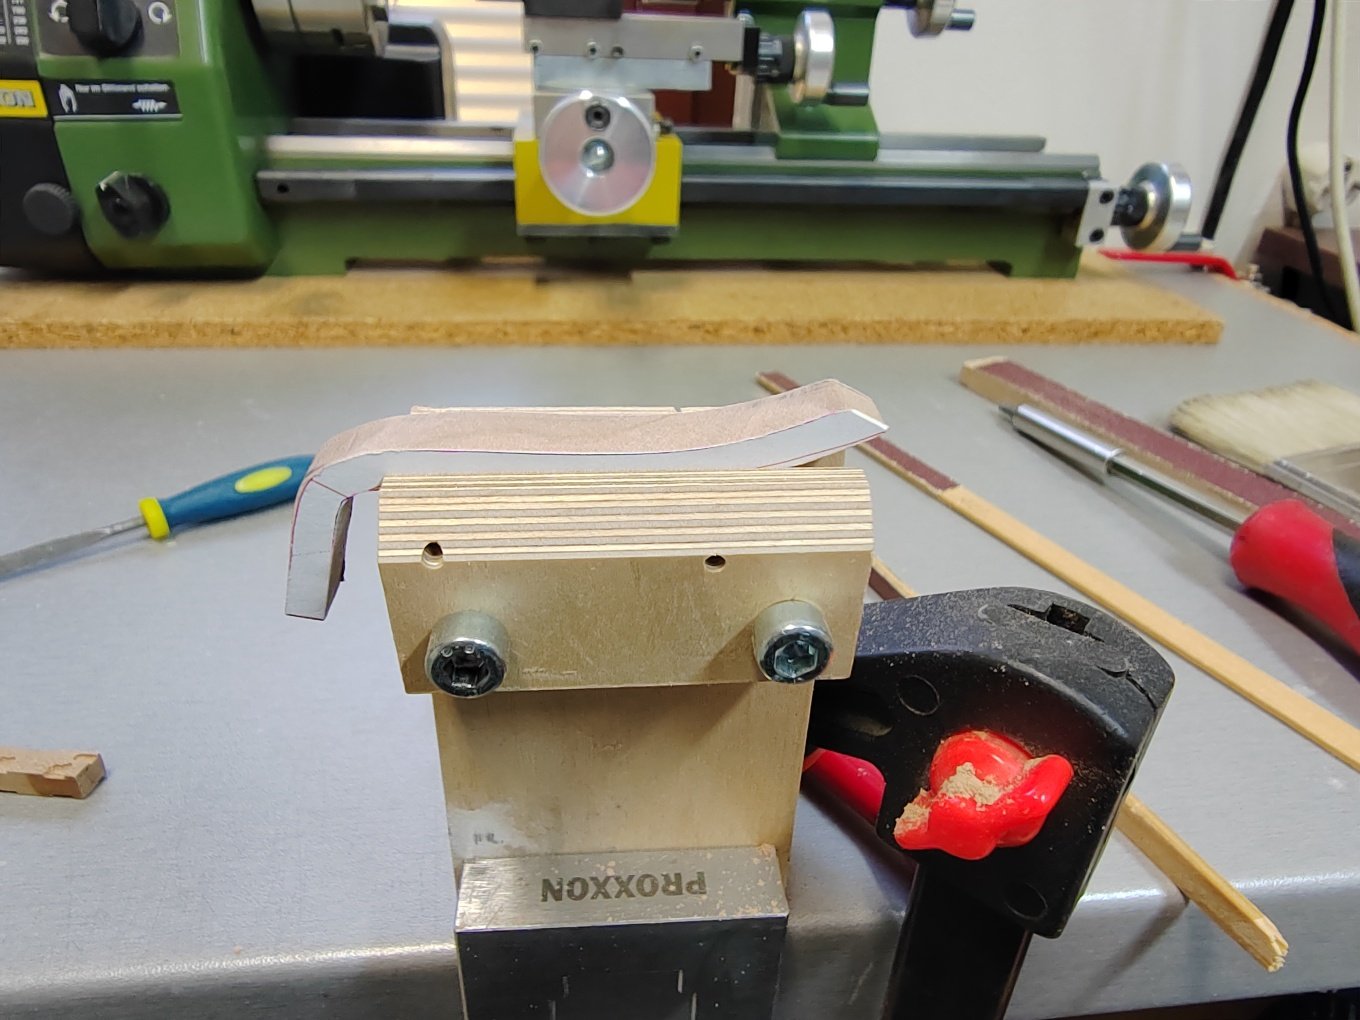
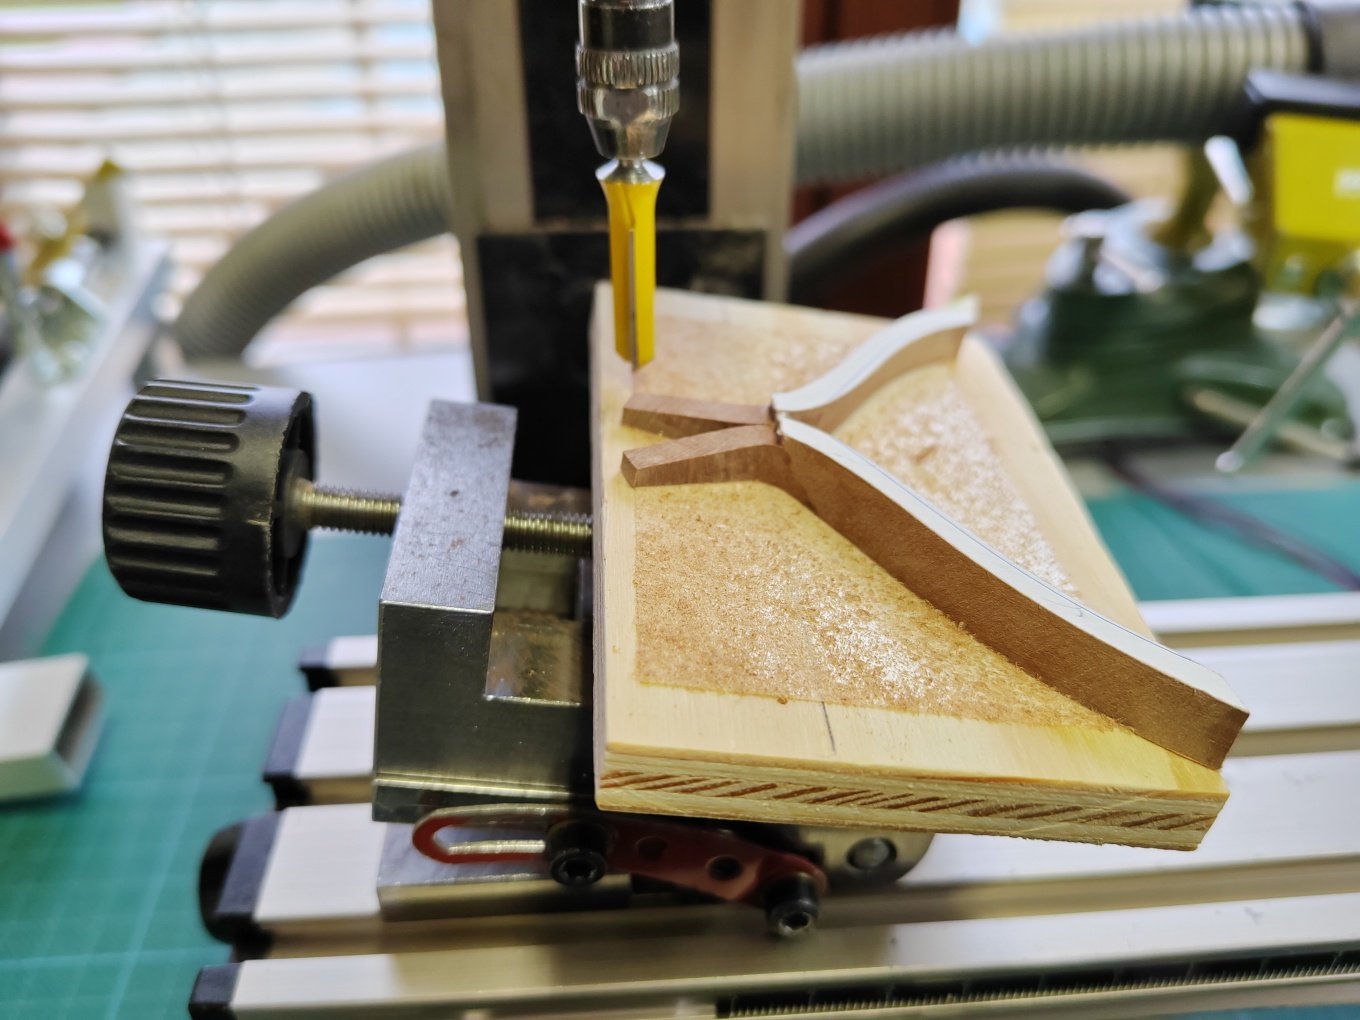
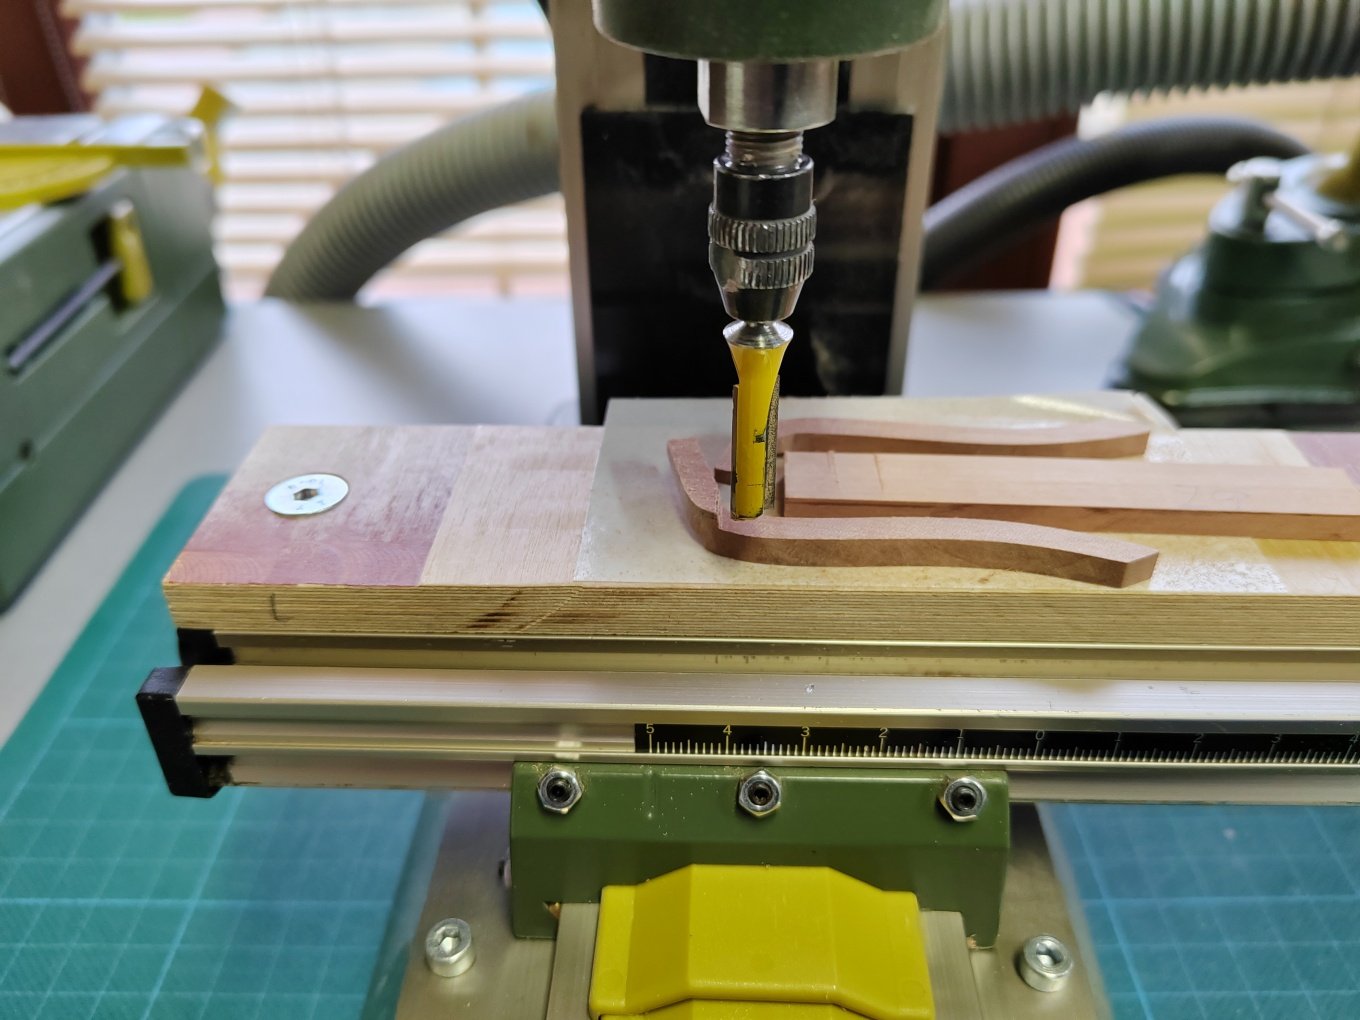
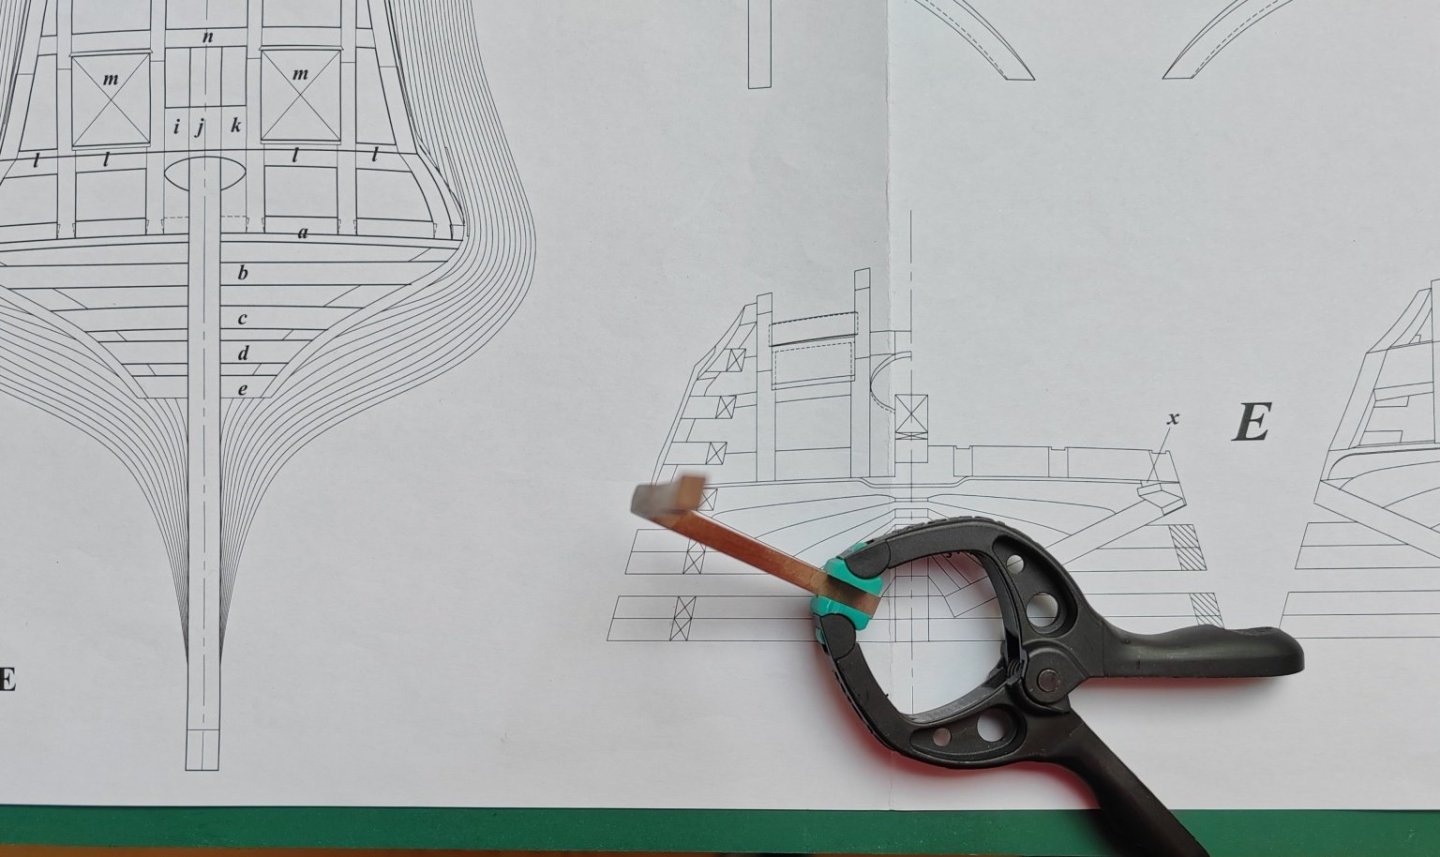
Now it was the turn of one of the more complicated parts, which I didn't really want to do - the fashion piece.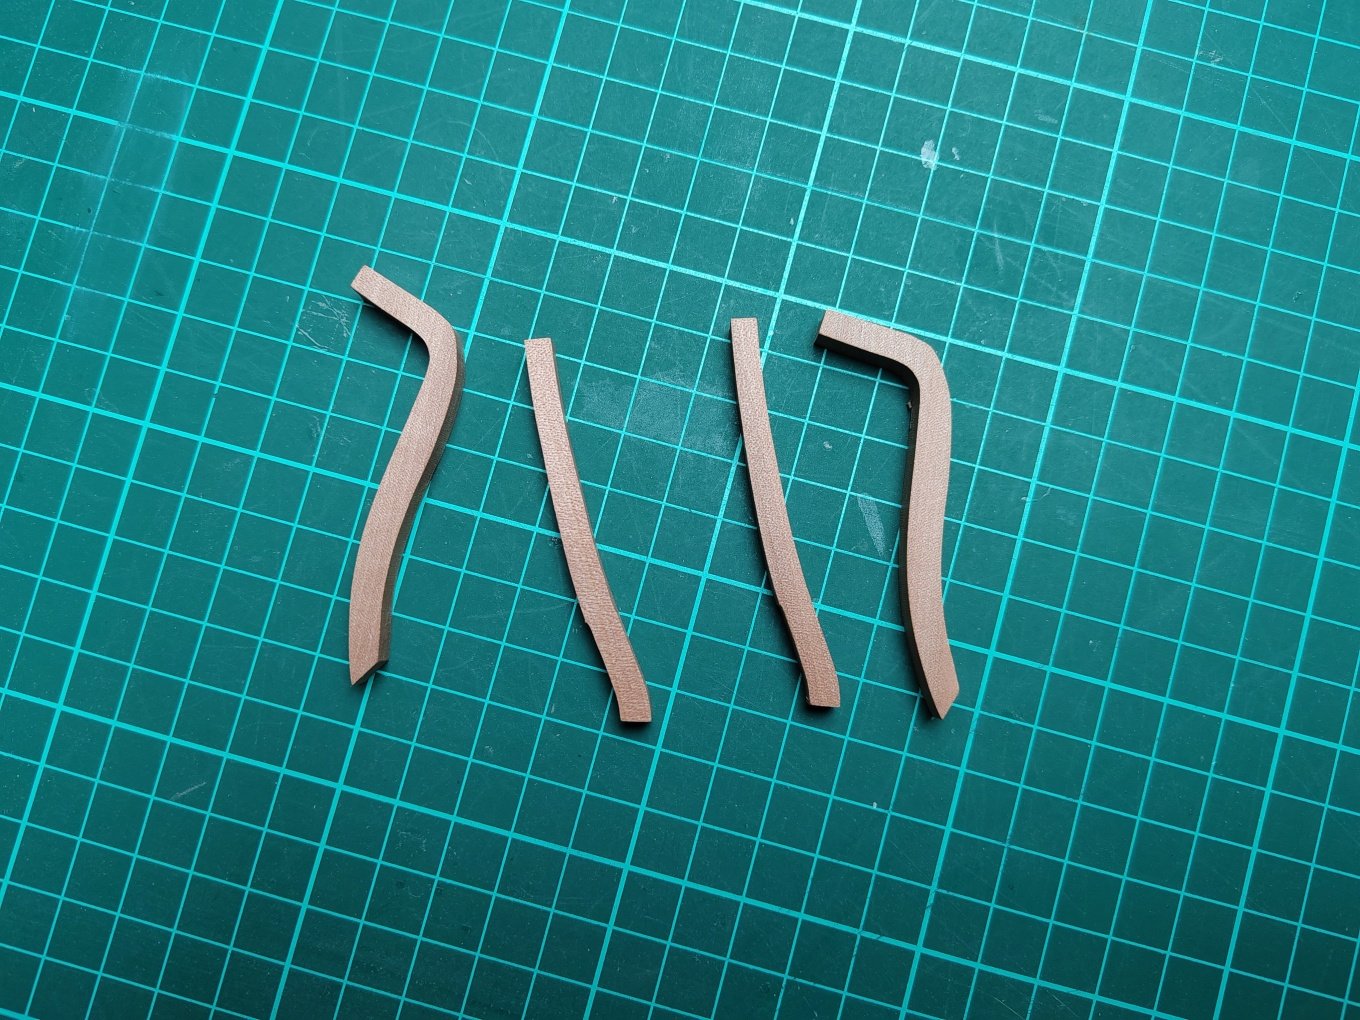


-
 I’m not seeing anything that’s a problem here. Can you show some photos of the rear of the bulwarks where they match up to inner frames. Have you sat the main stern part 2mm above the bulwarks to check where the bottom edge lies?
 -
Are these terms interchangeable?
-
 Inching closer to a finish...

-
Your rope work is an inspiration Johann.
-
 Thanks Kurt - I am going to put Sphinx on the shelf for now. I have another small Vanguard kit that I am going to work on while I consider my options here other than starting over with a new kit and throwing out all the stuff I won't need/use (although having a second set of parts is not necessarily a bad thing).
 -
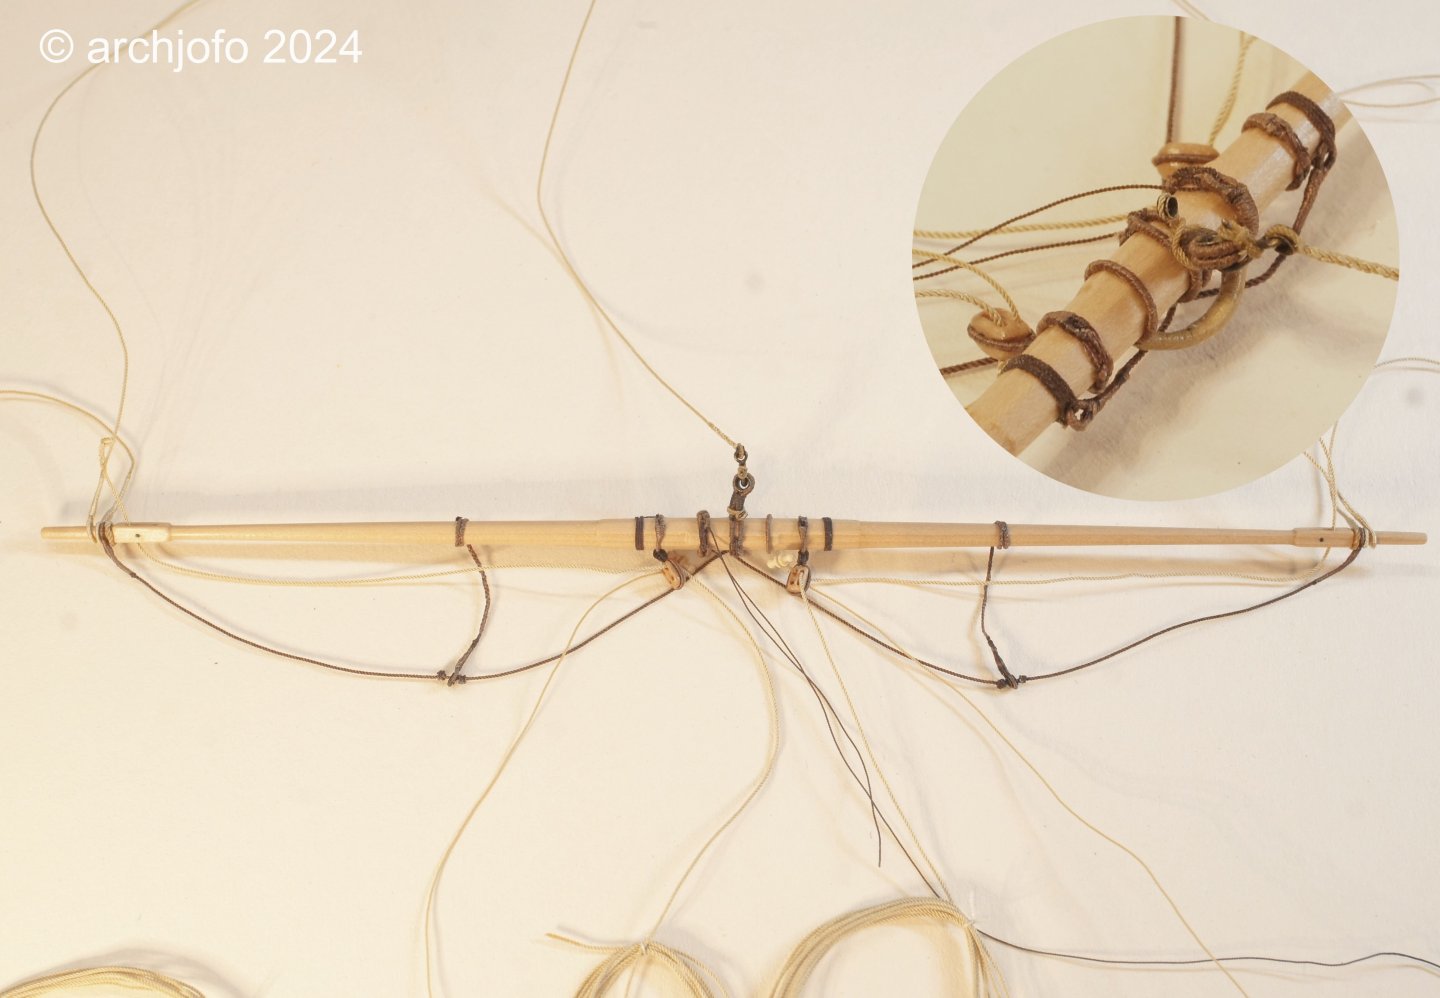
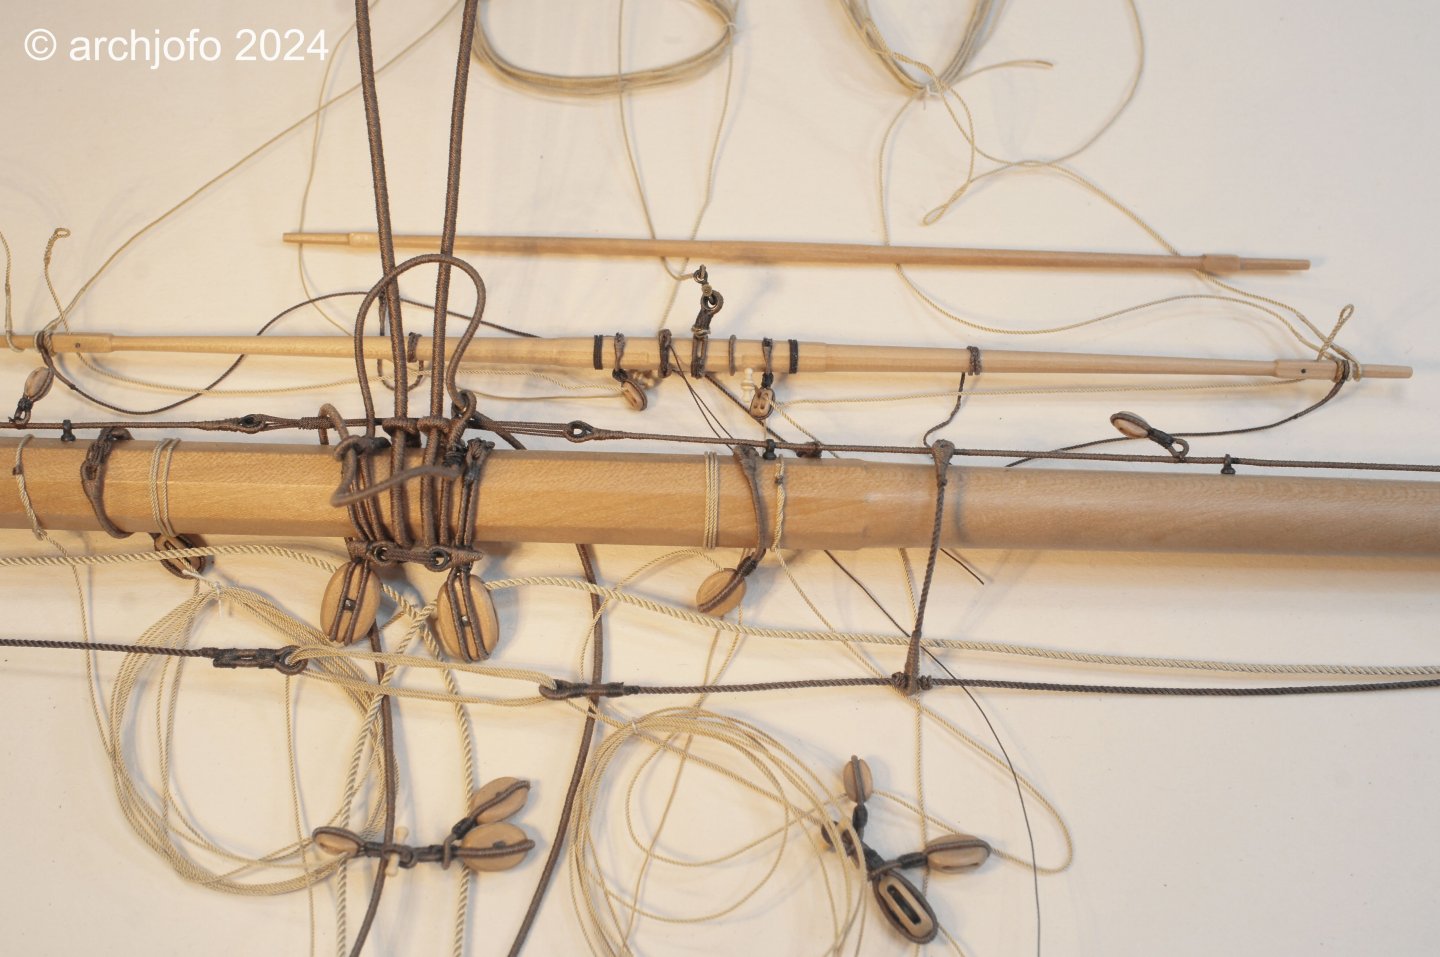
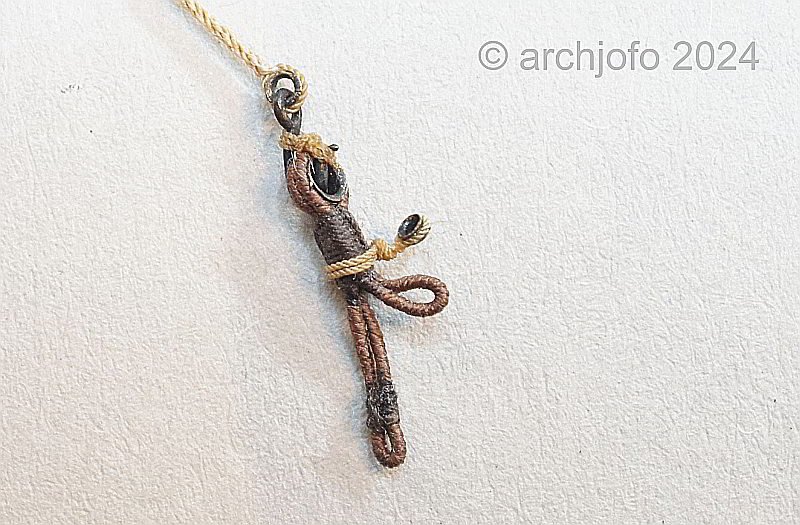
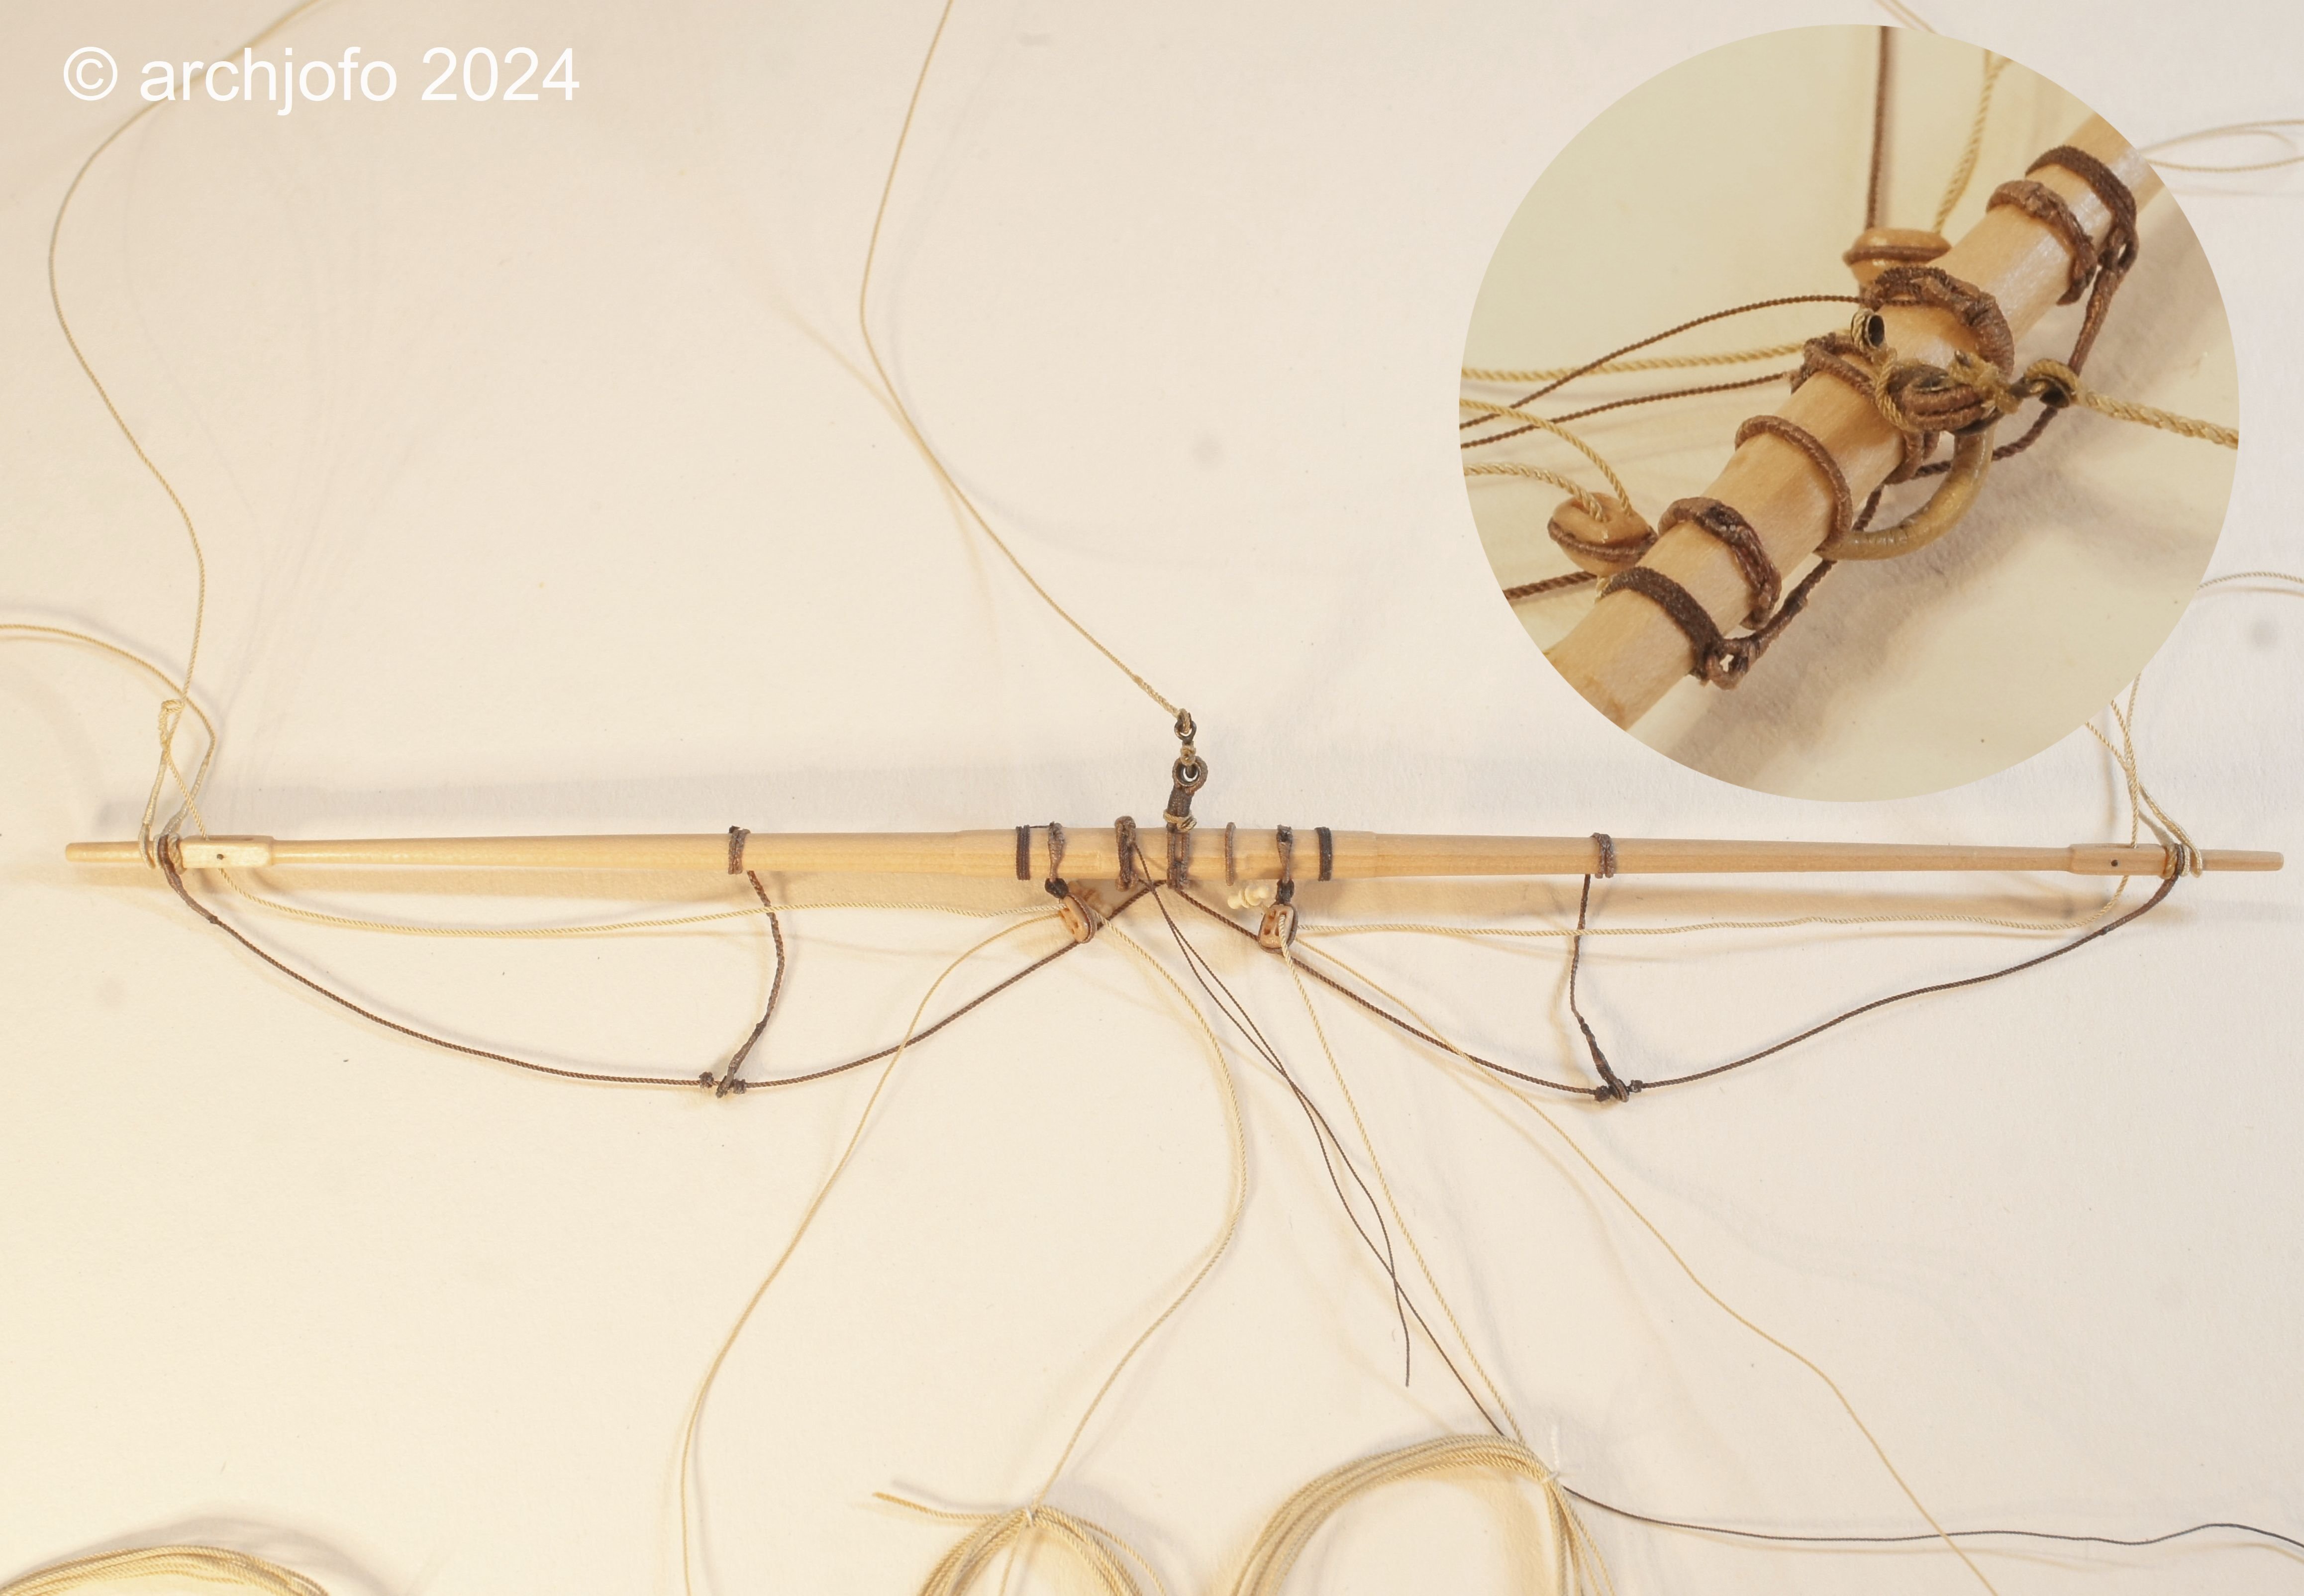
 Continuation: Equipping the mizzen topgallant yard - Vergue de perruche After the small mishap, as reported, I have now made a new mizzen topgallant yard and fully equipped it. This means that the topgallant yard chapter can be put to bed until it is installed on the model. Here is a picture of the finished mizzen topgallant yard. And another picture with the tye. The next picture shows different yards of the French corvette in size comparison. In the center you can see the mizzen topgallant yard. Above it is the mizzen royal yard and finally the middle section of the main yard is shown below. The next step is to equip the royal yards with the necessary rigging elements. Then I'll finally have finished fitting out the yards. To be continued ...