KeithAug
-
Posts
3,247 -
Joined
-
Last visited
Content Type
Profiles
Forums
Gallery
Events
Everything posted by KeithAug
-
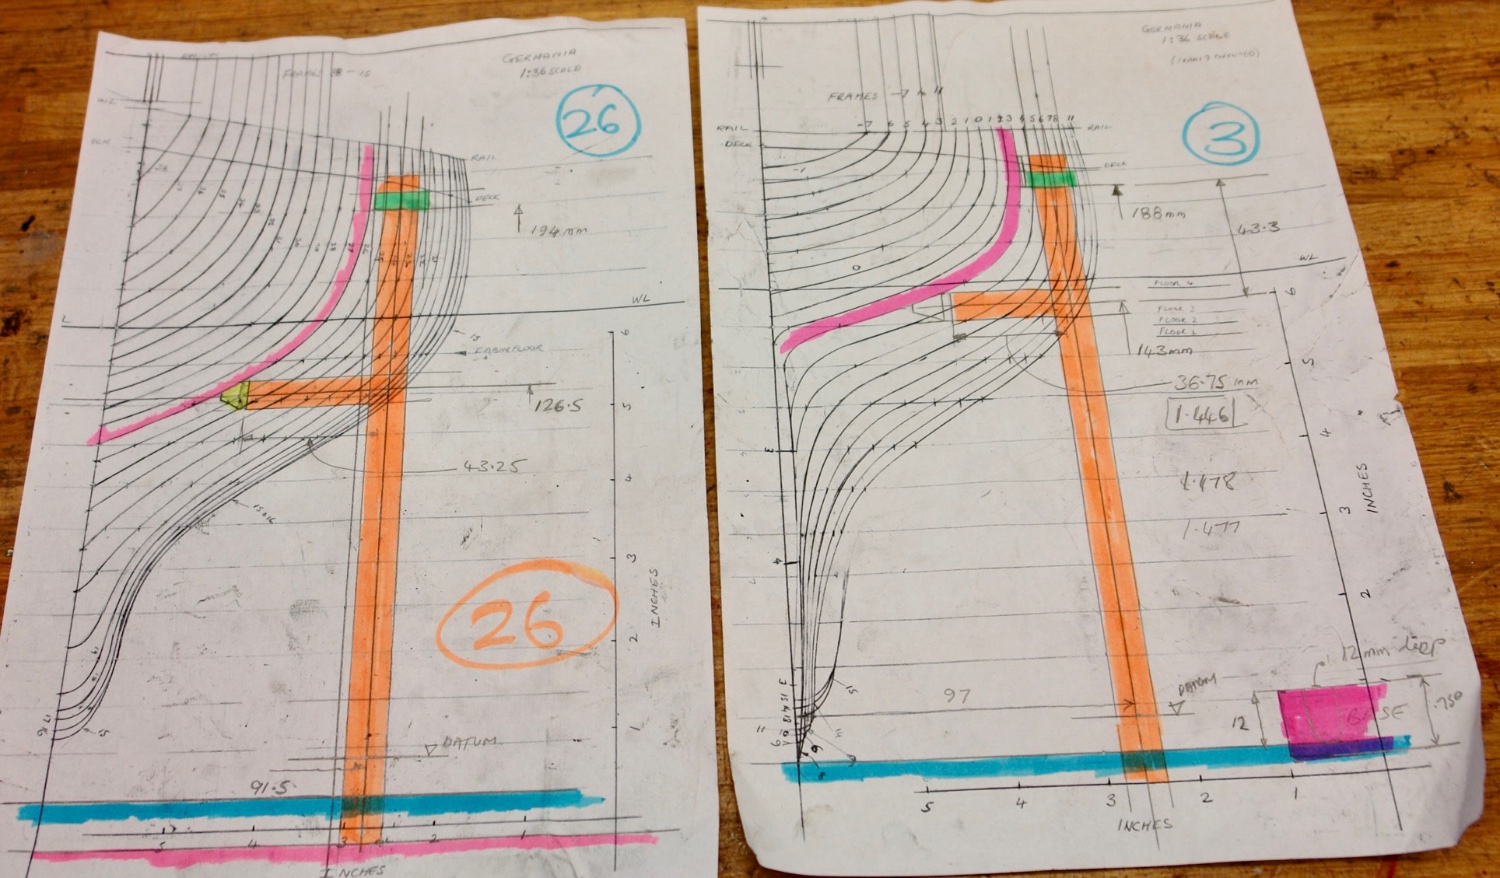
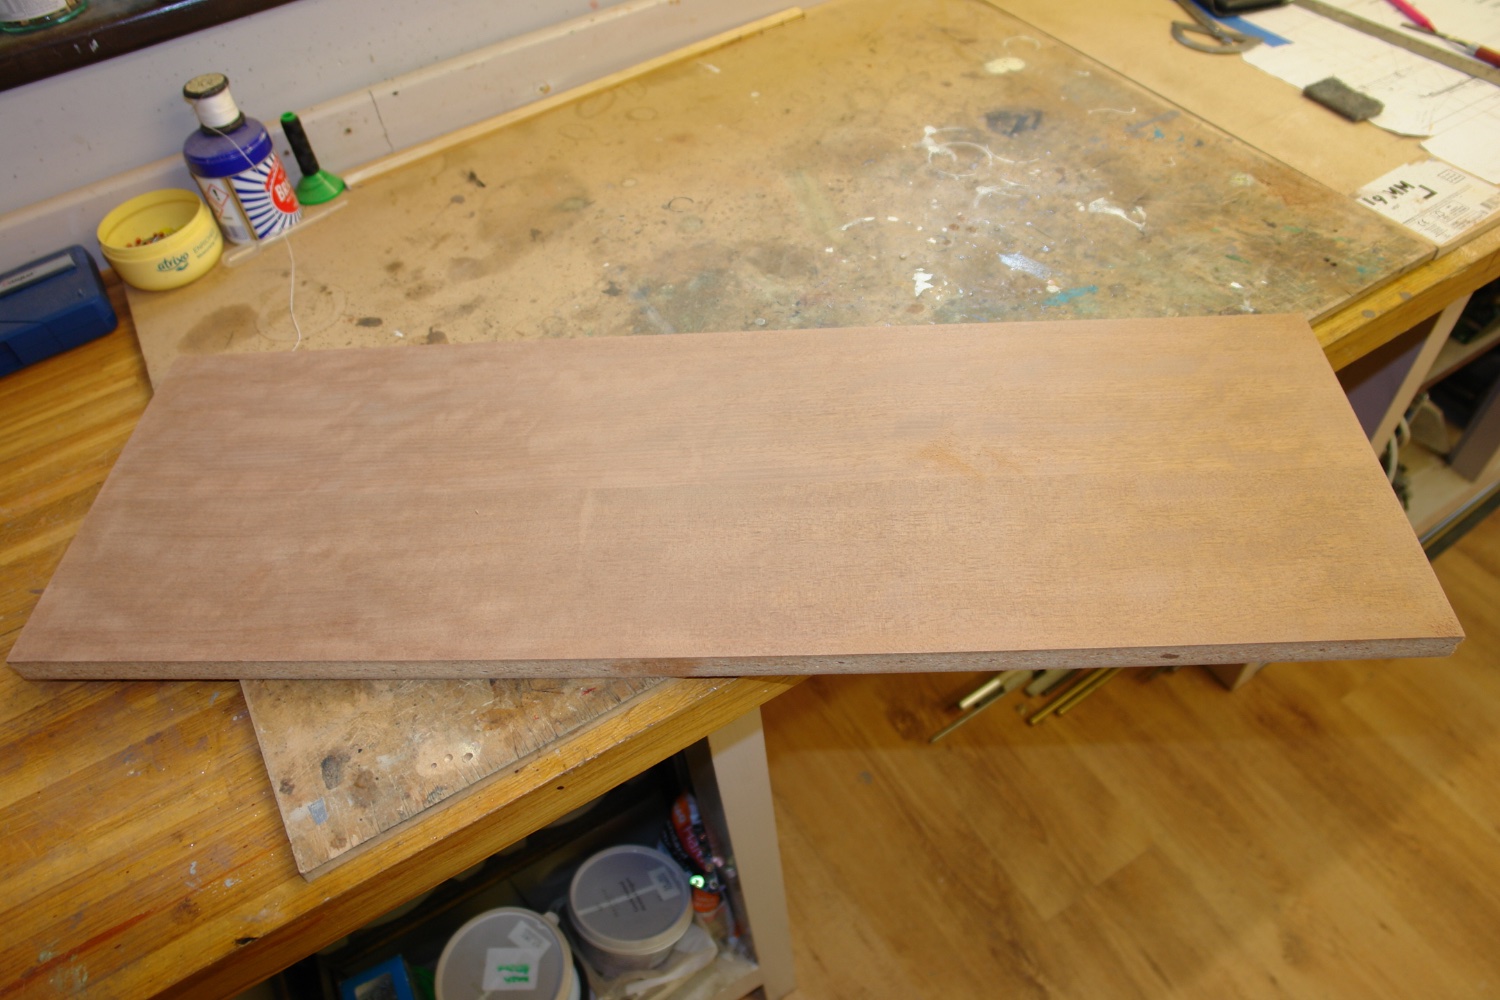
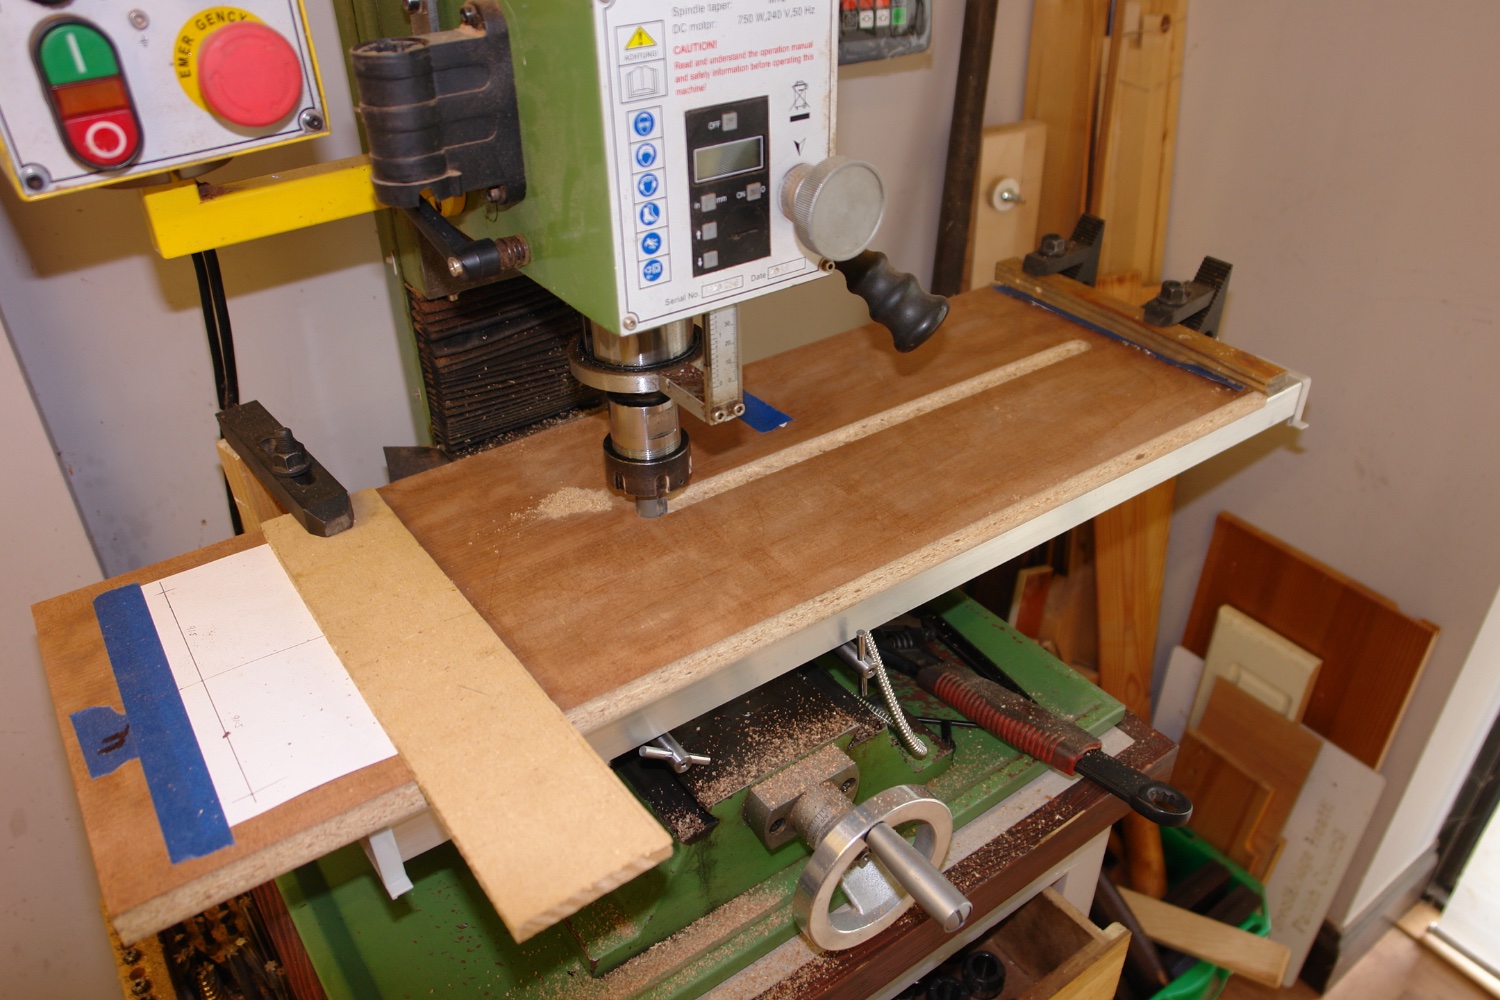
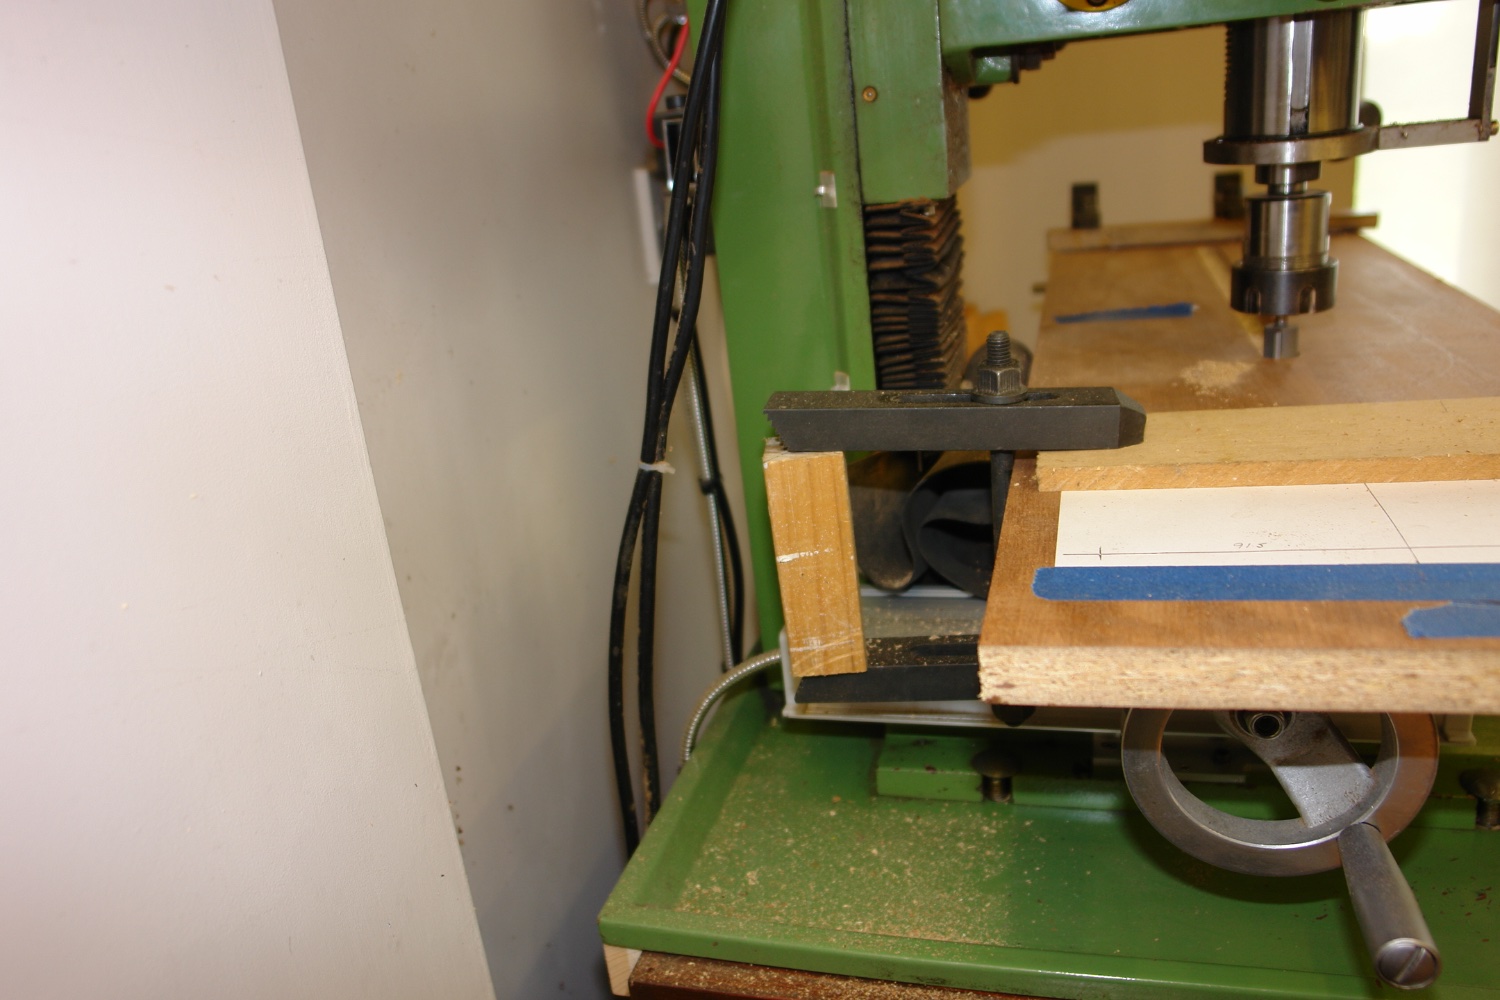
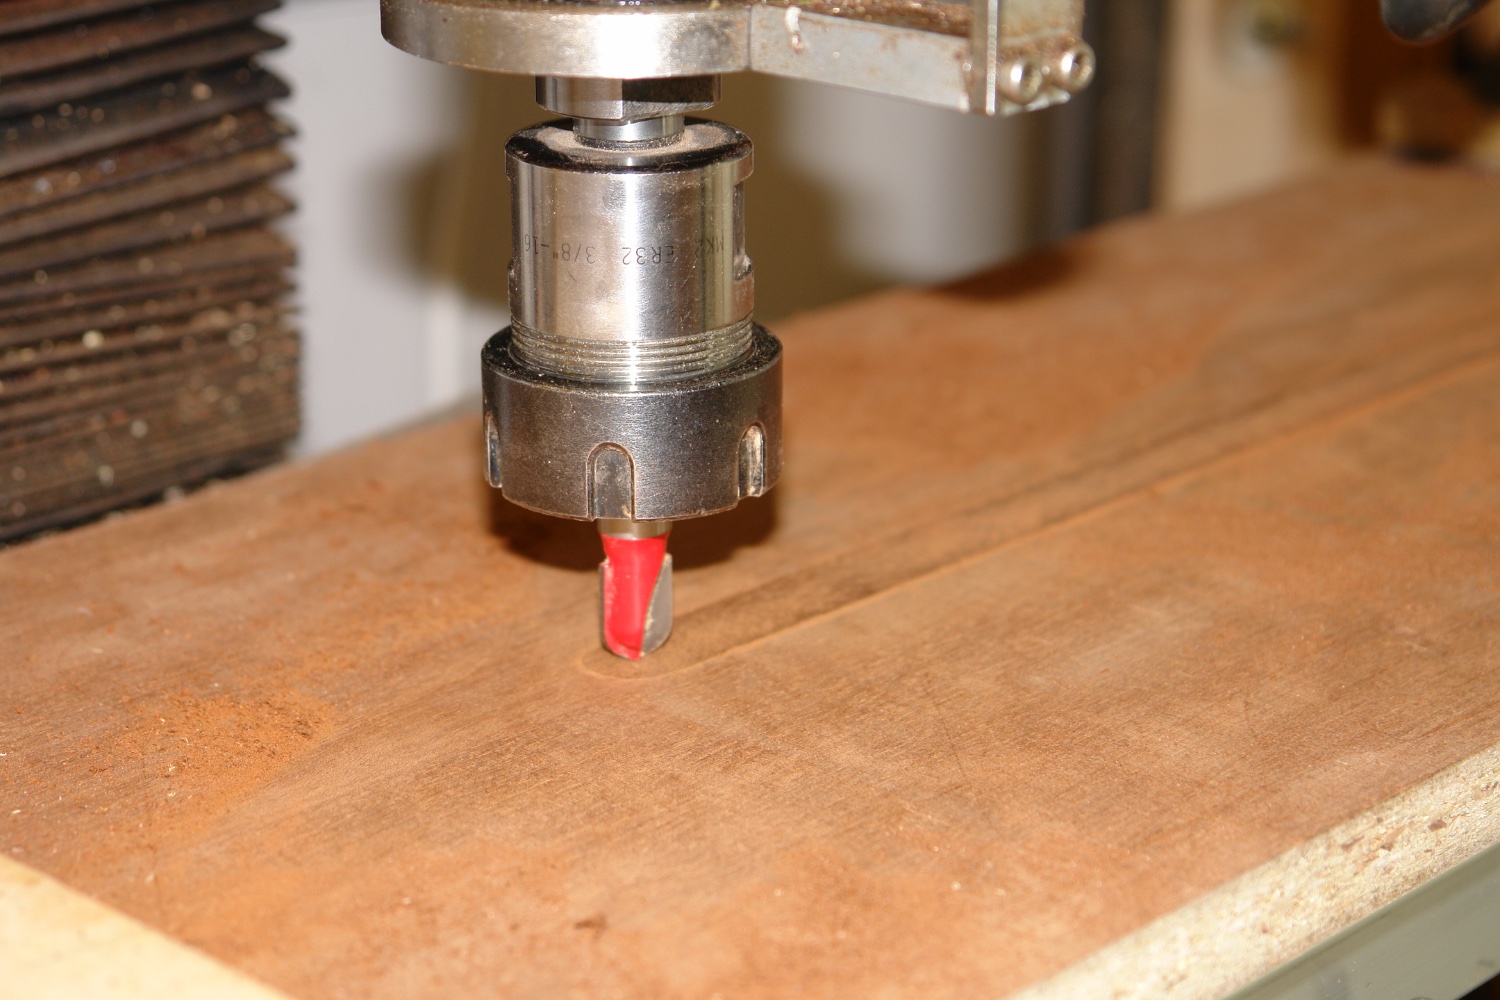
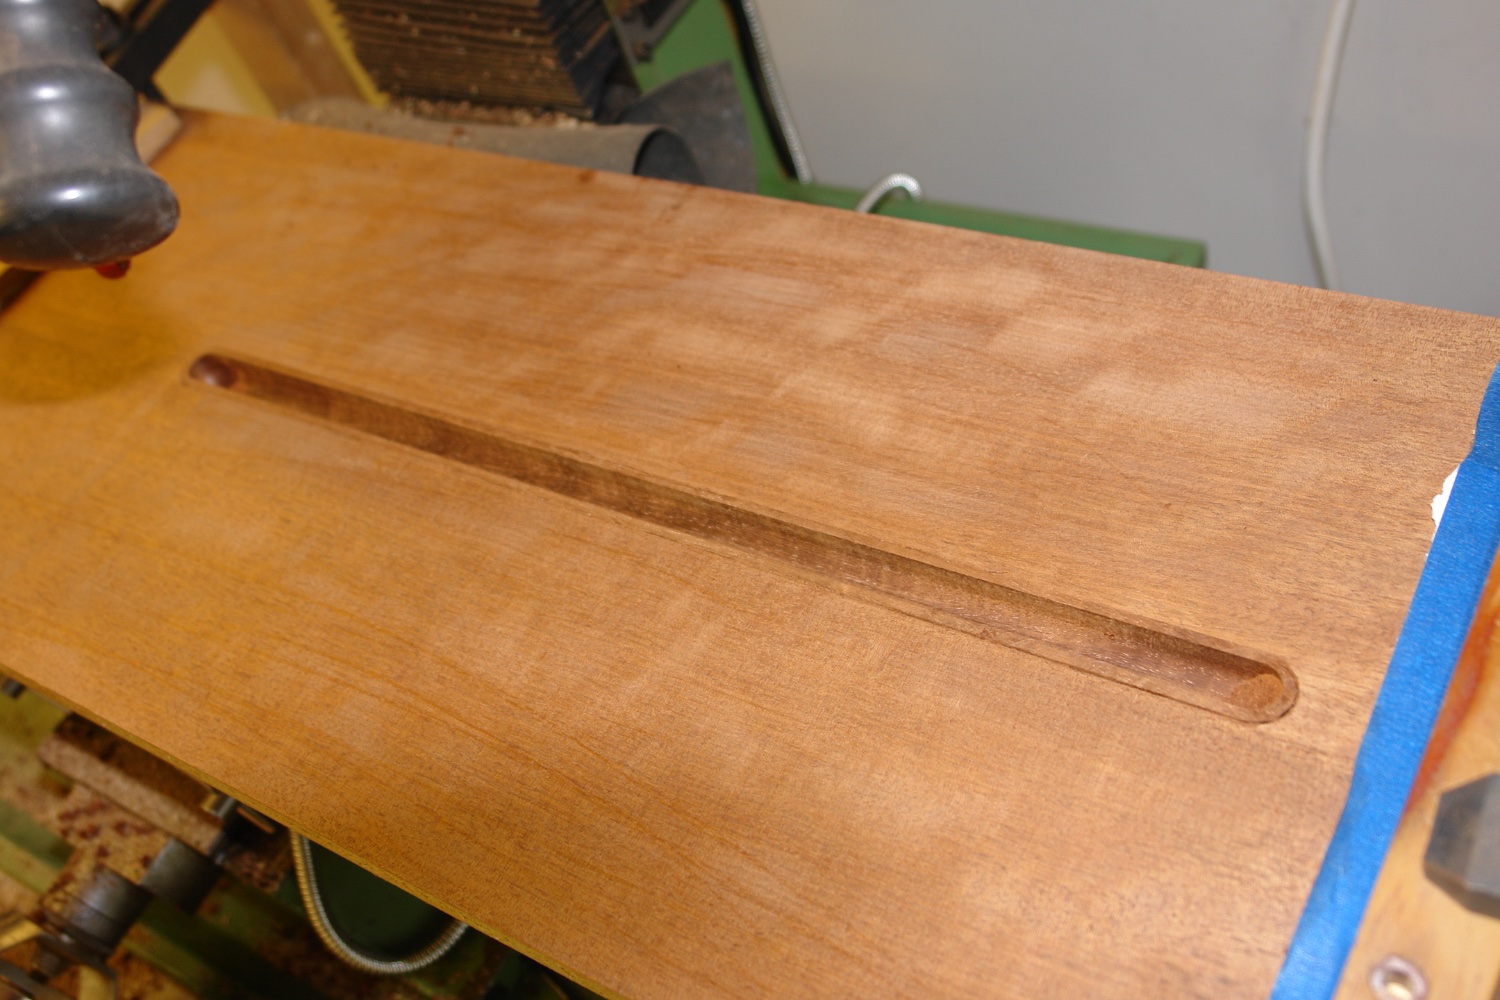
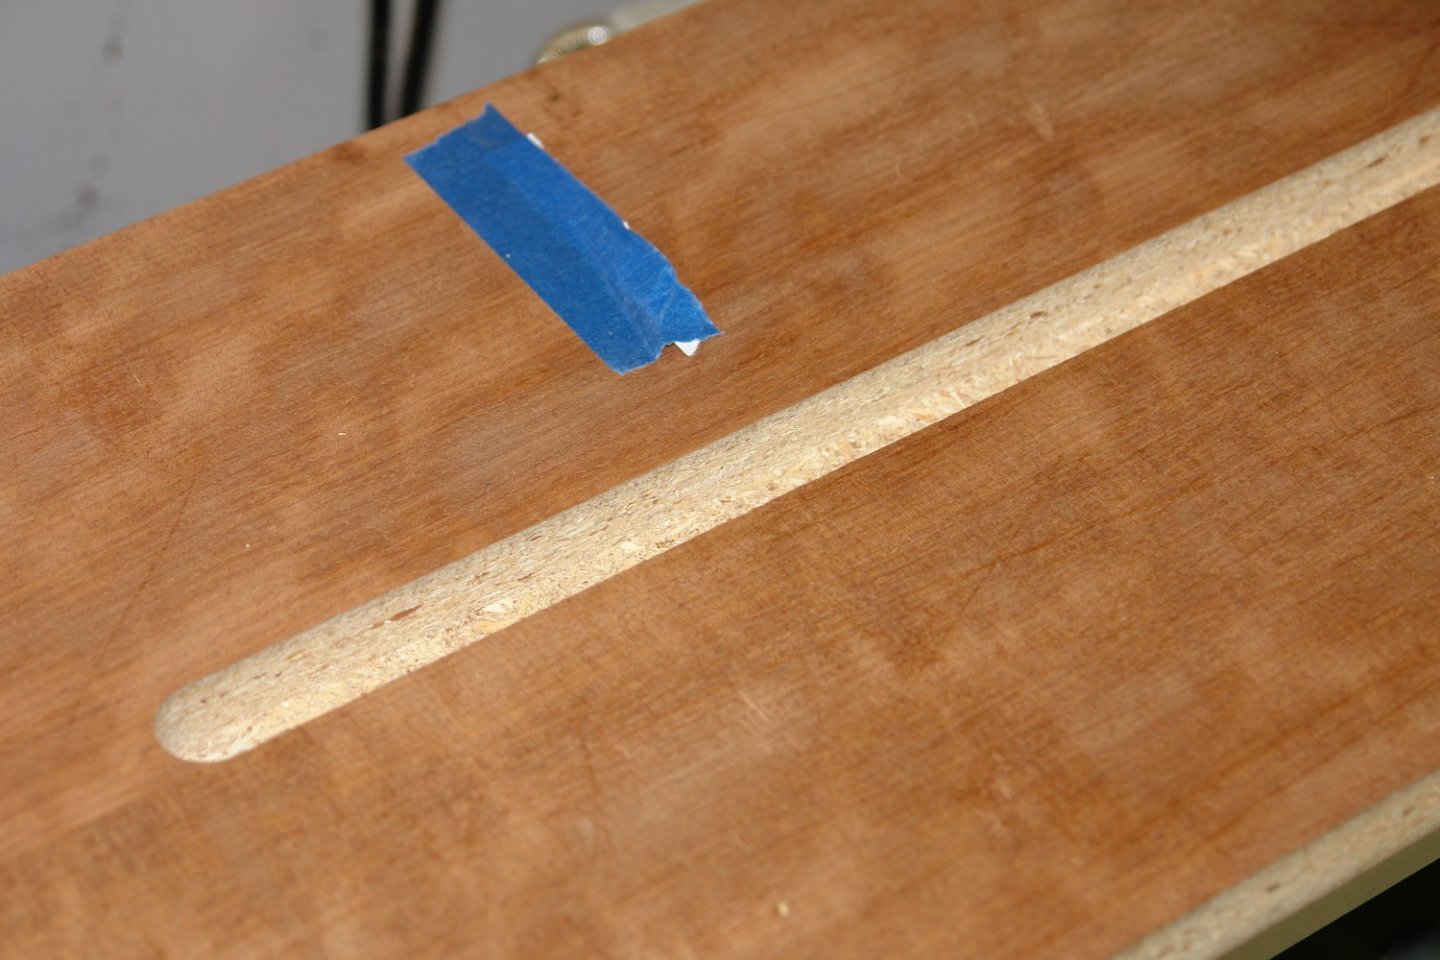
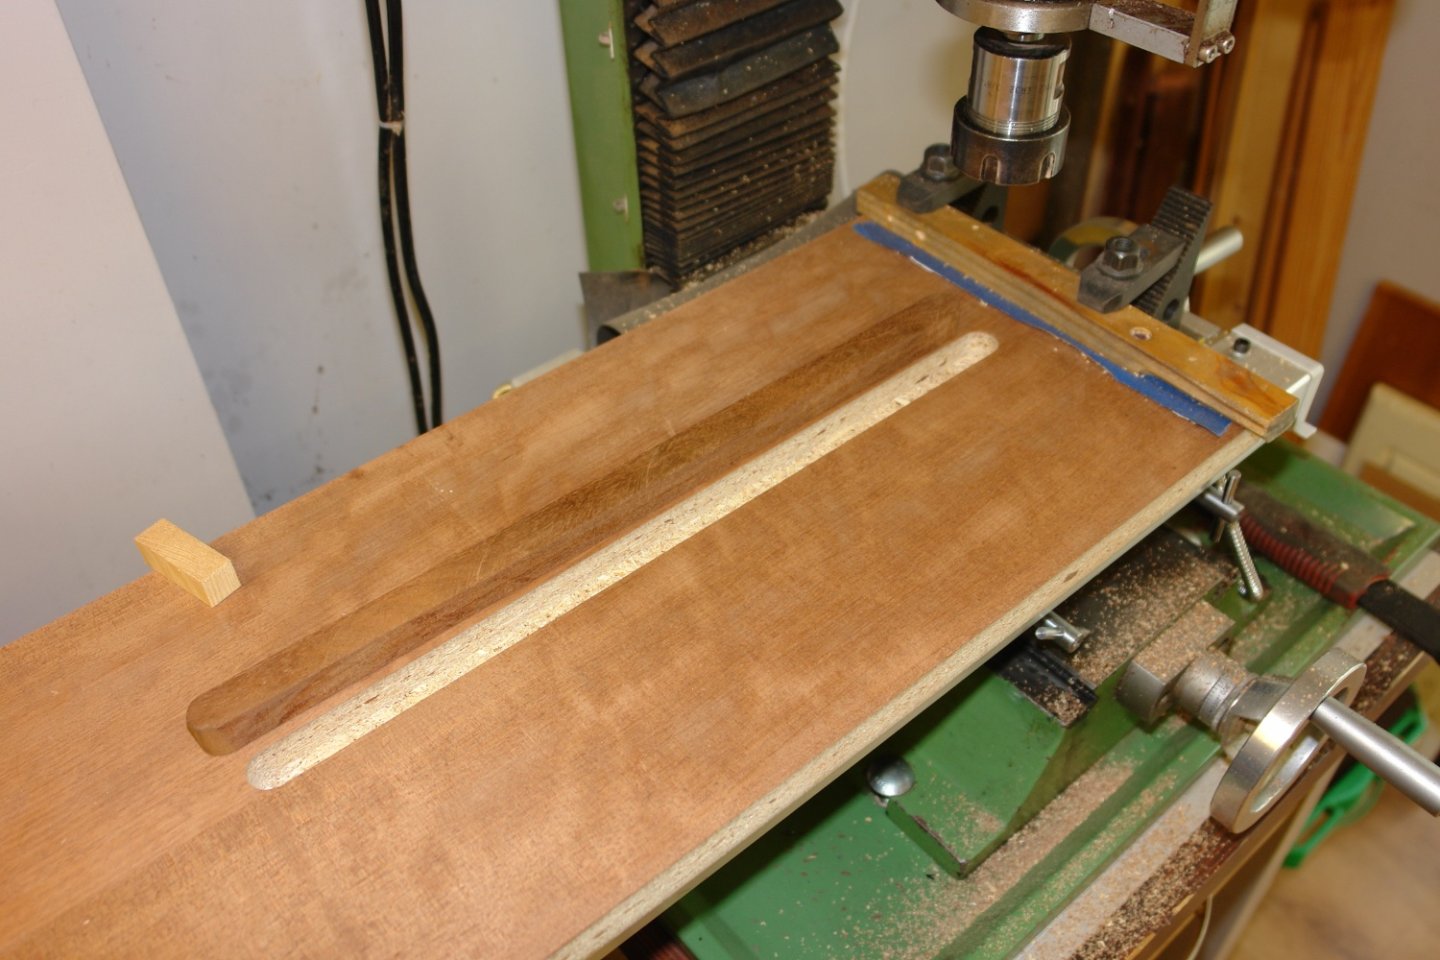
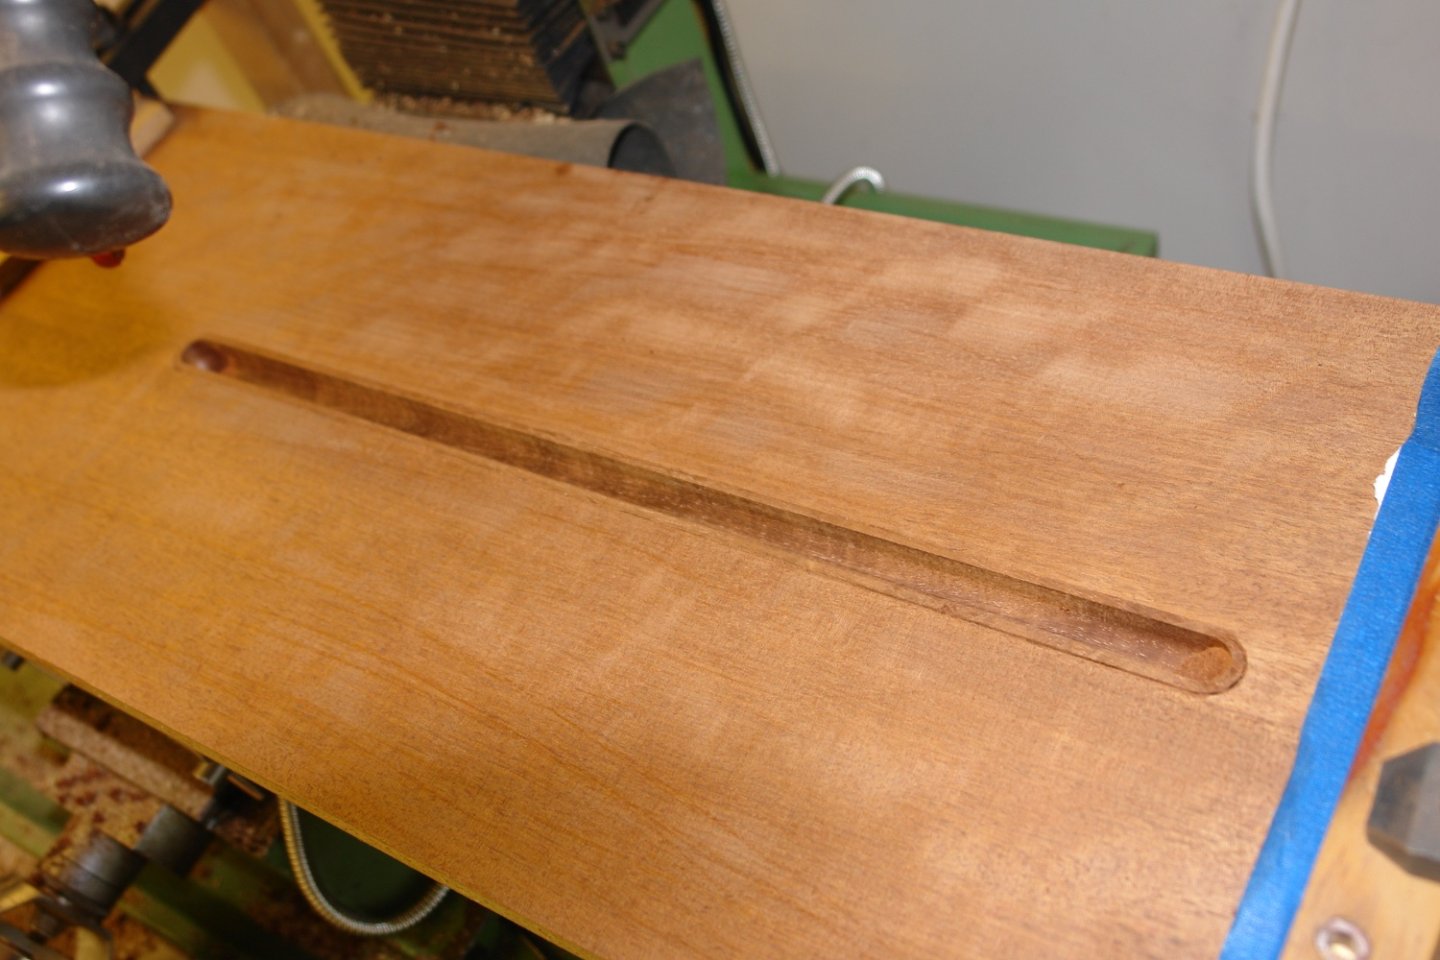
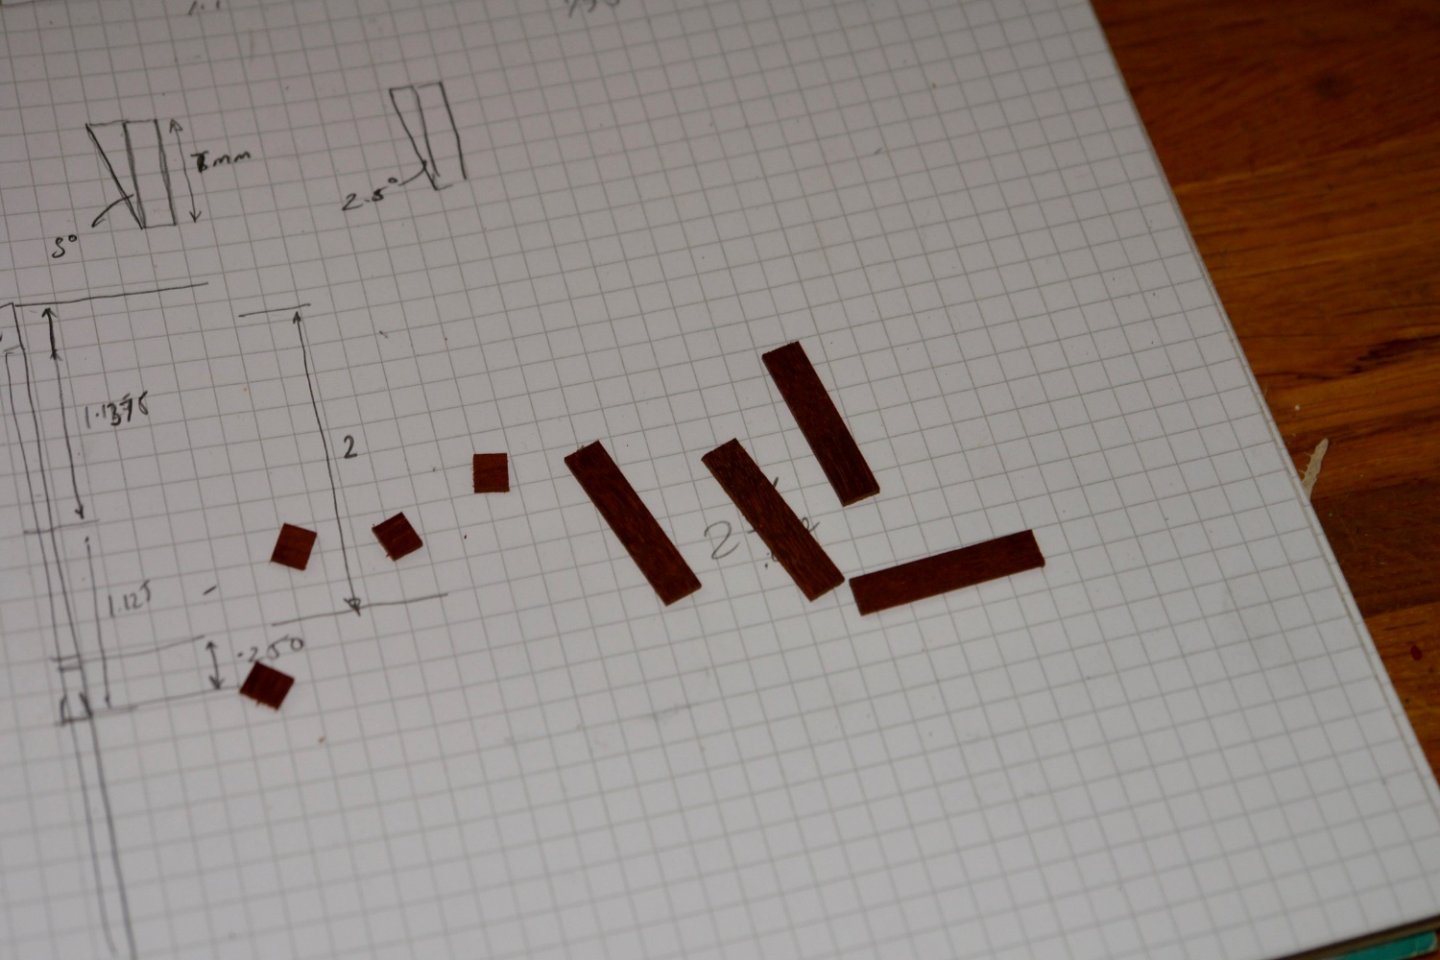
 Thank you for the new year messages. Although I have a few boat bits to finish off I have decided to move on to the display cradle. The move of the boat into the family room prompted my wife to critically comment on the building cradle so this was moved up the priority list. I started by going back to the hull frame line drawings produced at the start of the build. It took a bit of time sorting out the most appropriate frames position for the supports. I have an unreasonable aversion to drilling holes in the hull and for consistency I decided to reproduce the sort of cradle design I had used previously. I had a significant challenge in that we already had a mahogany serving table on which the model was to be displayed. The height of the model plus the height of the table meant that the cradle height had to be constrained to avoid the need for raising the ceiling height. I did suggest cutting an inch off the table legs but this didn't go down well with the authorities. The dimensional constraints turned out to be so severe that the only way of making the cradle work was to include a recess for the keel. The next photo show the sketch designs for the base. I am using a mahogany veneer on chipboard table for the base board. The table dates from the second year of my first marriage (I am now in the 47th year of my first marriage)😬. It took a lot of scraping to get rid of 45 years of polish. The base was somewhat too big for my mill but with a bit of ingenuity I managed to cut a slot for the keel insert. Note the dodgy clamping arrangement. This necessary by the bed "T" slots being unavailable. The plan was to insert a mahogany strip into the slot so this was cut and shaped to size. This strip was then glued in position and then a further slot was milled to take the keel.
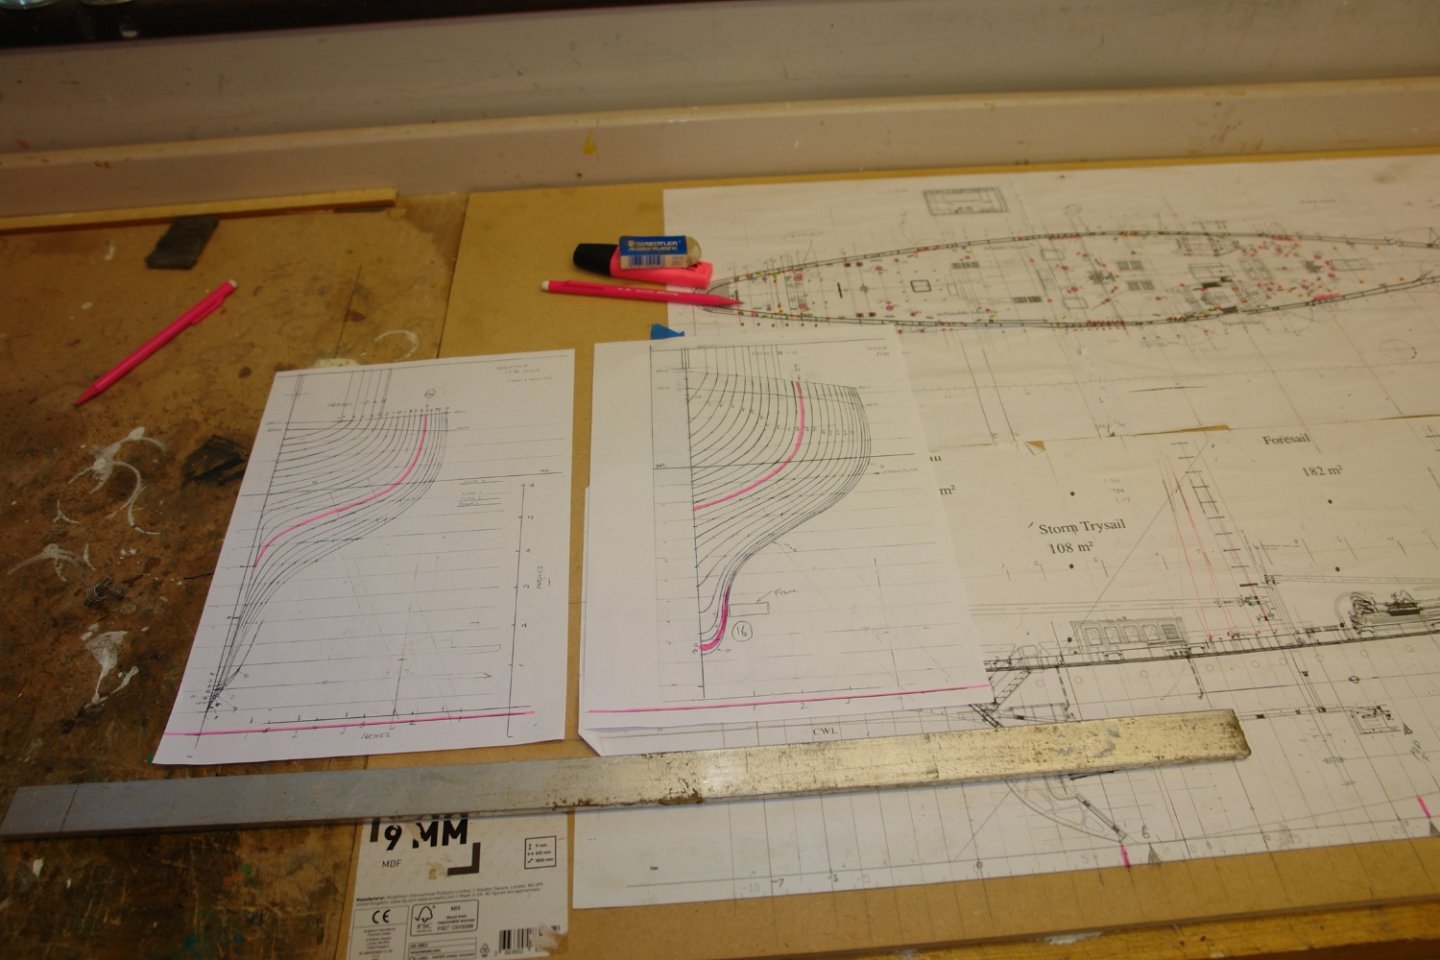


-
Thank you Druxey, Mark, Keith, Richard, Andy and Tom. Also thank you to all who have visited my build over the last 12 months. May I wish all of you a happy healthy and prosperous new year (even though for some of you it hasn’t happened yet).
-
I am thinking in particular about a free standing floor mounted model in a neighbours house in the late 1950's. I can remember the jolt to this day.
-
Nicely done Roger, an excellent piece of miniature fabrication.
-
Cap San Diego by mikegr - 1/160
KeithAug replied to mikegr's topic in - Build logs for subjects built 1901 - Present Day
looking very clean, all that filling and sanding seems to have done the trick. -
Im sorry to hear about your friend Hakan. life is a bit of a lottery and often it seems to be the better ones who draw the short straws.
-
Valeriy, it has been a great privilege and pleasure to follow your magnificent build. Your skills are an inspiration to us all. I hope the new year brings with it peace and prosperity for you all.
-
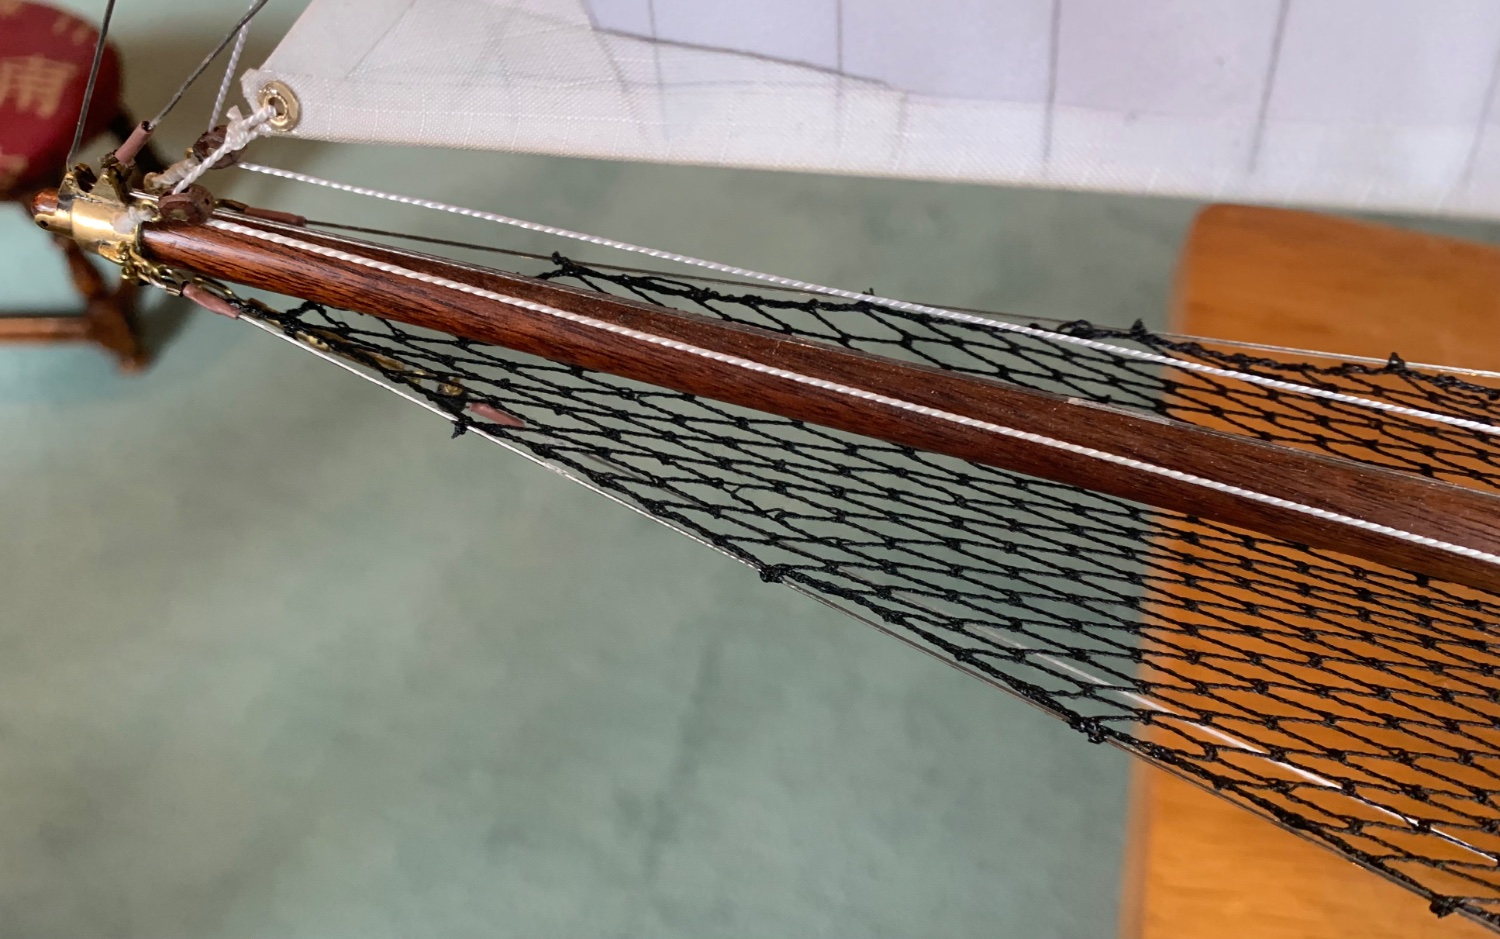
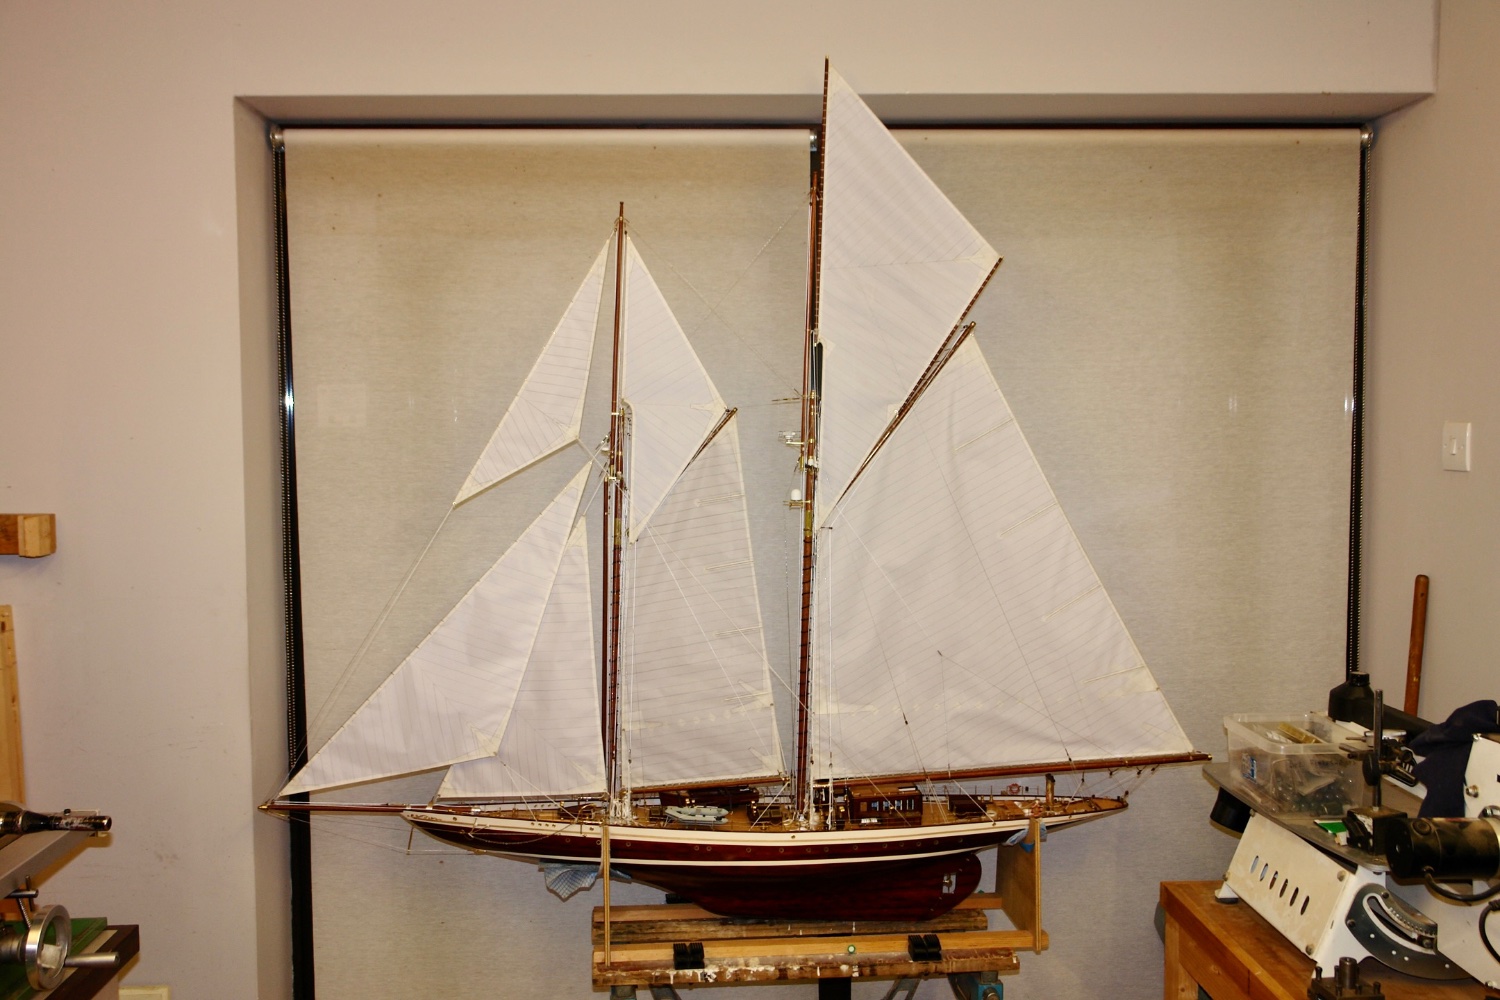
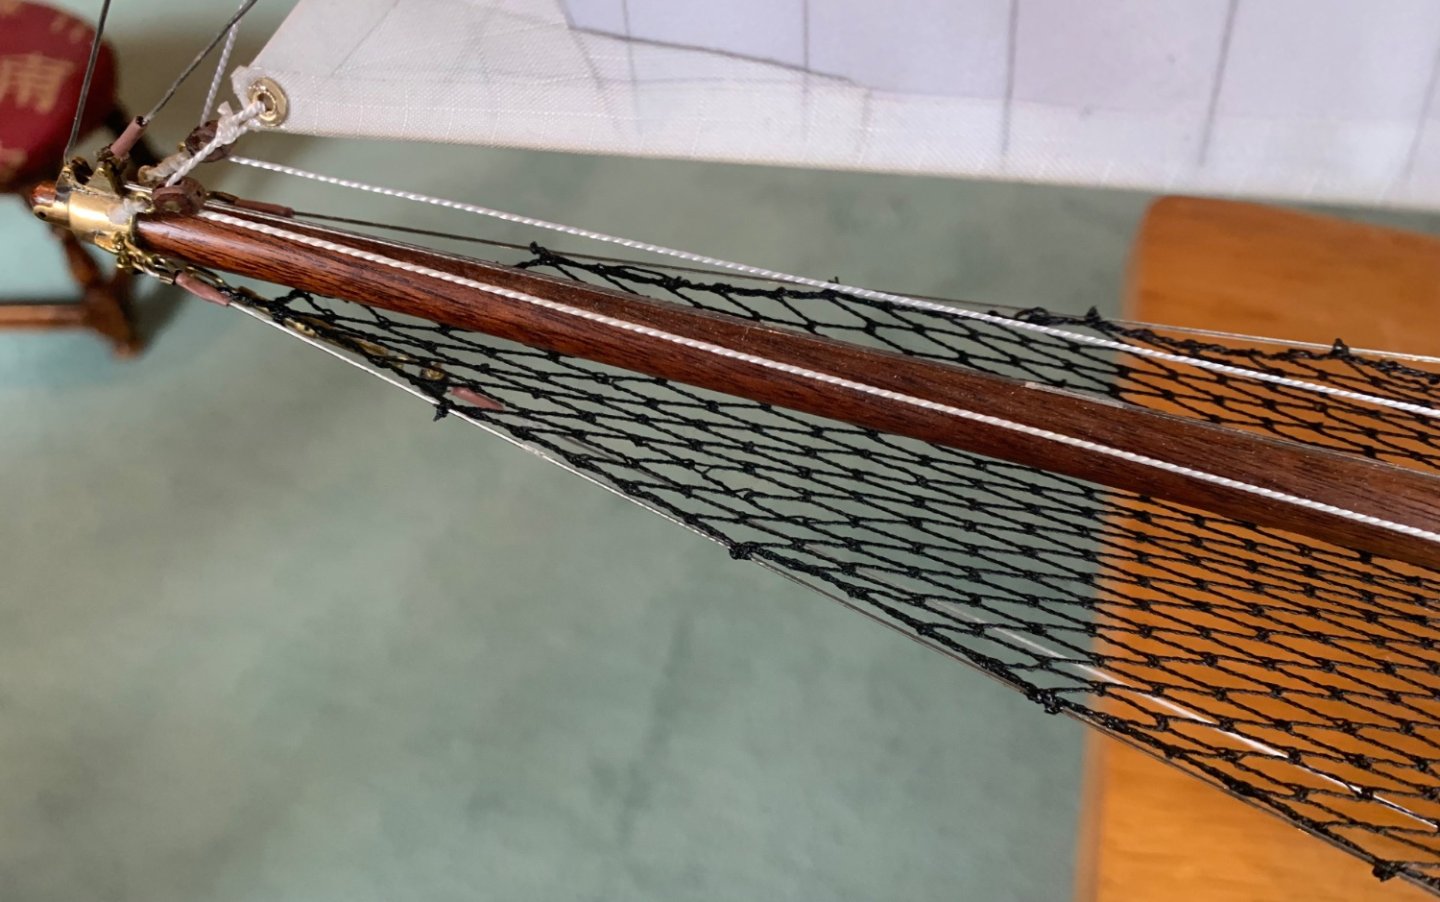
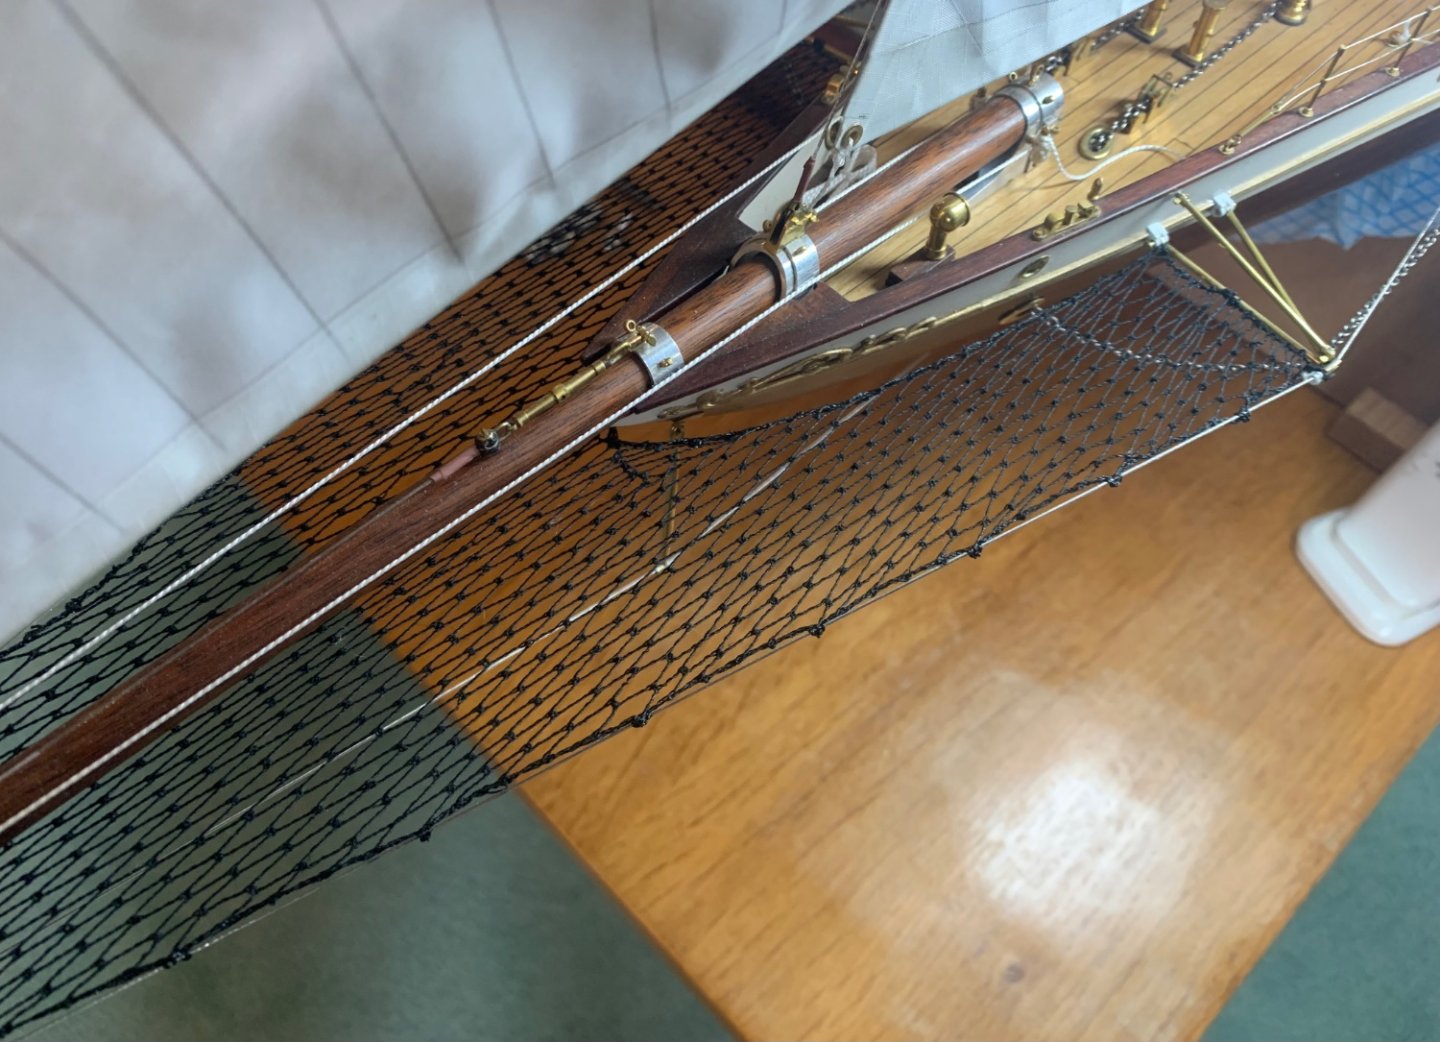
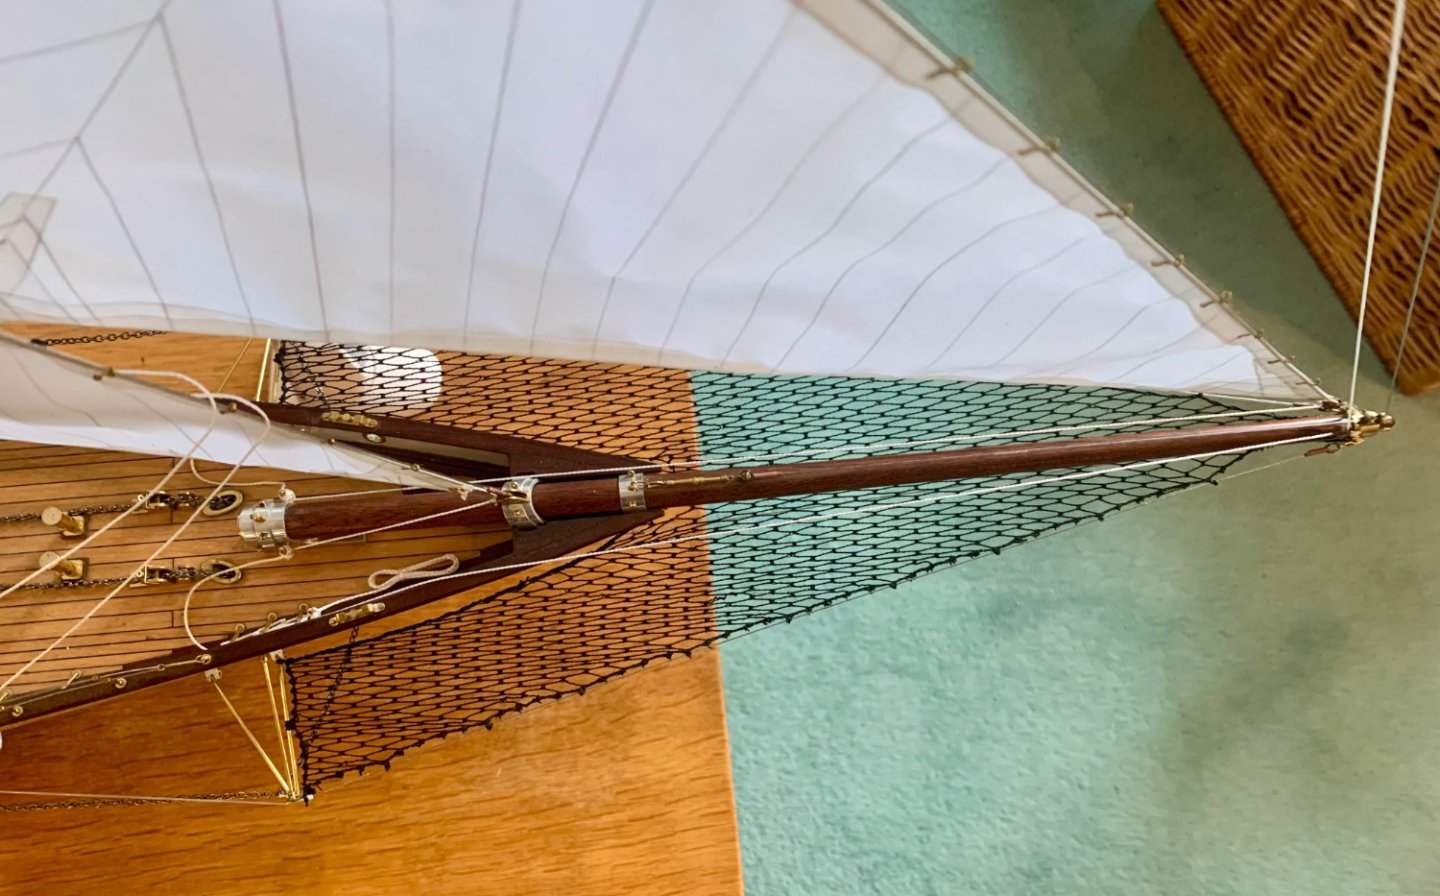
Druxey, no its naked as the day it was made, just fitted with a bit of tension. The most pleasing bit is how nicely the edge closest to the hull sits. I was a bit worried that I would need to reinforce this with wire but in the event it naturally took up the required shape.
-
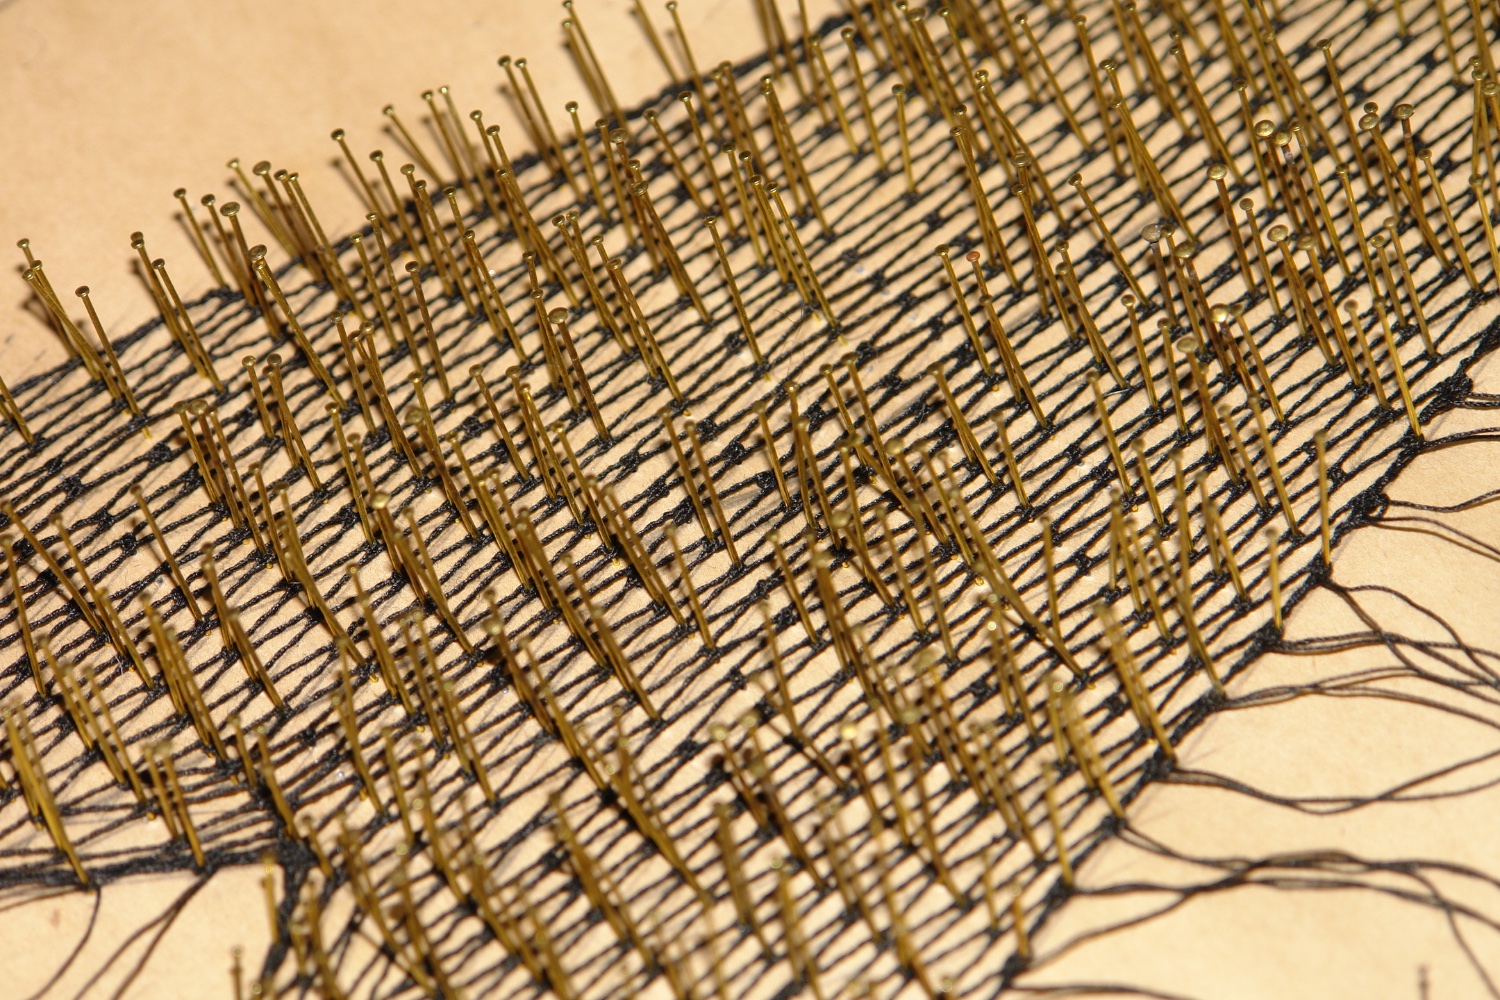
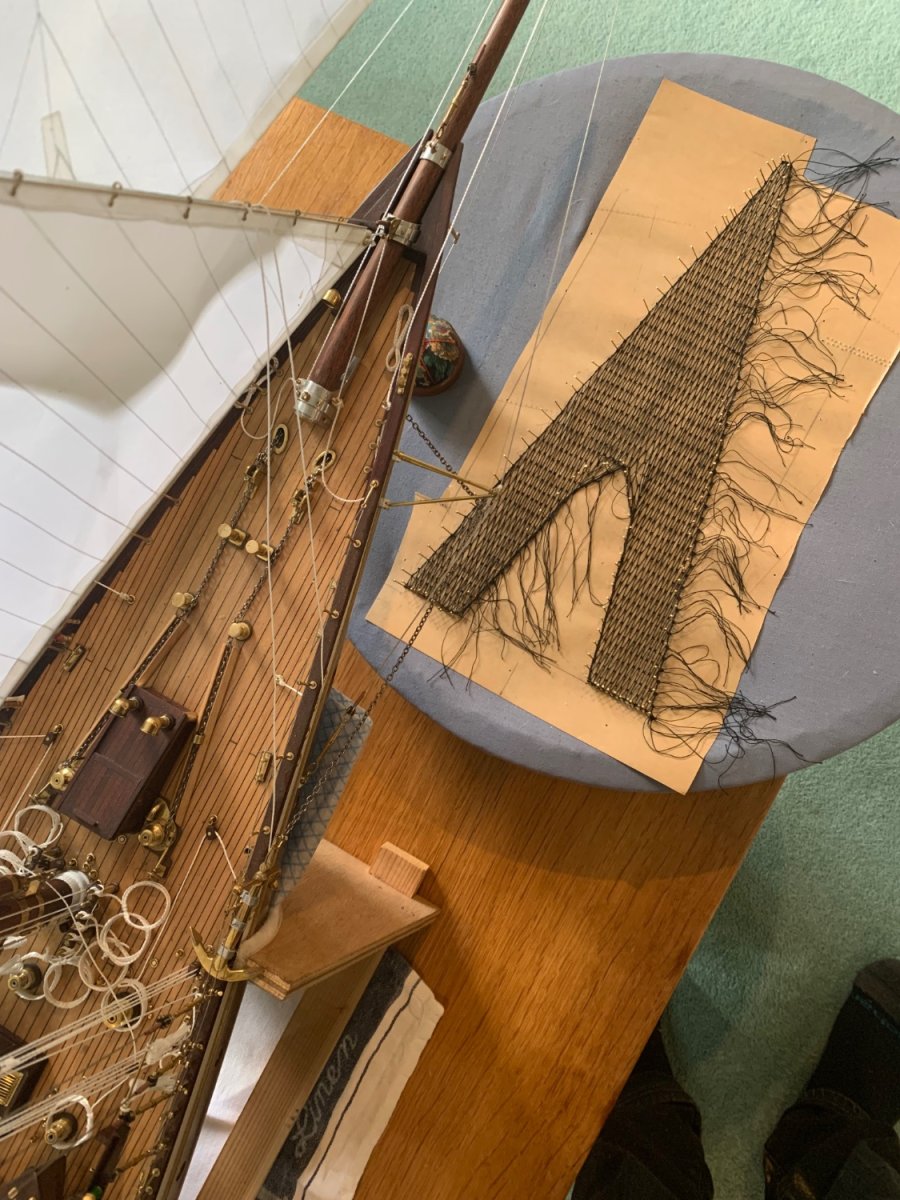
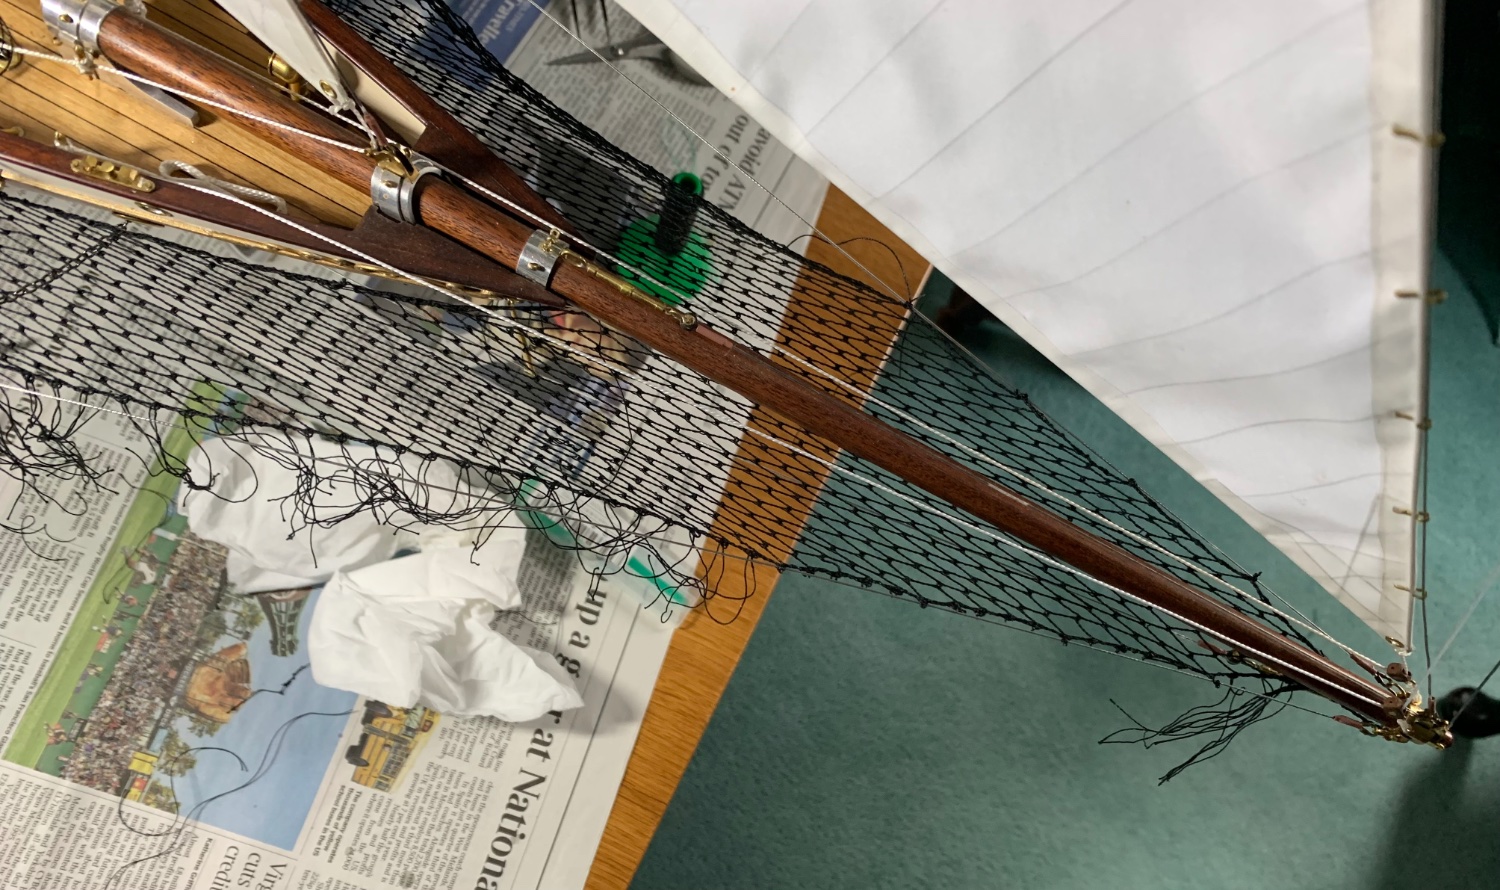
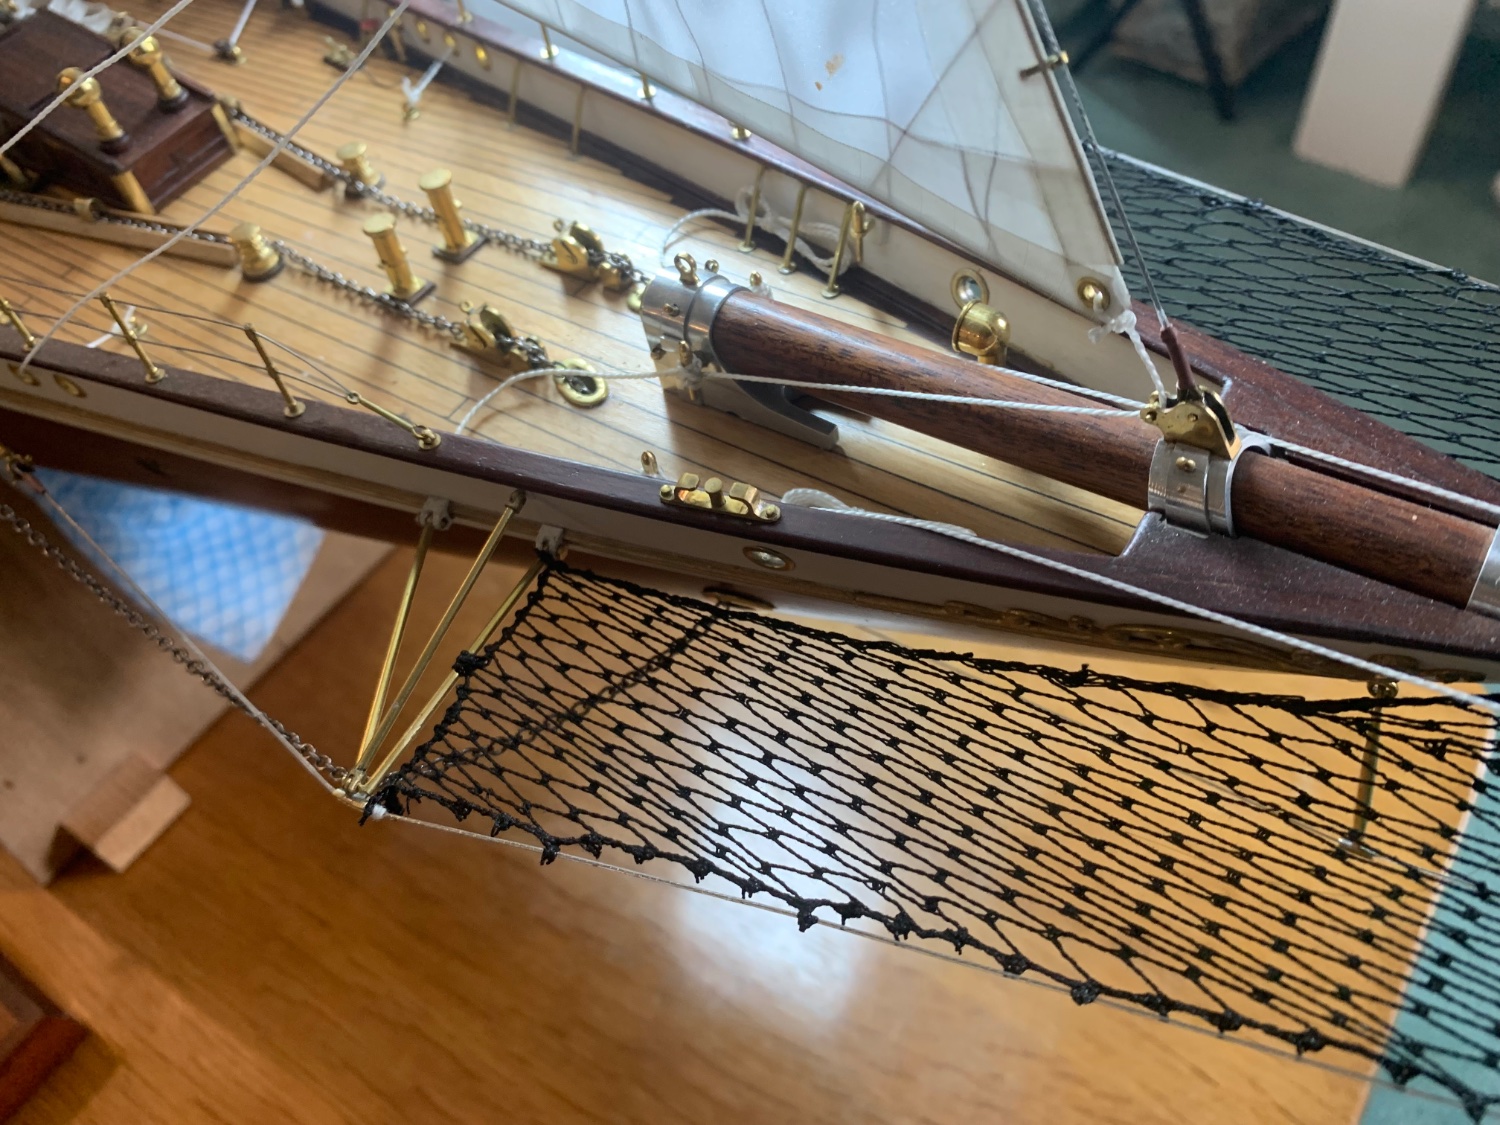
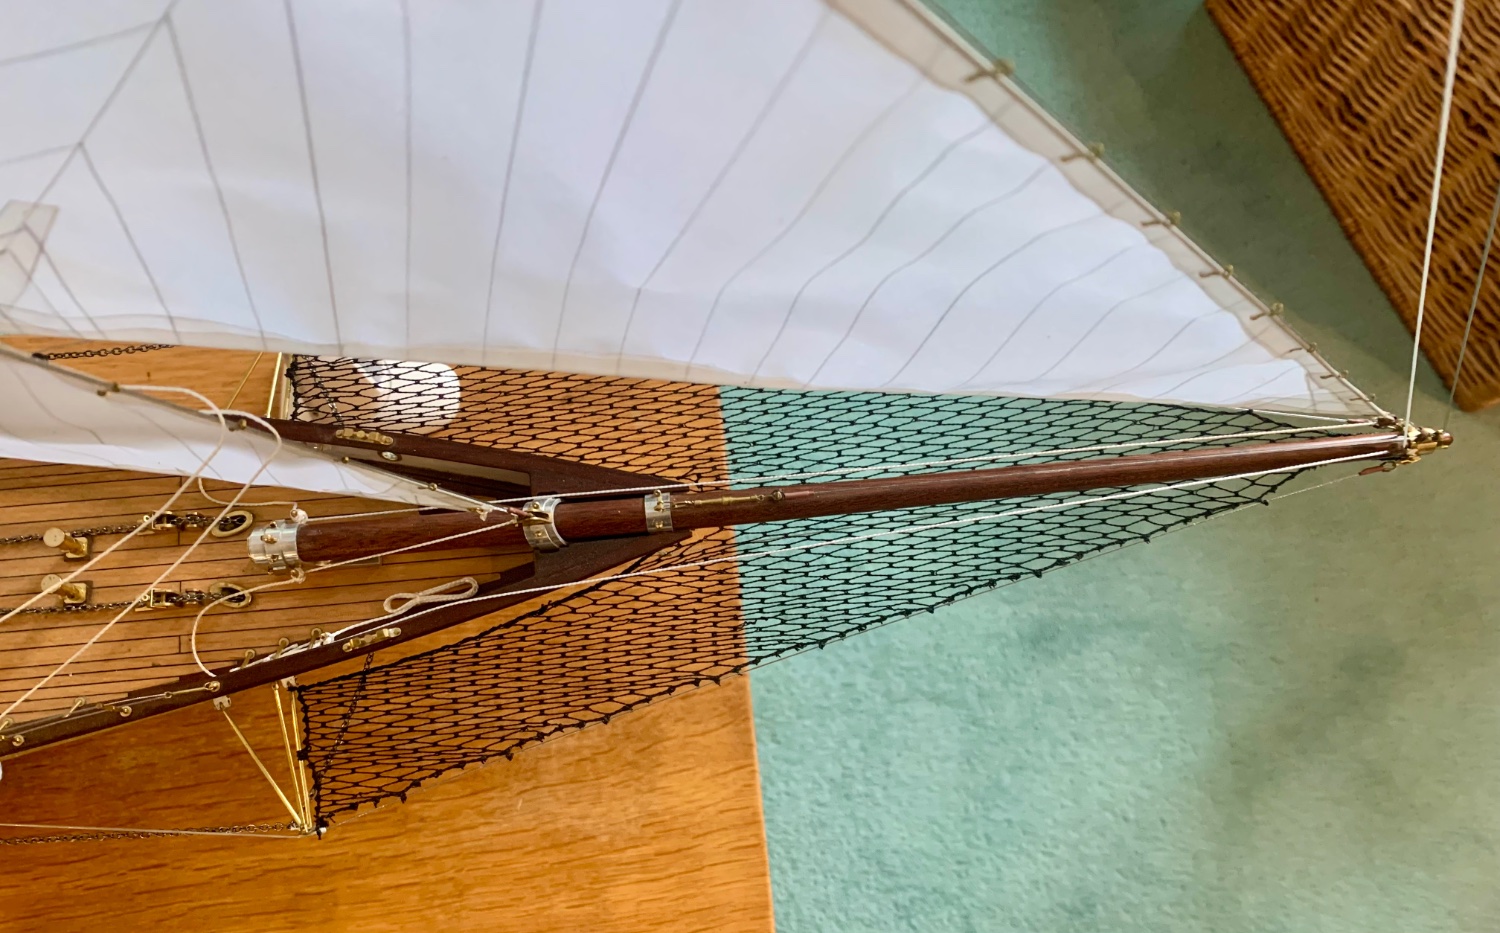
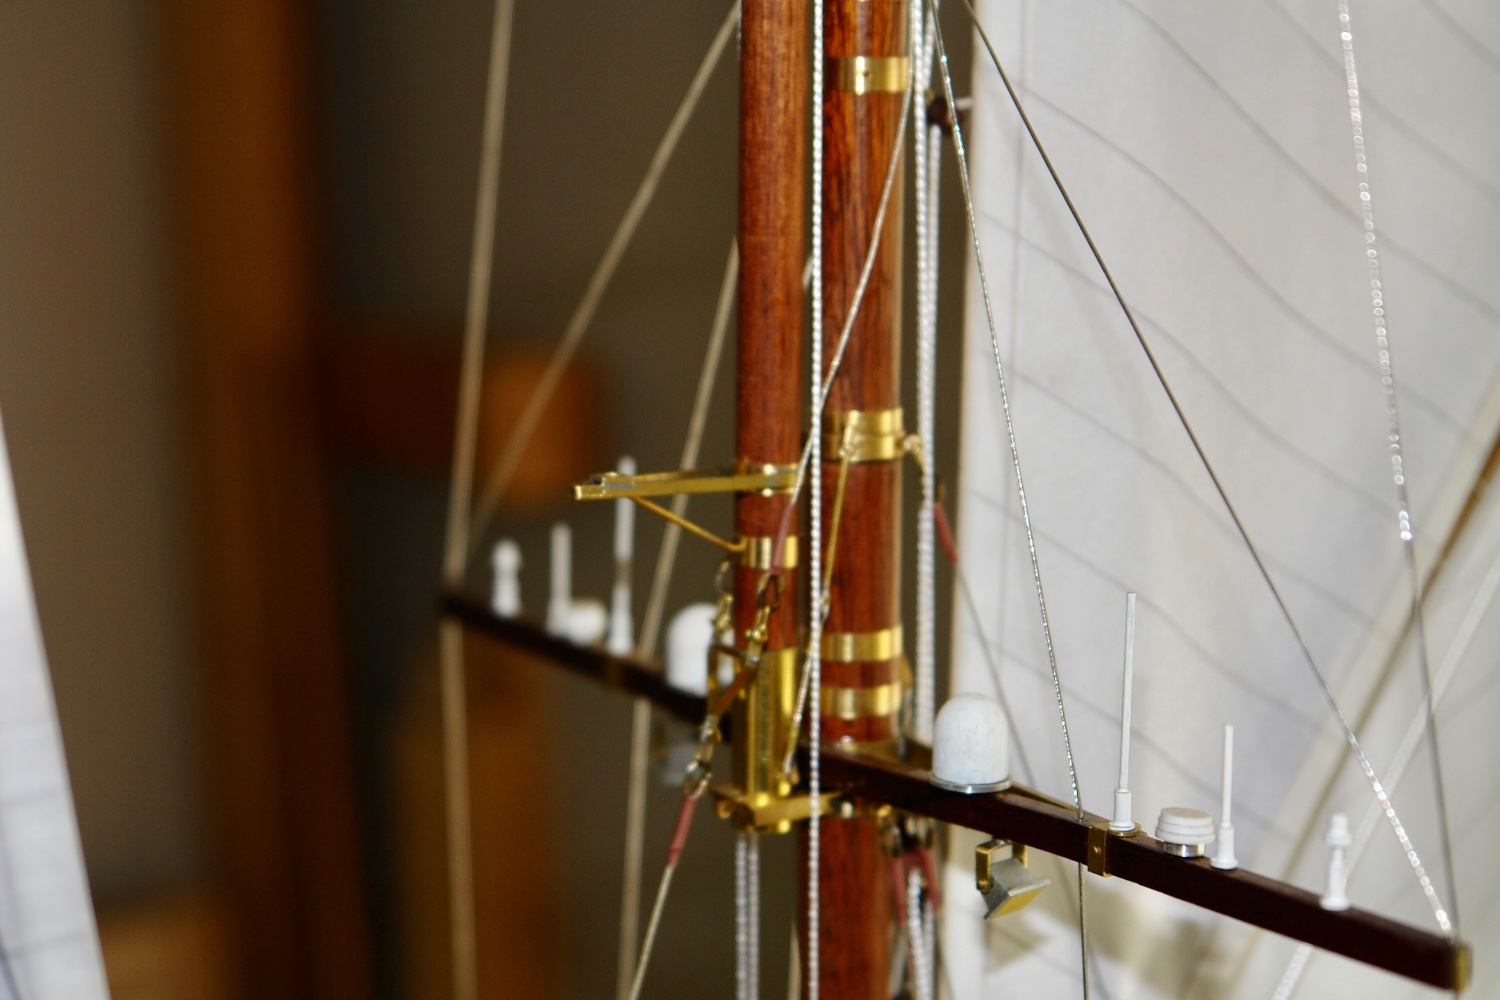
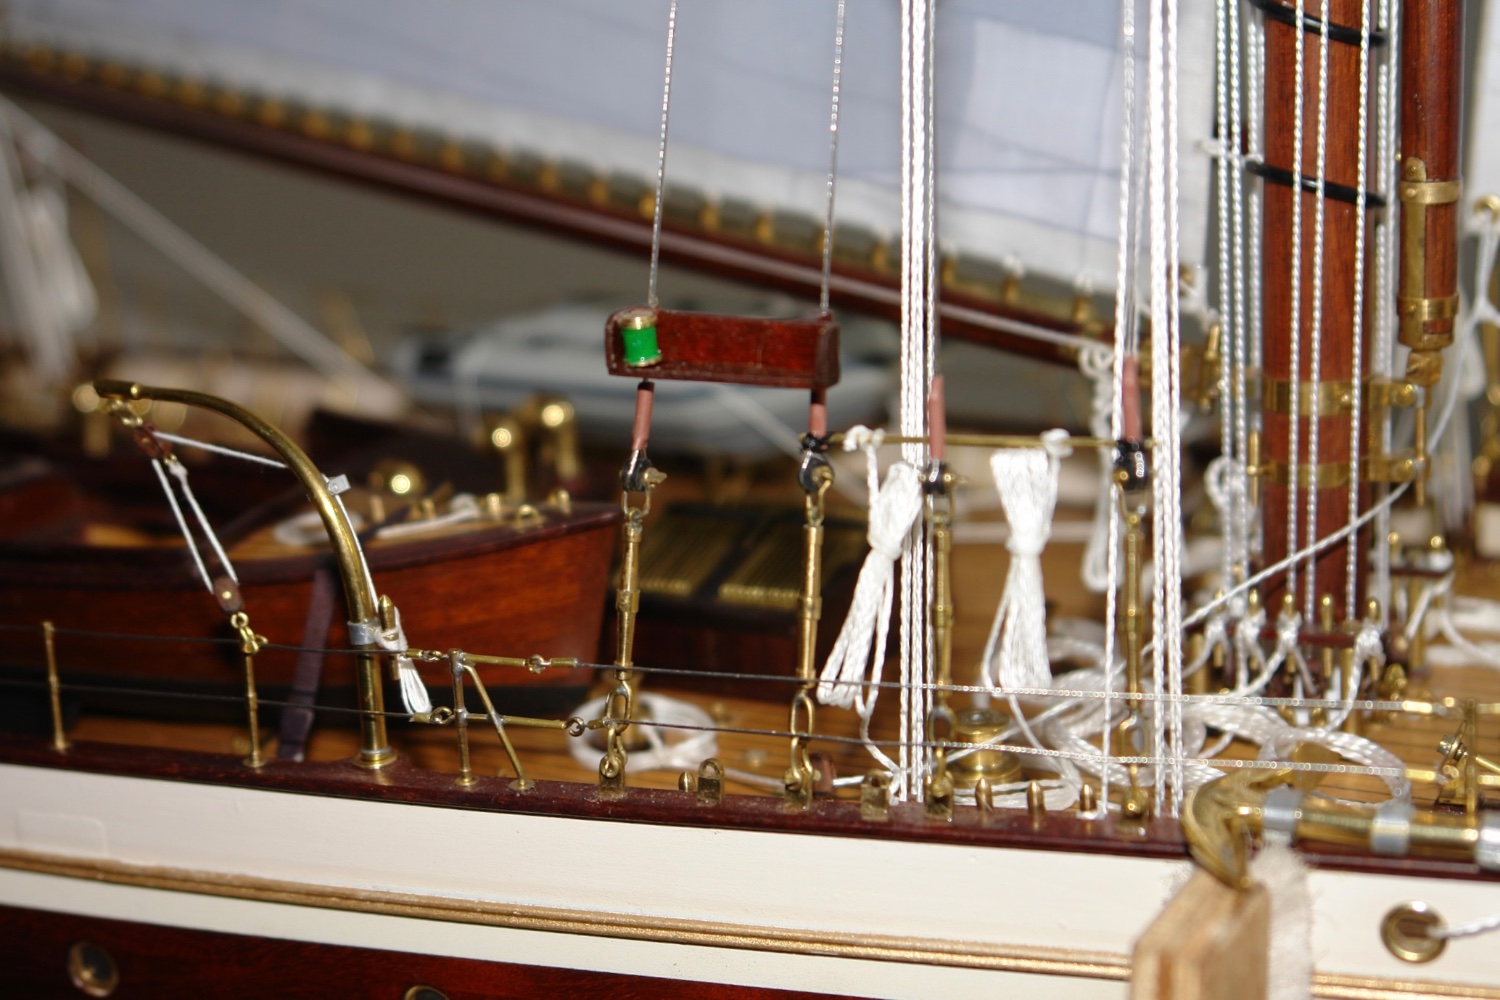
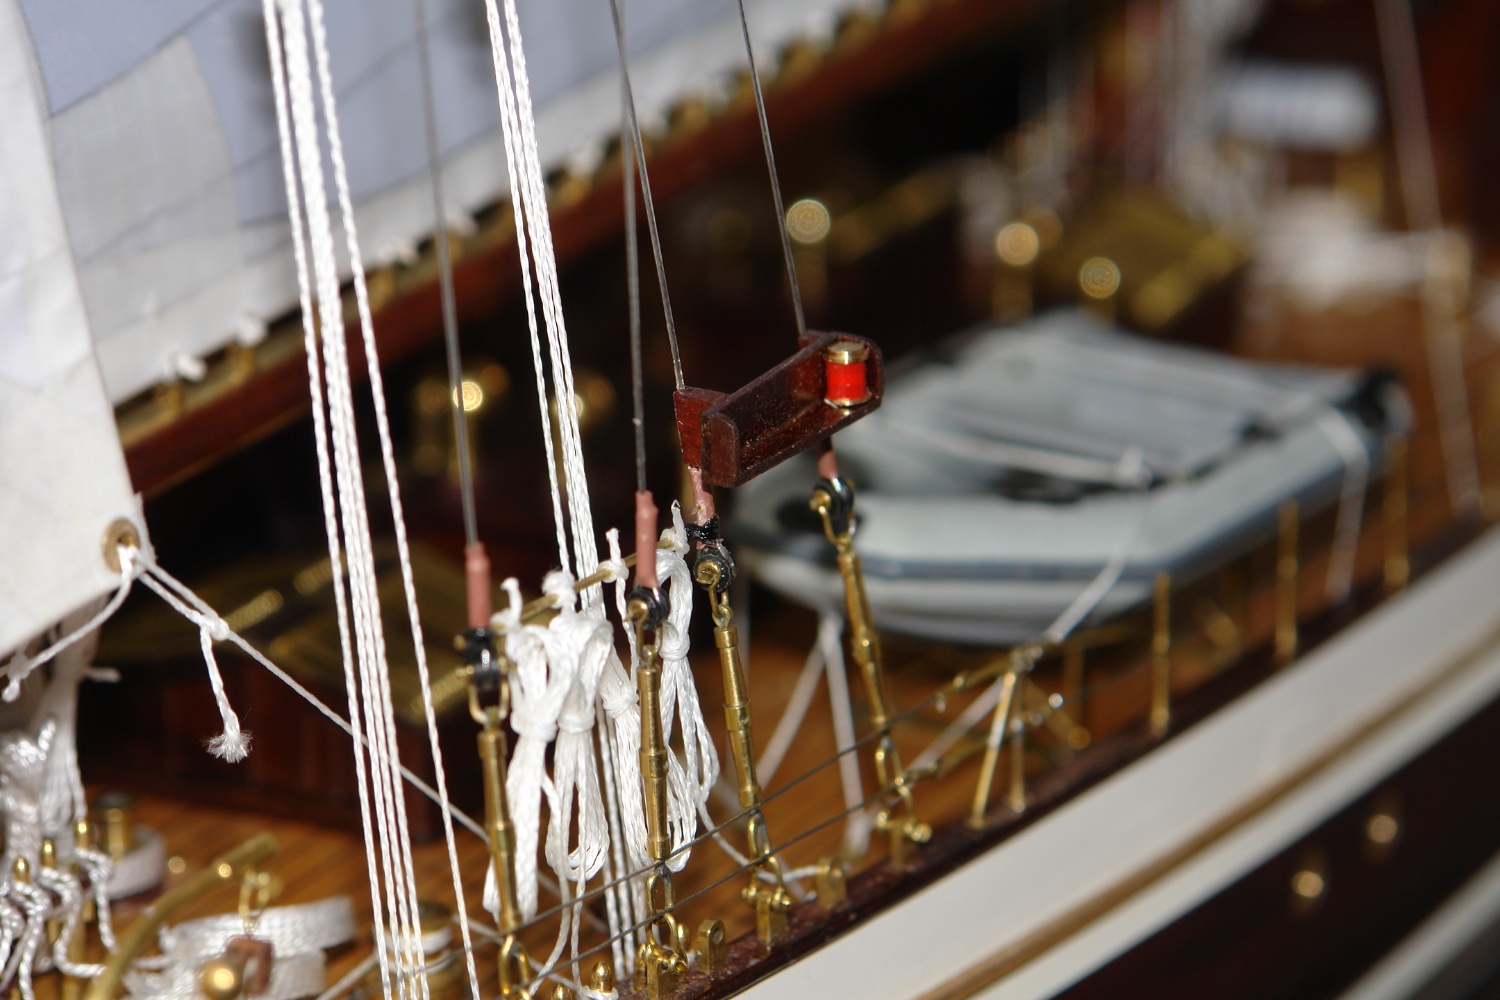
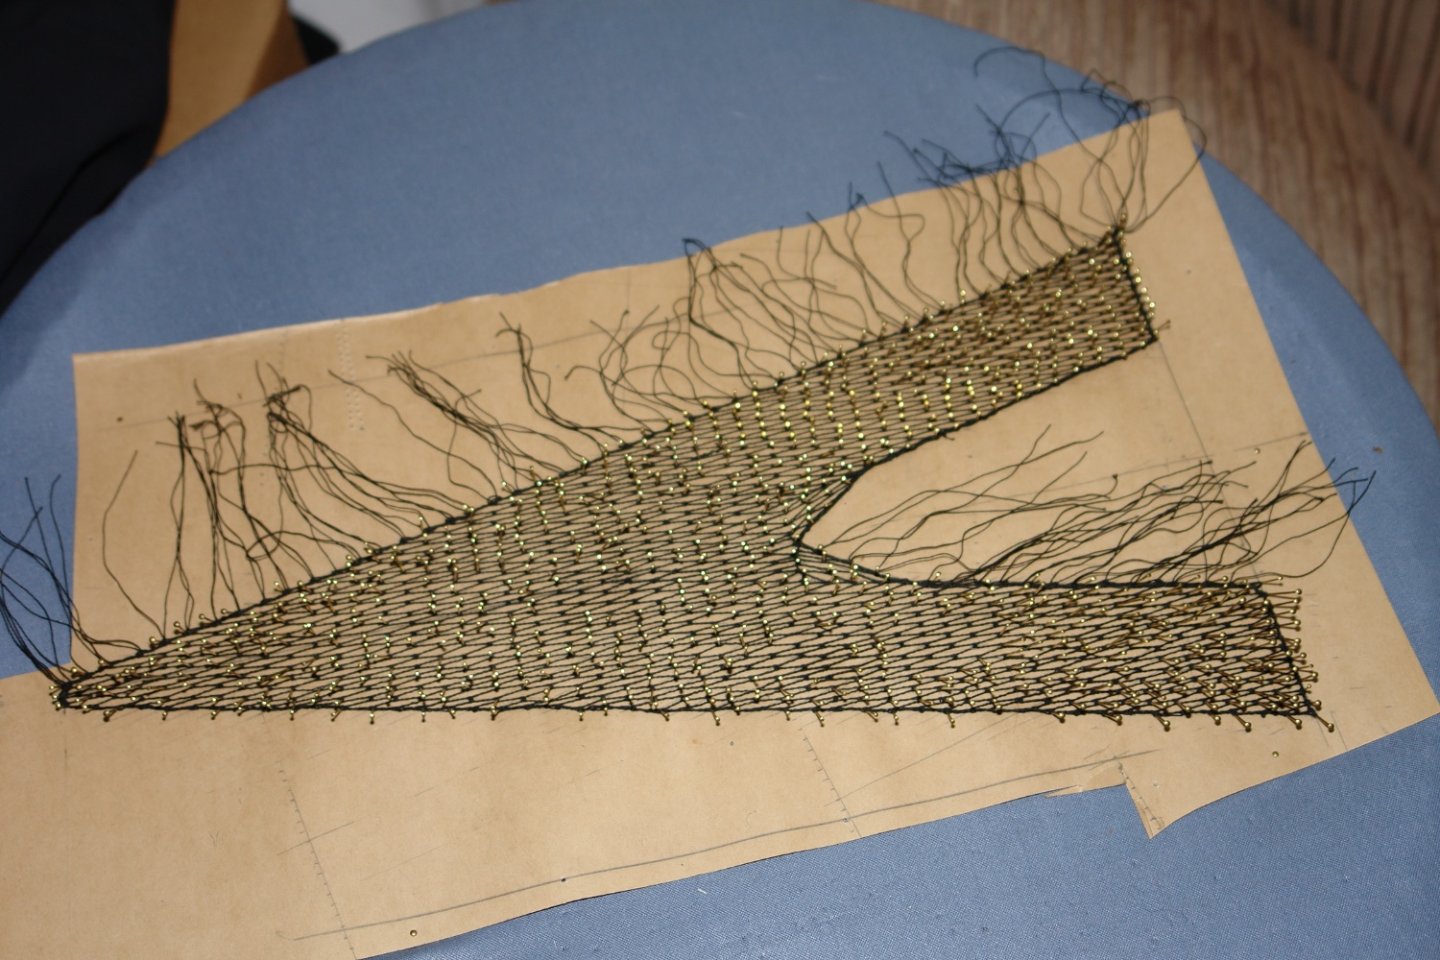
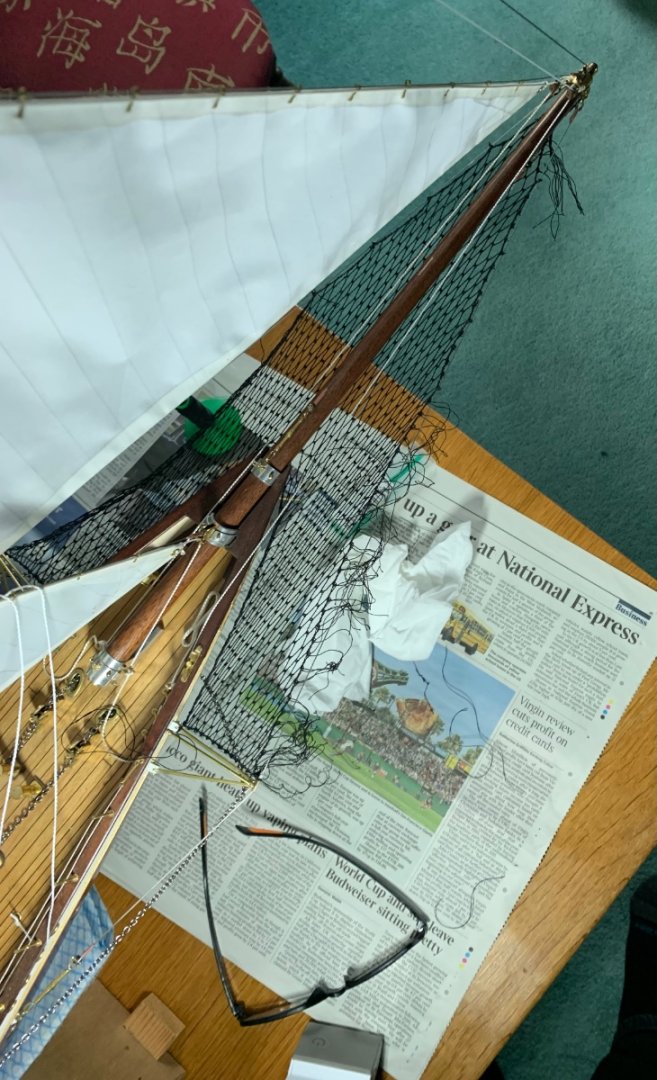
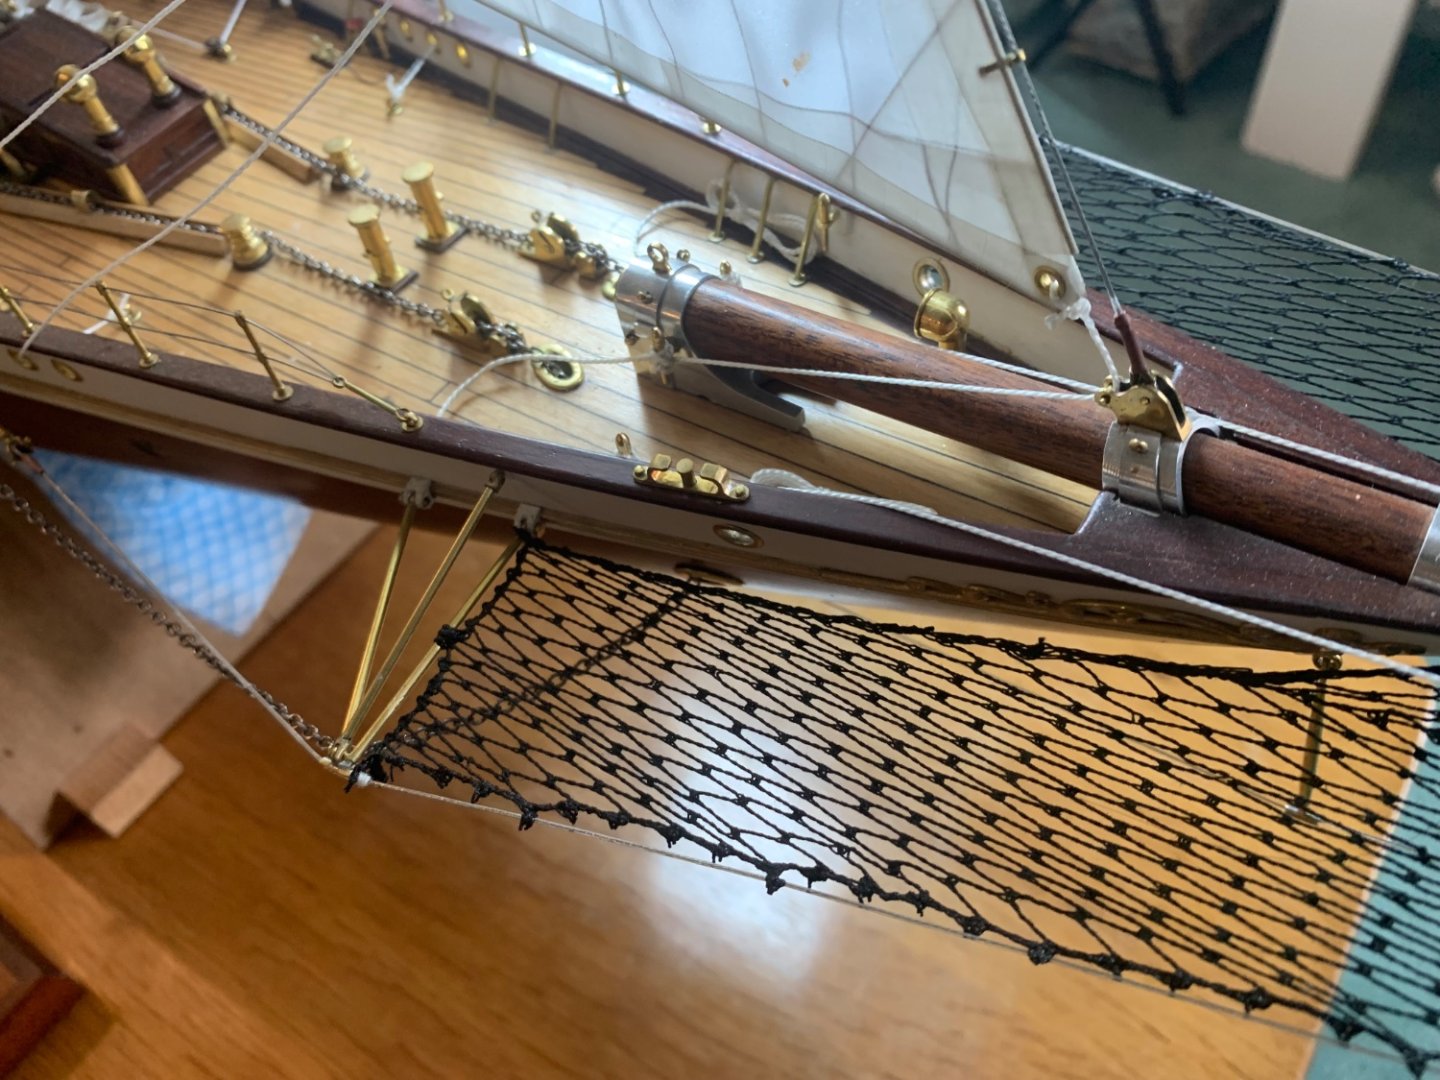
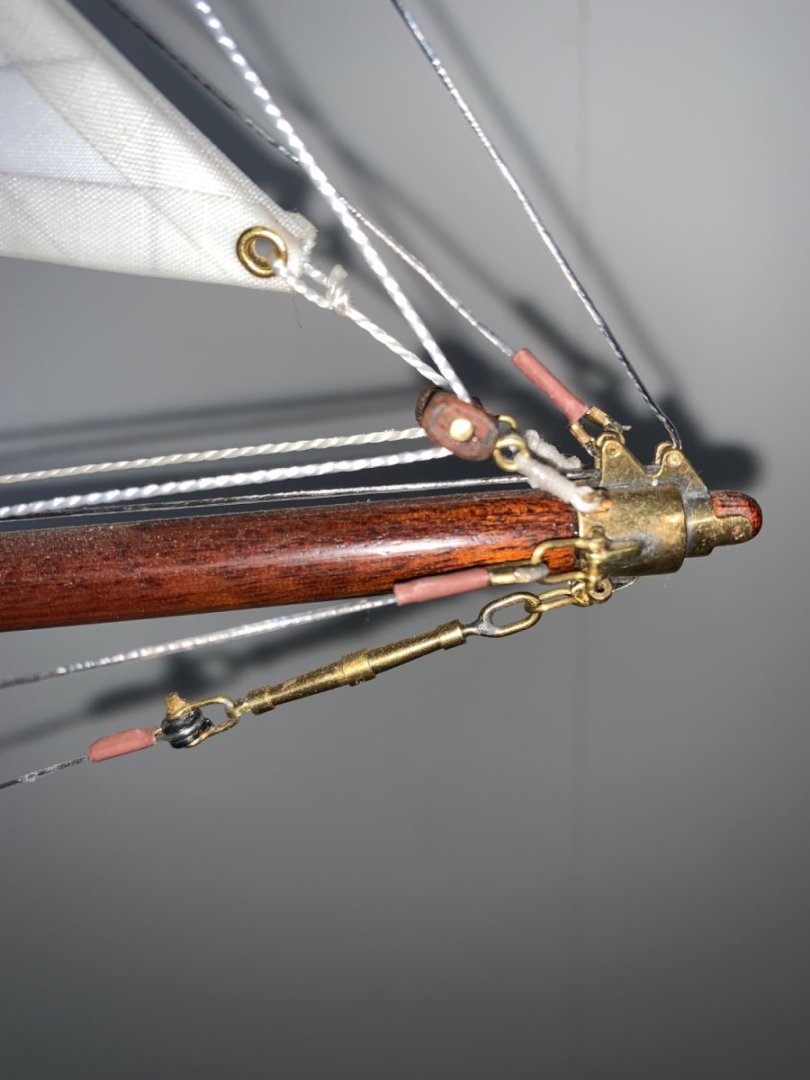
I know, I should resign before I am sacked. No - that is the domain of my lady wife and I don't need the competition. I think at present he has a full time job with Eberhard. Keith, Druxey, Hakan, Pat, Noel, Phil, Gary - thank you all for your very kind words. I finally tackled attaching the netting. I gingerly started to remove the pins and as my wife said the lace didn't disintegrate. The netting attaches at two points on the cranse iron, at multiple points on the jib stays and then to the brace for the stays. Once the pins were removed the lace was very flimsy and this added to the difficulty of getting it taught. I started by attaching the fore and aft lines working alternatively on each side. I then started working fore to aft with the port and starboard stay attachments. I removed all the stray ends as i progressed. It took me the best part of 2 afternoons to get the net looking suitably taught but I was very pleased with the result and in particular the contribution of my better half. Not much more to do now but I do need to make a start on the display cradle.


-
We have all gone soft. Don’t you remember the electric fires with coiled wire behind a grid wide enough for kids to push their fingers through. In my day an electric shock a week was considered a good way of toughening kids up. All the electrical equipment in our house had mandatory rat chewed flexes repaired expertly with scotch tape or bandaids.😐
- 227 replies
-
- 11
-

-

-

-
Good luck with the model. You are going to need a bigger supply of Maltesers.
- 9 replies
-
- 4
-
-
- German
- Battleship
- (and 1 more)
-
Hakan, the framing and planking are looking pretty special. Excellent job so far. Sorry you didn’t all get together and I hope they are all well soon. There is always next Christmas.
-
Amazing job
-
Best wishes to you and your family Keith. My brother in law in Arizona says it might be as cold as 60f and that the barbecue Turkey may have to be eaten with jumpers on. Keep warm.
-
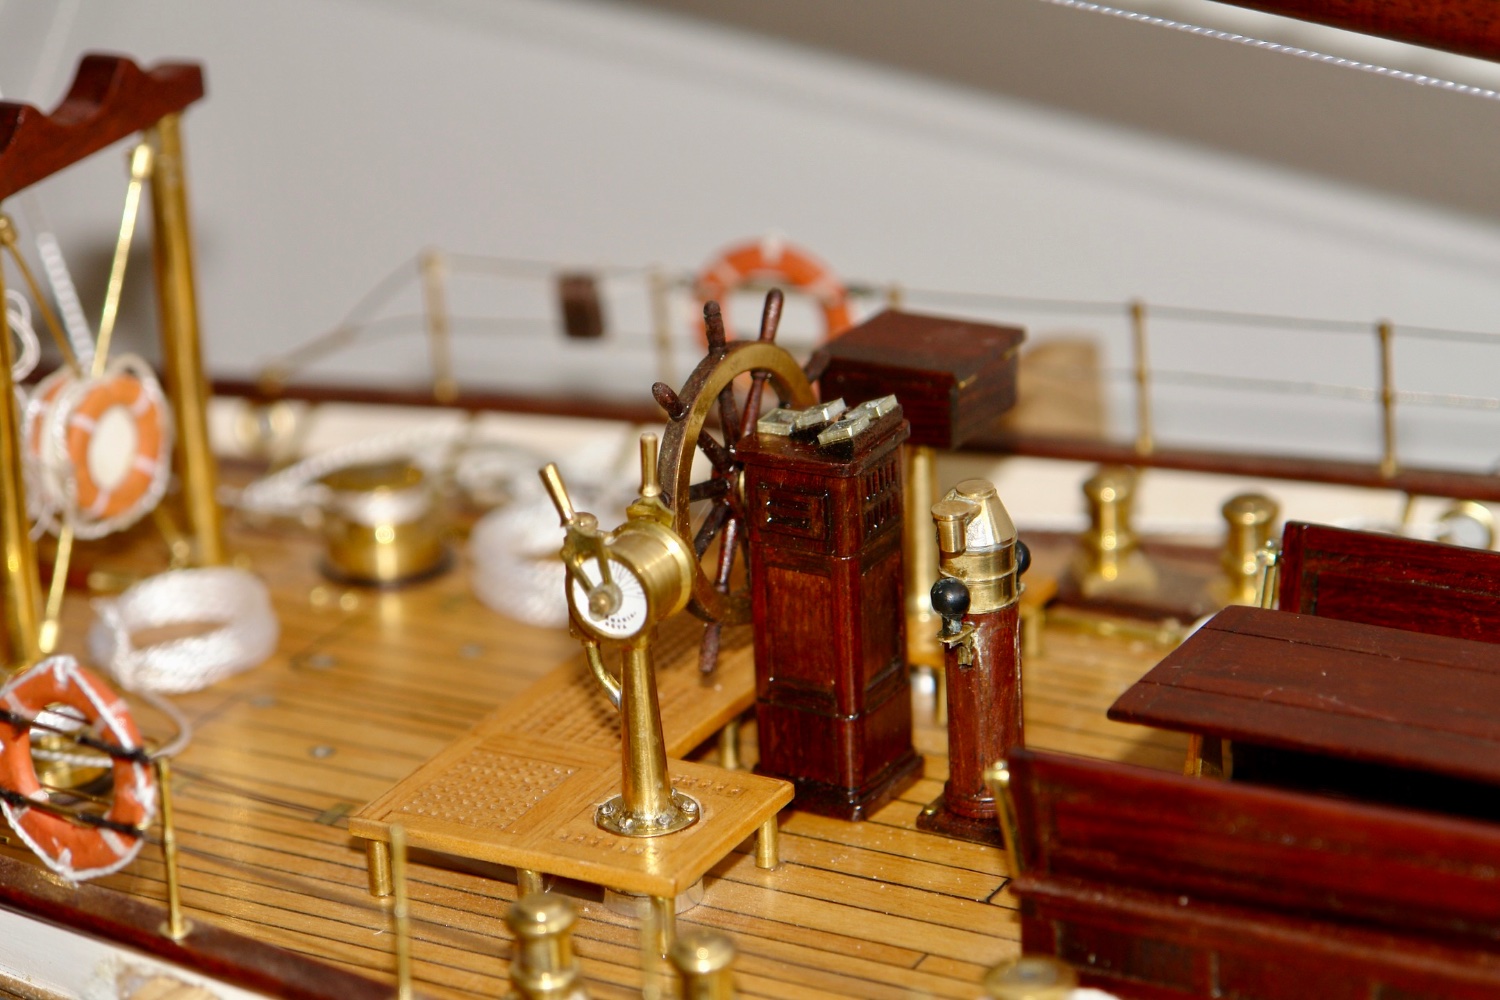
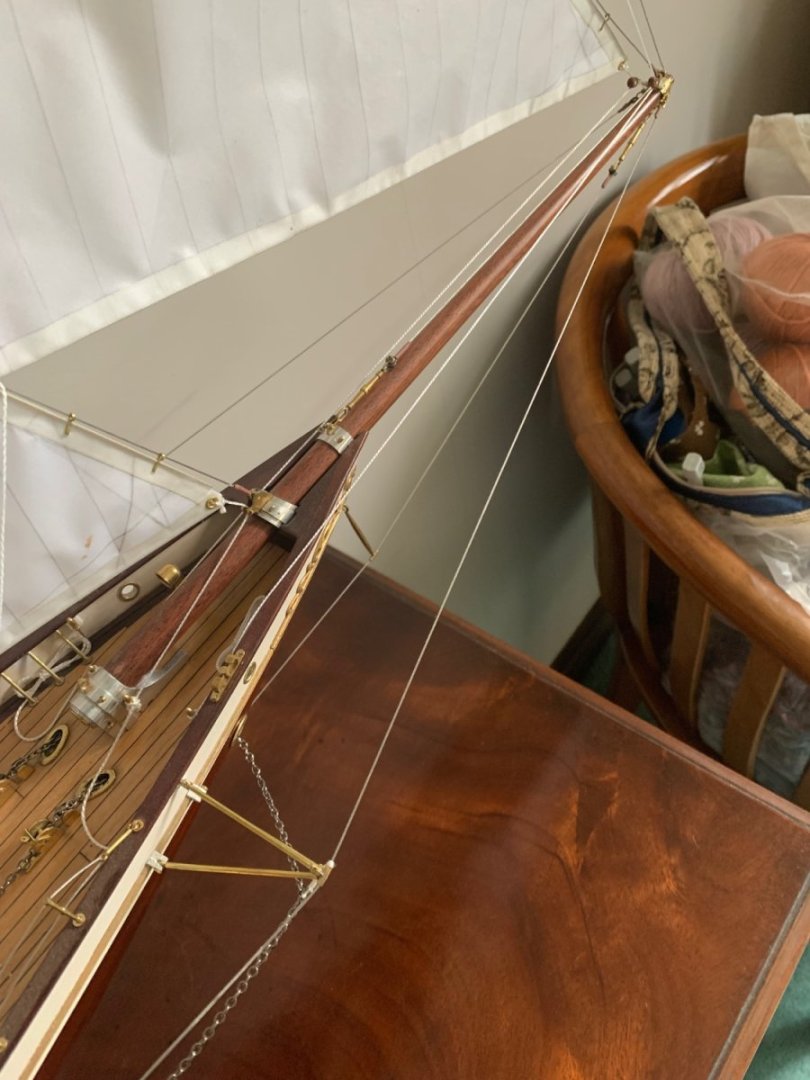
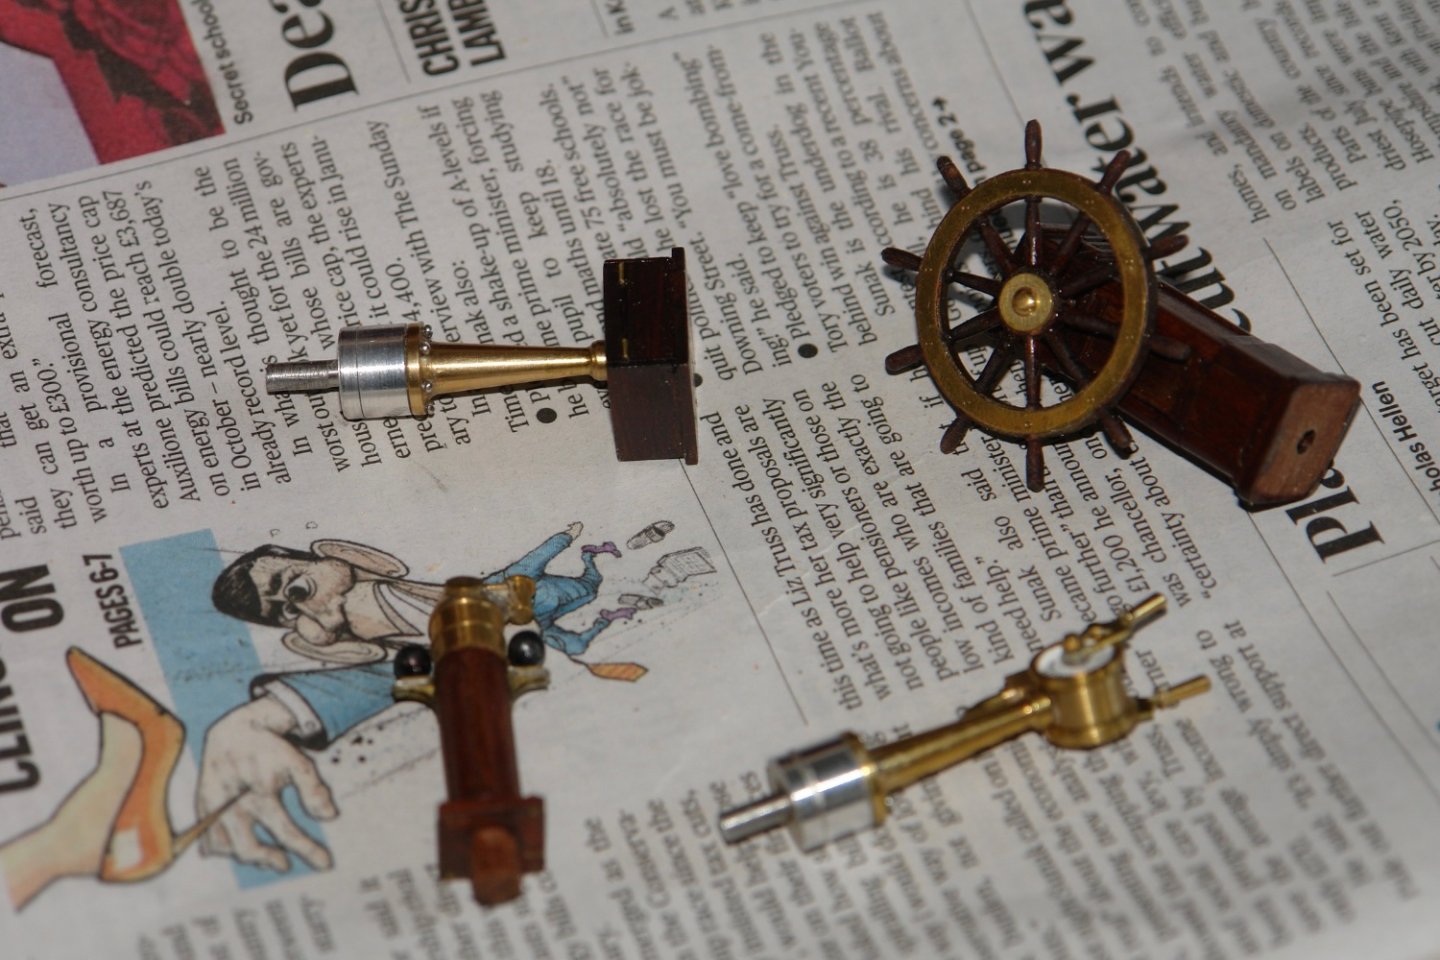
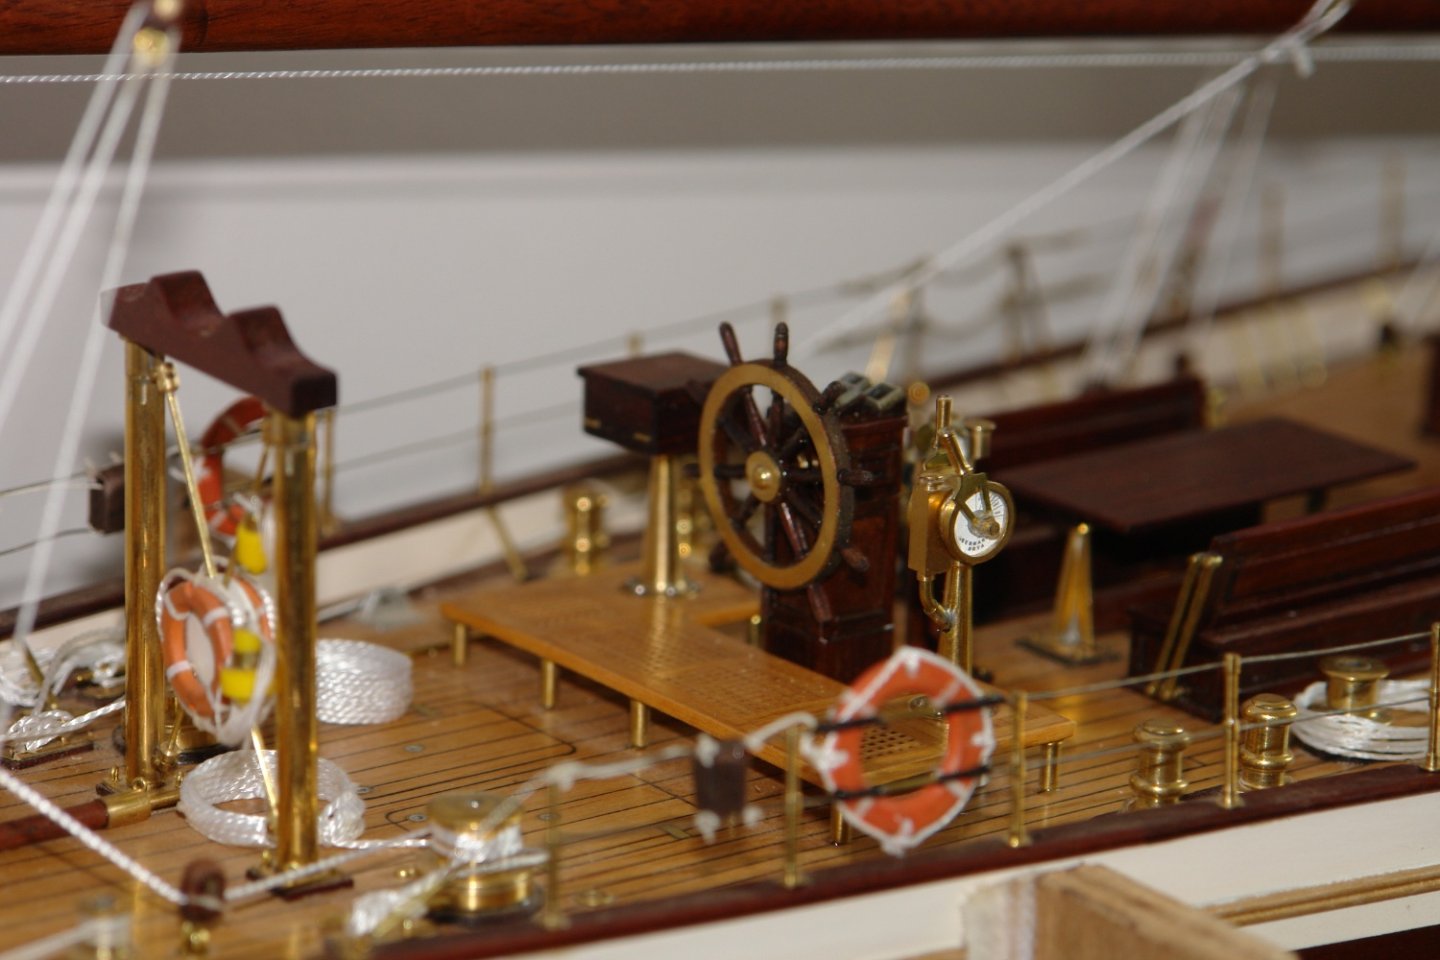
Thank you all - unfortunately I failed - it's not finished - Christmas got in the way. But here is how she stands. I had made the telegraph, wheel, binnacle and instruments some time ago but not fitted them in case of damage. So I glued them in place. I then stared thinking about attaching the netting to the already crowded cranse iron. You can see the attachment eye at the 7 o'clock position. I am nervously approaching the task of removing all the pins from the netting. I think it will all collapse in a tangled heap but the Admiral assures me otherwise. Merry Christmas.


-
Simply magnificent Valeriy. I hope that you and your family are safe and well over the festive season and through the coming year.
-
Brian, looks can be deceptive. It gets more and more untidy as I work and I start to get frustrated as tools and parts start to get lost. Finally when I am doing more searching than working I give up and tidy everything. Keith, Dan, Andy, Steve, Mark, Druxey, Lefebvre, Brian, Pat, Zbip, Richard, and everyone else thank you all for your continuing interest and support. To everyone may I wish you and your family a Happy Christmas.
-
Nicely done Roger. The best fun is working out how to do it.
-
Ras - nice job on the lockers. I particularly like the cup holder for the six pack of lager to the starboard side of the steering position.
-
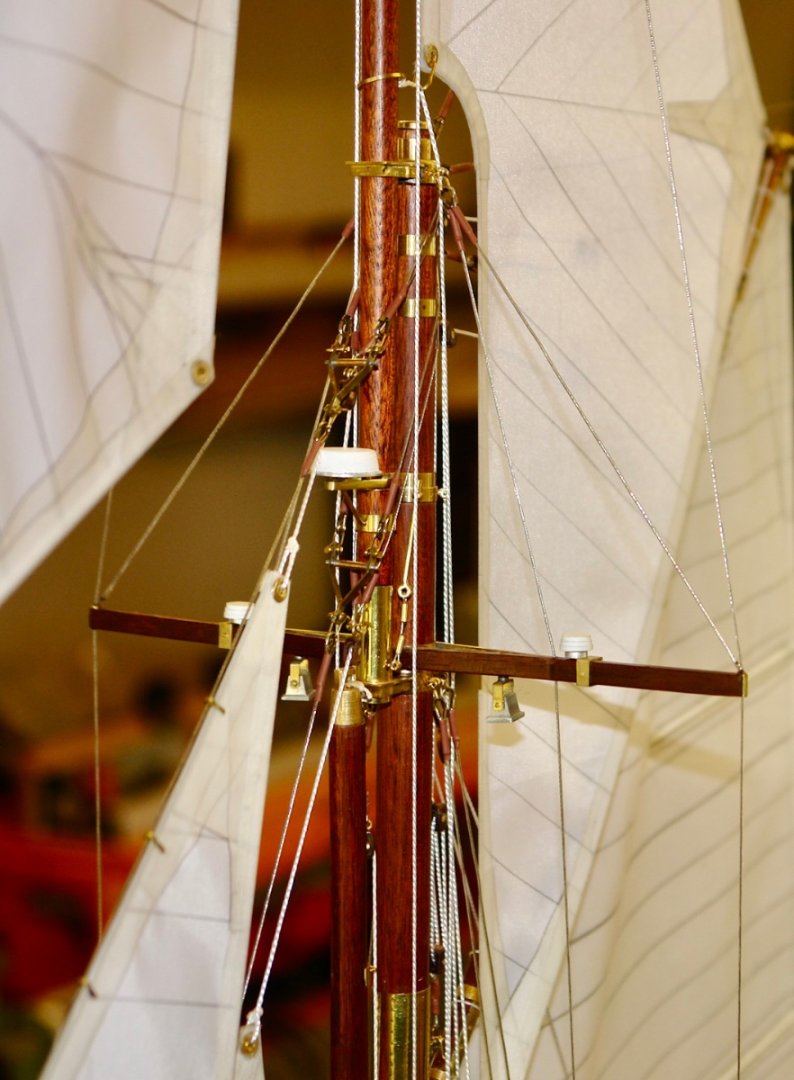
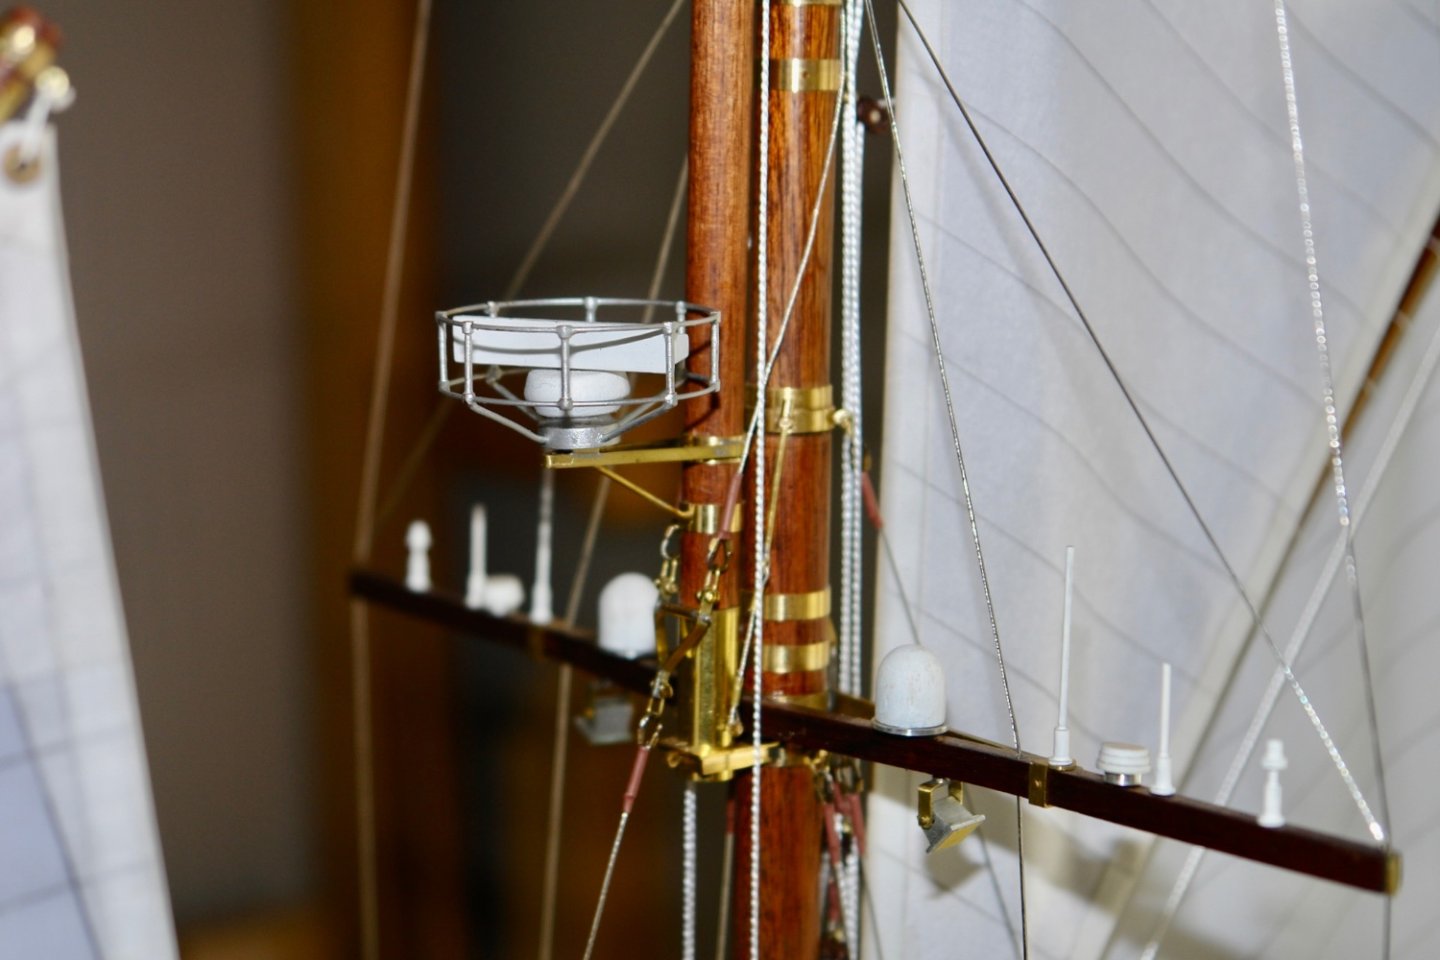
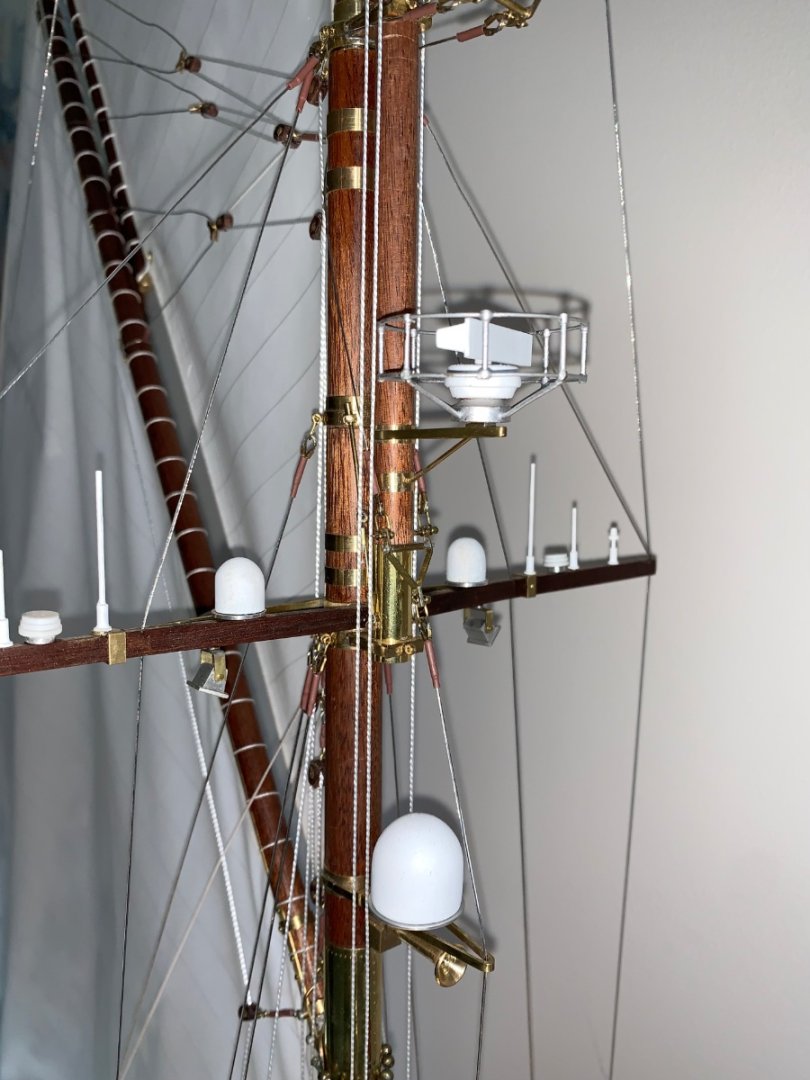
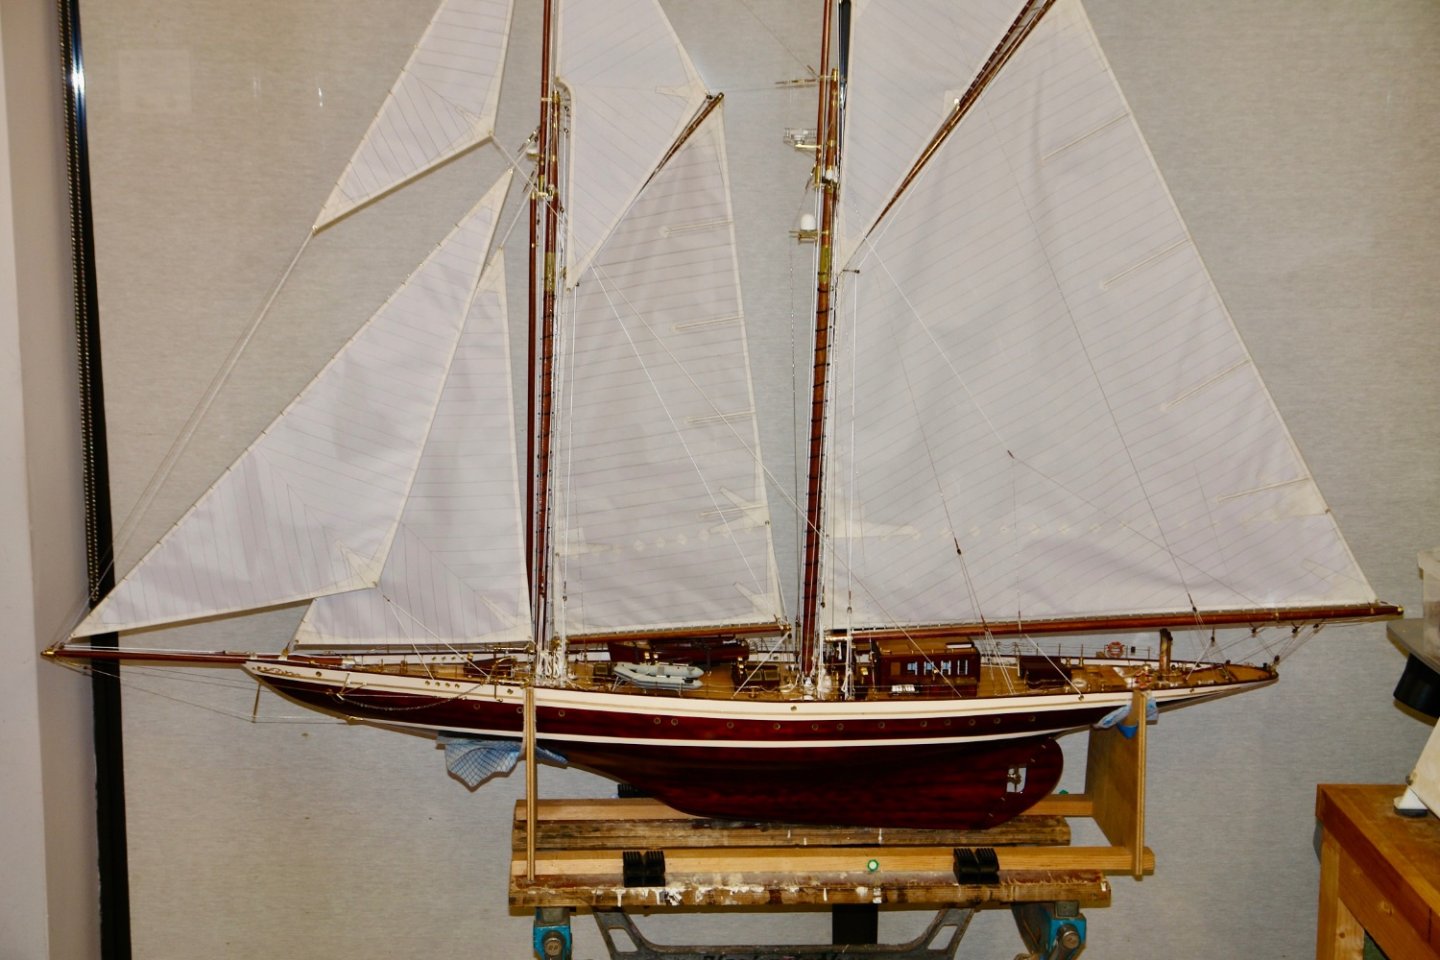
Thank you to everyone who has commented upon and / or liked my work. Firstly a bit of catching up with the upper ends of the masts. The lower foremast showing the crosstree and the shrouds. The mainmast crosstree and shrouds prior to mounting the radar. The small job of gluing on the previously made radar was completed. $ The mountings for the port and starboard navigation lights were made from .040" thick mahogany. Painted brass lights were then made and fitted. I still have a few things to do but it is now typically 2 to 3 deg c in the workshop so the model is going to be moved into the family room for completion. Here are the final 2 shots of Germania in the workshop.


-
Hermann - they were just a set I picked up through a google search. i have had a look but can't find the exact ones but these are very similar. https://www.aquamaremarine.com/uk/product/quick-release-pad-eye-ratchet-strap-kit-5-4m/
-
Druxey - noted ! will follow your advice. Veszett - it is steel - it is quite heavy so it should be ok. What a coincidence Chris. Dogs and Grandchildren are a delight.
-
The book "Jolie Brise - A Tall Ship's Tale" by Robin Bryer shows line drawing of the hull of the Jolie Brise taken off the actual hull in the 1926 by Jack Laurent Giles.
- 15 replies
-
- 1
-
-
- jolie brise
- pilot
- (and 1 more)
-
Mark - Thank you but I recall a story on MSW ( I think by Patrick of Omega fame) about a model yacht that was lost on its maiden voyage. Fingers crossed that she keeps it for some time as a memory of “ Grandi’.