Search the Community
Showing results for tags 'dumas'.
-
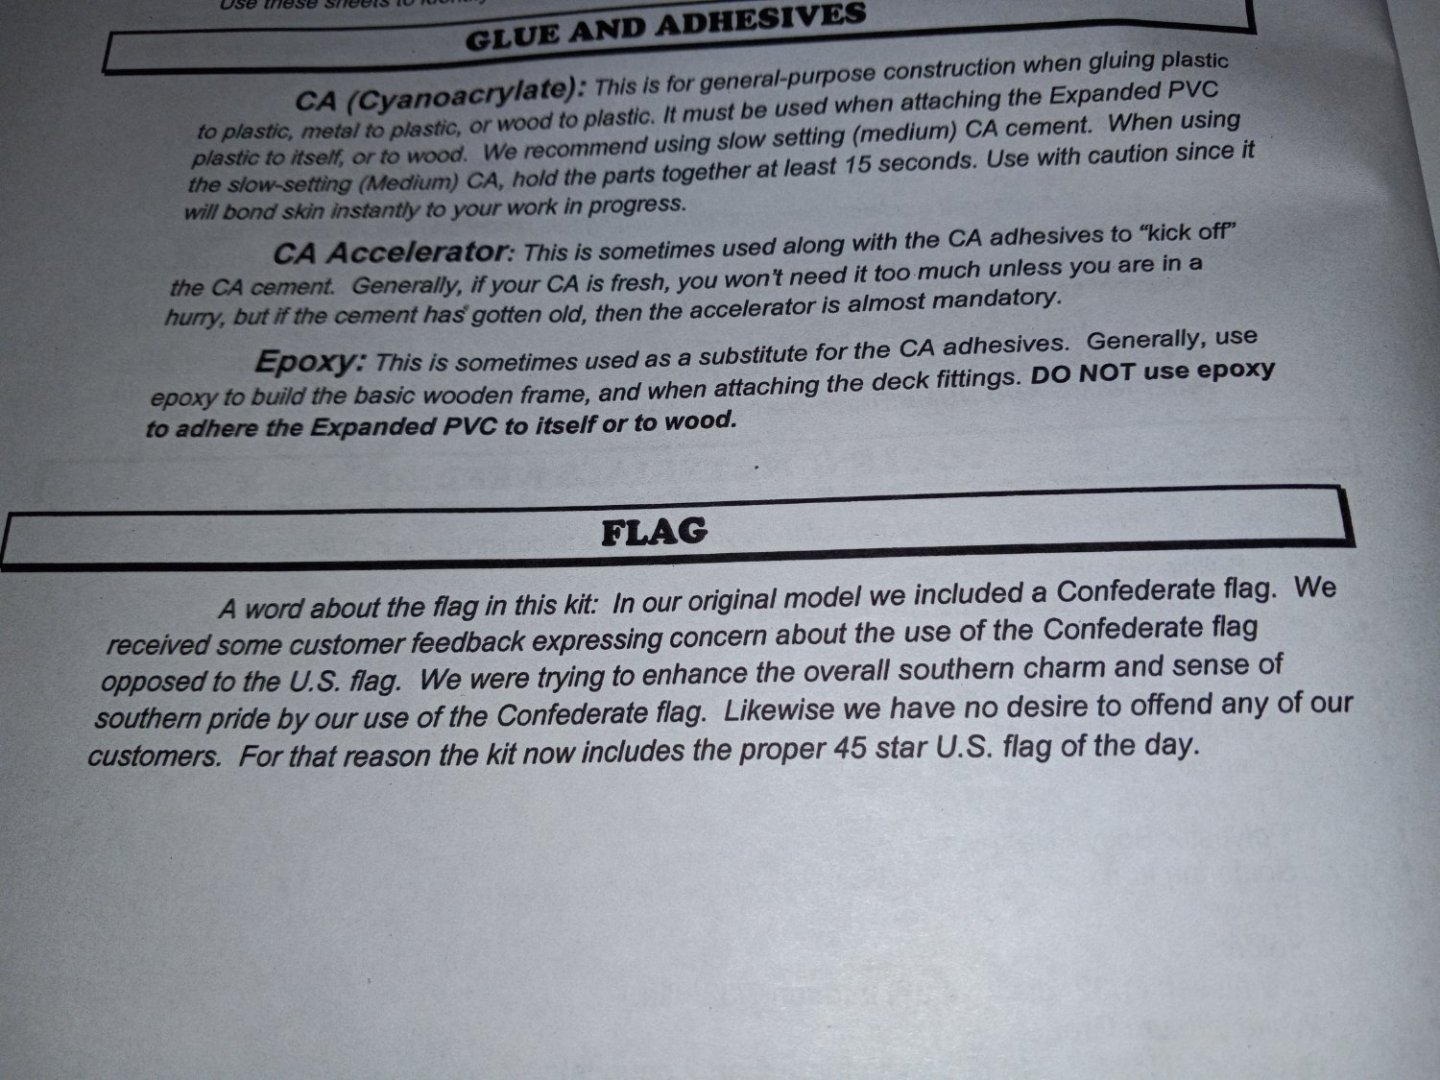
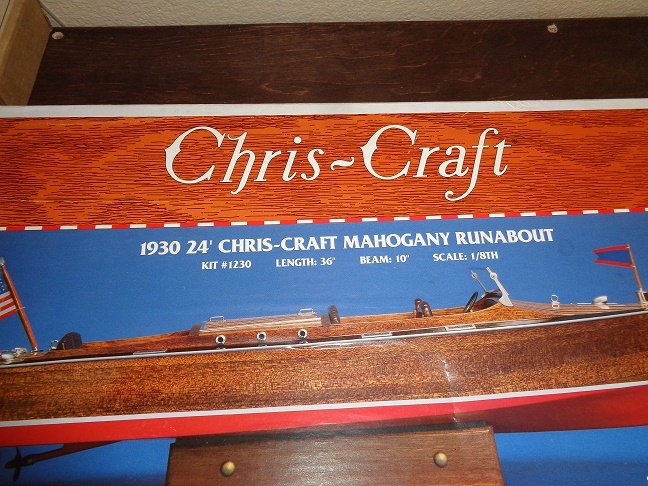
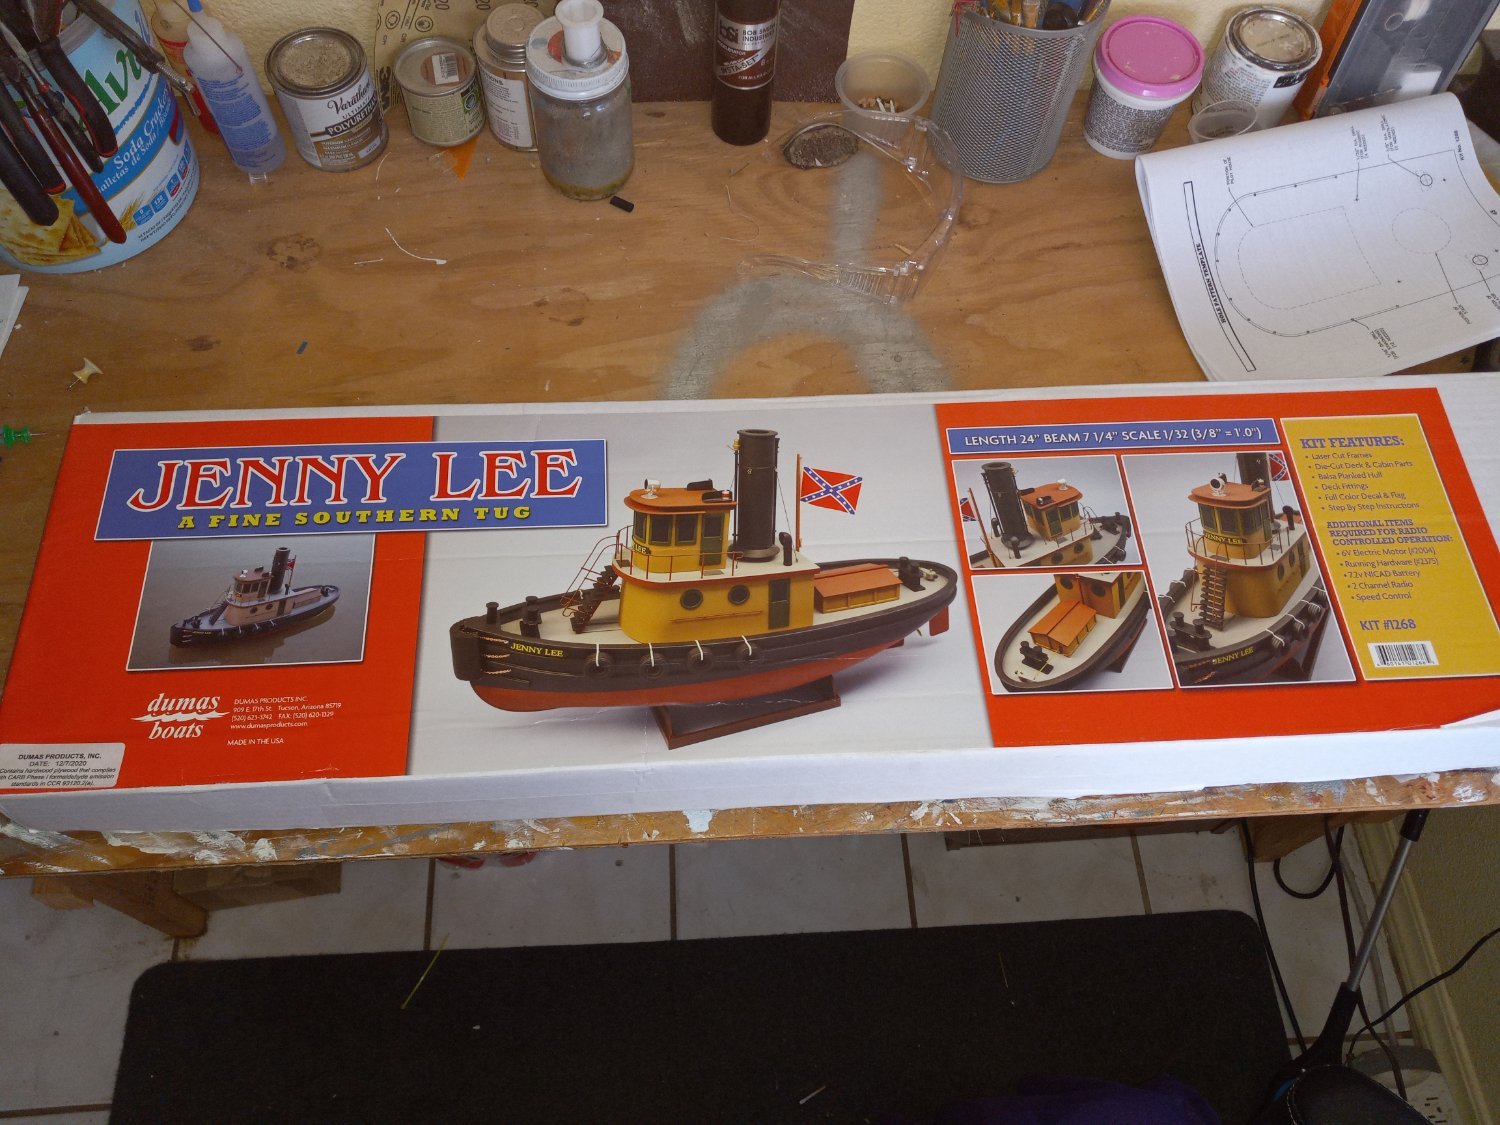
 I picked this orphaned kit up a couple of years ago intending to build it for my youngest grandson. So it has found its way to the building table. It's an r/c model. It will measure about 24 inches when finished. I will not be adding a stars and bars flag and will opt for an American flag.
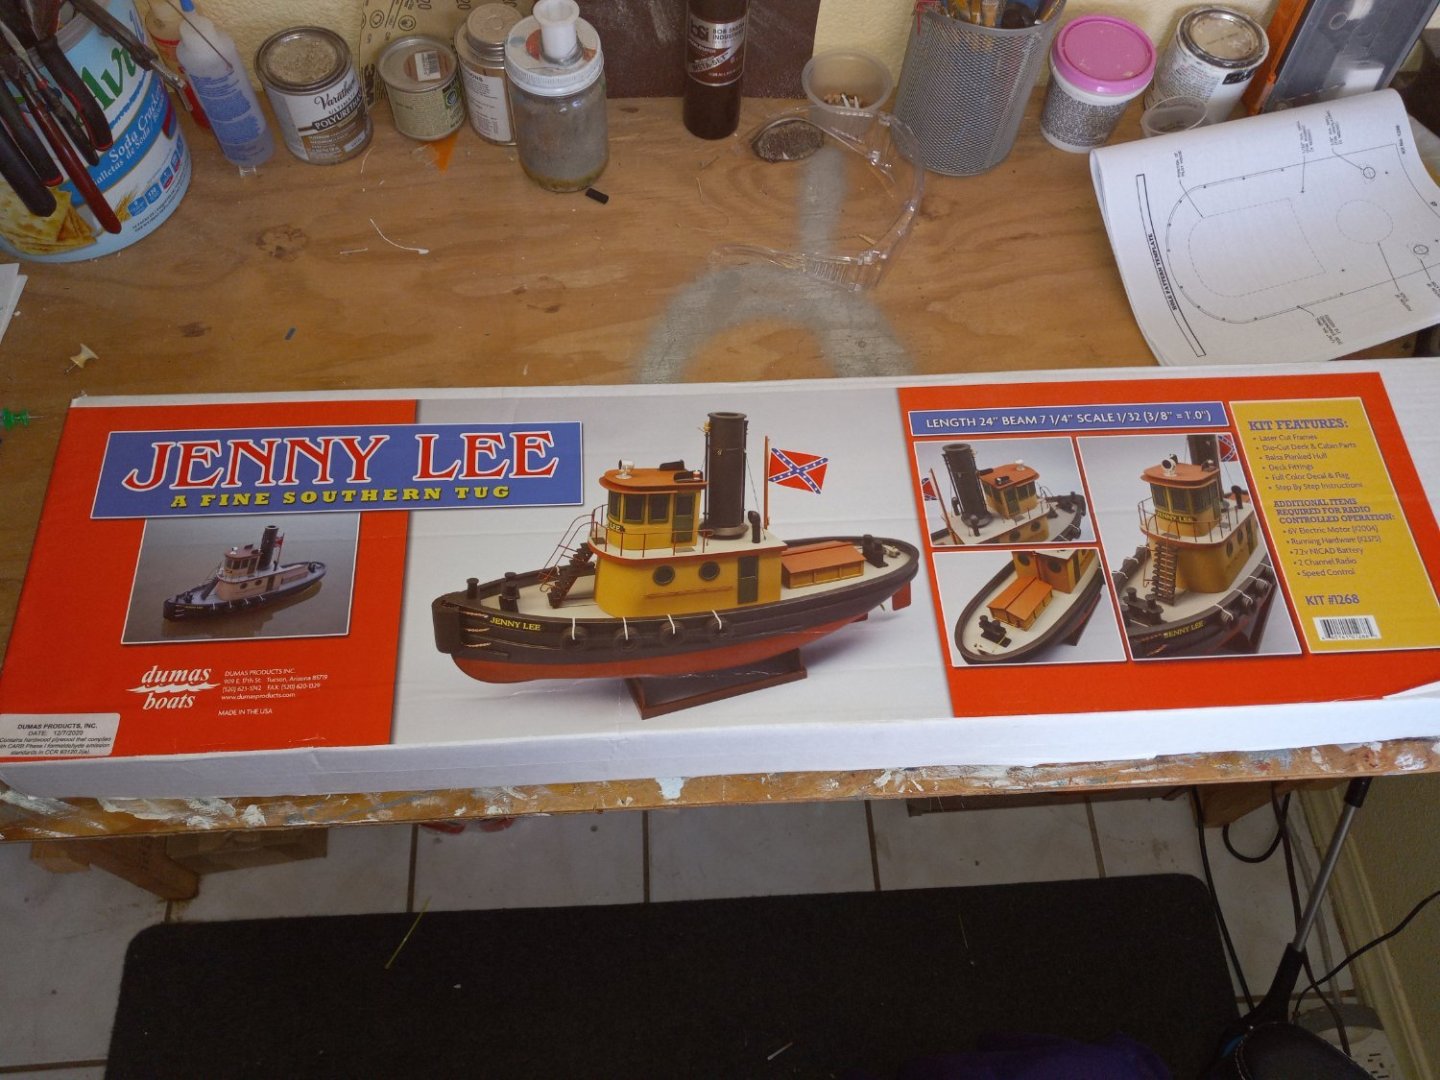
-
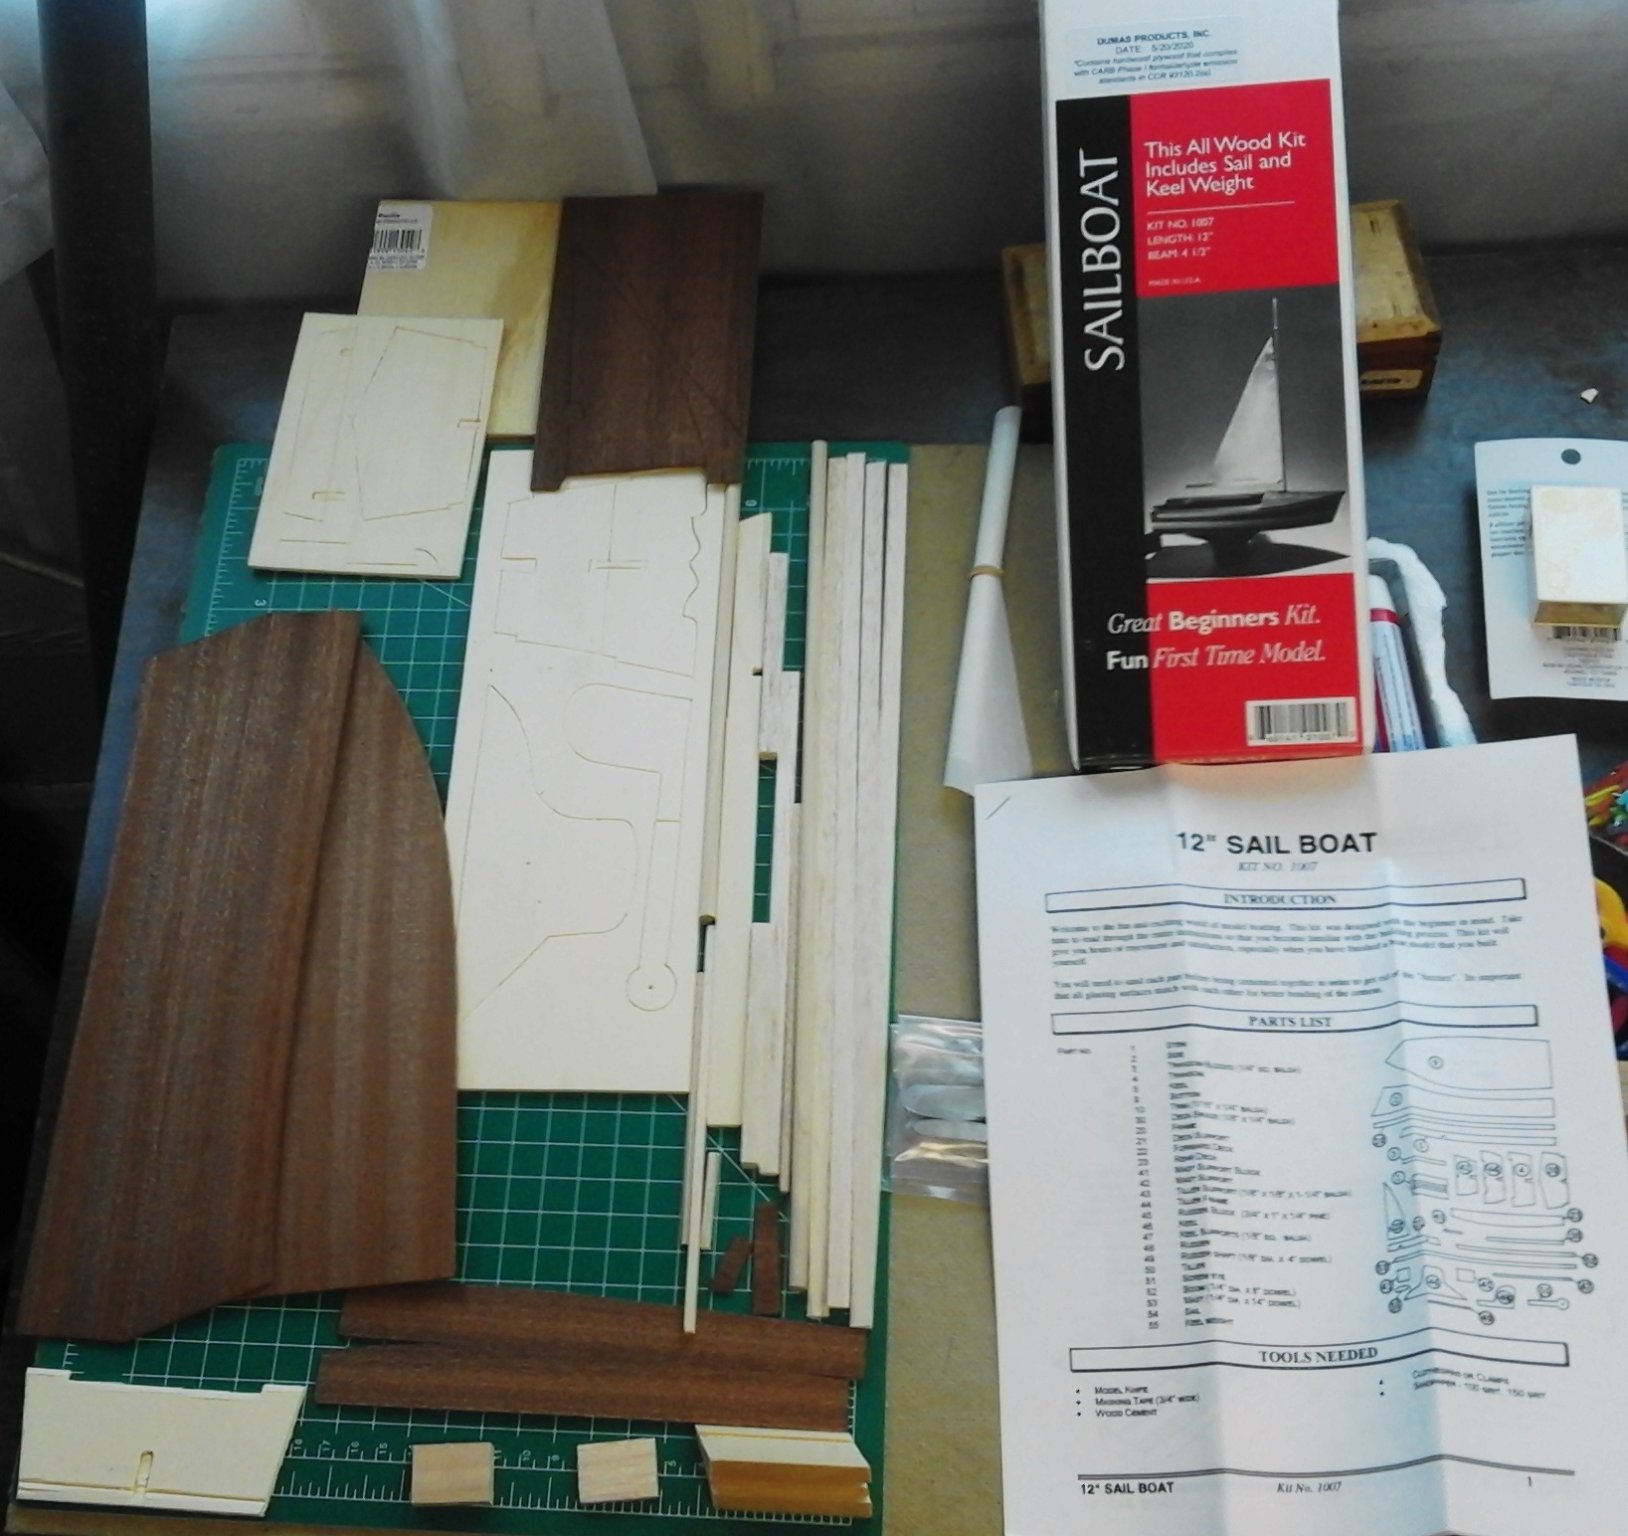
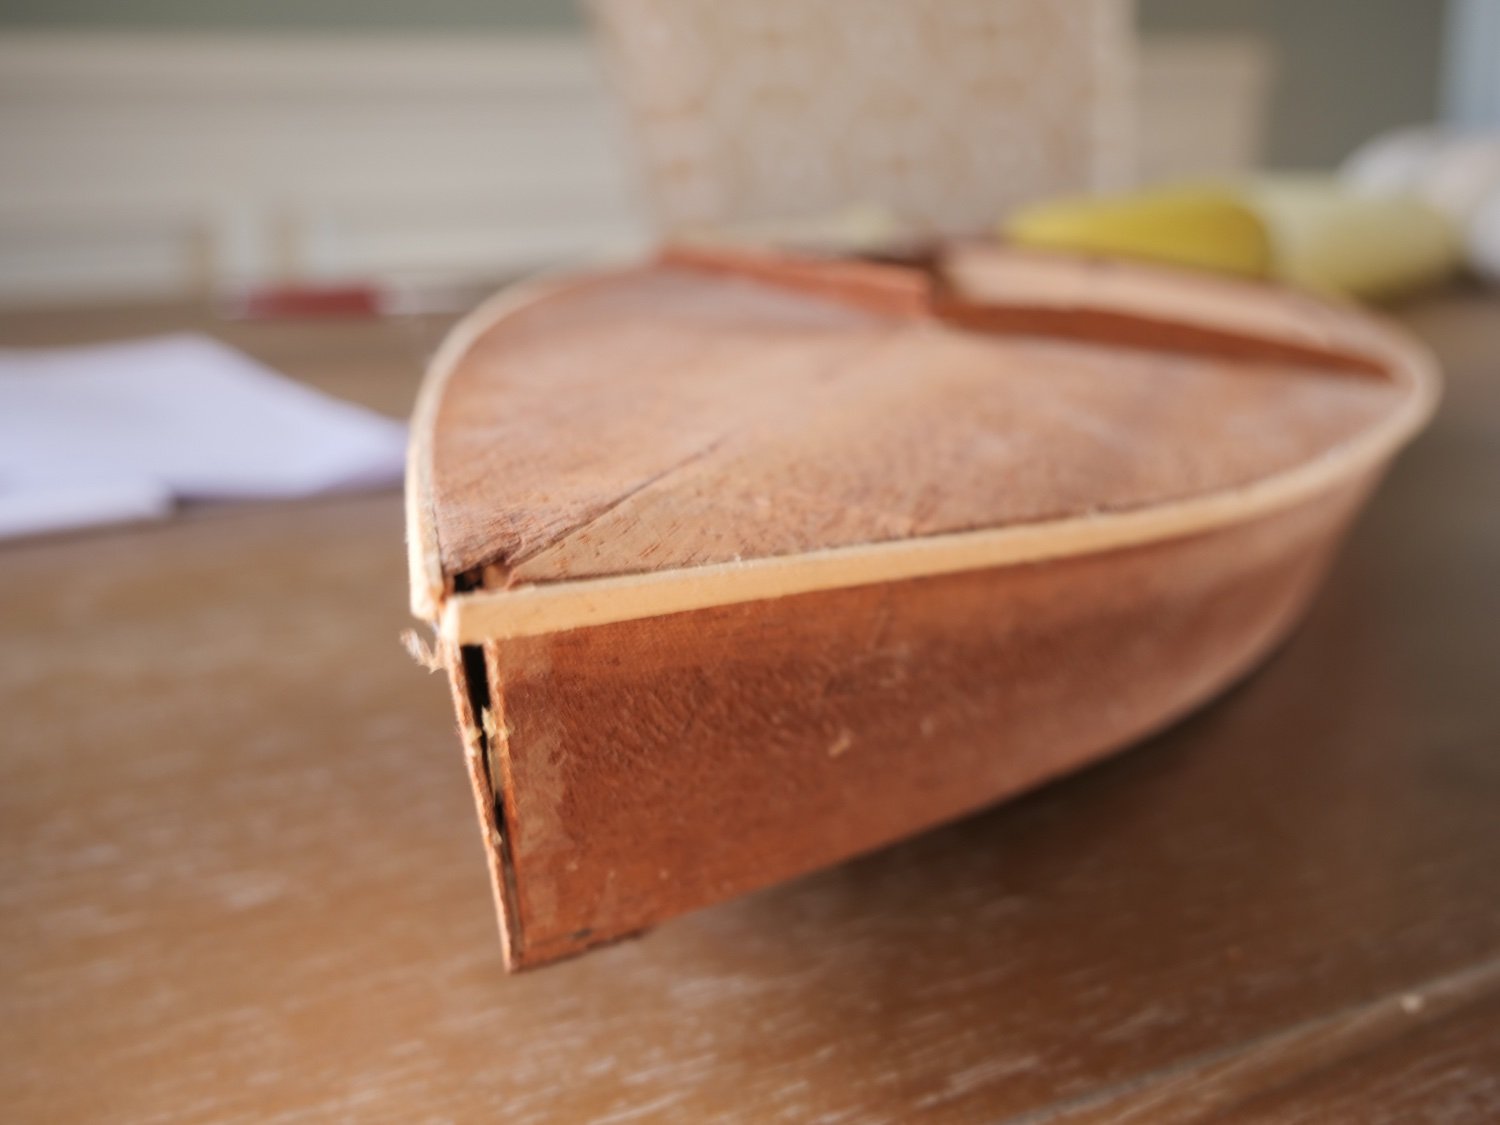
 I decided to start my Chris Craft kit to take a break from the Morgan this is a Dumas kit that ends up just over 13 inches on inspection seems the frame and first plank layer is balsa wood, will see how that goes
- 8 replies
-
- 2
-

-
- Dumas
- Chris-Craft
- (and 1 more)
-
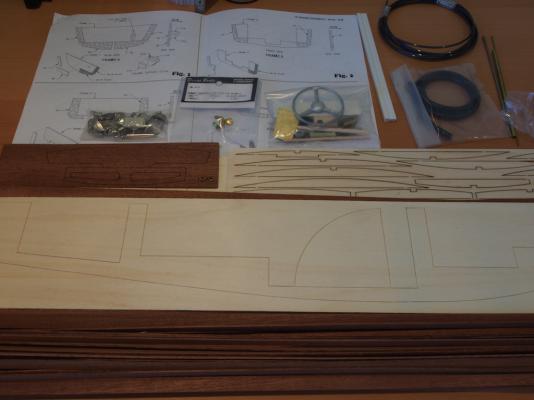
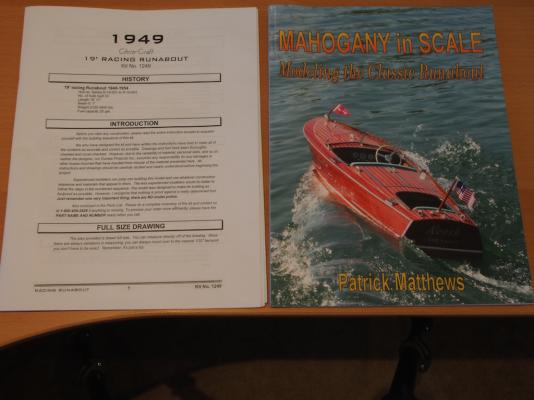
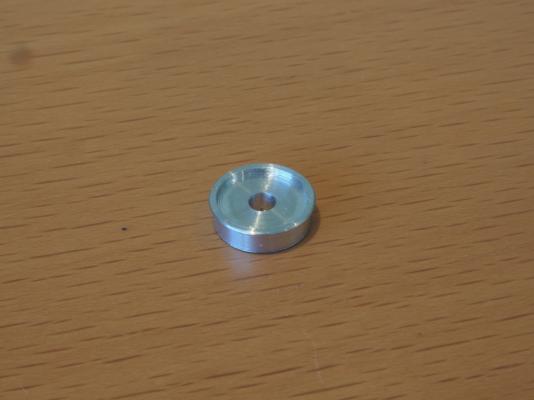
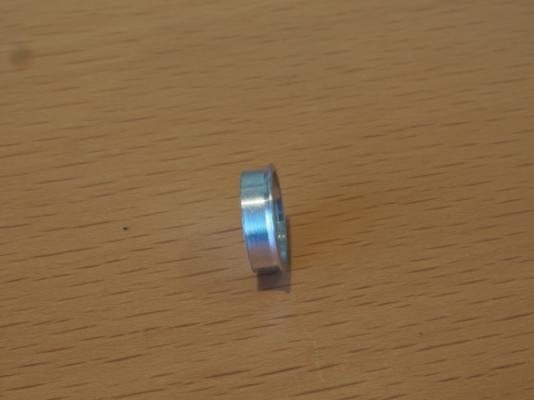
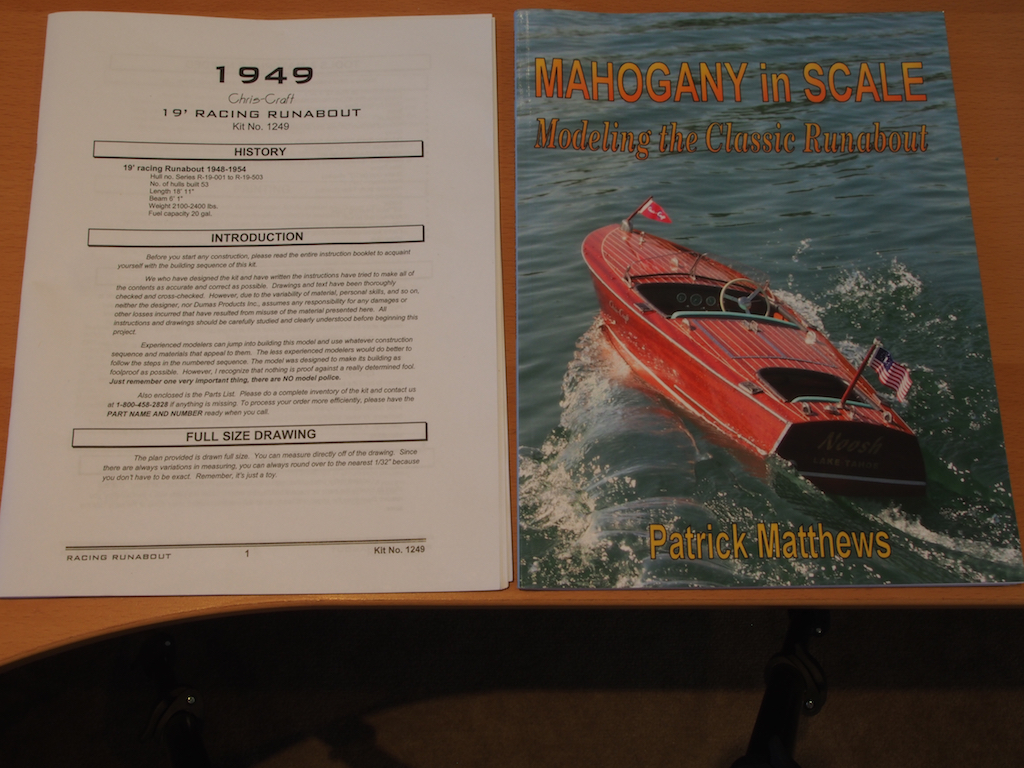
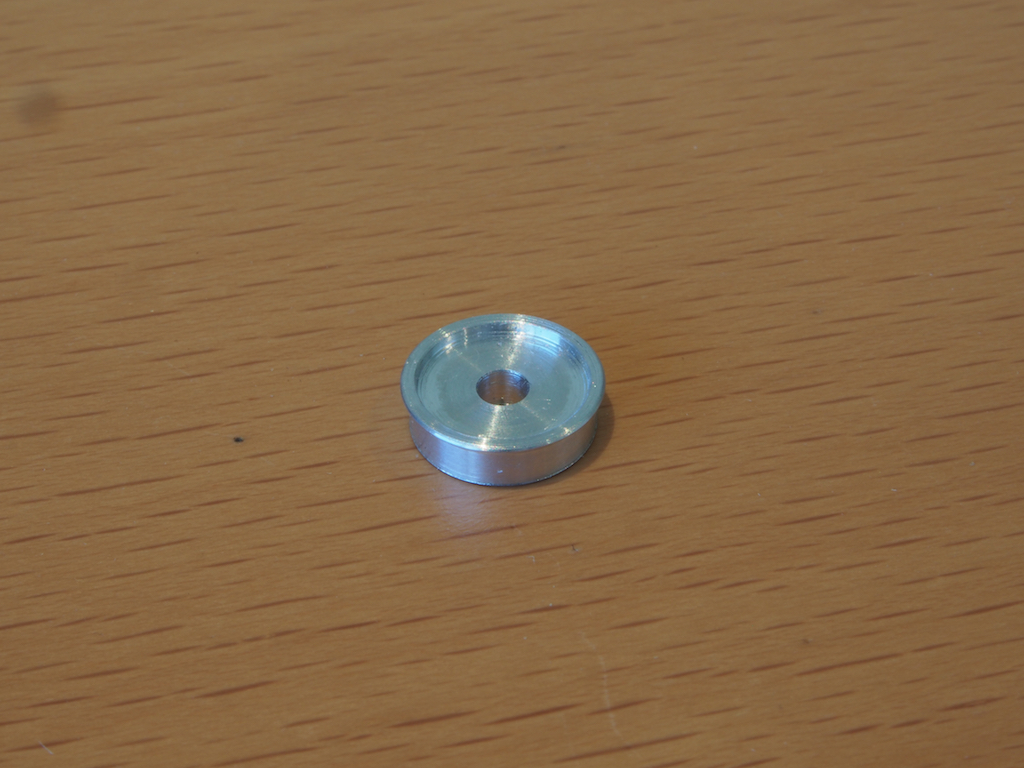
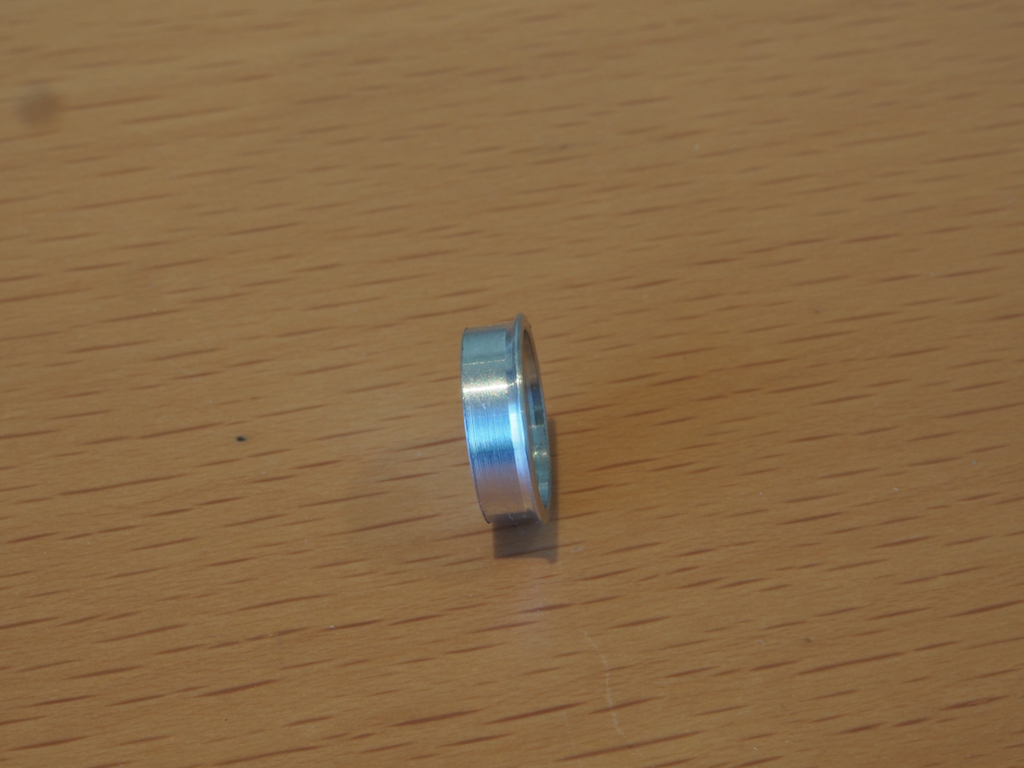
 Introduction I bought this kit about two years ago, having been enamoured by the excellent build log of Rusty on MSW 1. Sadly, that build log disappeared with the “great crash”, although Rusty did re-instate the photo sequence from his build. This kit represents a couple of “firsts” for me. First up, I’ve opted to go with making this a working radio controlled model – something I’ve never done before, but the Admiral thought it might be a bit of fun and so in a way this is “her” boat. We have a pond/lake nearby and some grand kids that might also enjoy taking her for a spin (if they can wrest the controls from the Admiral, that is!) Secondly, the building of this boat calls for the use of fibreglass – something else I have never done before. What's in the box? The kit contents are interesting and appear to be generally high quality. There is a mixture of die cut and laser cut parts, Mahogany strip wood, cast metal fittings (with what appears to be nickel plating), a type of plastic board (which forms the hull below the waterline), some aluminium strip (for the trim), and some styrene strips (that form the “caulking” for the deck planks). The kit also contains all of the running gear required to make the boat operational, minus the motor, battery and RC units. These I bought separately at the time that I bought the kit. The propeller supplied is a two-bladed plastic one, so straight up I opted to purchase a replacement three-bladed brass one (you can just see this in the centre of the photo below). A set of decals, a full size plan sheet, a collection of building diagrams and what appears to be a fairly comprehensive instruction manual complete the contents. I had also come across a book titled “Mahogany in Scale” by Patrick Matthews, which is meant as a generic guide for modelling this style of boat, but uses this exact kit as the example throughout. Having read it from cover to cover (twice), it will be a great reference throughout the build. Construction - First Steps I also found a number of build logs of this kit on an RC forum (including one by Pat Matthews) and have already come across some interesting ideas for modification. A common complaint among other builders has been the use of a decal strip for the instrument panel. I have already decided that I will replace this by making my own instrument gauges. So oddly enough, having cut out a build board to commence the project, I decided to start the build by doing a “proof of concept” for the instrument gauges. It took a little trial and error with the lathe, but here is a sample of what they might look like. I forgot to add a scale reference, but this is one of two smaller gauges that will be about 12mm external diameter. I have bored out an inner section to a 10mm diameter, into which a gauge face will be glued, and I have cut a shoulder and bezel to allow it to be mounted through the dash board. The one larger gauge will have a 16mm external diameter with 13mm inner section. I have found a few pictures of appropriate gauge faces on the web, and will probably draw my own in CAD based on these. Of course, my mate Mobbsie is now trying to convince me to add LED lighting to these……………..
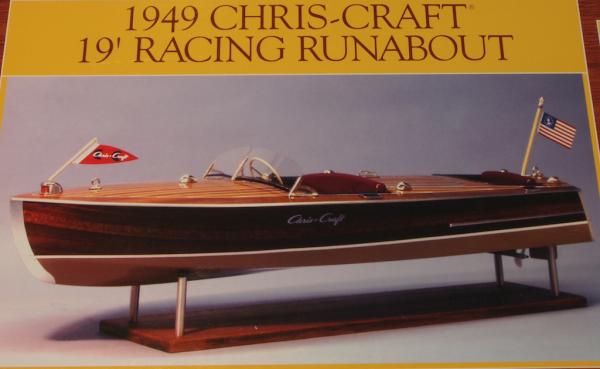
- 339 replies
-
- 19
-
-
- dumas
- Chris-Craft
- (and 3 more)
-
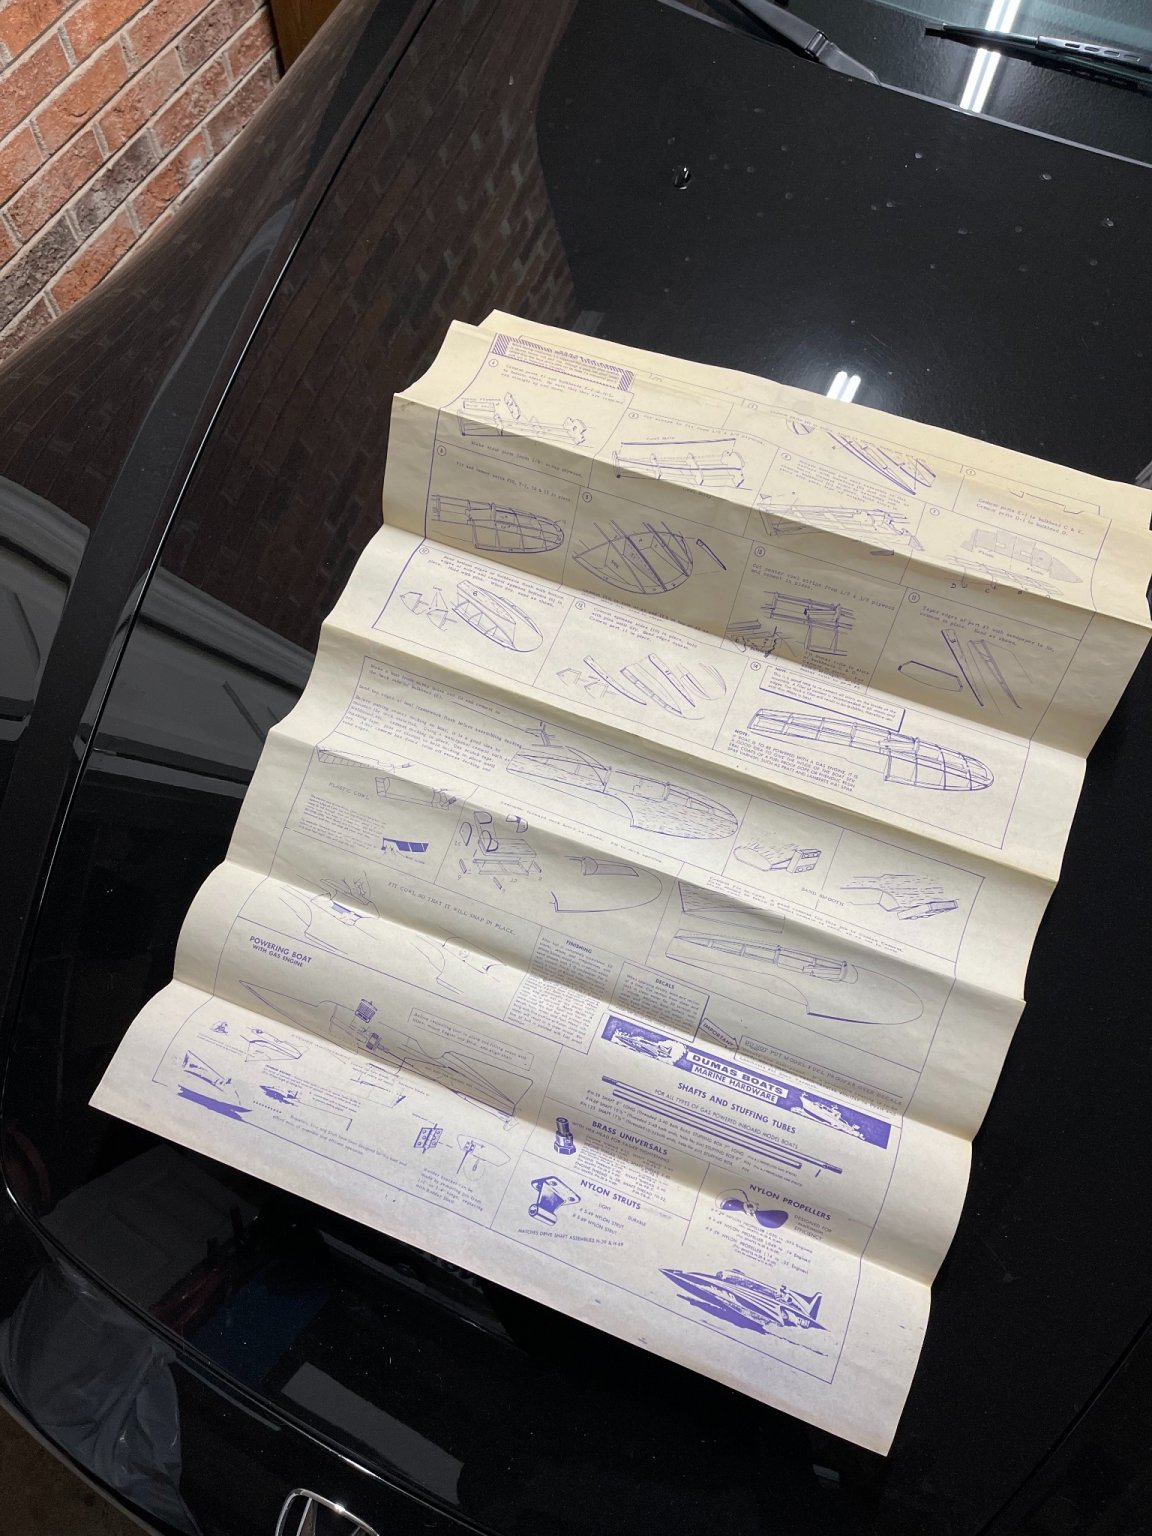
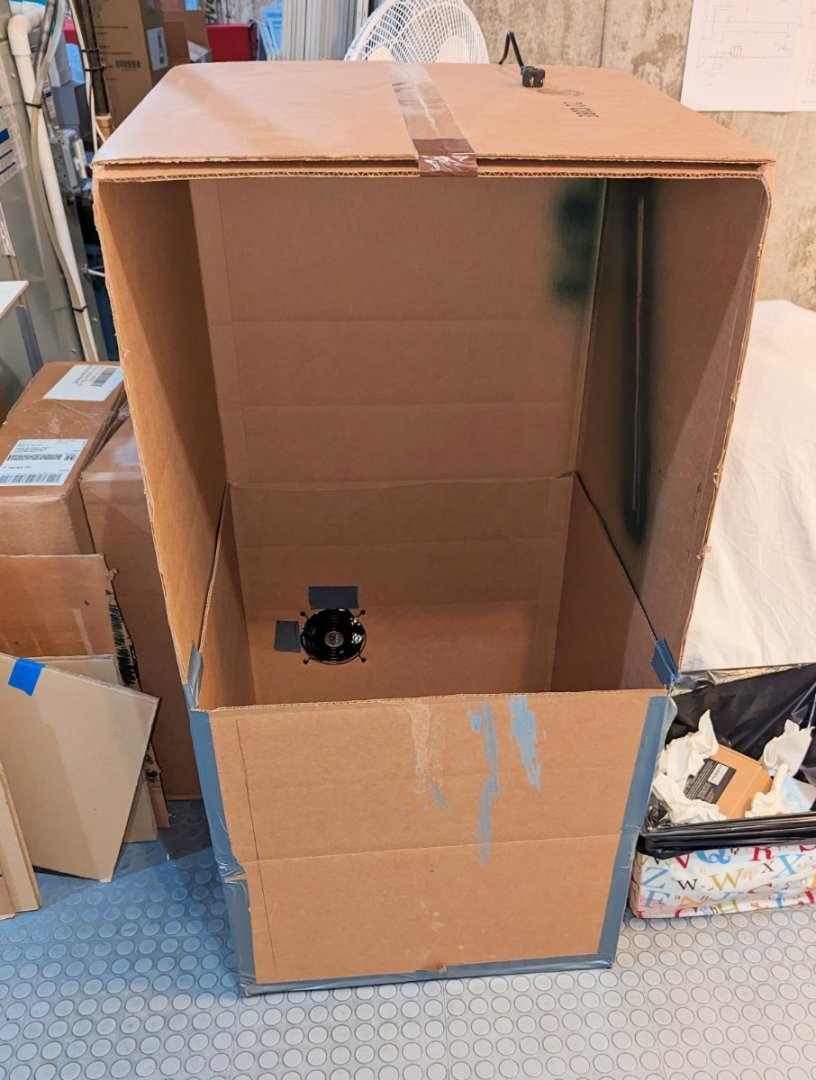
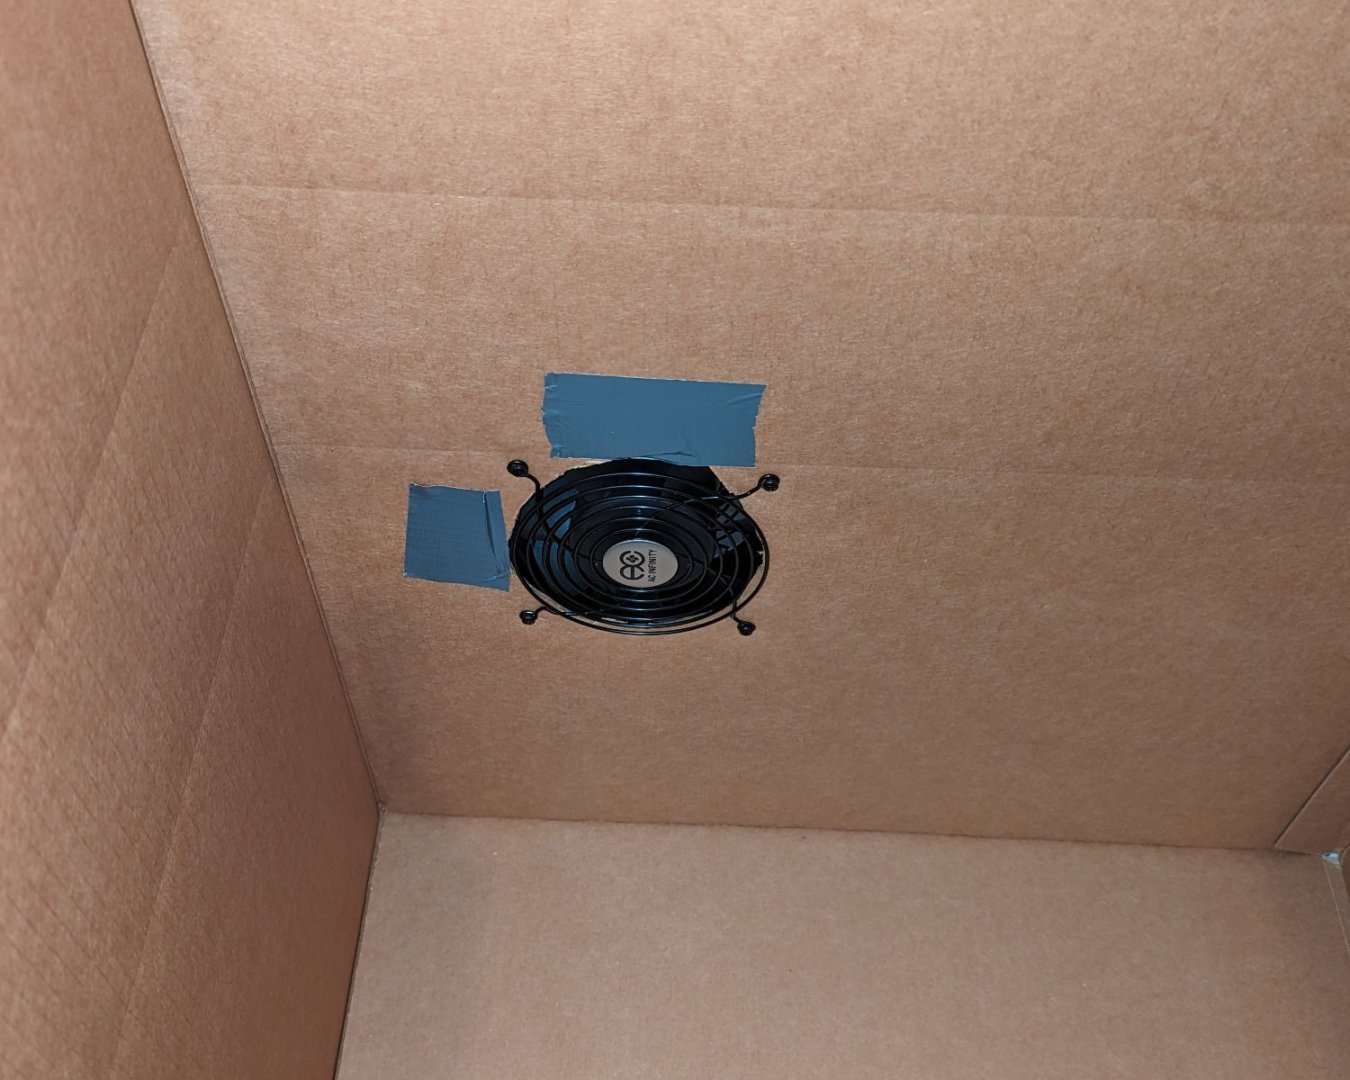
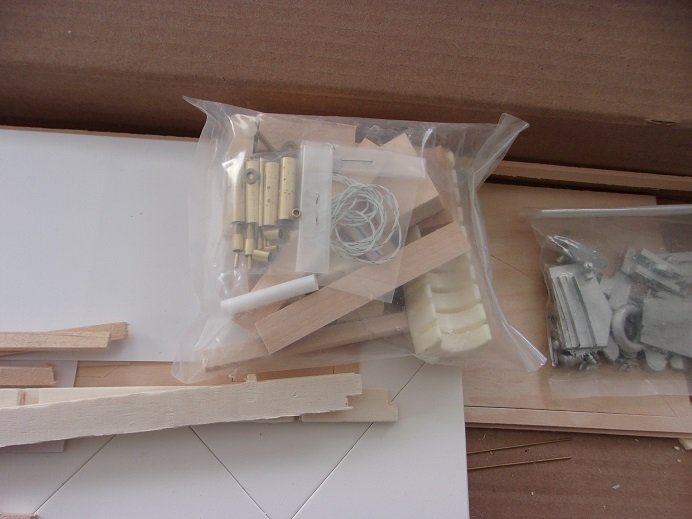
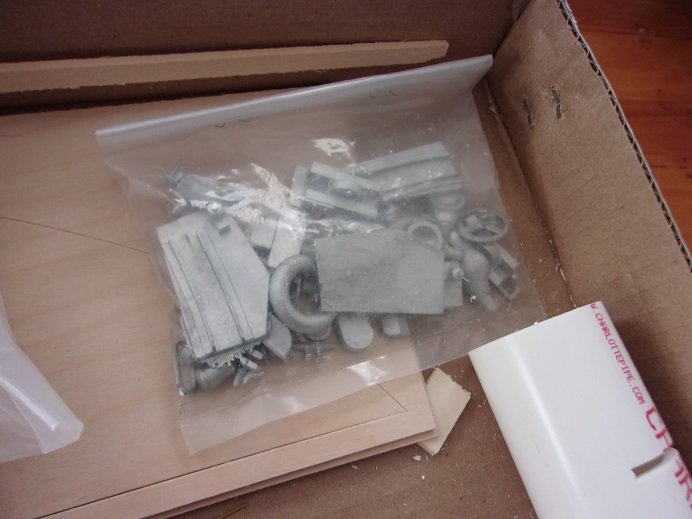
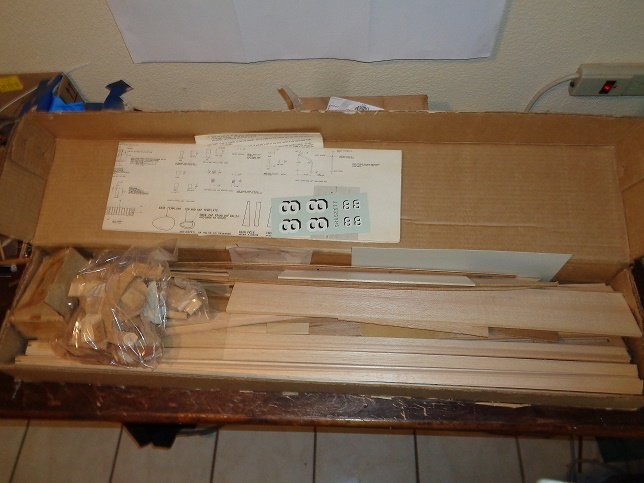
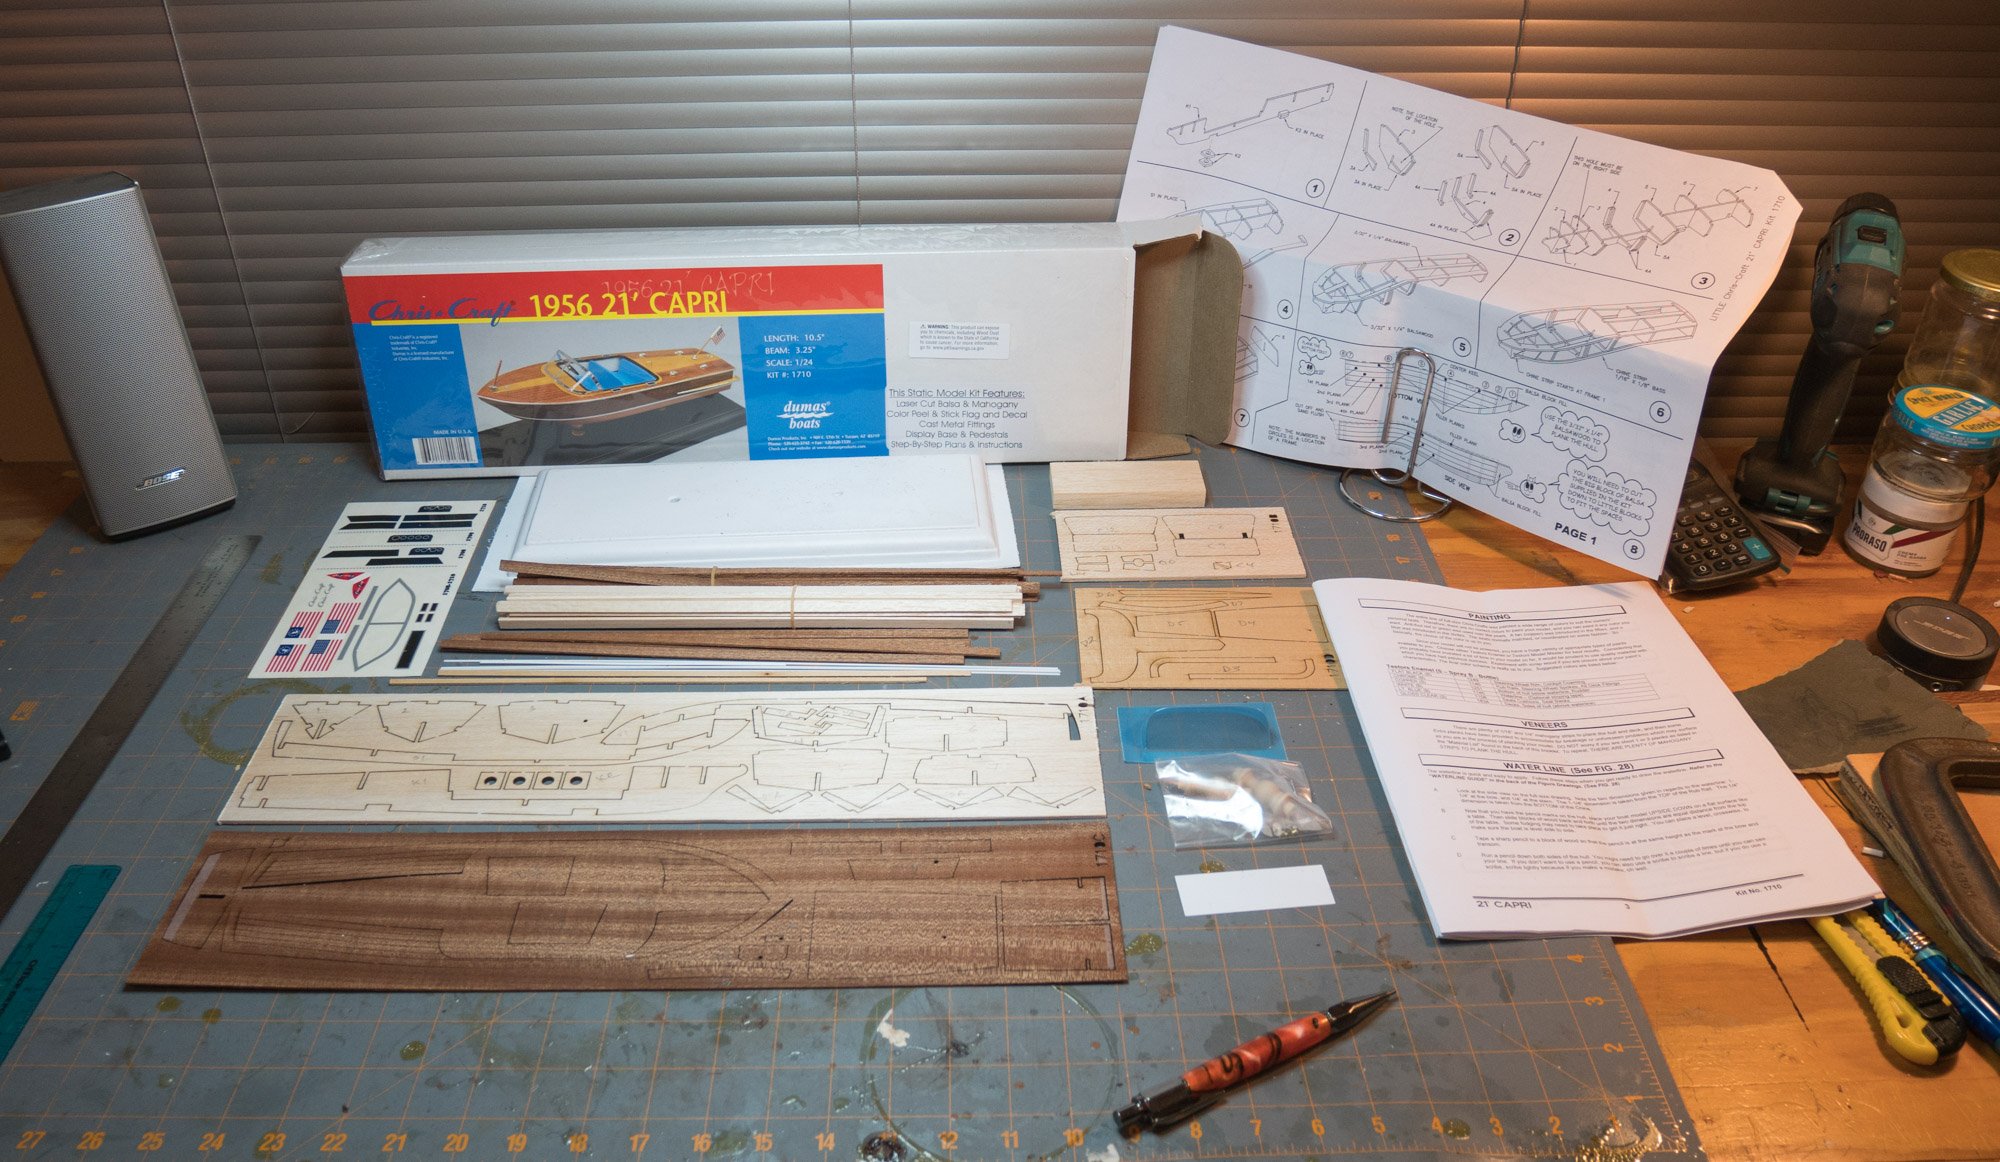
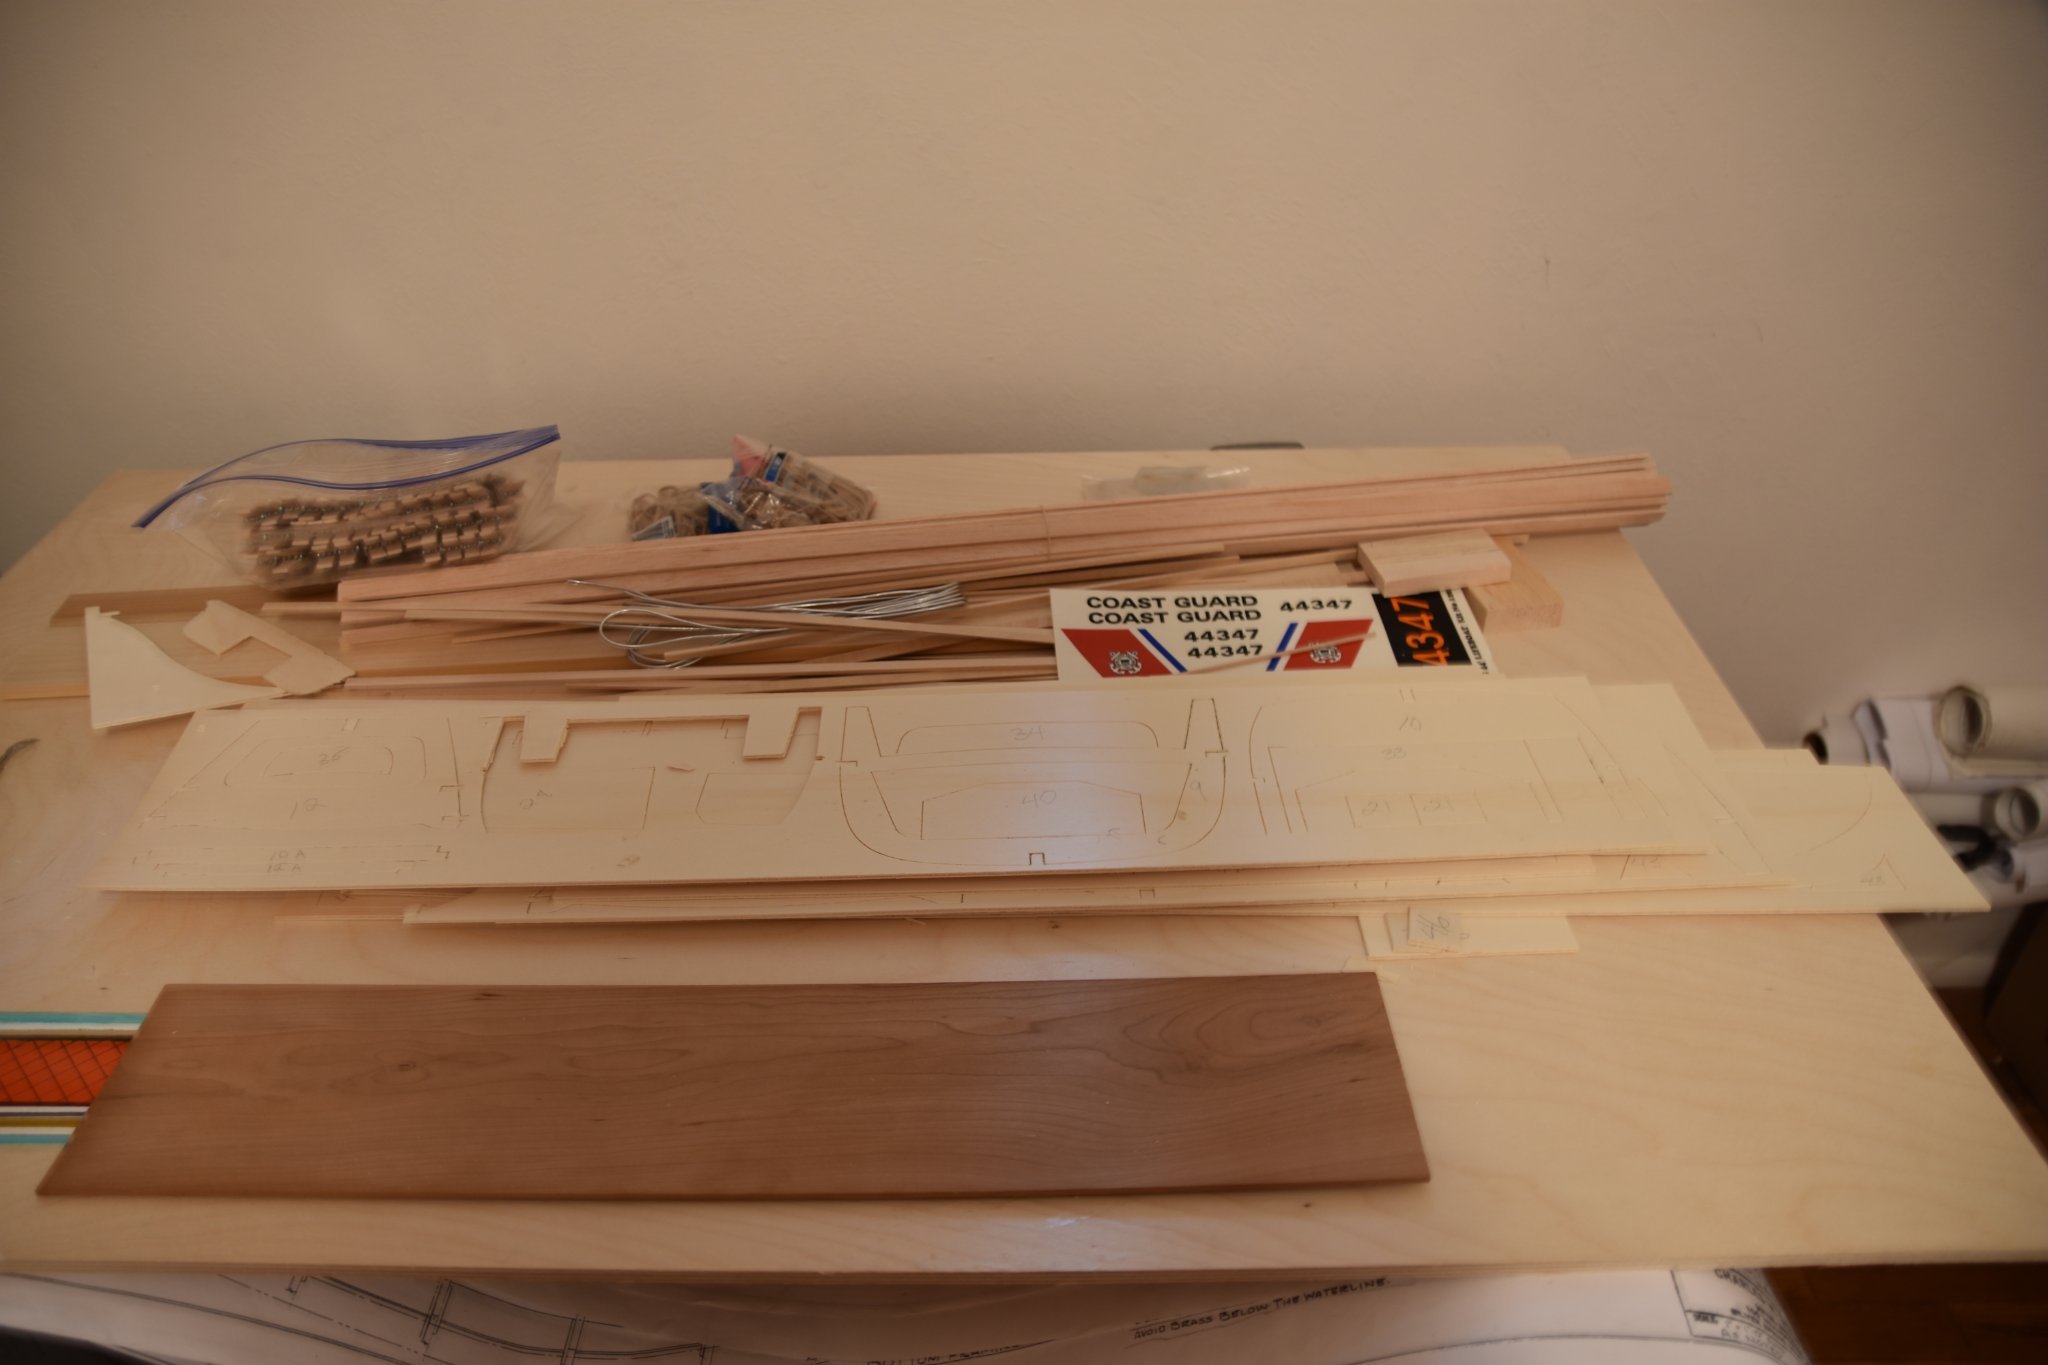
 After finishing my 2+ year HMS Victory project, I had planned to take some time off from modeling and pick up again when I returned from a vacation trip in mid-September. But I find myself getting antsy for a project, so here goes . . . I picked this model because I wanted something simpler after the complexity of Victory -- and something without ratlines! This is a Dumas model, and based on a couple of other Dumas kits I've built, it will require something of a mental shift from the construction of European kits: First and foremost, everything is in inches! The hull is expanded PVC over a wood frame Dumas uses styrene strips for some finish items where other kits would use wood I've included some "what's in the box" pictures. You can see one of the PVC sheets. Also some pictures of the manual and accompanying drawings. Dumas has really excellent detailed instructions with step-by-step drawings. Finally, looking at this kit and also looking forward in the instructions for the Amati Bismarck, which will be my next model after this, I've realized that I'm going to have to do some spray painting. I have developed an aversion to spraying because it's too cold here in the winter to do it someplace like the garage, and the "backspray" mist gets all over everything in my workshop. So I built the "spray booth" shown here (it's on its side in the pictures), with a small fan installed in the rear. I've tested it, and if you put a piece of tissue over the fan, it acts as a filter and the fan draws out the spray mist. We'll see how it works in practice. Now on to the kit. For anyone who follows, hope you enjoy this one. Regards, David


- 46 replies
-
- 8
-
-
- Fast Response Cutter
- Dumas
- (and 2 more)
-
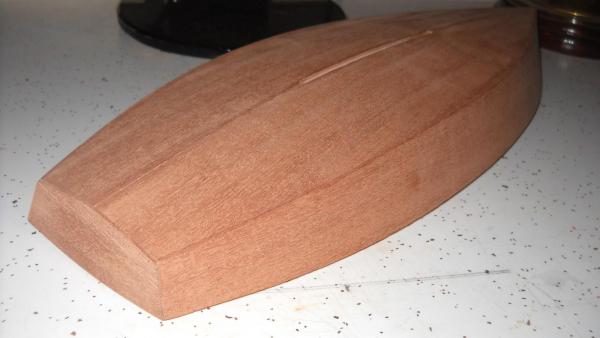
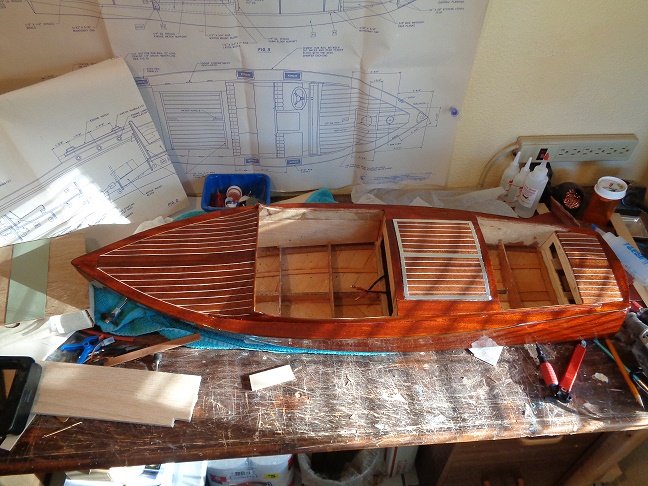
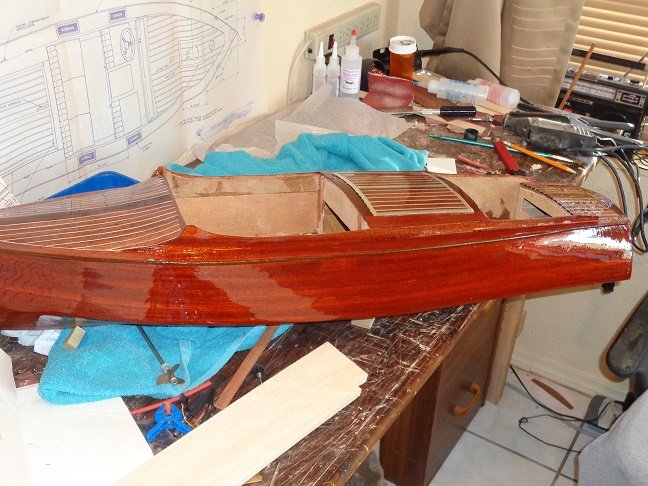
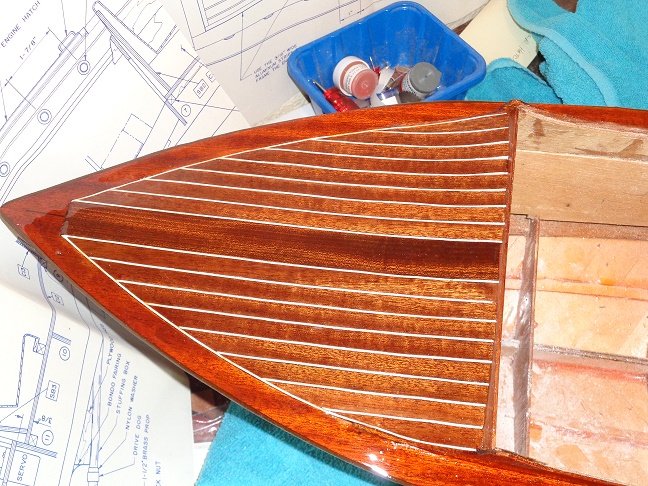
 For my first wooden boat kit I chose the Dumas Chris-Craft 1956 Capri. I wanted a modest kit to learn the basics and the kit offers a good introduction. I really like wooden inboard boats – they have a special sound. As a woodworking hobbyist I’m discovering that I’m not used to working with small parts. Since this is my first build, I am including my mistakes. The Dumas kit is complete, they say there are more than enough planks (I have extra pieces after planking). The drawing is very helpful and the instructions provide enough instruction to complete the kit (I’d like to see more tips). I use the plastic base as a place to store the project as I work on it. I’ll replace the plastic base with a wooden one that emulates a slow wake.
- 36 replies
-
- 3
-
-
- chris-craft 1956 capri
- dumas
- (and 2 more)
-
 This is my first wood build I've only built plastic ships before , I have already built the keel and the bulkheads and in the process of planking which is where I started having problems .
 -
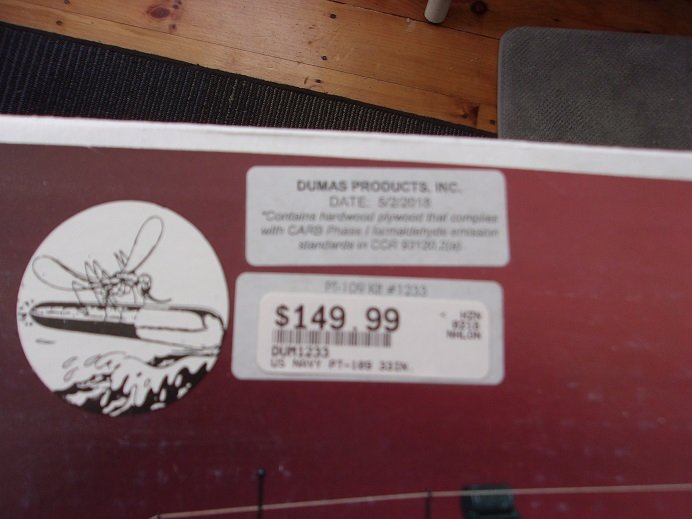
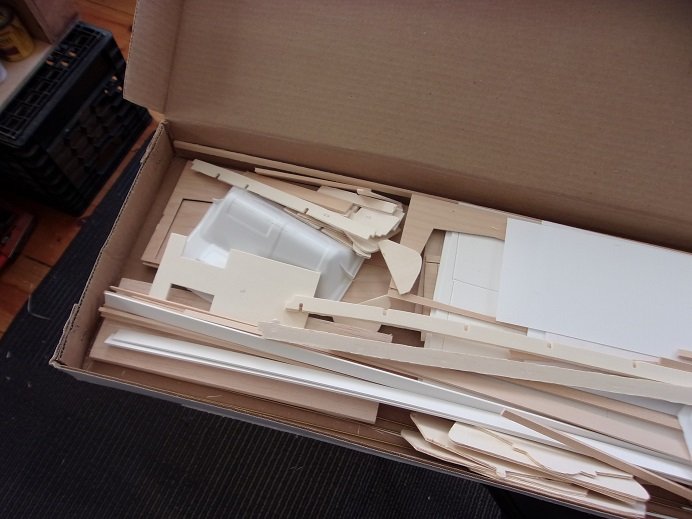
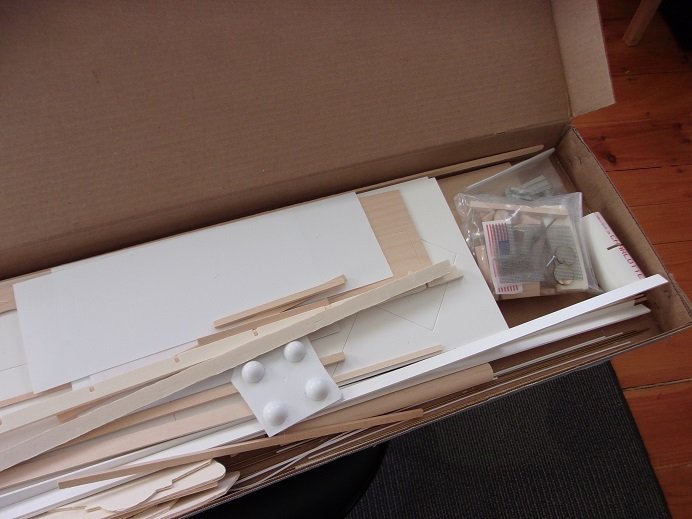
 I've always wanted to try my hand at a Dumas kit. I've seen projects in the past, and I liked what I saw Mog's PT boat project definitely put me over the edge... I had a coincidence of sorts occur. I was at Hobby Town one day........late last year or early this year { I can't recall which}, when I first came in contact with this kit. it was in a long brown cardboard box and it looked quite old.......I know that Hobby Town {at least the one in my area} had a policy that they would take complete kits in trade for other kits {mostly R/C stuff}. since $159.00 seemed a bit steep, and I didn't want to get killed by the Admiral, I passed on it and settled on a couple of plastic kits. Telling the admiral about it, I was surprised to hear that she wouldn't have killed me if I bought it. none the less......I didn't go back to get it. a few months passed.......I did little more than talk about it...I think it was the size of the model that intrigued me the most. come June of this year, my son came over, and out of the blue, asked me if I still wanted the PT boat. bewildered as to why he would ask, I looked at the admiral.......she just shrugged her shoulders, "if you want it, go get it.......early birthday present." she added to get any paints that I wanted as well........they used to be the best place to get paints and wood, but since they moved, they've gone more towards R/C than the model kits. so.......off we went! looking on the shelf, I didn't see the long brown cardboard box......there was a long white cardboard box with a huge picture label on it. I was impressed to see a production date on it.......5/2/2018. the other kit had a note on it about the hardware......I was going to ask about that, but this new kit, the question disappeared. it does resurface though......something I didn't pay any heed to or take into account. I didn't even have to stoop to pick it up.......Kevin snatched it up....."is this it?" we browsed a bit before heading to check out. getting it home, I did the ceremonial contents check....... things are jumbled in the box.......I used the other camera to take the initial pictures and they came out blurry. when I got this new camera, I retook these pictures.....they are not the complete bunch I took, but they give you an idea about the kit. a few weeks did pass before I started to pop out the parts.....mainly to do a dry fit, look'in on Mog's build and getting curious. we did PM each other for a short time to share ideas. the dry fit was comical at the start.......I had the stringers mixed up, making it look rather odd this is the other camera.......these are the better blurry pictures that I could use this is the doubling of the #7 bulkhead and the K1 keel { the main part of the keel} note that the stringer doesn't mate with the bow stem....that was my first clue. these instruction sheets are quite large and I had to use the dining table to view them. one thing that would have benefited this model, would be that the parts were laser cut, instead of die cut. the big problem with die cutting, is that the die blades become dull after a few production runs. this has the consequence of a lot of chipping and splitting, resulting in some really rough edges. from what I can gather, this is a Spruce plywood. as much as I tried to finish cut the parts, these abnormalities still occurred.....good that all this will be on the inside I didn't really get into building the hull, until October........that's when the fun began
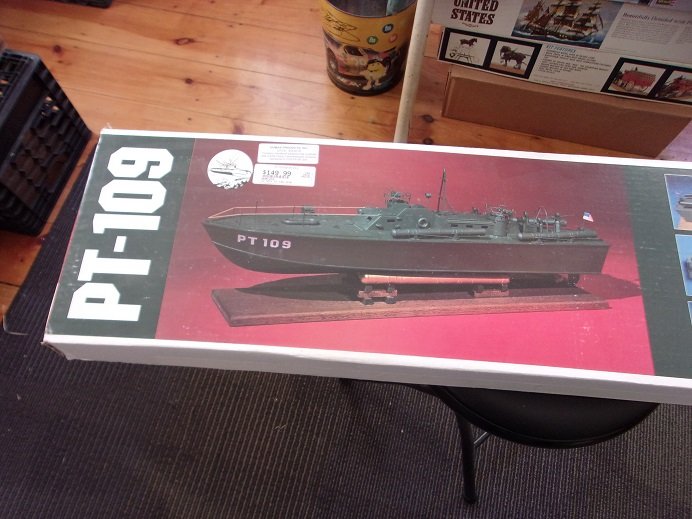
- 216 replies
-
- 10
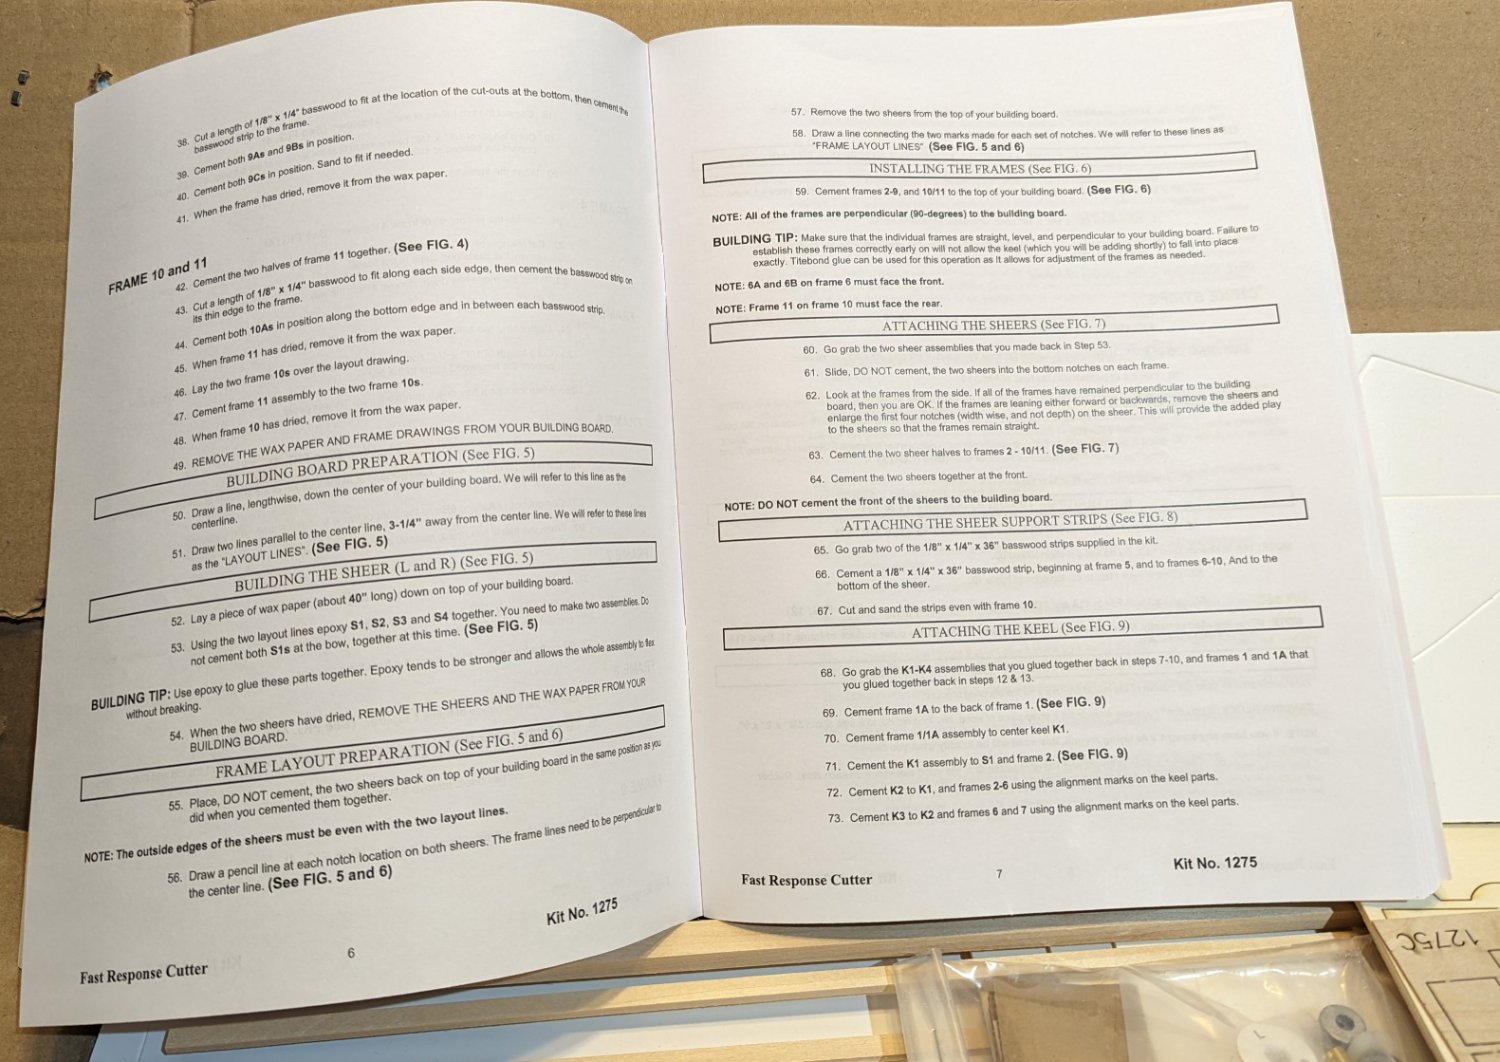
-
-
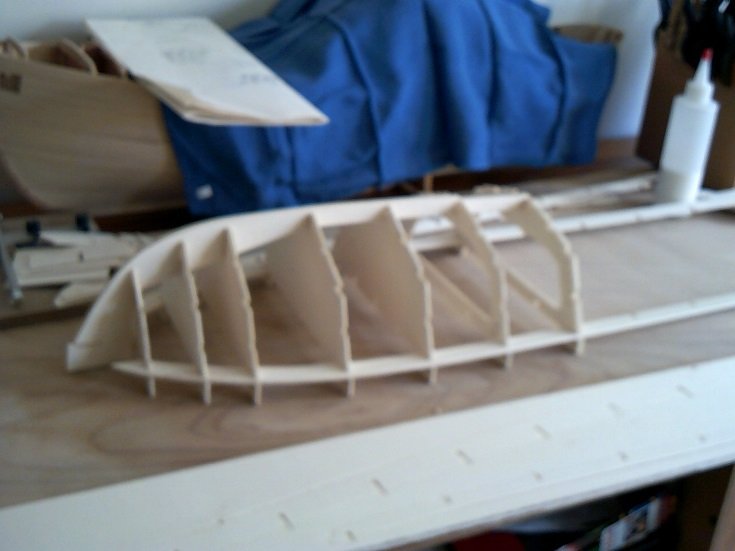
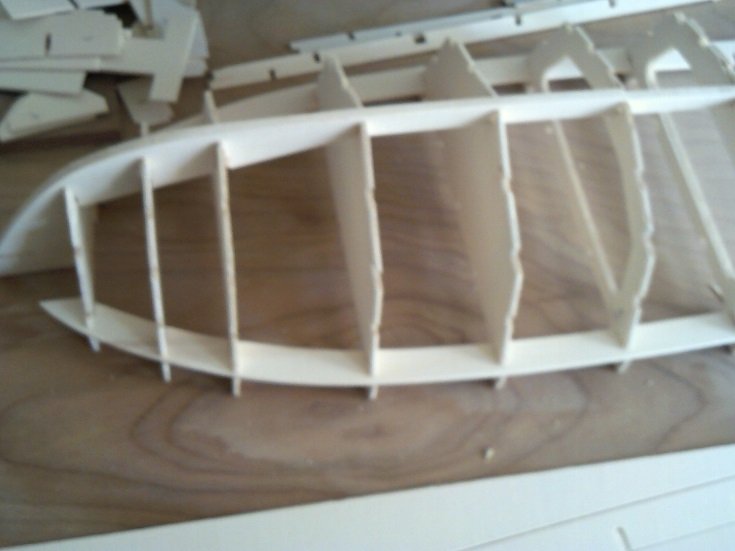
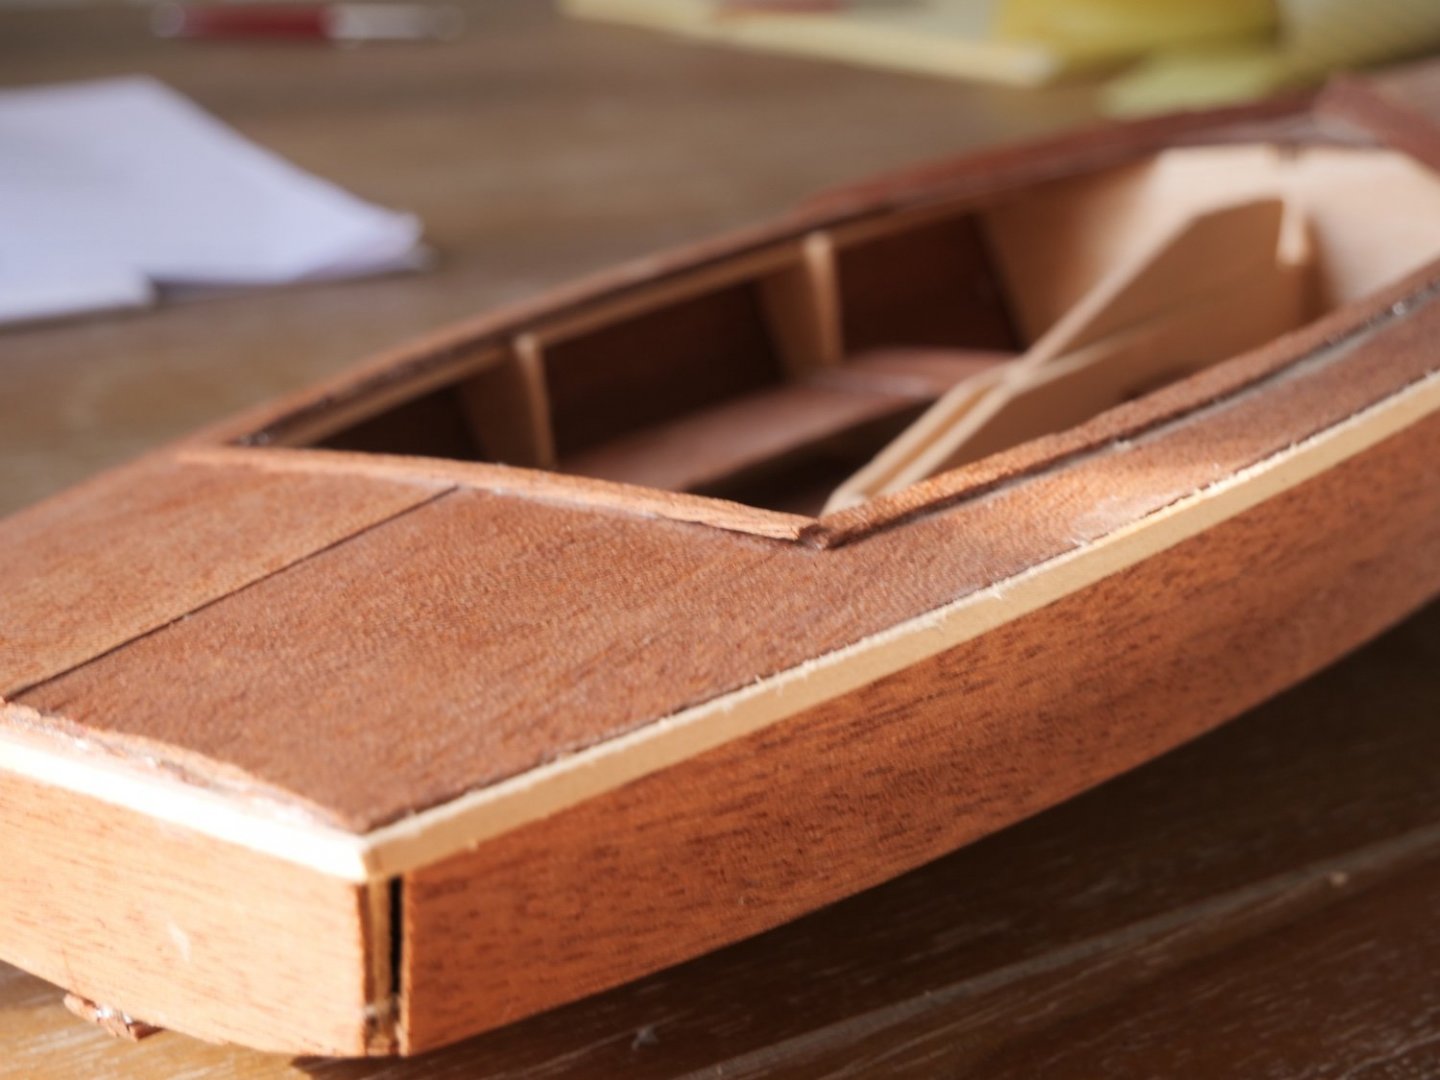
 I first started the build at least 16 years ago. It was my first attempt at building a wooden model, and I struggled. When I accidentally cut the mast in half, thinking I was trimming down the boom, the model went on the shelf. Seven years ago, I went on line and reordered the plans and instructions for it, in case I decided to try and finish it. Then while on vacation in Maine I discovered Bluejacket, and have now built 3 boats of increasing difficulty, and have also watched a ton of YouTube. Now I feel like I have the skills to repair what I sptarted and finish the boat. I reached out to Dumas and was able to order a replacement mast, their customer service was first rate. I recently stepped down from being involved in a Scout Troop, and now have some extra time to work on this boat. I originally chose the Lightning all those years ago, because when I was in college I worked at a summer camp for a summer on the water front. We had a Lightning I'd sail on my days off. My son latter went to that camp, and so we are going to name the boat after his favorite cabin "BEAR". I haven't figure out yet how I'm going to display it, but I have a few ideas. Here are some pictures of where things stand. First tasks are to fill all the holes and gaps, redo the rub rail around the transom. Re glue loose boards, especially in the cockpit, and get the hull painted. I found the original instructions I thought were lost. As you can see it was so long ago they were typed up, the new nice booklet is underneath them. There are gaps in the joins, and holes near the bow. The foredeck also isn't glued down in spots. More gaps to fix. Although it is hard to see, I could never get the rub rail to match the curve of the transom. I didn't know you could steam or heat wood to bend it back then. I'm going to remove the rub rail and steam a new one and put it in place. I'm not sure how long this build is going to take or how often I'll post, but I enjoy doing these build logs, even if it is for my own satisfaction.
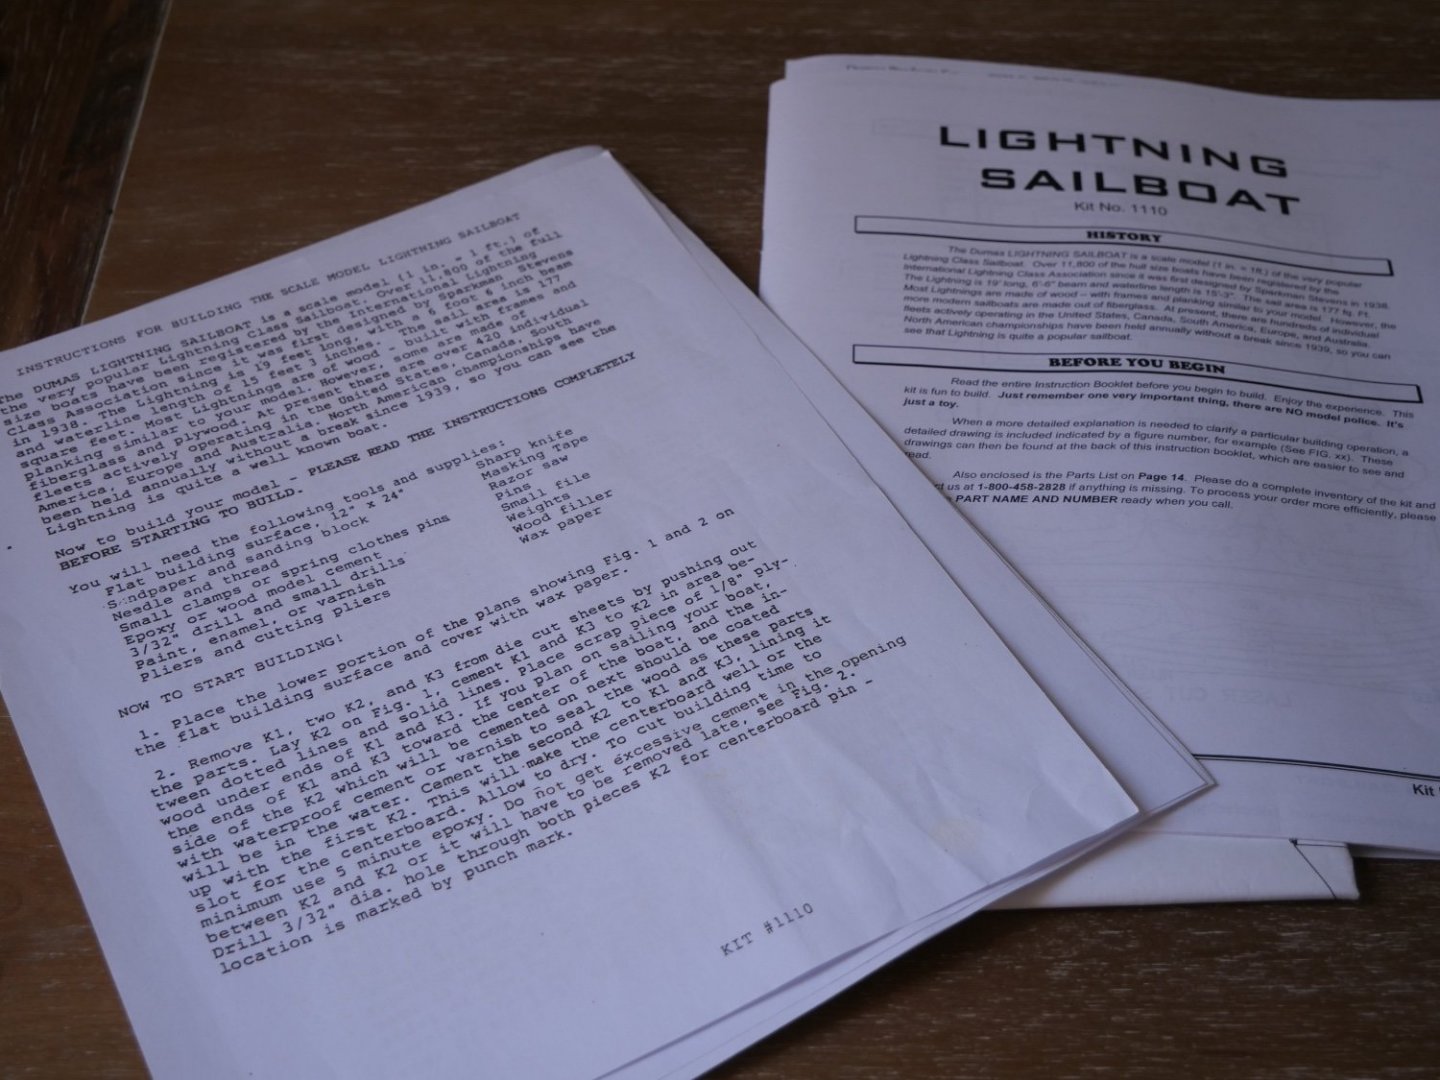

-
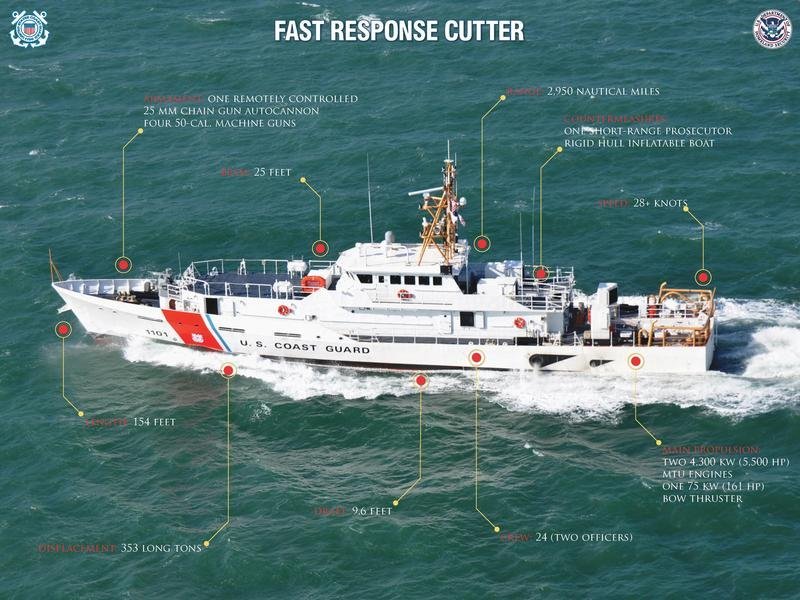
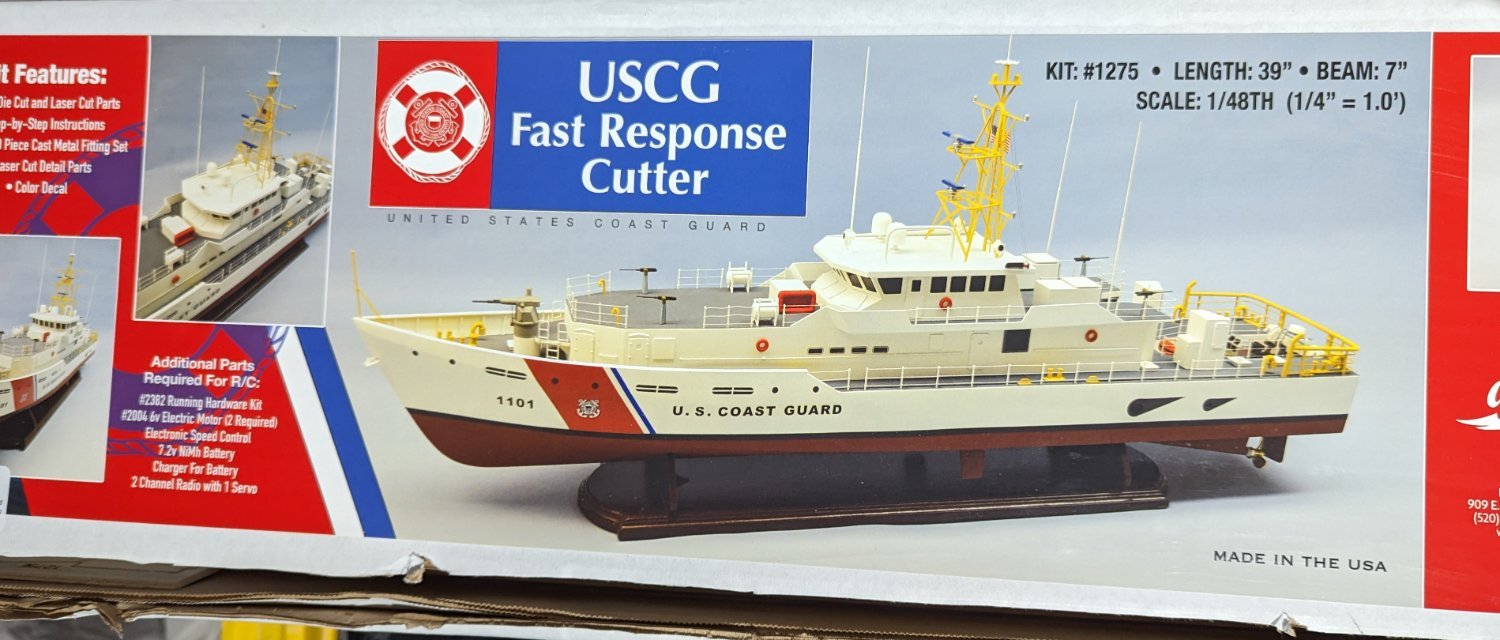
 Greetings All, This is my build log for a USCG FRC (fast response cutter) at a length of 154 feet. This class is only a few years old and even though it is intended for R/C I will be building it as static for display. I will likely post a Youtube video of the unboxing of the kit. So far from what I have seen this looks like a great kit by Dumas! Pictures are from official USCG sources. Hull line diagram is from the actual vessel plans. 154-WPC_85_301_1_-_B.pdf
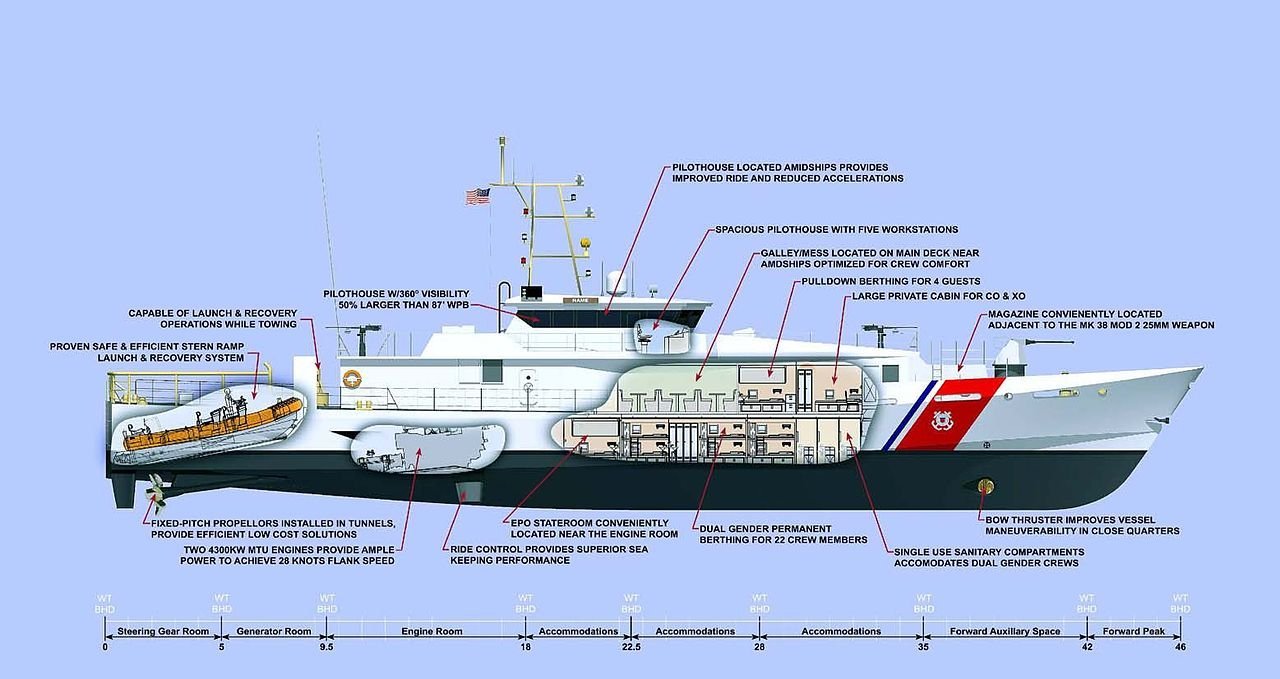
-
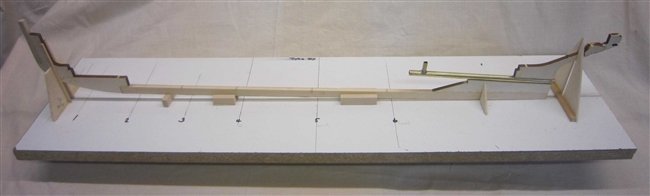
 Greetings all, as a winter project I decided I would like to build the George W Washburn. For a number of reasons: · I liked the look of it · Wooden construction with plank-on-frame hull · Good size and within budget · Build logs on MSW to refer to On opening the box, I was quite impressed with the contents of the kit. The Instruction Booklet is 56 pages long and there is a separate pack of drawings to go with it. There is basswood for the structure, balsa for the planking and some plastic parts. The quality of the wood seems to be good. It is my first plank-on-frame boat since I scratch built a Police Launch in the 1980’s so class myself as a beginner. There is a comment in one of the Forums that ‘single’ p-o-f is for the more experienced builder as there is no second layer to cover up the faults of the first. No pressure then, however the instructions for the Dumas Kit were more encouraging. It says the model was designed to make its building as fool proof as possible. We shall see! The length of the model is a bit of a puzzle. From the keel parts I estimate the length of the finished model to be 800mm (31.5”), this agrees with the 1:1 scale plan drawing supplied. But the box lid gives it as 30” (762mm). On searching for the length of the actual tug boat I could only find one source which gave it as 140’. Divide this by 48 and you get 35”. The existing Build Logs were published by lb0190 in 2013 and MarkBseau in 2014. I shall try to spot if Dumas have made any changes to the kit since then. As per the instructions I made the stand as the first task. Although not needed until much later it was a chance to try out the adhesives. I am not much of a fan of CA glue, I shall mostly be using a waterproof Aliphatic Wood Glue and 2 Part Epoxy (Araldite). For some weird reason I used the wrong strip wood for the stand, 1/8 x 1/4 instead of the correct 1/4 x 1/2. Not a good start. So, I made two new ends and built it again. 1. The Keel No problems assembling the keel except that the bass wood strip which formed the basis of the keel was oversize, it was too thick by just over 1/32” thus preventing the frames from being fitted. Rather than plane down the thickness to suit the frames I purchased a new piece of strip 6 x 15mm and planed that down to 6 x 12.7mm. For the prop shaft, the Material List gives the tube as 5/16” diameter and length 5-3/8” and the shaft as length 8-13/16”. This means that there is 3-1/2” of unsupported shaft, probably not a problem but not a technique that I would usually follow. In the UK most suppliers stock complete assemblies with the shaft having about 15mm threaded protrusion at each end of the tube. The tube would be fitted with bushes at each end to support the shaft and possibly come with the option of an oiler tube. I usually fit an oiler tube with oil being used instead of grease. Though it is important not to have oil in the prop shaft when commencing sailing as this can result in a slick on top of the water. So, having finished sailing I would prop up the bow and ‘inject’ oil using a lever action oil can. Any water in the prop shaft gets ejected, I then leave the boat propped up for a few days until no more oil is seen around the end of the shaft. Thus the tube is clean on the inside and the bushes lubricated. I purchased an 8” assembly with M4 threads at each end. For the oiler I cut a piece of brass tube and soft soldered it to the prop tube with a 3mm hole through to the shaft. This can be seen in the photo. 2. The Frames To follow.
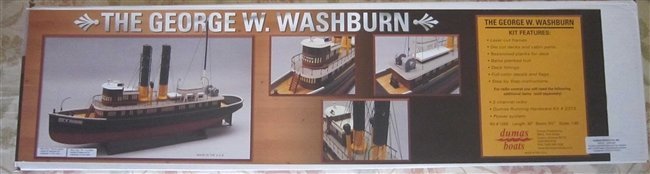
-
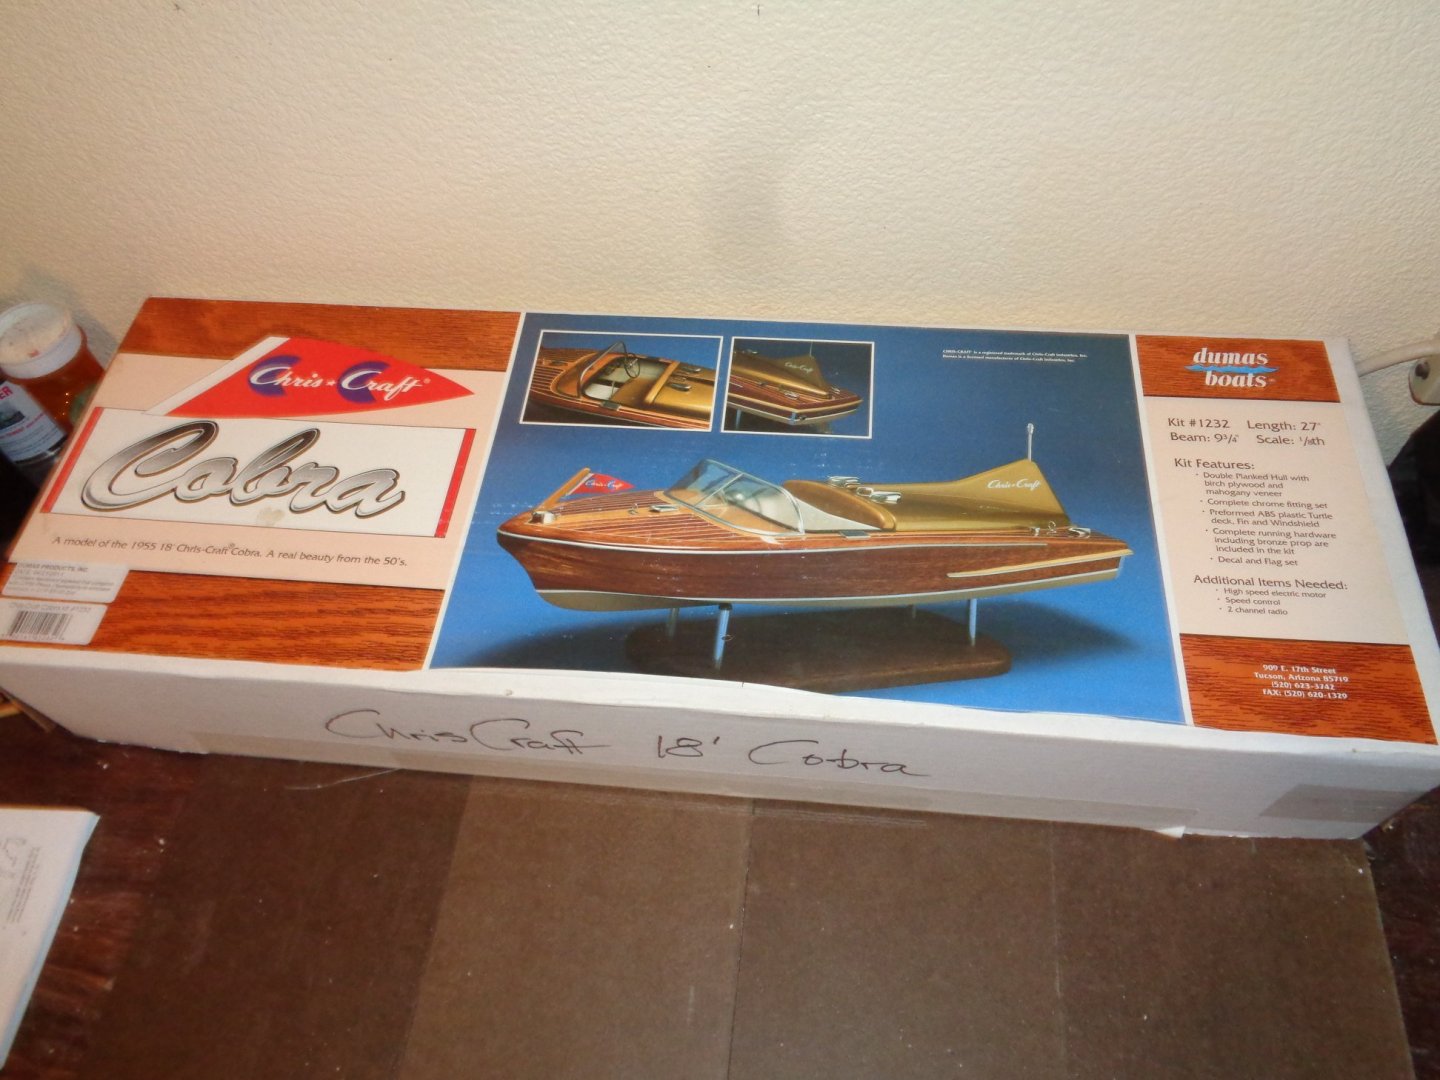
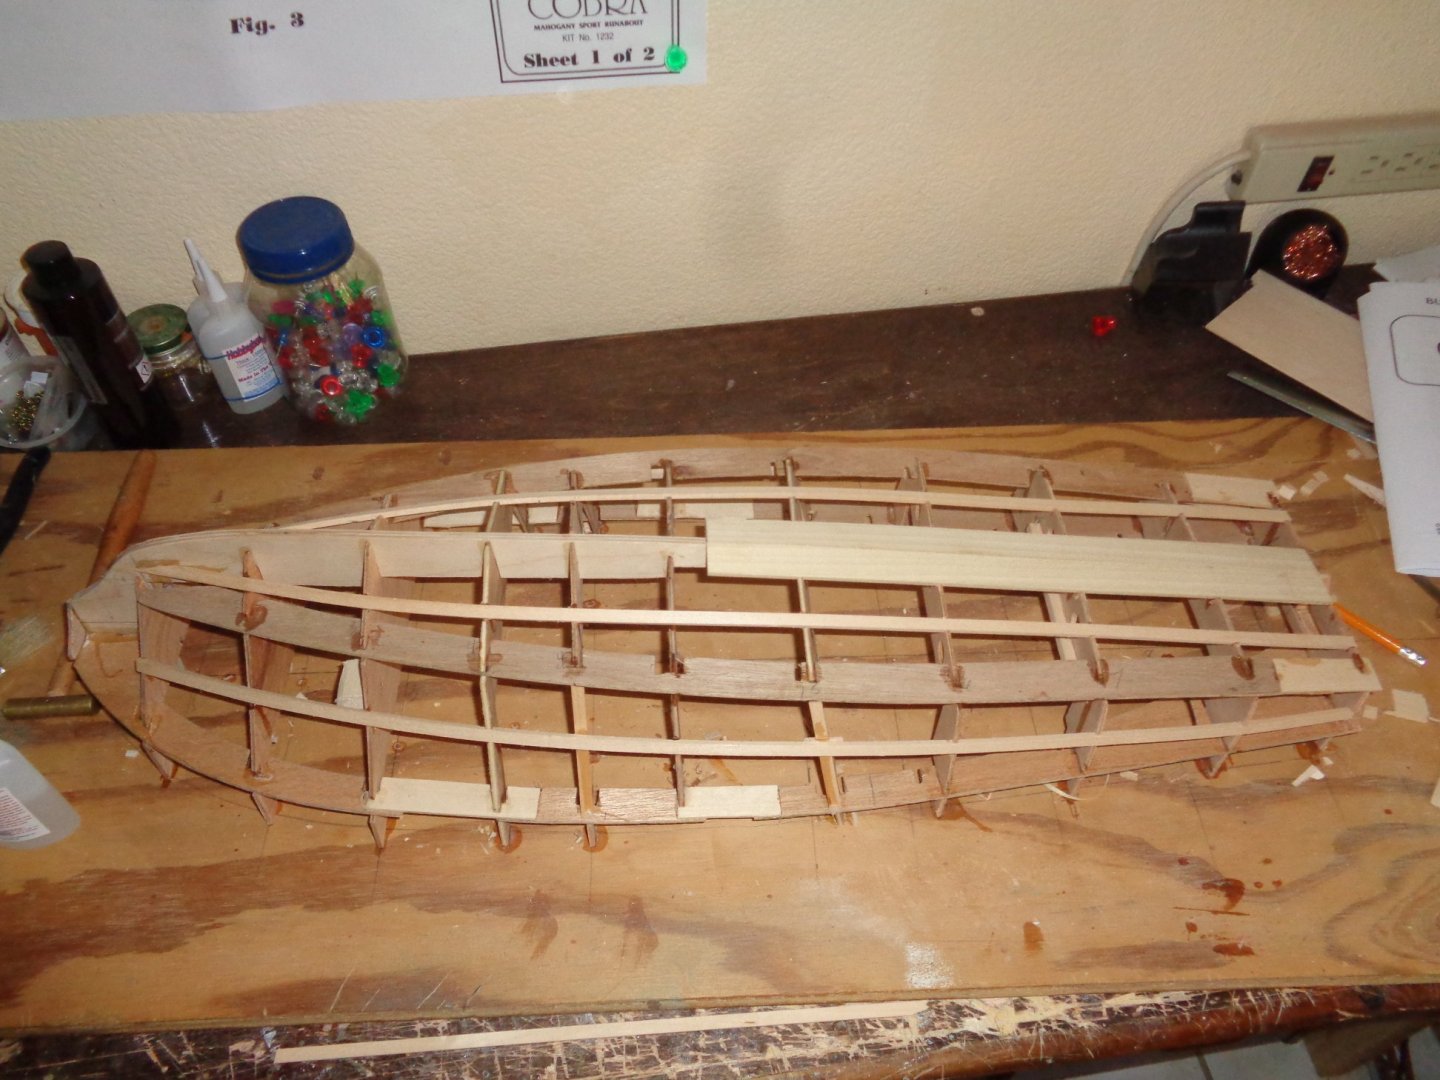
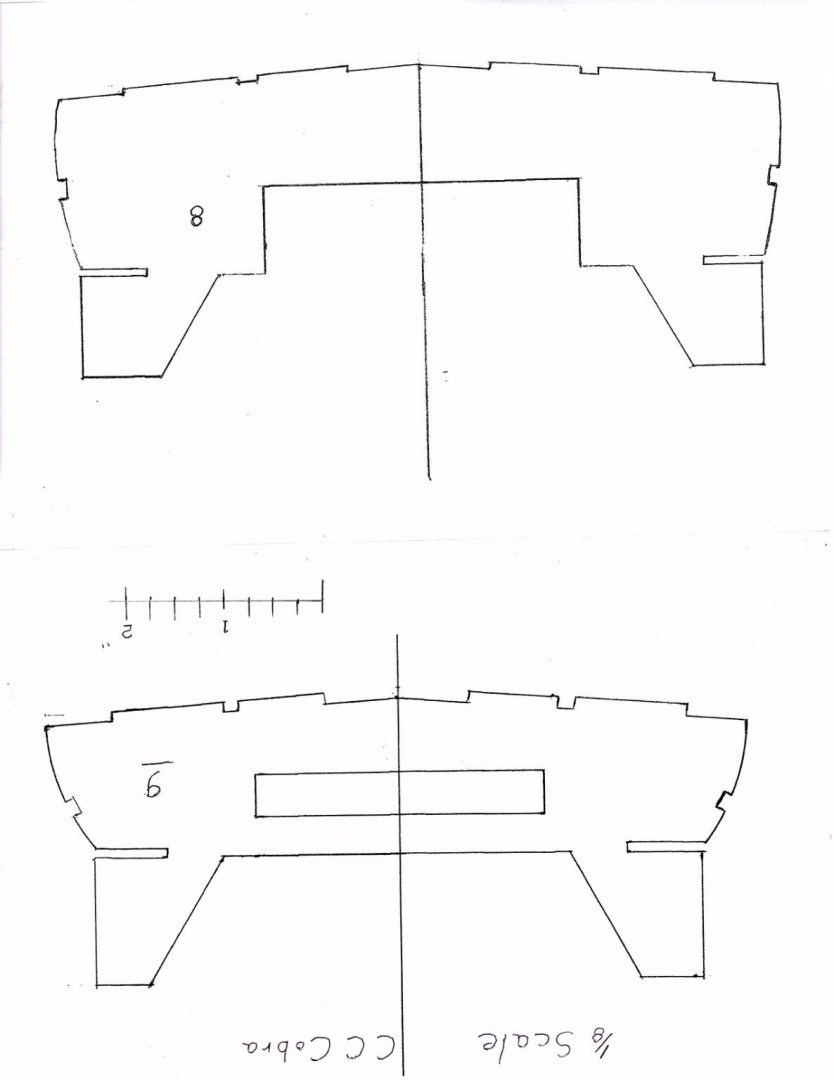
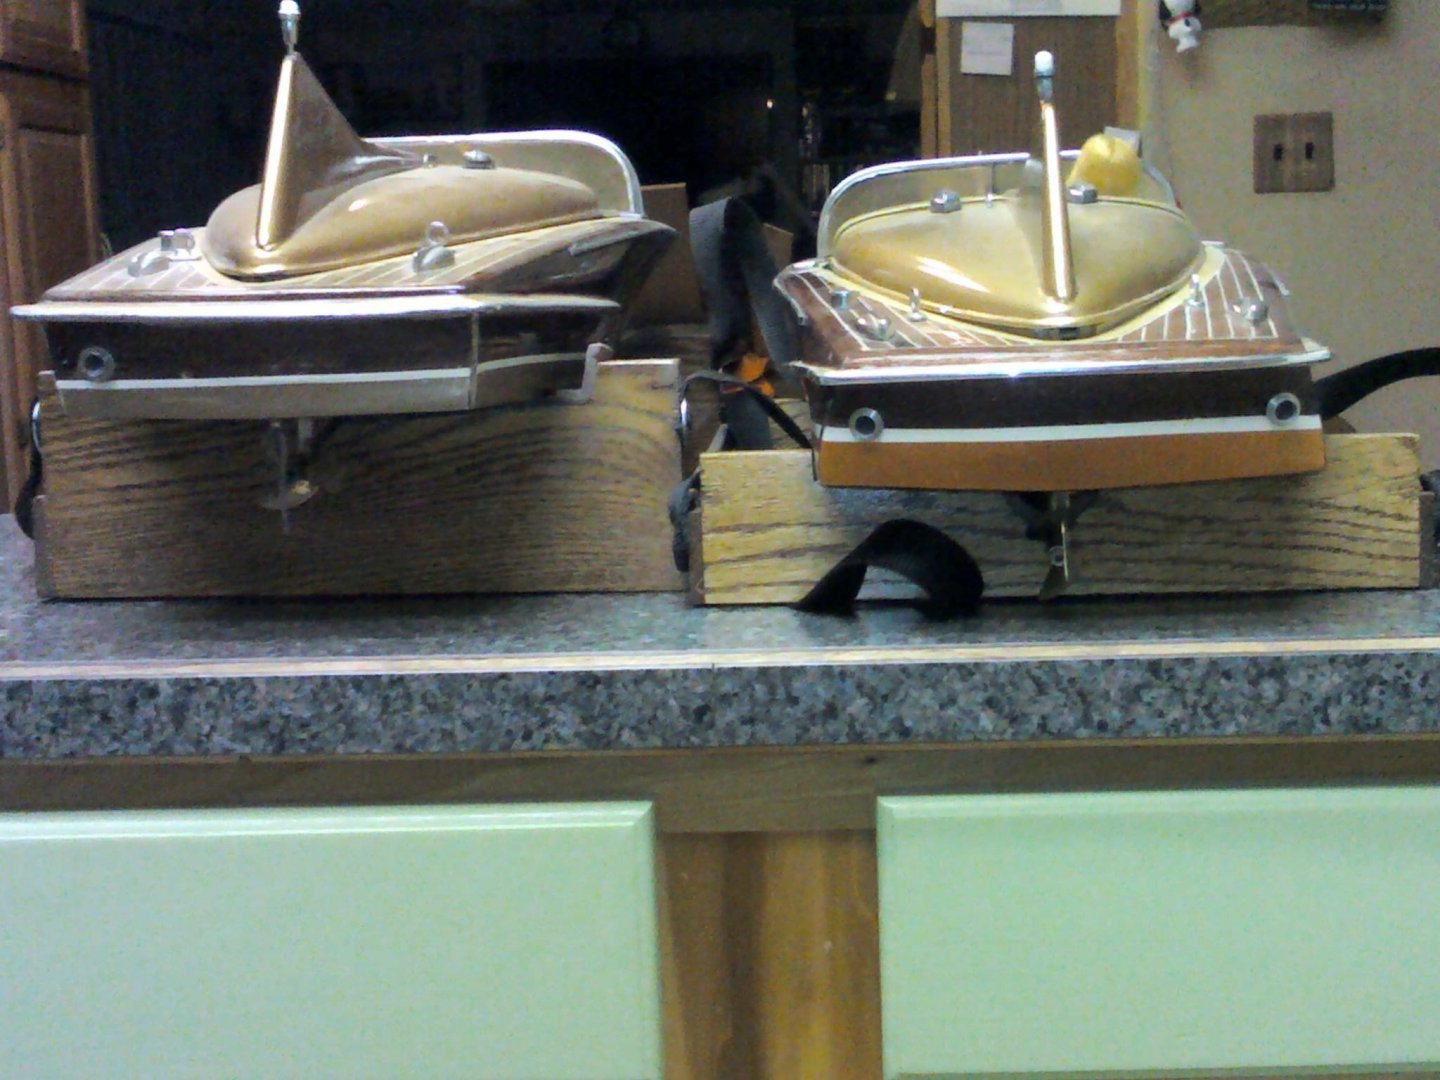
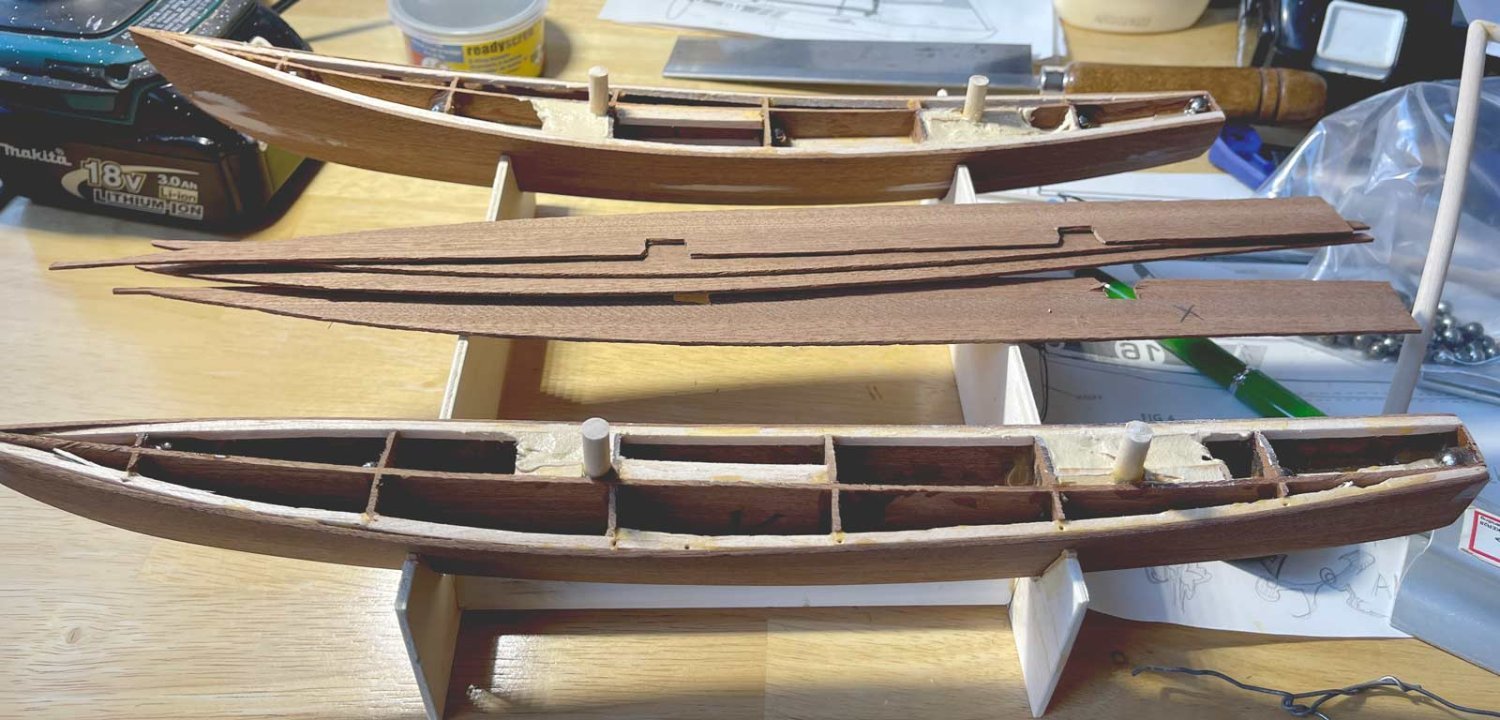
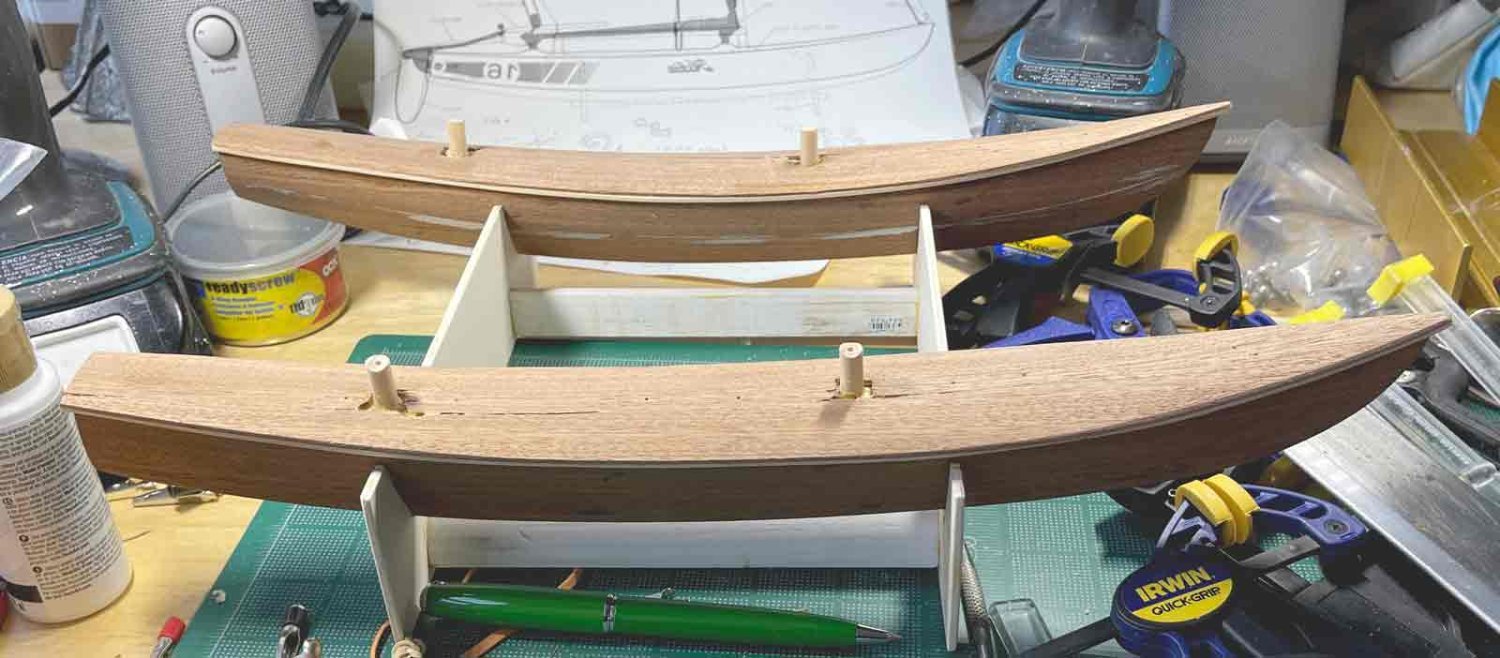
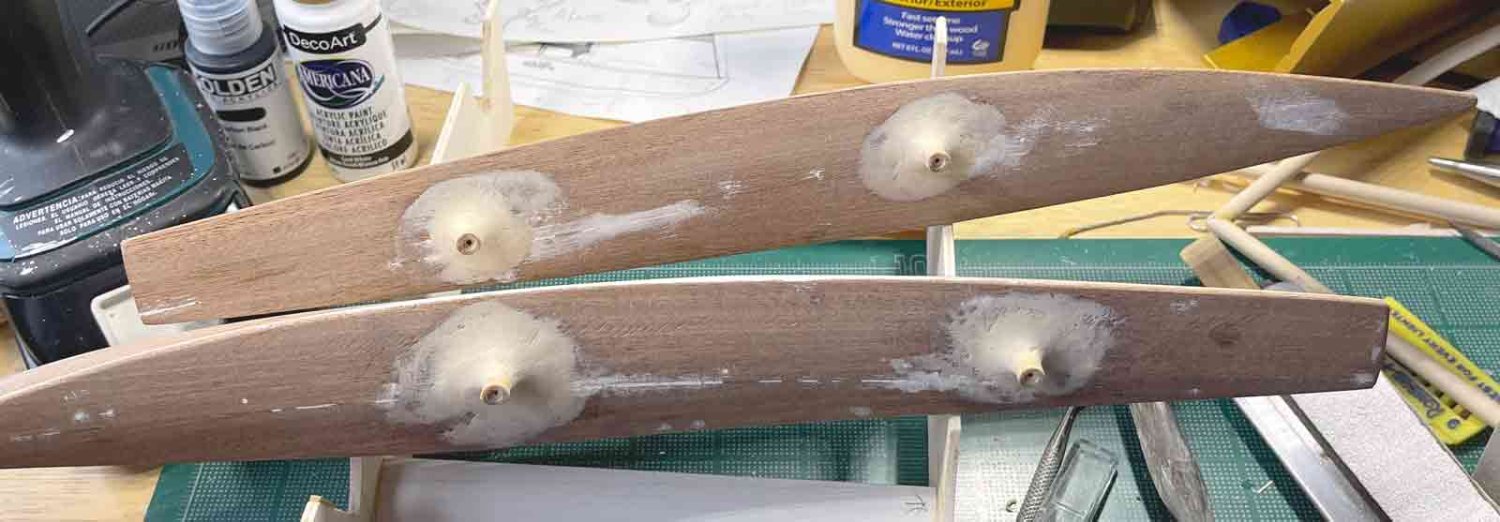
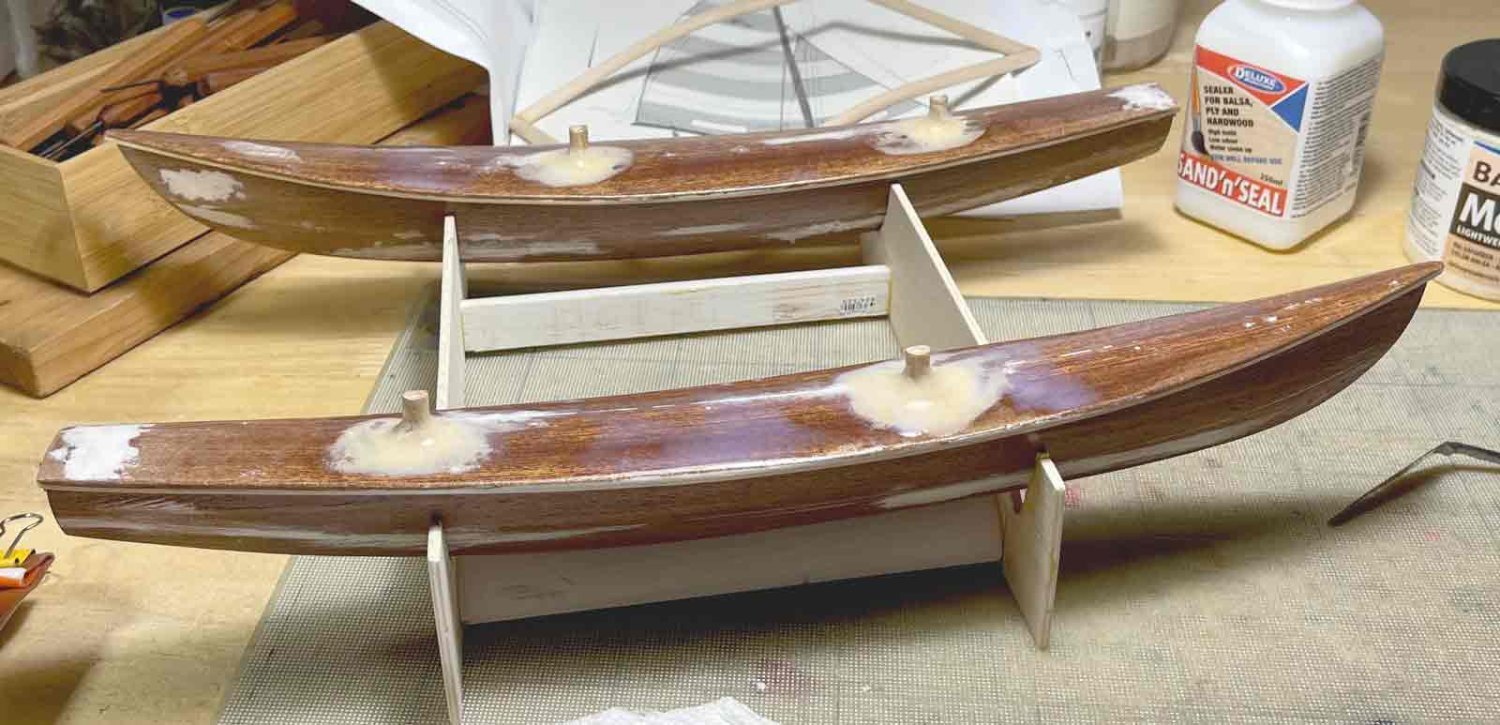
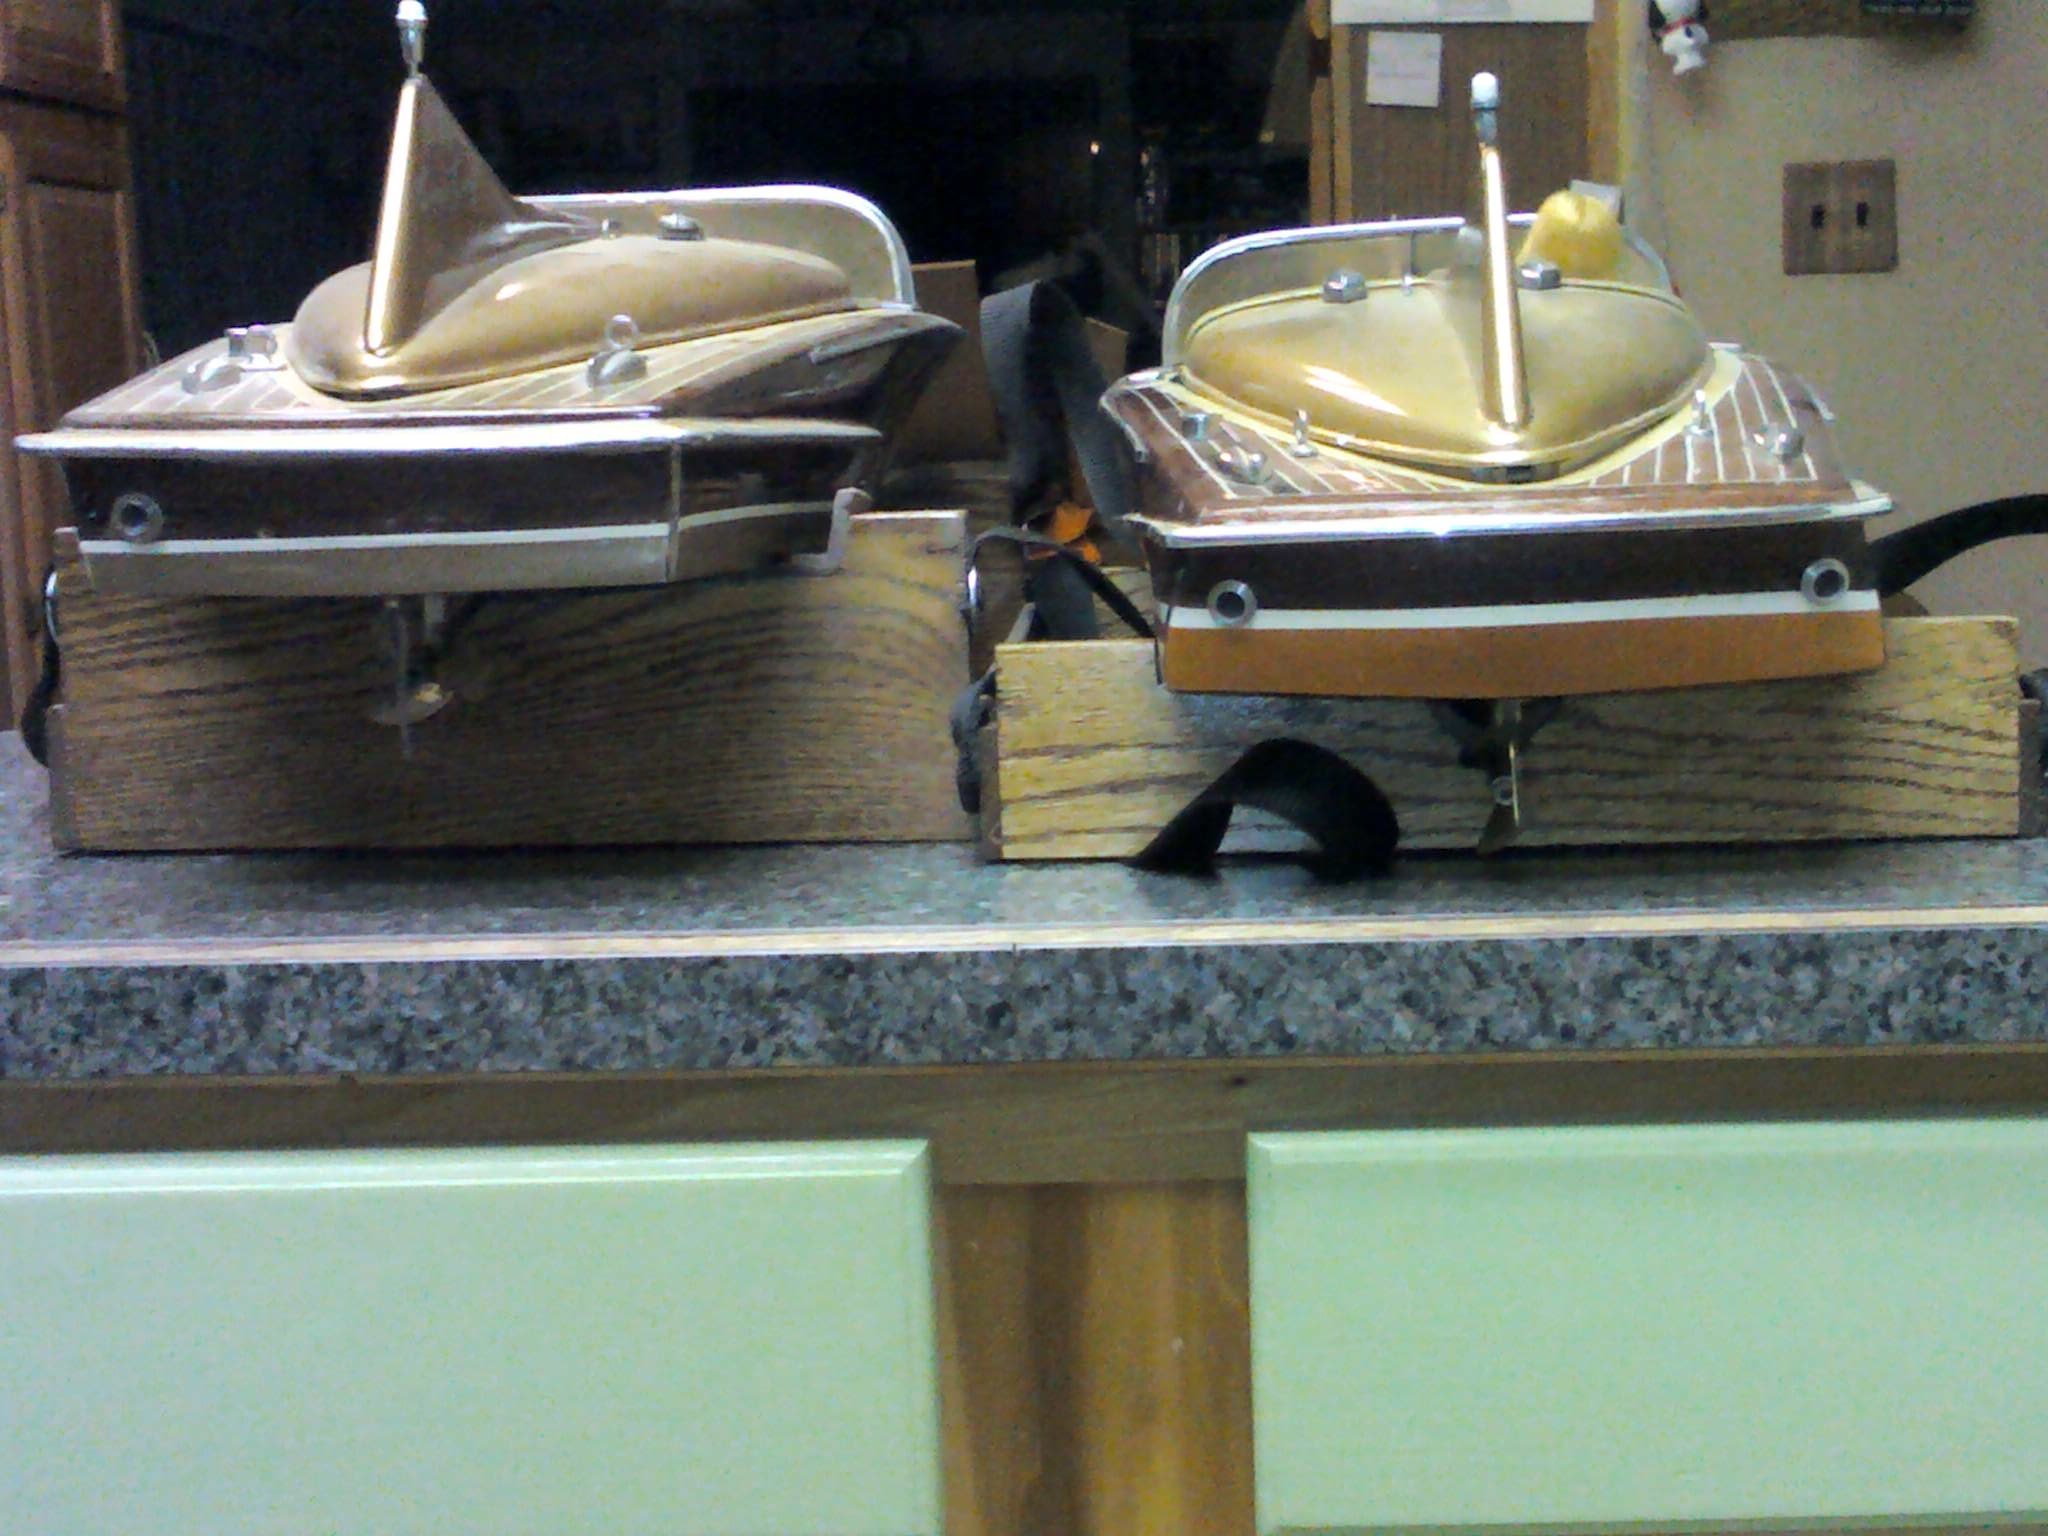
Here is my latest project, a Dumas 1955 Cobra kit that was "yes" an orphaned kit that a friend sent to me. But I will not be building this to kit specs. It will be moderate to heavily modified. The original 18' Cobra as with the 21' Cobra was notorious for poor handling, especially in turns and the stern or transome sat so low in the water that there had to be a cut water edge added to the rear sides and transome to keep the boat from being swamped. The kit is no exception. Now, the first modification probably won't help with the mechanics of operation, but will mainly be cosmetic because it is my kit and I can do what I want to it, which will be stretching the front section of the boat 3" from the cockpit forward. This will give it more of a front deck and look more proportional than the original which was 27" in length. But now it will be 30" in length. Next, I will try and address the stern section by building it up by 1/4" to 3/8" to give it a better profile in the water and hopefully help with the swamping issues. Lastly, I will address a glaring issue from the kit to the actual Cobra boat, which is the design of the transome (see picture). Hopfully this all goes well because with every action there is a reaction, so I will have to see which problems are caused by each modification. You can see the corrected version of frame 9. In the photo of the two Cobra's, you can see the corrected transome on the Cobra to the right. These were compliments of Gary, a friend of mine. Wish me luck!
-
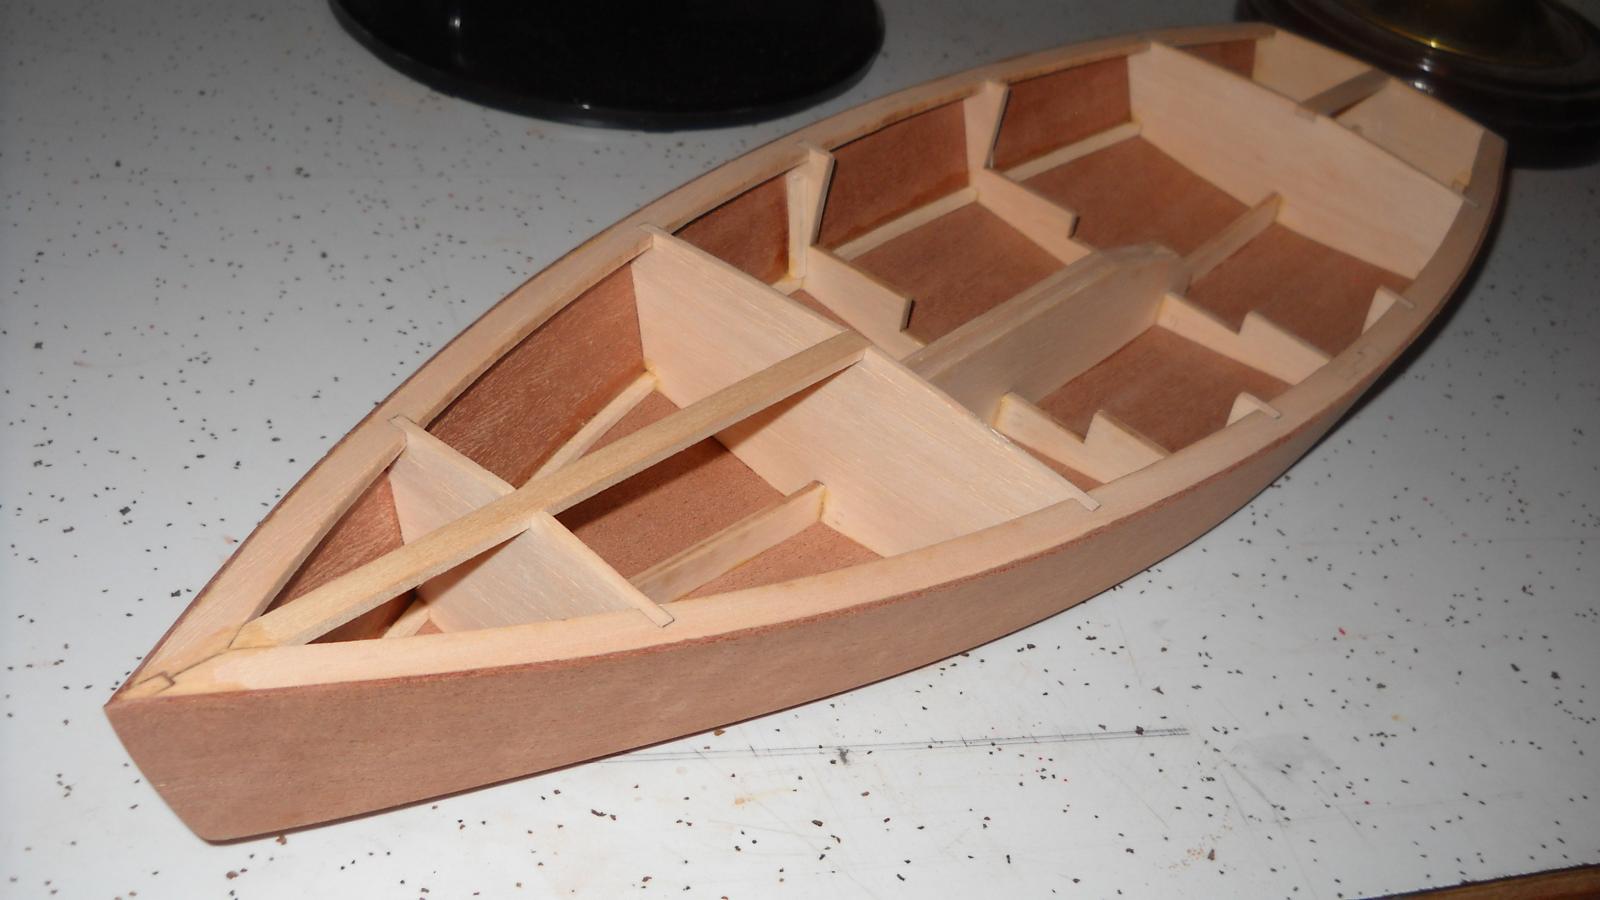
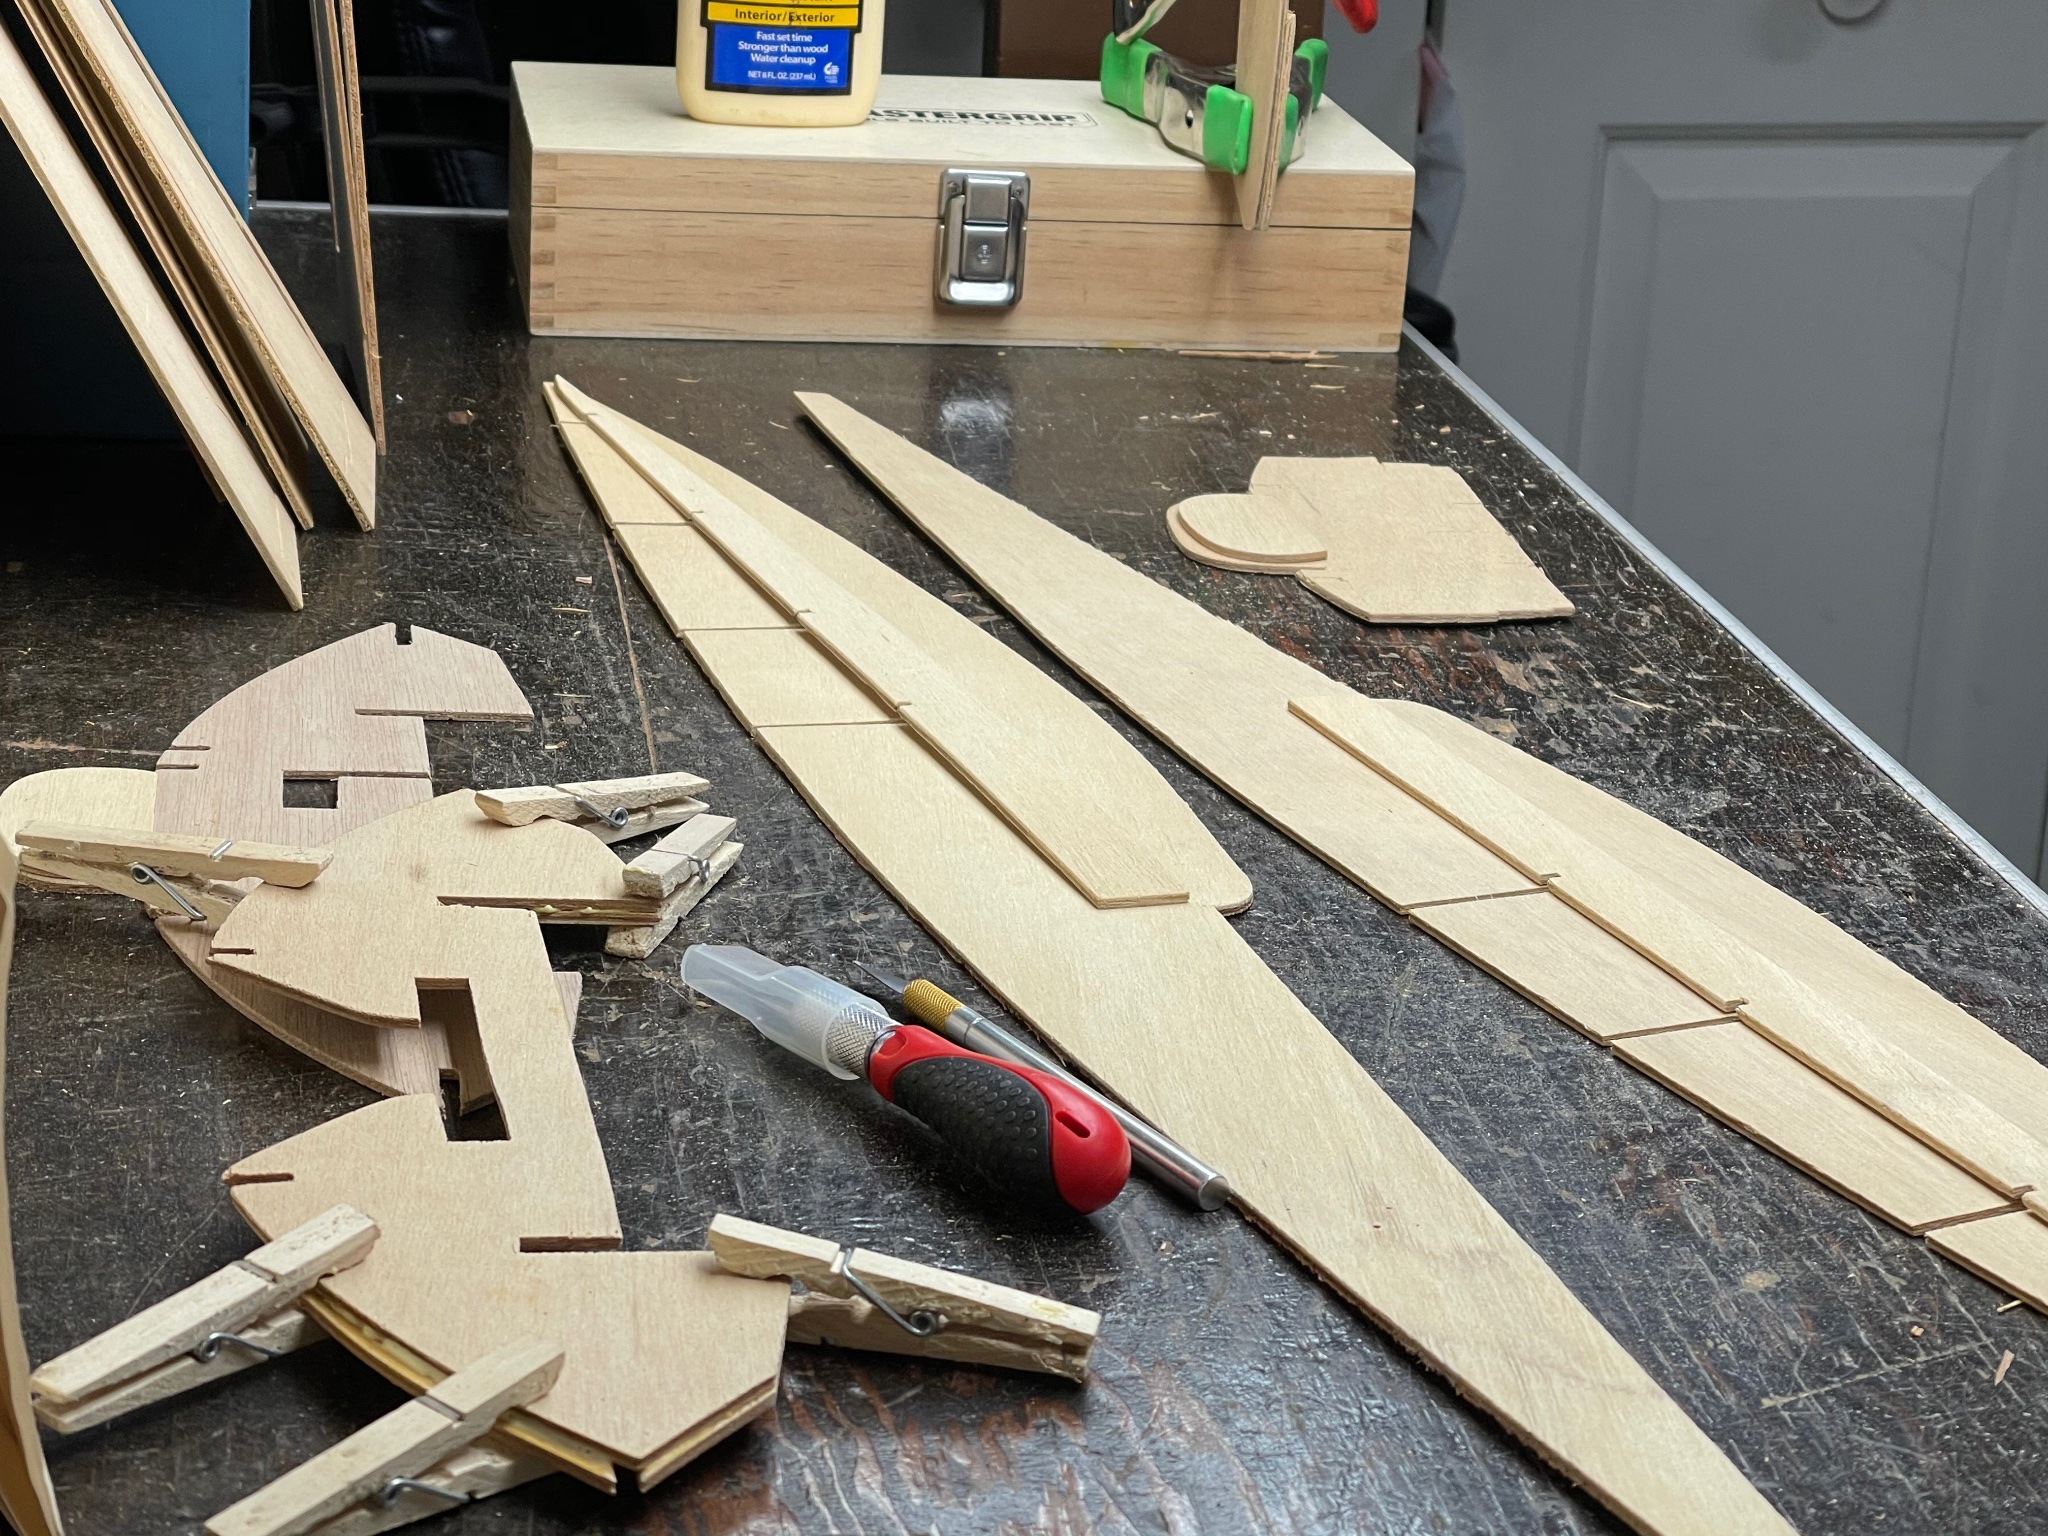
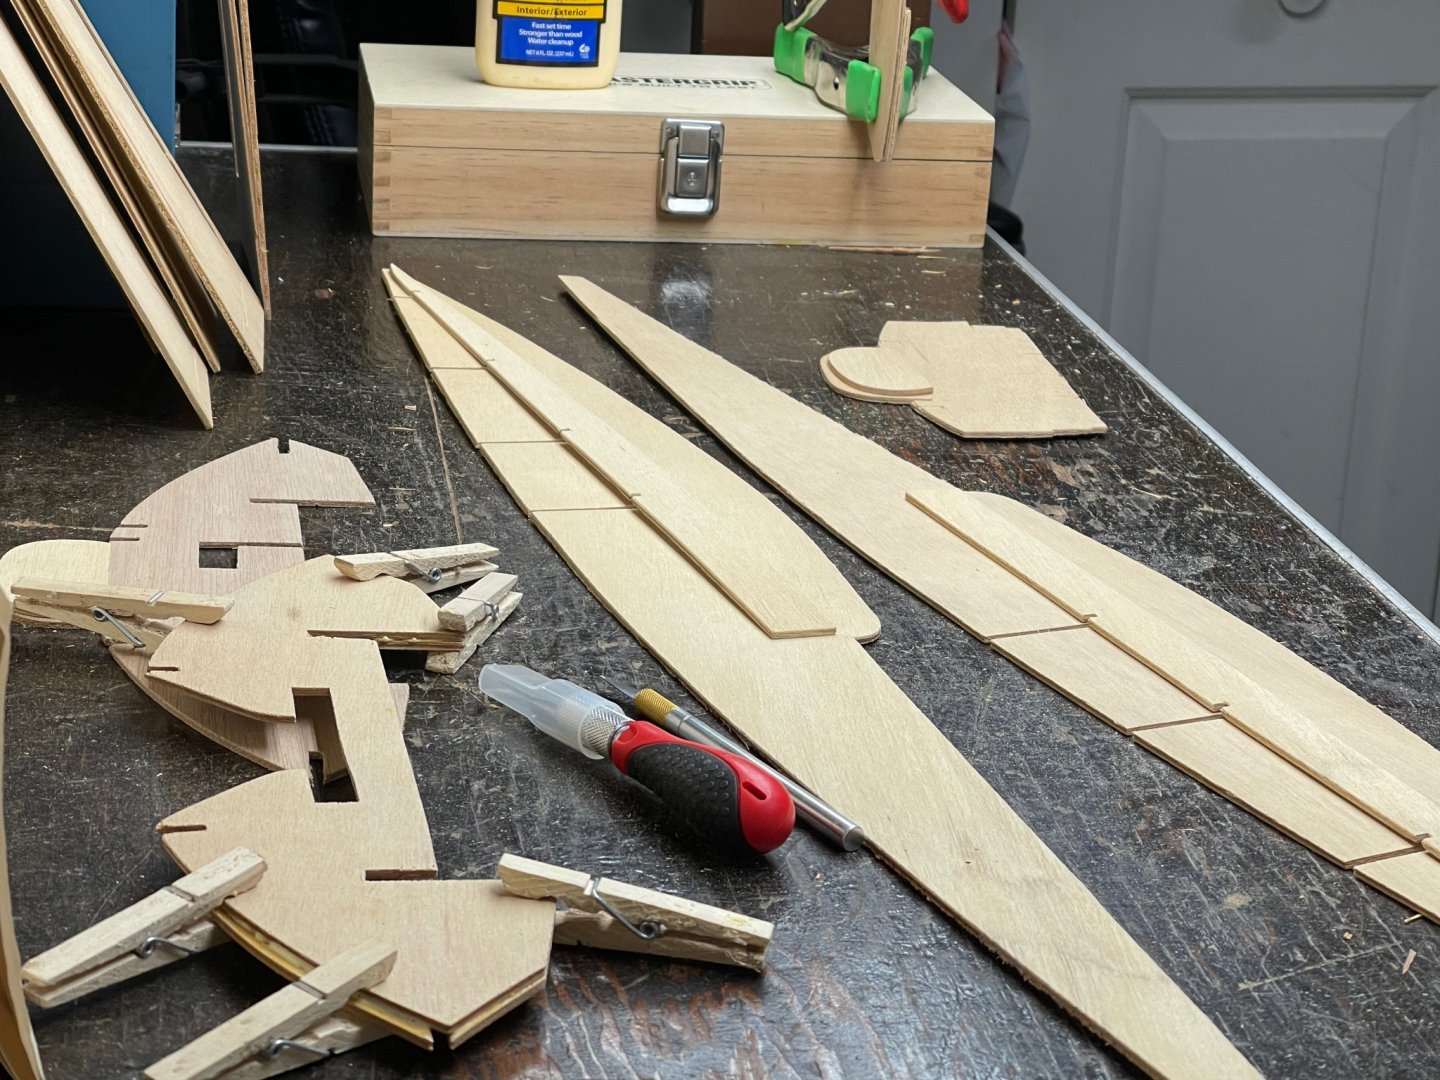
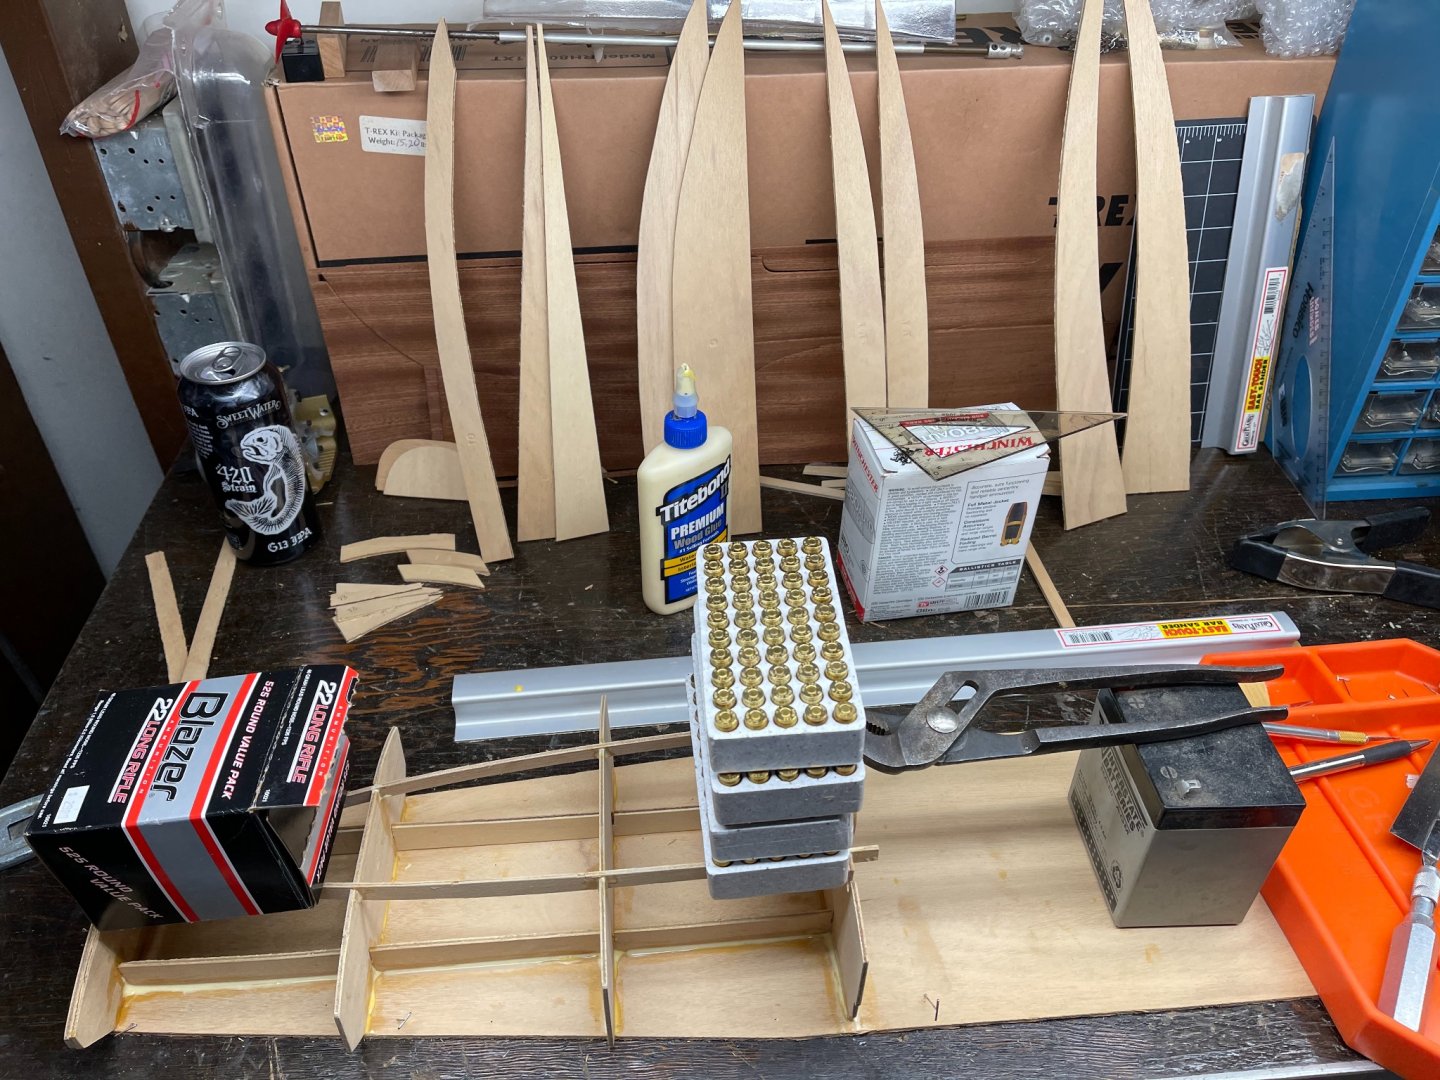
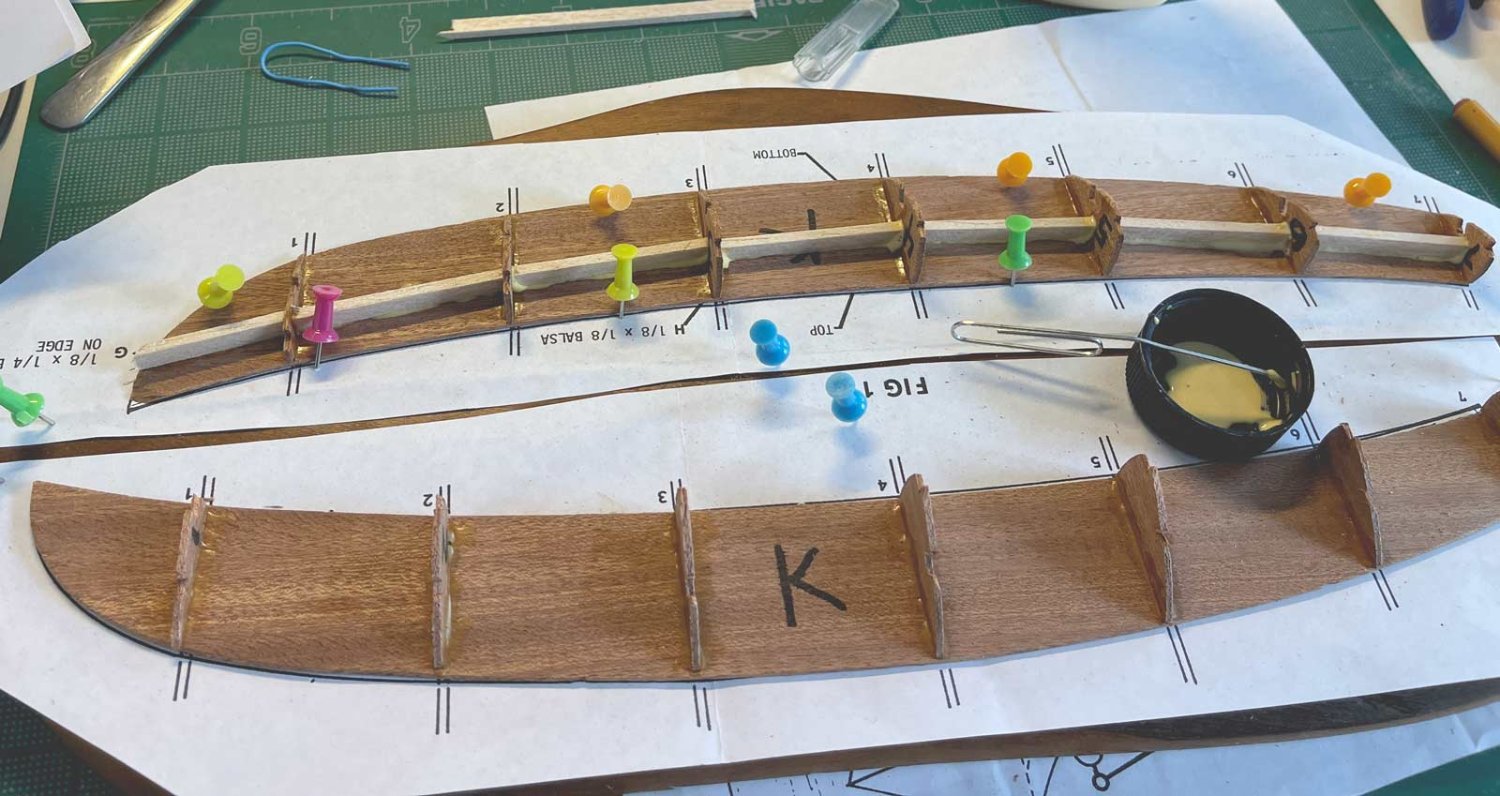
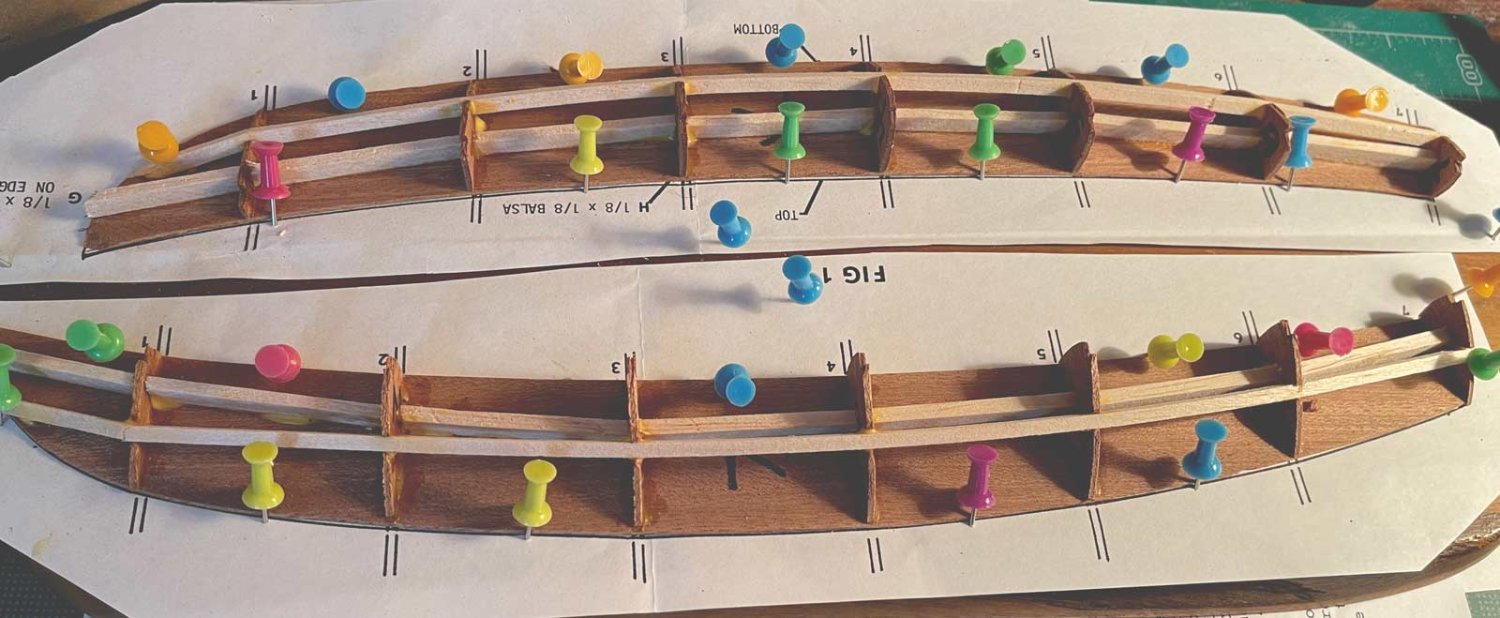
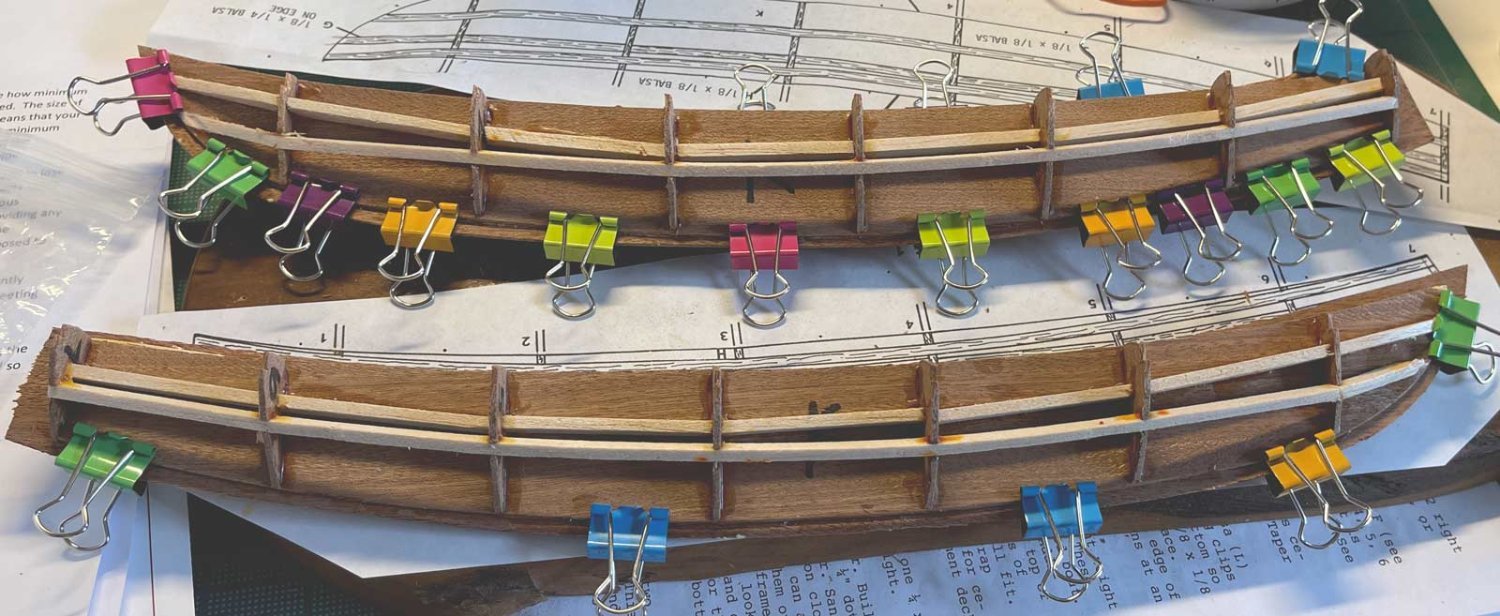
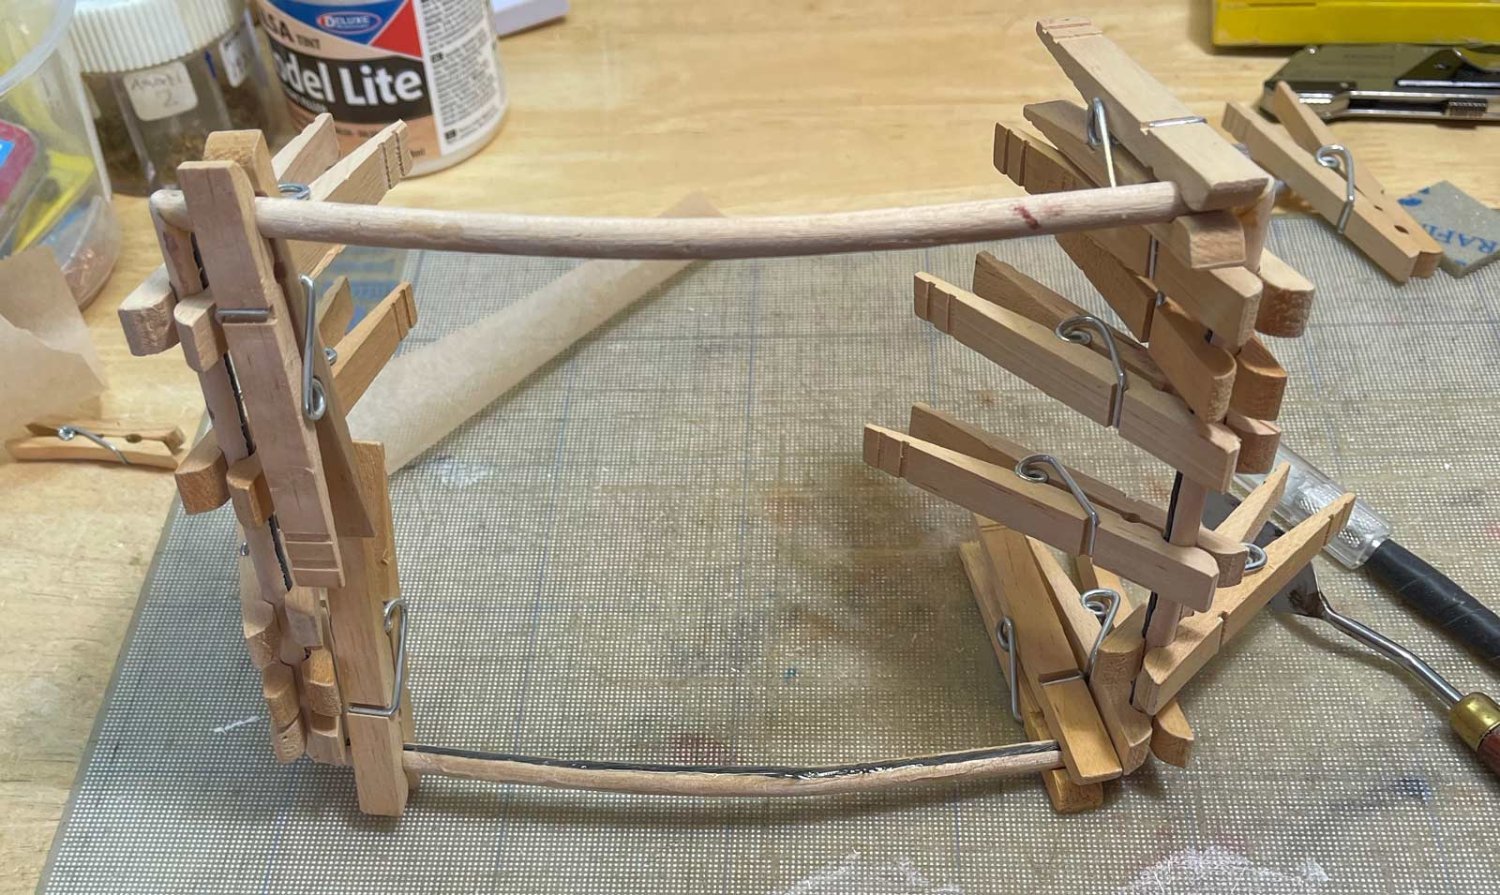
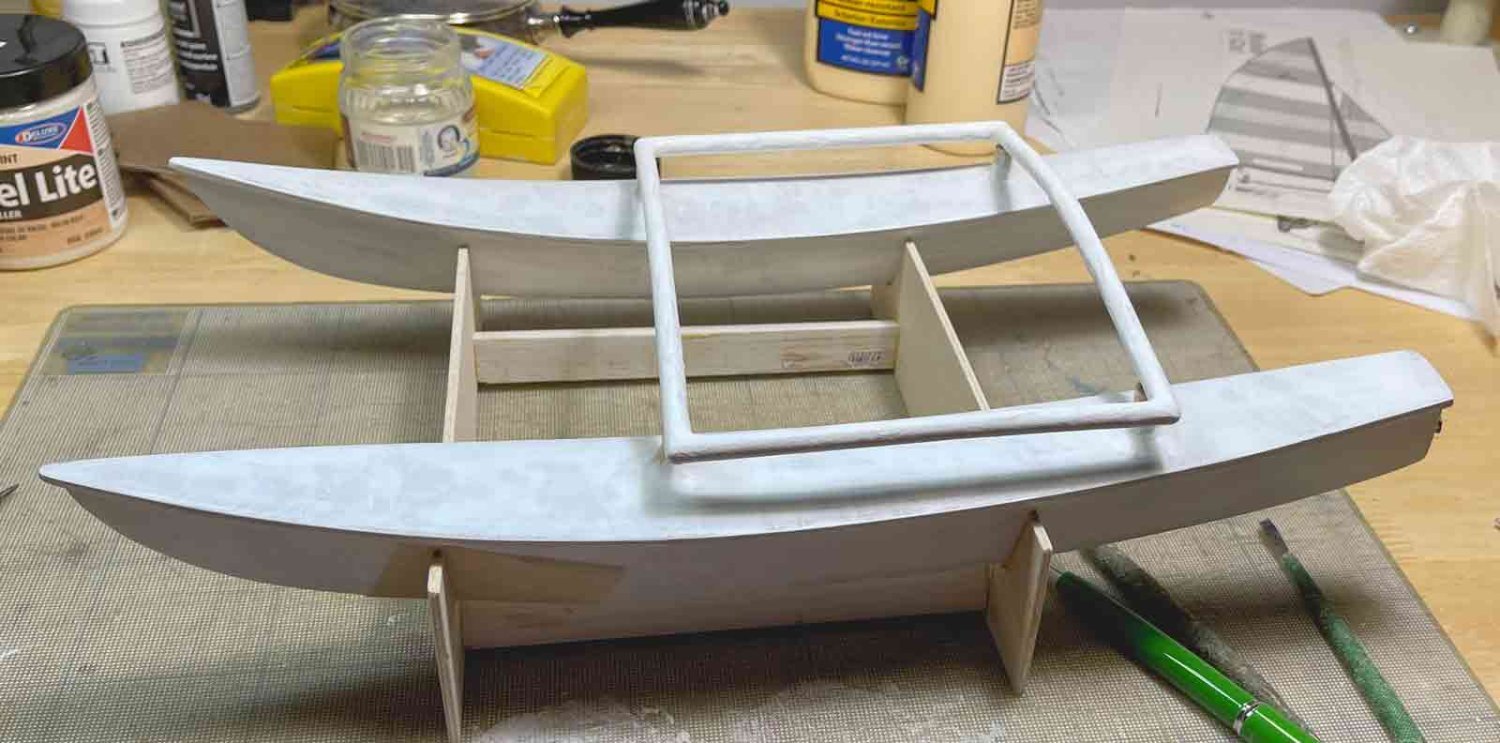
 The beginning. Let us hope and pray that I take my time, think everything through, cut safely, Sand carefully, measure two, three, or four times before I cut, always cut outside the line, apply epoxy or resin in small quantities, and clip with pins to hold together. I have also begun trimming the boat's cradle with cushioning (not pictured), and away we go. Take good care friends. John
.thumb.JPG.0051bbcb9a0c3b0b34ebb1aab6519c05.JPG)

.thumb.JPG.7daa2ad1caa4ed122b27a755332d307d.JPG)
-
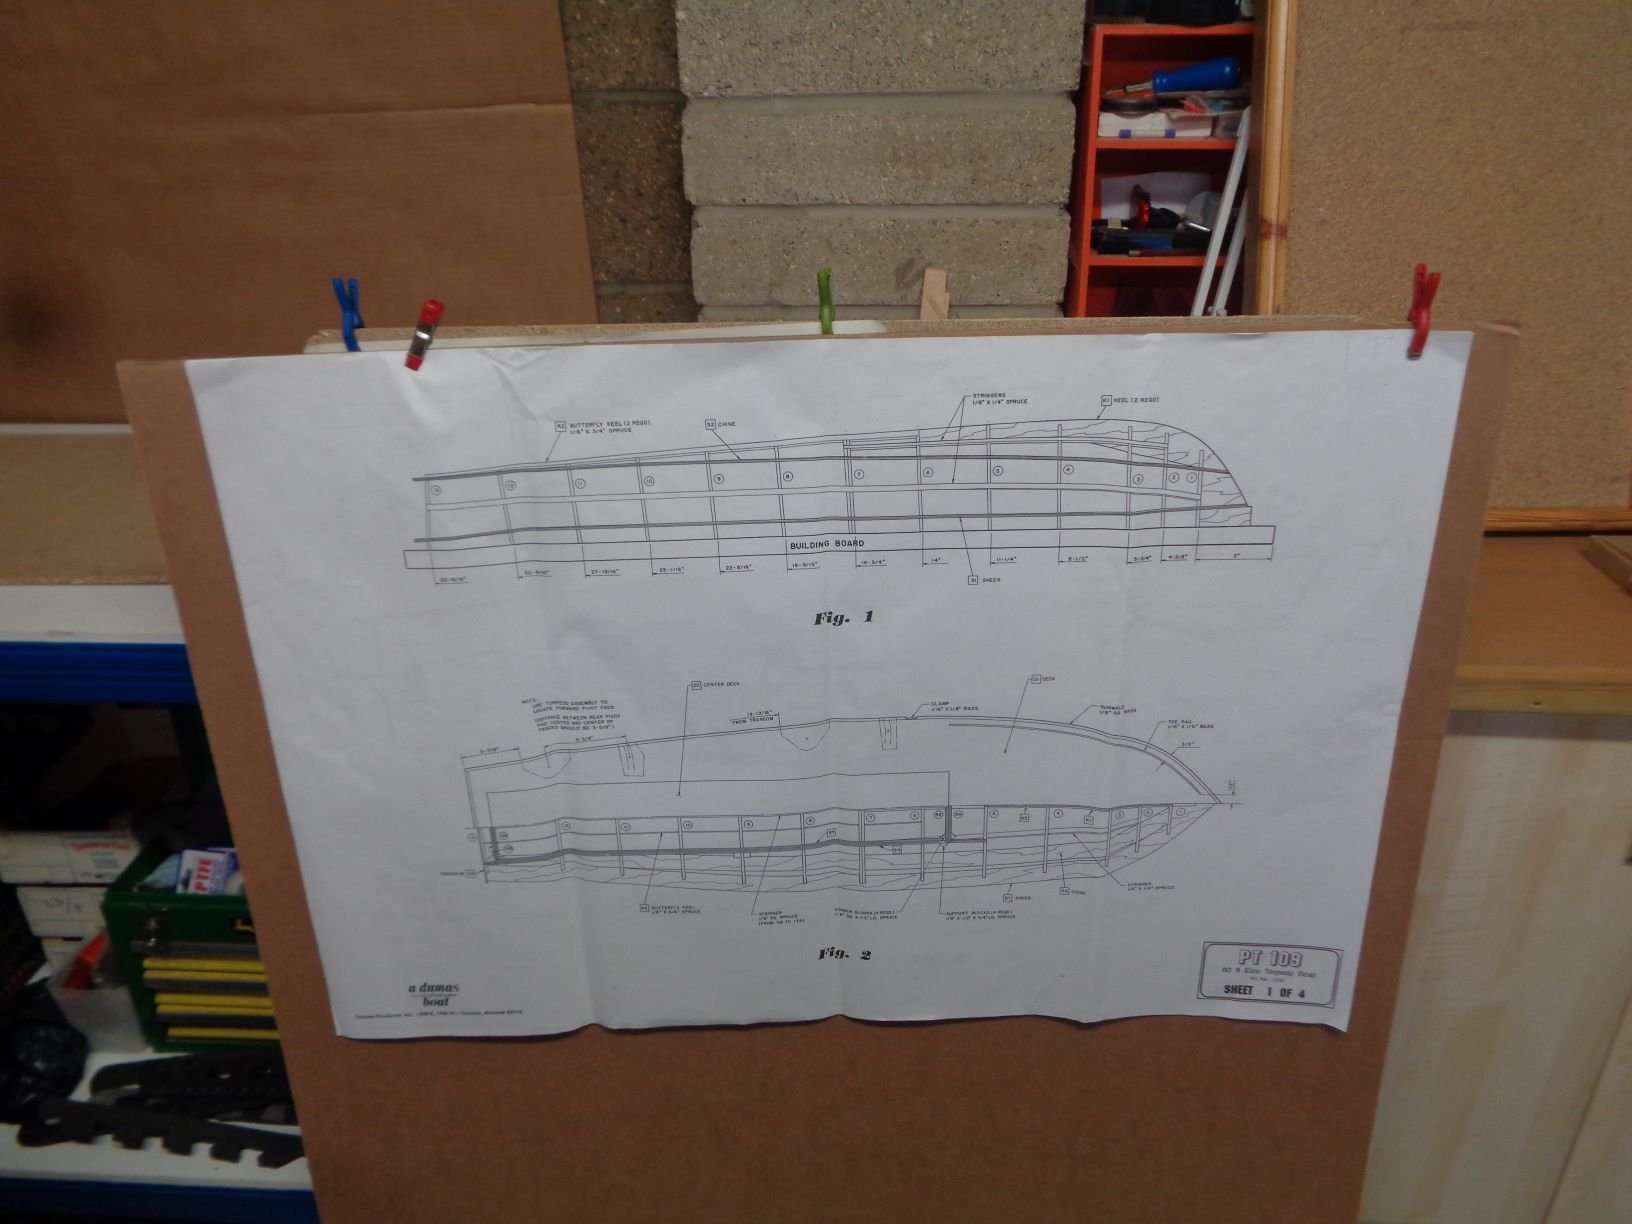
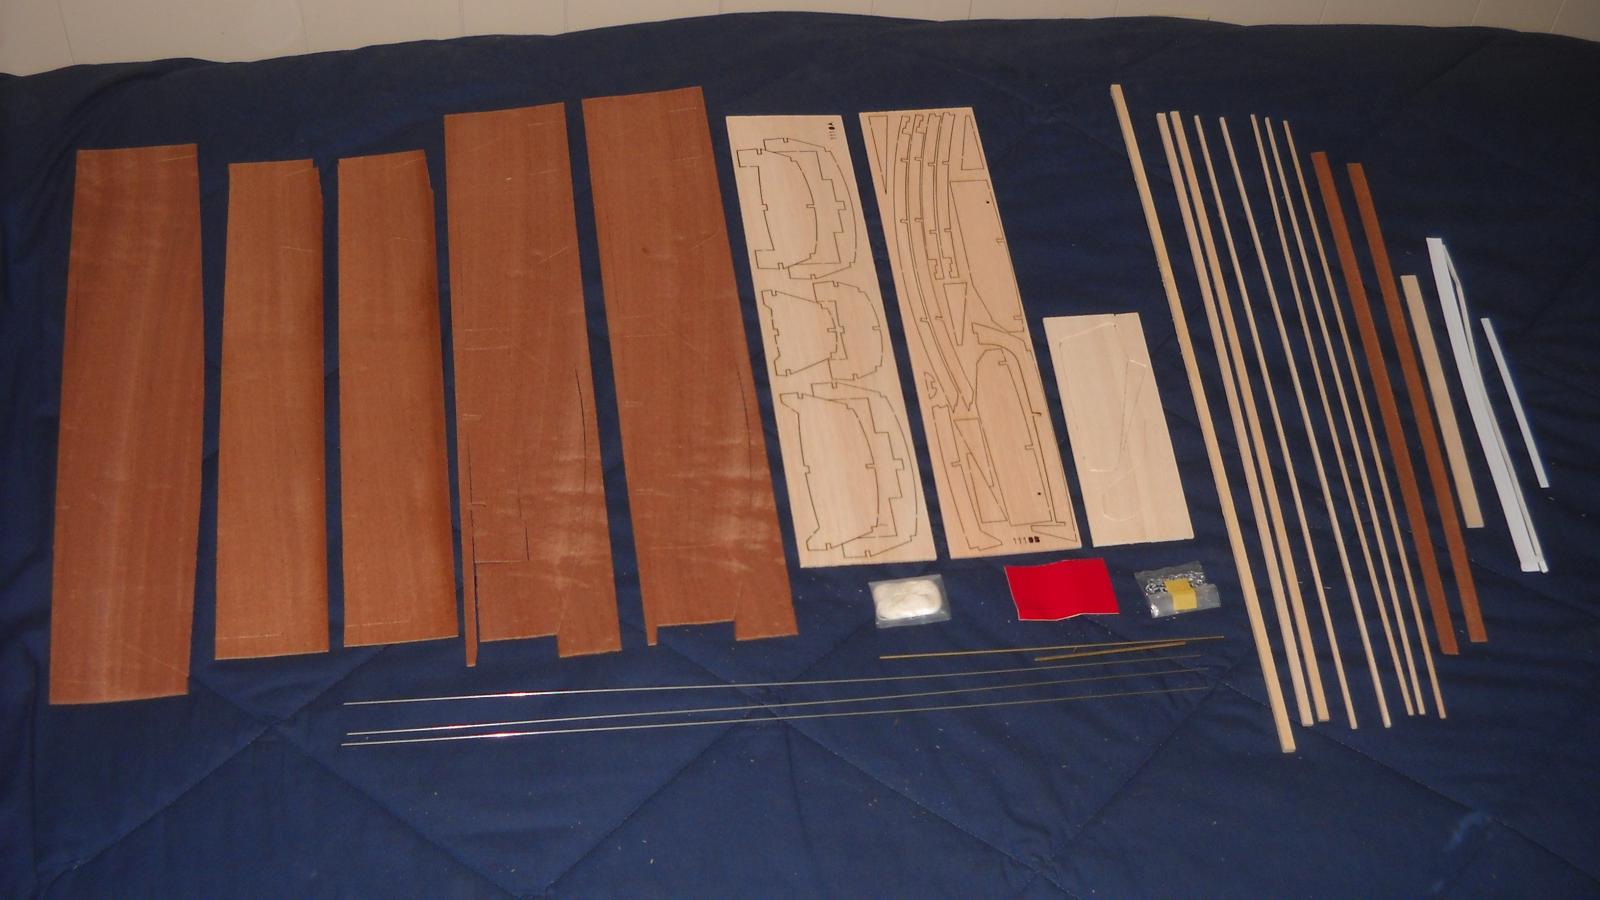
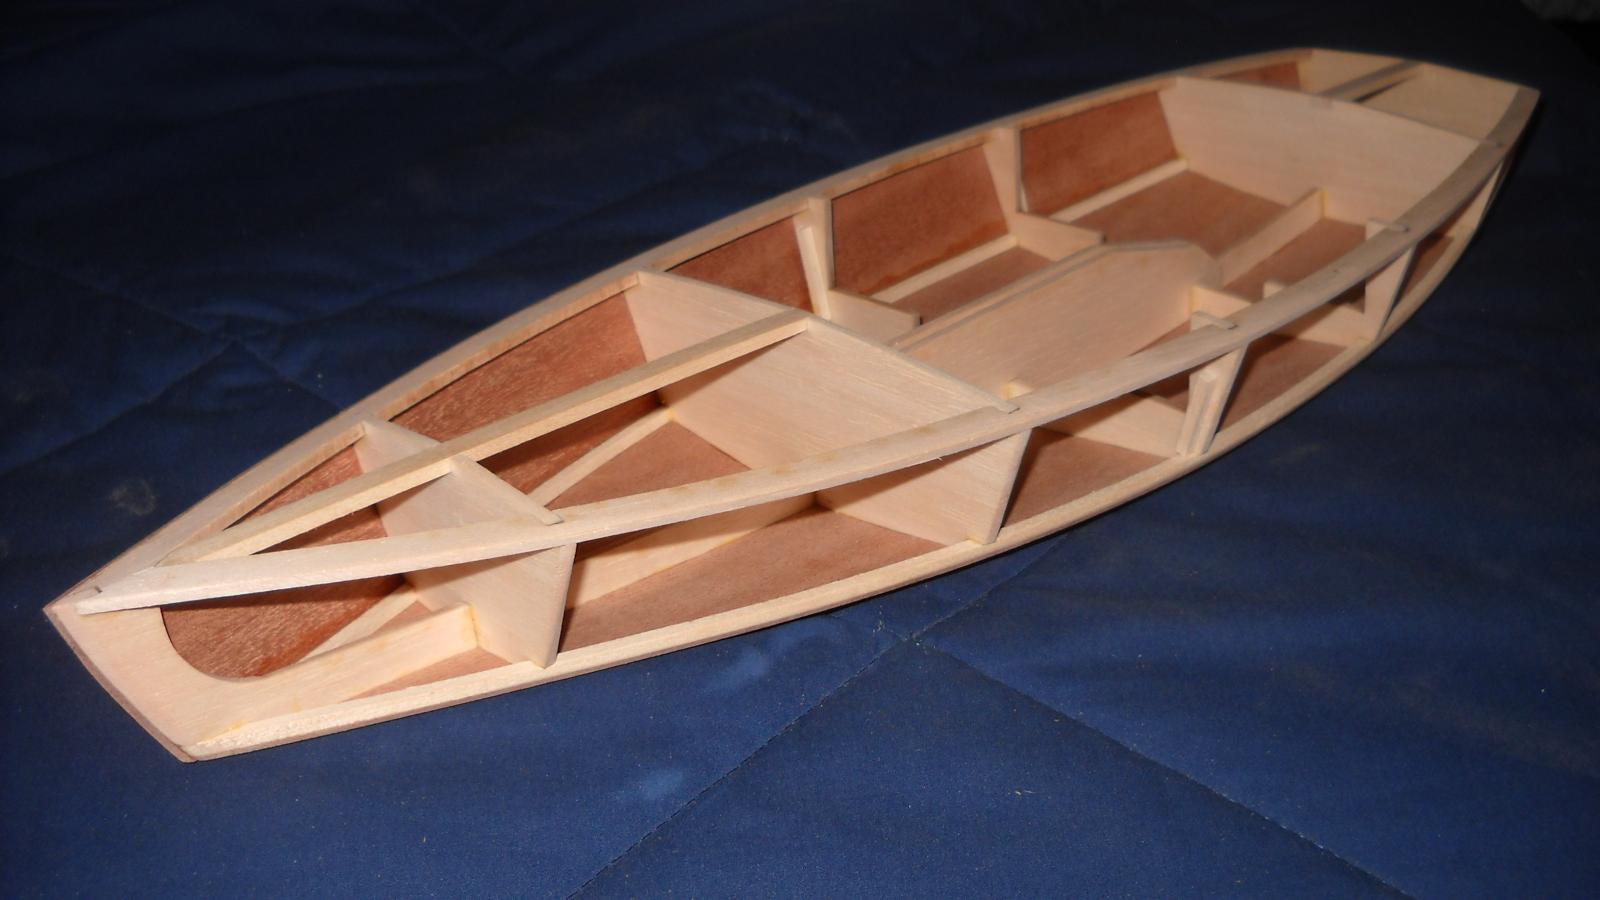
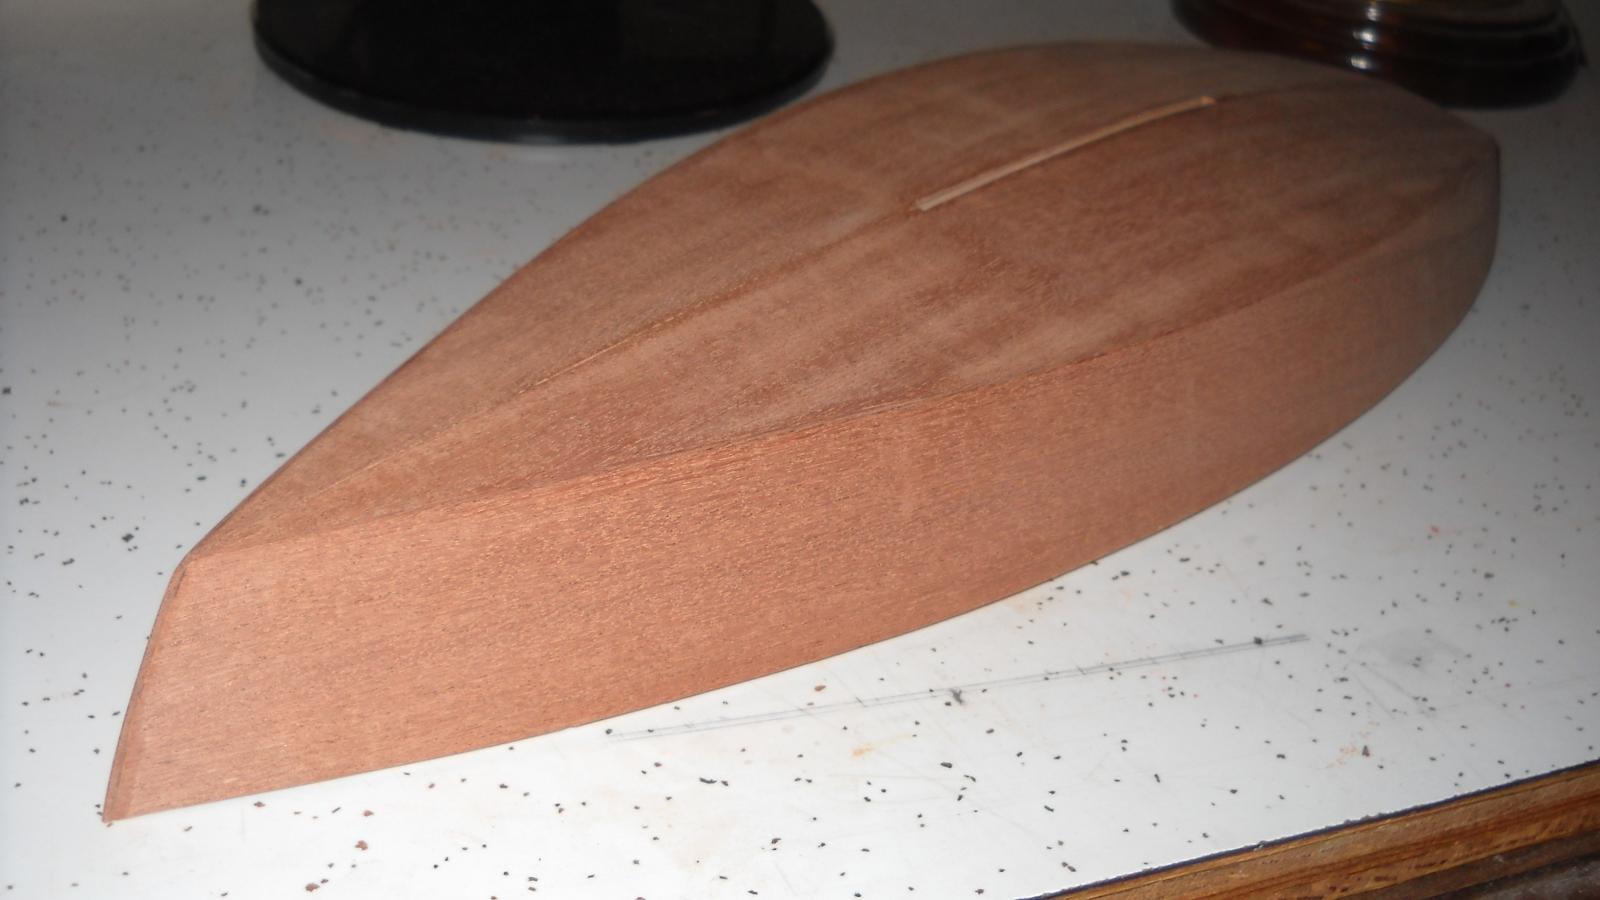
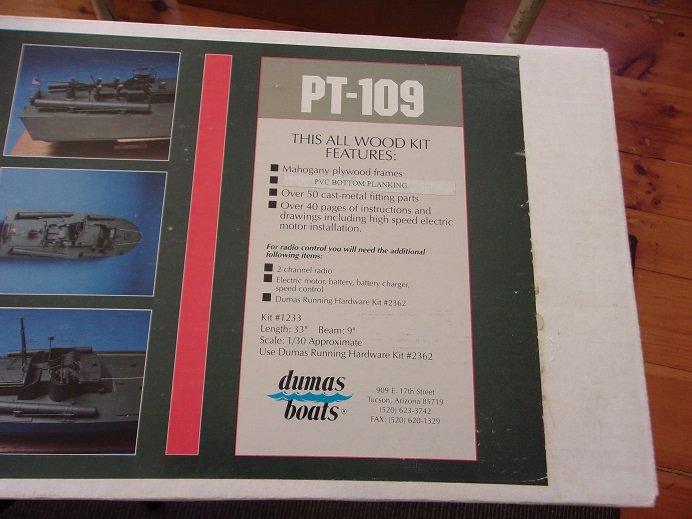
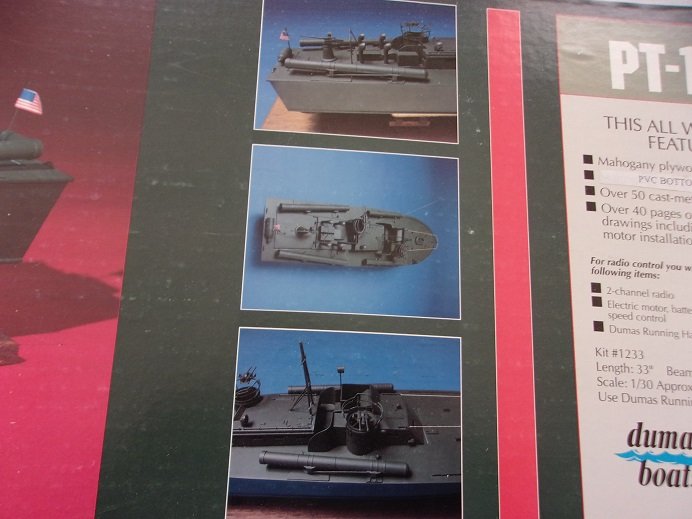
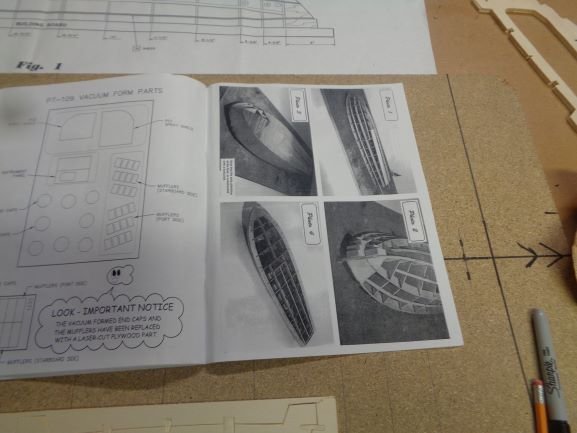
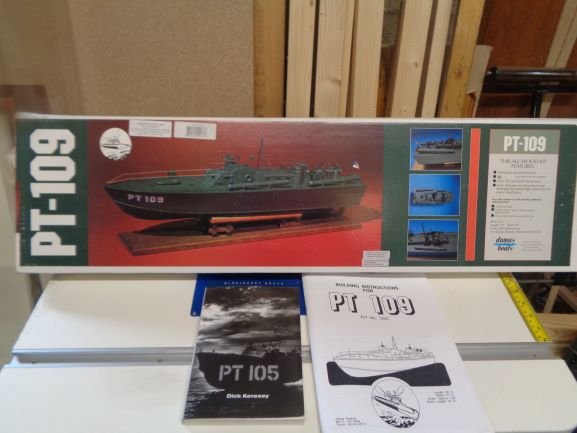
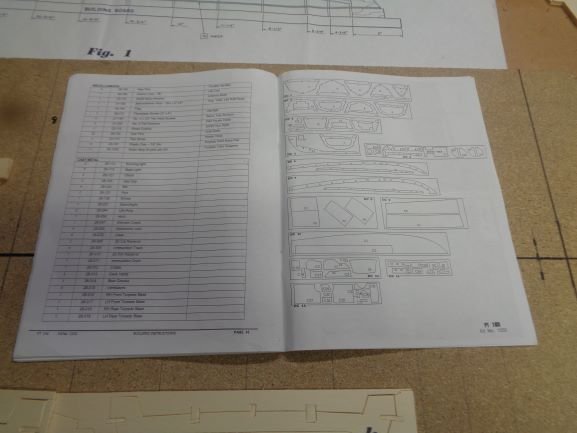
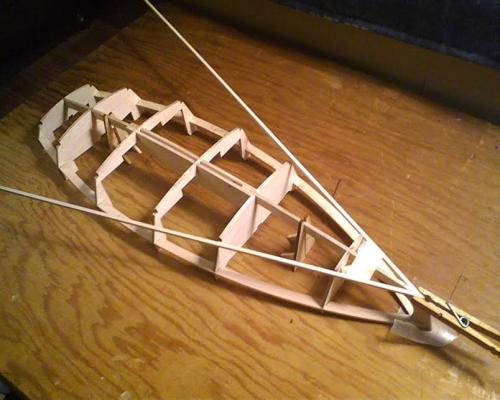
 After the Rattlesnake I wanted to do something different. I have always been interested in the WW2 PT (Patrol Torpedo) boat. My build will be modelled on PT 105 commanded by Dick Keresey. Yes, believe it or not they made another PTs besides the 109. The 105 was an 80-foot Elco Torpedo boat 1942, built of spruce, oak and mahogany and made watertight by marine plywood covering. The Dumas kit 1233, 4 large sheet plans, decent 45-page instruction book, ok pictures, good material list. Kit is supplied with Mahogany, birch, and poplar ply. Dumas decided to replace the Mahogany sheet hull planking with 2mm PVC they say it makes for a smother finial finish. OK however if I wanted to build a PVC boat, I would have bought one. I will buy 2mm Mahogany sheets to do the hull planking properly
- 195 replies
-
- 13
-
-
I have an opportunity to pick up an orphaned Dumas Typhoon mahogany runabout for the cost of shipping from a fellow builder, who received it as well but isn't interested in building it. he says he things all the parts are there, but who knows, it's a shot in the dark and a bit of a gamble. But I tend to be my own worst enemy at times and a really glutton for punishment. So, we'll see how it goes. But this is one of those kits I would LOVE to build. I had planned to retire from modeling with maybe an occasional small build here and there, but since heart surgery they have been finding me like stray puppies following me home from school.
-
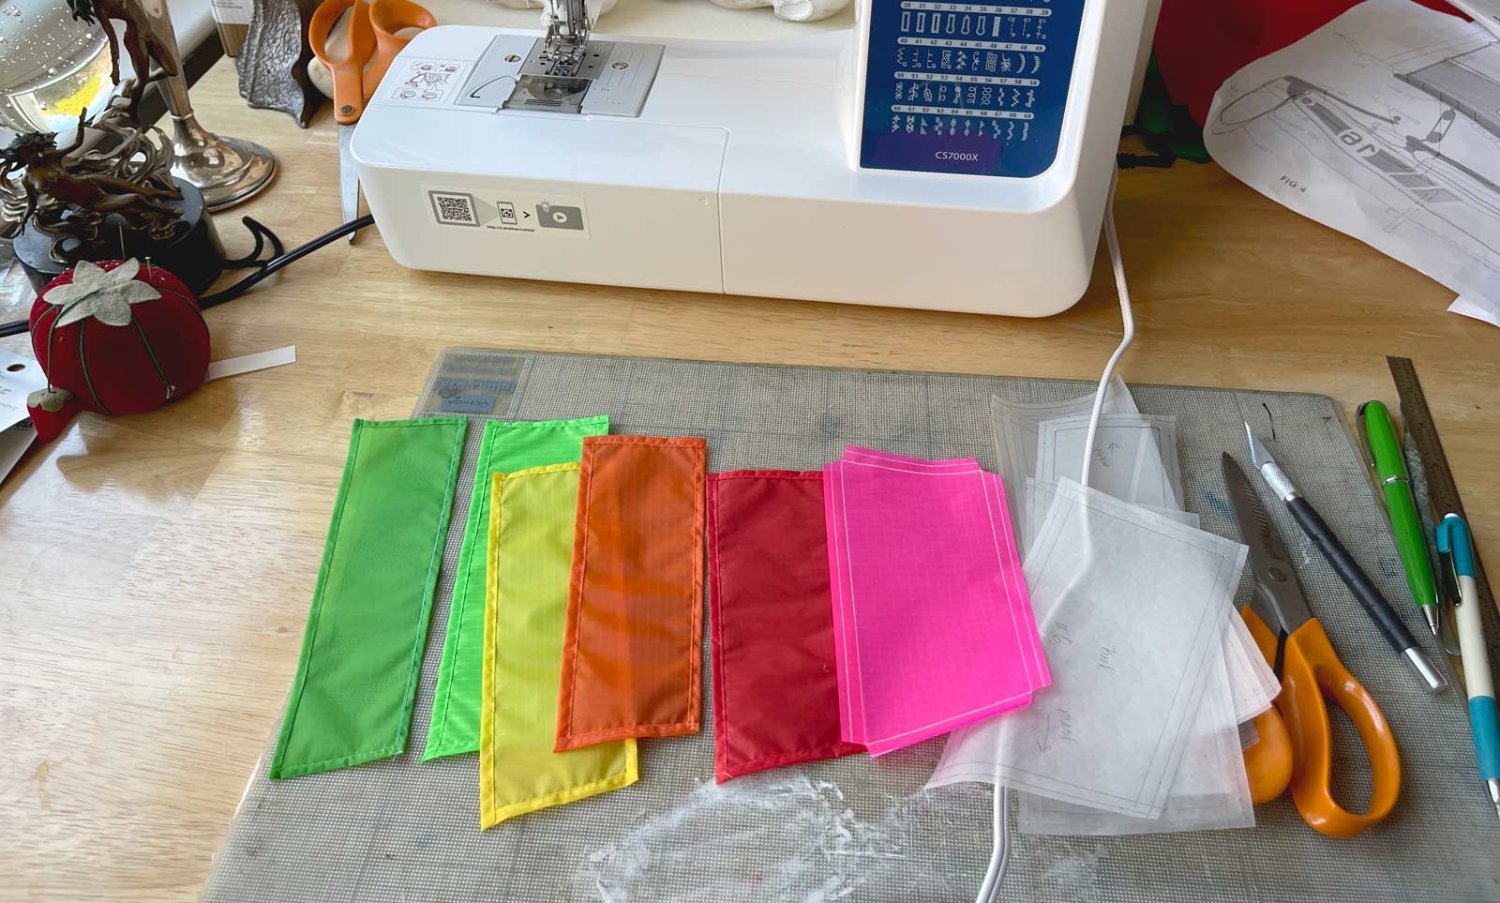
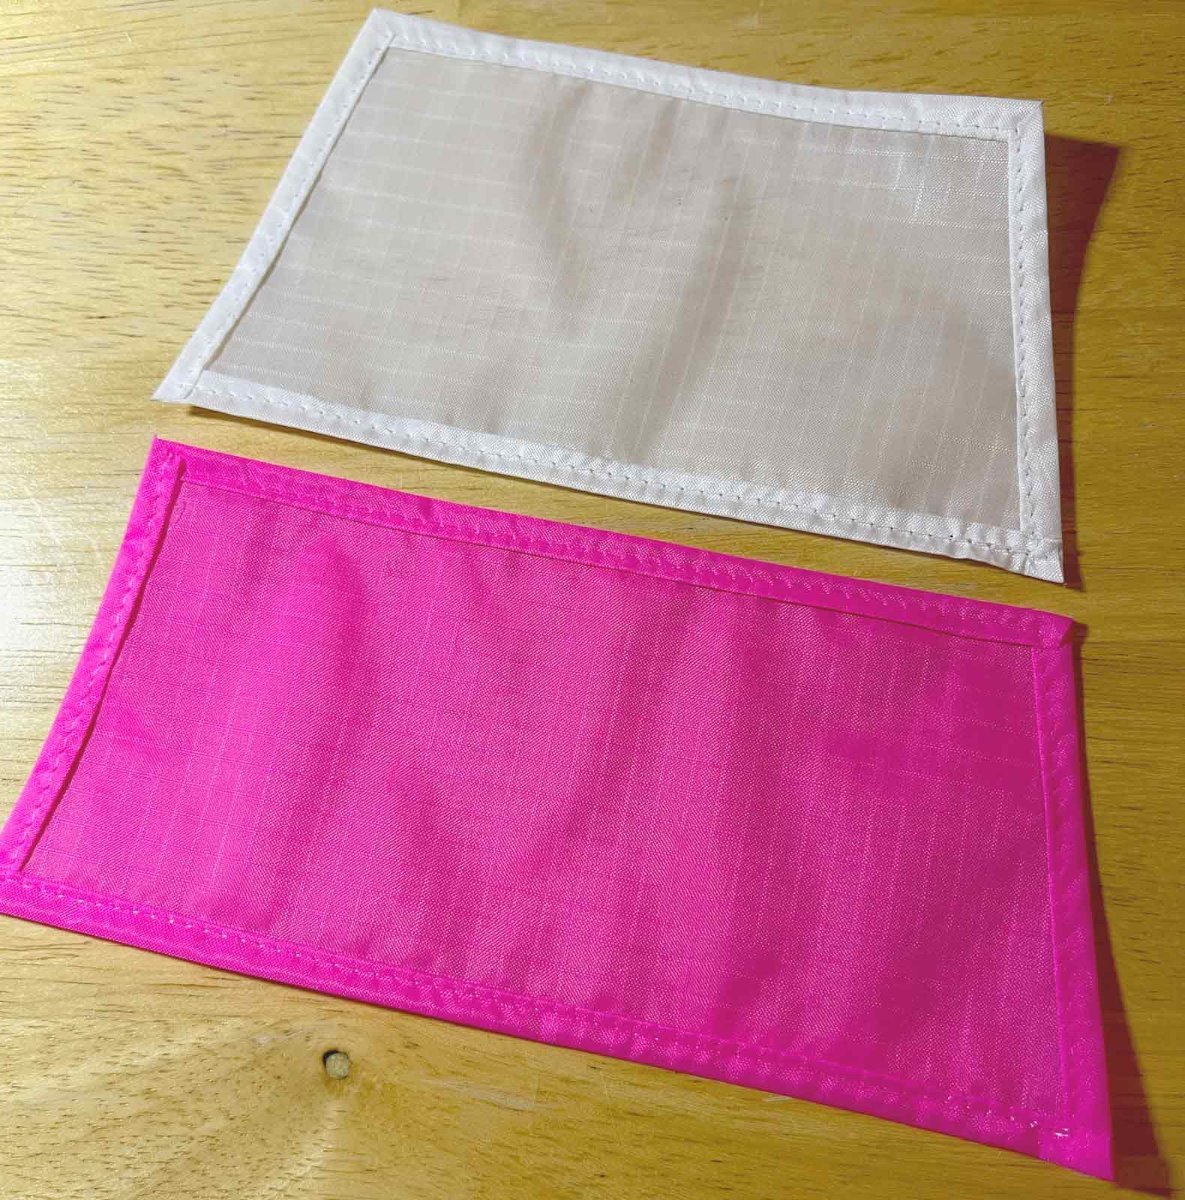
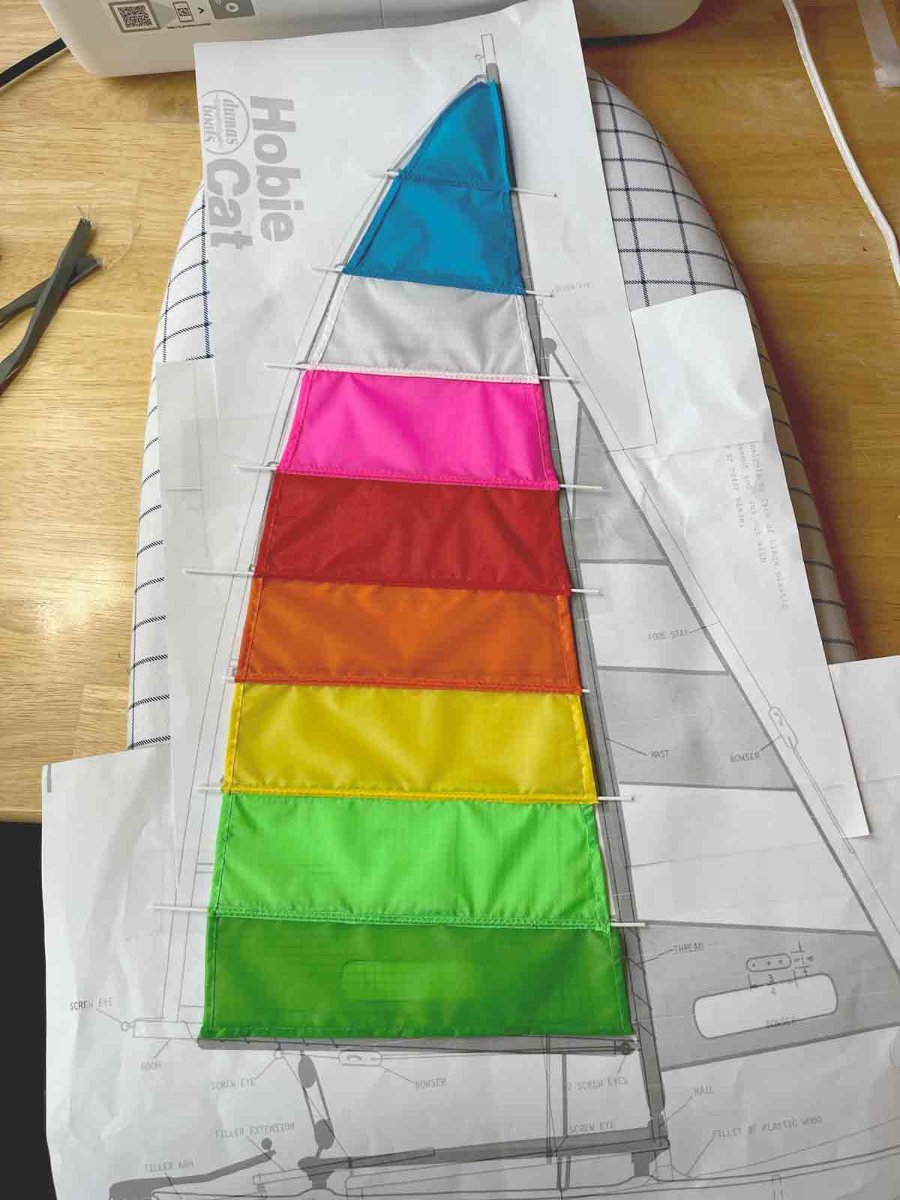
 Hello, all. I have been a member here for almost a year now, but this will be my first build log. I normally build model cars, but it's been a good 2 1/2 years since I finished one, although I have started many since then. I thought maybe it was time to just try something completely different. I have always loved working with wood, so I thought I'd take a whack at this. This is my second wooden boat, the first being the Midwest Sakonnet Daysailer. The Lightning has some significance to me, not really personally, as I have never been in one, but I work at the Skaneateles Country Club, where the first Lightning was launched in 1938. My end goal is to have it displayed in the club dining room and replace the tired old Revell 1:96 Cutty Sark that has resided there for many years and has a great many broken pieces and tangled, dusty rigging. My plan is to paint the sides red, the bottom blue, with a white stripe at the water line to mimic the flag in the club's logo. I will leave the deck natural with a satin finish. So far I think this kit is fantastic and I'm surprised it doesn't have more of an online presence. This will be the first build log of it on this site as far as I know. It has pretty standard basswood and balsa framing with mahogany veneer for the hull and deck. The new instructions, revised in 2009, I think, are superb and come with excellent diagrams for every step, much like a Midwest kit. It's made to be sailed, so the rigging is designed to be functional, the drawback being that it is very simple. I hope to find somebody at the club who will provide me with detailed instructions on how to rig a real Lightning, and then I can buy aftermarket blocks and cleats and rope and such. I will also need to make more accurate sails, as the kit comes with pre-made nylon sails that look awful. Any suggestions on material that would suitable in this scale would be much appreciated! If any of you out there have ever built one of these, please feel free to post a picture, and everybody please leave comments and suggestions, as I know I have much to learn from all of you
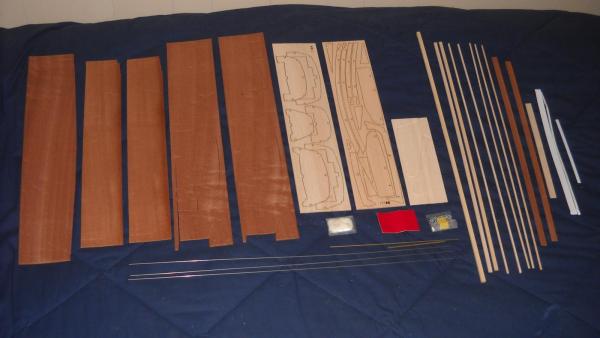


-
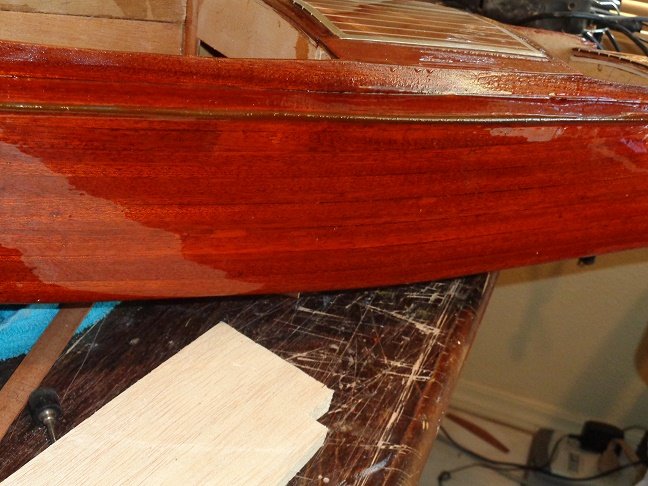
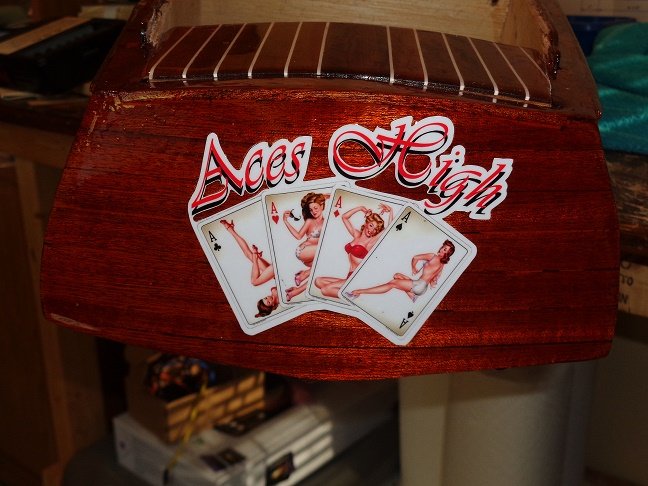
Here is a few pictures of my latest project, a 1930 mahogany run about. I call her Aces High. She is about 3/4 complete. The color scheme is mint green, also called mint Julip.
-
 Just got the starter boat in, inventoried and starting this log.
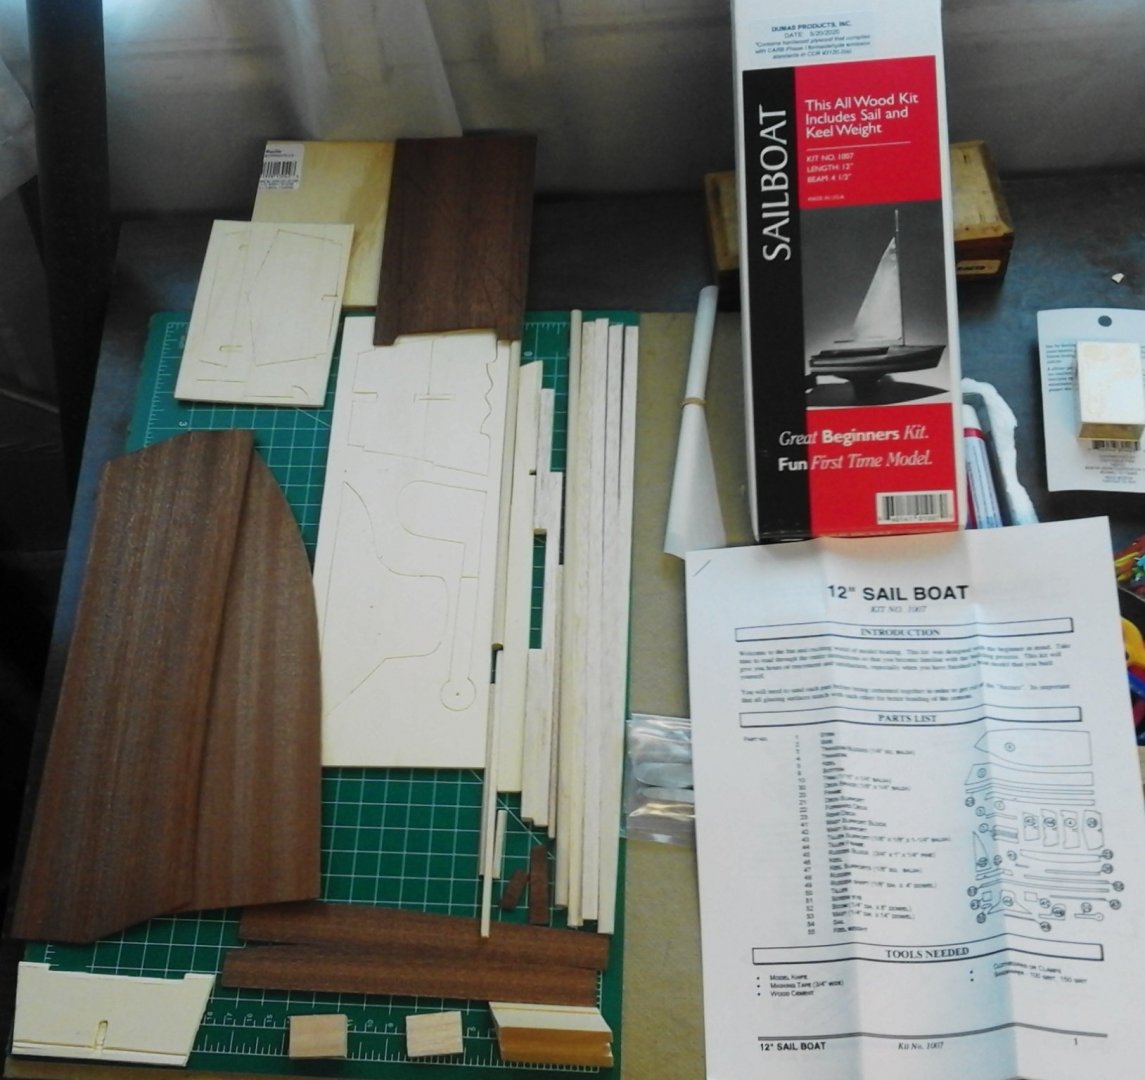
-
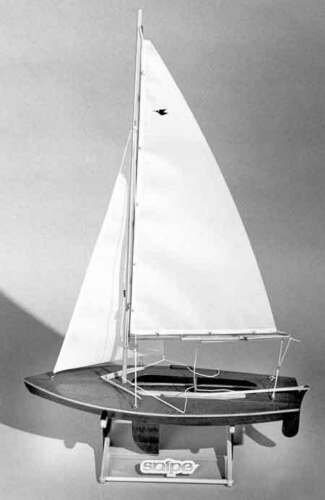
I haven't received the kit yet but this is what it's supposed to be. I posed this on the new member forum: Hi everyone I'm brand new to this hobby. I was browsing the internet and ran across a wooden kit of a Snipe and ordered it. My history is up until I was a teenager every Sunday we would go to the sailing club, on the lake, after church and sail with my step father in a regatta on board his Snipe. It reached a point it needed to be worked on (dry rot) and I tried my hand at it and failed. So this kit has special meaning to me. With that being said I'm wondering if I should start with an easier kit? Does anyone out there have experience with a Dumas, Snipe #1122? I don't even know what type of glue to use. Looking forward to hearing from someone. Thank you all for the encouragement. I did order a how to build wooden models for beginners, and am hoping that helps. I totally read thru DRW's build and the thing that troubled me is in his post #3 where he was glad he didn't start with this one. This boat has sentimental value to me but I suppose I can build another one to match my step-father's snipe.
-
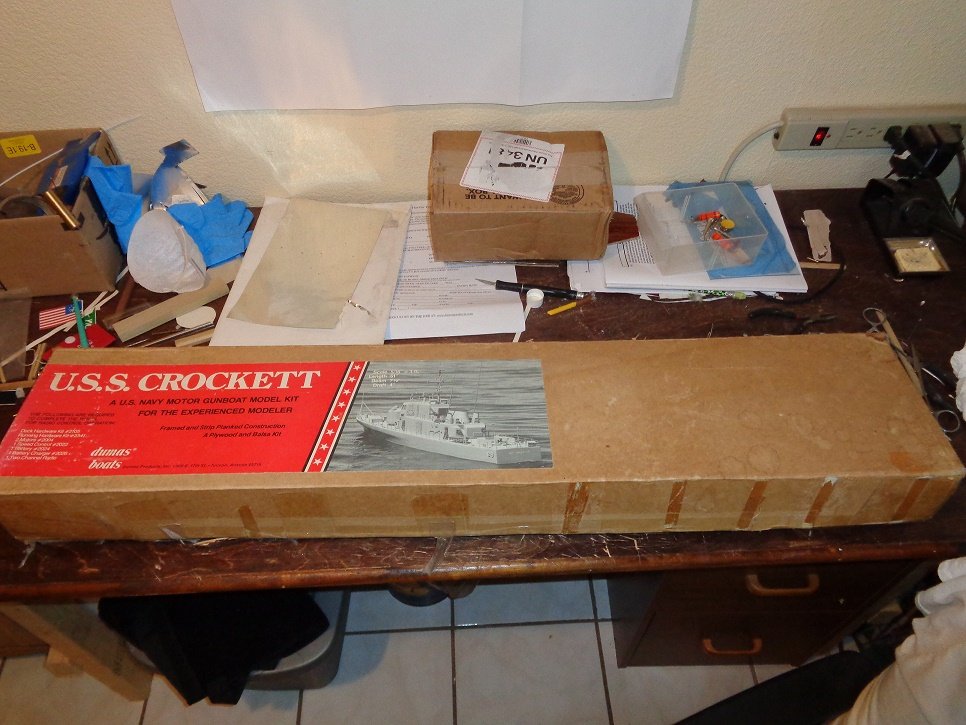
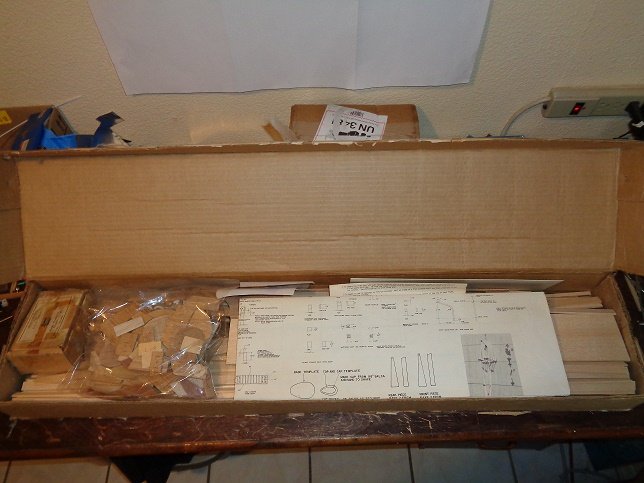
Here is another orphaned kit that I came across where the original owner with all good intentions I'm sure started the build by taking most of the parts off of the parts trees and that is about where they stopped their efforts. At least from what I can tell is that they numbered all the pieces so no harm I guess. Upon inspection, I noticed the rudders and drive shaft struts are missing, which is easily replaced. This is an old kit, which has been bounced around from pillar to post. I hate seeing this, but I can't save them all. But as long as I'm able, I will finish it. The USS Crockett is a Vietnam area gun boat: is one of seventeen gunboats in the Ashville Class. This is the first group of US Navy ships to be powered by gas turbine. The Crockett was designed for Coastal patrol, blockade reconnaissance and support missions in South Vietnam. Scale 5/16" = 1 foot Length 51" Beam 7 1/2" Draft 4"


- 75 replies
-
- 11
-
-
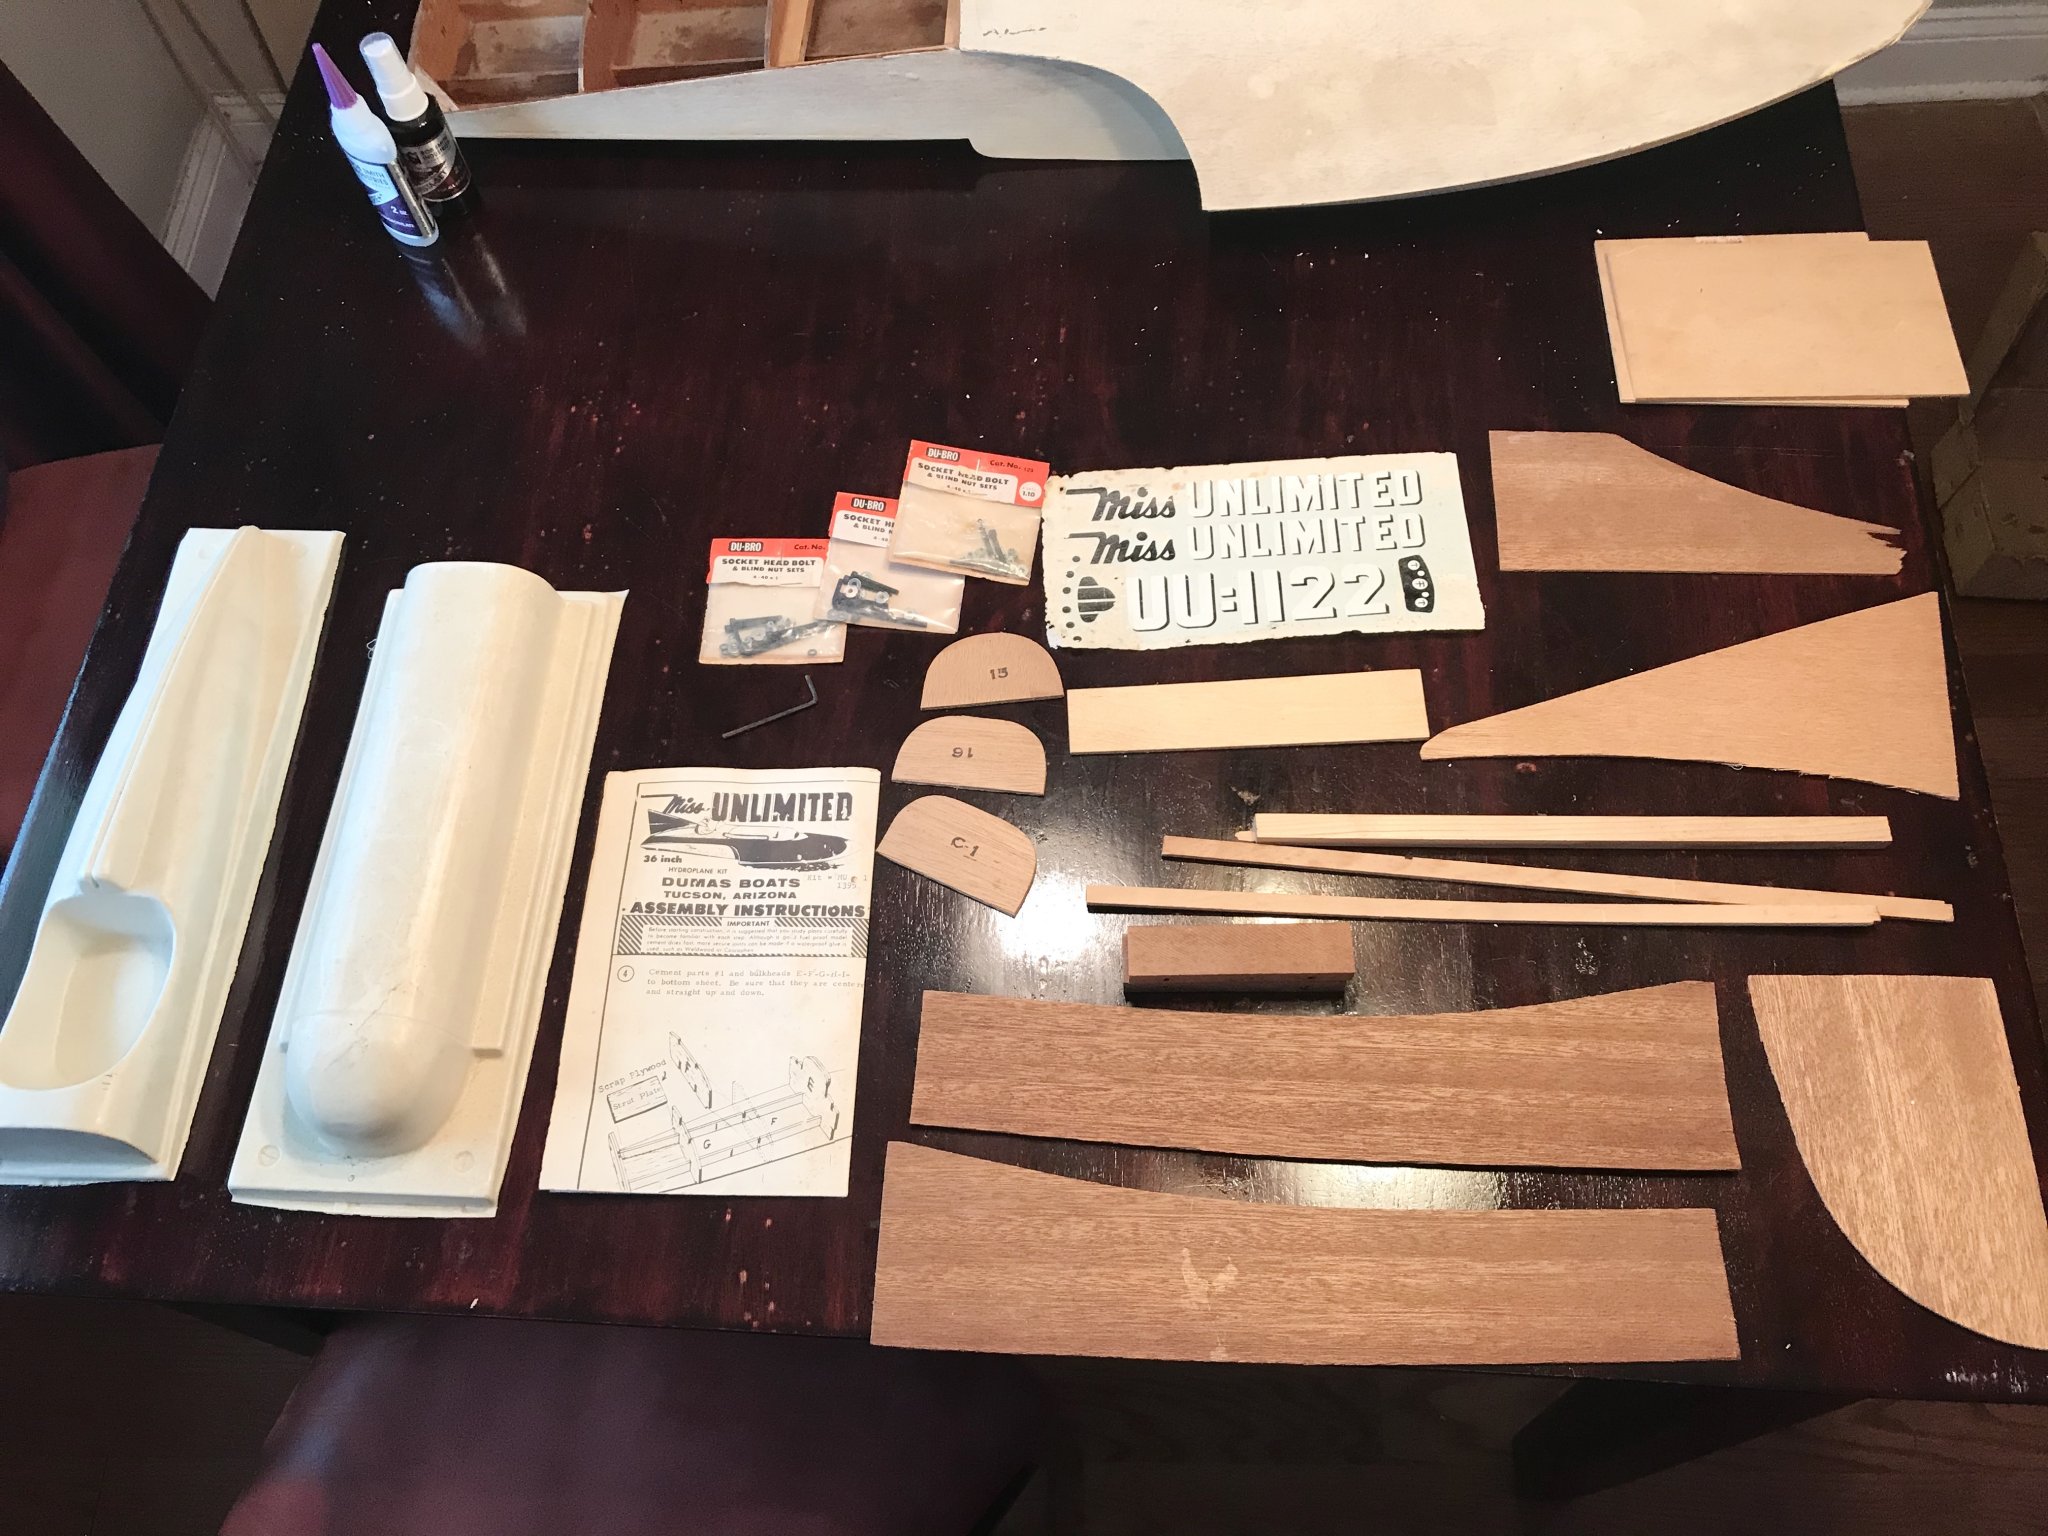
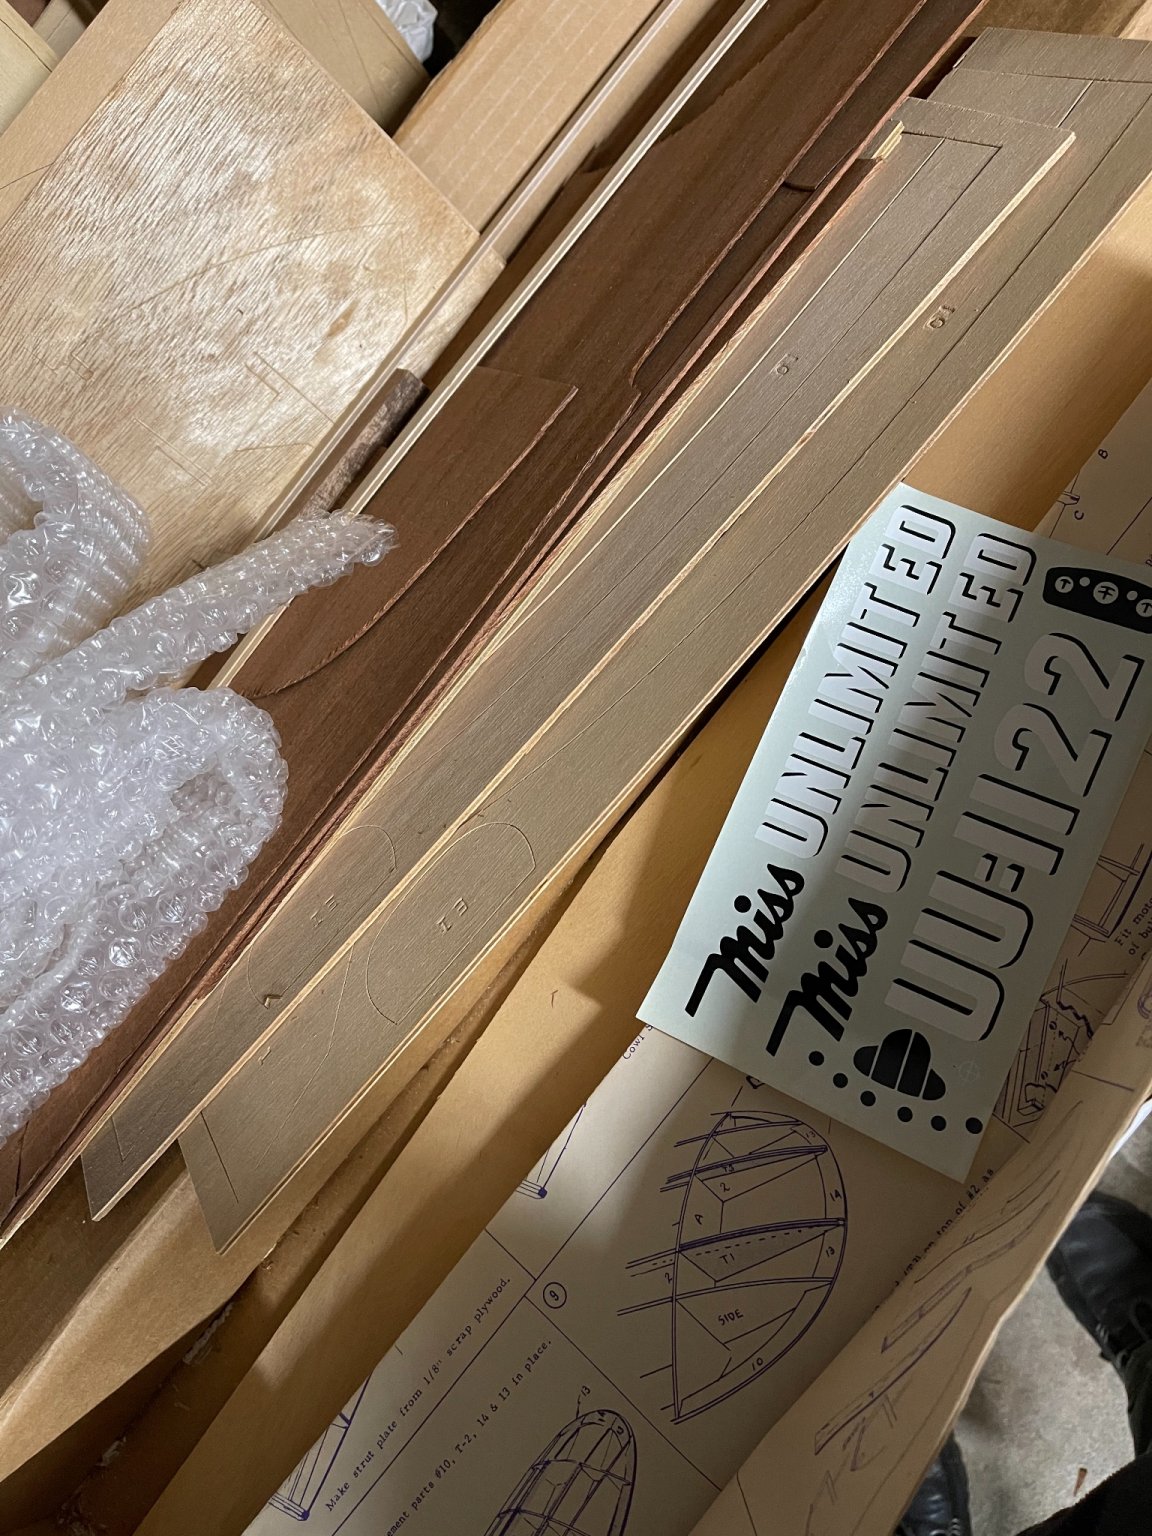
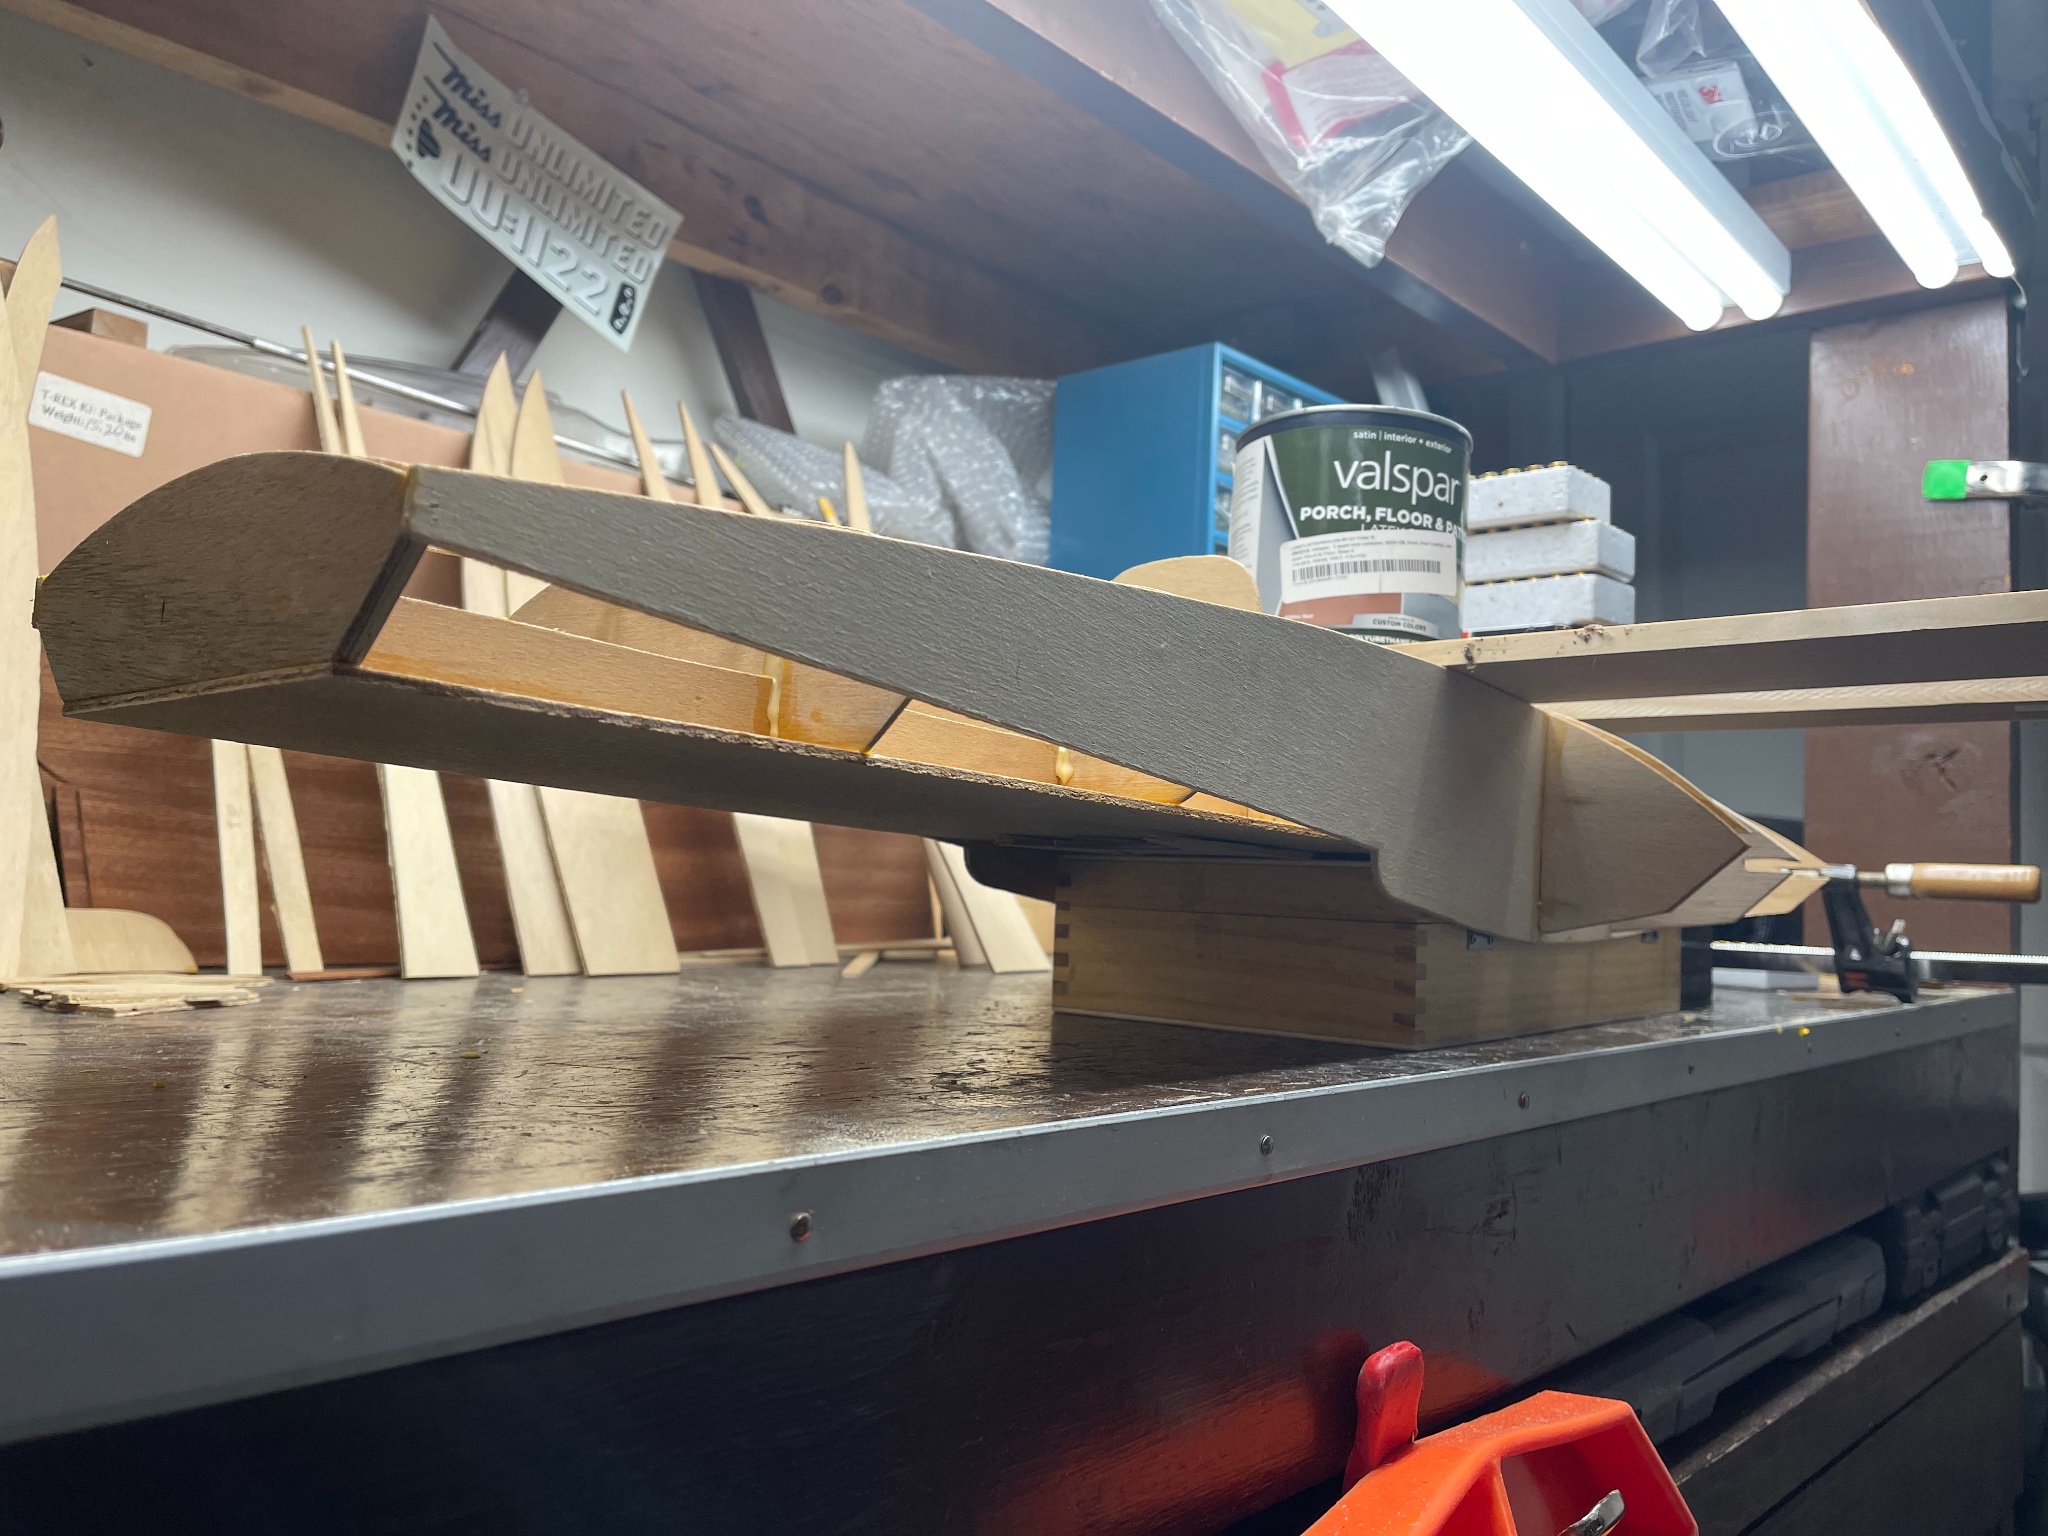
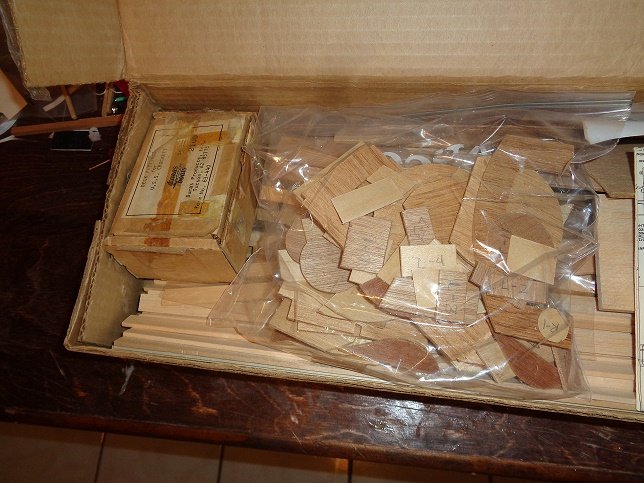
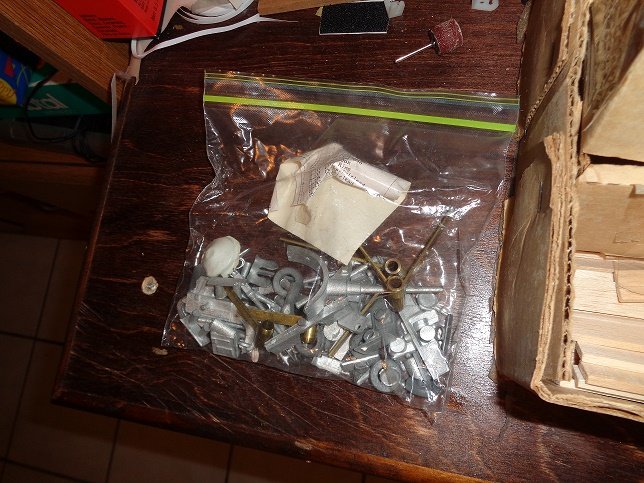
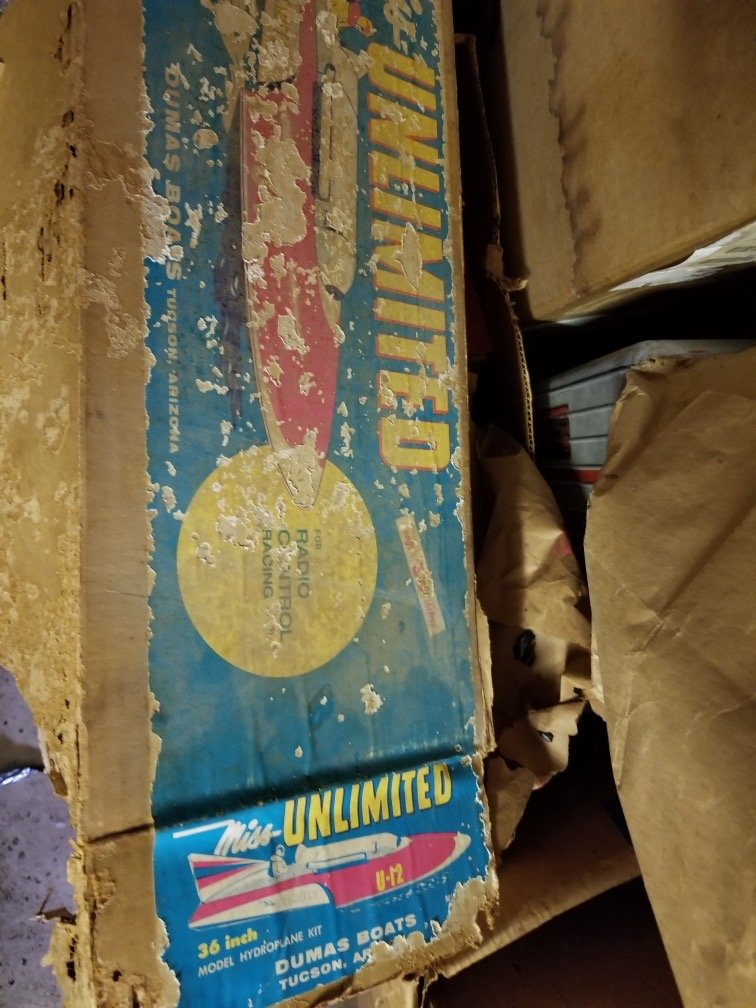
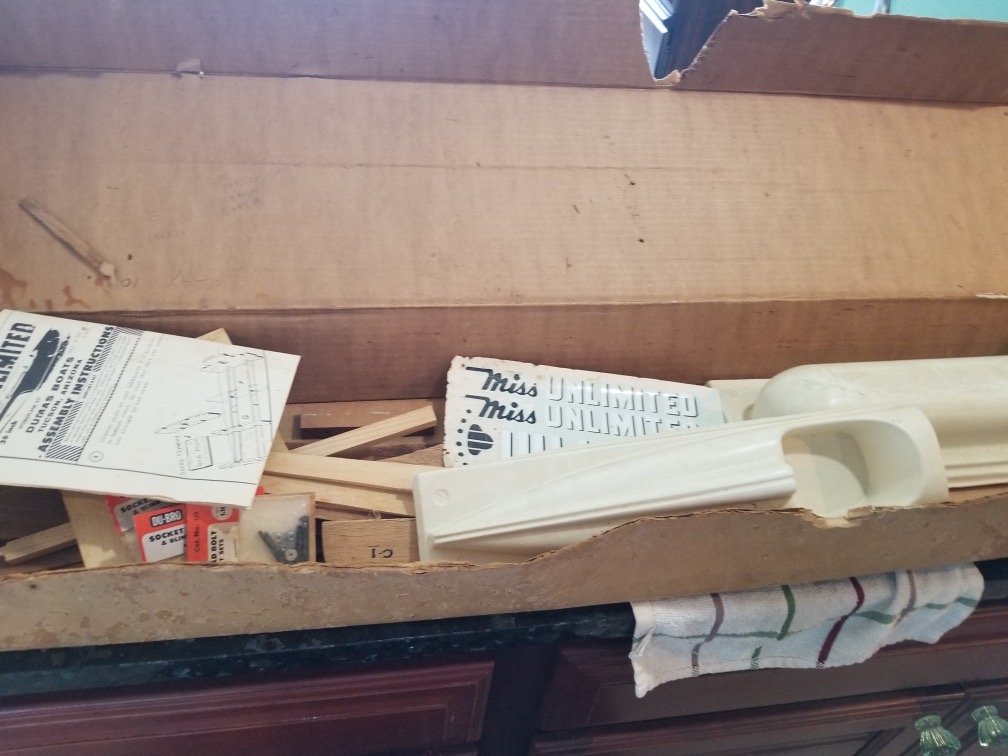
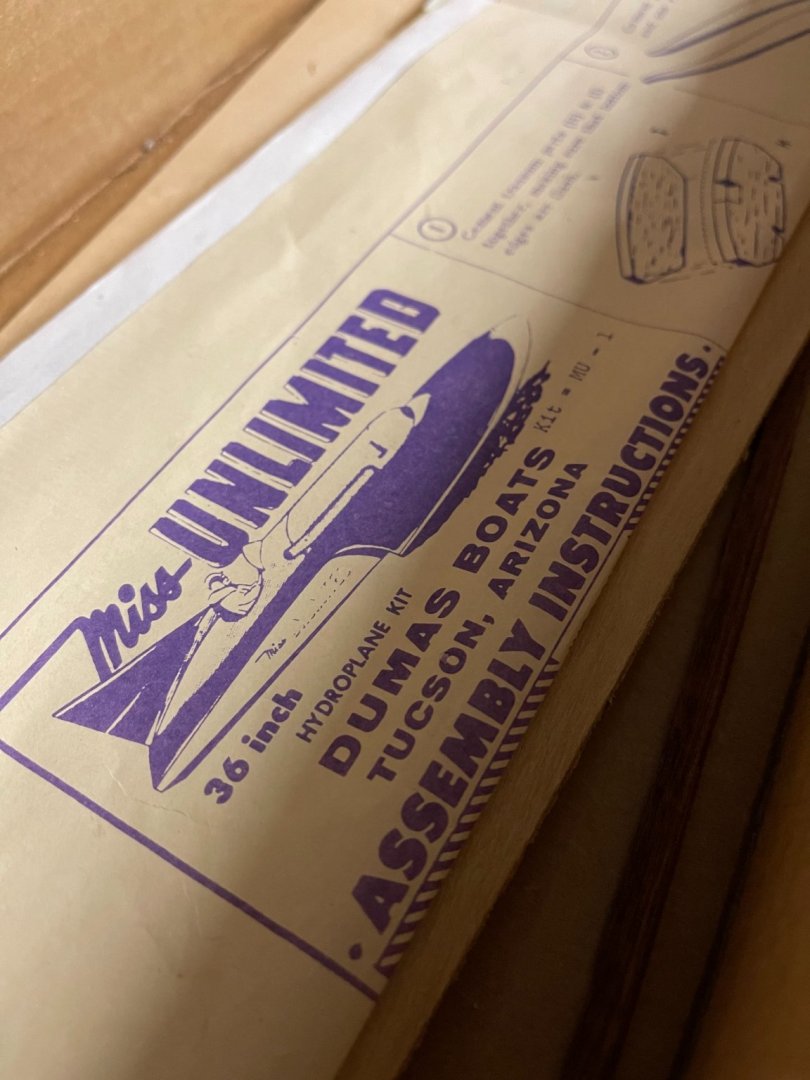
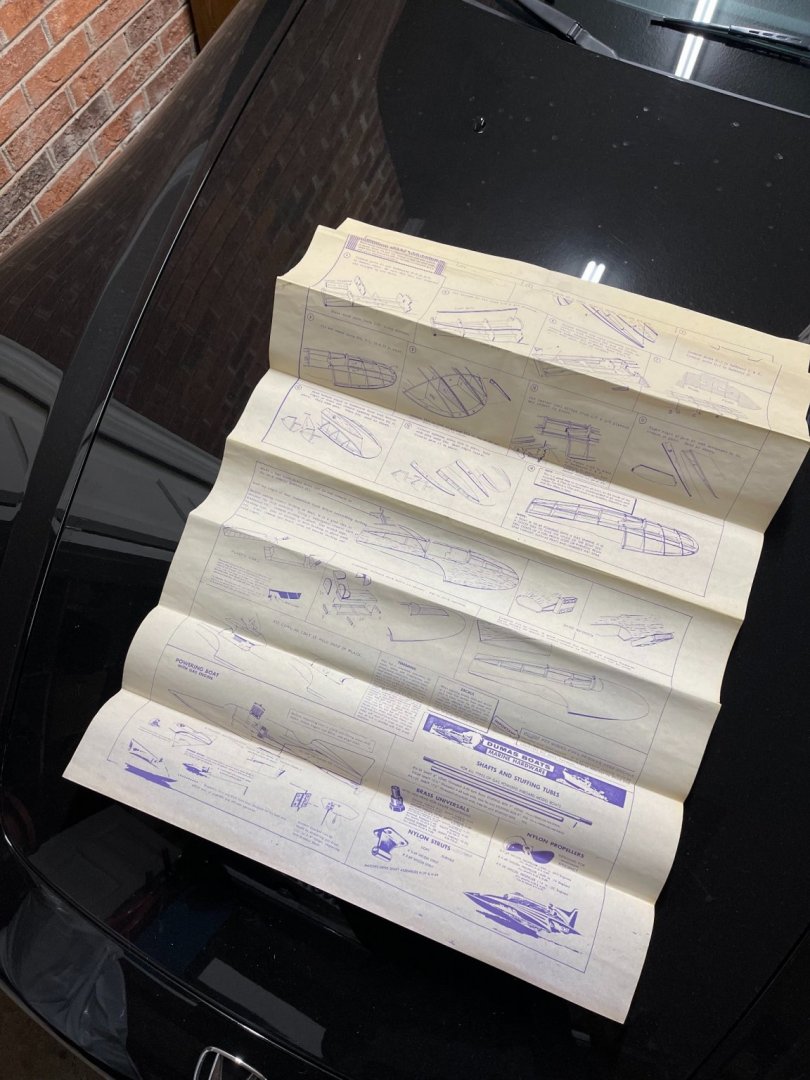
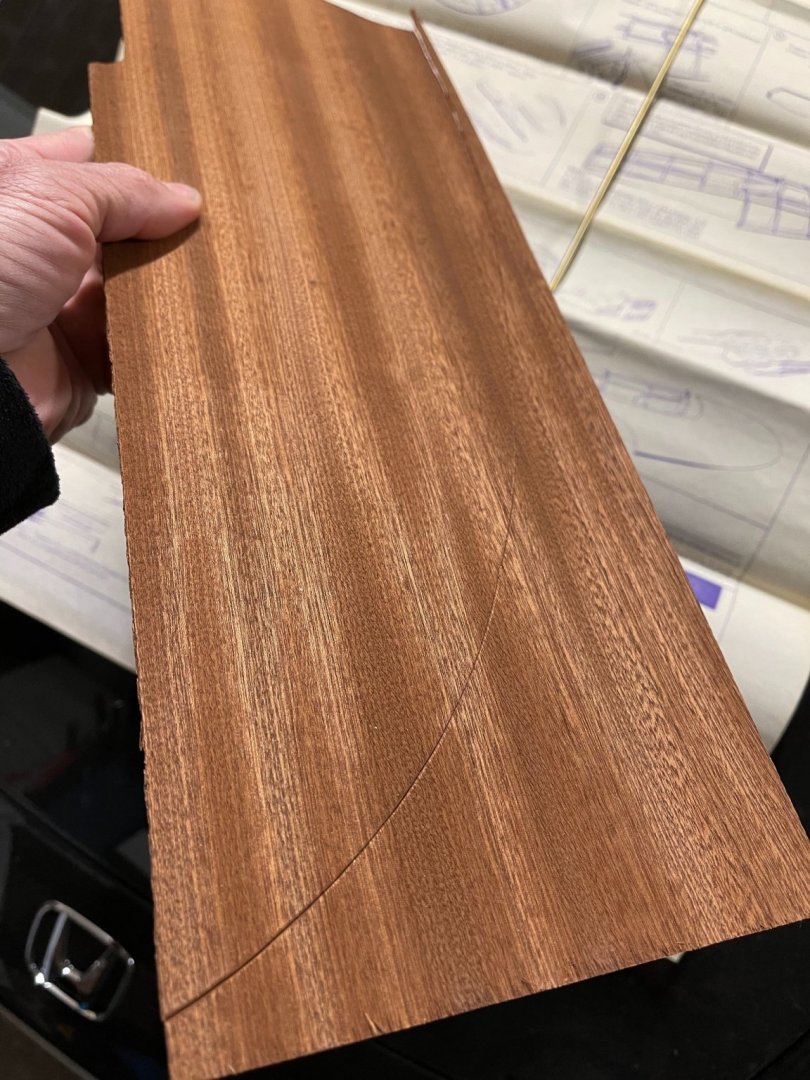
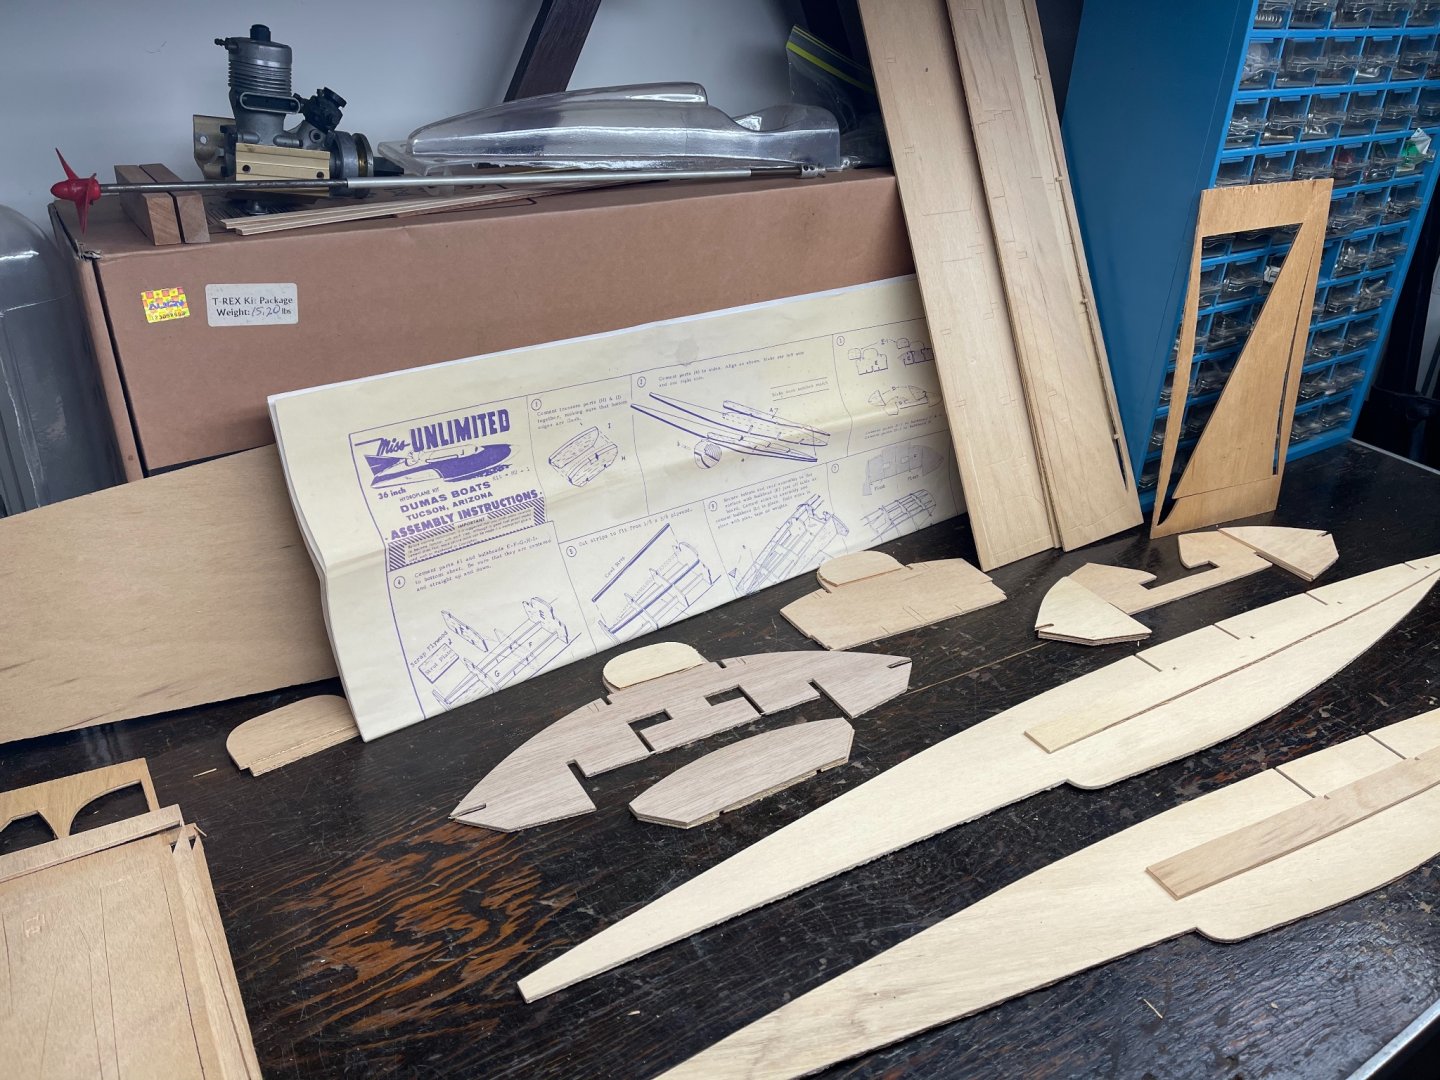
 OK, this is going to be an interesting build. We are setting up to have an estate sale for my Mother and Father's home. I was remind that an old boat that he was building may still be up in the attic. I remembered the boat from seeing in when I was young in the 70's and 80's. Just remember it being a speedboat of some sort. Well anyway, the estate lady did find the boat and handed it over to me and I didn't know how it was built, or where I would go from there. After asking some questions on here yesterday trying to find out what kit this was, I had it narrowed down to Miss Unlimited. I asked the Estate lady if there was a box for it, and she said no, So I figured I had to scratch build the upper section of the boat (which comes as plastic molds). But surprisingly a few hours later I received a text with these pictures asking if this is what I was looking for: I was ecstatic to get to see this. I drove over and picked up the box. I want to finish this boat as a tribute to my dad, but I didn't have and intention of making it motorized/RC controlled, just for display. I don't know if I will change my mind later. But for now I just want to finish it and give it an interesting paint job. There isn't a whole lot of pieces left to finish, but I'm still going to make a build log for this. Working with a model that has been in the attic for 40 years will be a challenge. I already had to seal a lot of spit plywood with a thinned out wood glue mixture and some clamps. That worked out great. Also, the model appears to have a whitewash paint over it, it came with mahogany sheets for the top, but so much for making a nice varnished top. I will improvise with the paint job to get a finish I like. The main reason Im glad I found the box was for the plastic molds. The contests of the box left are this: One other funny thing:
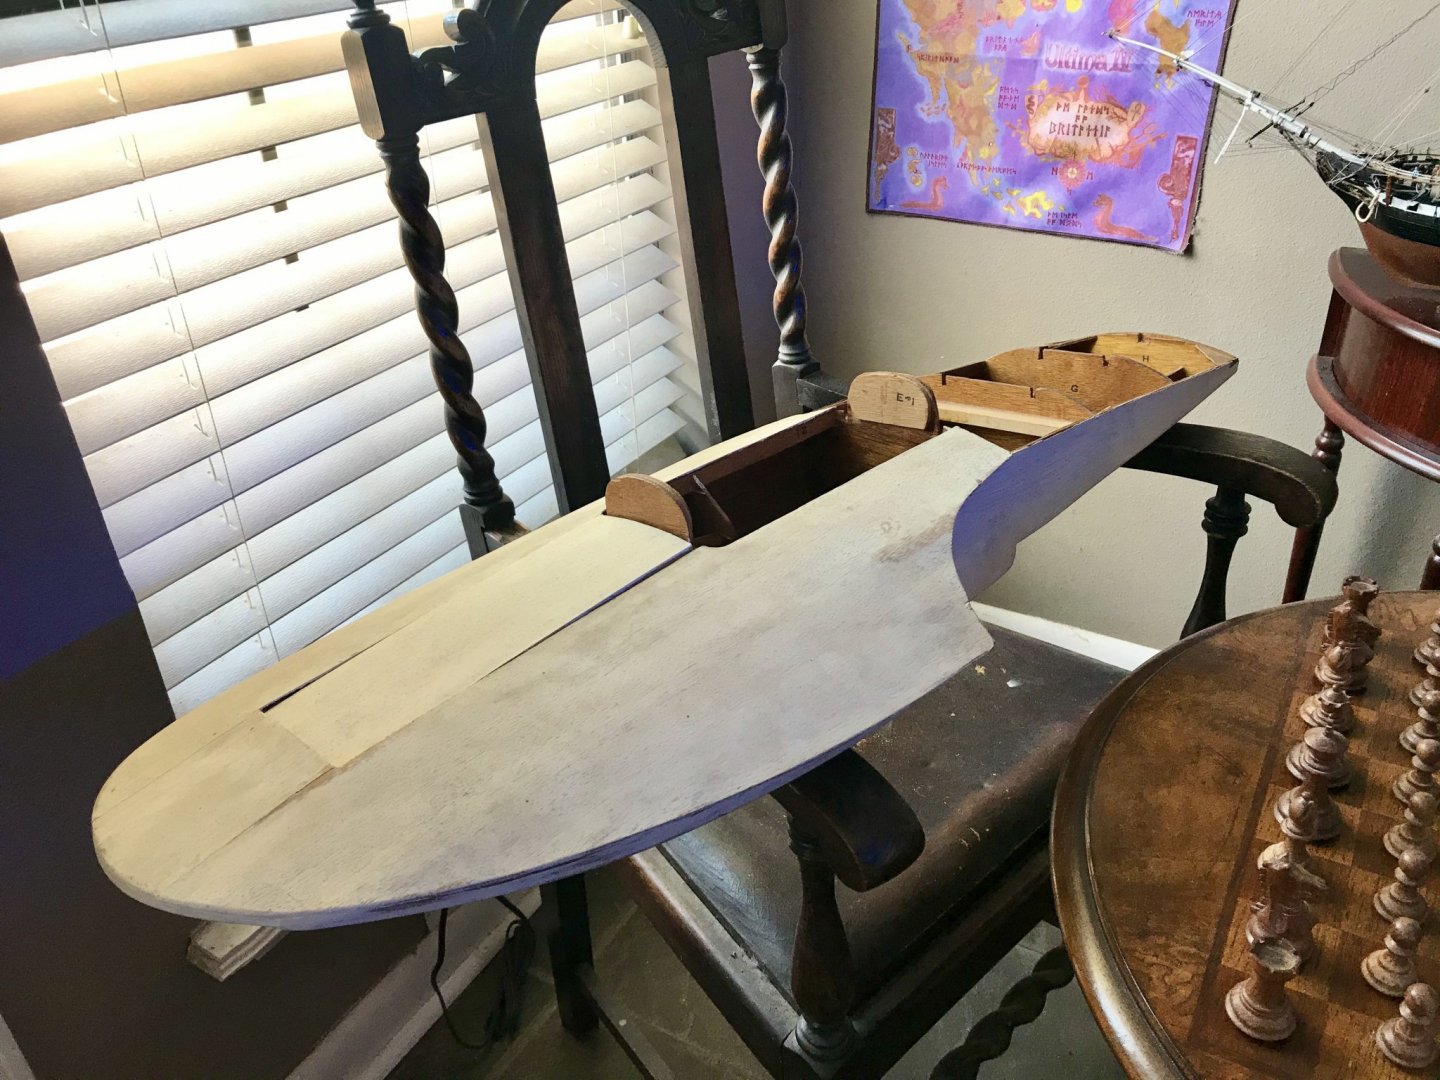

- 51 replies
-
- 10
-
-
- miss unlimited
- dumas
- (and 1 more)
-
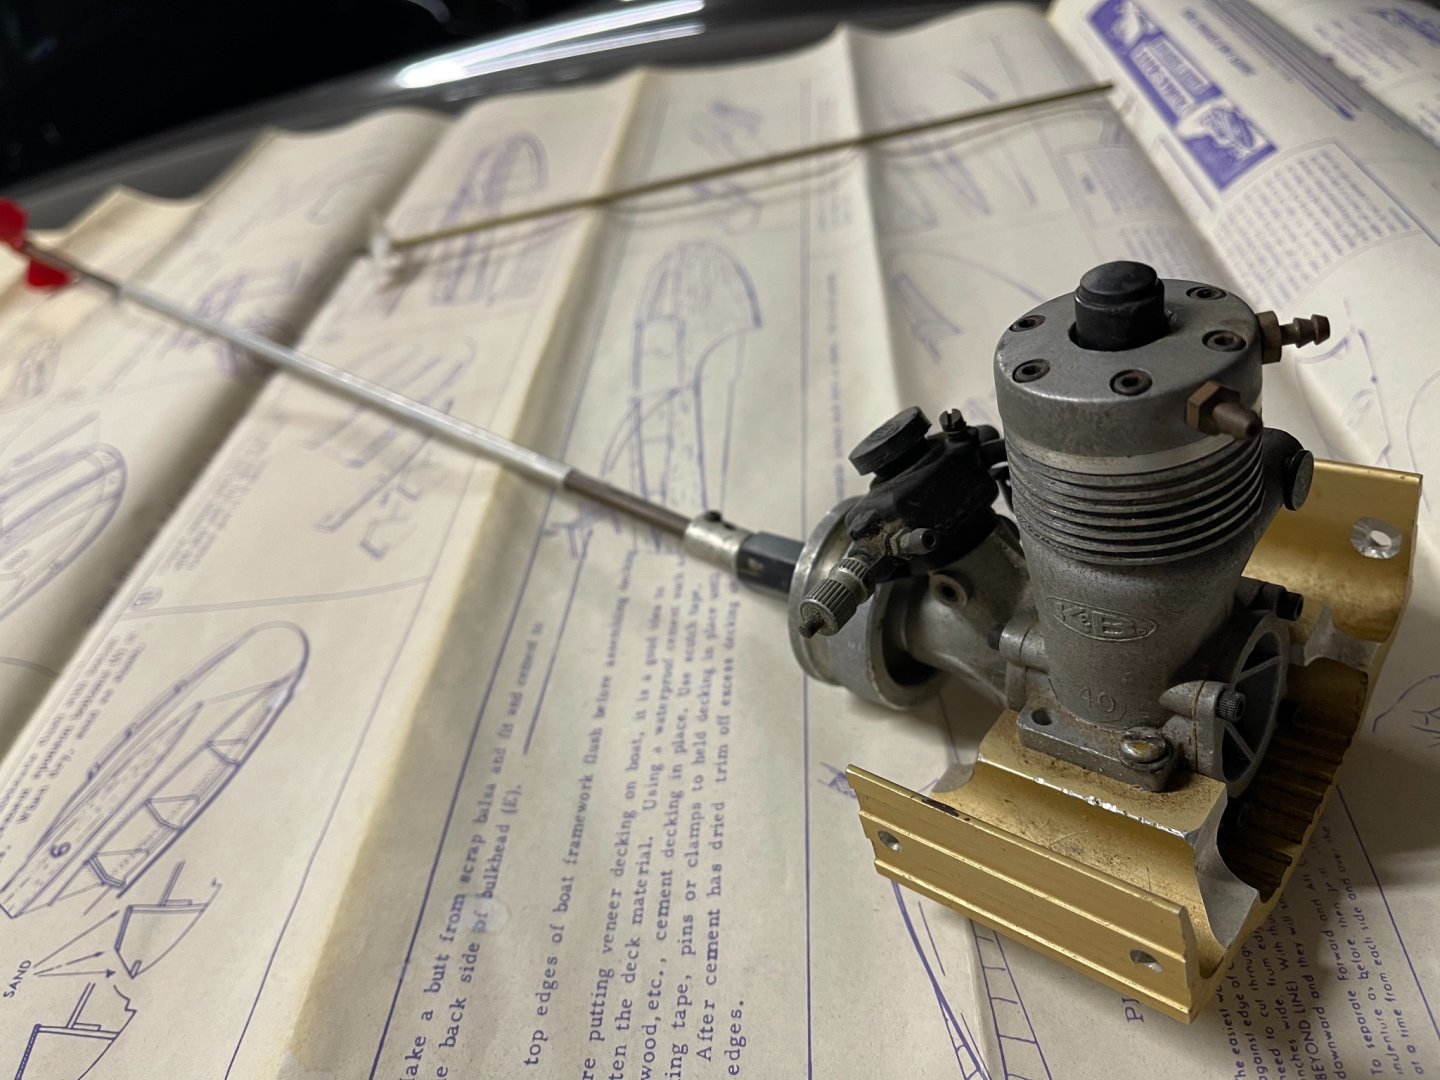
 hi! I Just started a model to pass some time. I thought I’d share some photos of the build. this is a old kit from eBay I found. I started searching for kit that would match a vintage gas water cooled motor that needed a place to sit I doubt I’ll ever run it but I’d like to build it like I would. I was thrilled to see other builds on here based on this kit and have used them to help me along. I decided to share my adventure in a photo journal. I have mistakes in early pictures but have corrected them and moved on. That’s a whole different story Im on day two and I can say this kit has helped me and entertained me 10x over the investment cost. Bang for the buck here is off the chart. Kid at heart. Only missing one here to share it with first hand. I Highly recommend some ship building in these times this is a vintage kit from the ‘70’s but still on Dumas Boats Website.


-
 Hi all, just starting on the POB kit by Dumas- City of Buffalo lake steamer of 1890. Will post pics shortly- the kit is really intended for R/C and is a bit light on detailing, so there's lots of room for additions at this scale! Cheers- Scott
 -
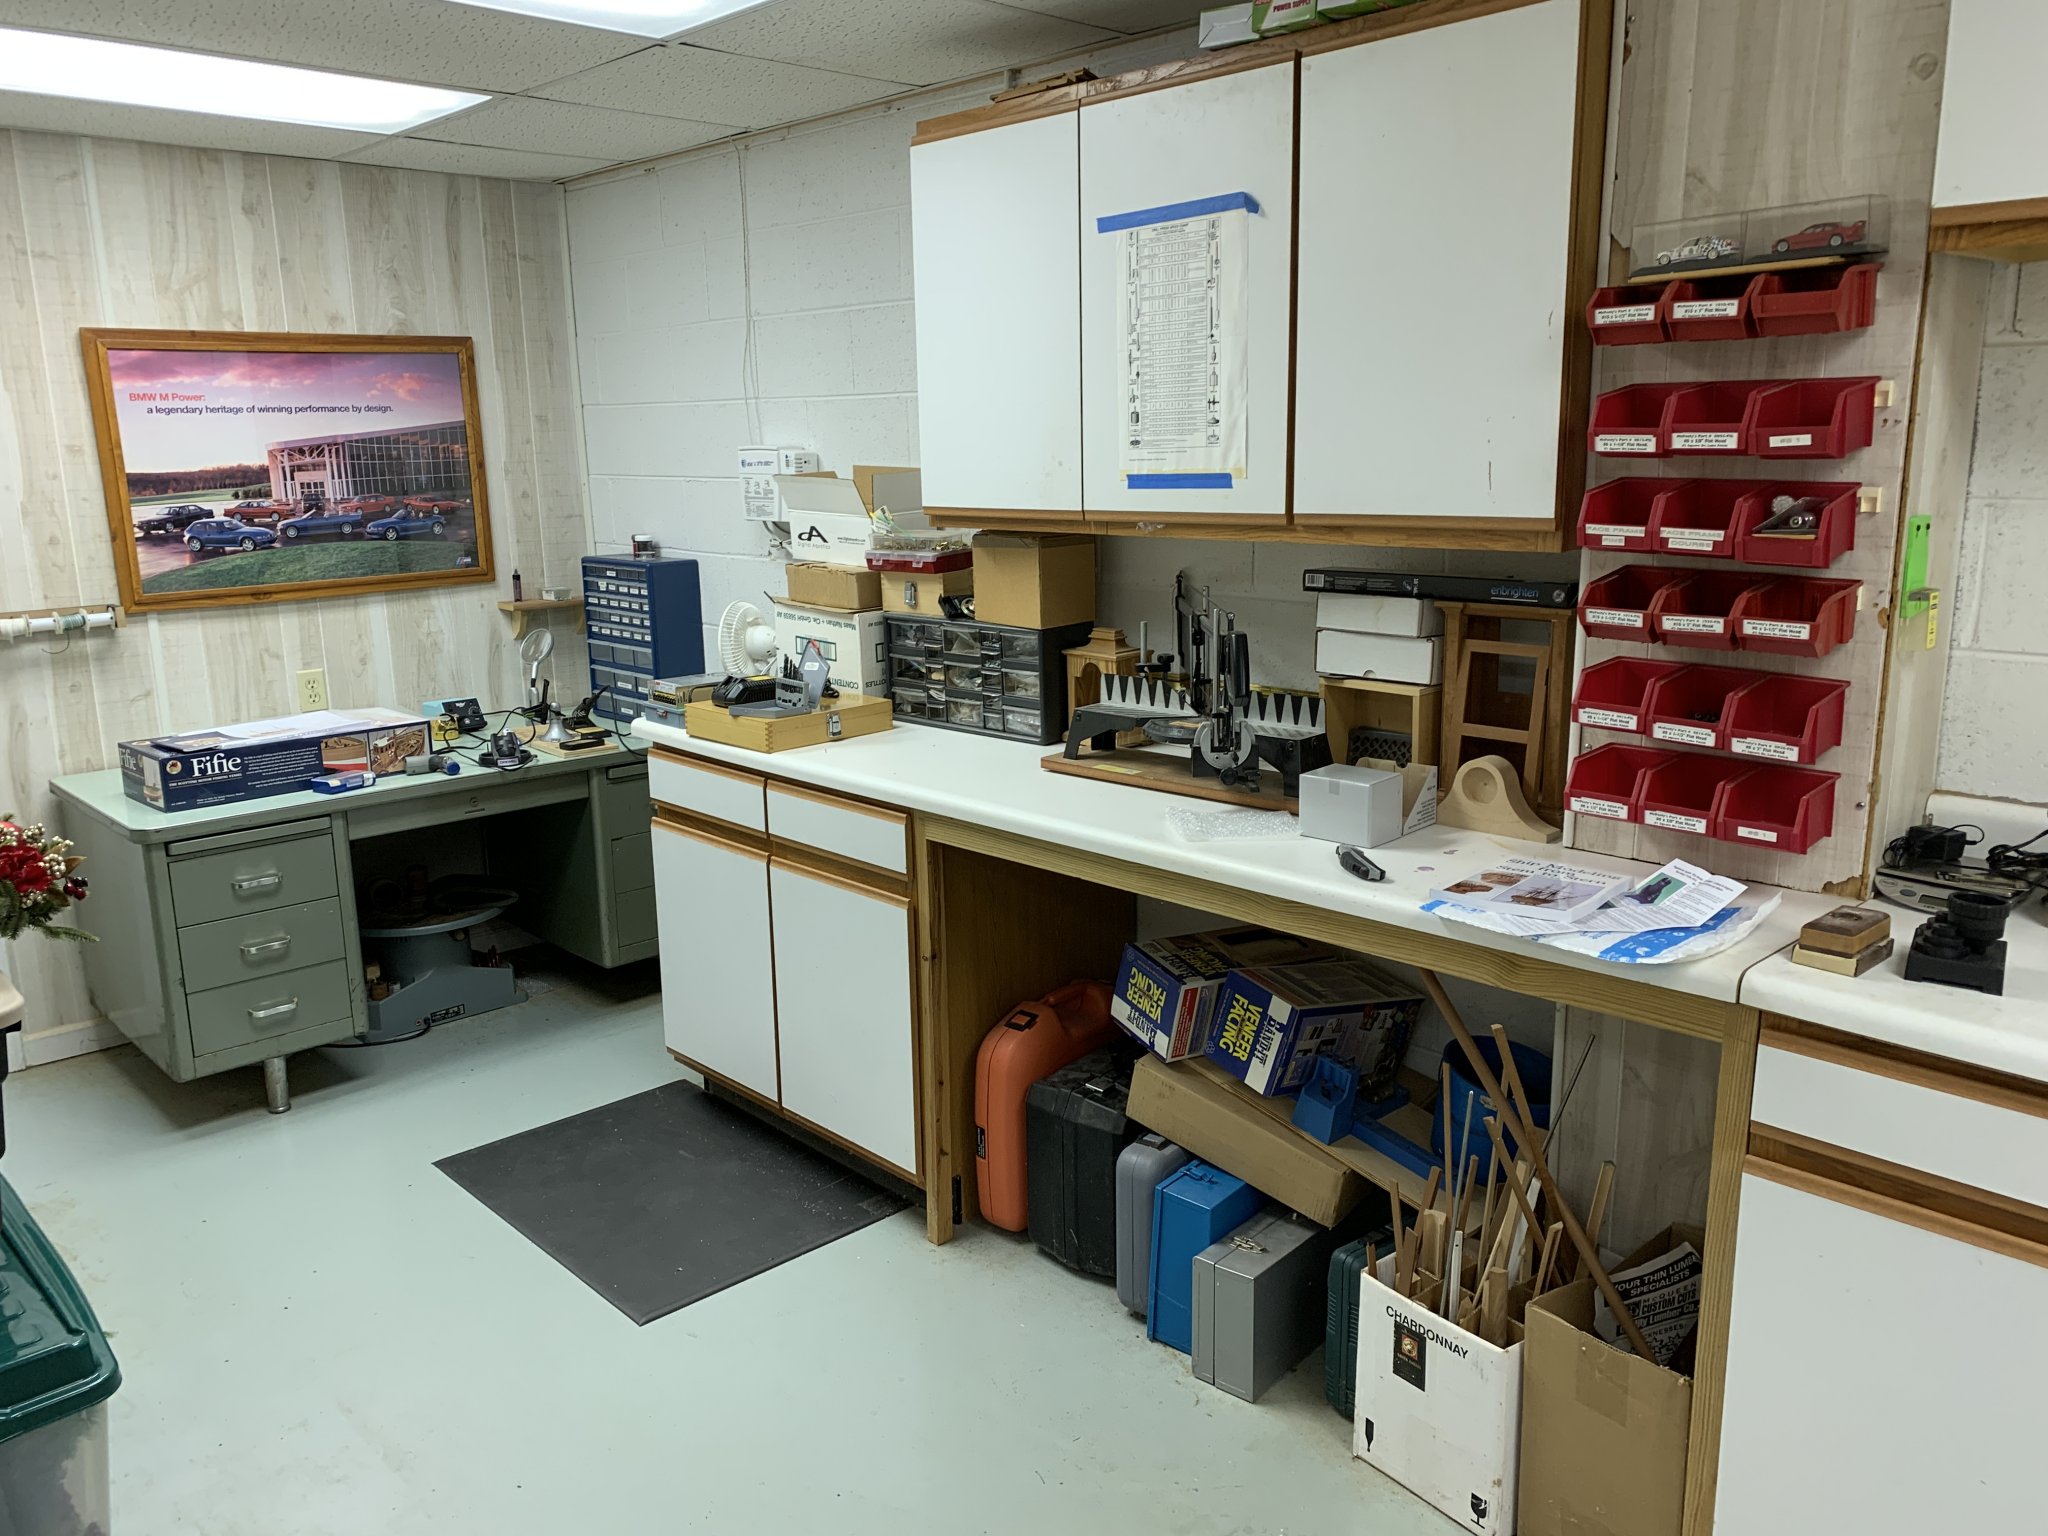
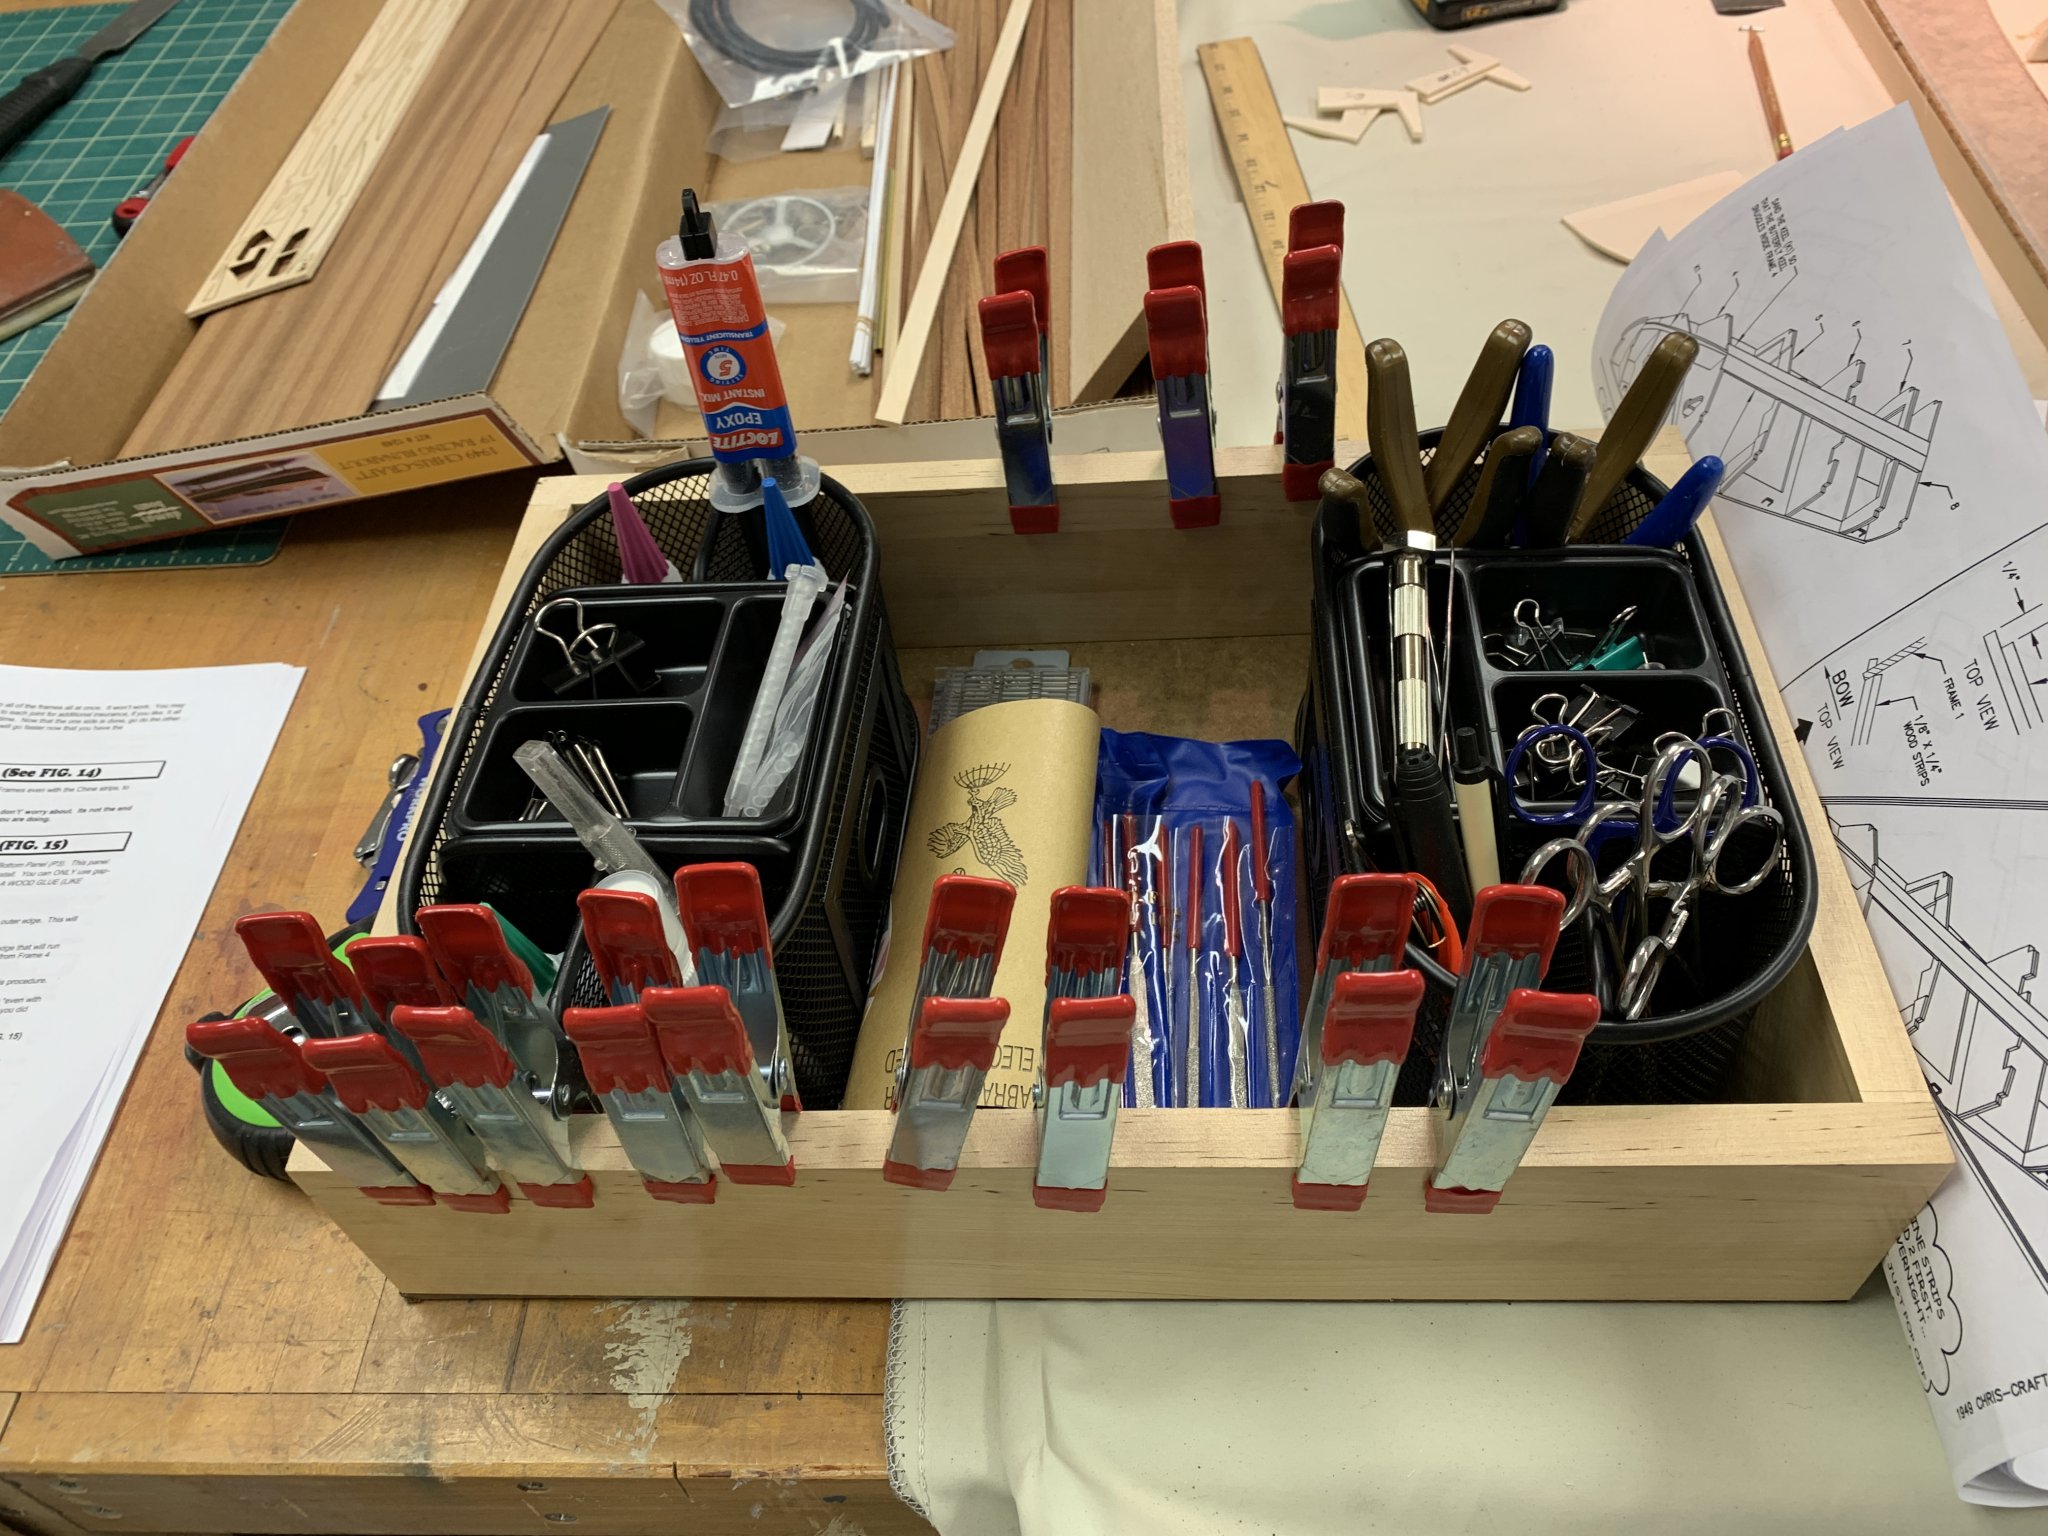
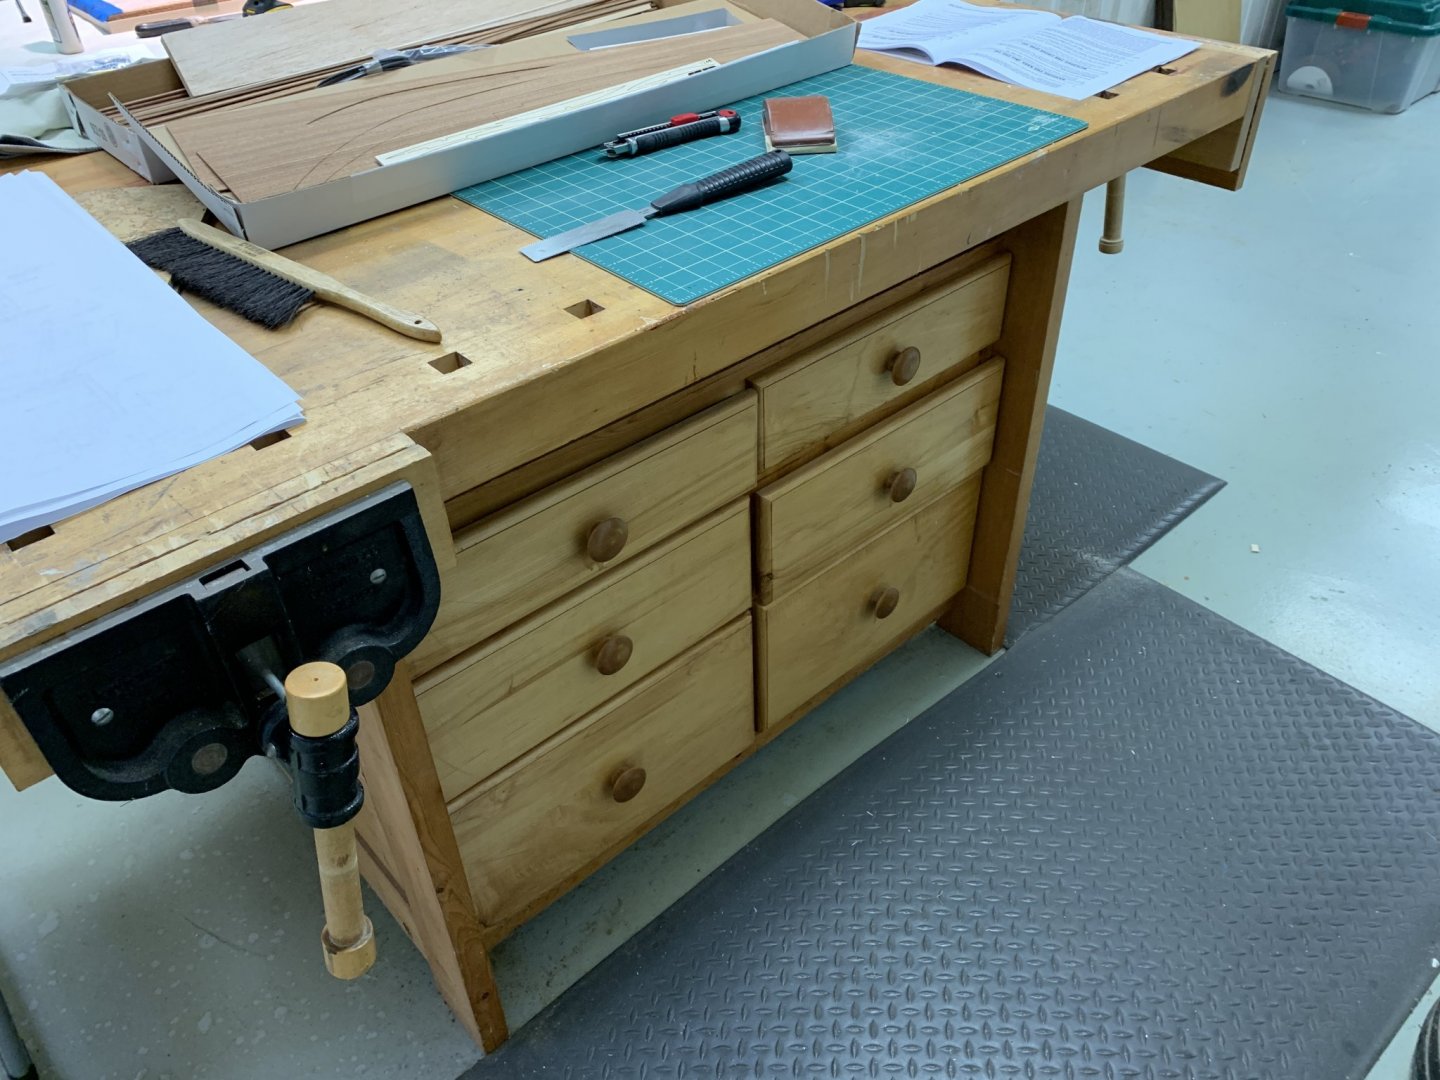
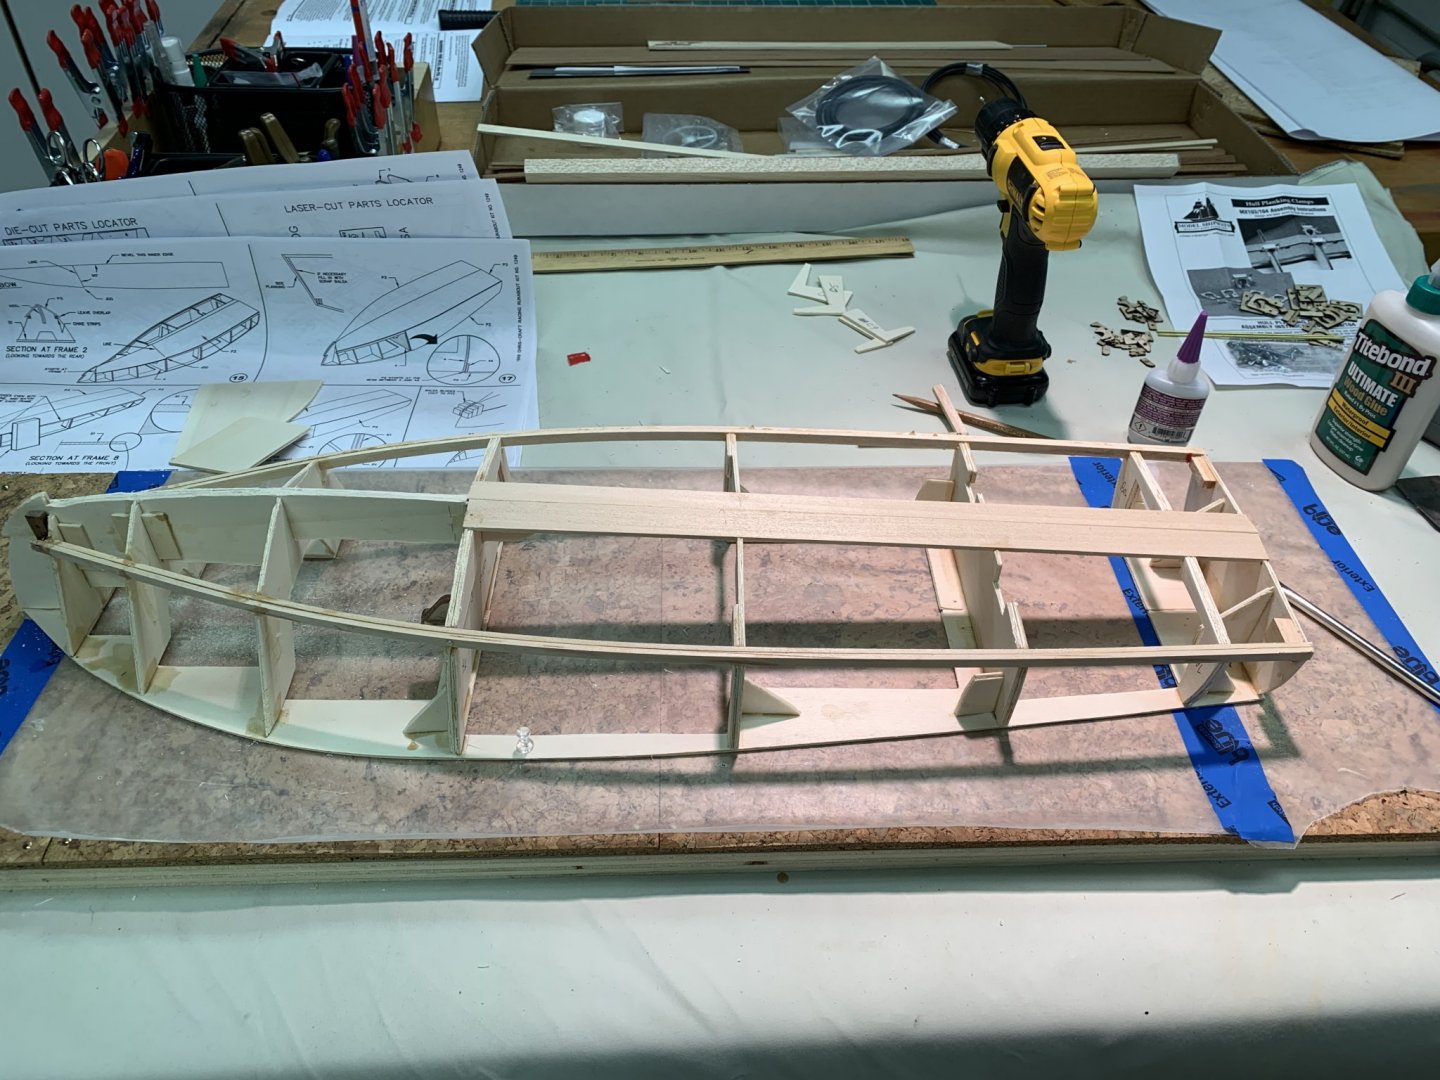
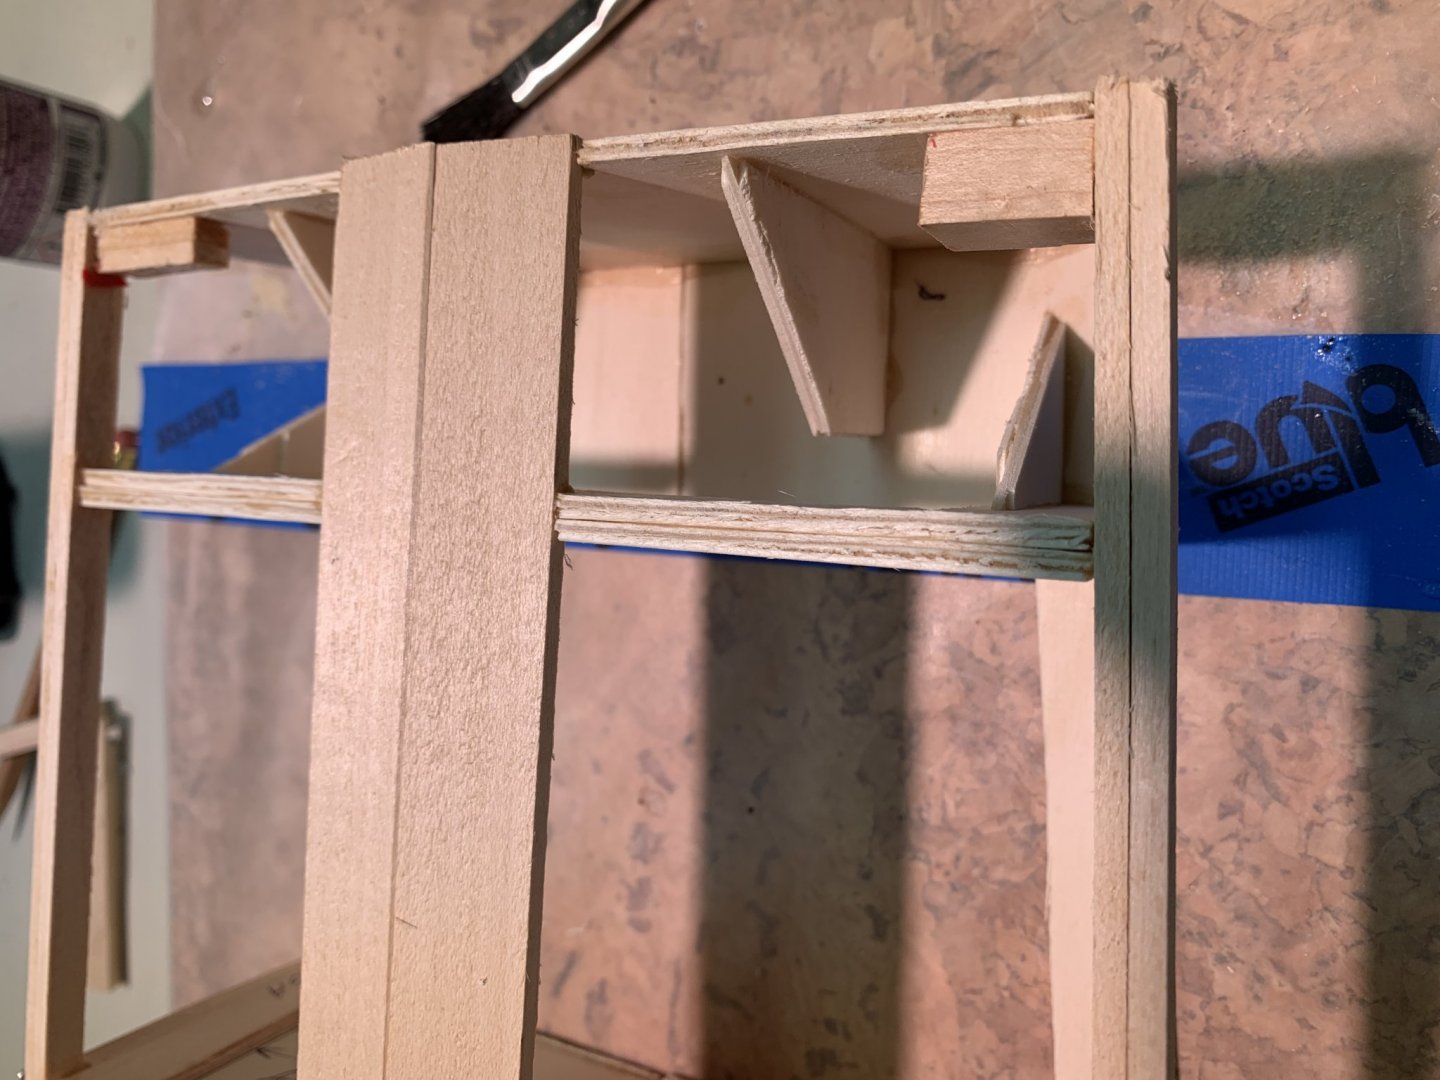
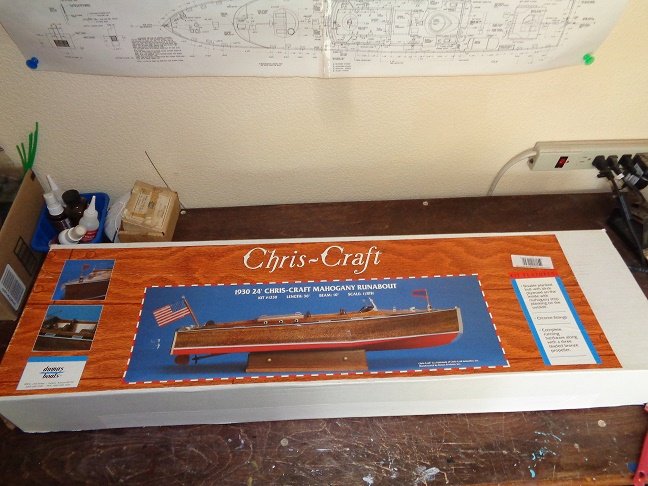
 This kit was on sale at Garrett Wade so I snapped it up. But first, a few shots of my now almost bare woodworking shop. It used to be filled with a table saw, bandsaw, planer, jointer all connected to a central dust collection system. Up until seven or eight years ago, I used to build furniture and clocks and other projects, but as I got older I decided to hang up my apron. Now I'm back where I was when I was a kid—building model boats. Enjoy Alan This is the first thing I built—a much needed workbench. I setup a caddy to house all of my clamps and glue and tools. BTW those clamps are junk. The plastic tips keep coming off. Here's the Chris Craft with all the frames and keel glued up. It was tricky to get everything aligned properly. I don't much care for the material the frames are made from (balsa ply?). The instructions said to just glue the frames to the underside of the deck, but I found additional bracing was required. Another kit awaiting my attention. I didn't realize that this was designed by Chris Watton. I haven't decided whether to build this one after the Chris Craft, or Zulu, 'Lady Isabella' any thoughts??
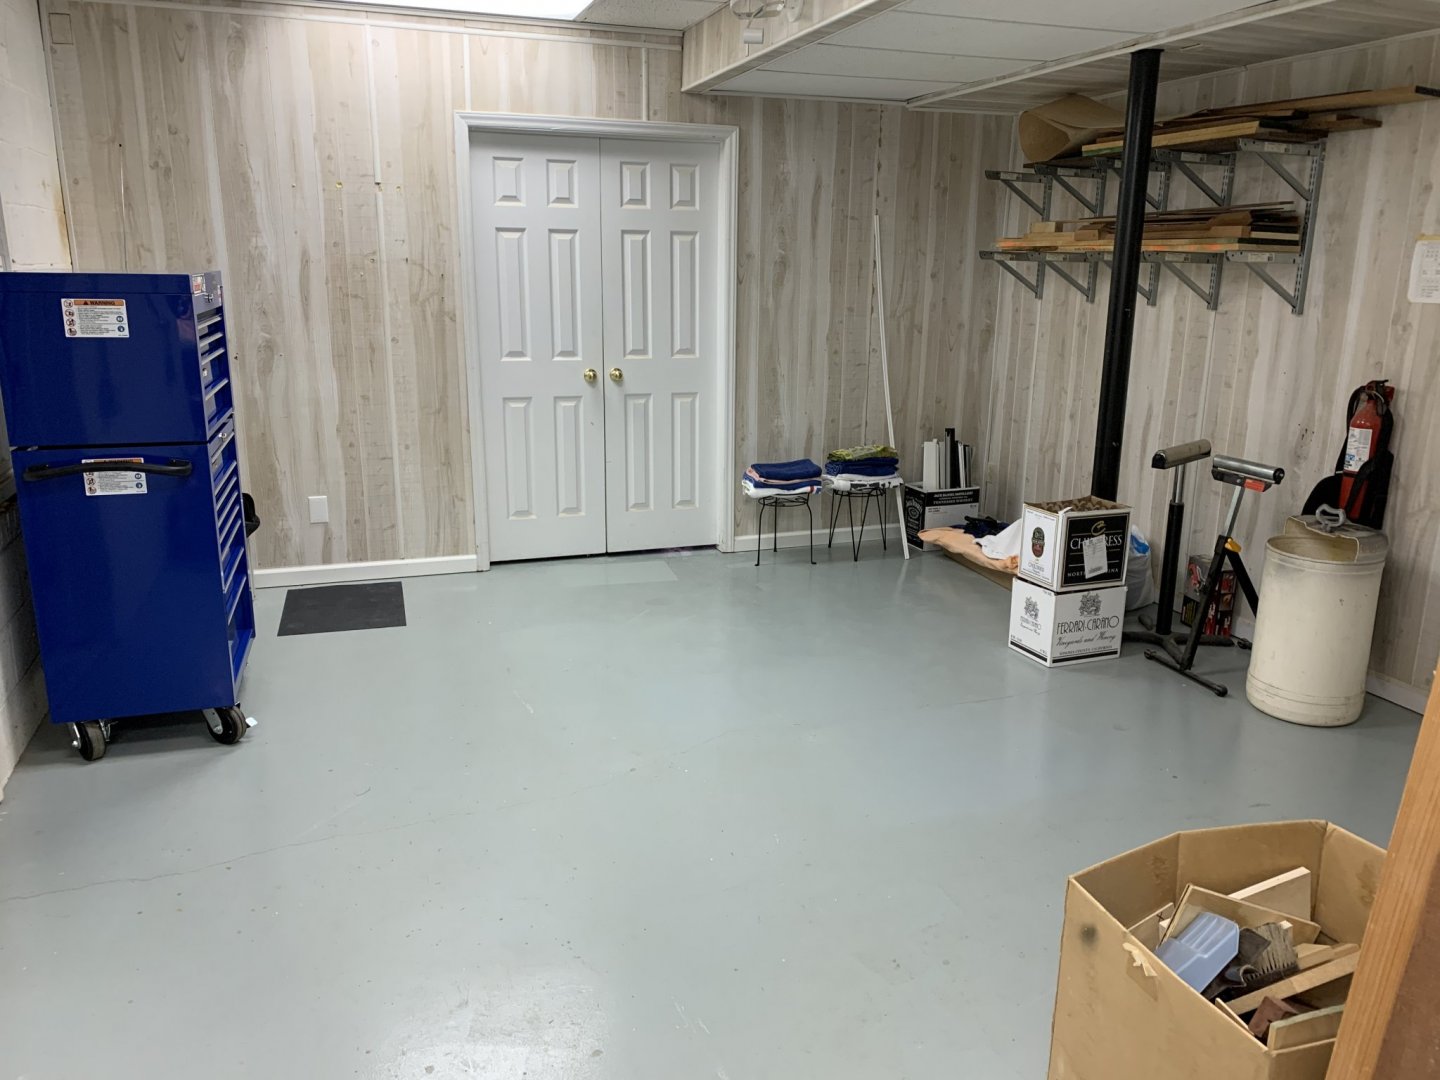


- 12 replies
-
- 10
-
-
- dumas
- Chris-Craft
- (and 2 more)
-
OK, I know, I know, I said in the past that I don't like building the same model twice, but I never said never, so here we go with another 1930 Chris Craft mahogany runabouts. Now, if I have my arm twisted behind my back to build a second model, my arm wouldn't have to be twisted nearly as much to build another 1930, this is one of if not my favorite Chris Craft runabout. I had been offered this kit a few months ago and it had been nagging at me, I could hear it in my sleep, saying (build me, build m mikie, you know you want to, just go with the feeling), which I finally did. I swear I could see that box dancing in my rear view mirror all the way home.
- 3 replies
-
- 2
-
-
- Chris-Craft
- Chris-Craft 24 Runabout
- (and 1 more)


.JPG.5bb384730b13c69dfb3e87e674d1b99d.JPG)
.JPG.ee80687deb7983ffca04759f1857e949.JPG)