James H
-
Posts
6,139 -
Joined
-
Last visited
Content Type
Profiles
Forums
Gallery
Events
Everything posted by James H
-
 Hi Chris, You'll find out all the info you need right here on MSW. Best thing to do is to follow this topic and I'll update as soon as I have first-hand information for you. If you read some purposely misleading posts on FB, they'll tell you this particular build stopped 'years ago'. due to 'bad quality materials'. You'll see it was only last August and that's because: Pandemic and Italy being crippled with it, especially in the north where Amati are and the parts are produced. The company producing the parts for Amati, did so from an unsuitable (not bad quality) material. This is now being sorted at the moment and I expect this build to be on again in a few months. Jim
 -
That looks just beautiful. Very clean.
-
PLEASE share a build log with us! My own Vic will be restarting in the next few months.
-
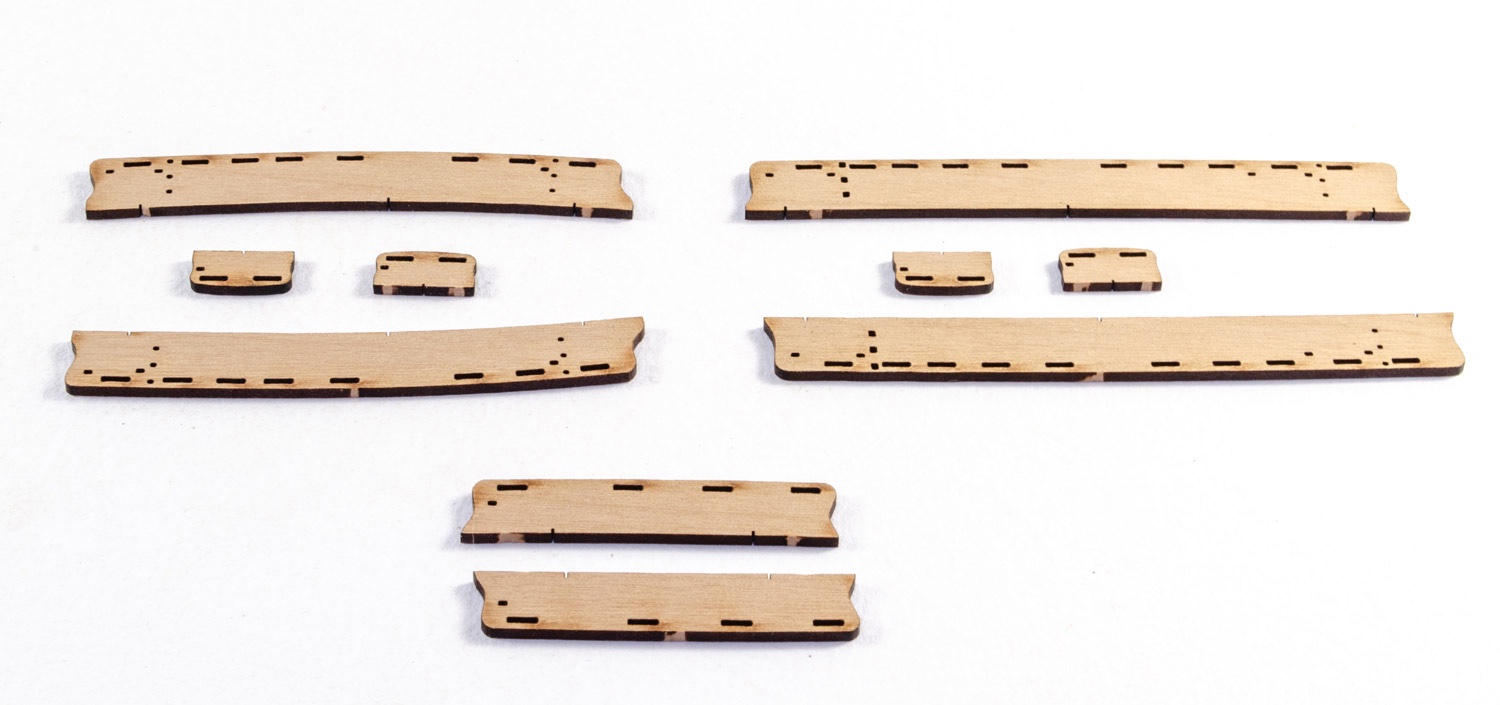
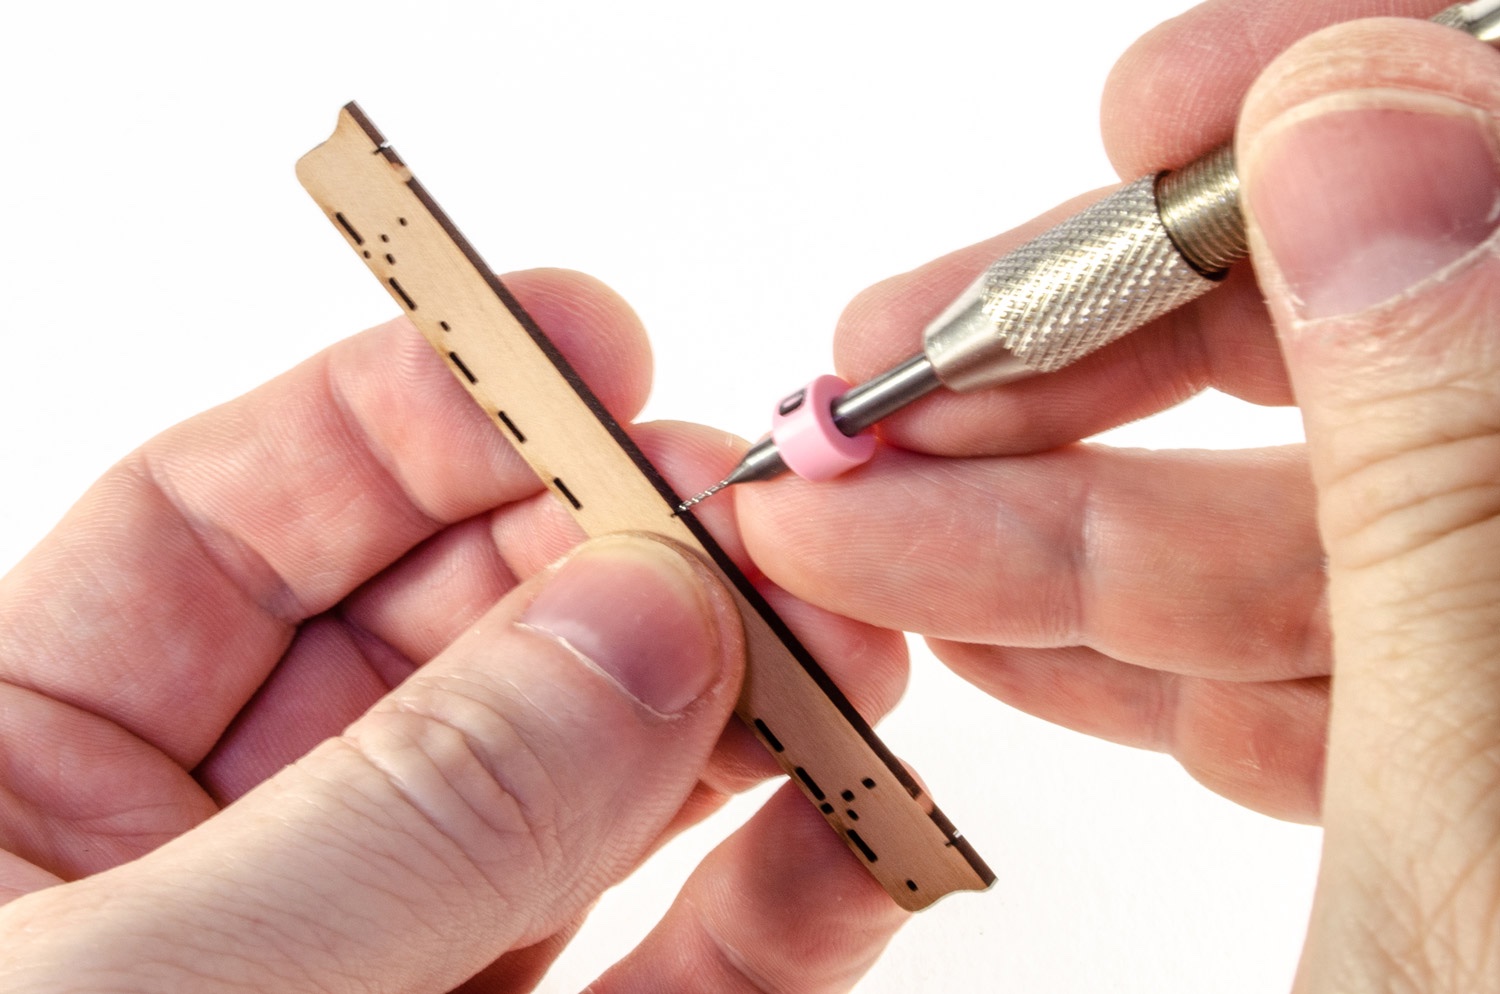
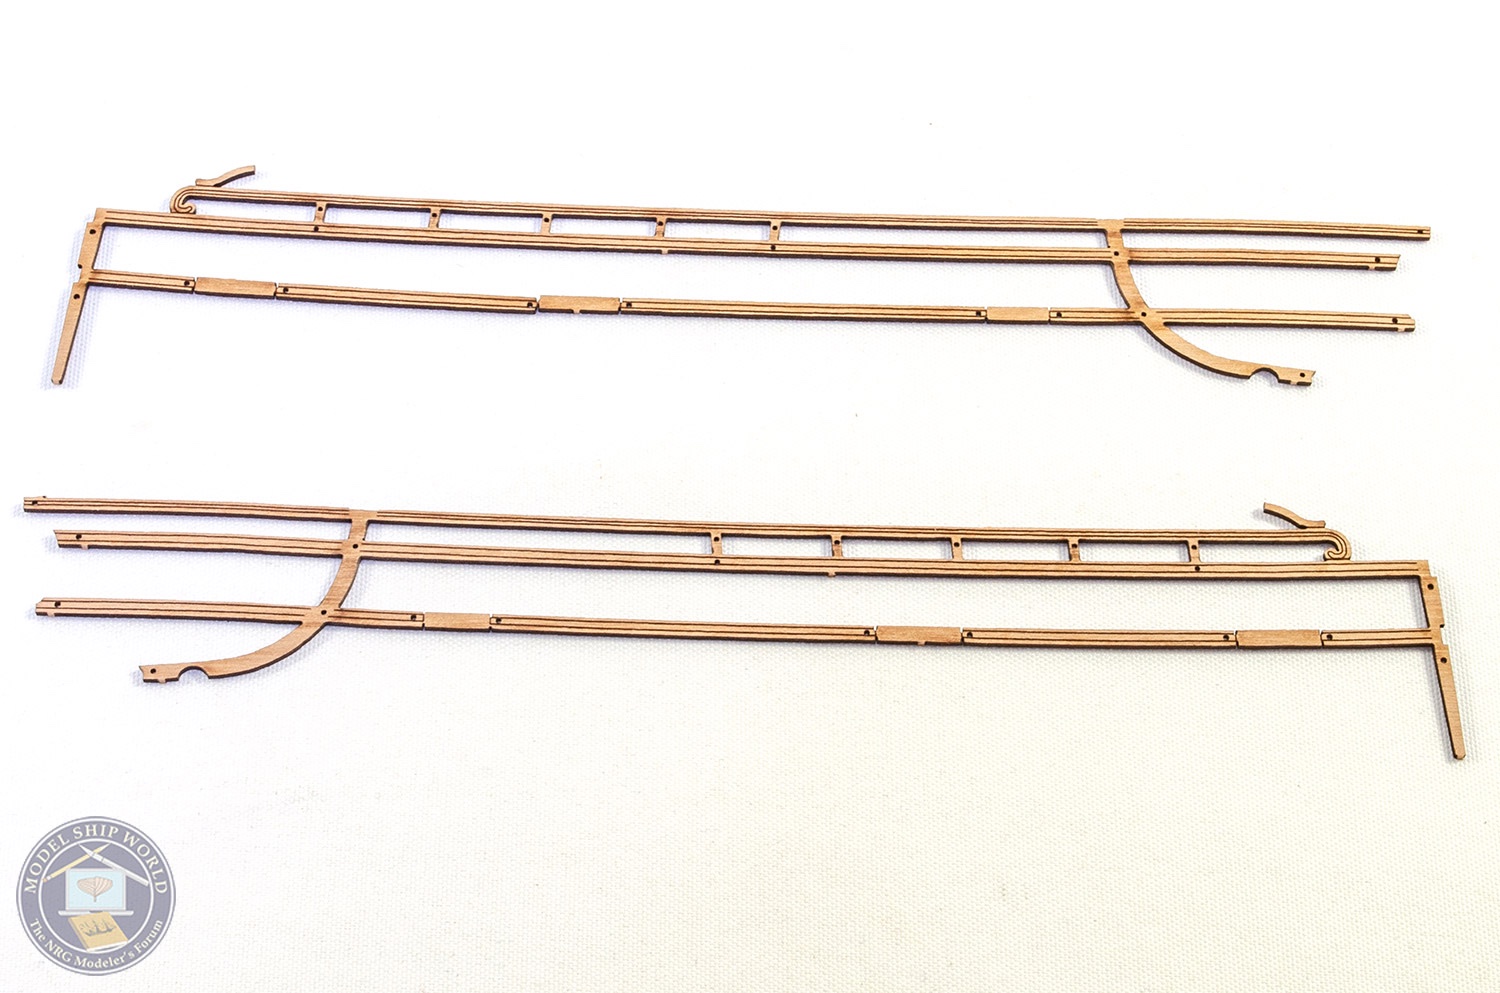
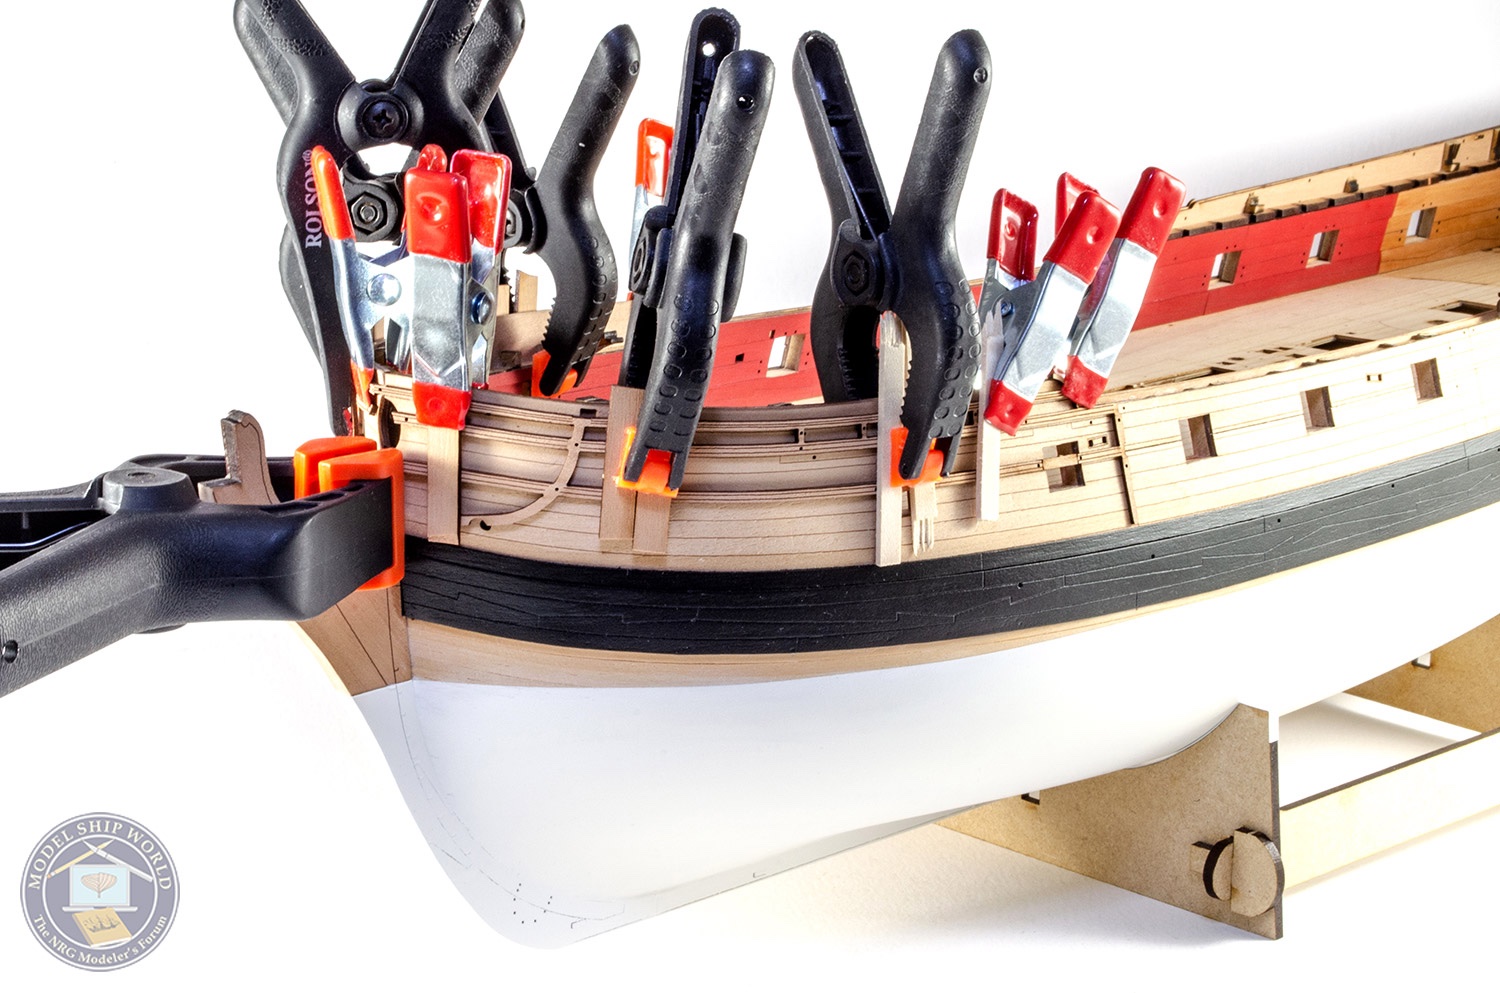
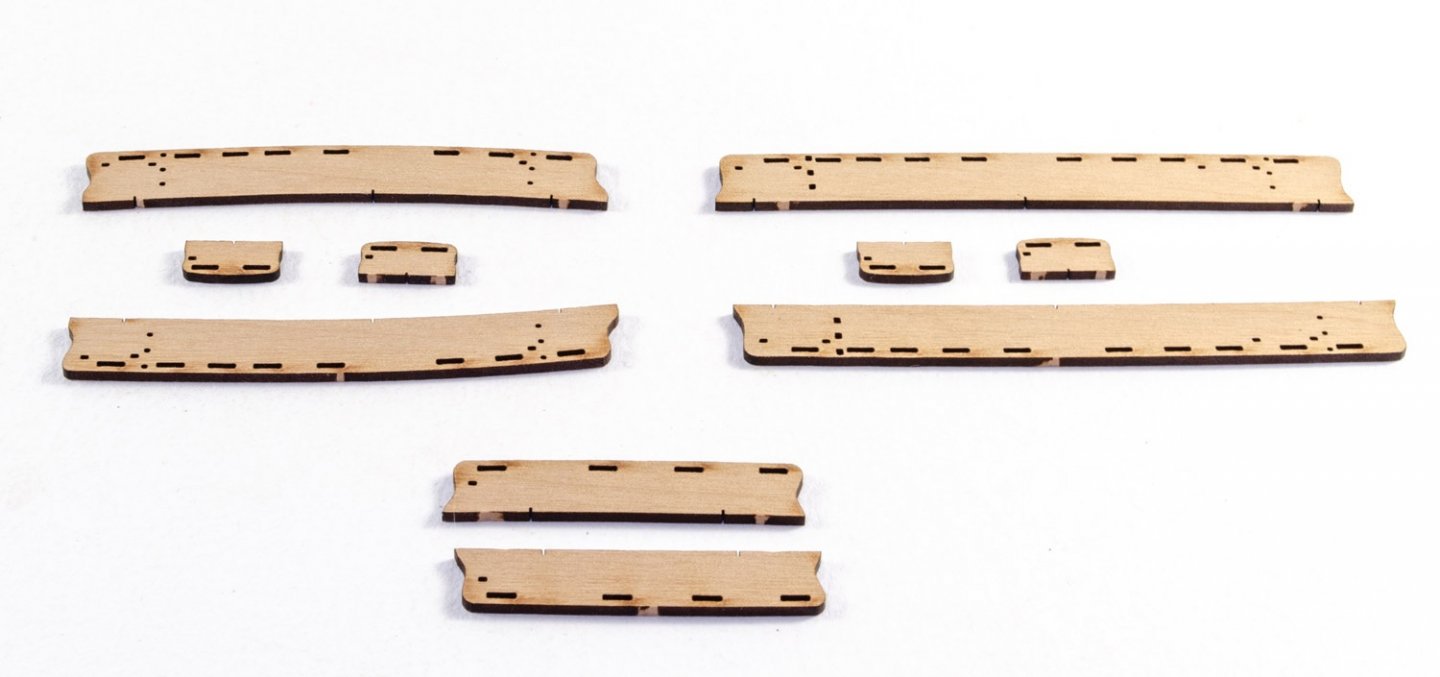
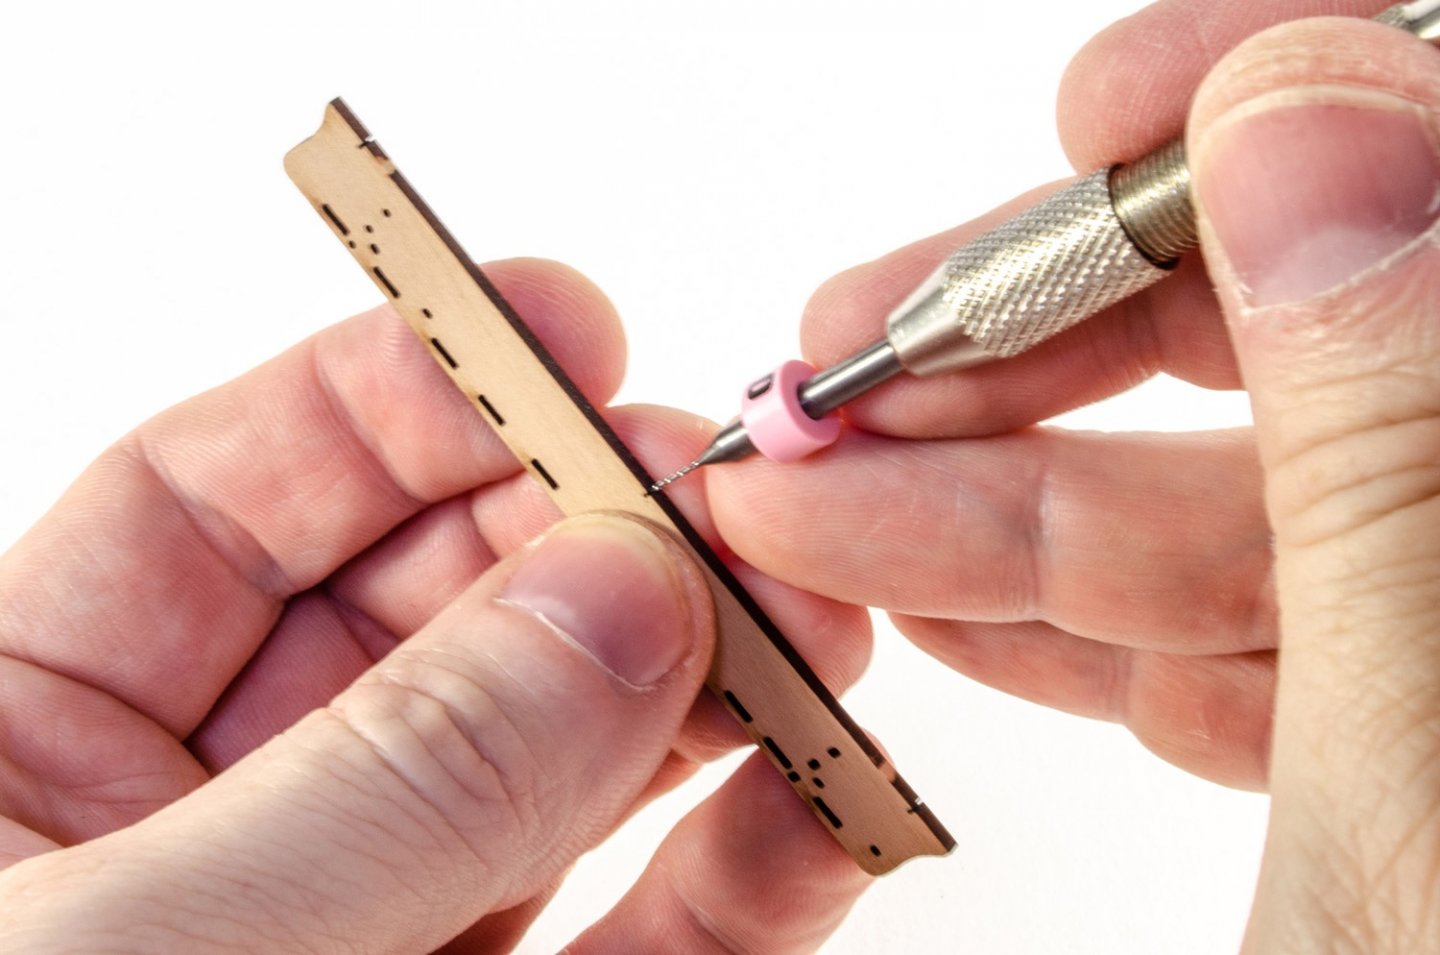
A quick end of week update before I delve into the bow area and then onto the stern/decor. This last couple of days been finishing the rudder and fitting it, adding the pintle/gudgeon straps, the horse shoe/fishplates to the keel....and the channels. All channel parts are first drilled with a 0.5mm drill bit in pre-cut laser slots and then painted black (after masking joint edge). Cut-off brass pins are then CA'd into the holes. Corresponding laser holes in the sides of the hull are then used to locate these when glued into position. Once fitted, the channel knees are added. I decided to leave the char on the upper edges of these with bare pear sides instead of just hiding the shapes under black paint. Here's the work so far.

- 355 replies
-
- 45
-

-
- vanguard models
- Sphinx
- (and 1 more)
-
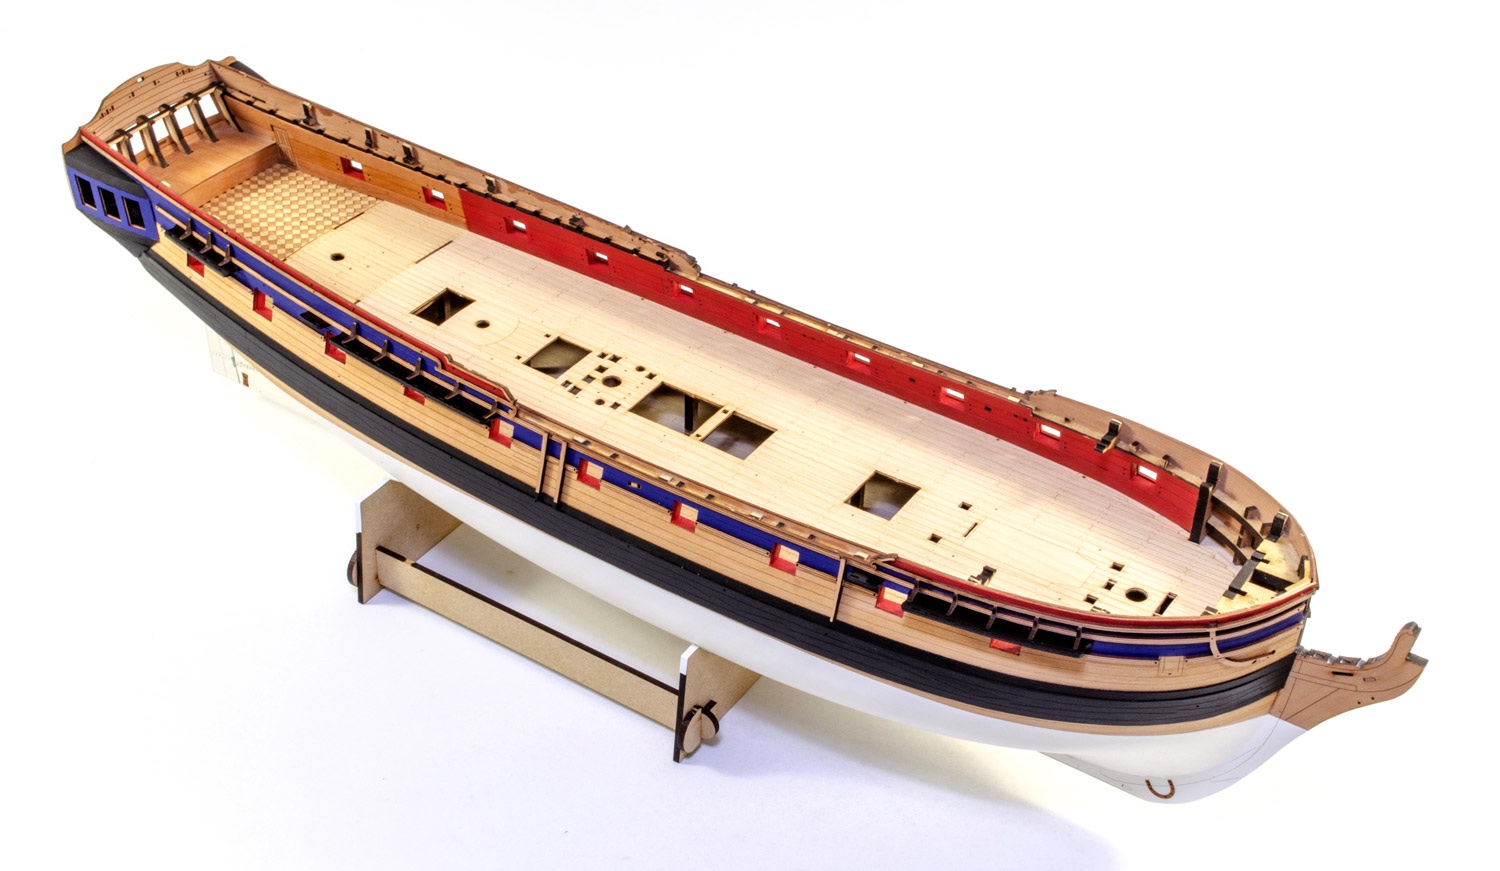
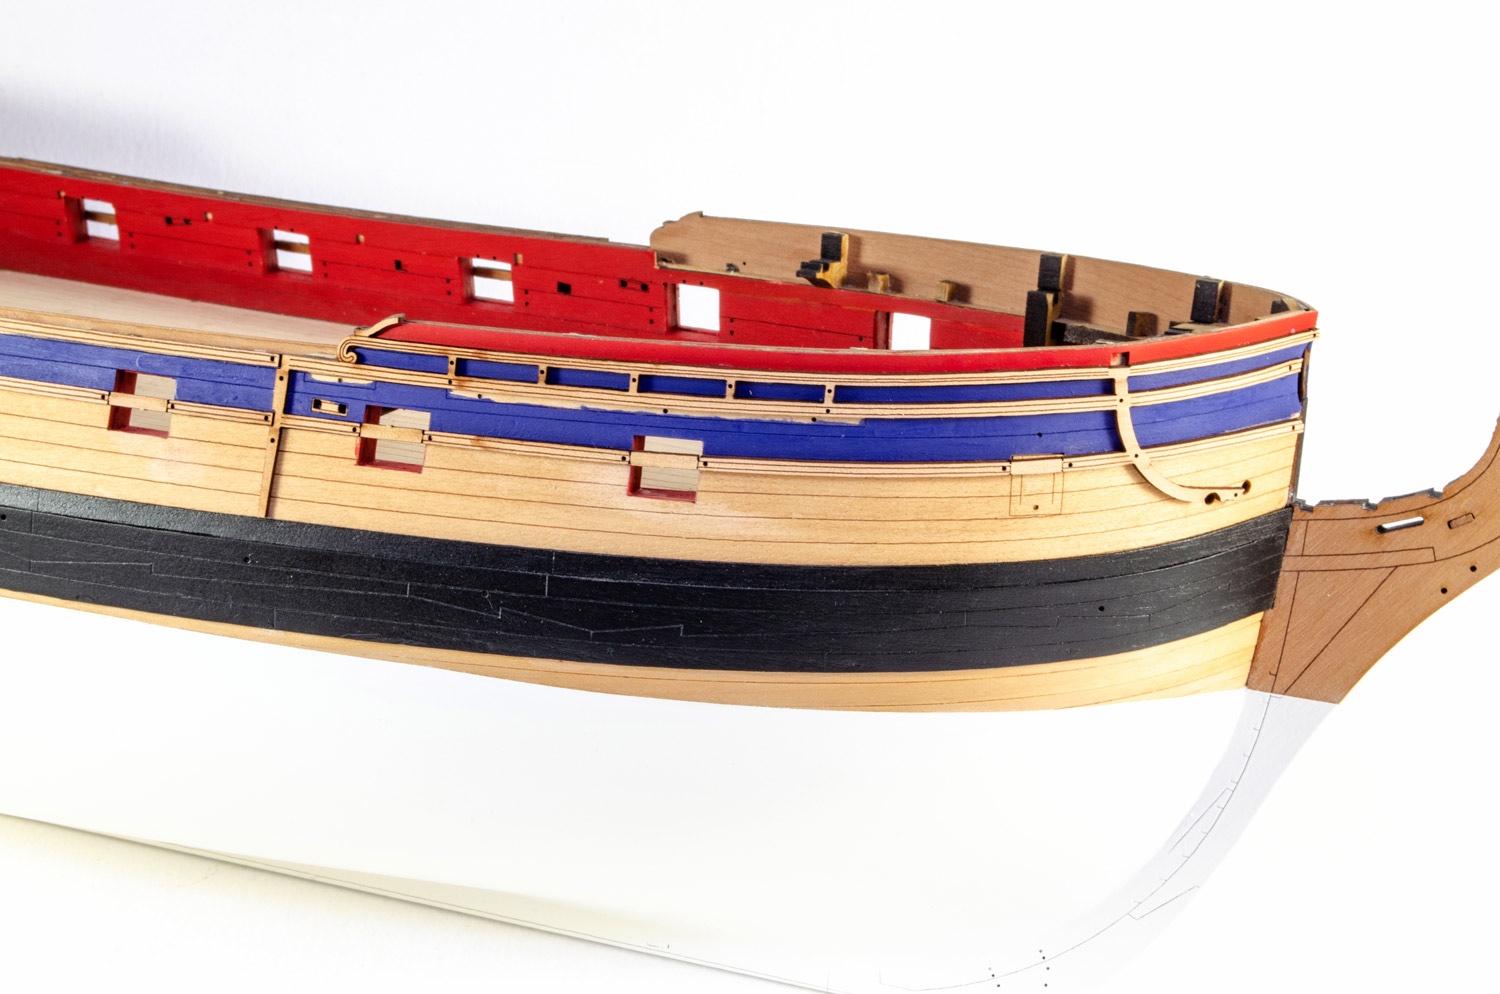
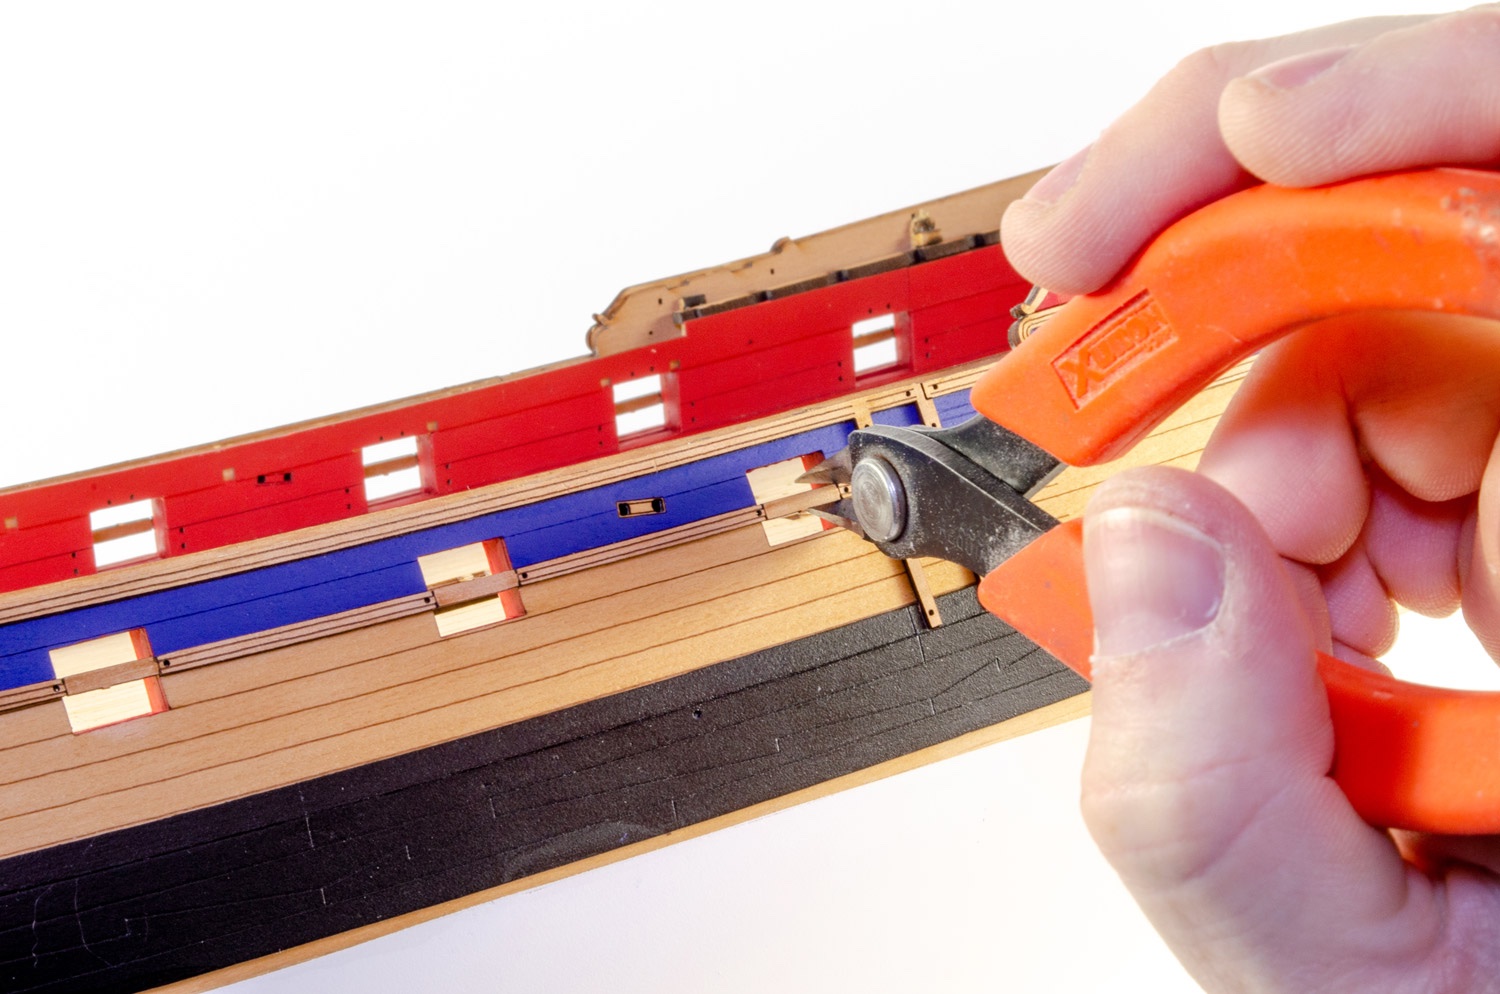
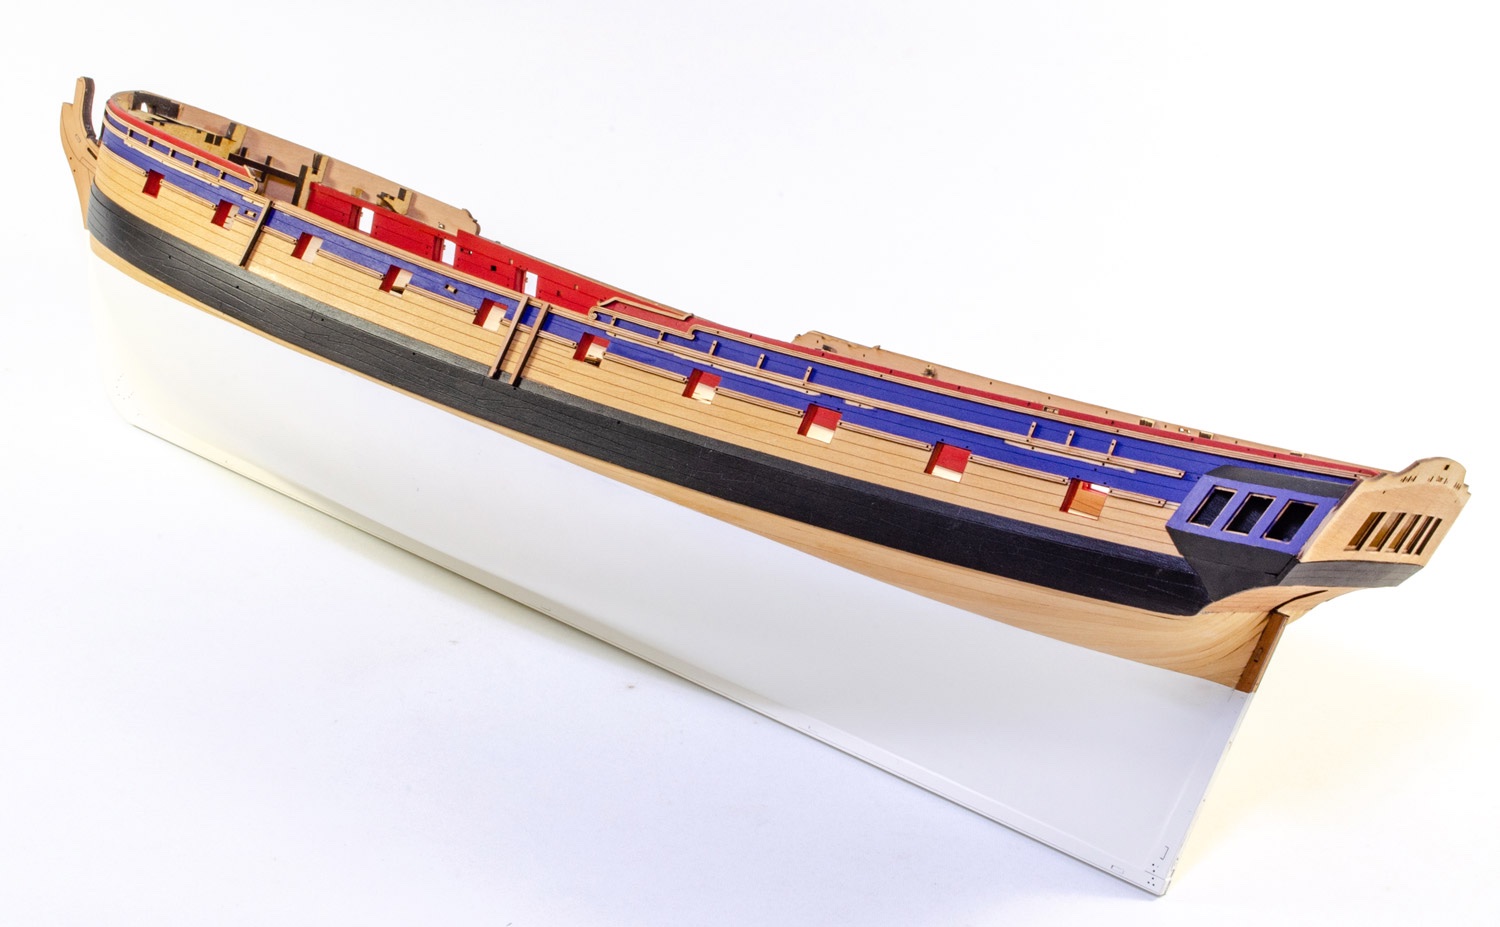
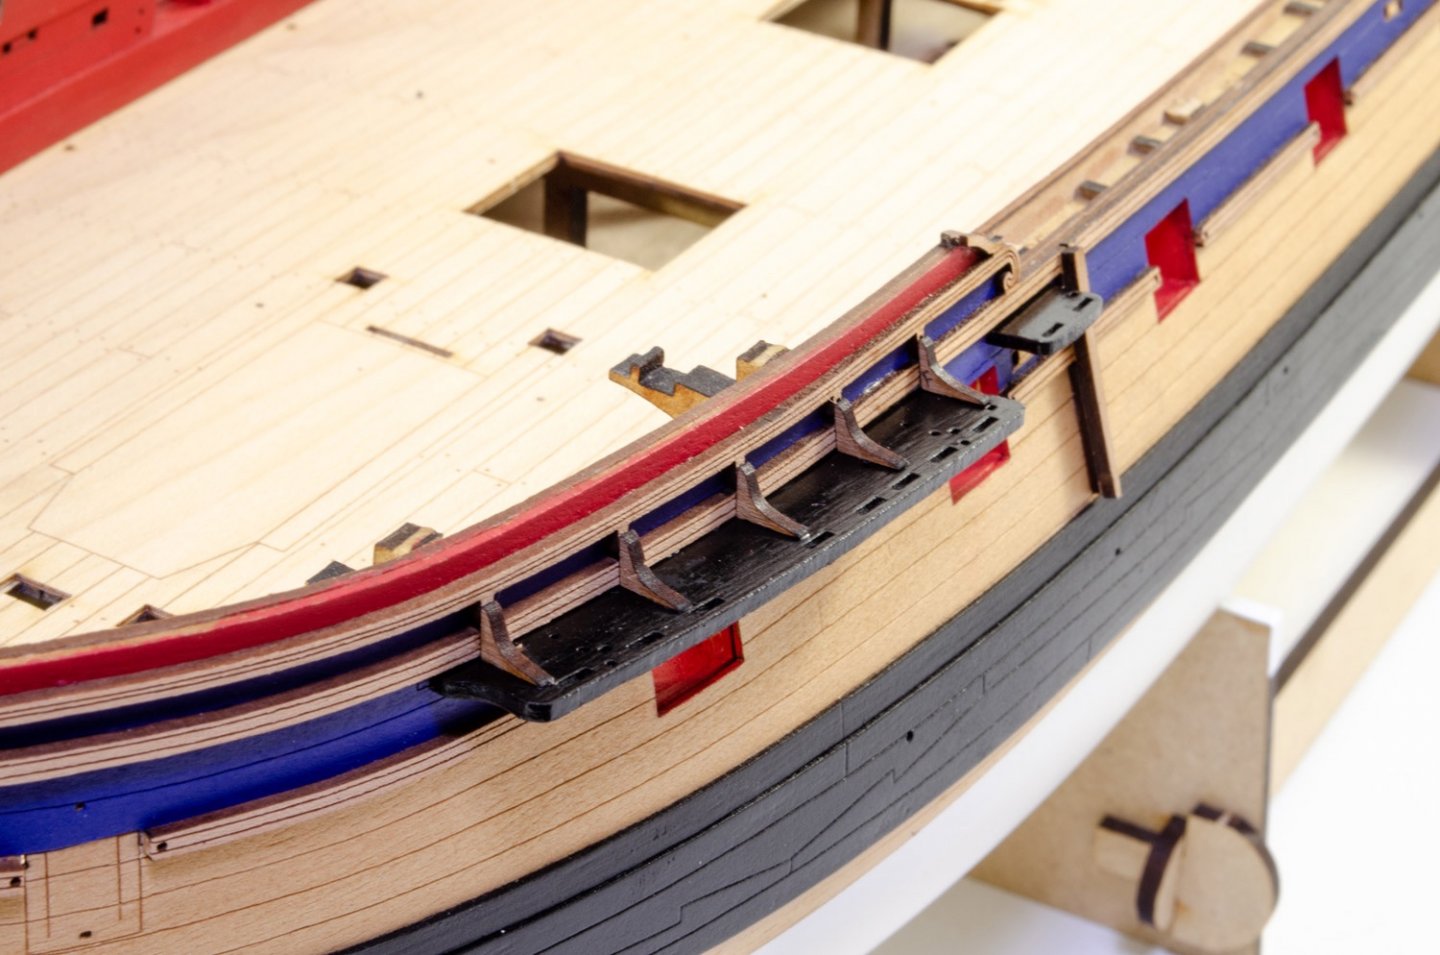
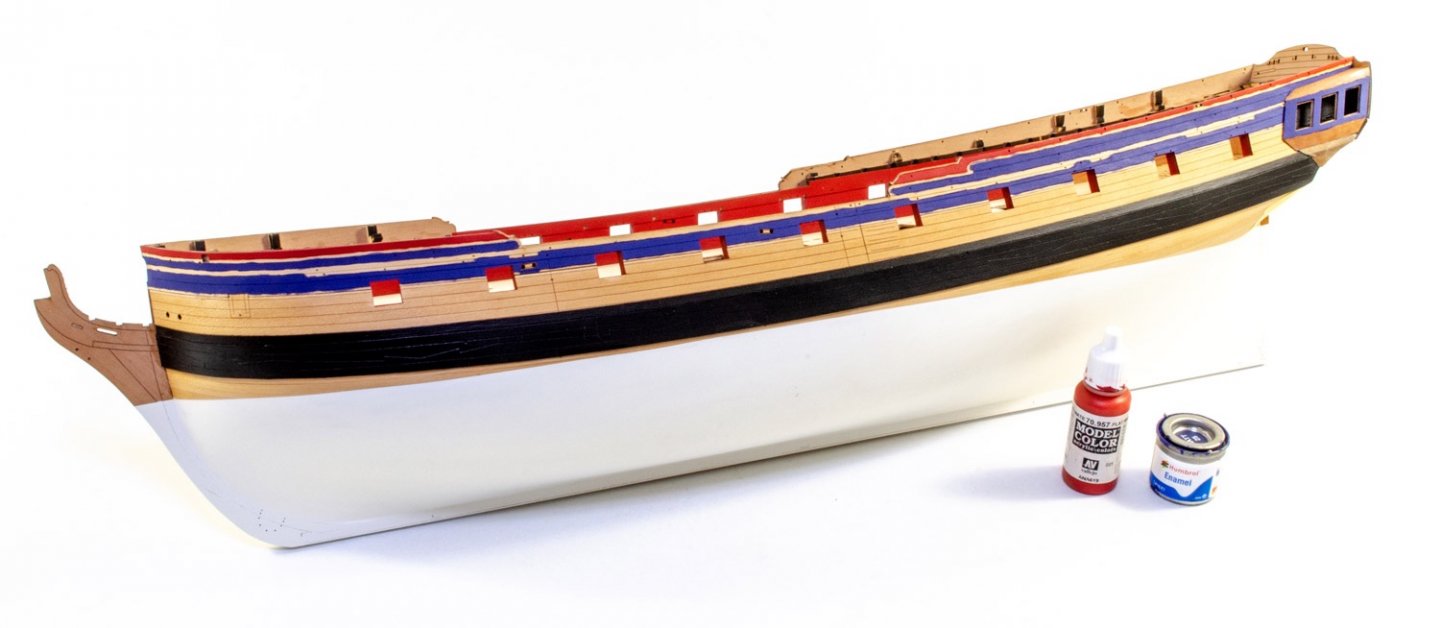
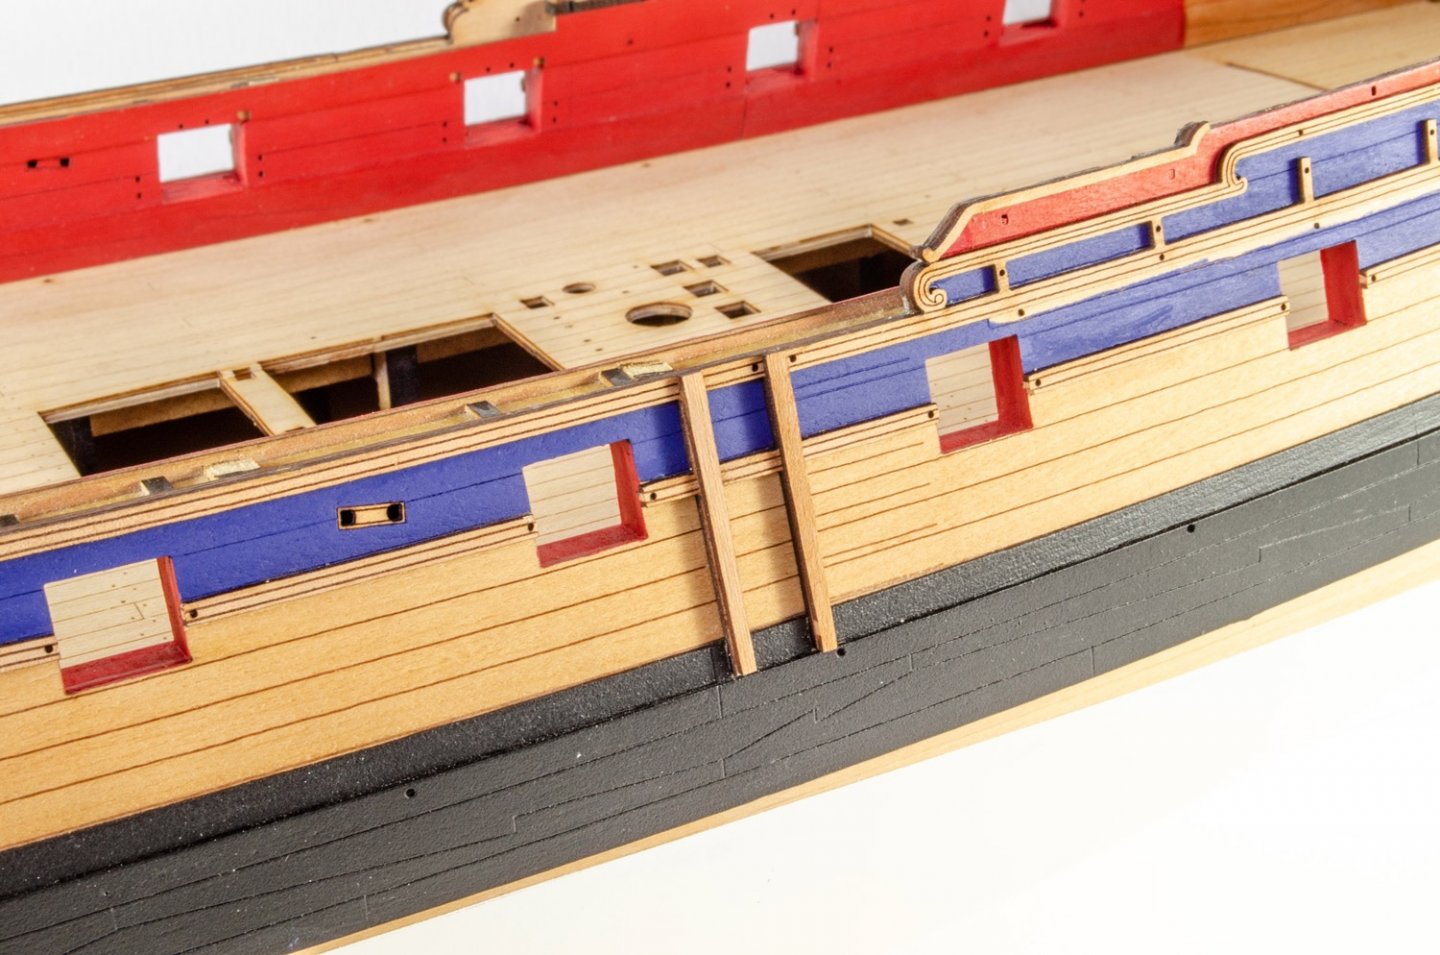
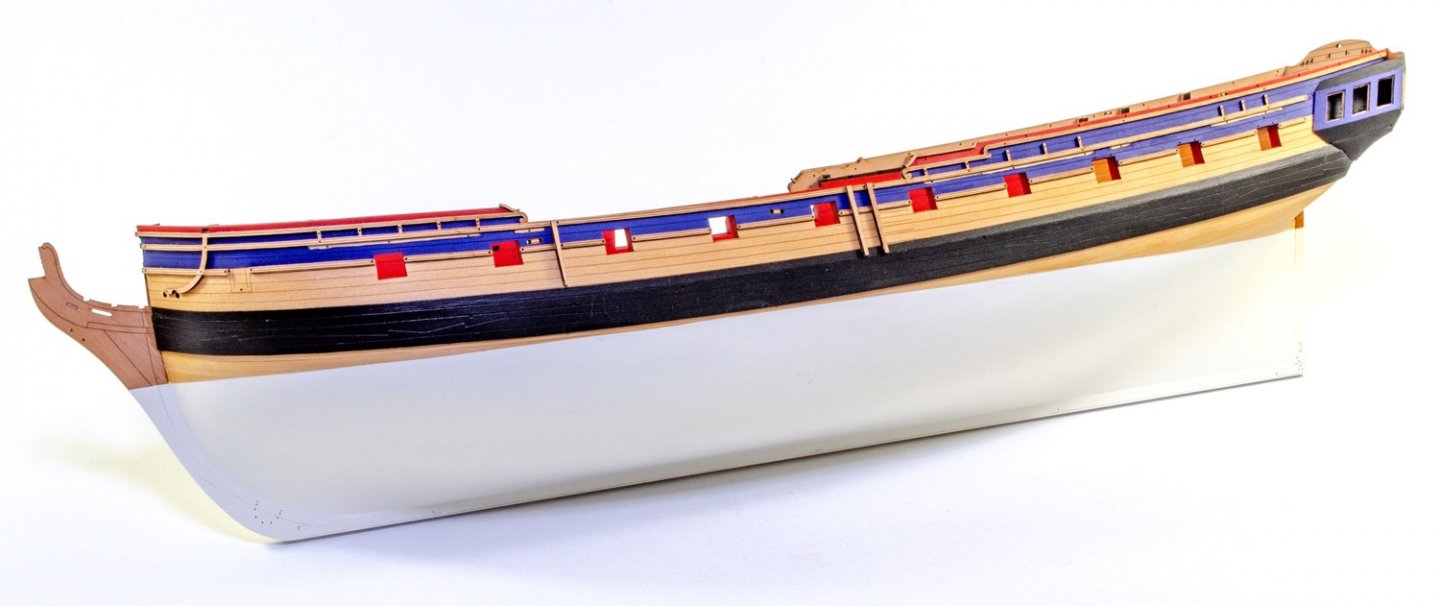
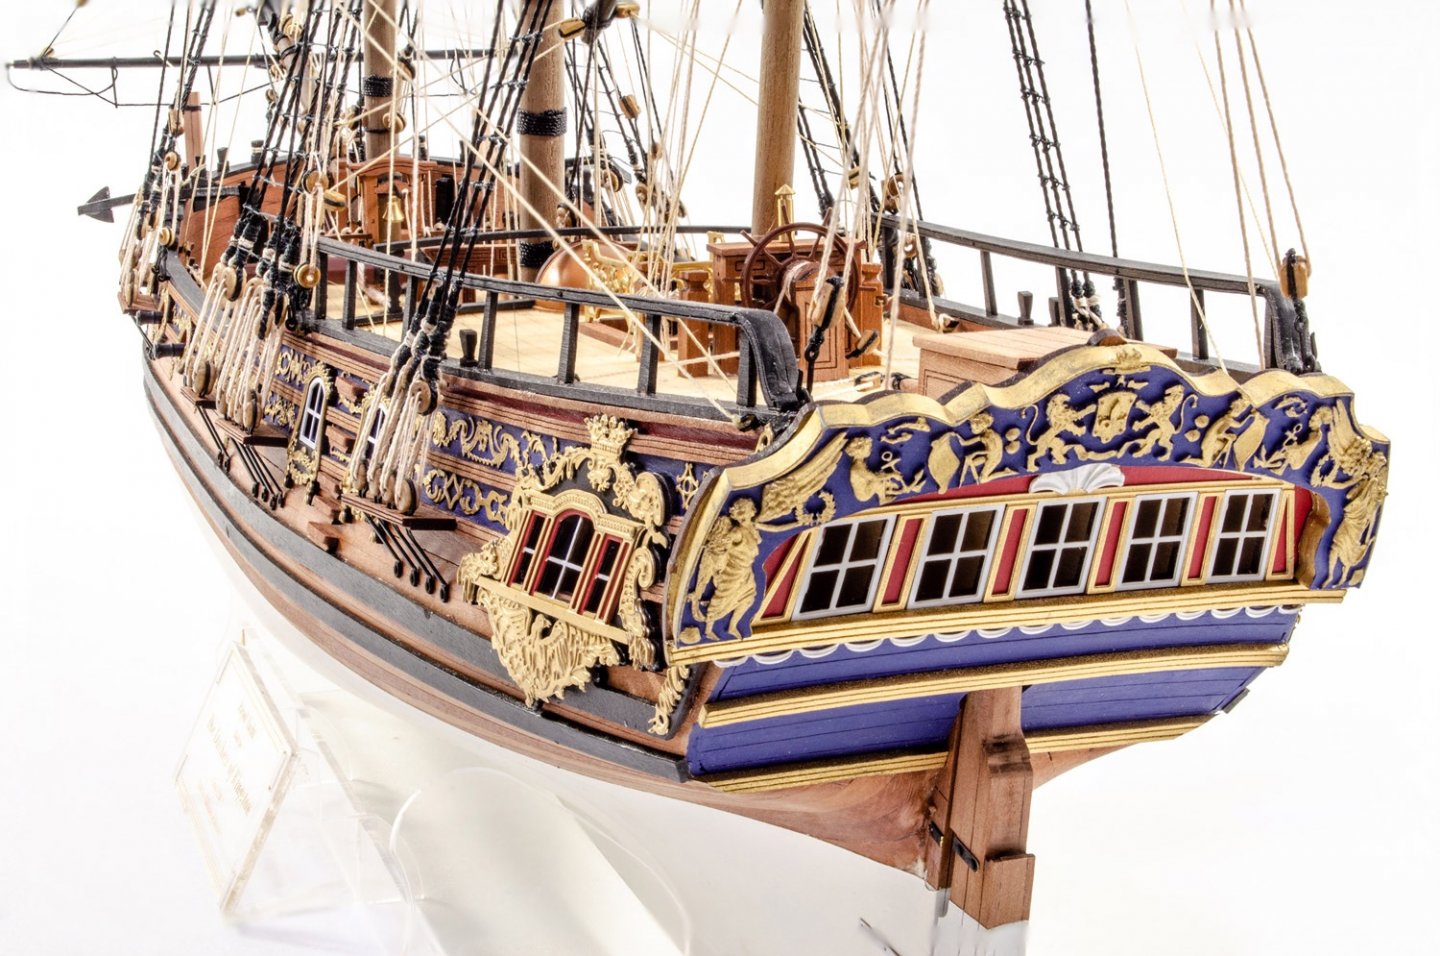
I thought I'd do another quick update as I've managed to put a little colour on things. Before paint, all the areas which would be under colour were first brushed with a little polyurethane varnish to prevent the paint soaking into the timber and looking grainy. For paint, I've used Humbrol 25 Flat Blue and Vallejo Flat Red. These are just brushed on by hand. I've purposely gone a little into the rail area so I know there won't be any areas I need to later touch up. You will still notice some areas where the channels will be fitted. I just want a solid wood - wood connection with no varnish in there. The rails are now added to the sides, making things look a little tidier. The sections over the cannon ports are part cut through with the laser, so I just snip them out. Fenders fitted: The last thing I've done is to get some paint on the quarter galleries and stern, prior to be doing the decoration within the next week. My next update should see things looking quite different. Until then...


- 355 replies
-
- 50
-
-
- vanguard models
- Sphinx
- (and 1 more)
-
Remember, only staff can see it. To me, I can see your membership number, so you set it correctly.
-
Ok, done. You also have a button in your profile which you should activate if you are an NRG member. There's a field to put your membership number into also. Only staff will be able to see the number. If members here can switch that button on and add their number, I can also add the badge as I see your number online. It makes things easier for staff.

-
Beautiful work and some nice info too re: skid beams.
- 126 replies
-
- 5
-
-

-
- victory models
- amati
- (and 2 more)
-
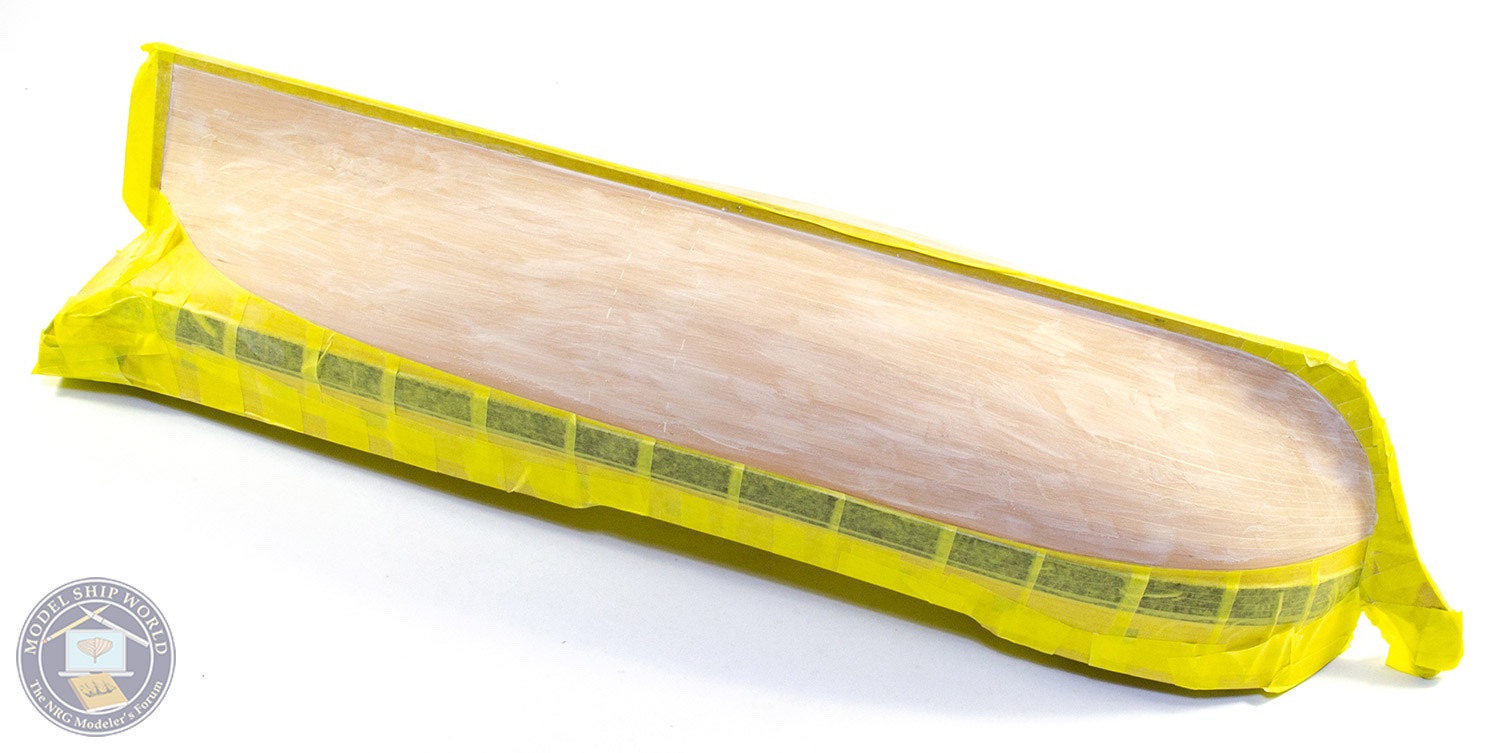
Ah yes! The masking tape is on the keel whilst I sanded back the filler on the hull underside. It was just to protect those surfaces. Once I was happy with the hull planks, I removed the tape from the keel and sprayed the whole underside. I use Ronseal natural acrylic wood filler on the undersides, diluted. I also added about 50% Titebond Original to the mix as it's easy to sand, more so other Titebond glues.
- 355 replies
-
- 7
-
-
- vanguard models
- Sphinx
- (and 1 more)
-
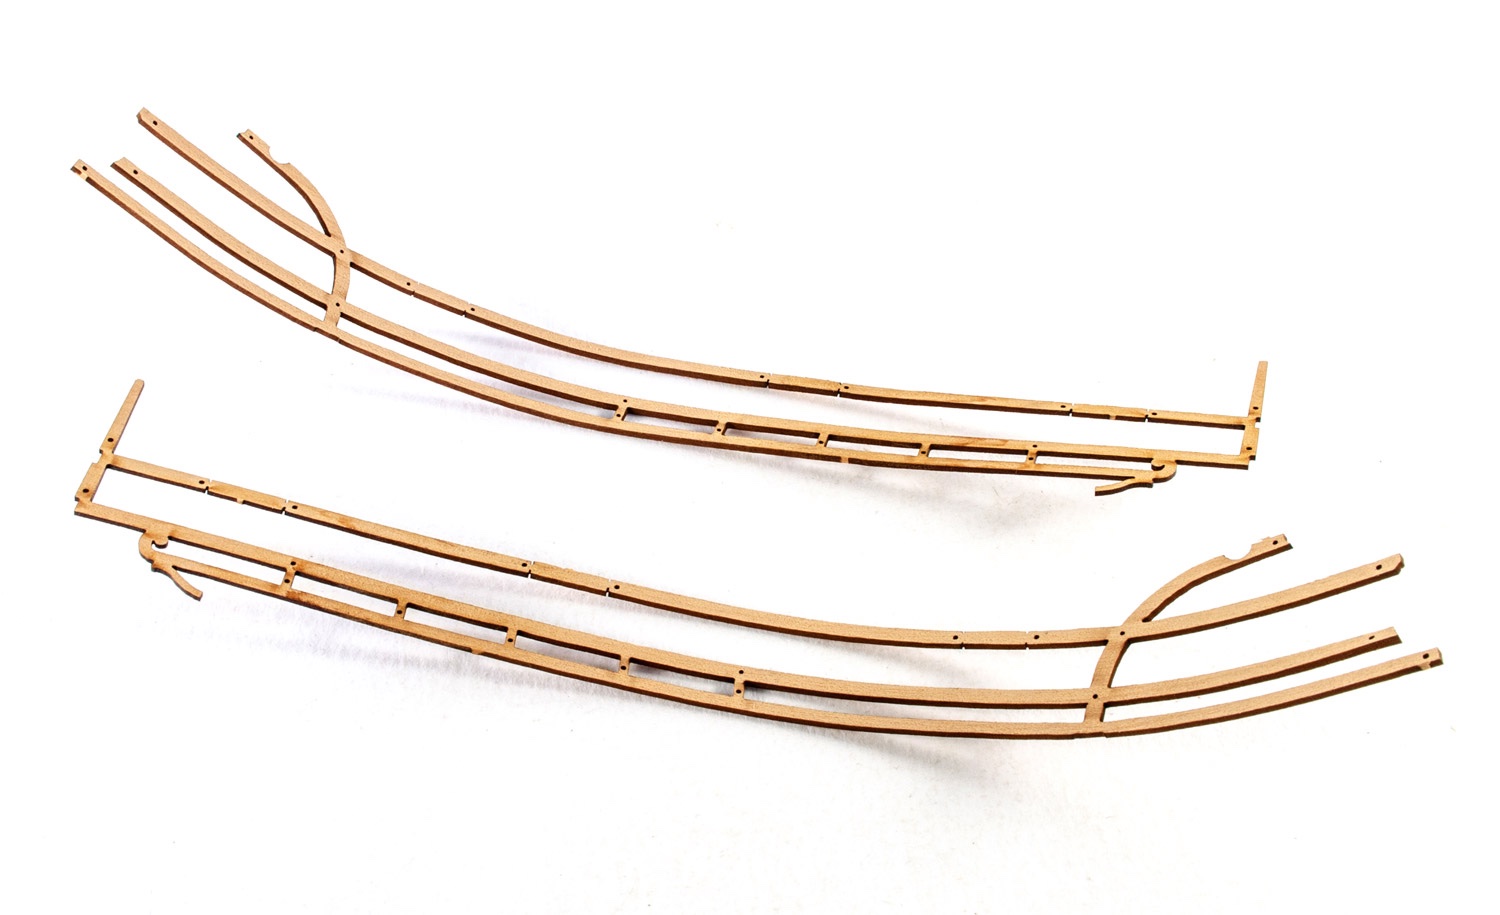
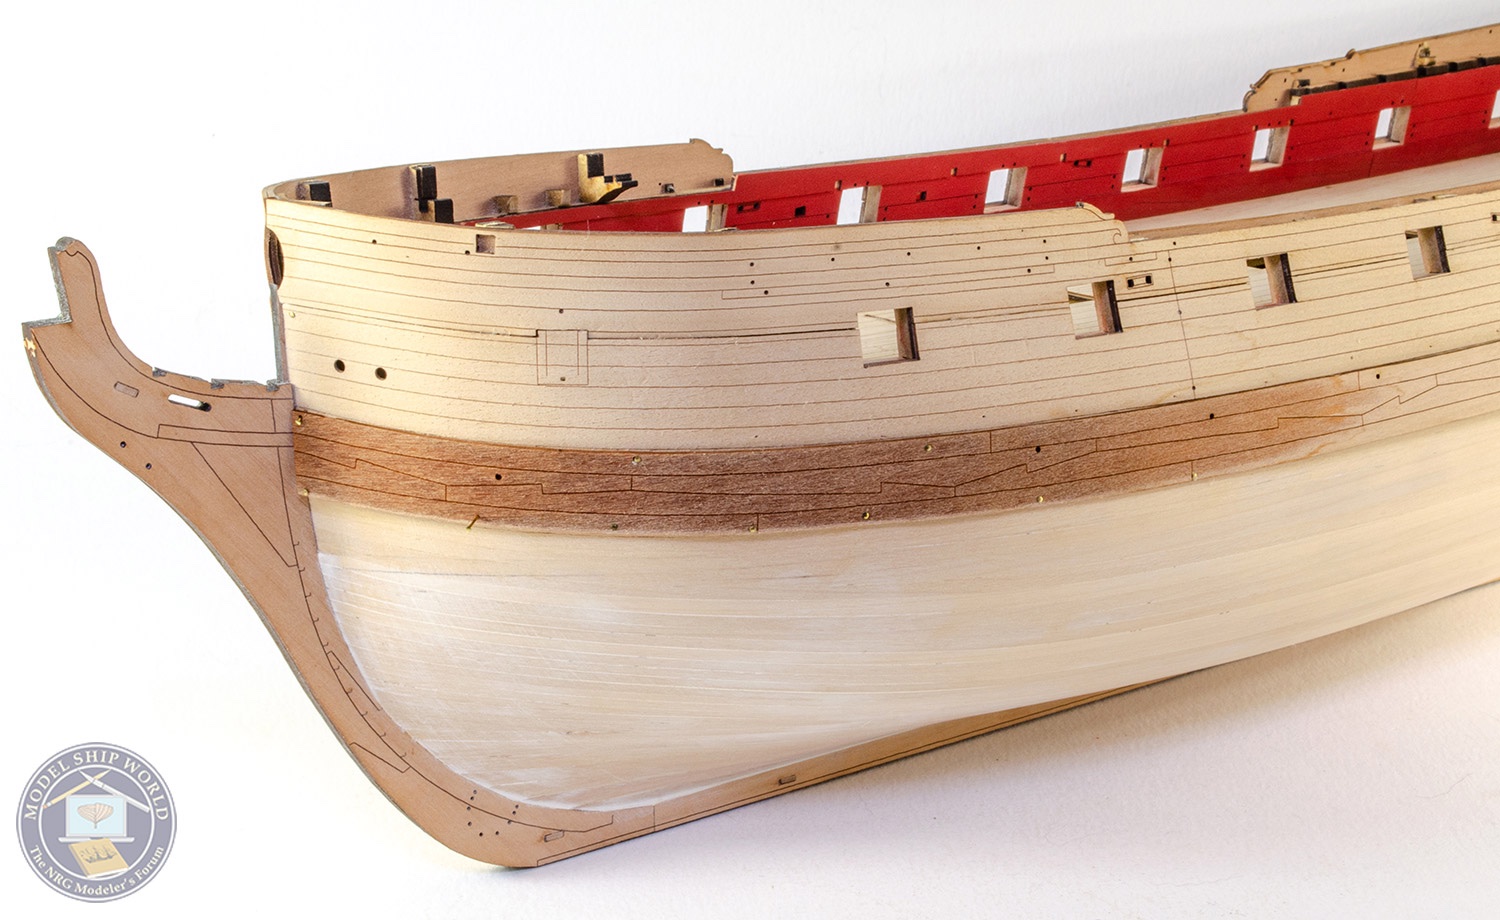
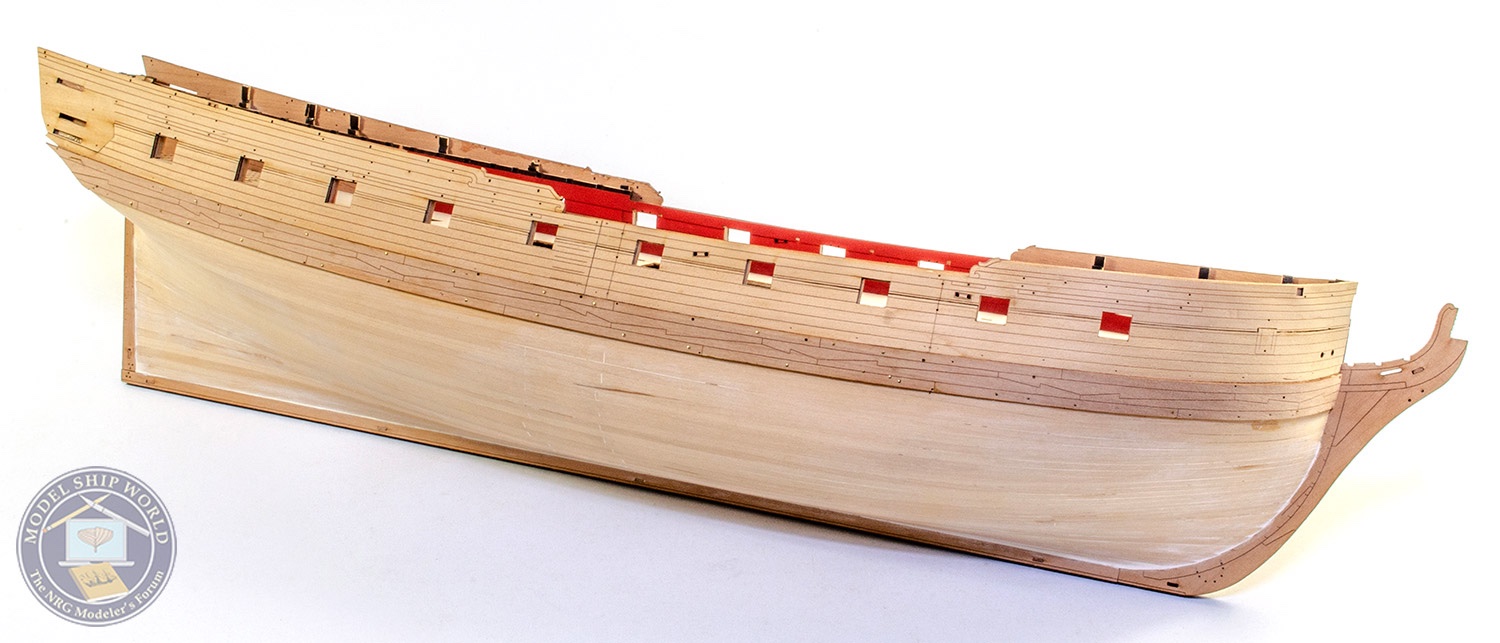
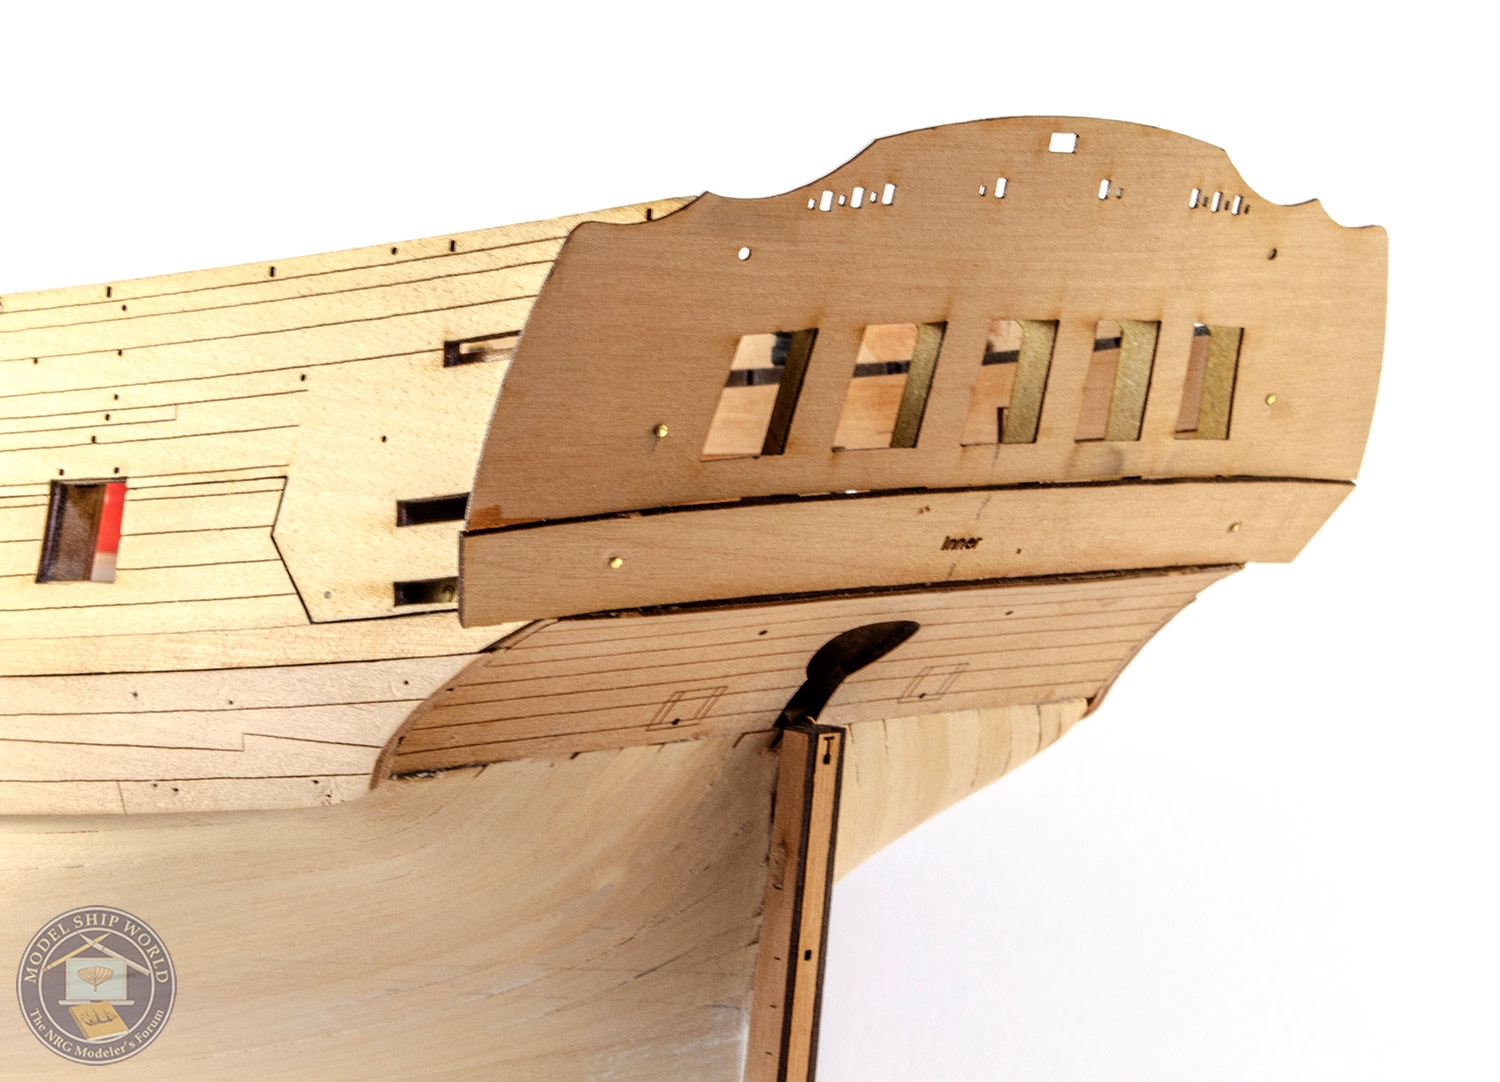
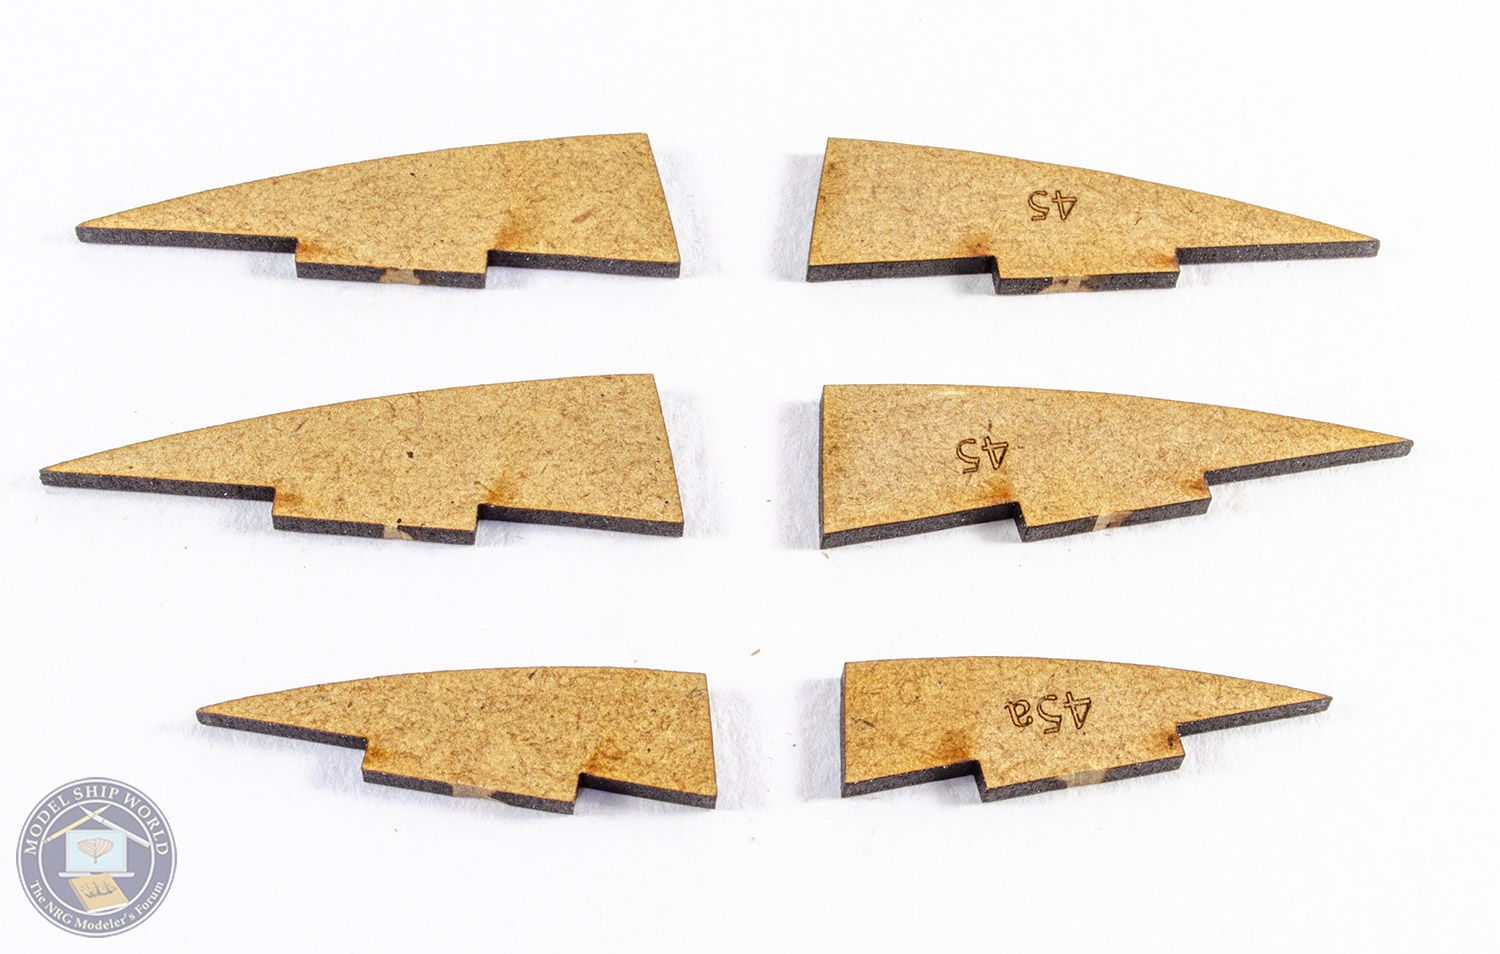
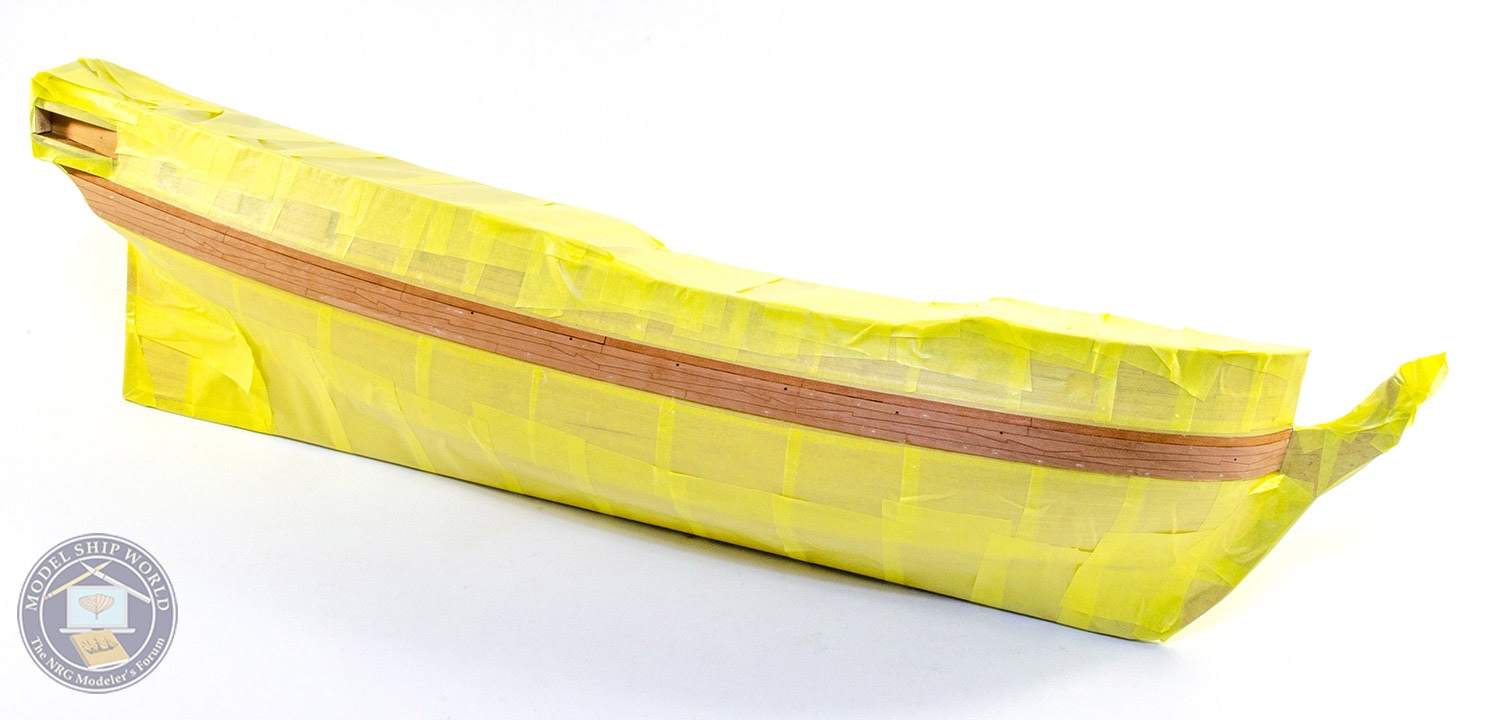
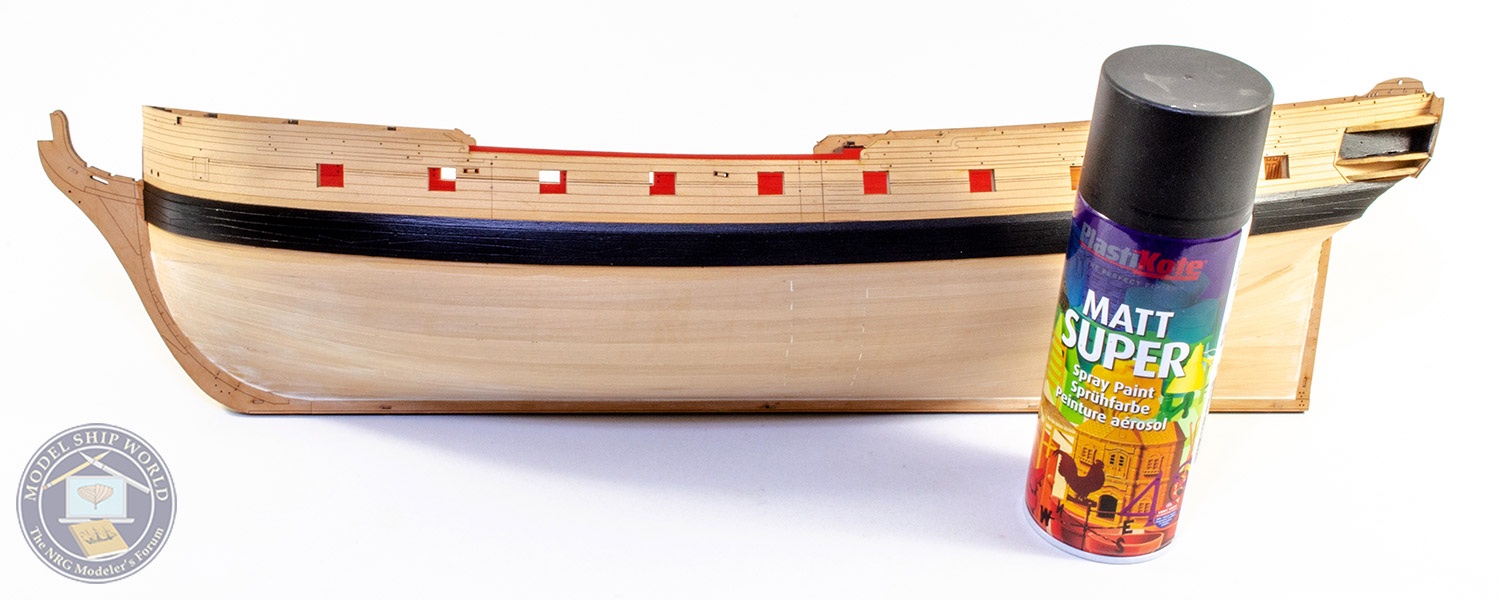
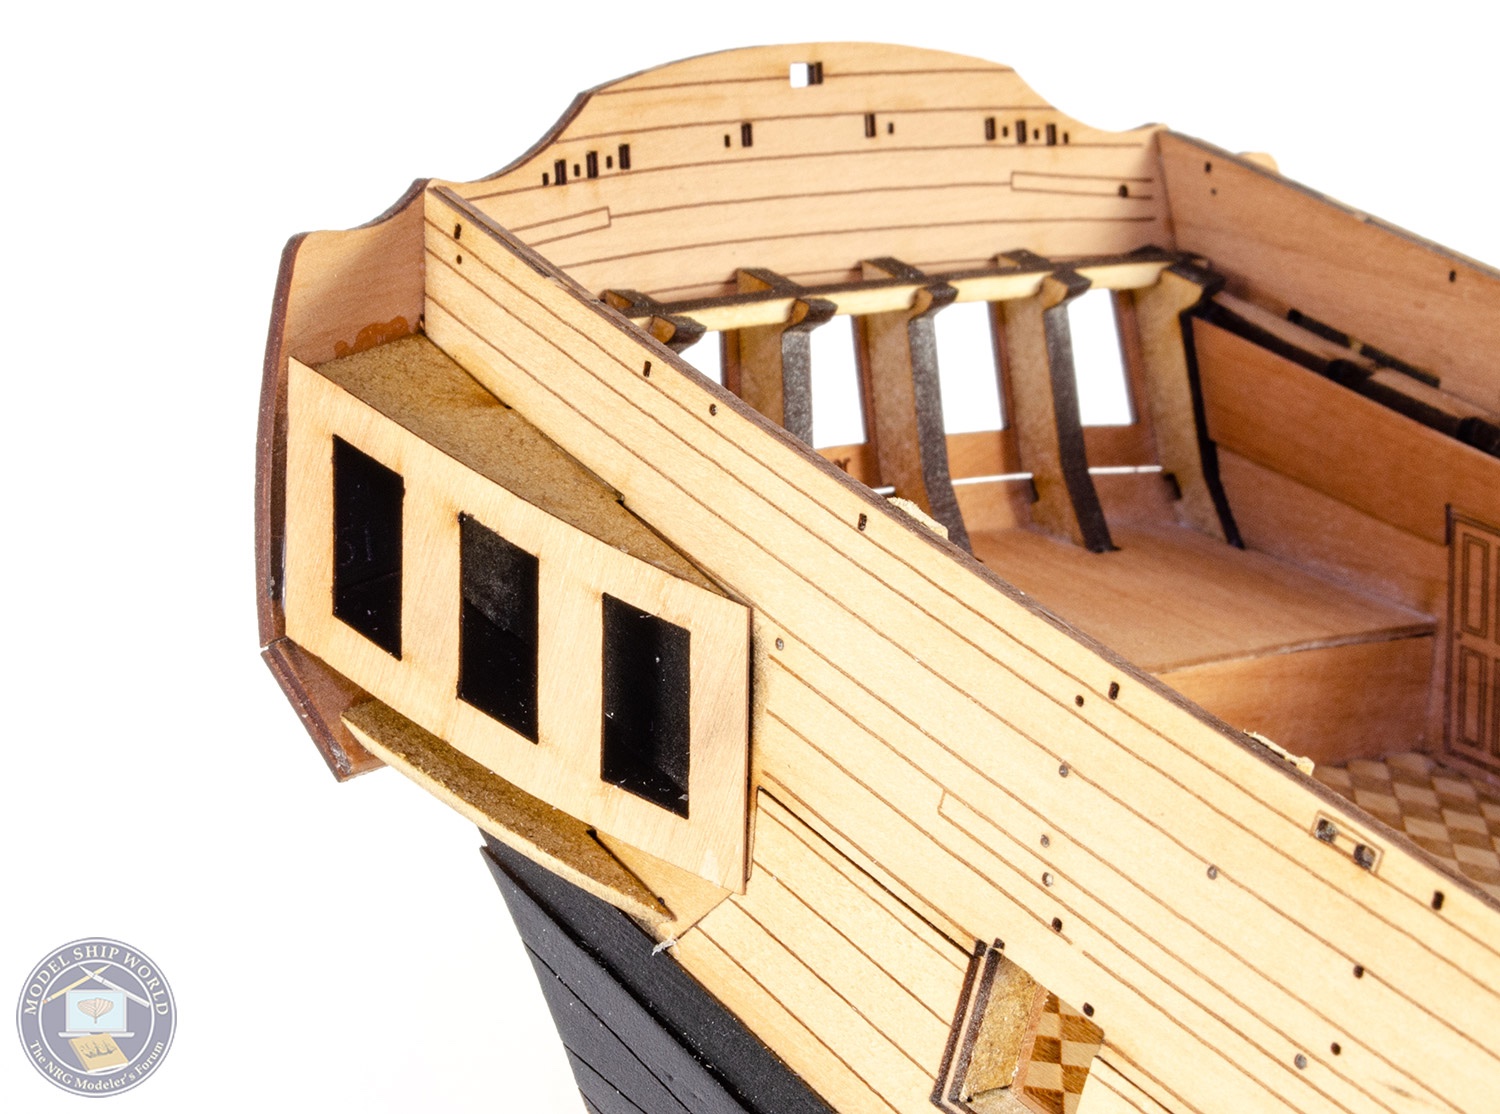
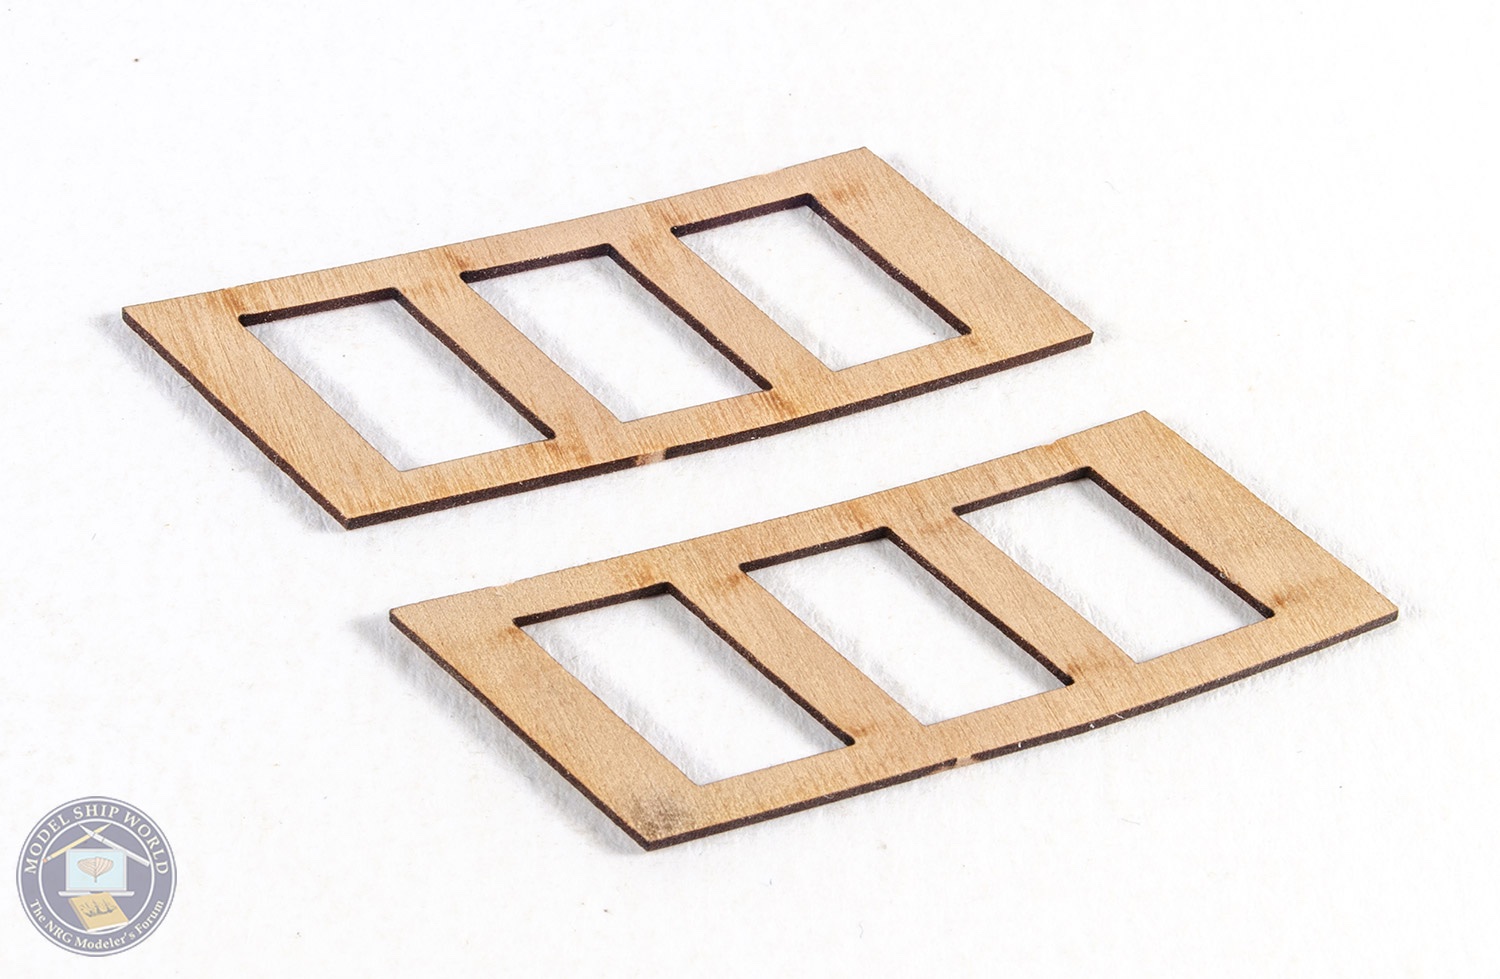
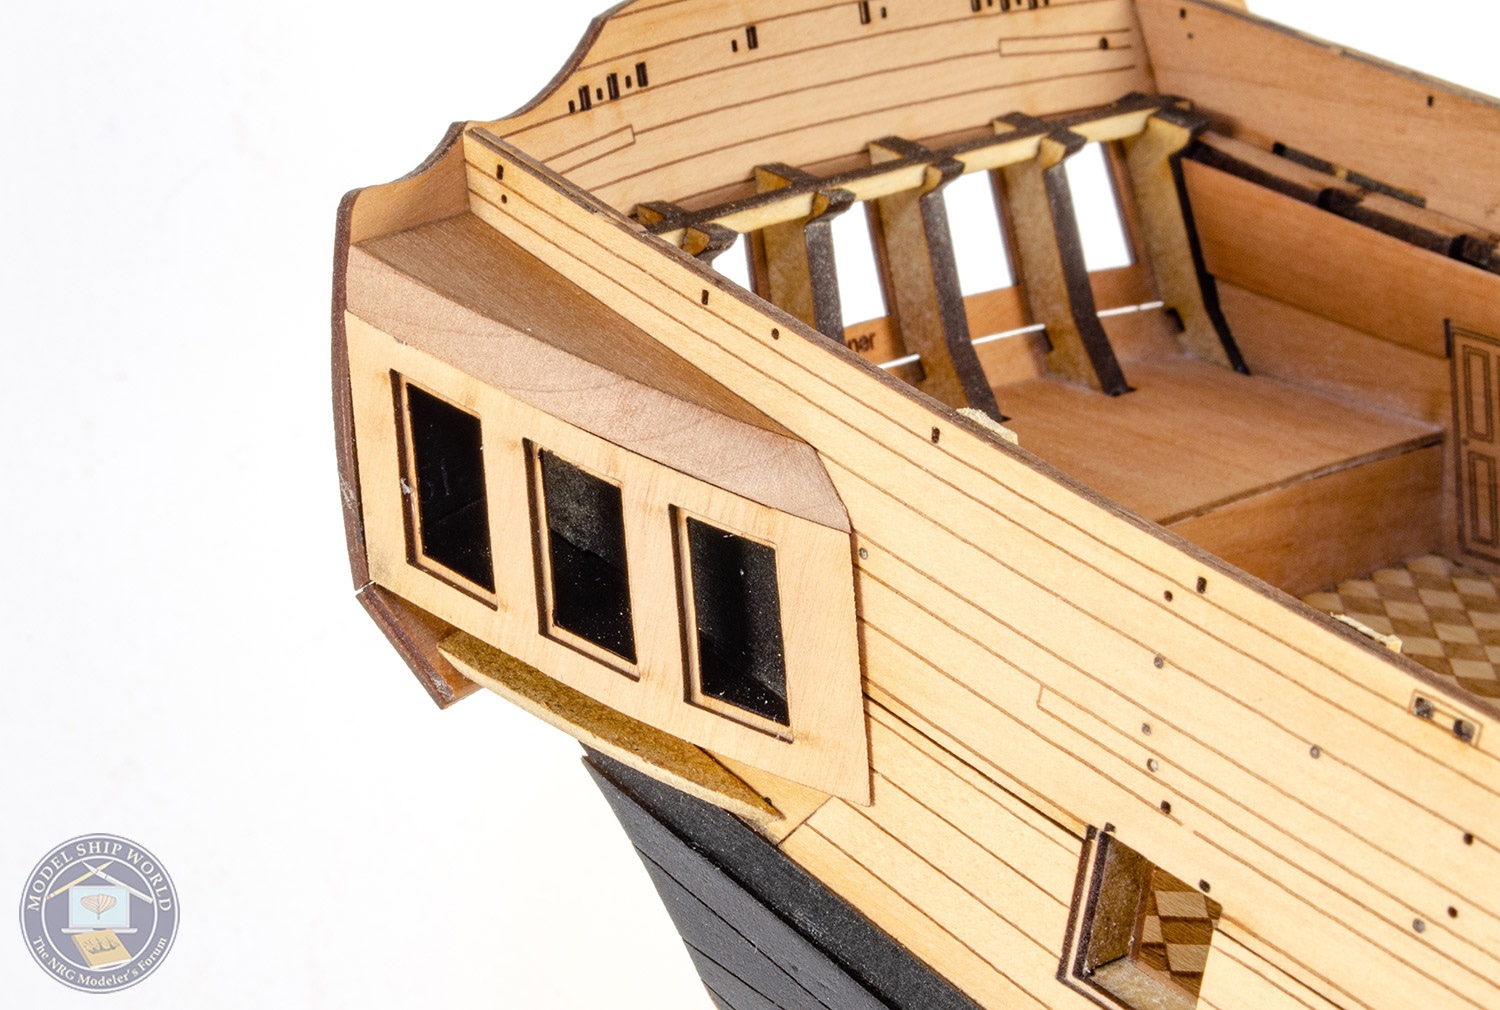
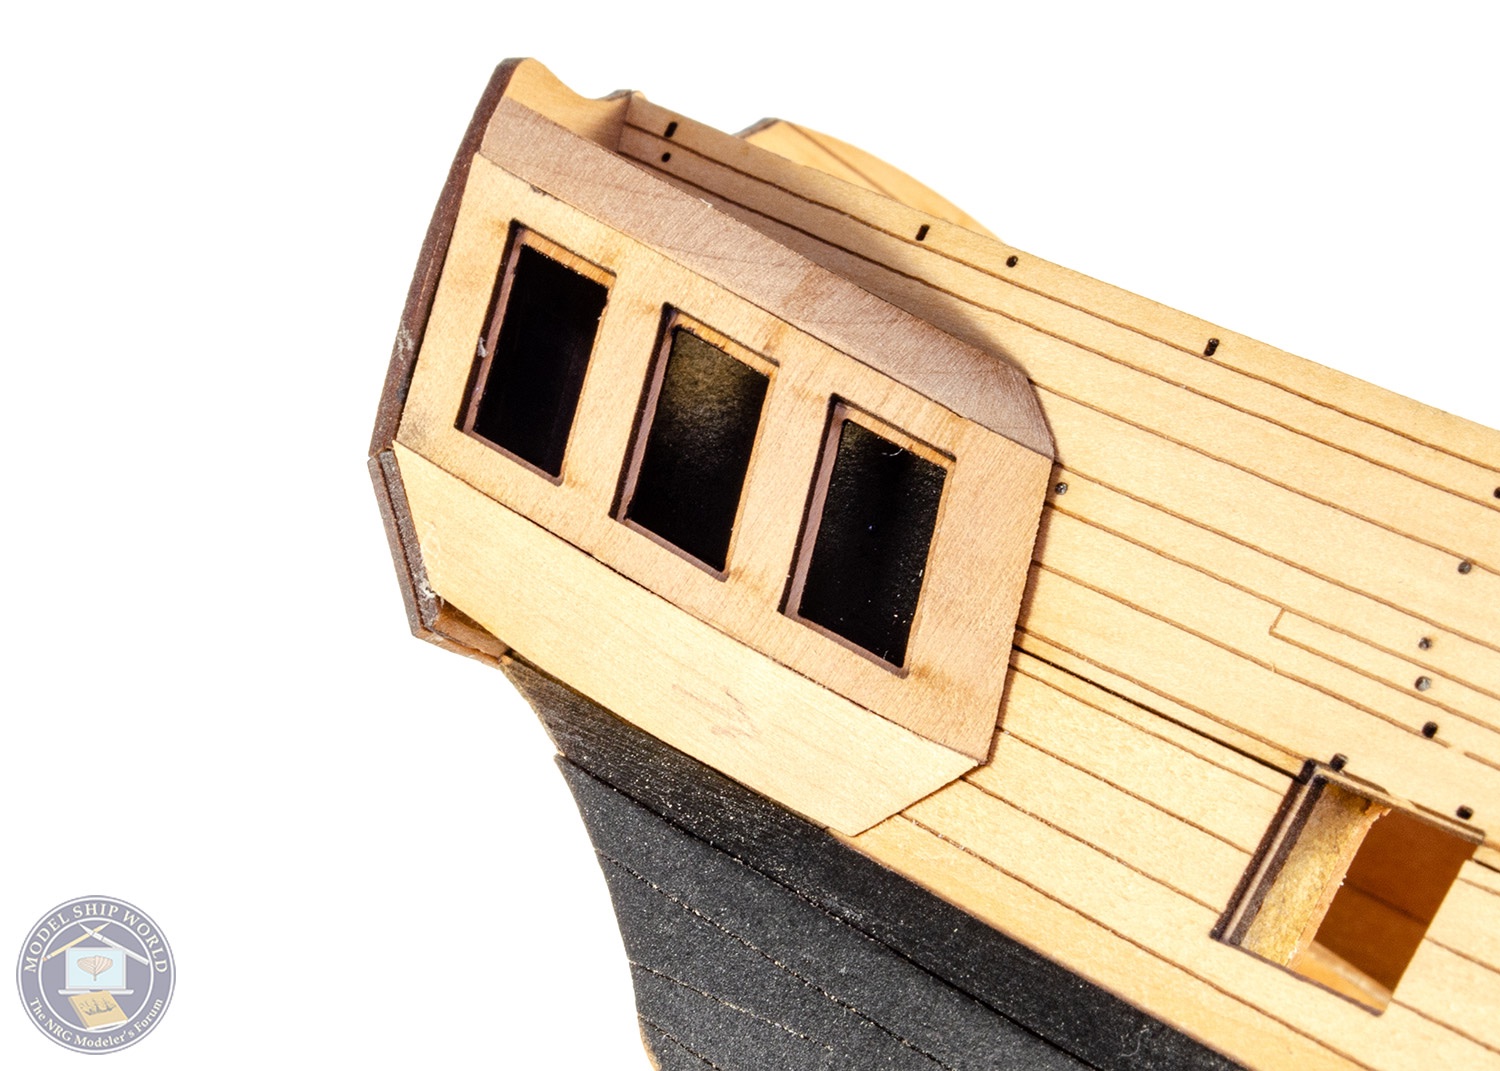
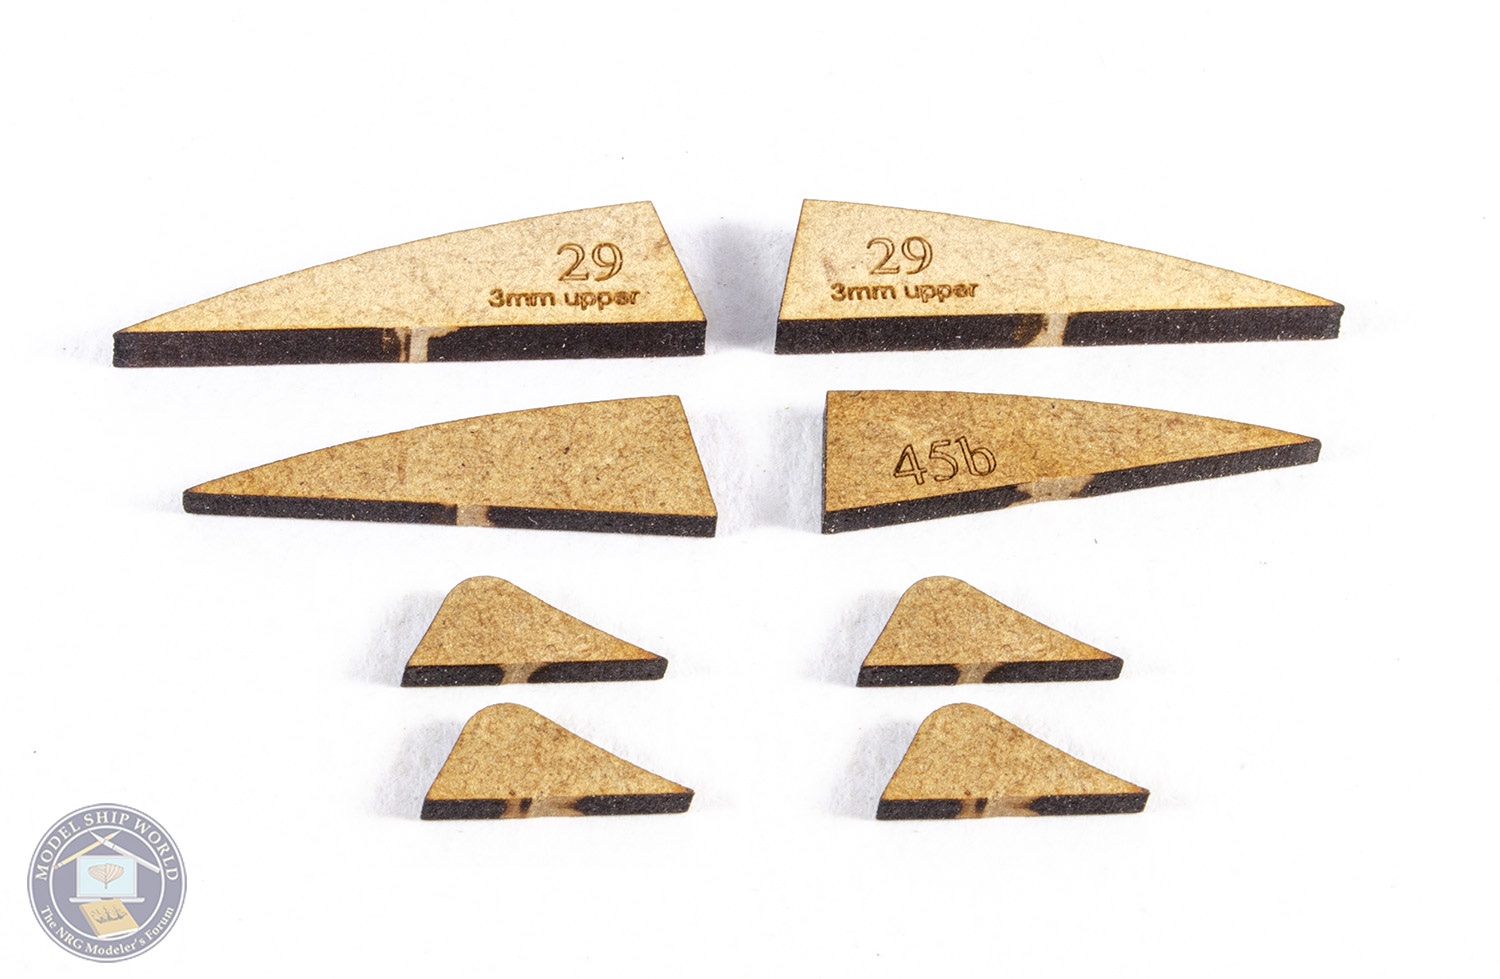
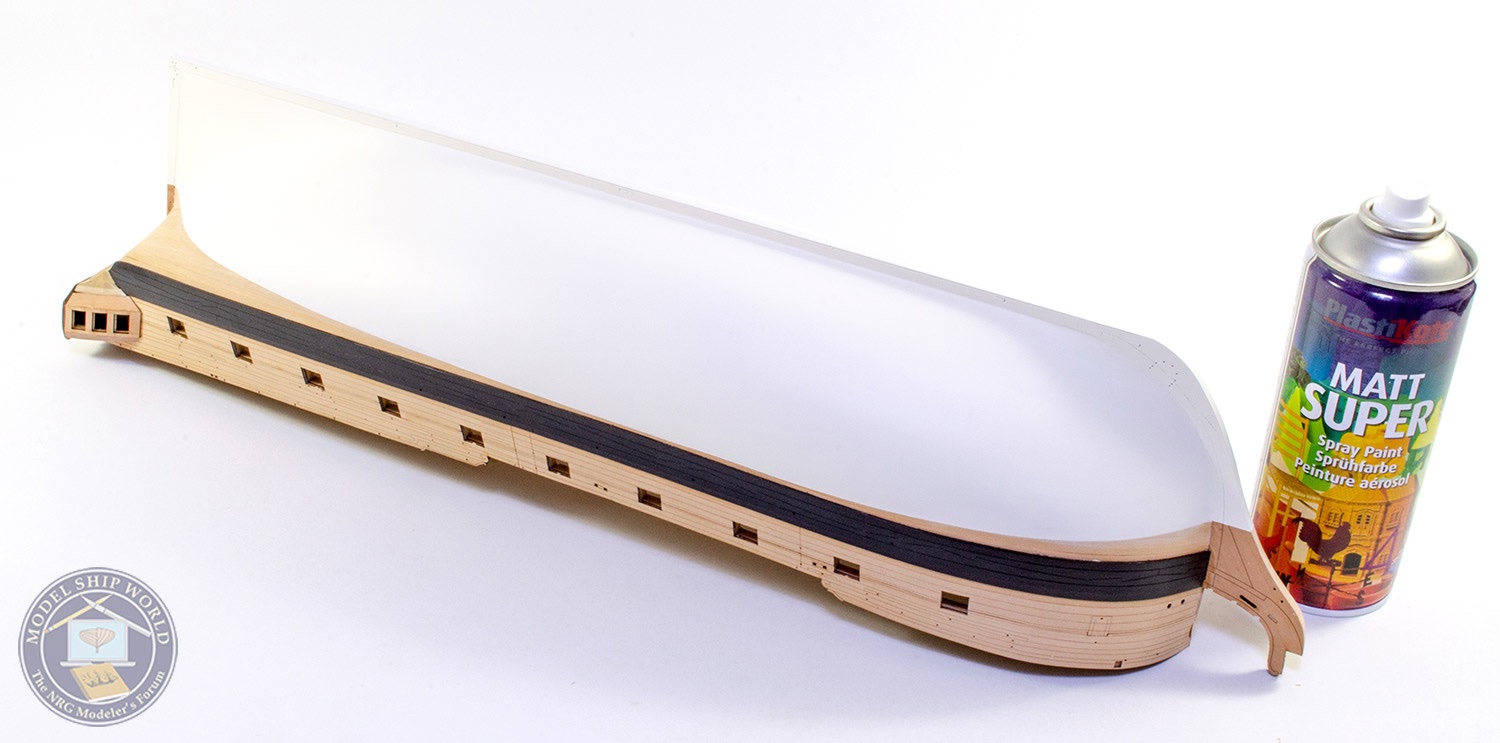
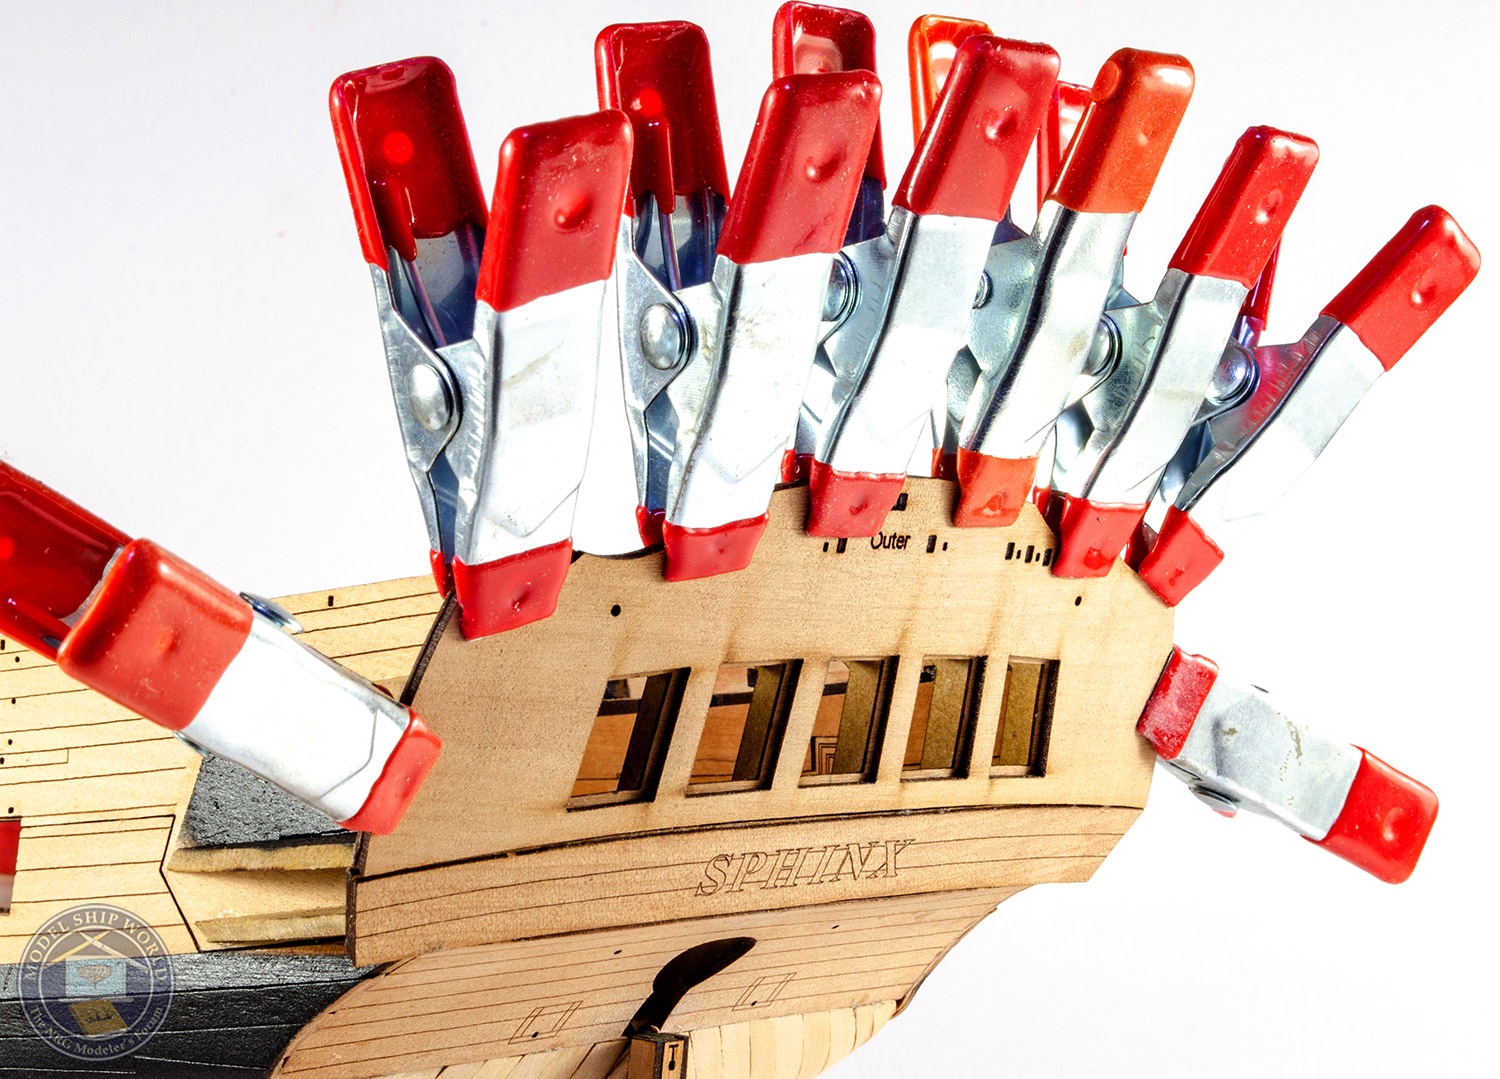
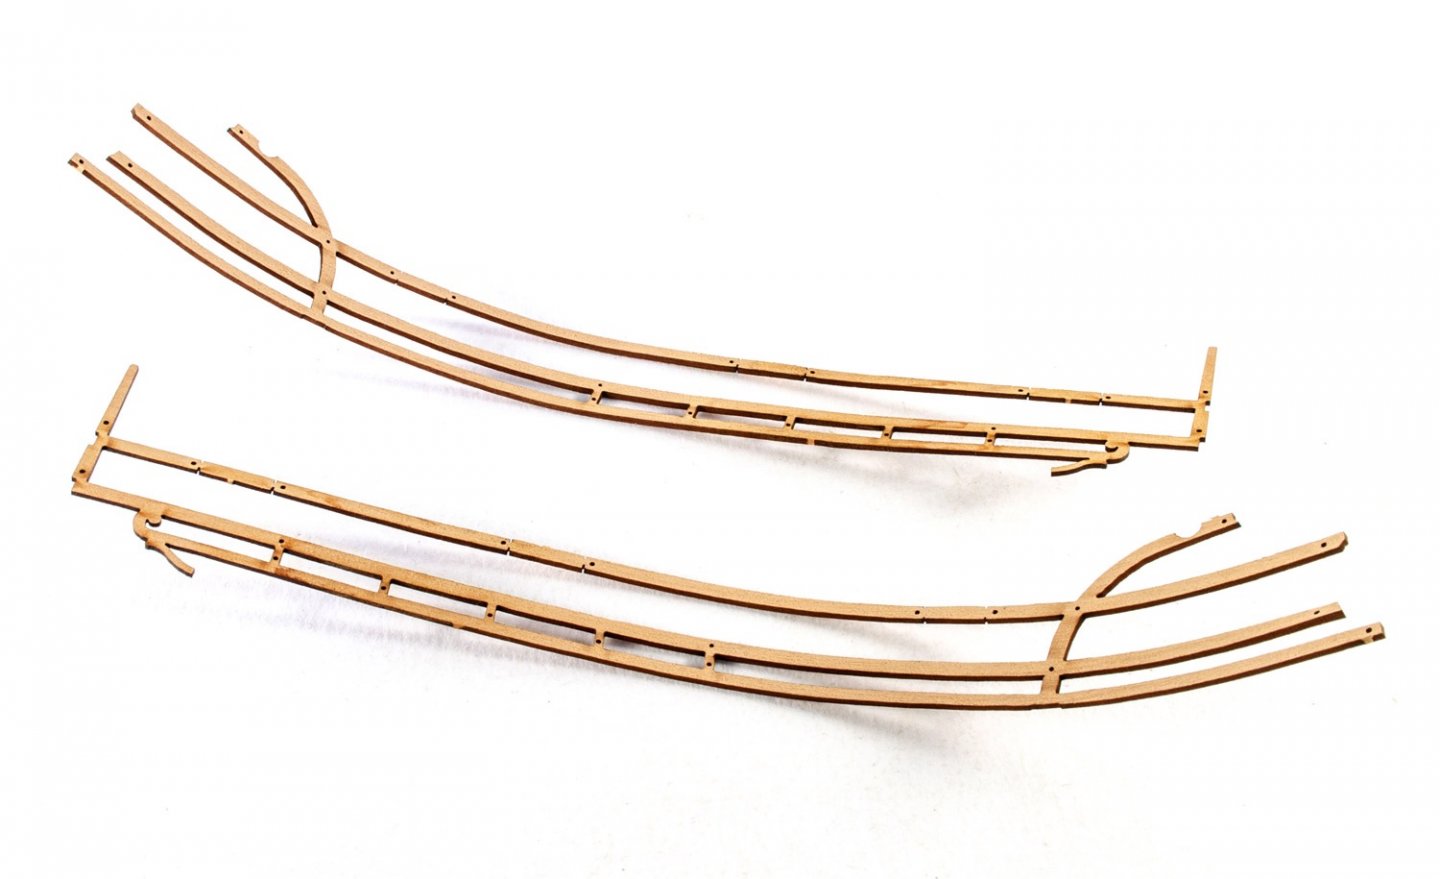
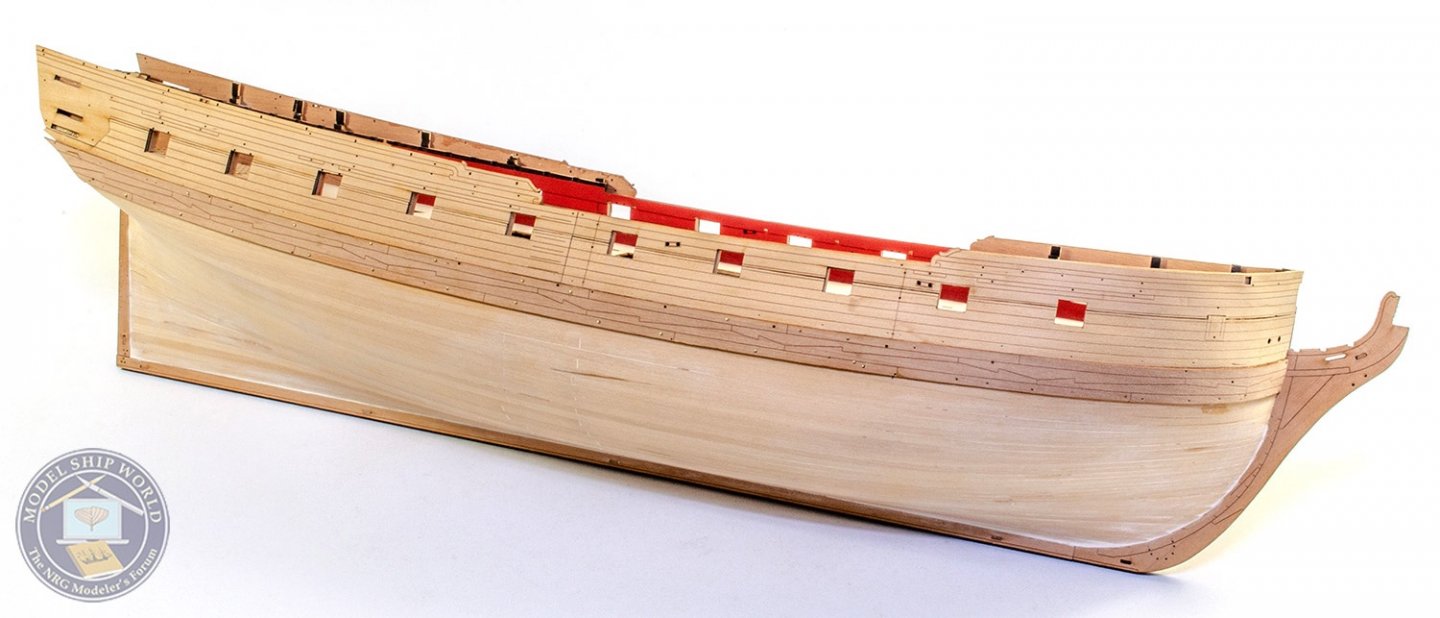
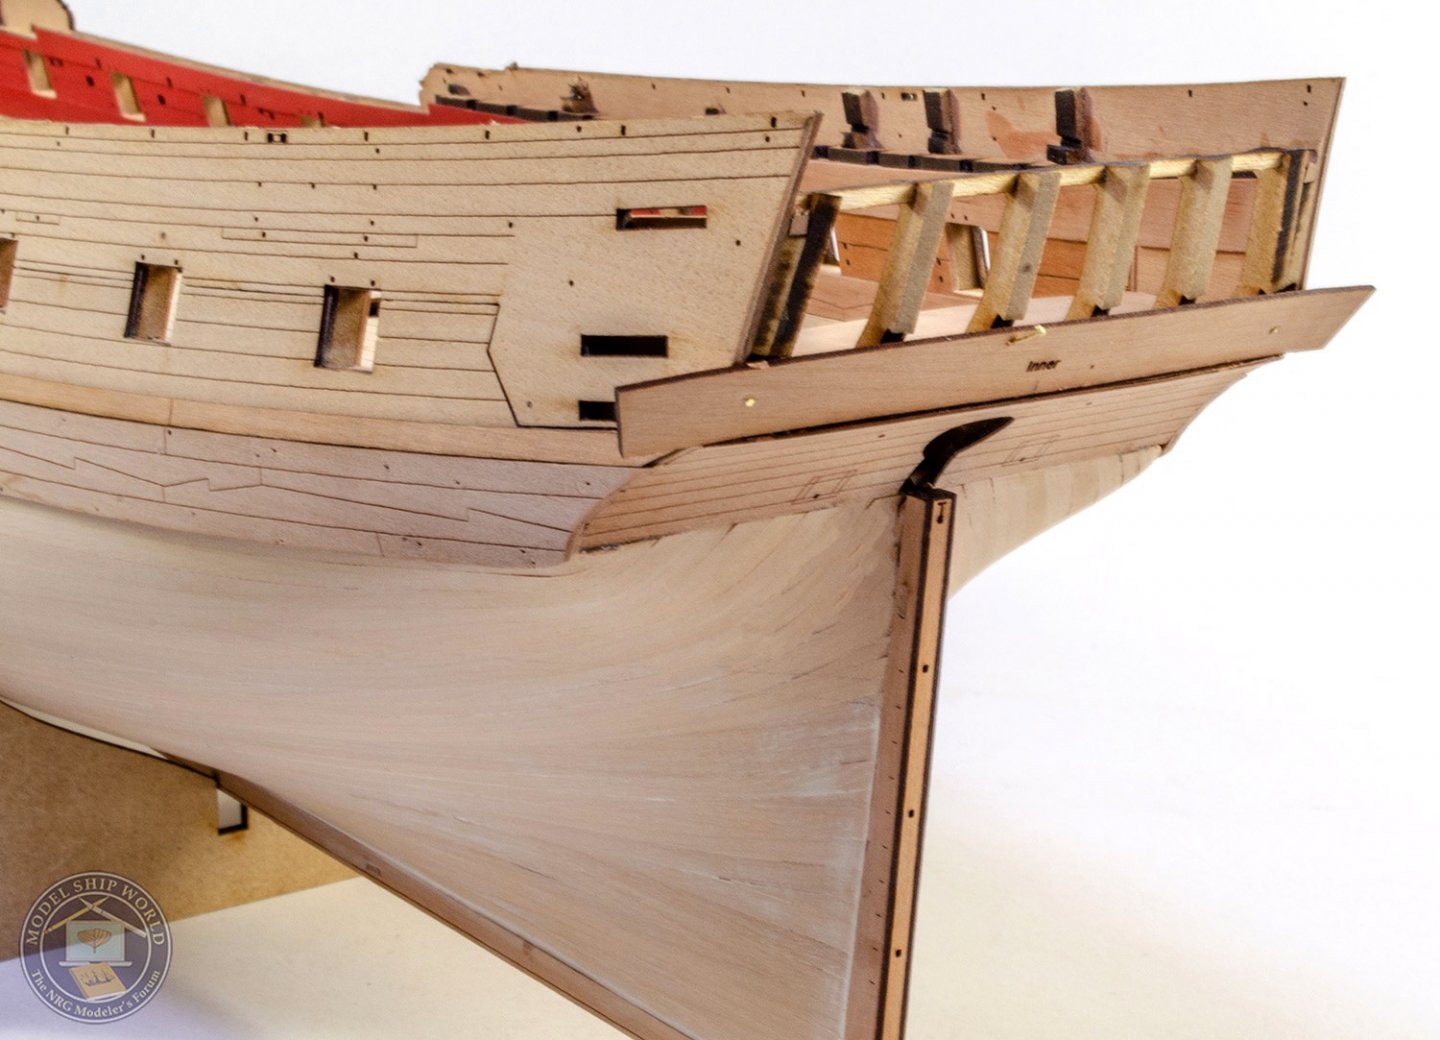
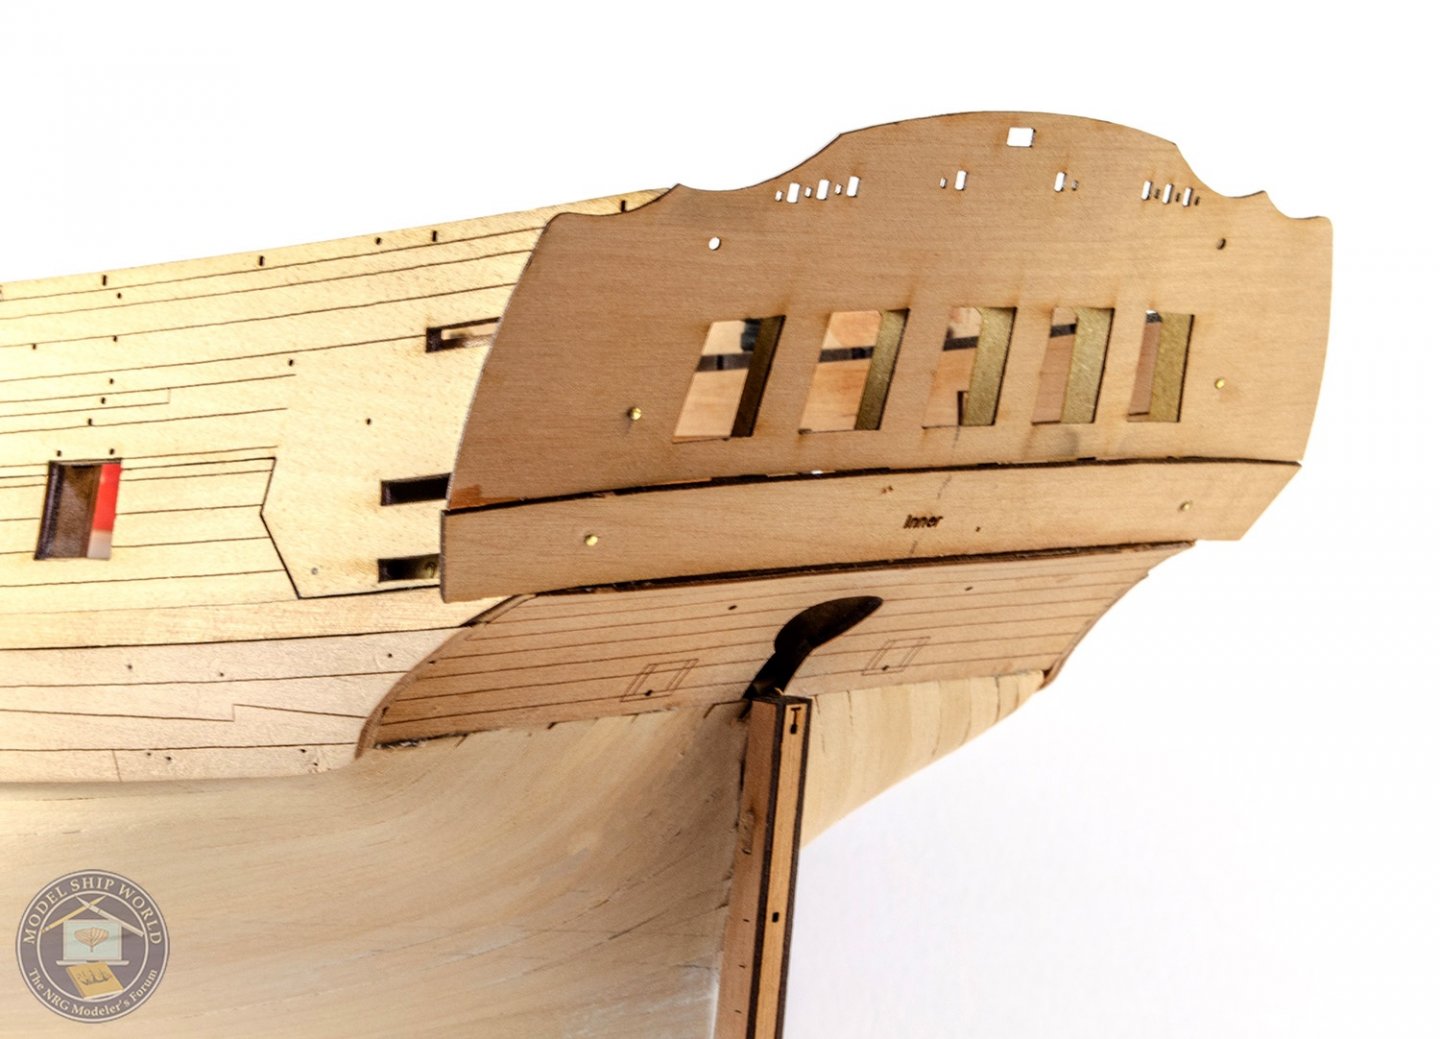
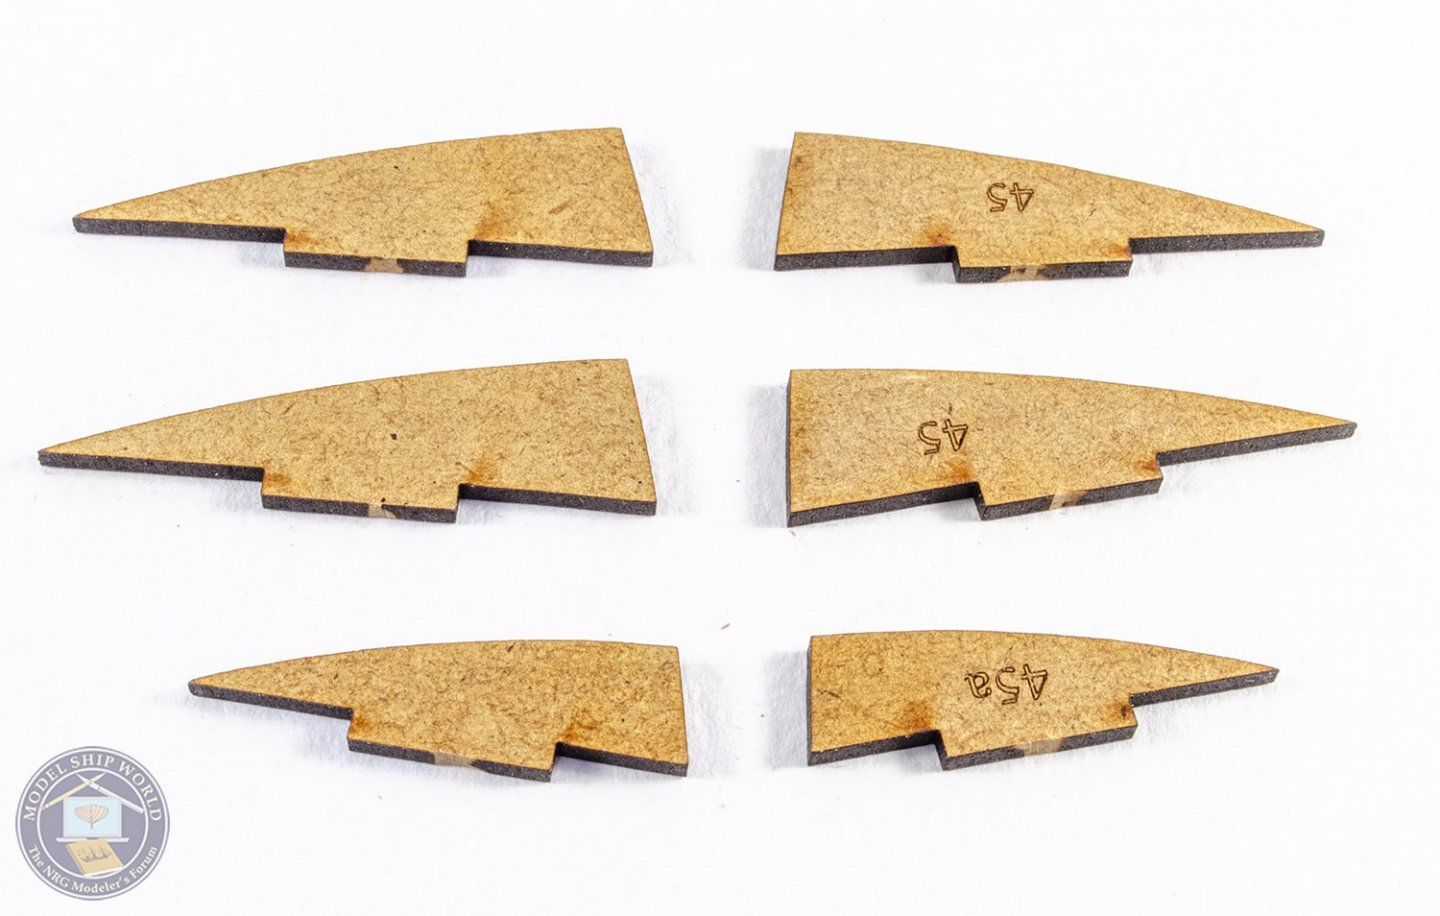
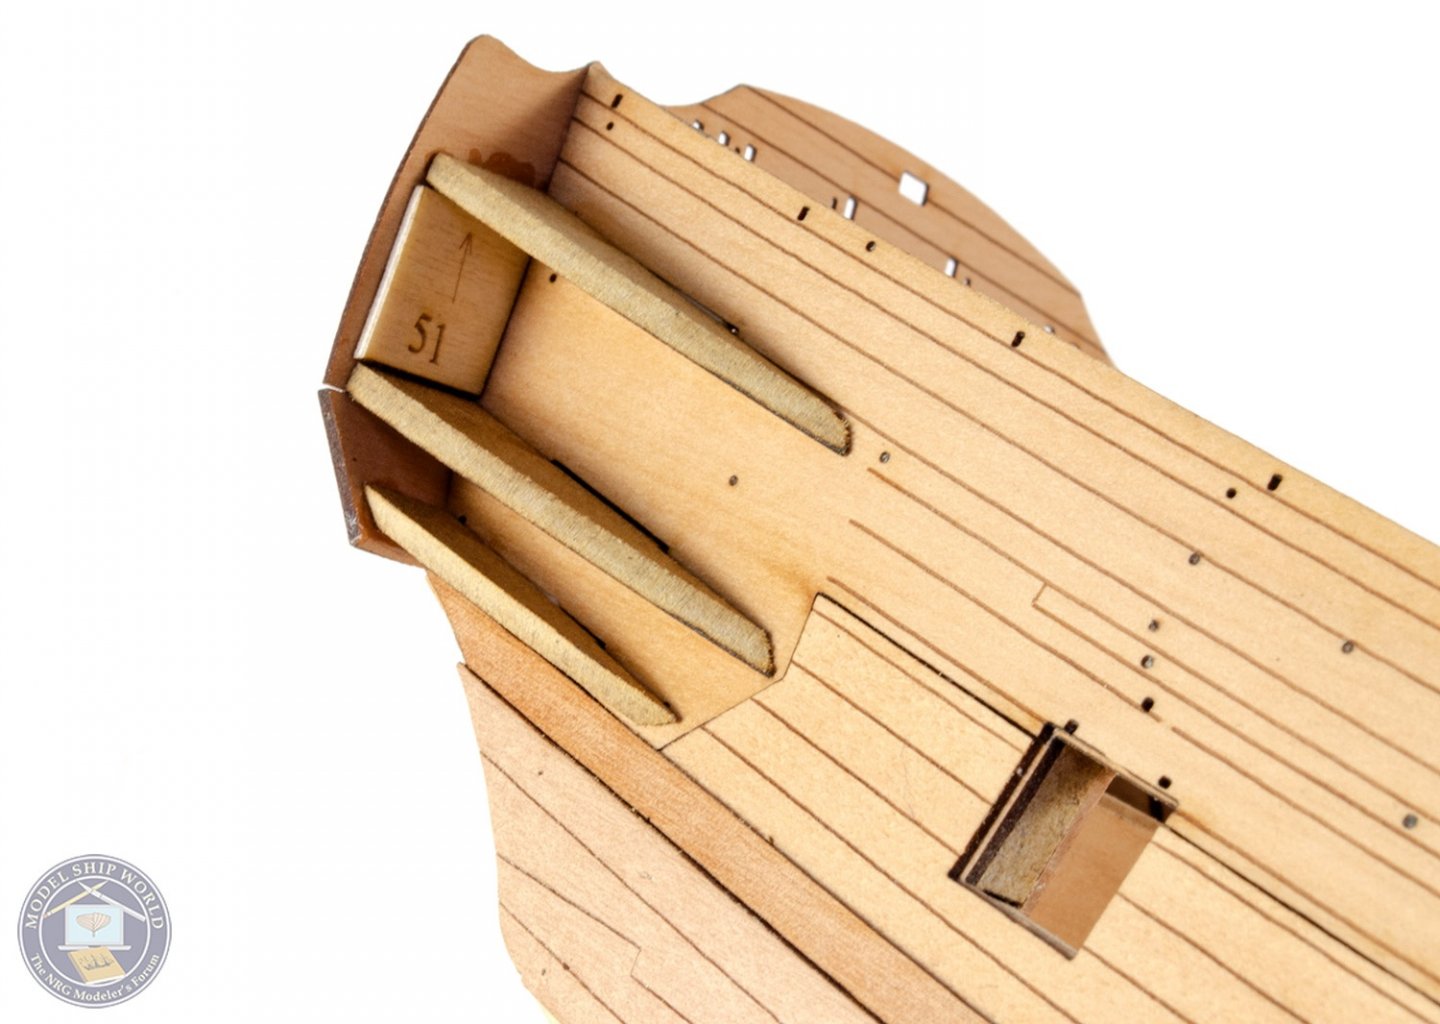
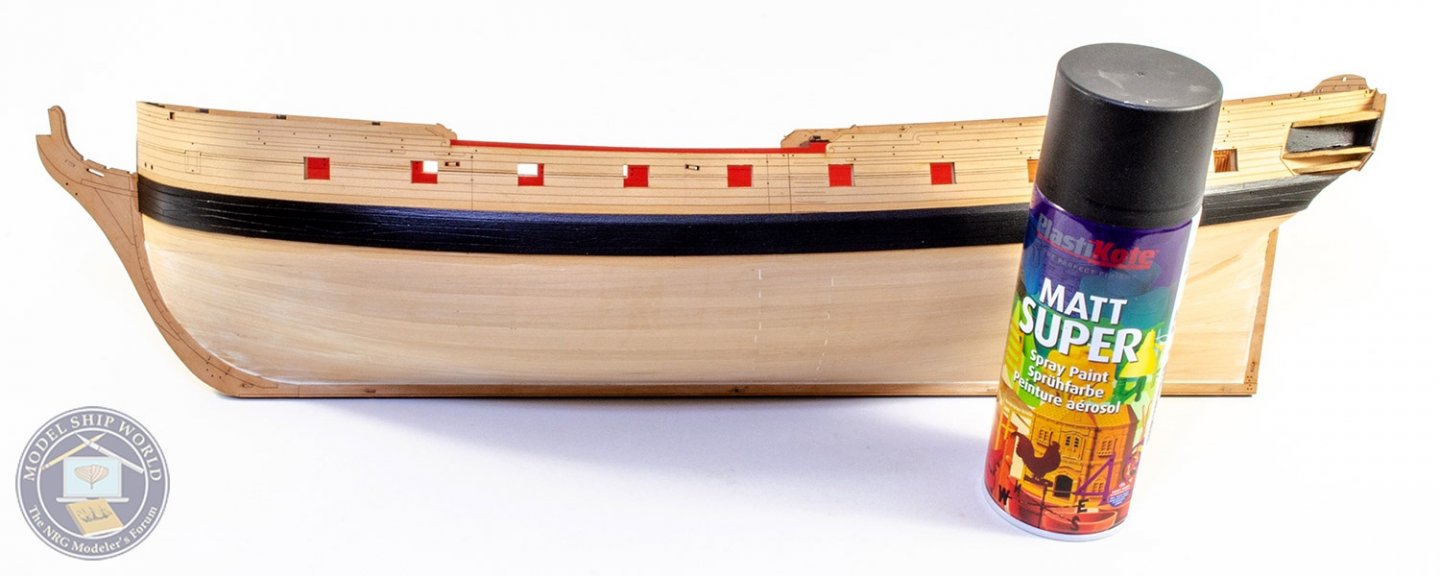
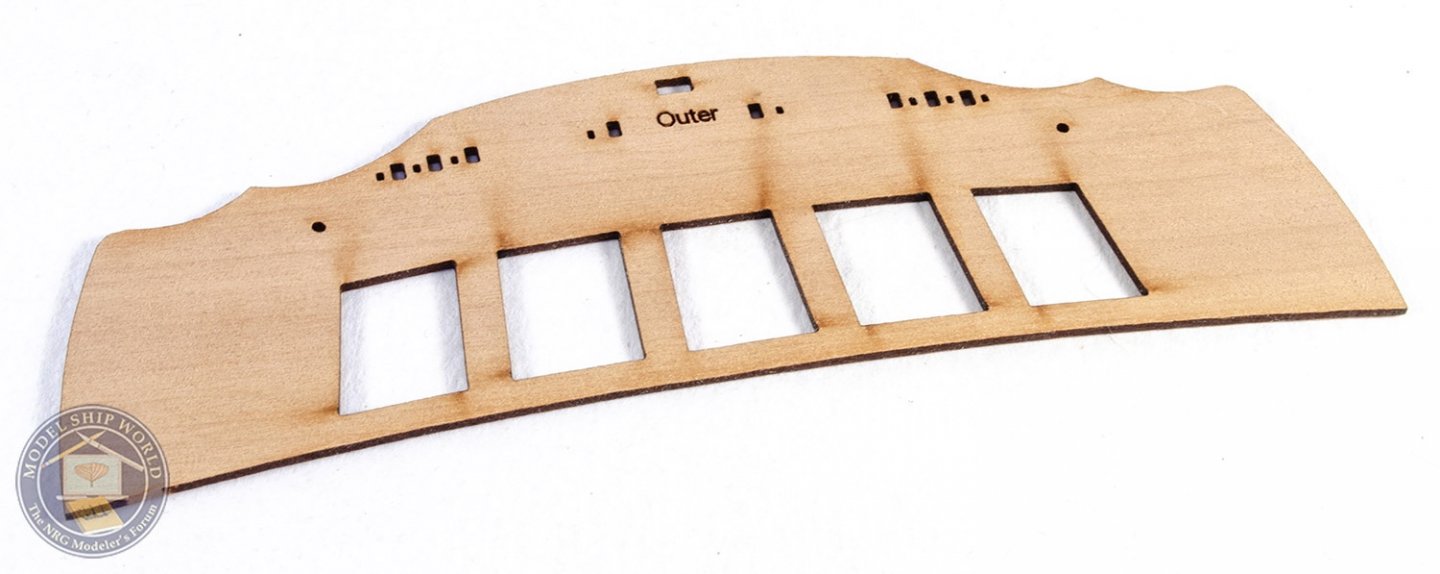
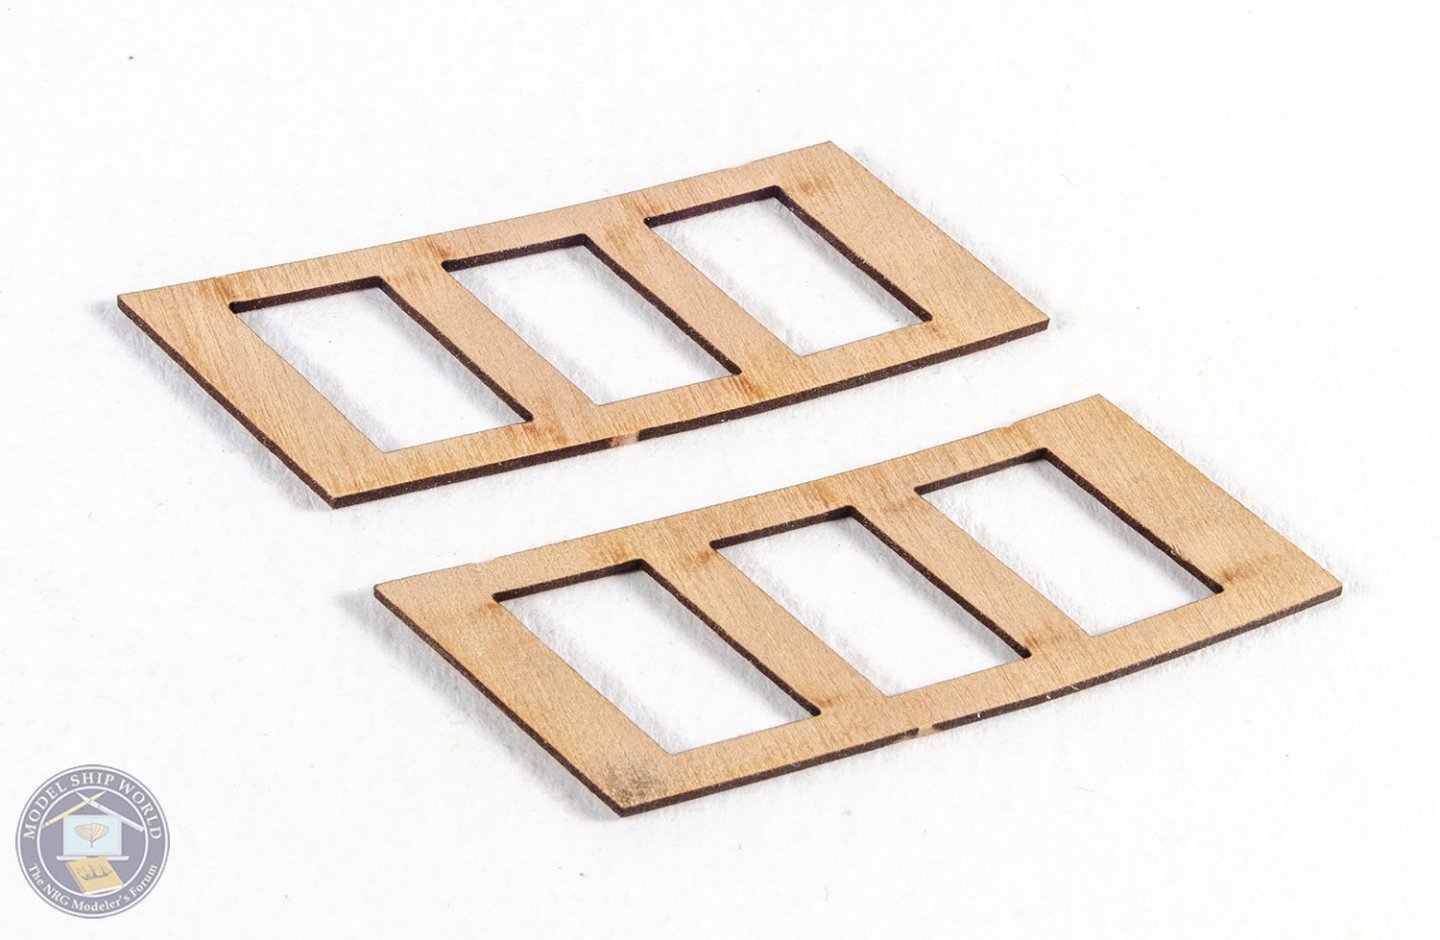
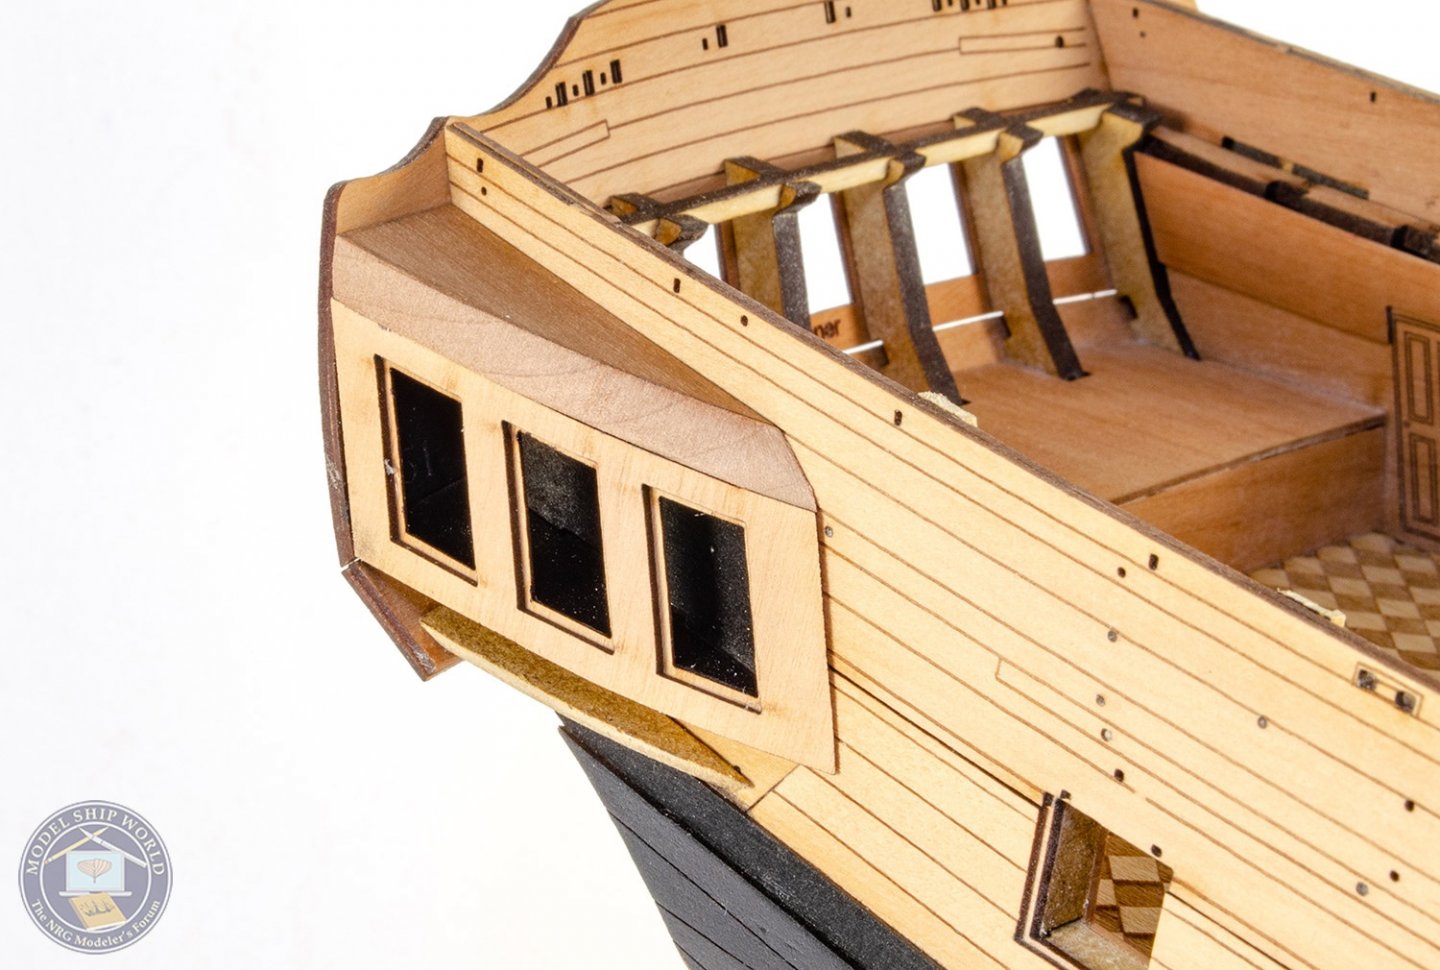
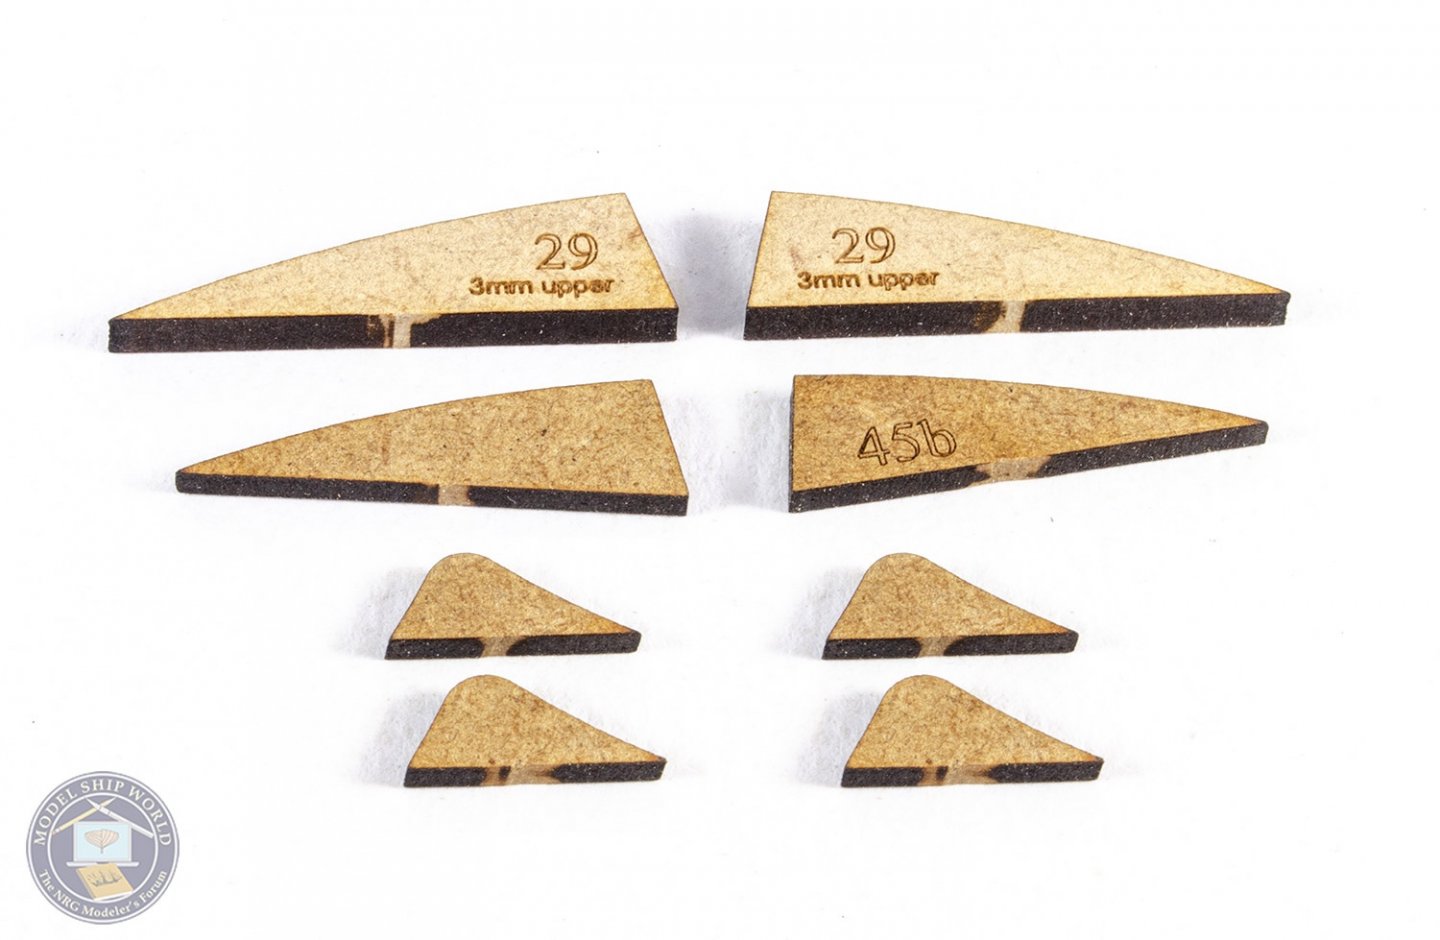
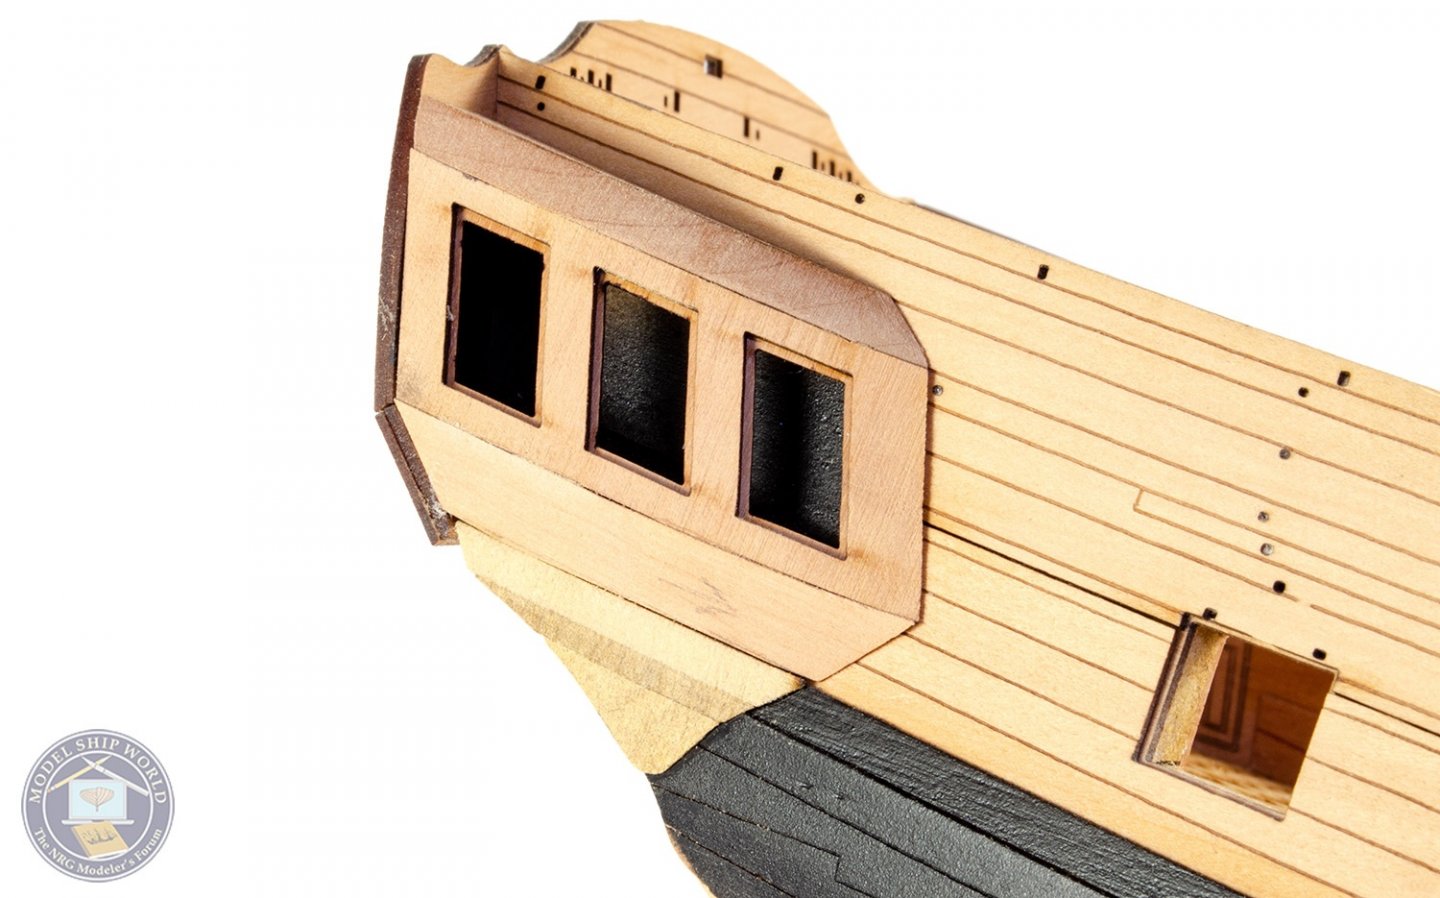
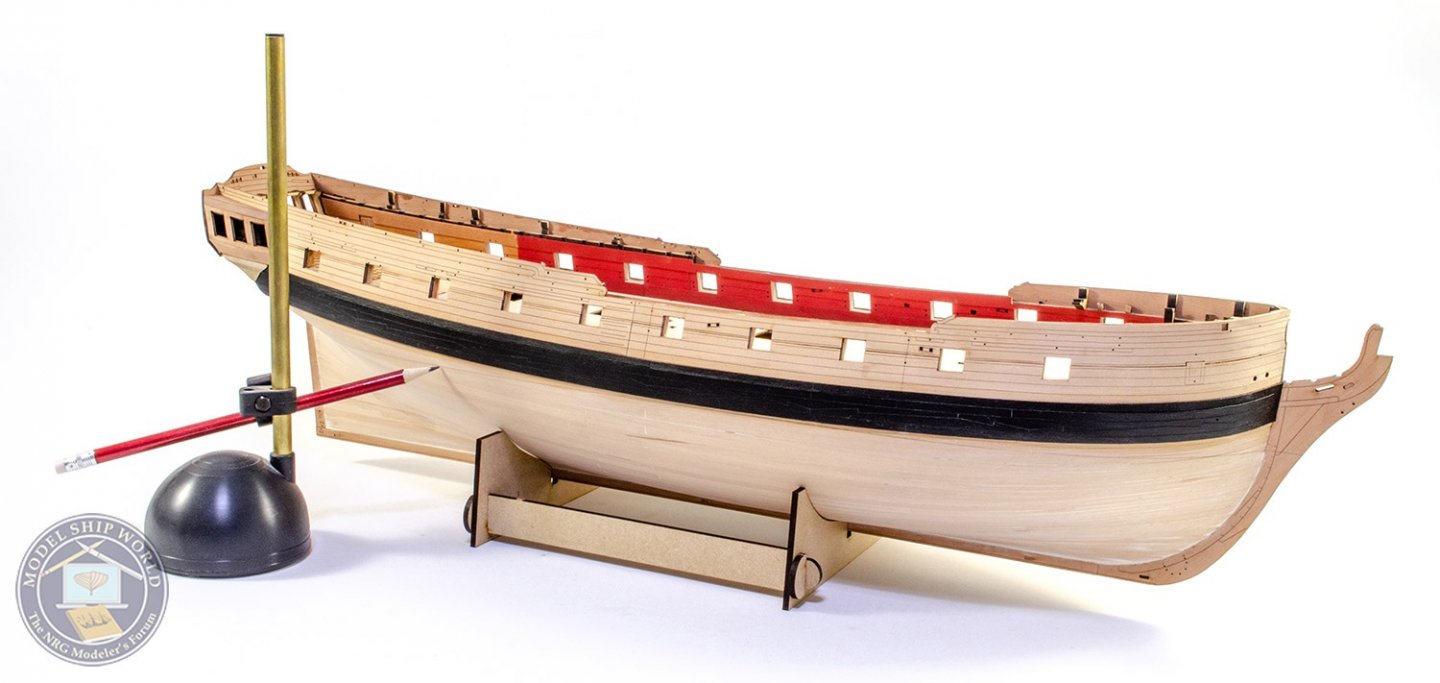
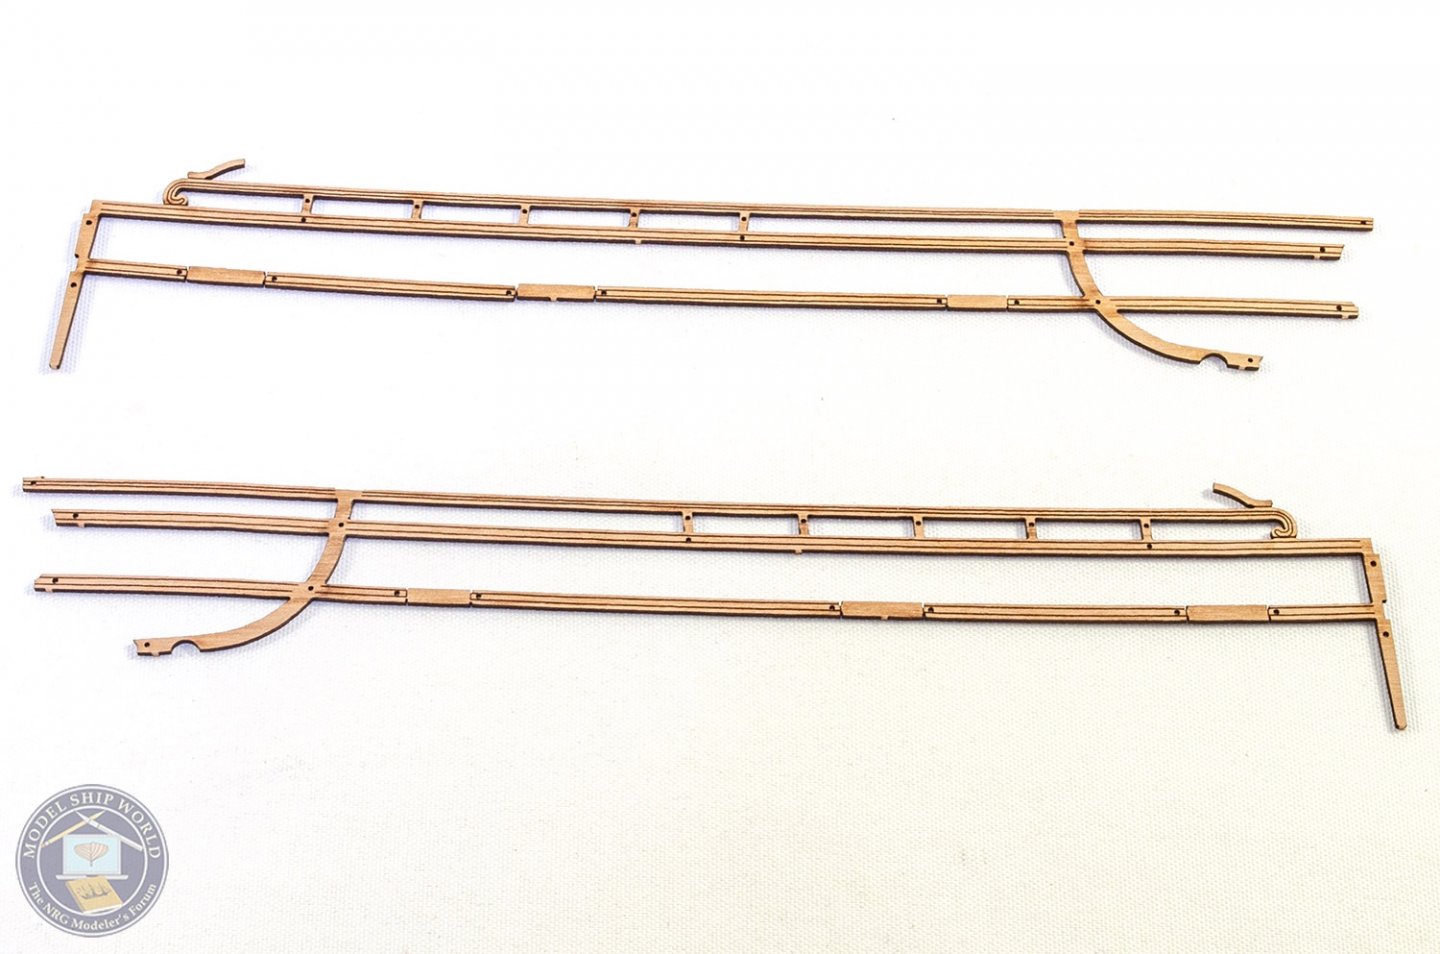
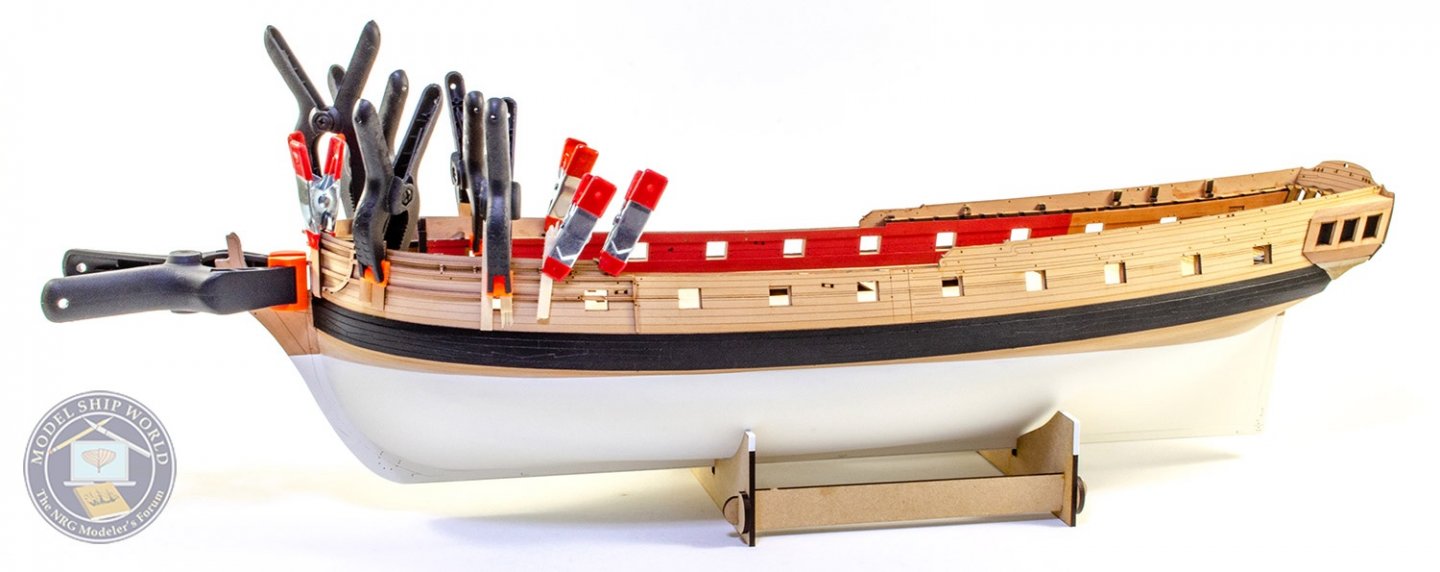
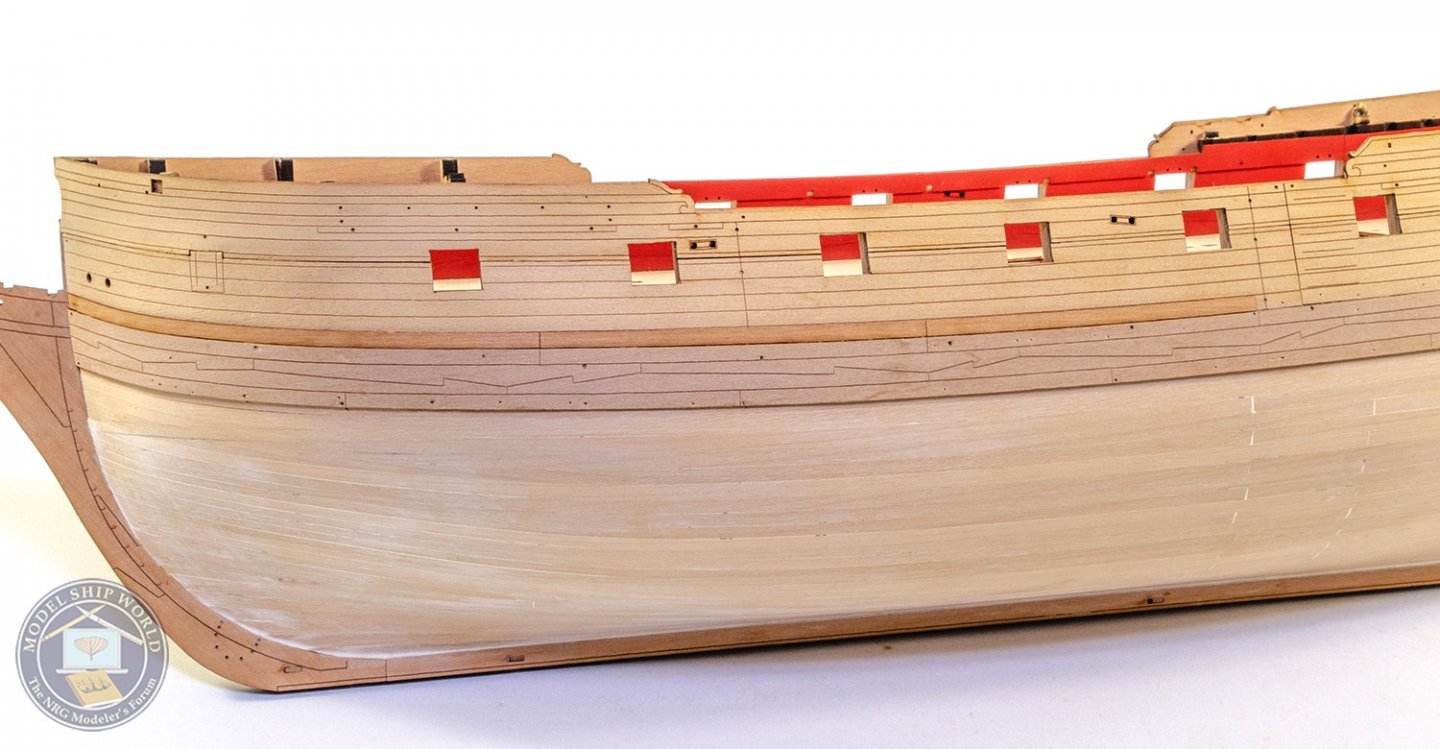
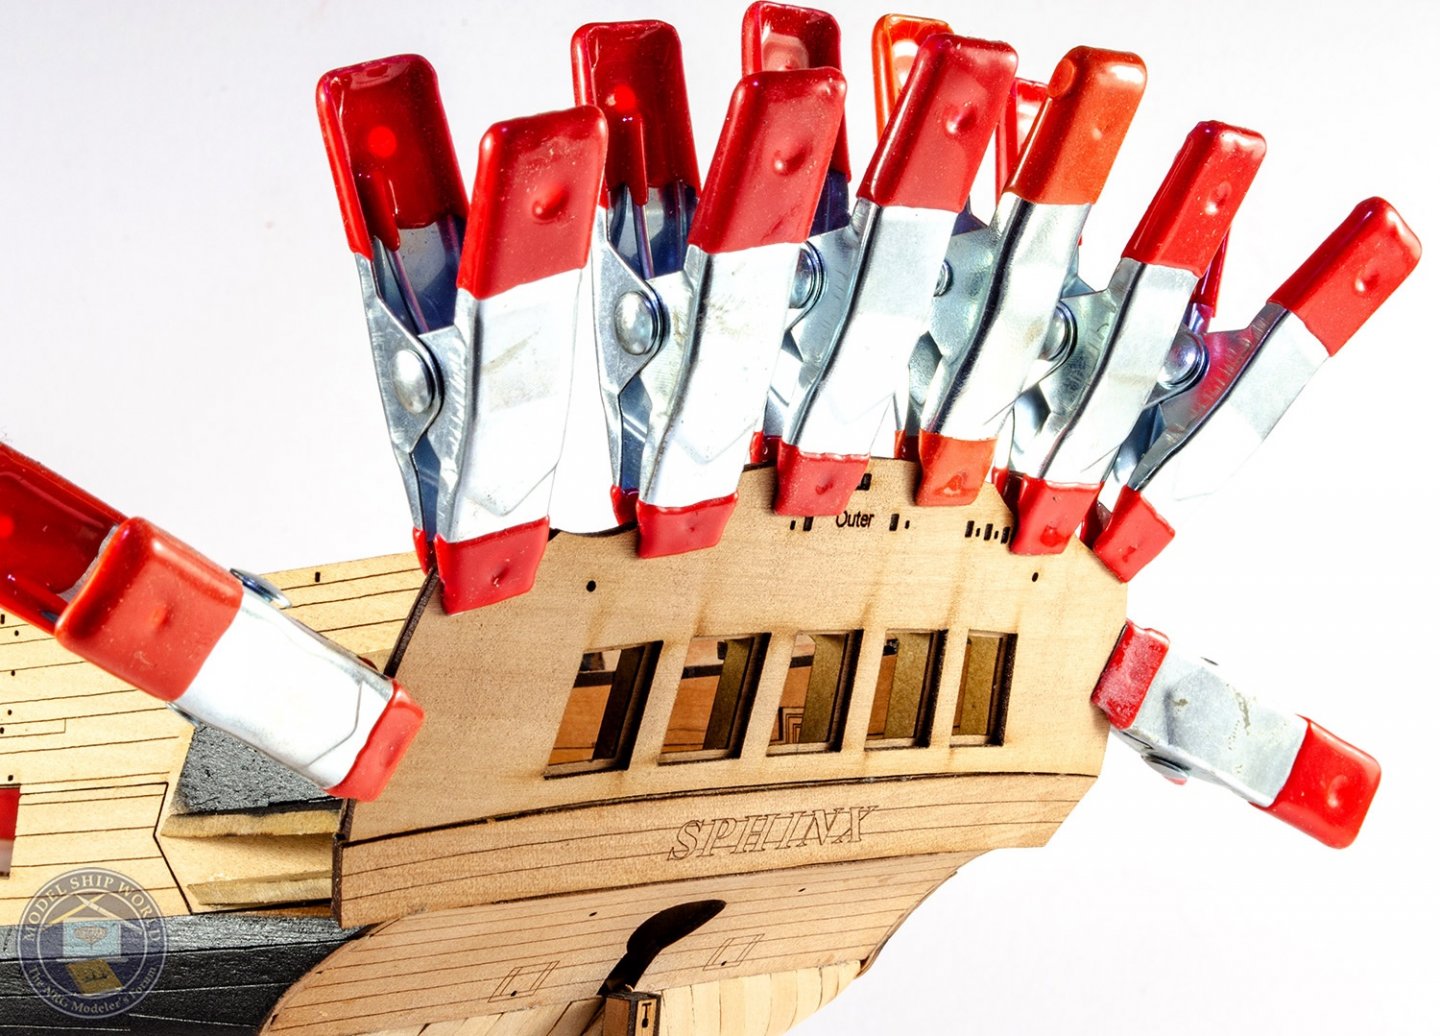
Morning! I was hoping to have more to show you, but finishing off the hull underside to get a nice even and homogenous surface really is a labour of love. Nonetheless, here's my work so far. The main wales are now fitted to the model, after a 30 minute soak in hot water for the forward half. Positioning this is very easy as it simply follows the line of the lower outside pattern parts that were fitted earlier, and covering the first two laters of later cut planks. The wales are pinned in position whilst they dry. This is left overnight as pear can expand quite a lot when soaked. Once dry, the wales are glued with PVA and pinned in place. After fitting the main wales, a narrower and thinner wale is added to their upper edges. This is supplied in halves. The inner stern upper counter and stern fascia are now fitted. Both these have inner and outer panels. I bevel the edges of these slightly as they butt up against each other. Some minor measurement is done to make sure the parts are central. Now it's the turn off the quarter galleries to be fitted. The core of these are some MDF frame parts. These are now fitted. Before gluing, they are trimmed at the rear end to the size of my particular build, and bevelled to match the angle of the stern fascia. The edges are bevelled to accept the exterior parts. This will be explained in the manual, and it's dead easy. All of these parts are supplied with extra material so there's no need to worry about things not fitting. Note also the small ply part (51) between the frames. This is there to get the angles of the frames to the hull, correct. Now the gallery frames are fitted, the model is masked up so I can spray the wales and the inside of the upper quarter gallery areas. I used Plastikote aerosol to do this as the coverage is excellent and is ok straight onto timber. The stern upper counter and fascia outer panels are now glued onto the hull. Note how the outer fascia now creates rebates for the window glazing parts. The quarter gallery window areas are constructed in the same way as the stern, with an inner part fitted first. Again, these parts have a little extra on the front and rear to cater to individual builds, and there will be little to nothing needed to be trimmed along the upper/lower edges. A thick pear 'roof' is then bevelled to the engraved line and these are fitted to the top of the quarter galleries. The gallery berthing panels are now added below this. MDF parts are now used to construct the lowest areas of the quarter galleries. These are assembled to each other on the model (but not glued to the model just yet), then set aside to dry. They are then shaped to match the gallery, checking progress by test fitting to the hull. Once shaped, some pint is scraped from the wales and the sections are glued into place. Out comes the waterline tool again. Checking this against the hull profile so both the prow and stern are at the same height, the line is added and the model masked again. More sanding, filling is then done. This took me about 4 days to get into a position where I was happy enough to paint. Plastikote White paint is now added. This is done in thin layers and more rubbing back and filling will need to be done to get a smooth, even surface. It is tedious, but the results pay off. The last task I did was to take the bow rail patterns and soak these before clamping into position on the hull so they can dry in shape. With these taken off, the hull can now be selectively varnished in places before applying the red, blue and black exterior panels. You'll see that in my next update.


- 355 replies
-
- 41
-
-
- vanguard models
- Sphinx
- (and 1 more)
-
Lovely work. Nice to see another of these being built.
-
Shame you don't want the ratlines, but this is a yacht Can also be built with very basic, standard tools. Lots is pre-cut/pre-fabricated, engraved, and from pearwood. You can see a build log in my signature, and the instructions are downloadable to see first, from the website. https://vanguardmodels.co.uk/product/duchess-of-kingston/
-
non-ship review 1:24 Istanbul tram - OcCre
James H replied to James H's topic in Non-ship kit reviews
That turned out beautifully 🥰 -
I don't think a search for 'new kits' would turn up anything as they only stay new for a time, so not worth tagging as such. What sort of thing are you actually after?
-
@DelF Your photo processed in Adobe Lightroom. I should've tweaked more, but it's only a 30 second fix.
-
I think it's important that for a white backdrop, you buy something which is bright white. For my use, I have a large card sheet called 'ice white' which is excellent. When I do larger photos, I draw down a vivid white roller blind as a drape. I still need to generally fix white balance in Adobe Lightroom, but it's pretty simple.
-
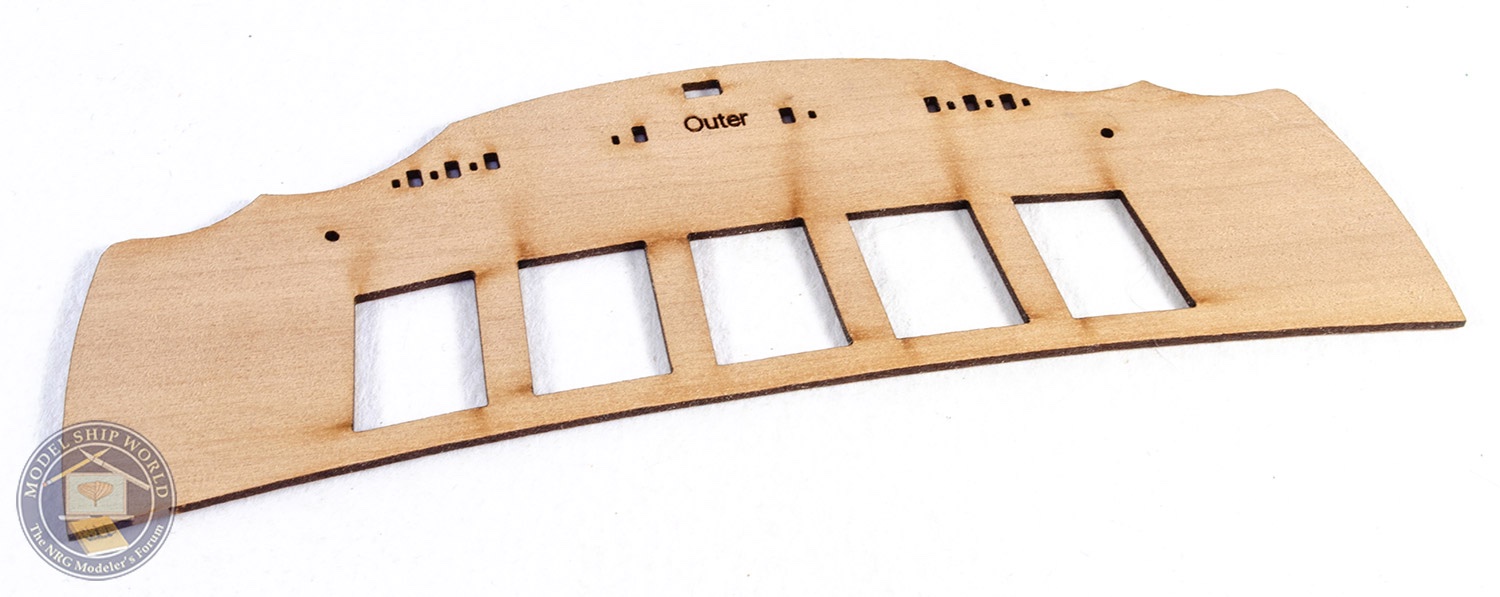
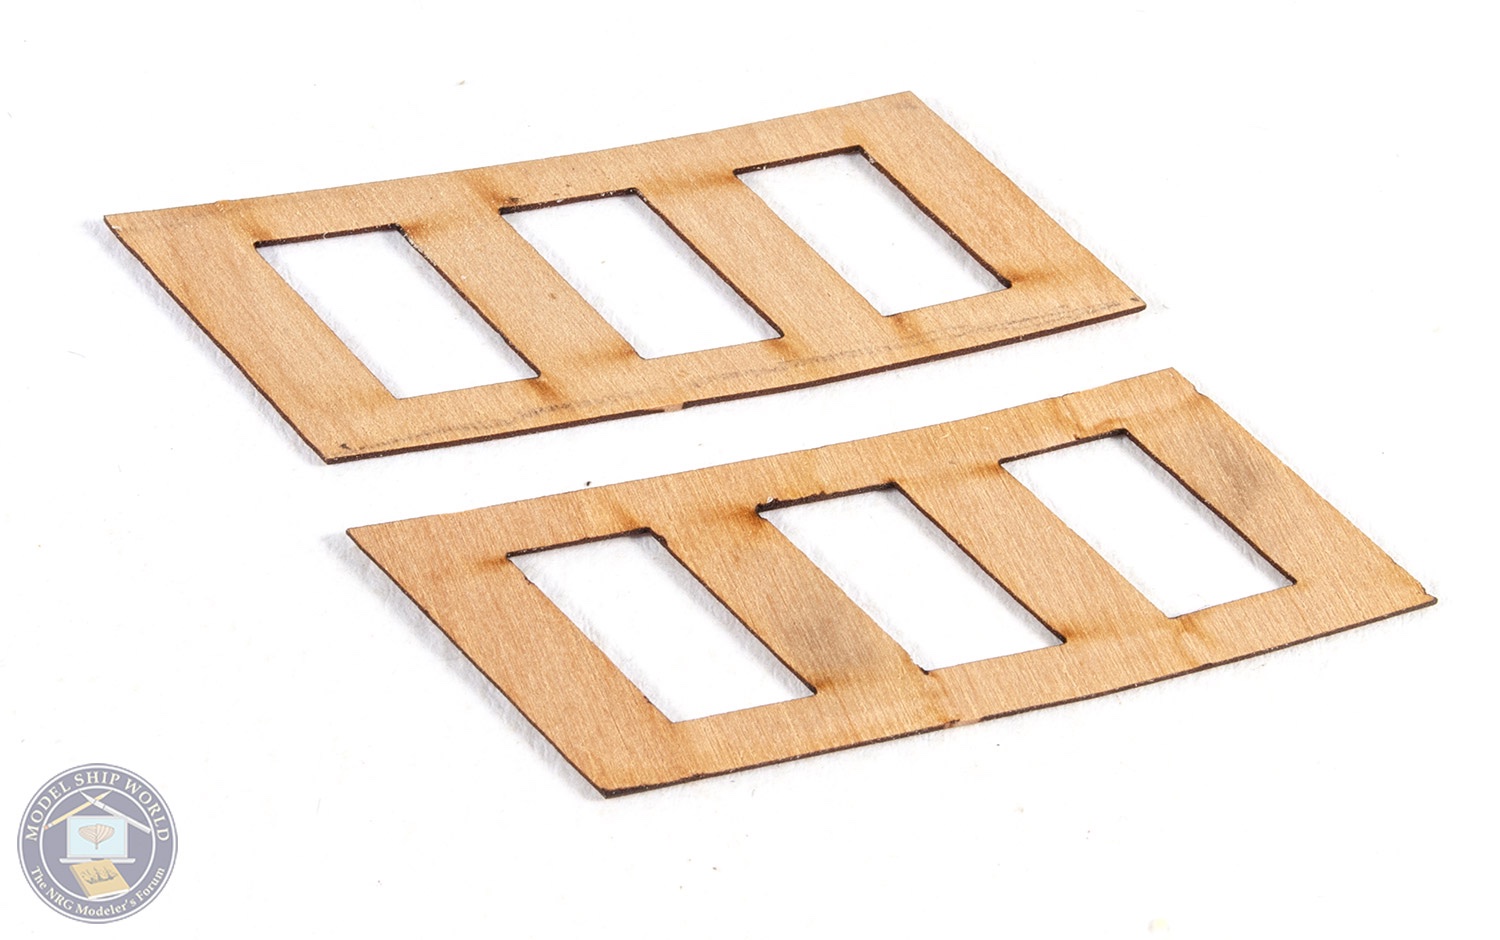
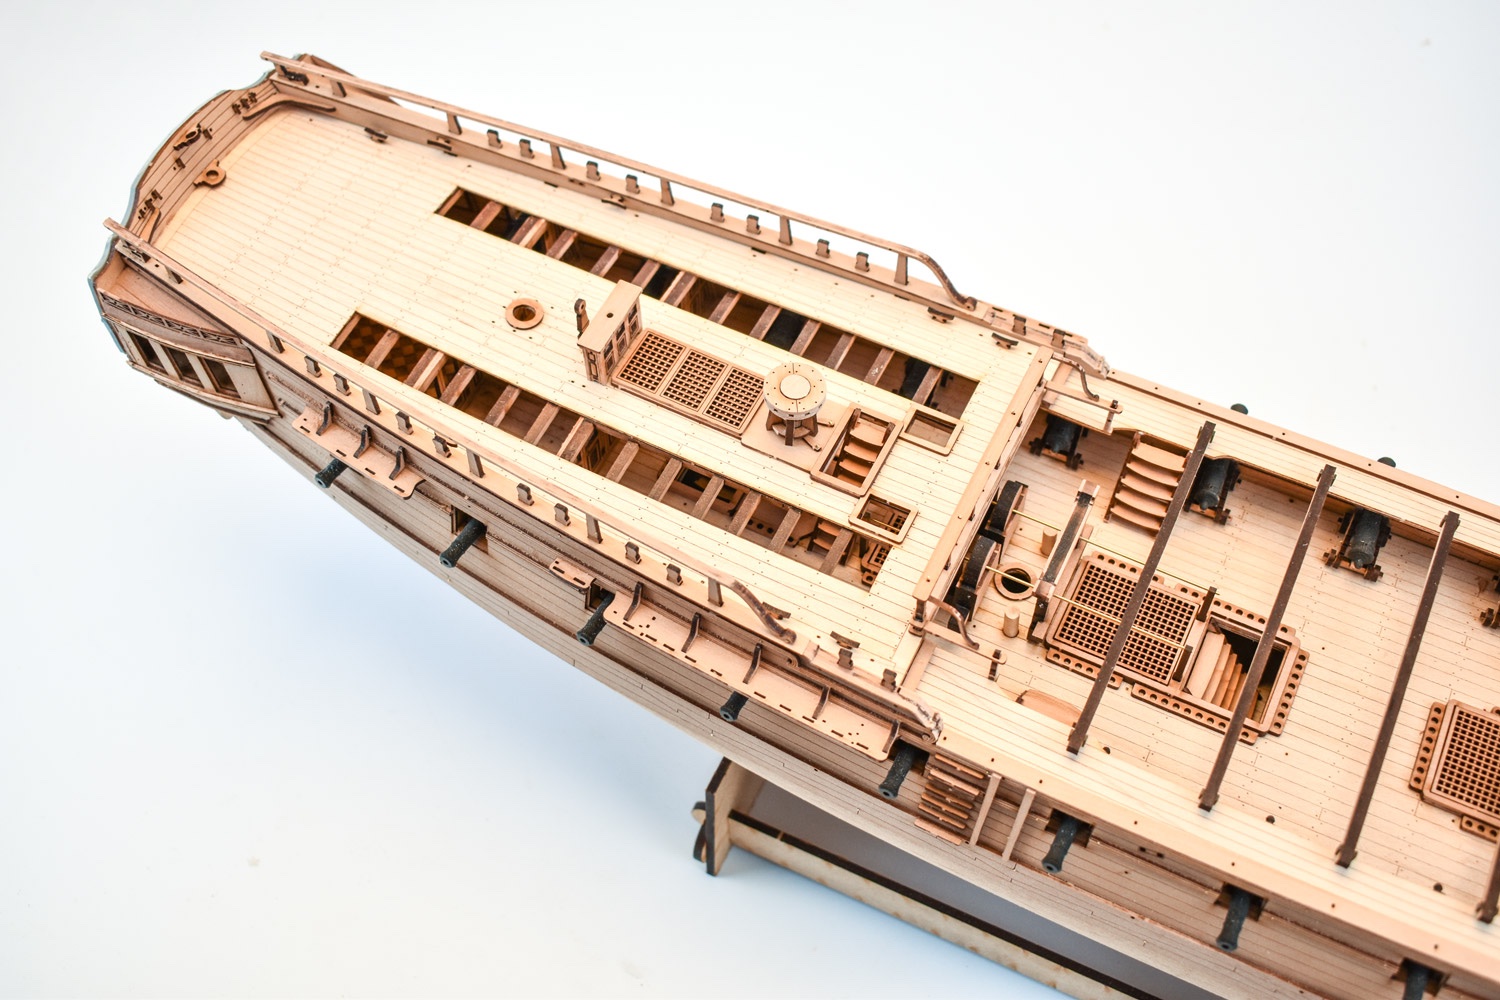
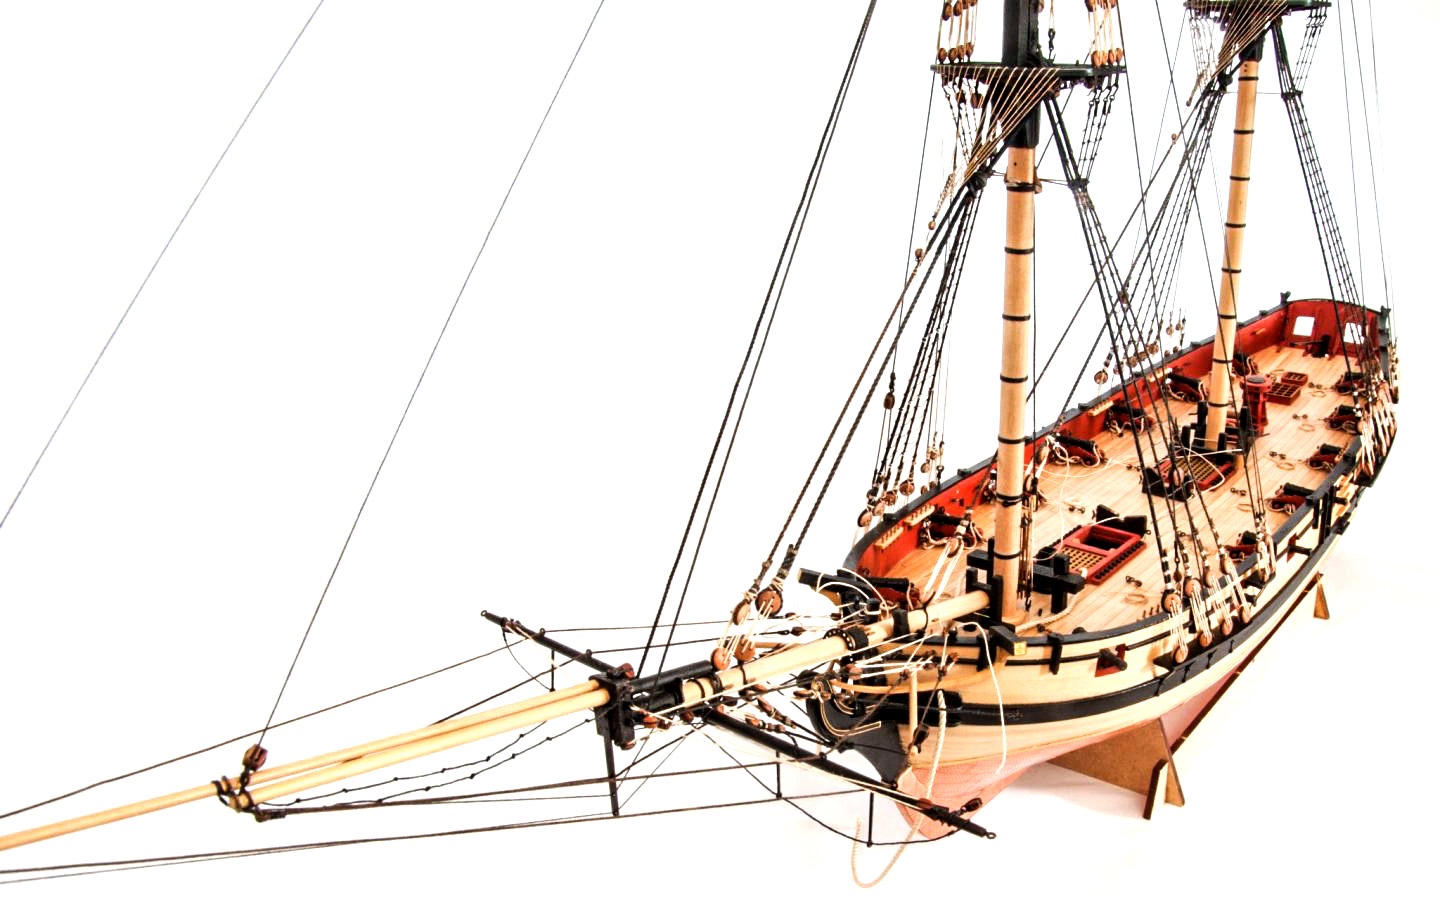
You'll be able to see into the cabins via the cutaways in the quarterdeck:

- 355 replies
-
- 17
-
-
- vanguard models
- Sphinx
- (and 1 more)
-
Prob going to be another week before I update. The engraved wales are now fitted and those needed to be altered slightly from the first cut parts, so little things like this need a couple of days lead time. I've just painted them black, and I'll be concentrating on the stern and underside this week, so there should be something worthwhile to show you in a week's time.
- 355 replies
-
- 6
-
-
-
- vanguard models
- Sphinx
- (and 1 more)
-
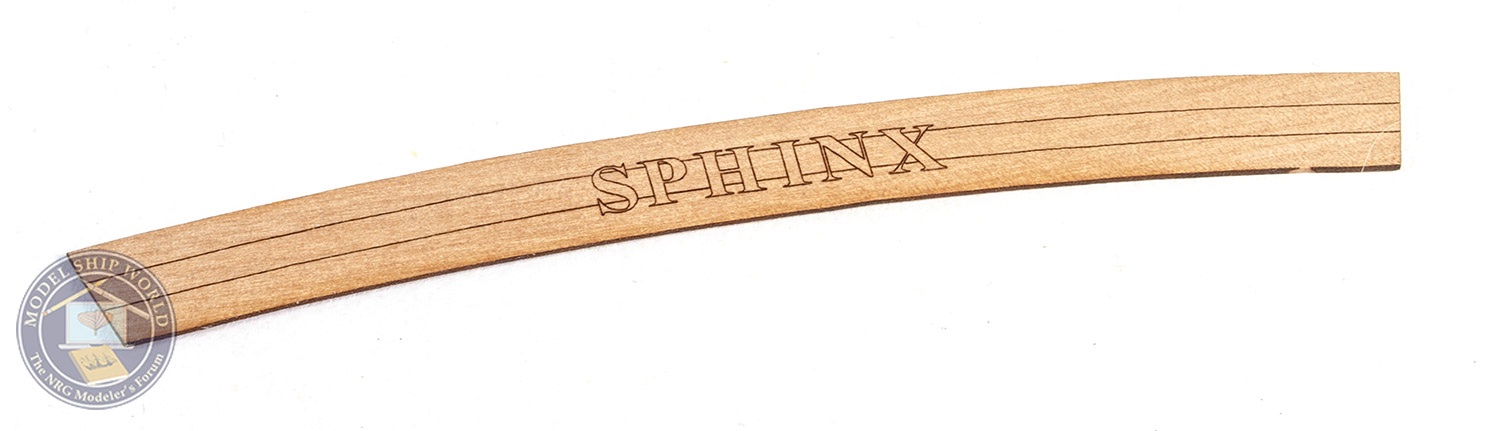
If it's not ready for Christmas, Chris will kill me and probably never use my services again! 😆 The stern lettering is PE, and sits above the letters which are engraved on the stern counter.
- 355 replies
-
- 10
-
-
- vanguard models
- Sphinx
- (and 1 more)
-
1:8 1965 Shelby Cobra 427 S/C - Agora Models
James H replied to James H's topic in Non-ship/categorised builds
I would've thought so, but I'm not too sure. Just building it as per instructions. -
1:8 1965 Shelby Cobra 427 S/C - Agora Models
James H replied to James H's topic in Non-ship/categorised builds
Sure is, as well as horn sound, working lights etc.